
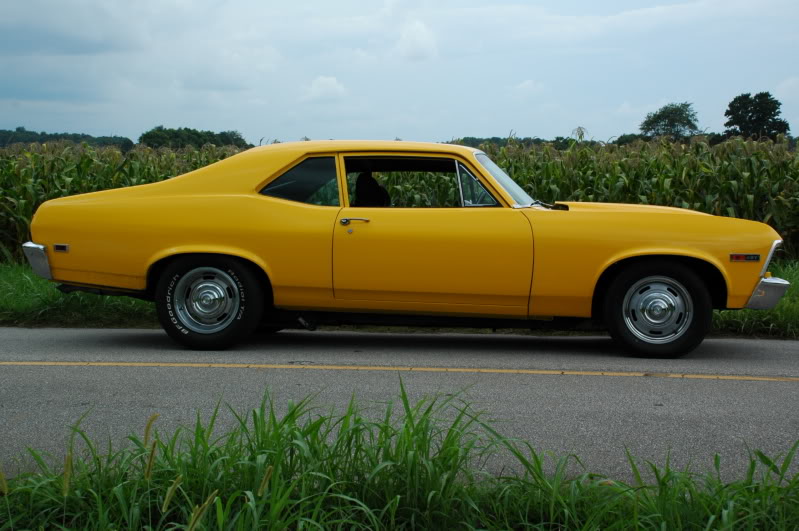
69 Nova Build - pumpgas twin turbo 408 LS
 09-17-2010, 11:45 AM
#1

A little documentation of my ’69 Nova LS1 twin turbo build. First some history. I bought this ’69 as a rolling chassis back in 1997. It replaced my ’68 Nova, which I had since 1987. After driving and racing it for 10 years, I started stripping & smoothing the body in 2007, and got it painted Viper yellow at the end of 2008.
With the body spruced up, and after running it for 13 years with a SBC 406 and nitrous I was ready for something different. The following story has been copied from my project thread on a local forum:
August 15, 2009
And so it begins...
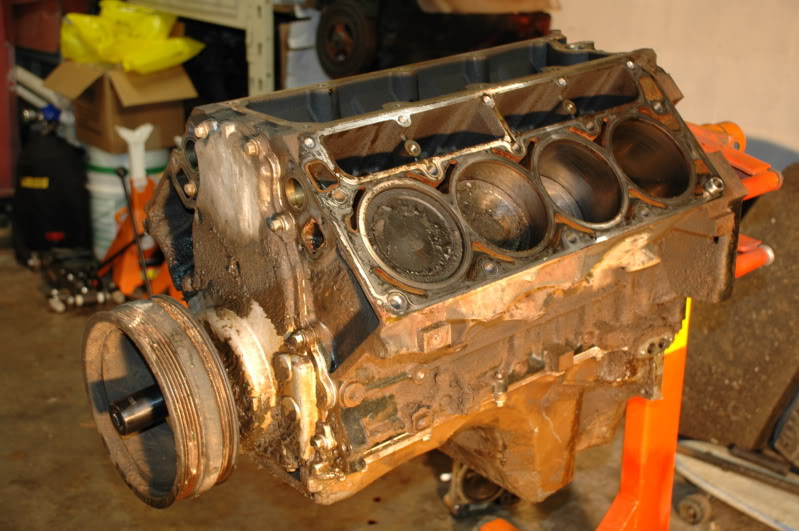
Back in the fall of 2008, I decided it was time to step up the Nova's drivetrain from the nitrous 406 to something with boost. My primary goal with this car has always been to be "streetable" and fairly quick. The nitrous is fun, but it's simply time to move on. When a local good deal came up for a used Dart block, I jumped on it with the intention of building a 427" SBC with 18° heads, and then adding a turbo when I saved up more money. But in the back of my mind I was still wanting to build a Gen III LS engine. I think the turning point was riding home with Dave with my broken Corvette on his trailer. He told me after playing with his turbo Mustang he wouldn't ever build another hotrod without turbos. Well, whatever the reason, I decided to sell off my SBC parts and dive into a 6.0 liter LQ4 engine build. Last Monday I picked up a 2001 truck engine from a junkyard in TN to get me started off. It is a humble beginning to say the least. The plan is to bore it .030", add a forged rotating assembly to 408CI, and pick out a suitable top end to handle a couple atmospheres of pressure.
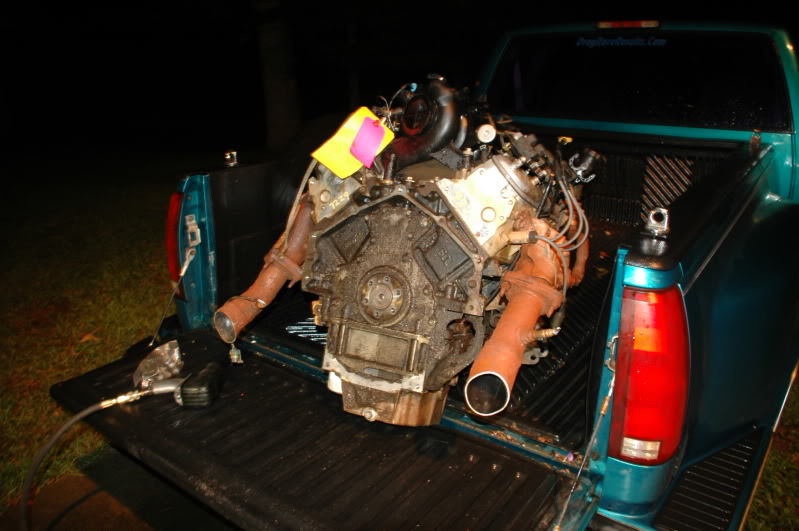
The Nova sitting in the background can't see what's going on with that cover over it.
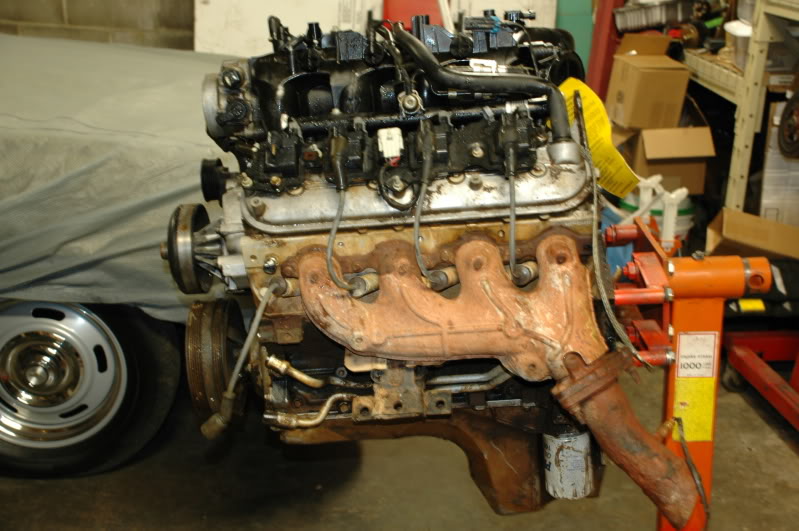
The teardown was severly hampered this week with the kids going back to school and needing attention and supply shopping all week. But, the good thing about disassembly is it goes pretty fast.
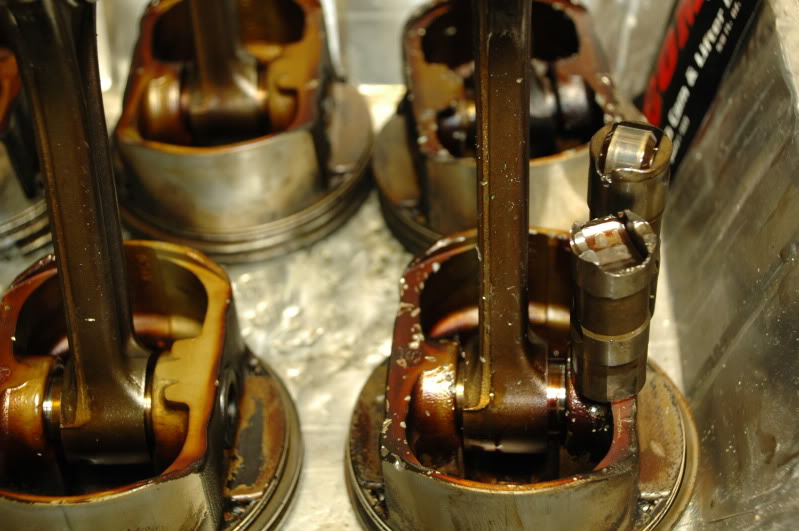
Looks like the intake lifter on cylinder #5 lost a roller, and wipped out the cam. That's probably what sent this truck to the junkyard. Hopefully there isn't any damage to the lifter bore. I'll find out tomorrow.
August 15, 2009
I have read about people making good numbers with ported 317 heads (which come on the LQ4). I would like to upgrade to an aftermarked head, but I really need to sit down and evaluate costs. I will spend money on a strong rotating assembly so I don't have to go back through it anytime soon. If I do keep the 317 heads it would be easy enough to upgrade them later on.
Thanks Mike. My approach is a little more shade tree than yours, but in the end we will both have some fun. I hope to leave the TH-400 and 3.73 10-bolt alone for now. It will need a different stall converter I am sure.
Ricky, I have read about several people running truck manifolds on turbo builds. I guess it limits the packaging options, and they can't flow as well as tube headers, but they do seem to work pretty well. You make a good point on the size of a downpipe from a big single. I didn't plan to use a T6 frame, but then again I haven't worked out just what size it will need. After looking at Pat's setup, I like the sound of smaller twins for a street driven build.
August 18, 2009
more pictures:
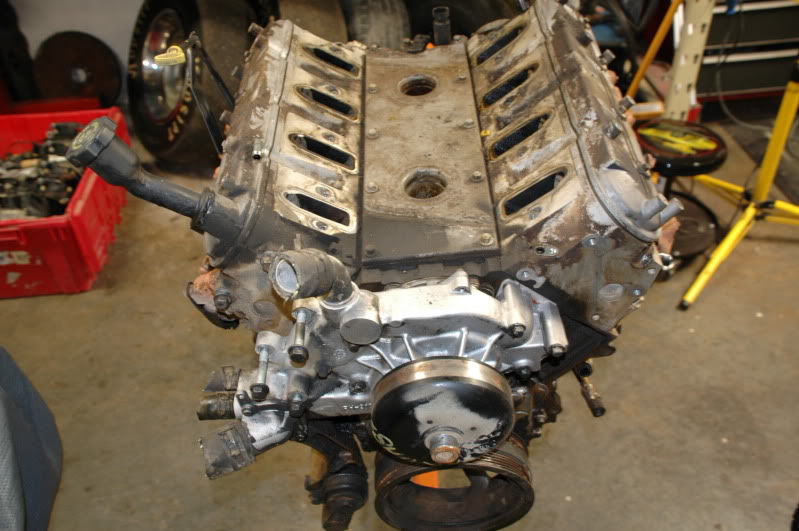
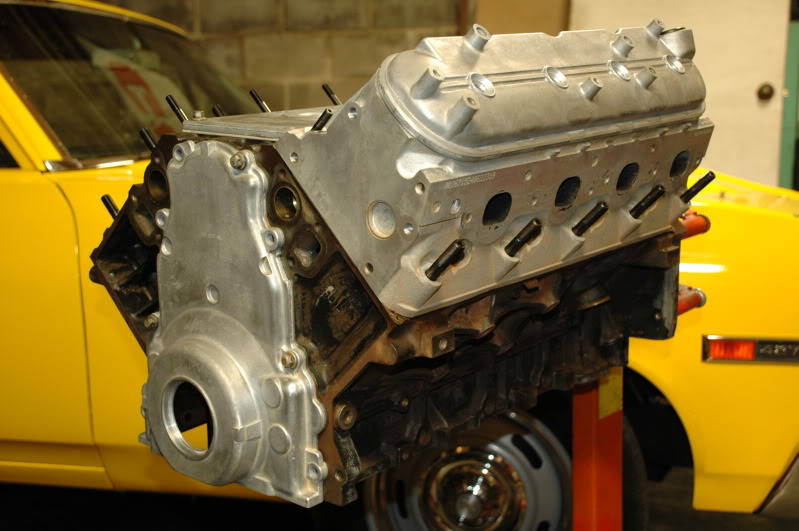
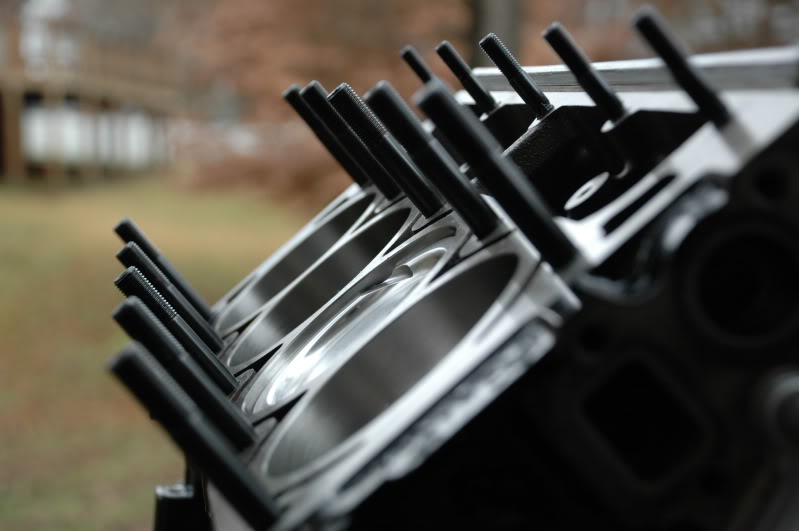
Naked block:
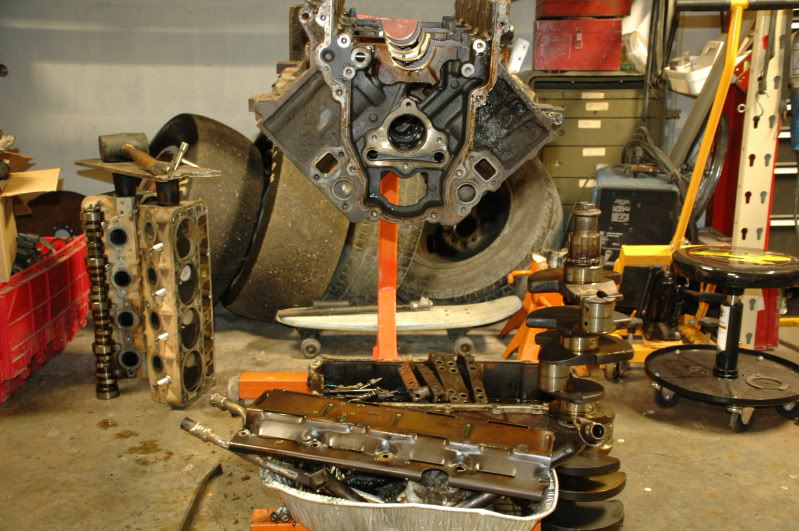
This isn't your typical 1st Gen SBC view:
The cylinder bores actually look very good considering this engine was supposed to have 244,000 miles.
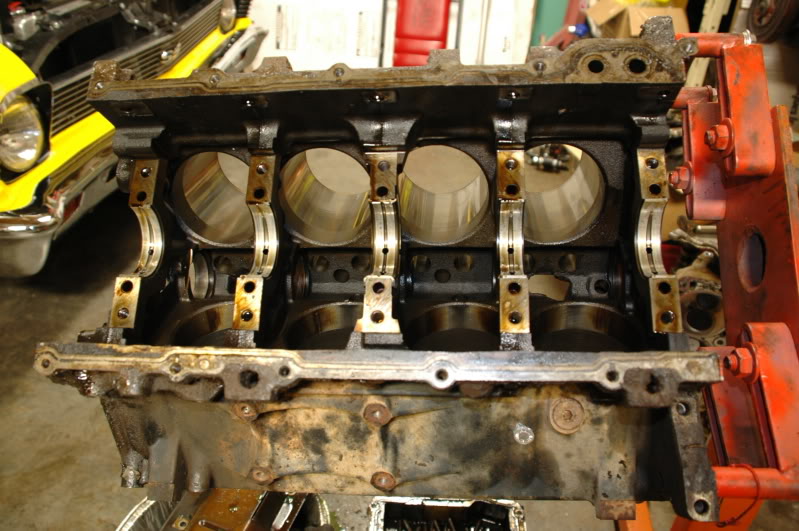
The only damage I have seen is where the #5 intake lifter came apart. The roller must have rattled around the crank and rod pretty good for a while. But no damage to the block.
Now it's clean up time...
August 21, 2009
One small update - I bought a '99 Corvette ECM today. It was out of a Fixed Roof car no less. Now I will have a spare for either car if one goes out.
August 23, 2009
I started out thinking a single 80+mm turbo, but Ricky, Dusty, and Pat have me re-thinking. If I can get a pair of turbos laid out right, the plumbing may actually be easier than with a big single and huge downpipe. Plus I want this thing to be fun to drive on the street. So, the current thinking is with twins - at least for now. Currently I only have a belt driven alternator and vacuum pump. I don't care about air conditioning or power steering in this car. It should be pretty easy to locate the alternator wherever I need to, and I'll probably keep the vacuum pump too.
September 20, 2009
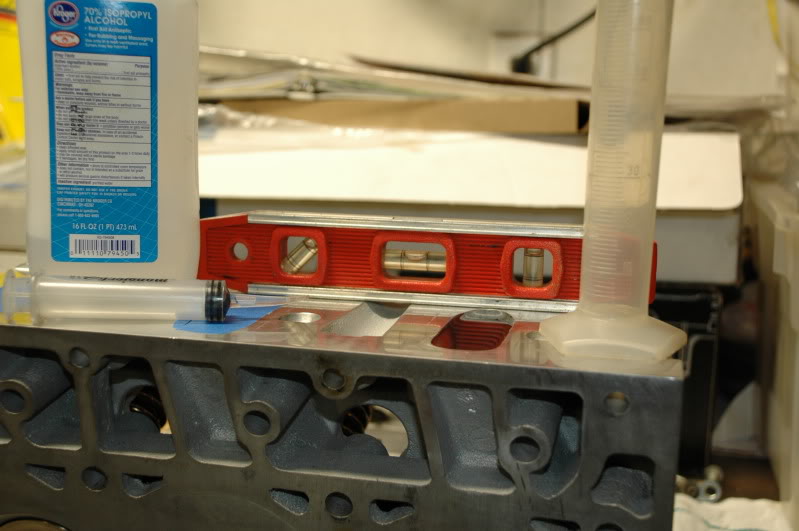
Well I spent entirely too long over analyzing what rotating assembly to get, but I finally placed an order for a 4" Callies crank, 6.125" Callies rods, Wiseco 4.030" pistons with -32cc dish, Clevite bearings, LS6 oil pump, double row timing set. Earlier I picked up a set of ARP main and head studs. I should be able to cart it all down to Dennis's shop the end of this week to get balanced and the block machined.
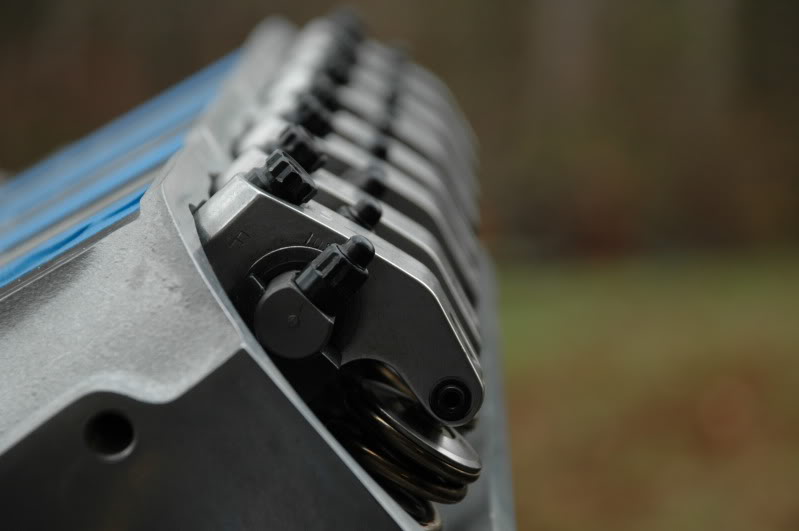
I have also worked off and on cleaning up the engine covers that I'll be re-using. I found that Purple Power degreaser and some fine steel wool does an amazing job cleaning 240k miles worth of crap off aluminum.
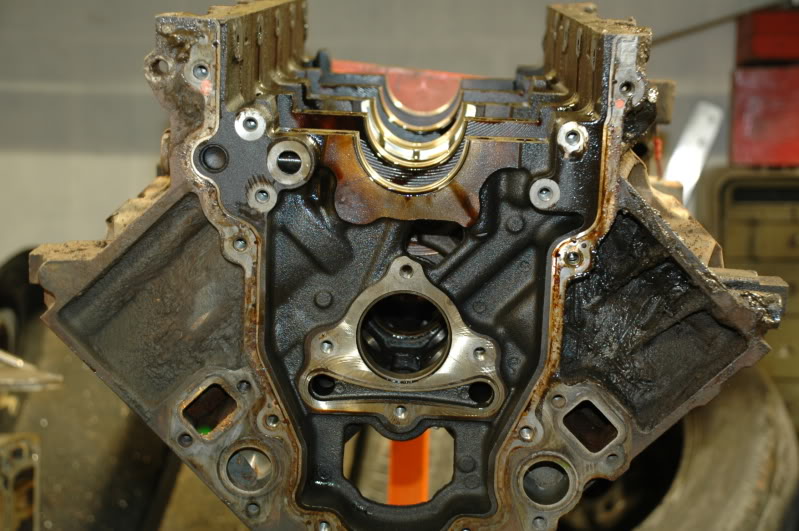
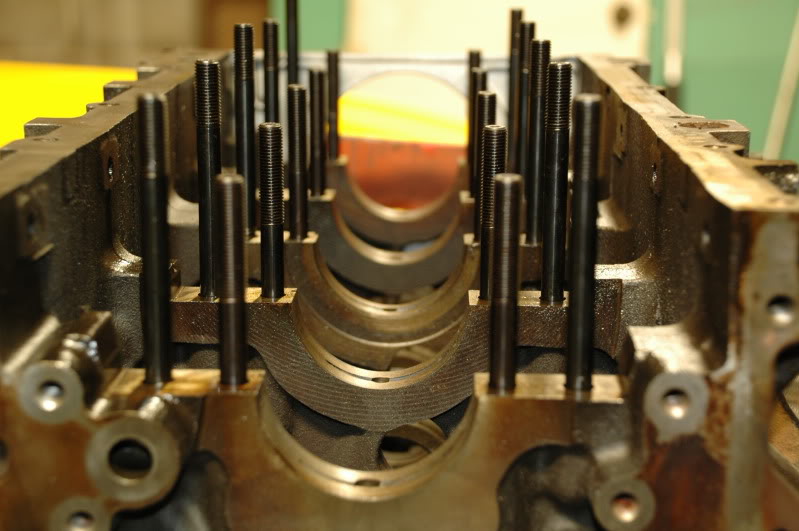
Looking at this picture you can really see how well the Gen III engine supports the crankshaft - and that doesn't show the side bolts holding the main caps.
Well, not much progress, and I have spent a fair amount of money without much to show for at this point.
September 29, 2009
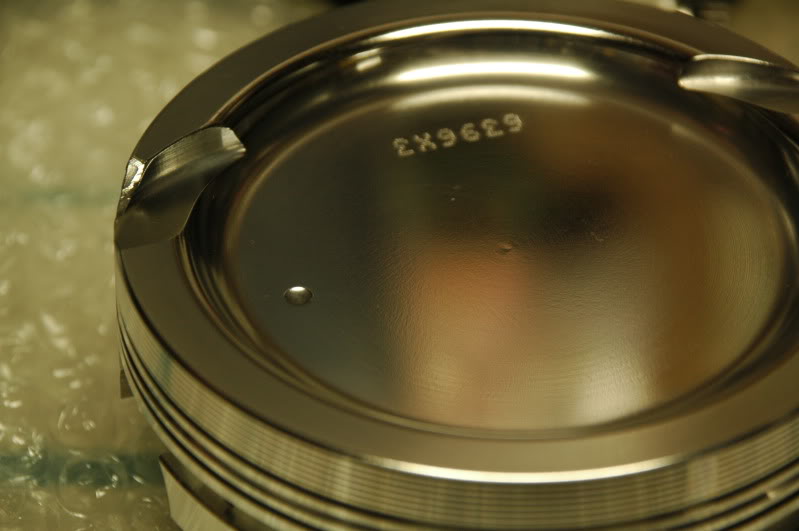
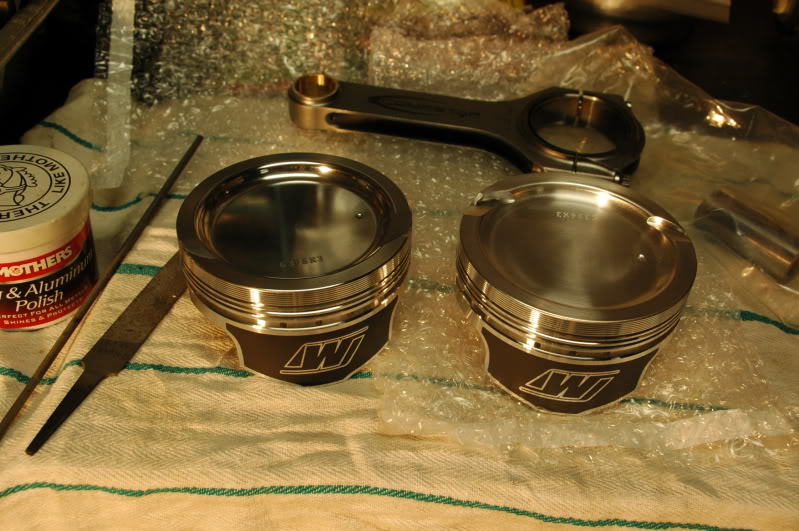
I got all my parts safe and sound, now it's just up to me to finish some details and off to the machine shop. The Wiseco pistons are very nice pieces, but I did notice a little burr at the intake valve relief.
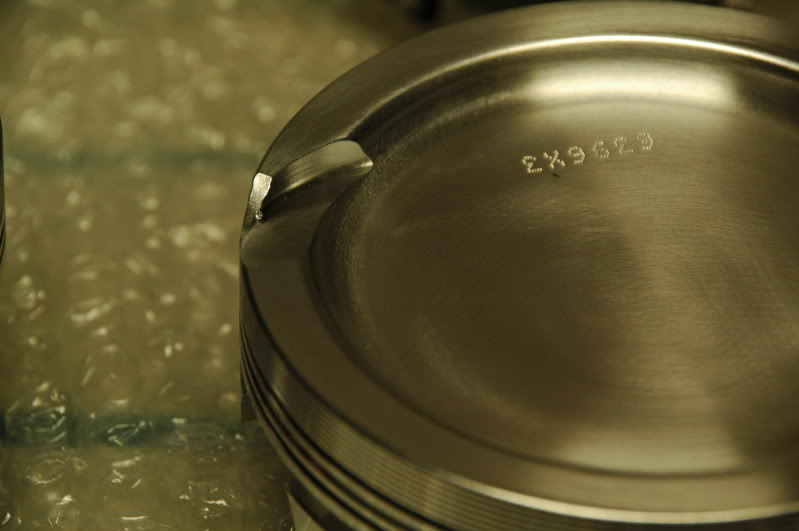
I spent a couple minutes with a file to round the machined edges, and then got a little silly with polishing the piston crown. Within 5 minutes of running it will be blackened up, but it does look good for a photo shoot on the work bench.
I also did a little more cleanup in the engine block with a die grinder and sanding rolls, just a little attempt to free up the oil flow. Unfortunately work and life are not allowing much time right now, but I'll try to keep at least some progress moving forward.
November 29, 2009
Over the Thanksgiving weekend I finished filing the rings, and installed 7 of the piston/rod sets. I kind of, sort of broke one top ring when it got a little misaligned in my ring compressor. I'll have to order another ring tomorrow. Next I am working on the oil system. I need to find a large capacity pan to feed the engine and 2 turbos, that will also work in the Nova. Unfortunately that looks like I'll have a remote mount filter (Moroso setup). I was hoping to avoid more clutter in the engine bay. Hopefully after the end of the year I'll have money for heads.
November 30, 2009
I was able to buy a single top 4.030" ring directly from Wiseco for $10. Thanks for the offer Nick. Little things like one broken bolt or ring can get aggravating. In this case, I am not on a time crunch and that is making the project a lot more enjoyable.
I have some Comp shaft rockers coming in the next day or so - they were a good deal but took over a month to get the deadbeat seller to finally ship them. I trashed him pretty good on Yellowbullet.
I have about made up my mind just to get a Moroso oil pan. Having 7 qts capacity would be good insurance to keep enough volume for the engine and turbos.

December 4, 2009
Got the replacement top piston ring from Wiseco, and finished up the rotating assembly last night. New Moroso oil pan should be here tonight. It's been nice not having a pressing time line to get the work done, but I would like to move a little quicker.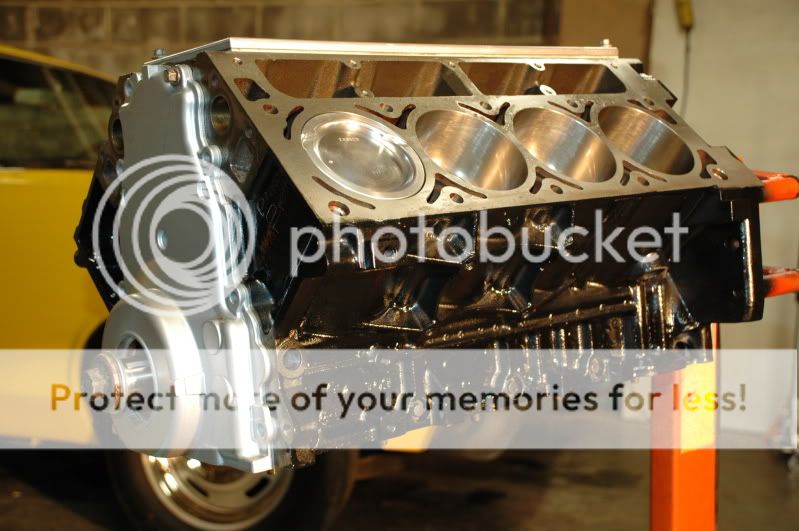
With the body spruced up, and after running it for 13 years with a SBC 406 and nitrous I was ready for something different. The following story has been copied from my project thread on a local forum:
August 15, 2009
And so it begins...
Back in the fall of 2008, I decided it was time to step up the Nova's drivetrain from the nitrous 406 to something with boost. My primary goal with this car has always been to be "streetable" and fairly quick. The nitrous is fun, but it's simply time to move on. When a local good deal came up for a used Dart block, I jumped on it with the intention of building a 427" SBC with 18° heads, and then adding a turbo when I saved up more money. But in the back of my mind I was still wanting to build a Gen III LS engine. I think the turning point was riding home with Dave with my broken Corvette on his trailer. He told me after playing with his turbo Mustang he wouldn't ever build another hotrod without turbos. Well, whatever the reason, I decided to sell off my SBC parts and dive into a 6.0 liter LQ4 engine build. Last Monday I picked up a 2001 truck engine from a junkyard in TN to get me started off. It is a humble beginning to say the least. The plan is to bore it .030", add a forged rotating assembly to 408CI, and pick out a suitable top end to handle a couple atmospheres of pressure.
The Nova sitting in the background can't see what's going on with that cover over it.
The teardown was severly hampered this week with the kids going back to school and needing attention and supply shopping all week. But, the good thing about disassembly is it goes pretty fast.
Looks like the intake lifter on cylinder #5 lost a roller, and wipped out the cam. That's probably what sent this truck to the junkyard. Hopefully there isn't any damage to the lifter bore. I'll find out tomorrow.
August 15, 2009
I have read about people making good numbers with ported 317 heads (which come on the LQ4). I would like to upgrade to an aftermarked head, but I really need to sit down and evaluate costs. I will spend money on a strong rotating assembly so I don't have to go back through it anytime soon. If I do keep the 317 heads it would be easy enough to upgrade them later on.
Thanks Mike. My approach is a little more shade tree than yours, but in the end we will both have some fun. I hope to leave the TH-400 and 3.73 10-bolt alone for now. It will need a different stall converter I am sure.
Ricky, I have read about several people running truck manifolds on turbo builds. I guess it limits the packaging options, and they can't flow as well as tube headers, but they do seem to work pretty well. You make a good point on the size of a downpipe from a big single. I didn't plan to use a T6 frame, but then again I haven't worked out just what size it will need. After looking at Pat's setup, I like the sound of smaller twins for a street driven build.
August 18, 2009
more pictures:
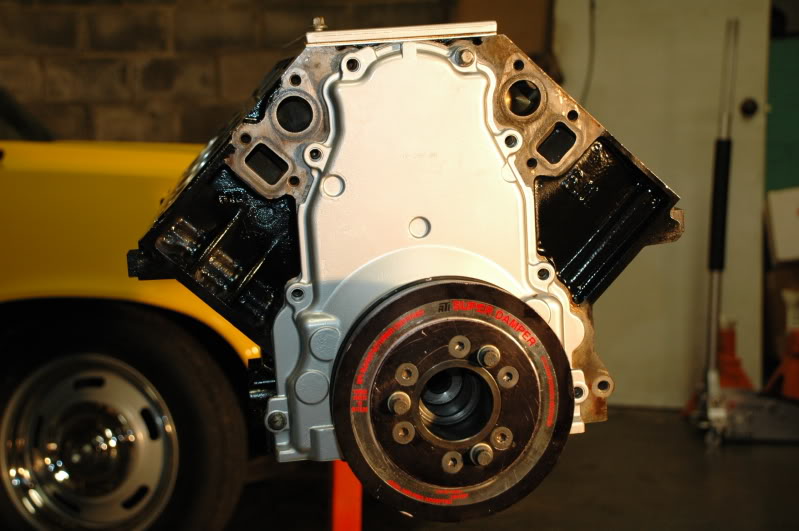
Naked block:
This isn't your typical 1st Gen SBC view:
The cylinder bores actually look very good considering this engine was supposed to have 244,000 miles.
The only damage I have seen is where the #5 intake lifter came apart. The roller must have rattled around the crank and rod pretty good for a while. But no damage to the block.
Now it's clean up time...
August 21, 2009
One small update - I bought a '99 Corvette ECM today. It was out of a Fixed Roof car no less. Now I will have a spare for either car if one goes out.
August 23, 2009
I started out thinking a single 80+mm turbo, but Ricky, Dusty, and Pat have me re-thinking. If I can get a pair of turbos laid out right, the plumbing may actually be easier than with a big single and huge downpipe. Plus I want this thing to be fun to drive on the street. So, the current thinking is with twins - at least for now. Currently I only have a belt driven alternator and vacuum pump. I don't care about air conditioning or power steering in this car. It should be pretty easy to locate the alternator wherever I need to, and I'll probably keep the vacuum pump too.
September 20, 2009
Well I spent entirely too long over analyzing what rotating assembly to get, but I finally placed an order for a 4" Callies crank, 6.125" Callies rods, Wiseco 4.030" pistons with -32cc dish, Clevite bearings, LS6 oil pump, double row timing set. Earlier I picked up a set of ARP main and head studs. I should be able to cart it all down to Dennis's shop the end of this week to get balanced and the block machined.
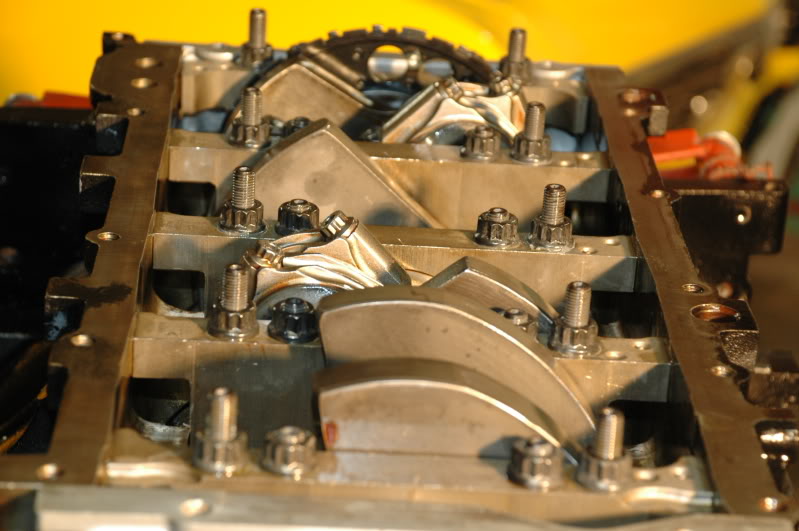
I have also worked off and on cleaning up the engine covers that I'll be re-using. I found that Purple Power degreaser and some fine steel wool does an amazing job cleaning 240k miles worth of crap off aluminum.
Looking at this picture you can really see how well the Gen III engine supports the crankshaft - and that doesn't show the side bolts holding the main caps.
Well, not much progress, and I have spent a fair amount of money without much to show for at this point.
September 29, 2009
I got all my parts safe and sound, now it's just up to me to finish some details and off to the machine shop. The Wiseco pistons are very nice pieces, but I did notice a little burr at the intake valve relief.
I spent a couple minutes with a file to round the machined edges, and then got a little silly with polishing the piston crown. Within 5 minutes of running it will be blackened up, but it does look good for a photo shoot on the work bench.
I also did a little more cleanup in the engine block with a die grinder and sanding rolls, just a little attempt to free up the oil flow. Unfortunately work and life are not allowing much time right now, but I'll try to keep at least some progress moving forward.
November 29, 2009
Over the Thanksgiving weekend I finished filing the rings, and installed 7 of the piston/rod sets. I kind of, sort of broke one top ring when it got a little misaligned in my ring compressor. I'll have to order another ring tomorrow. Next I am working on the oil system. I need to find a large capacity pan to feed the engine and 2 turbos, that will also work in the Nova. Unfortunately that looks like I'll have a remote mount filter (Moroso setup). I was hoping to avoid more clutter in the engine bay. Hopefully after the end of the year I'll have money for heads.
November 30, 2009
I was able to buy a single top 4.030" ring directly from Wiseco for $10. Thanks for the offer Nick. Little things like one broken bolt or ring can get aggravating. In this case, I am not on a time crunch and that is making the project a lot more enjoyable.
I have some Comp shaft rockers coming in the next day or so - they were a good deal but took over a month to get the deadbeat seller to finally ship them. I trashed him pretty good on Yellowbullet.
I have about made up my mind just to get a Moroso oil pan. Having 7 qts capacity would be good insurance to keep enough volume for the engine and turbos.
December 4, 2009
Got the replacement top piston ring from Wiseco, and finished up the rotating assembly last night. New Moroso oil pan should be here tonight. It's been nice not having a pressing time line to get the work done, but I would like to move a little quicker.
Last edited by Chevy406; 09-17-2010 at 12:07 PM.
 09-17-2010, 11:45 AM
#2
December 6, 2009
Spent a little grinding time on the factory windage tray in order to make it work with the Moroso pickup tube & pan.
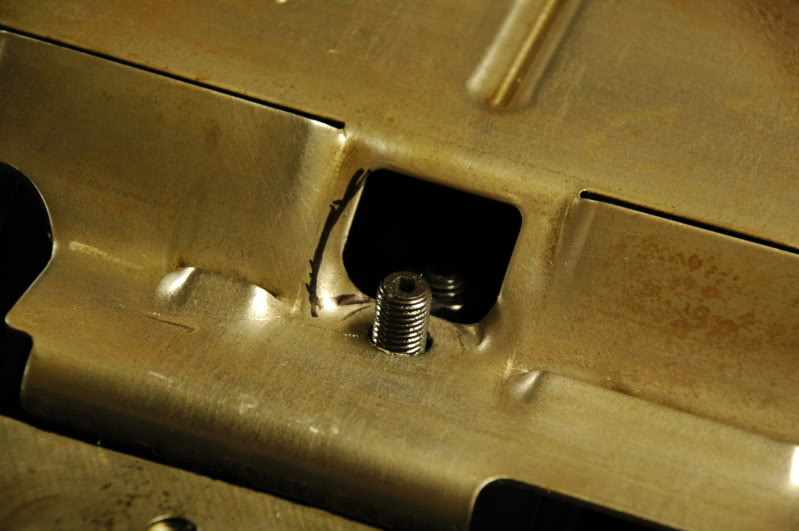
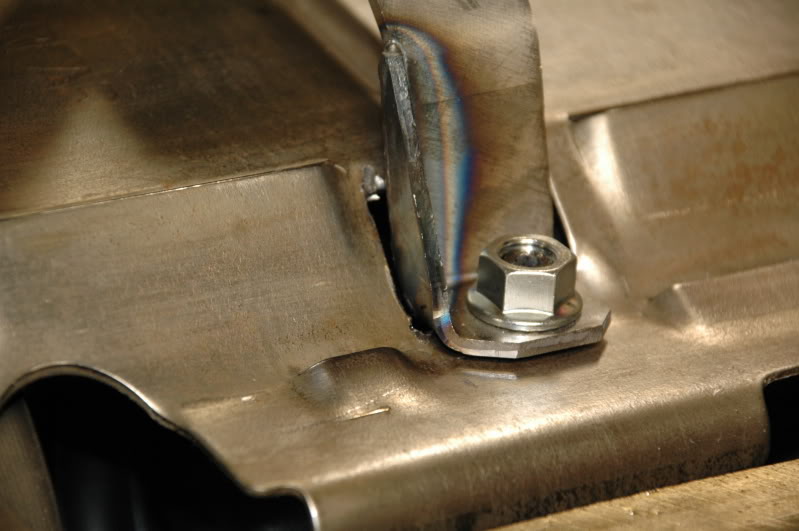
Here you can tell the pickup is not able to sit down straight in the oil pump since it is hitting the windage tray.
A little pecking with a hammer at the front corner of the windage tray now has the oil pick up lined up nicely with the oil pump. And here is a shot with the new Moroso oil pan sitting in place.

That is about it until the heads get here - maybe the end of next week...
December 19, 2009
Thought I would update the progress a little. I picked up a set of used AFR 225s from a guy in Little Rock. He did a super job of cleaning them up and reassembling, after touching up the valves and adding new seals. I have an Edlebrock Victor Jr. on the way, but that has emptied my car fund for a while. I still need a cam, lifters, flexplate, head gaskets, and the fuel system.
I did a little trial fitting with the Comp shaft rockers - going to need aftermarket covers now.
Finally have it sealed up enough not to not worry with keeping it bagged up.

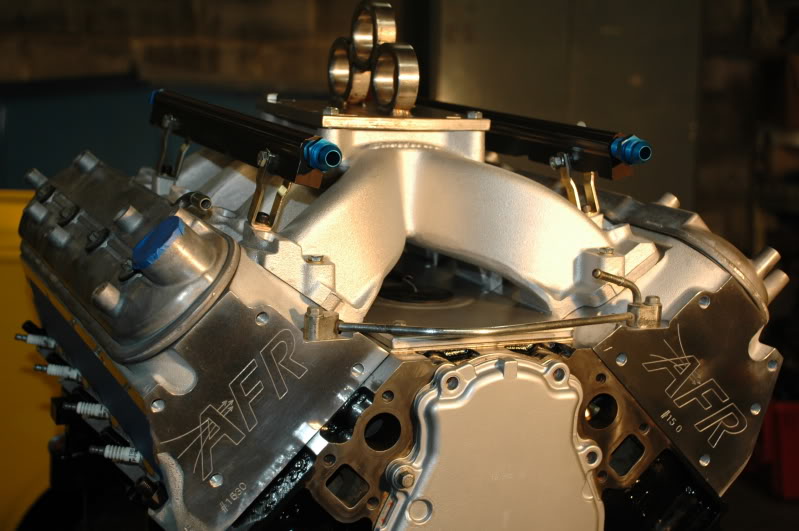
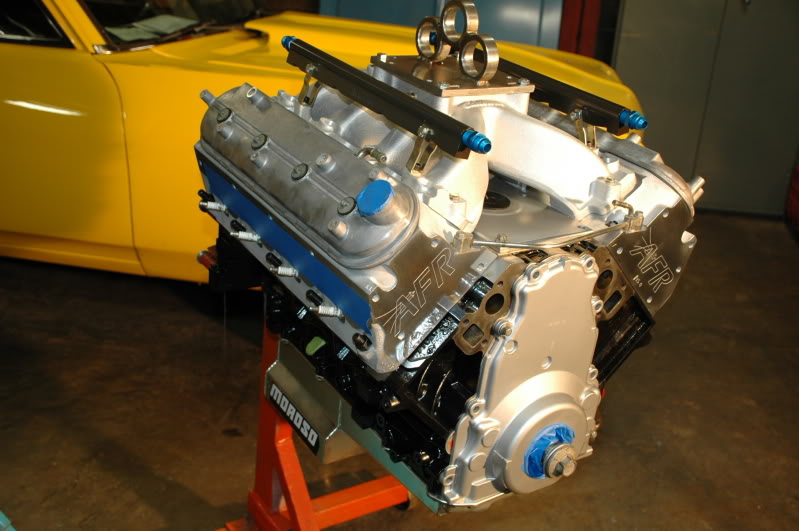
December 22, 2009
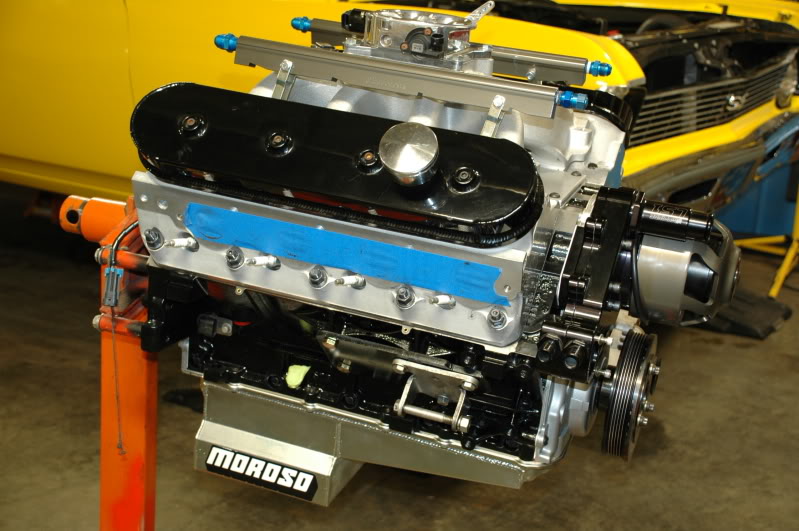
Slapped the Victor Jr. on for pictures last night. It's starting to look like an engine again. Don't be cracking on my engine puller plate - it works decently enough.
January 21, 2010
Crickets, Crickets.....
Money dried up on me after buying the heads and intake. I did order a camshaft and lifters this week though. I'm keeping it pretty mild in the upper 230°s and .610" lift. I have been slowly working on the Victor Jr. runners. They measure 0.950" wide and my AFR 225s are 1.100" wide. While it would be easy enough to simply hog out the intake runners another ⅛" the problem is that even with all 10 bolts loosely installed the intake can move back and forth quite a bit (causing misalignment b/t the head & intake runners). So I have drilled the intake flange and into the heads in order to dowel them in position before I port the runners. I am also making a 22 guage sheet metal template that I can use to transfer the head layout to the intake. Taking a little time, but time is what I have right now.
Not much in the way of new pictures to share. Just a shot of measuring the head intake runners (228 cc) and chambers (66cc):
January 30, 2010
I was reluctant to build a Gen III engine for boost because of the 4-bolt heads, but there sure are a lot of people making plenty of power with them these days. The biggest issue I have read about is that stock heads don't have a thick enough deck to hold much over say 800 whp. Many guys start out with the L92 heads for relatively cheap, out of the box 340 cfm intake flow, but when they get in the 700 to 800 whp range they start having head gasket problems. The aftermarket castings usually have 3/4" thick decks, and they seem to hold 20+ psi and over 1,000 whp. Some folks use the larger 1/2" head studs, and Virginia Speed has a double o-ring deal for high boost engines. I am hoping my AFR heads and a set of .040" Cometic gaskets plus ARP studs will be adequate for my little setup.
I bought a Meziere electric water pump today, and opened up a couple more intake runners. Not much to get excited about lately.
….
That is a fair enough question. Building a Gen 1 SBC with the Dart block would have been similar cost to the forged 408 Gen III, and arguably the Dart based Gen 1 could handle more power. For my goals of 800(+/-) whp either generation is more than adequate. The deciding factor for me was:
1. I just wanted to build an LS engine after always running SBC.
2. I figured using a factory harness and ECM and my existing HP Tuner would be the only way I could economically have forced induction and fuel injection. I am tired of carbs.
3. Just a side benefit is now I can share parts with my daily driver.
I really don't anticipate any problems with the 4-bolt LQ4 block. LS1tech is full of folks making a lot of forced induction power with them. A couple days ago I did consider if I should have started with an LSX block. It would have been roughly $1,000 more than my LQ4 after machining. But I really think this block will be more than adequate for my goals.
And Yeah, those aftermarket Warhawk blocks make a build go through the roof in expenses. Everything gets more specialized when you change deck heights...
March 14, 2010
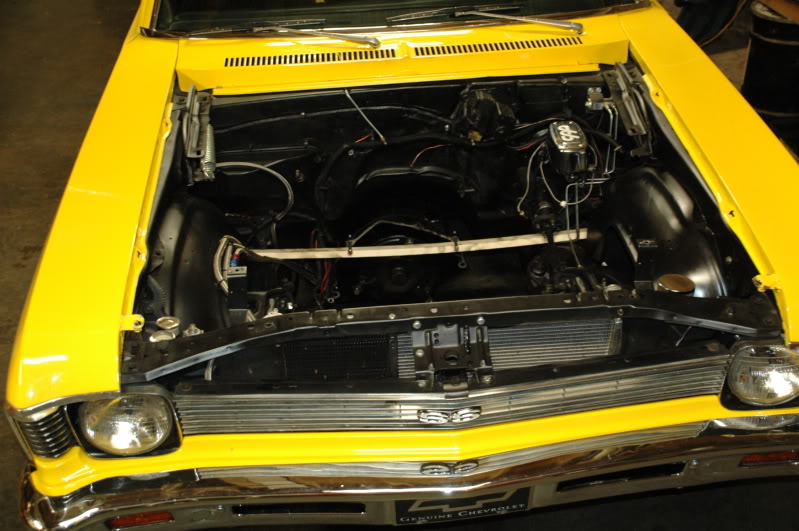
Pretty pitiful that it has been over a month since I posted an update. I have only added head gaskets and an electric Meziere water pump over the past month. But today I took a big step. The SBC 406, my namesake for so many years, is gone. A buyer from Kentucky drove down today while I snatched it out, and he left with not only the engine but also the carb and full MSD ignition. So, I am fully comitted to this LS change over now. It's time to start getting serious with the wiring harness and buy a fuel system. I think that I'll just get it running naturally aspirated and then go back and add the turbos. Time to get busy.
April 7, 2010
Engine is just about complete. Still need to measure pushrod length and buy a flexplate.
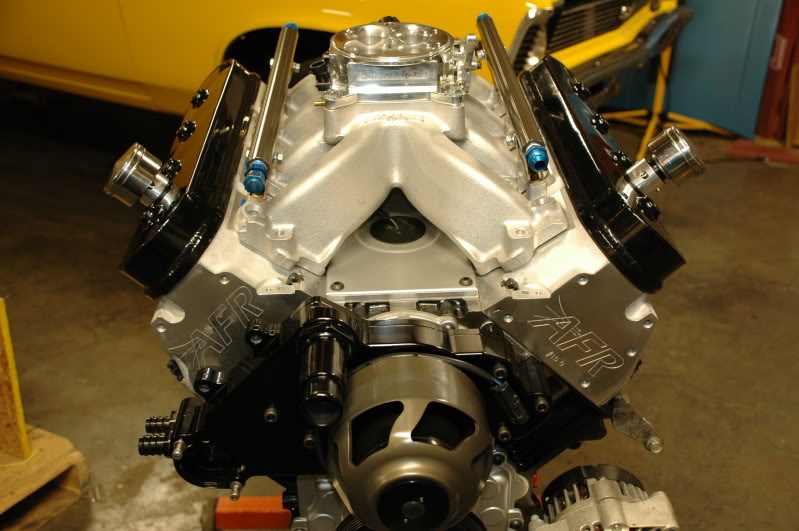
I plan to powder coat the intake. Probably a natural aluminum color. Should I keep the fabricated valve covers coated black like they are currently?
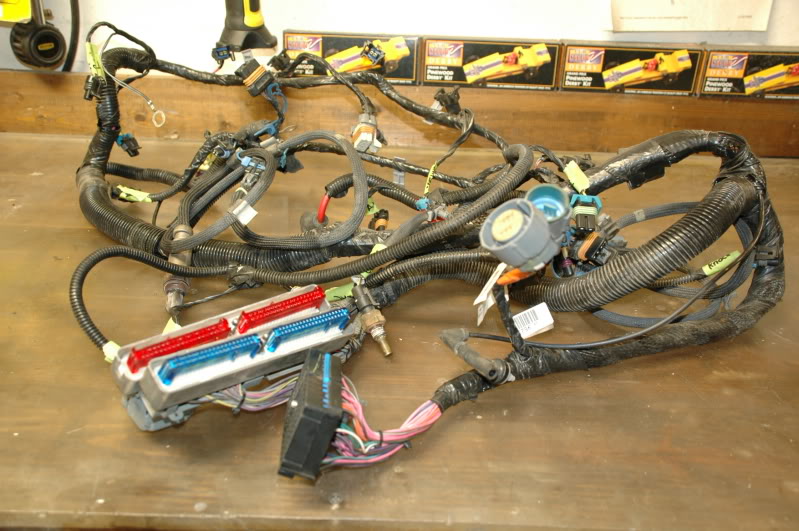
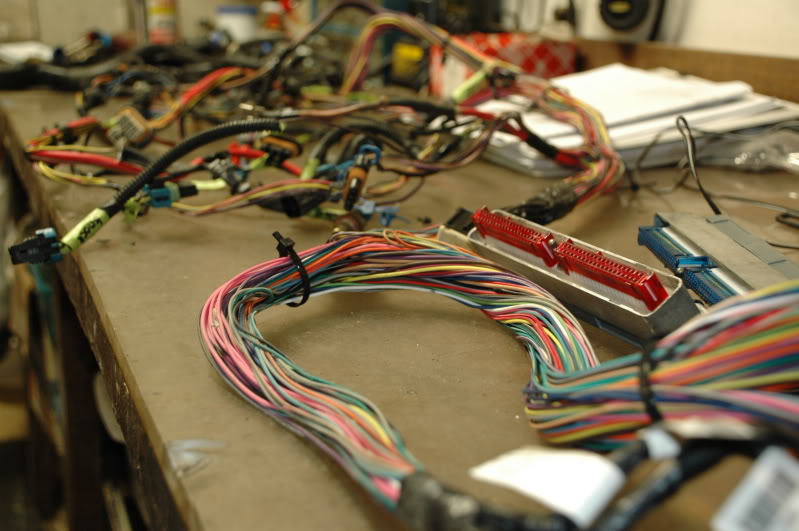
I have the conversion mounts now, so I'll be test fitting into the car in the next couple of days. I have a Ricks Tanks 304SS fuel tank on order. I need to get up with Kennedy to pick out the pump and regulator. The wiring harness is my next big hurdle. I need to quit reading about it and just jump in and start tearing it down. I plan to rework the wiring to be as un-noticeable as possible. I'll mount the coils down low to keep the valve covers clean. I am going to order replacement crimp ends so I can run new wires where needed. Here is what I'll start with - a stock C5 engine harness:
Spent a little grinding time on the factory windage tray in order to make it work with the Moroso pickup tube & pan.
Here you can tell the pickup is not able to sit down straight in the oil pump since it is hitting the windage tray.
A little pecking with a hammer at the front corner of the windage tray now has the oil pick up lined up nicely with the oil pump. And here is a shot with the new Moroso oil pan sitting in place.
That is about it until the heads get here - maybe the end of next week...
December 19, 2009
Thought I would update the progress a little. I picked up a set of used AFR 225s from a guy in Little Rock. He did a super job of cleaning them up and reassembling, after touching up the valves and adding new seals. I have an Edlebrock Victor Jr. on the way, but that has emptied my car fund for a while. I still need a cam, lifters, flexplate, head gaskets, and the fuel system.
I did a little trial fitting with the Comp shaft rockers - going to need aftermarket covers now.
Finally have it sealed up enough not to not worry with keeping it bagged up.
December 22, 2009
Slapped the Victor Jr. on for pictures last night. It's starting to look like an engine again. Don't be cracking on my engine puller plate - it works decently enough.
January 21, 2010
Crickets, Crickets.....
Money dried up on me after buying the heads and intake. I did order a camshaft and lifters this week though. I'm keeping it pretty mild in the upper 230°s and .610" lift. I have been slowly working on the Victor Jr. runners. They measure 0.950" wide and my AFR 225s are 1.100" wide. While it would be easy enough to simply hog out the intake runners another ⅛" the problem is that even with all 10 bolts loosely installed the intake can move back and forth quite a bit (causing misalignment b/t the head & intake runners). So I have drilled the intake flange and into the heads in order to dowel them in position before I port the runners. I am also making a 22 guage sheet metal template that I can use to transfer the head layout to the intake. Taking a little time, but time is what I have right now.
Not much in the way of new pictures to share. Just a shot of measuring the head intake runners (228 cc) and chambers (66cc):
January 30, 2010
I was reluctant to build a Gen III engine for boost because of the 4-bolt heads, but there sure are a lot of people making plenty of power with them these days. The biggest issue I have read about is that stock heads don't have a thick enough deck to hold much over say 800 whp. Many guys start out with the L92 heads for relatively cheap, out of the box 340 cfm intake flow, but when they get in the 700 to 800 whp range they start having head gasket problems. The aftermarket castings usually have 3/4" thick decks, and they seem to hold 20+ psi and over 1,000 whp. Some folks use the larger 1/2" head studs, and Virginia Speed has a double o-ring deal for high boost engines. I am hoping my AFR heads and a set of .040" Cometic gaskets plus ARP studs will be adequate for my little setup.
I bought a Meziere electric water pump today, and opened up a couple more intake runners. Not much to get excited about lately.
….
why did you choose an LQ block as opposed to the Dart block (5 head bolts per cylinder) that you had...
1. I just wanted to build an LS engine after always running SBC.
2. I figured using a factory harness and ECM and my existing HP Tuner would be the only way I could economically have forced induction and fuel injection. I am tired of carbs.
3. Just a side benefit is now I can share parts with my daily driver.
I really don't anticipate any problems with the 4-bolt LQ4 block. LS1tech is full of folks making a lot of forced induction power with them. A couple days ago I did consider if I should have started with an LSX block. It would have been roughly $1,000 more than my LQ4 after machining. But I really think this block will be more than adequate for my goals.
And Yeah, those aftermarket Warhawk blocks make a build go through the roof in expenses. Everything gets more specialized when you change deck heights...
March 14, 2010
Pretty pitiful that it has been over a month since I posted an update. I have only added head gaskets and an electric Meziere water pump over the past month. But today I took a big step. The SBC 406, my namesake for so many years, is gone. A buyer from Kentucky drove down today while I snatched it out, and he left with not only the engine but also the carb and full MSD ignition. So, I am fully comitted to this LS change over now. It's time to start getting serious with the wiring harness and buy a fuel system. I think that I'll just get it running naturally aspirated and then go back and add the turbos. Time to get busy.
April 7, 2010
Engine is just about complete. Still need to measure pushrod length and buy a flexplate.
I plan to powder coat the intake. Probably a natural aluminum color. Should I keep the fabricated valve covers coated black like they are currently?
I have the conversion mounts now, so I'll be test fitting into the car in the next couple of days. I have a Ricks Tanks 304SS fuel tank on order. I need to get up with Kennedy to pick out the pump and regulator. The wiring harness is my next big hurdle. I need to quit reading about it and just jump in and start tearing it down. I plan to rework the wiring to be as un-noticeable as possible. I'll mount the coils down low to keep the valve covers clean. I am going to order replacement crimp ends so I can run new wires where needed. Here is what I'll start with - a stock C5 engine harness:
Last edited by Chevy406; 09-17-2010 at 11:48 AM. Reason: added to description
09-17-2010, 11:46 AM
#3
April 10, 2010
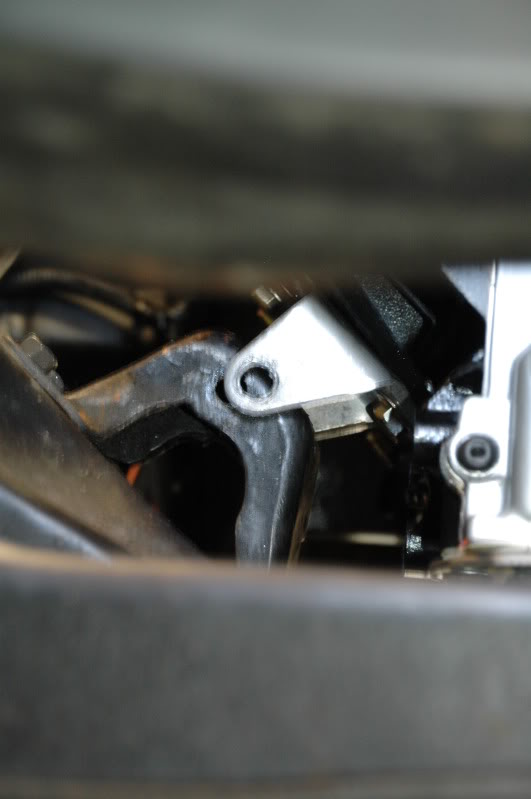
I set the 408 in the Nova today for a trial fit. For the record, I was using the Carshop 1"setback plates with my old school Moroso solid engine mounts. I had less than stellar results. The passenger side head and valve cover hit my heater core tubes, preventing the passenger side mount from lining up, and my Moroso oil pan touches the cross member on the driver's side when the mounting bolt was installed.

Passenger side mount mis-alignment (drivers side was bolted in):
Moroso oil pan resting on cross member with driver's side mount bolted down:
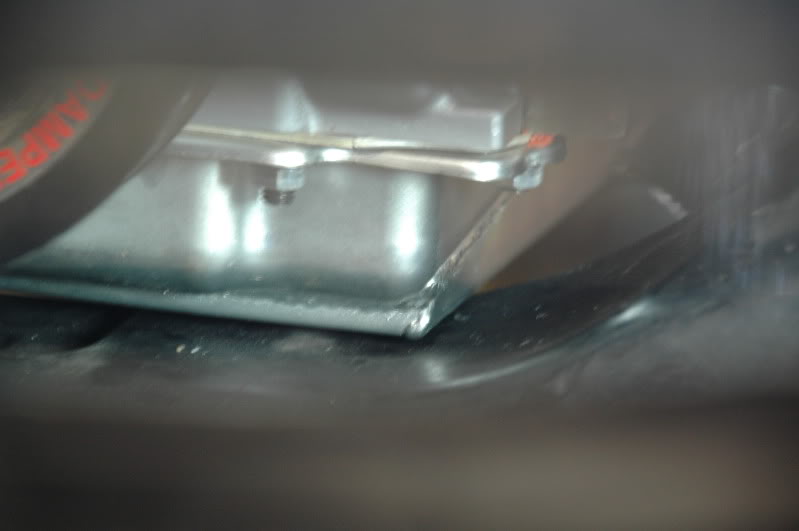
I think the mount alignment and oil pan touching can both be corrected by adding a spacer between the engine mounts and Carshop mounting plate. That will raise the engine as well as spread the mounts away from the oil pan. For my installation I think the zero setback will work best and not require me to get a BBC heater box.
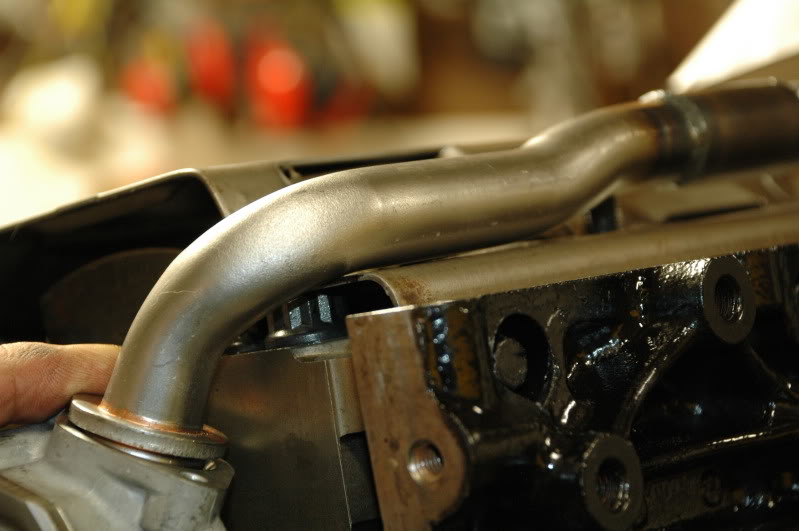
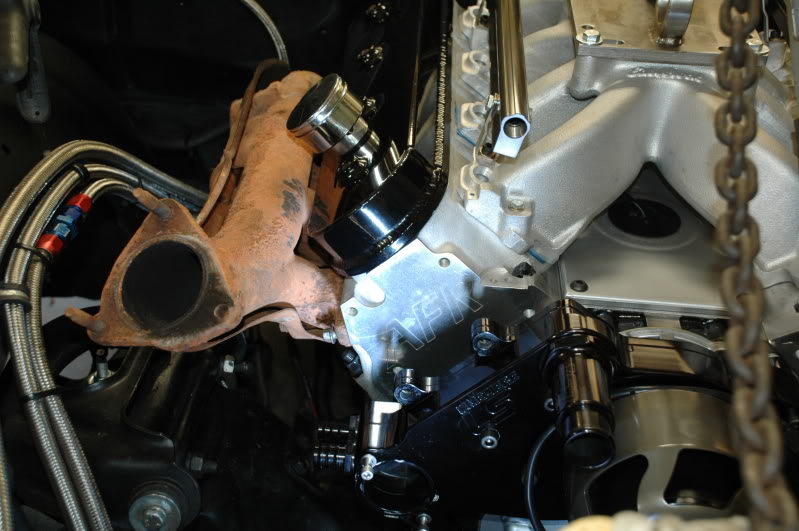
On a slightly different topic, I am not real thrilled about the looks of flipped and forward truck manifolds.
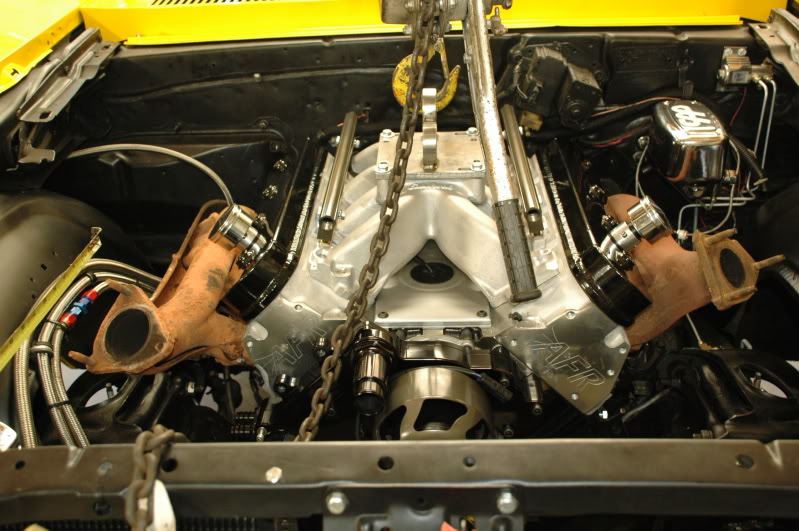
I am pretty sure I can make the driver's side manifold work facing down, by cutting some length and angle off the collector end. Here is a shot with the firewall end of the manifold bolted in but the front of the manifold is still 1" too high:
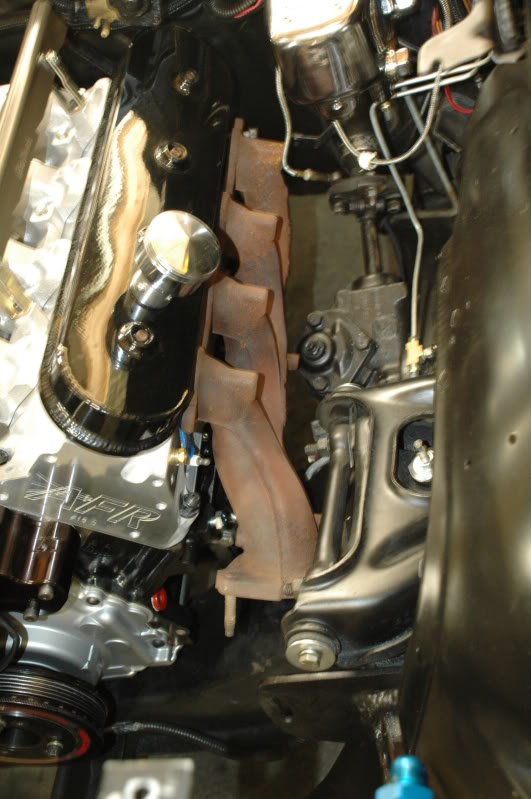
The passenger side truck manifold just plain won't work turned down and forward, and I am just not liking the flipped up look.
So, now I need to modify my Carshop plates to scoot the mounts forward 1", add a spacer between the plates and engine mounts, and do some research on other stock manifold choices - or possibly replace the cross member with a tubular setup... So my progress today was actually taking two steps backwards - make that 3 steps back because I locked up the engine in my John Deere running it low on oil. Sigh.
May 5, 2010
Look what brown dropped off today:
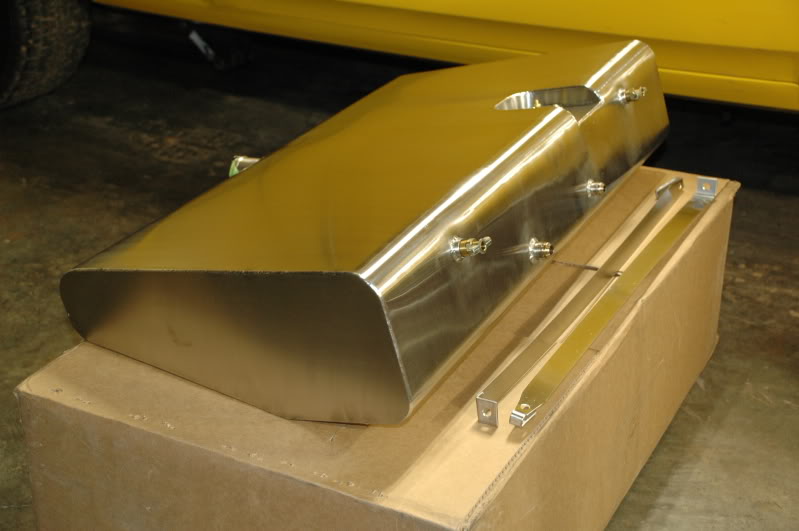

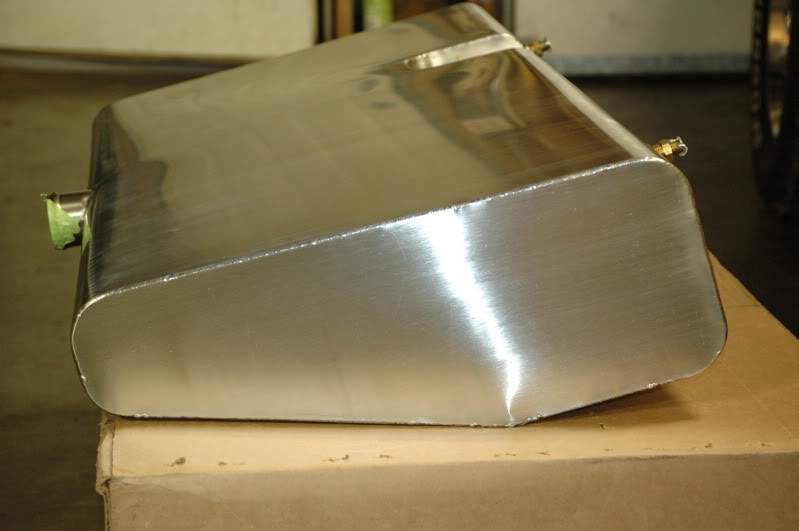

I've got to say, Rick's Tanks makes one nice looking product. This is probably one of the nicest bling pieces I have ever bought for the car. I love the fact there isn't a boxy sump hanging below the tank. It has a -10AN feed and -8 return with a couple 3/8" npt vent ports. The sides are tapered to allow the leaf springs to be moved in for a mini tub in the future. I like..
May 5, 2010
In some further progress, the wiring harness is starting to take shape. I stripped off the OEM sheathing and started removing un-needed circuits, one wire at a time.
Then I laid the harness on the engine and started plugging in sensors. I picked up a TPS and IAC plug off Ebay and wired them to the ECM, along with power for the Mezier water pump, & a water temp gauge.
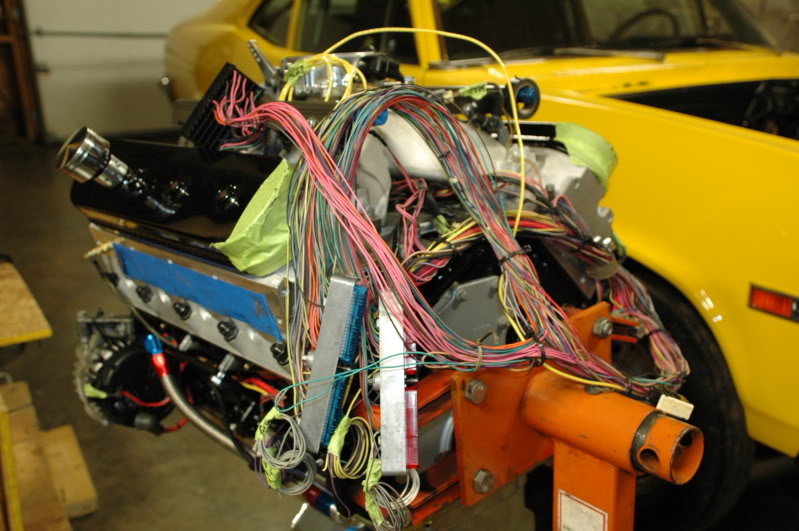
I picked up some split loom off Ebay to bundle up wires. Also bought a small relay/fuse box to provide circuits to power the ECM, fans, fuel, and water pumps.

Routing the injector lines under the Victor Jr and remote mounting the coils will really keep the top of the engine clean.
Still have to pick a spot to run it through the firewall and mount the ECM under the dash.
May 6, 2010
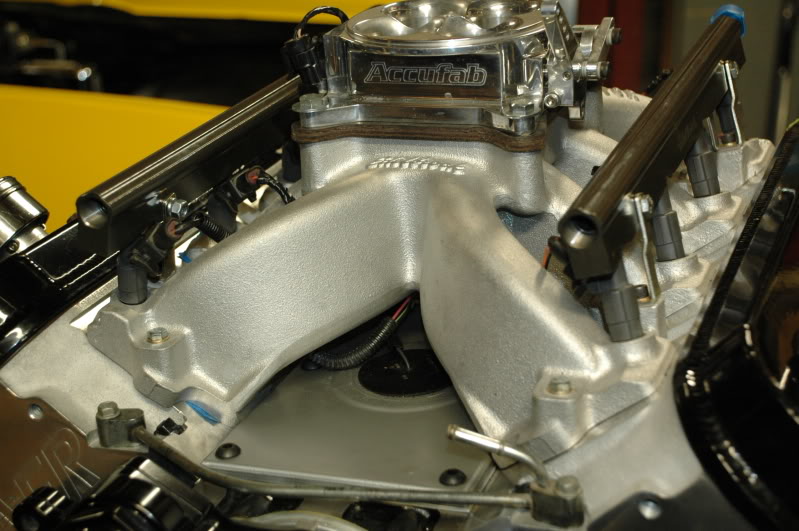
forced induction guys seem to make more power with the carb style intakes, and claim better air distribution with the 4150 4-hole throttle body. Plus I had to give some acknowledgement to my old school ways with an aluminum intake. I have a 2" cowl hood, and should be OK with a carb hat on top of the Accufab throttle body - but I haven't verified that yet.
I do still plan to make manifolds work - hoping to get my hands on some C6 stock manifolds to test. I just haven't spent much effort on that layout yet. I am feeble minded and can only focus on a couple tasks at a time.
June 26, 2010
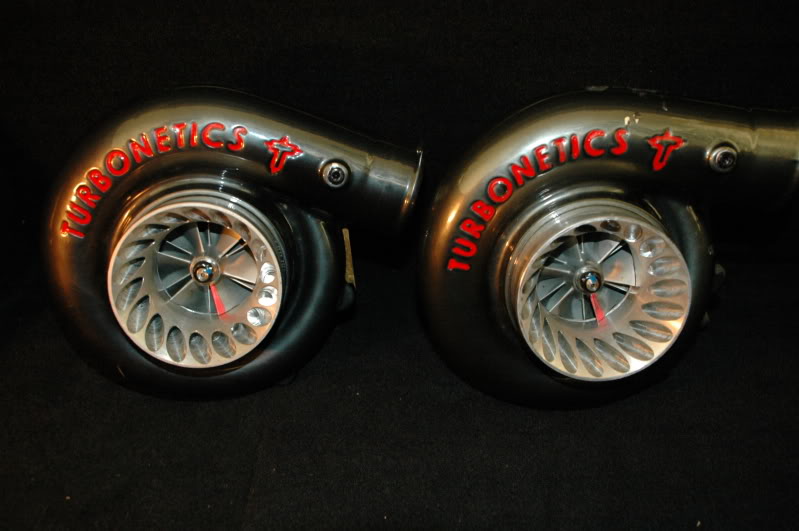
Got a good deal on a pair of Turbonetics GT-K 650s.
GT-K 650 HP-66 4.0"2.5" F1-65 T4 0.68 A/R 4-bolt / 3" V-band
Looks like I am well past the point of no return. I really need to start spending some time working on it now...
…..
I try not to make power and performance predictions, especially since I have zero experience with turbos and tuning with boost. I will say this with confidence however - if it doesn't make more power and go at least as fast on pump gas as it did with the nitrous 406 it will get reworked as needed. I hope I'm not getting over my head on this though.
Luke's truck is pretty much finished (for now), so I can start back on the Nova again. Time to bolt the transmission and engine together and see how the cross member lines up. From initial measurements it looks like the cross member will have to move forward, or else use the 1" setback engine mounts.
July 2
Turns out using the “neutral” position conversion plates and Moroso solid mounts I will be able to use my stock transmission cross member by sliding it forward ~˝”. The frame already had a pair of forward holes that line up, so I just have to drill another pair of holes.
July 10
Got the Rick’s Tank installed and mounted my Magnafuel 13101 pump and filter. Working on some #10 AN lines for the supply to the rails and #8 return.
September 17 2010
The summer came and went without a whole lot of progress on my Nova. But I spent some great time with my son getting his first vehicle on the road... Over the past few weeks I have played around with mounting my alternator down low on the driver's side and with mocking up some remote coil brackets. I'll follow up this weekend with some new pictures. A friend is powder coating my intake manifold (clear over the aluminum), fuel rails (yellow), C6 manifolds (cast iron ceramic), and valve covers (natural aluminum with clear). Should have those back in a week or so.
I set the 408 in the Nova today for a trial fit. For the record, I was using the Carshop 1"setback plates with my old school Moroso solid engine mounts. I had less than stellar results. The passenger side head and valve cover hit my heater core tubes, preventing the passenger side mount from lining up, and my Moroso oil pan touches the cross member on the driver's side when the mounting bolt was installed.
Passenger side mount mis-alignment (drivers side was bolted in):
Moroso oil pan resting on cross member with driver's side mount bolted down:
I think the mount alignment and oil pan touching can both be corrected by adding a spacer between the engine mounts and Carshop mounting plate. That will raise the engine as well as spread the mounts away from the oil pan. For my installation I think the zero setback will work best and not require me to get a BBC heater box.
On a slightly different topic, I am not real thrilled about the looks of flipped and forward truck manifolds.
I am pretty sure I can make the driver's side manifold work facing down, by cutting some length and angle off the collector end. Here is a shot with the firewall end of the manifold bolted in but the front of the manifold is still 1" too high:
The passenger side truck manifold just plain won't work turned down and forward, and I am just not liking the flipped up look.
So, now I need to modify my Carshop plates to scoot the mounts forward 1", add a spacer between the plates and engine mounts, and do some research on other stock manifold choices - or possibly replace the cross member with a tubular setup... So my progress today was actually taking two steps backwards - make that 3 steps back because I locked up the engine in my John Deere running it low on oil. Sigh.
May 5, 2010
Look what brown dropped off today:
I've got to say, Rick's Tanks makes one nice looking product. This is probably one of the nicest bling pieces I have ever bought for the car. I love the fact there isn't a boxy sump hanging below the tank. It has a -10AN feed and -8 return with a couple 3/8" npt vent ports. The sides are tapered to allow the leaf springs to be moved in for a mini tub in the future. I like..
May 5, 2010
In some further progress, the wiring harness is starting to take shape. I stripped off the OEM sheathing and started removing un-needed circuits, one wire at a time.
Then I laid the harness on the engine and started plugging in sensors. I picked up a TPS and IAC plug off Ebay and wired them to the ECM, along with power for the Mezier water pump, & a water temp gauge.
I picked up some split loom off Ebay to bundle up wires. Also bought a small relay/fuse box to provide circuits to power the ECM, fans, fuel, and water pumps.
Routing the injector lines under the Victor Jr and remote mounting the coils will really keep the top of the engine clean.
Still have to pick a spot to run it through the firewall and mount the ECM under the dash.
May 6, 2010
forced induction guys seem to make more power with the carb style intakes, and claim better air distribution with the 4150 4-hole throttle body. Plus I had to give some acknowledgement to my old school ways with an aluminum intake. I have a 2" cowl hood, and should be OK with a carb hat on top of the Accufab throttle body - but I haven't verified that yet.
I do still plan to make manifolds work - hoping to get my hands on some C6 stock manifolds to test. I just haven't spent much effort on that layout yet. I am feeble minded and can only focus on a couple tasks at a time.
June 26, 2010
Got a good deal on a pair of Turbonetics GT-K 650s.
GT-K 650 HP-66 4.0"2.5" F1-65 T4 0.68 A/R 4-bolt / 3" V-band
Looks like I am well past the point of no return. I really need to start spending some time working on it now...
…..
I try not to make power and performance predictions, especially since I have zero experience with turbos and tuning with boost. I will say this with confidence however - if it doesn't make more power and go at least as fast on pump gas as it did with the nitrous 406 it will get reworked as needed. I hope I'm not getting over my head on this though.
Luke's truck is pretty much finished (for now), so I can start back on the Nova again. Time to bolt the transmission and engine together and see how the cross member lines up. From initial measurements it looks like the cross member will have to move forward, or else use the 1" setback engine mounts.
July 2
Turns out using the “neutral” position conversion plates and Moroso solid mounts I will be able to use my stock transmission cross member by sliding it forward ~˝”. The frame already had a pair of forward holes that line up, so I just have to drill another pair of holes.
July 10
Got the Rick’s Tank installed and mounted my Magnafuel 13101 pump and filter. Working on some #10 AN lines for the supply to the rails and #8 return.
September 17 2010
The summer came and went without a whole lot of progress on my Nova. But I spent some great time with my son getting his first vehicle on the road... Over the past few weeks I have played around with mounting my alternator down low on the driver's side and with mocking up some remote coil brackets. I'll follow up this weekend with some new pictures. A friend is powder coating my intake manifold (clear over the aluminum), fuel rails (yellow), C6 manifolds (cast iron ceramic), and valve covers (natural aluminum with clear). Should have those back in a week or so.
Last edited by Chevy406; 09-17-2010 at 11:59 AM. Reason: added to description
09-17-2010, 11:46 AM
#4
reserved to list part numbers for build...
Just a side note - I bought a ton of parts from LS1tech (and other forum) members. Thanks for the good deals, it really helps keep the expenses down:
° AFR 225 heads
° 60# Motron injectors
° Magnafuel pump
° Comp shaft rockers
° Victor Jr. intake
° Corvette ECM & engine harness
° Meziere water pump
° fabricated valve covers
° TCI flexplate
° 4150 Accufab throttle body
Last edited by Chevy406; 09-17-2010 at 12:05 PM.
09-17-2010, 12:58 PM
#6
one regret with my LQ92 build... not stroking the thing (since I replaced everything else but the block anyway). oh well, i guess 370 cubes will have to do.
and i have to say it again - i f'ing LOVE that color. great build.
looks like i'll have to consider a turbo setup for the gto if guys keep upping the ante like this.
and i have to say it again - i f'ing LOVE that color. great build.
looks like i'll have to consider a turbo setup for the gto if guys keep upping the ante like this.

Trending Topics
09-17-2010, 02:57 PM
#8
Another great reason to post and maintain a build thread is to help keep a project moving forward. I have found these car forums to be very addictive, and reading about other folks success and achievments pushes me to make progress. I hope to have some new progress to show after this weekend.
09-17-2010, 03:01 PM
#9

 09-17-2010, 03:03 PM
#10
Chevy406,
Glad to put a thread with the stray build pics fyling around here. Looks great. I can't wait to see it finished. Subscribing.
Glad to put a thread with the stray build pics fyling around here. Looks great. I can't wait to see it finished. Subscribing.
 09-18-2010, 06:04 PM
#12


updates?
09-18-2010, 07:35 PM
#13
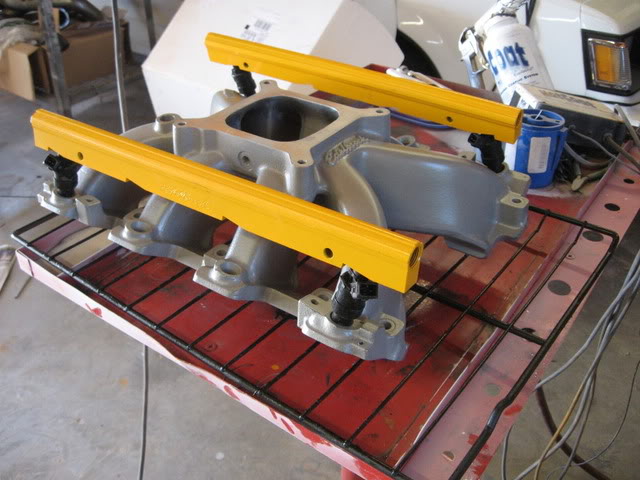
My friend posted some pictures today of my Victor Jr and fuel rails that he is powder coating for me. I am going out on a limb with the yellow fuel rails, but we'll see how they look on the engine. I can always change the color again if it looks wrong.
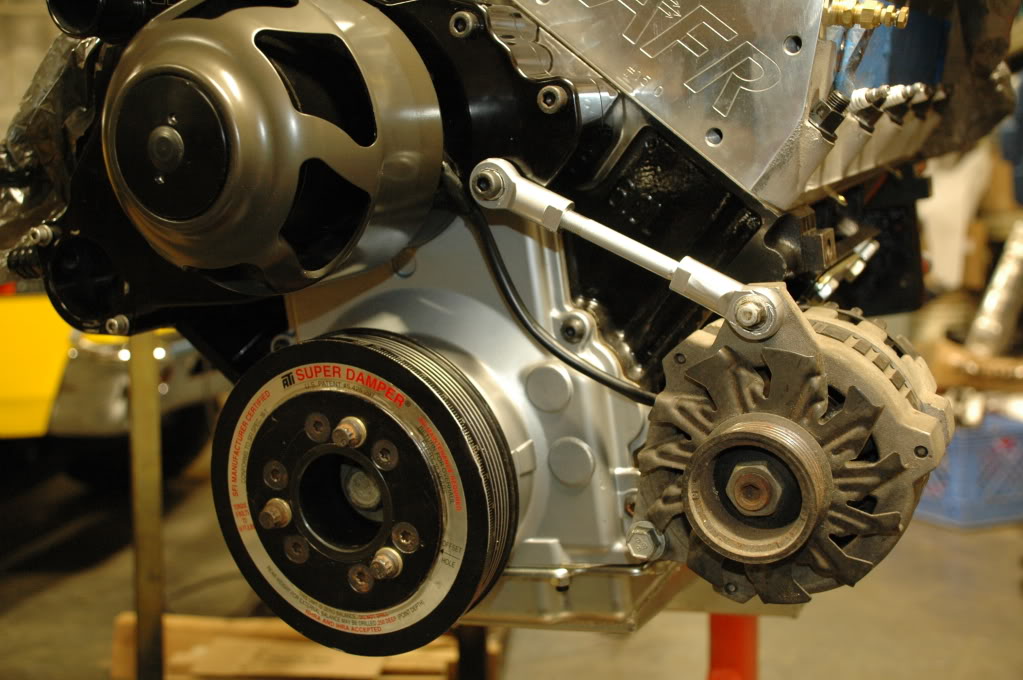
I also came up with this simple alternator mount, for a low, driver's side placement. I'll still have to make sure it clears the cross member though.
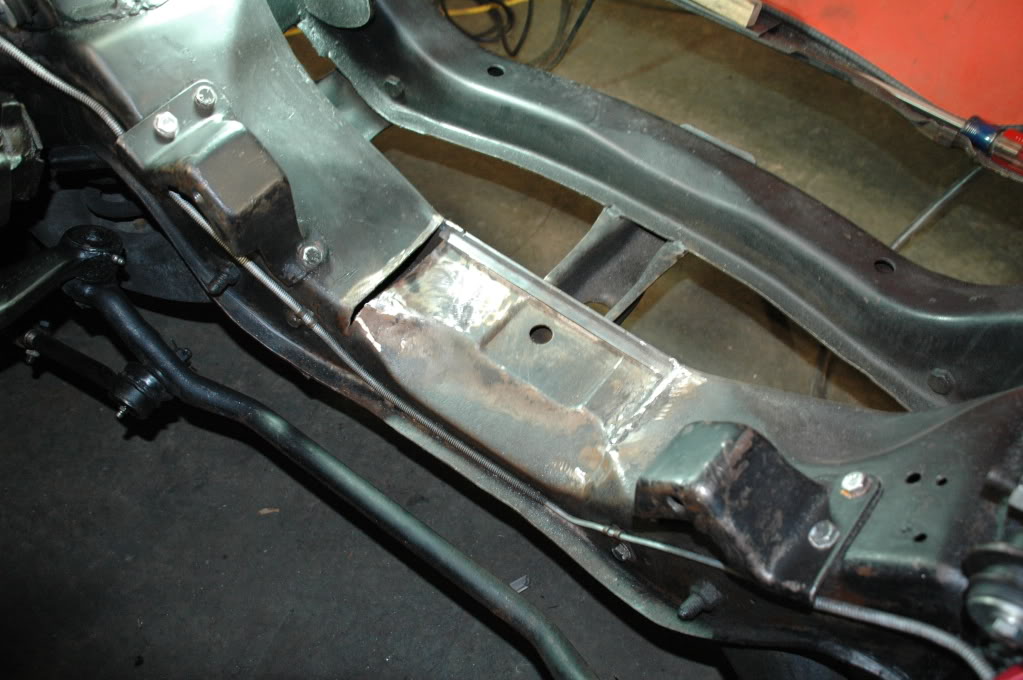
I am currently working on welding up a notch in my crossmember that I added for oil pan clearance. Should have some pictures tomorrow.
I also came up with this simple alternator mount, for a low, driver's side placement. I'll still have to make sure it clears the cross member though.
I am currently working on welding up a notch in my crossmember that I added for oil pan clearance. Should have some pictures tomorrow.

 09-21-2010, 06:14 PM
#20