
Pro-Touring 68 Acadian (Nova) with L92
 10-28-2009, 07:24 PM
#1
On The Tree
Thread Starter
iTrader: (4)

Join Date: Mar 2009
Location: British Columbia, Canada
Posts: 132
Likes: 0
Received 0 Likes
on
0 Posts
Well I've been lurking around this site for several months and have meant to start a build thread, but never got around to it. I finally found a bit of time to post some pics. It won't be as detailed as some of the other build threads I have on other forums, but it will have lots of pics. If anyone is interested in the other threads, let me know and I'll post a link. Here's the plans for the car:
Pro Touring theme

Suspension, brakes and tires:
18" New Gen Splitters, polished lip and brushed centers. 305-30-18 in the rear and 245-35-18 in the front.
Speed Tech Performance subframe with Speed Tech high clearance tubular control arms.
Speed Tech 1.25" solid sway bar.
Unisteer rack and pinion kit
Ridetech single adjustable coil overs
Wilwood 6 piston calipers with 12.2" rotors
Prodigy bar rear suspension (airbar with adjustable arms) with Ridetech single adjustable coil overs
Moser M9 housing
Moser 31 spline axles
Strange Pro Nodular centre section with 3.70 gears and half billet posi
Wilwood 4 piston calipers with 12.2" rotors
Drivetrain:
LS3 6.2L crate motor. Hope to be around 550 hp.
Speartech ECU with DBW
Comp Cams camshaft: 226/234 .598”/.612” 114LSA custom cam using EPS on intake and LXL lobes on the exhaust.
LS3 intake with LS3 ported and polished throttle body
Speed Tech Performance / Stainless Works long tube polished headers.
Wegner Motorsports polished diamond cut serpentine kit
Tremec TKO600 with MGW shifter
Monster stage 3 clutch
Interior:
Flaming River polished tilt steering column
Flaming River Waterfall leather steering wheel
2005 GTO leather power bucket seats in front and GTO rear seats
Custom console with 7" LCD screen
Thunder Road gauge cluster
Speedhut gauges
Vintage Air Gen IV air conditions
Billet Specialties air conditions louvers
Body:
New sheet metal includes:
Goodmark: quarter panels, inner rear wheel wells, deck filler panel
Auto Metal Direct: 2" cowl hood, inner fender wells, rear cross rail, rear tail light panel, quarter panel end caps, door skins
DSE deep tubs
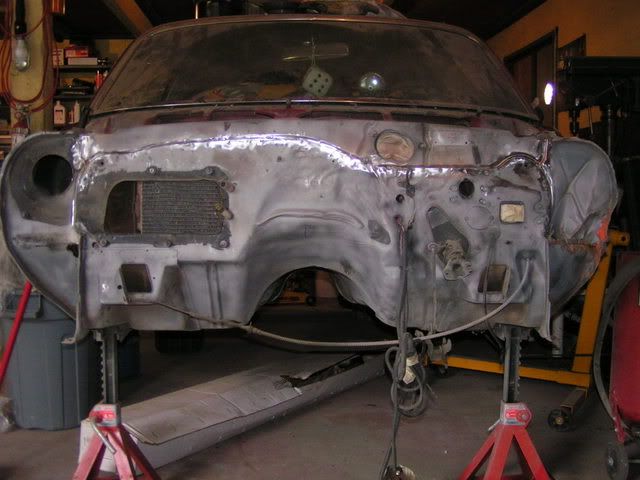
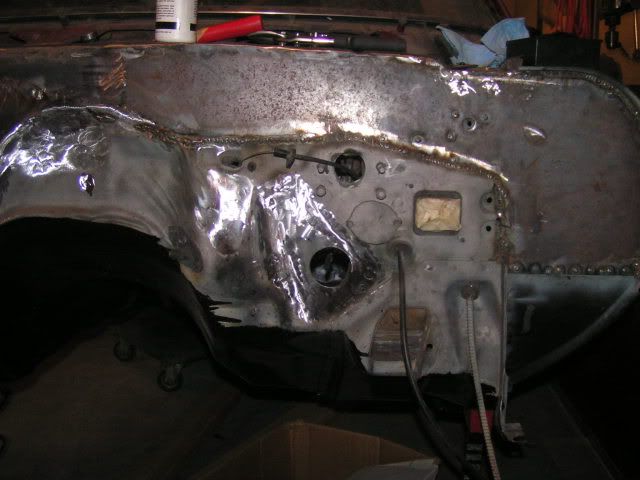
Firewall has been completely smoothed
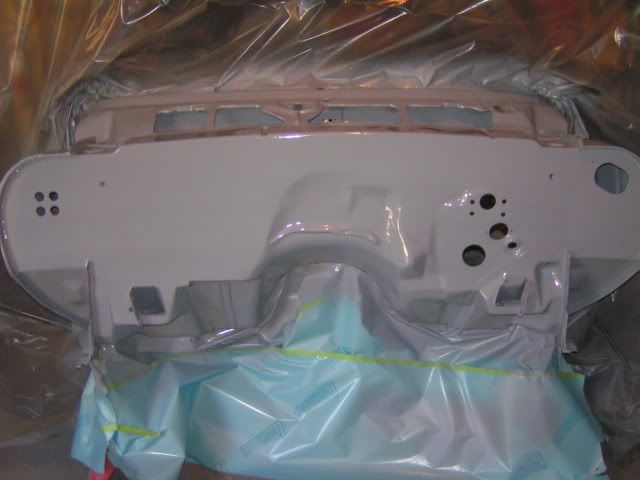
Paint will be House of Kolor's apple red with black base coat
Stereo:
JL Audio stereo (haven't decided what but will be big)
More to come, but in the meantime here's some pics:
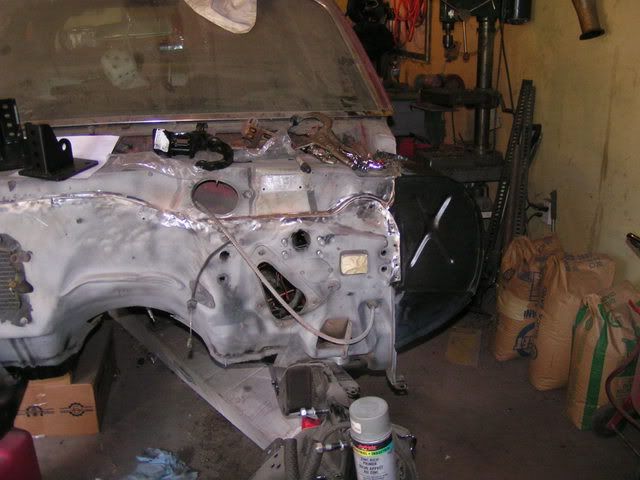
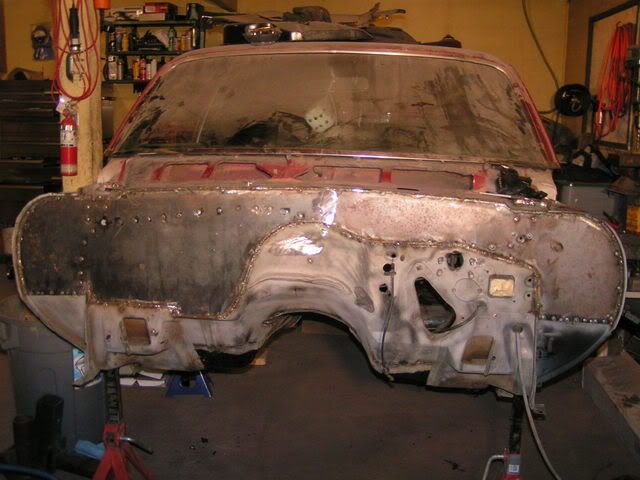
The car before I started
Some of the metal work/panel replacement done on the car


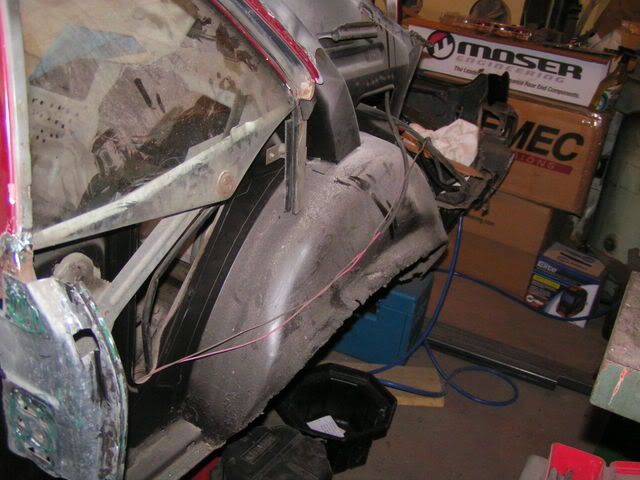
Deep tubs with new outer wheels wells
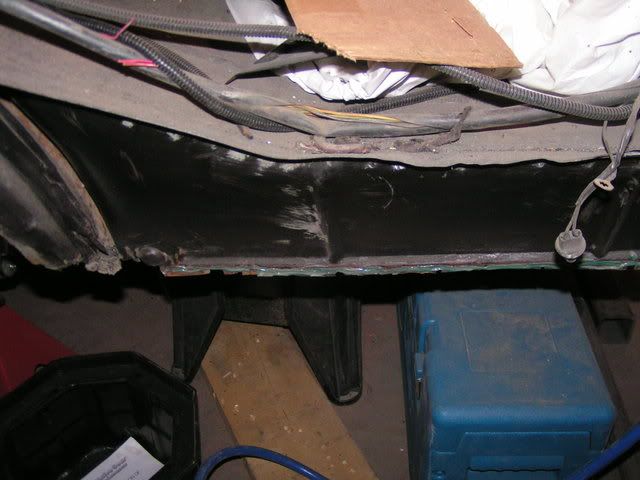
Driver's side cowel panel
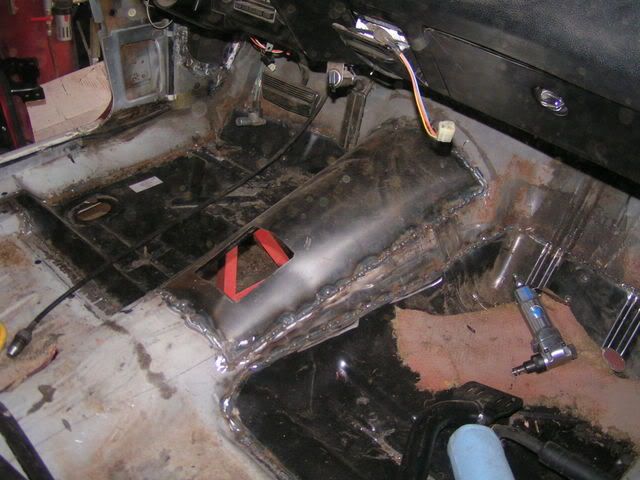
Trans tunnel
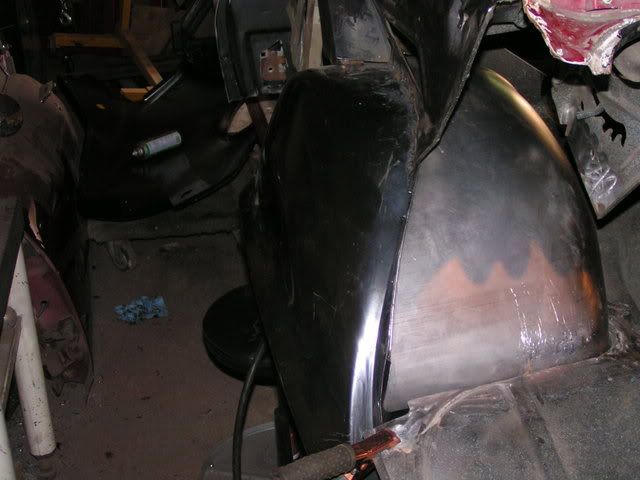
Quarter panel - both sides
Firewall smoothing
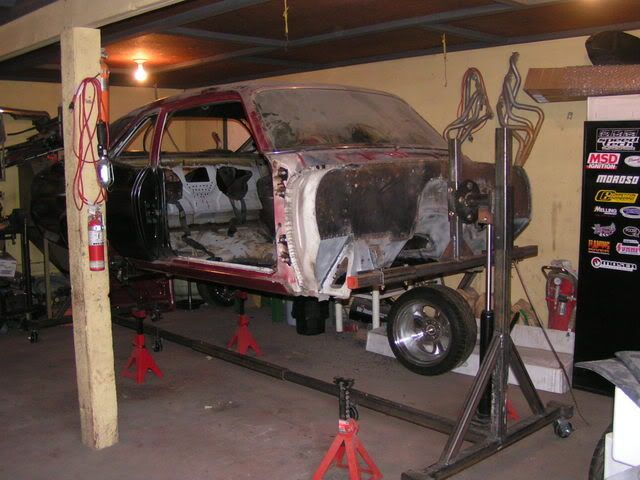
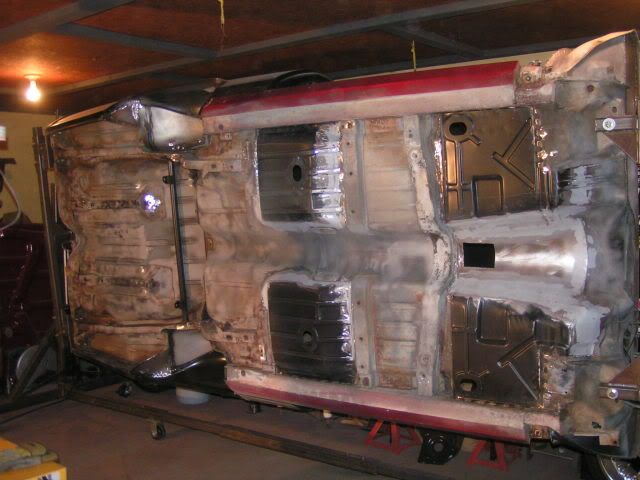
On the rotisserie (I built the rotisserie also)
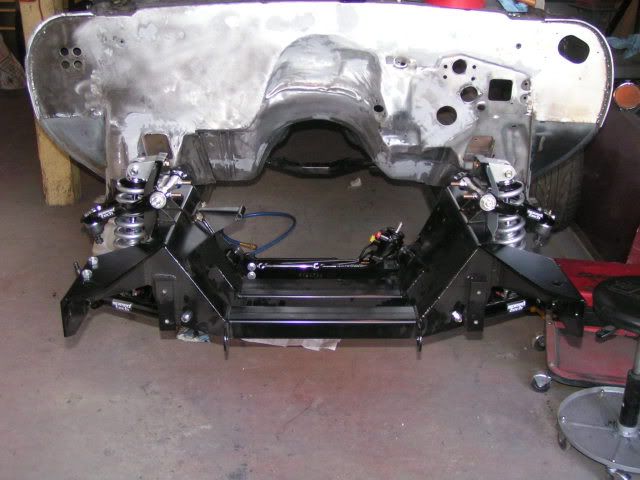
Suspension upgrades
Speedtech subframe
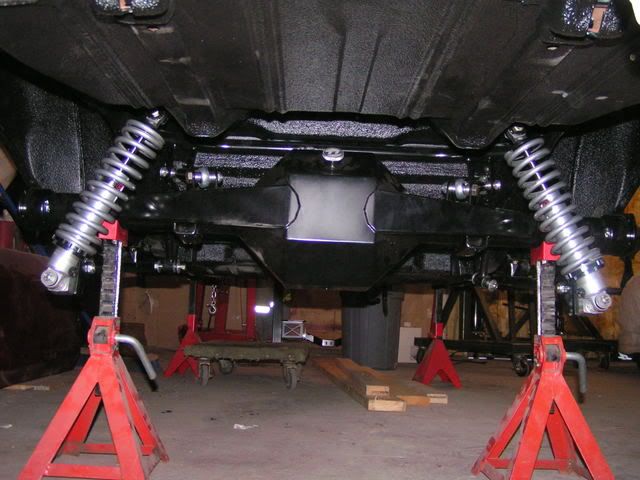
Moser M9 housing with Prodigy bar 4 link rear suspension. QA1 coils overs at all corners
Pro Touring theme
Suspension, brakes and tires:
18" New Gen Splitters, polished lip and brushed centers. 305-30-18 in the rear and 245-35-18 in the front.
Speed Tech Performance subframe with Speed Tech high clearance tubular control arms.
Speed Tech 1.25" solid sway bar.
Unisteer rack and pinion kit
Ridetech single adjustable coil overs
Wilwood 6 piston calipers with 12.2" rotors
Prodigy bar rear suspension (airbar with adjustable arms) with Ridetech single adjustable coil overs
Moser M9 housing
Moser 31 spline axles
Strange Pro Nodular centre section with 3.70 gears and half billet posi
Wilwood 4 piston calipers with 12.2" rotors
Drivetrain:
LS3 6.2L crate motor. Hope to be around 550 hp.
Speartech ECU with DBW
Comp Cams camshaft: 226/234 .598”/.612” 114LSA custom cam using EPS on intake and LXL lobes on the exhaust.
LS3 intake with LS3 ported and polished throttle body
Speed Tech Performance / Stainless Works long tube polished headers.
Wegner Motorsports polished diamond cut serpentine kit
Tremec TKO600 with MGW shifter
Monster stage 3 clutch
Interior:
Flaming River polished tilt steering column
Flaming River Waterfall leather steering wheel
2005 GTO leather power bucket seats in front and GTO rear seats
Custom console with 7" LCD screen
Thunder Road gauge cluster
Speedhut gauges
Vintage Air Gen IV air conditions
Billet Specialties air conditions louvers
Body:
New sheet metal includes:
Goodmark: quarter panels, inner rear wheel wells, deck filler panel
Auto Metal Direct: 2" cowl hood, inner fender wells, rear cross rail, rear tail light panel, quarter panel end caps, door skins
DSE deep tubs
Firewall has been completely smoothed
Paint will be House of Kolor's apple red with black base coat
Stereo:
JL Audio stereo (haven't decided what but will be big)
More to come, but in the meantime here's some pics:
The car before I started
Some of the metal work/panel replacement done on the car
Deep tubs with new outer wheels wells
Driver's side cowel panel
Trans tunnel
Quarter panel - both sides
Firewall smoothing
On the rotisserie (I built the rotisserie also)
Suspension upgrades
Speedtech subframe
Moser M9 housing with Prodigy bar 4 link rear suspension. QA1 coils overs at all corners
Last edited by scherp69; 03-13-2012 at 10:37 PM. Reason: updated parts list
 10-28-2009, 07:24 PM
#2
On The Tree
Thread Starter
iTrader: (4)
Join Date: Mar 2009
Location: British Columbia, Canada
Posts: 132
Likes: 0
Received 0 Likes
on
0 Posts
6 piston Wilwood calipers with 12.19" rotors on the front

Could have swore I had pics of the back brakes...am running 4 piston calipers with 12.19" rotors also
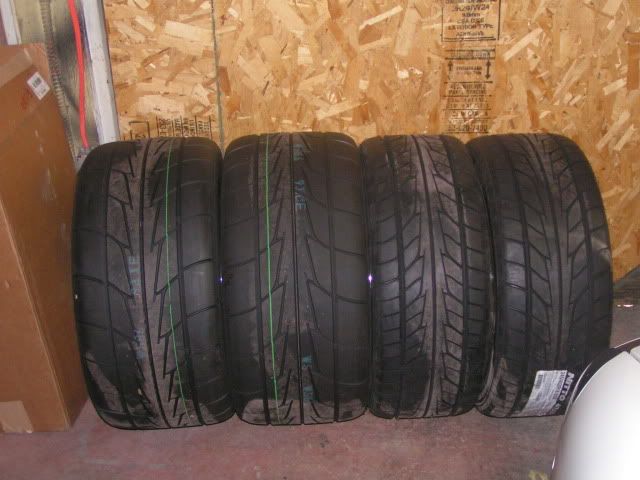
New Gen Splitters with brushed aluminum centres. Nitto 555R 305-35-18 on the back. Nitto 555 245-40-18 on the front
LS goodies
New L92 crate

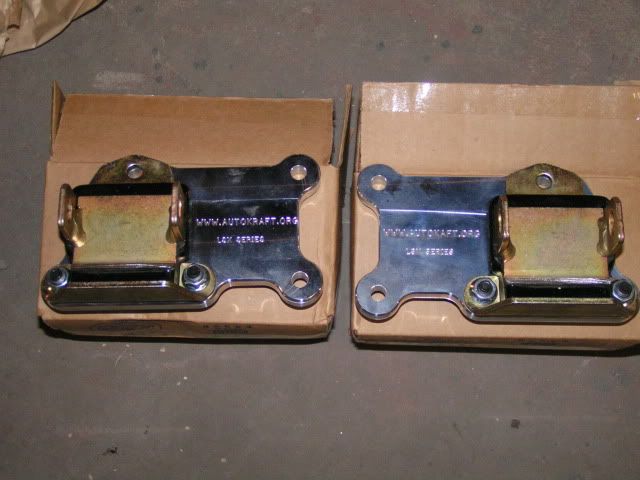
Autokraft oil pan and motor mounts

Trans will be a TKO 600, for some reason I don't have a pic right now
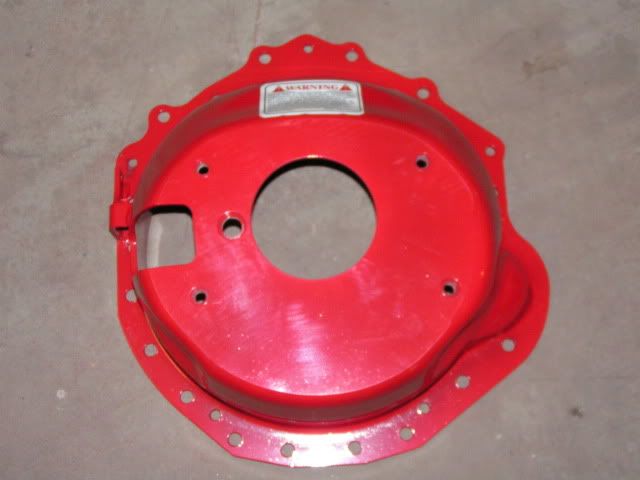
Lakewood LS scattershield
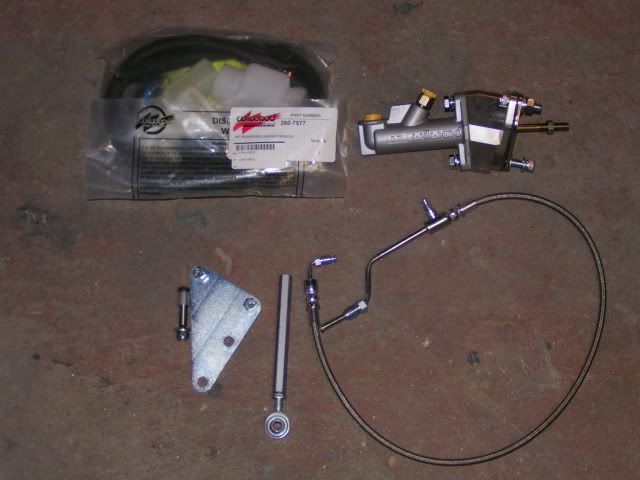
Keisler hydraulic master kit
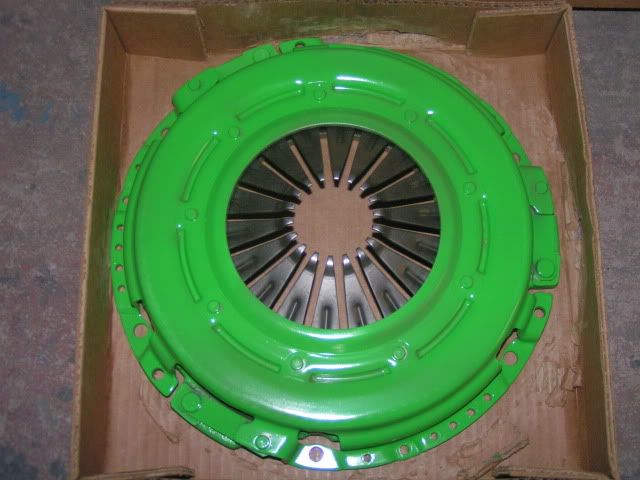
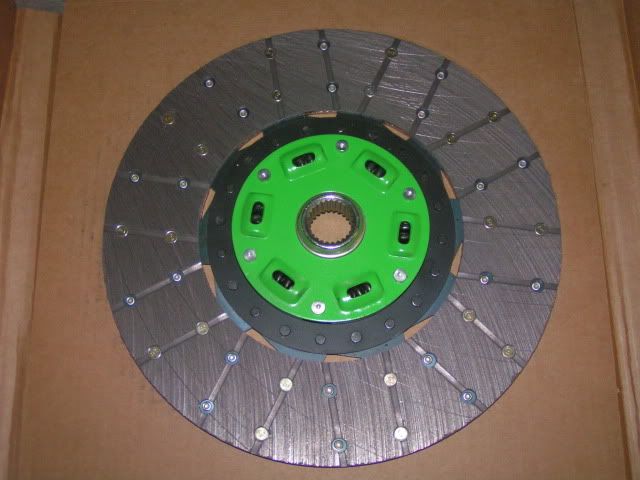
Monster clutch level 3.5
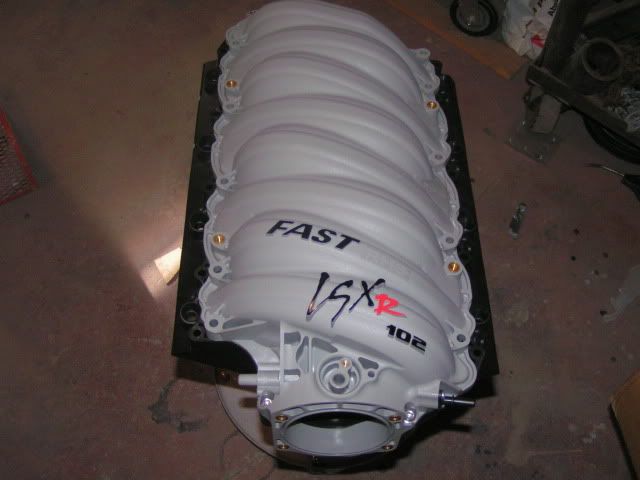
FAST 102mm intake which will be fitted with a 102mm DBW throttle body
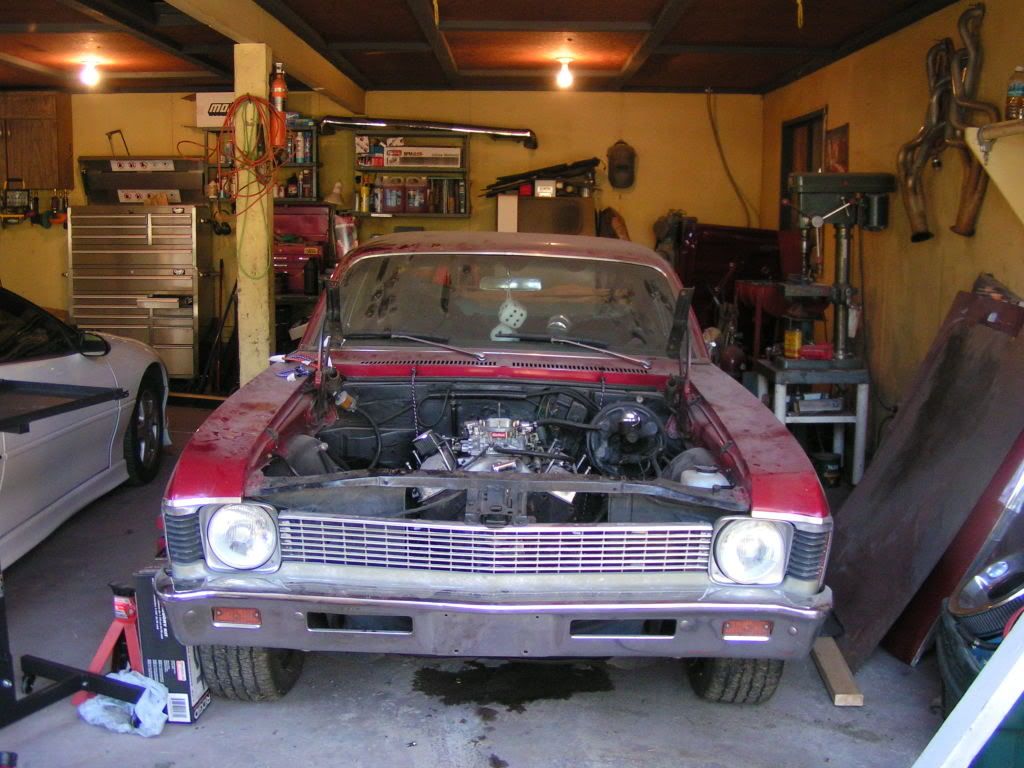
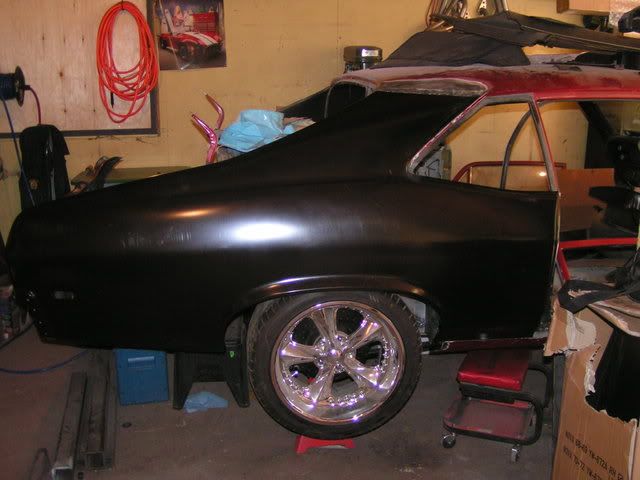
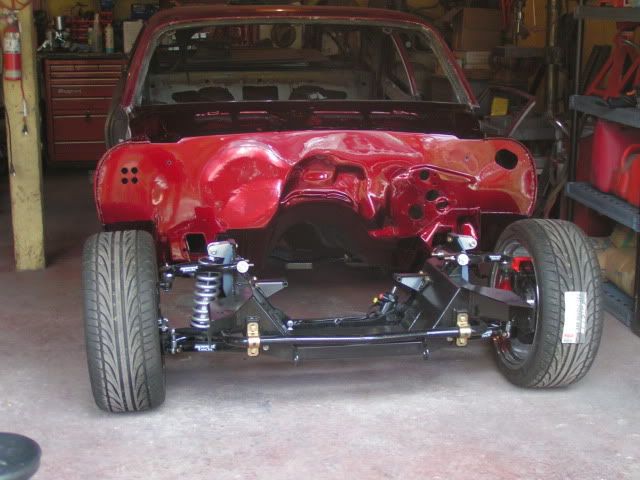
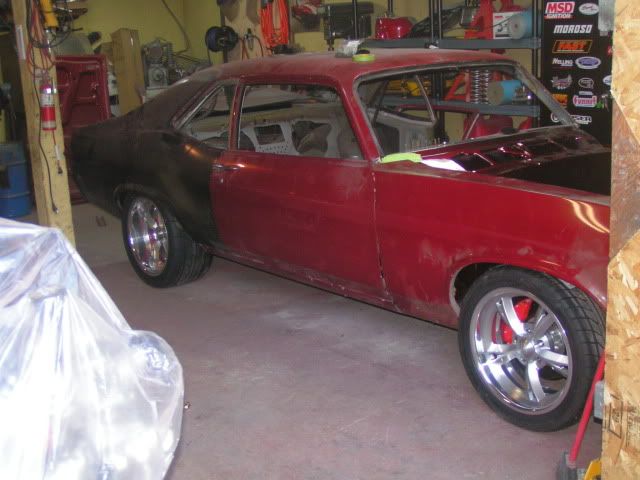
As the car sits today. The color is House of Kolor's apple red
Right now I'm just dialing in the scattershield and will hopefully have the trans and motor in within a couple weeks.
Plans for the motor still include:
Mast Motorsports performance package (SS cam with their controller) - should put me to 540hp without intake and headers
Stainless Works long tube headers - designed to fit the Speedtech subframe
Vintage Air Frontrunner serpentine kit
102mm DBW throttle body - likely Nick Williams or if FAST comes out with one
Could have swore I had pics of the back brakes...am running 4 piston calipers with 12.19" rotors also
New Gen Splitters with brushed aluminum centres. Nitto 555R 305-35-18 on the back. Nitto 555 245-40-18 on the front
LS goodies
New L92 crate
Autokraft oil pan and motor mounts
Trans will be a TKO 600, for some reason I don't have a pic right now
Lakewood LS scattershield
Keisler hydraulic master kit
Monster clutch level 3.5
FAST 102mm intake which will be fitted with a 102mm DBW throttle body
As the car sits today. The color is House of Kolor's apple red
Right now I'm just dialing in the scattershield and will hopefully have the trans and motor in within a couple weeks.
Plans for the motor still include:
Mast Motorsports performance package (SS cam with their controller) - should put me to 540hp without intake and headers
Stainless Works long tube headers - designed to fit the Speedtech subframe
Vintage Air Frontrunner serpentine kit
102mm DBW throttle body - likely Nick Williams or if FAST comes out with one
 10-29-2009, 11:43 AM
#7
On The Tree
Thread Starter
iTrader: (4)
Join Date: Mar 2009
Location: British Columbia, Canada
Posts: 132
Likes: 0
Received 0 Likes
on
0 Posts
Thanks for the comments guys. I went through my pics and thought I would post a few more.
Car on the rotisserie and rolled outside to spray off the bottom. That's the wife's 97 RS on the left. I always give her a hard time that it only has a 6 in it.
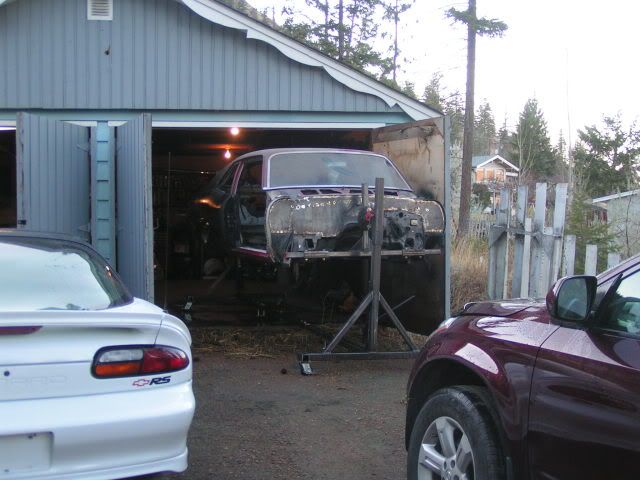
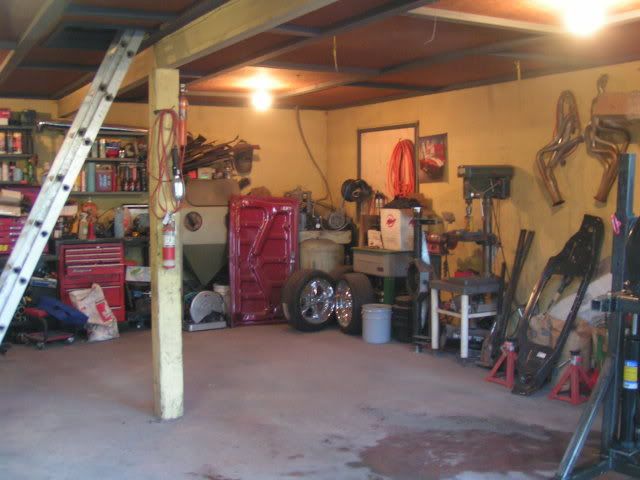
My shop where everything happens. It's much more organized now. I spent a day a few weeks ago re-organizing it.
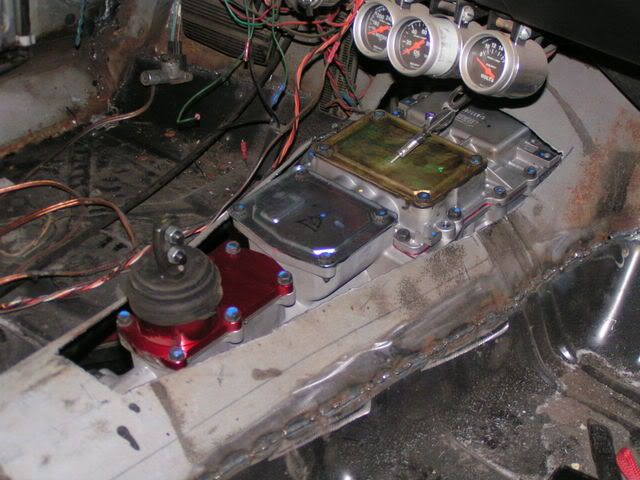
Transmission in the car when I was installing the tunnel
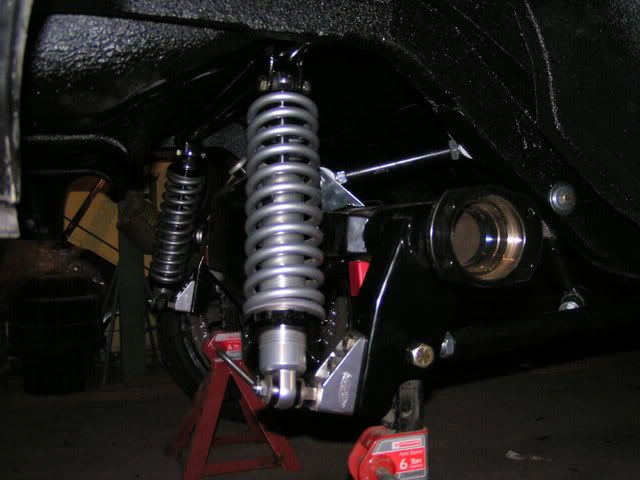
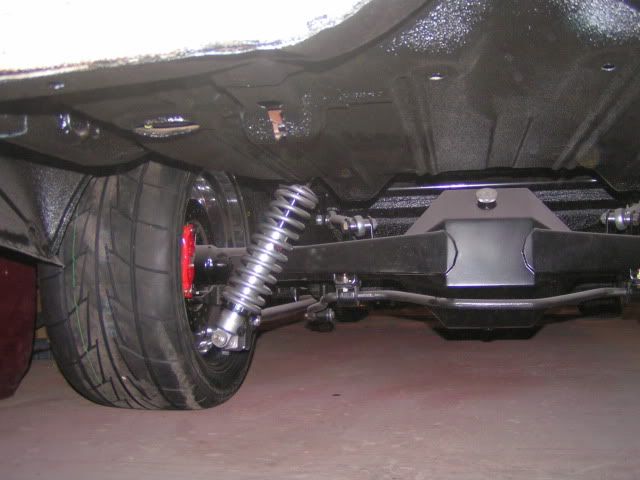
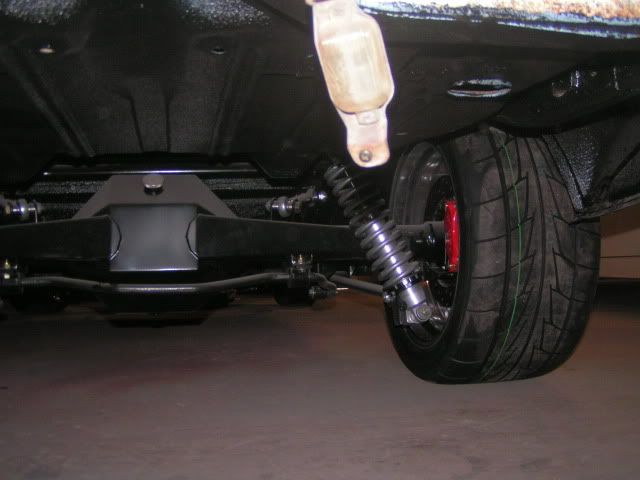
Here's some better pics of the rear set up. Added a rear sway bar
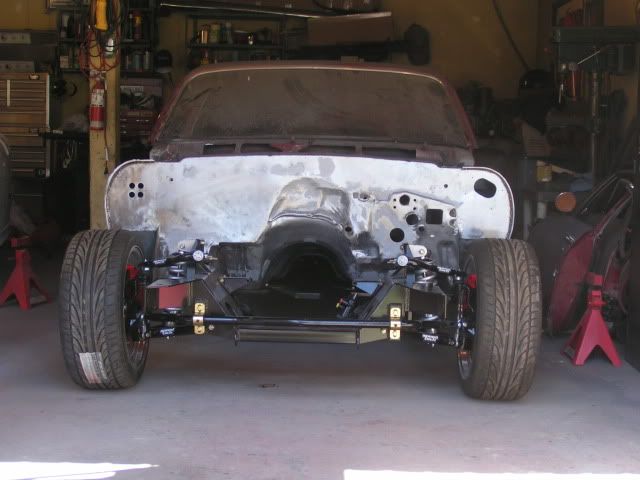
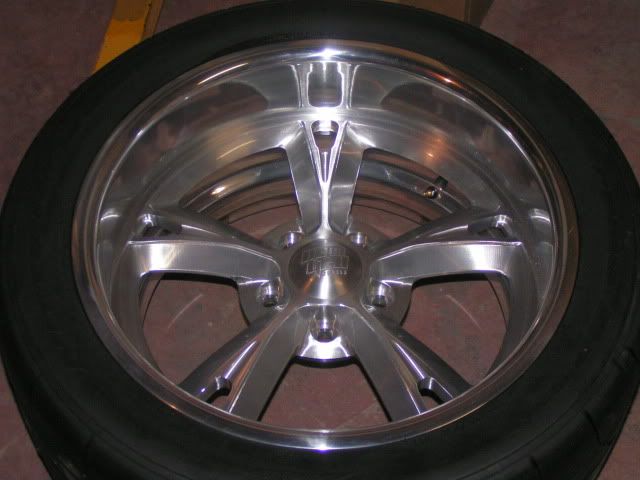
Hung some sheet metal to see how the new wheels look
Here's an outline/plans for the car. Some parts I have, some still to come.
L92 swap with Mast Motorsports SS cam, springs and controller
Black Label roller rocker arms
Autokraft oil pan and motor mounts/adapter plates
FAST 102mm intake
102mm DBW throttle body
Vintage Air Frontrunner serpentine kit
Coils will be relocated
Stainless Works long tube polished headers
Tremec TKO600 transmission
Lakewood scattershield
Monster level 3.5 clutch
Wilwood hydraulic clutch master
Haven't decided on the exhaust yet
Speedtech subframe with high clearance control arms
Unisteer power rack and pinion
1.5" front sway bar
QA1 coil over springs
L&H tall billet spindles
Wilwood 12.19" rotors with 6 piston red powder coated calipers
Polished stainless 8" dual diaphragm brake booster
Prodigy bar triangulated 4 link rear suspension
QA1 coil over springs
Wilwood 12.19" rotor with 4 piston red powder coated calipers
Moser M9 rear housing with back brace, shortened from stock length
Moser 31 spline axles
Strange pro nodular center section with half billet posi and black aluminum pinion cover with 3.70 gears
3" aluminum driveshaft
New Gen Splitters with brushed aluminum centers
Rear are 18x10 with 5.50" backspacing with Nitto 555R 305-35-18's
Fronts are 18x8 with 4.75" backspacing with Nitto 555 245-40-18's
Paint is House of Kolors apple red with black basecoat
I haven't decided if the car with be solid red or if I will do black rally stripes
Interior will be either custom leather or Fesler panels once they are released.
Flaming River polished tilt column with Flaming River Waterfall steering wheel
Covan's dash with autometer or Mast Motorsports gauges
Bucket seats with custom console
Rear seats will likely be a Mike's Custom Cars seat which makes it two seats molded in fiberglass
Clayton Machine Works pedal assembly with DBW pedal
Custom JL stereo set up with 7" LCD screen to control it all
Vintage Air Gen IV air conditioning with electronic controls
Car on the rotisserie and rolled outside to spray off the bottom. That's the wife's 97 RS on the left. I always give her a hard time that it only has a 6 in it.
My shop where everything happens. It's much more organized now. I spent a day a few weeks ago re-organizing it.
Transmission in the car when I was installing the tunnel
Here's some better pics of the rear set up. Added a rear sway bar
Hung some sheet metal to see how the new wheels look
Here's an outline/plans for the car. Some parts I have, some still to come.
L92 swap with Mast Motorsports SS cam, springs and controller
Black Label roller rocker arms
Autokraft oil pan and motor mounts/adapter plates
FAST 102mm intake
102mm DBW throttle body
Vintage Air Frontrunner serpentine kit
Coils will be relocated
Stainless Works long tube polished headers
Tremec TKO600 transmission
Lakewood scattershield
Monster level 3.5 clutch
Wilwood hydraulic clutch master
Haven't decided on the exhaust yet
Speedtech subframe with high clearance control arms
Unisteer power rack and pinion
1.5" front sway bar
QA1 coil over springs
L&H tall billet spindles
Wilwood 12.19" rotors with 6 piston red powder coated calipers
Polished stainless 8" dual diaphragm brake booster
Prodigy bar triangulated 4 link rear suspension
QA1 coil over springs
Wilwood 12.19" rotor with 4 piston red powder coated calipers
Moser M9 rear housing with back brace, shortened from stock length
Moser 31 spline axles
Strange pro nodular center section with half billet posi and black aluminum pinion cover with 3.70 gears
3" aluminum driveshaft
New Gen Splitters with brushed aluminum centers
Rear are 18x10 with 5.50" backspacing with Nitto 555R 305-35-18's
Fronts are 18x8 with 4.75" backspacing with Nitto 555 245-40-18's
Paint is House of Kolors apple red with black basecoat
I haven't decided if the car with be solid red or if I will do black rally stripes
Interior will be either custom leather or Fesler panels once they are released.
Flaming River polished tilt column with Flaming River Waterfall steering wheel
Covan's dash with autometer or Mast Motorsports gauges
Bucket seats with custom console
Rear seats will likely be a Mike's Custom Cars seat which makes it two seats molded in fiberglass
Clayton Machine Works pedal assembly with DBW pedal
Custom JL stereo set up with 7" LCD screen to control it all
Vintage Air Gen IV air conditioning with electronic controls
Last edited by scherp69; 10-30-2009 at 11:08 AM.
Trending Topics
10-29-2009, 11:46 AM
#8
On The Tree
Thread Starter
iTrader: (4)
Join Date: Mar 2009
Location: British Columbia, Canada
Posts: 132
Likes: 0
Received 0 Likes
on
0 Posts
I thought I would catch up to my other build threads. From now on when I update the other ones, I will copy the posts here also. This is from last week and the latest update.
I started doing some work on the engine today. I know the LS conversion is becoming almost the norm, so I thought I be quite detailed in what I'm doing. Any area where I had any questions, I will post more pics. Hopefully there aren't too many to make it boring. Onto the pics:
First thing was to take off the stock oil pan
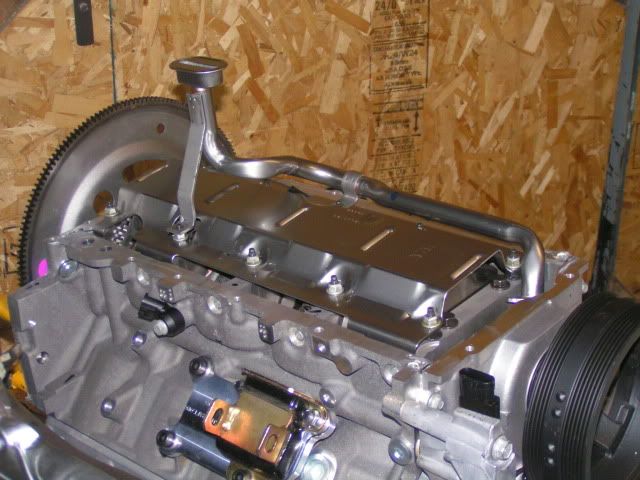
Yep it's definitely a LS
Replace the stock oil pickup with the one included with the Autokraft oil pan. After talking to another member who did the L92 swap, I decided to leave the stock windage pan on also.
The stock oil pan gasket is metal so there's no reason not to reuse it
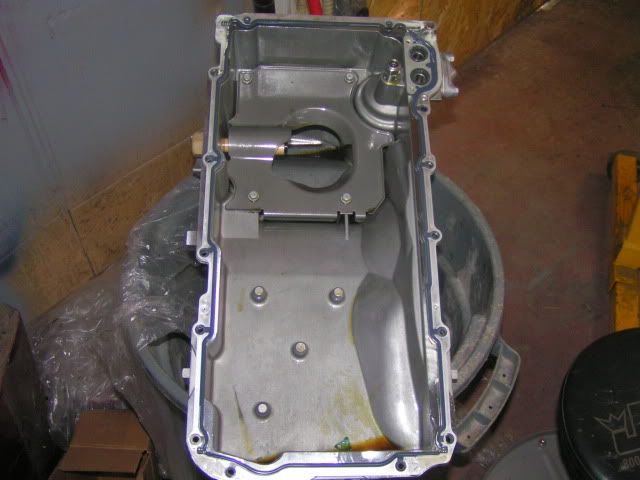
To get the stock gasket off, I had to drill out two rivets holding it in place
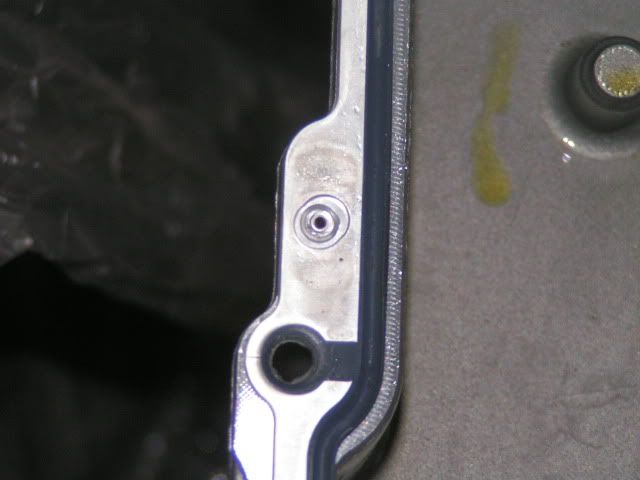

Gasket in place
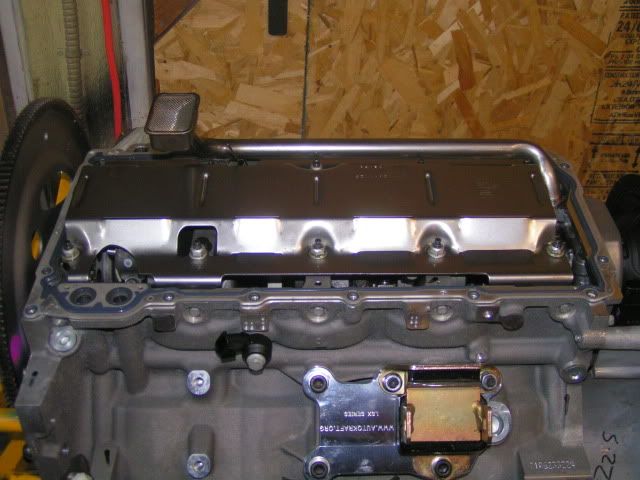
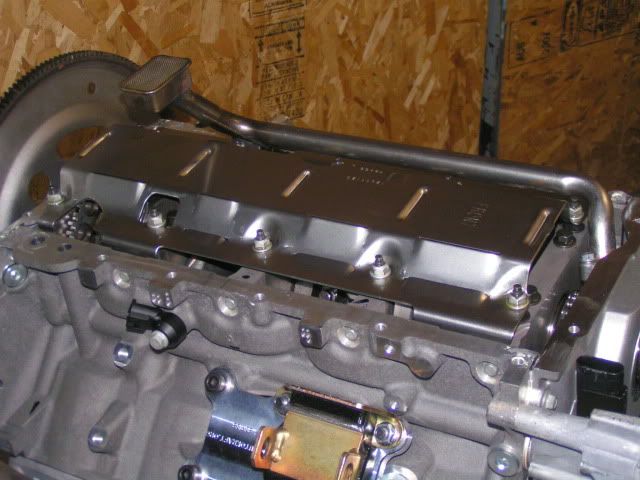
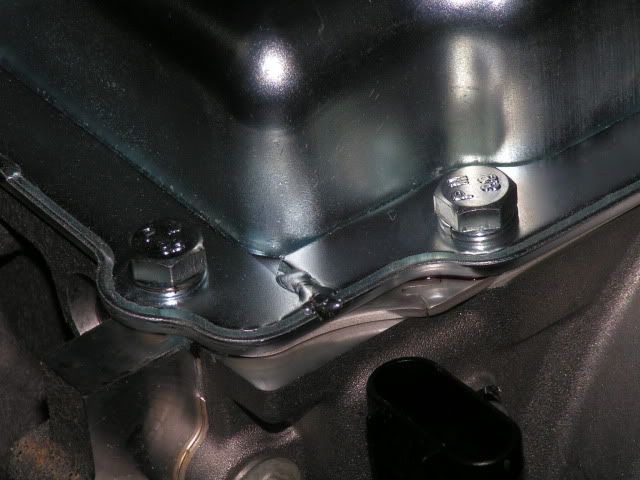
Autokraft pan on
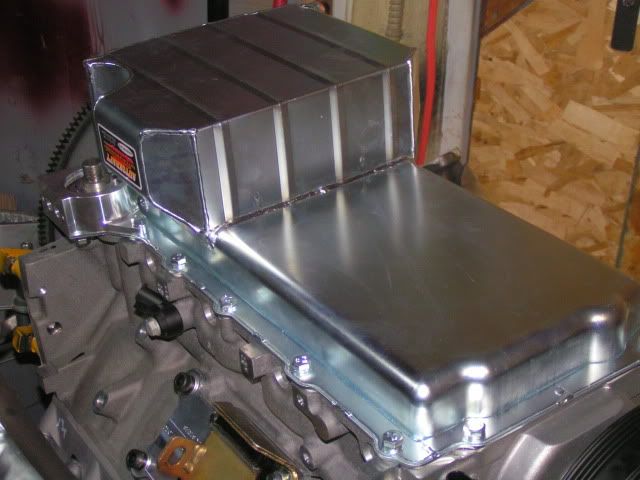
When using the Autokraft pan, the stock oil pan bolts are a bit too long. You can either put washers under then or get new bolts. I decided to get new bolts as they look way nicer than the stock one. They cost me about 4 bucks for all of them with washers. Torqued to 80 inch/lbs as per GM specs.
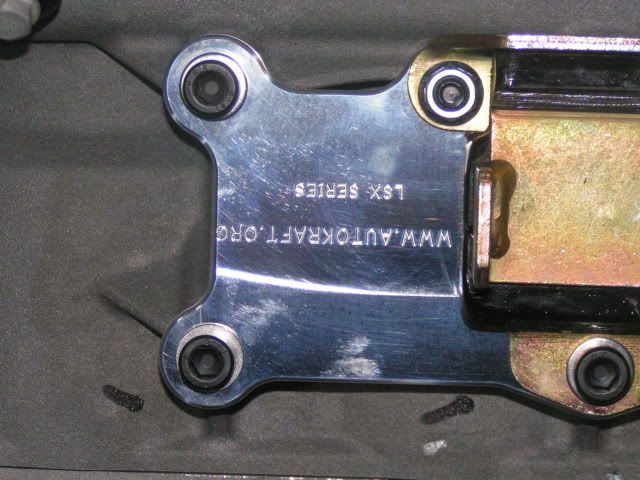
I also put on the Autokraft LS conversion motor mounts. I've seen them put on several different ways, but after confirming with Autokraft, these are the proper way of mounting them. The driver's side and passenger side are both marked, so unless you can't read, it's pretty straight forward. Also, they are designed that when the engine is sitting in the car, you should be able to read the writing on the side of the plates right side up.
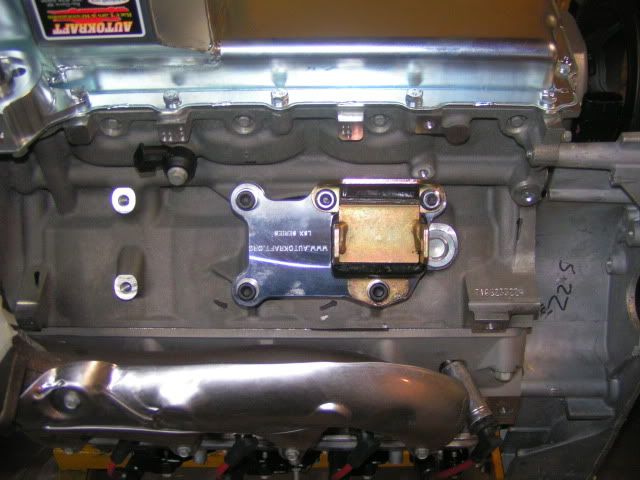
This is with the motor upside down
Next came getting rid of the truck intake. If anyone is looking for one with drive by wire throttle body, I'm wanting to get rid of this one. Brand new, never been started.
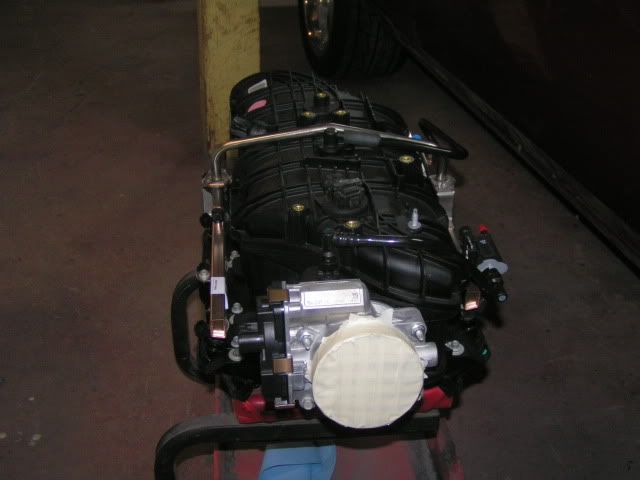
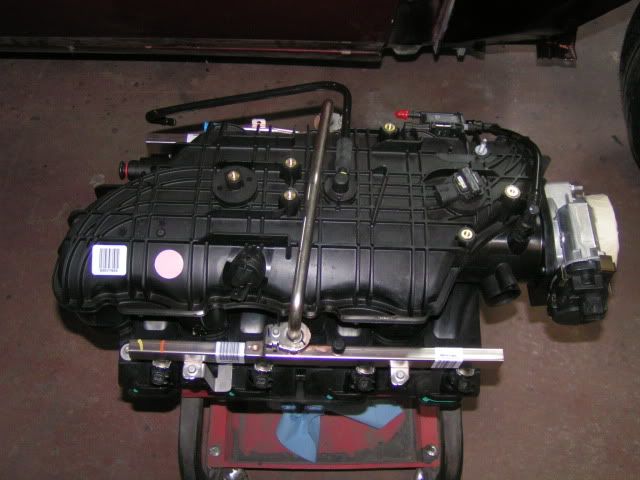
Taped off the heads.
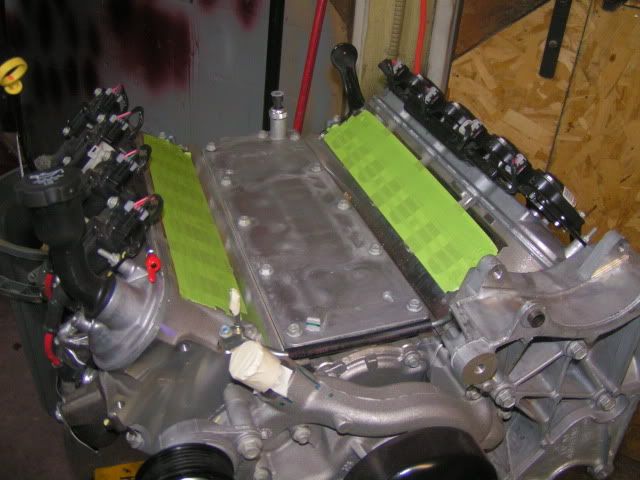
Next was to get rid of the ugly accessory bracket
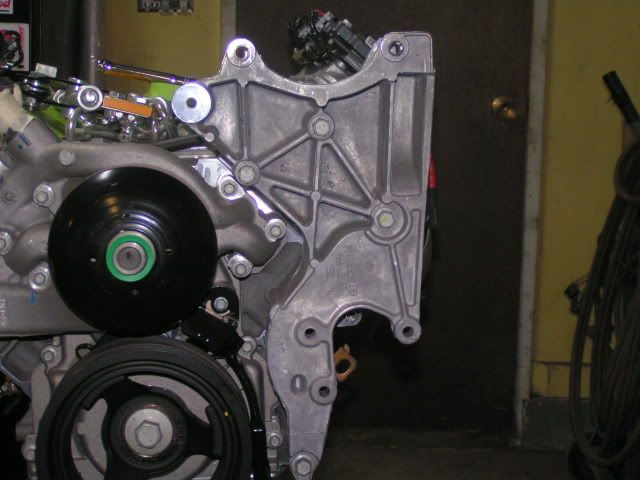
Looks way better already
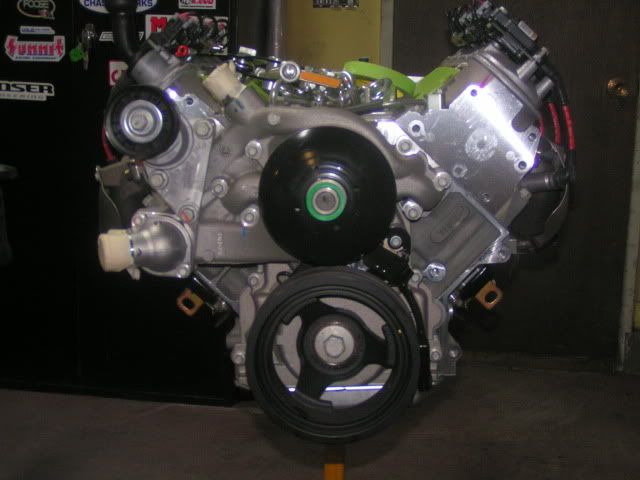
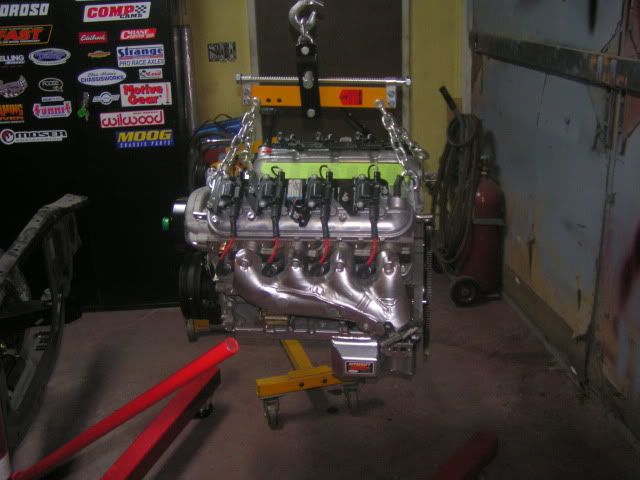
I then took the engine off the stand to start hooking up the scattershield and to dial it in.
I started doing some work on the engine today. I know the LS conversion is becoming almost the norm, so I thought I be quite detailed in what I'm doing. Any area where I had any questions, I will post more pics. Hopefully there aren't too many to make it boring. Onto the pics:
First thing was to take off the stock oil pan
Yep it's definitely a LS
Replace the stock oil pickup with the one included with the Autokraft oil pan. After talking to another member who did the L92 swap, I decided to leave the stock windage pan on also.
The stock oil pan gasket is metal so there's no reason not to reuse it
To get the stock gasket off, I had to drill out two rivets holding it in place
Gasket in place
Autokraft pan on
When using the Autokraft pan, the stock oil pan bolts are a bit too long. You can either put washers under then or get new bolts. I decided to get new bolts as they look way nicer than the stock one. They cost me about 4 bucks for all of them with washers. Torqued to 80 inch/lbs as per GM specs.
I also put on the Autokraft LS conversion motor mounts. I've seen them put on several different ways, but after confirming with Autokraft, these are the proper way of mounting them. The driver's side and passenger side are both marked, so unless you can't read, it's pretty straight forward. Also, they are designed that when the engine is sitting in the car, you should be able to read the writing on the side of the plates right side up.
This is with the motor upside down
Next came getting rid of the truck intake. If anyone is looking for one with drive by wire throttle body, I'm wanting to get rid of this one. Brand new, never been started.
Taped off the heads.
Next was to get rid of the ugly accessory bracket
Looks way better already
I then took the engine off the stand to start hooking up the scattershield and to dial it in.
10-29-2009, 11:46 AM
#9
On The Tree
Thread Starter
iTrader: (4)
Join Date: Mar 2009
Location: British Columbia, Canada
Posts: 132
Likes: 0
Received 0 Likes
on
0 Posts
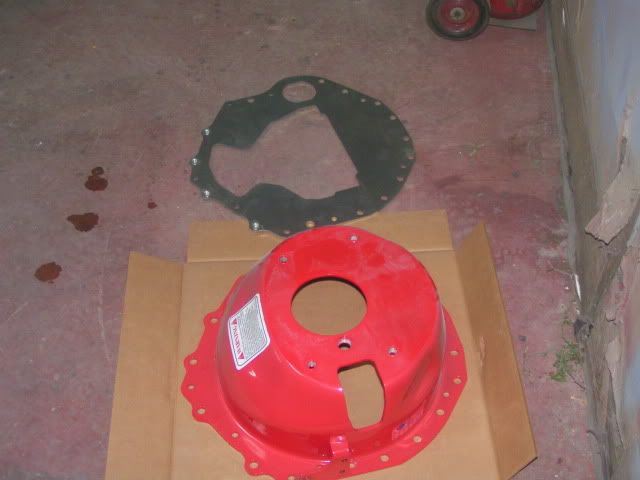
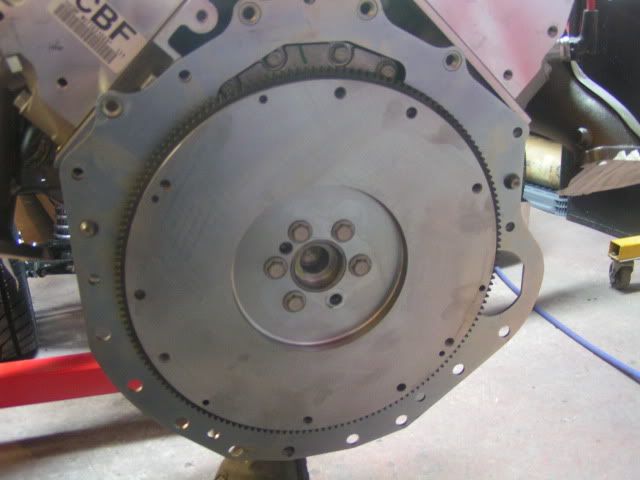
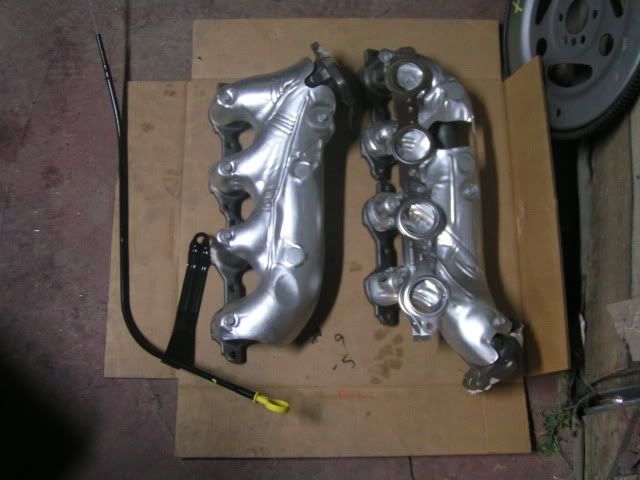
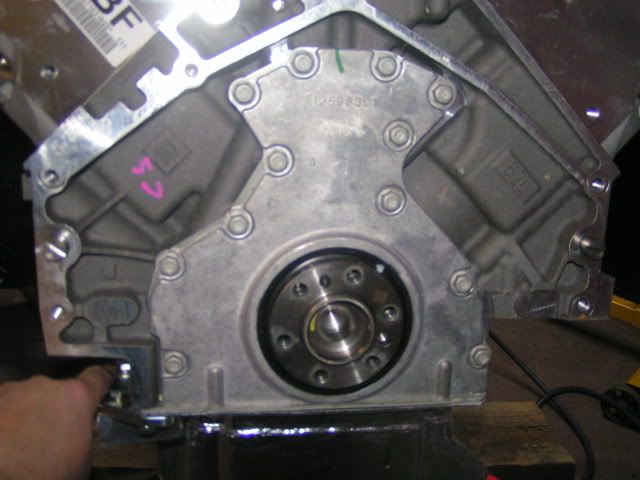
The stock flex plate (also for sale if someone wants them as well as the stock exhaust manifolds)
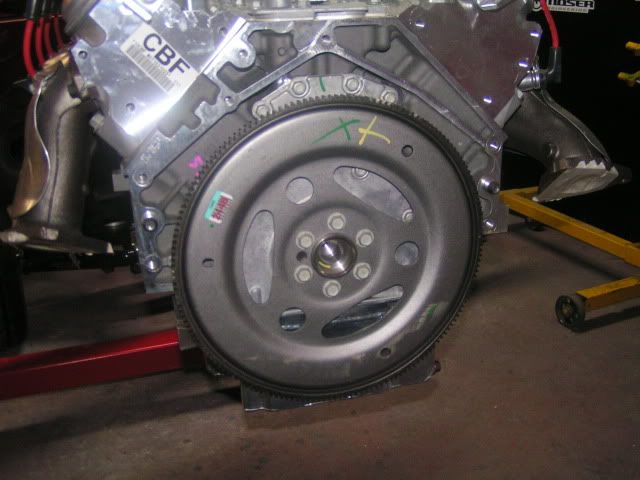
You'll notice there is one bolt missing, that is for the dialing in process
That's where I got to today. I started to dial in the scattershield, but didn't have all the hardware to properly secure it to the block. I'm going to get the nuts and bolts in the morning and will hopefully have it dialed in. I will post pics of how to dial in the scattershield/bellhousing when I'm done.
10-29-2009, 11:48 AM
#10
On The Tree
Thread Starter
iTrader: (4)
Join Date: Mar 2009
Location: British Columbia, Canada
Posts: 132
Likes: 0
Received 0 Likes
on
0 Posts
One question I have for you guys...I now have a stock L92 truck intake with fuel rails and stock drive by wire throttle body and stock exhaust manifolds that I want to sell. What do you guys think they would be worth. They are new and never run.
10-29-2009, 02:23 PM
#11
that thing's wicked. i'm not sure how much the intake/manifolds would be worth. put the PNs in gmpartsdirect.com and see what price they're offering them for.
there have been a few x-body builds around here - i'm thinking of starting a thread to link to them all, with summaries of each.
there have been a few x-body builds around here - i'm thinking of starting a thread to link to them all, with summaries of each.
10-30-2009, 01:23 AM
#13
On The Tree
iTrader: (5)

Join Date: May 2008
Location: Moorhead Minnesota
Posts: 177
Likes: 0
Received 0 Likes
on
0 Posts

that thing's wicked. i'm not sure how much the intake/manifolds would be worth. put the PNs in gmpartsdirect.com and see what price they're offering them for.
there have been a few x-body builds around here - i'm thinking of starting a thread to link to them all, with summaries of each.
there have been a few x-body builds around here - i'm thinking of starting a thread to link to them all, with summaries of each.
What are your plans for your trans tunnel? I have to do the same with my mustang to fit the t56. I'm not worried about the metal, but the carpet. I hope the carpet will just flex! Any thoughts on this? Anyway looks great!
10-31-2009, 02:05 PM
#16
On The Tree
Thread Starter
iTrader: (4)
Join Date: Mar 2009
Location: British Columbia, Canada
Posts: 132
Likes: 0
Received 0 Likes
on
0 Posts
Thanks for the compliments guys. I appreciate it.
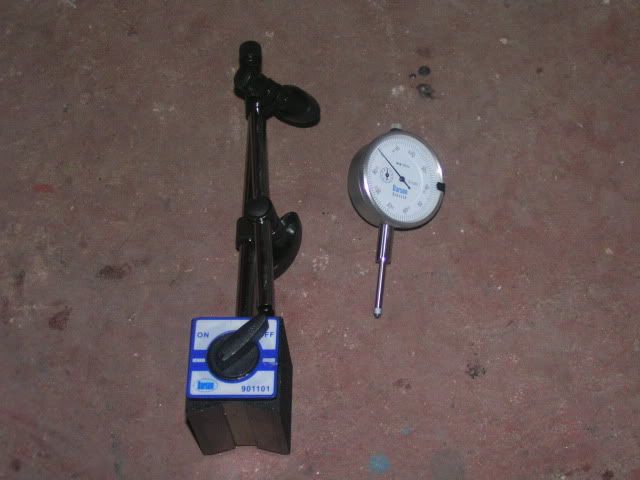
So a little update, a very frustrating one for me, but hopefully someone will learn from my mistake. I started dialing in the scattershield. First I had to buy a dial indicator and a magnetic base. Some write ups I read said you could use a 3" bolt and a c-clamp, but for $18 I thought the magnetic base would be easier. The dial indicator cost me about $20. You can also use a test indicator for this.
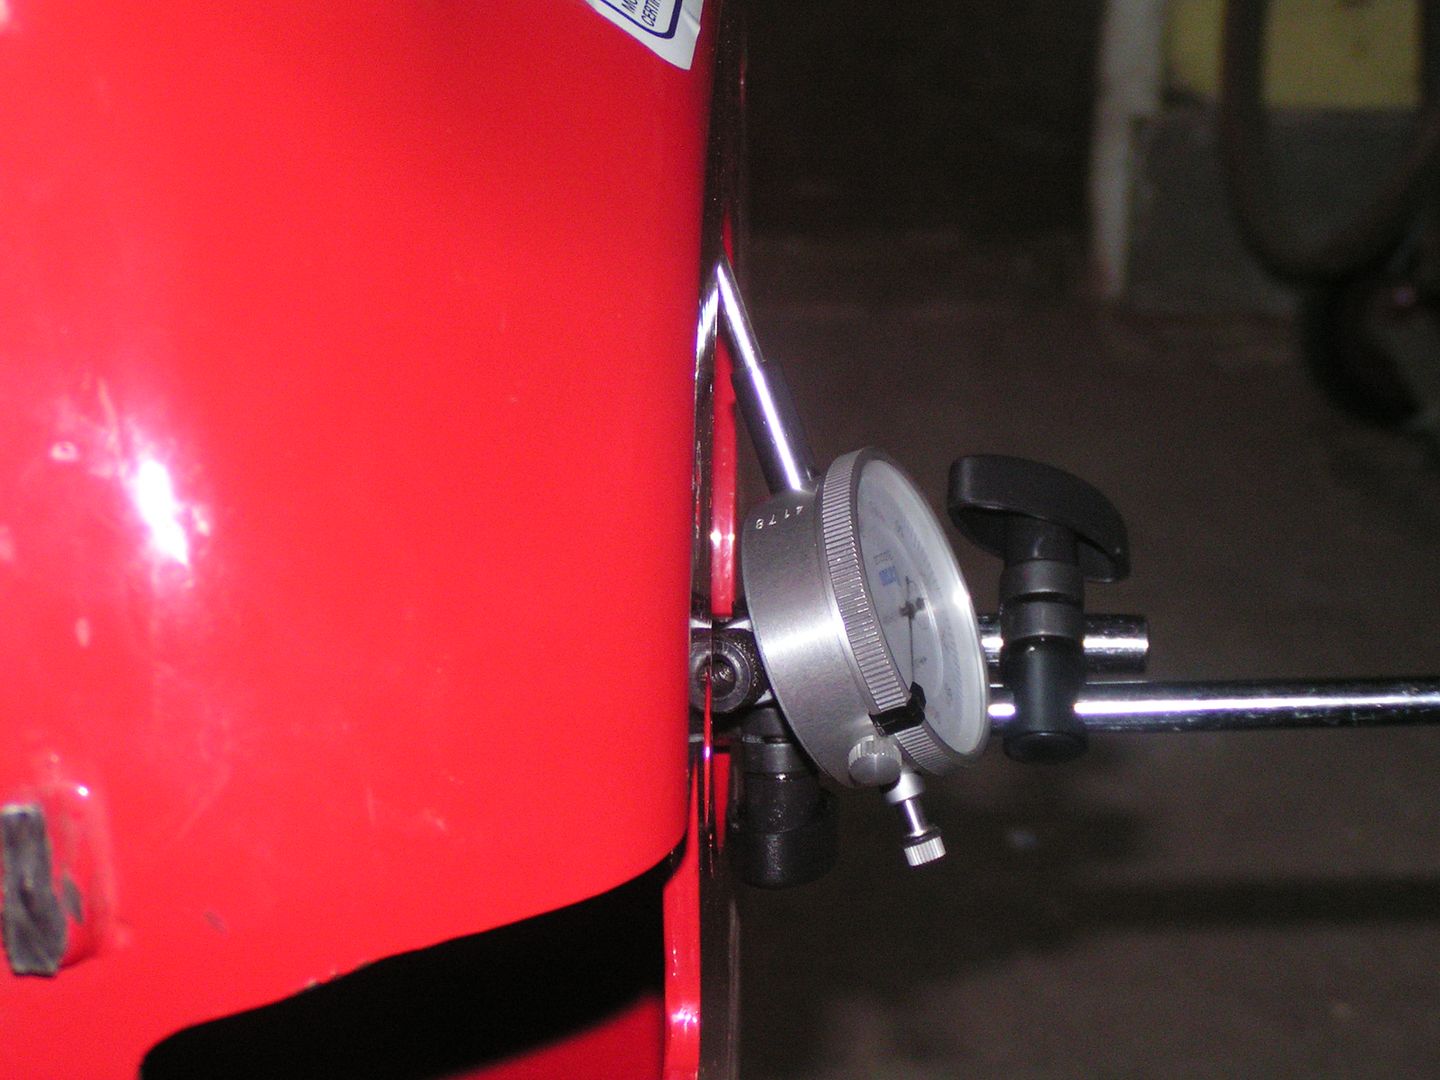
I hooked the dial indicator up to the magnetic base and put it on the flywheel to give a good picture of how it looks without the scattershield on.

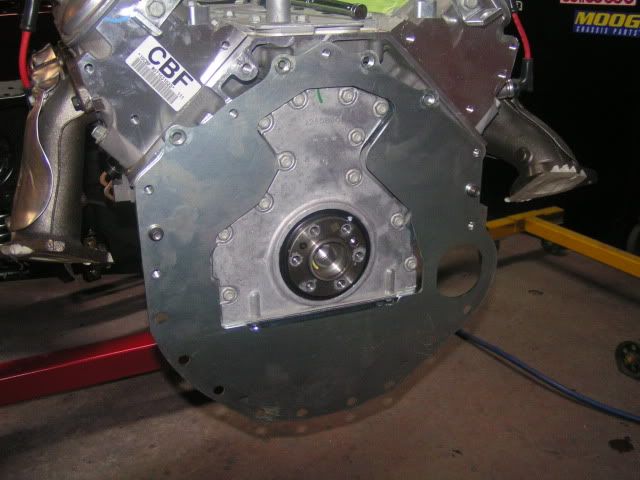
The scattershield went on and I put the dial indicator back on the flywheel. Here's some pics of how it looks

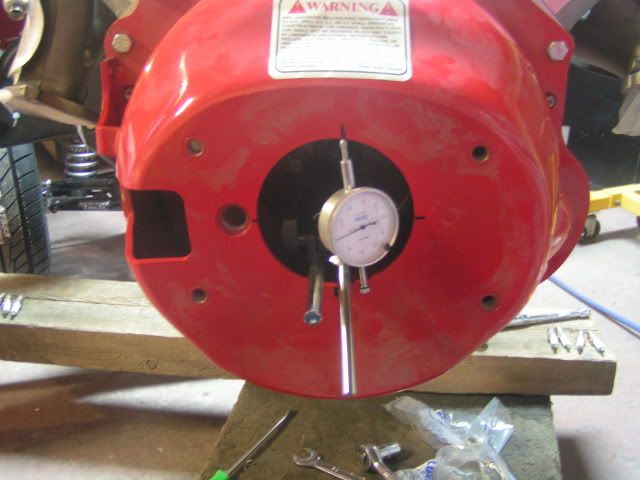
After posting several questions on another forum, I found out this was not the right way to do it
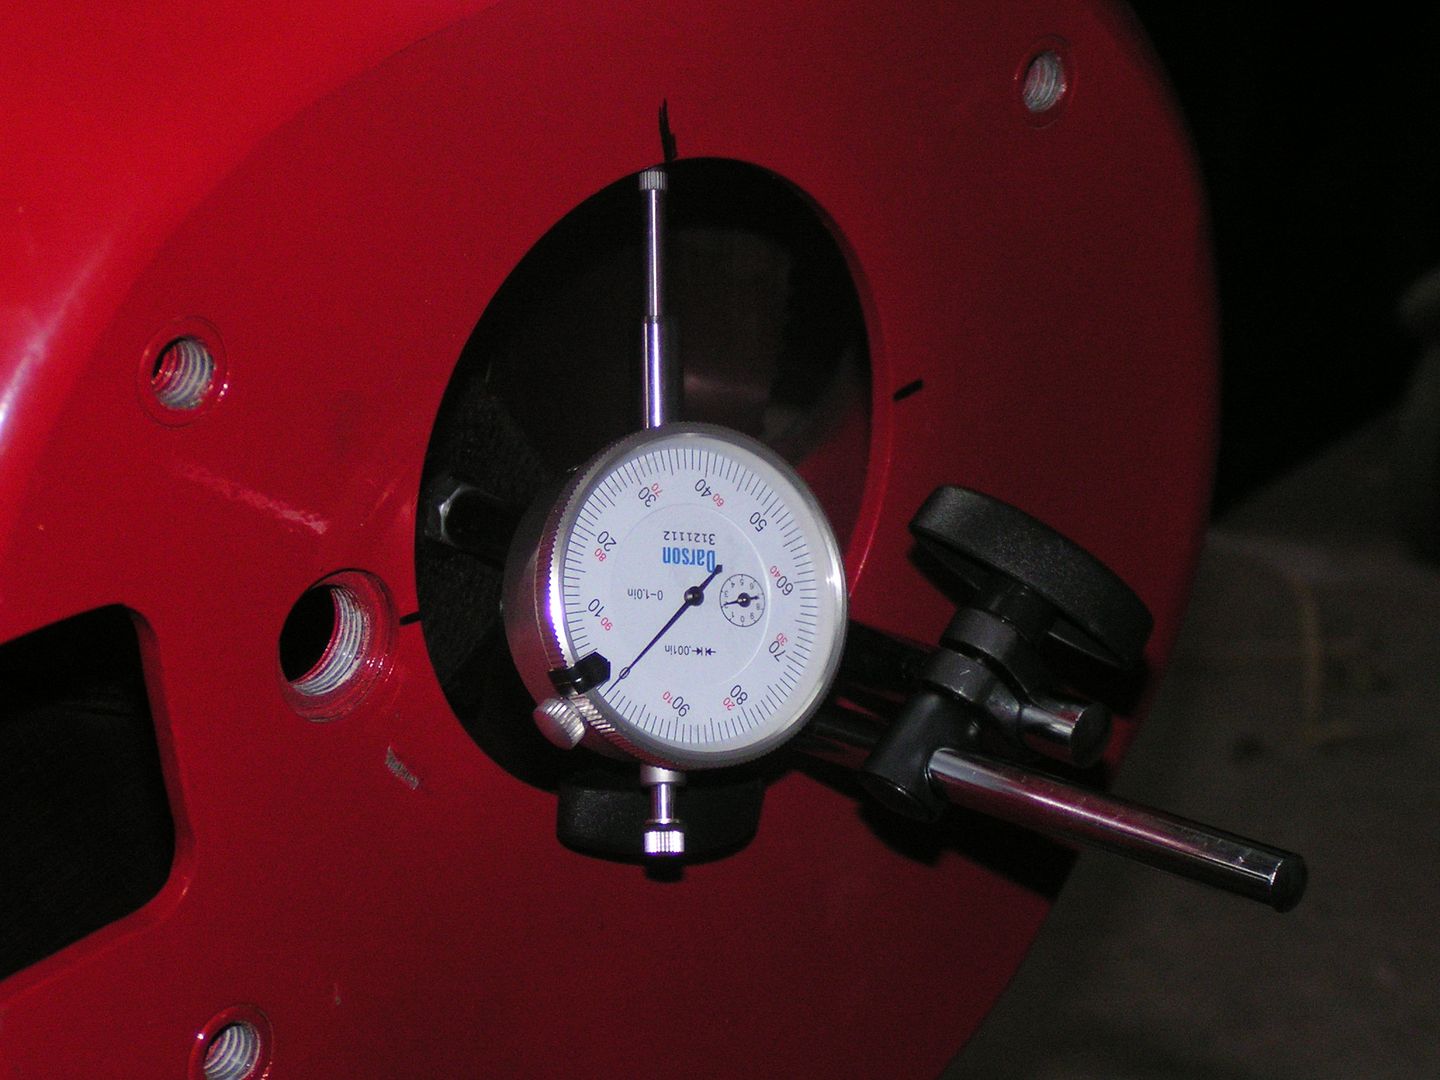
It needs to be as flat as possible like this
Once the dial indicator was in place, I turned the engine 360 degrees and found the high and low points. My high point was at about 7 o'clock which put my low point around 2 o'clock. Your high point should be almost across from your high point. Once you get your high point and low point numbers, you take the difference and divide by 2. Then you get the off set dowels accordingly. For mine, I needed 0.0021 dowels.
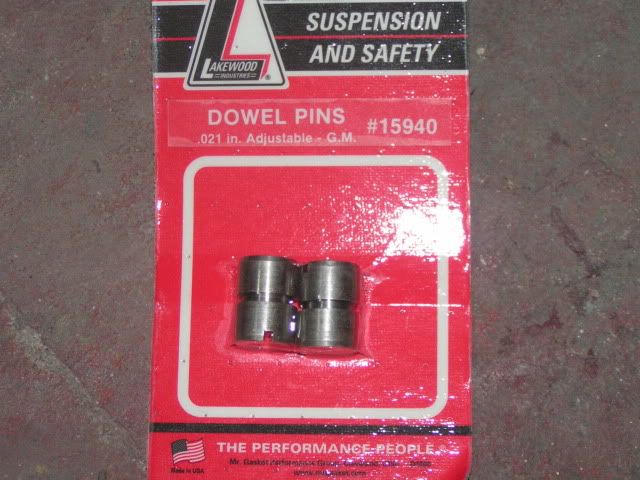
Here's where I made a big mistake. It was recommend that I get some dowels from http://www.robbmcperformance.com/ but I thought "they're all the same and I can just get them in Canada and not have to pay the duty". So I had a pair of Lakewood ones shipped to me. They cost $19 for the dowels and $15 shipping. The Lakewood ones are supposed to turn using a screwdriver......I call bulls$*t. I'll get back to that in a minute.
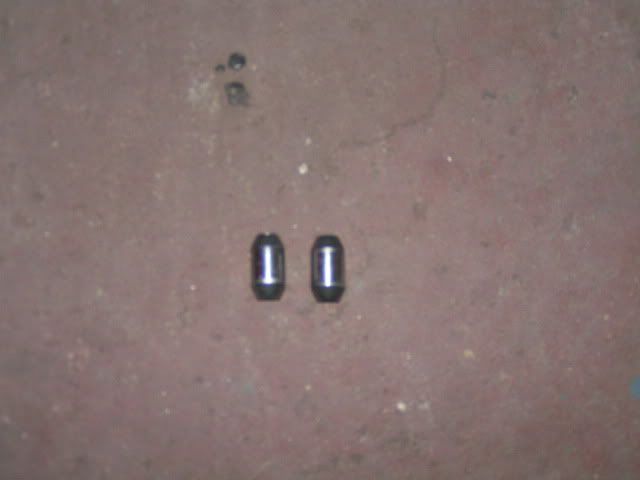
So I finally got the new dowels
And it was time to take out the old ones. This was quite easy. I took off the exhaust manifolds as they're not being used anyways and used a long bolt. I then tapped them out with a hammer.
Now you want to put some grease on in the dowel holes and on the dowel and tap them in.
Before putting them in, look at them and find out where the high point on the dowel is, for both. You want to have them parallel in the block.
Here's where I was/am getting confused. My high reading was at 7 o'clock and my low was at 2 o'clock. I wasn't sure which way to point the dowels. After watching a video by Keisler, I found you want to point the high side of the dowel towards the biggest number you got with the dial indicator. This is because that number is telling you that it is 0.0035 (for example) away from the center. I think this is correct, but please if someone knows...correct me and help me figure this damn process out. I want to do it right.
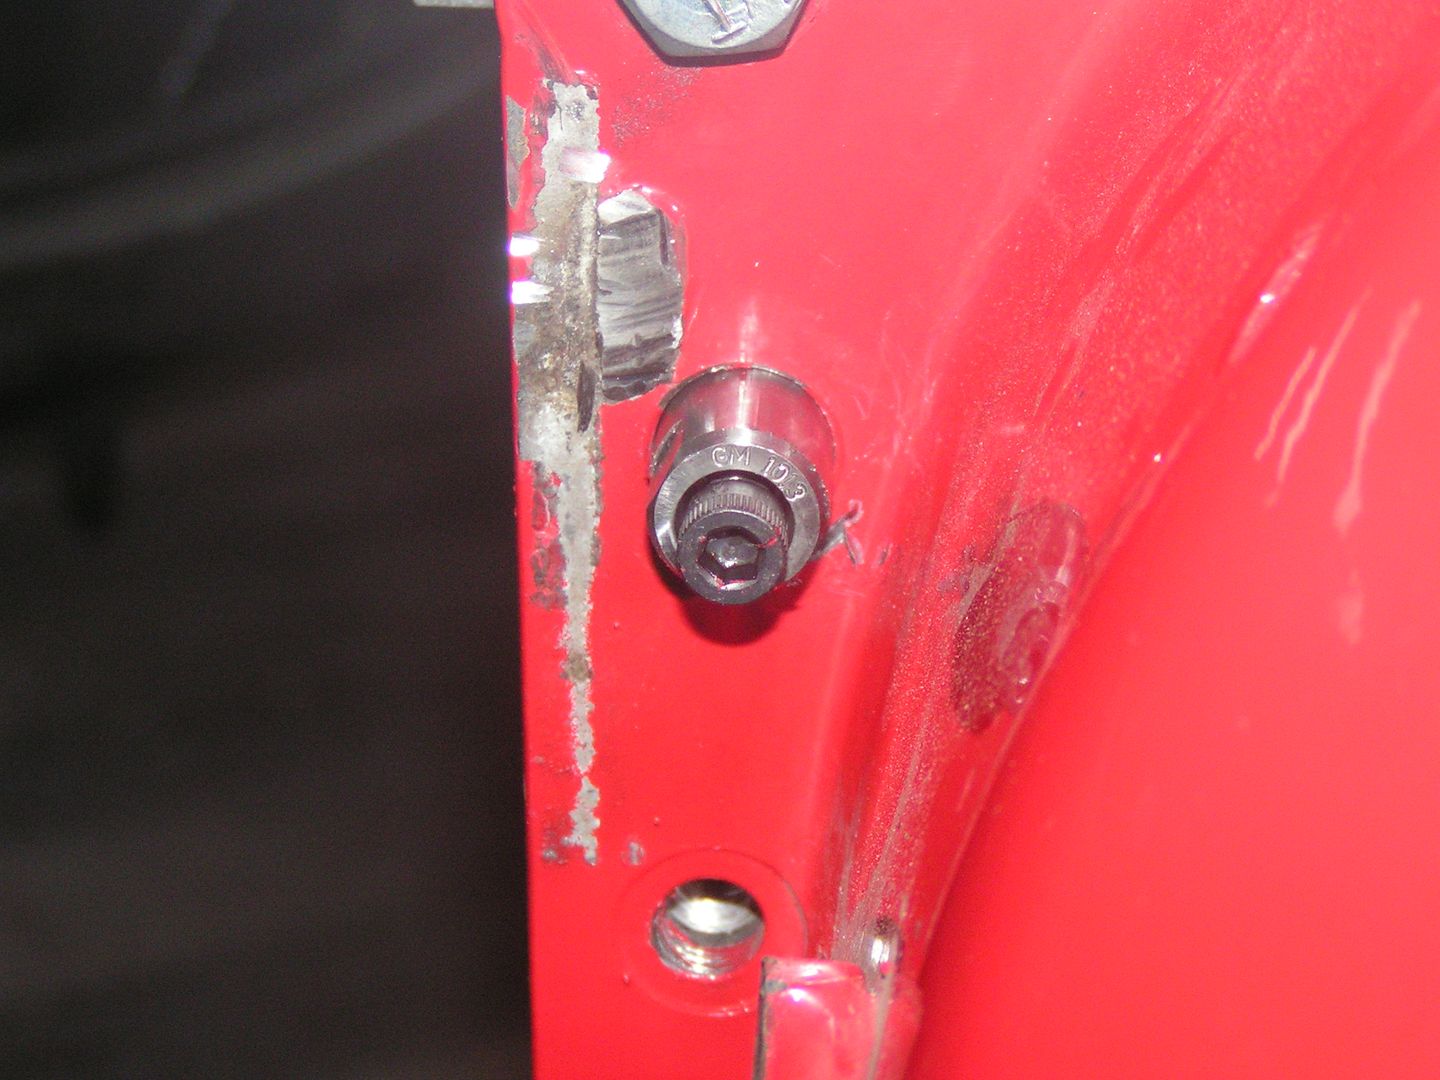
So I went to try and turn the dowel with a screwdriver, like it said to do, and I'm not sure who was doing it, but there is no way in hell those things were moving. So I grabbed some vice grips and was able to turn them with those. I kept turning the dowels and remeasuring but ended up no farther ahead. The annoying thing is everytime you need to turn the dowels, you have to loosen all the bolts holding the scattershield, turn the dowels and then tighten them back up. On the passenger side I had no problem fitting the vice grips but on the driver's side, I had to cut out the mechanical linkage bracket. Good thing I'm going hydraulic.
Before
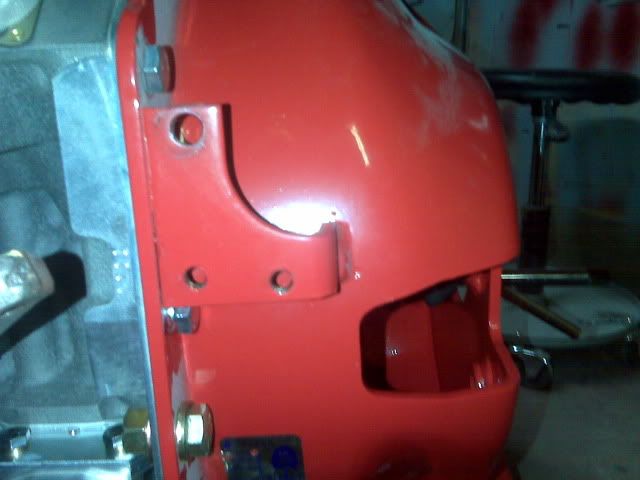
After. I'm going to grind it down smooth and put some red paint on to clean it up.
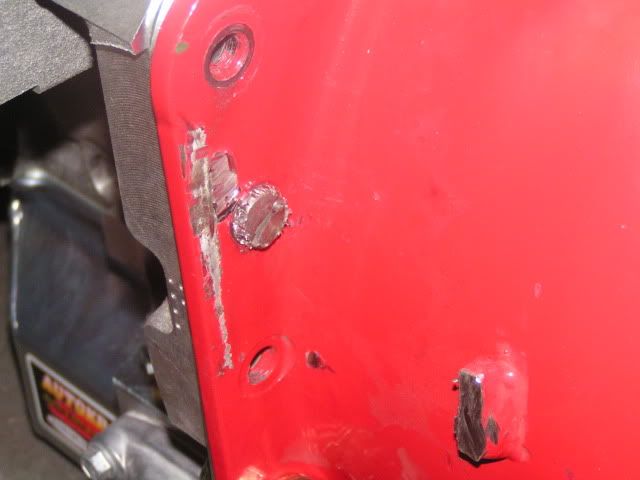
That last picture gave a glimpse as to why not to use the 'screwdriver type' of dowels. You can only clamp them so many times before they end up looking like this


So basically I wasted $40 on dowels when I was told to get the good ones to start with. Take my advice....get the good ones to start with!!!
Yesterday I called RobbMC Performance and they will ship me a new set on Monday. The new dowels run $28 and the thing that pi****es me off...I paid $15 to have the first ones shipped from a place that is 3 hours away. RobbMC is charging $10 to be shipped from Nevada. The difference between the good ones and the Lakewood ones are that once they are in place, you can use a open end wrench to turn them. They also have a screw down the middle that allows you to loosen the dowels so they turn. Once in final place, you tighten the screw and they are locked in place. Here's a link to the good ones: http://www.robbmcperformance.com/products/dowels.html
Another thing I found during all the trial and error runs was that my magnetic base was not sitting completely flat on the flywheel. I could lightly touch the shaft on it and it would rock. I found out why. When it was sitting on the flywheel, the lip on the crank that comes through the flywheel (hopefully that makes sense) sits slightly higher, causing there to be a ridge. Also, the magnetic base would not sit flat between the two bolts as it was a little bit two wide. Nothing a grinder can't fix.
So today I am no farther ahead, but actually down $40 and a few frustrating hours. Hopefully next week I will get a chance to put the new dowels in and get this done once and for all. I just hope that I have all the kinks worked out and it goes smoothly.
Please if anyone has any suggestions or advice on dialing in the scattershield, please feel free to join in. I want this to be as informative as possible for anyone reading this.
So a little update, a very frustrating one for me, but hopefully someone will learn from my mistake. I started dialing in the scattershield. First I had to buy a dial indicator and a magnetic base. Some write ups I read said you could use a 3" bolt and a c-clamp, but for $18 I thought the magnetic base would be easier. The dial indicator cost me about $20. You can also use a test indicator for this.
I hooked the dial indicator up to the magnetic base and put it on the flywheel to give a good picture of how it looks without the scattershield on.
The scattershield went on and I put the dial indicator back on the flywheel. Here's some pics of how it looks
After posting several questions on another forum, I found out this was not the right way to do it
It needs to be as flat as possible like this
Once the dial indicator was in place, I turned the engine 360 degrees and found the high and low points. My high point was at about 7 o'clock which put my low point around 2 o'clock. Your high point should be almost across from your high point. Once you get your high point and low point numbers, you take the difference and divide by 2. Then you get the off set dowels accordingly. For mine, I needed 0.0021 dowels.
Here's where I made a big mistake. It was recommend that I get some dowels from http://www.robbmcperformance.com/ but I thought "they're all the same and I can just get them in Canada and not have to pay the duty". So I had a pair of Lakewood ones shipped to me. They cost $19 for the dowels and $15 shipping. The Lakewood ones are supposed to turn using a screwdriver......I call bulls$*t. I'll get back to that in a minute.
So I finally got the new dowels
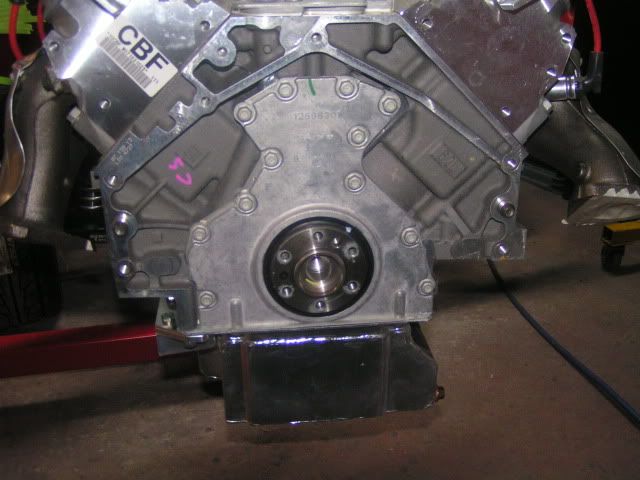
And it was time to take out the old ones. This was quite easy. I took off the exhaust manifolds as they're not being used anyways and used a long bolt. I then tapped them out with a hammer.
Now you want to put some grease on in the dowel holes and on the dowel and tap them in.
Before putting them in, look at them and find out where the high point on the dowel is, for both. You want to have them parallel in the block.
Here's where I was/am getting confused. My high reading was at 7 o'clock and my low was at 2 o'clock. I wasn't sure which way to point the dowels. After watching a video by Keisler, I found you want to point the high side of the dowel towards the biggest number you got with the dial indicator. This is because that number is telling you that it is 0.0035 (for example) away from the center. I think this is correct, but please if someone knows...correct me and help me figure this damn process out. I want to do it right.
So I went to try and turn the dowel with a screwdriver, like it said to do, and I'm not sure who was doing it, but there is no way in hell those things were moving. So I grabbed some vice grips and was able to turn them with those. I kept turning the dowels and remeasuring but ended up no farther ahead. The annoying thing is everytime you need to turn the dowels, you have to loosen all the bolts holding the scattershield, turn the dowels and then tighten them back up. On the passenger side I had no problem fitting the vice grips but on the driver's side, I had to cut out the mechanical linkage bracket. Good thing I'm going hydraulic.
Before
After. I'm going to grind it down smooth and put some red paint on to clean it up.
That last picture gave a glimpse as to why not to use the 'screwdriver type' of dowels. You can only clamp them so many times before they end up looking like this
So basically I wasted $40 on dowels when I was told to get the good ones to start with. Take my advice....get the good ones to start with!!!
Yesterday I called RobbMC Performance and they will ship me a new set on Monday. The new dowels run $28 and the thing that pi****es me off...I paid $15 to have the first ones shipped from a place that is 3 hours away. RobbMC is charging $10 to be shipped from Nevada. The difference between the good ones and the Lakewood ones are that once they are in place, you can use a open end wrench to turn them. They also have a screw down the middle that allows you to loosen the dowels so they turn. Once in final place, you tighten the screw and they are locked in place. Here's a link to the good ones: http://www.robbmcperformance.com/products/dowels.html
Another thing I found during all the trial and error runs was that my magnetic base was not sitting completely flat on the flywheel. I could lightly touch the shaft on it and it would rock. I found out why. When it was sitting on the flywheel, the lip on the crank that comes through the flywheel (hopefully that makes sense) sits slightly higher, causing there to be a ridge. Also, the magnetic base would not sit flat between the two bolts as it was a little bit two wide. Nothing a grinder can't fix.
So today I am no farther ahead, but actually down $40 and a few frustrating hours. Hopefully next week I will get a chance to put the new dowels in and get this done once and for all. I just hope that I have all the kinks worked out and it goes smoothly.
Please if anyone has any suggestions or advice on dialing in the scattershield, please feel free to join in. I want this to be as informative as possible for anyone reading this.
11-19-2009, 03:07 PM
#17
On The Tree
Thread Starter
iTrader: (4)
Join Date: Mar 2009
Location: British Columbia, Canada
Posts: 132
Likes: 0
Received 0 Likes
on
0 Posts
Today was a good day. I got the new RobbMC dowels on Monday and really wanted to take another shot at getting the scatter shield dialed in so thought I would try it today. If you wondering what the big deal is about the RobbMC dowels, there is a huge difference between them and the Lakewood ones. You'll see in the pics. I was able to get it dialed in....and on the first try I got it to 0.0035"  As the minimum recommended is 0.005", I wasn't going to play around with it any more. Onto the pics.
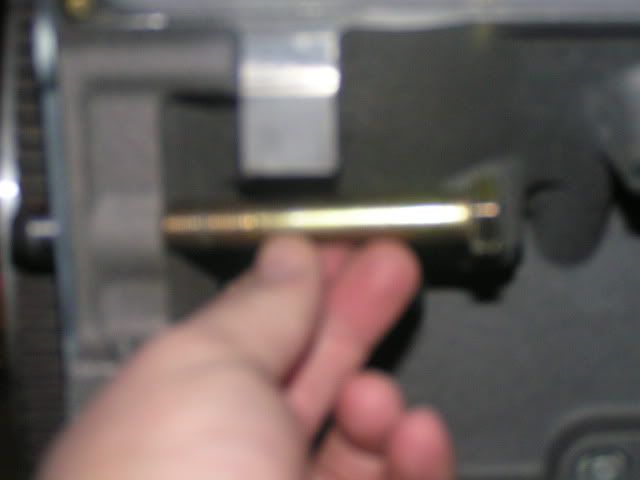
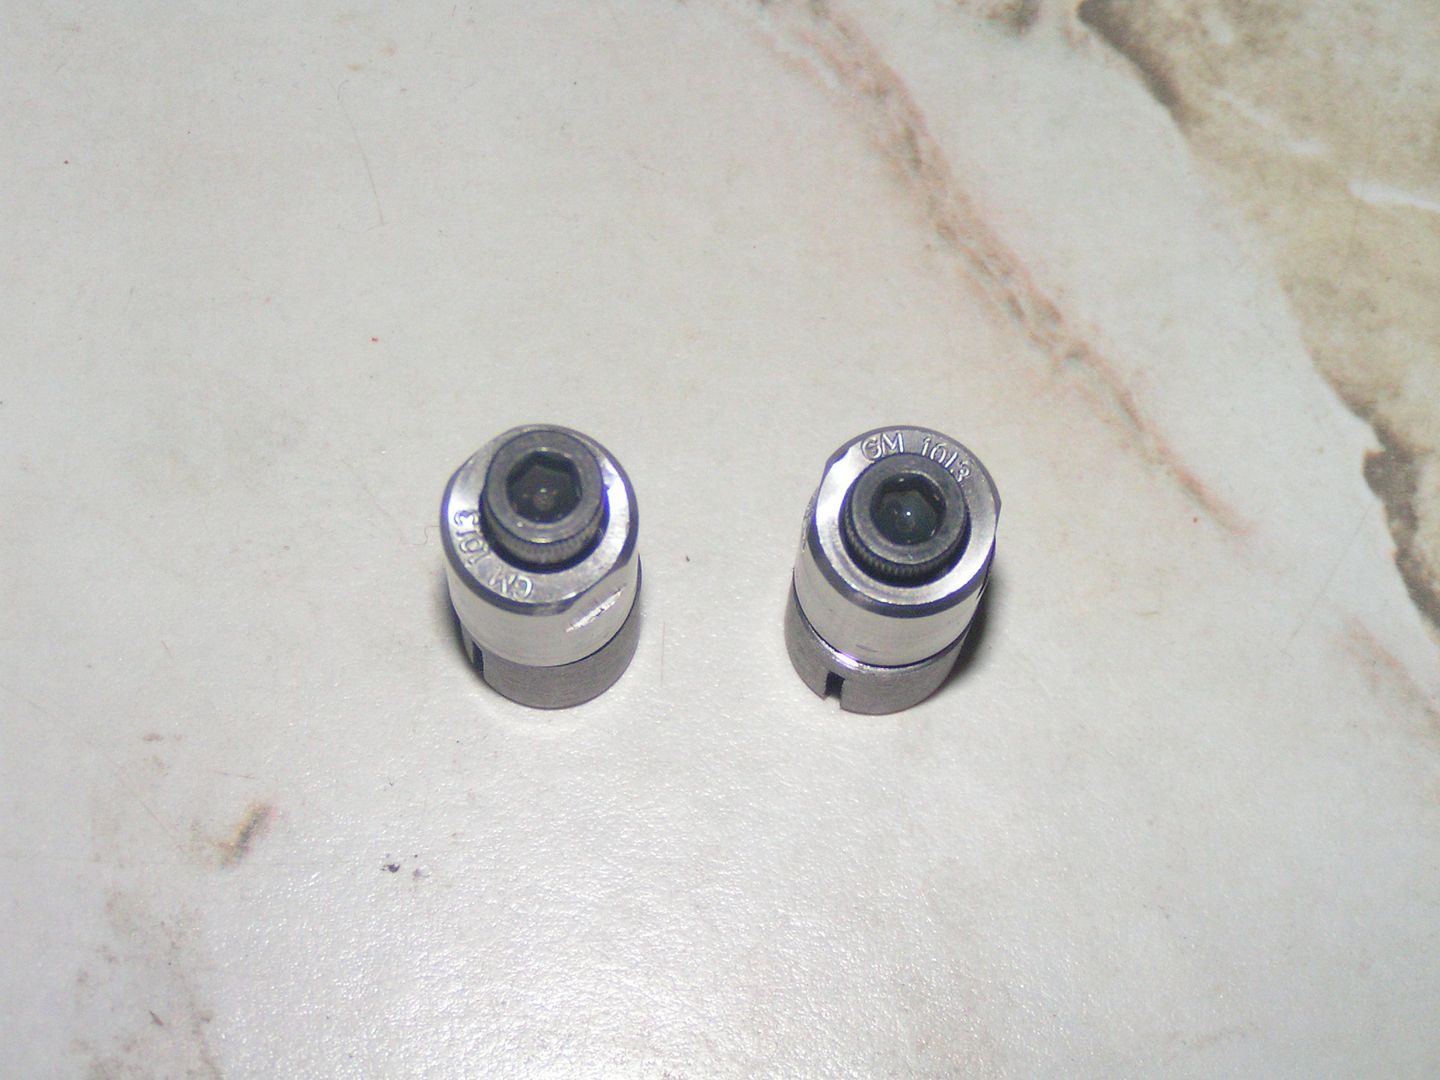
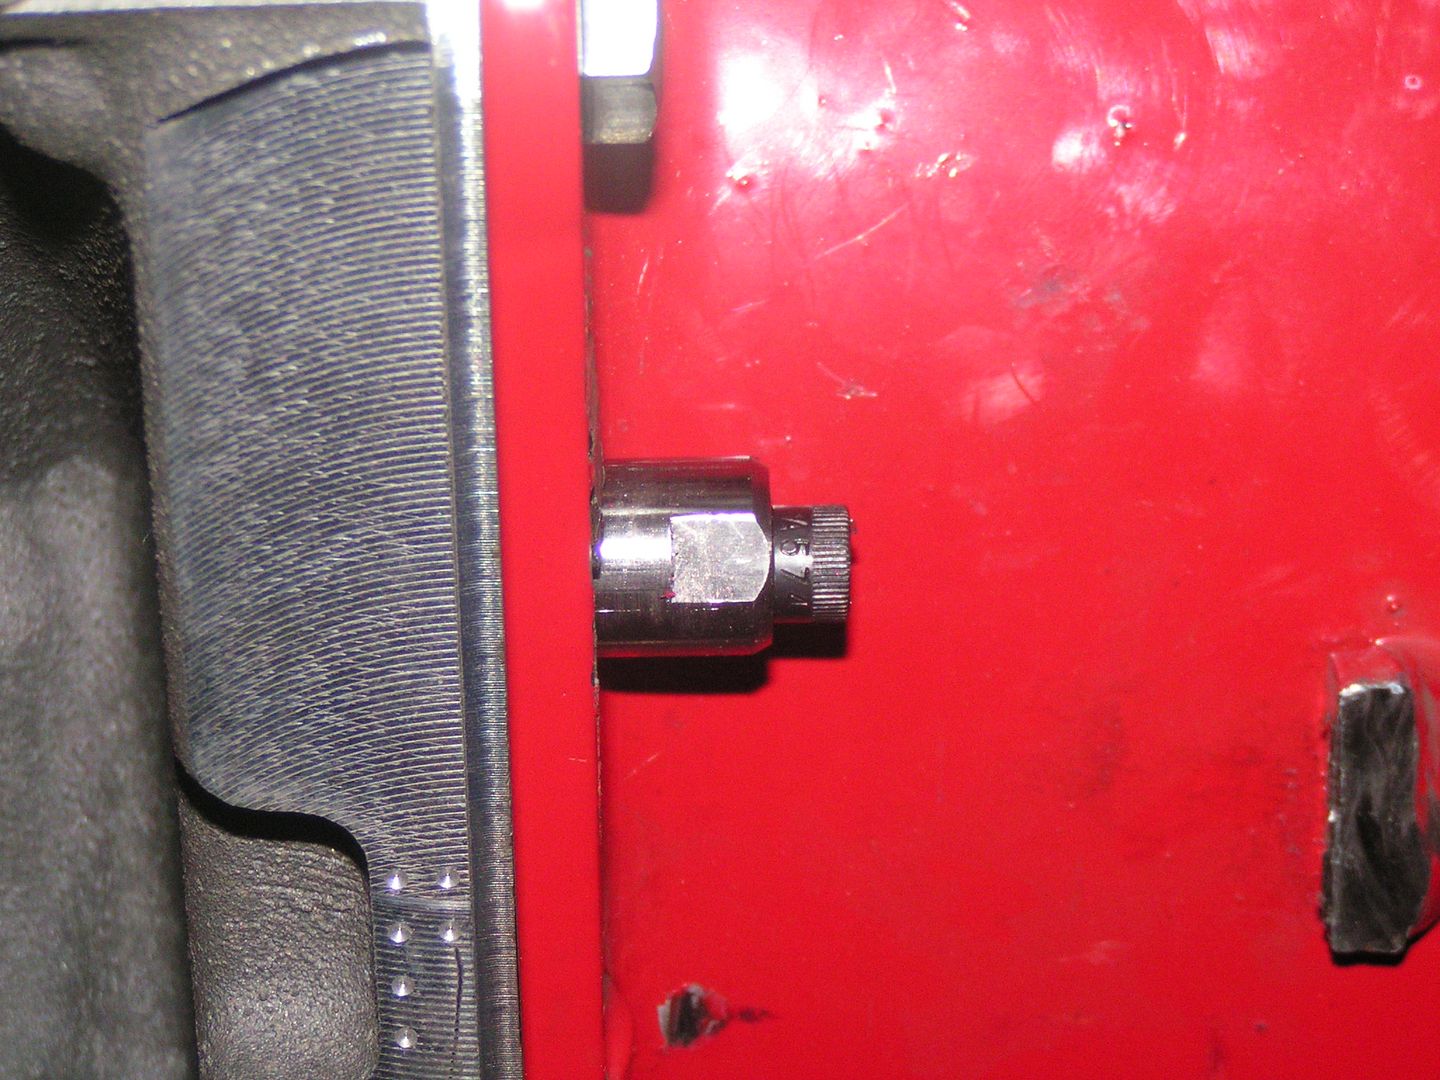
The new RobbMC dowels. They are .021. You can vaguely see a flat spot on the top of them. That is so you can use a 9/16 open end wrench to turn them while in the block instead of a flat screw driver which does not work.
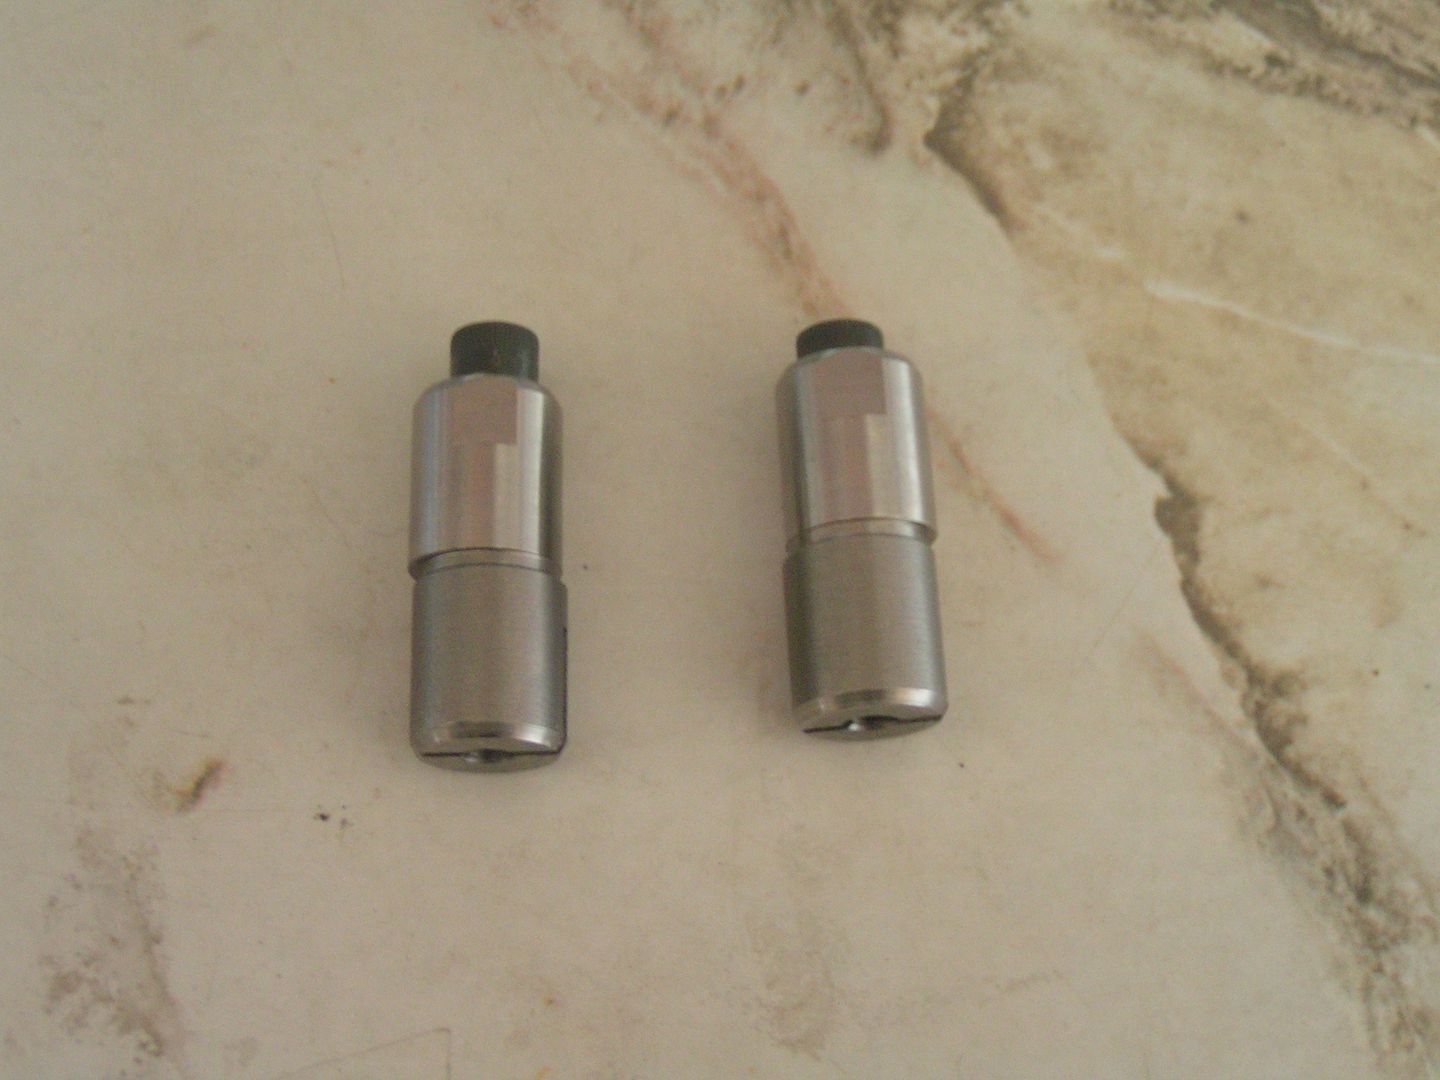
Here's the two side by side. Huge difference
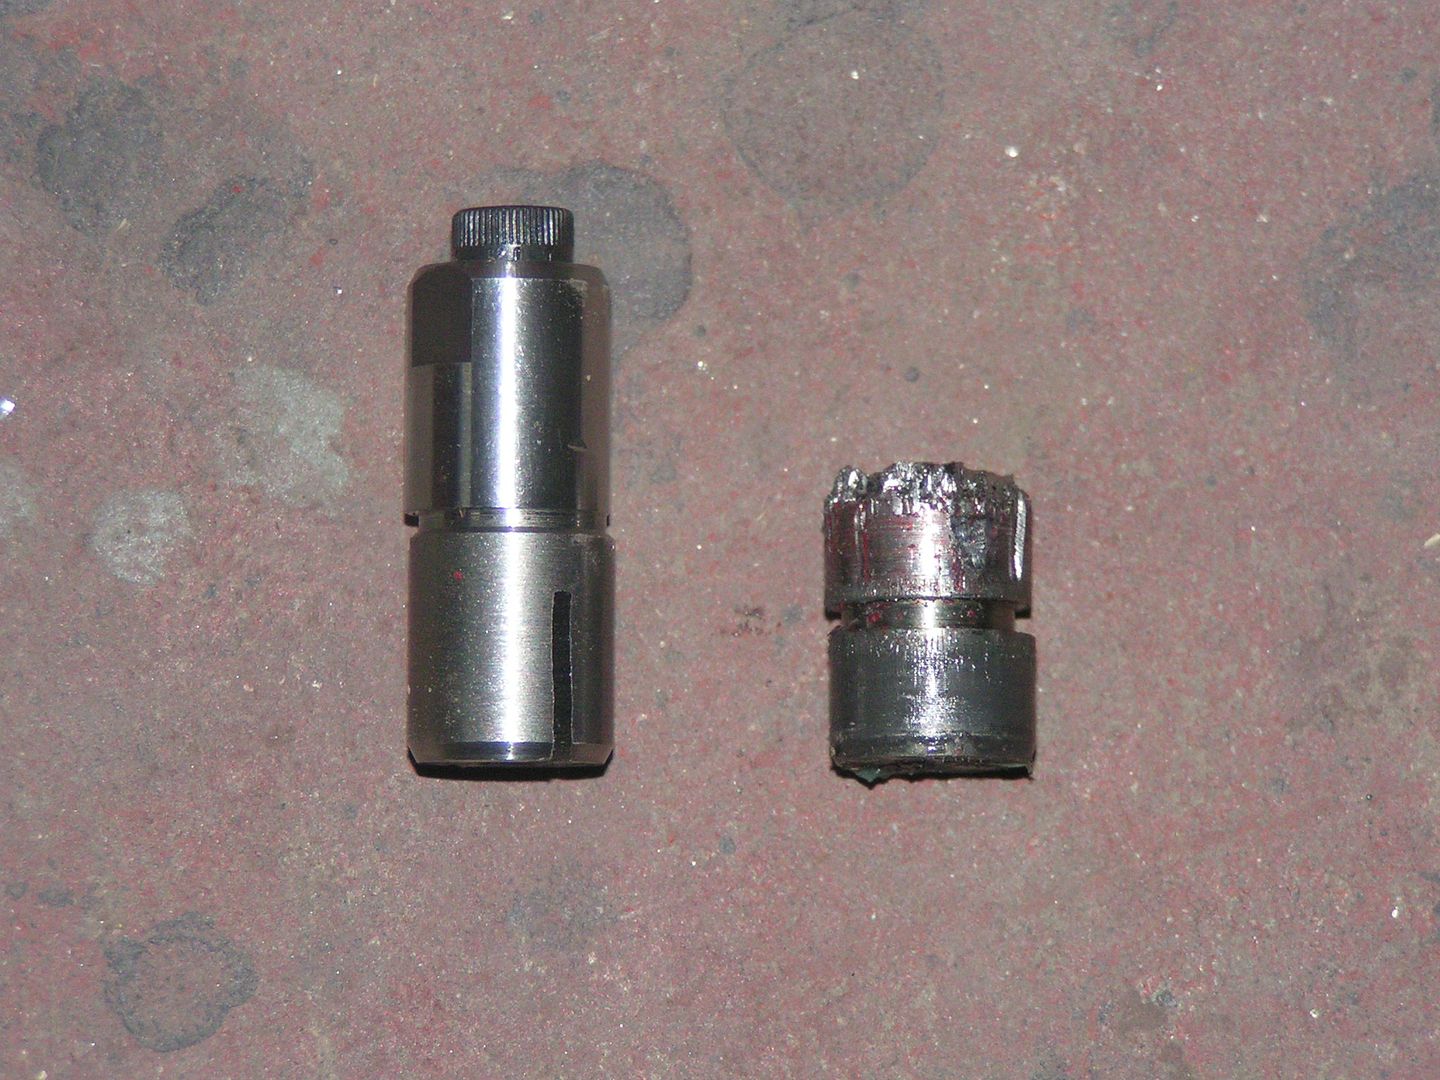
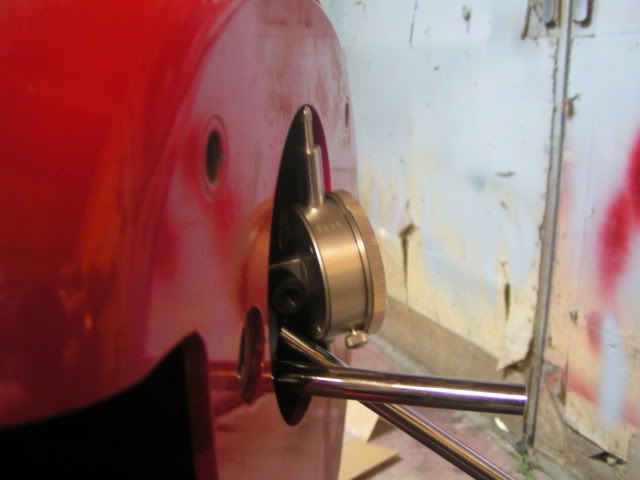
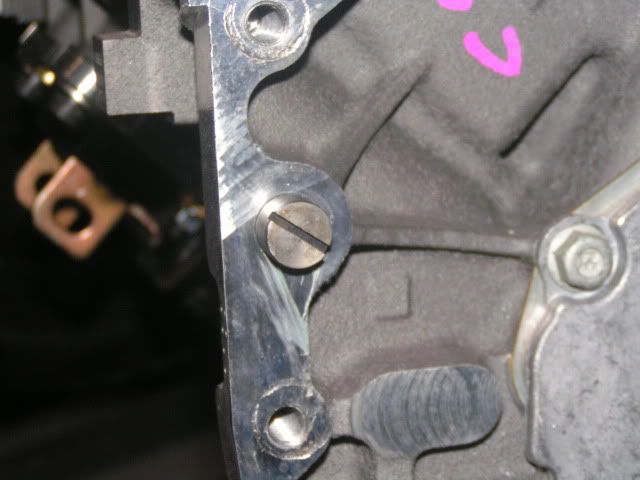
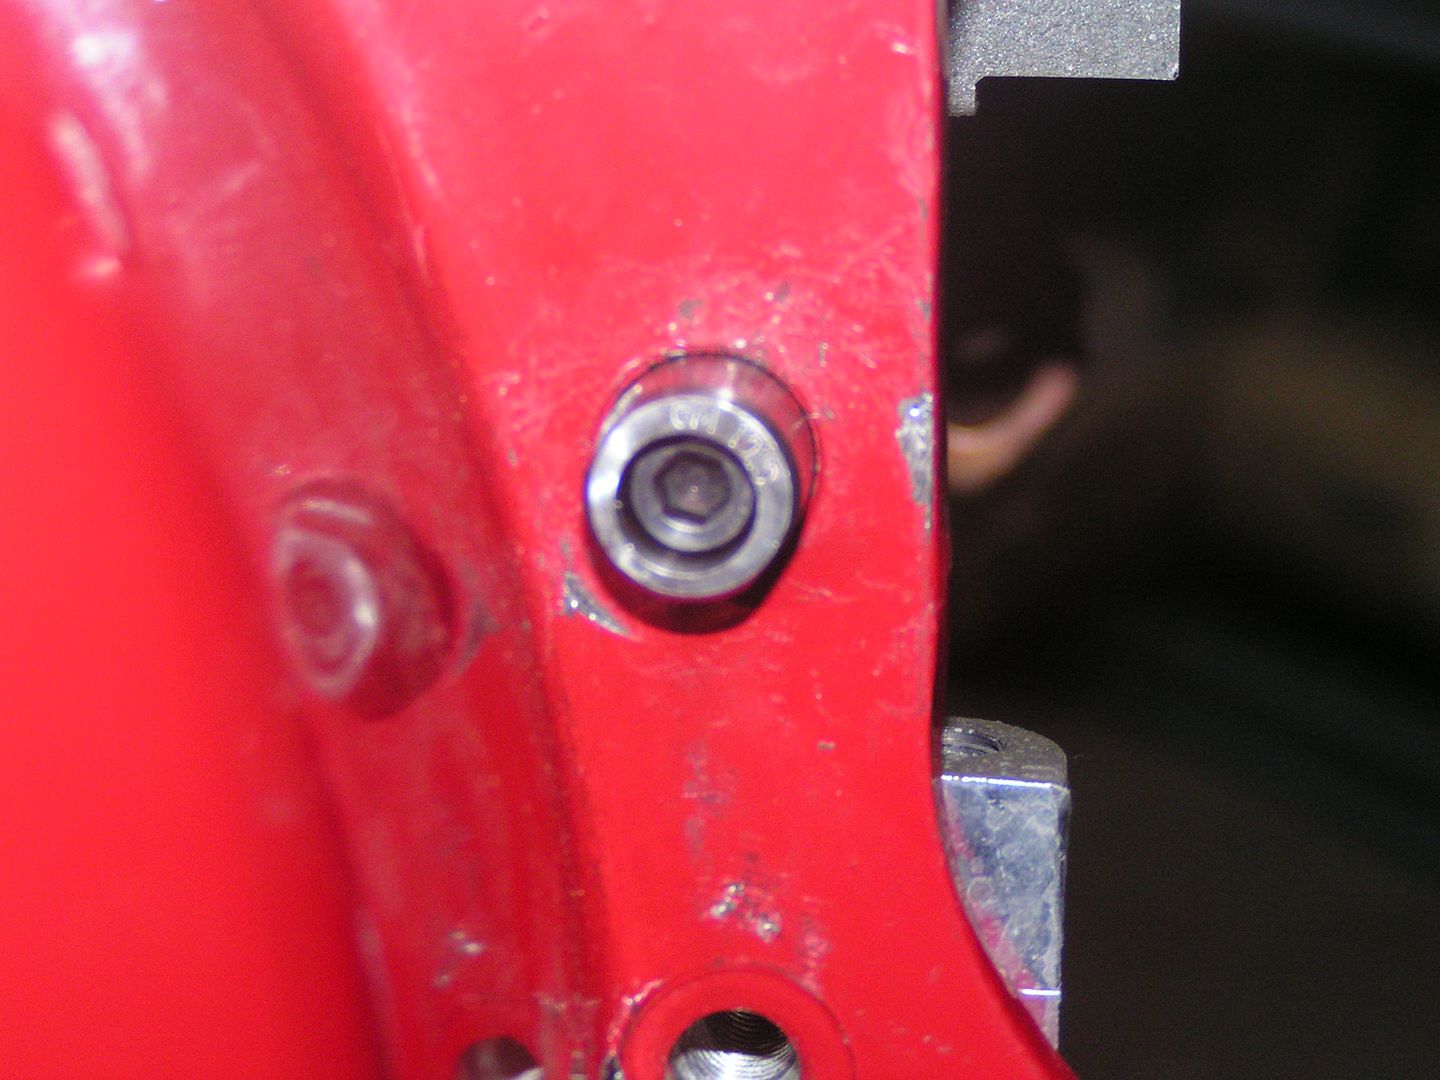
Here's the old one's sticking through the scatter shield. No wonder they got chewed up

And the new ones
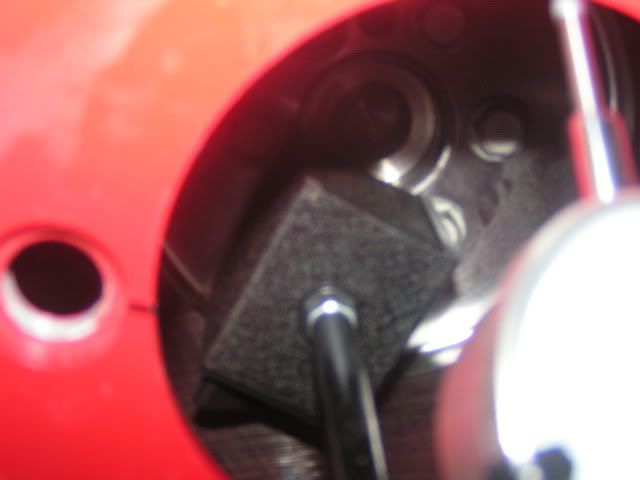
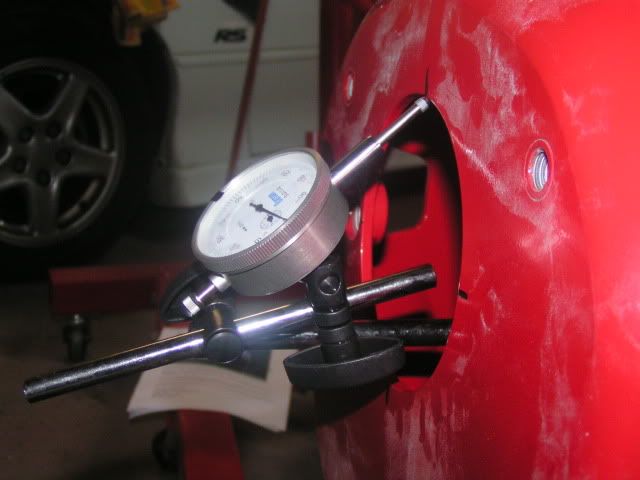
Now that I ground down the sides if the magnetic base for the dial indicator, it sat on the flywheel completely flat and there was no movement. A huge must for doing this.
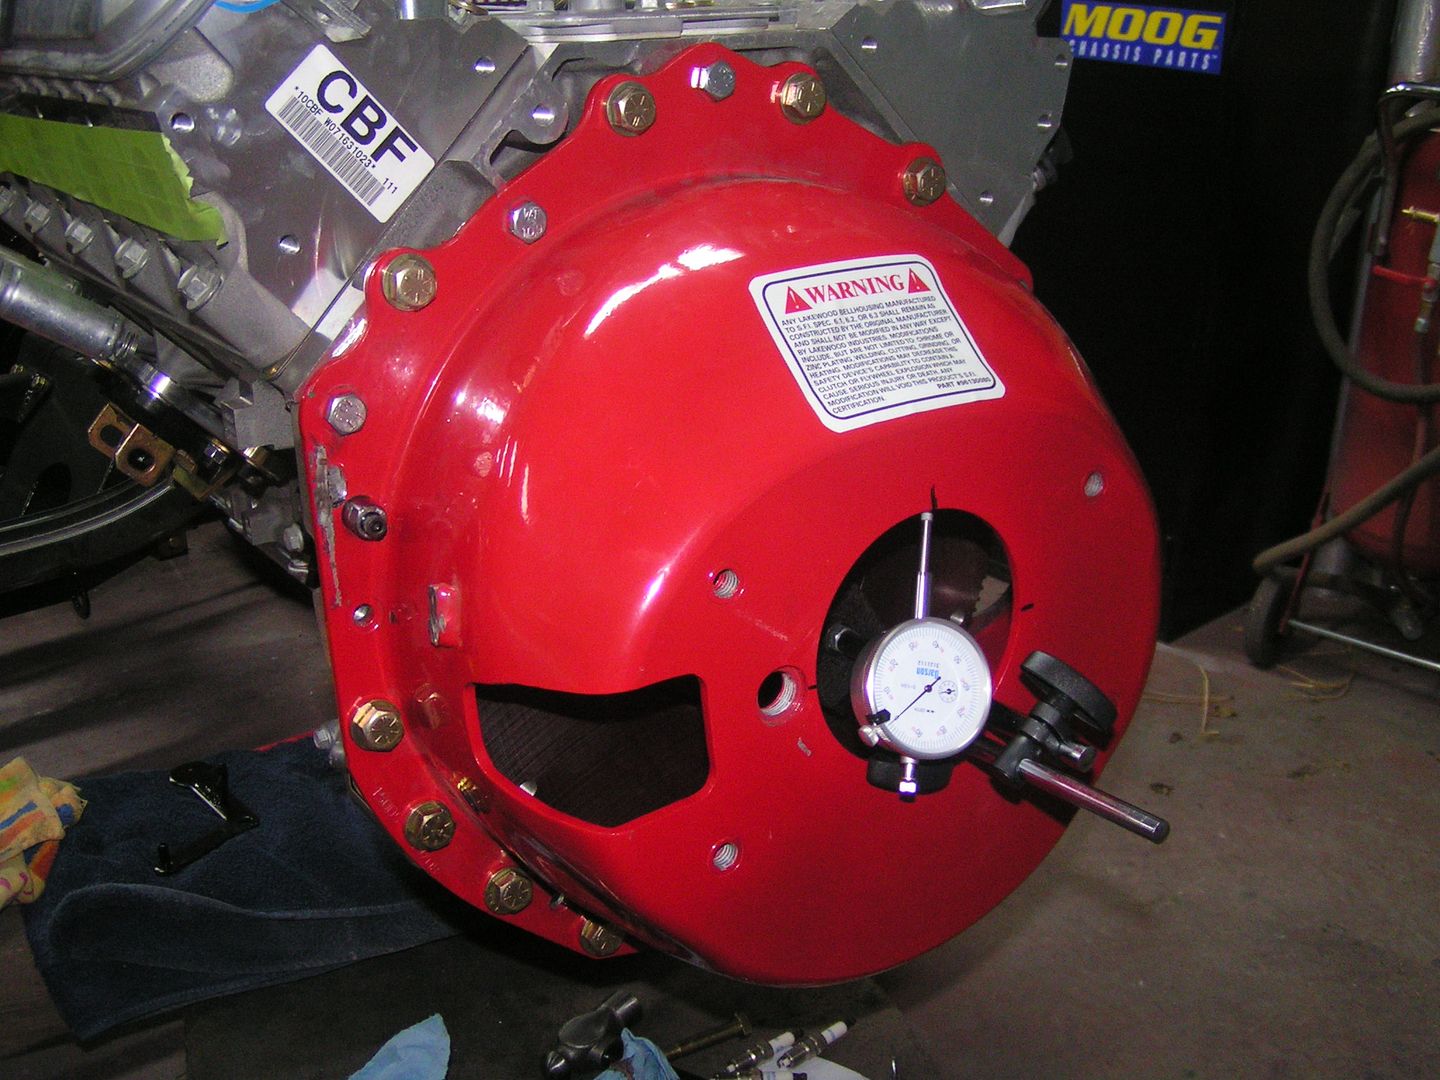
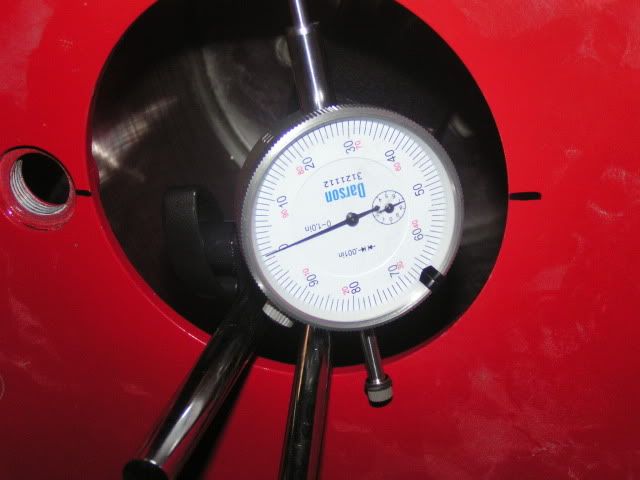
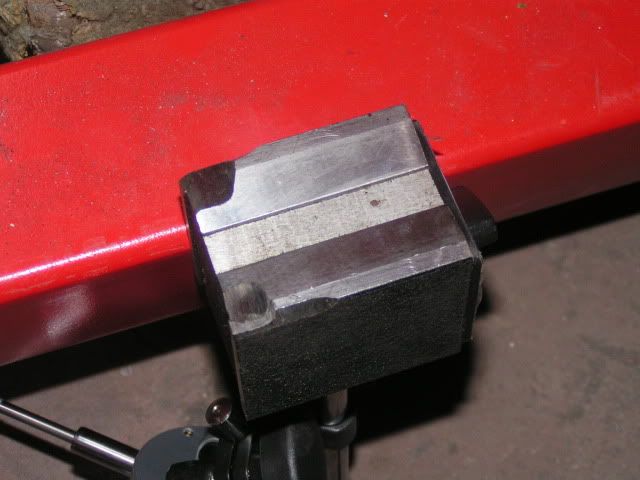
Now that the dial indicator was in place, it was time to get my readings. This time I decided to get only the 12, 3, 6 and 9 o'clock readings. Last time I was writing them down on pieces of paper and trying to remember which was which or I had a bunch of pieces of paper going with a ton of diagrams. Here's a very easy way to keep track of your measurements. Get a dry erase marker and write it on the face. When you need to repeat, wipe off the marks and start over. Here's my readings.
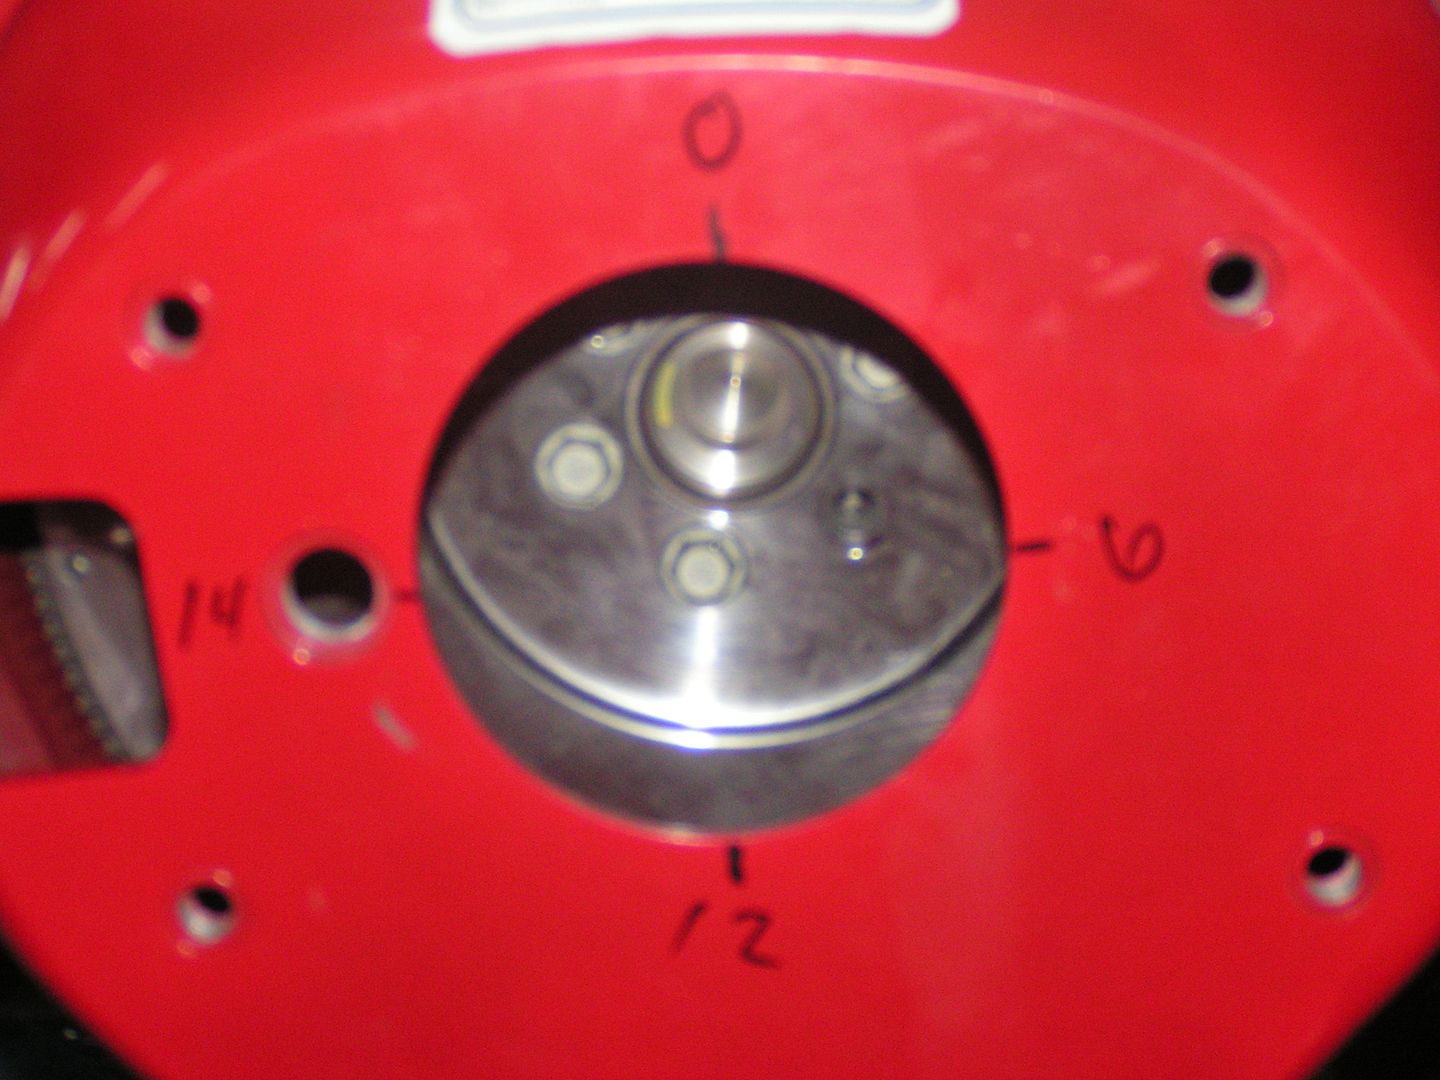
With these readings I was so happy. I tightened the screws in the dowels and set them in place.
As the minimum recommended is 0.005", I wasn't going to play around with it any more. Onto the pics.The new RobbMC dowels. They are .021. You can vaguely see a flat spot on the top of them. That is so you can use a 9/16 open end wrench to turn them while in the block instead of a flat screw driver which does not work.
Here's the two side by side. Huge difference
Here's the old one's sticking through the scatter shield. No wonder they got chewed up
And the new ones
Now that I ground down the sides if the magnetic base for the dial indicator, it sat on the flywheel completely flat and there was no movement. A huge must for doing this.
Now that the dial indicator was in place, it was time to get my readings. This time I decided to get only the 12, 3, 6 and 9 o'clock readings. Last time I was writing them down on pieces of paper and trying to remember which was which or I had a bunch of pieces of paper going with a ton of diagrams. Here's a very easy way to keep track of your measurements. Get a dry erase marker and write it on the face. When you need to repeat, wipe off the marks and start over. Here's my readings.
With these readings I was so happy. I tightened the screws in the dowels and set them in place.
11-19-2009, 03:09 PM
#18
On The Tree
Thread Starter
iTrader: (4)
Join Date: Mar 2009
Location: British Columbia, Canada
Posts: 132
Likes: 0
Received 0 Likes
on
0 Posts
Now that that was done...it was time to measure the clutch.
I didn't take a bunch of pics of this process as I know there are quite a few threads out there, but here's the engine with the Monster on
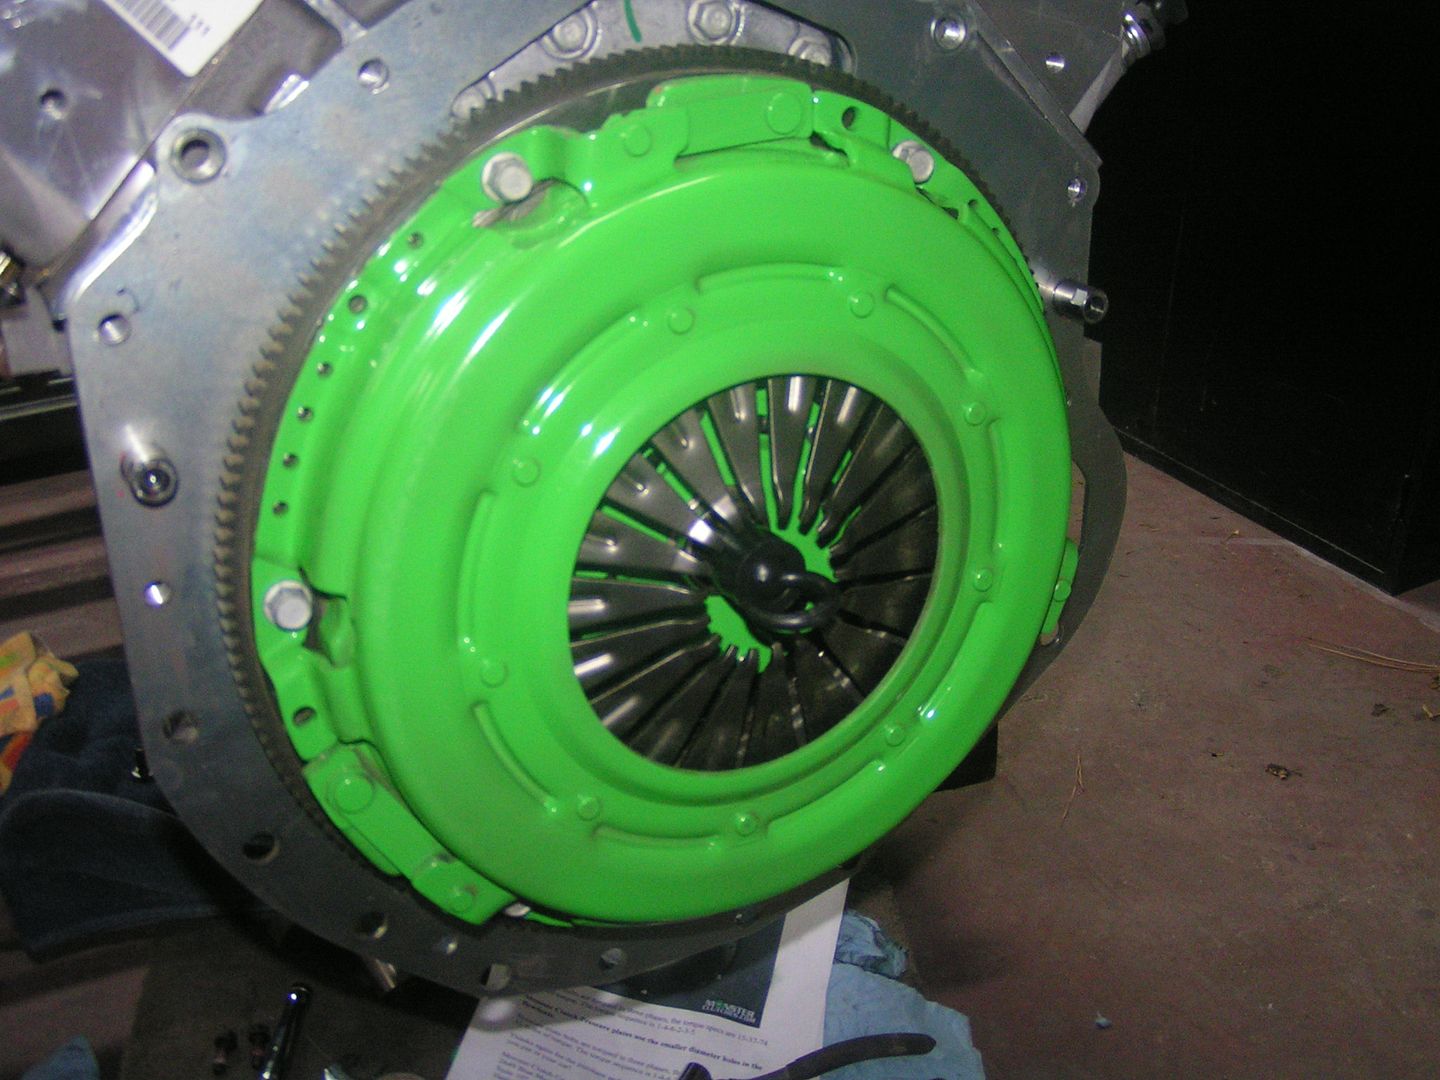

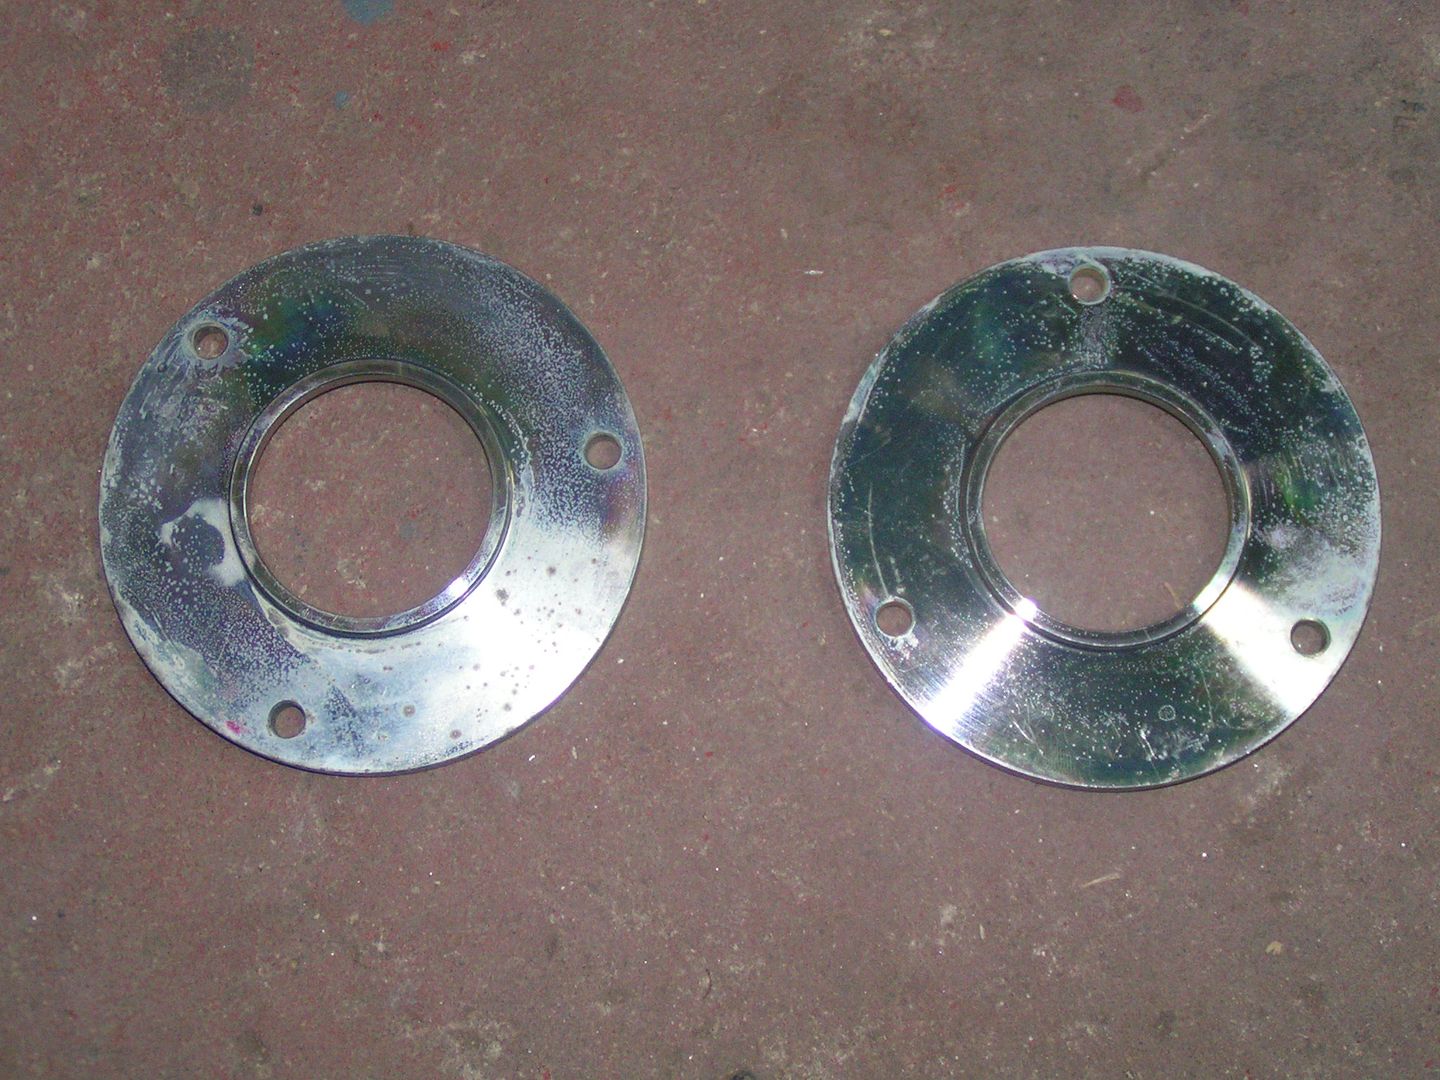
I took the measurements and found the following: The difference between the end of the clutch fingers and the face of the scatter shield was 3 1/8". The difference between the face of the trans and the top of the throwout bearing when it was fully compressed was 2 3/8" giving me a difference of 3/4". According to the instructions from Keisler, the ideal difference would be 1/4", so it looks like I need 1/2" shims. I've pm'd Shafi at Keisler as I'm not sure if these are shims or not. They were included in the kit. They seem to be shims, but have no threaded holes to mount the throwout bearings. Anyone know if these are shims as they are 1/2" thick together, and that's exactly what I need.
I didn't take a bunch of pics of this process as I know there are quite a few threads out there, but here's the engine with the Monster on
I took the measurements and found the following: The difference between the end of the clutch fingers and the face of the scatter shield was 3 1/8". The difference between the face of the trans and the top of the throwout bearing when it was fully compressed was 2 3/8" giving me a difference of 3/4". According to the instructions from Keisler, the ideal difference would be 1/4", so it looks like I need 1/2" shims. I've pm'd Shafi at Keisler as I'm not sure if these are shims or not. They were included in the kit. They seem to be shims, but have no threaded holes to mount the throwout bearings. Anyone know if these are shims as they are 1/2" thick together, and that's exactly what I need.
 11-20-2009, 04:44 AM
#20
On The Tree
Thread Starter
iTrader: (4)
Join Date: Mar 2009
Location: British Columbia, Canada
Posts: 132
Likes: 0
Received 0 Likes
on
0 Posts
As for the mounts...they are on right. According to Autokraft, who made the adapter plates, the adapter plates are supposed to sit so you can read the writing on the side of them right side up while the motor is in the car. Once the adapter plates are on...there is only one way to bolt the mounts on. I haven't had it in the frame yet to confirm. Hope to be doing that in the next couple weeks.