Rear Diff Bushing Replacement Help
 08-07-2012, 07:48 AM
#1
On The Tree
Thread Starter

Join Date: Apr 2007
Location: Bloomington, MN
Posts: 165
Likes: 0
Received 0 Likes
on
0 Posts

So I set out to replace my rear diff bushing last night because I had a fair amount of clunking - The bushing was pretty much just an oval core floating in the pressed in sleeve at this point so its good that im replacing it.
Im having a hell of a time getting the old sleeve out - didnt get the custom steel tool, but I tried using a puller of my own and i was afraid I was going to deform the aluminum ring it goes in. I think I can get it out tonight, but Im worried about putting the new one in.
Any hints for the install to make sure the thing goes in square? How much force does it take to get it in? Is it going to be a massive load required or is it a light press fit? Does greasing it up help any?
Thanks for any help - this is going to bug me all day at work.
Last edited by Bacon; 08-07-2012 at 08:04 AM. Reason: Title

 08-07-2012, 08:50 AM
#4
On The Tree
Thread Starter
Join Date: Apr 2007
Location: Bloomington, MN
Posts: 165
Likes: 0
Received 0 Likes
on
0 Posts
ugh...dammit i knew that was going to be the answer. I spent an hour with a keyhole hacksaw last night doing just that. Its about ready to come out, but like I said Im worried about how the install will go. PLEASE tell me it goes in easier than it comes out?
Im replacing it with a CS bushing. Once this is done Ill post some pics and video - the old one was so bad that the internals fell out and I could move the differential about 1/2" with one hand. I bought it 2 weeks ago so apparently the previous owner learned to deal with it?
Im replacing it with a CS bushing. Once this is done Ill post some pics and video - the old one was so bad that the internals fell out and I could move the differential about 1/2" with one hand. I bought it 2 weeks ago so apparently the previous owner learned to deal with it?
08-07-2012, 11:31 AM
#7
On The Tree
Thread Starter
Join Date: Apr 2007
Location: Bloomington, MN
Posts: 165
Likes: 0
Received 0 Likes
on
0 Posts
Anyone have any idea what the interference or press fit will be for this thing? I called CS and he said he thought it was .020"? That sounds huge to me, especially in thin cast aluminum. Wouldnt a press that tight just dig the aluminum out anyway thus reducing the amount of press?
Might have to try to heat the diff and cool the busing to get it to go in nicely...
Might have to try to heat the diff and cool the busing to get it to go in nicely...
Trending Topics
08-07-2012, 12:07 PM
#8
On The Tree
Thread Starter
Join Date: Apr 2007
Location: Bloomington, MN
Posts: 165
Likes: 0
Received 0 Likes
on
0 Posts
Sometimes when I kick problems like these around I'm embarrassed to say im an engineer.
So I ran some numbers and this may help people in the future:
coefficient of linear expansion for aluminum is 23x10^-6/C and 11x10^-6 for carbon steel.
If I can heat the aluminum of the diff by even 50*C, then I will have 23x10^-6/C * 50C * .048(diameter of bushing) = .055mm growth in diameter which is roughly .002".
Similarly with the bushing, if I can COOL it by lets say 35*C, then I have 11x10^-6/C * -35C * .048 = -.018mm shrink in diameter which is roughly .001".
So heating and cooling I can gain maybe .003" in my favor - thats not much when I need to get to the .020" they claimed. Looks like ill be borrowing a heat gun from work tonight.
08-07-2012, 01:28 PM
#10
On The Tree
Thread Starter
Join Date: Apr 2007
Location: Bloomington, MN
Posts: 165
Likes: 0
Received 0 Likes
on
0 Posts
Eh, gas tank near by, some residual penetrating oil...we'll see how daring I get. I may also just turn the sucker down a little in the shop. If it truly is a .020 press fit, you would have to heat the diff to 950 degrees Celsius in theory just to get the press fit down to a 1:1 fit. Since aluminum melts at 660C, I dont see that happening. AKA, I dont see need for such a tight fit.
08-07-2012, 01:58 PM
#11
other people have installed these before so i would assume the size is ok. You have the diff and the bushing so go measure and see how much of a press fit it really is. and convert to english units... for temp i have to think about celcius too much to get a feel for how much energy that is...
08-07-2012, 02:29 PM
#12
TECH Enthusiast
A freezer, hammer & block of wood is all you should need. You are over analyzing this big time. I rented the tool to do mine but if I had done a little more research I would have passed on the hassle of waiting then return shipping.
The following users liked this post:
Joseph0284 (09-14-2023)
08-07-2012, 02:36 PM
#13
Launching!
iTrader: (3)
Join Date: May 2012
Location: Michigan
Posts: 270
Likes: 0
Received 0 Likes
on
0 Posts
You are seriously over thinking this. I agree with SSMOKD U. Freeze it, then get a nice heavy blow or smaller sledge and a piece of 2x4 and knock it in. I recall it being very easy putting the frozen bushing in.
08-07-2012, 02:37 PM
#14
Ya, use a hacksaw blade to get old sleeve out.
Here's my writeup on CF.....
Missing pics on page 7
http://www.cadillacforums.com/forums...l-removal.html
Like above, freeze the new bushing and hit with a small hammer. Don't over analyze it.
Here's my writeup on CF.....
Missing pics on page 7
http://www.cadillacforums.com/forums...l-removal.html
Like above, freeze the new bushing and hit with a small hammer. Don't over analyze it.
08-07-2012, 02:49 PM
#15
On The Tree
Thread Starter
Join Date: Apr 2007
Location: Bloomington, MN
Posts: 165
Likes: 0
Received 0 Likes
on
0 Posts
Ha, I read all those posts. That coupled with all the trouble to get the old one out is what makes me analyze this. Plus, Im putting in the CS instead of the UUC which seems to slip in much easier.
Im at work and have nothing to do other than overthink this...leave me alone Ill just squirt some KY Jelly on it - you can get a cadillac in a doghouse with that stuff.
Im at work and have nothing to do other than overthink this...leave me alone
Ill just squirt some KY Jelly on it - you can get a cadillac in a doghouse with that stuff.
08-08-2012, 08:11 AM
#18
On The Tree
Thread Starter
Join Date: Apr 2007
Location: Bloomington, MN
Posts: 165
Likes: 0
Received 0 Likes
on
0 Posts
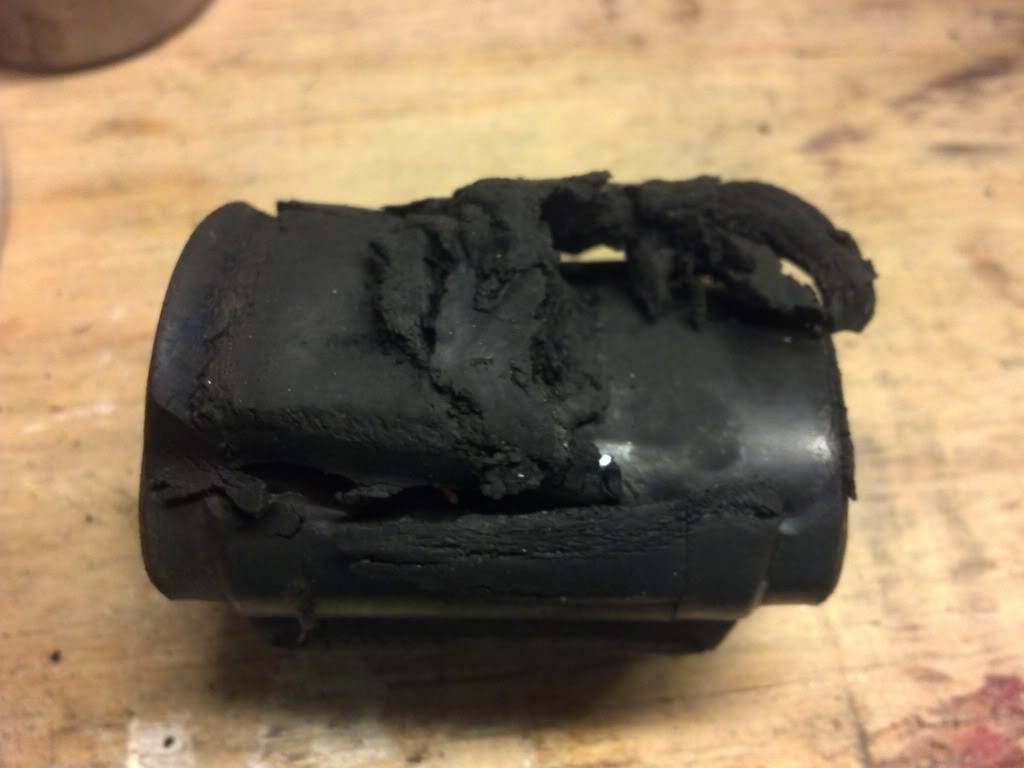
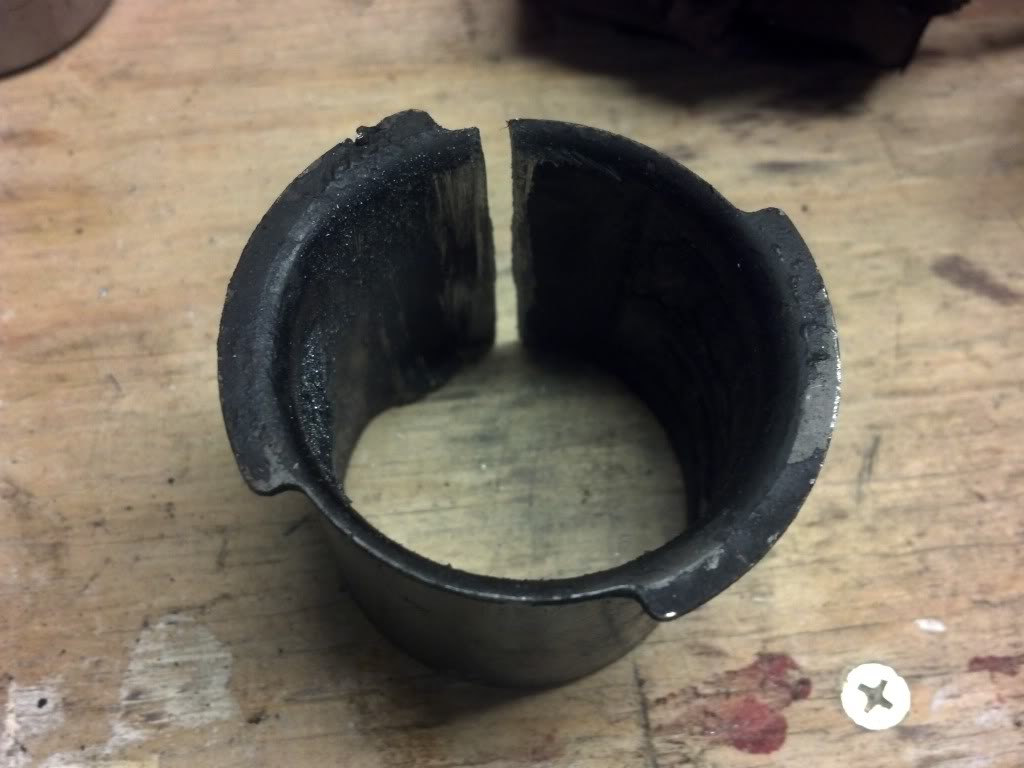
I must have been tired the other night and gave up too soon. Came home after work yesterday and with one tap of the hammer i heard a loud TING, and then the old steel ring popped right out.
Before I left work I took .005 off the diameter of the new CS unit for the first .200 to give it a lead in. With a rubber mallet that first 200 seated like butter. Lubed the rest of it up and put the press on and it went in nicely on the first try. Getting a press fit started right is all it takes.
The whole reassembly took about an hour and was much easier. Left the exhaust on (lowered it from the hangers though), left the driveshaft in place. You dont need to take those out.
Heres what I pulled out - completely shot. The new bushing completely eliminated the clunk that I had and left me with a slight click. The holes in the mounting bracket are just a little bigger than the bolt so I think its the bolt moving around under load. There is a little more whine present now, but its much better than the clunk.

