
My Valve Covers and Coil Packs Project
 03-16-2009, 06:35 PM
#1
So i pulled my valve covers and coil packs off yesterday and today i started the fun process.
I began by taking the coil packs off the brackets and seperating them. Then i took my coil brackets valve covers and washed them in the sick with dish soap and Simple Green. After washing them i dried them and too them out side where i proceeded to sand them. I used 220 grit to scuff both the coil brackets and valve covers up. I then used 1000 grit to sand it all smooth. It took me 15 min on each valve cover for both 220 grit sanding and 1000 grit smoothing. The brackets took like 5 mins.
Next came the coil packs. Those are pretty damn smooth to begin with, so i sanded them all with 1000 grit.
Next i took brake cleaner and sprayed the valve covers and coil brackets and wiped them down, then i took a rag and wiped all the coil packs down. Aftet that i proceeded to wash the valve covers and coil brackets again. Toweled dried them and it was ready for primer.
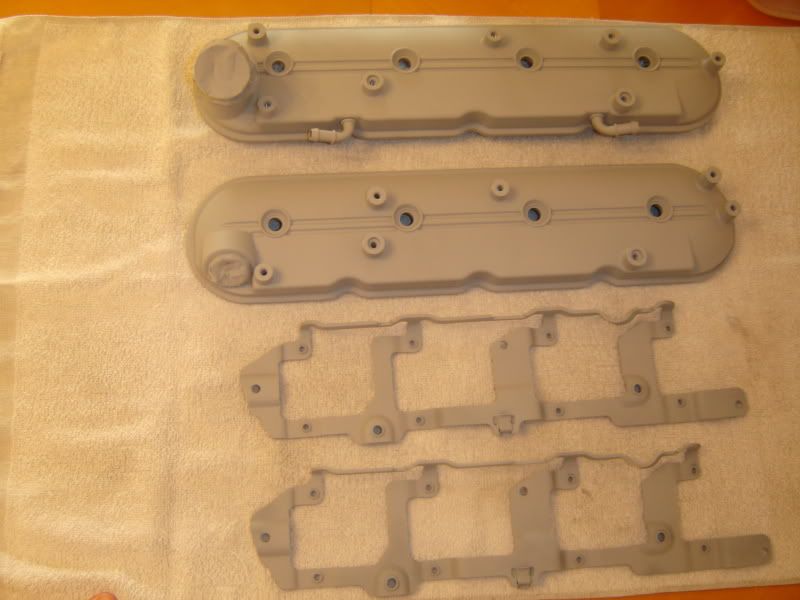
For the both the valve covers and coil brackets i used Dupli-Color Filler Primer. I did 3 light coats (drying 10 mins between each coat) then i did 2 medium-heavy coats (again drying 10 mins between each coat). That was all i did today with the valve covers and coil brackets. I will finish those up tomorrow. So right now they are sitting with primer ready for paint tomorrow. Going to paint them cast iron (it looks dark shadow grey or a gun metal color).
As for the coil packs, i sprayed each one with 2 light coats of Dupli-Color Adhesion Promoter (letting them dry 3 mins between easch coat) then the last coat was a medium coat. Then after letting them all dry i took 1 coil pack and started to paint it. I used Dupli-Color Caliper RED paint. I took the coil pack applied a very light coat of red paint to it where i saw it was blotchy in some spots
 So i let it dry for 15 mins, in the mean time i took another coil pack and proceded to spray it with filler primer. After both of them dried, the one i paint, i added another coar pf red paitn to it, agin blotchy. Now the one i jsut primed, i added a coat of red to it and the paint stuck perfect
So as of right now, i have 1 totally painted coil pack, 1 that is primed ready for paint and the other 6 are sprayed with adhesion promoter, ready for primer and paint. That will have to be tomorrow. It was a long day today..
So here are some pics
The valve covers and coil brackets are filled in nicely and ready for paint
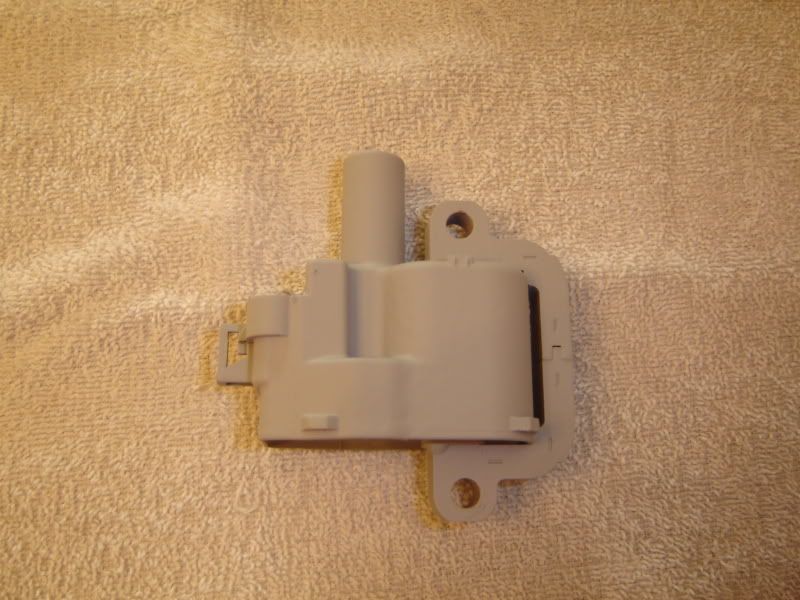
Here is 1 coil pack that is done being primed and ready for paint tomorrow
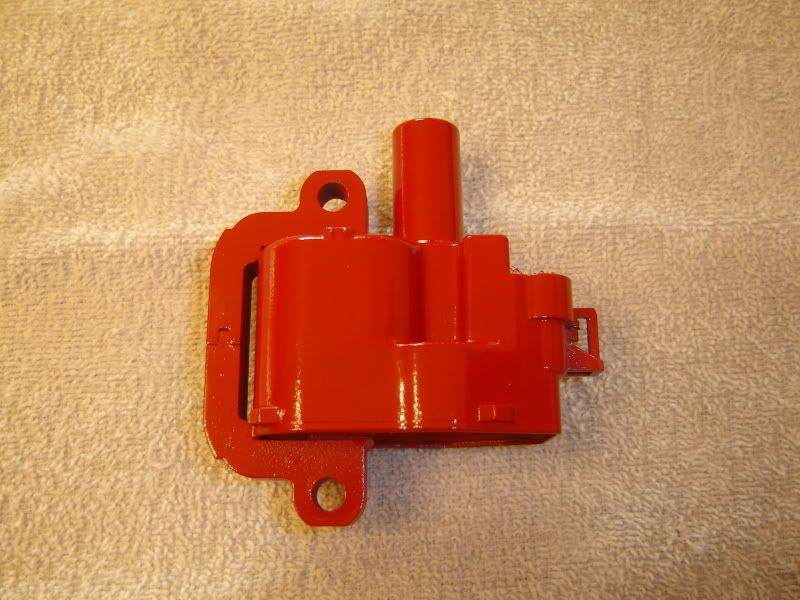
And here is 1 finished coil pack in red. Going to clear it tomorrow
I began by taking the coil packs off the brackets and seperating them. Then i took my coil brackets valve covers and washed them in the sick with dish soap and Simple Green. After washing them i dried them and too them out side where i proceeded to sand them. I used 220 grit to scuff both the coil brackets and valve covers up. I then used 1000 grit to sand it all smooth. It took me 15 min on each valve cover for both 220 grit sanding and 1000 grit smoothing. The brackets took like 5 mins.
Next came the coil packs. Those are pretty damn smooth to begin with, so i sanded them all with 1000 grit.
Next i took brake cleaner and sprayed the valve covers and coil brackets and wiped them down, then i took a rag and wiped all the coil packs down. Aftet that i proceeded to wash the valve covers and coil brackets again. Toweled dried them and it was ready for primer.
For the both the valve covers and coil brackets i used Dupli-Color Filler Primer. I did 3 light coats (drying 10 mins between each coat) then i did 2 medium-heavy coats (again drying 10 mins between each coat). That was all i did today with the valve covers and coil brackets. I will finish those up tomorrow. So right now they are sitting with primer ready for paint tomorrow. Going to paint them cast iron (it looks dark shadow grey or a gun metal color).
As for the coil packs, i sprayed each one with 2 light coats of Dupli-Color Adhesion Promoter (letting them dry 3 mins between easch coat) then the last coat was a medium coat. Then after letting them all dry i took 1 coil pack and started to paint it. I used Dupli-Color Caliper RED paint. I took the coil pack applied a very light coat of red paint to it where i saw it was blotchy in some spots
So i let it dry for 15 mins, in the mean time i took another coil pack and proceded to spray it with filler primer. After both of them dried, the one i paint, i added another coar pf red paitn to it, agin blotchy. Now the one i jsut primed, i added a coat of red to it and the paint stuck perfect So as of right now, i have 1 totally painted coil pack, 1 that is primed ready for paint and the other 6 are sprayed with adhesion promoter, ready for primer and paint. That will have to be tomorrow. It was a long day today..
So here are some pics
The valve covers and coil brackets are filled in nicely and ready for paint
Here is 1 coil pack that is done being primed and ready for paint tomorrow
And here is 1 finished coil pack in red. Going to clear it tomorrow

 03-16-2009, 07:43 PM
#4
TECH Addict
iTrader: (3)
Join Date: Apr 2005
Location: Northern Kentucky
Posts: 2,905
Likes: 0
Received 0 Likes
on
0 Posts
im thinking bout doin the same thing, but what do you torque the valve covers back down to after your bolt them back up???? and do you have to change the gasket????


Trending Topics
 03-16-2009, 08:08 PM
#9
11 Second Club
iTrader: (5)
Join Date: Sep 2008
Location: Norridge, IL
Posts: 522
Likes: 0
Received 0 Likes
on
0 Posts
Off and running.....I'm not sure if you layed color out on those coil brackets yet...but if not, you may want to drill them out and get yourself some fancy allen head bolts for the coil packs.
If a certain somebody gets me the rest of my parts back I can better show ya what I mean!
If a certain somebody gets me the rest of my parts back I can better show ya what I mean!
03-16-2009, 08:33 PM
#11
Off and running.....I'm not sure if you layed color out on those coil brackets yet...but if not, you may want to drill them out and get yourself some fancy allen head bolts for the coil packs.
If a certain somebody gets me the rest of my parts back I can better show ya what I mean!
If a certain somebody gets me the rest of my parts back I can better show ya what I mean!
 03-16-2009, 09:22 PM
#15
TECH Enthusiast
iTrader: (4)
Join Date: Jan 2009
Location: Lawn Guyland
Posts: 675
Likes: 0
Received 0 Likes
on
0 Posts

Looks good, keep in mind that you can sand the primer for a smoother finish before color, and check when it says to clear. I believe within an hour of color coat for chemical bond or wait until color coat cures (usually couple days) then sand for mechanical bond and then clear. Keep up the good work!
03-16-2009, 09:50 PM
#17
Looks good, keep in mind that you can sand the primer for a smoother finish before color, and check when it says to clear. I believe within an hour of color coat for chemical bond or wait until color coat cures (usually couple days) then sand for mechanical bond and then clear. Keep up the good work!
Well the ontly one that is painted so far is the one coil pack. Other wise none of them are painted yet. Everything is primed except for 6 coil packs. Tomorrow i will give everything color and clear