
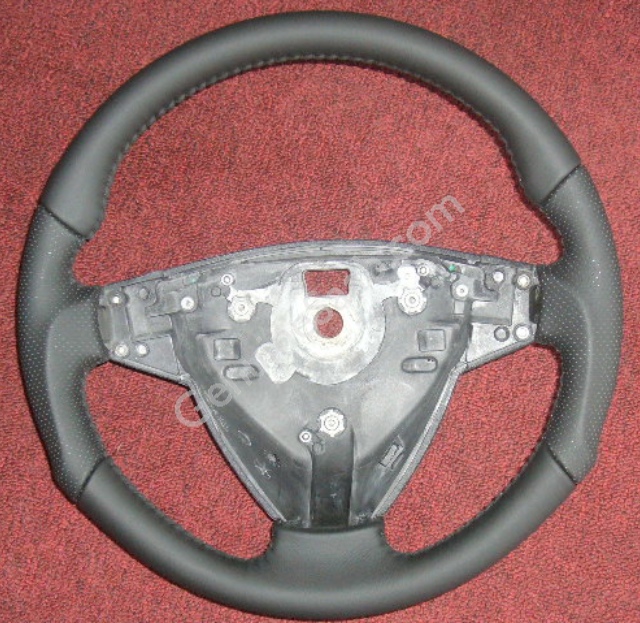
Write Up: C6 Steering Wheel in an F-body


 08-15-2016, 04:40 PM
#283

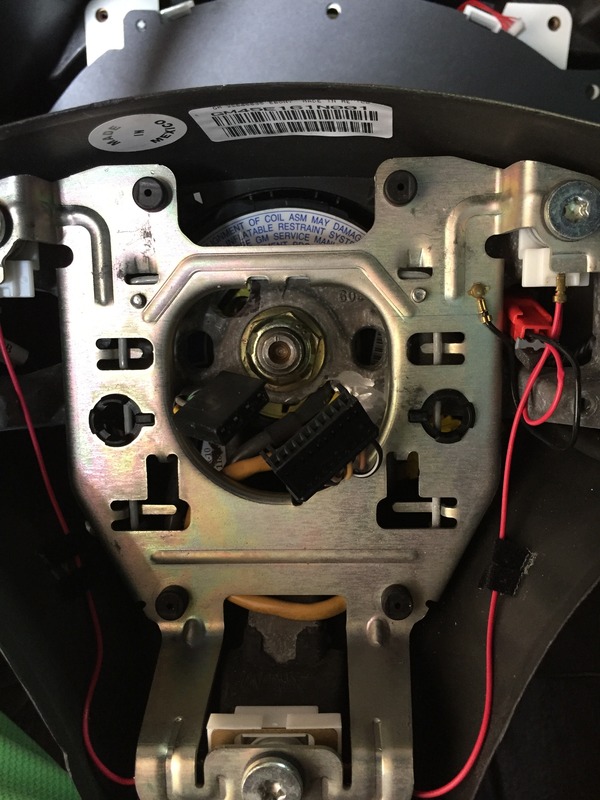
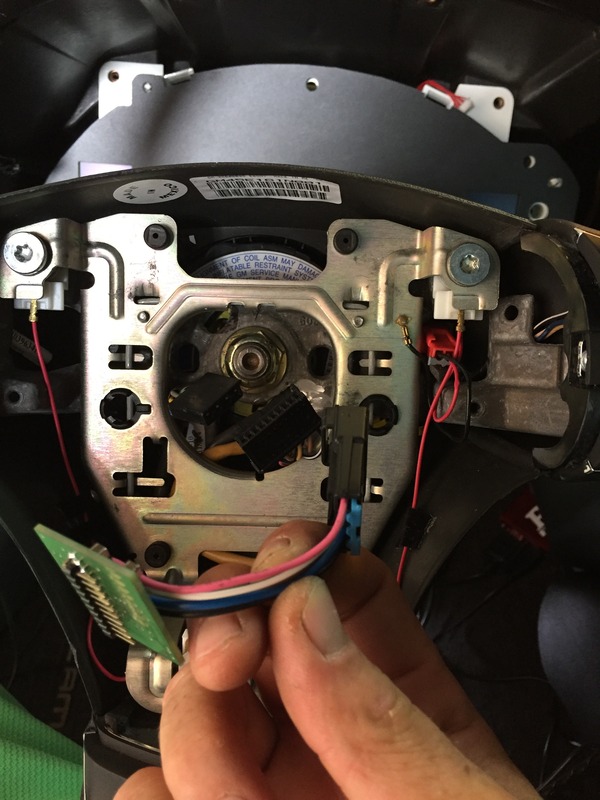
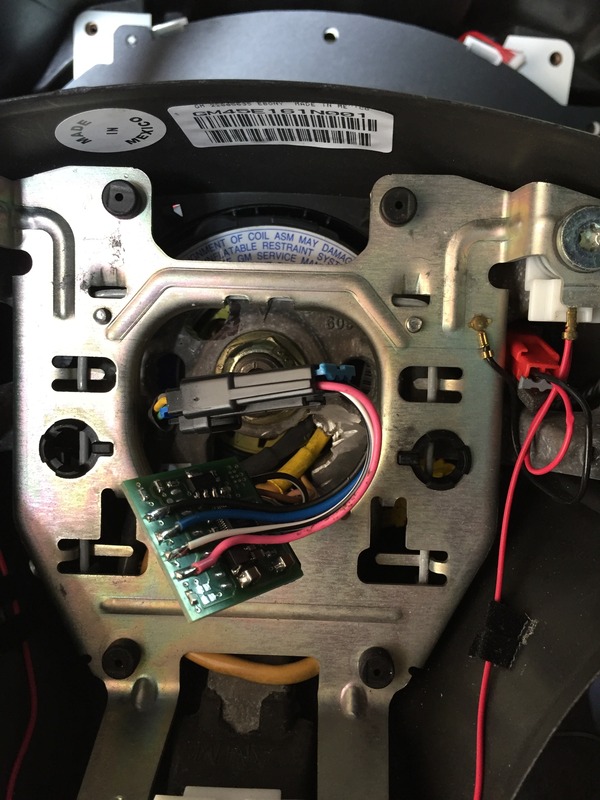
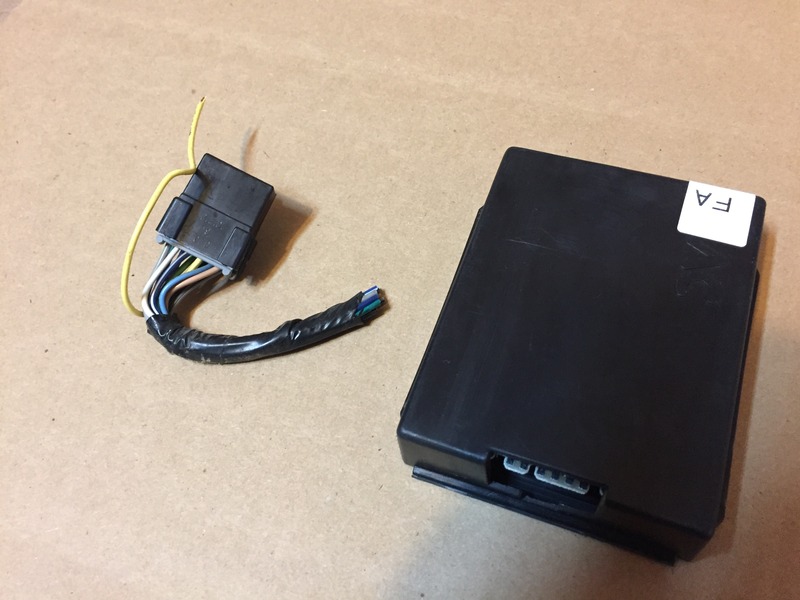
Ok, so I have made a final version of the adapter that goes into the steering wheel. It is tiny and mounts to the OEM connector and has short pigtail for the F-body clockspring:

Adapter with F-body connector

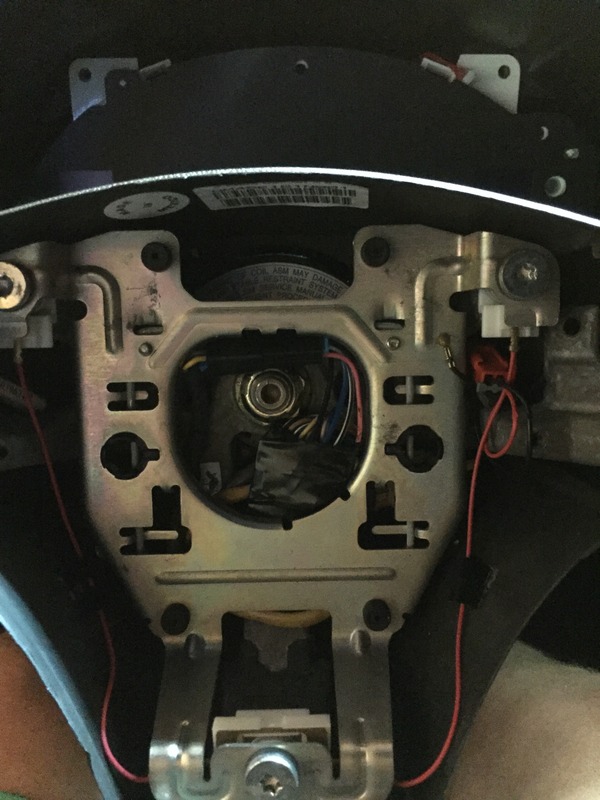
The whole thing installed in the wheel...
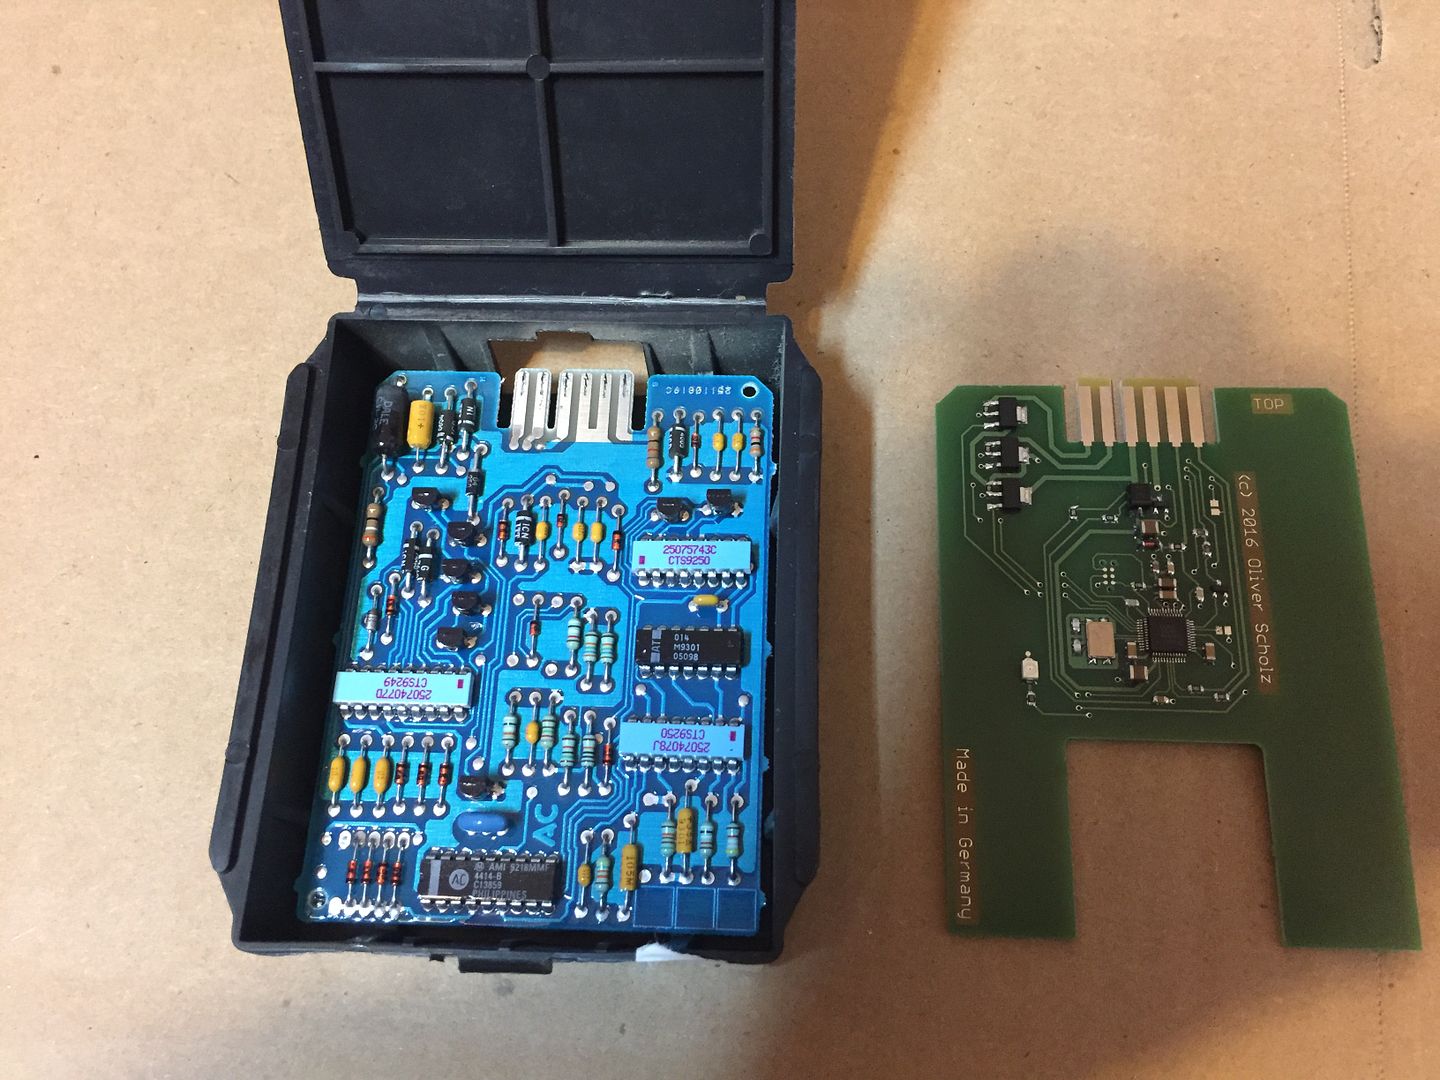
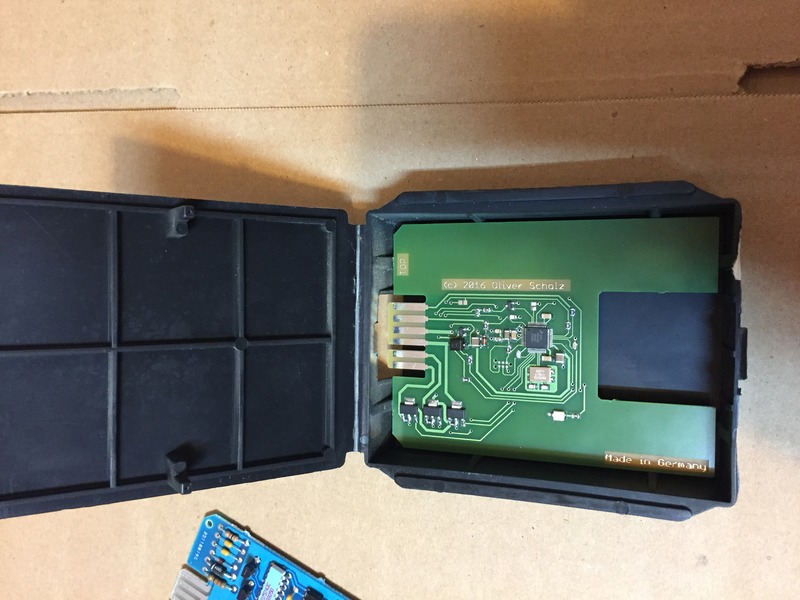
And here is the prototype of the receiver. It regenerates the cruise stalk signals. I made the board for GM's old cruise control module enclosure 😉

Old enclosure - new contents!
 08-15-2016, 05:08 PM
#284
TECH Apprentice
Ok, so I have made a final version of the adapter that goes into the steering wheel. It is tiny and mounts to the OEM connector and has short pigtail for the F-body clockspring:
Adapter with F-body connector
The whole thing installed in the wheel...
And here is the prototype of the receiver. It regenerates the cruise stalk signals. I made the board for GM's old cruise control module enclosure 😉
Old enclosure - new contents!
 08-16-2016, 02:54 AM
#285
That is awesome! Are you going to be selling these?
In the meantime I'll finish development of the base board, because I need to get that one to work with the DashComputer I built as well as the cruise control. The car I had planned on installing this stuff into still isn't ready so I'll probably have to temporarily install this into my daily driver. But hopefully it will all work out quickly...
08-17-2016, 04:28 PM
#286
Something I realized driving home today in my Saab 9-3, is that it is nearly the same wheel as the corvette. It makes me wonder if I can find a Saab 9-3 wheel and make it work. I don't care if the air bag is disabled, and I can cover over the saab logo, but it makes me wonder.
http://www.ebay.com/itm/Brand-new-20...JSAAay&vxp=mtr
This is what I actually have in my 9-3. I like the size and shape of it.
http://www.ebay.com/itm/03-06-SAAB-9...dW4yU1&vxp=mtr
Here's a D-shaped bottom one that looks to be a little thicker.
http://www.ebay.com/itm/Steering-Whe...BXbodP&vxp=mtr
Considering the 03+ Saab's were GM cars, it might be a good option.
This is really what I want my steering wheel to look like. I like the 4-spoke design, I just want the ring to be thicker, and slightly smaller diameter.
http://www.ebay.com/itm/Steering-Whe...kAAOSwqBJXXVVw
Last edited by The Alchemist; 08-17-2016 at 04:39 PM.
08-17-2016, 07:36 PM
#288
The Saab 9-3 wheel should theoretically work being an Epsilon chassis car. The most painless way to find out without doing any work is to get the part number for the upper steering shaft in the Saab. It should match the part number for 06-10 G6, 07-10 Saturn Aura or a 08-13 Malibu. If it matches the US models then thatll tell you the upper shaft has the same size splines as the shaft you have to use in the fbody. The wildcard here is the 9-3 is more based on the euro version of epsilon and has more in common with an Opel Vectra and Cadillac BLS so it may be its own thing.
08-17-2016, 08:05 PM
#289
Well, I reached out to the company that modifies the Saab 9-3 wheels, which I may buy, and asked if they could do the same thing to my factory wheel, and they are looking into it. So that may be an option. Buy a cheap-o wheel from a junkyard, and send it to them, let them mod it, then I don't have to worry about any electronics or adapters.
08-21-2016, 08:39 AM
#291
Its not that its really all that hard. Its just super tedious and time consuming. Having the proper tools makes all the difference as well. Beyond the basic hand tools, you'll need a pivot pin puller for a GM Saginaw style column, "GOOD" snap ring pliers, the lock plate tool and a assortment of picks. I took lots of pics as I dissembled so Id have references putting it back together. The biggest issue I had was the high beam rod of all things, and of course that was the one thing I didnt take pics of. Now matter how I tried to install it, it bound up. I wasted a couple hours getting that one right.
08-21-2016, 09:26 AM
#292
Yeah, I'm getting to the point in my life, that as mechanically inclined as I am, struggling through something tedious like that would just frustrate the hell out of me.
I am now looking into sending my wheel to someone who will essentially reshape the outer ring, and recover it, even making it a d-shape. I have found a couple places that charge in the $450-600 range, which in the end, becomes a simple remove and replace scenario.... well worth the money.
I am now looking into sending my wheel to someone who will essentially reshape the outer ring, and recover it, even making it a d-shape. I have found a couple places that charge in the $450-600 range, which in the end, becomes a simple remove and replace scenario.... well worth the money.
 09-25-2016, 01:31 PM
#296
This weekend I was able to get Olivers(fieroluke) adapter boards installed. The install was quite simple, further...we have sucess. The radio controls are working with the adapter from Oliver and a pac swi-cp5 radio switch adapter. The cruise switches work perfectly and the info/enter buttons work with the OLED screen to reset the trip meter and set the clock.
Took a bit to figure out, but the pac adapter must be set up in 100% manual mode due to this application being a hybrid set up. I have volume up, volume down, mute, track up, track down, answer call and end call all working sucessfulky with my pioneer HU.
Heres some pics
First up, the radio circuit board. Heres the 2 connectors were dealing with. The left is the oem f car radio switch plug out of the clockspring, the other is the new connector from the 3 spoke radio controls.
Next up is the adapter.
The plug in the old plug along with the new radio control connector
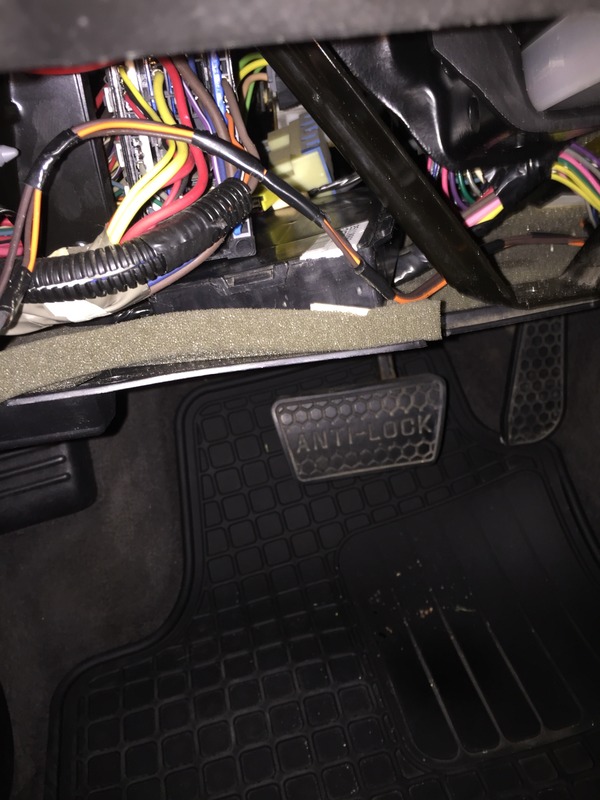
Wrap the circuit board with electrical tape to protect it. Then tuck it away in the space shown but the upper shaft nut being care not to bind the horn.
Next up is the cruise adapter installation. The cruise module casing this installs in can be found in many 80's GM rwd cars and trucks. When I got mine, I got 2. 1 from a 90 Caprice and the other from an late 80's full size conversion van. They were 5 bucks each with the plug. Make sure to leave the wires on the plug as long as you can for flexibility on your install.
The wires you need to use at the bottom of the column are circled.
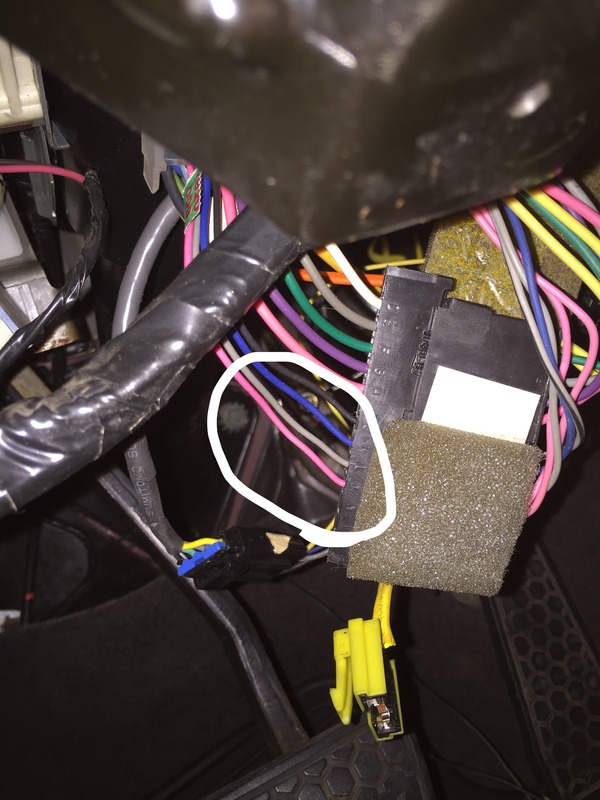
All wired up nice and tidy. The directions are quite clear so I didnt go into detail. For the ground wire, I just spliced into the existing ground on the 4 wire radio controls harness.
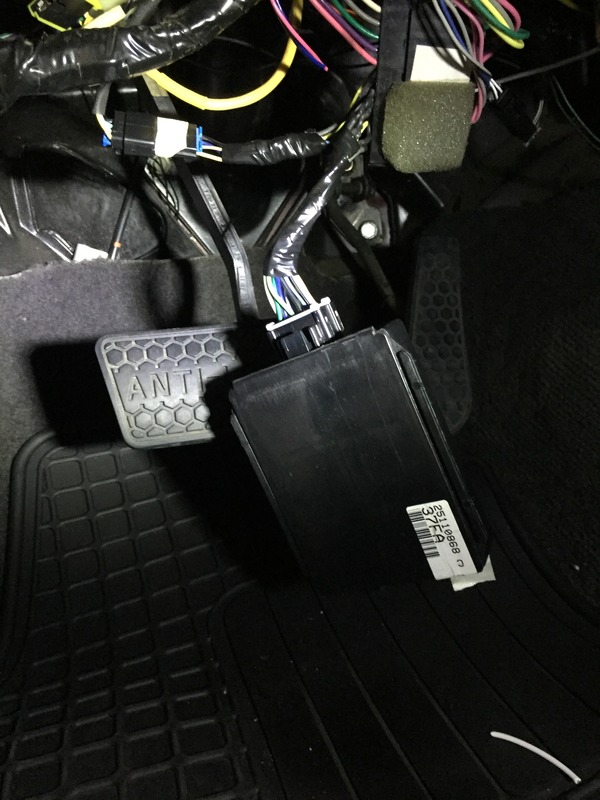
Then found a good place to tuck the module away.
Lastly, heres a vid of it all working. Sorry for the crappy quality, I just used my cell.
Took a bit to figure out, but the pac adapter must be set up in 100% manual mode due to this application being a hybrid set up. I have volume up, volume down, mute, track up, track down, answer call and end call all working sucessfulky with my pioneer HU.
Heres some pics
First up, the radio circuit board. Heres the 2 connectors were dealing with. The left is the oem f car radio switch plug out of the clockspring, the other is the new connector from the 3 spoke radio controls.

Next up is the adapter.

The plug in the old plug along with the new radio control connector

Wrap the circuit board with electrical tape to protect it. Then tuck it away in the space shown but the upper shaft nut being care not to bind the horn.

Next up is the cruise adapter installation. The cruise module casing this installs in can be found in many 80's GM rwd cars and trucks. When I got mine, I got 2. 1 from a 90 Caprice and the other from an late 80's full size conversion van. They were 5 bucks each with the plug. Make sure to leave the wires on the plug as long as you can for flexibility on your install.


The wires you need to use at the bottom of the column are circled.

All wired up nice and tidy. The directions are quite clear so I didnt go into detail. For the ground wire, I just spliced into the existing ground on the 4 wire radio controls harness.

Then found a good place to tuck the module away.

Lastly, heres a vid of it all working. Sorry for the crappy quality, I just used my cell.
09-25-2016, 02:10 PM
#299
TECH Enthusiast
iTrader: (13)
Join Date: Nov 2006
Location: Right across the river from Huntington, WV
Posts: 698
Likes: 0
Received 1 Like
on
1 Post

I can't praise either of you enough for the quality of work and effort you put into your projects. You two are one helluva team. I can vouch that your work is OEM quality. Actually...better than OEM.
Last edited by drain89; 09-25-2016 at 02:23 PM.