Fog Light Restoration
 03-02-2013, 12:06 PM
#1
On The Tree
Thread Starter
Join Date: Jan 2012
Location: Norfolk, VA
Posts: 171
Likes: 0
Received 0 Likes
on
0 Posts
I decided to replace all of the lighting on my 2002 Camaro SS and one of my next steps was my Fog Lights. I have ordered a pair of Headlights from BLS, customized to my satisfaction with Morimoto 35W 5K HIDs on the way. So my next step was either to replace my road rash, scratched up fog lights that have taken a beating now for over 11 years. Buy new ones and call it a day for roughly around $120.... OR I could restore them myself, taking the pride and cleaning them up and make them look great for my DDM Tuning 35W 5k HID kit with 880 bulbs that I would like to order.... (coming soon now because of the results!)
Ok so this is how I spent my Friday night while bored, putting a little bit of time, effort and elbow grease into it! (estimated time was roughly 3 hours total, it can be done quicker I just prefer to take my time, there is no rush).
First step is to remove your fog lights (this step only takes 20mins)... to do this all you need is a ratchet or wrench (Size 10mm). Pop open your hood, remove the brackets attached to your left & right headlights. If you look down into your bumper below your turn signals you will see (2) 10mm bolts holding your Blazer fog lights in place. Remove the bolts and keep them in a safe place i.e. your pockets.
Second Step is to aquire some equipment... you can find any of these items at your local Auto Parts store.
Equipment:
- Fog lights
- Mother's Headlight Restoration
- 800, 1000 grit Wet or Dry Sand paper
- Ratchet with 10mm socket
- Microfiber towel
- Powertool (preferably a polishing tool or drill with attachment)
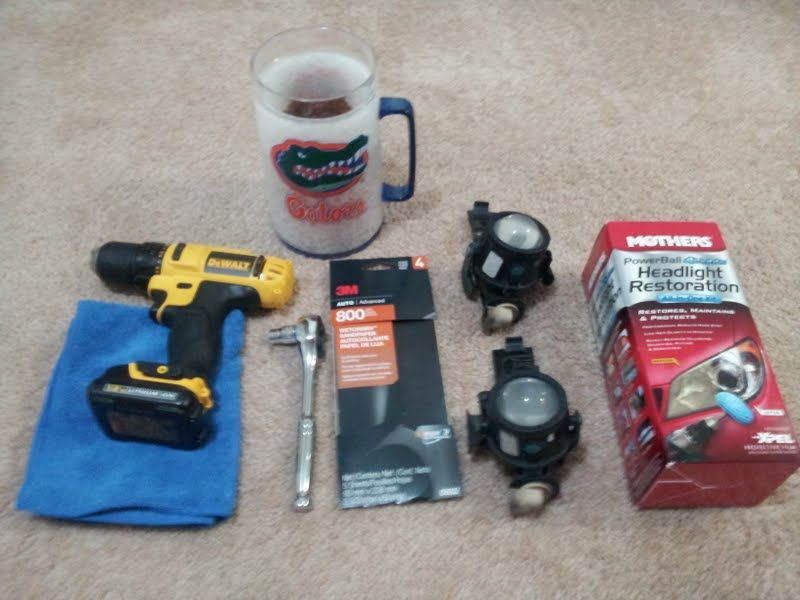
(Don't mind the Beer mug, that is optional and helps time pass by quicker ONLY if you are 21+!! I do not promote underage drinking but I do encourage rooting for the FL GATORS!!!)
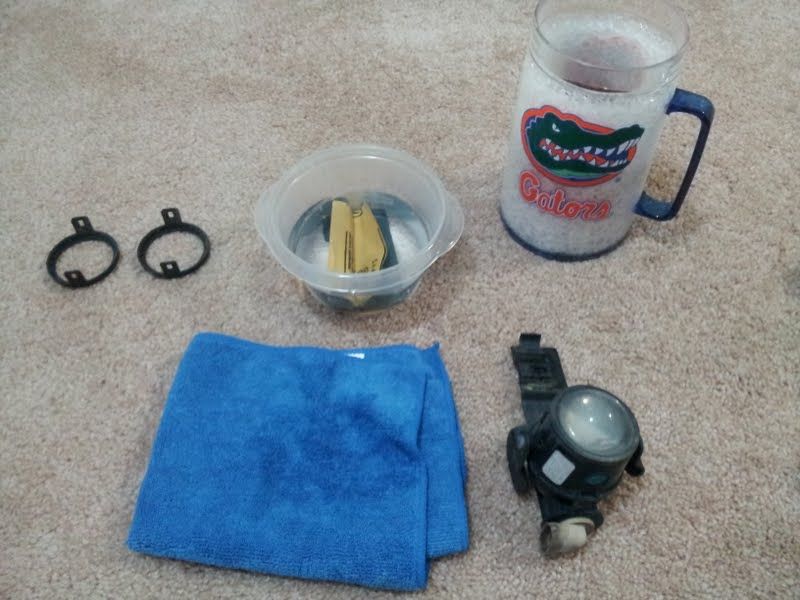
After you have aquired your tools, taken off your fog lights and are ready to go. Grab a bowl of water and start soaking a folded piece of 800 grit sand paper (doesn't need to soak long, just a dip).
Next step is to remove the small plastic ring set around your fogs lens. Either a flat head screw driver (what I used) or a butter knife will work. Remove the rings and clean them up a bit, soap, water, whatever you prefer.
After removing as much dirt from the lens and outer parts of the fog, grab your first piece of folded 800 grit sand paper and get to using that elbow grease! I started with 800 and worked it until it turned a white/grayish wet film over the lens. Wipe off the whiteish wet film and then move to a 1000 grit wet sand.
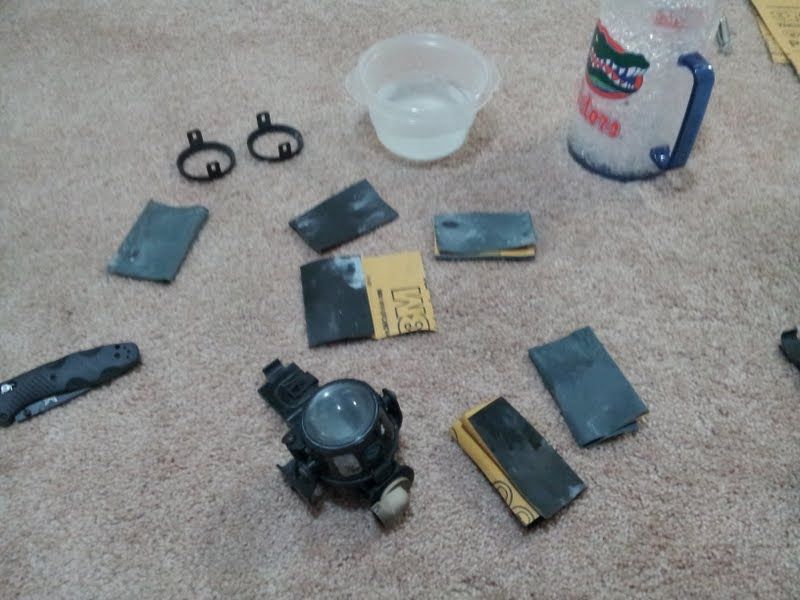
After you have sanded for about 5 minutes on each lens, putting a nice gray haze to the lens. Put them down and open up your headlight restoration kit OR grab some lens clarifying compound.
After you have scratched the fogs to your liking and have removed most or all of the rock chips or scratches, it is time to then polish them (take as much time as you spent sanding, for polishing, remember this takes a lot of repetition and patience is needed). Add a dab of compound to your microfiber towel and spread evenly over the lens. (I found that it helped to let them sit for a few minutes, allowing the liquid compound to soak in a bit so this is when I utilized my drinking skills!).
(I didn't take any pictures due to it being a little hard using my Meguiars DA Power System tool and Mothers Polishing drill atachment while tryimg to take pictures at the same time).
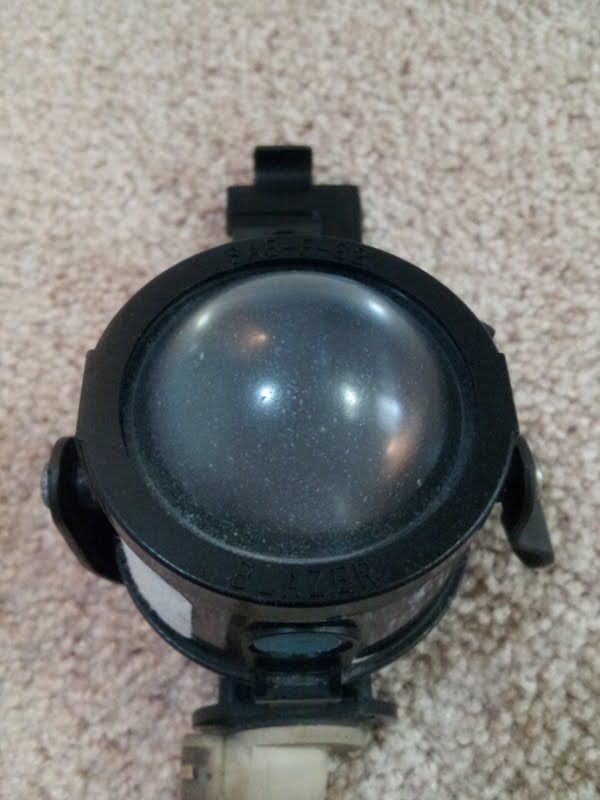
Here was my finished work and results...
Before:

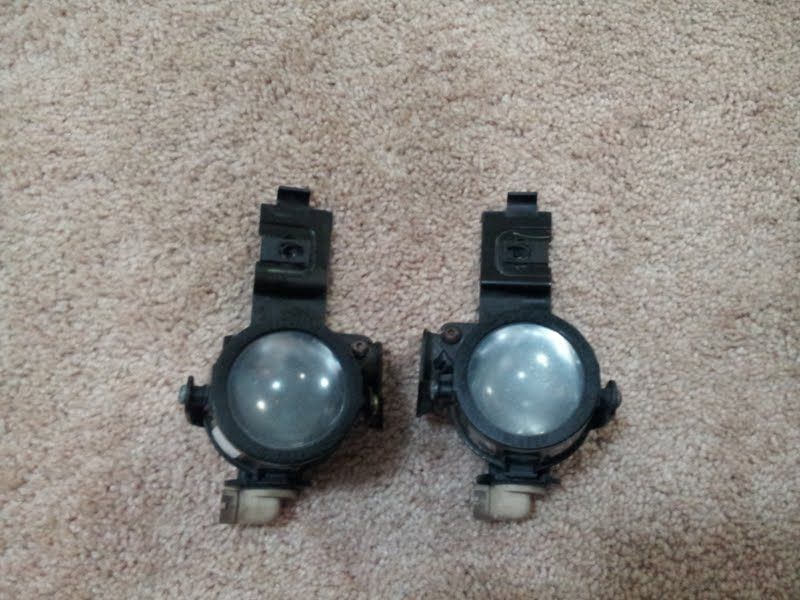
Before Pair:
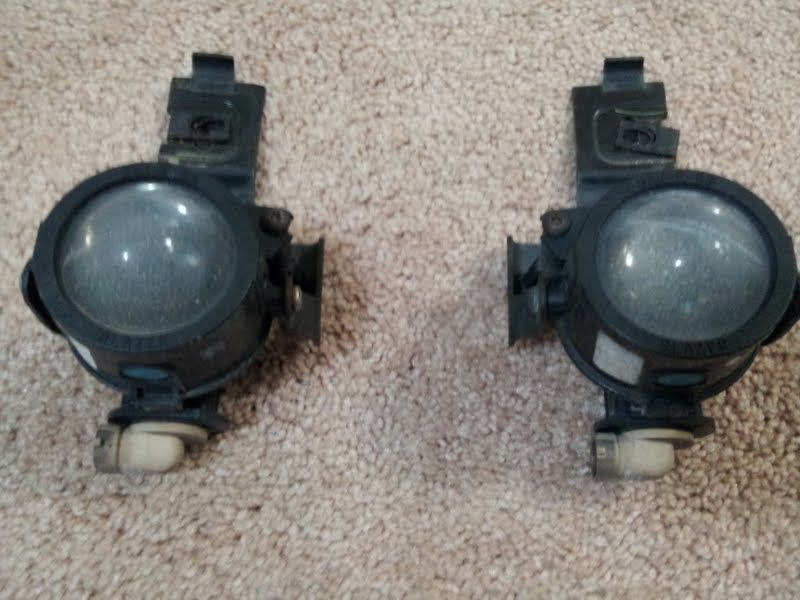
After Pair:
Last and final step is to put a protective coat on them, which I will be doing this weekend.
I wanted a decent pair, didn't have to be "brand new" or "perfect" so I worked at them until I was satisfied! The fact with them being glass and not plastic probably has to deal with them not being as perfect but I am happy with how they came out to look. They were pretty bad in the beginning and had a feeling the HID output wouldn't have been "as" clear... Now I am positive I will have a cleaner look and light output!
I had researched "Fog Light Restore Restoration" and with a little bit of searching only found other threads of people talking about trying it.
So I hope this helps anyone for future references!
Ok so this is how I spent my Friday night while bored, putting a little bit of time, effort and elbow grease into it! (estimated time was roughly 3 hours total, it can be done quicker I just prefer to take my time, there is no rush).
First step is to remove your fog lights (this step only takes 20mins)... to do this all you need is a ratchet or wrench (Size 10mm). Pop open your hood, remove the brackets attached to your left & right headlights. If you look down into your bumper below your turn signals you will see (2) 10mm bolts holding your Blazer fog lights in place. Remove the bolts and keep them in a safe place i.e. your pockets.
Second Step is to aquire some equipment... you can find any of these items at your local Auto Parts store.
Equipment:
- Fog lights
- Mother's Headlight Restoration
- 800, 1000 grit Wet or Dry Sand paper
- Ratchet with 10mm socket
- Microfiber towel
- Powertool (preferably a polishing tool or drill with attachment)
(Don't mind the Beer mug, that is optional and helps time pass by quicker ONLY if you are 21+!! I do not promote underage drinking but I do encourage rooting for the FL GATORS!!!)
After you have aquired your tools, taken off your fog lights and are ready to go. Grab a bowl of water and start soaking a folded piece of 800 grit sand paper (doesn't need to soak long, just a dip).
Next step is to remove the small plastic ring set around your fogs lens. Either a flat head screw driver (what I used) or a butter knife will work. Remove the rings and clean them up a bit, soap, water, whatever you prefer.
After removing as much dirt from the lens and outer parts of the fog, grab your first piece of folded 800 grit sand paper and get to using that elbow grease! I started with 800 and worked it until it turned a white/grayish wet film over the lens. Wipe off the whiteish wet film and then move to a 1000 grit wet sand.
After you have sanded for about 5 minutes on each lens, putting a nice gray haze to the lens. Put them down and open up your headlight restoration kit OR grab some lens clarifying compound.
After you have scratched the fogs to your liking and have removed most or all of the rock chips or scratches, it is time to then polish them (take as much time as you spent sanding, for polishing, remember this takes a lot of repetition and patience is needed). Add a dab of compound to your microfiber towel and spread evenly over the lens. (I found that it helped to let them sit for a few minutes, allowing the liquid compound to soak in a bit so this is when I utilized my drinking skills!).
(I didn't take any pictures due to it being a little hard using my Meguiars DA Power System tool and Mothers Polishing drill atachment while tryimg to take pictures at the same time).
Here was my finished work and results...
Before:
Before Pair:
After Pair:
Last and final step is to put a protective coat on them, which I will be doing this weekend.
I wanted a decent pair, didn't have to be "brand new" or "perfect" so I worked at them until I was satisfied! The fact with them being glass and not plastic probably has to deal with them not being as perfect but I am happy with how they came out to look. They were pretty bad in the beginning and had a feeling the HID output wouldn't have been "as" clear... Now I am positive I will have a cleaner look and light output!
I had researched "Fog Light Restore Restoration" and with a little bit of searching only found other threads of people talking about trying it.
So I hope this helps anyone for future references!
Last edited by BAD2theBONE; 03-02-2013 at 12:18 PM.
 03-02-2013, 07:02 PM
#2
Copy & Paste Moderator

Can you post a closer pic of the result (like you did for the one in the "before" pic)?
Also, take a look inside. The chrome inside these small projectors tends to get burned up with age. You may have to re-coat the inside as well.
Also, take a look inside. The chrome inside these small projectors tends to get burned up with age. You may have to re-coat the inside as well.
03-03-2013, 06:34 AM
#3
On The Tree
Thread Starter
Join Date: Jan 2012
Location: Norfolk, VA
Posts: 171
Likes: 0
Received 0 Likes
on
0 Posts
Sure I'd be glad to take a closer pic, but I'm on duty at the moment. Once I get off of work tomorrow I will...
Is there a safe way to open them up and take a look inside of them? If they are burnt, and I cleaned them up, what would you suggest to re-coat them with that will last?
Is there a safe way to open them up and take a look inside of them? If they are burnt, and I cleaned them up, what would you suggest to re-coat them with that will last?
03-03-2013, 11:39 AM
#4
Copy & Paste Moderator
I think they are sealed, but I have seen people open them. They are basically the "blazer" brand fog lights (there are 2 versions: bulb enters from bottom & bulbs enters from back, both use 880 bulb). There were a couple threads on here and HID Planet about it.
I haven't seen anyone actually re-chrome them, but I have seen people use shiny/metallic heat resistant paint (I don't remember the brands). It won't be as good as new, but it will be better than blackened/flaky chrome.
I haven't seen anyone actually re-chrome them, but I have seen people use shiny/metallic heat resistant paint (I don't remember the brands). It won't be as good as new, but it will be better than blackened/flaky chrome.
03-04-2013, 03:29 PM
#5
On The Tree
Thread Starter
Join Date: Jan 2012
Location: Norfolk, VA
Posts: 171
Likes: 0
Received 0 Likes
on
0 Posts
I just snapped a few pics for yea VIP and I'll be posting them up here soon when I get a chance! There is no need to open them up, I found it easier to just remove the bulb (factories attached from the back) and take a look inside... the chrome to me still has a bright shine and no signs of cracking, being burnt or black... it looked to be clean as a whistle in there. I have a close up shot and one showing the chrome from where the bulb inserts.
03-04-2013, 06:47 PM
#6
On The Tree
Thread Starter
Join Date: Jan 2012
Location: Norfolk, VA
Posts: 171
Likes: 0
Received 0 Likes
on
0 Posts
The results like I said aren't "perfect", but I ended up being satisified and had nothing else better to do that night... sad, but true... so I popped off my fogs and got to work...
This is the chrome lining on the inside with the bulb removed...
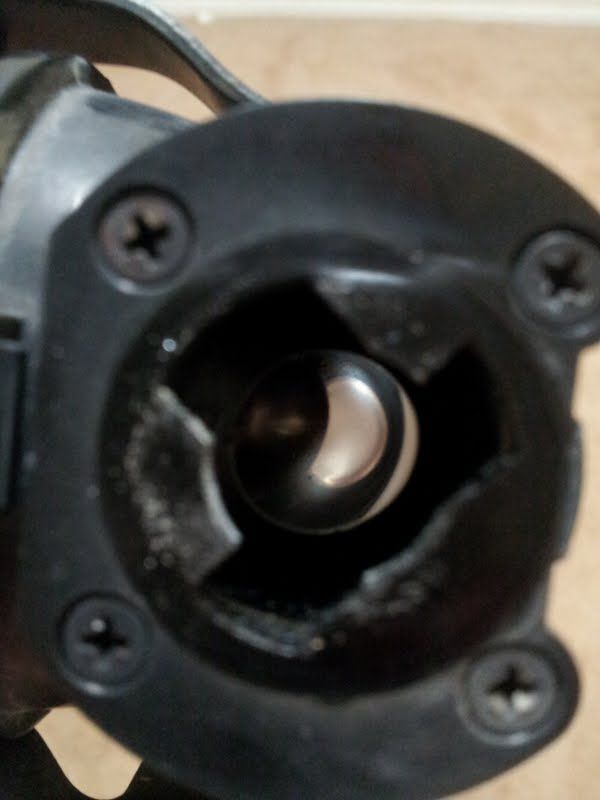
This is the chrome lining on the inside with the bulb removed...
03-06-2013, 11:06 AM
#7
Copy & Paste Moderator
Unfortunately that after pic doesn't really look that much better. Does it look better in person? Is the output improved?
I can't tell how that chrome looks from that pic. It may be difficult to take a pic of that with them still complete/closed. You may be able to look in yourself with a flashlight though.
I can't tell how that chrome looks from that pic. It may be difficult to take a pic of that with them still complete/closed. You may be able to look in yourself with a flashlight though.
Trending Topics
03-13-2013, 12:49 AM
#8
Teching In
Join Date: Jul 2012
Posts: 38
Likes: 0
Received 0 Likes
on
0 Posts
I had some substantial pitting in my lights. I did go a bit further and took the glass completley out of the housing. I use some of the red scotch brite dry then went to 600 and 800 1000 then 2000. All Dry. After I wet sanded with 25000 and used some rubbing compound then a polishing compound. I was quite pleased with how they came out as far as the pitting goes. They still arent as clear as I'd like. I do plan to work them a bit more this weekend.
03-13-2013, 09:32 PM
#10

Mine were pitted so badly that even with 80 grit paper I couldn't go deep enough to get all the chips out.
I finally said screw it and removed the reflector plate out of them. Can't really see any better but now you can kind of tell when they are turned on
I finally said screw it and removed the reflector plate out of them. Can't really see any better but now you can kind of tell when they are turned on
03-14-2013, 09:34 PM
#11
On The Tree
Thread Starter
Join Date: Jan 2012
Location: Norfolk, VA
Posts: 171
Likes: 0
Received 0 Likes
on
0 Posts
Wet sanding isn't a guarantee for sure with glass, but my new HID kit won't show "as much" haze on the lens now... not perfect, but good enough! Worth a shot!