How much plastidip to cover the entire hood
 04-28-2015, 10:49 PM
#1

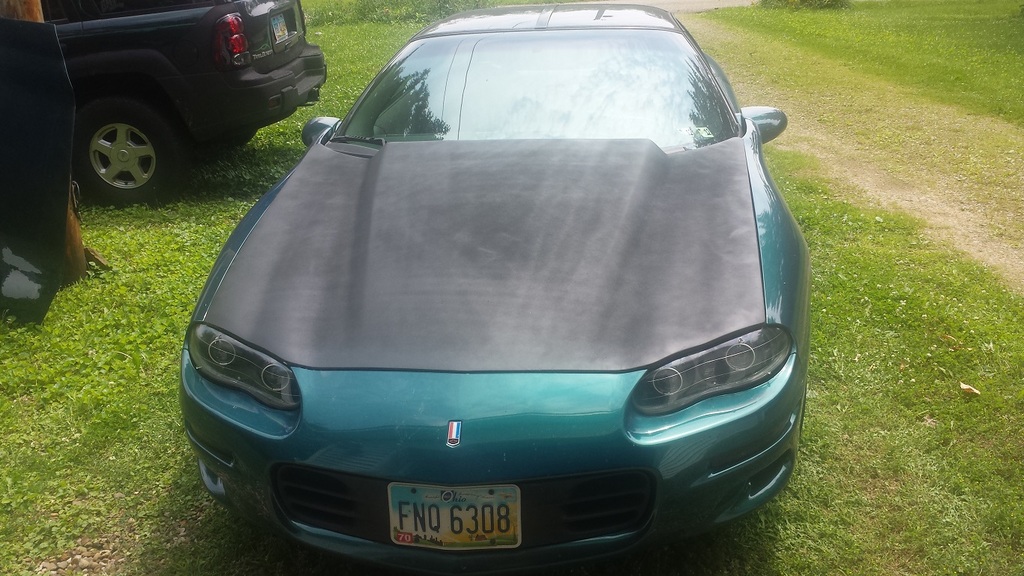
My factory hood has a huge hunk of paint missing thanks to GM's lackluster 90's paint and a touchless car wash hitting a rock chip. It looks really ugly, so I was thinking of taking my fiberglass hood (that currently has a bad white paint job on it), spraying it with plastidip, and installing it on the car as I am thinking it would look a lot better than what's on there now. How many cans of plastidip would I need to do this? I bought two.
Eventually I'll get the car repainted but I cannot afford to do that for at least 2 years due to house expenses (furnace, driveway, and windows for starters).
If this is just a bad idea altogether let me know. I'll grab a pic of both hoods as they are.
Eventually I'll get the car repainted but I cannot afford to do that for at least 2 years due to house expenses (furnace, driveway, and windows for starters).
If this is just a bad idea altogether let me know. I'll grab a pic of both hoods as they are.
Last edited by SparkyJJO; 04-29-2015 at 08:36 AM.
 04-29-2015, 02:16 PM
#2

your going to need somewhere around 8 cans. I plasti dipped my superhawk hood until the new one arrives and lows only had 2 cans of grey and 2 cans of white. I also had a can of black. Sprayed what I had of black then white then grey on top of the white to get a lighter grey.... turned out it was not nearly enough.
 05-04-2015, 10:08 PM
#5
Yeah it would suck to get part way through the project and run out. I have 8 cans now. If I don't end up needing them all that's fine.
Of course the weather is utter crap this week so it doesn't look like I'll be able to do it until next. Oh well, can't drive the car right now since I don't have a driver's seat in it! Wouldn't take that much to put it back in I guess, just I'm tired of mounting and dismounting that seat so many times lol.
Of course the weather is utter crap this week so it doesn't look like I'll be able to do it until next. Oh well, can't drive the car right now since I don't have a driver's seat in it! Wouldn't take that much to put it back in I guess, just I'm tired of mounting and dismounting that seat so many times lol.
05-05-2015, 08:46 AM
#6
8 cans sounds about right....make sure u at least put 6-7 coats on the hood so when it comes to taking it off u can just peel it off...the more coats the better...less coats it's a pain in the *ss.

Trending Topics
 05-05-2015, 02:18 PM
#11
I did my SS Spoiler in red and took me 2 cans because the spoiler was black.
1 Can of White as base coat
1 Can of Red for color
If you are spraying black, its much easier and obviously don't need tons of coats for it to look like an even black surface.
If you do need to remove it, goo gone works really well for those tiny pieces that don't wana come off in a big chunk.


whats up sparky!
1 Can of White as base coat
1 Can of Red for color
If you are spraying black, its much easier and obviously don't need tons of coats for it to look like an even black surface.
If you do need to remove it, goo gone works really well for those tiny pieces that don't wana come off in a big chunk.
whats up sparky!
Last edited by bad_408_vert; 05-05-2015 at 02:45 PM.
05-05-2015, 02:29 PM
#13
TECH Junkie
What I got out of it is he is dipping a already white hood with white plasti, should not be a problem with a couple cans


 07-03-2015, 12:14 PM
#16
So I finally got around to doing this. Looks... well, blotchy and streaky lol. I used 5 cans. It took 2 cans just to cover the white and make it black. I was going vertical on the hood, got stripes that way, so then I started doing horizontal which covered the vertical but made horizontal lines. So I went criss-cross which then hid that, but made it look like crosshatching on a cylinder wall 4 cans was enough but I went over with a 5th can to try to blend it all together. Waiting for it to dry before I install it and see how it looks.
I suppose it may still look better than the peeled paint on the factory hood. Sigh.
The other thing I was fighting was BUGS. These stupid little bugs would just fly in and land on the hood while I was painting. Are they attracted to paint or somthing? So now I have a few painted over little bumps that are actually tiny gnats or some other insect (tiny pinhead size, hard shell). Sigh.
I need to get money saved to just get the car painted properly. I blew it all on my truck and furnace this year, and next year I really should do windows on the house...
4 cans was enough but I went over with a 5th can to try to blend it all together. Waiting for it to dry before I install it and see how it looks.I suppose it may still look better than the peeled paint on the factory hood. Sigh.
The other thing I was fighting was BUGS. These stupid little bugs would just fly in and land on the hood while I was painting. Are they attracted to paint or somthing? So now I have a few painted over little bumps that are actually tiny gnats or some other insect (tiny pinhead size, hard shell). Sigh.
I need to get money saved to just get the car painted properly. I blew it all on my truck and furnace this year, and next year I really should do windows on the house...
07-03-2015, 12:44 PM
#17
TECH Addict
iTrader: (1)

Join Date: Apr 2012
Location: Ellijay, GA
Posts: 2,769
Likes: 0
Received 0 Likes
on
0 Posts
So I finally got around to doing this. Looks... well, blotchy and streaky lol. I used 5 cans. It took 2 cans just to cover the white and make it black. I was going vertical on the hood, got stripes that way, so then I started doing horizontal which covered the vertical but made horizontal lines. So I went criss-cross which then hid that, but made it look like crosshatching on a cylinder wall 4 cans was enough but I went over with a 5th can to try to blend it all together. Waiting for it to dry before I install it and see how it looks.
I suppose it may still look better than the peeled paint on the factory hood. Sigh.
The other thing I was fighting was BUGS. These stupid little bugs would just fly in and land on the hood while I was painting. Are they attracted to paint or somthing? So now I have a few painted over little bumps that are actually tiny gnats or some other insect (tiny pinhead size, hard shell). Sigh.
I need to get money saved to just get the car painted properly. I blew it all on my truck and furnace this year, and next year I really should do windows on the house...
4 cans was enough but I went over with a 5th can to try to blend it all together. Waiting for it to dry before I install it and see how it looks.I suppose it may still look better than the peeled paint on the factory hood. Sigh.
The other thing I was fighting was BUGS. These stupid little bugs would just fly in and land on the hood while I was painting. Are they attracted to paint or somthing? So now I have a few painted over little bumps that are actually tiny gnats or some other insect (tiny pinhead size, hard shell). Sigh.
I need to get money saved to just get the car painted properly. I blew it all on my truck and furnace this year, and next year I really should do windows on the house...
07-03-2015, 01:37 PM
#19
Well it is just to be temporary anyway!
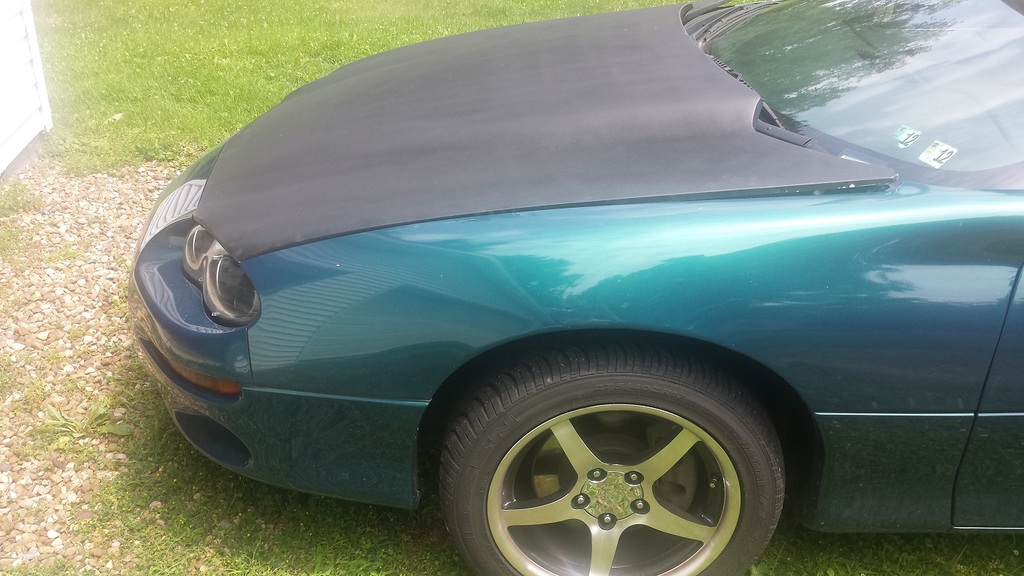
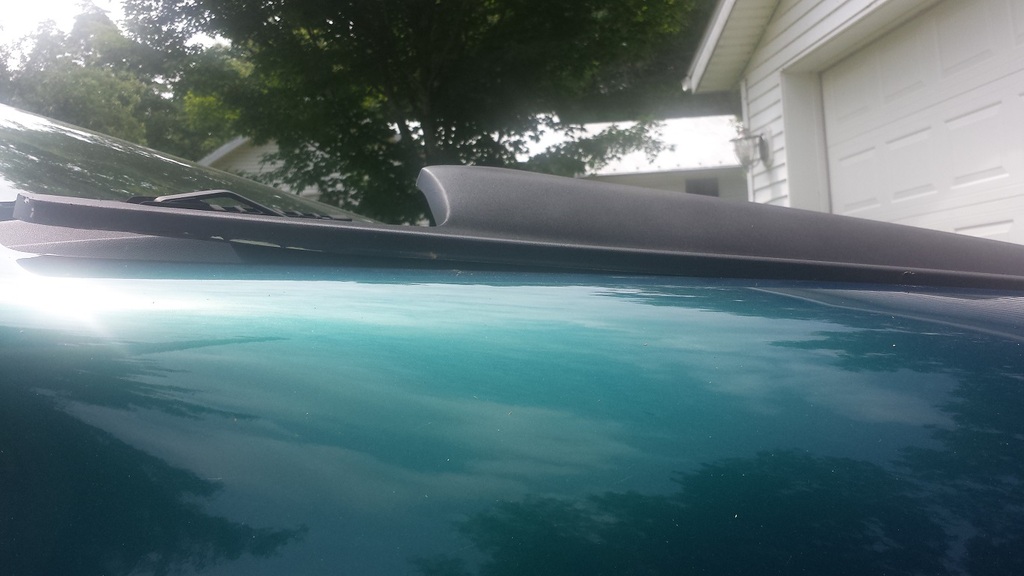
But I ran into a totally new issue that maybe is better suited for another section, but this Harwood hood I bought 6 years ago now fits like utter crap and the bolt holes aren't threaded the same as factory bolts. The more I look at it though the more I'm thinking I was sold a "Harwood" ebay special by whoever it was I got it from. At first I was thinking OK I just need to adjust it properly, but the more I look at the sides the more I'm thinking there is no way to make it even come close to matching the fenders. Looks like the hood is just totally shaped wrong! But it was installed on the guy's car previously and it looked fine in those pictures... I don't get it. Unless I'm totally missing something.
Regardless, there is no way I can bolt it down until I figure out what bolts fit. Here are a few pics with it just sitting on top. I moved the hood too soon so the plasti isn't really set up fully and it started peeling a bit on the edges (oops).
Live and learn...
*edit* Now that I look at it again, if I push down on the corners they sit on top of the hinges and gets a lot closer. Maybe it can be all adjusted to fit after all, but then the hood is under some pressure. Could the fiberglass have warped over the last 6 years of storage?
07-03-2015, 05:19 PM
#20
TECH Addict
iTrader: (1)
Join Date: Apr 2012
Location: Ellijay, GA
Posts: 2,769
Likes: 0
Received 0 Likes
on
0 Posts
HOW was it stored? if fiberglass is exposed to high enough heat (depending on the quality of the construction), learned that one the hard way, I was installing fenders and a full widebody kit on one of my old hondas and had a set of halogen lights pointed at one of the fiberglass fenders and after a while noticed a dip in the fender, it had heated up to a point to hot to touch and was maleable, after turning off the lights I could push up from behind and the spot was VERY soft, so if it got heated right and was stood on those ends it's possible.