When you click on links to various merchants on this site and make a purchase, this can result in this site earning a commission. Affiliate programs and affiliations include, but are not limited to, the eBay Partner Network.
I have a black car and I can't seem to remove the swirl marks using a dewalt rotary buffer. I am new to buffing, my buddy swears I should be able to get them out.
I have done 7 passes now... Same area. I am buffing at 1000 rpm and moving fairly quickly over the panel. I tried slowing down moving over the panel and applying pressure and none seem to get the swirls out. I buff until the compound almost looks dry and then stop, wipe off, rinse and repeat.
Any advice?
Should I just pay someone to paint correct? I have spent around $100 on new pads, backing plate and compound already. I have used about an 1/8 of a bottle already. Perhaps the paint is just too far gone? Should I try upping the speed?
Not sure how others do it, but i usually buff at a higher speed, around 3k rpm. I'm used to the 3m three step products we use at our shop. Agressive, fine, then polish. Black cars were my nemesis.
your new to it and using a rotary . Their is quite the learning curve with those. Get a porter cable 7424xp or flex 3401 and some meguirs 105 and meguirs 205 . You will want an orange pad for the 105 and use a white pad for the 205 .
Well, the scratches currently in the car ARE getting removed. It's just not removing all of them. I just had my buddy come over who lent me his rotary and he showed me some techniques that seemed to help. So I will give that a shot first prior to buying something else.
He also came over with some more abrasive compound and that worked miracles on the bigger scratches.
I upped the speed of the rotary to 1400rpm for the 3m product and that seems about perfect. The coarser grit rubbing compound I am using 1000 rpm. I do one area and then move on to the next, thus letting the first area of the panel cool and then I come back. So far the car is looking much better, no where near the pro's, but huge improvement for sure. Mainly focusing on the big scratches first.
Last edited by alaska_guy; 09-14-2016 at 04:26 PM.
Well, the scratches currently in the car ARE getting removed. It's just not removing all of them. I just had my buddy come over who lent me his rotary and he showed me some techniques that seemed to help. So I will give that a shot first prior to buying something else.
He also came over with some more abrasive compound and that worked miracles on the bigger scratches.
I upped the speed of the rotary to 1400rpm for the 3m product and that seems about perfect. The coarser grit rubbing compound I am using 1000 rpm. I do one area and then move on to the next, thus letting the first area of the panel cool and then I come back. So far the car is looking much better, no where near the pro's, but huge improvement for sure. Mainly focusing on the big scratches first.
The compound should not feel grit are all. List the products you are using.
Originally Posted by The Guz
To me those look like rotary holograms. Seems to be pretty common with a rotary. Finishing with a rotary is pretty tough and requires some skill.
A dual action polisher comes in handy when finishing out to a near perfect finish.
I am debating on buying either the griots garage polisher or the porter cable as I can obtain either locally. I also can get M105 and M205 locally. What other pads would I need if i bought the griots garage polisher? Would this polisher eliminate all swirls marks?
Also, what finish (wax, sealer, glaze) should I use for a black daily driver?
Either of those DA's would work fine. The Griot's has more power than the PC.
Pick up M105 and M205. Just be warned that M105 has a short working time and a slight learning curve. You will need some type of wetting agent, basically water in a spray bottle to help extend the working time and to remove it off. If M105 is overworked it turns into concrete on the paint.
Ultimate Compound is another option that can be sourced locally. It's derived from M105. It contains the same abrasive set but just less than M105. I would recommend M100 or M101 over M105 but these others are not sourced locally.
The other option is investing in the Meguiar's microfiber cutting pads and their D300 microfiber compound. This works great on the harder paint found f-bodies.
M205 would be a finishing polish to use after compounding.
With either machine, i would recommend going with a 5" backing plate and 5" pads to take advantage of the tools power.
Thanks again Gus for all the informative advice. I also appreciate all the information in PM's.
The turtle wax compound acts much like what I imagine M105 does... It can cure like concrete if it gets too hot/warm or lacks hydration. I had a spray bottle handy and it seemed two mists on the pad seemed to activate the product well again and also extended the life of the product. I would put the compound on the car, spray my pad and work away. When it seemed the product was getting too far gone/warm I would spray my pad again to activate the product. Seemed to work well once I got the technique down. I was able to see the haze the compound produced vs the polish and knew when I was far enough with the compound.
I will send you a PM shortly as I have a few more questions I imagine you can answer.
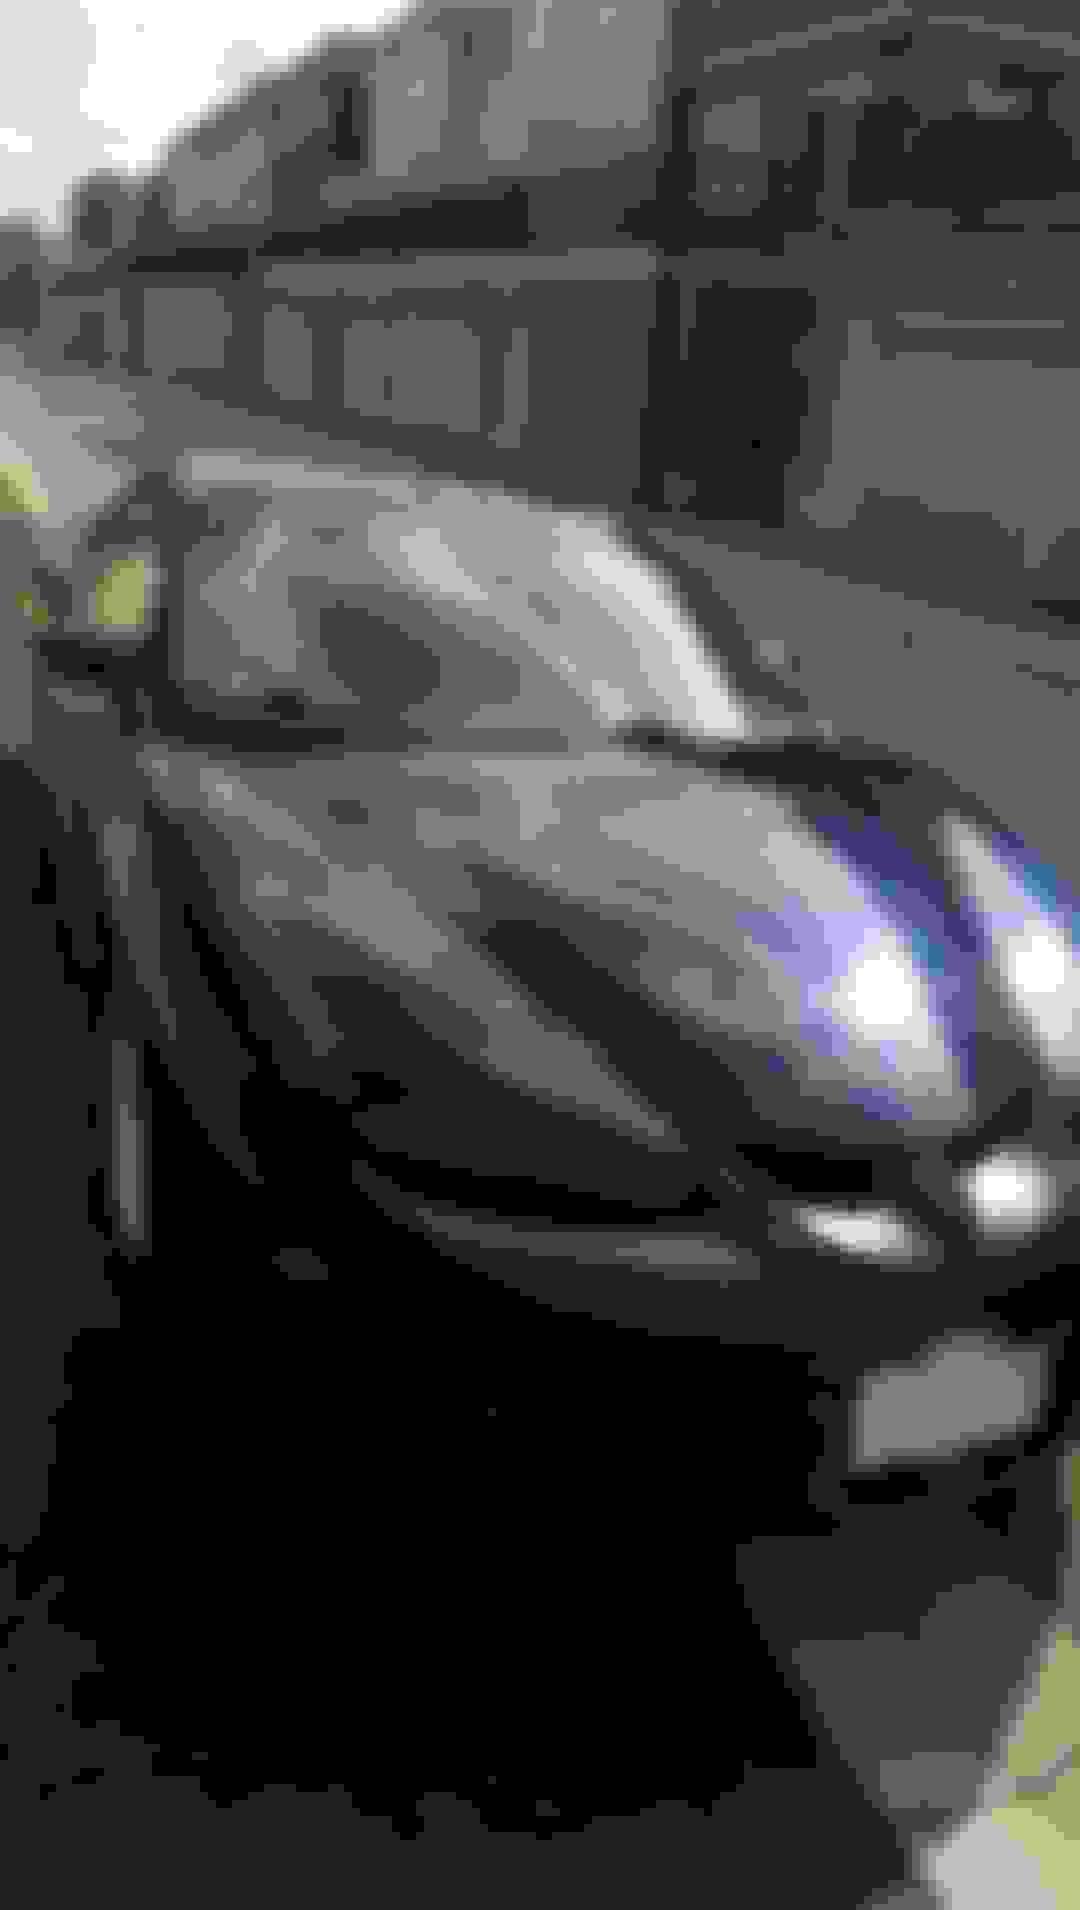
Your paint looks a lot better man. I used this 3m paint restoration kit, https://www.amazon.ca/3M-39053-Resto...dp/B004NDBYQ4#, my first time at trying paint correction with the pc7424. It came out good if you want to give it a shot. It came with everything you need, it took me all day to do the hood and front fenders. I went real slow in 1x1 ft sections.
I used the foam pads and the Meguiars compound, glaze #7, and #26 caranuba wax. I decided to take the car for one last ride before the rain and snow decides to start...
Overall the car looks much better. Hoping it buys me another year or so until I can get a new hood, front bumper and paint job.

 09-14-2016, 02:29 PM