
How hard is it to do this? (Interior door mod)
 01-13-2008, 12:40 PM
#1
TECH Resident
Thread Starter
iTrader: (4)

Join Date: Jul 2006
Location: Spring Hill, FL
Posts: 872
Likes: 0
Received 0 Likes
on
0 Posts


I would love to get the red vinyl instead of the plain black to match my car. How hard is it to do this

 01-13-2008, 05:14 PM
#4
Copy & Paste Moderator

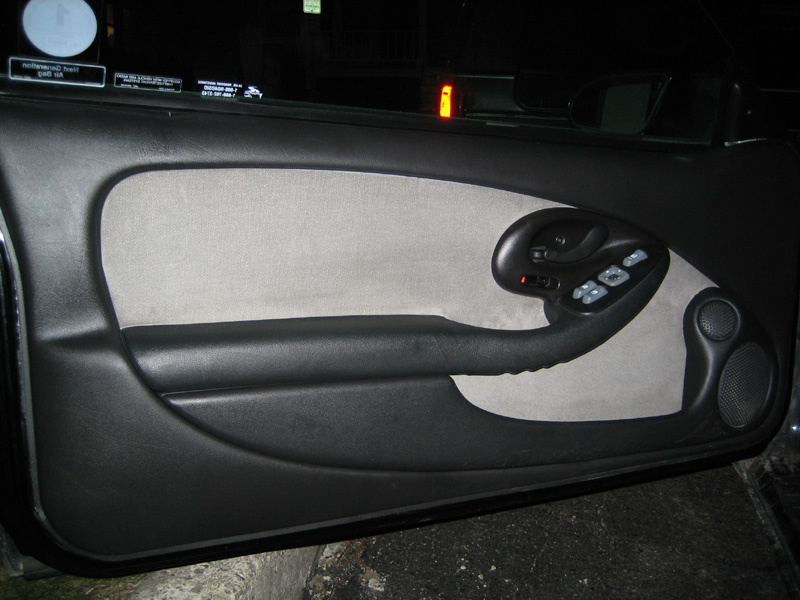
I have the cloth interior and replaced the black cloth in the door panels with silver stock-like cloth that I got at a fabric store for $5 or $6 a yard. I bought 4 yards (in case of mistakes and to have left over) and only used about half.
Here is the write-up I followed to do the silver inserts in my door panels:
http://www.lastofthebreed.com/Instal.../DoorPanel.htm
(Same link 00CaliforniaZ28 posted.)
Except that instead of re-melting the posts, I used a blob of LockTite Plastic Epoxy on each post and kept some pressure/weight on the panel to hold it together untill the epoxy hardened. I didn't use contact cement for the whole thing either, only the edges that get folded over so that I didn't get any glue bleeding through the cloth. I used some "carpet tape" also around the edge that doesnt get folded over to help hold things in place.
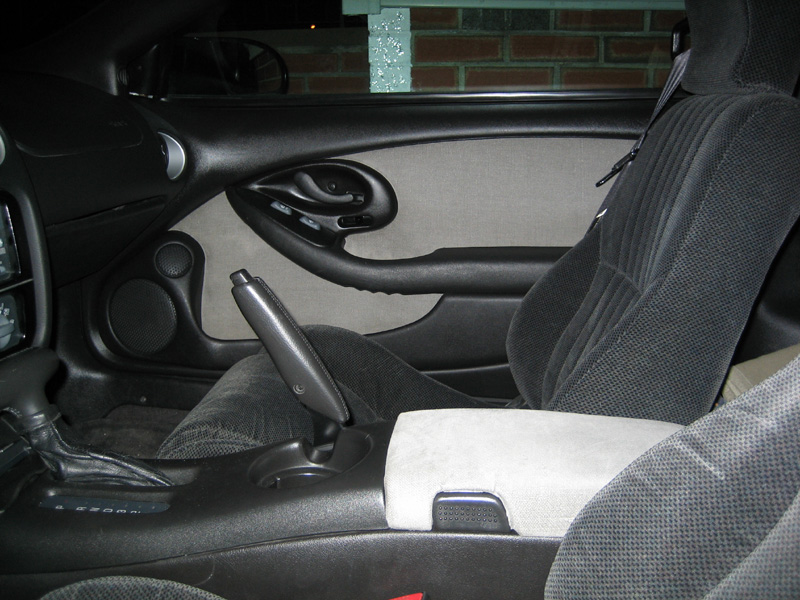
I also covered the center console lid in the same silver cloth.
Sorry, no pictures.
Here is the write-up I followed to do the silver inserts in my door panels:
http://www.lastofthebreed.com/Instal.../DoorPanel.htm
(Same link 00CaliforniaZ28 posted.)
Except that instead of re-melting the posts, I used a blob of LockTite Plastic Epoxy on each post and kept some pressure/weight on the panel to hold it together untill the epoxy hardened. I didn't use contact cement for the whole thing either, only the edges that get folded over so that I didn't get any glue bleeding through the cloth. I used some "carpet tape" also around the edge that doesnt get folded over to help hold things in place.
I also covered the center console lid in the same silver cloth.
Sorry, no pictures.
 01-13-2008, 06:28 PM
#6
Copy & Paste Moderator
OK 
I just took those pics and updated my site.
You can see larger pics here:
http://www.fadingarrow.com/DoorPanels.htm
I just took those pics and updated my site.
You can see larger pics here:
http://www.fadingarrow.com/DoorPanels.htm
Trending Topics
01-14-2008, 05:36 PM
#9
Copy & Paste Moderator
Thanks.
Here is my thinking on that scale.
1 = Snap in a part
10 = major engine and body work.
I think its easier than painting. I've done plenty of painting, but I prefer things I can shape/build/modify. I don't know where that would fit on the scale though. Maybe 3. Its just time consuming, not difficult. But that's doing it the way I did it. The way its outlined in the write-up is a little more difficult with the whole panel being glued instead of just the edges, because you'd have to worry more about it sticking wrong and getting air bubbles/wrinkles. Although it is more secure that way. I haven't had any problems with mine the way they are though.
Be careful trimming the fabric around the mounting holes. Depending on the fabric, it can fray slightly and be noticeable. I had one or two do that, but its minor and in a spot not particularity noticeable. Its the one at the edge of the tweeter pod. That mount is not recessed/hidden like the others so any imperfection in the cut/glue will appear. It happened on my driver's side, but not my passenger side... I got better with practice I guess. Look at the large pic on my site. You probably won't see it.
I'm thinking of re-doing it in a thicker/firmer material, something like a microfiber or suede, but the prices tend to be $24+/yard. The stuff I used in those pics was $4/yard (I got a deal).
The armrest cover was something I put together quick and dirty in a few minutes and its held up better than expected.... don't look too close to the area around the button though... that could have come out much better (difficult to tell in the pics due to flash). Like I said, it was just a proof of concept and it stayed for now.
My door panel is cracking (see the 1/2" white line at the top left of the driver's side door panel -- under middle sticker in pic) and I'm thinking of wrapping the plastic shell in leather, but that could be something that could go wrong easily, so I'd rather have a spare to work on. Anyone local selling 1998-2002 Firebird door panels for a good price?
I have some other subtle door mods in mind too.....
(I don't think anyone has done them yet.)
Last edited by VIP1; 01-14-2008 at 06:06 PM.

 01-16-2008, 12:47 PM
#13
TECH Enthusiast
iTrader: (1)

Join Date: Dec 2004
Location: San Jose
Posts: 535
Likes: 0
Received 0 Likes
on
0 Posts
Off topic and i dont what the jack the thread but has anyone done this mod with a big sheat of aluminum? I think it would look pretty sharp and was going to do it when i redo the interior in black. I know it would be a pain to keep clean but i thought about having a brushed look then shooting clear over it.
01-16-2008, 01:06 PM
#14
The easiest thing to do is look for an LT1 body style door panel. There was a red interior option available that you might be able to find and save the trouble of redoing your current panels.
