Porting my Victor Jr
 04-03-2012, 11:53 AM
#1

So, I was in the middle of a cam swap...I had previously pulled my G5x3 and sold it, while it was out I stuck my stocker back in place to keep the lifters in place. My Howards Cam finally showed up and I pulled the stock cam back out again and, "plunk, plunk, plunk". There go the lifters into the oil pan. 
So, pulled the intake manifold off, then the heads, etc...I will go fishing for the missing lifters sometime this week. Meanwhile, since I have the intake off I figured I might as well port it! I have a set of carbides heading my way in the mail. Took a good look at it tonight and I see what everyone said about the injector pad area. I actually blocks the entire pent roof of the cathedral port. So obviously there are gains to be made there. Not sure I will be handy enough to fully port match the runners, and I've seen in the past where guys have had to use paper gaskets because the o-rings wouldn't work after porting. Not sure I want to go that far.
Anyway, the point here is I want to see some pictures or examples from others that have ported their Victor Jrs or similar. And any advice before I start cutting.
 04-03-2012, 02:35 PM
#3

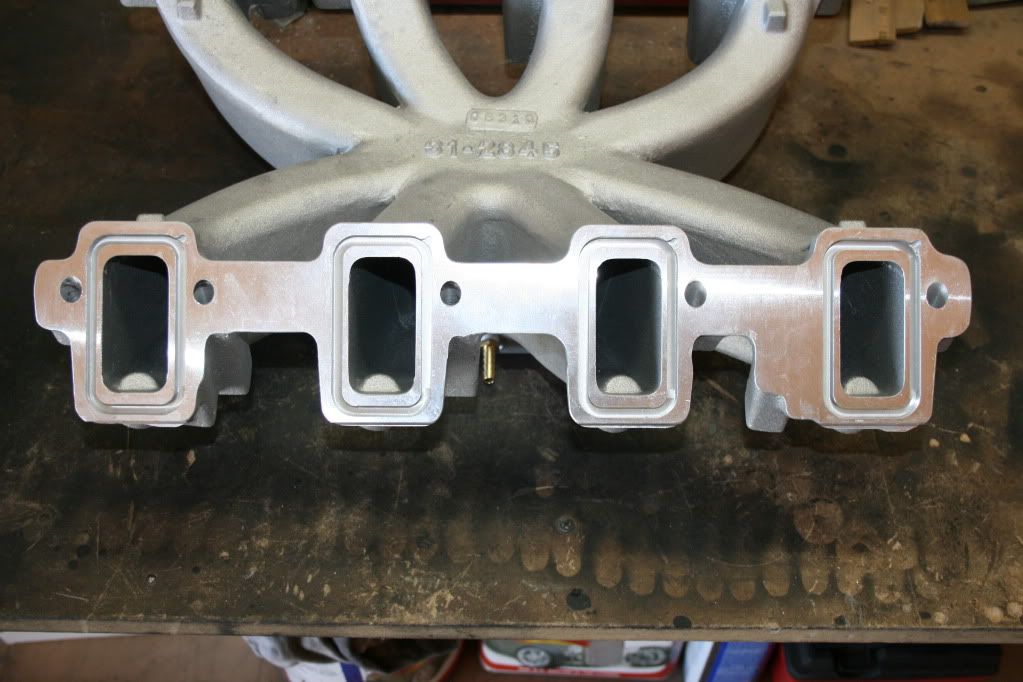
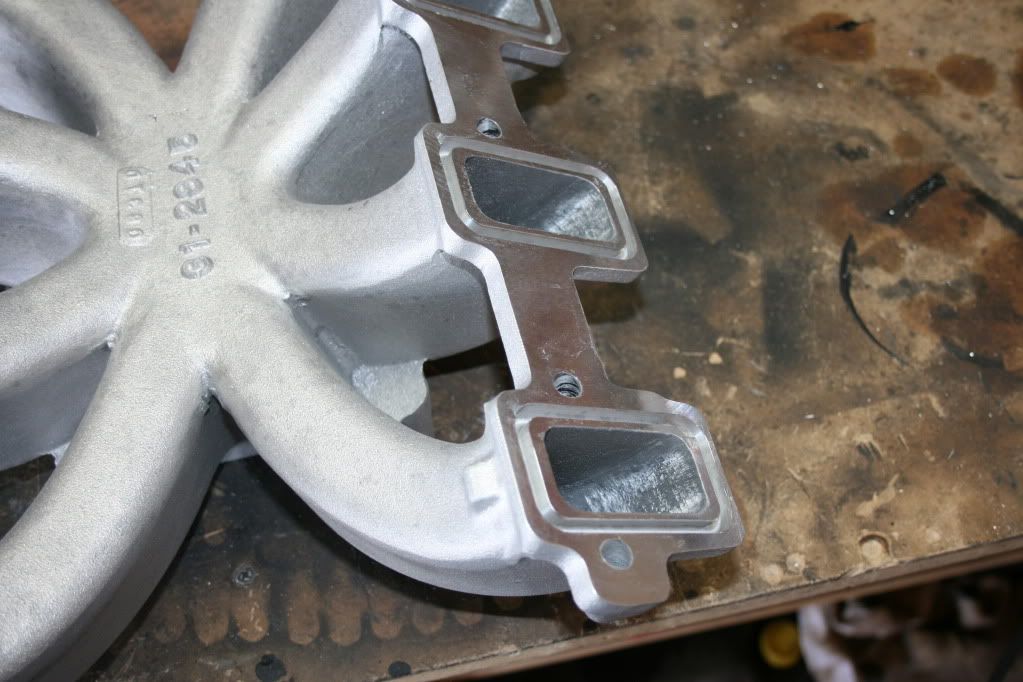
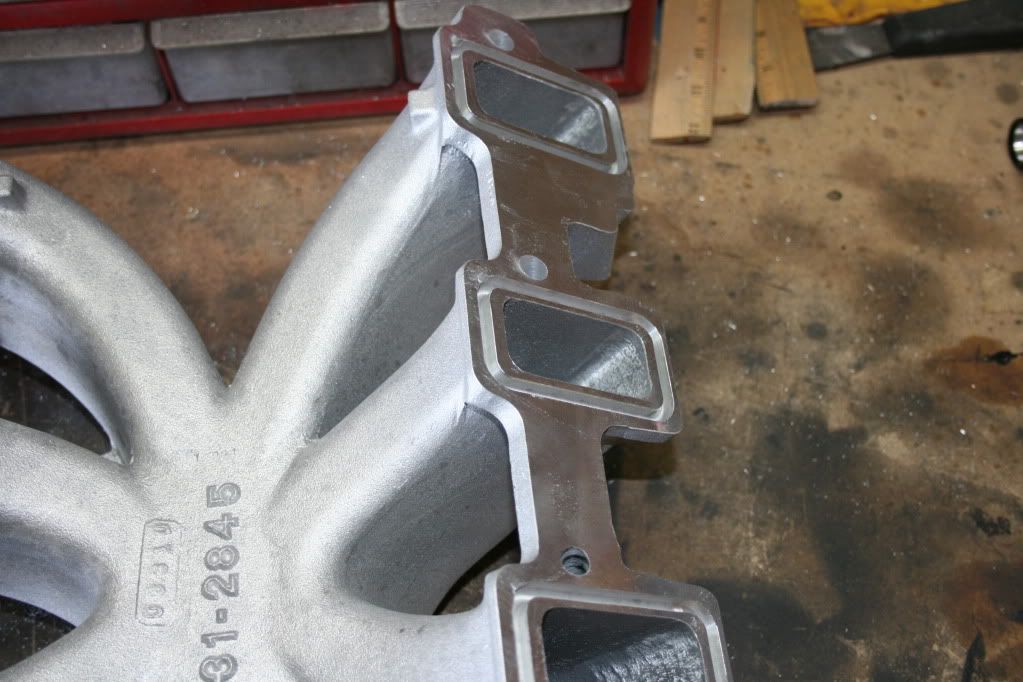
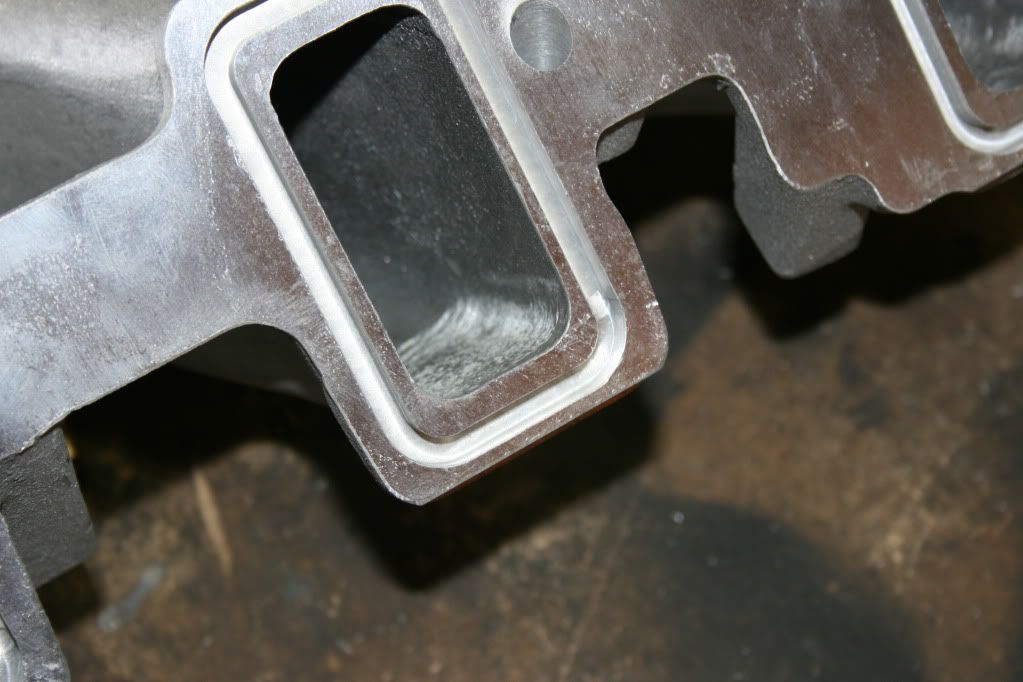
Here are some before and after pics of my L92 Vic Jr. I didn't do any port matching. I primarily just wanted to remove the injector bosses and also smooth out a little casting flash in the openings of the runners.

A few things that were helpful for me in this process were:
1. Frequetly dip your carbide bit in ATF. It's a little more messy, but it helped keep the bit from clogging up with aluminum. I'm pretty sure someone on here gave me that tip. Thanks!
2. Do your major material removal work with your carbide bit, but use sanding rolls for the finish work. Again, I'm no master porter but this is what worked for me. Someone more skilled with a carbide bit or with a better selection of bits may disagree.
3. Getting all of the fine aluminum shavings out of the runners is really tough. Even if it looks clean, it probably isn't. A few cycles through the dish washer while your wife is out of the house is a good start, but you'll probably need some additional presurized cleaning and hand brushing of the runners to be completely clean. Brake parts cleaner and compressed air is what I used to blow out the runners before and after the dishwasher cycles.
04-07-2012, 02:09 PM
#7
I did not photograph mine, but I do have a couple suggestions.
First, use inside calipers:

Use these to measure the cross sectional area (width X height) of the port to make sure you have consistent port cross section from the head mounting surface all the way to the intakes carburetor plenum area.
The most common mistake (included from some pros) is to enlarge the area right next to the gasket surface to match the head entrance and stopping there. This merely leaves the restriction in place further up the port and will likely gain 0 HP.
Taper down from the carb plenum area to the head mating surface is good, reverse taper (cross sectional area larger at the head mating surface is larger than anyplace else in the port) is bad. Variations in cross sectional area and shape cause turbulence and pressure changes that impede flow and cylinder to cylinder mixture consistency.
I also like to do it over the course of several days even though I can do it in one. This allows me to come back with fresh eyes and inspect my work. With these "fresh eyes", I always find things to improve upon before I call it done.
Lastly, I use my fingers to feel. I often catch surface irregularities with my hands that my eyes can't see.
In port matching my TSP Stage 1 CNC LS6 heads, I found it was necessary to widen the port significantly, but no work was needed on the roof or the floor of the intake.
First, use inside calipers:
Use these to measure the cross sectional area (width X height) of the port to make sure you have consistent port cross section from the head mounting surface all the way to the intakes carburetor plenum area.
The most common mistake (included from some pros) is to enlarge the area right next to the gasket surface to match the head entrance and stopping there. This merely leaves the restriction in place further up the port and will likely gain 0 HP.
Taper down from the carb plenum area to the head mating surface is good, reverse taper (cross sectional area larger at the head mating surface is larger than anyplace else in the port) is bad. Variations in cross sectional area and shape cause turbulence and pressure changes that impede flow and cylinder to cylinder mixture consistency.
I also like to do it over the course of several days even though I can do it in one. This allows me to come back with fresh eyes and inspect my work. With these "fresh eyes", I always find things to improve upon before I call it done.
Lastly, I use my fingers to feel. I often catch surface irregularities with my hands that my eyes can't see.
In port matching my TSP Stage 1 CNC LS6 heads, I found it was necessary to widen the port significantly, but no work was needed on the roof or the floor of the intake.

