BADNBLK 91 Z28 is going LS1


 04-09-2015, 10:46 AM
#42
I've seen this car for a long time over on thirdgen.org. I've always had a soft spot for 91-92 z's. Have had a few of them. Have also had quite a few ls1 cars. Always wanted to combine them, just hasn't happened yet.
You will be happy with the ls1 even stock in that car..and due to all the room to work under the hood of the thirdgen.. heads and cam won't be too big of an ordeal later on.
You will be happy with the ls1 even stock in that car..and due to all the room to work under the hood of the thirdgen.. heads and cam won't be too big of an ordeal later on.
04-09-2015, 11:48 AM
#43
Staging Lane
Thread Starter

Join Date: Jan 2012
Location: Fort Collins CO
Posts: 93
Likes: 0
Received 0 Likes
on
0 Posts
I've seen this car for a long time over on thirdgen.org. I've always had a soft spot for 91-92 z's. Have had a few of them. Have also had quite a few ls1 cars. Always wanted to combine them, just hasn't happened yet.
You will be happy with the ls1 even stock in that car..and due to all the room to work under the hood of the thirdgen.. heads and cam won't be too big of an ordeal later on.
You will be happy with the ls1 even stock in that car..and due to all the room to work under the hood of the thirdgen.. heads and cam won't be too big of an ordeal later on.
I haven't made much for updates to the plan, as some of the plan goes out of the window as funds show up or disappear. I bought a set of 243 heads and sent them off the Advance Induction to let Phil work his magic on them, and spec me out a cam as well. We haven't got the cam selection completed, so I haven't posted much about it, but it is paid for so it totally happening
 Should make it that much more interesting.


 04-30-2015, 04:24 PM
#45
Staging Lane
Thread Starter
Join Date: Jan 2012
Location: Fort Collins CO
Posts: 93
Likes: 0
Received 0 Likes
on
0 Posts
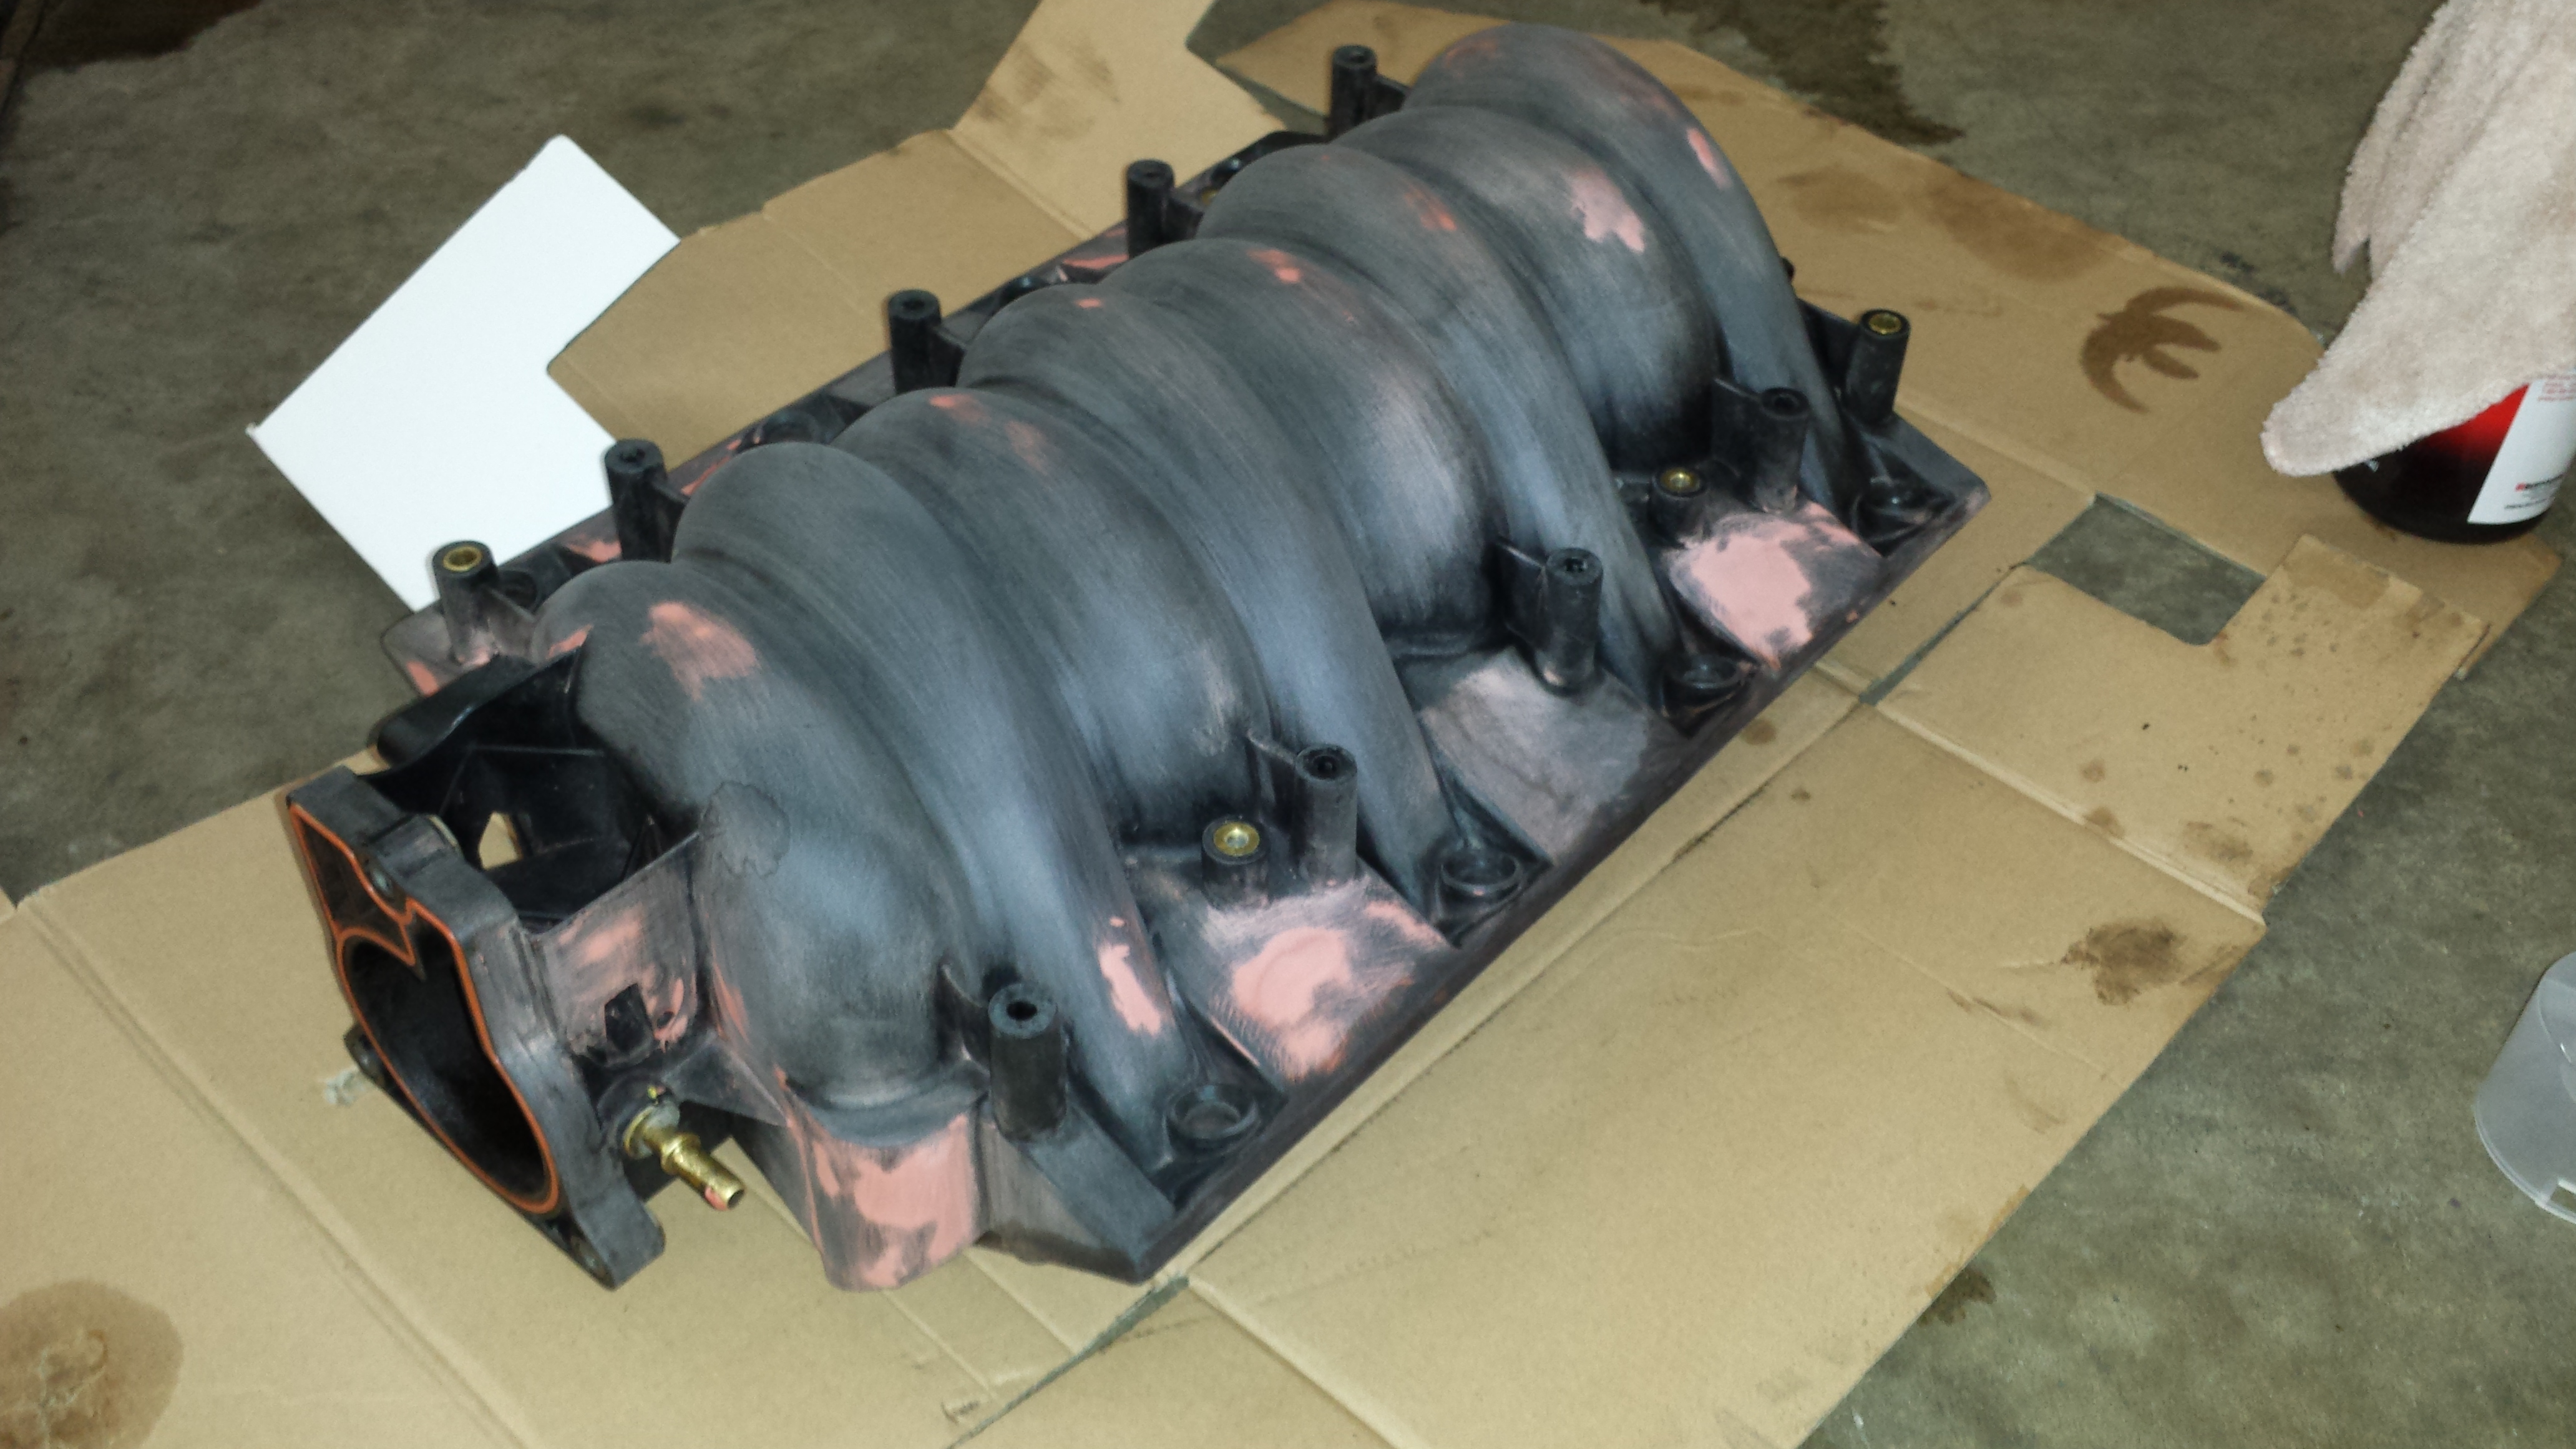
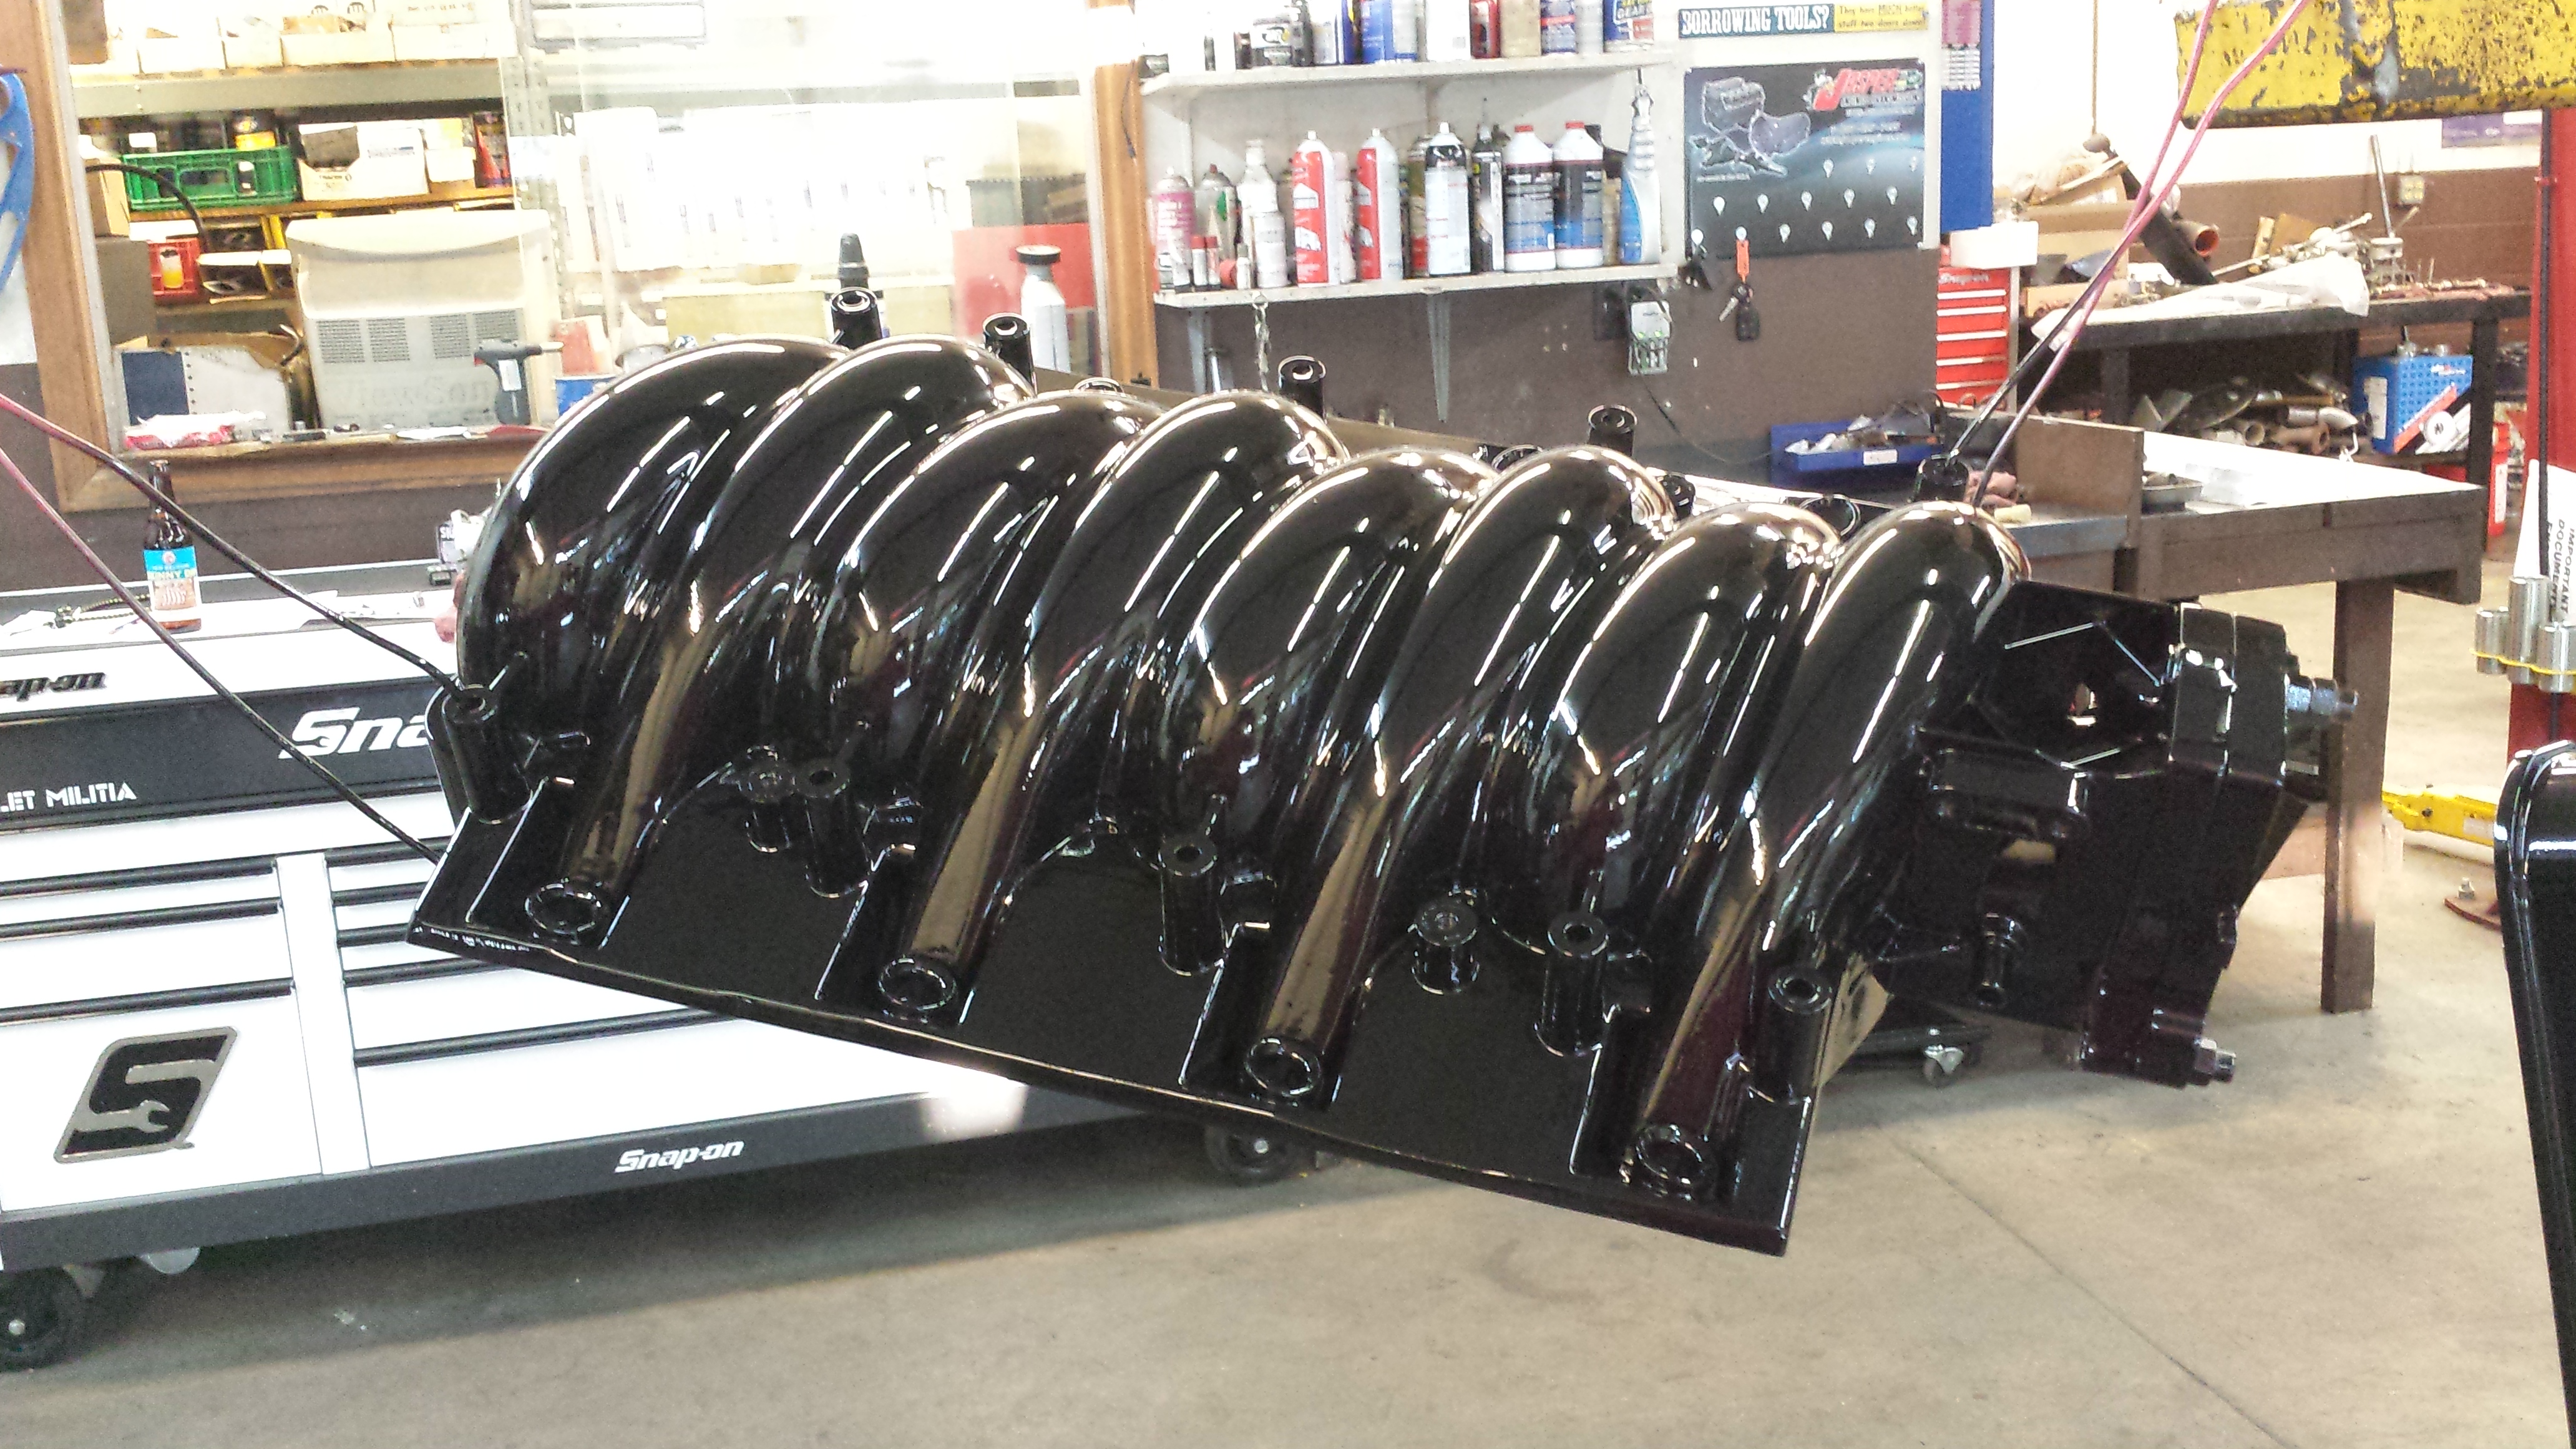
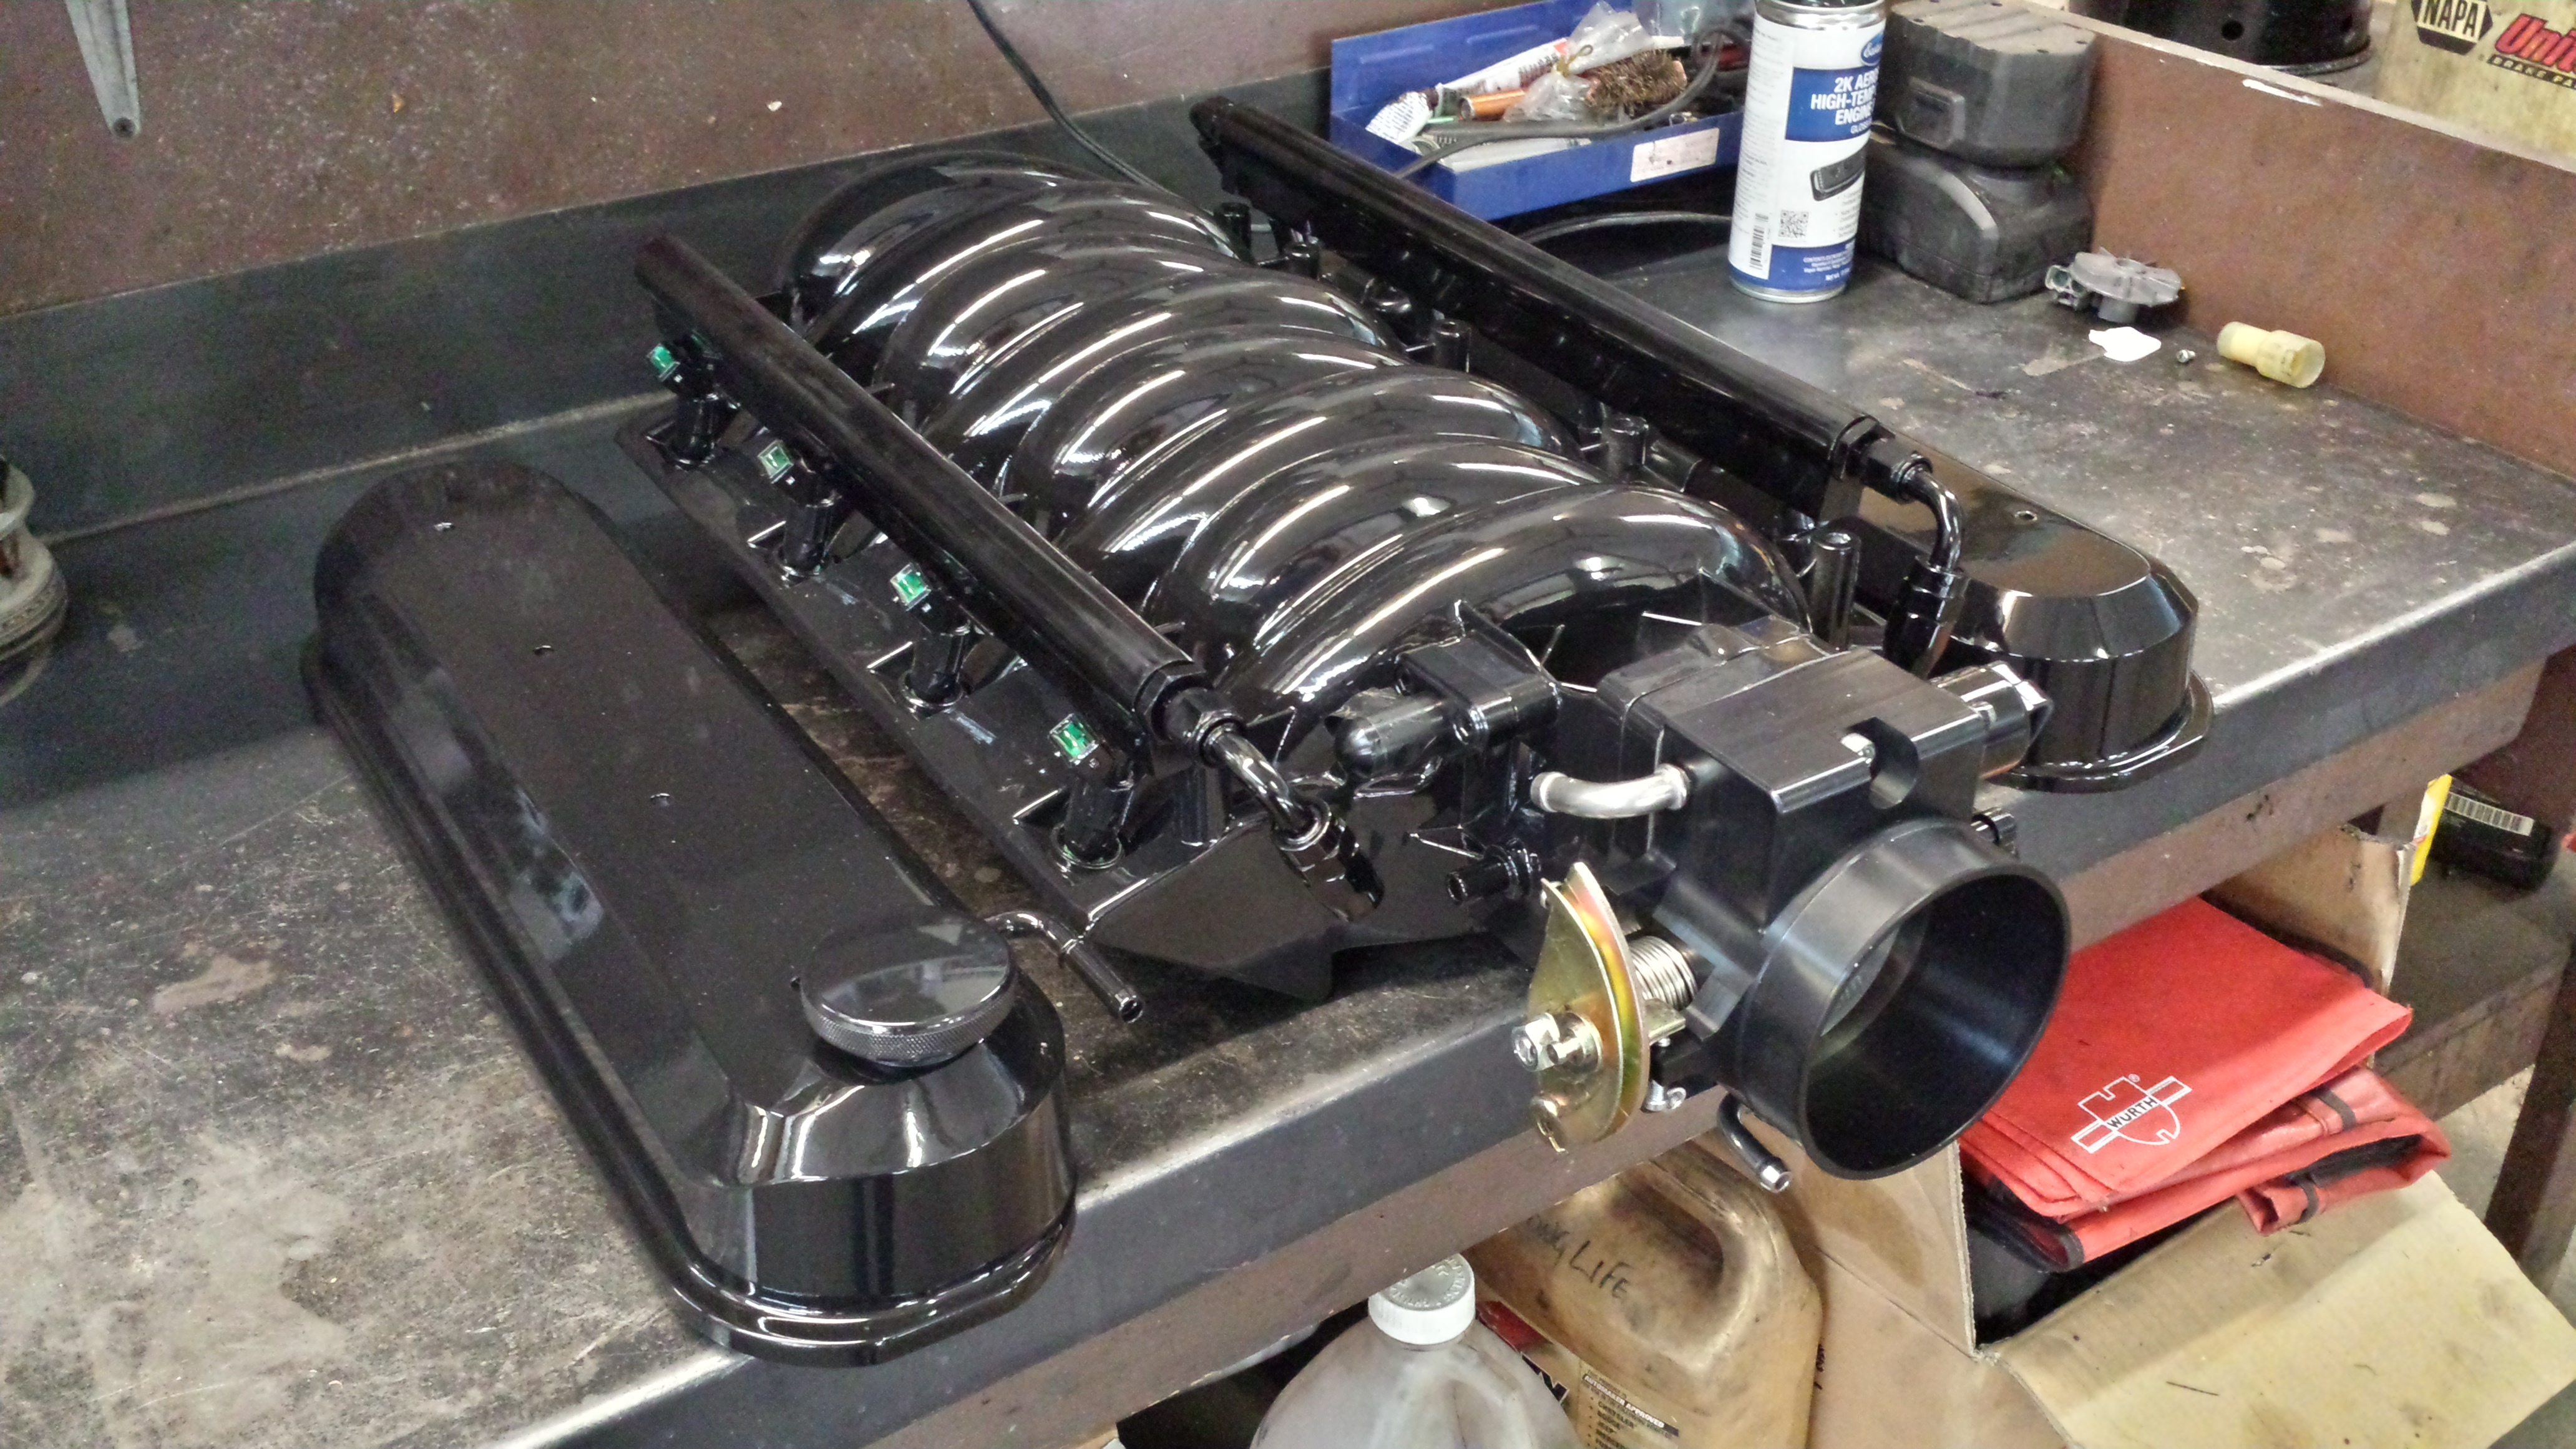
While I'm waiting for my short block to get back from the machine shop I had some time to clean up, smooth and paint my LS6 intake and my valve covers.
I didn't take too many pictures of the early stages of my sanding, but started with 120 grit by hand knocking off all the ridges and casting lines from the manifold. I made the choice to also grind off the bracket retainer on the base edges. From there sanded to 600 grind and used glazing putty to fill minor low spots and flaws.
I shot it with duplicolor adhesion promoter, then a sanding filling primer.
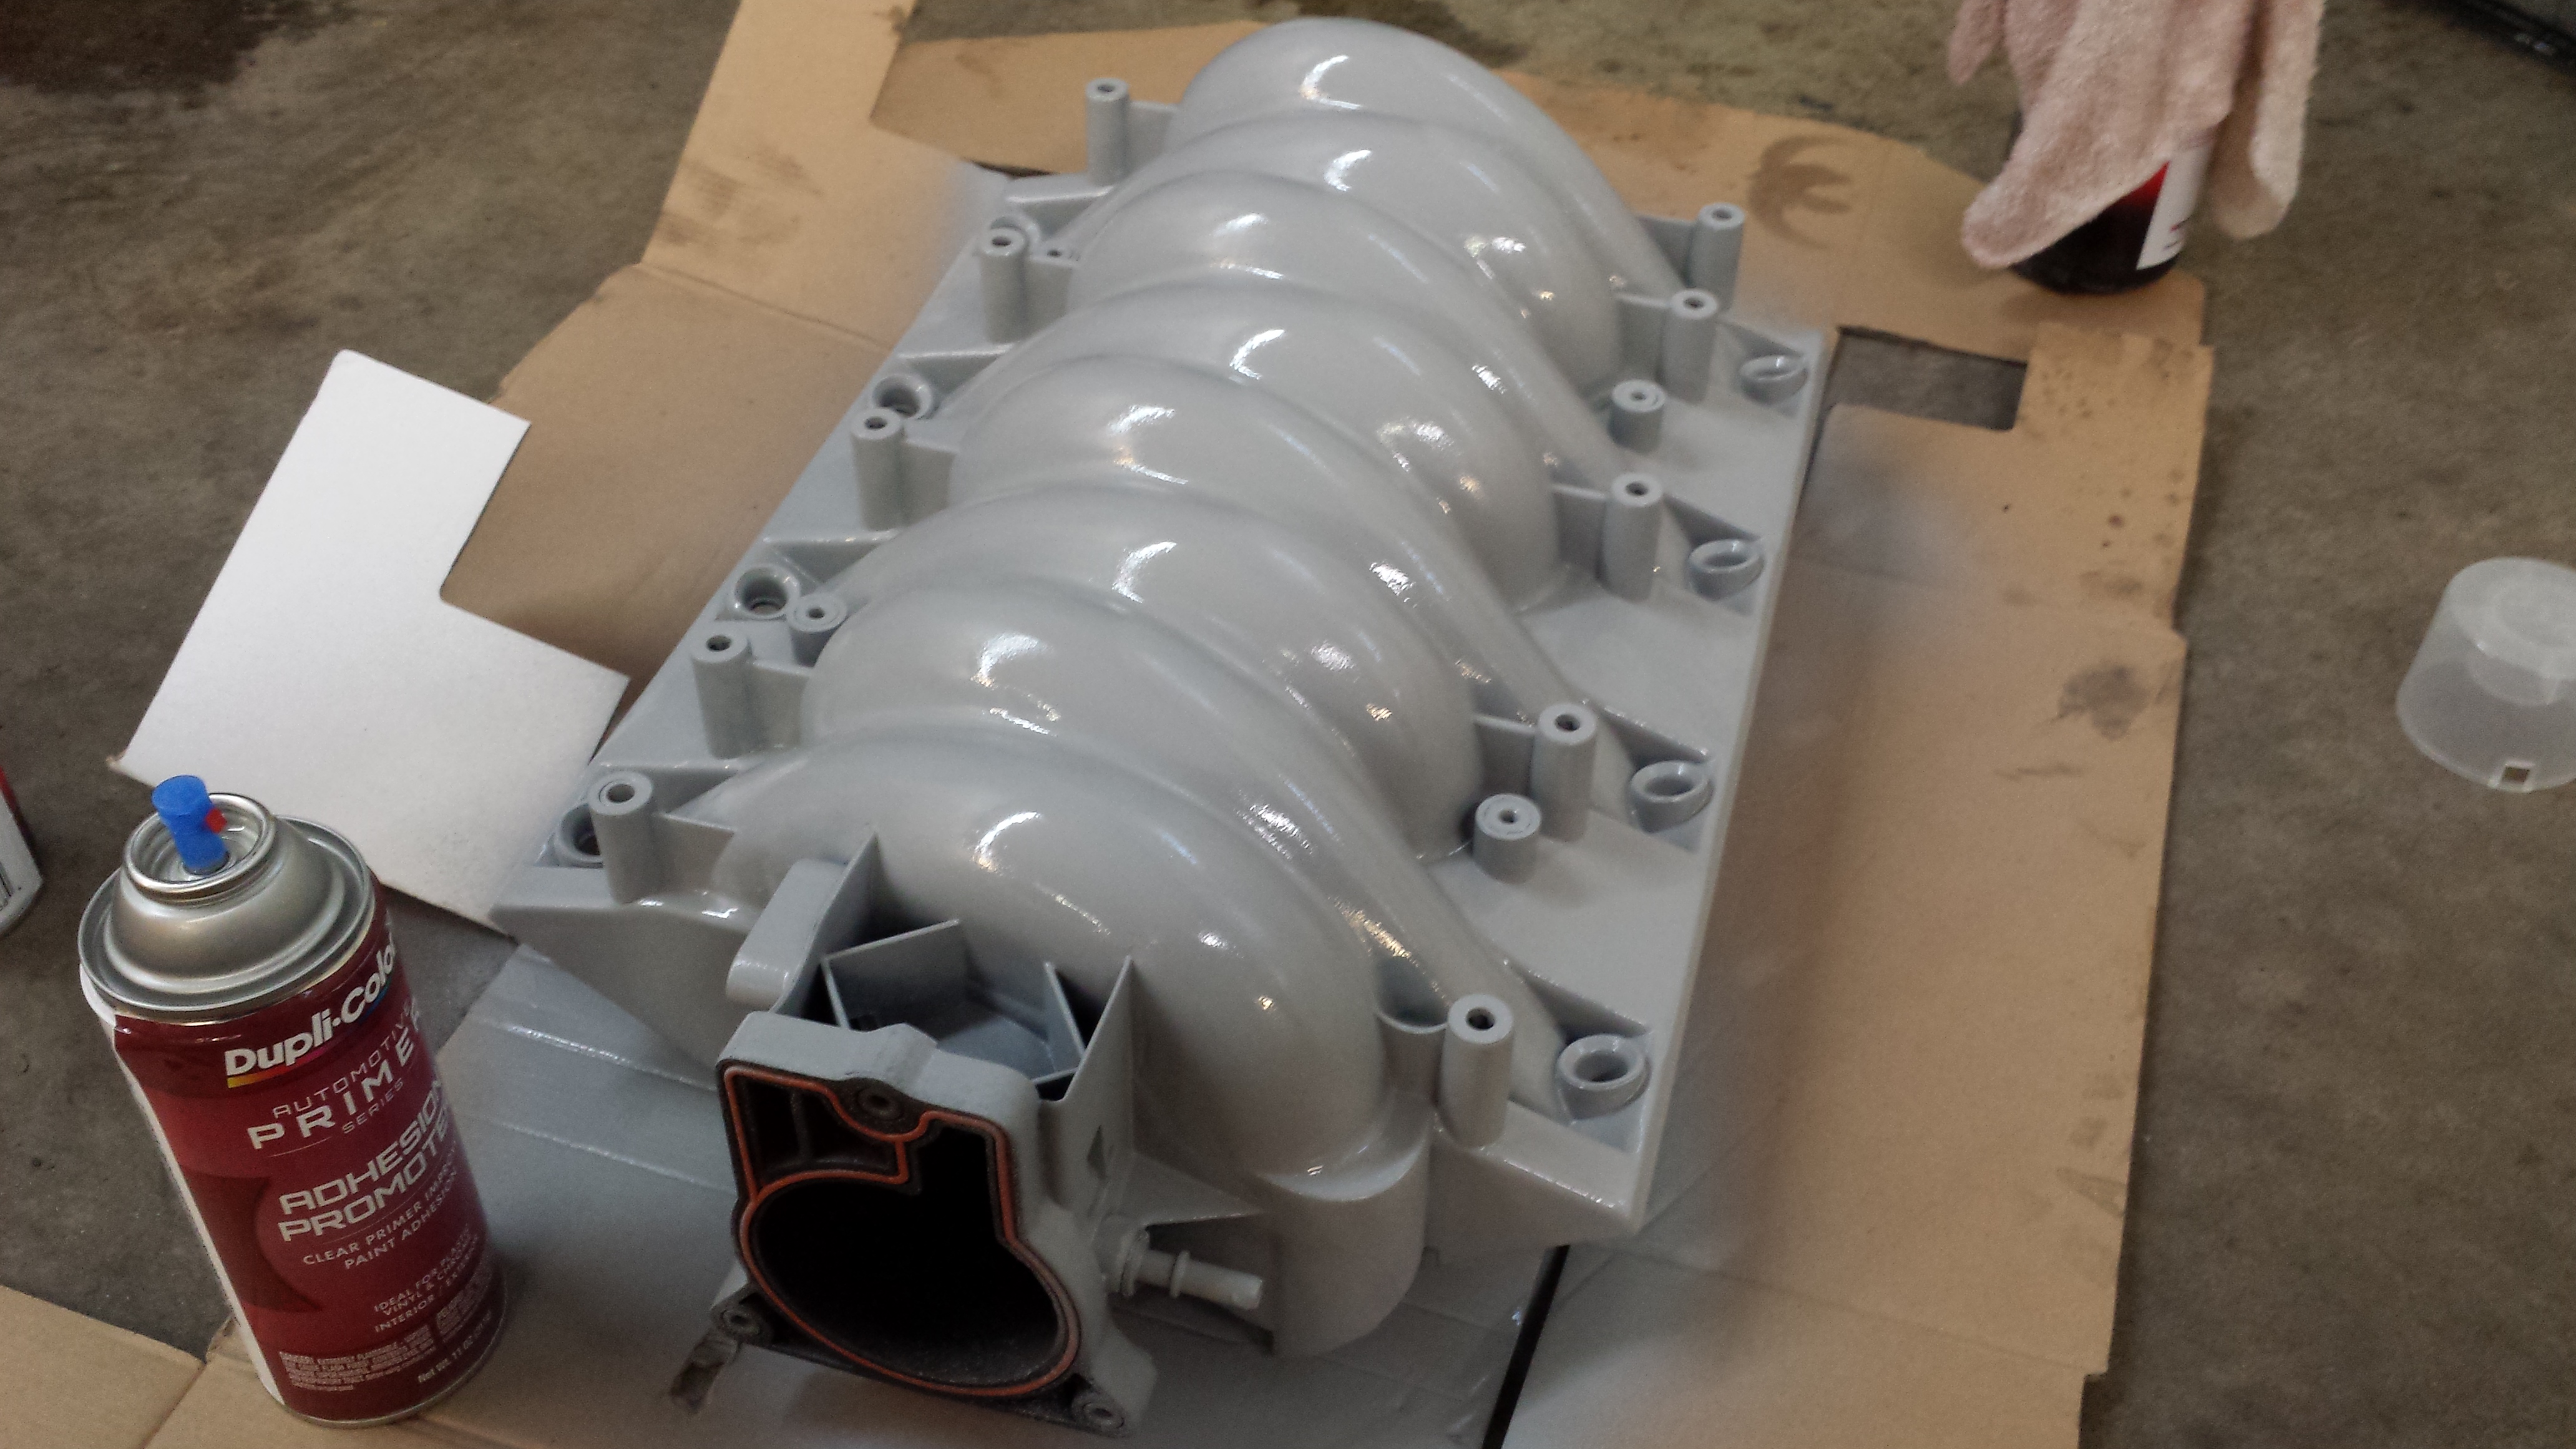
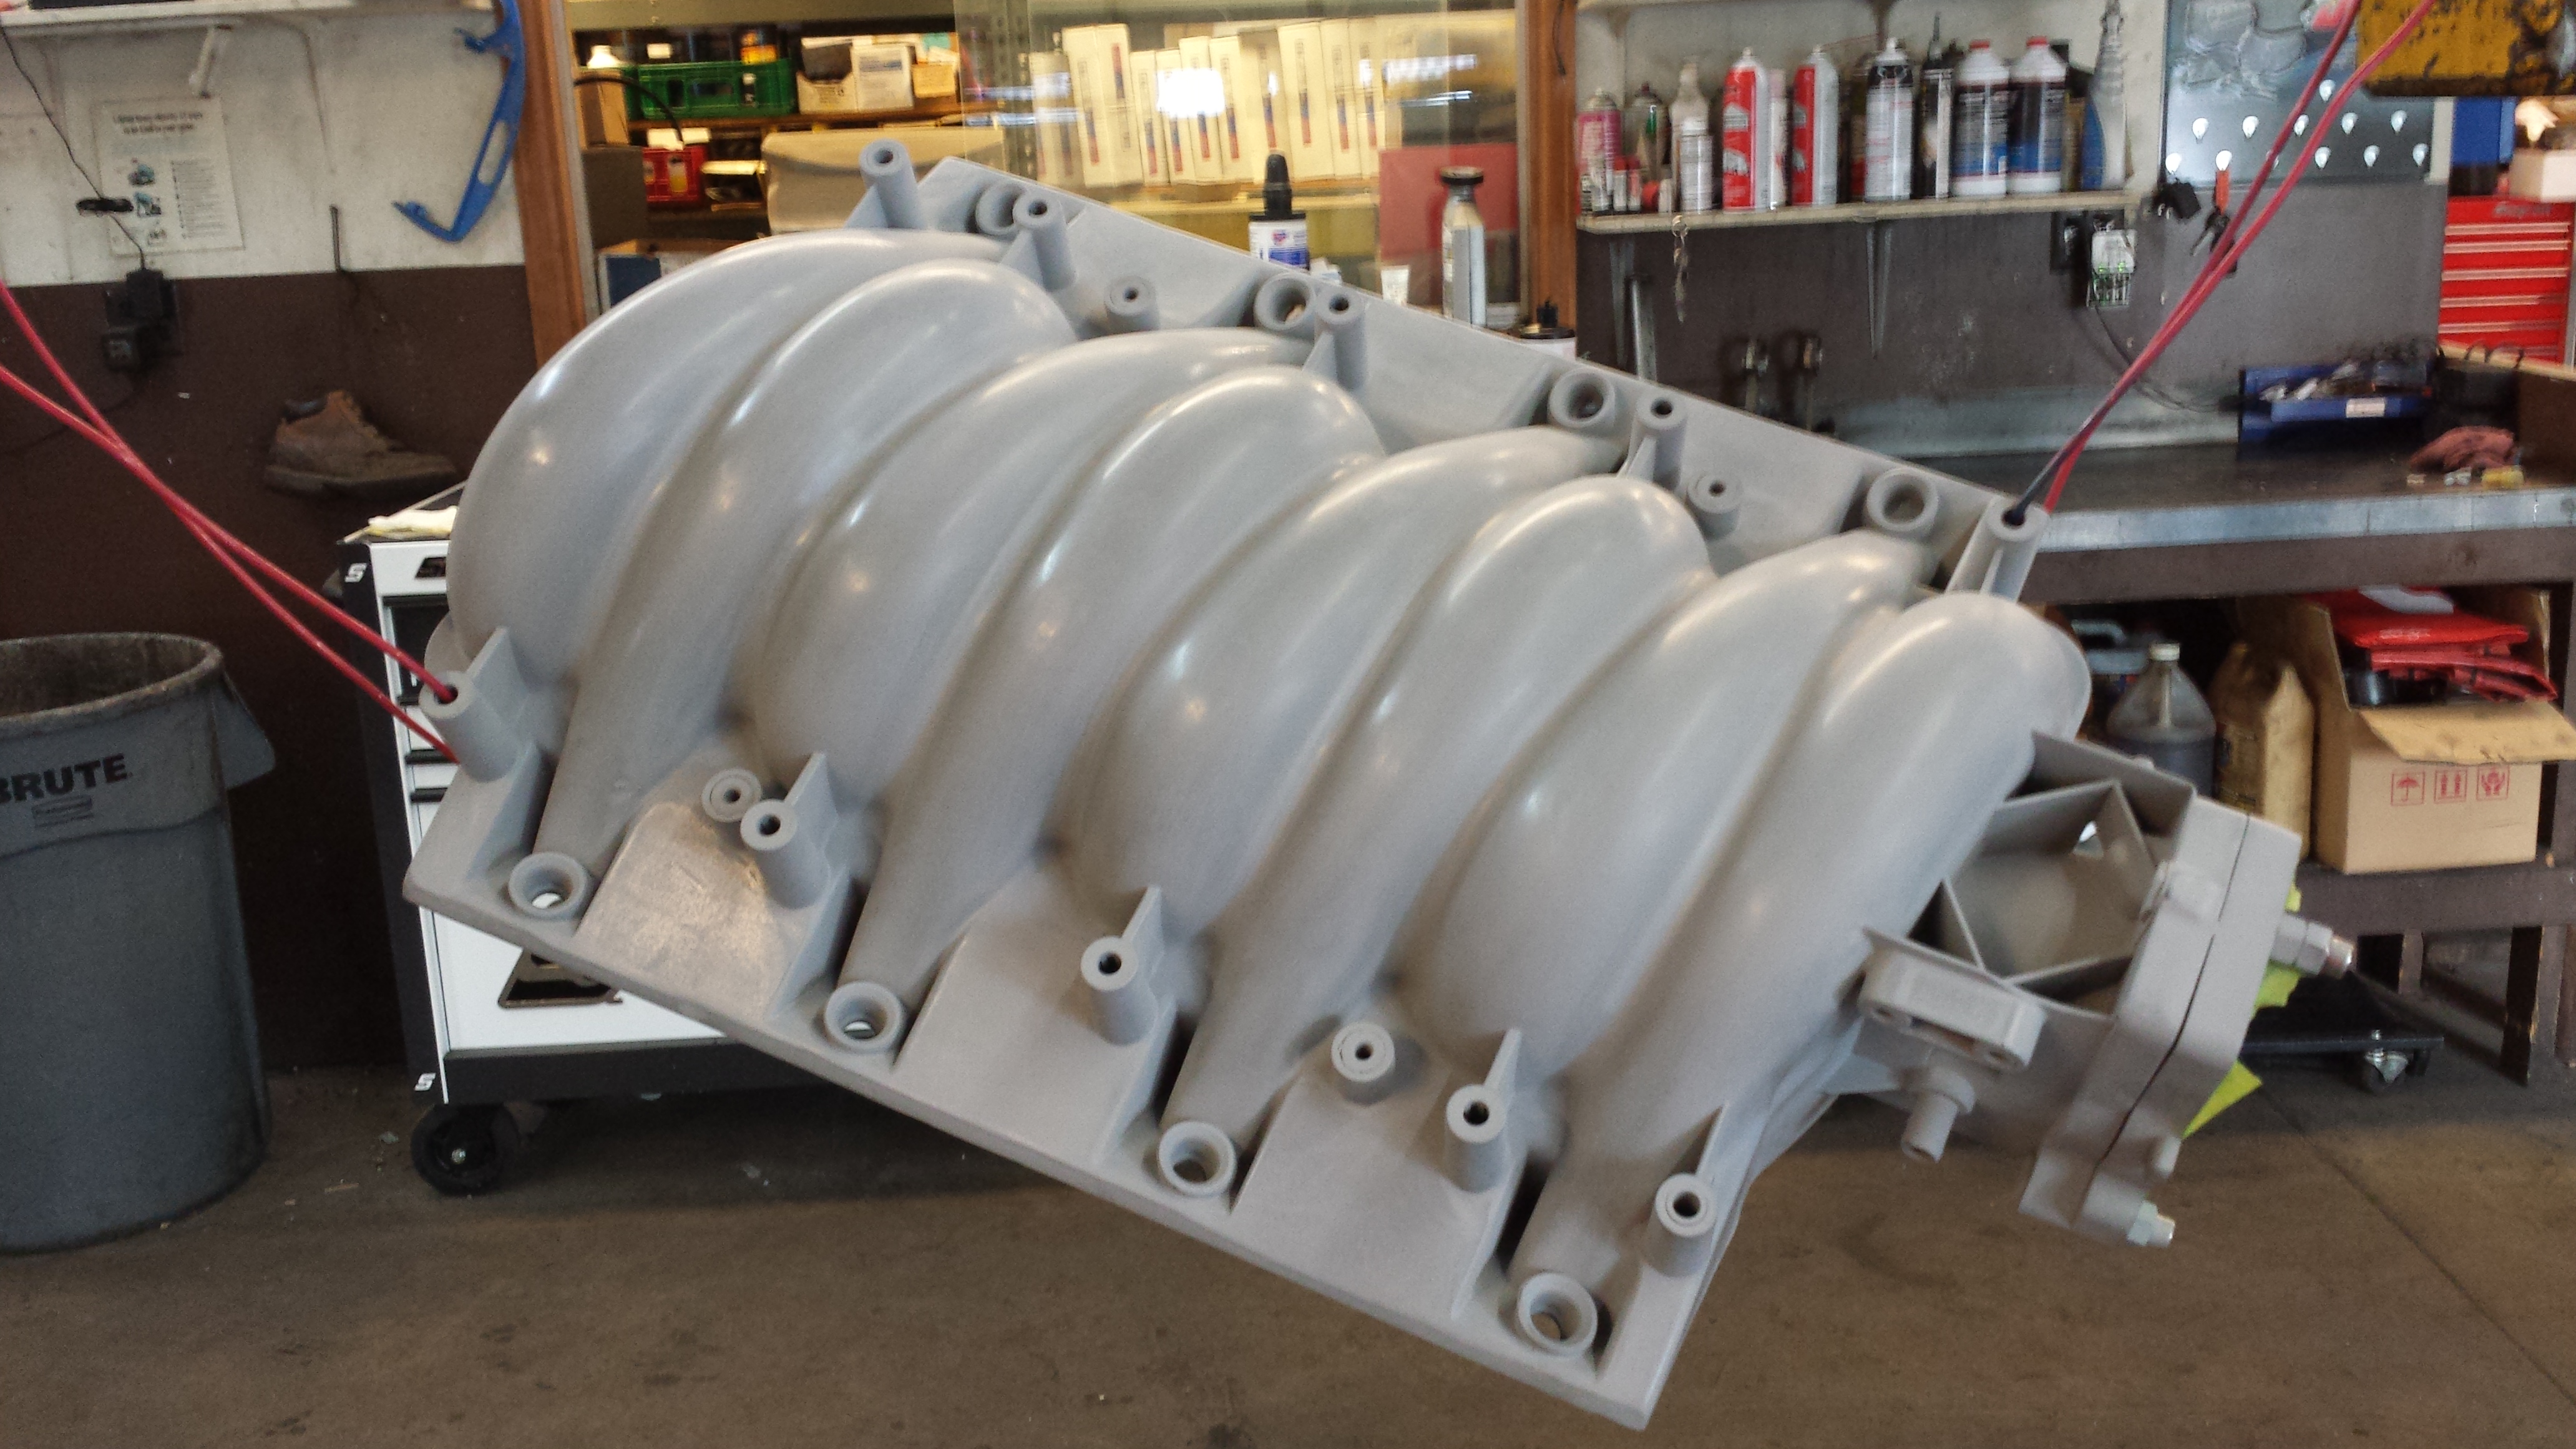
I blocked and then re-filled any other pin holes or imperfections again and then sanded to a 1000 grit
I used Eastwood's 2K Aerospray gloss black high temp rattle can... This stuff sprays like a normal touch up gun! I found that can is a little finicky when it starts getting low, and needs to be straight up and down to spray at all, but the paint lays down super smooth, and the gloss is awesome. I intended on clearing it, but with the depth of the shine I see no reason too at this point.
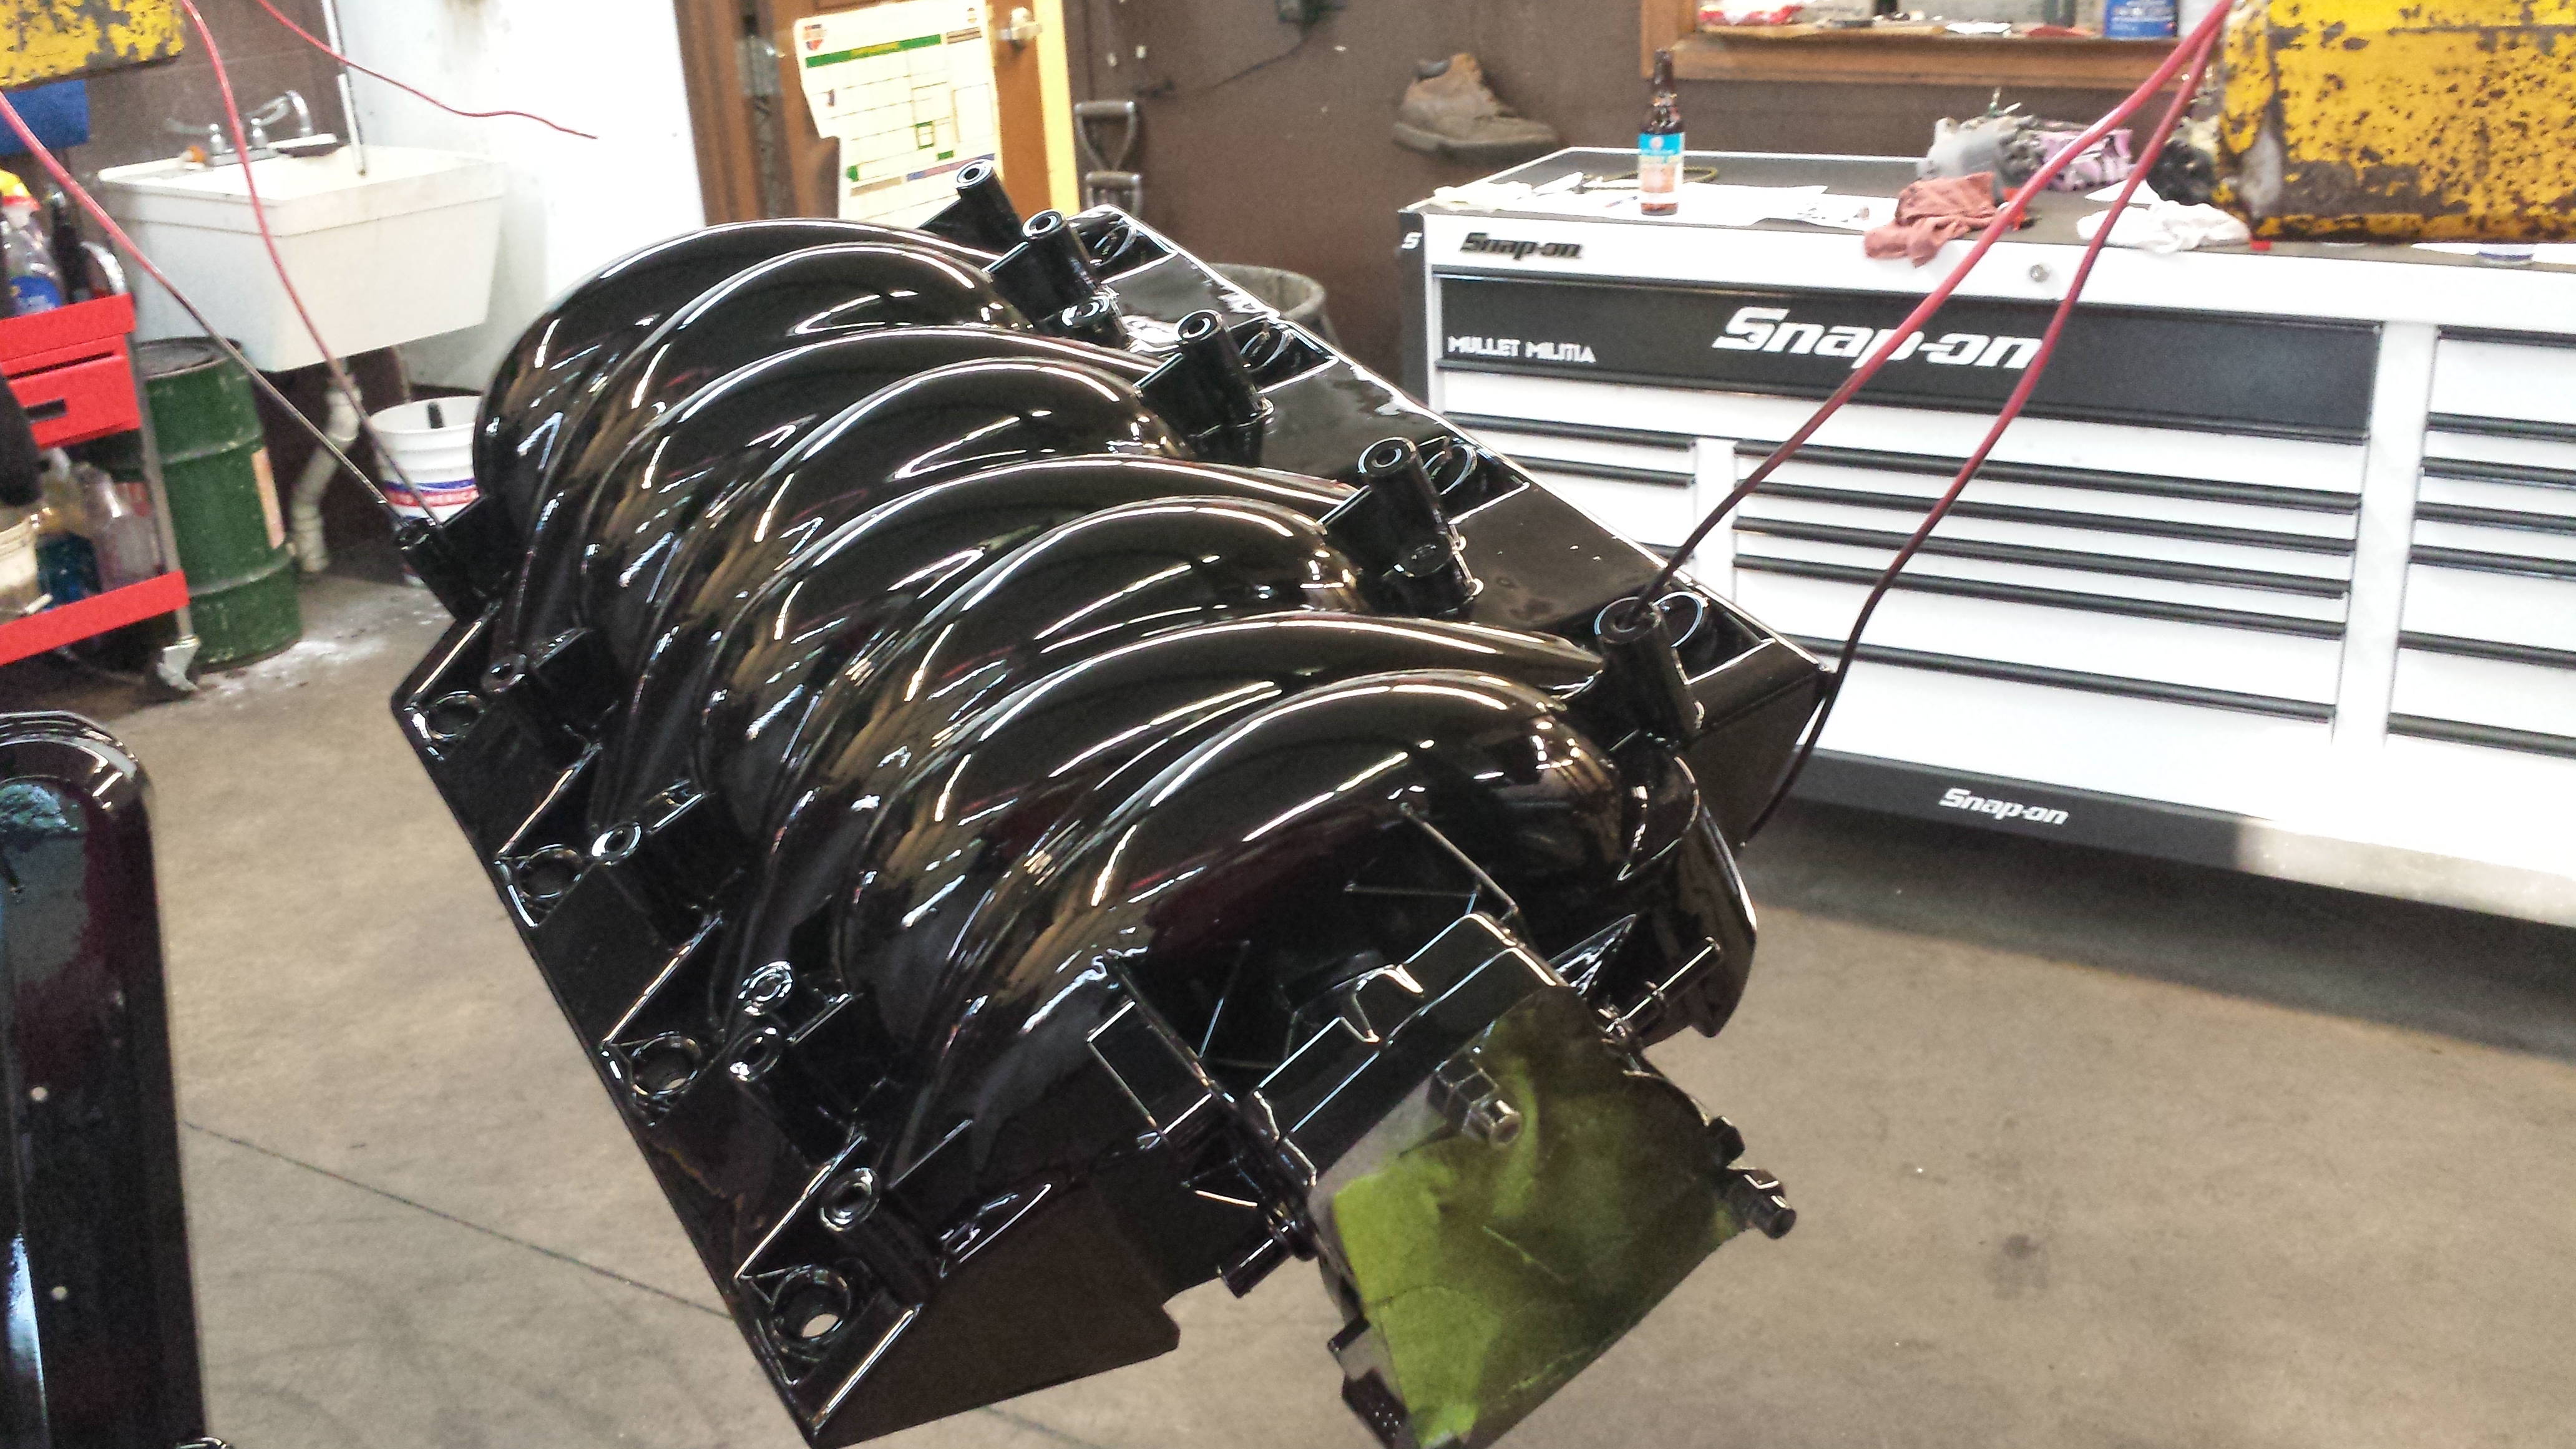
Here is it on the bench with the valve covers next to it, and the TB, injectors and rails installed.
I didn't take too many pictures of the early stages of my sanding, but started with 120 grit by hand knocking off all the ridges and casting lines from the manifold. I made the choice to also grind off the bracket retainer on the base edges. From there sanded to 600 grind and used glazing putty to fill minor low spots and flaws.

I shot it with duplicolor adhesion promoter, then a sanding filling primer.

I blocked and then re-filled any other pin holes or imperfections again and then sanded to a 1000 grit

I used Eastwood's 2K Aerospray gloss black high temp rattle can... This stuff sprays like a normal touch up gun! I found that can is a little finicky when it starts getting low, and needs to be straight up and down to spray at all, but the paint lays down super smooth, and the gloss is awesome. I intended on clearing it, but with the depth of the shine I see no reason too at this point.


Here is it on the bench with the valve covers next to it, and the TB, injectors and rails installed.


 06-23-2015, 10:24 AM
#49
Staging Lane
Thread Starter
Join Date: Jan 2012
Location: Fort Collins CO
Posts: 93
Likes: 0
Received 0 Likes
on
0 Posts
Thank you! There is actually quite a bit of polished billet under there already, I might be toning it down some even... I'll see what stays polished and what doesn't when I get it between the fenders.
04-12-2016, 10:15 AM
#50
Staging Lane
Thread Starter
Join Date: Jan 2012
Location: Fort Collins CO
Posts: 93
Likes: 0
Received 0 Likes
on
0 Posts
I kinda forgot about this thread... Ooops!
I'll start throwing down some stuff here.
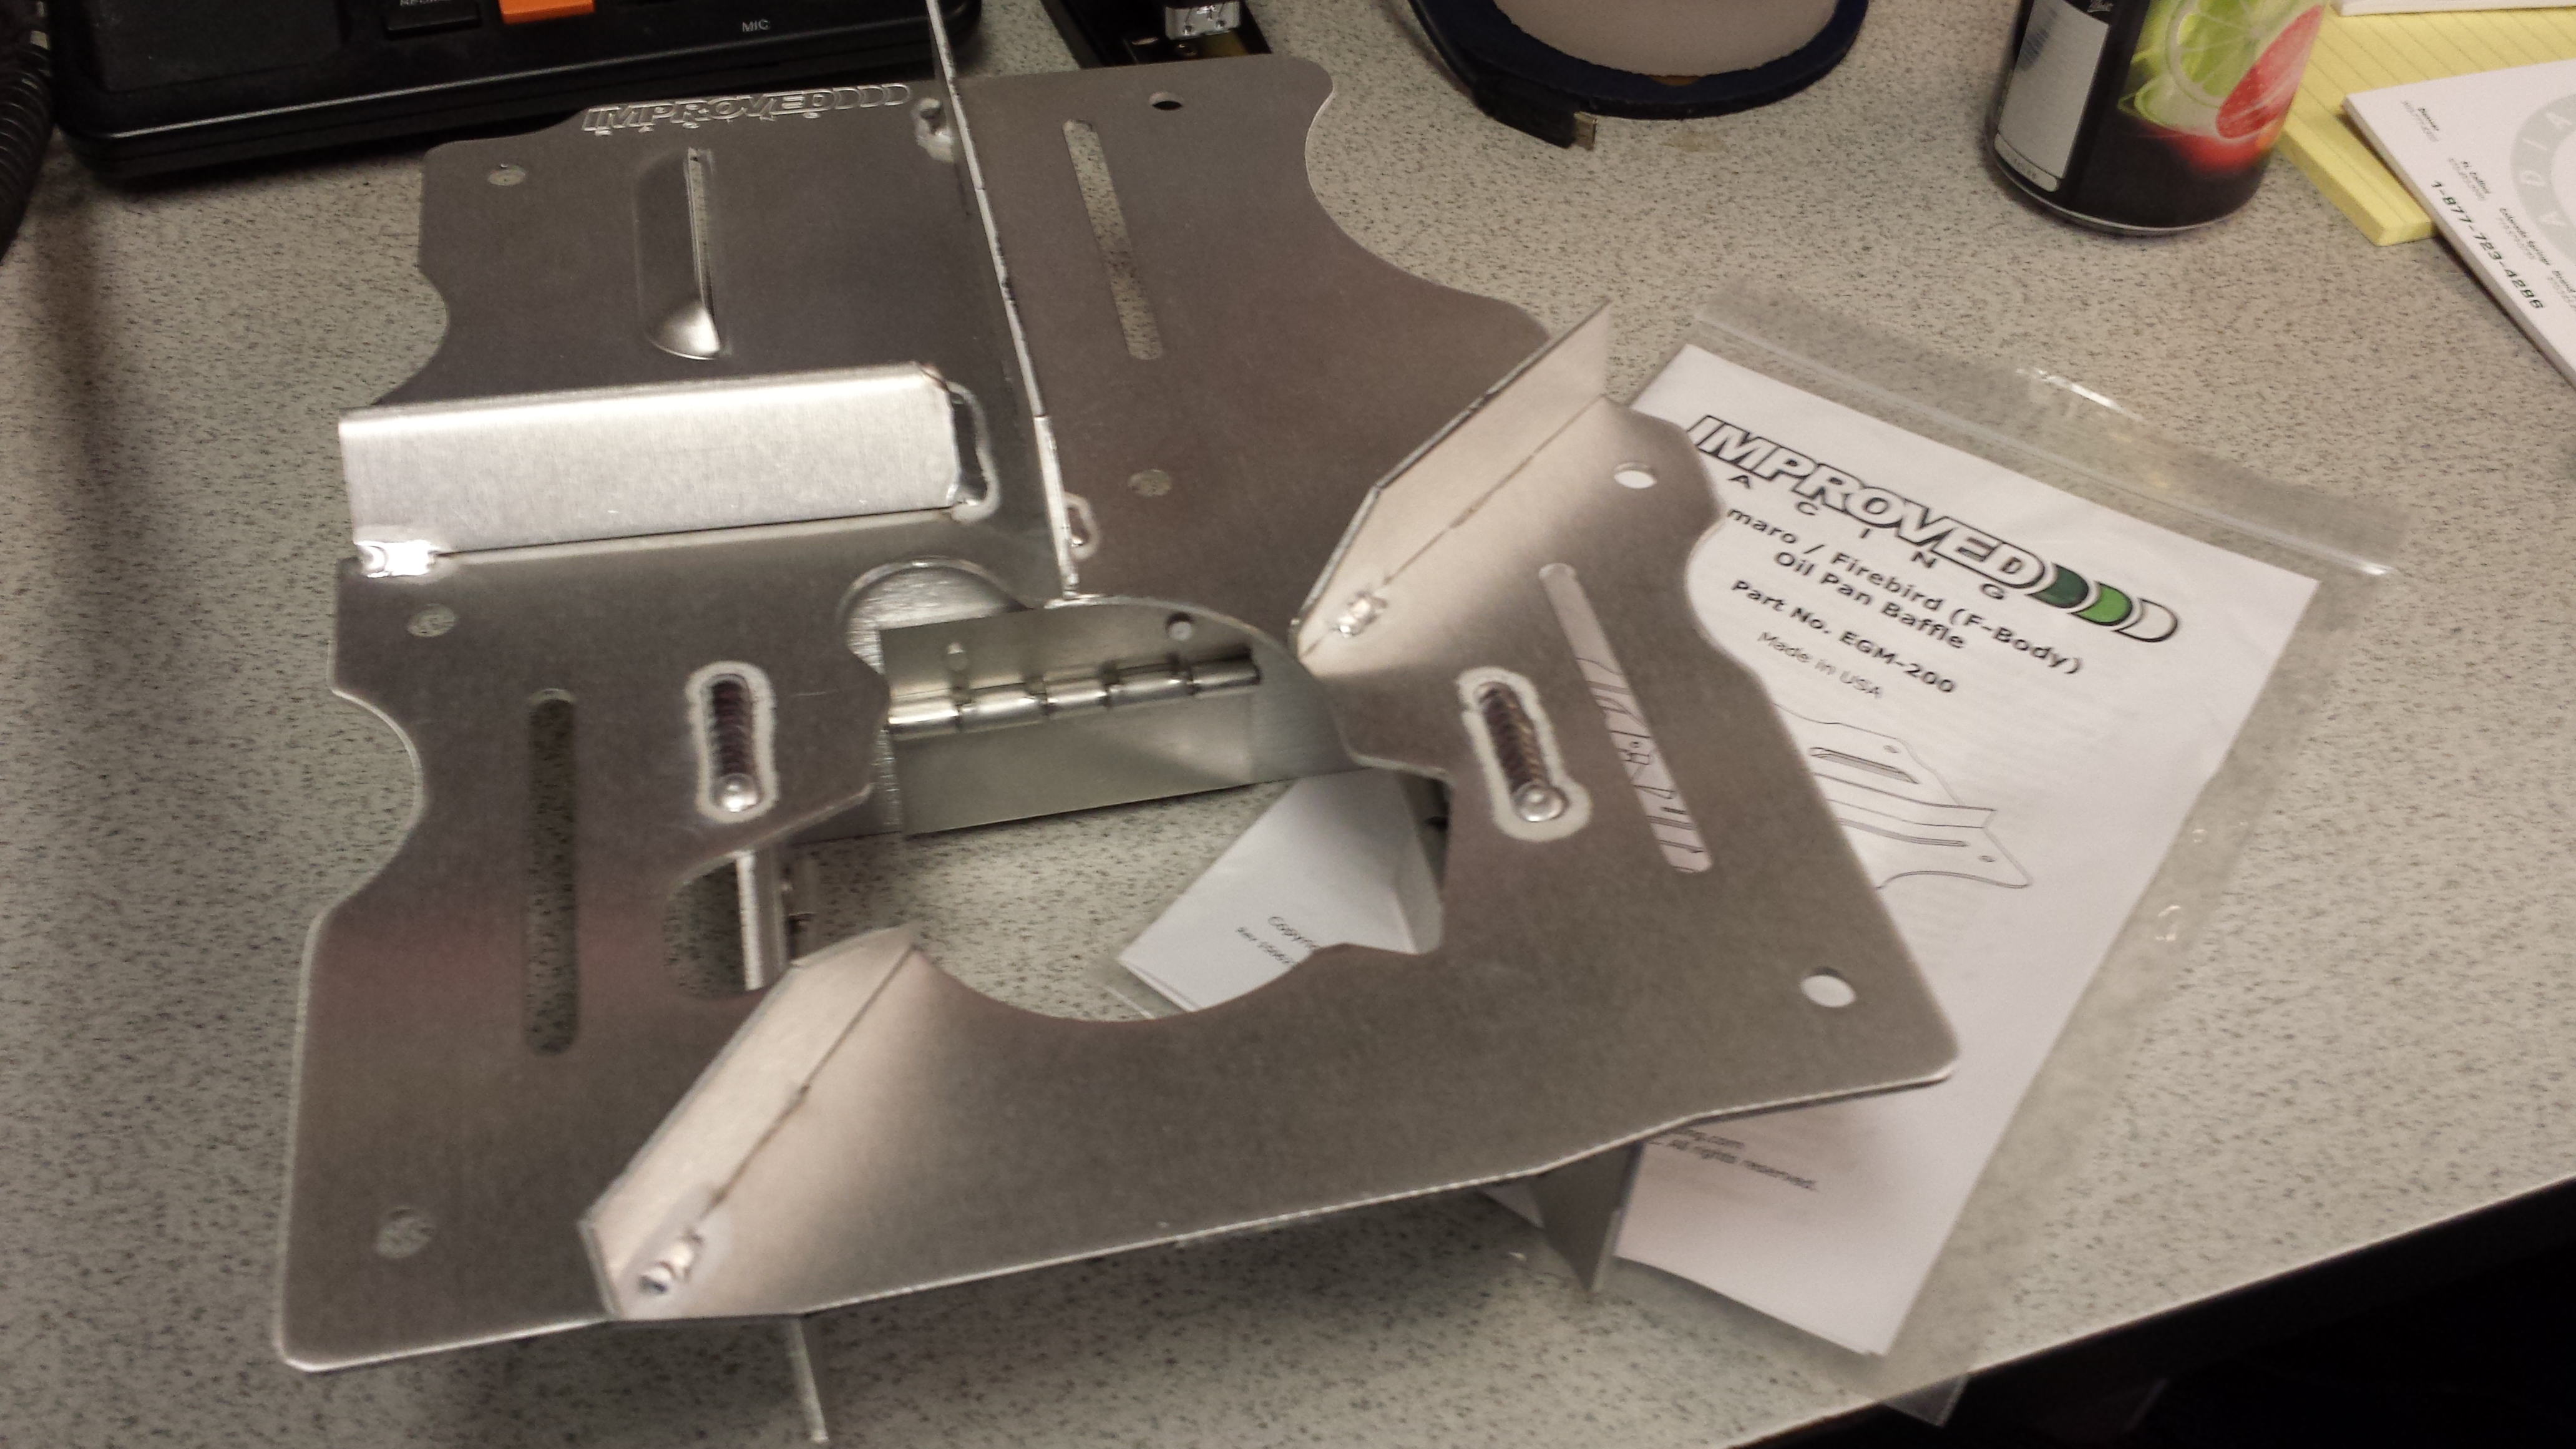
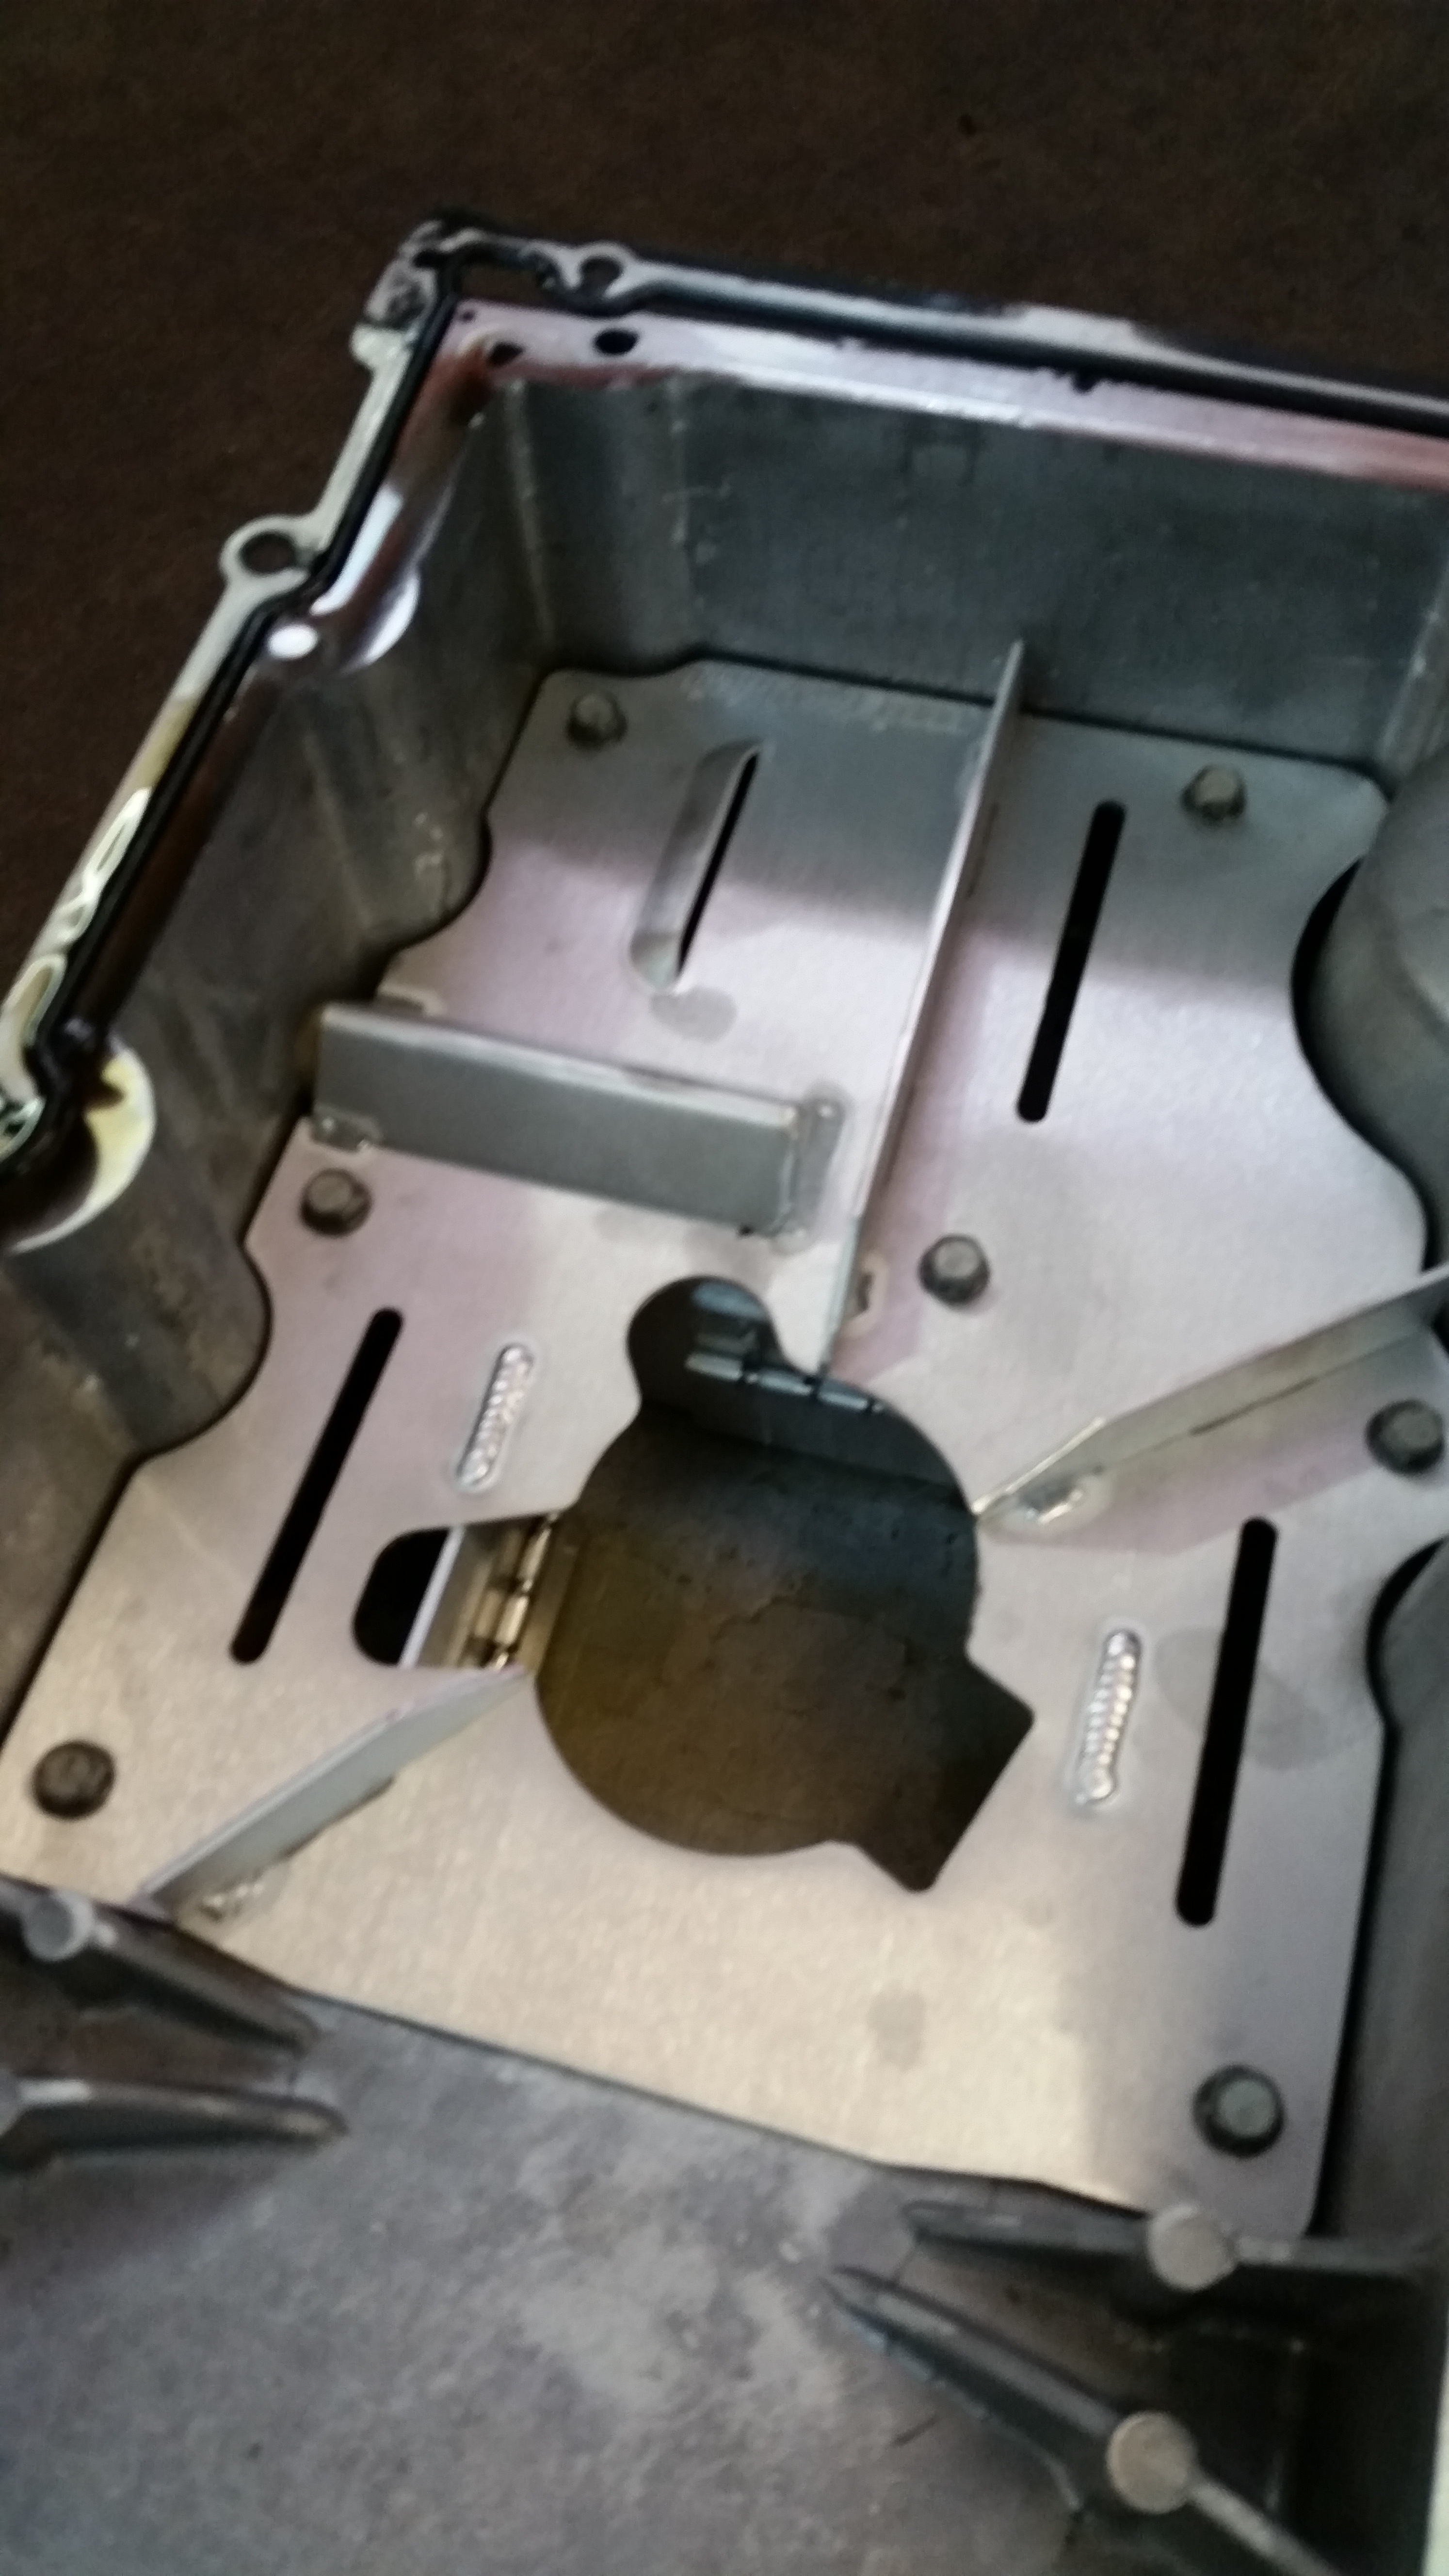
I dropped an Improved Racing oil pan Baffle in
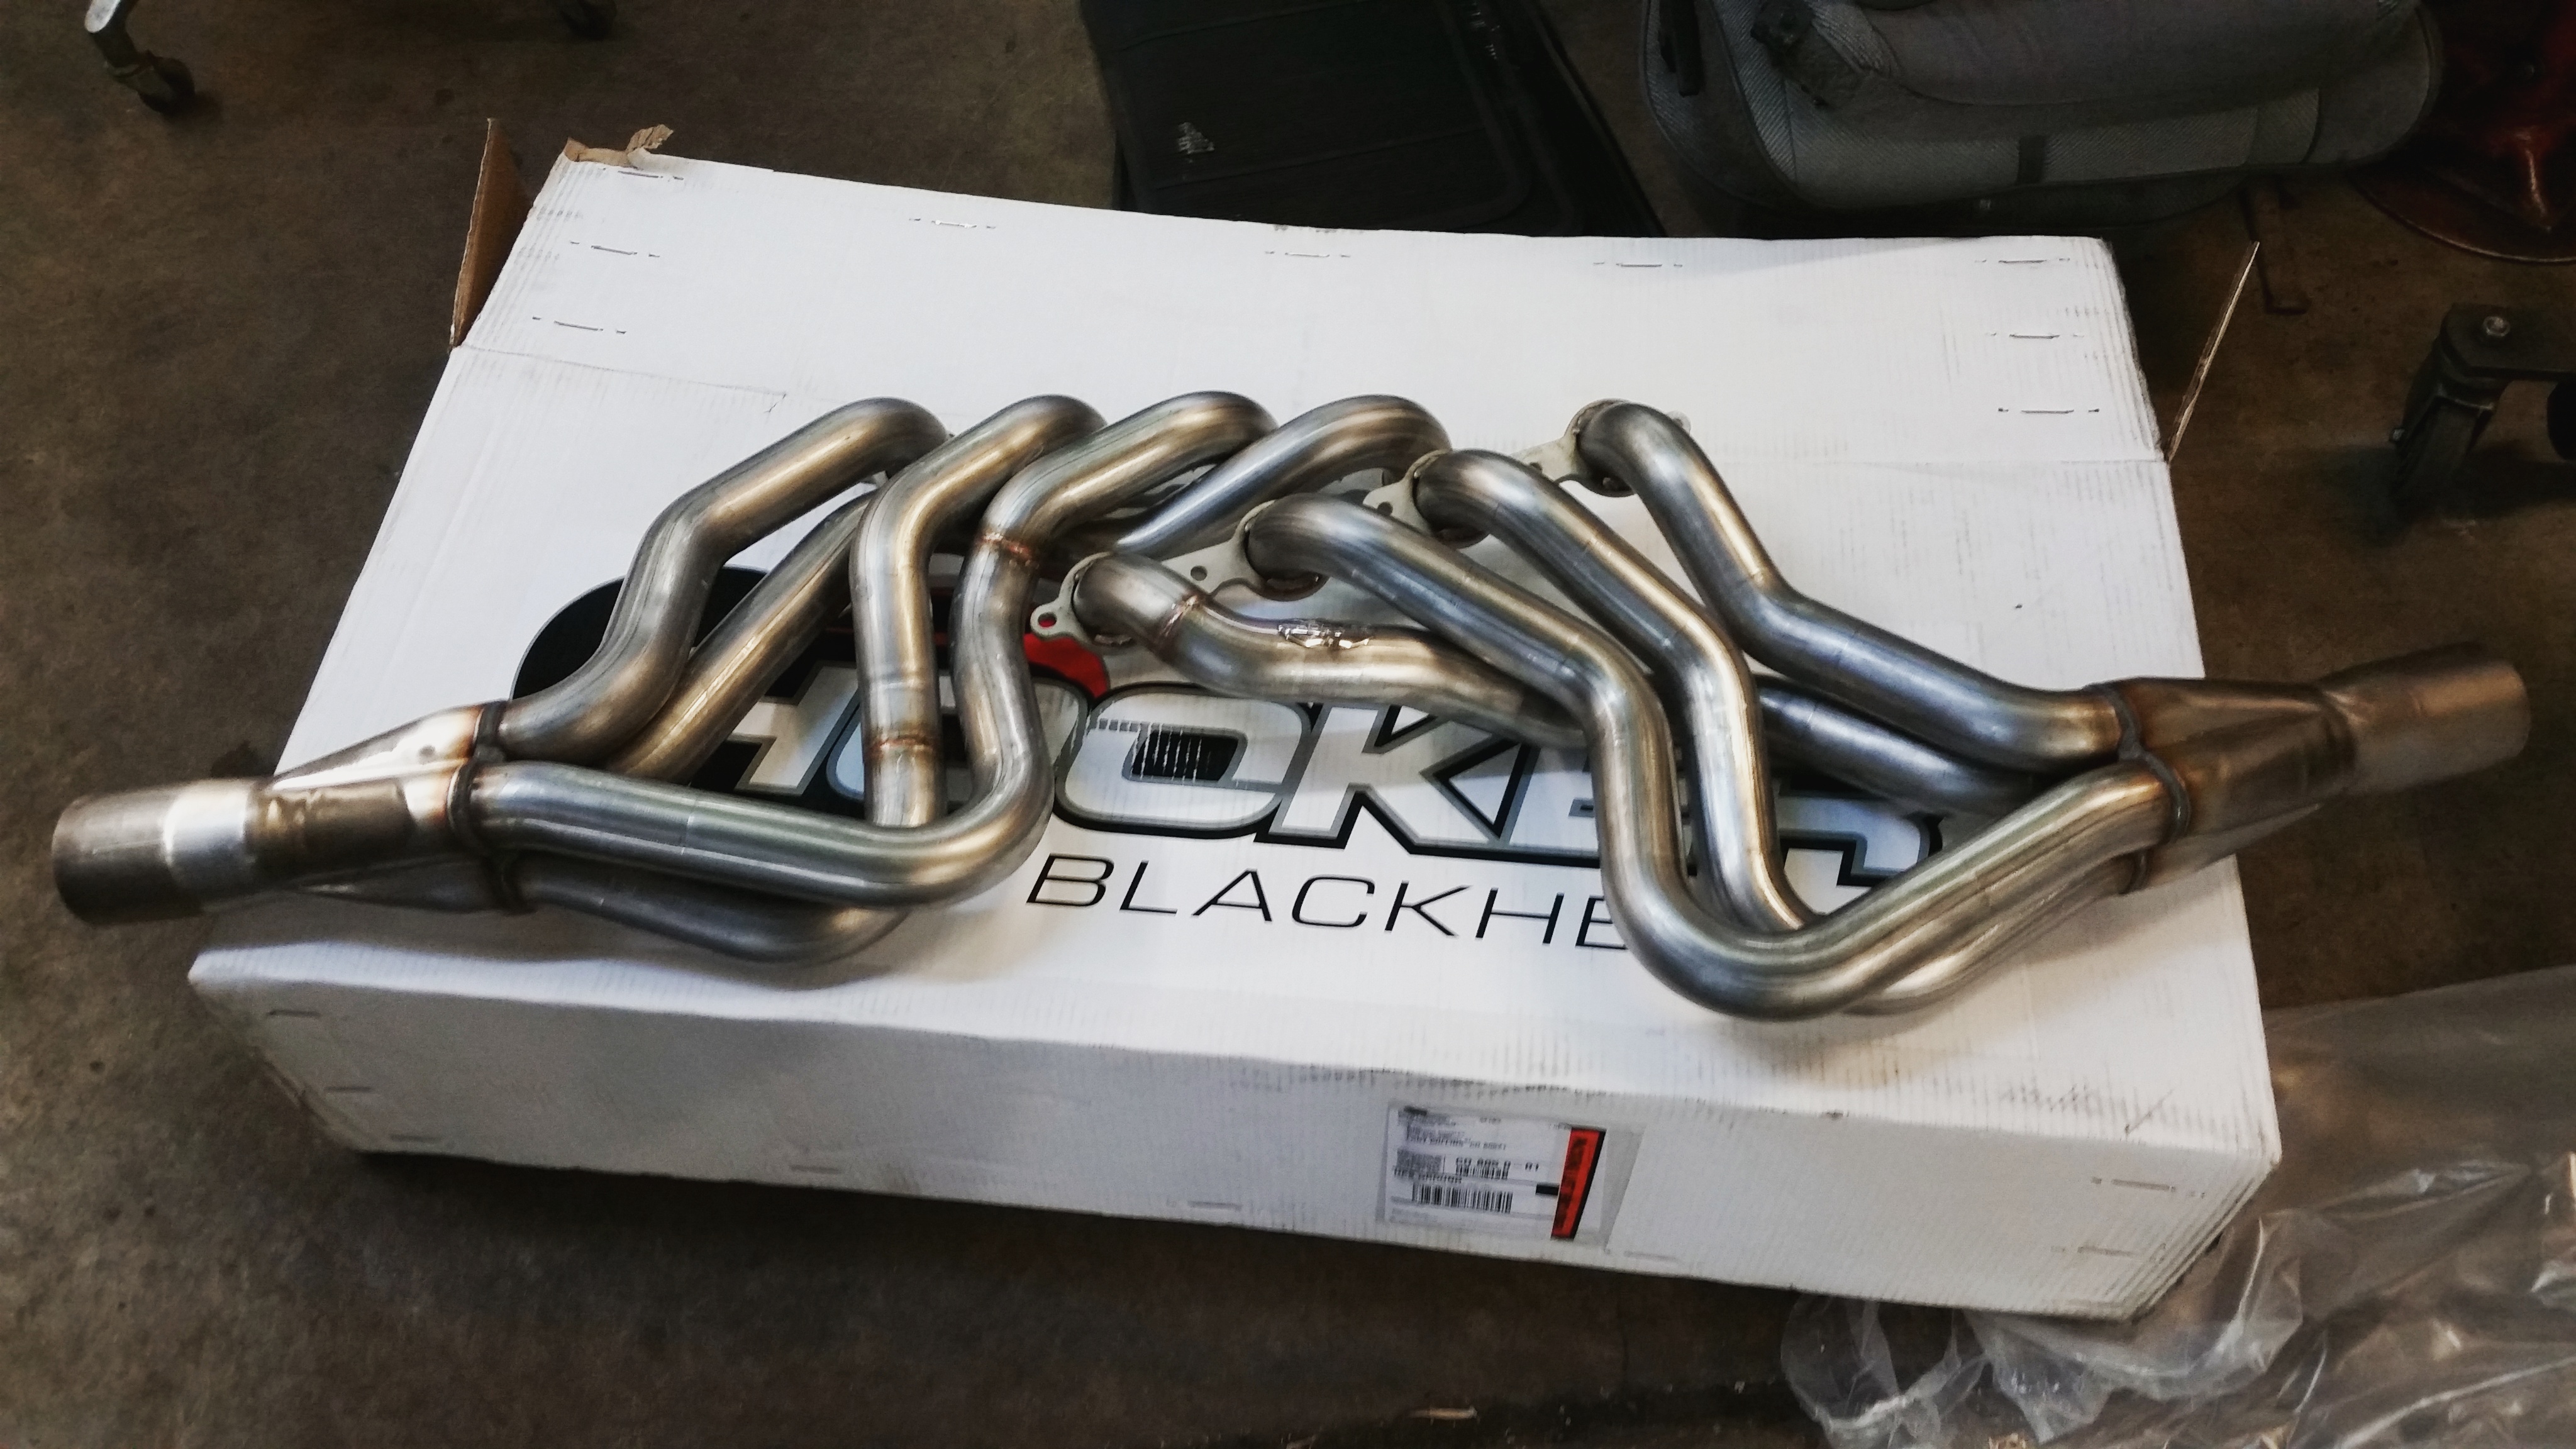
Hooker BlackHeart 1 7/8 headers which I sent out for high temp coating
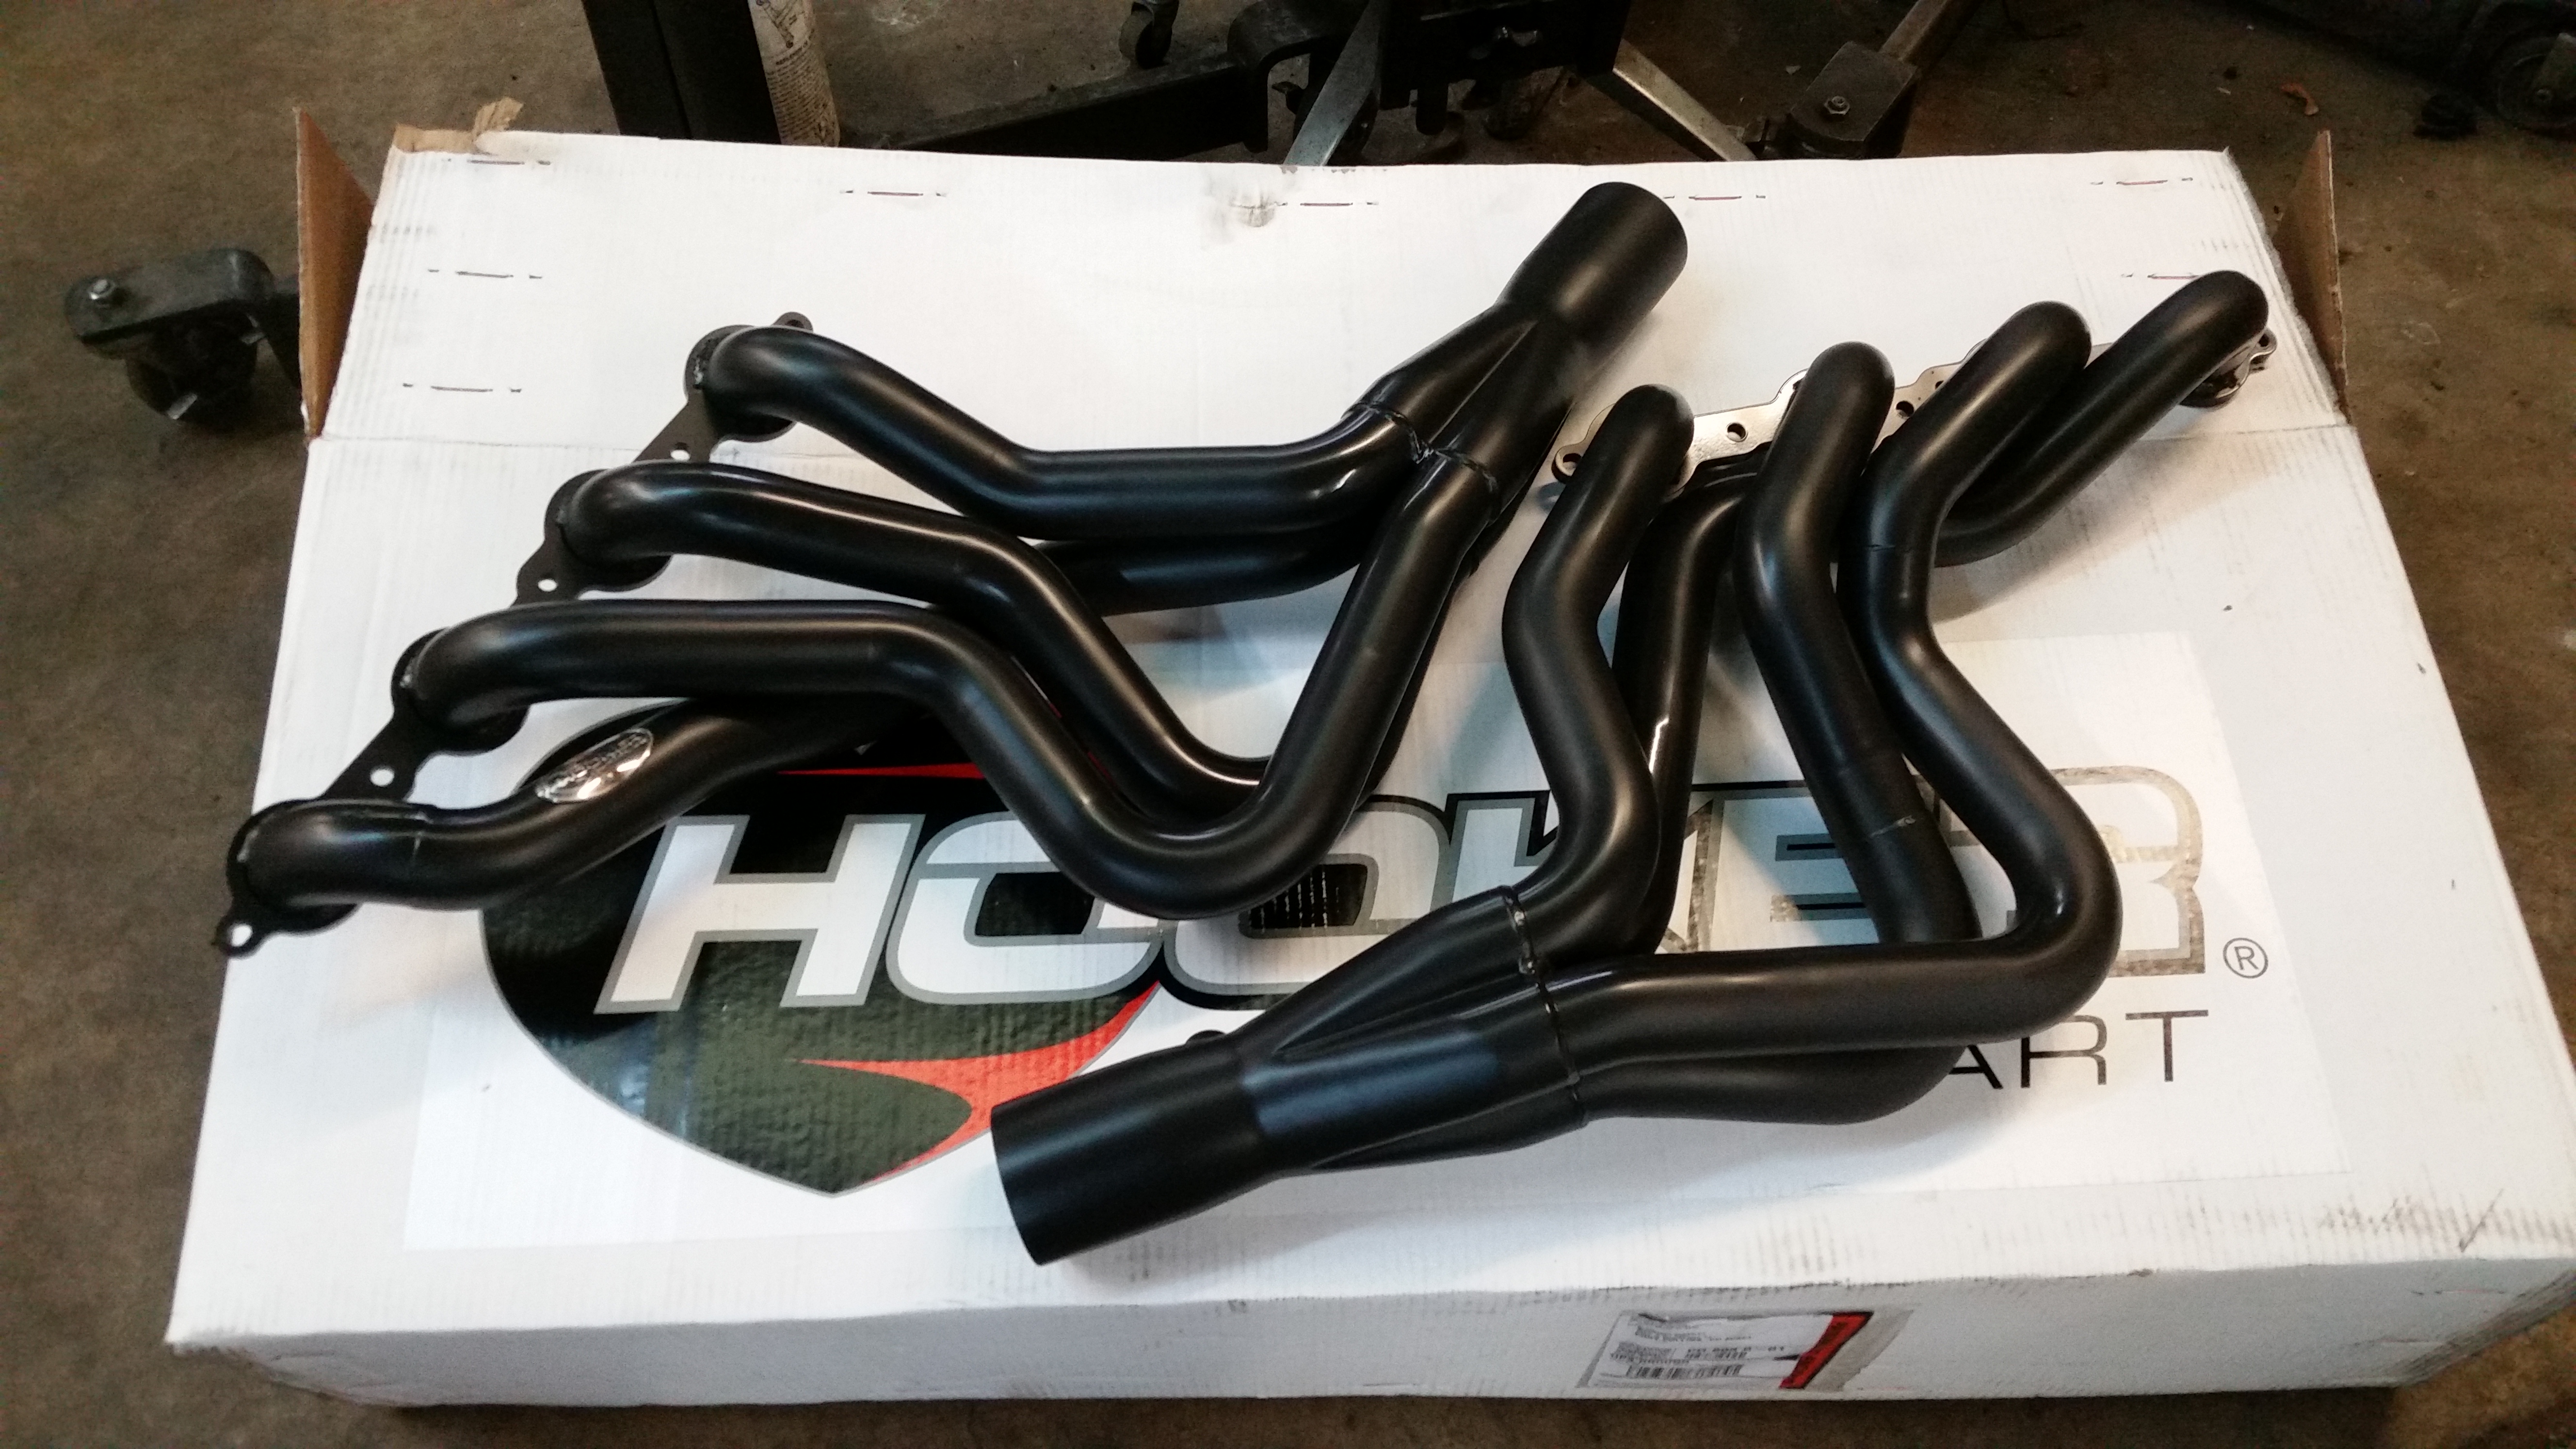
After Cerakote applied in satin black
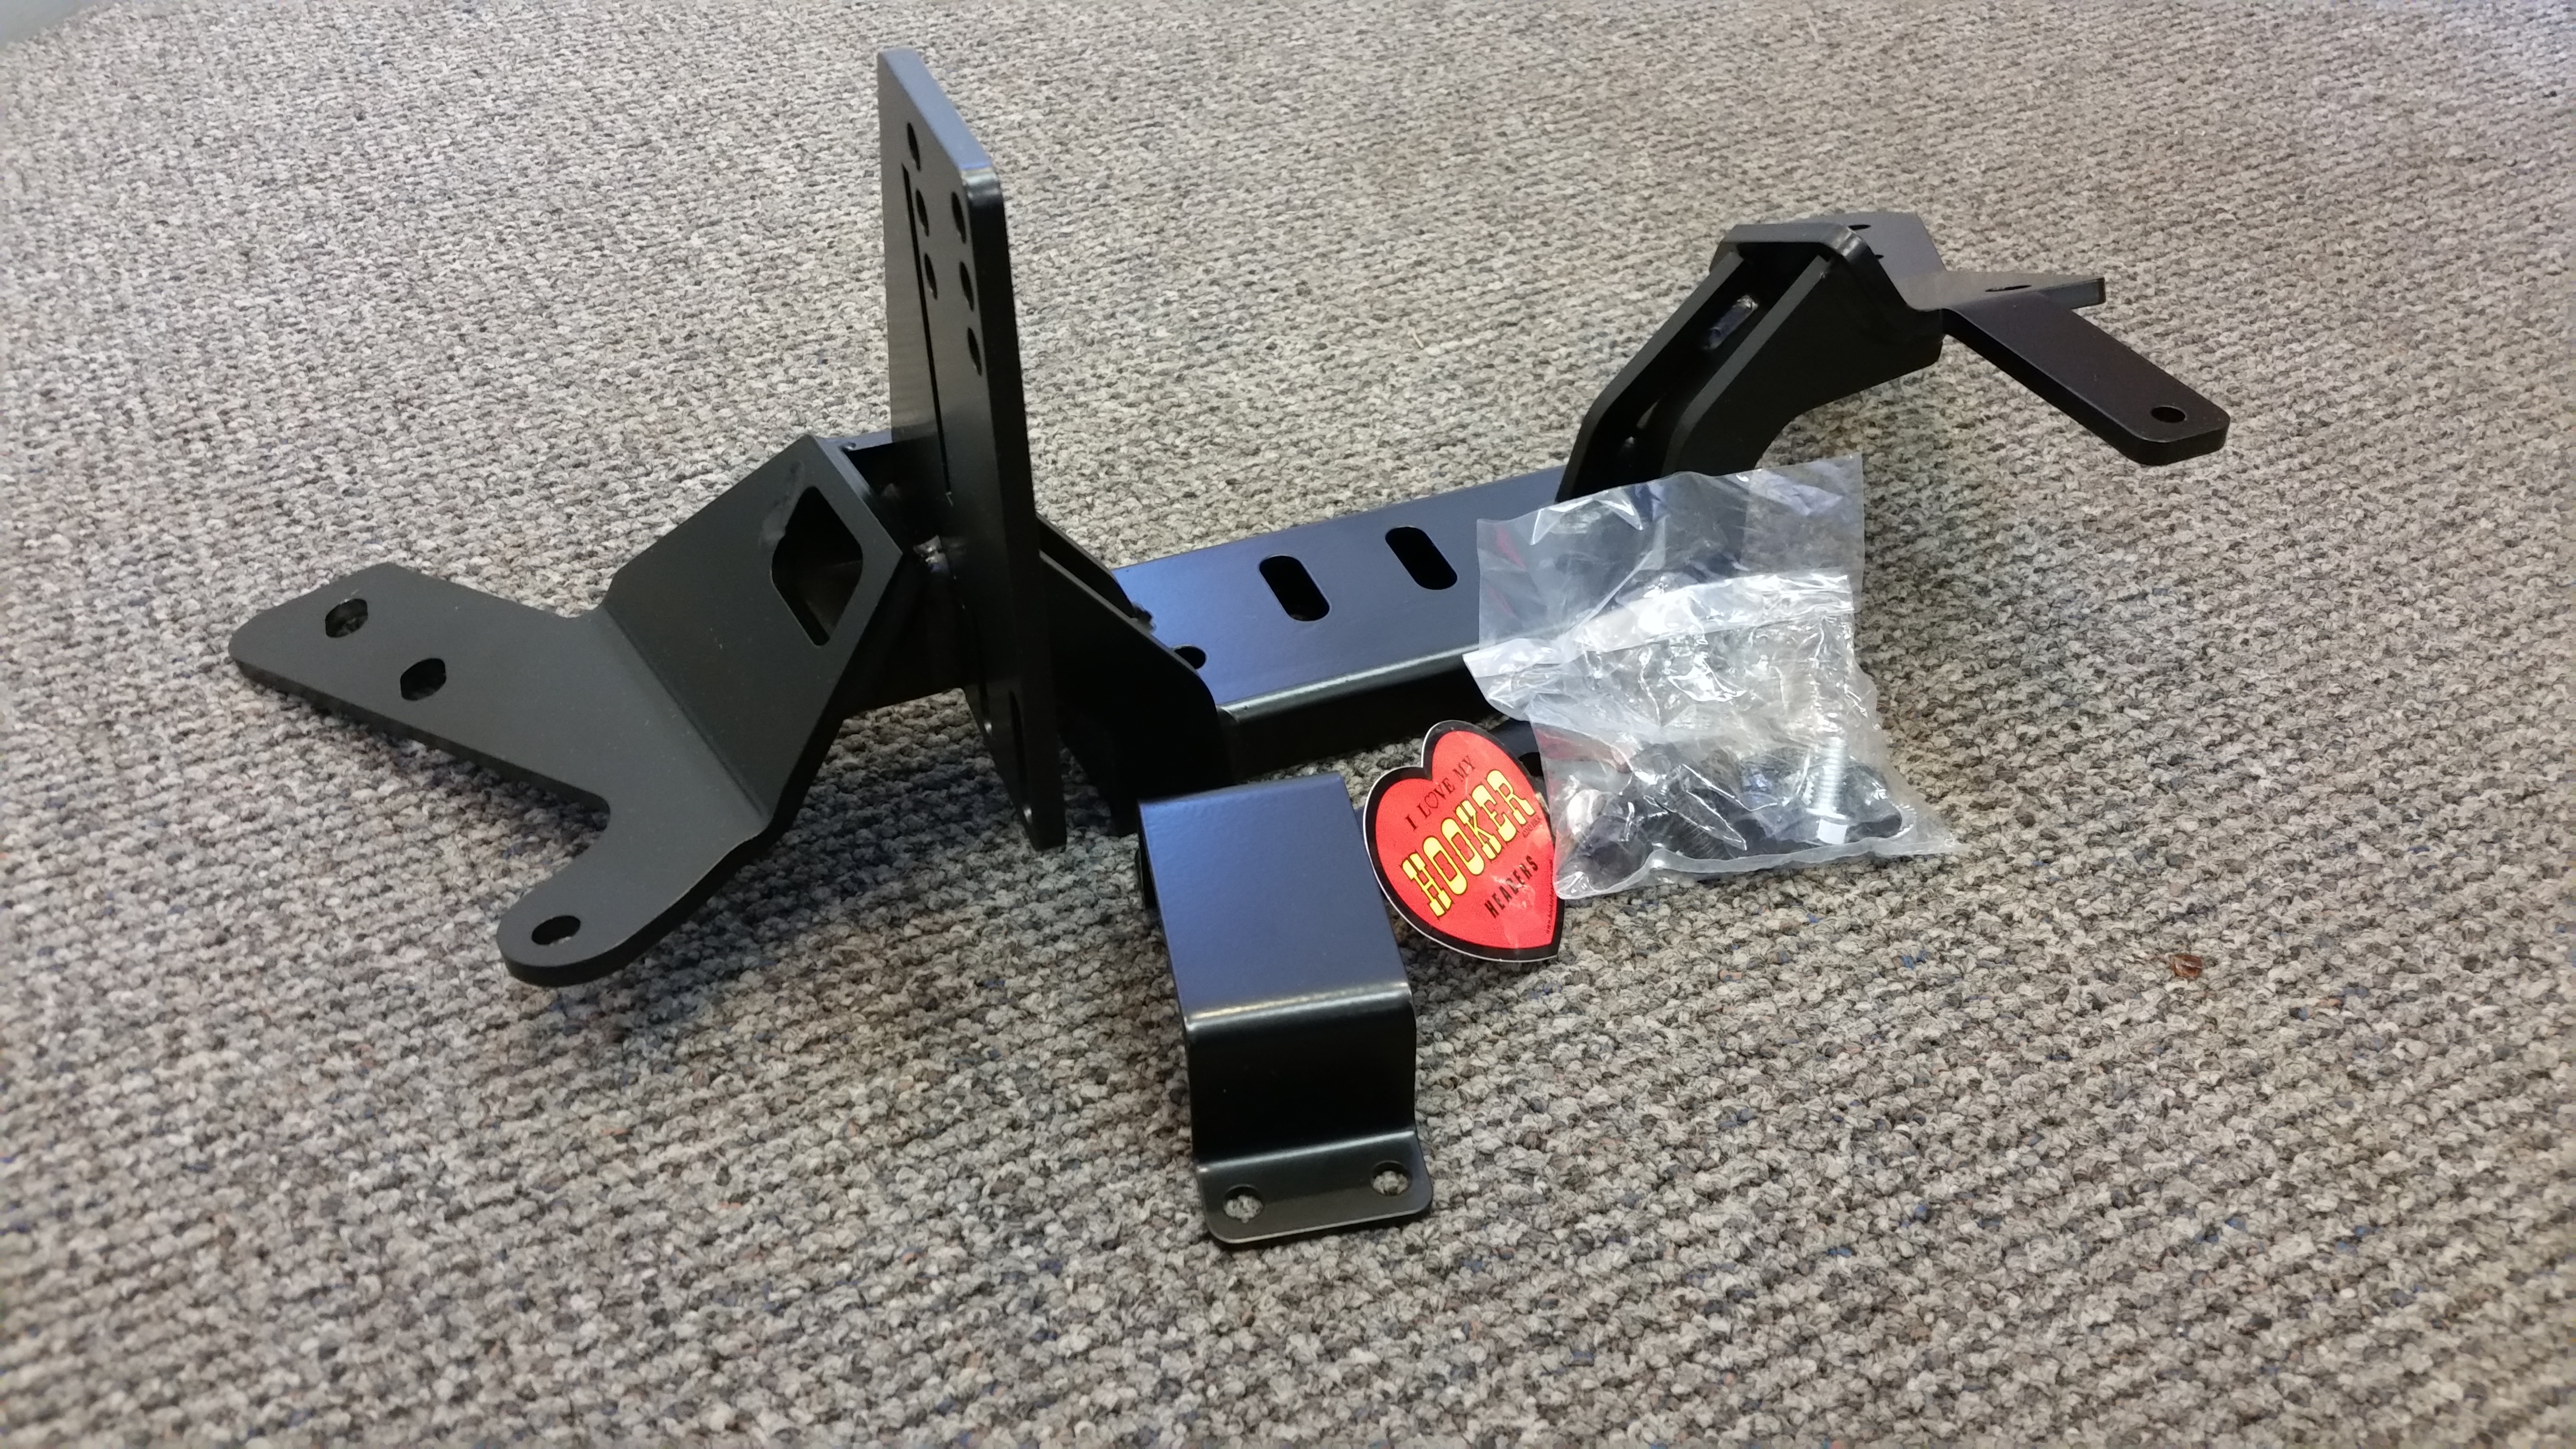
Hooker transmission mount
Holley Hydra-Mat for the fuel pump pick up
Put a condom on the Camaro and got started yanking the motor
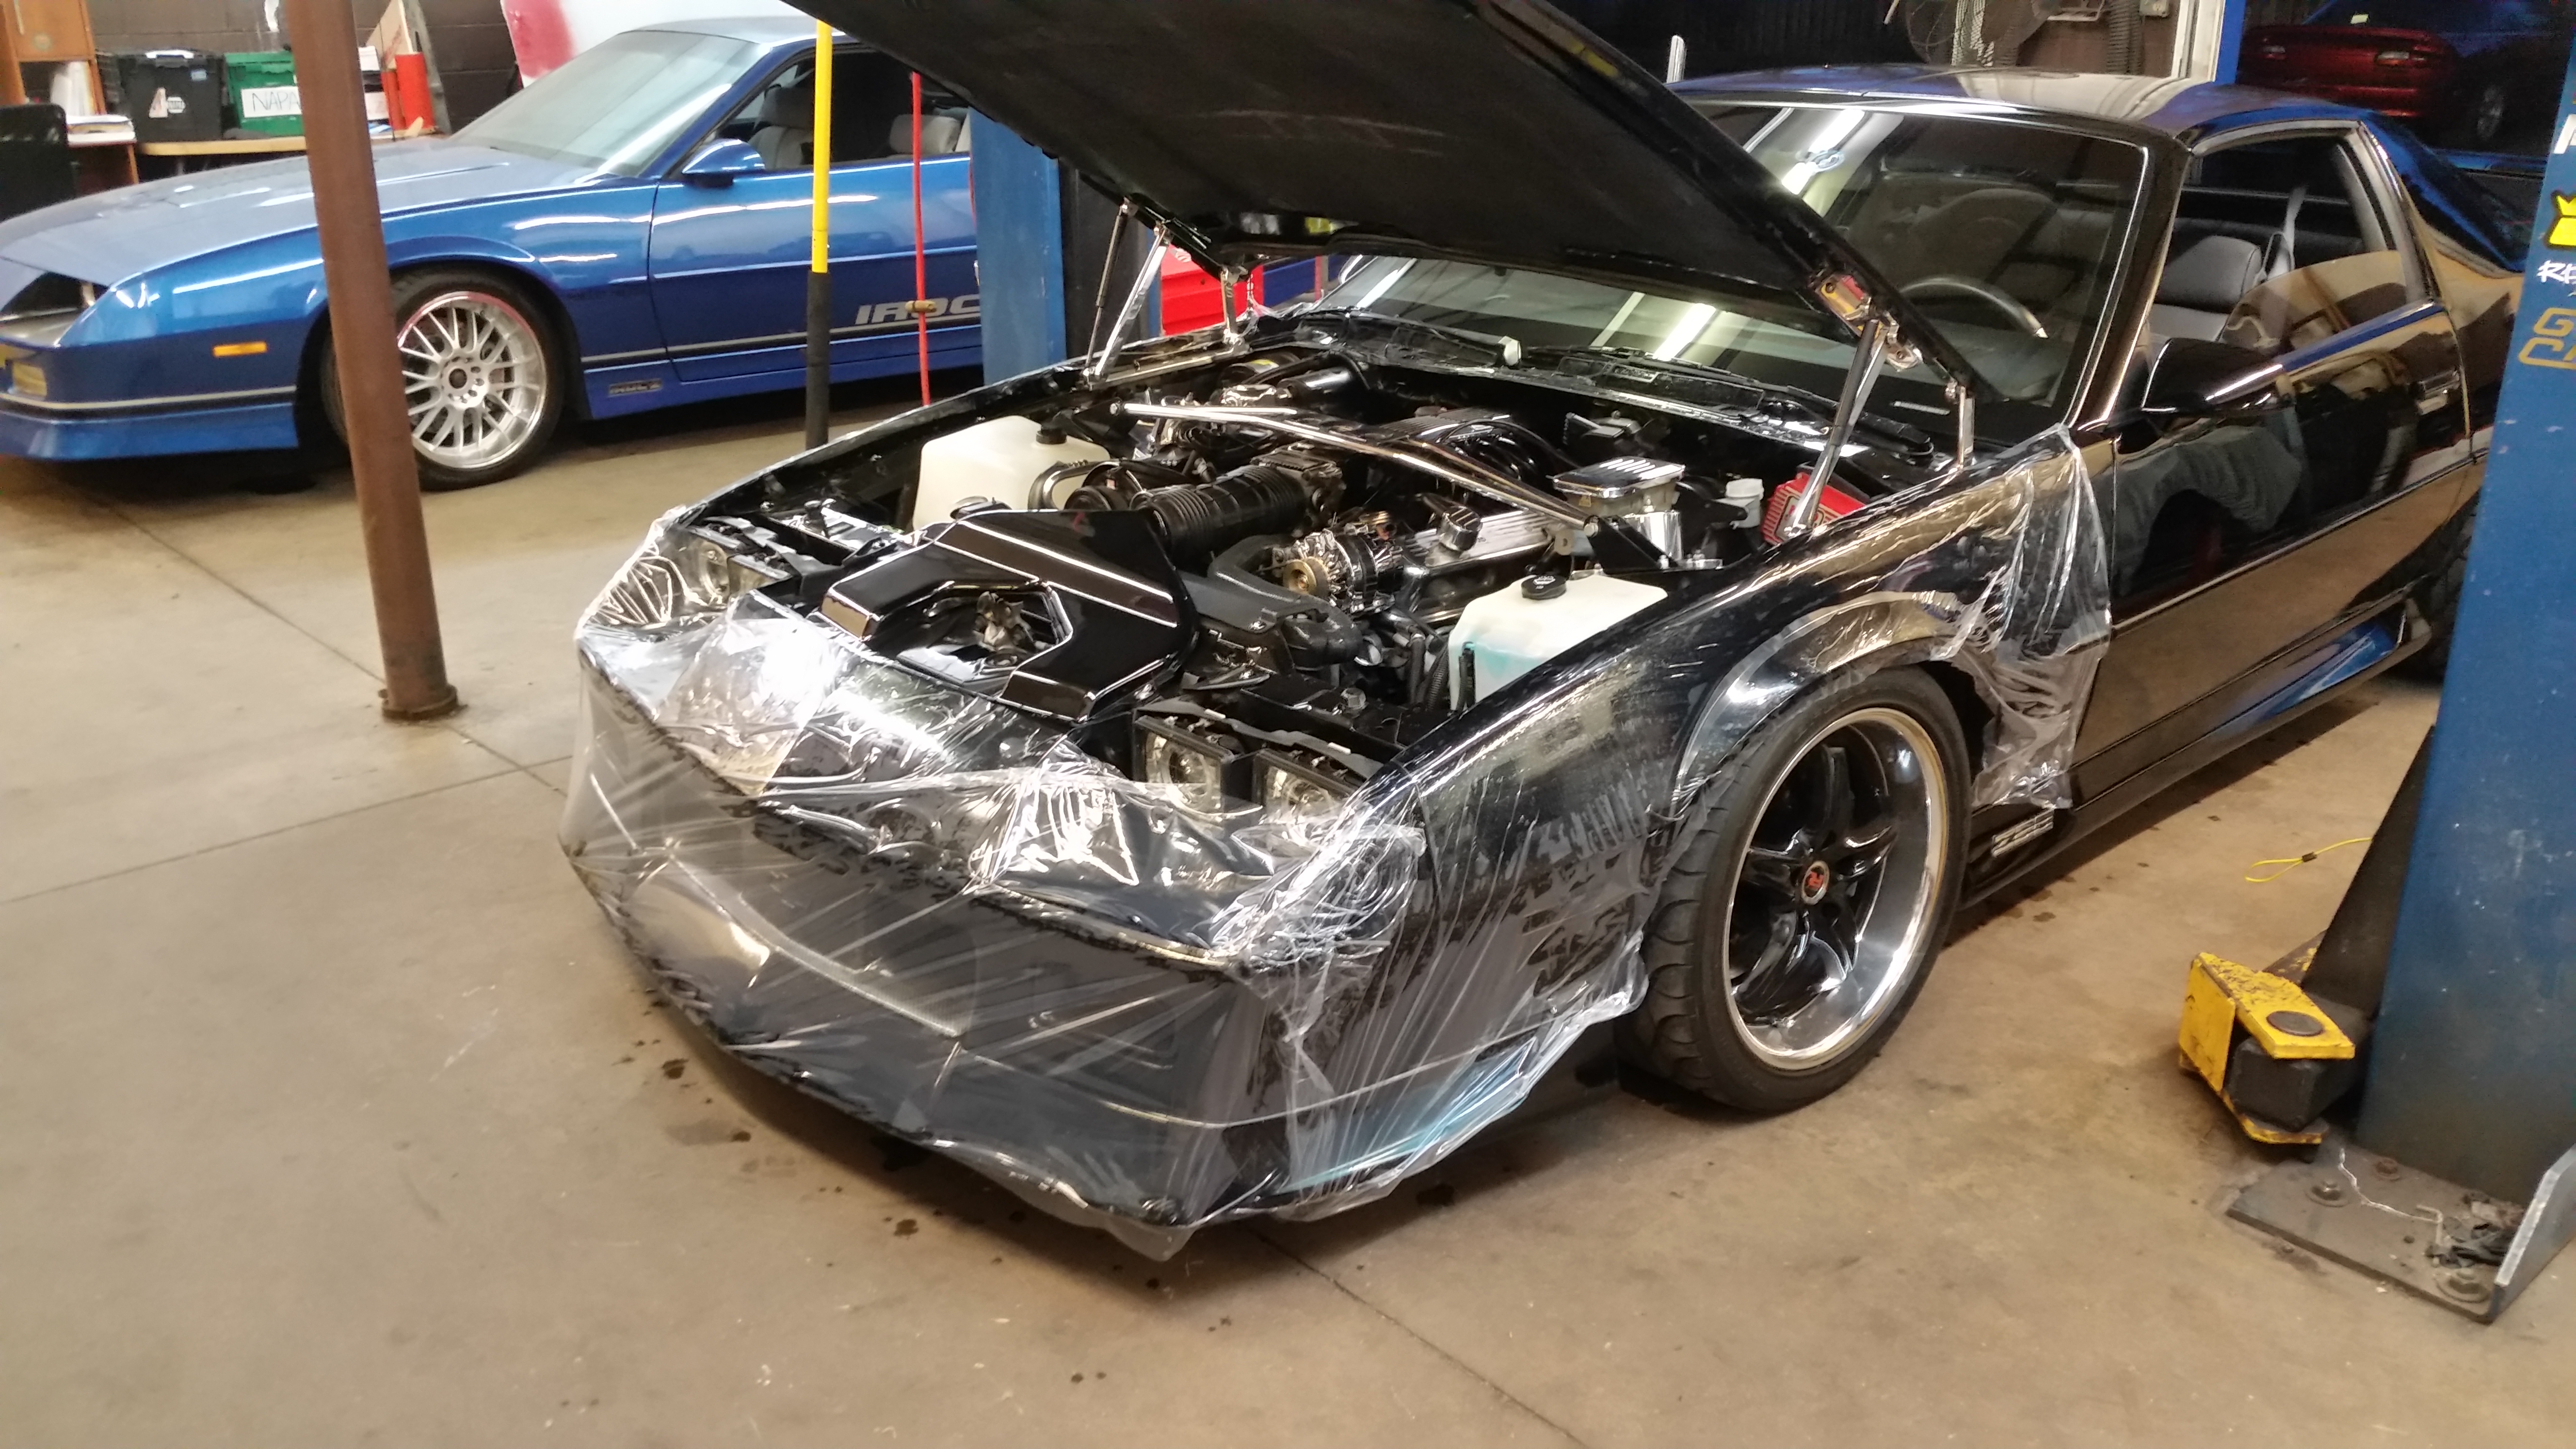
Its out! Now this TPI motor will be going into my 1987 Camaro Sport Coupe
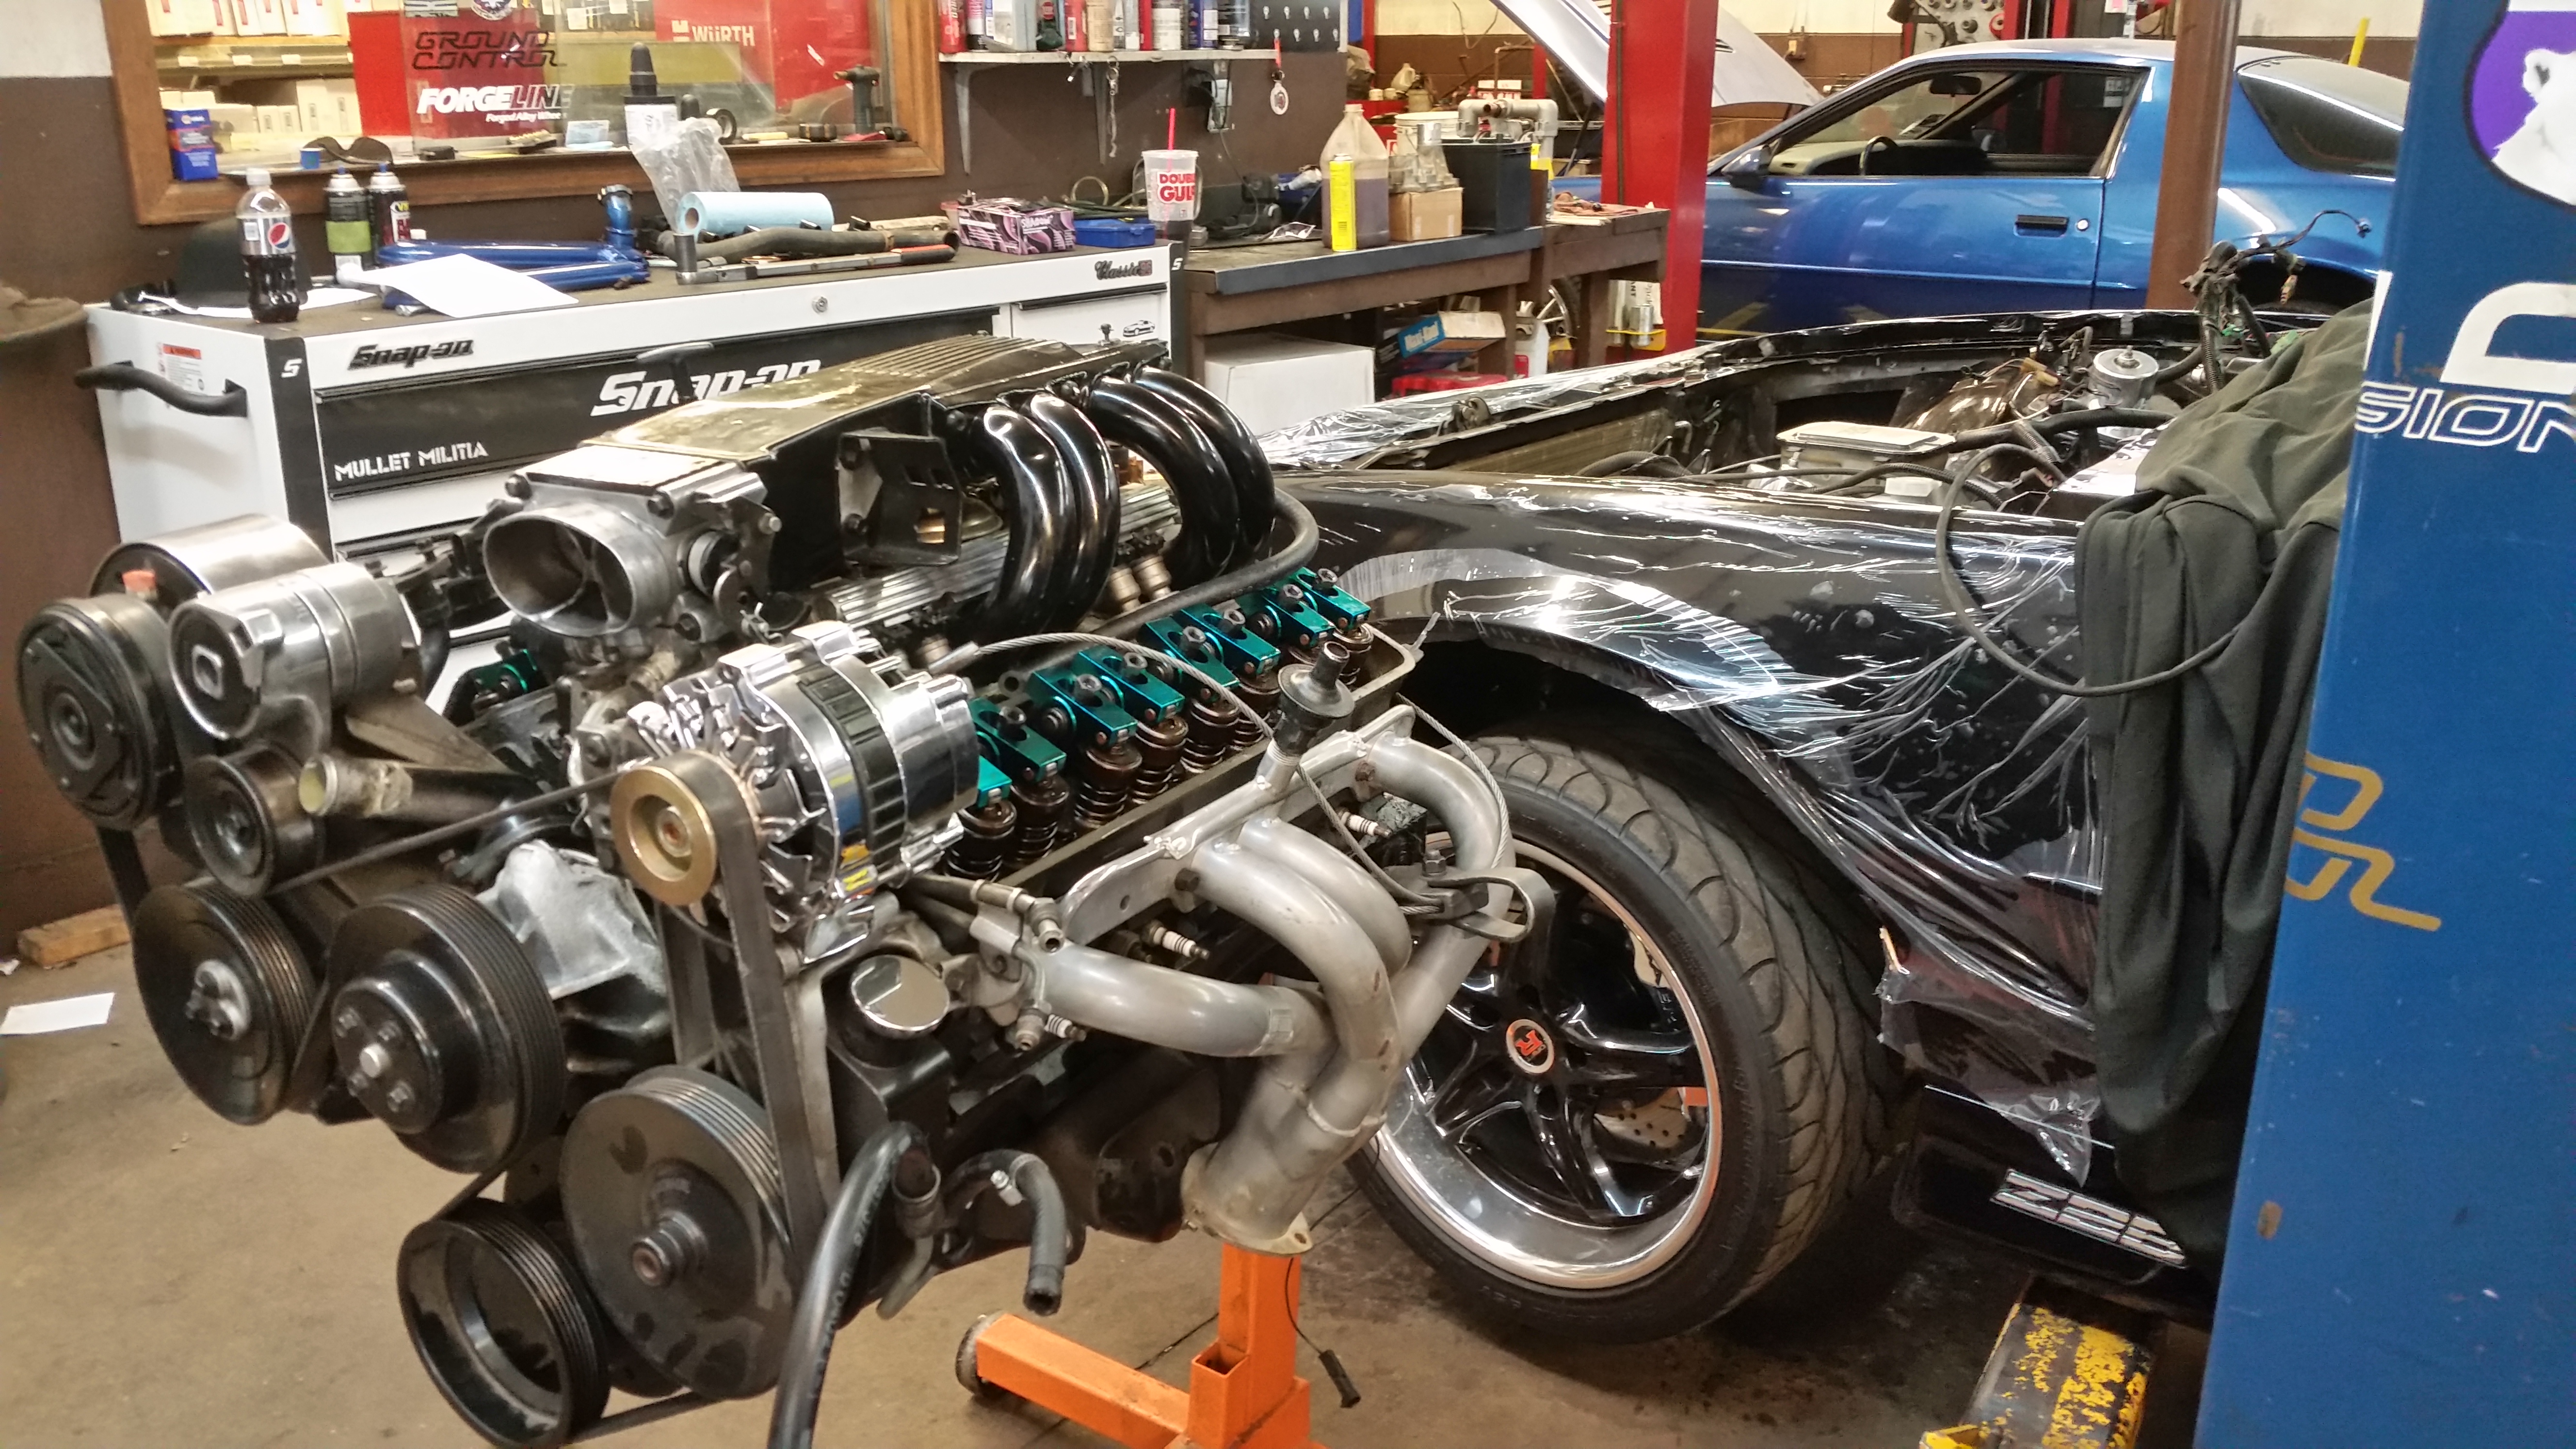
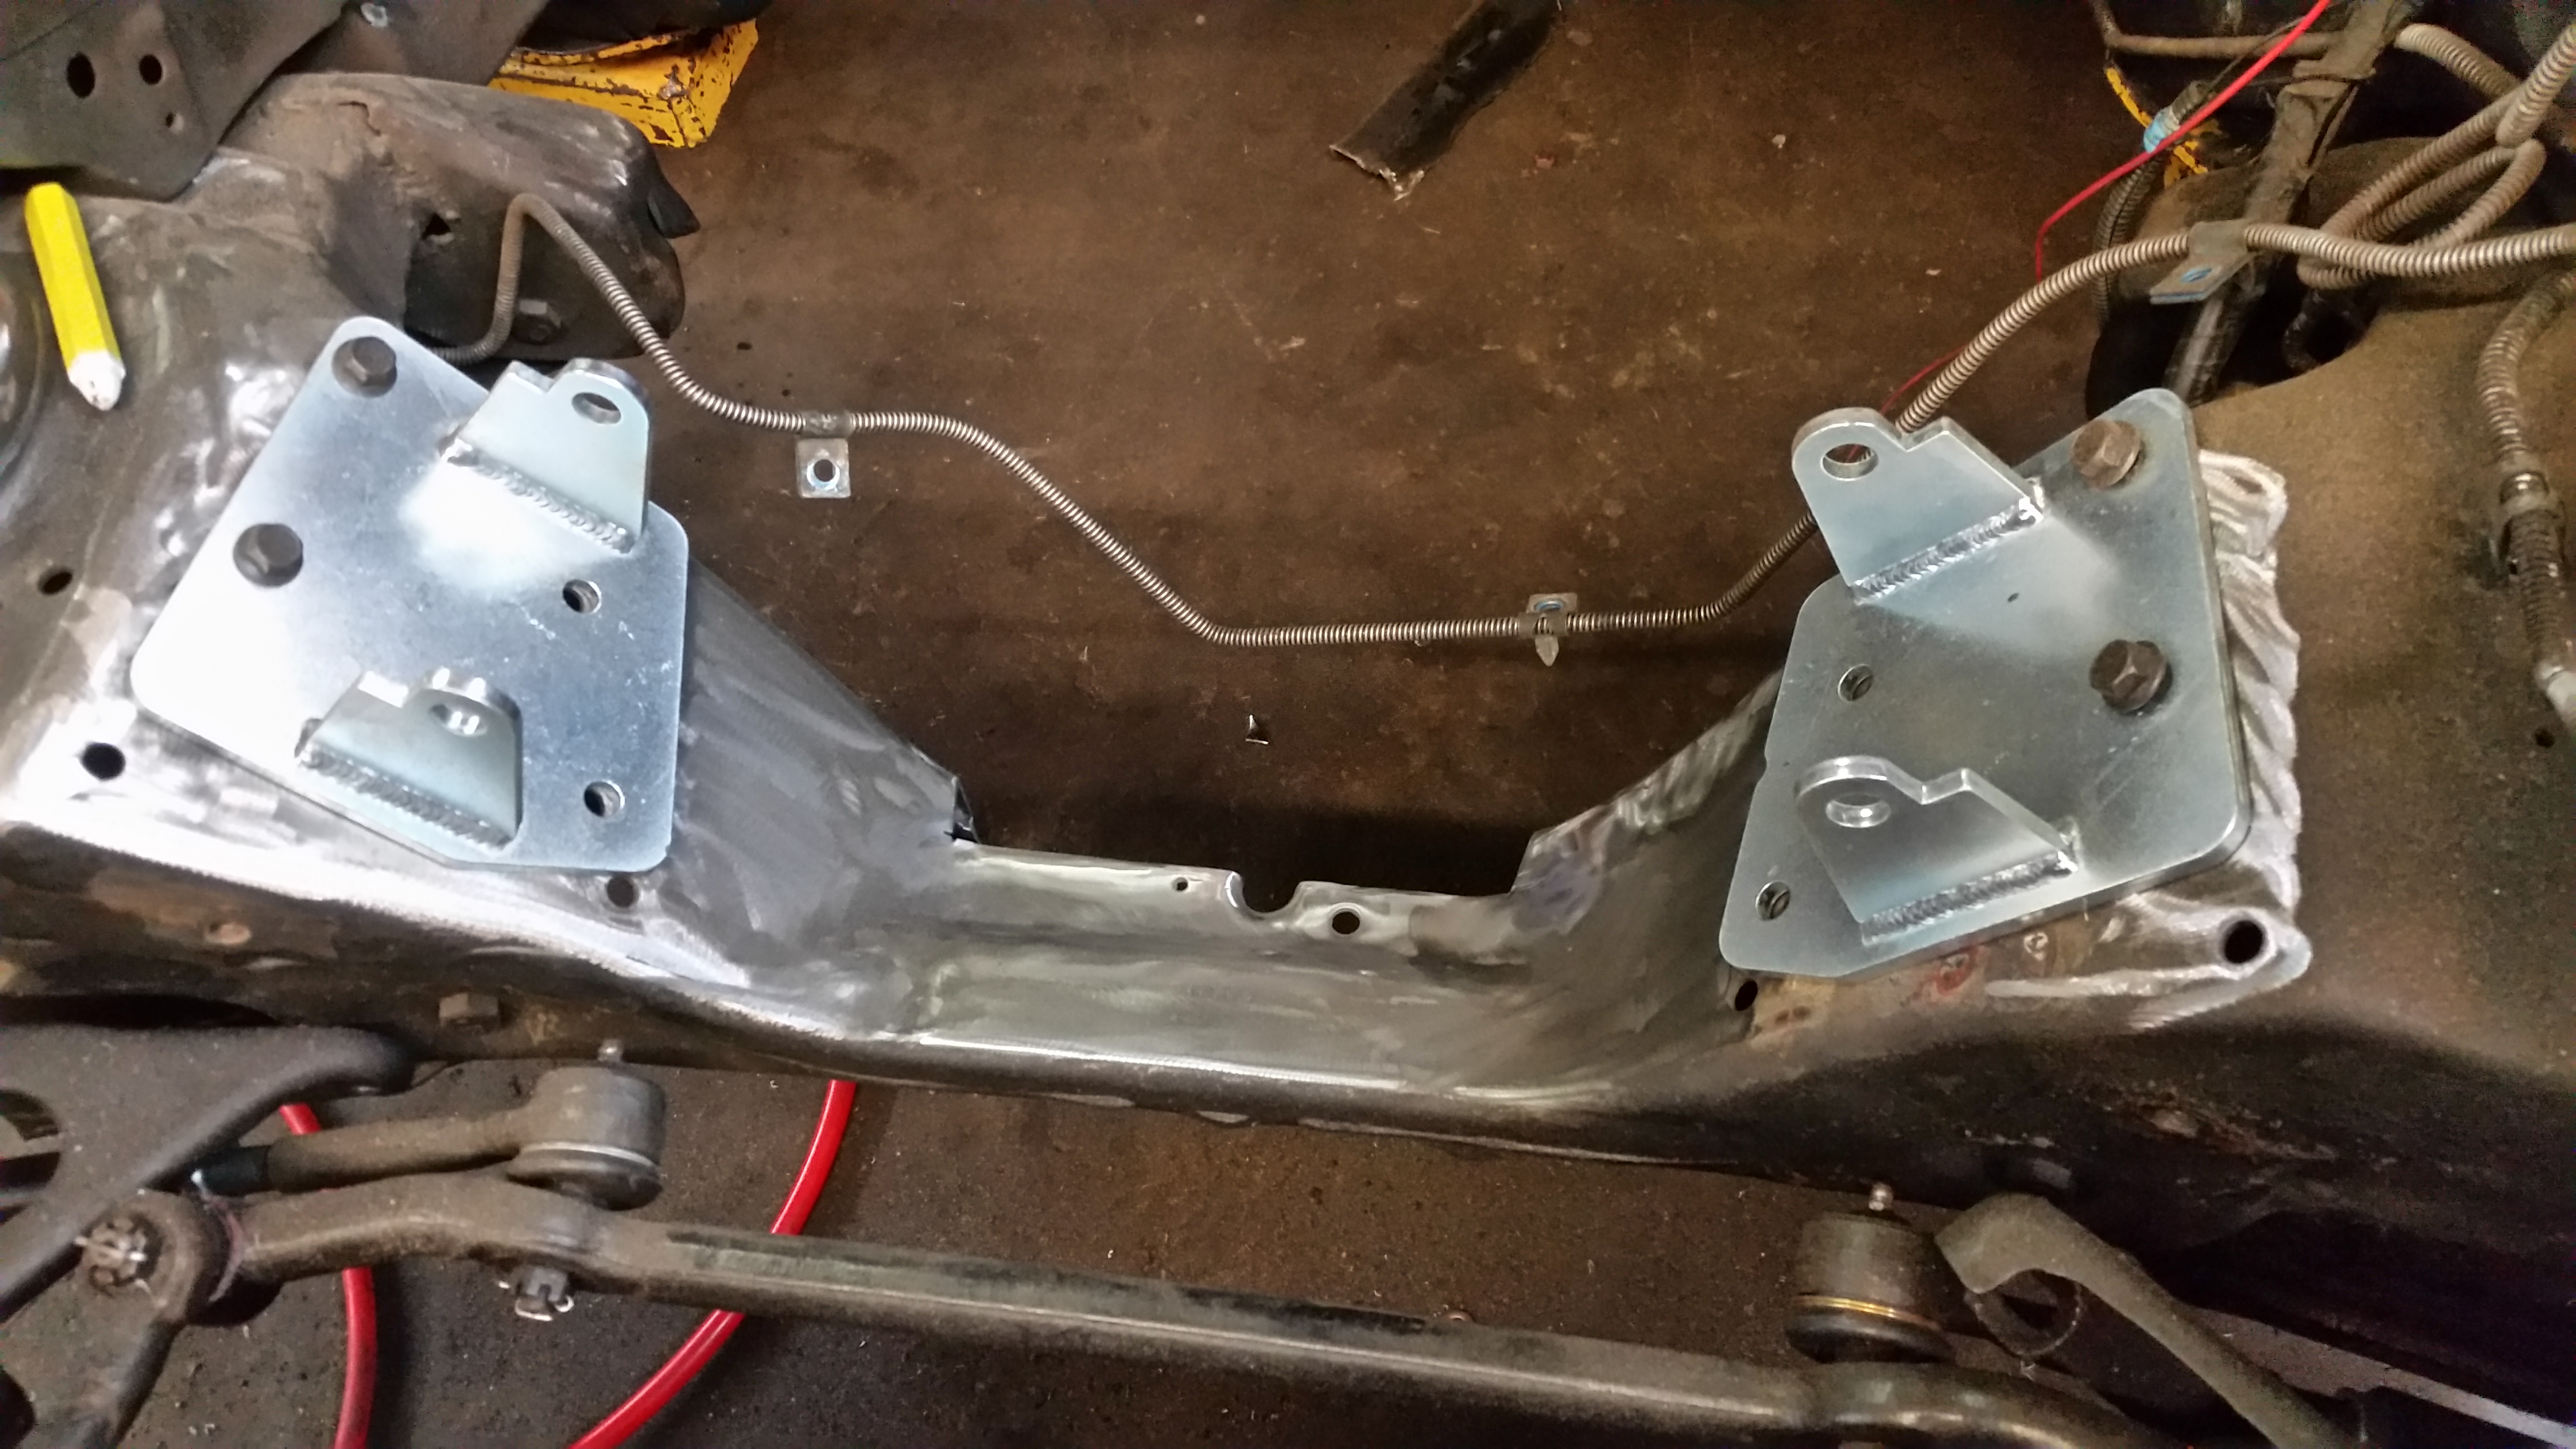
Mocking up the Hooker engine mount placement, and the notch in the Kmember.
I'll start throwing down some stuff here.
I dropped an Improved Racing oil pan Baffle in


Hooker BlackHeart 1 7/8 headers which I sent out for high temp coating

After Cerakote applied in satin black

Hooker transmission mount

Holley Hydra-Mat for the fuel pump pick up

Put a condom on the Camaro and got started yanking the motor

Its out! Now this TPI motor will be going into my 1987 Camaro Sport Coupe


Mocking up the Hooker engine mount placement, and the notch in the Kmember.
 04-12-2016, 10:35 AM
#51
Staging Lane
Thread Starter
Join Date: Jan 2012
Location: Fort Collins CO
Posts: 93
Likes: 0
Received 0 Likes
on
0 Posts

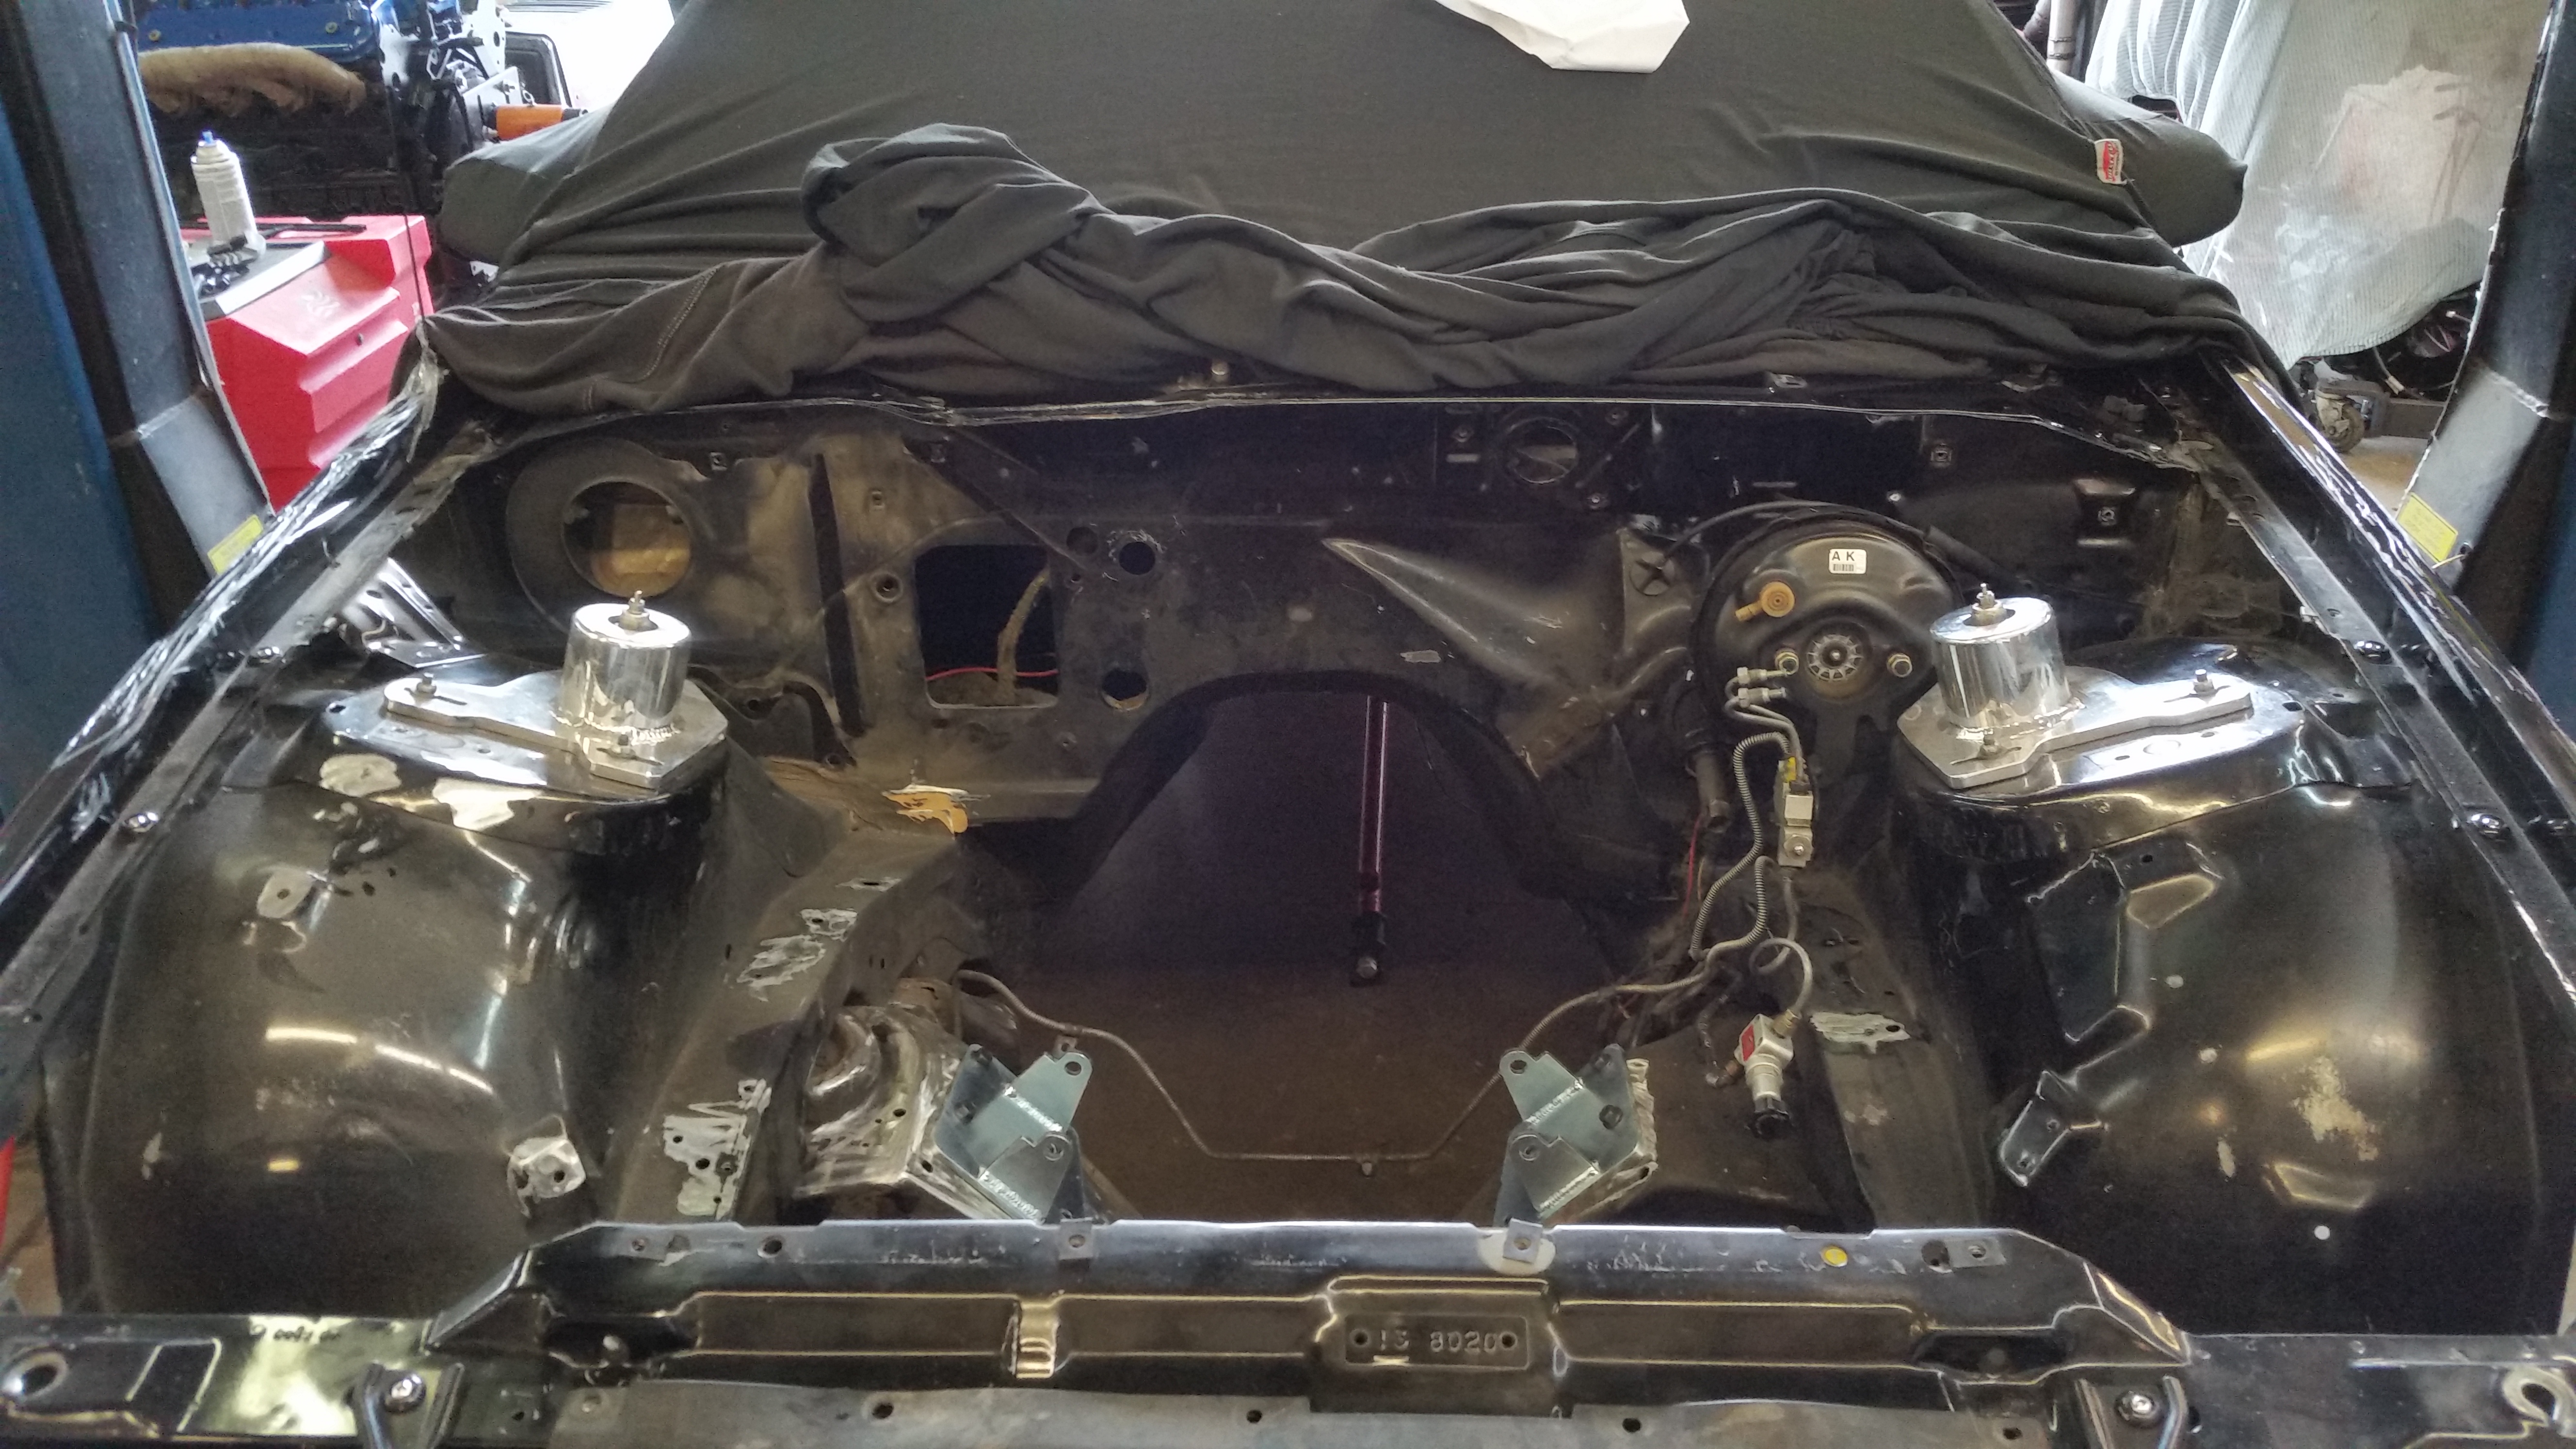
Started cutting inner fenders to smooth and remove the washer & coolant bottles and the bumps for their mounting. Relief cuts then hammer and dolly them down to close.


My 4.5 year old son helping me out.

I battled the Holley Hydra mat in finding a solution to connect the NPT fitting on the mat to the push on sock/strainer fitting on the pump... after getting little to no help from Holley on the subject I had to get creative.
I used a 1/2" nylon barbed fitting and opened up the end enough to fit over the pump, and staked the fitting to the pump body as the original sock was staked to the pump.


The Hydra mat with the NPT 90* fitting and high pressure fuel hose to take to the fitting on the pump. I mounted this offset slightly to the right (passenger side) to clear the fuel level sending unit float.


Installing my -6an fuel line to the corvette regulator assembly


 04-12-2016, 11:08 AM
#53
Staging Lane
Thread Starter
Join Date: Jan 2012
Location: Fort Collins CO
Posts: 93
Likes: 0
Received 0 Likes
on
0 Posts
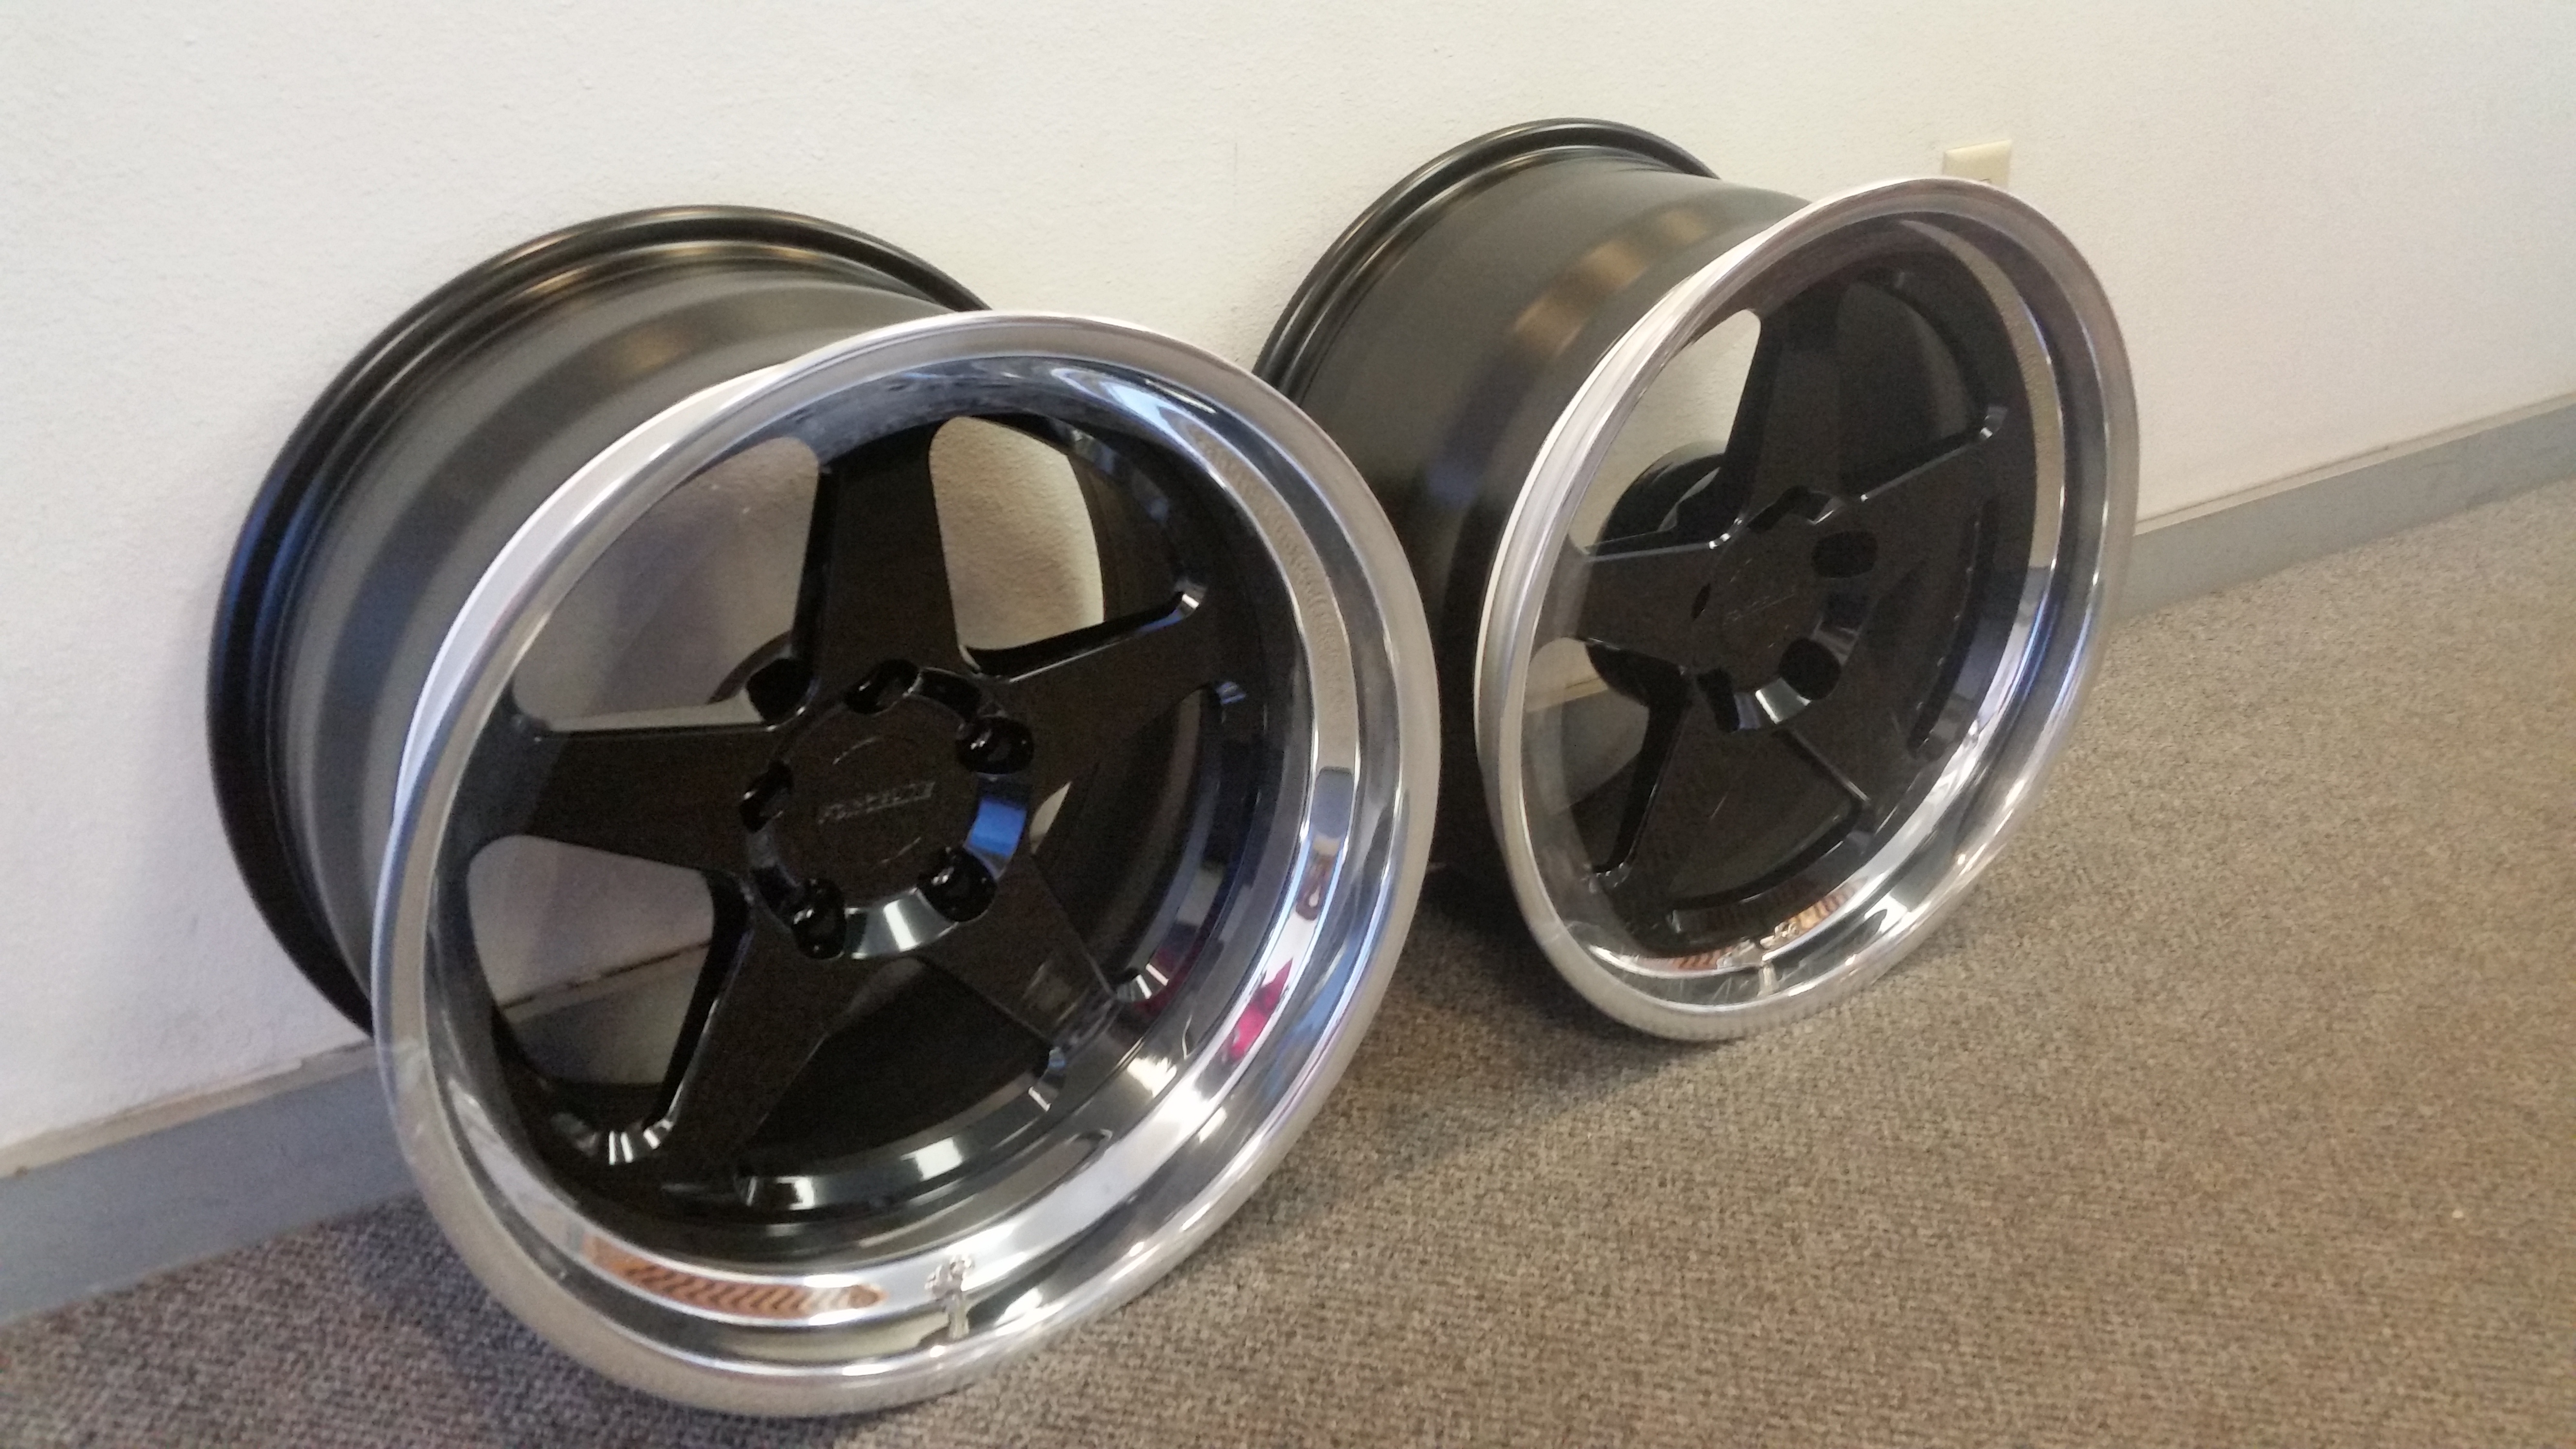
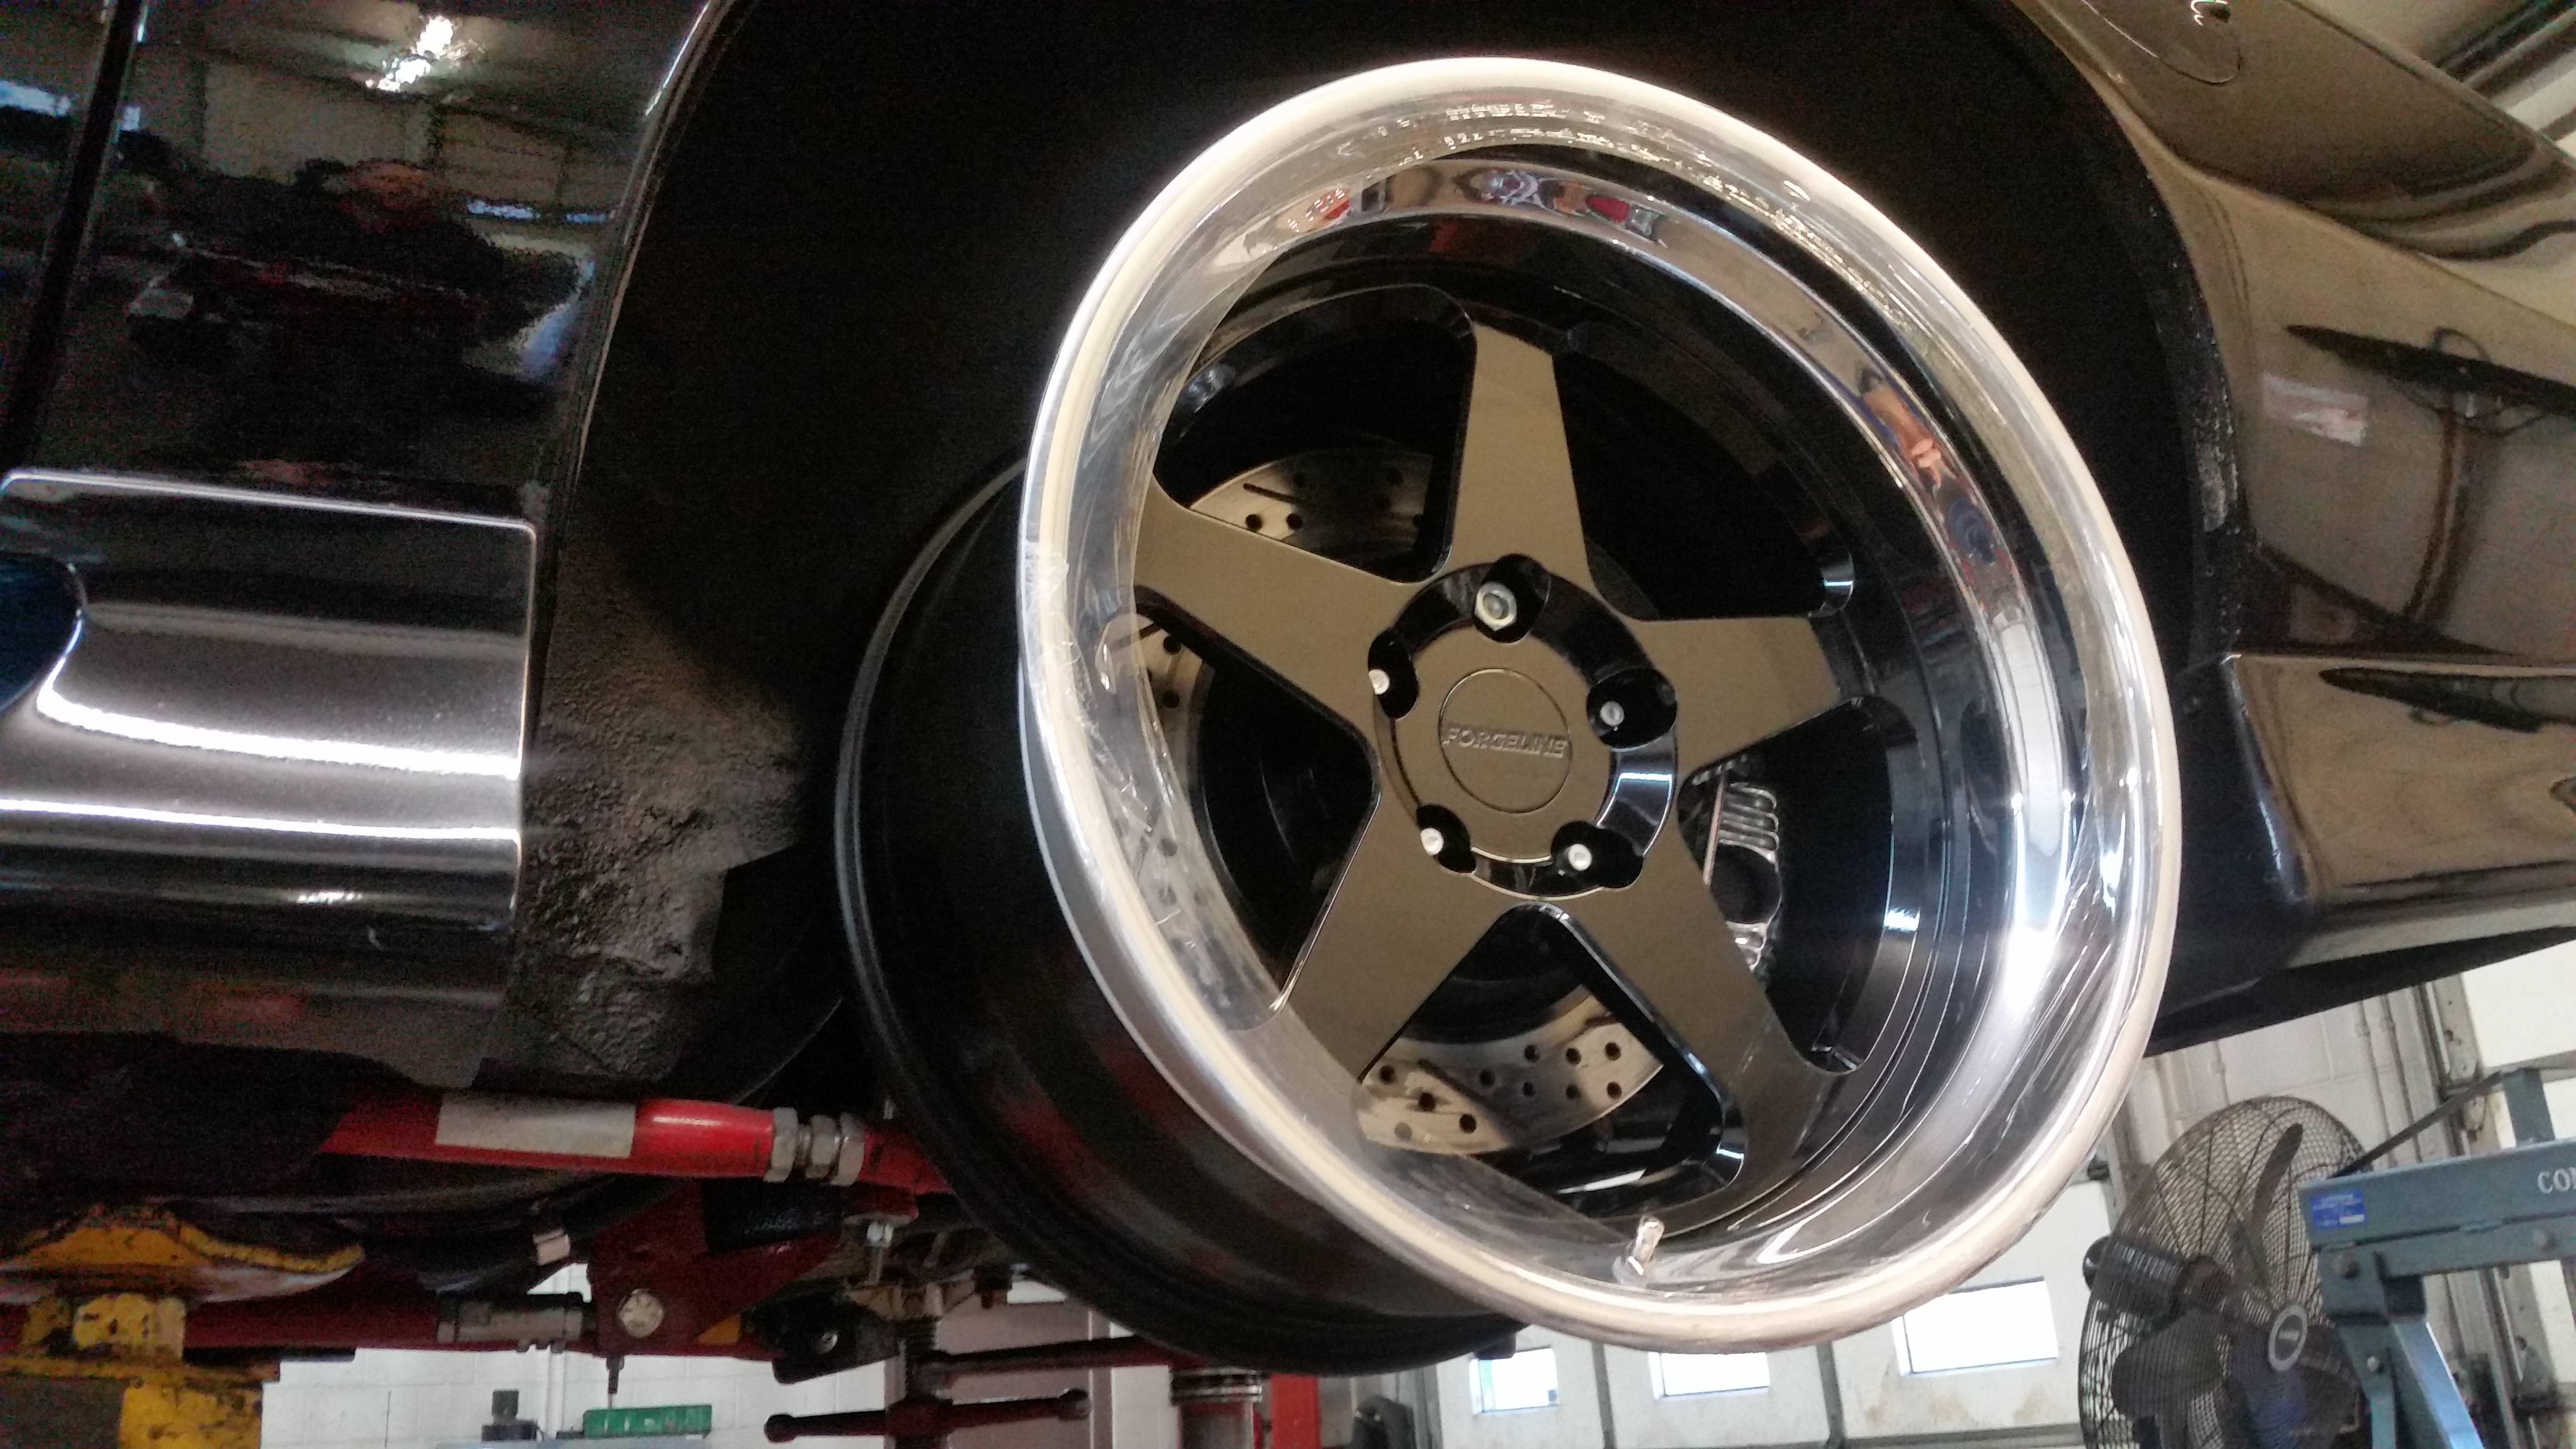
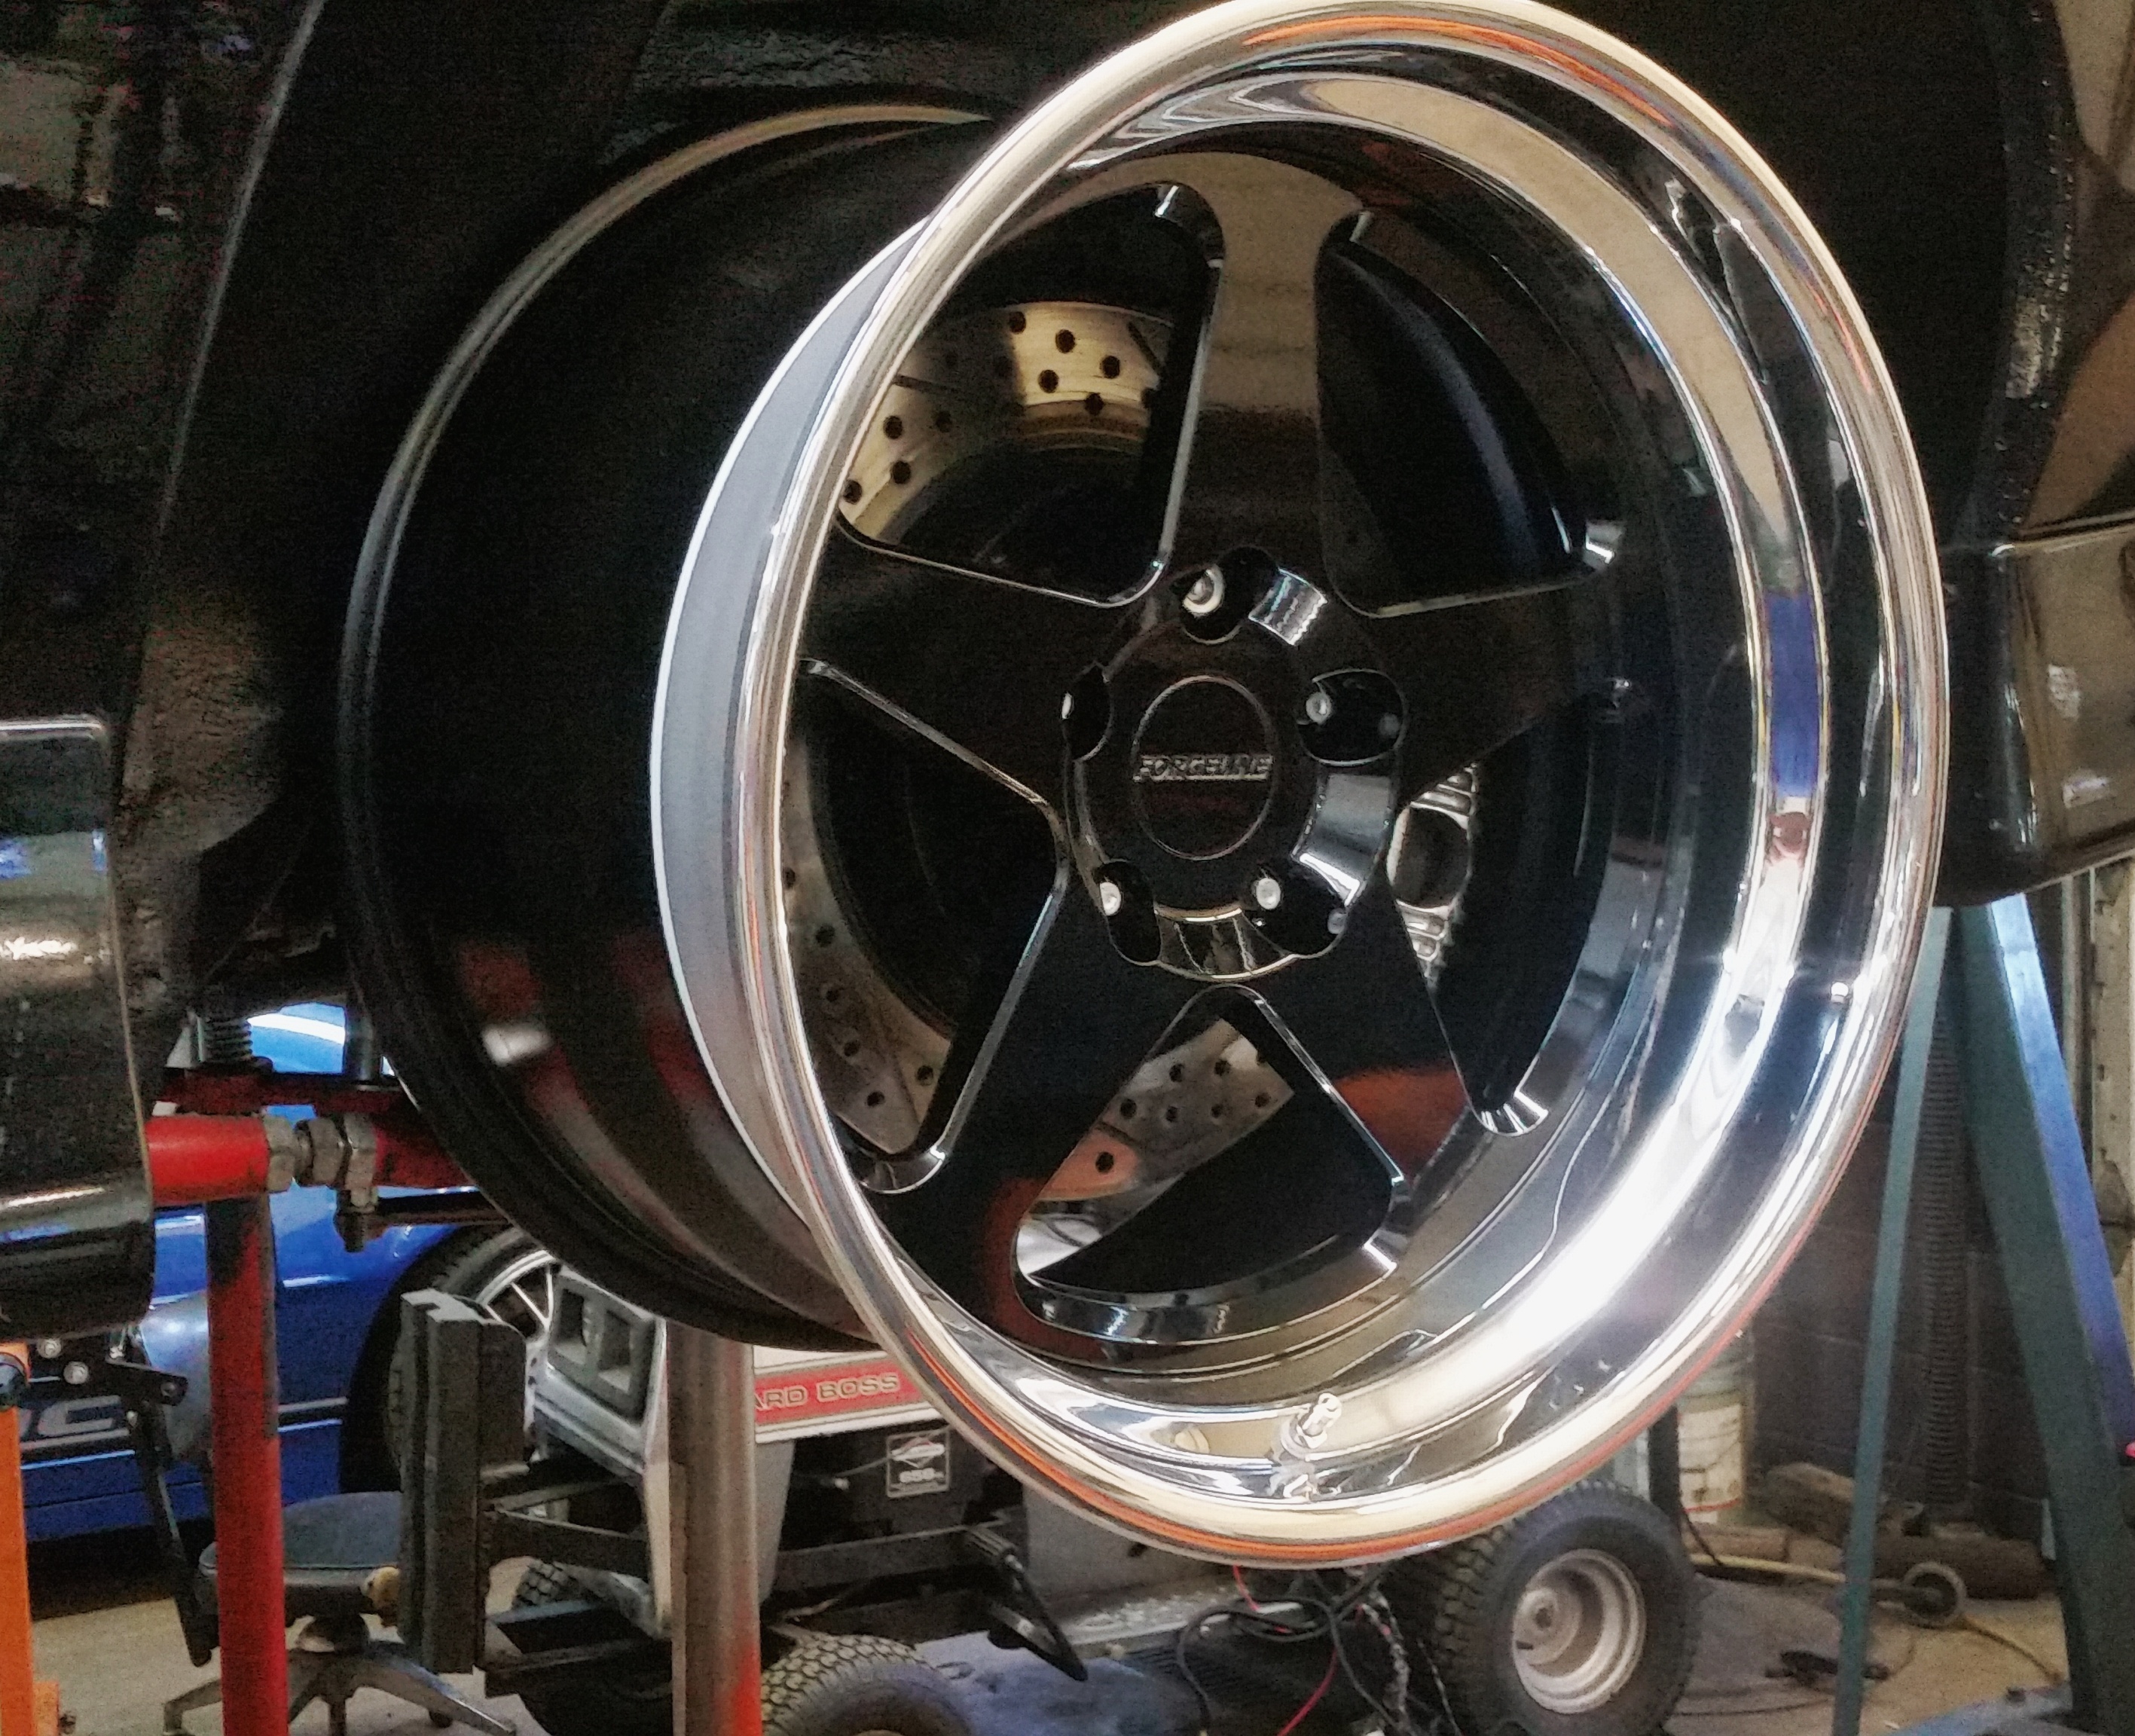
Couple boxes showed up at the shop... Yes Yes Yes!!!!

I ordered Forgeline FF3 in 18x10f and 18x11r
They are gonna run my current BFG KDW2's (275f, 295r) until they wear out, which won't be hard with all the new power, then I will figure out what I will do from there.
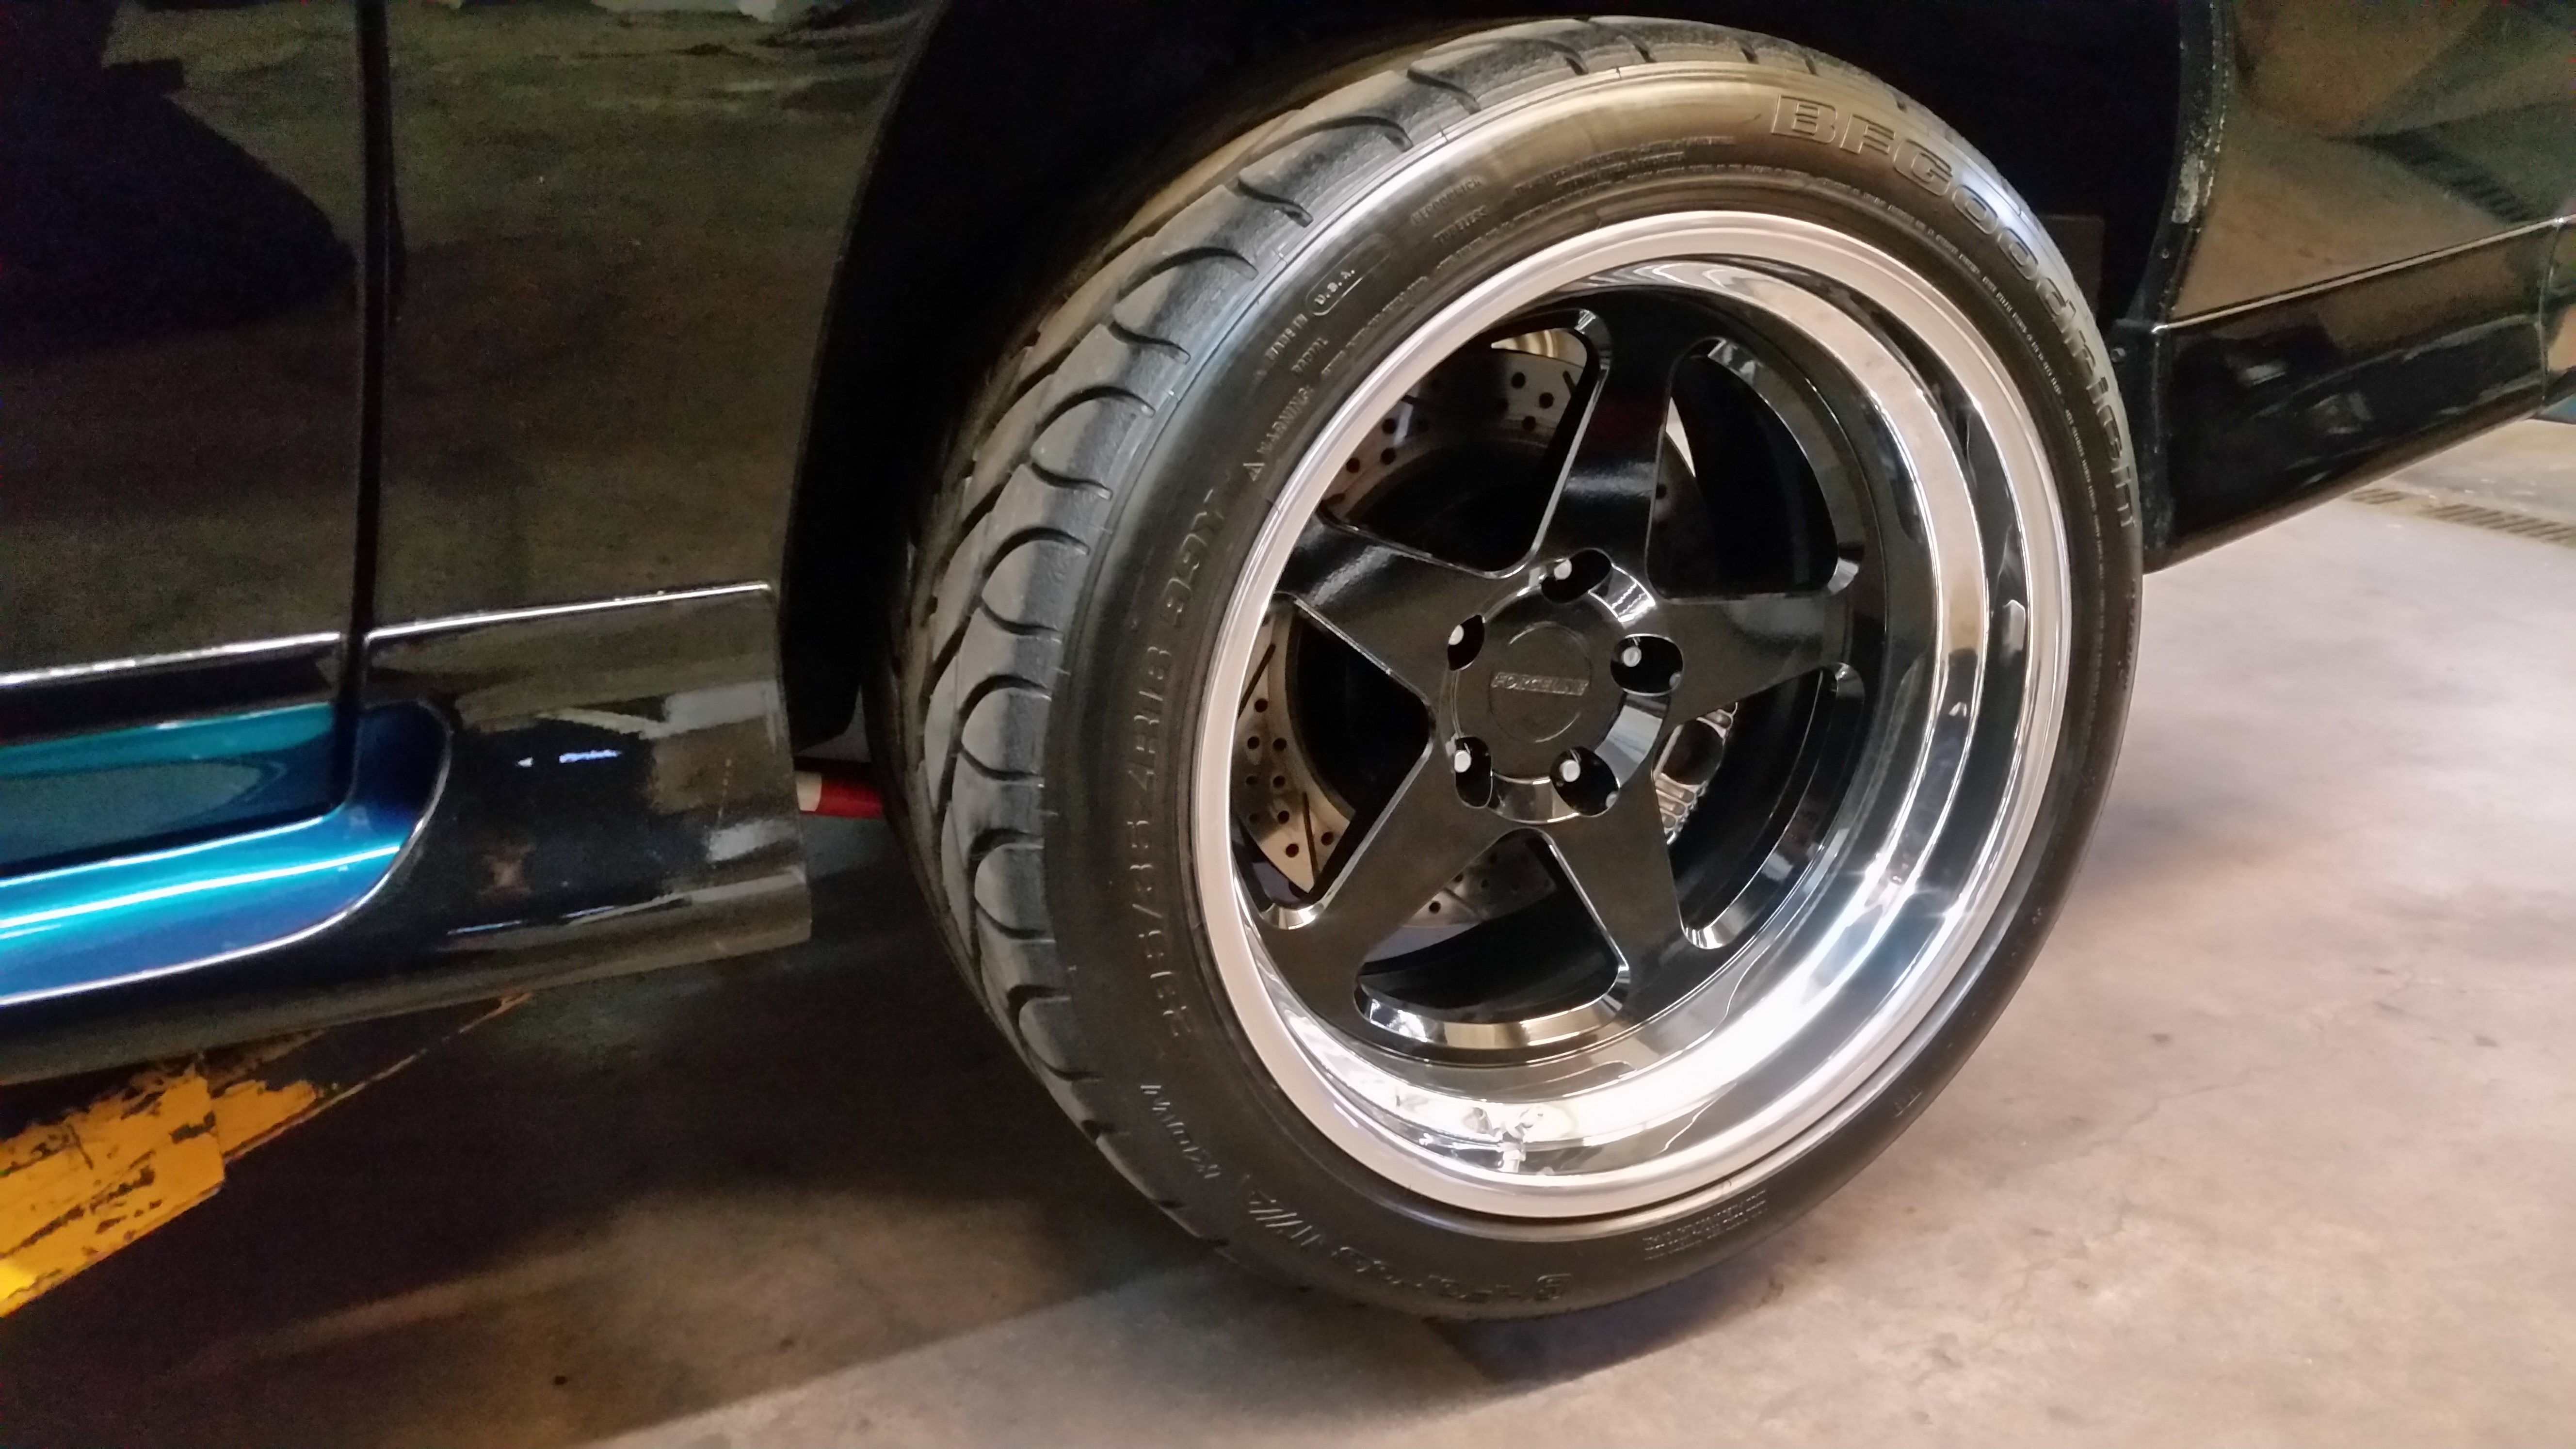

I ordered Forgeline FF3 in 18x10f and 18x11r


They are gonna run my current BFG KDW2's (275f, 295r) until they wear out, which won't be hard with all the new power, then I will figure out what I will do from there.


 06-02-2016, 08:50 AM
#58
Staging Lane
Thread Starter
Join Date: Jan 2012
Location: Fort Collins CO
Posts: 93
Likes: 0
Received 0 Likes
on
0 Posts
 06-05-2016, 12:07 PM
#59
On The Tree
iTrader: (1)

Join Date: Nov 2009
Location: Clovis, NM
Posts: 123
Likes: 0
Received 0 Likes
on
0 Posts

I'm definitely following! I brought my Iroc out to New Mexico and left my Formula back home. I'll post up my Ls thread. It already has the Ls1 T56 swapped in, but I plan to redo a bunch of things and swap in a 4th gen dash and such...
06-06-2016, 01:06 PM
#60
Staging Lane
Thread Starter
Join Date: Jan 2012
Location: Fort Collins CO
Posts: 93
Likes: 0
Received 0 Likes
on
0 Posts
Where are you in NM? You know I'm only just a few hours north right. I'll look forward to seeing what you do with it.
So I shot clear over my base this weekend...

