When you click on links to various merchants on this site and make a purchase, this can result in this site earning a commission. Affiliate programs and affiliations include, but are not limited to, the eBay Partner Network.
Updates! The updated bracket is working great. The air filter has yet to contact the belt or pulleys, so I haven't moved forward with an air box. I did, however, make a conceptual design using the tried-and-true cardboard method and pull some flat filter dimensions from K&N. I'm considering sandwiching a filter between the hood and air box; but, again, haven't executed yet.
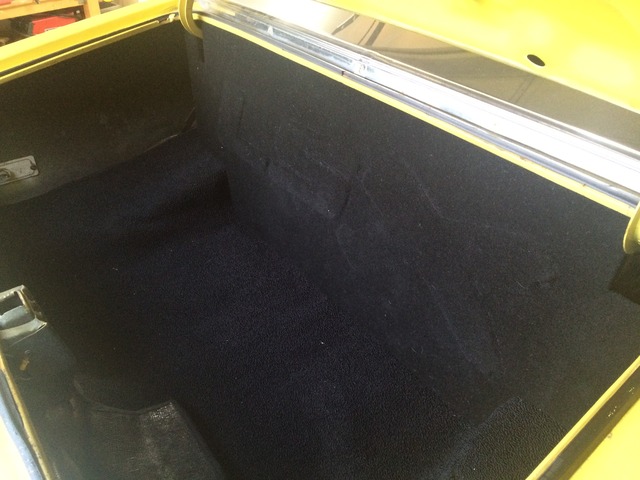
In other news, I moved my battery to the center-front of the trunk. A buddy of mine who I'm helping swap an LS/TKO into his '70 Nova is making me some trunk inserts to clean things up in the back (the sides aren't finished yet). I reloc'd the battery to bring the ~40 lb closer to the center of mass and reduce the moment of inertia. I will fully admit that it's a pain to install, though.
And one more thing. I spent much of Sunday driving around (it was sub-100, which is a rarity in the Phoenix summer). Toward the tail end of the day, when the car was fully heat-soaked, it began cutting out at idle. I've experienced an overheated fuel pump relay at the end of a cruise before, which was easily remedied with a replacement. I'm thinking heat may be the culprit here, increasing the resistance in the relay/wiring and reducing amperage to the pump. To test this theory, I'm planning to temporarily rewire the fuel pump circuit with 8- or 10-gauge wiring (I'm fairly certain I used 12 gauge), and mount a relay in the car to keep it cooler. If this works, I'll likely rewire my harness and put everything under the dash. I've discussed this a little with Joe, since he has his ECU mounted under his dash.
The trunk looks nice. I'm not convinced the MOI you're affecting has a significant impact to handling and to be honest you've probably hurt things a tad by moving the CG forward, but the net effect is likely imperceptible for either MOI or CG.
I just came back from a short business trip to Scottsdale this week. I wish I had some free time; it would be awesome to meet you and see your Nova. It's way way way too hot there for me!
Oh agreed. It's a minuscule difference, but it's what I had to tell myself whilst laying in the trunk trying to mount the damn thing.
And a shame you couldn't get out! Would've been fun to show you the car. I'm hoping to get this hot soak issue taken care of this year, and trek it to Good Guys Del Mar in April.
still haven't decided that yet, but I'm strongly considering the sandwich option described above. I have made a proof-of-concept out of cardboard, and will likely transfer that to 'glass whenever I get around to it.
she died on me at a light yesterday, so I beefed up the ground wire going to the fuel pump itself. I plan to add a couple more grounds (engine-body, body-subframe, etc.) just in case. the next step will be making a temporary circuit with the relay in the cabin. One thing that's baffling is that the Aeromotive stealth 340 wires are 14 gauge, so my 10 gauge power and ground wires have to step down at the pump. I really don't get that decision.
Im going to try and get your sides cut out in the next couple days in between my 1000 projects. lol We should swing by Tempe Sales and grab carpet and also maybe some vinyl for dash.
Since I see Bandit is posting on here...a HUGE THANKS for his writeup on the subframe notches. My alt side is PERFECT!!!!!
Thanks 70NovaSS. Do you have a build link or photos I could check out?
hookem next time I spent more than a night in the area I'll try to get in touch. Seeing your car would be good motivation. What do you think is causing the car to die? Are you sure it's a ground issue?
clint, that's why you're here! I honestly don't know. All I know is this:
1) I fried a fuel pump relay when I had my initial relay setup, so I rewired the harness for the current relay box. It then died on me a couple summers back, after a long cruise (~90 min drive to lunch, ~60 min into the trip back home). The fuel pump relay was scorching hot; replacing it with a (relatively cool) headlight relay got me back on the road.
2) It died again on me toward the end of a day-long excursion around Phoenix. Pushing the accelerator pedal while starting would bring it to life. It did not die at part throttle.
3) It died again at a light last weekend, coming back from 70NovaSS's place (about a 10 min highway drive).
Each time my gas gauge read >1/2 tank, and my engine temps never exceeded 205�. I need to stick a fuel pressure gauge on it. The Stealth 340 takes approximately 15 amps at 60psi and hasn't popped the 30a fuse, so relays shouldn't be overheating unless there's a serious restriction in the system (vette FPR?) or the pump itself is bad.
No build link yet. I have so many projects going that keeping tabs with updating everything was last on my mind. I do however have a ton of pics as we go along. As things start to slow down around the house I will work on that.
Quick late-night update... I cleaned up my harness a bit and added two MIL-spec connectors to connect to the firewall. I'm moving the ECU and relay box under the dash (likely glove box for the latter). I'm also integrating the Vintage Air relays into the box. The culmination of this will be a drastic reduction in wiring under the hood and simple two-point harness disconnect if (when?) I ever need to pull the engine and trans - all sensors and connectors can remain connected to the power pack.
The negative of all of this? It's expensive. MIL connectors are ~$100 for a mating pair, and the crimping tool runs north of $300 (that is not a typo). I'm only doing this because we have bins of extras at work, which required me to spend hours tracking down the correct connector pairs, pins, and sockets; I'm also borrowing the tool.
Harness. The white sleeves for the VSS, crank position sensor, and O2's are high-temp from work, while the black is Techflex PET expandable sleeving. I'm not so sure how much I like the Techflex stuff. For anybody wondering, a 25' roll of each 1/4" (or 3/8") and 3/4" will easily suffice for the entire harness.
On the up-side they are high density and highly reliable! Looks like it is going to clean up nicely. I am thinking about a bulkhead pass through for my OBDII, accelerator pedal, and gauges, but I'll probably go with a metri-pack version.
I may have something, depending on how many wires you need to run. of course, it would be on you to find a crimping tool.
I decided to pull and clean up the American Autowire fuse box I installed pre-LSx, and run the fan control wires through its bulkhead connector. It also has fused BAT and switched circuits for the PCM. Cleanup, cleanup - seems to be the story of my build.
Quick question for you, might be years back for you but did the 56 bolt right up to the LQ4? starting the swap from 4l80e and have heard mix reviews of spacers needed etc? thanks.
Sorry missed that 3 pages back.. my bad. build looks great. going to help me a lot on my 71 nova t56/lq4 build. nice work.
yup, it bolts right up. mine needed 1/2" spacers and a special flywheel to make it work, due to the rear of the crank protruding .400" out of the back of the block.
Also, I'm nearly finished with the wiring, AC vents, and some other bits n bobs I took care of. Bigger project than I wanted. I'll update when I get it together and running.
How did you wire your fuel pump? Do you have a relay in the trunk near the battery with a signal wire going to the PCM or to the key? Have you checked along all those wires to see if you have pinches and/or potential shorts/opens that could be causing your relay to melt down and/or pump failure?
I am thinking through how I'll wire my fuel pump and I think since my battery will be in the trunk, I will probably run the relay and fuse in the trunk also and run the relay signal wire inside the car to my firewall pass through then to the ECM (mimic the routing of the fuel gauge sending wire).
It is wired through a relay panel now in the glove compartment. It receives power through a 30a MAXI fuse with 10ga wiring that runs in the cabin all the way back to the trunk, where it exits through a grommet to the pump. It attaches to a short piece of 14 ga wire at the pump. I've redone the relay box, and all wires have been inspected.
The relay is controlled via the PCM.
I've updated a couple things during this swap:
The relay is now a Ford OEM one, originally designed for the fuel pump in whatever vehicle I pulled the panel from. I had originally used some aftermarket one.
The fuel pump ground is now attached directly to the chassis where the battery negative terminal attaches, rather than the trunk floor as I originally had it.
The relay box is inside the cabin (glove box), rather than under hood.
The car is back running, but I'm a few steps from driving it to report on my findings.
Thanks for the detail. As I read back through your thread, I see you had some issues during AutoX that you thought were tank/fuel starvation related. I wonder if that really was the problem or if the issue was electrical or elsewhere. You seemed to have a pretty decent setup for your in-tank-tank/reservoir. Maybe the issue is that your return feed doesn't dump back into it? I don't like the idea of reheating fuel, but it's does keep the pump submerged and I think that's how it's done on the newer OEM fuel pump modules and it's how the Tanks Inc hanger is setup.
By "dump back into it" do you mean into the fuel pump reservoir area? That certainly is a possibility. When I started this swap, I read somewhere to return far from the pump to avoid frothing and pump cavitation. I've since seen retrofit applications using modern Camaro/CTS-v pumps, which incorporate the pressure regulator in the pump assembly.
I just replied to your thread, but here's hoping that return setup fares better for you than mine has.
Yes, I mean having the fuel return going back into the same tray where the fuel pump pickup sock is located. On my Tanks Inc PA-4 hanger module (image here), the return line has a down-tube and exits near the bottom inside of the tray, so the return remains submerged; I assume this is to prevent frothing. You might consider pulling your module and modifying to mimic that design. The way you currently have it, you are pumping out / emptying the tray and returning it to other parts of the tank. Changing the return setup might yield better results in autocross, at least that's what I'm banking on.
Last edited by -TheBandit-; 09-21-2015 at 02:23 PM.
So not to leave anyone hanging, I did finish this project. I broke one of the Vintage Air slide pots for the OEM control panel, which they're very proud of ($35 apiece!). Given that combined with the limited space brought about by my newfound in-dash vents, I elected to run a VA streamline panel. To my surprise, the AC works again! It was intermittent when I ran the OEM controls, so this is a pleasant surprise. The new engine harness is also working wonderfully.
Here's how the interior looks now. Clearly a stereo will be necessary. I'm also planning to modify the console to better cover the PCM.
The relay center is now in the glove box.
While I was at it, I picked up a lower shift boot from a 4th gen F-body to seal the trans tunnel. It works brilliantly.
70novaSS was also gracious enough to make me a new package tray to replace the old flimsy, warped cardboard piece. I need some speakers to finish it.
Good Guys is next weekend, so I'll be running her at the autocross. I doubt I'll have time to modify my fuel return by then, so that will likely be next on my list of things to do. But videos coming soon.

 07-23-2015, 10:46 AM