
LQ4 in a 1971 Nova
 06-23-2009, 12:07 PM
#81
I know it’s been a while – the girl’s literally had me traveling the country (and mexico!) for the past month or so. Plus I’ve been coordinating with the machine shop to ensure i’m where I want to be with the engine, so it’s been slow going.
I got the harness cleaned-up, but I’m going to wait until the engine and trans are done to finish it. I’ve still gotta solder on some connectors, and maybe run a few more wires.
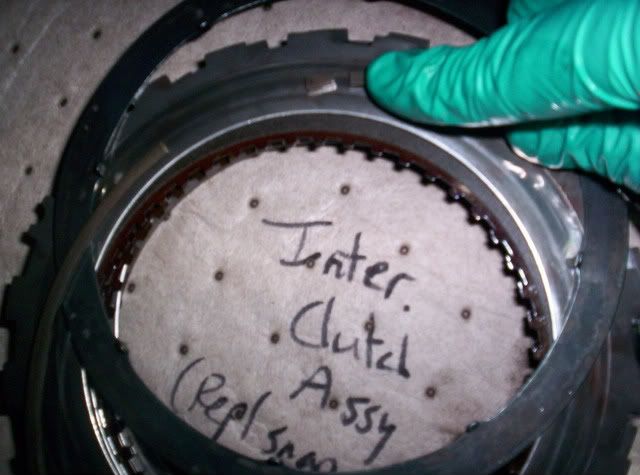
I also decided to install a TransGo HD2 kit in the ‘80e. Unfortunately, I found a piece of the intermediate clutch snap ring in the pan (see below and click here for some pics), so I decided to overhaul the entire unit. Luckily the HD2 kit comes with a beefed-up snap ring to ensure this doesn’t happen again. I went with Raybestos frictions, rather than going all-out with alto red eagles. Believe it or not, the most expensive piece I bought was the 4th clutch seal protector. That b**ch was $175! It’s literally three pieces of metal with a couple steps on them. Wow. Anyway, I’m in the middle of the rebuild right meow.
The engine build will come next. Here’s the specs on the (soon-to-be-built) engine (pics here):
*2000 6.0L LQ4 block bored .030 over
*Stock crank
*Mahle L92-specific flat-tops with 4cc valve reliefs, 4.030 bore
*Scat 6.125 I-beam rods (found out a few days ago that my stockers wouldn’t work with the pistons - .943 stock wrist pin vs. .927 Mahle)
*L92 heads with Comp 921s, 69cc CR has been calculated at 10.28:1 (I may mill these bump up the CR a bit – 67cc brings it to my desired 10.5:1). Exhaust ports will be touched-up.
*LG Motorsports G6X3 cam
*Stock LS3 intake and 42# injectors
*Holley 90mm cable TB
*American Racing Headers 1 7/8” long-tubes – I may be selling these because of the clearance issues with the O2 sensors and 80e pan.
I got the harness cleaned-up, but I’m going to wait until the engine and trans are done to finish it. I’ve still gotta solder on some connectors, and maybe run a few more wires.
I also decided to install a TransGo HD2 kit in the ‘80e. Unfortunately, I found a piece of the intermediate clutch snap ring in the pan (see below and click here for some pics), so I decided to overhaul the entire unit. Luckily the HD2 kit comes with a beefed-up snap ring to ensure this doesn’t happen again. I went with Raybestos frictions, rather than going all-out with alto red eagles. Believe it or not, the most expensive piece I bought was the 4th clutch seal protector. That b**ch was $175! It’s literally three pieces of metal with a couple steps on them. Wow. Anyway, I’m in the middle of the rebuild right meow.
The engine build will come next. Here’s the specs on the (soon-to-be-built) engine (pics here):
*2000 6.0L LQ4 block bored .030 over
*Stock crank
*Mahle L92-specific flat-tops with 4cc valve reliefs, 4.030 bore
*Scat 6.125 I-beam rods (found out a few days ago that my stockers wouldn’t work with the pistons - .943 stock wrist pin vs. .927 Mahle)
*L92 heads with Comp 921s, 69cc CR has been calculated at 10.28:1 (I may mill these bump up the CR a bit – 67cc brings it to my desired 10.5:1). Exhaust ports will be touched-up.
*LG Motorsports G6X3 cam
*Stock LS3 intake and 42# injectors
*Holley 90mm cable TB
*American Racing Headers 1 7/8” long-tubes – I may be selling these because of the clearance issues with the O2 sensors and 80e pan.
 06-24-2009, 10:51 AM
#83
2000. I know they made some changes in late 1999, which I confirmed upon disassembly. O/H has been fun - I chucked up the output shaft bushing during installation, and the bushing kit didn't come with the OD drum rear bushing. Other than that, I'm rockin' on it.
 06-24-2009, 04:55 PM
#85
TECH Regular
iTrader: (8)
Join Date: Apr 2009
Location: Mount Bethel PA
Posts: 431
Likes: 0
Received 0 Likes
on
0 Posts

good stuff. i have been looking around here for an 80 but up in the north its hard to find any 4x2 there all 4x4's every thing i find is in the 850-1200 range more then my budget. so i may take a ride to a local u pull it scrap yard on the weekend and do some scoping see if i can find one to pull me self. wish me luck lol
07-14-2009, 01:19 PM
#86
finally done with the 80 rebuild! finished it up last night. ran into a couple issues right at the end, bolting up the valve body (almost lost a bolt, then check ball, into the drivetrain; sheared a bolt off, bent another, etc etc), but all-in-all it went well. i'm praying it doesn't explode as soon as i put it in gear though. oh, and i picked up a vig 3600 single-disc torque converter. here's a link to some trans pics i took. nothing too special. also, i used this thread by blown3qtr at performancetrucks - it was immensely helpful.
some final thoughts on the build:
-i wish i had a better work bench and holding fixture. i understand the 80e weighs somewhere near 260 lbs., and it feels every bit that heavy. i did get good at manhandling it by the end though.
-the atsg manual is a horribly-written piece of $#!+
-the sun gear shaft houses 2 bushings, not 1. but a couple extra just in case (the kit i bought only had 1, and i damaged another). also the kit i bought didn't include the correct rear stator bushing.
-wtf is up with trans tools costing $150+? i paid $175 for the 4th clutch lip seal installer, which is literally 3 pieces of stepped tubing. i guess it's worth it, judging by some of the other builds i came across. but (luckily) that was the only tool i had to purchase.
-did i mention how terrible the atsg manual is? it helps a little, but be sure to take plenty of pictures/notes during disassembly.
here's a few other links i used that others may find helpful:
blow-up diagram
great drivetrain reference
some info from the 'automatic trans' section
info on the HD2 shift kit, optional upgrades
tech info
my engine is back from the machine shop - i'm going to clean and prep it tonight. wish me luck.
Last edited by hookemdevils22; 07-14-2009 at 02:55 PM.
 08-01-2009, 04:12 PM
#89
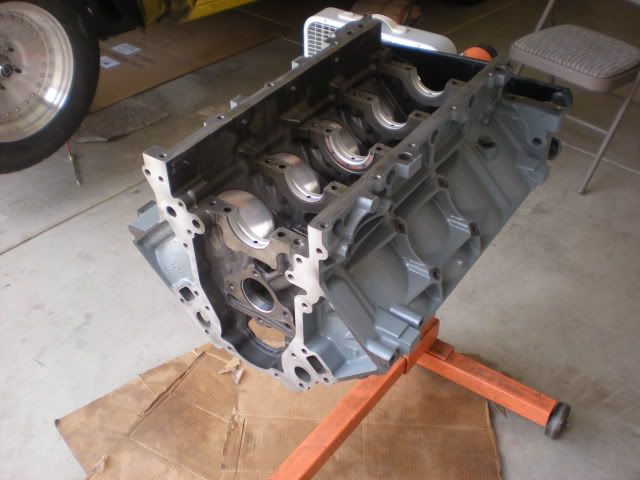
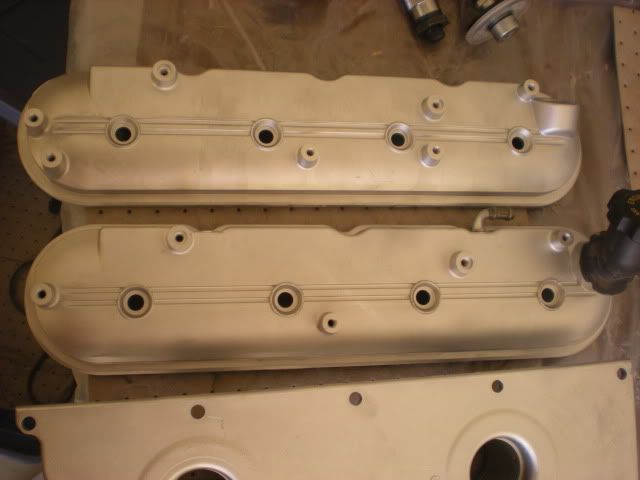
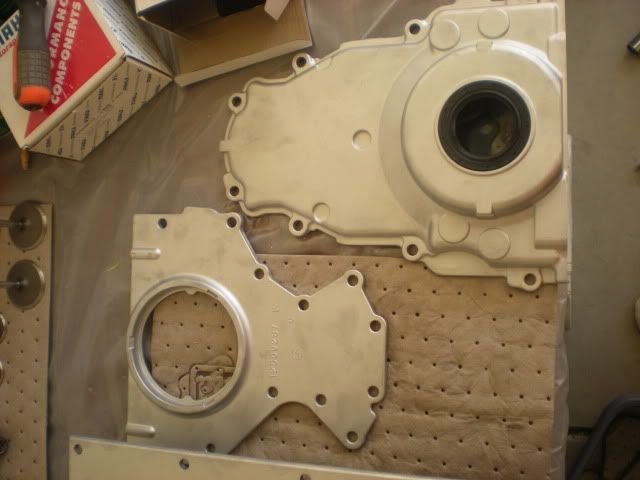
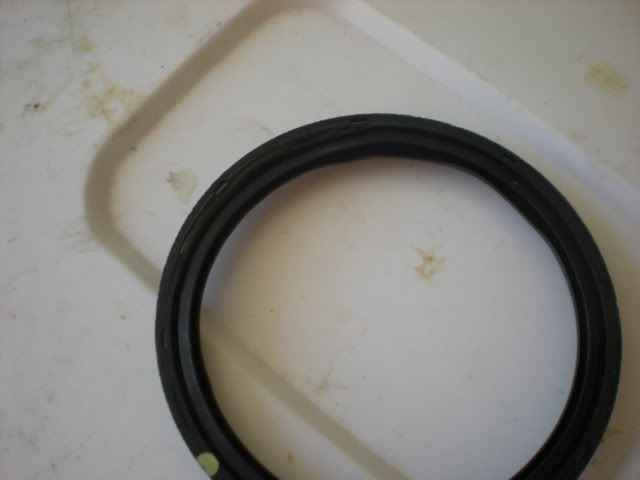
slowly coming along with the engine build. i cleaned the front/rear/valley/valve covers today using the glass peen machine at work. wow, what a difference - they look better than new. i'm planning to shoot the outer surfaces with rattle can clear coat. anyone have experience with this - good idea or nay? i also installed the front and rear crank seals - went a little crazy on the rear and tore it though  got a new one on order.
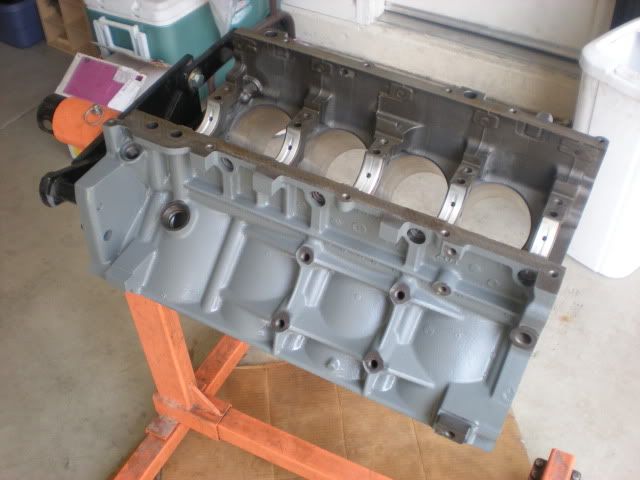
i'm almost done with preassembly - still need to degree the cam and check ptv clearance. pistons were .007" out of the hole, and i calculated the static CR to be 10.2:1 with the 69cc (yes, they were checked) L92s. I'm mulling over milling the heads to 66cc's for 10.55:1 CR. btw, i painted the block ford grey - i figured i'd do ford a favor so at least something they came up with would be fast
here's some pics:
and the covers:
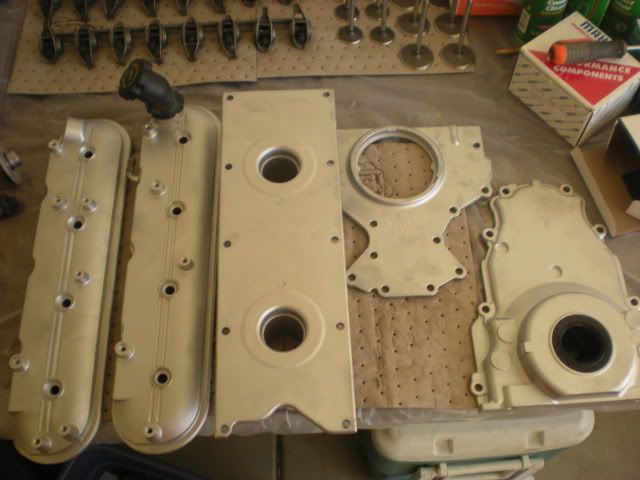
rear seal (upper left) - whoops
got a new one on order.i'm almost done with preassembly - still need to degree the cam and check ptv clearance. pistons were .007" out of the hole, and i calculated the static CR to be 10.2:1 with the 69cc (yes, they were checked) L92s. I'm mulling over milling the heads to 66cc's for 10.55:1 CR. btw, i painted the block ford grey - i figured i'd do ford a favor so at least something they came up with would be fast
here's some pics:
and the covers:
rear seal (upper left) - whoops
08-02-2009, 03:17 PM
#91
good call, that's what i was wondering.
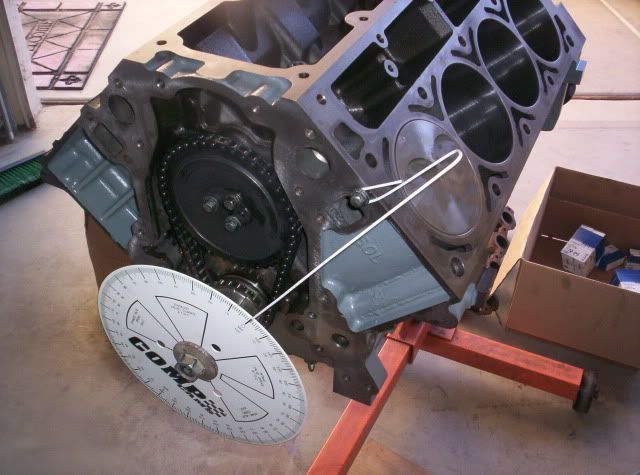
finished pre-assembly. ptv clearance was a large .275 intake / .240 exhaust. i'm going to mill the l92's to get around 10.5:1 cr. all that's left is setting piston ring gap and determining pushrod length. so close...
finished pre-assembly. ptv clearance was a large .275 intake / .240 exhaust. i'm going to mill the l92's to get around 10.5:1 cr. all that's left is setting piston ring gap and determining pushrod length. so close...
08-09-2009, 04:44 PM
#95

A man after my own heart with that Grey motor i paint all my motors grey like that always underestimated wen you pop the hood for someone hehe tell them it came out of an old econoline van just dropped it right it nice car im doing 4 ls based swaps in my shop right now 72 nova 88 S15 85 C10 and 96 S10 keep up the good work
08-10-2009, 09:22 AM
#96
cam specs are roughly 235/242 @ .050, .645/.620 on 111 lsa. it's an lg motorsports g6x3 cam. it definately strikes me as being 'backward' for the L92s, but i talked with louis @ lg, and they spent a lot of time on the dyno coming up with that combo.
headers are american racing 1 7/8" lsx conversion headers for 1st-gen f-body/3rd gen nova. real nice pieces. only complaint is the o2 sensor bungs are welded on the inside. they interfere w/ the 4l80e pan, so i capped them and welded bungs on the outside. also, i should have gone with 1 3/4" primaries - i'll probably lose a little down low, as the cam is optimized for the 1 3/4s.
orange88 - let me know how the swaps go. esp. the 72.
oh, and i'm having the pcm flashed today, heads are at the machine shop being milled, and i'm going to start (continue) on the harness this evening. i also need to modify my oil pickup tube, since i cut the f-body pan (although it looks like i had plenty of room). should be in the engine bay as soon as i finish the tube.
08-17-2009, 12:18 AM
#97
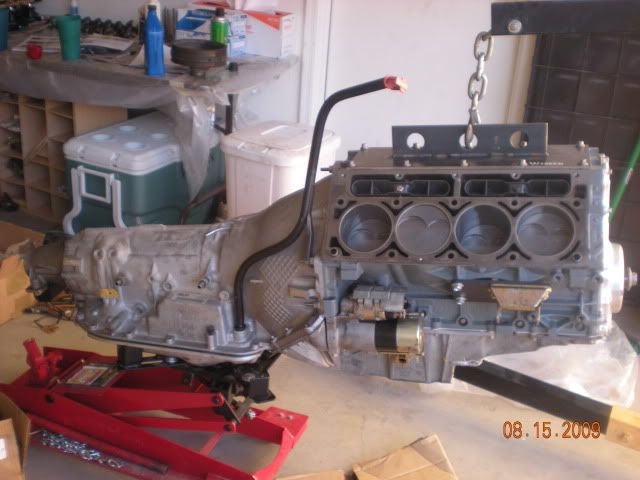
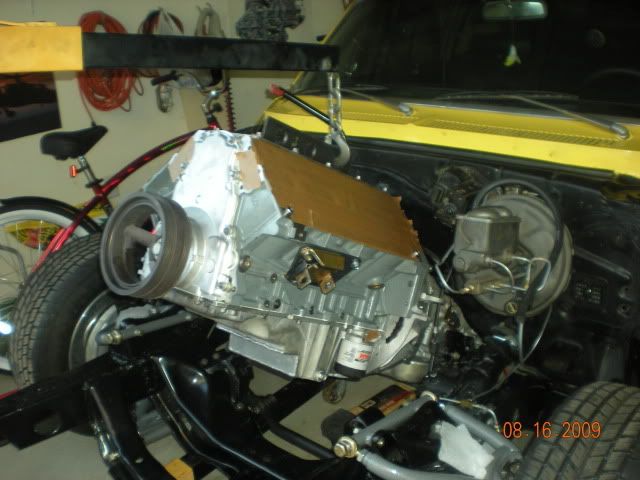
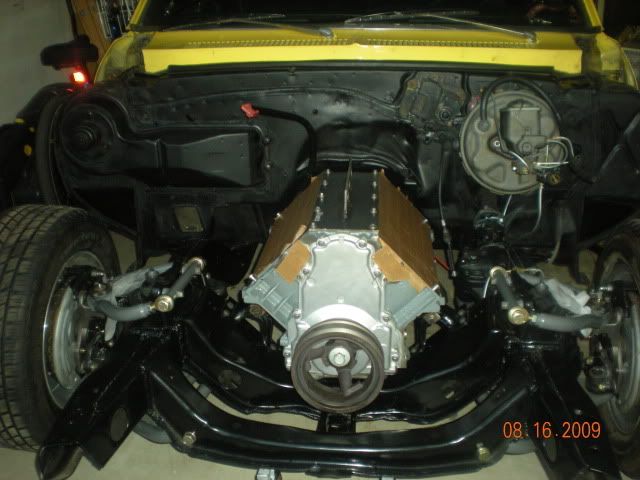
engine and trans are in. stoked about this. ordered some harness stuff, uscar injector connectors for the ls3 injectors, loom, and a few stray connectors that were damaged/gone - one of the plugs for the 80e was $60! list price was well over $100! for a stupid piece of plastic! anyway, i'm going to mock up the harness this week. i only need to measure my pushrod length, then the engine can be fully built. but i cleared a big hurdle this weekend - at least it's in the engine bay (hopefully for a loooong time). oh, and i had to weld an approx. 1" piece of tubing to the oil pickup - i thought i could bend it to make it fit the modified pan, but alas.
i've got a few more parts on order - going with an L92 water pump, heard it works with the car manifolds and truck accessories. on a related note, anyone know how to get the damn power steering pulley off? is the allen-head fastener right-hand or lefty thread? i want to blast the bracket, but couldnt' get the damn thing off.
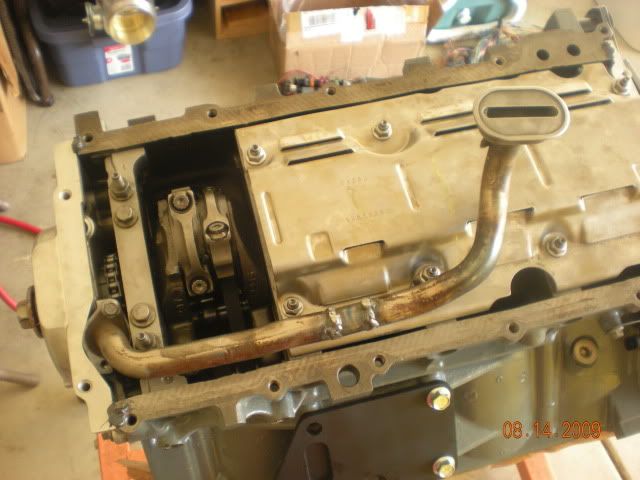
pickup tube. the factory bracket wouldn't work, so i welded a new bracket that you can't see. it's the second bolt from left end of the pan on the bottom.
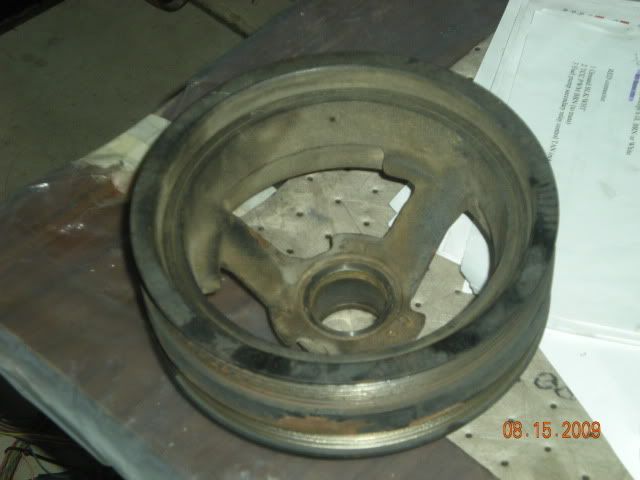
just for kicks, here's a pic of my balancer before i media blasted it today. it was looking pretty rough. you can see post-blast in the pics below. btw - the book i've been following, how to rebuild gm ls-series engines, recommended using an m16x2.0 by 120mm bolt to install the balancer. i ran all over town and couldn't find it (seriously, nobody but the chain stores is open on weekends!), and no auto parts store install kits (ok, the one i tried) worked, so i ended up torching the balancer. it slid right on enough to use the old crank bolt.
vig 3600 installed
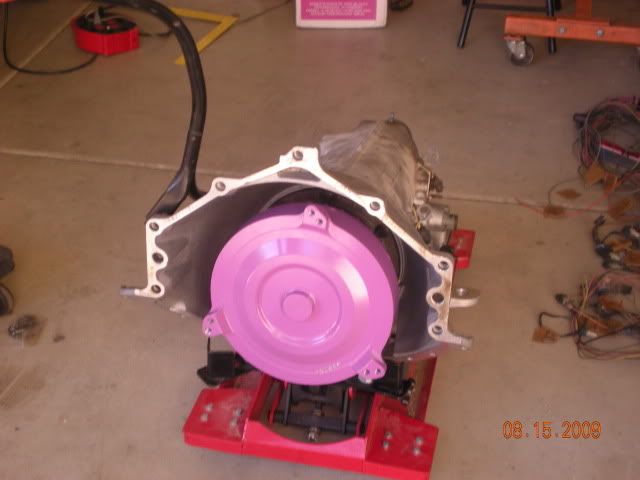
ready for install
almost there
man that's a beautiful thing
i've got a few more parts on order - going with an L92 water pump, heard it works with the car manifolds and truck accessories. on a related note, anyone know how to get the damn power steering pulley off? is the allen-head fastener right-hand or lefty thread? i want to blast the bracket, but couldnt' get the damn thing off.
pickup tube. the factory bracket wouldn't work, so i welded a new bracket that you can't see. it's the second bolt from left end of the pan on the bottom.
just for kicks, here's a pic of my balancer before i media blasted it today. it was looking pretty rough. you can see post-blast in the pics below. btw - the book i've been following, how to rebuild gm ls-series engines, recommended using an m16x2.0 by 120mm bolt to install the balancer. i ran all over town and couldn't find it (seriously, nobody but the chain stores is open on weekends!), and no auto parts store install kits (ok, the one i tried) worked, so i ended up torching the balancer. it slid right on enough to use the old crank bolt.
vig 3600 installed
ready for install
almost there
man that's a beautiful thing
10-02-2009, 08:02 PM
#98
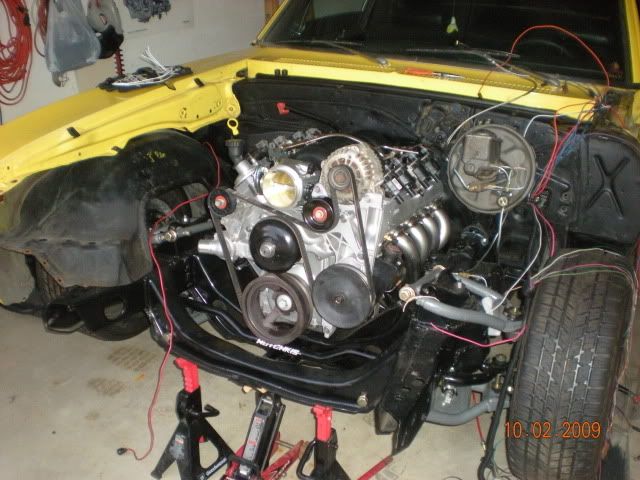
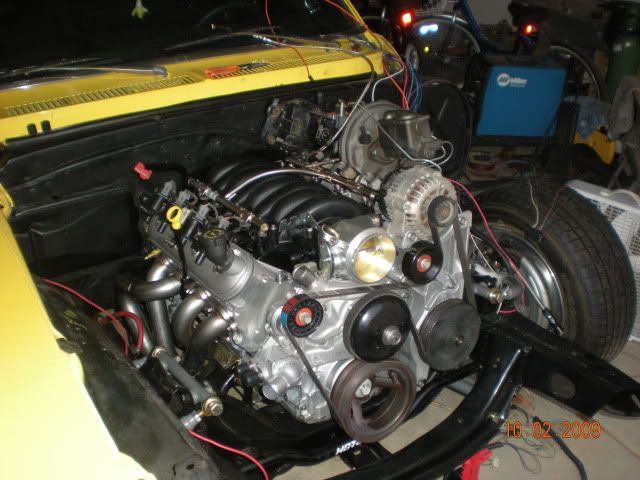
Haven't made much progress in the last month.. b-school's been taking up too much time. But - the harness is nearly done, just need to hook up a couple relays (following brendan's write-up on lt1swap.com) and she'll be set. and i need to fab up some cut-outs on my trans x-member for the exhaust and get a driveshaft. here's where i'm at:

i did just pick up a '72 scout which i'm pumped about. first up are front disc brakes, then steering, then the big dog - LQ4/4L60e. can't wait.
i did just pick up a '72 scout which i'm pumped about. first up are front disc brakes, then steering, then the big dog - LQ4/4L60e. can't wait.