
89 RX7 Vert LS1/T56/Cobra diff IRS
 01-19-2009, 11:43 AM
#1
TECH Senior Member
Thread Starter
iTrader: (7)

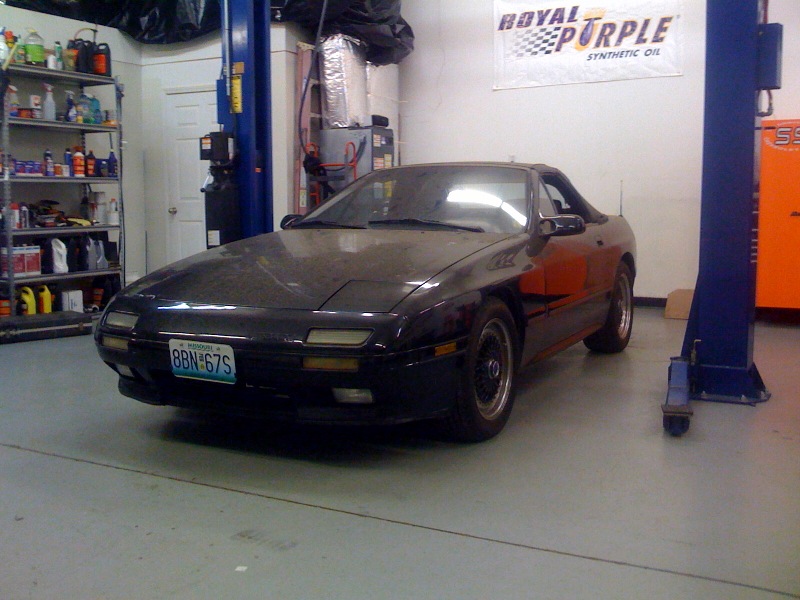
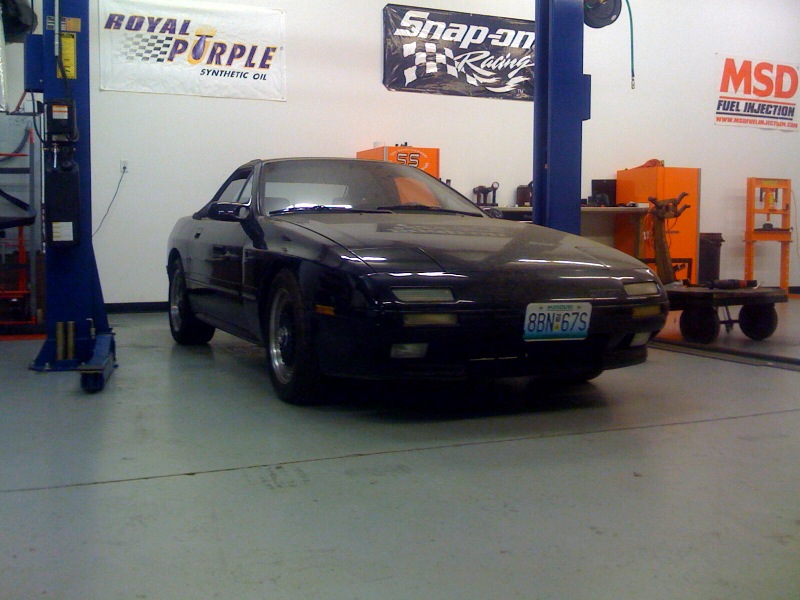
This is a new project for me that I am doing for a guy that I met through the board. The car is a super clean 89 convertible. I started on it last Monday and I hope to have most of the mechanical systems wrapped up by Friday. Thanks The Horsepower House for the shop space and a helping hand!
Here are some progress pictures:
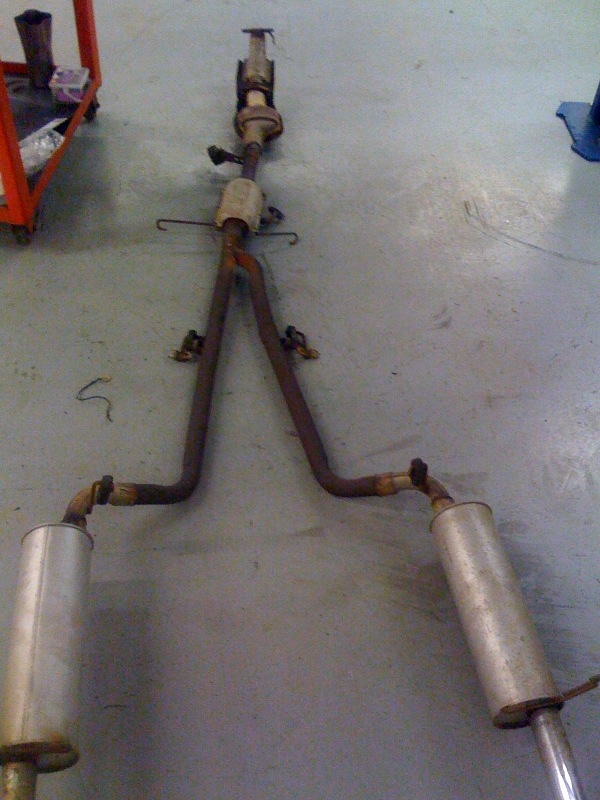
First thing I did was drop the original exhaust:
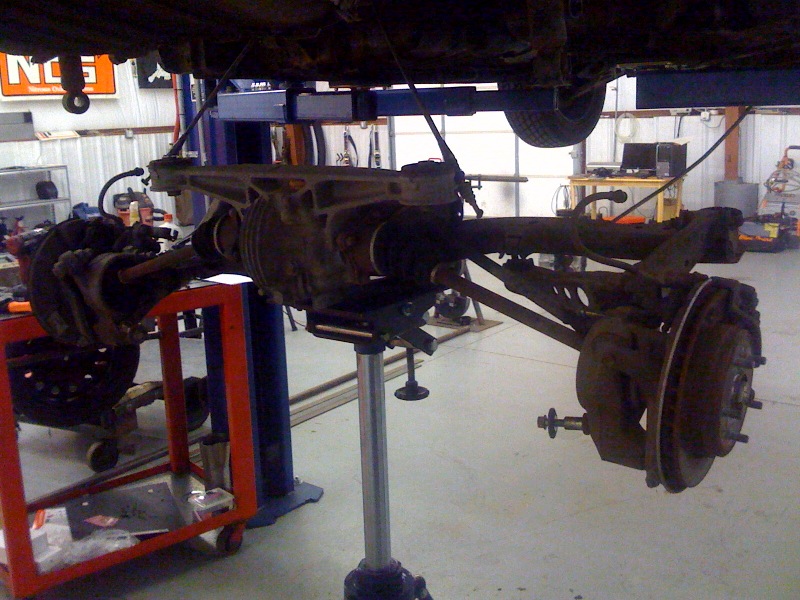
With the exhaust out of the way it is very simple to remove the whole rear end as an assembly:
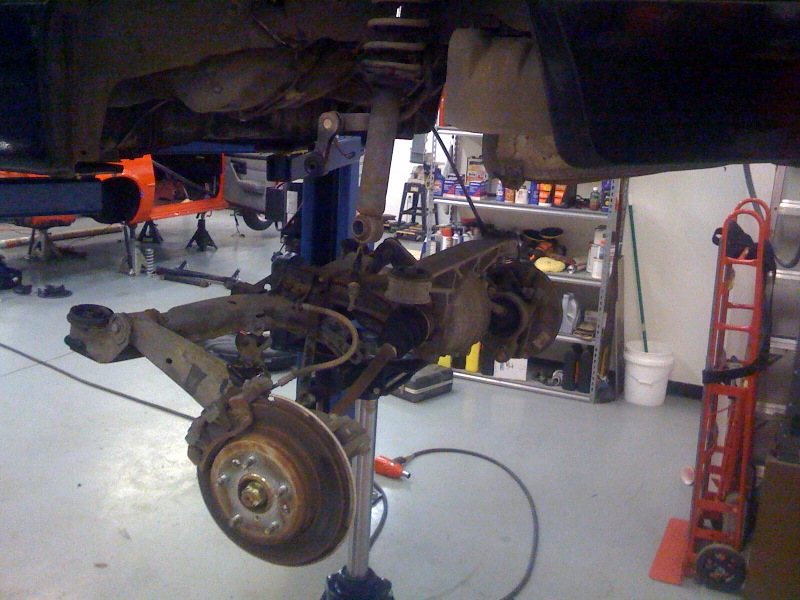
This is a stock NA rear with a 7"ring gear and an open diff. Standard convertible equipment.
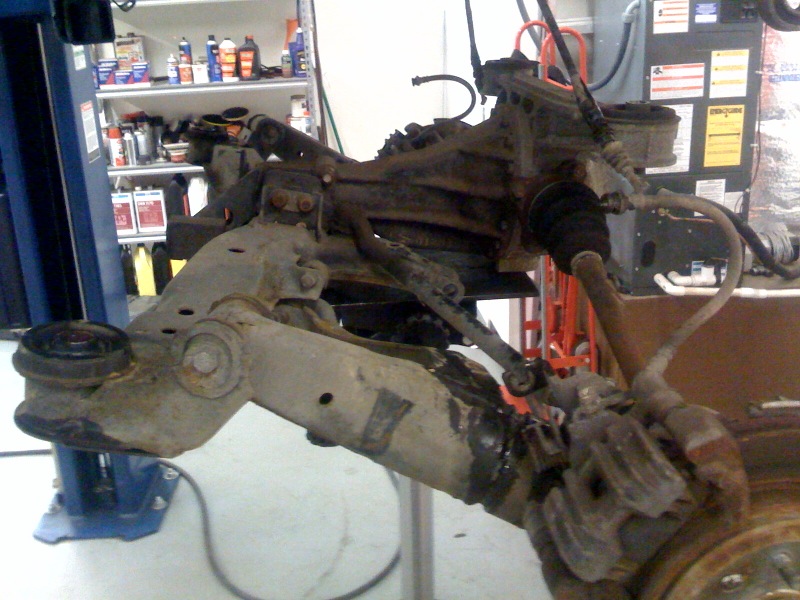
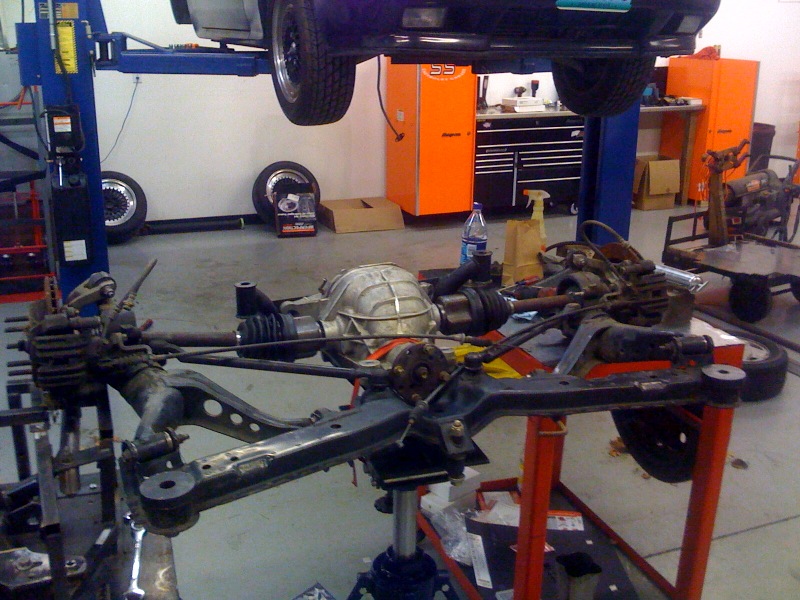
The rear end going into this car came out of my last project "Darrell". It is a 2004 Cobra rear end with the stock diff and 3.55 gears. It is mounted on my custom cradle and uses custom axles from The DriveShaft Shop. The inner CVs are stock 31 spline Cobra, while the outboard side has massive 33 spline CVs inside bored and broached RX7 hubs.
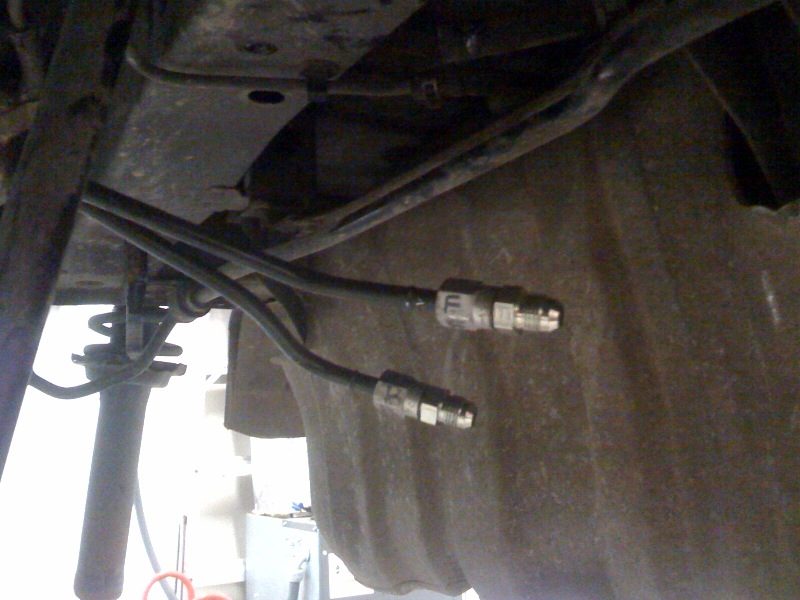
On all of my previous builds I have used the stock RX7 fuel lines for both the feed and the return. I like using AN fittings for the rest of the system. There is an excellent hydraulic store in town and I get everything from them. The prices are way less than some fancy shmancy fittings and the quality is excellent. Here are the compression fittings that mate the hard lines to the AN hoses.
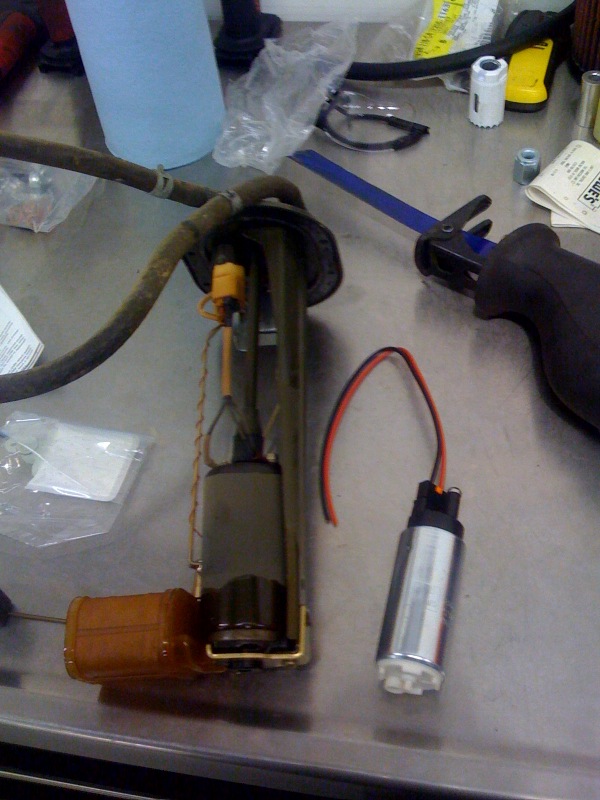
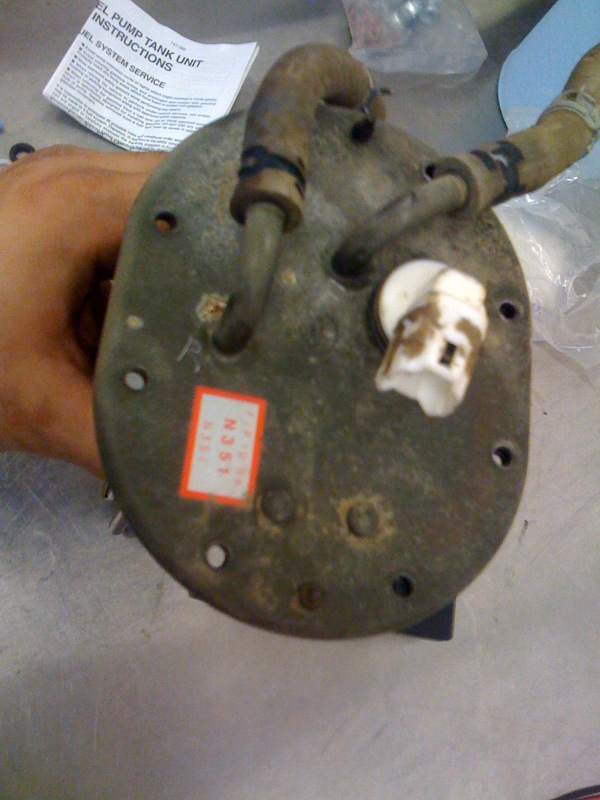
The stock fuel pump was replaced with a Walbro 255 L/hr pump. The feed and the return lines on top of the fuel pump insert also received the same compression fittings as the previously shown fuel lines.
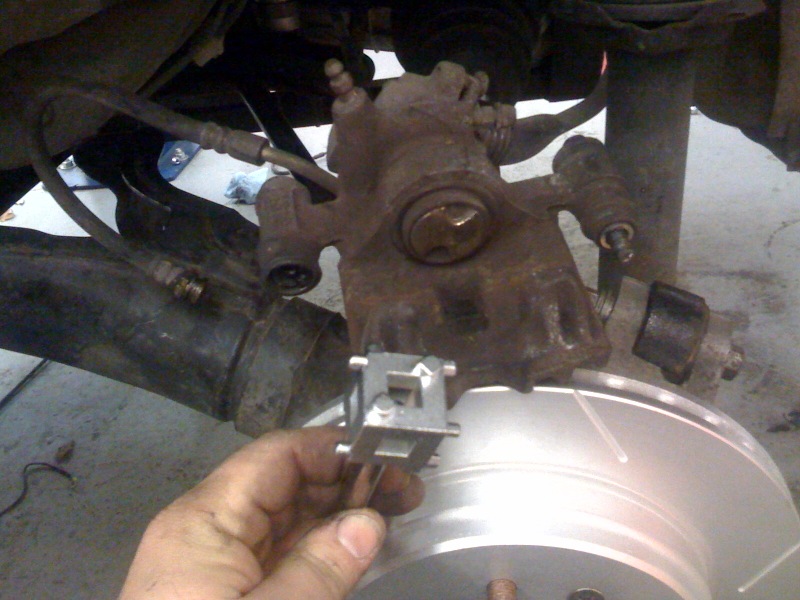
The brakes were upgraded with Power Slot rotors and Hawk HP pads. This is a handy little tool that makes resetting the rear calipers a snap:
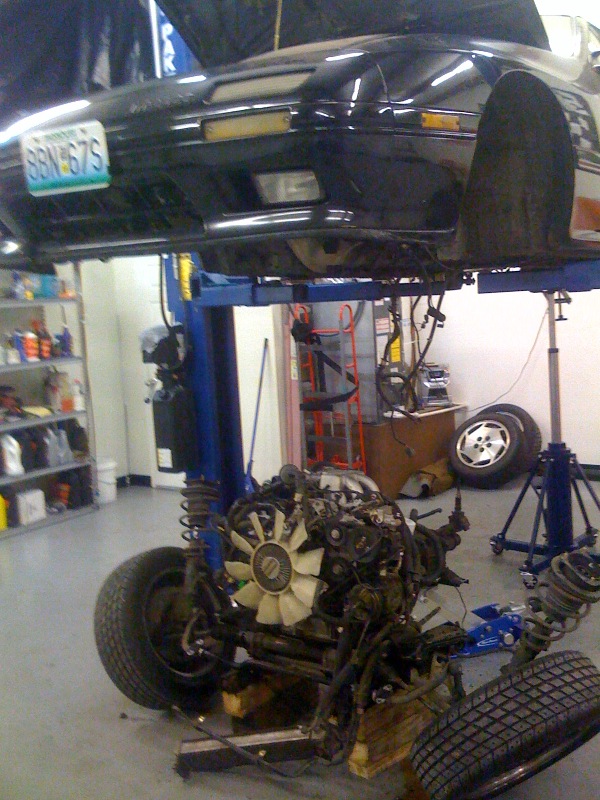
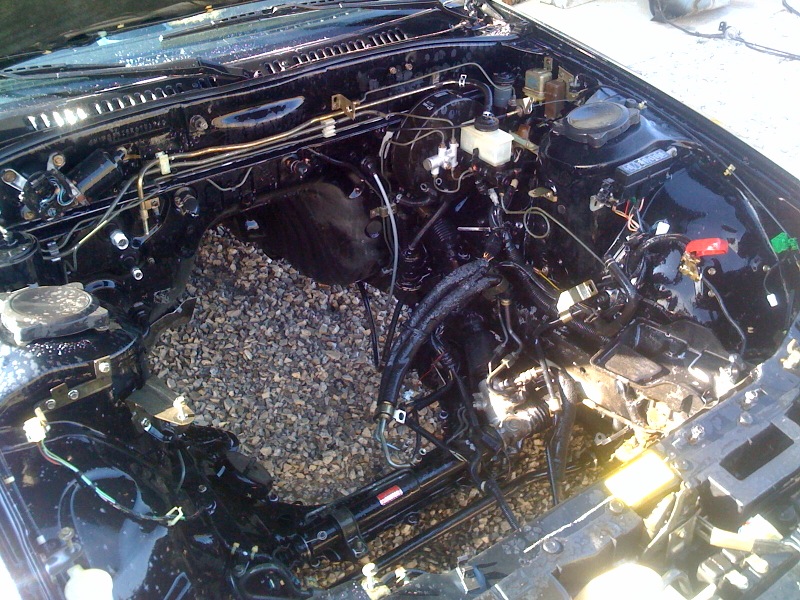
After the rear end was buttoned up it was time to start getting the engine out:
After a couple of hours of disconnecting all of the plumbing and electrical connections, the engine and transmission were dropped out the bottom:

The car was taken outside for a quick soaking in Simple Green and a good pressure wash:
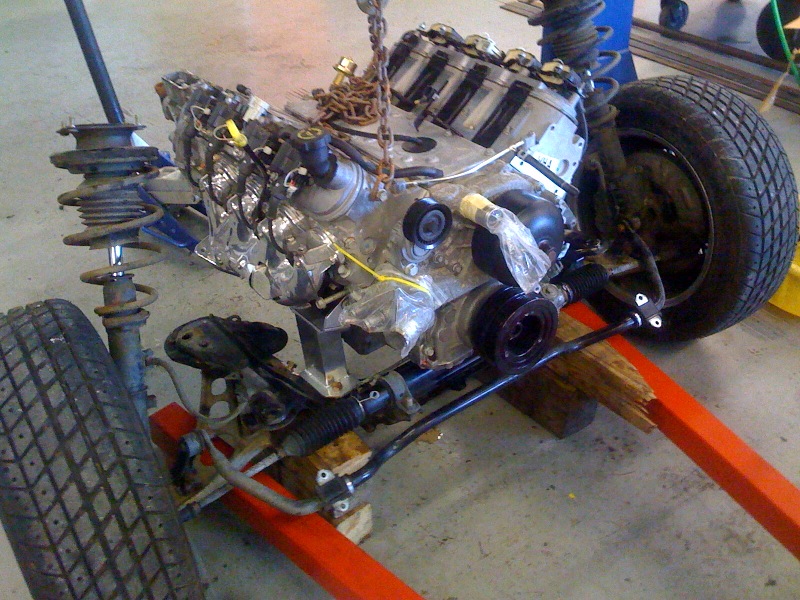
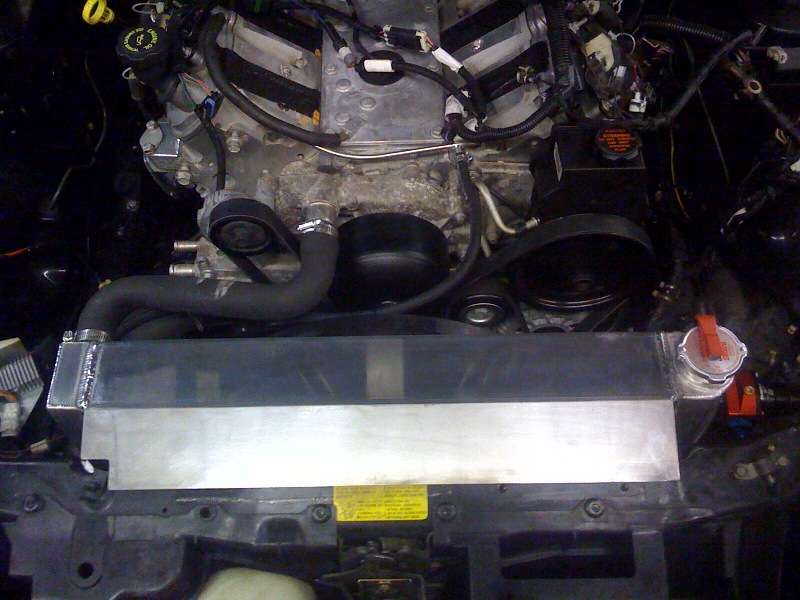
New engine and transmission being mocked up:
More to come....
Andrew
Here are some progress pictures:
First thing I did was drop the original exhaust:
With the exhaust out of the way it is very simple to remove the whole rear end as an assembly:
This is a stock NA rear with a 7"ring gear and an open diff. Standard convertible equipment.
The rear end going into this car came out of my last project "Darrell". It is a 2004 Cobra rear end with the stock diff and 3.55 gears. It is mounted on my custom cradle and uses custom axles from The DriveShaft Shop. The inner CVs are stock 31 spline Cobra, while the outboard side has massive 33 spline CVs inside bored and broached RX7 hubs.
On all of my previous builds I have used the stock RX7 fuel lines for both the feed and the return. I like using AN fittings for the rest of the system. There is an excellent hydraulic store in town and I get everything from them. The prices are way less than some fancy shmancy fittings and the quality is excellent. Here are the compression fittings that mate the hard lines to the AN hoses.
The stock fuel pump was replaced with a Walbro 255 L/hr pump. The feed and the return lines on top of the fuel pump insert also received the same compression fittings as the previously shown fuel lines.
The brakes were upgraded with Power Slot rotors and Hawk HP pads. This is a handy little tool that makes resetting the rear calipers a snap:
After the rear end was buttoned up it was time to start getting the engine out:
After a couple of hours of disconnecting all of the plumbing and electrical connections, the engine and transmission were dropped out the bottom:
The car was taken outside for a quick soaking in Simple Green and a good pressure wash:
New engine and transmission being mocked up:
More to come....
Andrew
 01-19-2009, 12:41 PM
#2
Damn looks like a fun project!
__________________
Glenn ***
Sales Tech
www.bmrsuspension.com
813.986.9302

Find a Quality alignment shop near you!
Glenn ***
Sales Tech
www.bmrsuspension.com
813.986.9302
Find a Quality alignment shop near you!


Trending Topics
01-20-2009, 09:14 AM
#8
TECH Senior Member
Thread Starter
iTrader: (7)
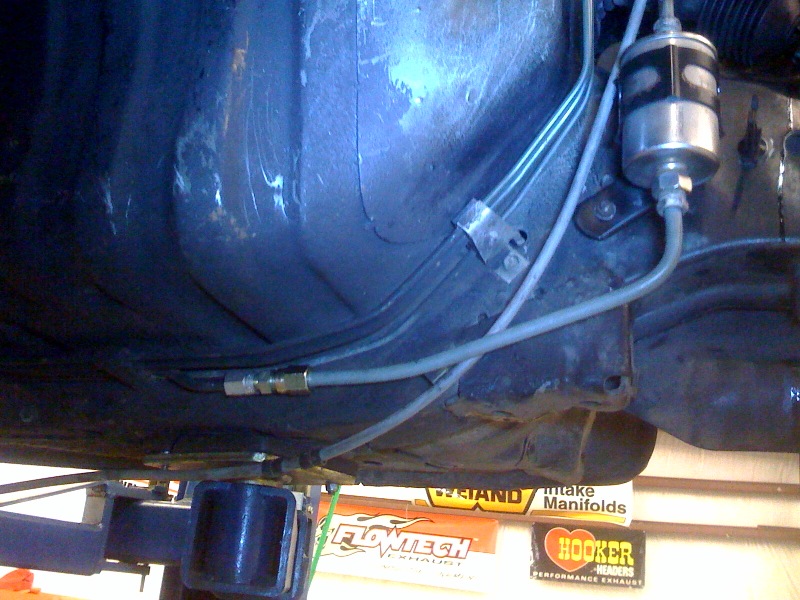
The more I work on cars, the more I like using as much OEM equipment as possible. This fuel filter is very common and can be purchased in any parts store for less than $10. Since this car will be using F-body exhaust manifolds, there is plenty of room to leave the filter in the stock location. I joined the stock RX7 feed line to a 3/8" with the same compression union that I used everywhere else on the fuel system.
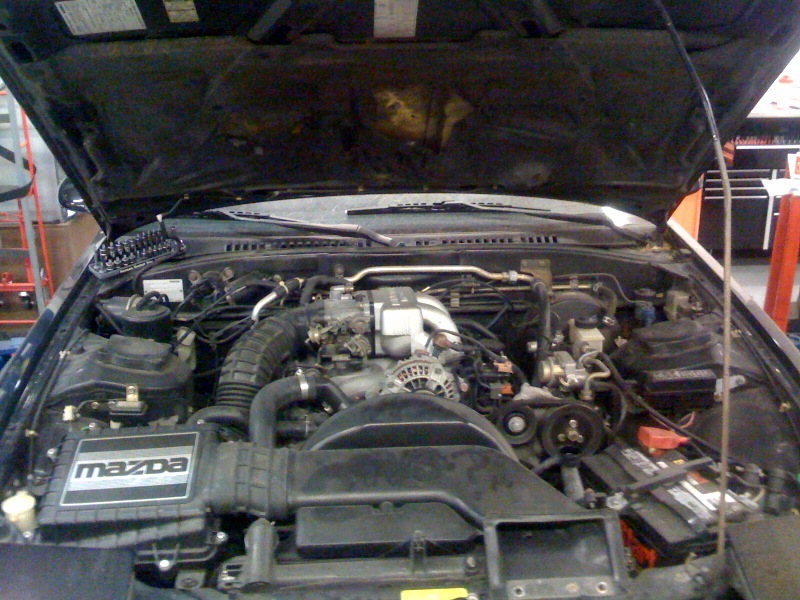
The engine is installed in the car, so there will be more pictures tonight.
Andrew
The engine is installed in the car, so there will be more pictures tonight.
Andrew
 01-20-2009, 11:26 AM
#11
TECH Fanatic
iTrader: (15)
Join Date: Jun 2006
Location: Janesville WI
Posts: 1,155
Likes: 0
Received 0 Likes
on
0 Posts

Wow Andrew, you are doing conversions for others now!
Want to take on one of my projects? My pace is frustratingly slow, your pace will actually get it done!
And your write ups are always informative! Subscribing.
Want to take on one of my projects? My pace is frustratingly slow, your pace will actually get it done!
And your write ups are always informative! Subscribing.
01-20-2009, 11:28 PM
#12
TECH Senior Member
Thread Starter
iTrader: (7)
 I also take bad *** T56's in trade.
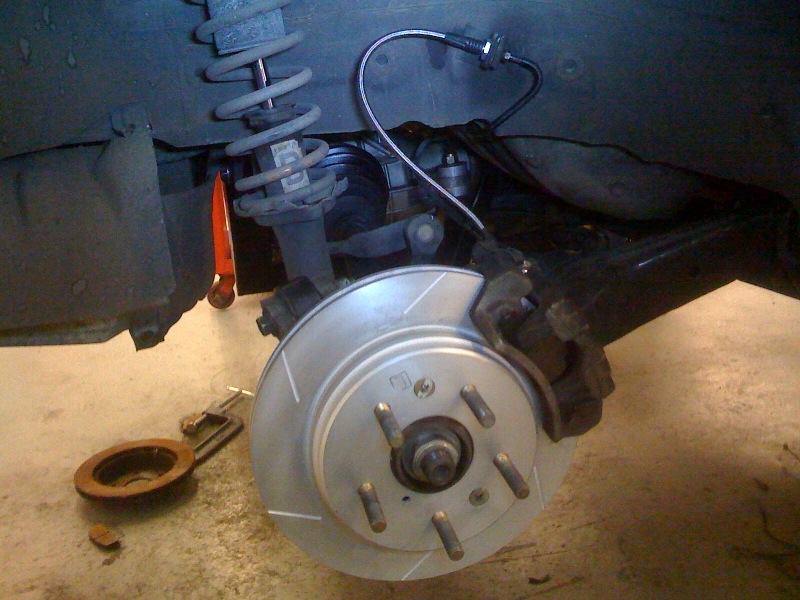
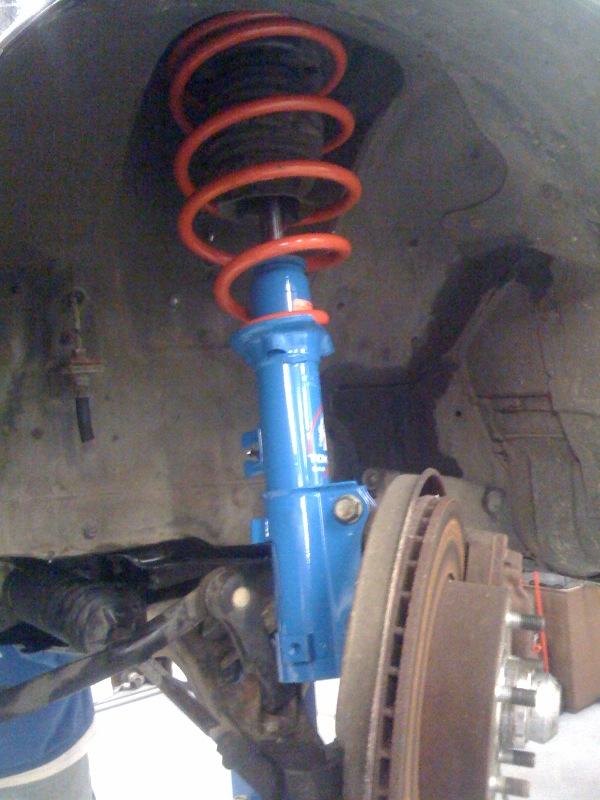
Just a little progress today. Got the new struts and springs installed, along with new rotors (not pictured) and pads.
I also called Turn One to get the resized power steering orifice to reduce the volume of fluid going to the rack. This is my first time doing a car with a power rack and I am eager to see how different it feels compared to manual steering. For the power steering pressure line I used the stock LS1 line. I cut the end that went into the F-body rack then used the tube nut from the stock RX7 line. The RX7 rack uses a standard 45 degree inverted flare fitting. So I just flared the line for a simple, cost effective solution. I plan on using the stock return line with the integral cooler.
Andrew
01-21-2009, 06:33 PM
#16
TECH Senior Member
Thread Starter
iTrader: (7)
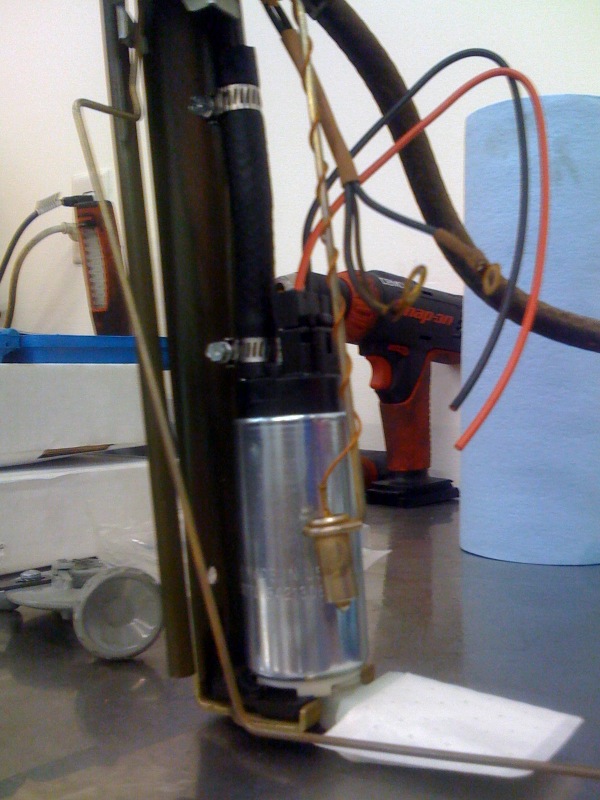
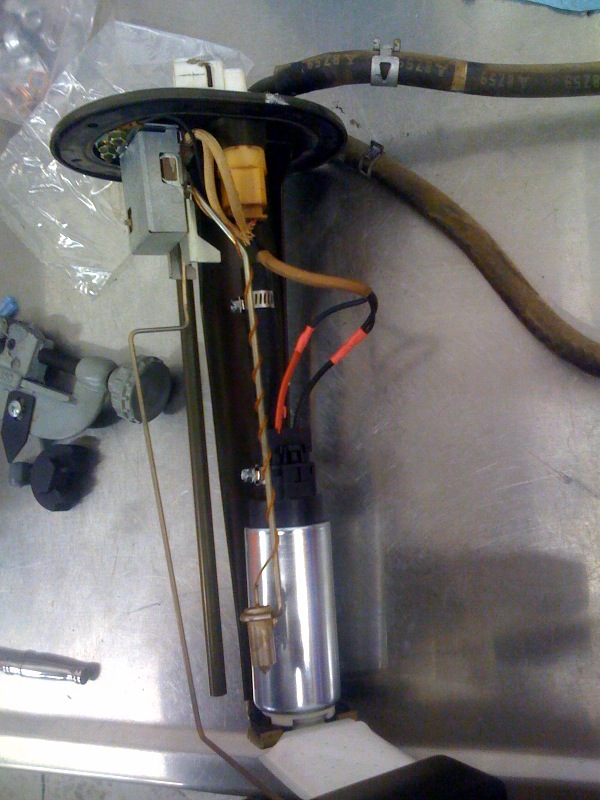
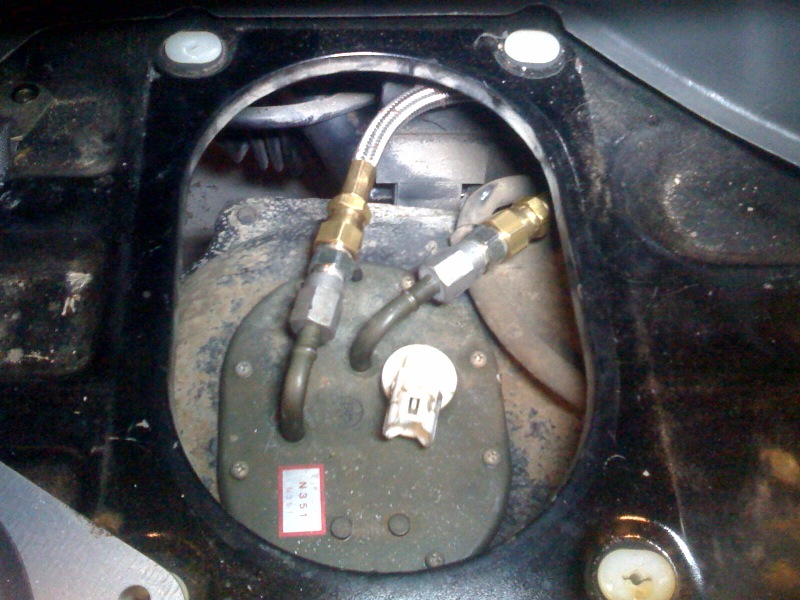
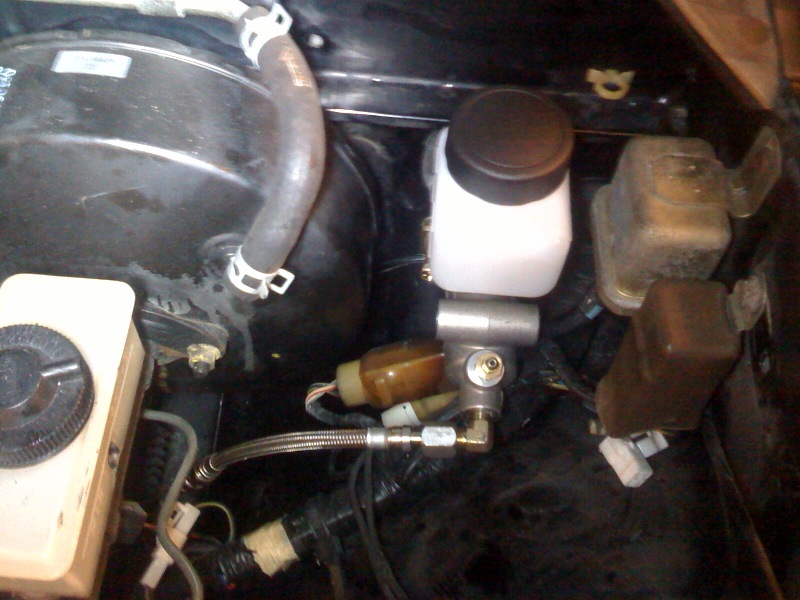
Here is a picture of the fittings on top of the fuel pump insert. Once again you can see the compression fittings with Teflon lined stainless braided hose.
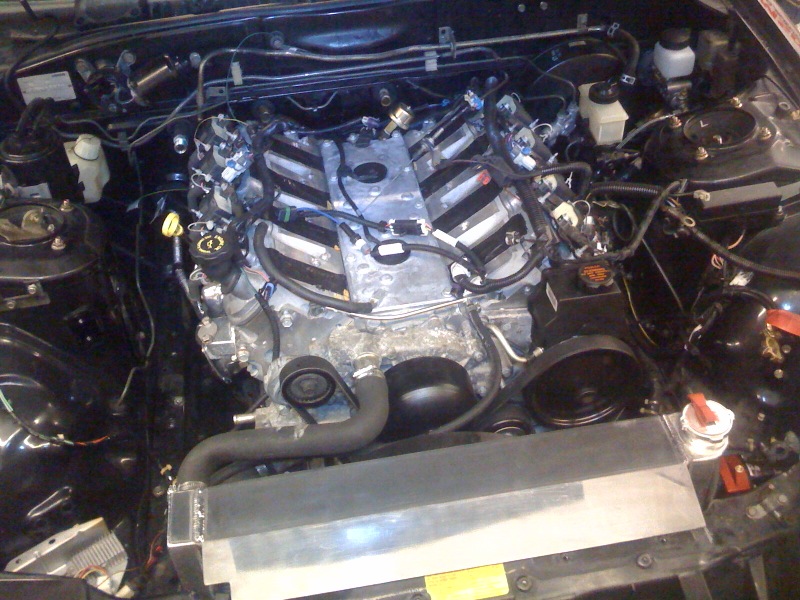
The Hinson radiator kit is OK. Not great by any means, but OK. I wish some instructions were included as to where the cuts need to be. I also wish that Brian would have returned my call when I called yesterday. Oh well.
The mounting pads that are welded to the radiator can certainly be made a little wider. And instead of the giant slots, I would have preferred making my own holes, as needed.
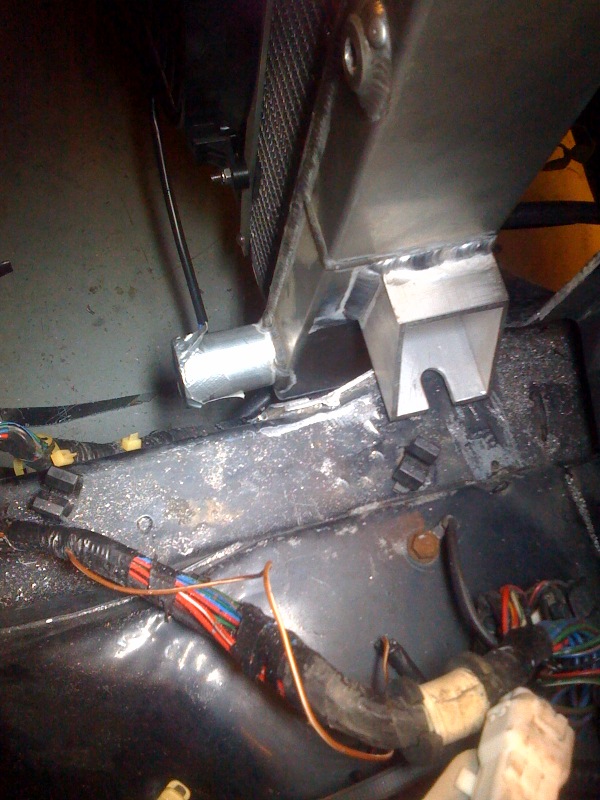
We drilled small holes in the top of the frame rails and used a punch to enlarge them to accommodate the right size tap. Using a punch to enlarge the holes folds the metal over and gives more surface area for tapping. There are several stock rubber pads that are no longer used, so we used them to cushion the radiator. I am going to get some big washer to go under and over the aluminum bracket for added support.
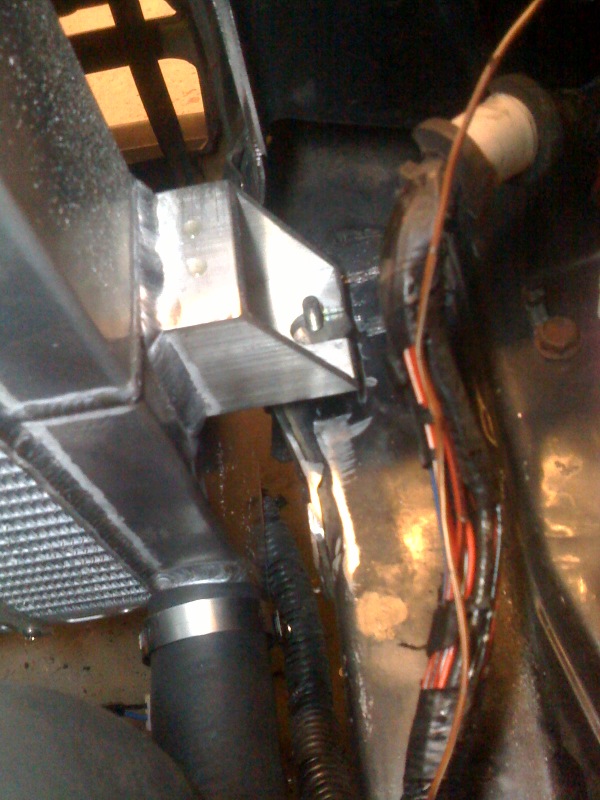
Overall, not a bad looking setup.
I saw no reason to do anything crazy with the pressure side of the power steering hose. I reused the F-body hose and modified the end using the tube nut from the stock Mazda hose.
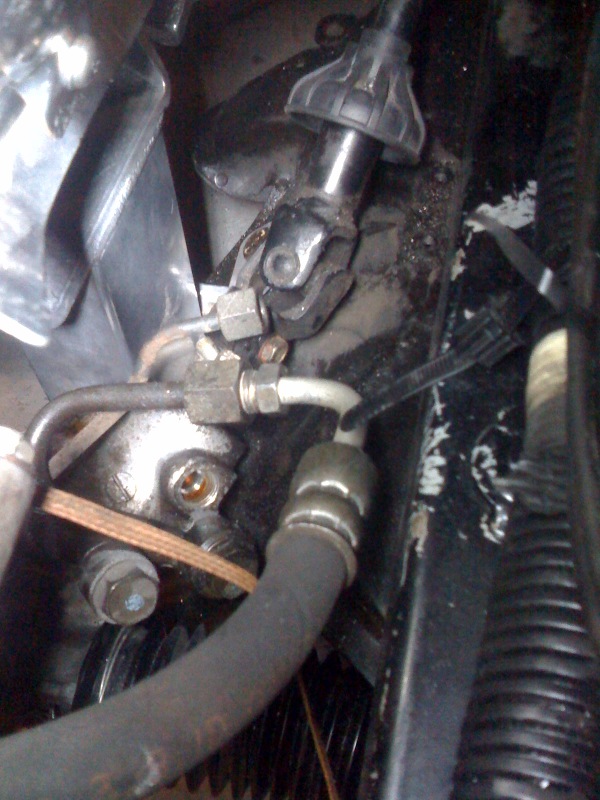
The small port next to it will simply get plugged with a welded line made from the stock Mazda line. The return line will also retain the stock cooler loop and fittings.
The clutch master was mounted.
Moving right along.
Andrew
The Hinson radiator kit is OK. Not great by any means, but OK. I wish some instructions were included as to where the cuts need to be. I also wish that Brian would have returned my call when I called yesterday. Oh well.
The mounting pads that are welded to the radiator can certainly be made a little wider. And instead of the giant slots, I would have preferred making my own holes, as needed.
We drilled small holes in the top of the frame rails and used a punch to enlarge them to accommodate the right size tap. Using a punch to enlarge the holes folds the metal over and gives more surface area for tapping. There are several stock rubber pads that are no longer used, so we used them to cushion the radiator. I am going to get some big washer to go under and over the aluminum bracket for added support.
Overall, not a bad looking setup.
I saw no reason to do anything crazy with the pressure side of the power steering hose. I reused the F-body hose and modified the end using the tube nut from the stock Mazda hose.
The small port next to it will simply get plugged with a welded line made from the stock Mazda line. The return line will also retain the stock cooler loop and fittings.
The clutch master was mounted.
Moving right along.
Andrew
 01-22-2009, 09:49 PM
#19
Launching!
iTrader: (1)
Join Date: Oct 2008
Location: okc,vero beach FL
Posts: 201
Likes: 0
Received 0 Likes
on
0 Posts
a buddy of mine just finished this swap in a 88 rx-7 with just tires he's hit 11.9 with a bad 60' i wish i could do one its fun *** hell to even just ride in