
my lsx iroc build
 03-09-2009, 03:31 AM
#1
TECH Enthusiast
Thread Starter
iTrader: (52)

Join Date: Oct 2005
Location: SGV, So Cal
Posts: 680
Likes: 0
Received 0 Likes
on
0 Posts

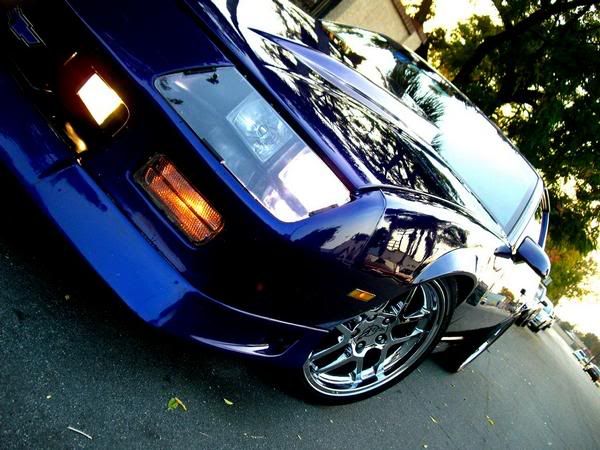
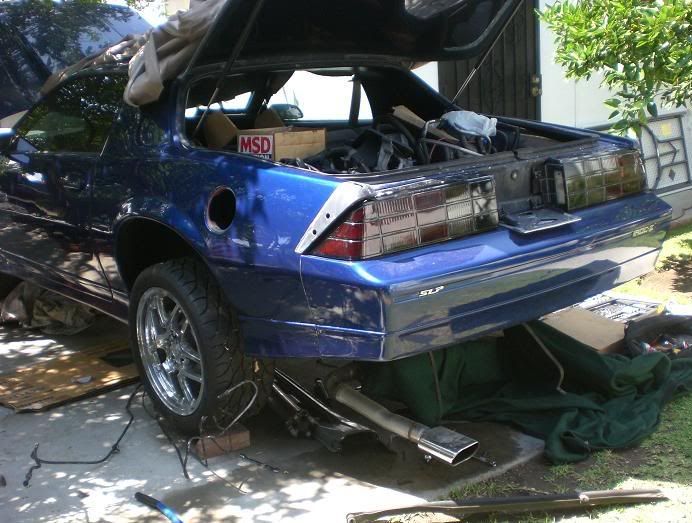
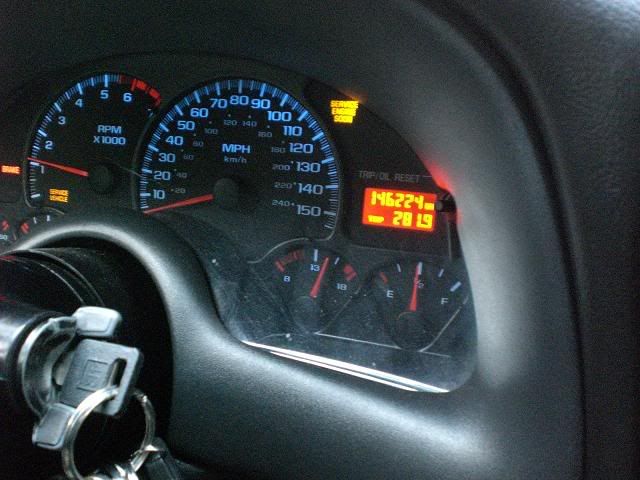
this is my current build on my 87 iroc. been working on the car for about 5 years with the old tuned port set up but i decided to ditch all the maintenance and break downs and go with a lsx conversion with a 06 gto tranny that was adapted to my sbc. ditched the old school dash and went with a complete 02 dash and even got my FUEL gauge to work!!!
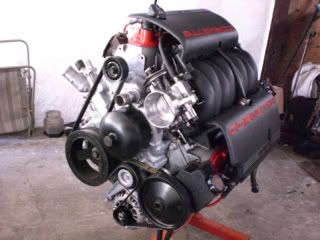
Engine was off 02 with 50k miles which included all
LS1 accessories power steering pump, TB, etc
New alternator
New seals
Port and polished TB
sent in oem harness to lt1wiring for a
Standalone unit. extended Wiring harness
i used a 4th gen tank
modded feed return and evap
255 walbro fuel pump
06 GTO ls2 MN12 tranny and bell housing
06 GTO ls2 starter
LS7 clutch kit
New slave cylinder and master
Pro 5.0 short shifter
SPOHN LSx motor and tranny mounts
06 GTO CAI
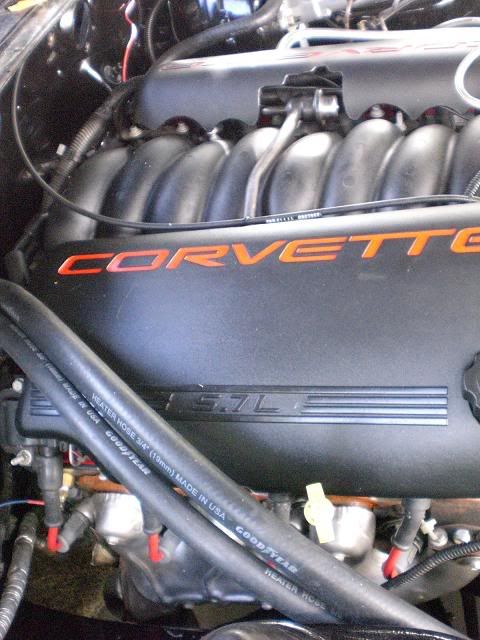
C5 valve covers
MSD wires
Catch can
Gatorback belts
Summit aluminum radiator
Stock dual fan set up
Steel braided fuel line and Adapter Fittings
Auto meter adapter fittings for oil pressure and temp
TB Cable Non-TCS
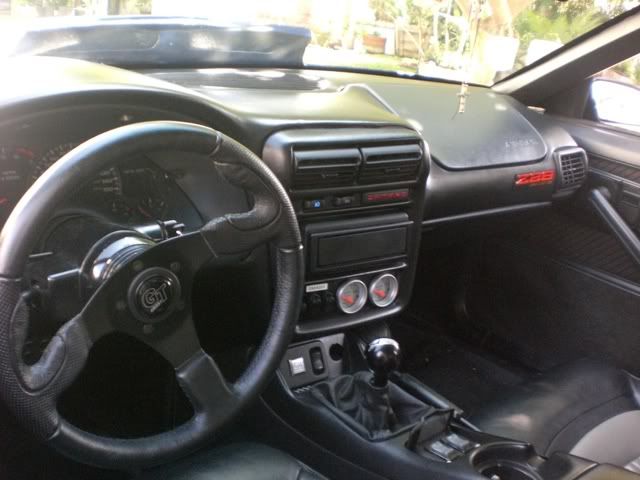
02 SS ebony dashboard
Fuse relay box for ignition and 12v source
Switch breaker bar for ignition power
some small suspension work form the past
Still running the 4th gen rear drive train
3:42s and alum. Driveshaft
my process went from dropping in the engine placement but mostly working on the dash .. cluster and electrical.etc i wanted that modern look
the last part was the harness and whole lots hours sodering and wiring!!!!
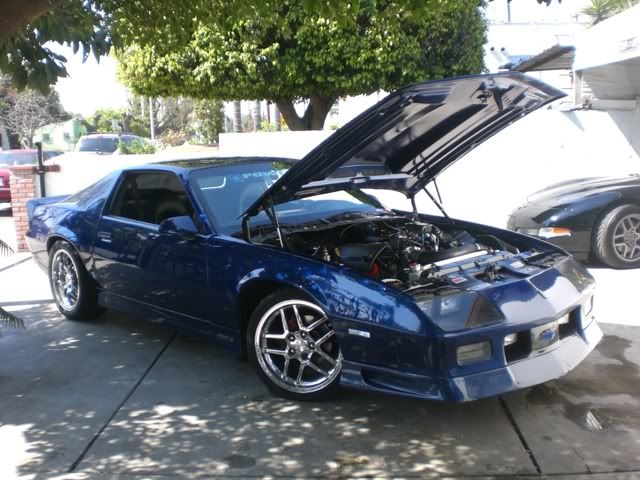
to start off heres the car
Engine was off 02 with 50k miles which included all
LS1 accessories power steering pump, TB, etc
New alternator
New seals
Port and polished TB
sent in oem harness to lt1wiring for a
Standalone unit. extended Wiring harness
i used a 4th gen tank
modded feed return and evap
255 walbro fuel pump
06 GTO ls2 MN12 tranny and bell housing
06 GTO ls2 starter
LS7 clutch kit
New slave cylinder and master
Pro 5.0 short shifter
SPOHN LSx motor and tranny mounts
06 GTO CAI
C5 valve covers
MSD wires
Catch can
Gatorback belts
Summit aluminum radiator
Stock dual fan set up
Steel braided fuel line and Adapter Fittings
Auto meter adapter fittings for oil pressure and temp
TB Cable Non-TCS
02 SS ebony dashboard
Fuse relay box for ignition and 12v source
Switch breaker bar for ignition power
some small suspension work form the past
Still running the 4th gen rear drive train
3:42s and alum. Driveshaft
my process went from dropping in the engine placement but mostly working on the dash .. cluster and electrical.etc i wanted that modern look
the last part was the harness and whole lots hours sodering and wiring!!!!
to start off heres the car
Last edited by TPI TERROR; 08-08-2011 at 10:29 PM.
 03-09-2009, 03:32 AM
#2
TECH Enthusiast
Thread Starter
iTrader: (52)
Join Date: Oct 2005
Location: SGV, So Cal
Posts: 680
Likes: 0
Received 0 Likes
on
0 Posts
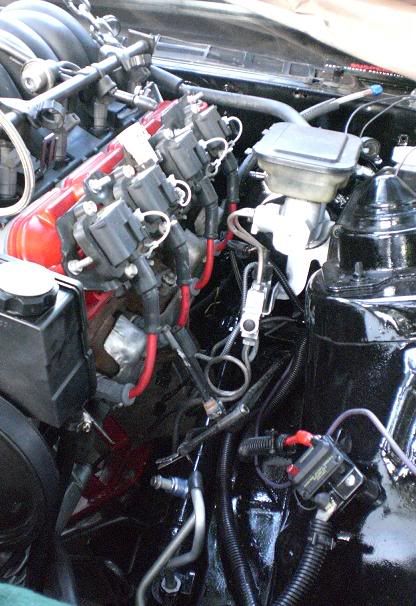
prepping the engine bay.
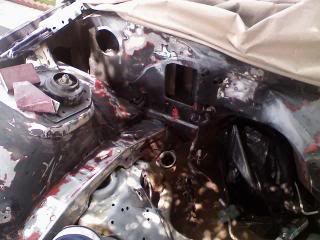
I started off by removing most of the wiring. Me and my brother have already experienced a ls1 swap in the past his his 3rd gen.
After hours of working on his car I gained a bit more experience and my set up was a bit more organized..
My engine was far gone I was ready to start prepping the engine bay for a better quality look.
My previous set up consisted of a cammed 350 mated with McLeod bell, mn12 GTO tranny and 4th gen rear differential
My intentions is to build a reliable 80s performance vehicle with the LSx drivability performance, yet fuel efficient, with modern interior and able to say I built this car.
I used esi data output for all the schematics for the 4th gen wiring.
Im attempting to run the evap and a fully functional cluster.
The process took a few months the only problem I came across was using a ls2 bell housing and finding the right starter. After researching the least expensive starter was the OEM Mitsubishi starter for lsx goats.
I purchased the ls1 with a k member and brake set up off ls1tech member.
As well as the fuel tank and dashboard.
Small appliances were supplied by the local parts store
All the fuel fittings and adapters were from others online or summit
Al work was done by myself with help of my close friends
And soon enough need some exhaust work for the y pipe
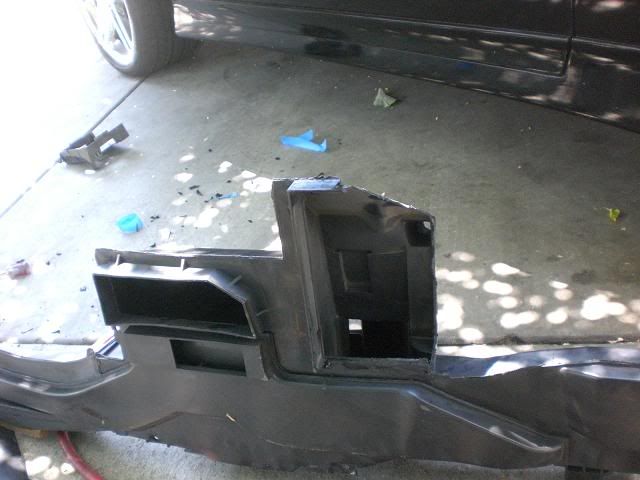
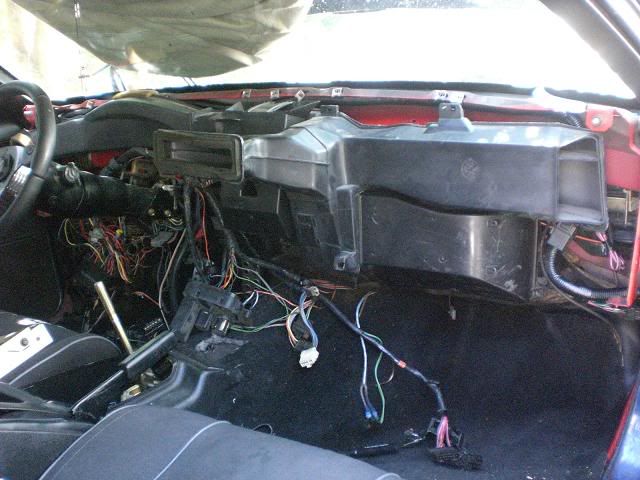
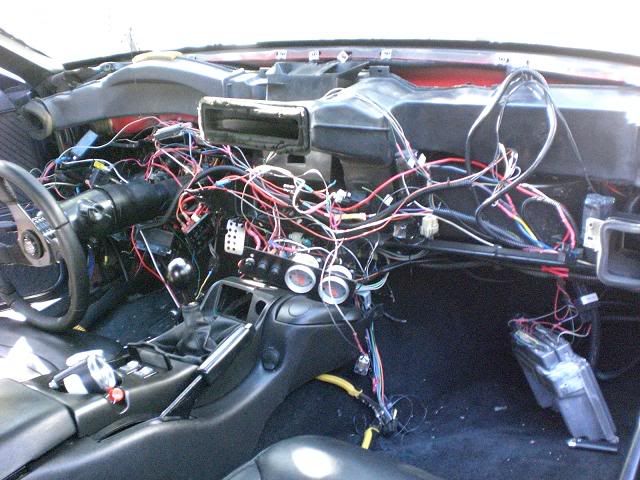
i started off with dissembling the old dash . Cutting grinding and bending metal for a test fit on the new dash .
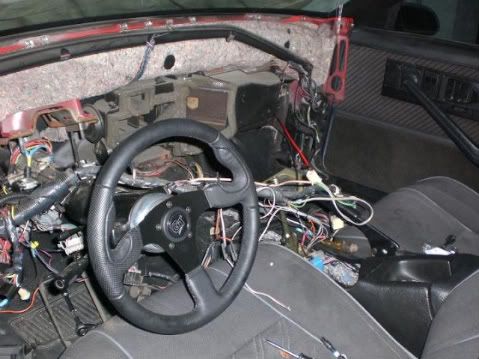
Soon moved on to the 4th gen vents these fall right on top of the 3rd gen unit.. Modded and cut for future usage.

After painting the engine bay I left it plain and simple.
Main red wires were to control the ignition supply.
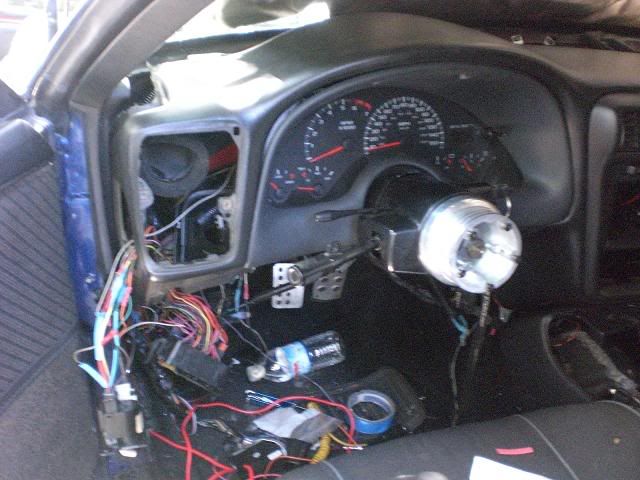
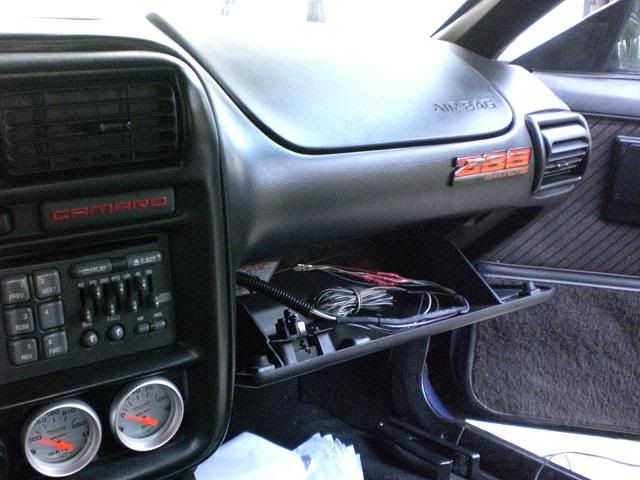
the instrumental work was done with extending wiring and merging the 4th gen cluster plug mostly color matched
Last edited by TPI TERROR; 08-08-2011 at 10:29 PM.
03-09-2009, 03:33 AM
#3
TECH Enthusiast
Thread Starter
iTrader: (52)
Join Date: Oct 2005
Location: SGV, So Cal
Posts: 680
Likes: 0
Received 0 Likes
on
0 Posts
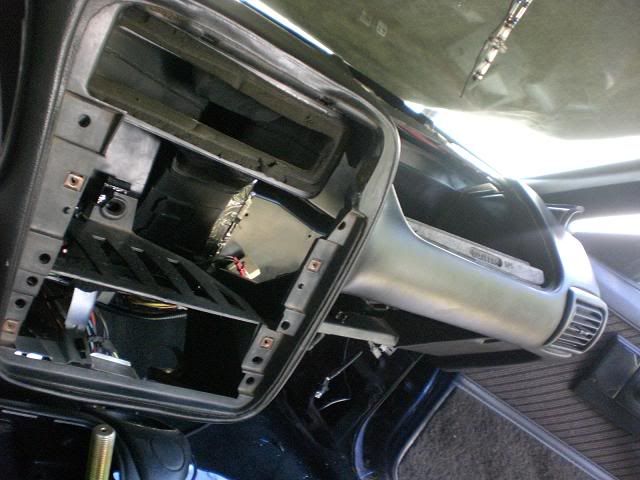
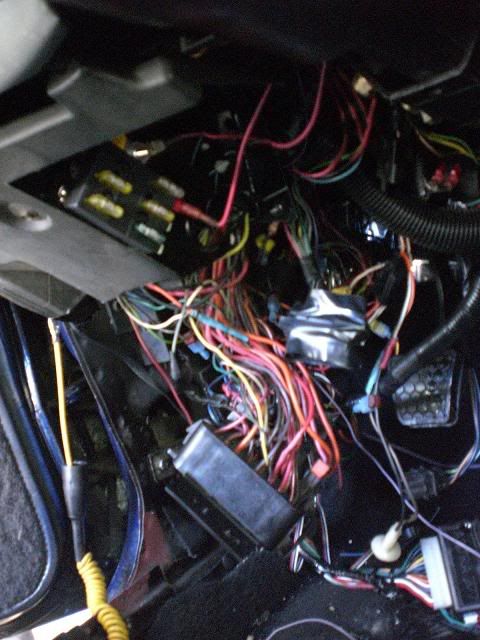
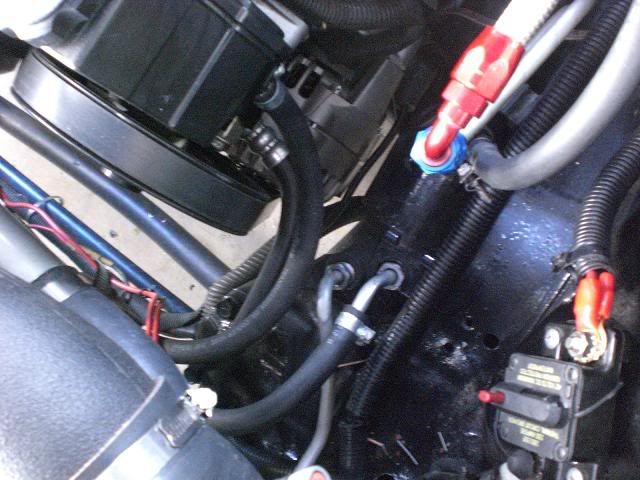
i used two power distrubution blocks. from the battery as the main 12v source and power with ignition.
before with tpi wiring

after with Spohn motor mounts in place.
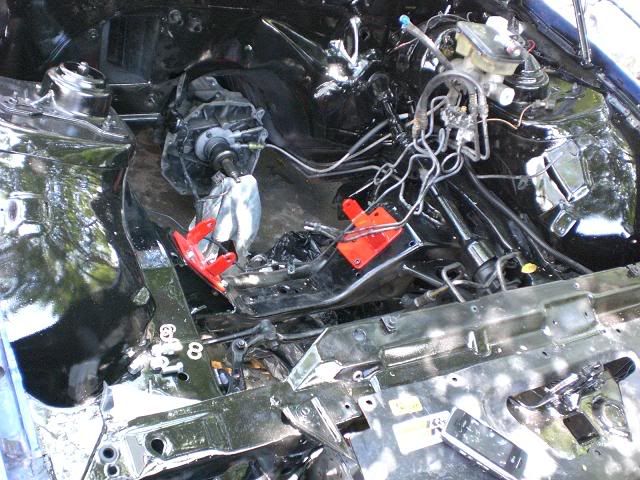
using the ls7 clutch kit
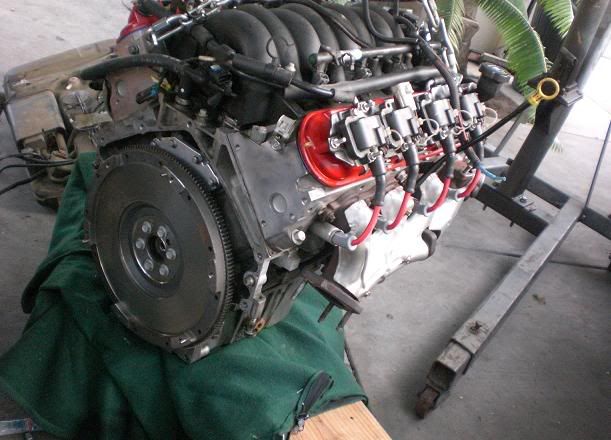

Moved back to the engine and worked on the smaller components
Used autometer adaptor fitting for the individual gauges for my oil pressure and water temp. aside from the cluster .
Used a summit radiator and hoses from AutoZone to run the cooler routed back to the power steering pump unit fuel rail fittings and evap controls etc,
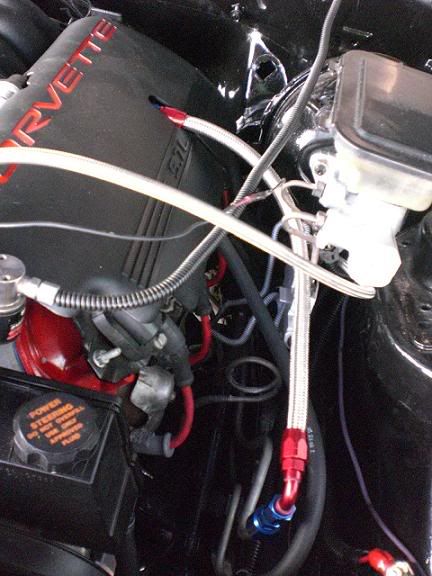
Here I used 90* swivel fittings from the local speed shop
As well as compressor fitting which I used to shorten the 4th gen fuel feed line
Last edited by TPI TERROR; 08-08-2011 at 10:31 PM.
03-09-2009, 03:34 AM
#4
TECH Enthusiast
Thread Starter
iTrader: (52)
Join Date: Oct 2005
Location: SGV, So Cal
Posts: 680
Likes: 0
Received 0 Likes
on
0 Posts
Over view of the 4th gen fuel tank
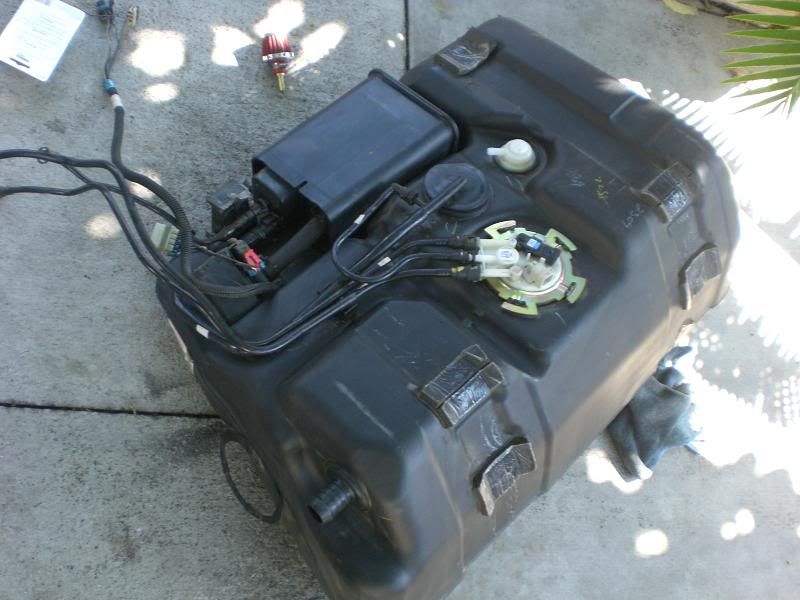
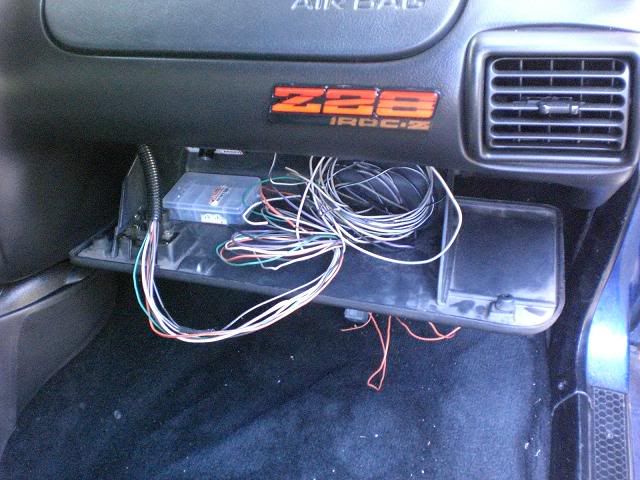
I extended the wiring from the evap canister module, and the sending unit up to the dash .a whole lot of wiring.
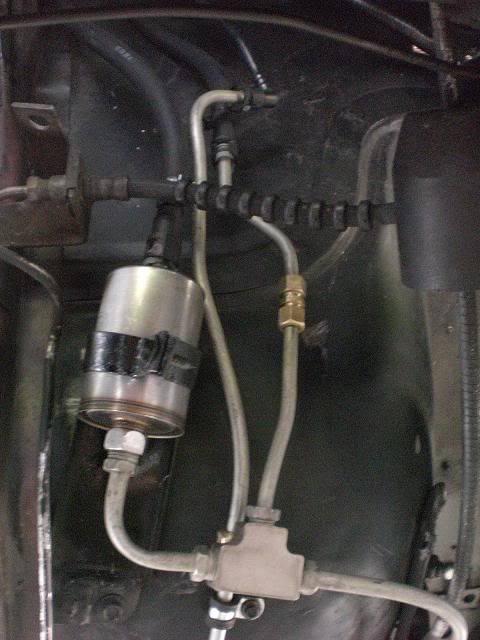
Re worked on the quick disconnects and added fuel hose with some good clamps. These fuel lines were routed up by the rear area united to the fuel filter and hard lines to the front on the engine bay.
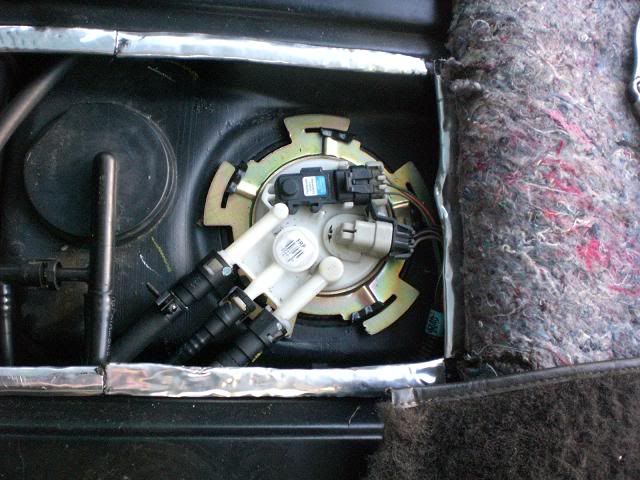
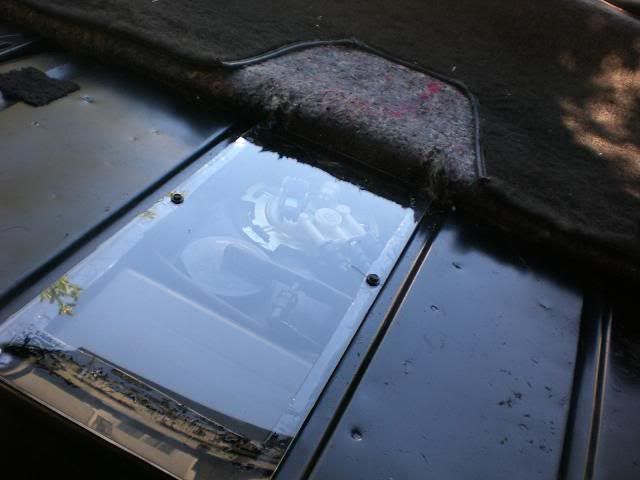
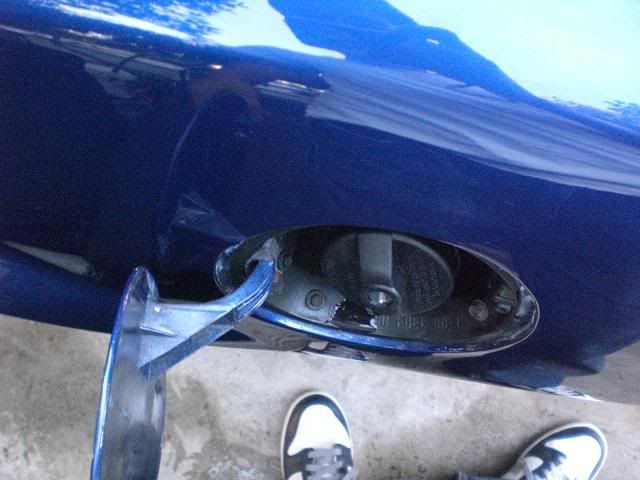
I used the walbro fuel pump a few mods. And this is what it looked like with a opening in the cargo area for easy access sealed up pretty good.

Last edited by TPI TERROR; 08-08-2011 at 10:30 PM.
03-09-2009, 03:34 AM
#5
TECH Enthusiast
Thread Starter
iTrader: (52)
Join Date: Oct 2005
Location: SGV, So Cal
Posts: 680
Likes: 0
Received 0 Likes
on
0 Posts
Cut 2.5 inches off the filler neck to clear the fuel door
The sending unit harness extended sodered and united to the control plugs
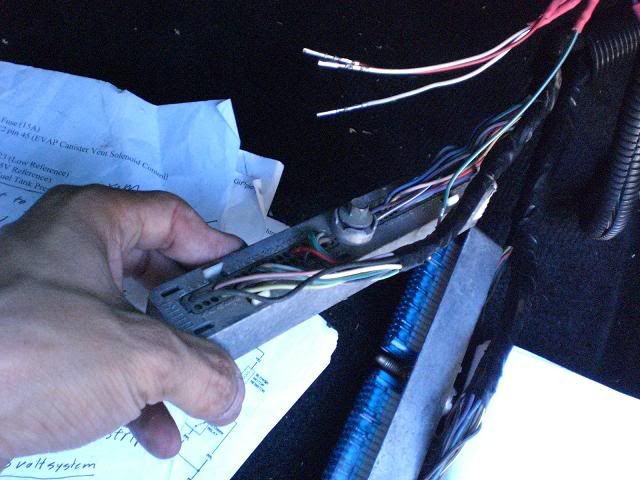
Once I received my harness from lt1wiring . Couldn�t be easier.
Pictures below everything was test fit and included with the obd2 port, fan relay, fuel pump relay and extended 2.5 feet for easy installation
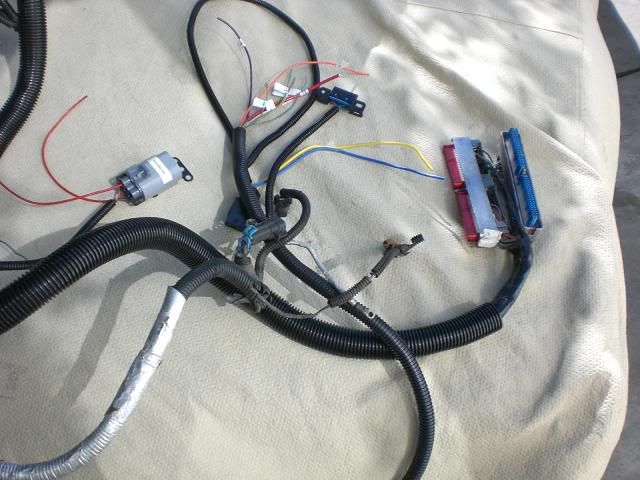

Just scaring u guys a bit.. jk a bit unorganized but wire loom can take care of this.
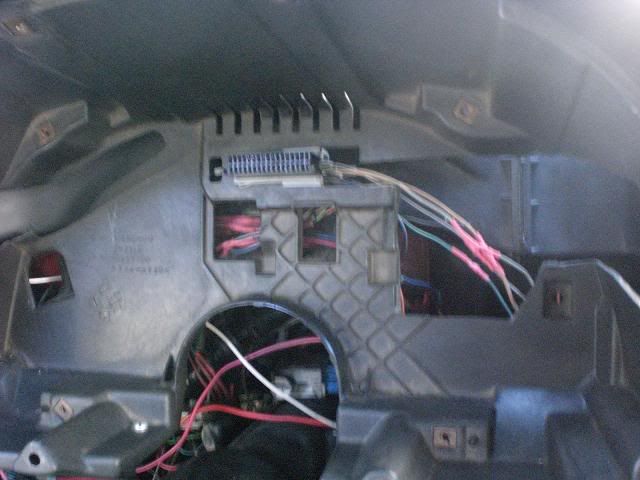
The rest of the wires on my cluster plug consisted off the signal off the harness vss, oil temp
The sending unit harness extended sodered and united to the control plugs
Once I received my harness from lt1wiring . Couldn�t be easier.
Pictures below everything was test fit and included with the obd2 port, fan relay, fuel pump relay and extended 2.5 feet for easy installation
Just scaring u guys a bit.. jk a bit unorganized but wire loom can take care of this.
The rest of the wires on my cluster plug consisted off the signal off the harness vss, oil temp
Last edited by TPI TERROR; 08-08-2011 at 10:32 PM.
03-09-2009, 03:39 AM
#6
TECH Enthusiast
Thread Starter
iTrader: (52)
Join Date: Oct 2005
Location: SGV, So Cal
Posts: 680
Likes: 0
Received 0 Likes
on
0 Posts
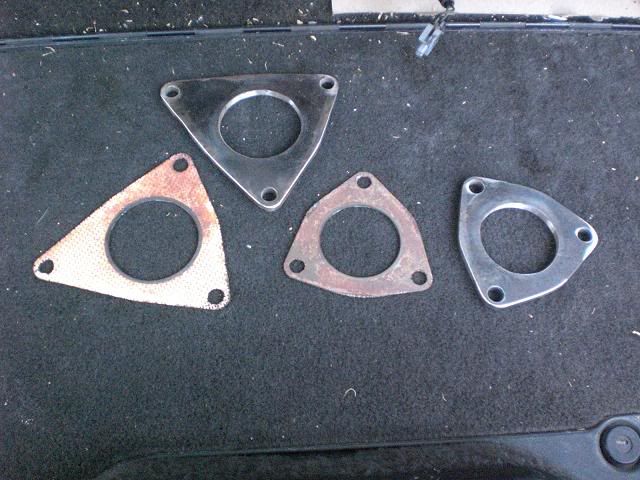
I am using stock manifolds. had o2 sensor bongs in place and took it in to amuffler shop to do a temporary y pipe.
fbody shifter cup was finally swapped since i was using the gto shifter
and some good artistic shot my friend walter o. good photographer
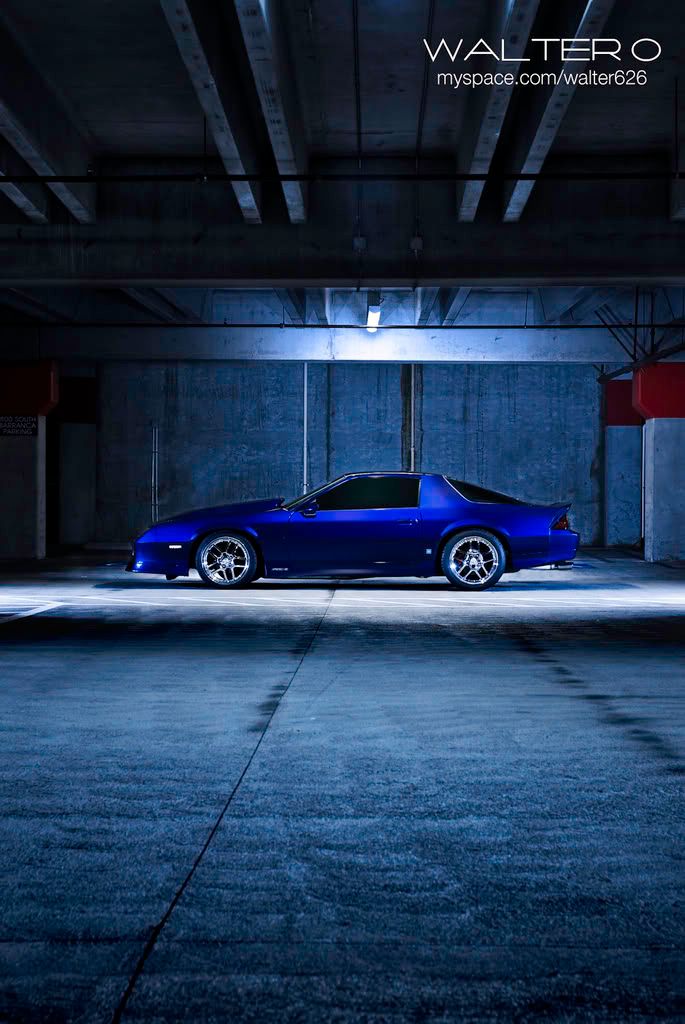
fbody shifter cup was finally swapped since i was using the gto shifter
and some good artistic shot my friend walter o. good photographer
Last edited by TPI TERROR; 08-08-2011 at 10:32 PM.
Trending Topics


 03-09-2009, 03:05 PM
#11
TECH Enthusiast
Thread Starter
iTrader: (52)
Join Date: Oct 2005
Location: SGV, So Cal
Posts: 680
Likes: 0
Received 0 Likes
on
0 Posts
it was just a whole lot of wiring.
right now im focusing on the interior. dash pad. a pillars to work on ..
then suspension .
back to the engine.
right now im focusing on the interior. dash pad. a pillars to work on ..
then suspension .
back to the engine.
 03-13-2009, 02:52 PM
#14
TECH Enthusiast
Thread Starter
iTrader: (52)
Join Date: Oct 2005
Location: SGV, So Cal
Posts: 680
Likes: 0
Received 0 Likes
on
0 Posts
thanks people..
its nice to build em your self.
today i got around finishing up the dash cover
looked iffy driving it like that
still in the process of the 4th gen a pillars flushed into my originals
its nice to build em your self.
today i got around finishing up the dash cover
looked iffy driving it like that
still in the process of the 4th gen a pillars flushed into my originals
Last edited by TPI TERROR; 08-08-2011 at 10:33 PM.
03-18-2009, 11:53 PM
#17
TECH Fanatic
iTrader: (9)
Join Date: Aug 2007
Location: Rocky Mtn thin air & snow...
Posts: 1,237
Likes: 0
Received 1 Like
on
1 Post
Originally Posted by -98-Z28-Darkness-
hum how much does it weigh? my estimate with you in the car and like a 1/4 of gas about 3360lbs? sounds close???lol
 Here's one recent thread that has info for a couple of LS-swap cars. It seems that the ballpark is around 3300#.
I'm really curious to find out how my heavy pig GTA is going to turn out...
03-19-2009, 01:04 PM
#19
TECH Enthusiast
Thread Starter
iTrader: (52)
Join Date: Oct 2005
Location: SGV, So Cal
Posts: 680
Likes: 0
Received 0 Likes
on
0 Posts
estimated 3400 or so. race weight ...
roughly 100lbs less with out rear seats cargo lid. and unnecessary stuff in my trunk .. lol
i am running 4th gen plastic tank ..full interior. heavy 18" rims. ..
i do need some suspension upgrades.. and big brake upgrade.. maybe oem rims. thall be great ..
i believe i got my section in gm high tech for the may issue.
street heat section..
