
70 Chevelle LS2 Melba Toast

 05-05-2010, 09:22 PM
#42
TECH Resident
Thread Starter
iTrader: (10)
Join Date: Oct 2005
Location: Cincinnati, Ohio
Posts: 948
Likes: 0
Received 0 Likes
on
0 Posts

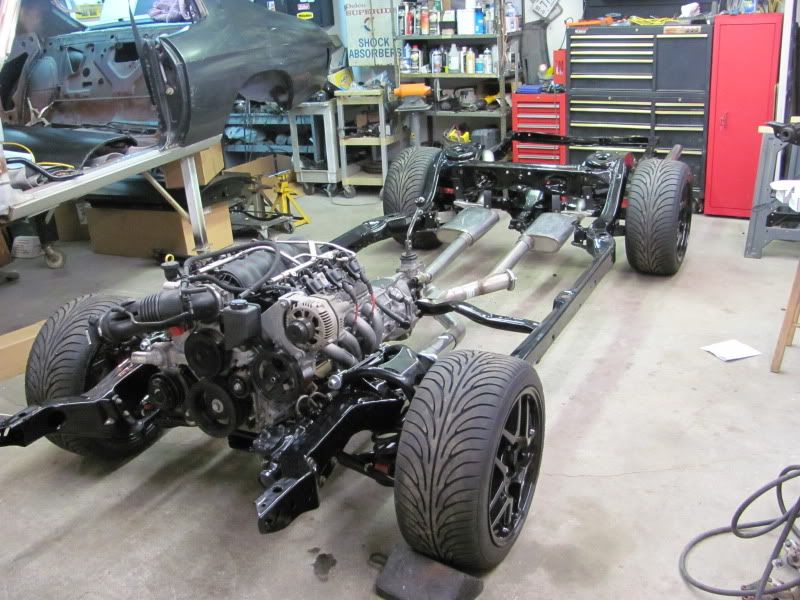
I still have to put the QA-1 shocks on. I screwed around with the front calipers and brackets tonight. Ultimately I will probably end up with some high dollar spindles but for now I think what I have will work nicely.
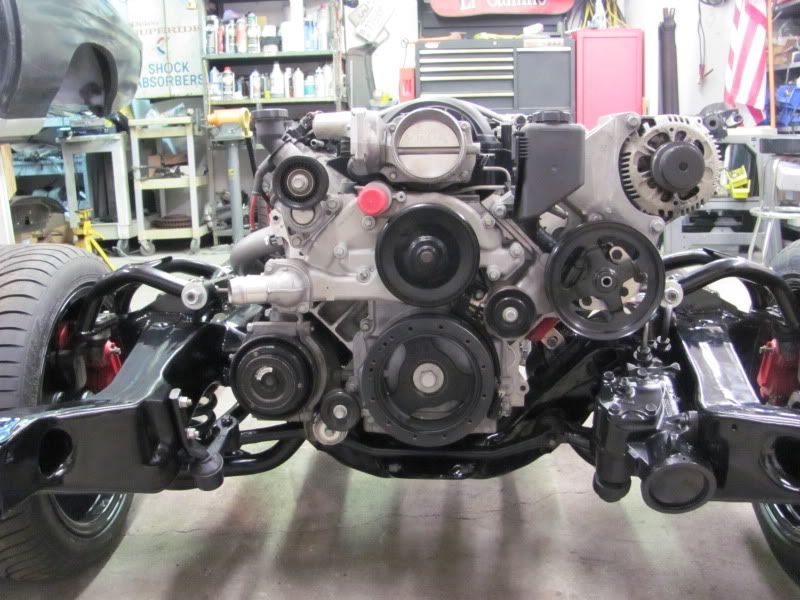
Just a few specs for what I have here: 2006 LS2 from a Cadillac CTS-v, Hybrid MN12 6 speed(same ratios and synchros as a Z06), 12 bolt posi traction with Superior axles, LS1 rear disc brakes, Baer eradispeed rotors, Pypes 3 inch stainless mandrel bent exhaust, Front control arms are cheapos with trw/moog ball joints, Grand Cherokee steering box, C5 Z06 wheels with hub adapters.
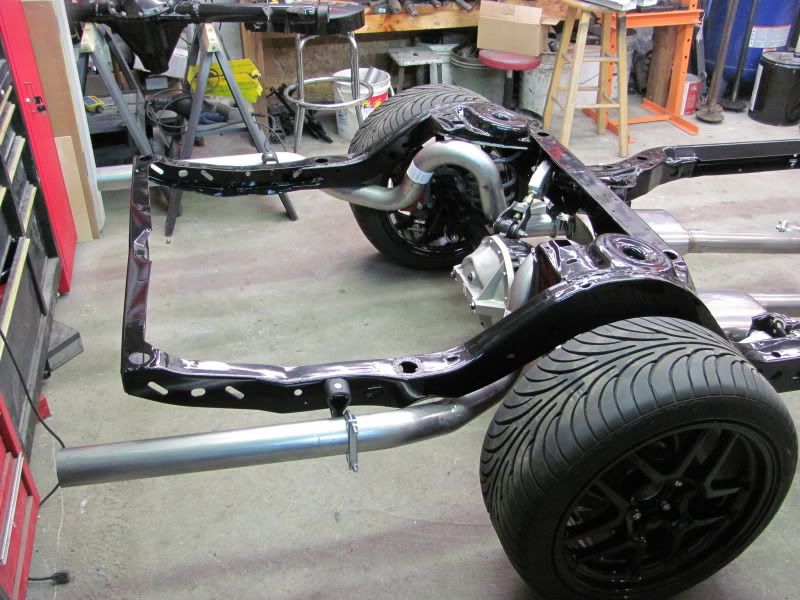
I am trying to get the rolling chassis together so I can get back to body and interior work. Next I need to order my AMD hood, install my drivers' side NOS door skin, and fit my rustfree GM fenders (thank god for that find). This is one of those low buck builds. Since I do all of my own labor I should be in this for less than $20K. Of course I have owned this car since 1994 so I would hate to add the real money I have in it from the 3 previous engines and transmissions and 2 previous rearends. You know the drill LOL.
07-05-2010, 10:41 PM
#44
TECH Senior Member
iTrader: (7)

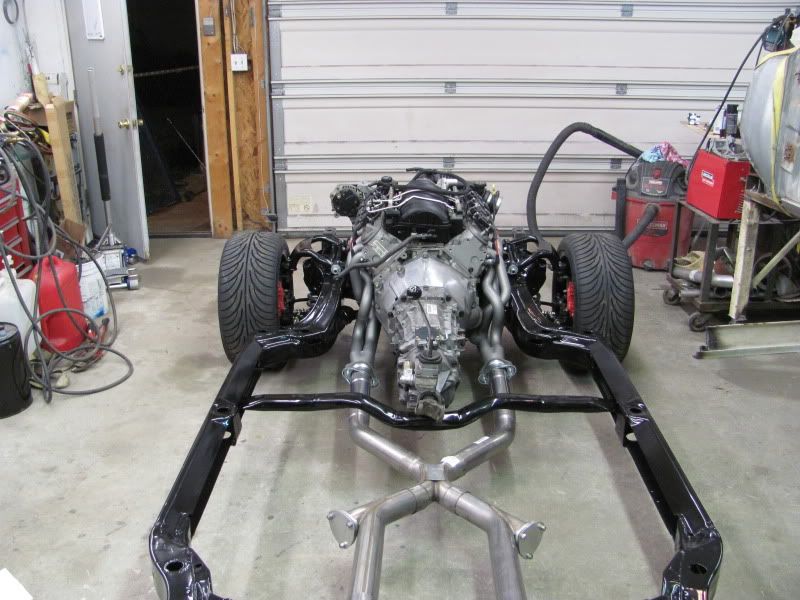
Great project. You may want to think about the driveline angles. I see that you raised the engine to solve the tie-rod issue, but that makes the driveline angle problem worse. The low stance will also make the problem worse. When these cars are lowered the position of the pinion is higher than the output shaft of the transmission. The solution is to raise the back of the trans as high as possible. By raising the front of the engine, your setup will require the tailshaft to be raised even higher, but you will run into another problem; the driveshaft tunnel. Some people have actually cut the entire tunnel out and replaced it with another tunnel that is higher. Food for thought.
Andrew
Andrew
07-11-2010, 02:58 PM
#45
TECH Resident
Thread Starter
iTrader: (10)
Join Date: Oct 2005
Location: Cincinnati, Ohio
Posts: 948
Likes: 0
Received 0 Likes
on
0 Posts
I raised the engine 1/4 of an inch and I did measure the drive line angles before I tok the body off the frame. I made a custom transmission tunnel and even cut the firewall up an extra inch. I have adjustable upper rear control arms so I could change the rear pinion angle at will. Thanks for the heads up though, worse case scenario I will have to cut the floor some more.
07-11-2010, 08:29 PM
#46

Great project. You may want to think about the driveline angles. I see that you raised the engine to solve the tie-rod issue, but that makes the driveline angle problem worse. The low stance will also make the problem worse. When these cars are lowered the position of the pinion is higher than the output shaft of the transmission. The solution is to raise the back of the trans as high as possible. By raising the front of the engine, your setup will require the tailshaft to be raised even higher, but you will run into another problem; the driveshaft tunnel. Some people have actually cut the entire tunnel out and replaced it with another tunnel that is higher. Food for thought.
Andrew
Andrew
02-20-2011, 08:32 AM
#48
TECH Resident
Thread Starter
iTrader: (10)
Join Date: Oct 2005
Location: Cincinnati, Ohio
Posts: 948
Likes: 0
Received 0 Likes
on
0 Posts
I wish it were on the road. I tend to get derailed by other projects (69 Hurst S/C Rambler) but I am back on it with fury. I have been buying parts though. I bought some KORE3 brake hoses, DSE wiper kit, fuel system parts (fittings and hoses), and yesterday I picked up a Vintage Air Gen IV sure fit system. I am to the point where I need to get some paint and body done before I go any further on the drivetrain.
02-20-2011, 07:42 PM
#51
TECH Resident
Thread Starter
iTrader: (10)
Join Date: Oct 2005
Location: Cincinnati, Ohio
Posts: 948
Likes: 0
Received 0 Likes
on
0 Posts
Thank you very much. I spent part of the day in the attic of my garage getting some parts back together that I removed from the car. Once the weather breaks I will be able to get some paint work done.
04-13-2011, 08:13 PM
#52
TECH Resident
Thread Starter
iTrader: (10)
Join Date: Oct 2005
Location: Cincinnati, Ohio
Posts: 948
Likes: 0
Received 0 Likes
on
0 Posts
I came up with a cheap solution for a steering shaft to connect my Jeep Cherokee steering box to the stock steering column. Assuming you already have the splined big block shaft. I took the stock big block steering shaft and removed the lower flange. I bought a Sweet steering joint (SWE401-51518) 3/4-30 spline to 1" 48 spline
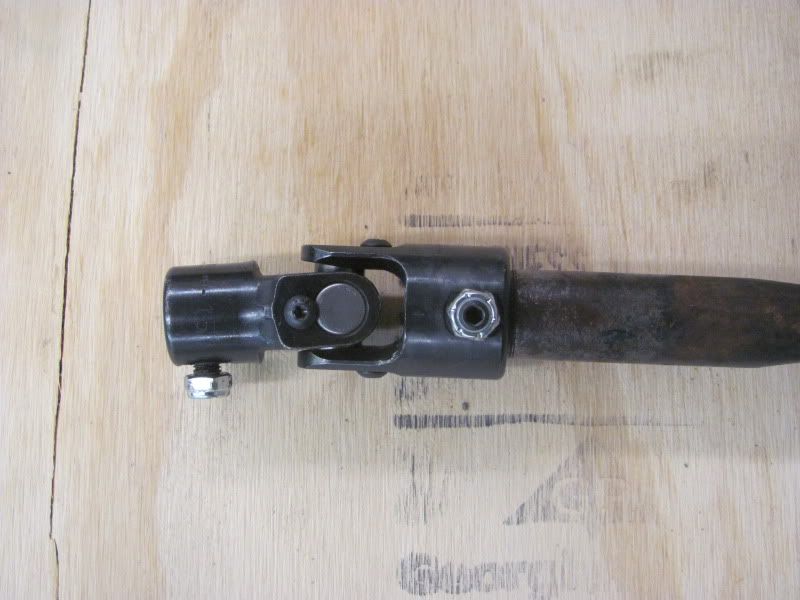
I cleaned the splines on the steering shaft and slid the joint on and then slid it onto the steering box. I didn't slide it all the way on because I was planning on taking it right back off.
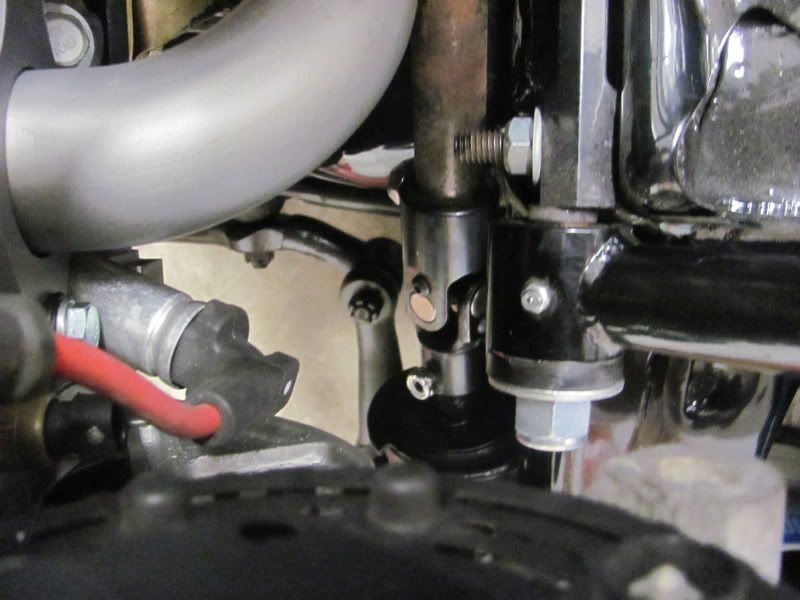
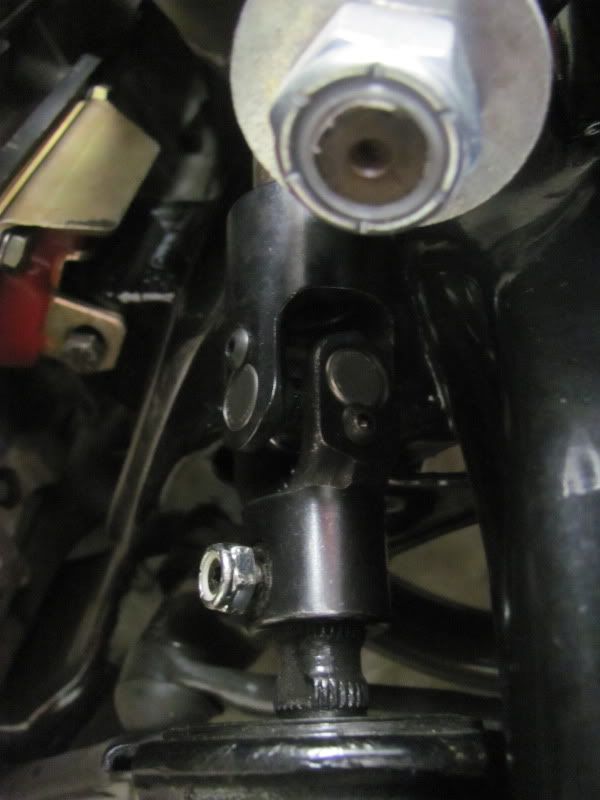
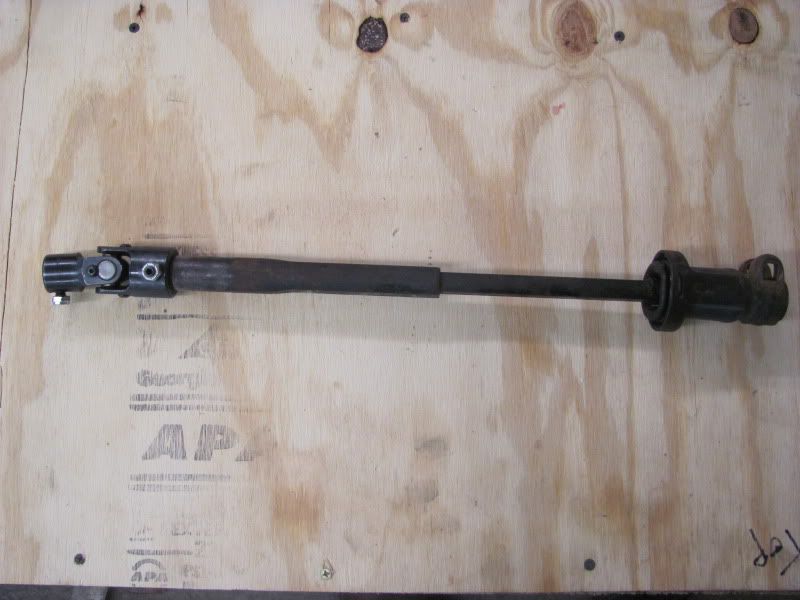
I haven't seen this done and was going to sell the steering shaft to finance a $275 aftermarket one. Glad I didn't cause all it cost me was a $40 Ebay steering joint.
I cleaned the splines on the steering shaft and slid the joint on and then slid it onto the steering box. I didn't slide it all the way on because I was planning on taking it right back off.
I haven't seen this done and was going to sell the steering shaft to finance a $275 aftermarket one. Glad I didn't cause all it cost me was a $40 Ebay steering joint.
09-01-2011, 07:09 AM
#55
i got u joints on both ends and got a collapsable steering shaft. my header clearance with the steering shaft was rubbing. with the collapsable shaft i put smaller diameter part of the rod at the box to give me more header clearance. i got all my stuff from summit. borgeson joints. no welding required. cut to fit shaft and drill 2 holes. i used a DD steering shaft.
http://www.summitracing.com/parts/BRG-014931/
i tried a bigger sweet joint at the column to the shaft and it wasnt machined correctly to fit the steering tube. they are recommended for racing applications and most of them are weld on. fyi
http://www.summitracing.com/parts/BRG-014931/
i tried a bigger sweet joint at the column to the shaft and it wasnt machined correctly to fit the steering tube. they are recommended for racing applications and most of them are weld on. fyi
01-12-2012, 10:23 PM
#56
TECH Resident
Thread Starter
iTrader: (10)
Join Date: Oct 2005
Location: Cincinnati, Ohio
Posts: 948
Likes: 0
Received 0 Likes
on
0 Posts
My poor car has been languishing in the garage for a long time now. I got the AMC bug and bought a 70 Rebel Machine so I have been messing with that. I have a new shop to work on my Chevelle in now so I look forward to making up for lost time very very soon.
 03-04-2012, 09:52 PM
#58
 03-05-2012, 09:26 PM
#59
TECH Resident
Thread Starter
iTrader: (10)
Join Date: Oct 2005
Location: Cincinnati, Ohio
Posts: 948
Likes: 0
Received 0 Likes
on
0 Posts
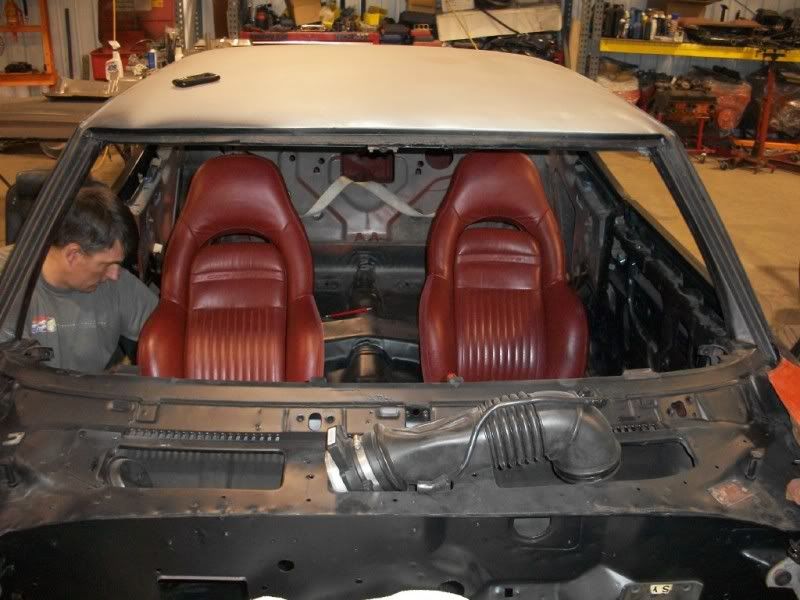
I will put up more info about the install. I have the factory bucket seat mounts in my car. I plan on adapting the Vette seats to the original floor brackets. I had one of the seats next to a original one and the height was almost identical. The two rear bolt holes actually line up with the seats. I could use them that way and just make a bracket or modify the front. I am 6'6 though and I need to temporarily install the dash,column and console to make sure everything fits me well.
03-06-2012, 10:36 AM
#60
I will put up more info about the install. I have the factory bucket seat mounts in my car. I plan on adapting the Vette seats to the original floor brackets. I had one of the seats next to a original one and the height was almost identical. The two rear bolt holes actually line up with the seats. I could use them that way and just make a bracket or modify the front. I am 6'6 though and I need to temporarily install the dash,column and console to make sure everything fits me well.
Dave