
Pro-Touring 68 Acadian (Nova) with L92
 01-31-2011, 02:06 PM
#81
On The Tree
Thread Starter
iTrader: (4)

Join Date: Mar 2009
Location: British Columbia, Canada
Posts: 132
Likes: 0
Received 0 Likes
on
0 Posts
Thanks Tony. As for the intake, I assume you're asking about the truck intake that I took off. I actually sold it a while back. Your 48 sounds pretty cool. Hope to see some pics.
Last edited by scherp69; 01-31-2011 at 05:16 PM.
 01-31-2011, 02:08 PM
#82
On The Tree
Thread Starter
iTrader: (4)
Join Date: Mar 2009
Location: British Columbia, Canada
Posts: 132
Likes: 0
Received 0 Likes
on
0 Posts
It's a Covan's Thunder Road cluster. John Covan started Covan's Classic years ago. He left Covan's Classic and started Thunder Road. Covan's Classic is now known as Classic Dash. From everything I've read and seen, the Thunder Road products are quite a bit better. Here's a link to the site: http://covansthunderroad.com/
02-03-2011, 06:38 PM
#83
On The Tree
Thread Starter
iTrader: (4)
Join Date: Mar 2009
Location: British Columbia, Canada
Posts: 132
Likes: 0
Received 0 Likes
on
0 Posts
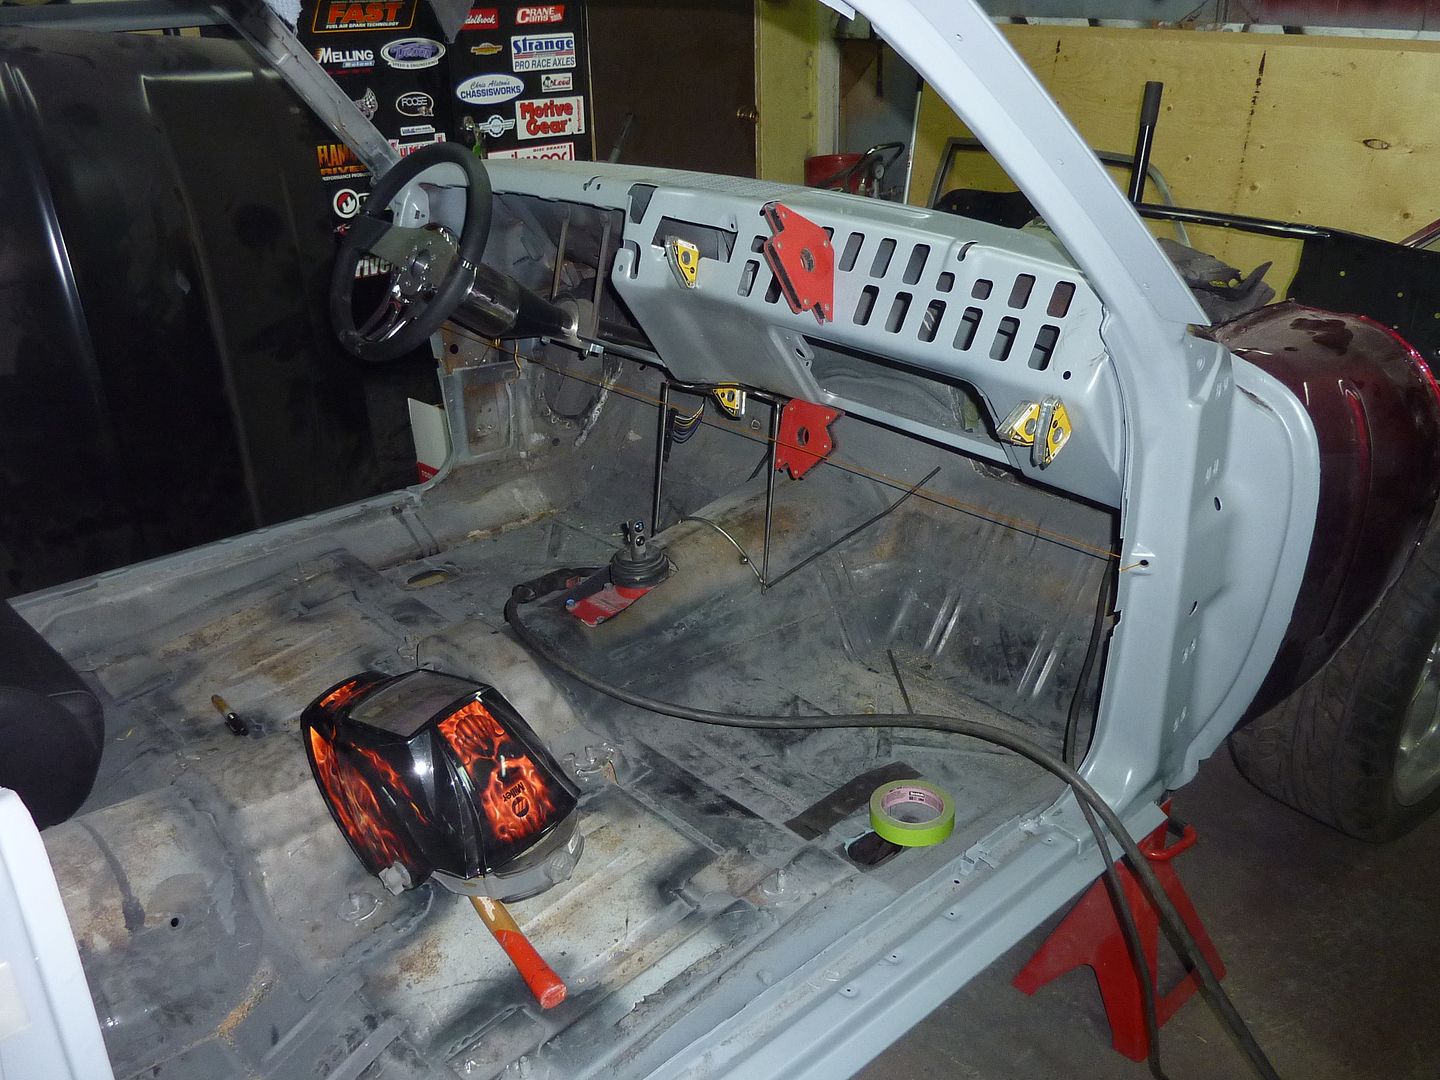
Got a few new parts in the last couple days. I got my brackets from Roger at Ironworks. http://www.ironworksspeedandkustom.com/
This is for the Mast ECU. Once I get my Highway 22 wiring harness, I'm going to send it to Roger and he will make a bracket for that and then I'll weld them together and put them both in the glove box area.
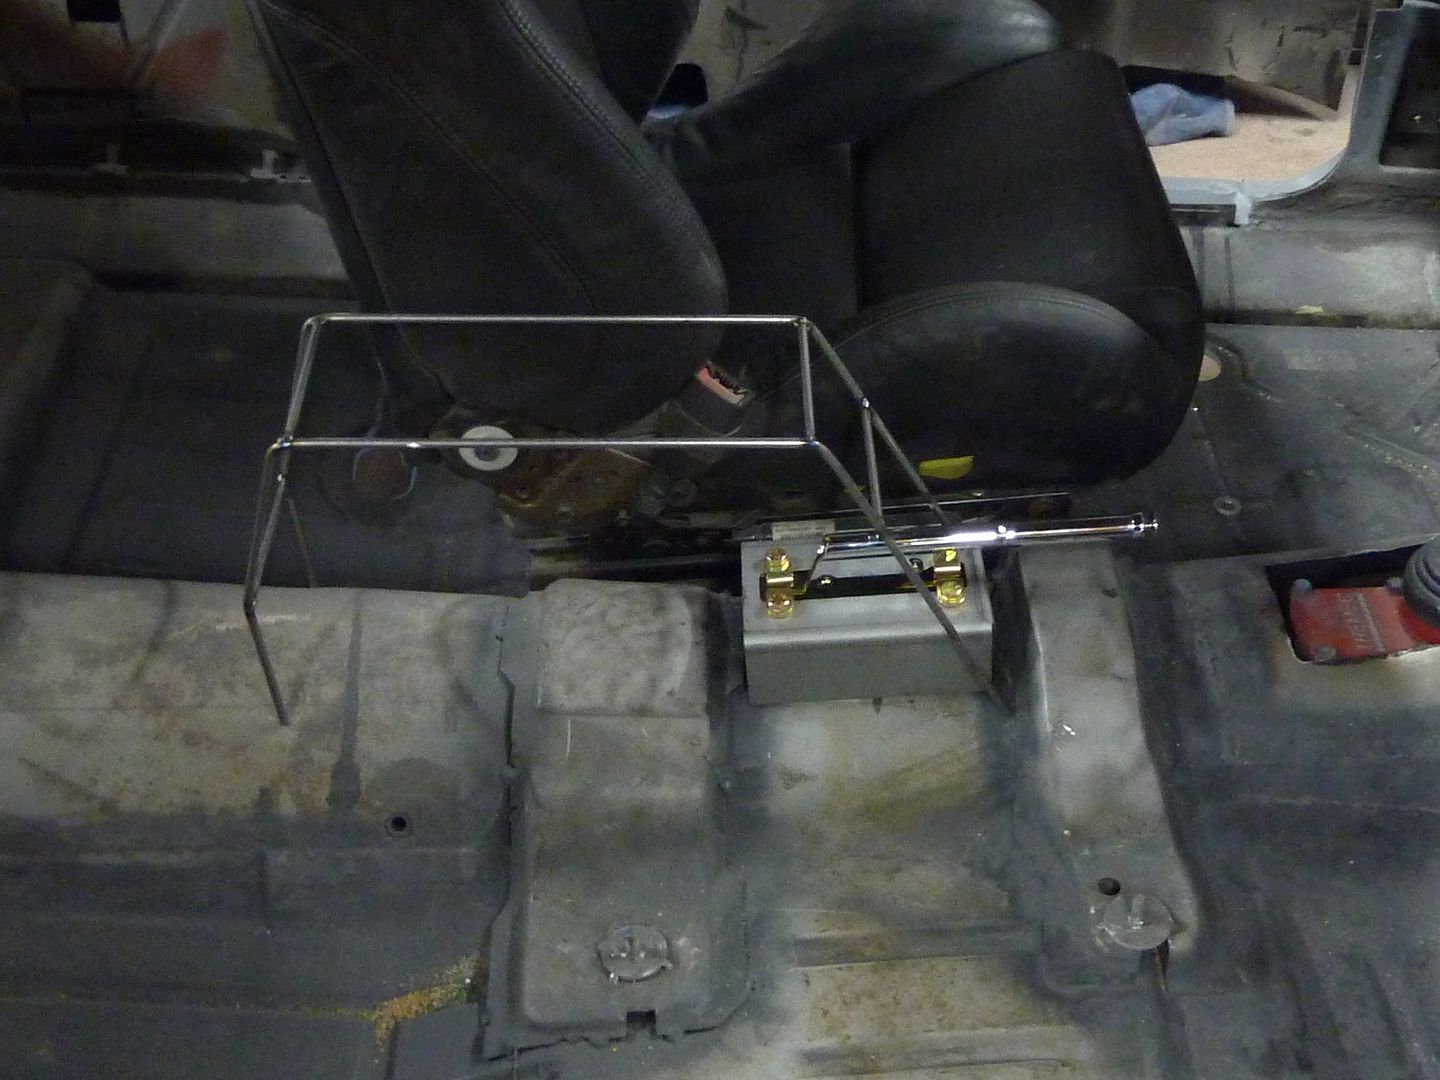
I was originally going to go with a Lokar foot emergency brake, but as soon as I saw Roger's hand brake bracket, I knew I was going with a hand brake. Here's the bracket
I also got a Lokar hand brake and tried it in the bracket. Gonna like this set up.
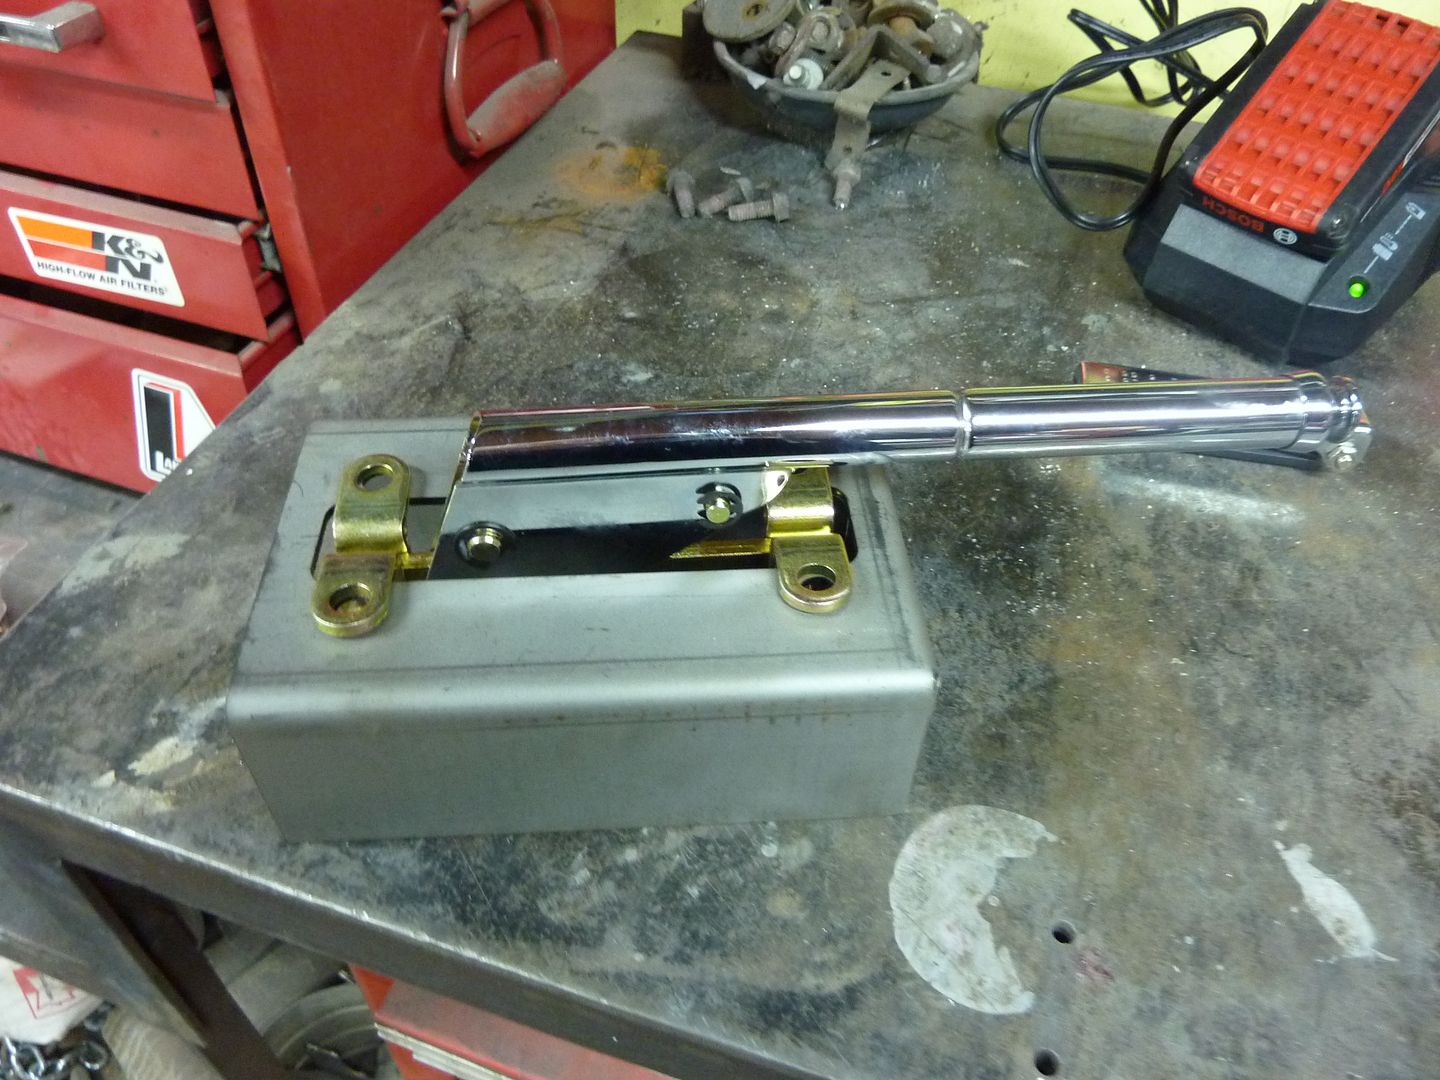
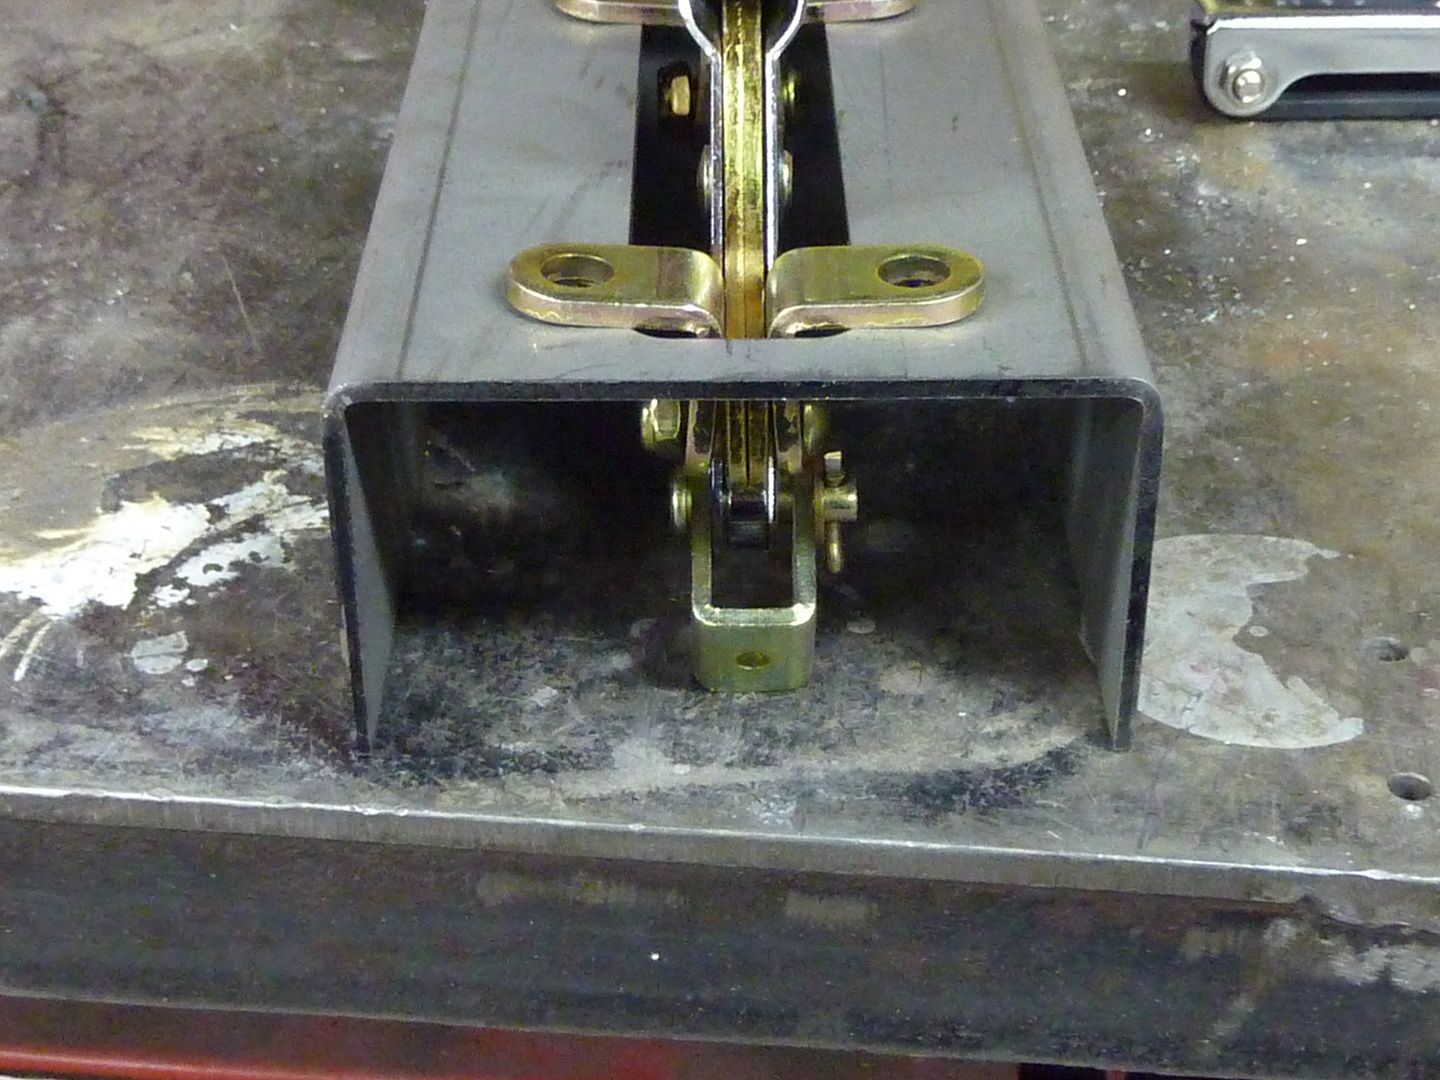
Lots of room for the cables to hook up. The front is closed in.
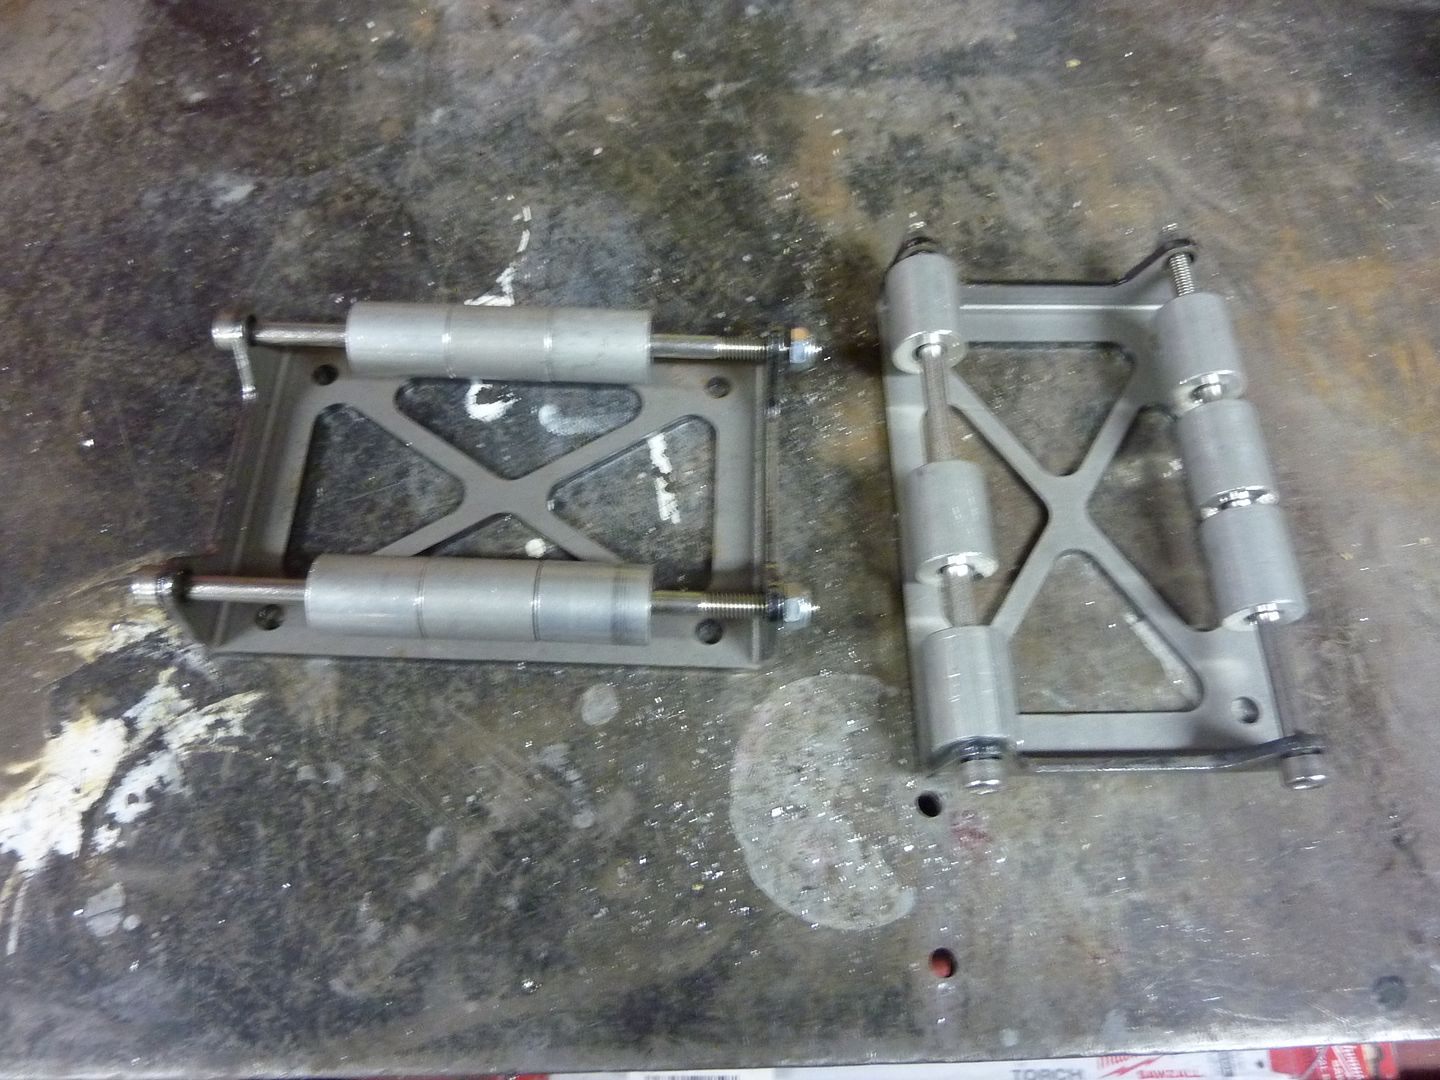
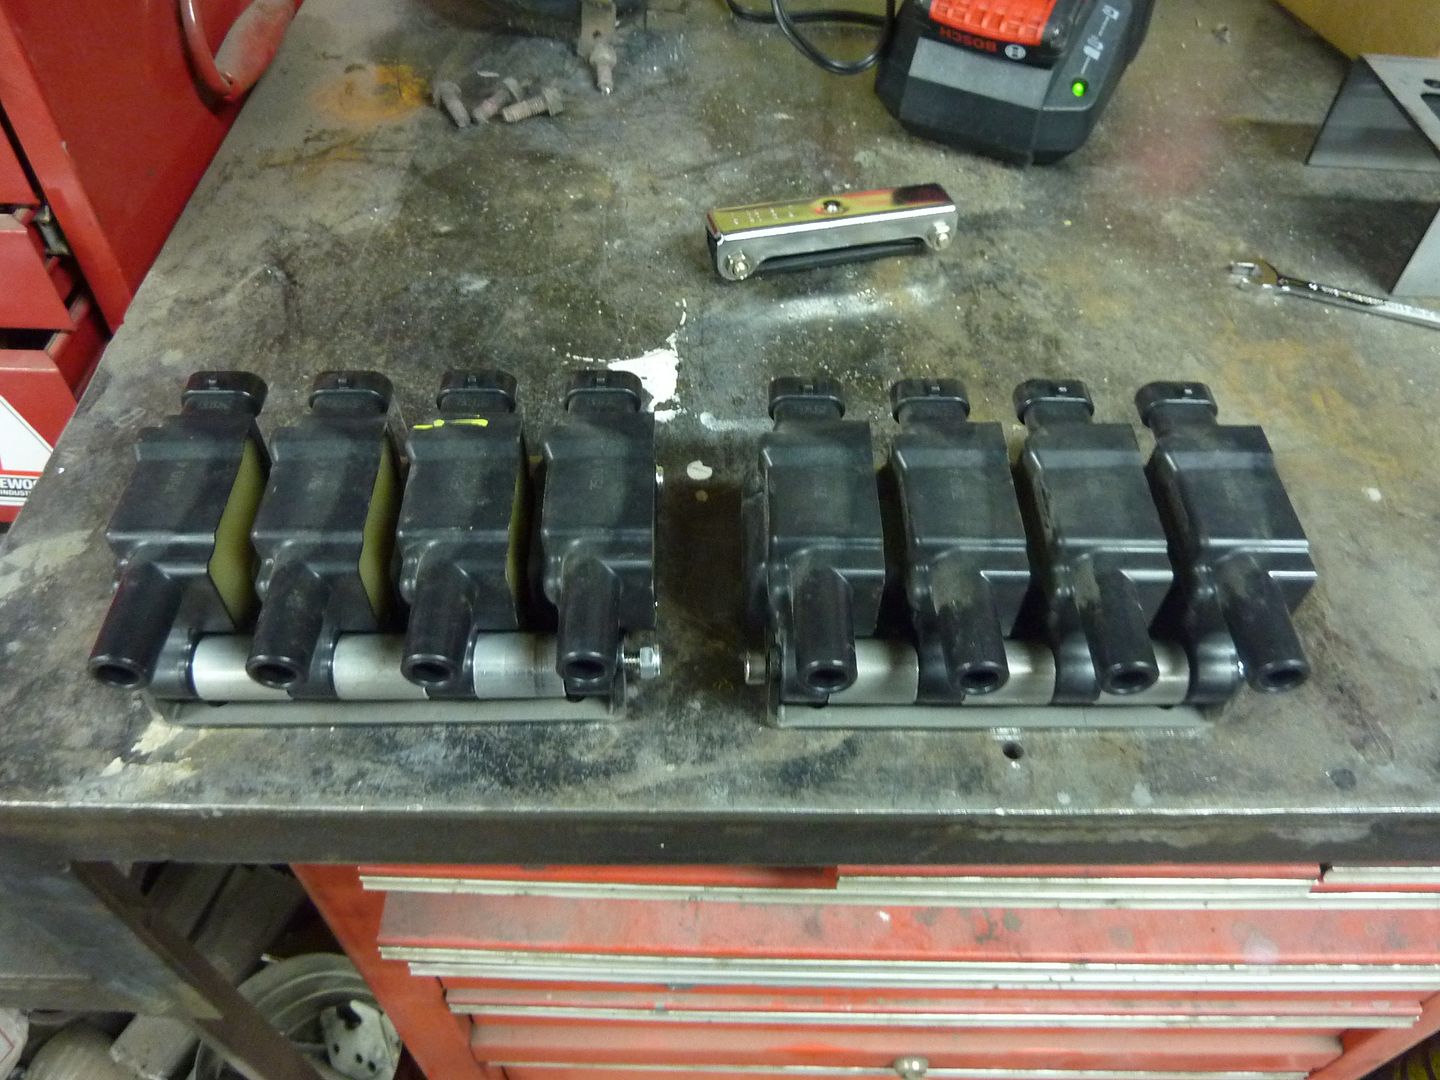
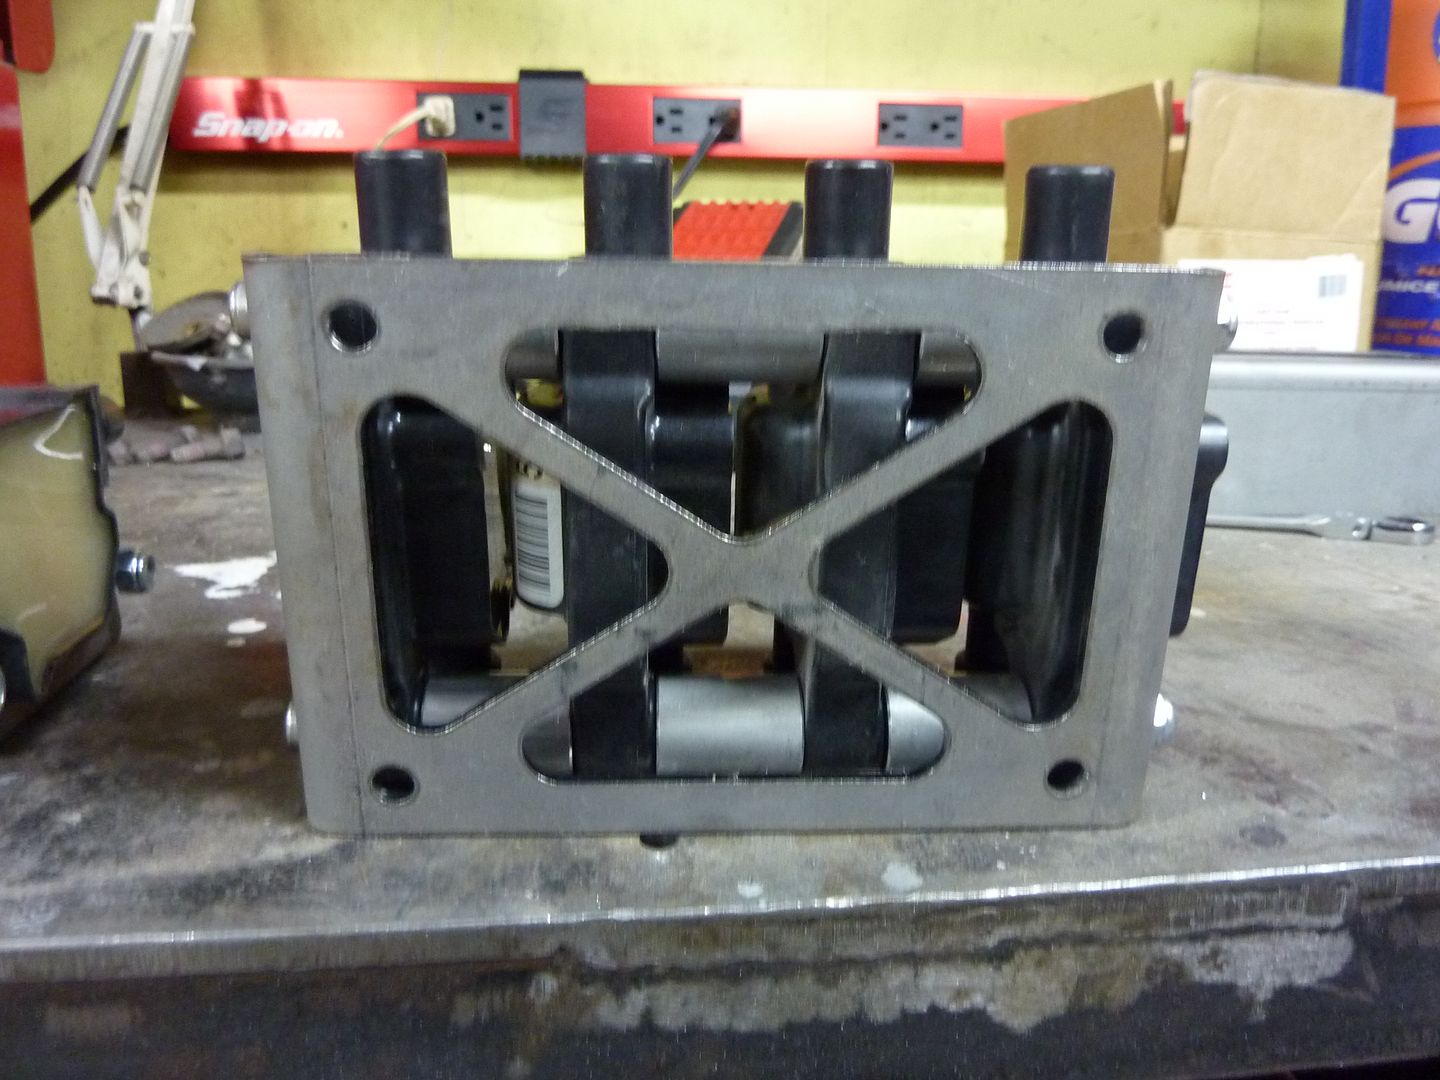
I also got a set of coil relocation brackets. These things are sweet. I was going to try and make a set myself, but I can guarantee they wouldn't have come even close to these. I'm going to put these on the subframe just in front of the headers.
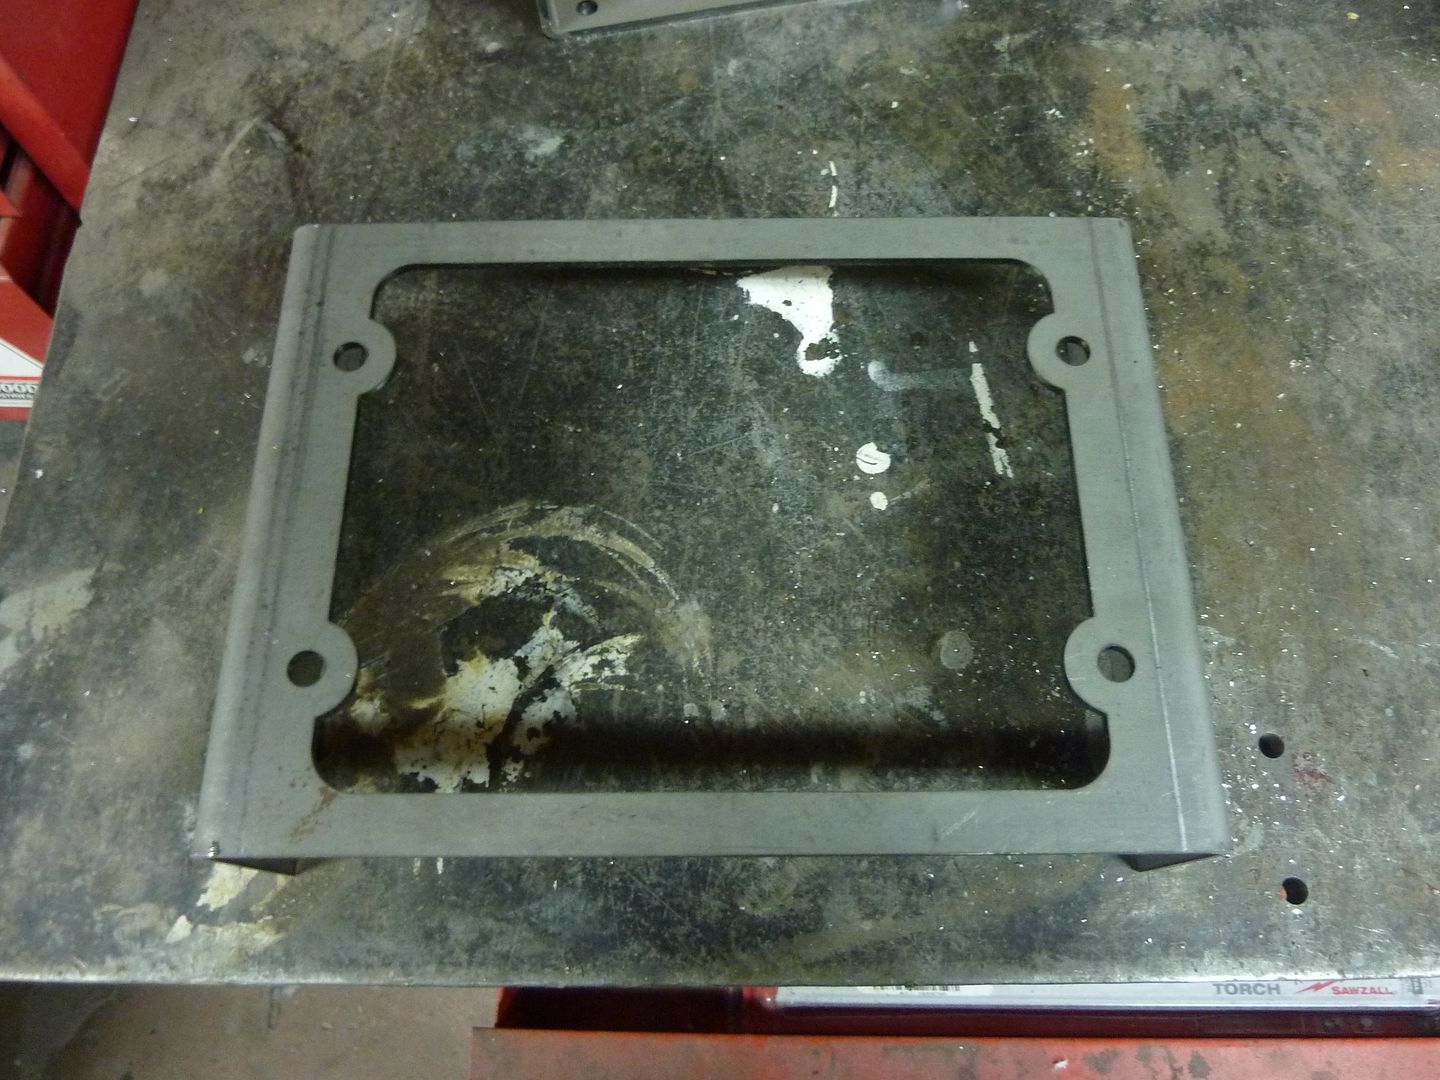
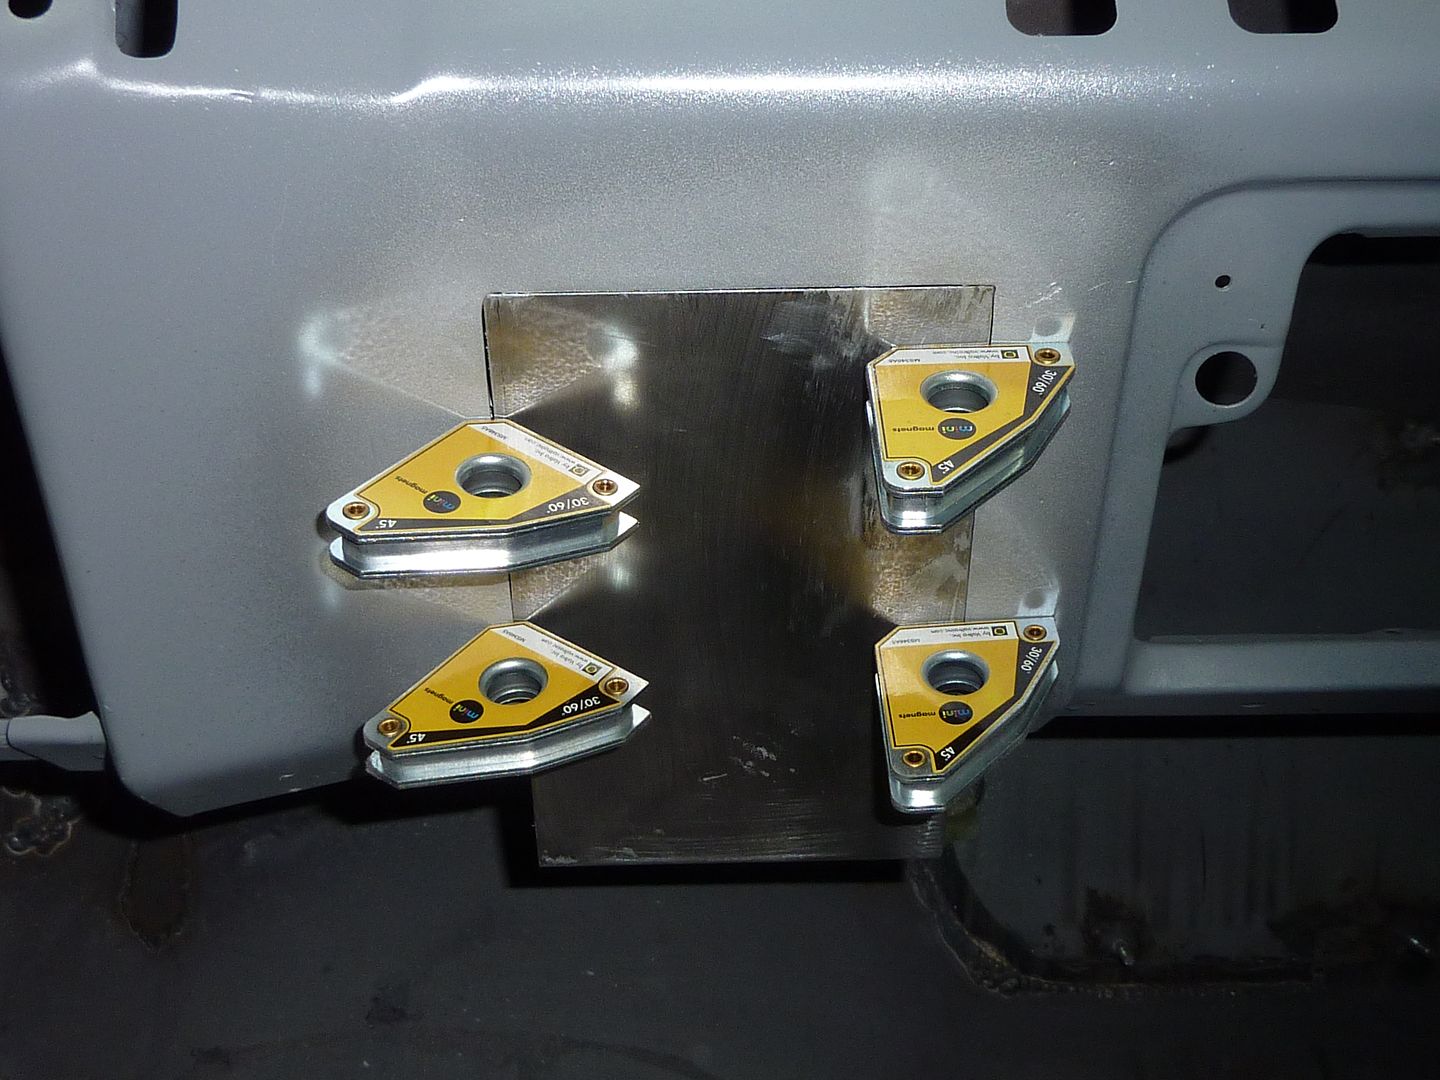
I also got started on officially making my car a no-smoking area.
Out with the old
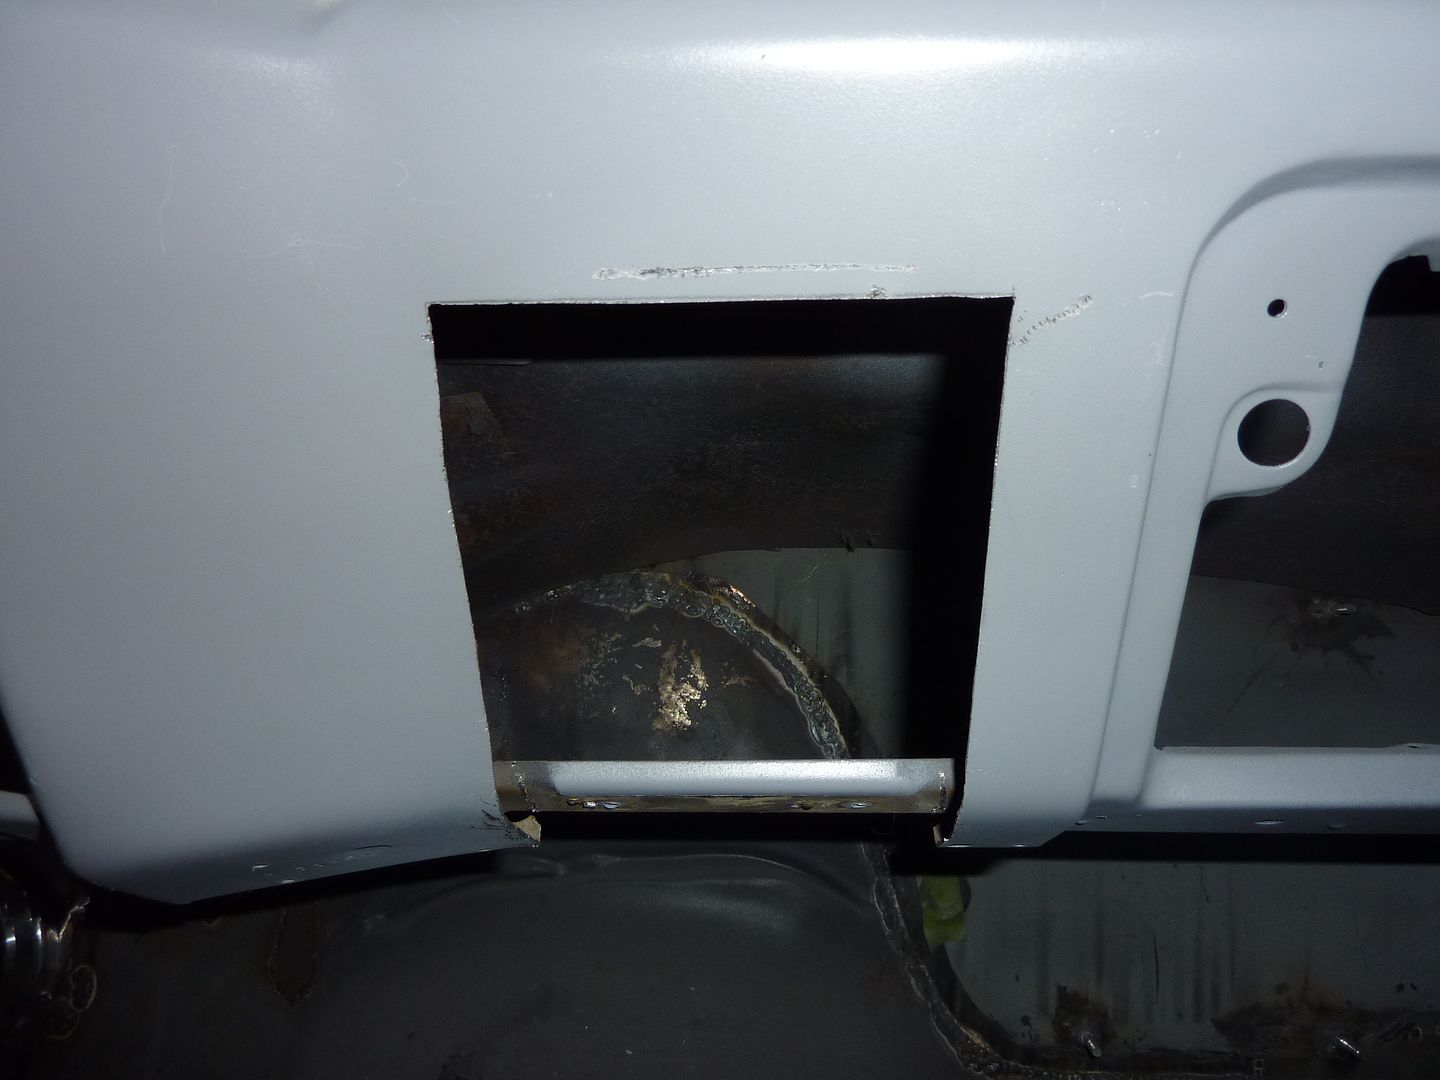
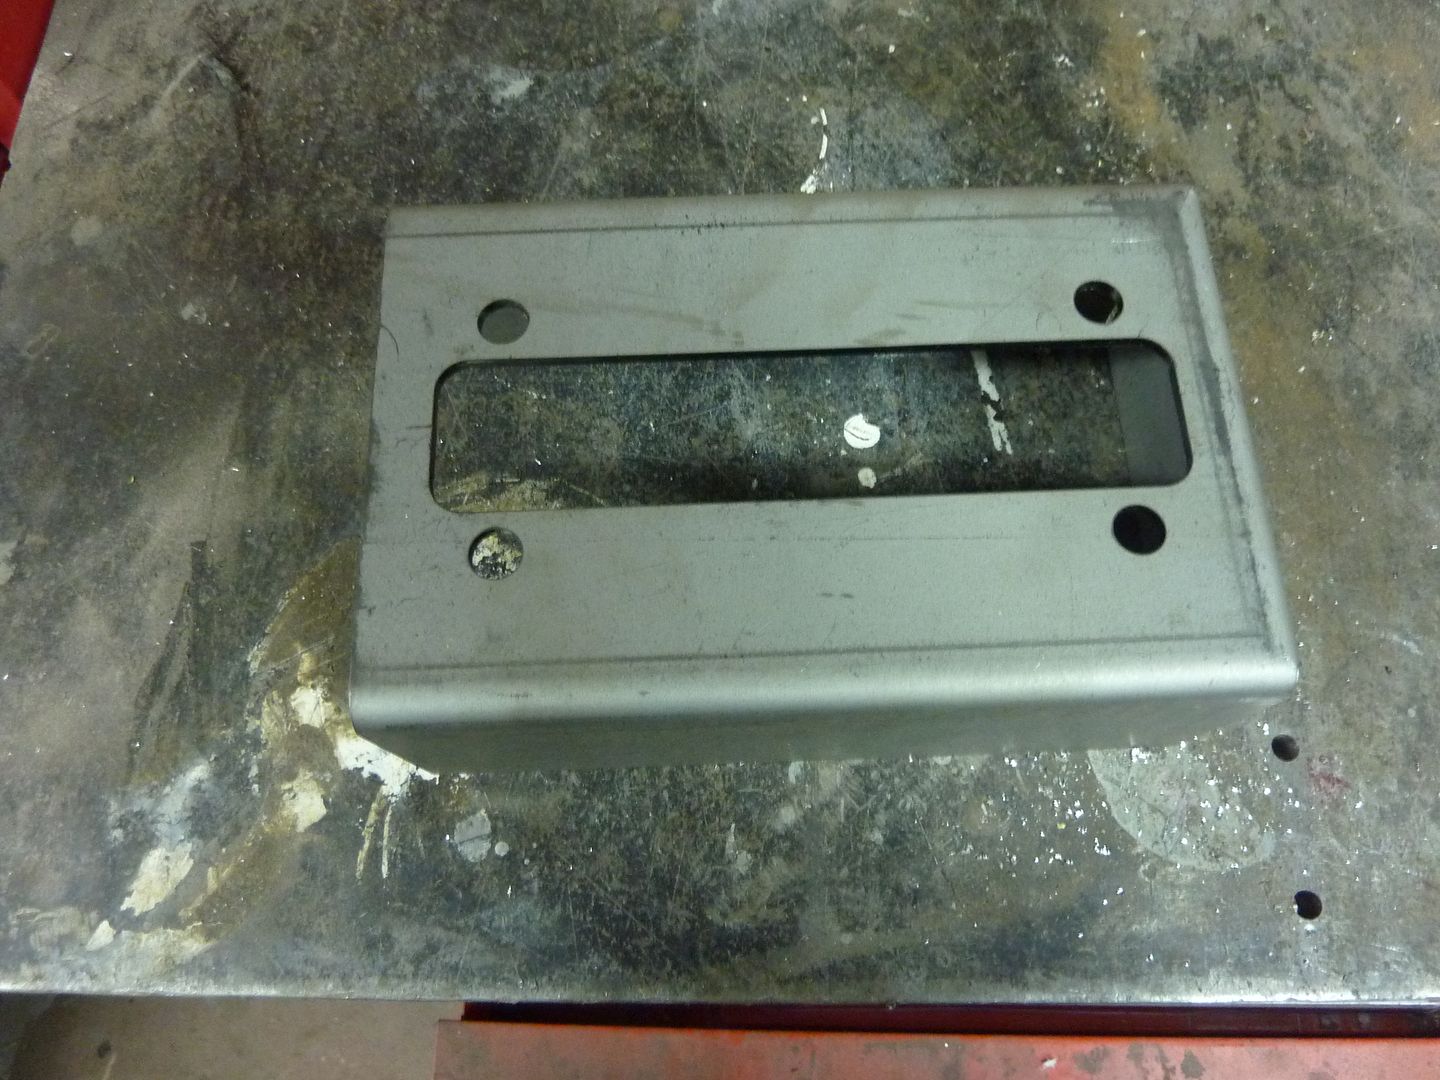
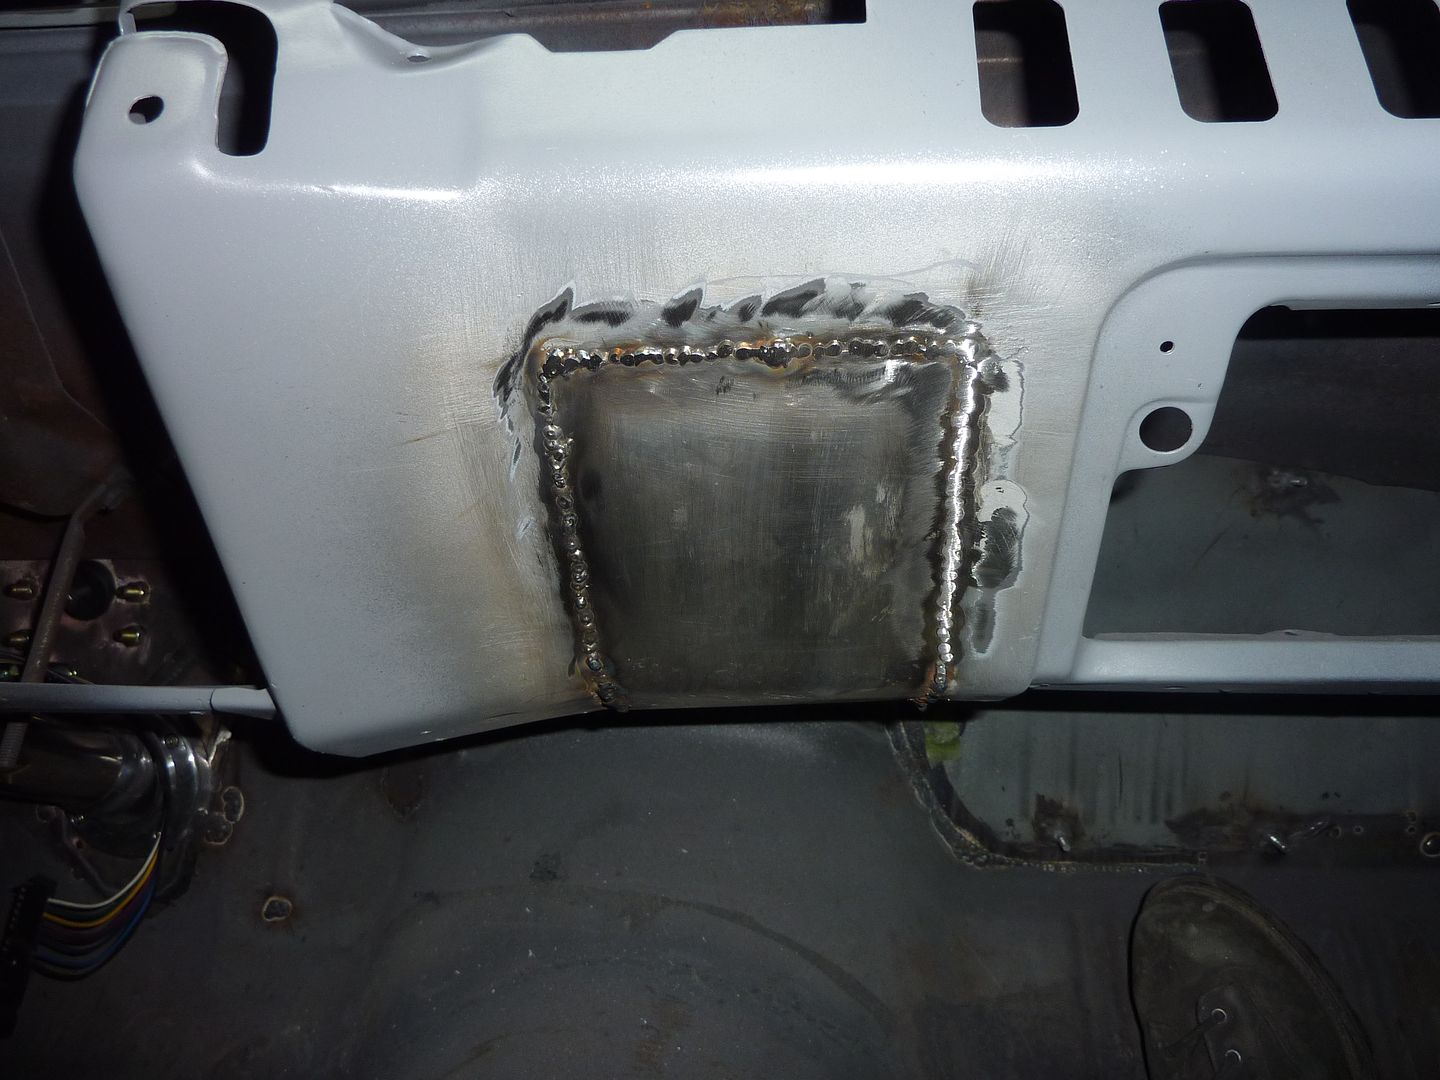
In with the new
Welded in. Still need to finish cleaning it up. I'm really happy with the way my welds have been turning out. Thanks again for the great tips Greg.
I plan on heading out to the shop again tomorrow so will post pics if I get anything done.
This is for the Mast ECU. Once I get my Highway 22 wiring harness, I'm going to send it to Roger and he will make a bracket for that and then I'll weld them together and put them both in the glove box area.
I was originally going to go with a Lokar foot emergency brake, but as soon as I saw Roger's hand brake bracket, I knew I was going with a hand brake. Here's the bracket
I also got a Lokar hand brake and tried it in the bracket. Gonna like this set up.
Lots of room for the cables to hook up. The front is closed in.
I also got a set of coil relocation brackets. These things are sweet. I was going to try and make a set myself, but I can guarantee they wouldn't have come even close to these. I'm going to put these on the subframe just in front of the headers.
I also got started on officially making my car a no-smoking area.
Out with the old
In with the new
Welded in. Still need to finish cleaning it up. I'm really happy with the way my welds have been turning out. Thanks again for the great tips Greg.
I plan on heading out to the shop again tomorrow so will post pics if I get anything done.
02-03-2011, 06:50 PM
#84
Launching!

Join Date: Sep 2009
Location: SOUTH CAROLINA
Posts: 260
Likes: 0
Received 0 Likes
on
0 Posts
 Hi,
Hi,i loved the build photos. You have a great talent and it reflects in your work. Do you have any completed photos. I would love to see them. Have a blessed day..jim
Last edited by jim ravencraft; 02-03-2011 at 07:00 PM.
 02-04-2011, 04:40 PM
#86
On The Tree
Thread Starter
iTrader: (4)
Join Date: Mar 2009
Location: British Columbia, Canada
Posts: 132
Likes: 0
Received 0 Likes
on
0 Posts
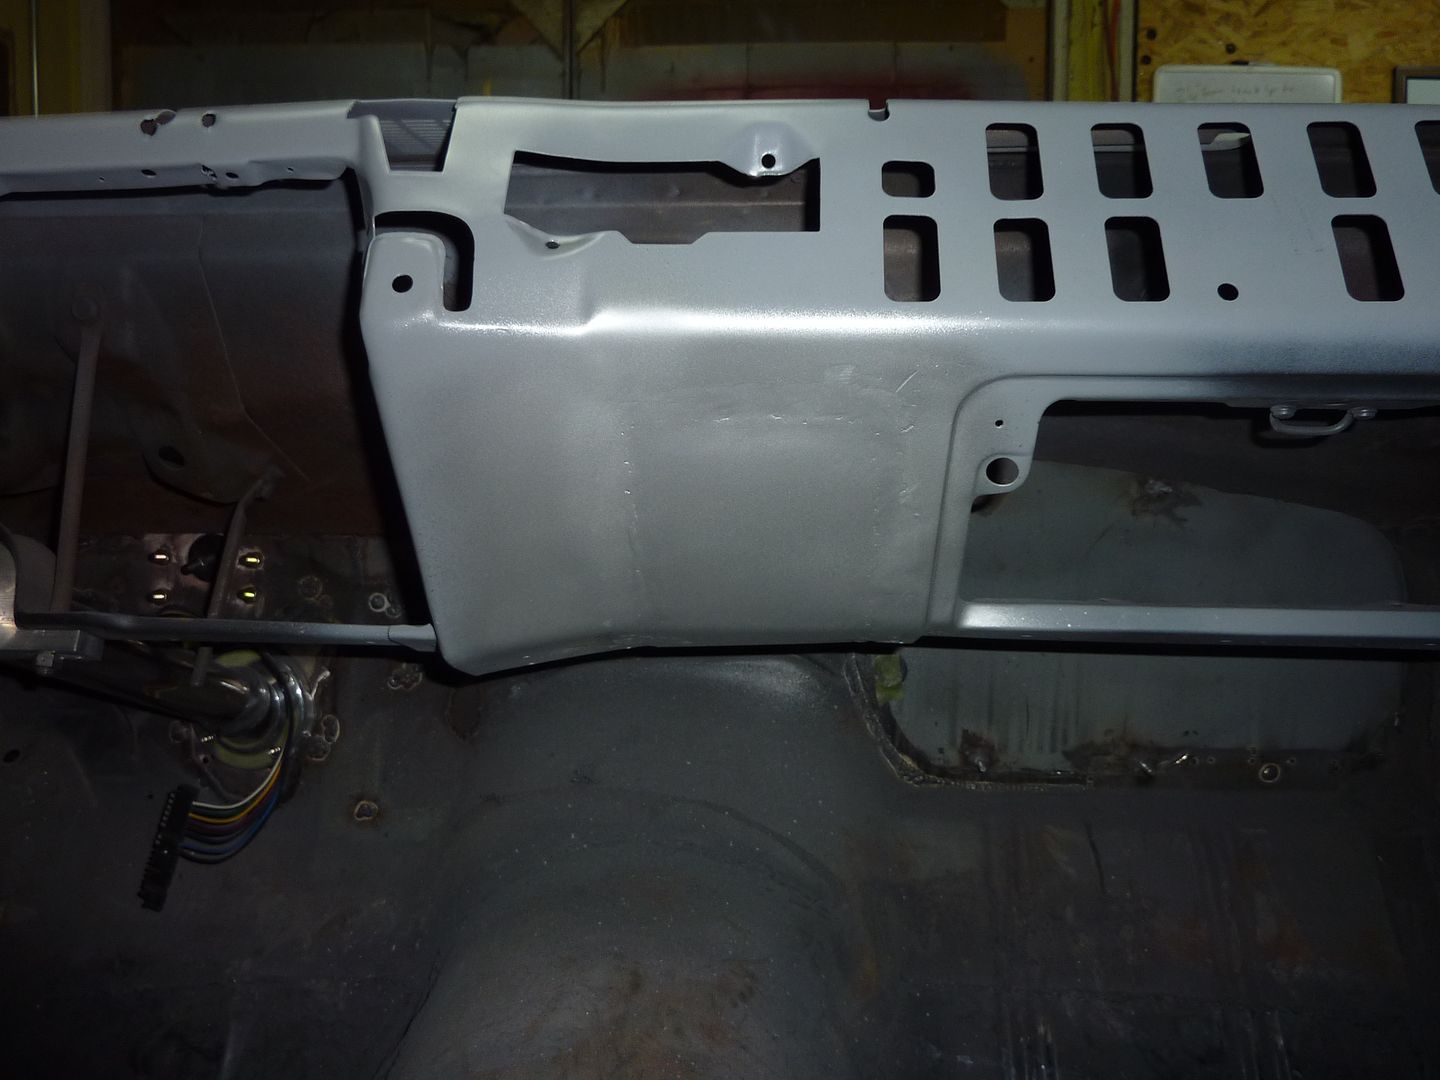
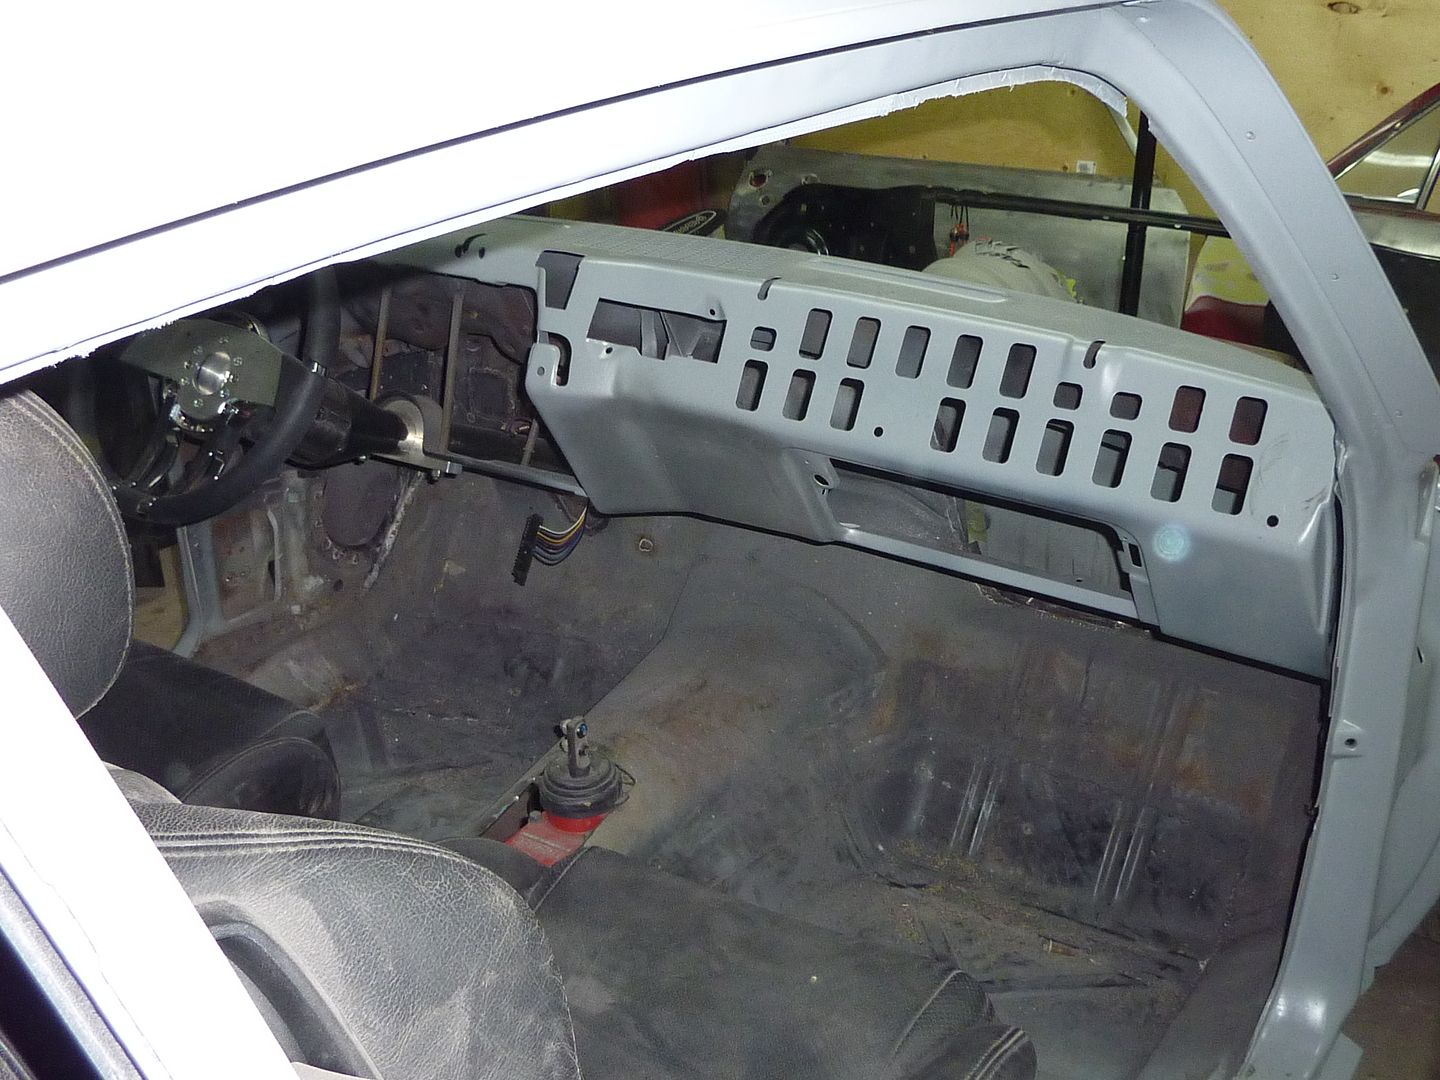
So not much of an update today as I was feeling lazy. I got the ash tray area welds cleaned up. When I was welding in the new metal, I noticed that the dash went in on a bit of an angle. I tried to push it out, but you can still see a bit of a dent. It also doesn't help when the primer on the rest of the dash is thicker. A little more with a hammer and dolly should help. Also, once it gets to a temperature to where I don't have to use 220 construction heaters, I'll put some filler on there and smooth it out. Here's how it looks so far. I think I like it better without the ash tray.
 03-28-2011, 07:08 PM
#87
On The Tree
Thread Starter
iTrader: (4)
Join Date: Mar 2009
Location: British Columbia, Canada
Posts: 132
Likes: 0
Received 0 Likes
on
0 Posts
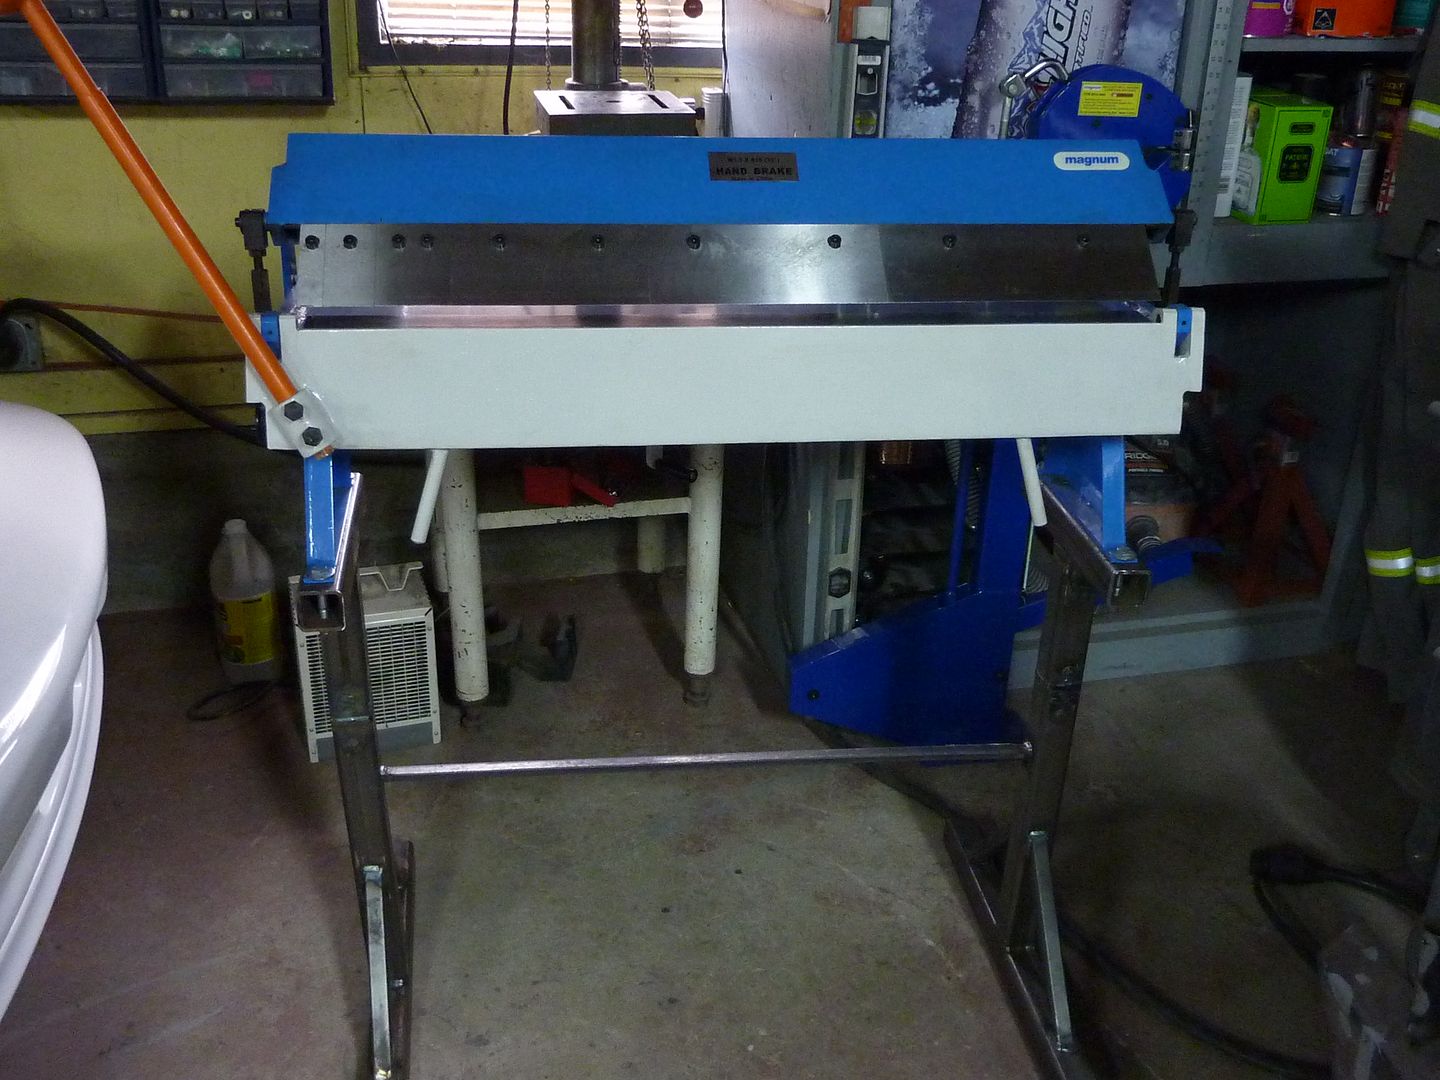
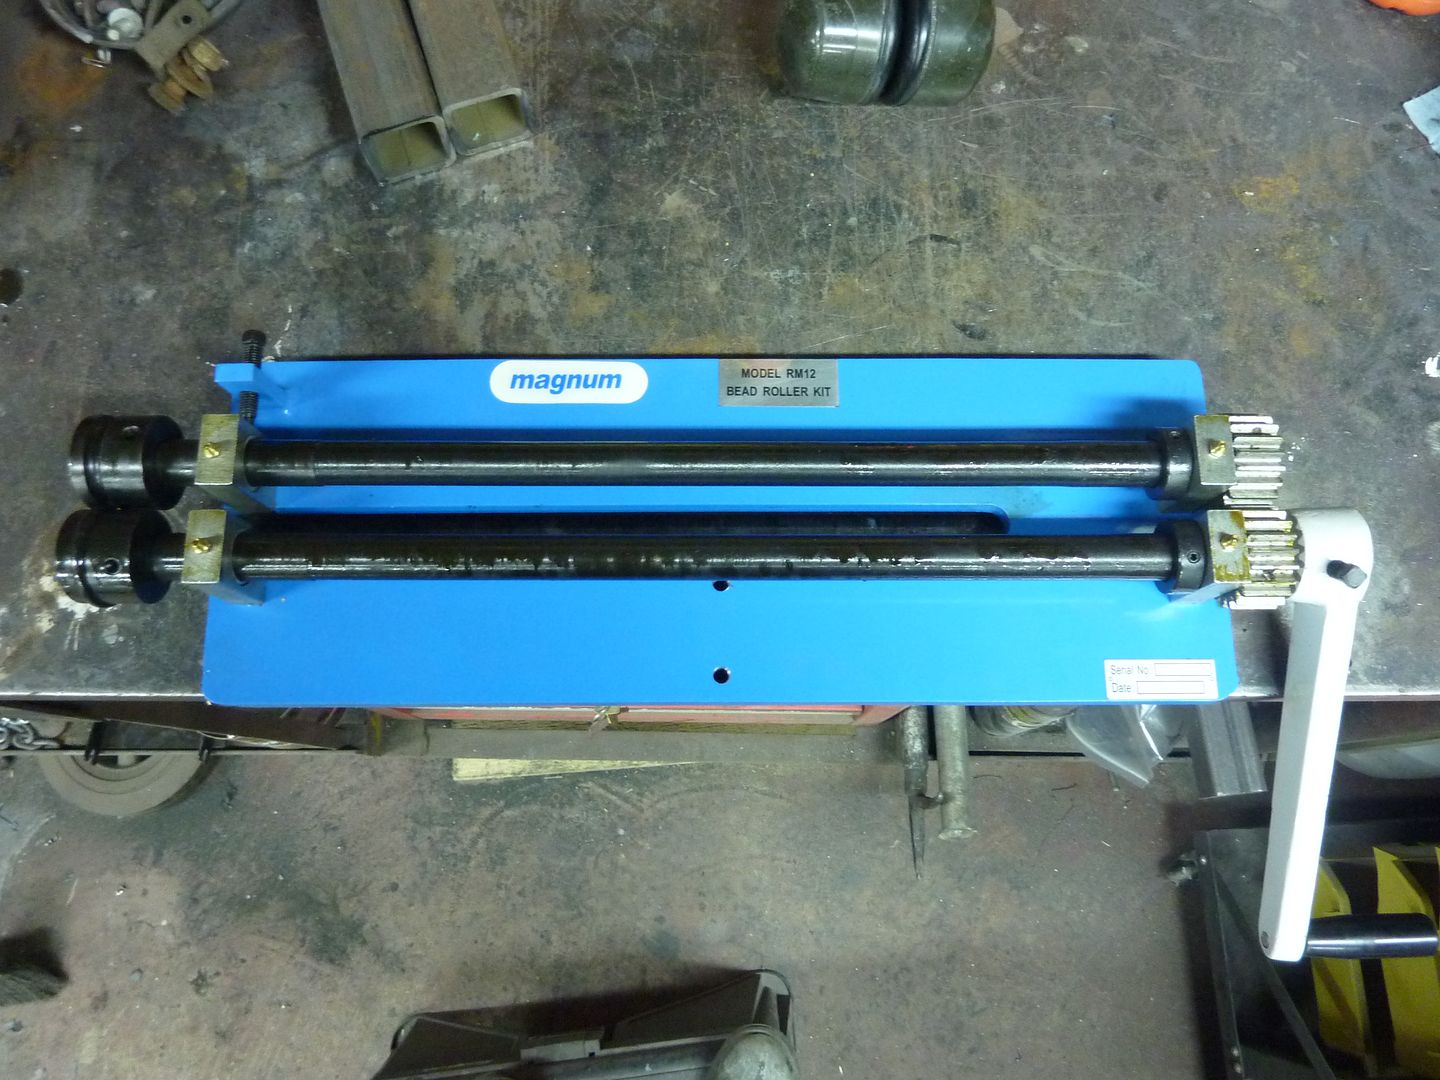
Not a huge update, but an update none the less. A couple weeks ago I went and got some new tools. The brand is Magnum. It's a Chinese brand, but they still weren't cheap. The owner of the tool store gave me a really good deal so I thought why not. They are all very heavy so I know the steel is good. For as often as I will actually use them, they should do me fine.
36" pan and brake
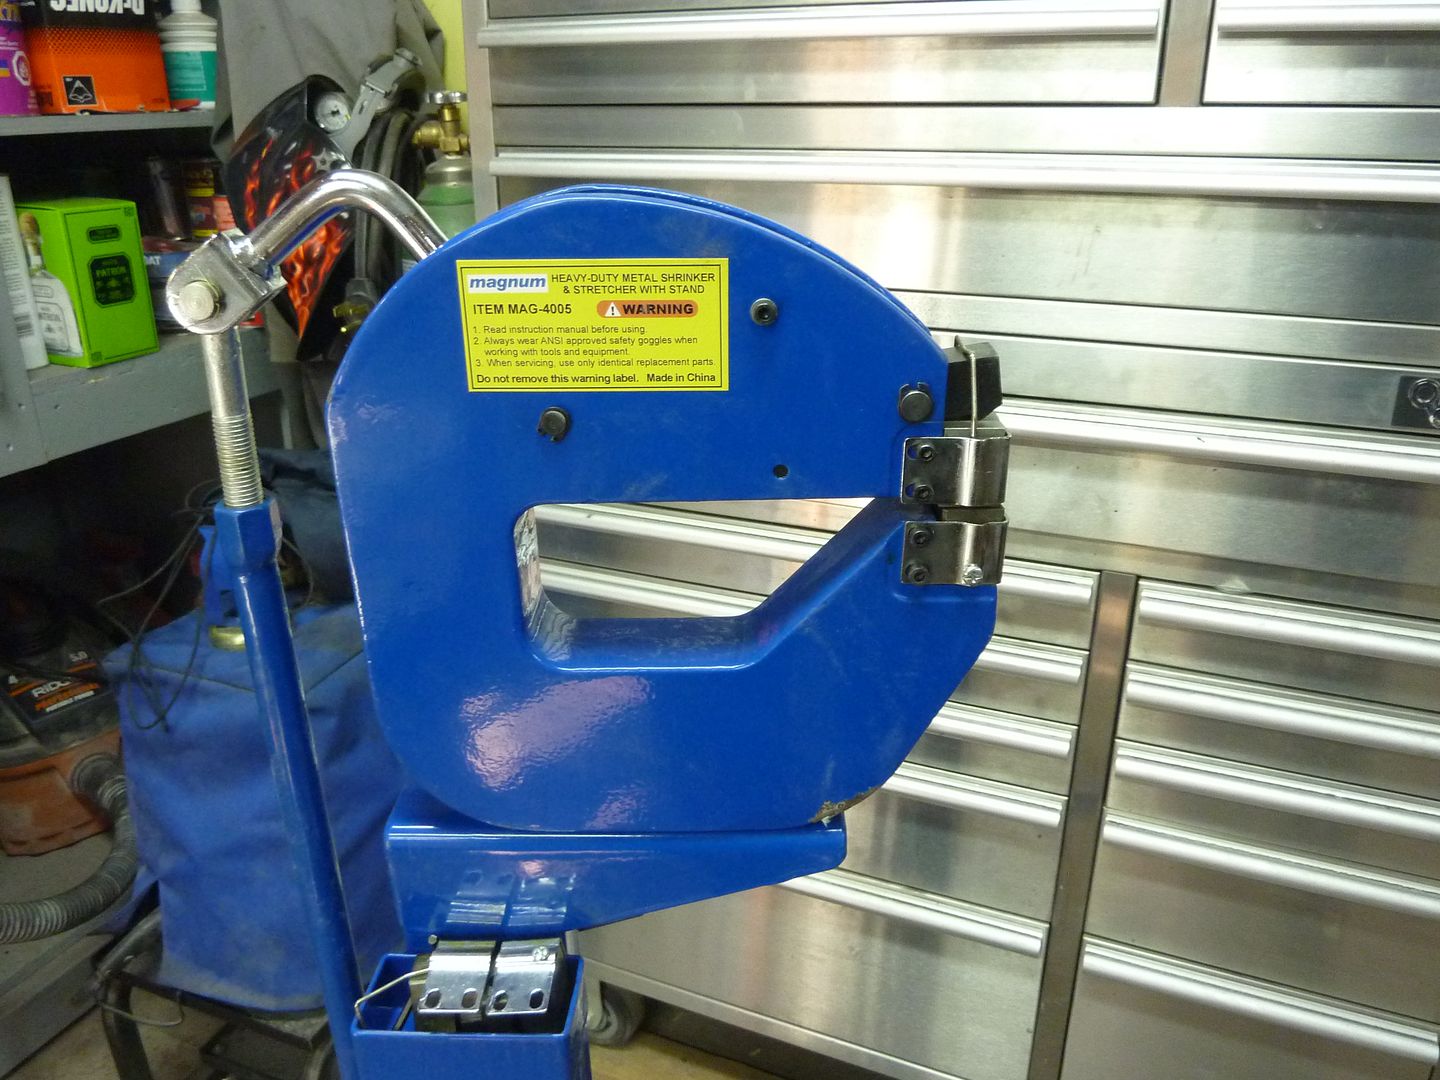
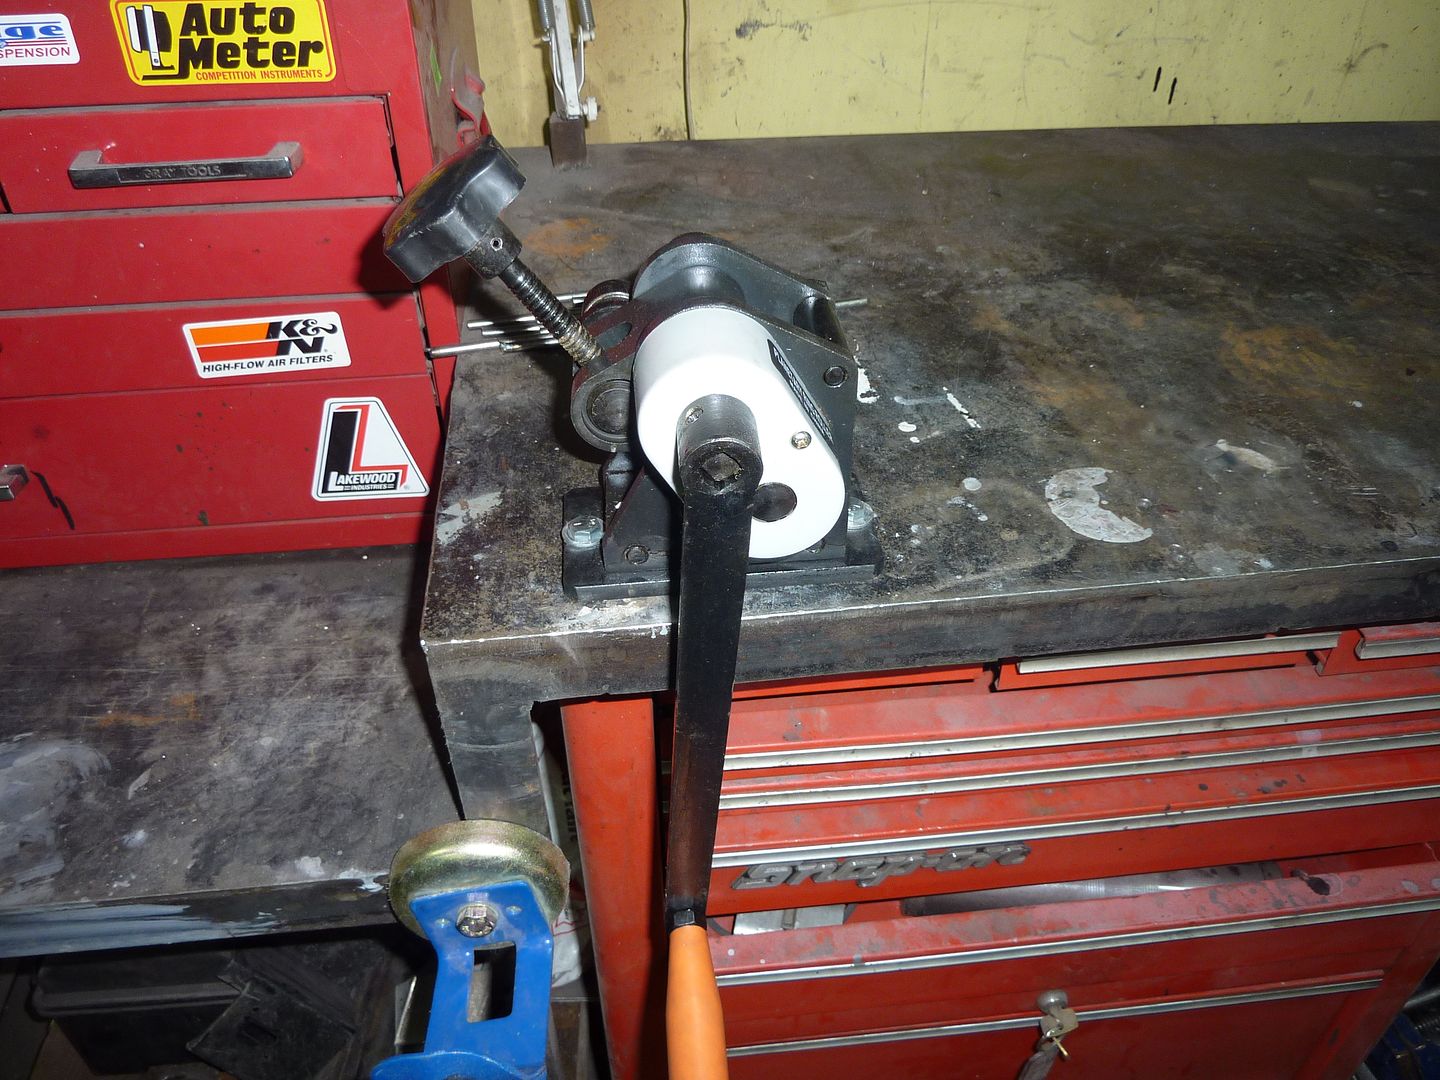
Heavy duty shrinker and stretcher with foot pedal
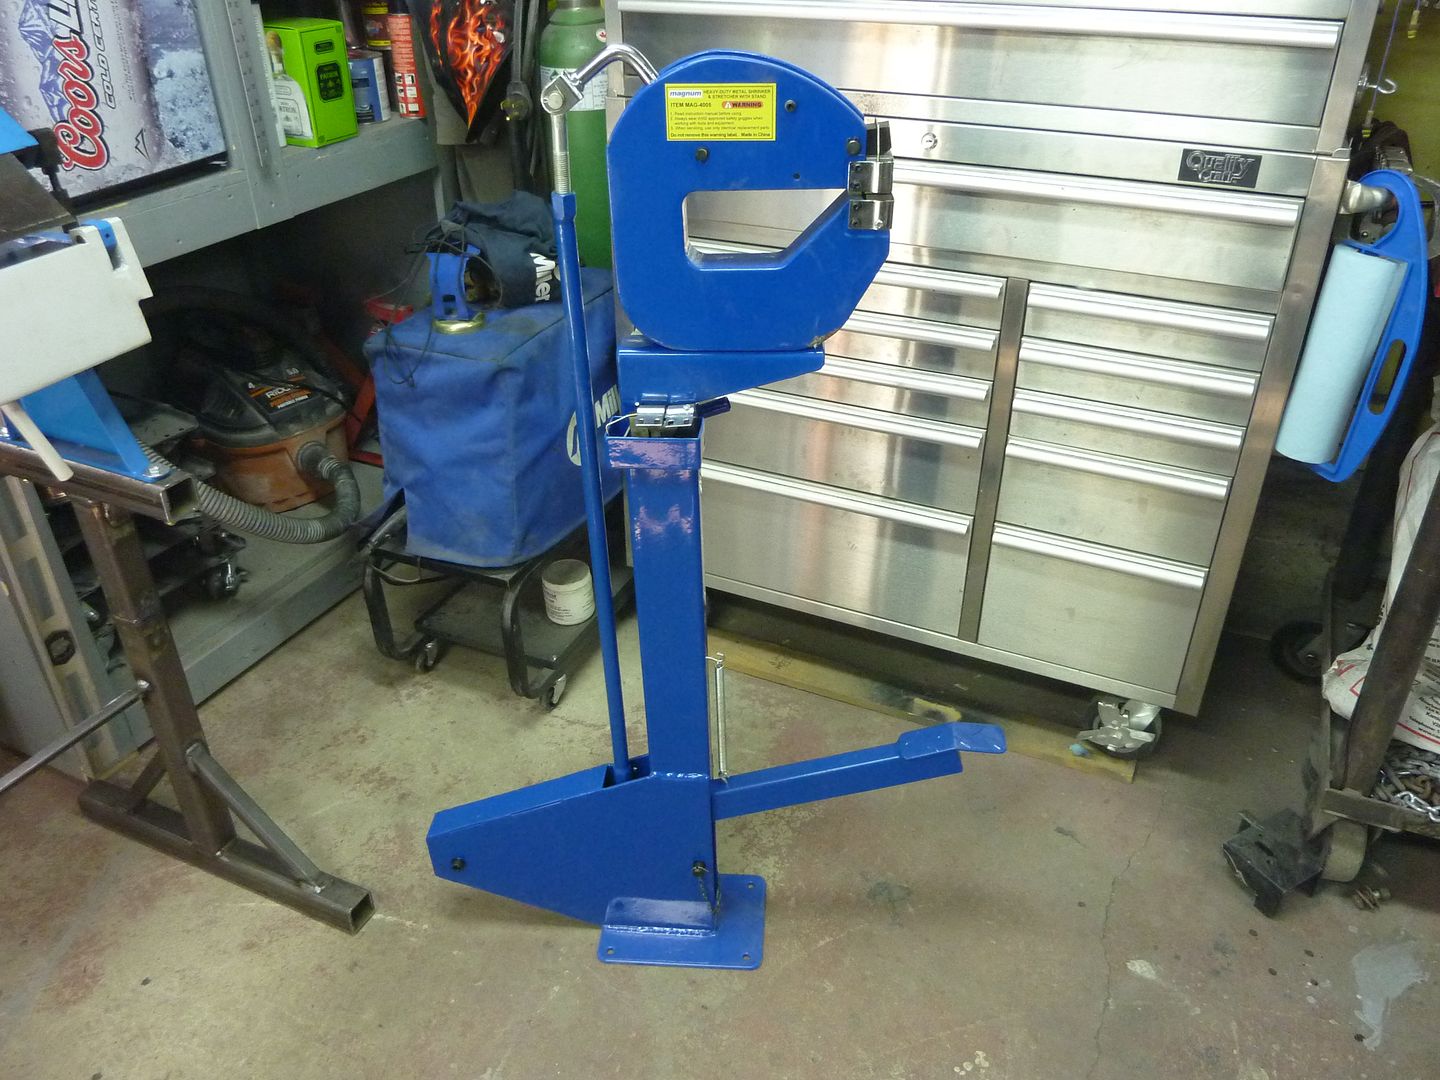
The nice thing about the heavy duty one is how deep the throat is. The regular barely had any room to play at all
Bead roller with 15" throat. It came with 3 sets of beads and 3 sets of flanges. I'll likely end up getting a set of the shear ends for it. I just need to grab a 2" piece of steel tube next time I'm in town and I'm going to make a stand for it.
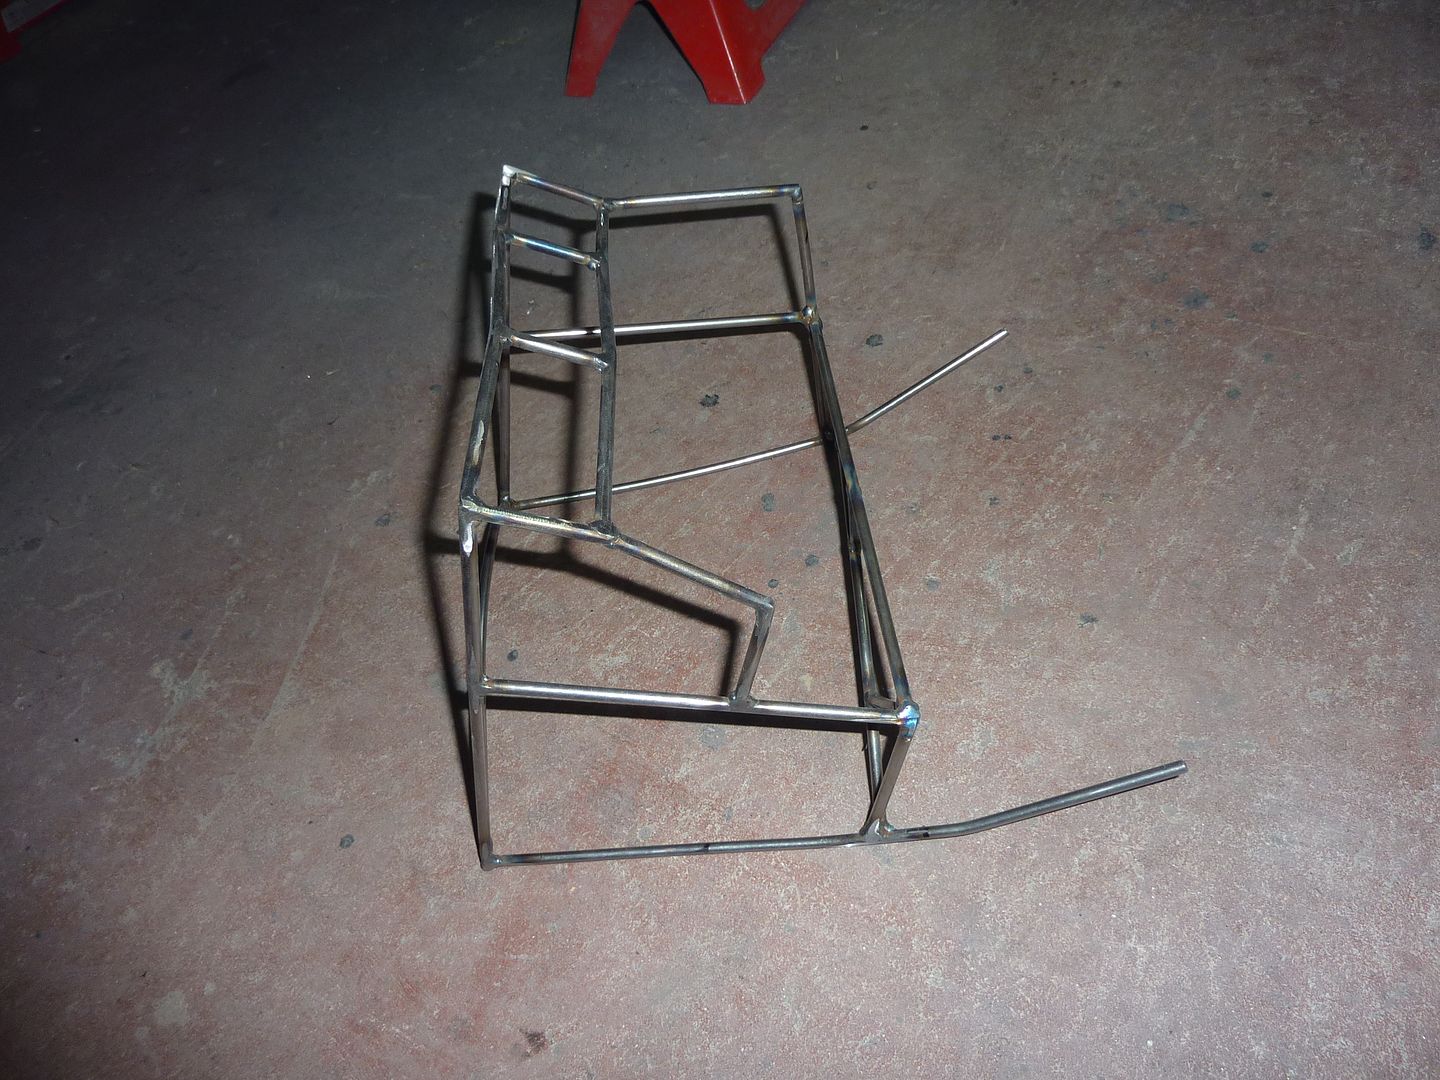
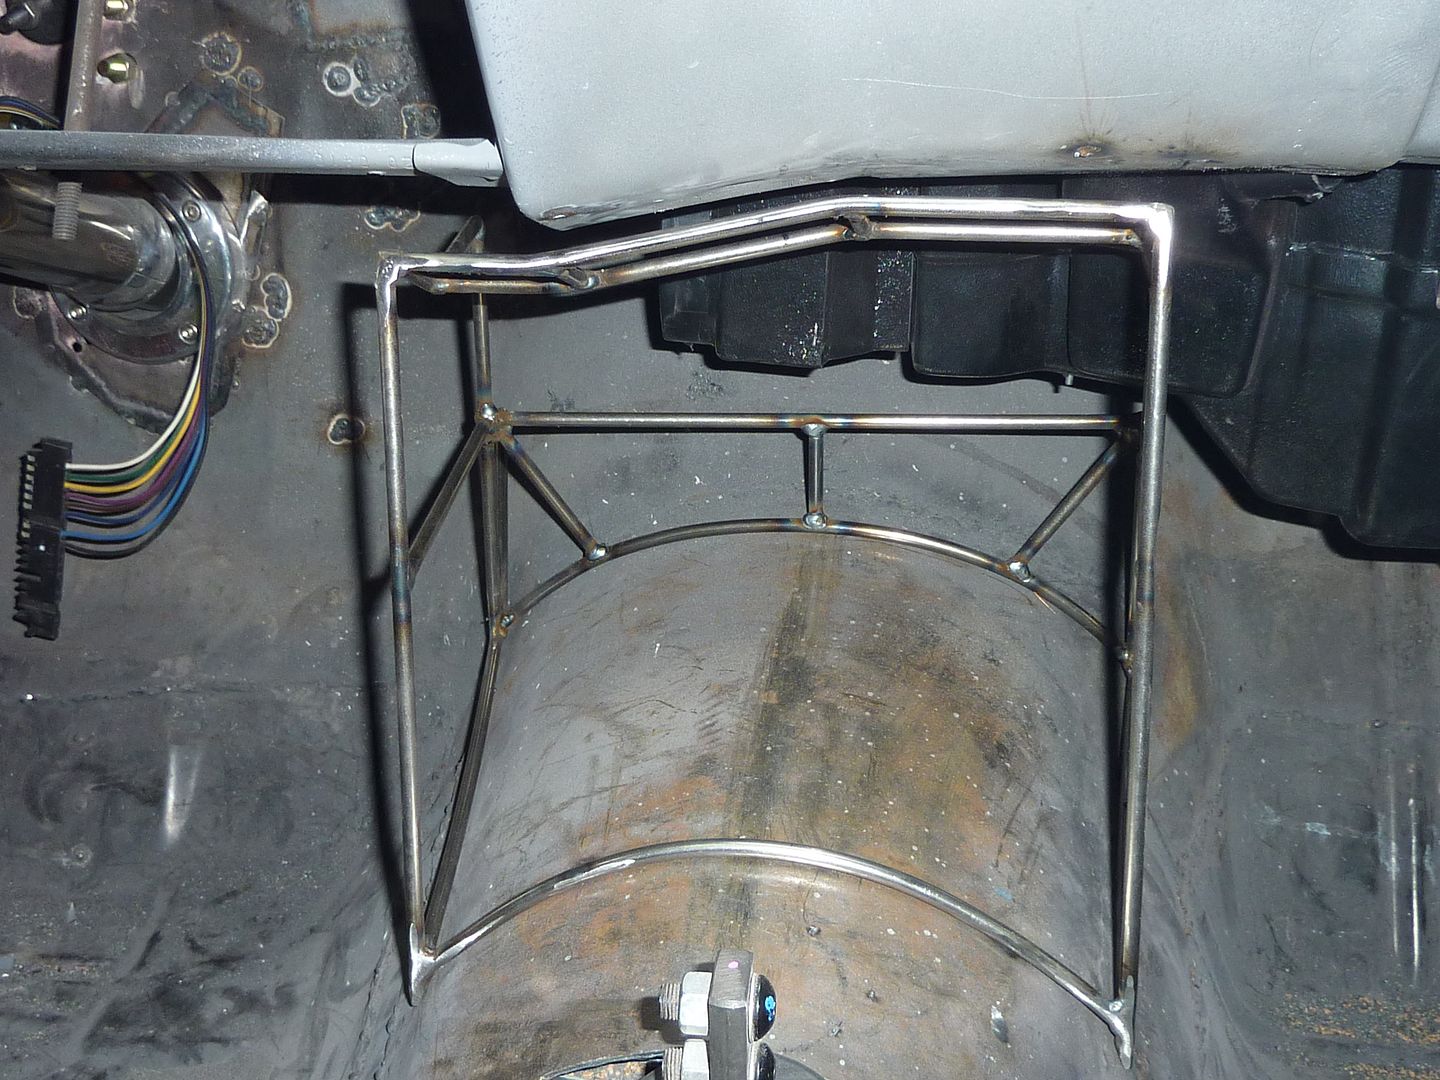
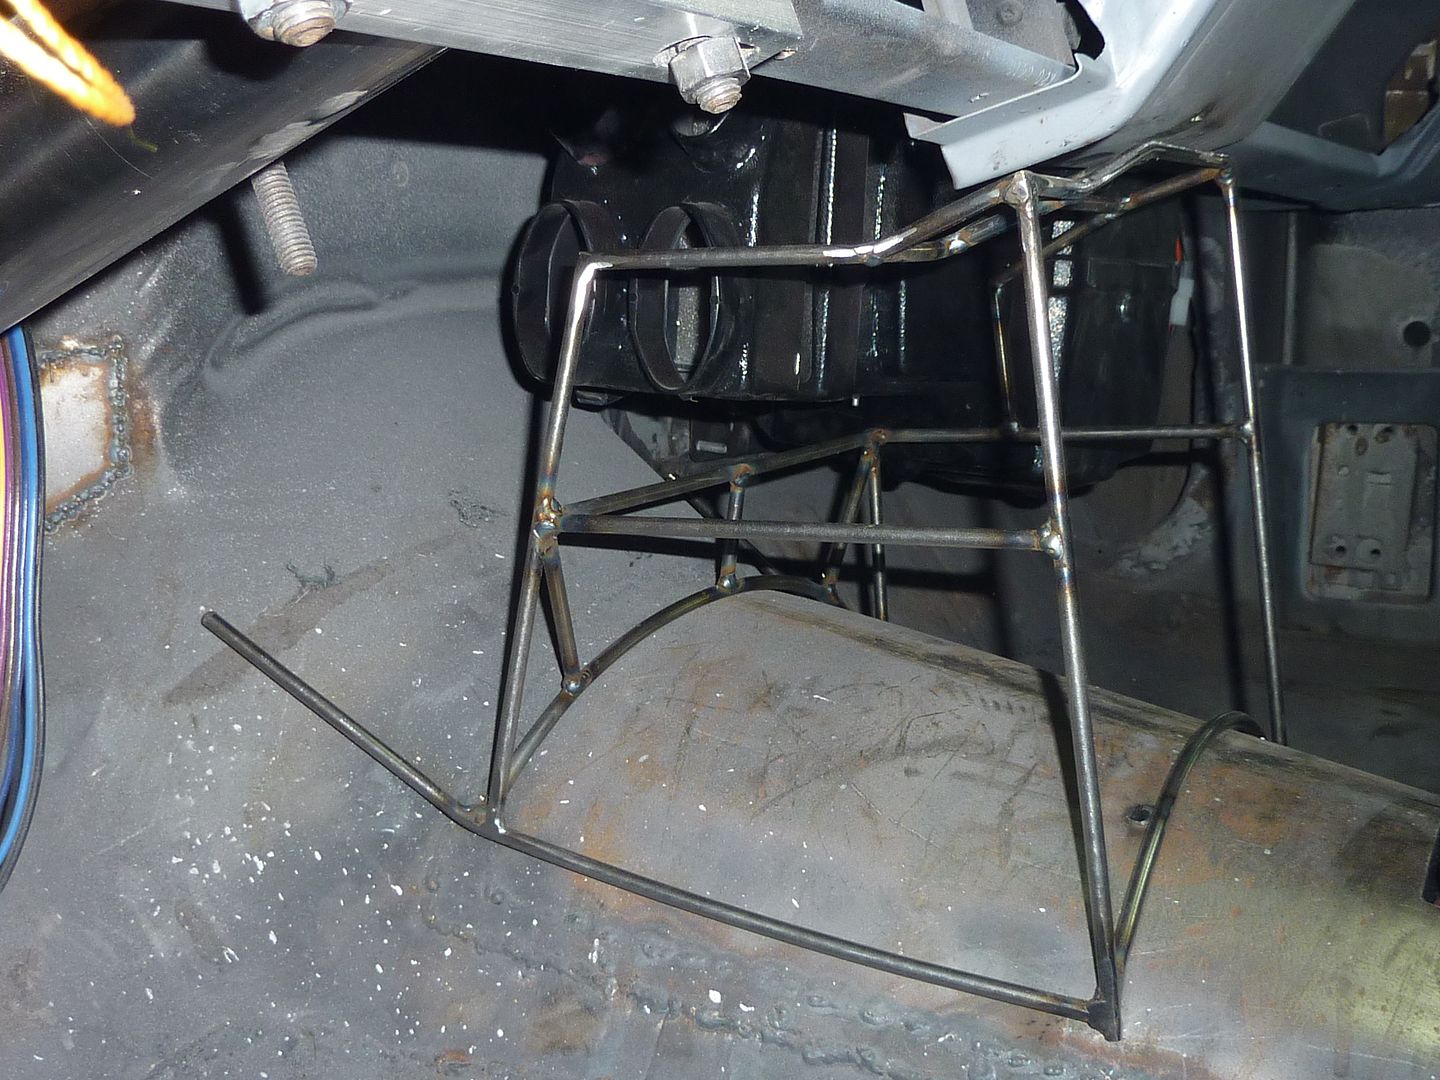
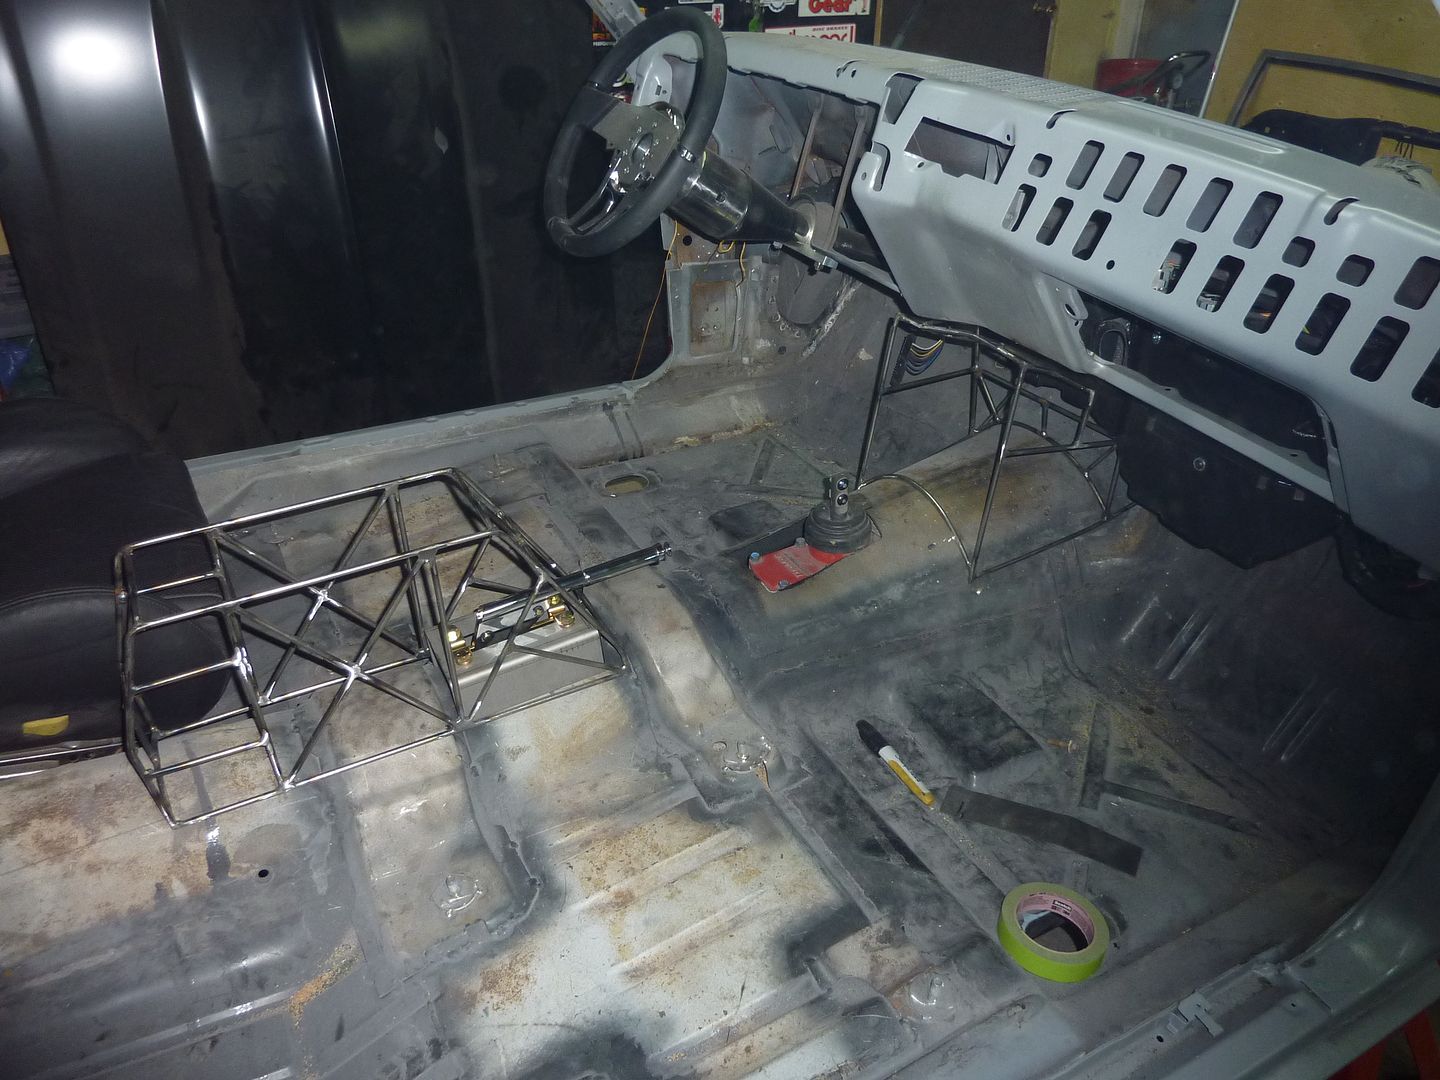
Today I started making the console. I thought I would document it, whether or not it turns out okay. I decided to try making it out of metal. I'm using 1/4" round bar for the skeleton and then I will wrap it with sheet metal. I'm going to build it in 3 stages: first the arm rest area, then the front part of it and then I will connect the two. If you've never done work with round bar, it's slow going.
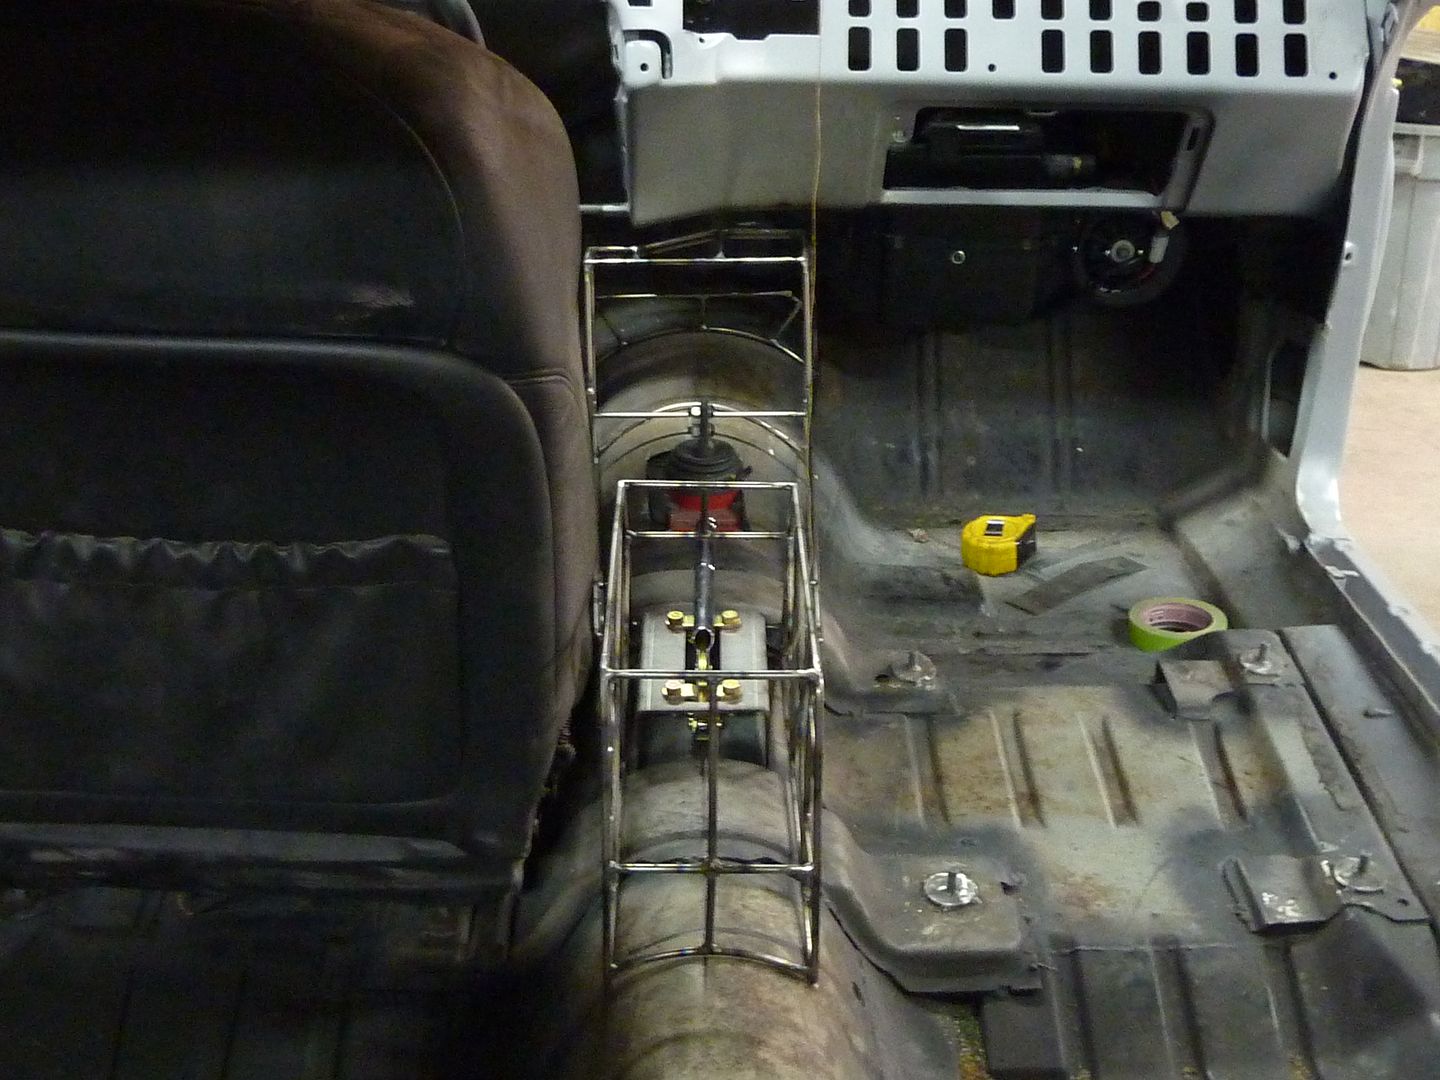
I made the two side like this

And then added round bar between the two. My plan is to have the back of the hand brake hidden and only the handle showing. Here's how the arm rest looks so far. I also plan on adding a hinged pad on top.
36" pan and brake
Heavy duty shrinker and stretcher with foot pedal
The nice thing about the heavy duty one is how deep the throat is. The regular barely had any room to play at all
Bead roller with 15" throat. It came with 3 sets of beads and 3 sets of flanges. I'll likely end up getting a set of the shear ends for it. I just need to grab a 2" piece of steel tube next time I'm in town and I'm going to make a stand for it.
Today I started making the console. I thought I would document it, whether or not it turns out okay. I decided to try making it out of metal. I'm using 1/4" round bar for the skeleton and then I will wrap it with sheet metal. I'm going to build it in 3 stages: first the arm rest area, then the front part of it and then I will connect the two. If you've never done work with round bar, it's slow going.
I made the two side like this
And then added round bar between the two. My plan is to have the back of the hand brake hidden and only the handle showing. Here's how the arm rest looks so far. I also plan on adding a hinged pad on top.
03-28-2011, 07:09 PM
#88
On The Tree
Thread Starter
iTrader: (4)
Join Date: Mar 2009
Location: British Columbia, Canada
Posts: 132
Likes: 0
Received 0 Likes
on
0 Posts
Finally got back into the shop to get a bit more done. I've been working a ton of overtime lately. Bad thing with that...no shop time. Good thing though.....more parts. After next week I'll have gotten an extra 43 hours of double bubble  Hope to make a parts run in a couple more months.
Picked up a few more tools since the last update.
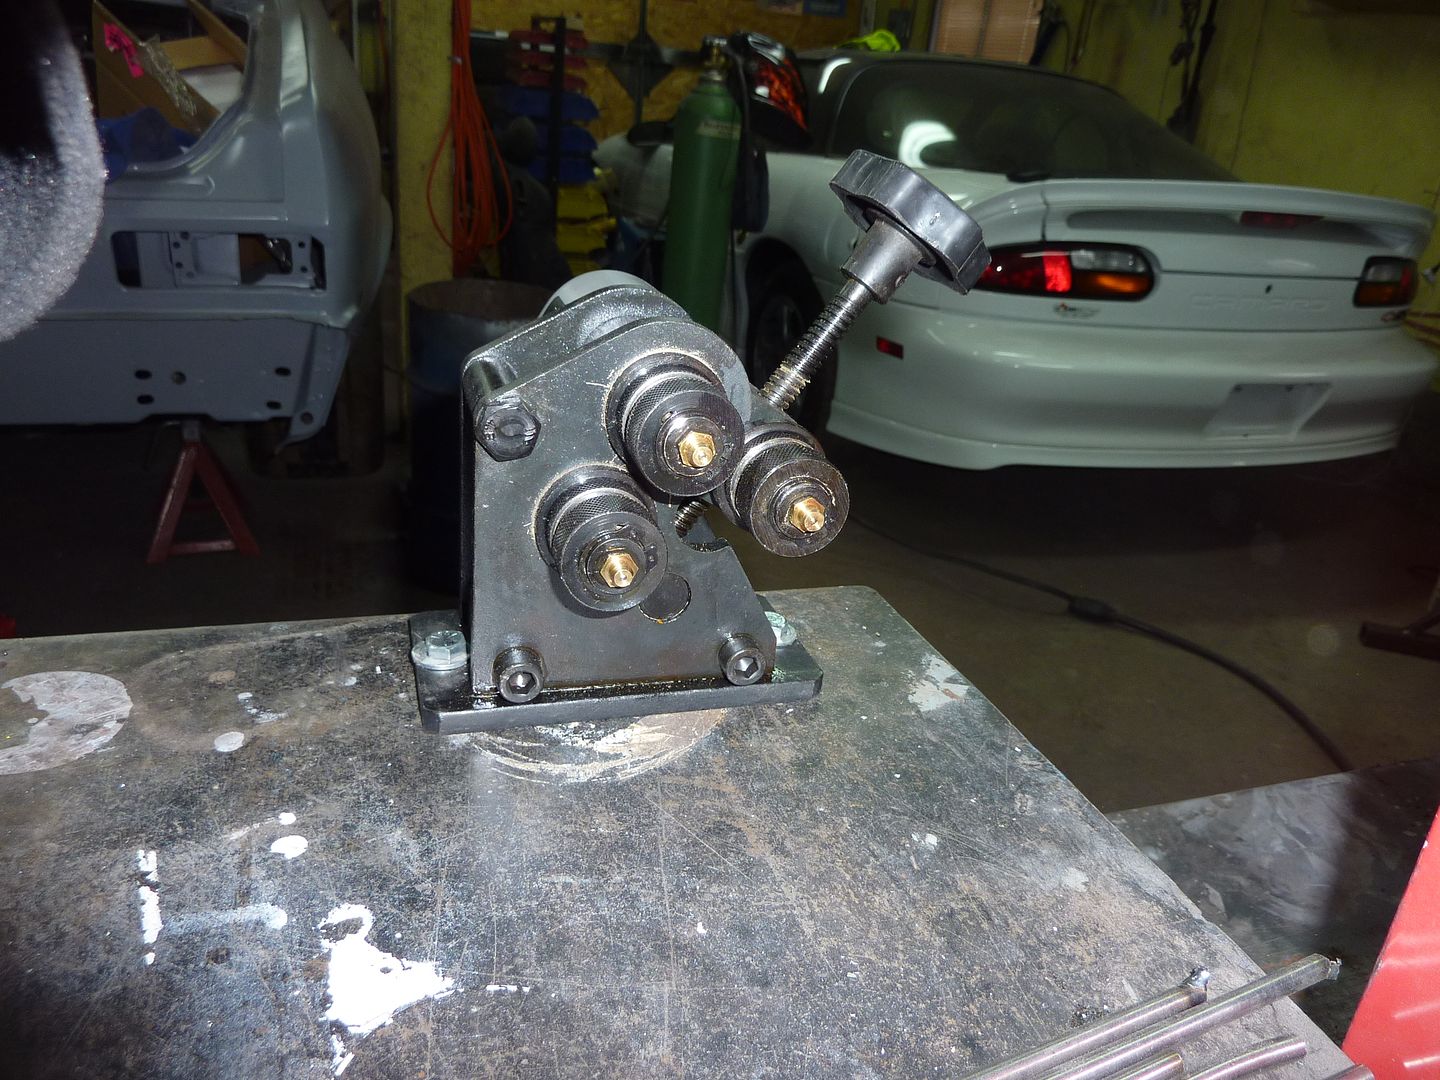
Got a ring roller. Works great with 1/4" round bar.
I also picked up a universal metal bender, more for bending round bar. It was on sale for $40 so I thought why not. http://www.princessauto.com/workshop...l-metal-bender
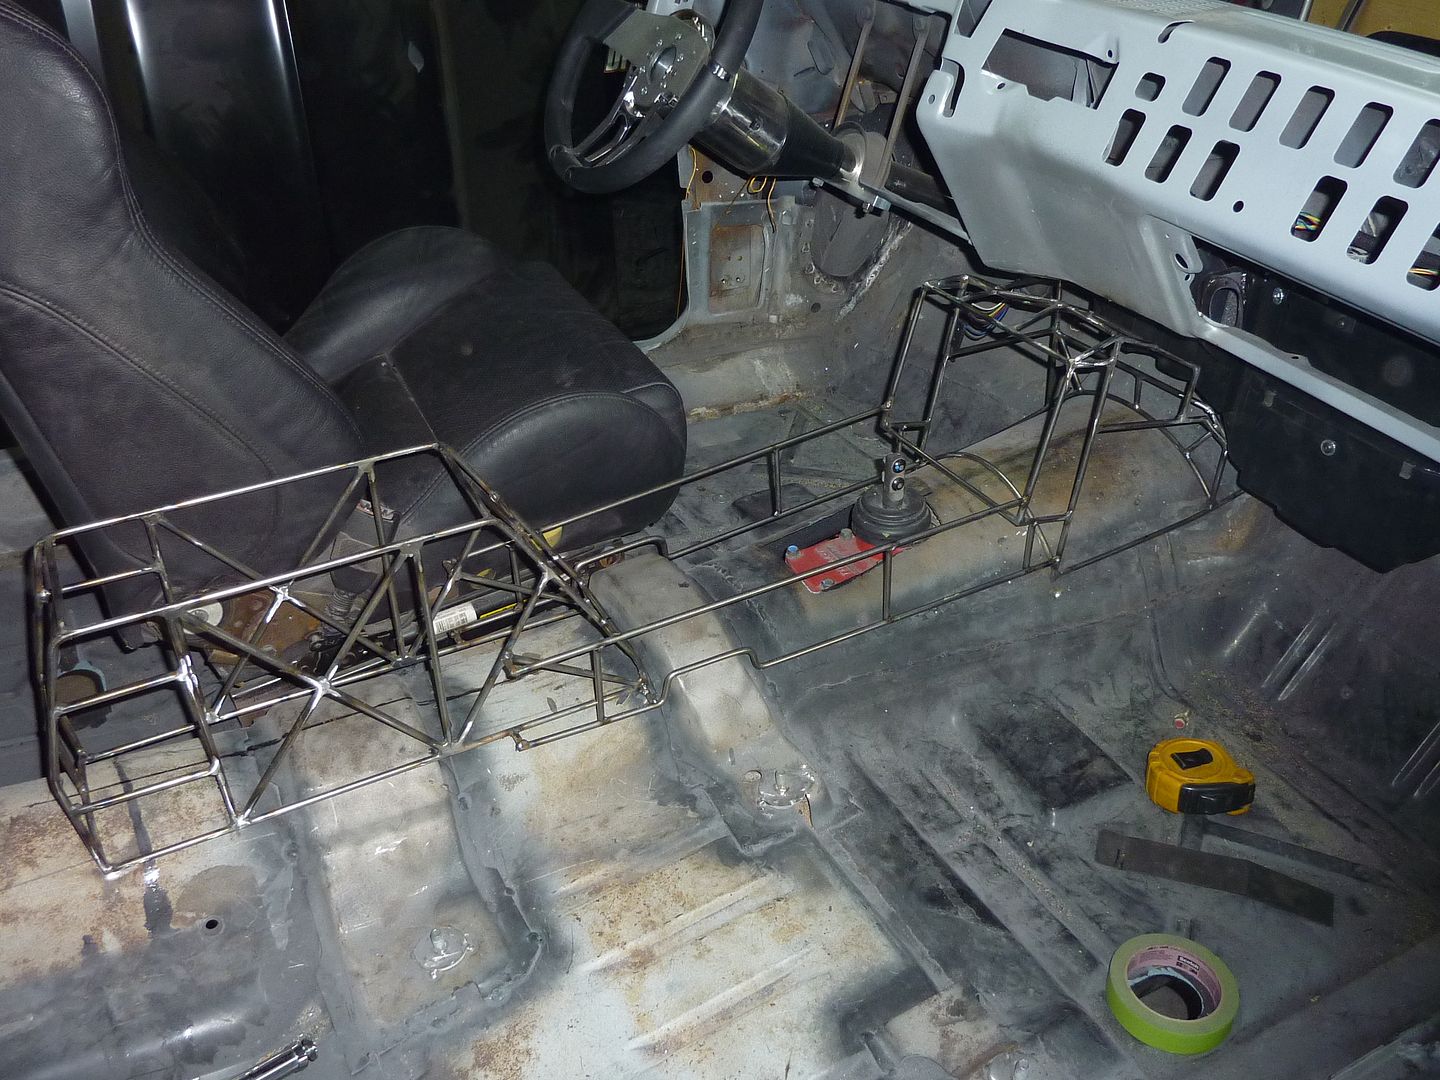
I started on the front part of the console. I ran a piece of string across the car to give me a straight line as a guide.
I'm glad I remembered that I had a Vintage Air unit to put in still. I started measuring to run the console almost to the firewall and then I remembered the a/c.
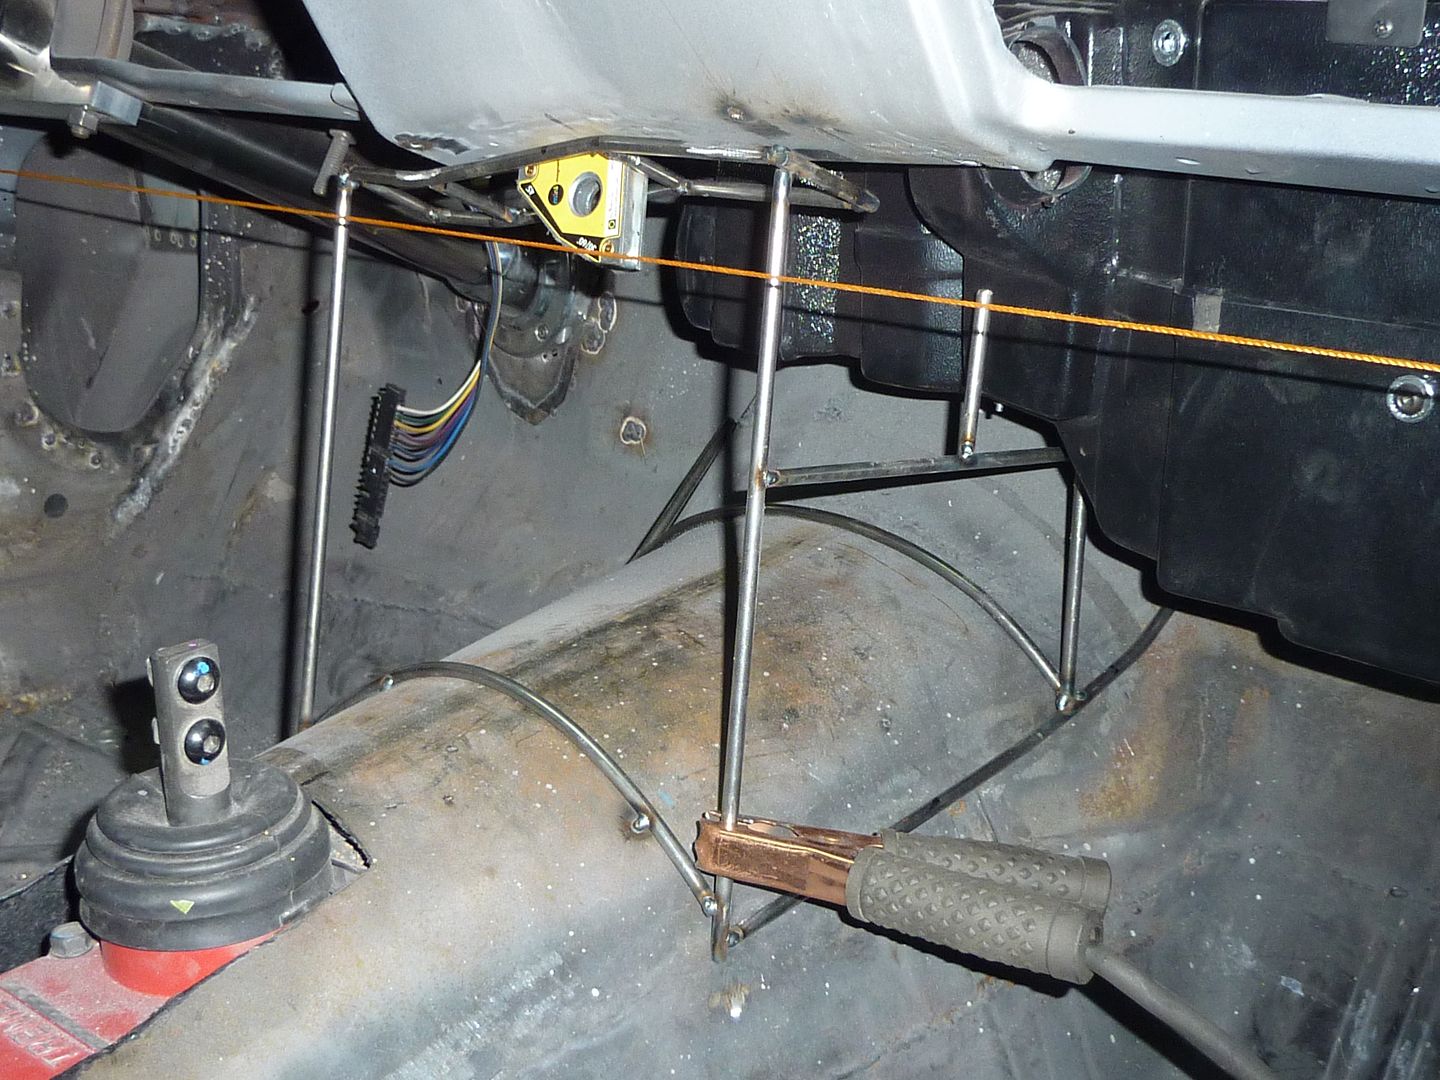
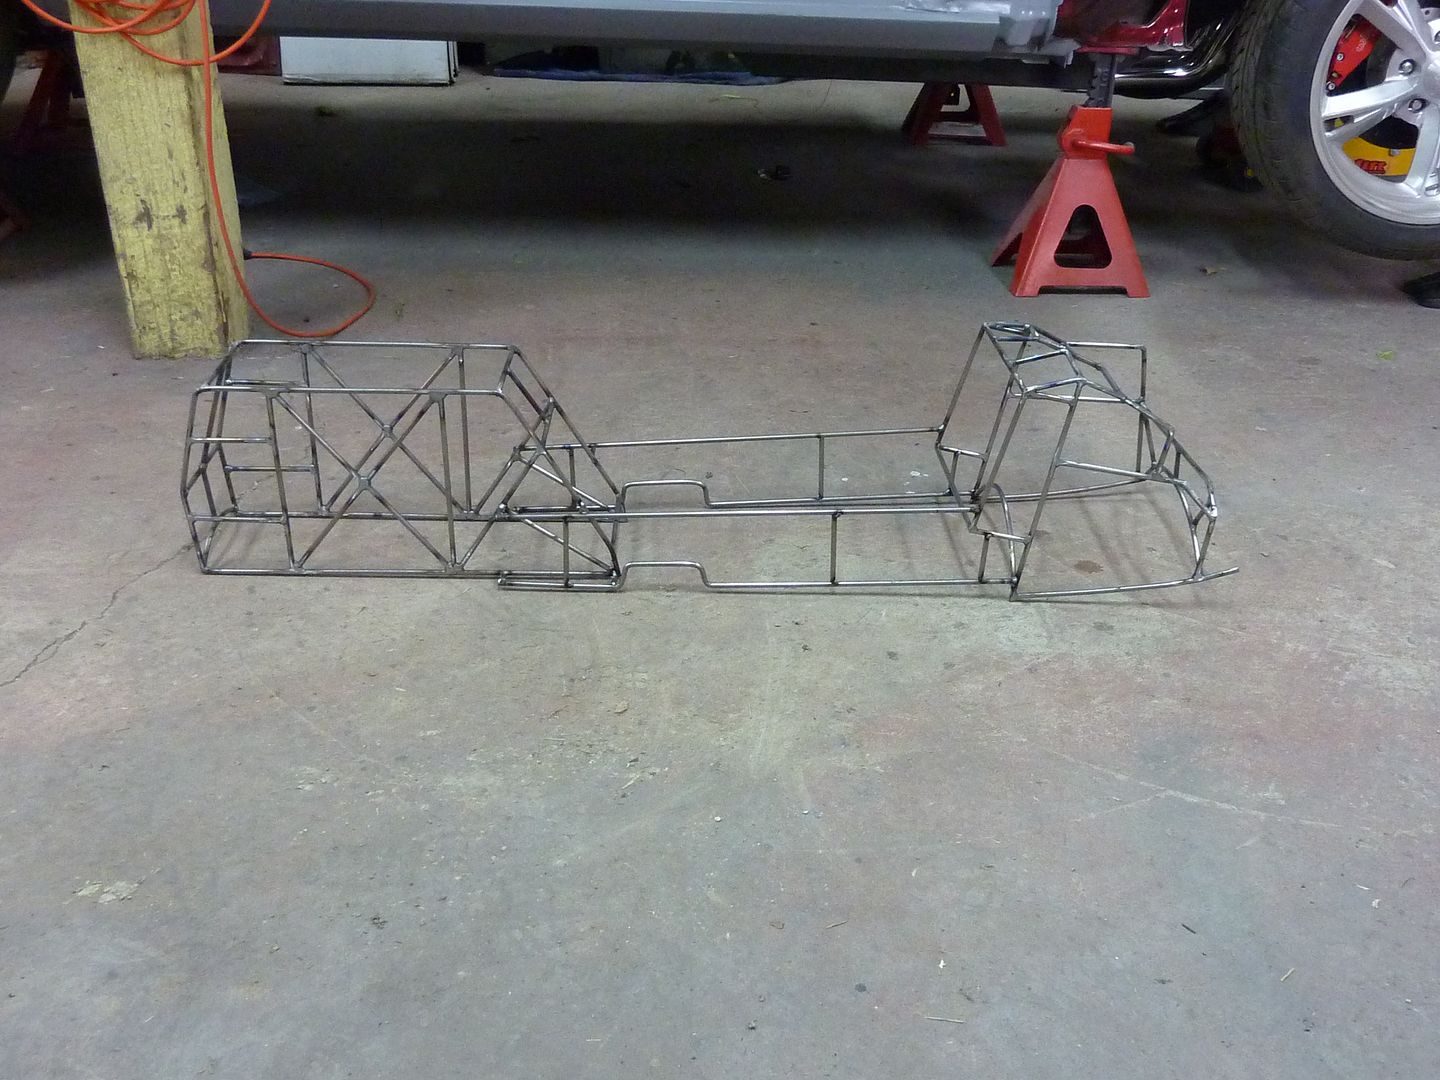
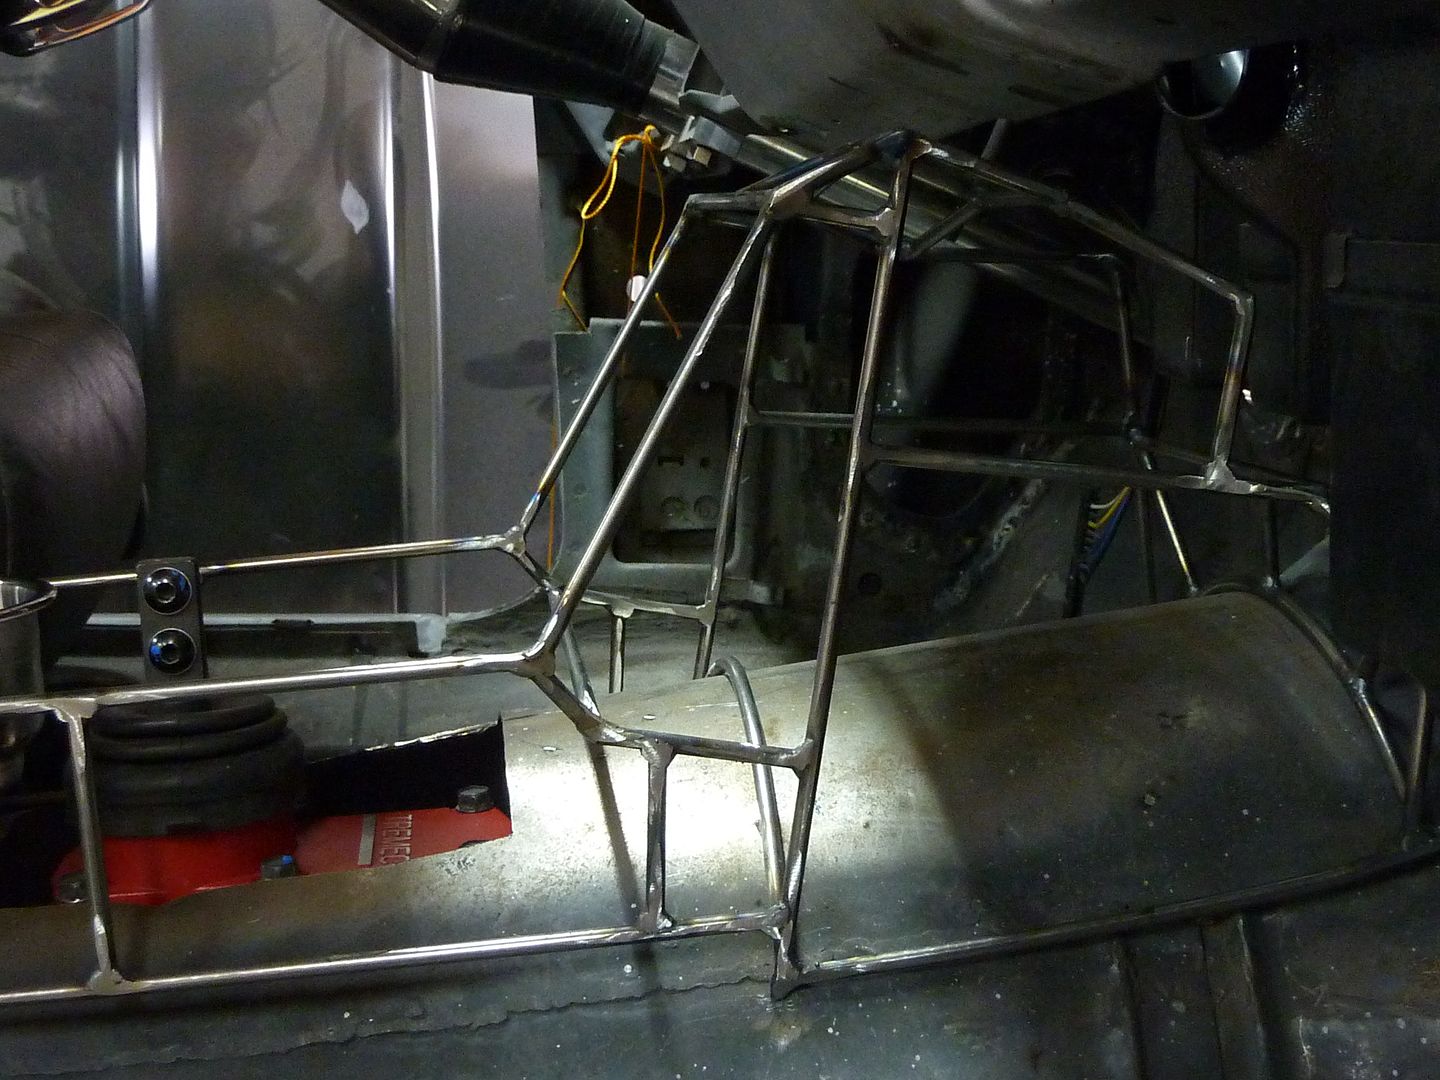
After about 5 straight hours in the shop, I ended up with this
Once I get the center section in place, I plan on running the front of the console on more of an angle. It won't be sitting straight up like it is now.
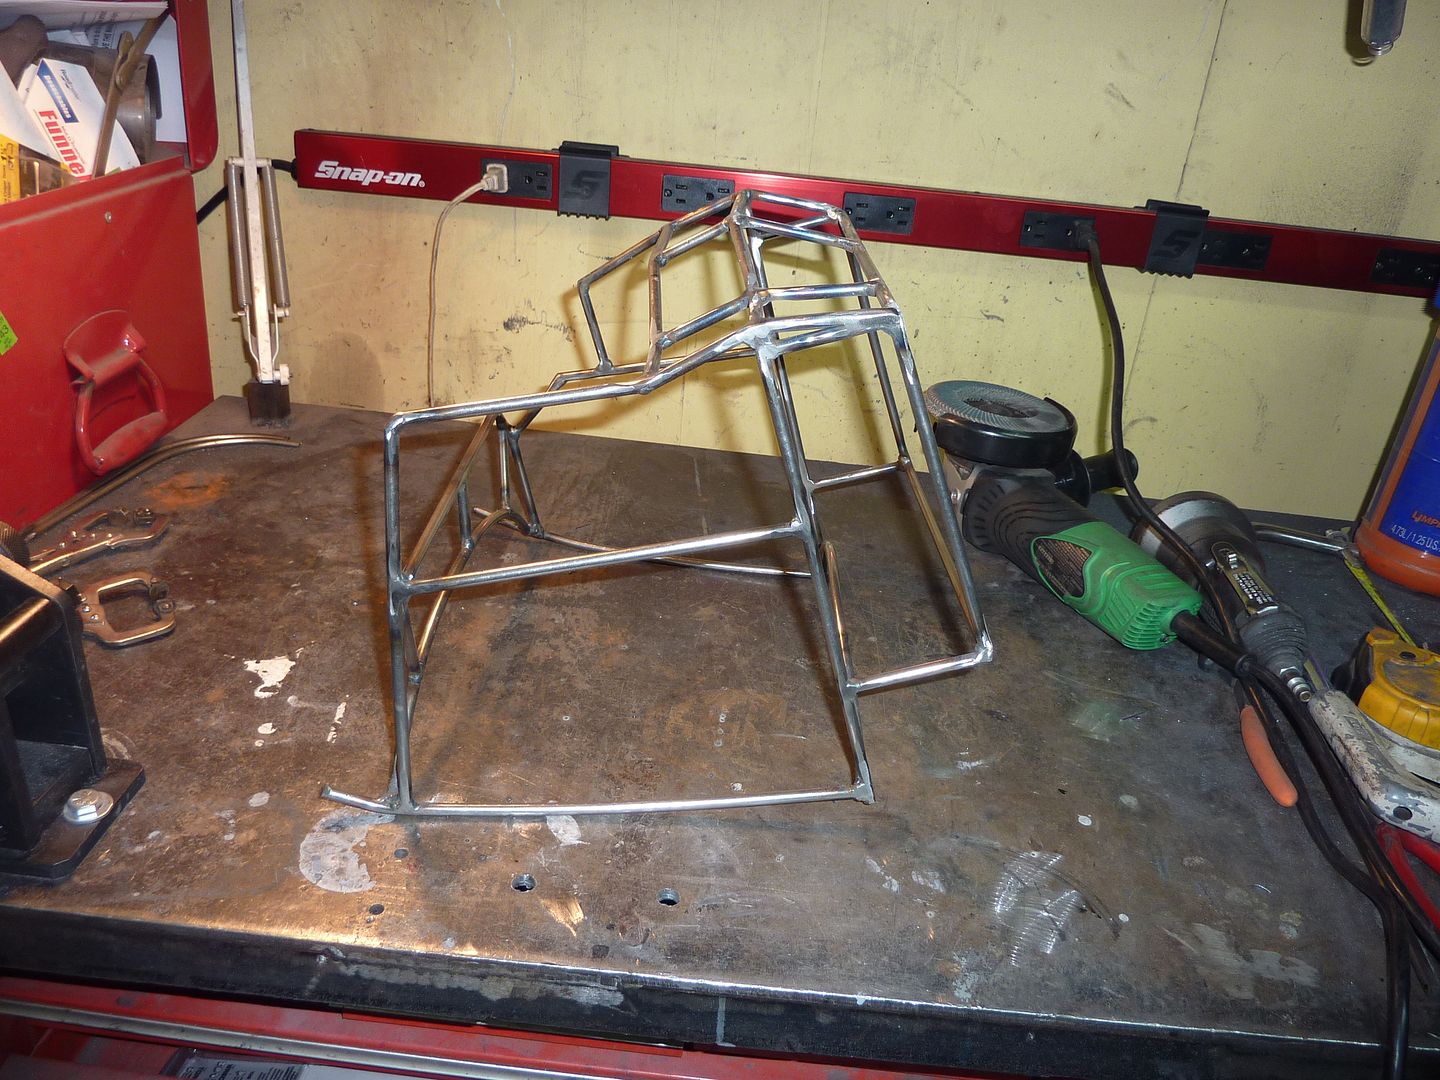
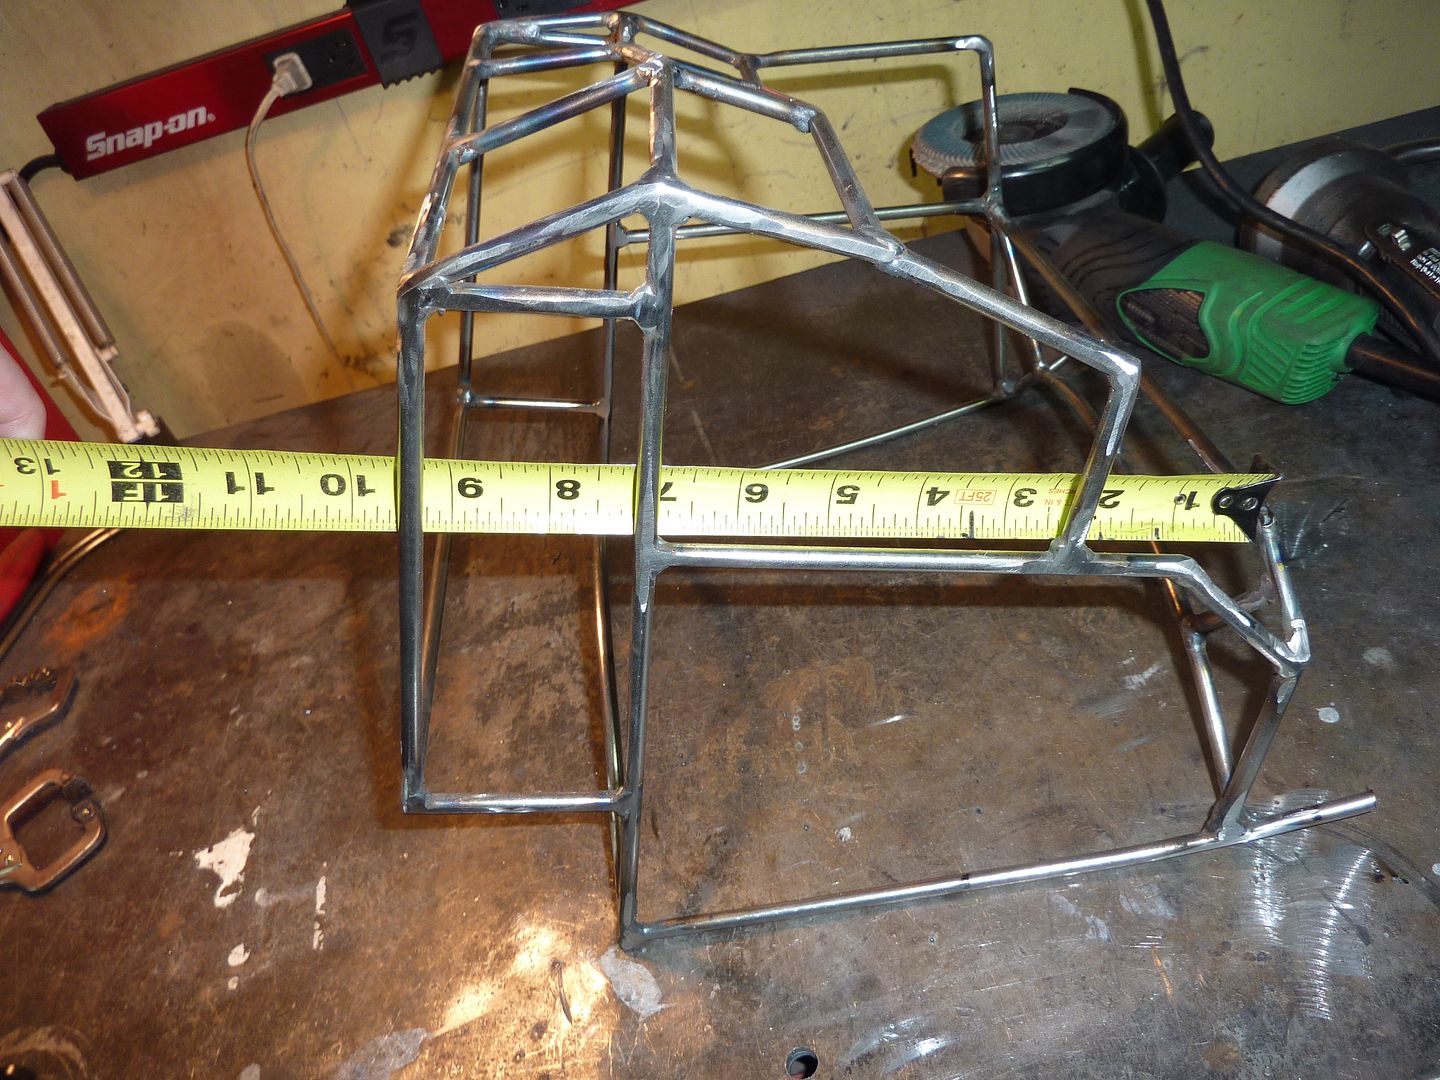
And I reinforced the arm rest. These things look they should be at Paul Jr. Designs with all the round bar

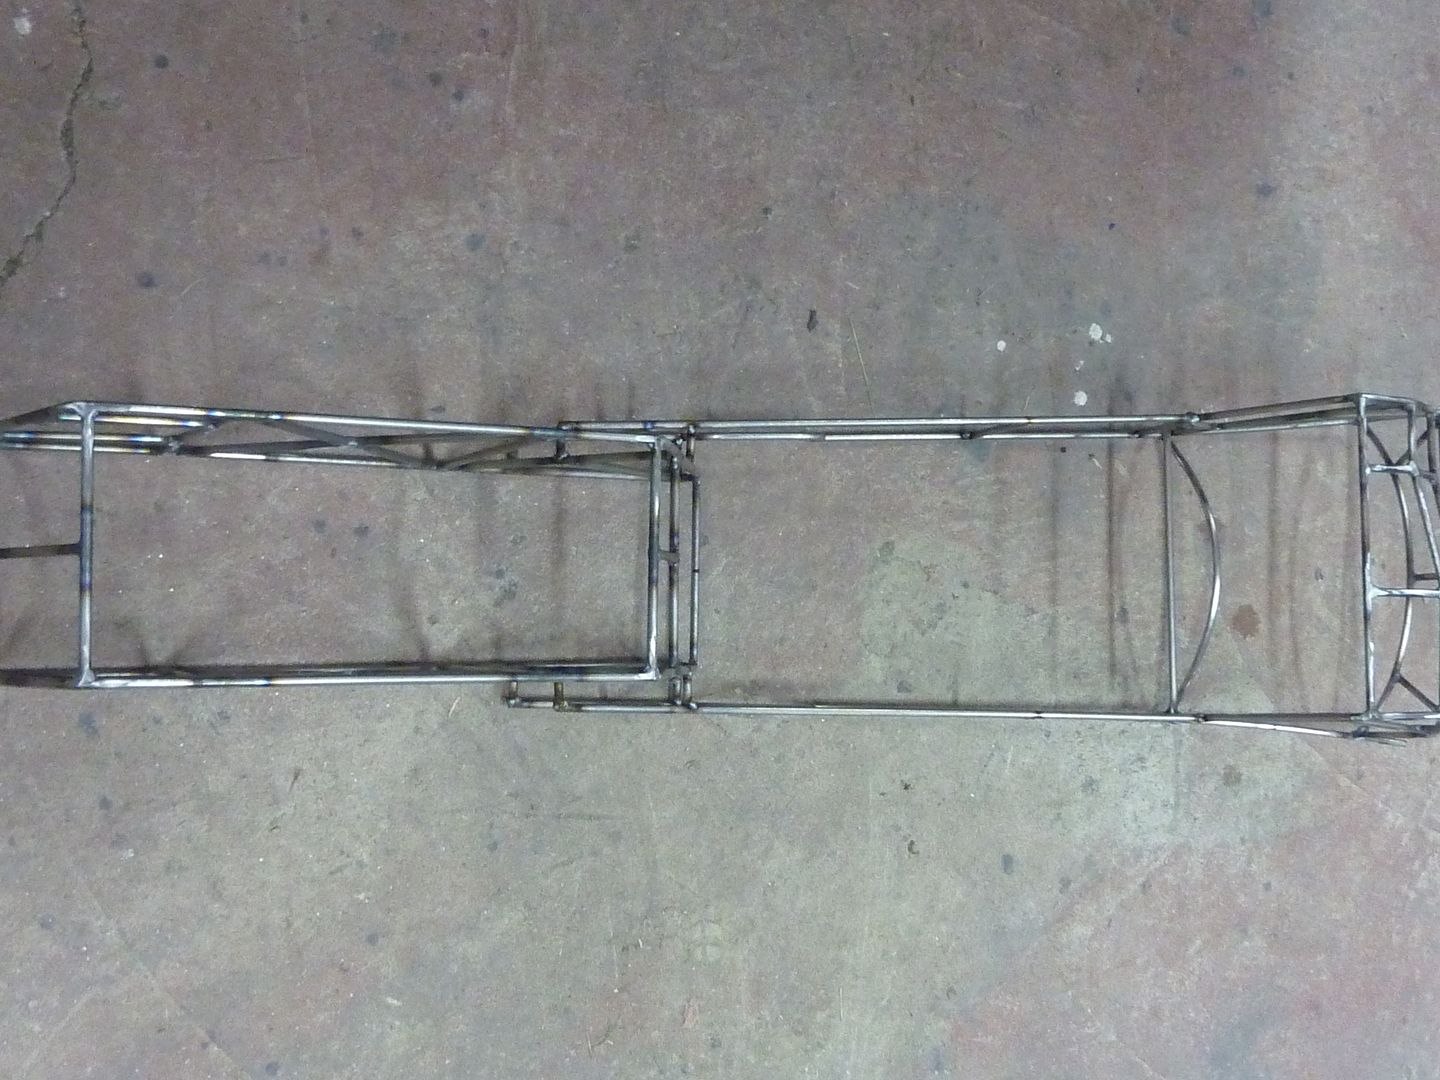
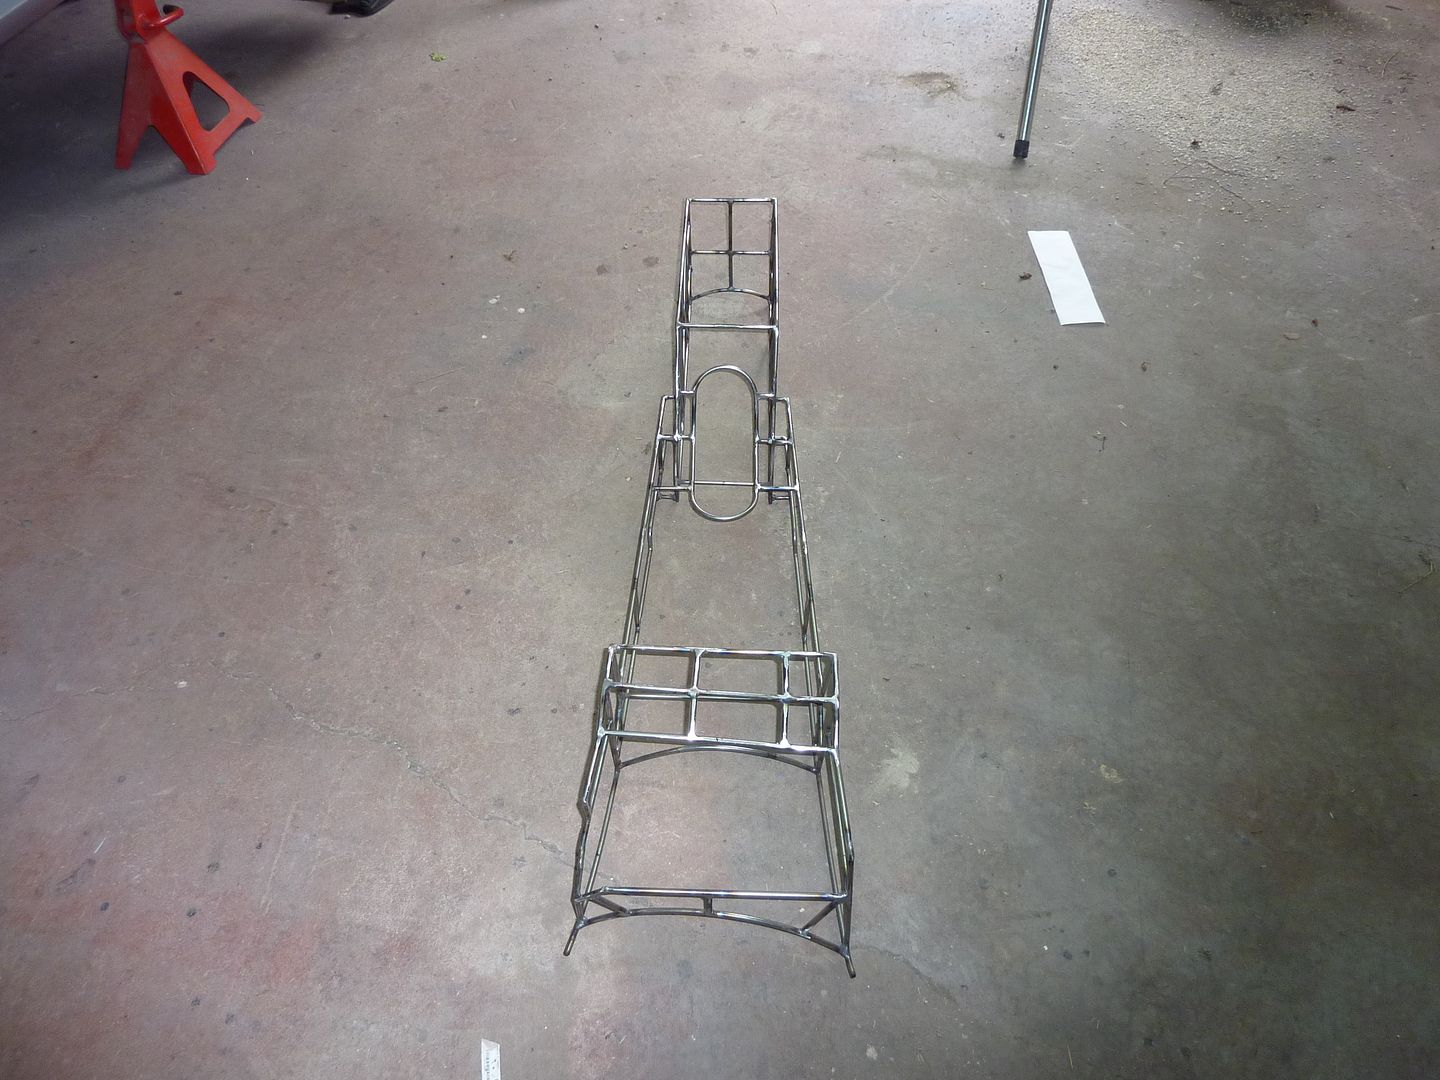
This one almost looks like a chassis
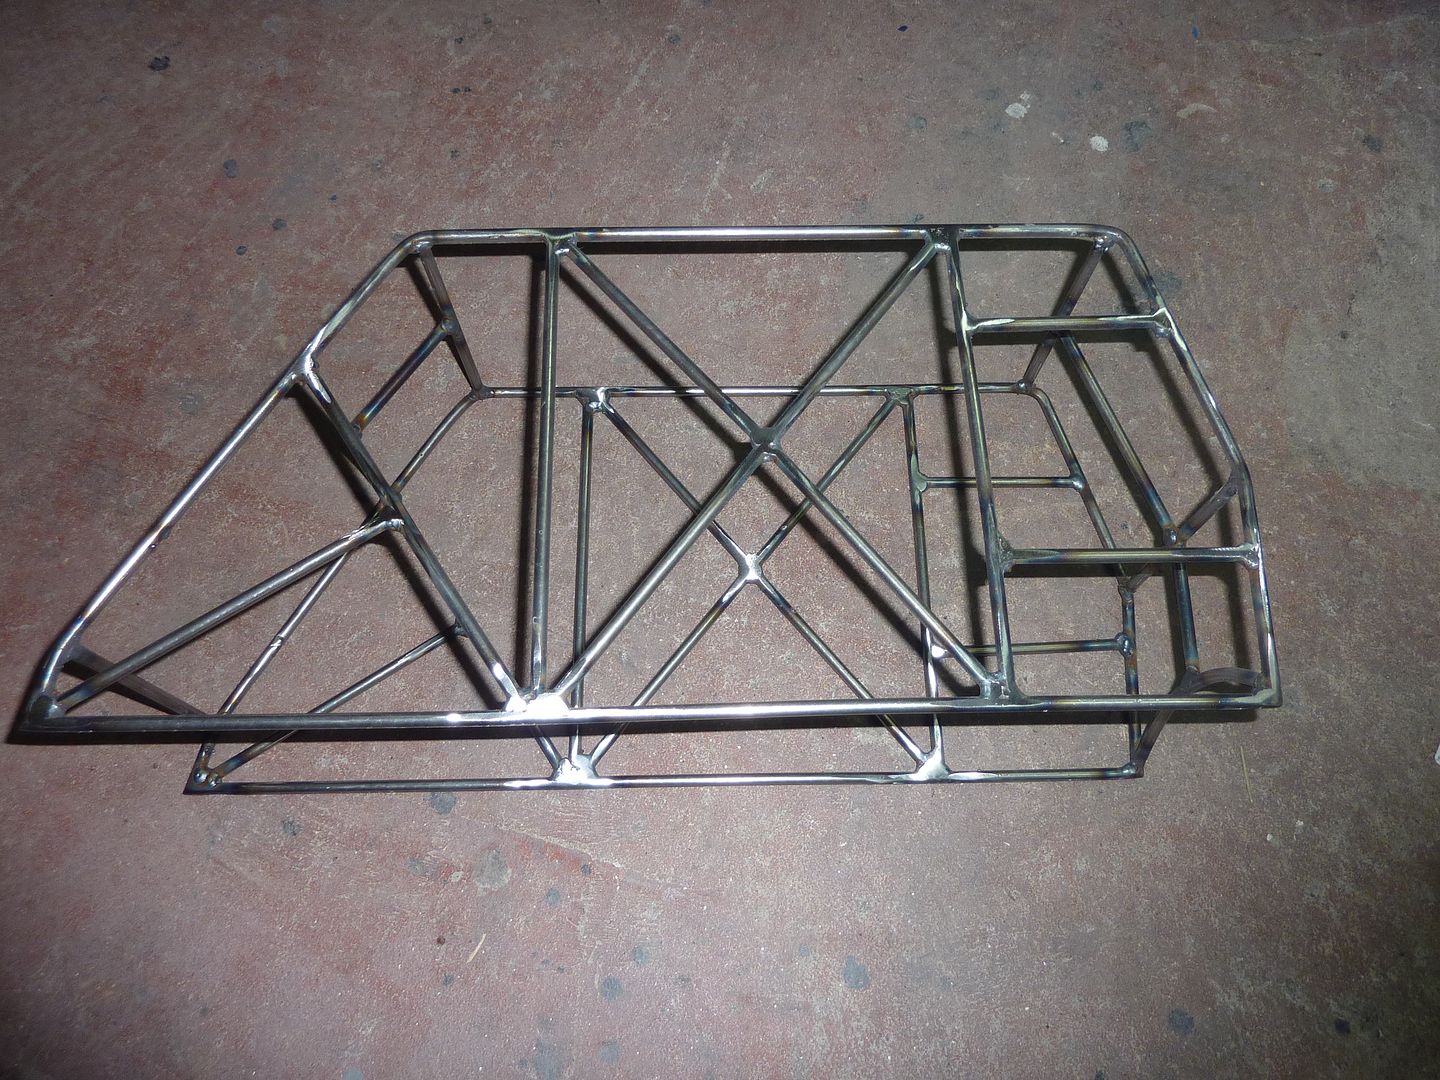
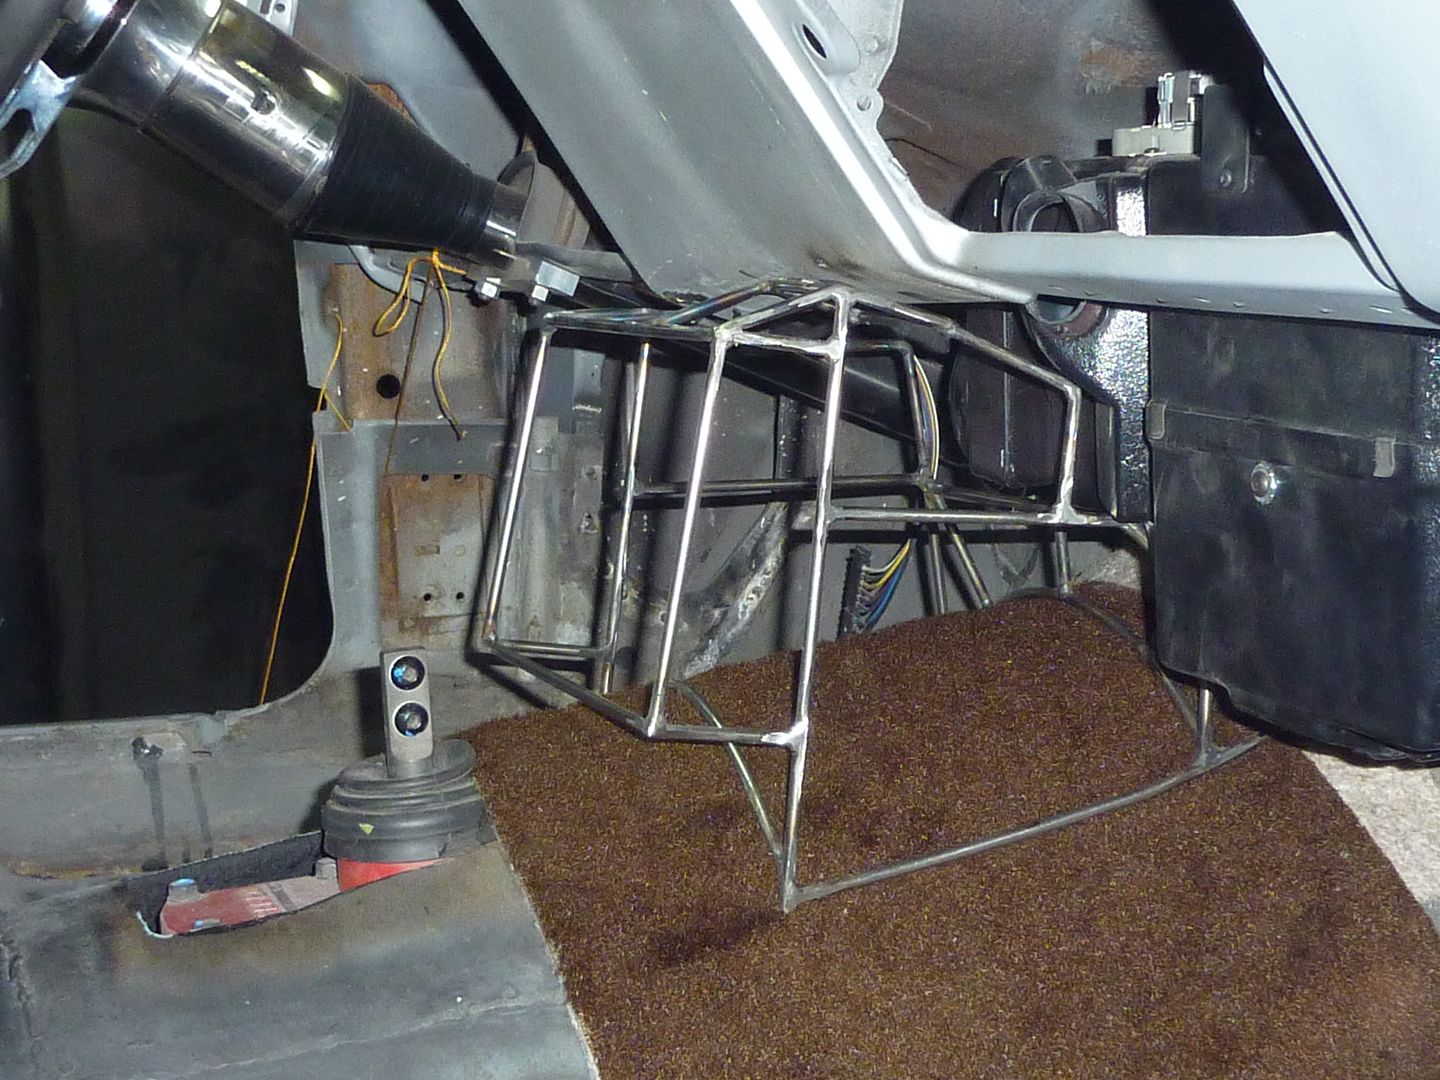
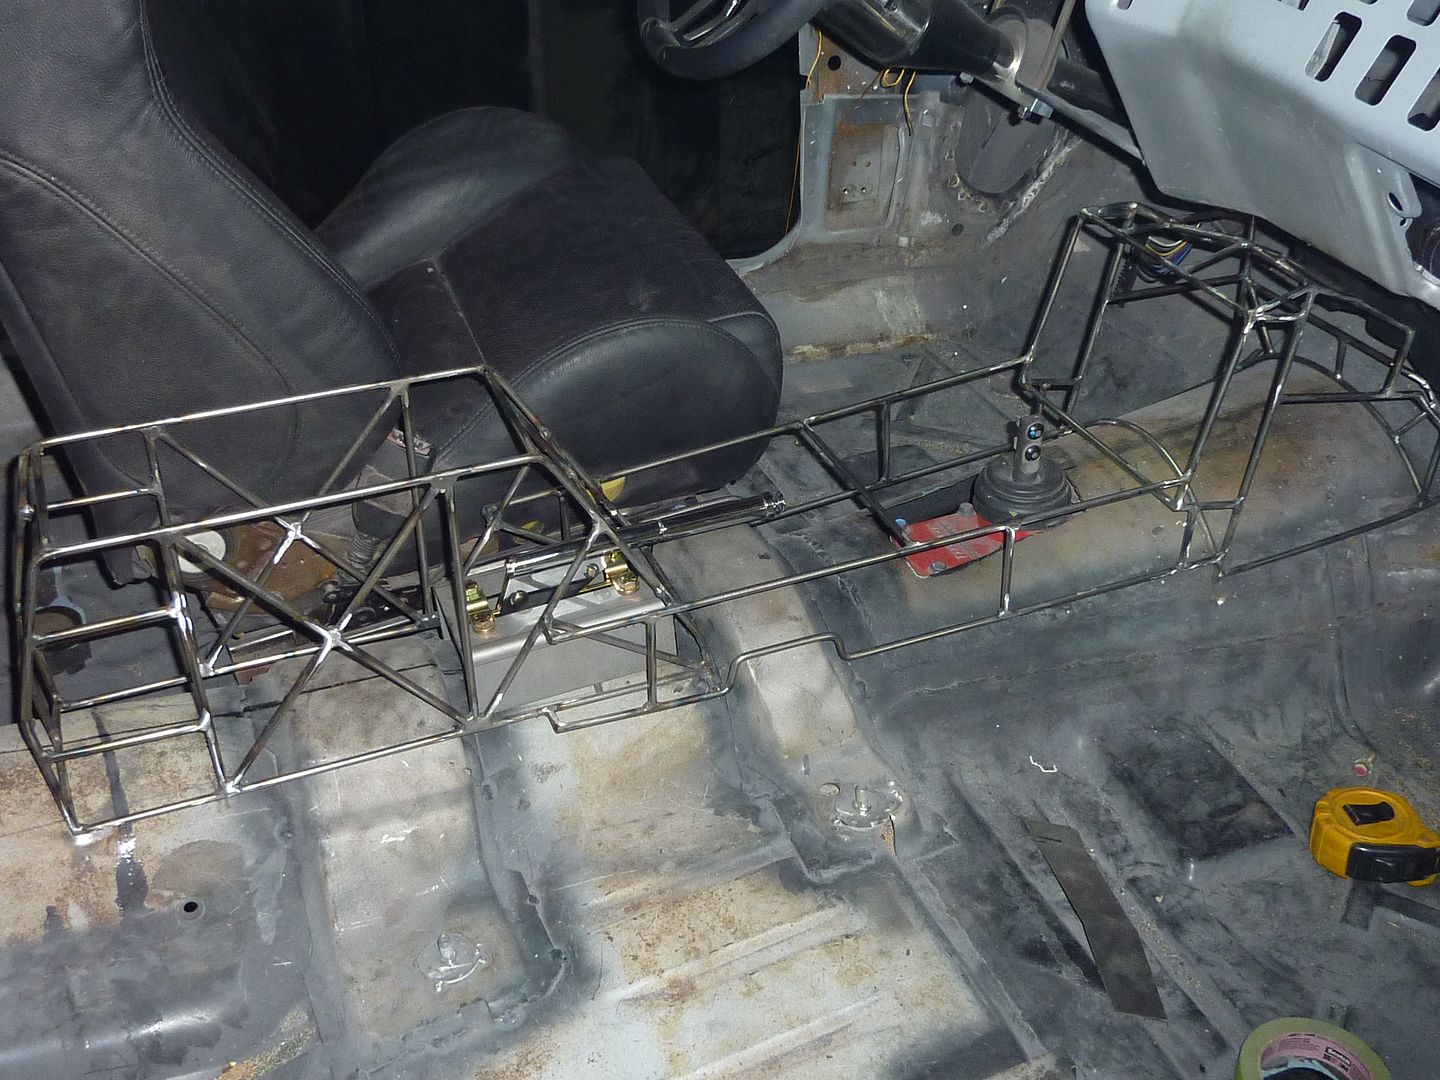
Here's with it in place
And finally the two in place. I plan on using round bar to connect the two parts and then wrap it all with sheet metal. Not sure if I will just paint it or wrap it in leather.
What do you guys think of it so far??
Hope to make a parts run in a couple more months.Picked up a few more tools since the last update.
Got a ring roller. Works great with 1/4" round bar.
I also picked up a universal metal bender, more for bending round bar. It was on sale for $40 so I thought why not. http://www.princessauto.com/workshop...l-metal-bender
I started on the front part of the console. I ran a piece of string across the car to give me a straight line as a guide.
I'm glad I remembered that I had a Vintage Air unit to put in still. I started measuring to run the console almost to the firewall and then I remembered the a/c.
After about 5 straight hours in the shop, I ended up with this
Once I get the center section in place, I plan on running the front of the console on more of an angle. It won't be sitting straight up like it is now.
And I reinforced the arm rest. These things look they should be at Paul Jr. Designs with all the round bar
This one almost looks like a chassis
Here's with it in place
And finally the two in place. I plan on using round bar to connect the two parts and then wrap it all with sheet metal. Not sure if I will just paint it or wrap it in leather.
What do you guys think of it so far??
03-29-2011, 04:58 PM
#91
On The Tree
Thread Starter
iTrader: (4)
Join Date: Mar 2009
Location: British Columbia, Canada
Posts: 132
Likes: 0
Received 0 Likes
on
0 Posts
Thanks Steve.
 03-29-2011, 09:54 PM
#92
TECH Fanatic
iTrader: (14)
Join Date: Mar 2007
Location: Phoenix/Tempe, AZ
Posts: 1,969
Likes: 0
Received 0 Likes
on
0 Posts

lol @ the paul jr designs comment.
the round bar is definitley overengineering it, but who cares? its cool
maybe you should do the sheetmetal on the inside and powdercoat the 'frame'
the round bar is definitley overengineering it, but who cares? its cool
maybe you should do the sheetmetal on the inside and powdercoat the 'frame'
04-12-2011, 07:12 PM
#93
On The Tree
Thread Starter
iTrader: (4)
Join Date: Mar 2009
Location: British Columbia, Canada
Posts: 132
Likes: 0
Received 0 Likes
on
0 Posts
Thanks Irish.
Got more done on the console today and yesterday. First thing I did was mock it up with some carpet and underlay. Found out that it was too high so I took off about 1/2" more. I also had to make some modifications around the a/c unit. It will be snug now, but once it gets bolted down, it should look good. The other issue I found was regarding the depth of it. I was talking to a friend of mine who manages a electronics store. For the head unit I want to put in, he recommended close to 10" depth. Well I had a bit of ways to go. I got it to about 9 1/2". I was looking at the specs of the Alpine units, they are just under 6 1/2" deep, then wiring. I think I'll be good with it now.
I also spoke to an upholsterer about getting it wrapped in leather. After taking with him, I've decided that overall it will be easier to wrap it in sheet metal first, then leather. As much fun as it would have been trying fiberglass, I think it will be less headaches, now and in the future, with sheet metal.
Here's some pics.
Added to the front section

I think I might try and move the upper part in a bit to make it on more of angle so I will be able to see the screen better once it's in.
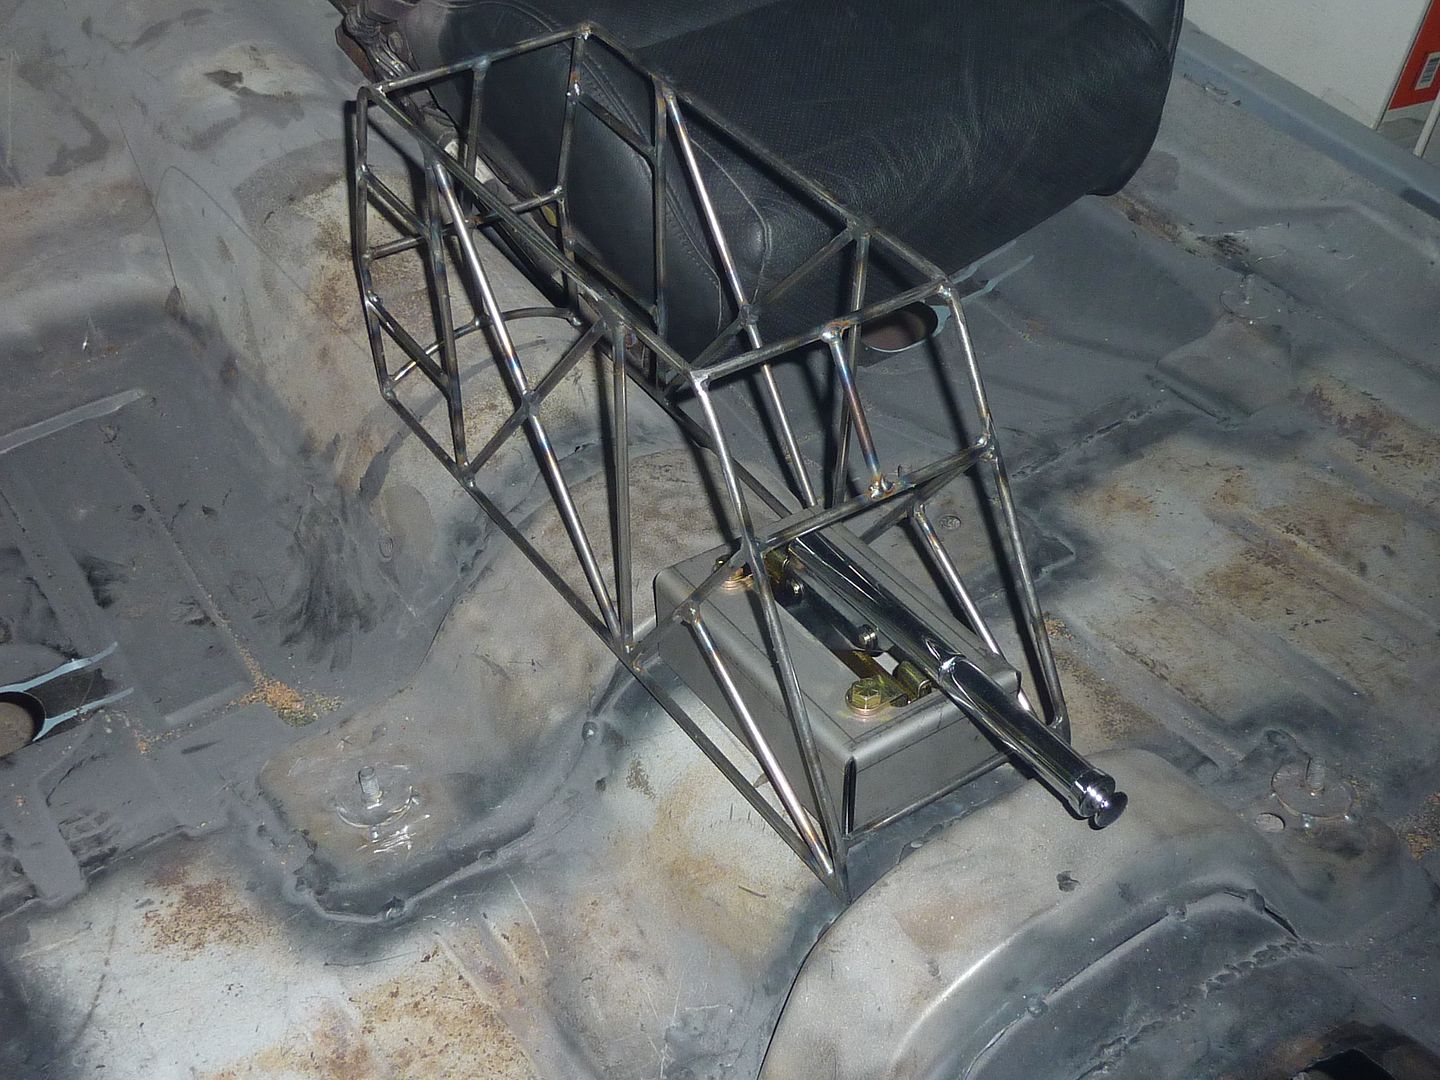
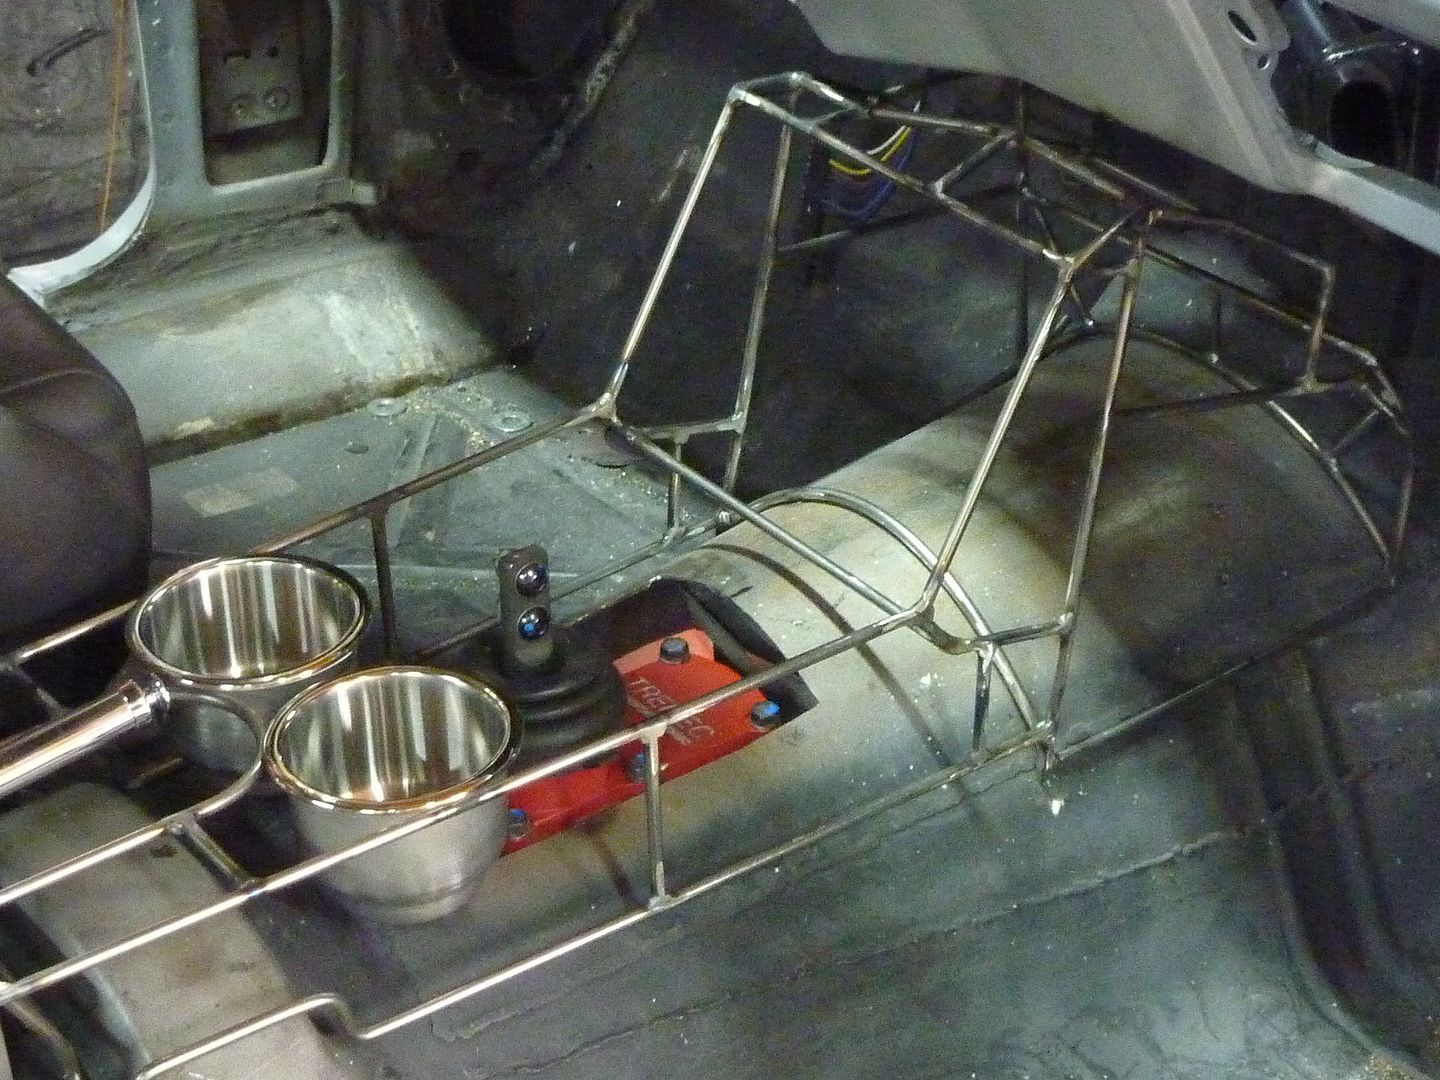
Got the two pieces connected
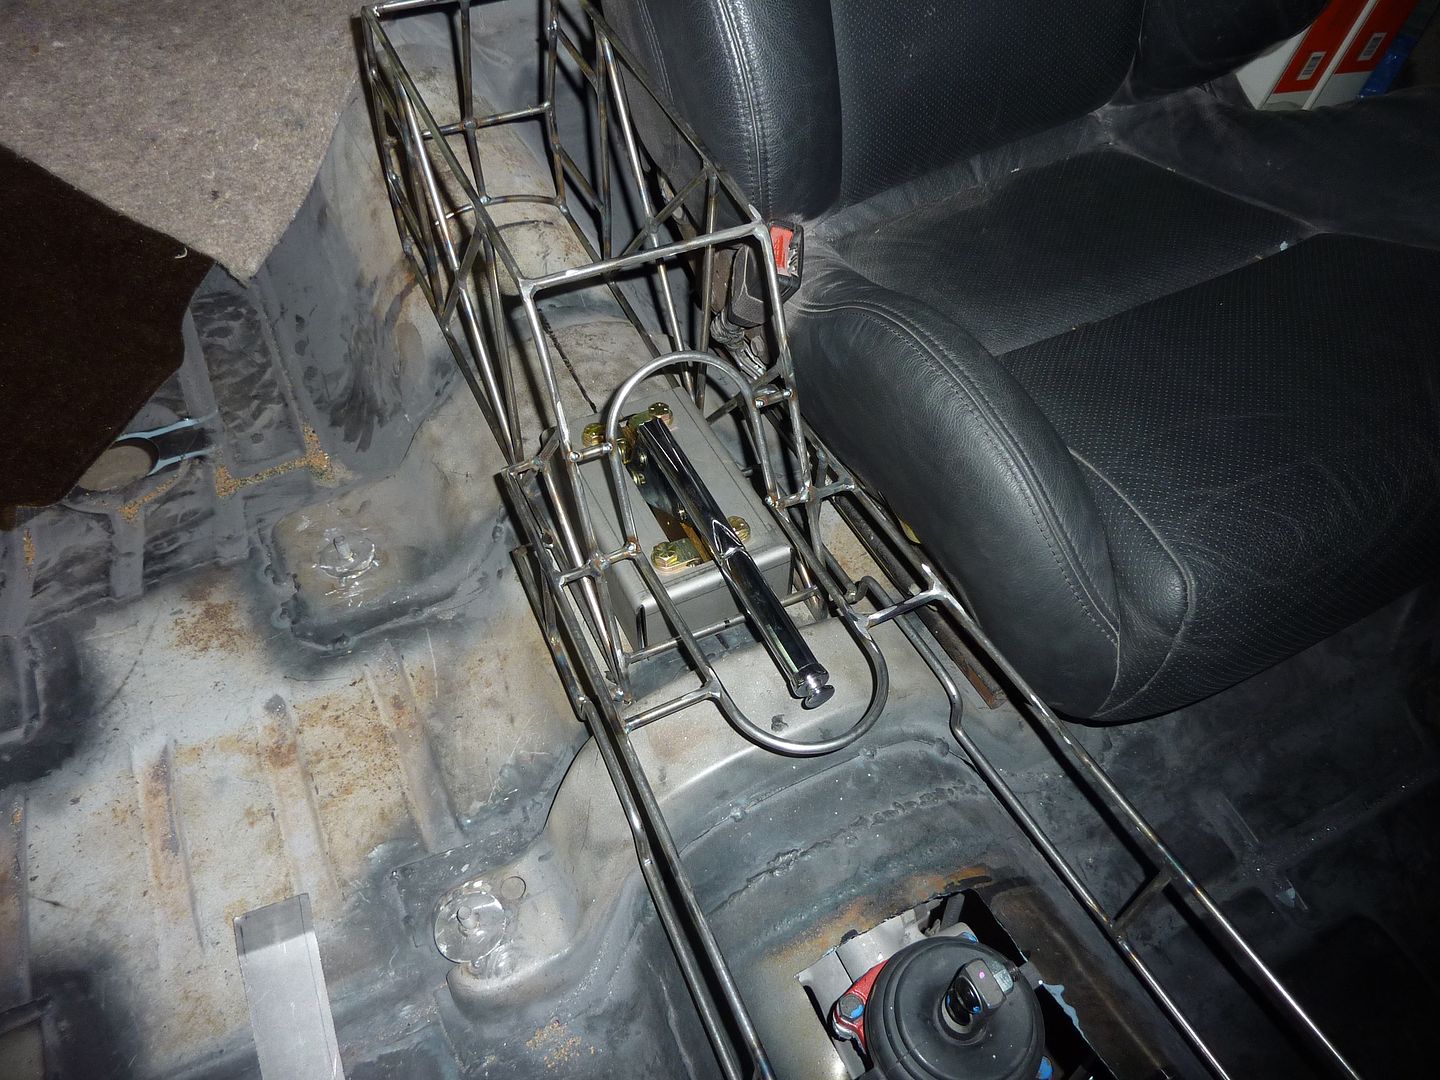
I'm going to have the ebrake handle sunk in a bit
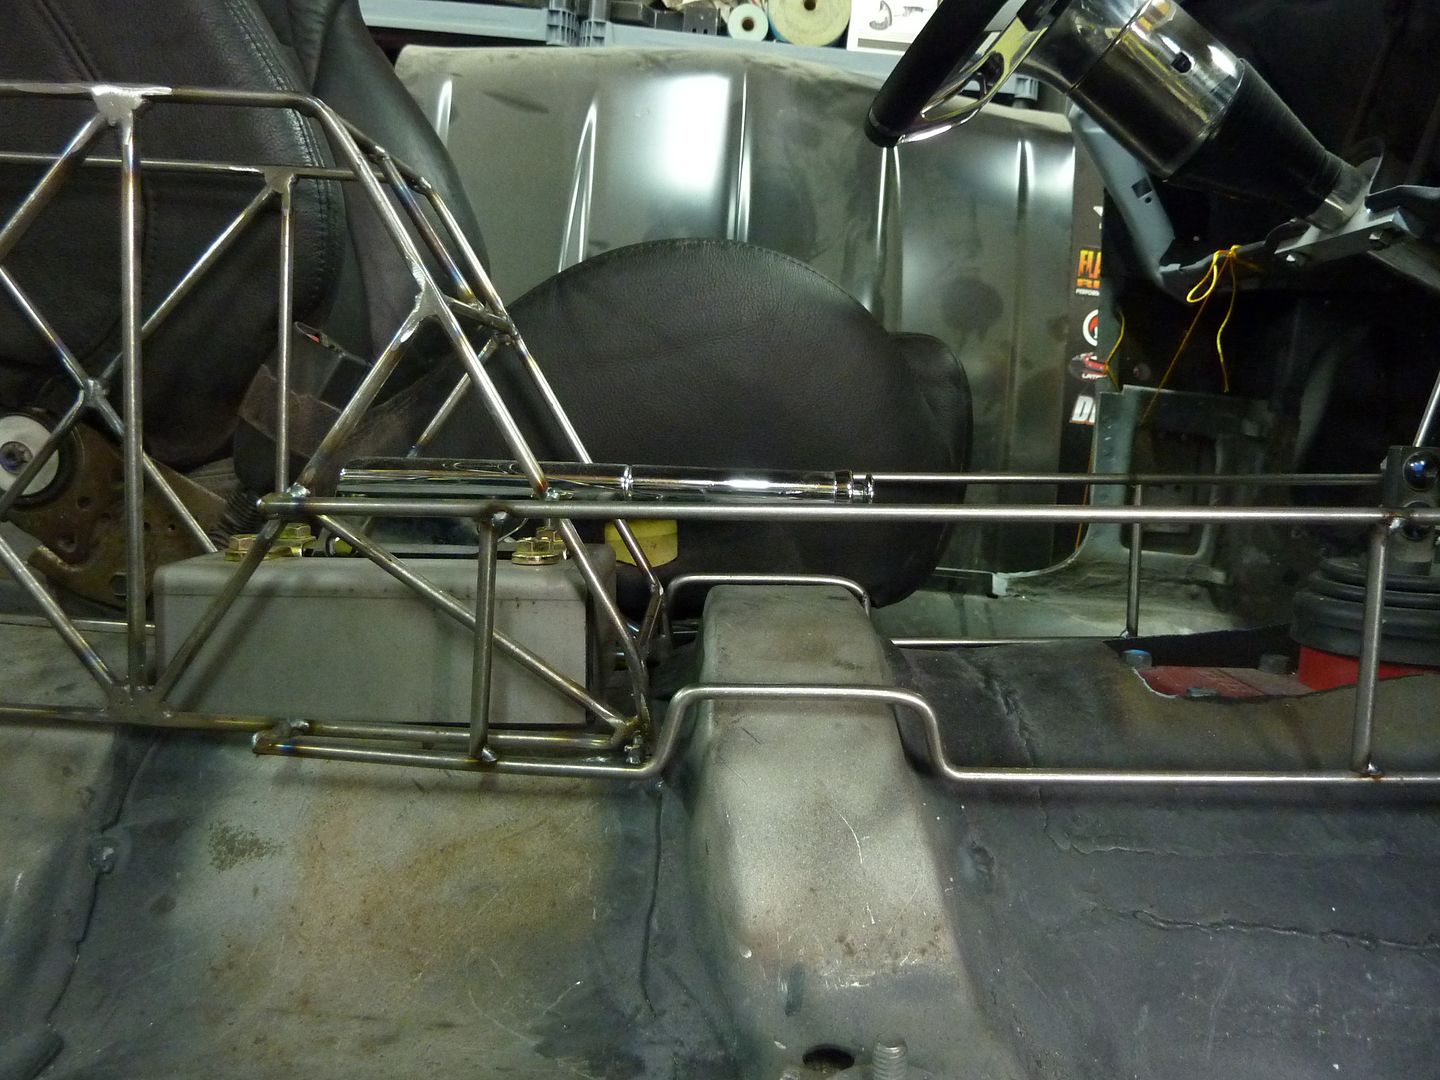
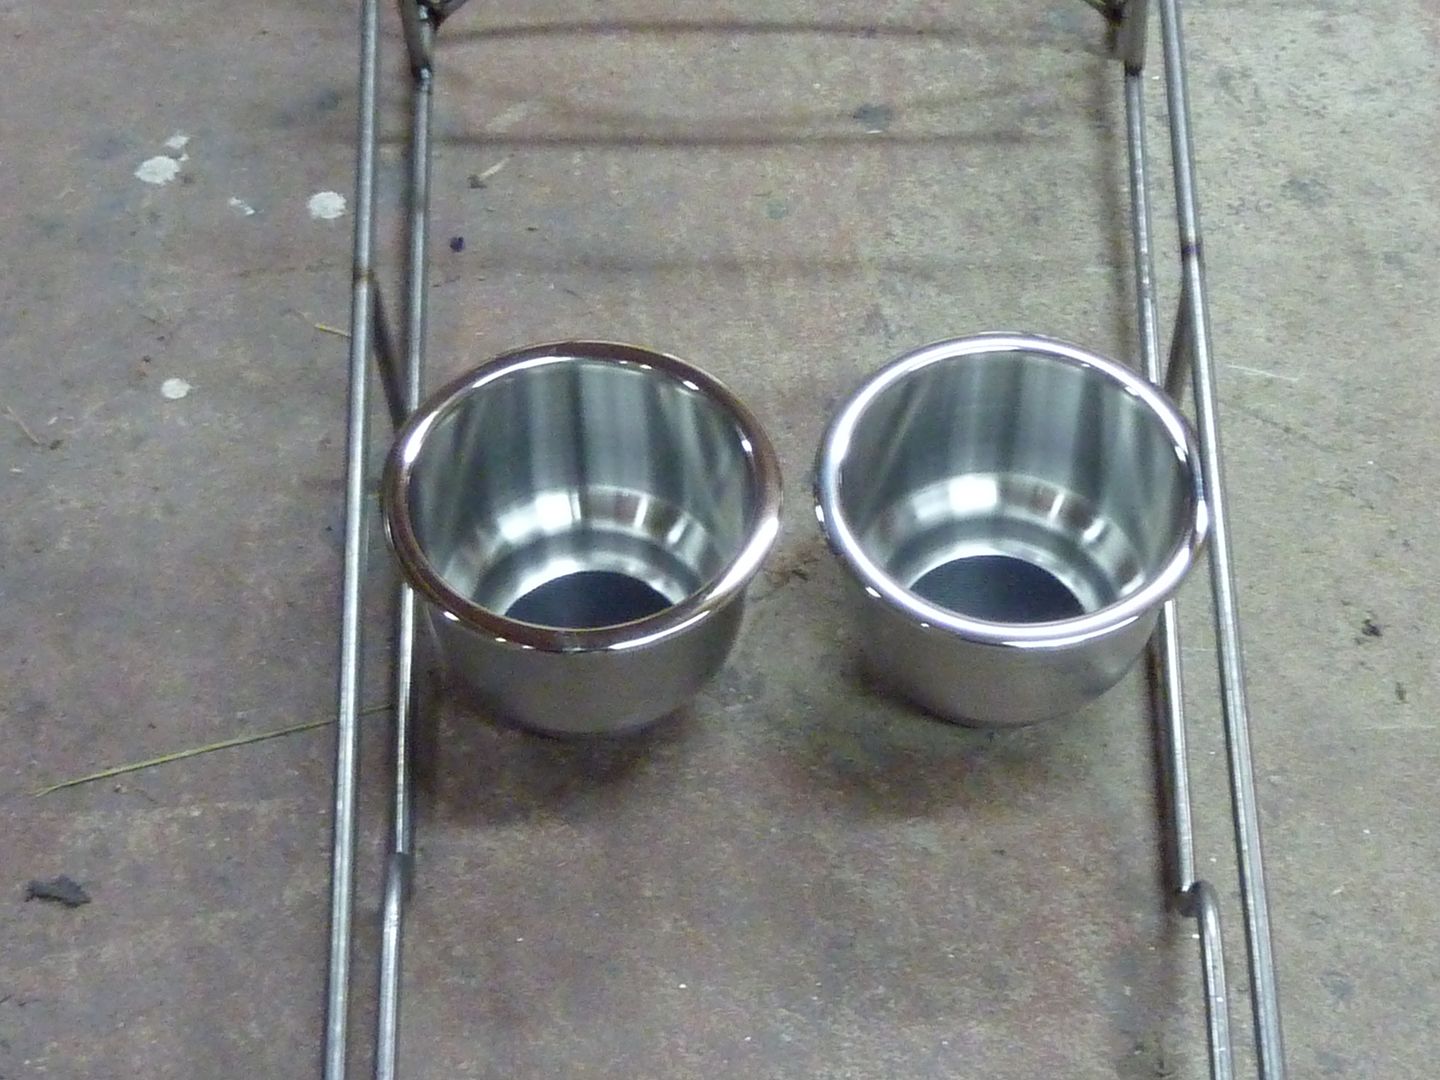
And the most important part.....................................cup holders
What do you guys think so far?
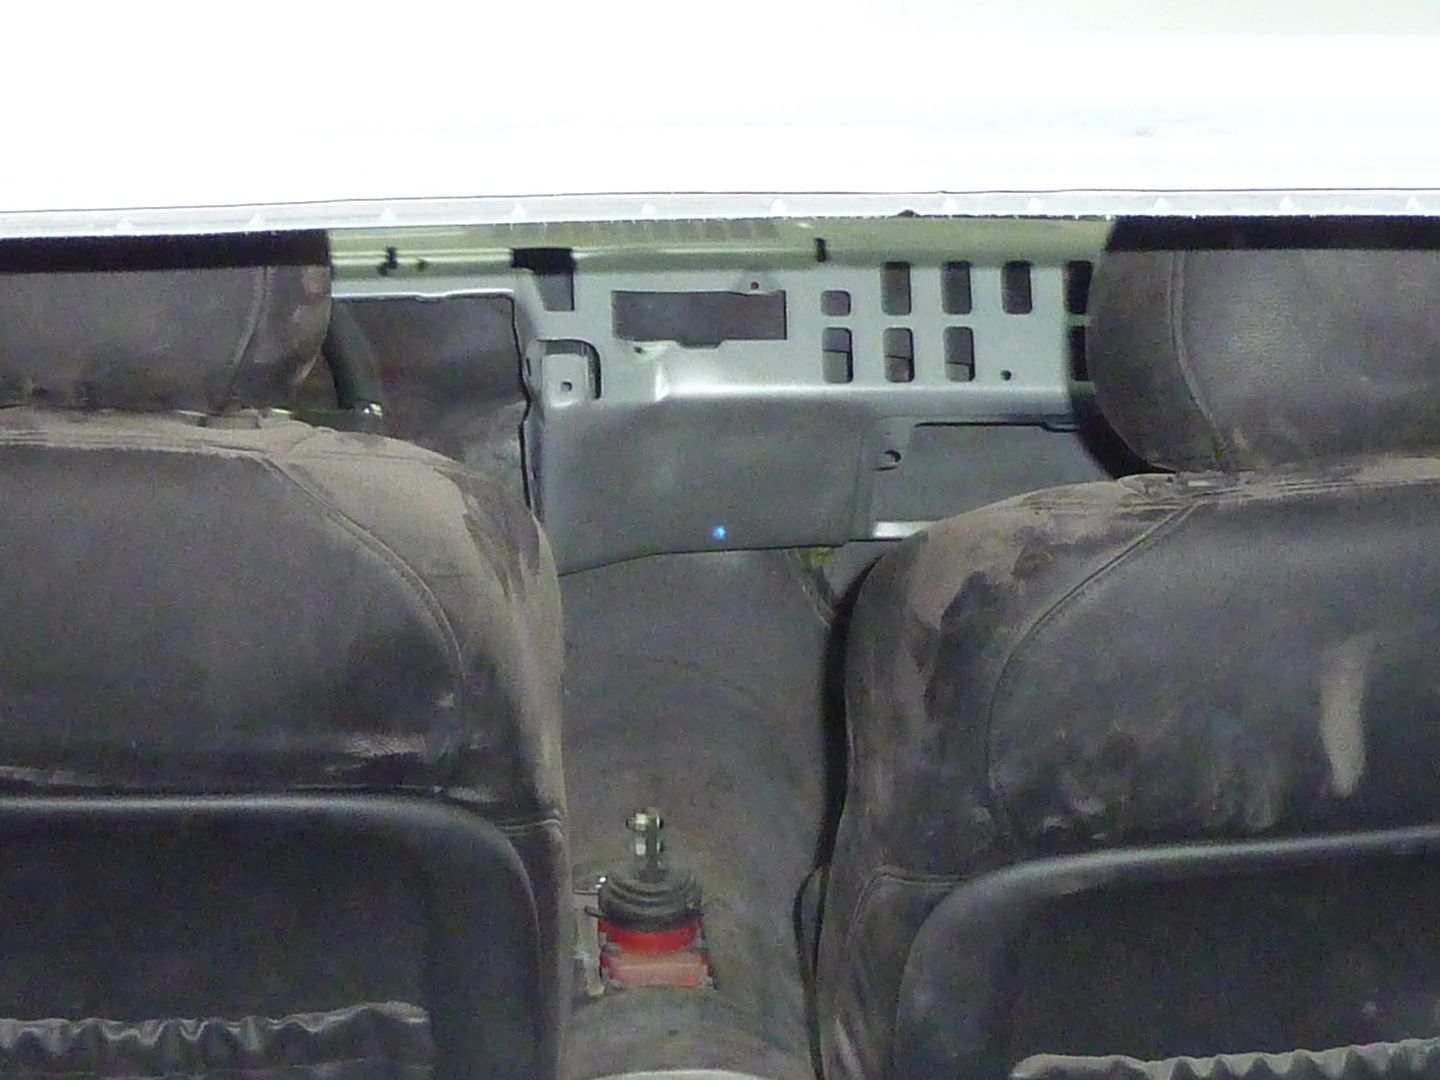
I was also looking at the GTO seats. I finally got them hooked up to a good battery and made sure they were all the way down. I find they do sit quite high. Has anyone found a way to get them lower and still keep the power options. Couple things I was thinking to gain some room:
Move the base tight up against the bottom of the seat
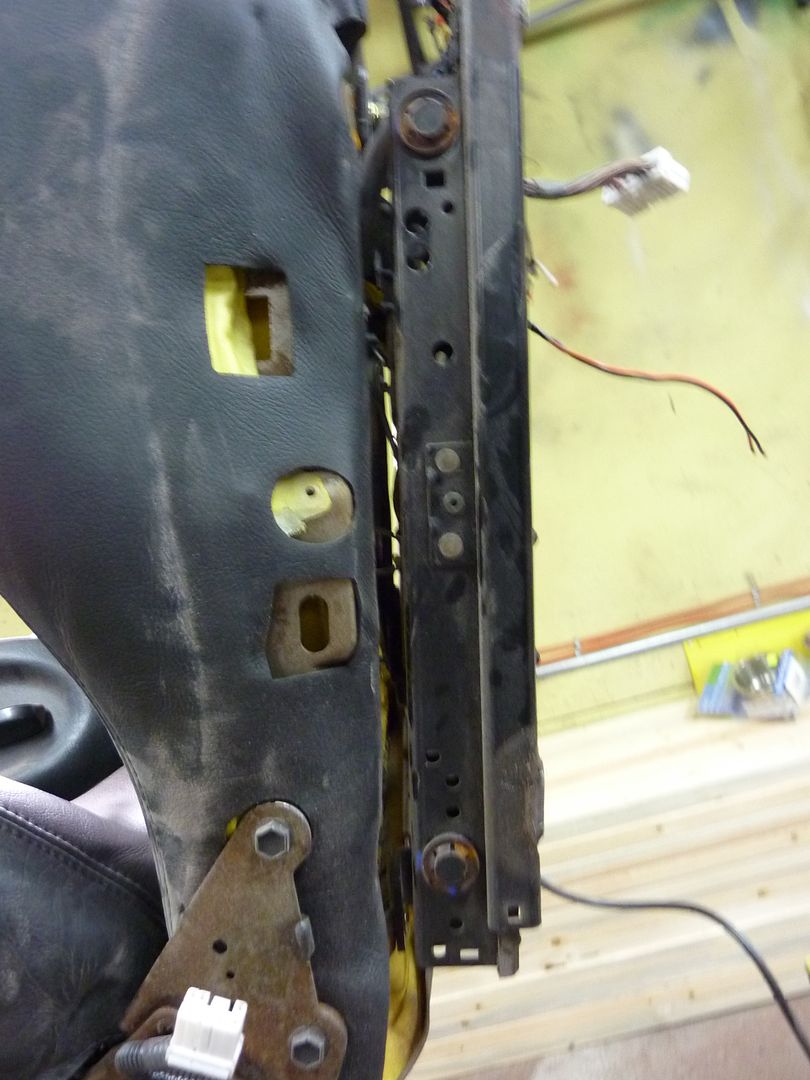
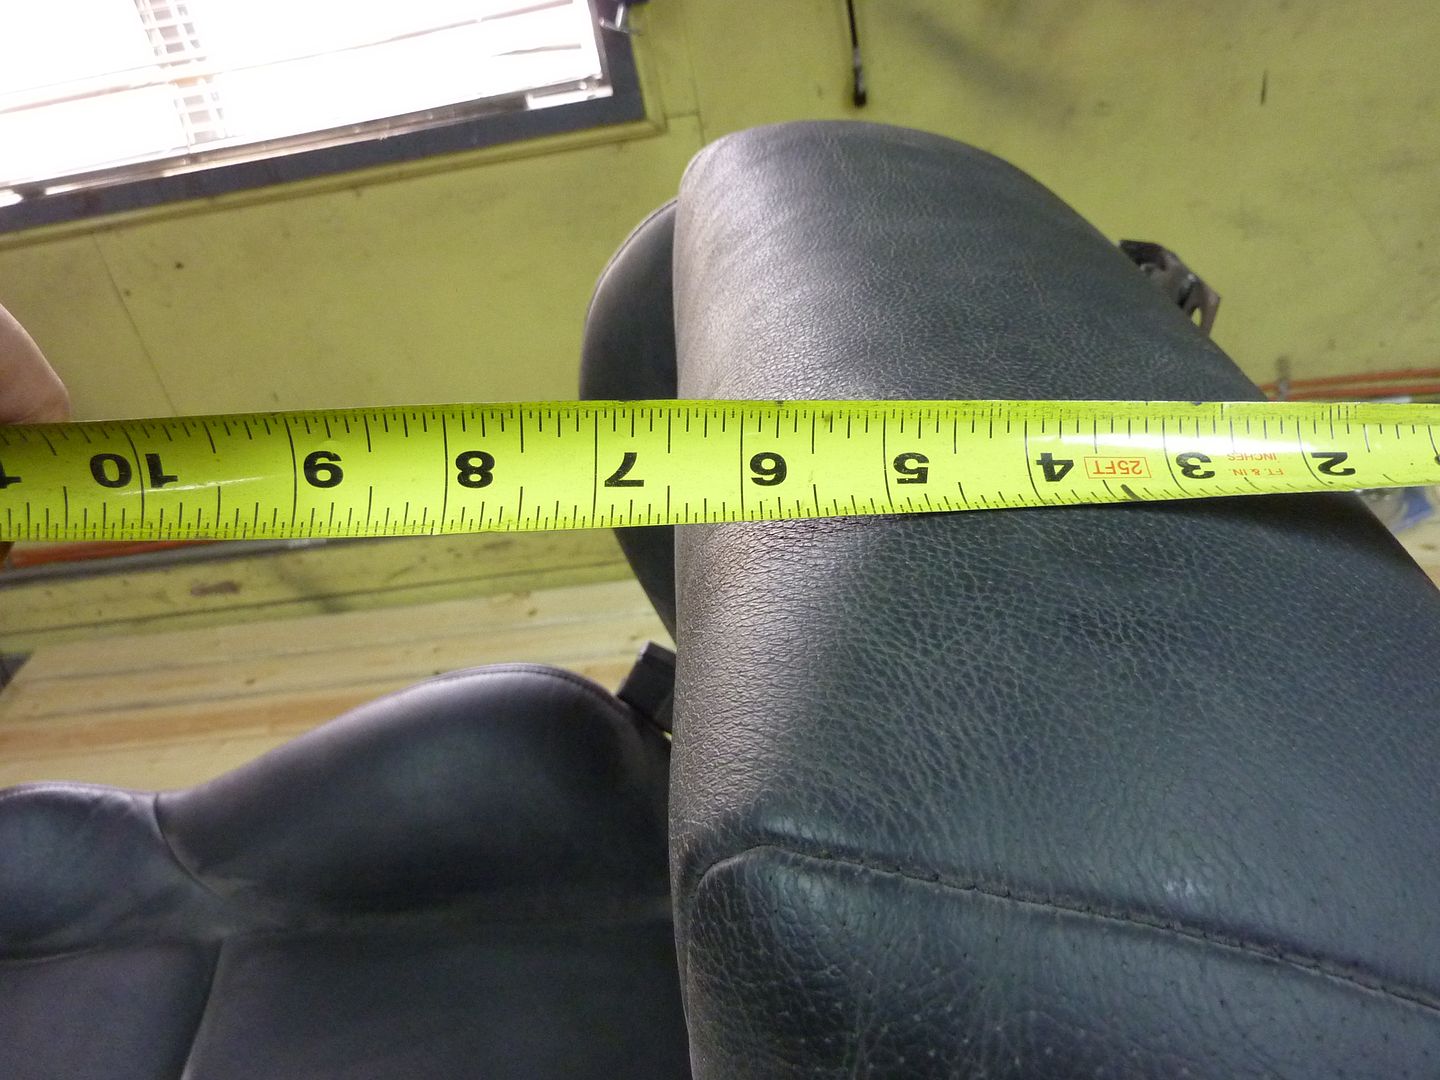
I'm also thinking about cutting down the foam on the bottom part. Right now there is almost 6 1/2" of foam. I'm sure I could get rid of a bit.
Anyone else have any ideas?
Got more done on the console today and yesterday. First thing I did was mock it up with some carpet and underlay. Found out that it was too high so I took off about 1/2" more. I also had to make some modifications around the a/c unit. It will be snug now, but once it gets bolted down, it should look good. The other issue I found was regarding the depth of it. I was talking to a friend of mine who manages a electronics store. For the head unit I want to put in, he recommended close to 10" depth. Well I had a bit of ways to go. I got it to about 9 1/2". I was looking at the specs of the Alpine units, they are just under 6 1/2" deep, then wiring. I think I'll be good with it now.
I also spoke to an upholsterer about getting it wrapped in leather. After taking with him, I've decided that overall it will be easier to wrap it in sheet metal first, then leather. As much fun as it would have been trying fiberglass, I think it will be less headaches, now and in the future, with sheet metal.
Here's some pics.
Added to the front section
I think I might try and move the upper part in a bit to make it on more of angle so I will be able to see the screen better once it's in.
Got the two pieces connected
I'm going to have the ebrake handle sunk in a bit
And the most important part.....................................cup holders
What do you guys think so far?
I was also looking at the GTO seats. I finally got them hooked up to a good battery and made sure they were all the way down. I find they do sit quite high. Has anyone found a way to get them lower and still keep the power options. Couple things I was thinking to gain some room:
Move the base tight up against the bottom of the seat
I'm also thinking about cutting down the foam on the bottom part. Right now there is almost 6 1/2" of foam. I'm sure I could get rid of a bit.
Anyone else have any ideas?
04-12-2011, 08:25 PM
#94

Have you seen the guy that transpanted the entire interior out of a GTO into his 69 firebird T/A vert? He used the GTO back seats but opted for some BMW M3 front seats for the same reason you are having problems. If I find the thread I will send it to you. He used the dash, console, back seats and all. Console looks good. Do you work as a machinist? I was wondering since we use round bar similar to what you used. Gives me some future ideas for a console as I like metal better than wood. You could raise the Ebrake bracket unless you want the recess. Keep up the good work!!!
04-13-2011, 06:53 PM
#95
On The Tree
Thread Starter
iTrader: (4)
Join Date: Mar 2009
Location: British Columbia, Canada
Posts: 132
Likes: 0
Received 0 Likes
on
0 Posts
Thanks. I vaguely remember seeing that build. I've seen quite a few with the GTO seats in them. Nope don't work as a machinist. This is my first attempt at anything like this. To be honest, I have absolutely no mechanical training at all, other than fixing my own cars. I have a degree in psychology and now I'm a cop. I do this as a hobby and am kind of teaching myself as I go (with help from all the forums of course).
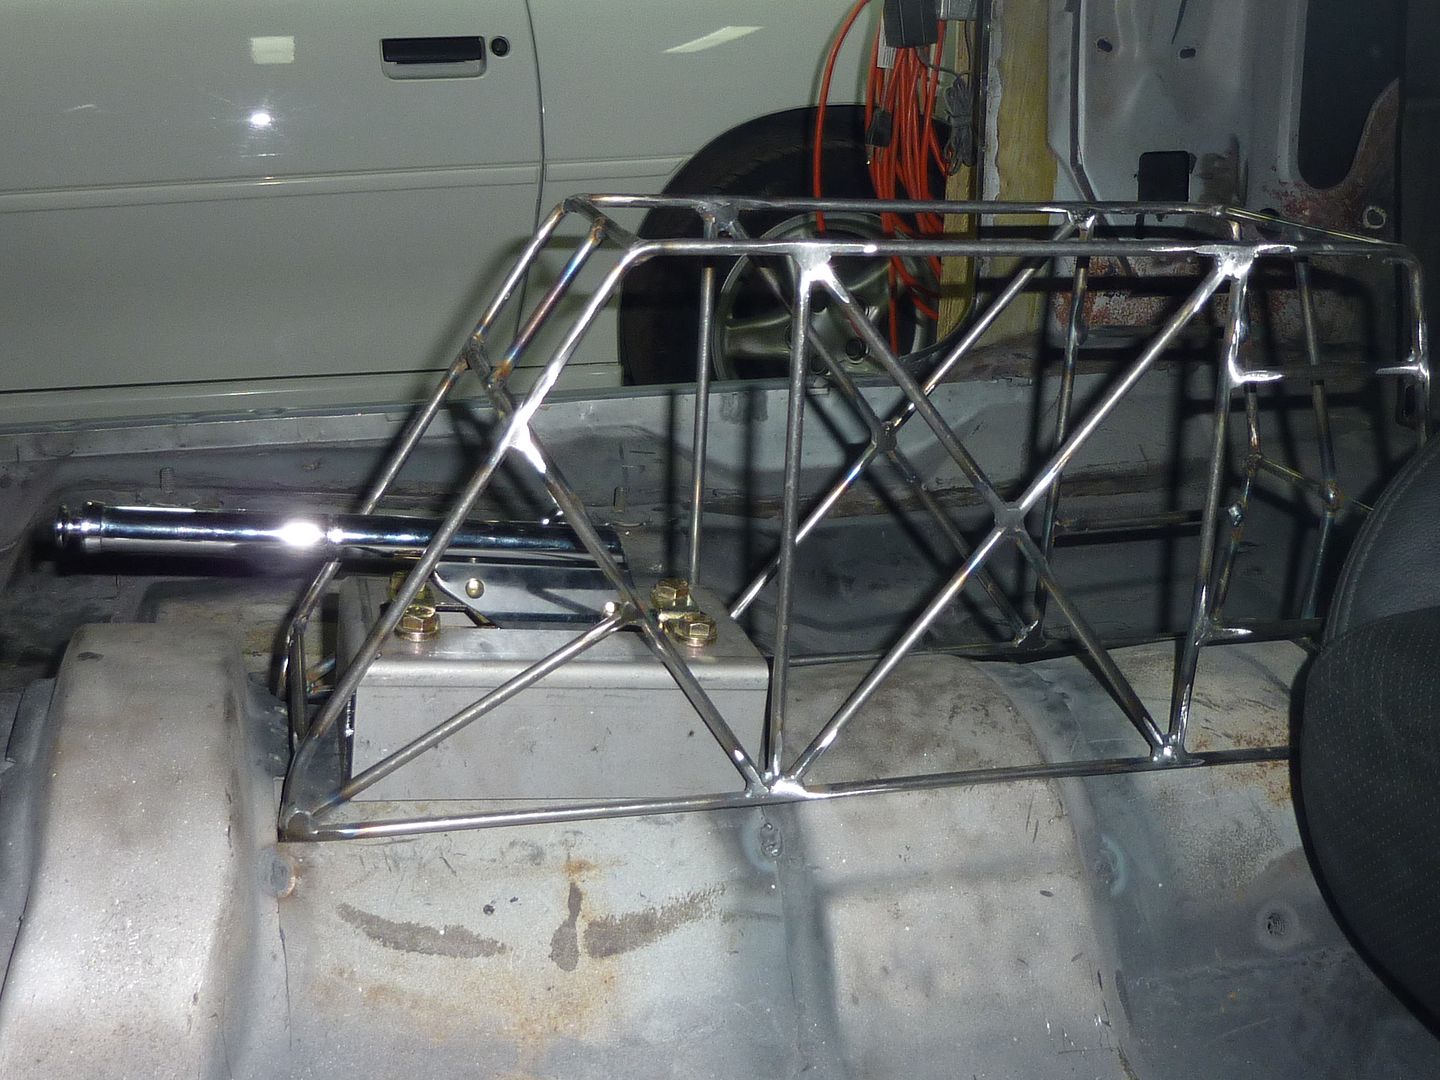
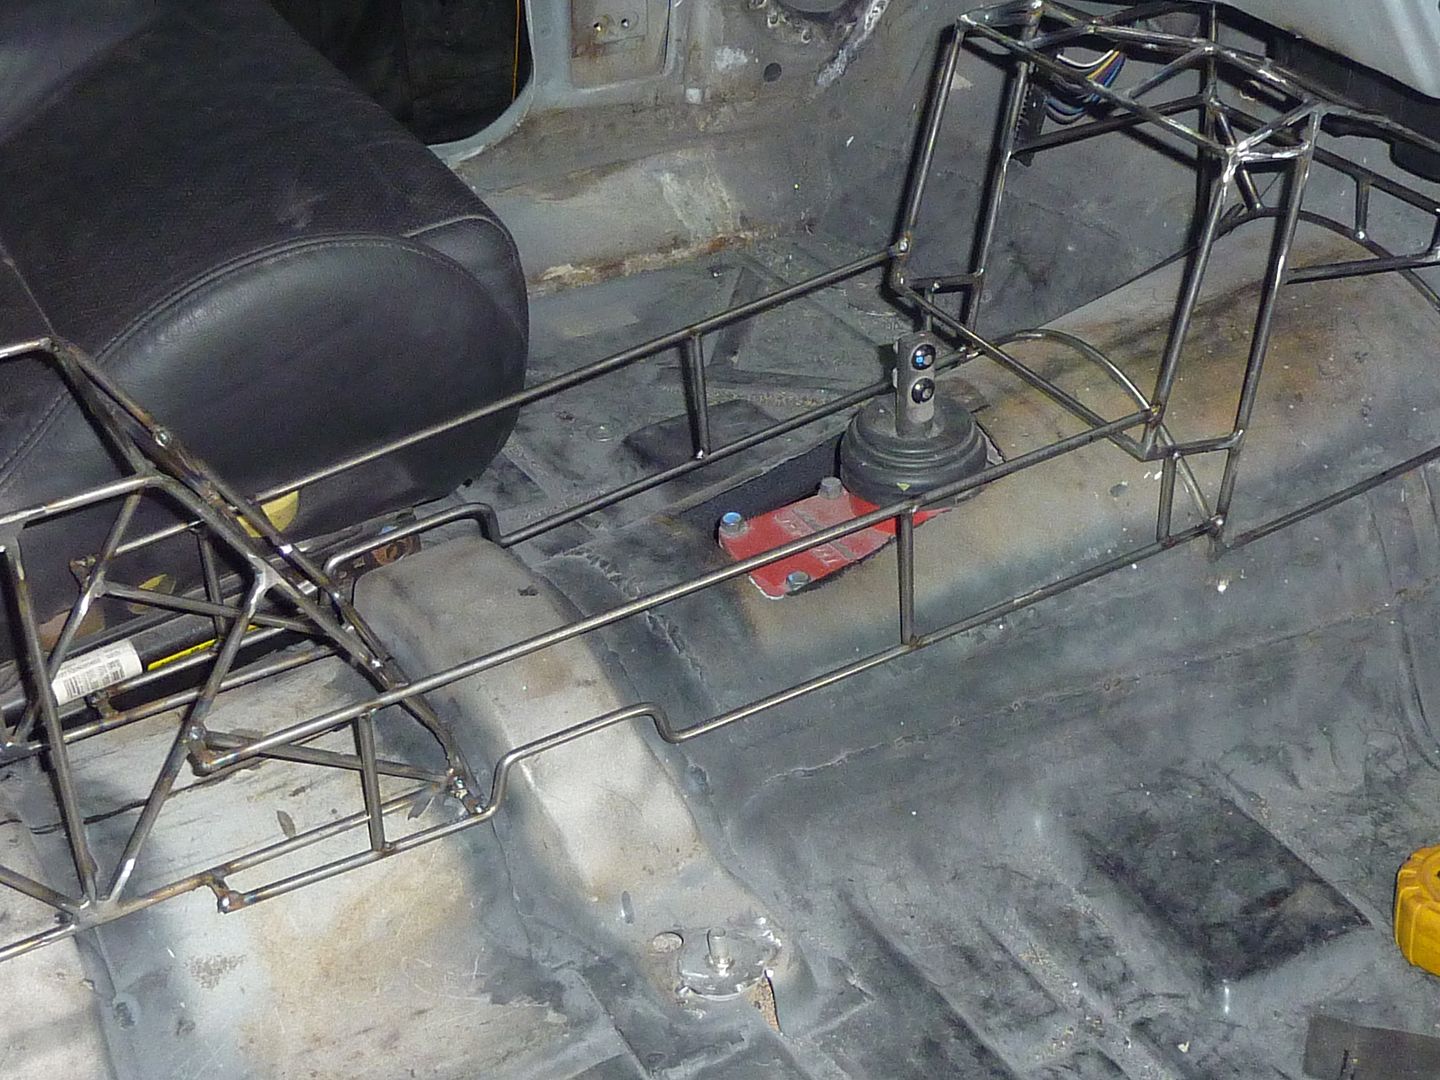
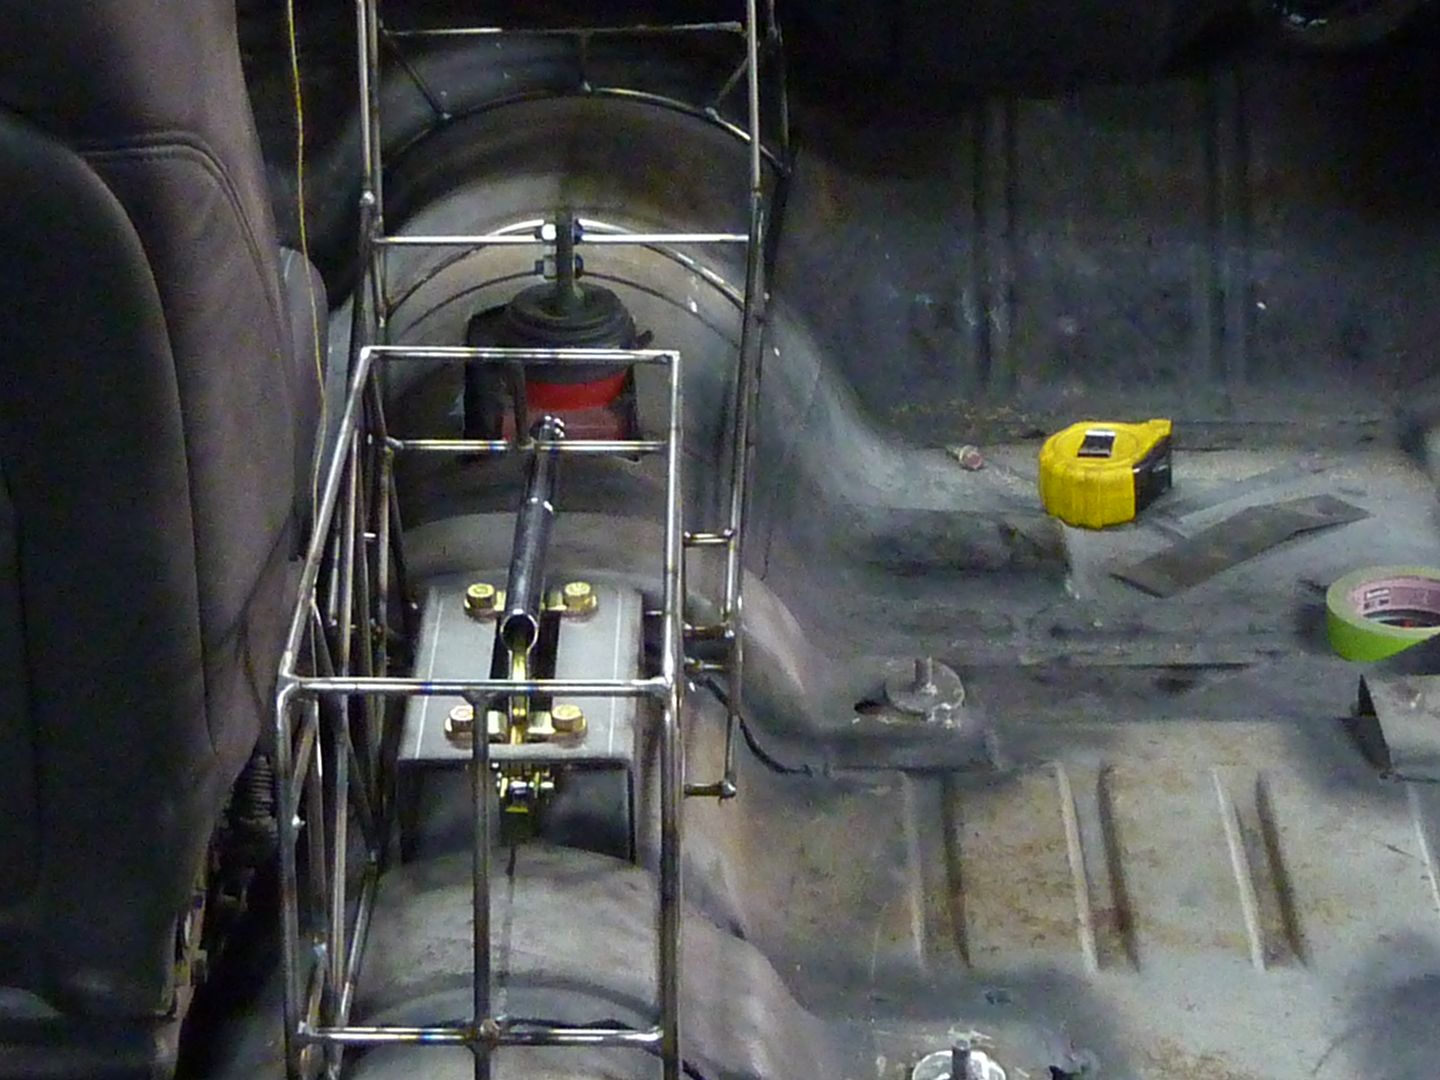
Got a little bit done today. Moved the shifter back into it's original location. I like it better there. Also had to cut a few pieces out and I made the ebrake hole.
I know the one side is a little bit off, but it's a one off piece. It all can't be dead on. Plus with the leather, it will never even be noticeable.
Last edited by scherp69; 04-13-2011 at 06:59 PM.
04-13-2011, 10:46 PM
#96
I think it looks pretty good. When you say it's a bit "off", what do you mean? Due to perspective, it's hard to tell if everything's symmetrical from the pictures.
How do you plan to cover it? *EDIT* Nevermind I see you plan to add sheet metal then leather.
One suggestion I have is to make the front part of the console go all the way up to meet the dash. That space up top will always look disconnected if you don't. Here's a really old writeup of a console I built for my Nova out of wood. It isn't as nice as what you're putting together, but maybe it will give you some ideas. If you read the text, please pardon my hyperbole. http://cjnn.xtremefabricator.com/psnpics21.htm
04-14-2011, 12:51 AM
#97
On The Tree
Thread Starter
iTrader: (4)
Join Date: Mar 2009
Location: British Columbia, Canada
Posts: 132
Likes: 0
Received 0 Likes
on
0 Posts
Thanks Clint. I guess it's just that I know where it's not completely symmetrical so I just assume that everyone else will see it right away. The area I was talking about was around the ebrake. There's one side that seems to open up more than the other, but I don't think it will be noticeable once it's done. As for where it meets the dash, it will be alot closer. It will be pretty tight to the dash actually. I had to leave room for dynamat, underlay, carpet and the leather on the top. You can see here with carpet and underlay in place, it's alot closer. Will still have dynamat under there as well.
04-15-2011, 10:27 AM
#98
I really like the overall look of the console and the way you've integrated the ebrake. I love the idea of a handbrake in the Nova - I may have to do that some day. It's going to be realy nice when you get finished. What are those cup holders from?
Your build is very inspiring. You've tackled some really tough stuff and the budget must be high. This is the way I would build something if I had the talent and the $s. Keep up the good work!
Your build is very inspiring. You've tackled some really tough stuff and the budget must be high. This is the way I would build something if I had the talent and the $s. Keep up the good work!
04-15-2011, 11:26 AM
#99
Thanks Irish.
I was also looking at the GTO seats. I finally got them hooked up to a good battery and made sure they were all the way down. I find they do sit quite high. Has anyone found a way to get them lower and still keep the power options. Couple things I was thinking to gain some room:
Move the base tight up against the bottom of the seat
I'm also thinking about cutting down the foam on the bottom part. Right now there is almost 6 1/2" of foam. I'm sure I could get rid of a bit.
Anyone else have any ideas?
https://ls1tech.com/forums/conversio...dayton-oh.html
I sit up a little higher than I'd like but I just recline the seat a bit more. I've driven it from CA to DC and the seats are very comfy.
04-15-2011, 06:12 PM
#100
On The Tree
Thread Starter
iTrader: (4)
Join Date: Mar 2009
Location: British Columbia, Canada
Posts: 132
Likes: 0
Received 0 Likes
on
0 Posts
I really like the overall look of the console and the way you've integrated the ebrake. I love the idea of a handbrake in the Nova - I may have to do that some day. It's going to be realy nice when you get finished. What are those cup holders from?
Your build is very inspiring. You've tackled some really tough stuff and the budget must be high. This is the way I would build something if I had the talent and the $s. Keep up the good work!
Your build is very inspiring. You've tackled some really tough stuff and the budget must be high. This is the way I would build something if I had the talent and the $s. Keep up the good work!
I kept the front GTOs stock in my Cutlass; had to cut 3in off the rear and widen the center section 1.5in to fit the back and let my convertible top clear. There is a pic in my build thread about 2/3 down on first page:
https://ls1tech.com/forums/conversio...dayton-oh.html
I sit up a little higher than I'd like but I just recline the seat a bit more. I've driven it from CA to DC and the seats are very comfy.
https://ls1tech.com/forums/conversio...dayton-oh.html
I sit up a little higher than I'd like but I just recline the seat a bit more. I've driven it from CA to DC and the seats are very comfy.
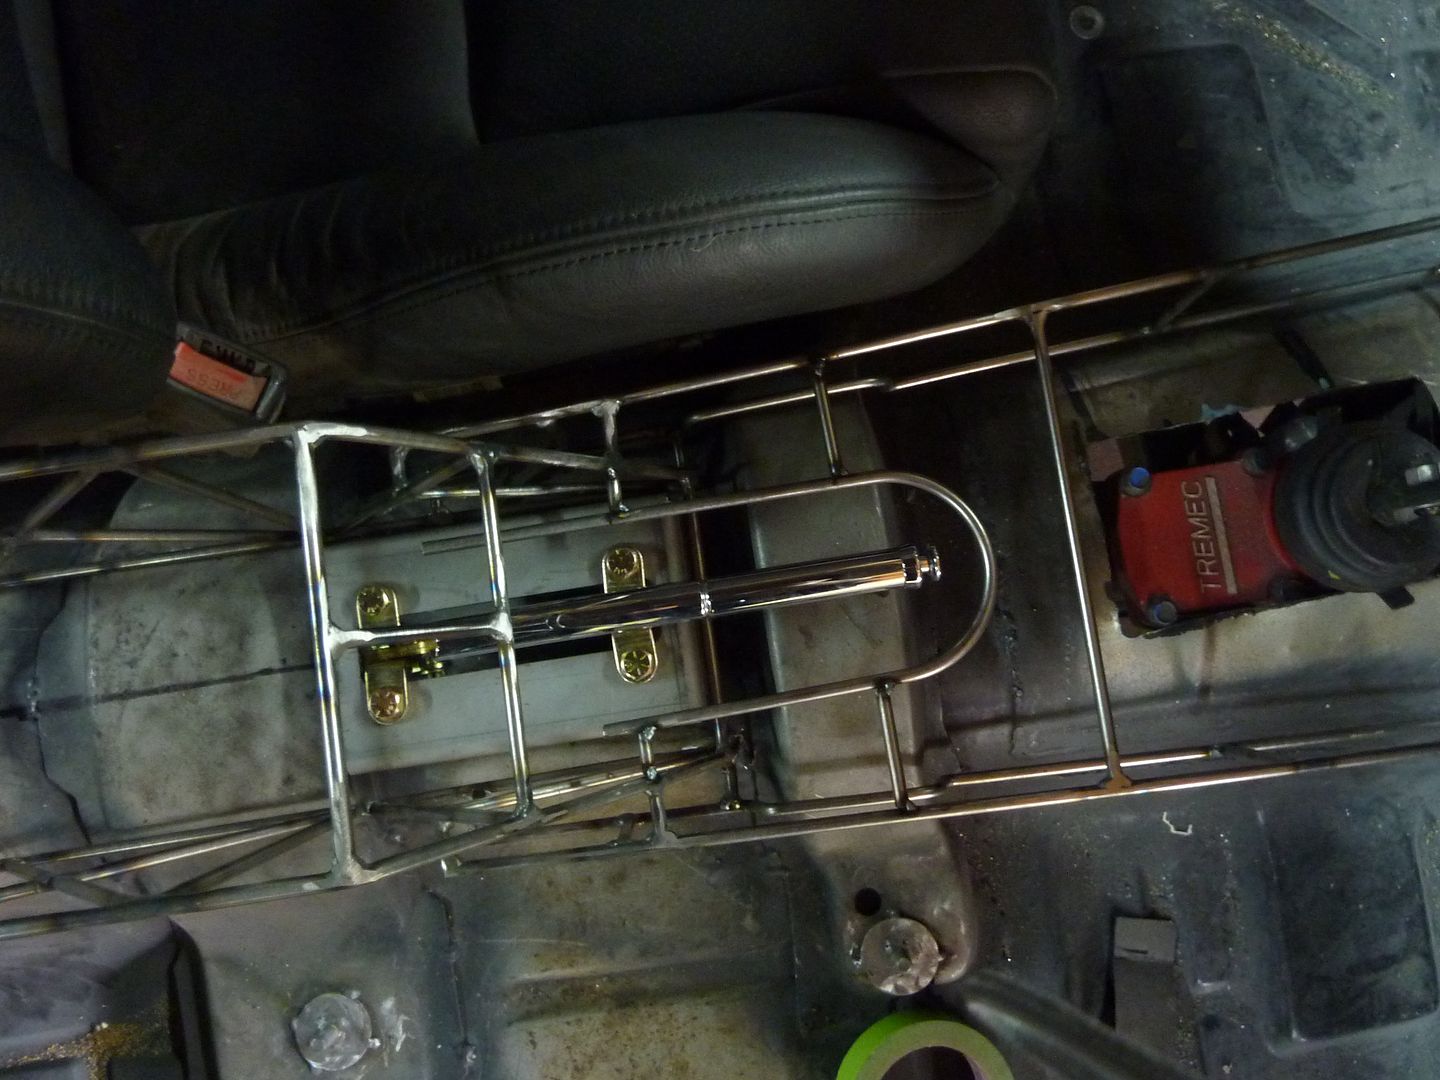
Got a little bit done today. Had a lazy day, so wasn't much.
Made the angle for the stereo better to see it. I ended up taking off 3/4" at the top and brought the bottom out about an inch. That way I figured I wouldn't loose too much room for wiring. I'm really going to have to watch myself though if I'm hard shifting. Not a whole lot of room between the shifter and stereo now.
I then put the cup holders in place. I think I'm going to put them there as I still have to put the Vintage Air control underneath the stereo. I would still like to find some cup holders that are a bit smaller.
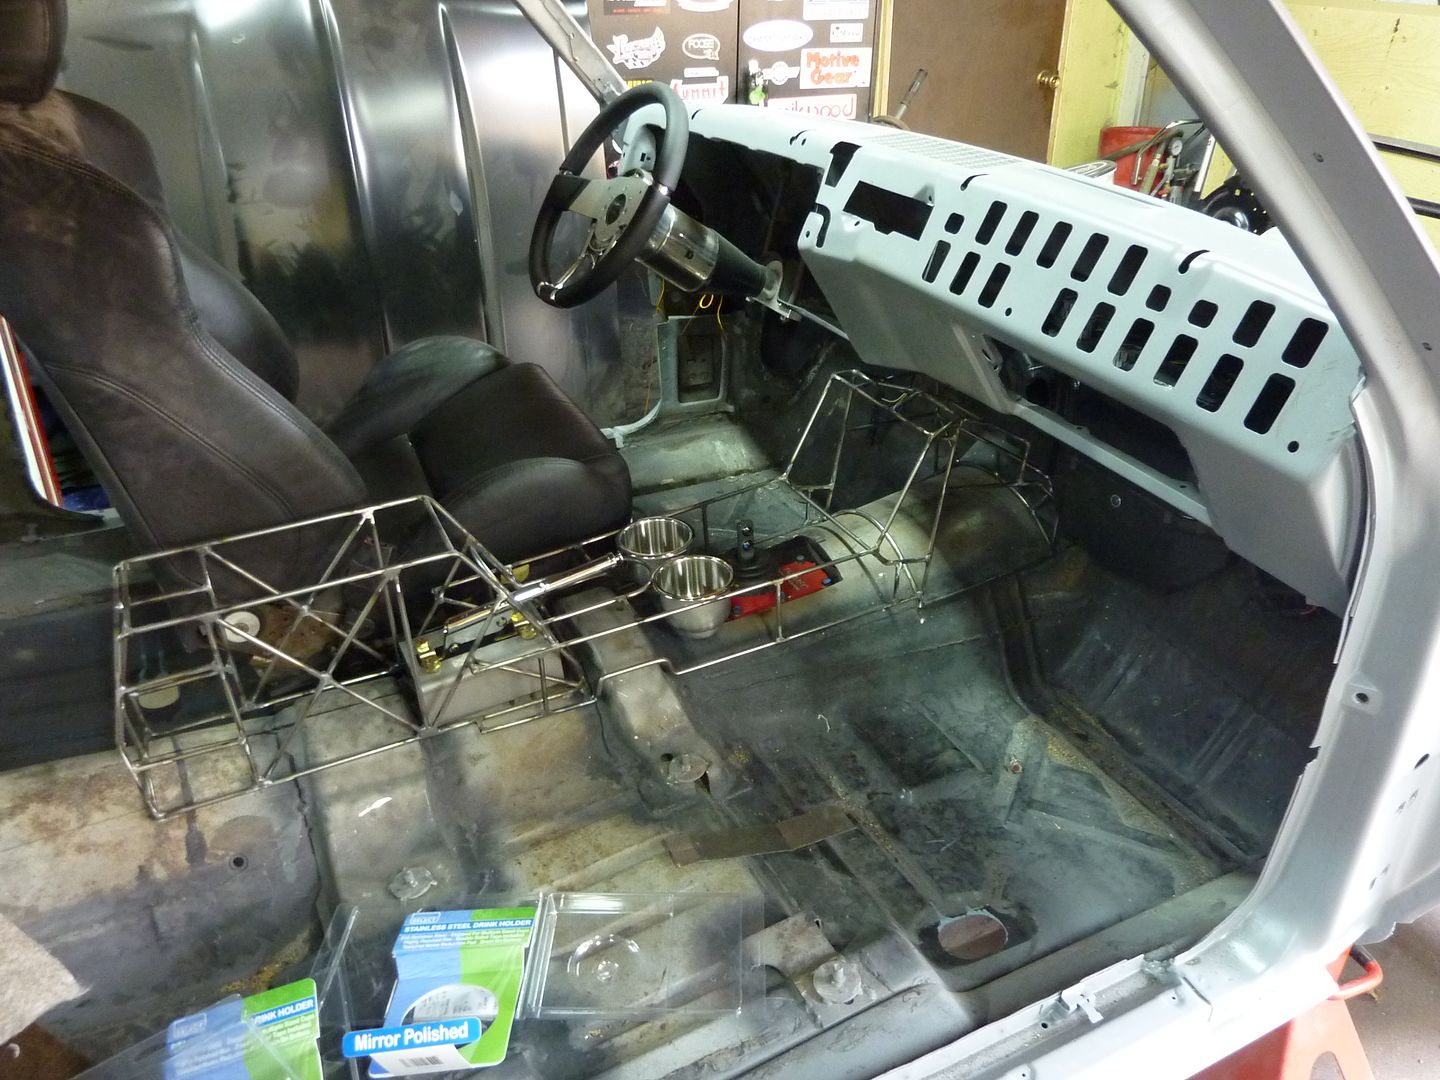
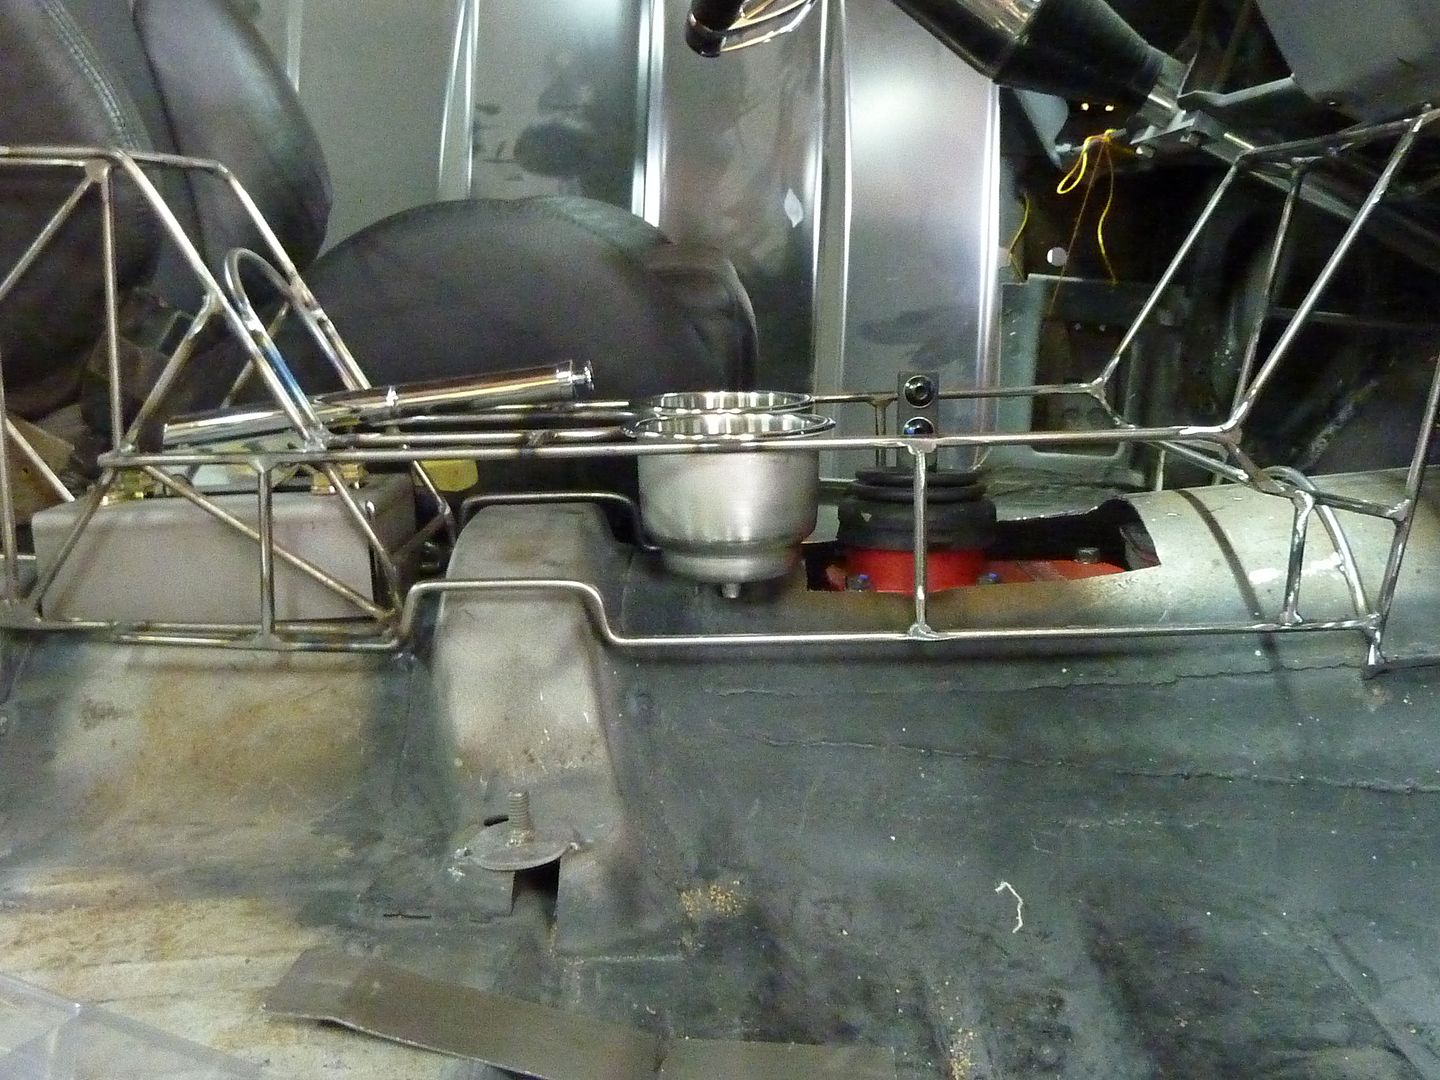
And to answer the question about what cup holders they are, I just went to one of the local boat shops and they brought them in for me. They were about $18 each. Here's the brand.
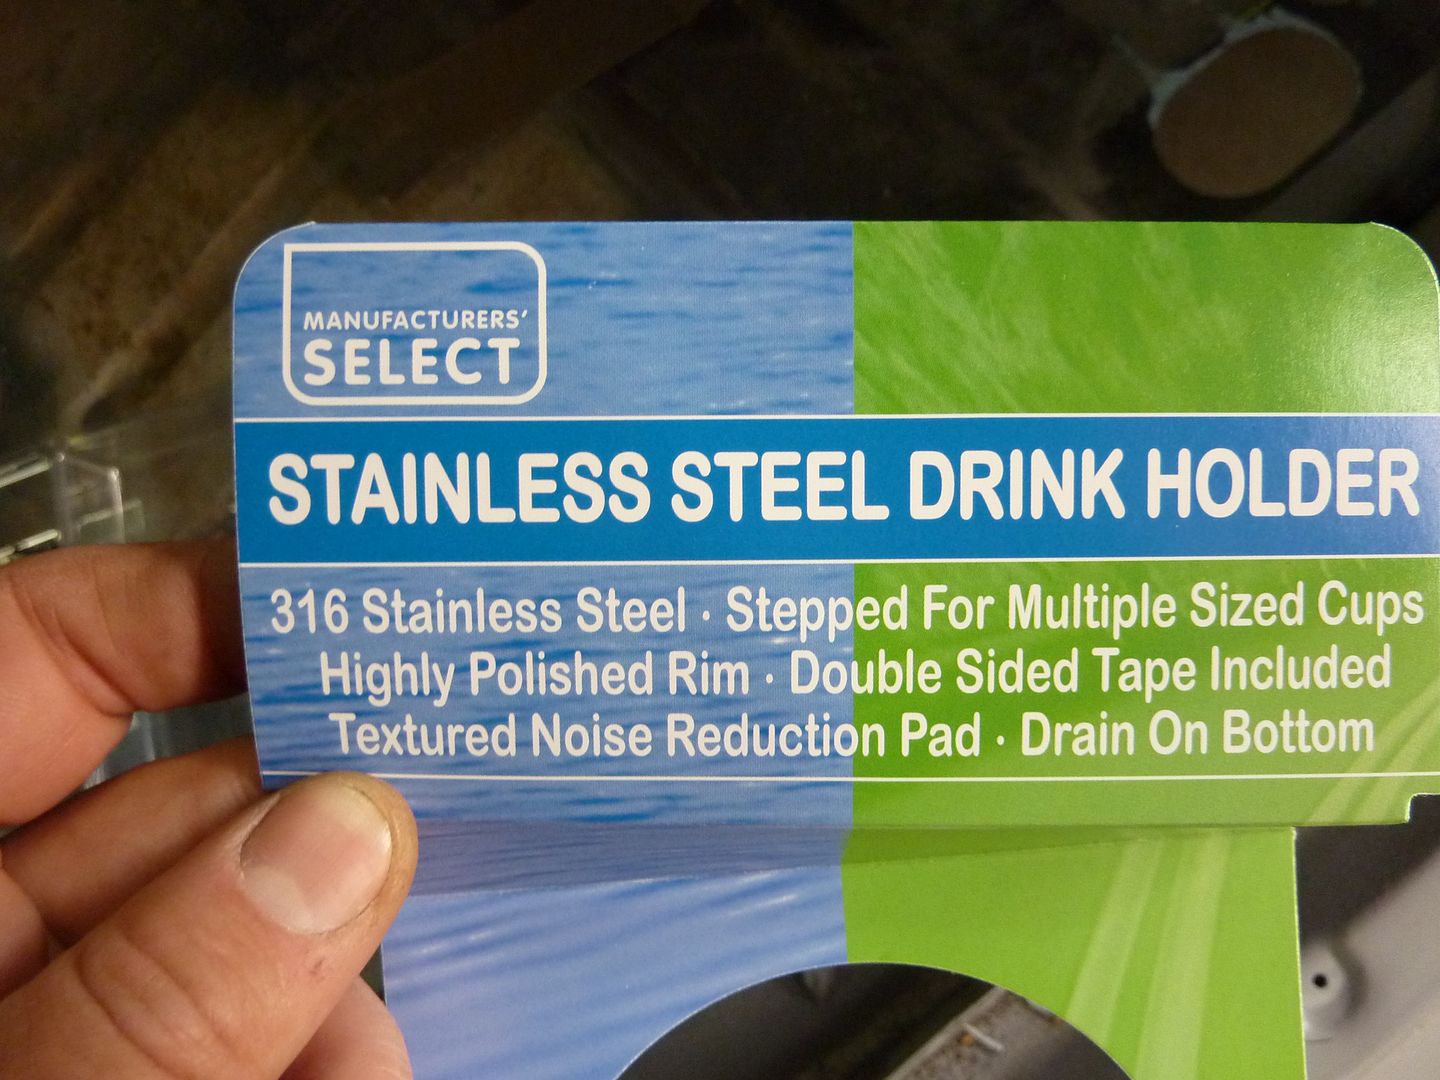
Back to work in the morning, but hope to get back out to the shop next Thursday. Will update as usual.

