
Pro-Touring 68 Acadian (Nova) with L92
 01-06-2012, 08:09 PM
#141
On The Tree
Thread Starter
iTrader: (4)

Join Date: Mar 2009
Location: British Columbia, Canada
Posts: 132
Likes: 0
Received 0 Likes
on
0 Posts
Well it's been quite a while since I posted an update. Unfortunately haven't gotten much done on the car at all. Had some other projects on the go, lost motivation for a while, trip to Vegas and now am sick. But I'll post a small update anyways.
First, I found out why I ended up with moisture in my paint. I decided to take the plug in the side of compressor out. Found out that I had about 8-10 inches of water in the bottom of my tank. I always emptied out the air after each day, but never thought of actually draining it. That's changed. I fixed the drain that was on the bottom and made it easier to access. Then I was told that most filter systems don't work that great unless they have gone through 50 feet of line first. So I had an extra 50 feet of air line that I ran between my tank and filter. Then it goes into an air reel with 50 more feet. So far it's working alot better.
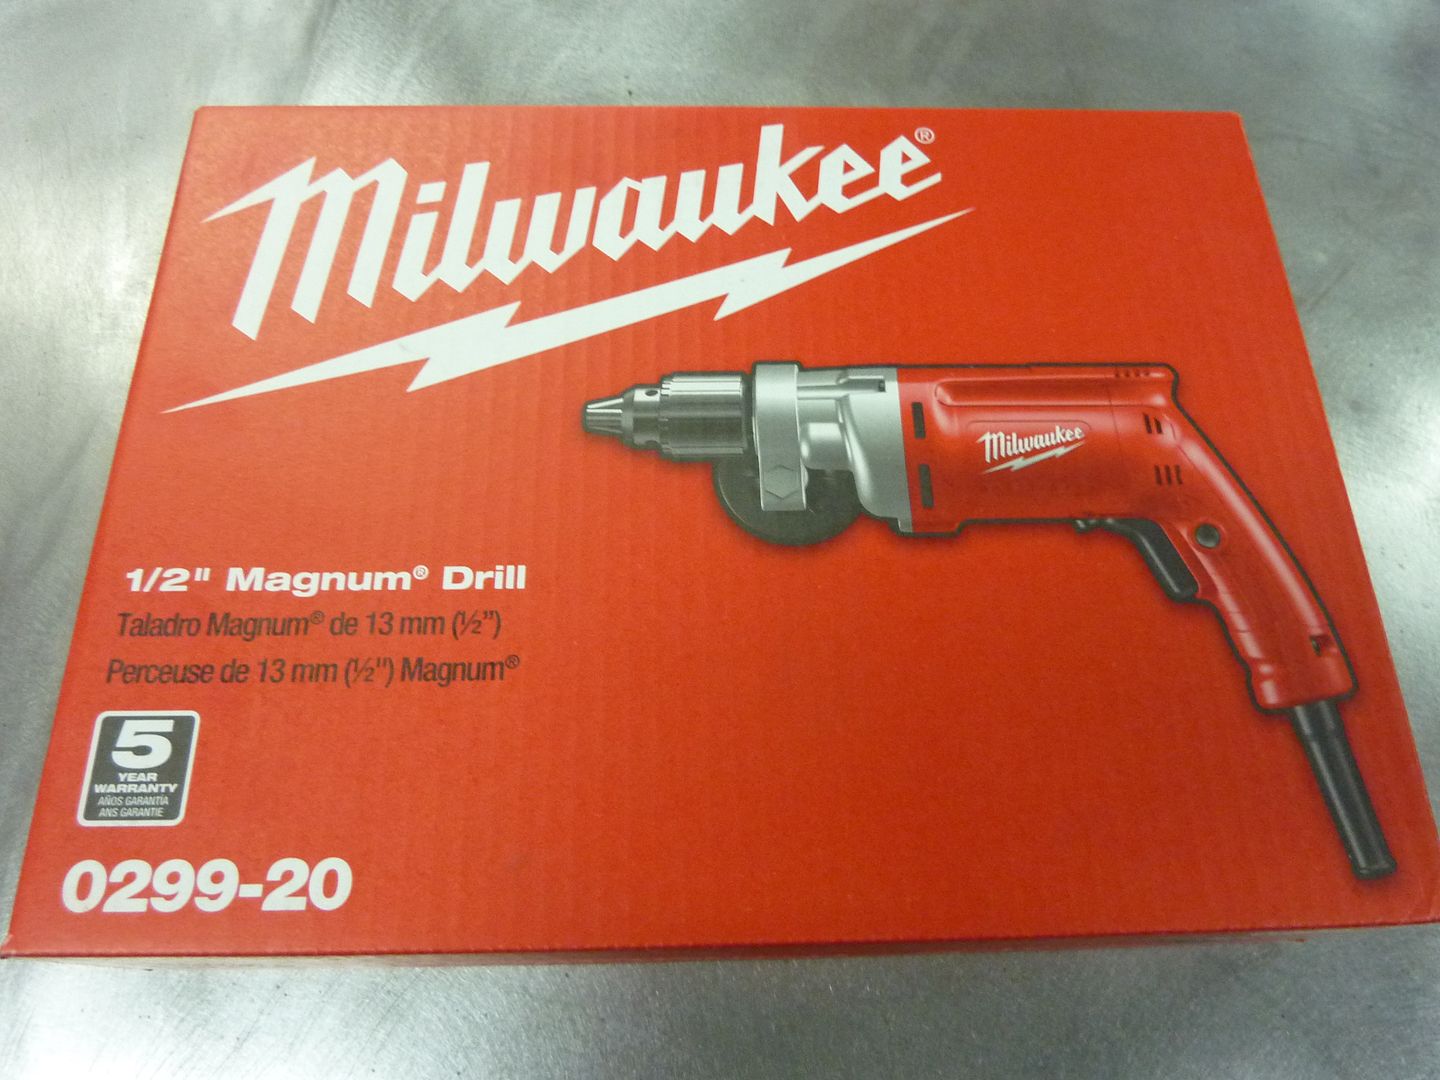
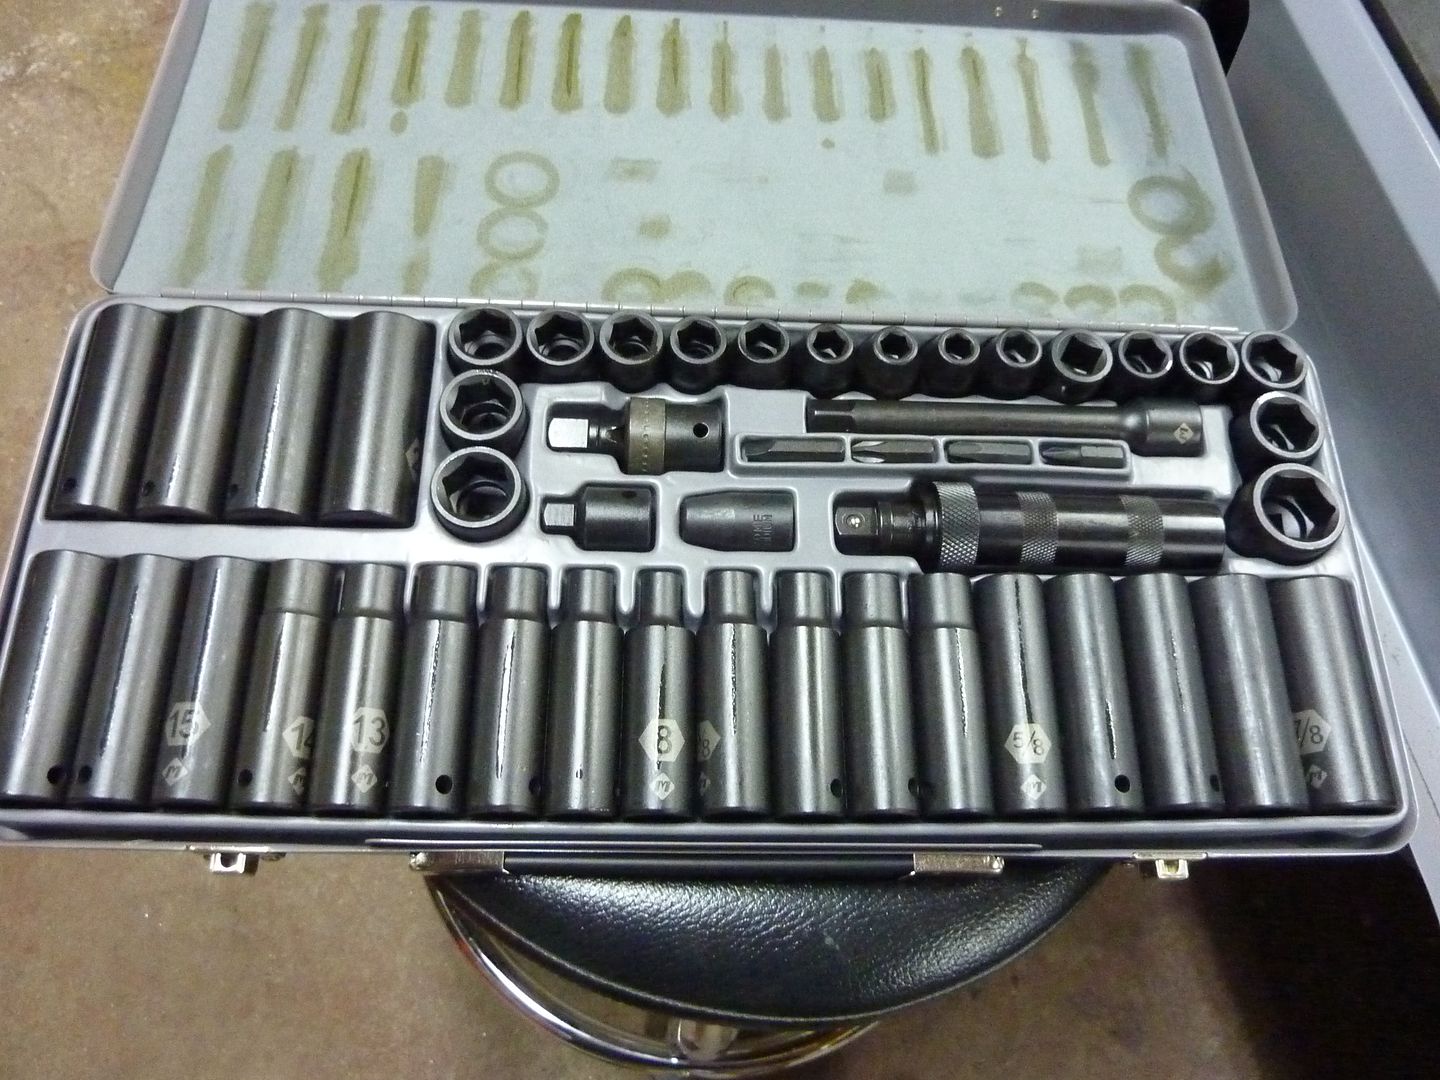
Picked up a few new tools over the holidays.
One of my cordless drills packed it in, so replaced it with this. Got it for half price.
Grabbed a new impact socket set which includes deep. Regular price was $220, picked it up for $65
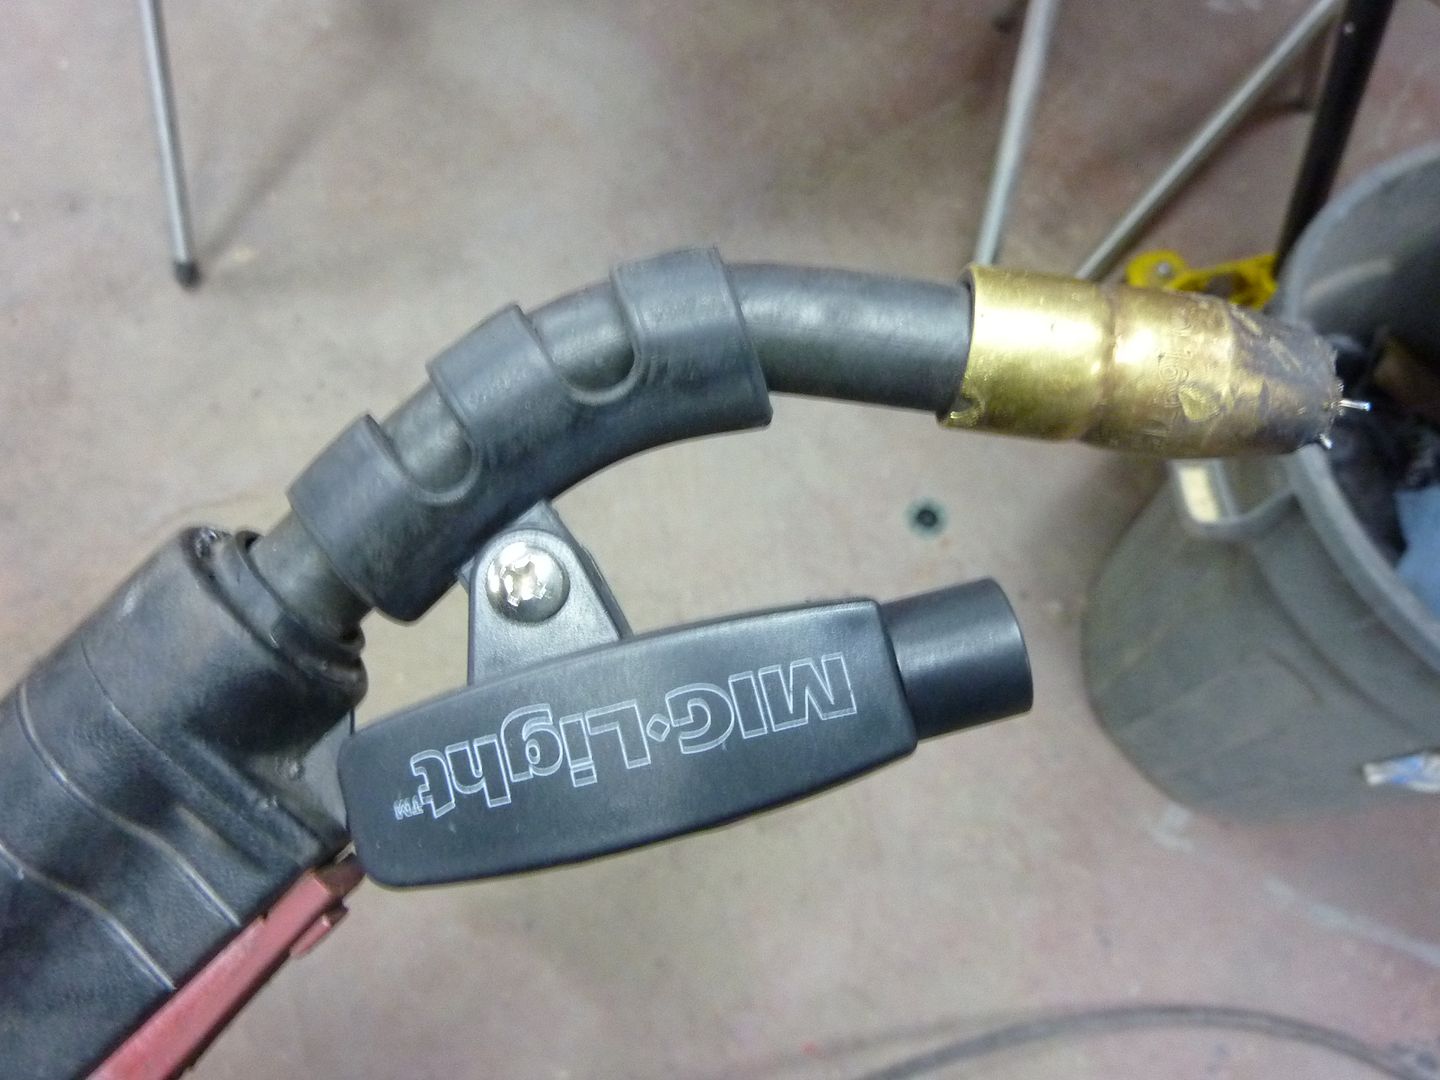
A while back I also picked up this mig light from Eastwood. It works really well. Helps light up the area you're working on.
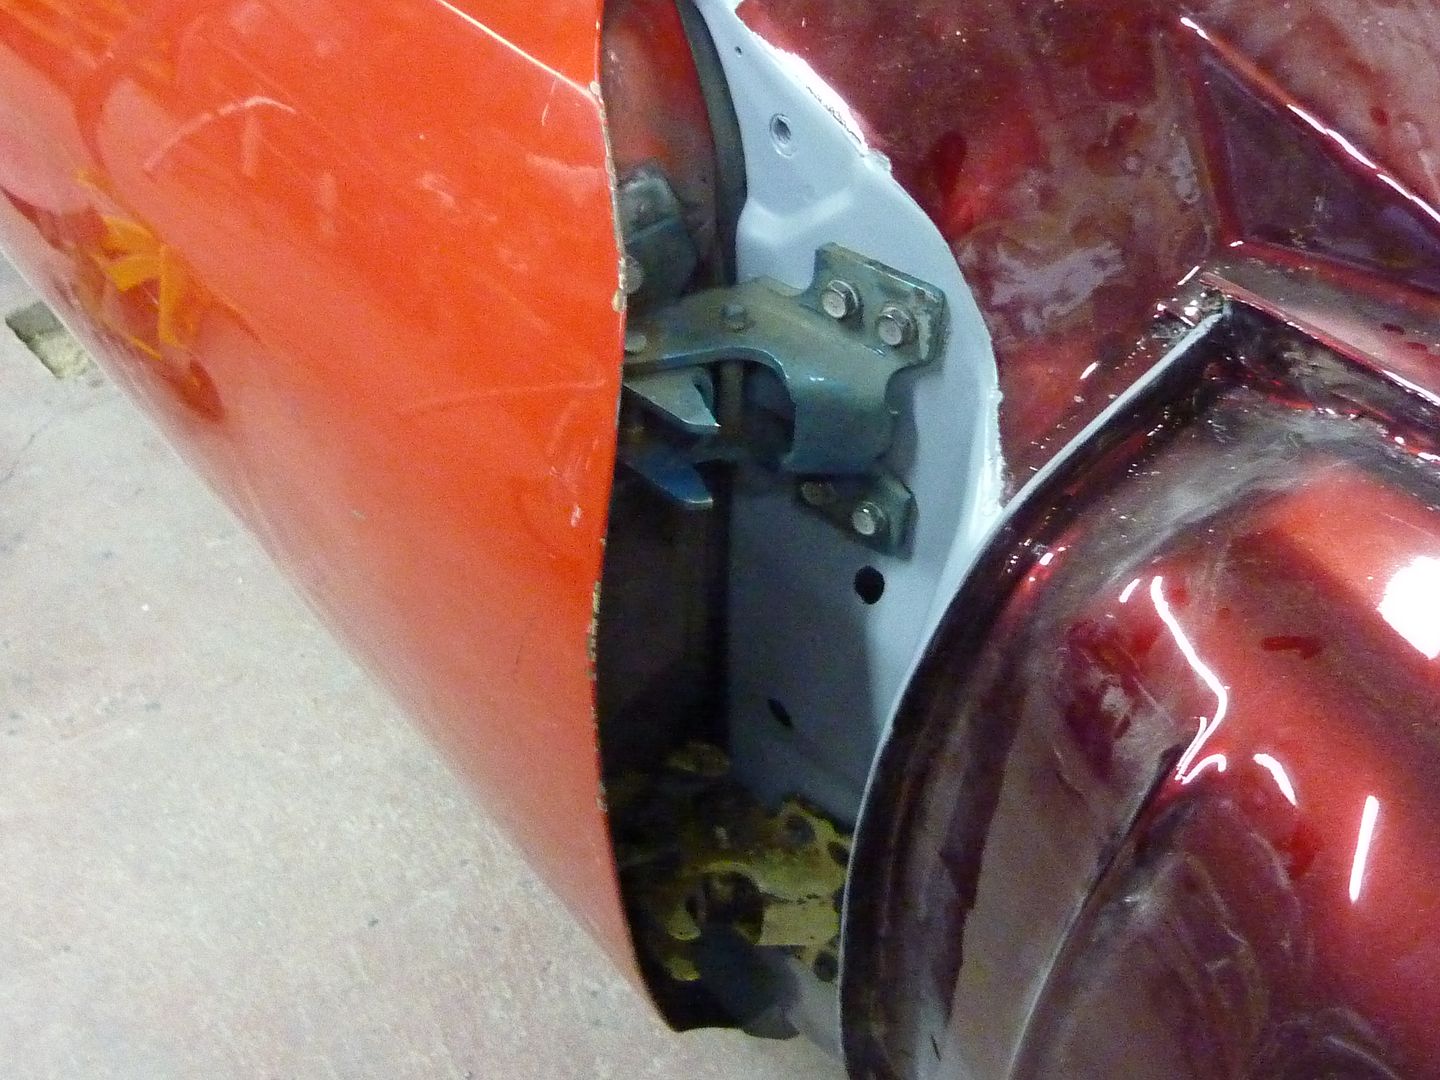
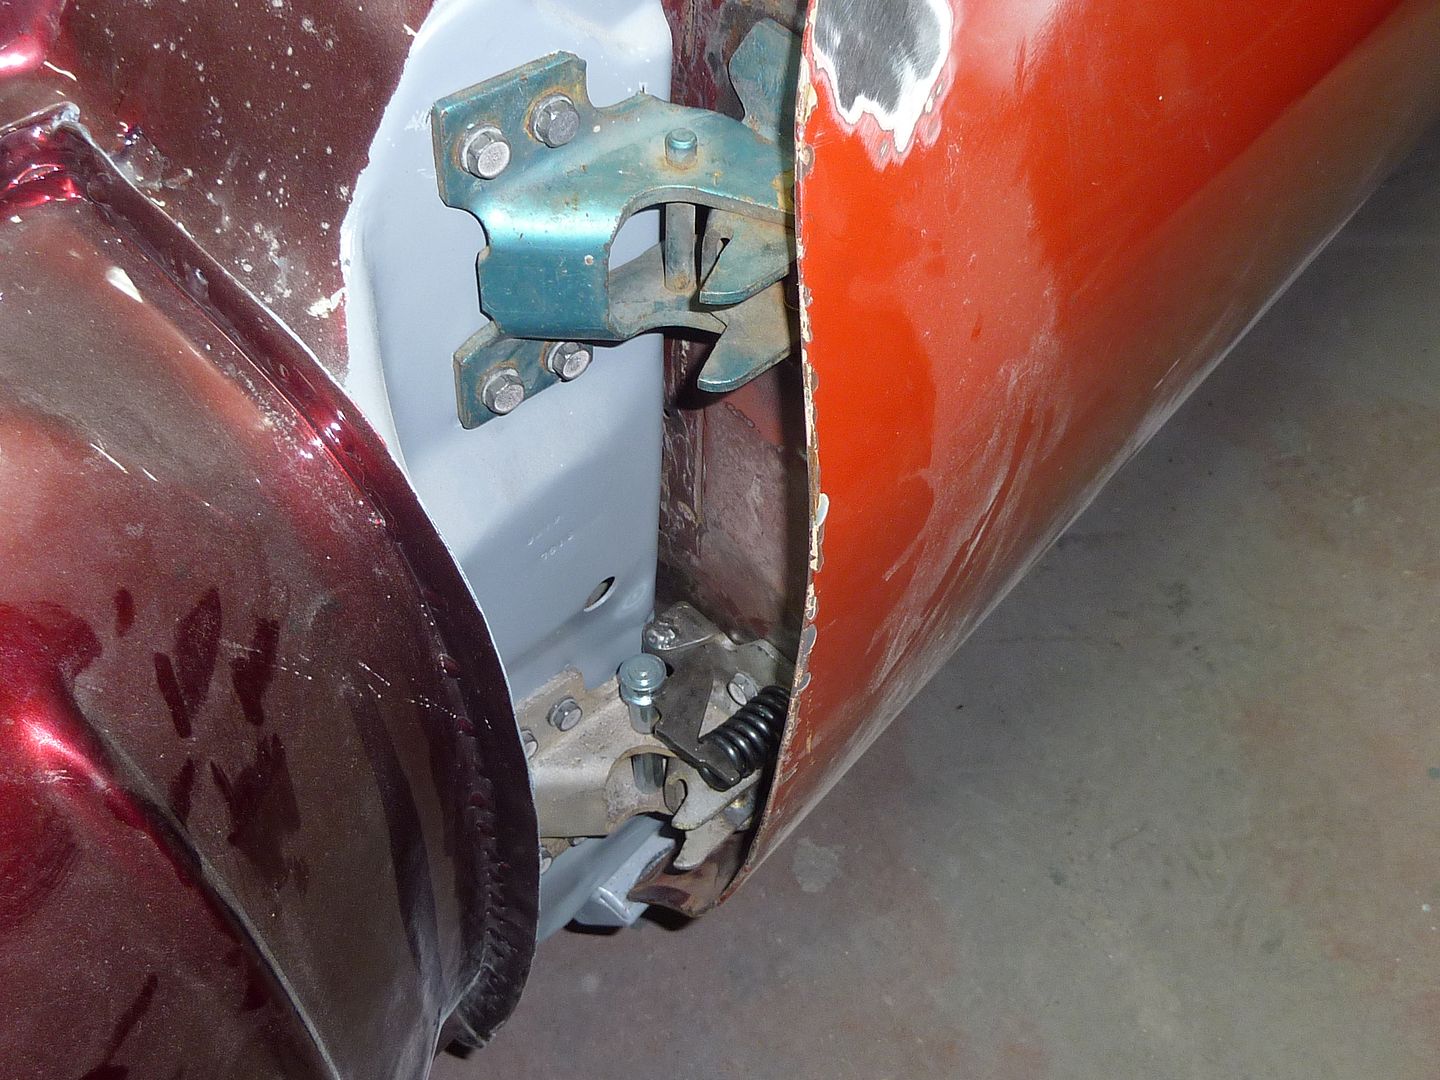
Well onto the car. I did manage to start working on getting rid of the weld on hinges from the 74 doors and making them work with bolt on hinges.
To make the bolt on door work better, I wanted to get the front bolt area from a wrecked set of doors. Thanks again for this Jeff (a member on a different forum). Jeff cut out the front part of some doors that he had and shipped them to me. What these pieces gave me was a better idea where the holes go and it also gave me the piece of steel inside the door with the threaded holes. I didn't want to put nuts on the inside of the door like I've heard some guys have done.
Here's the pieces I got from Jeff
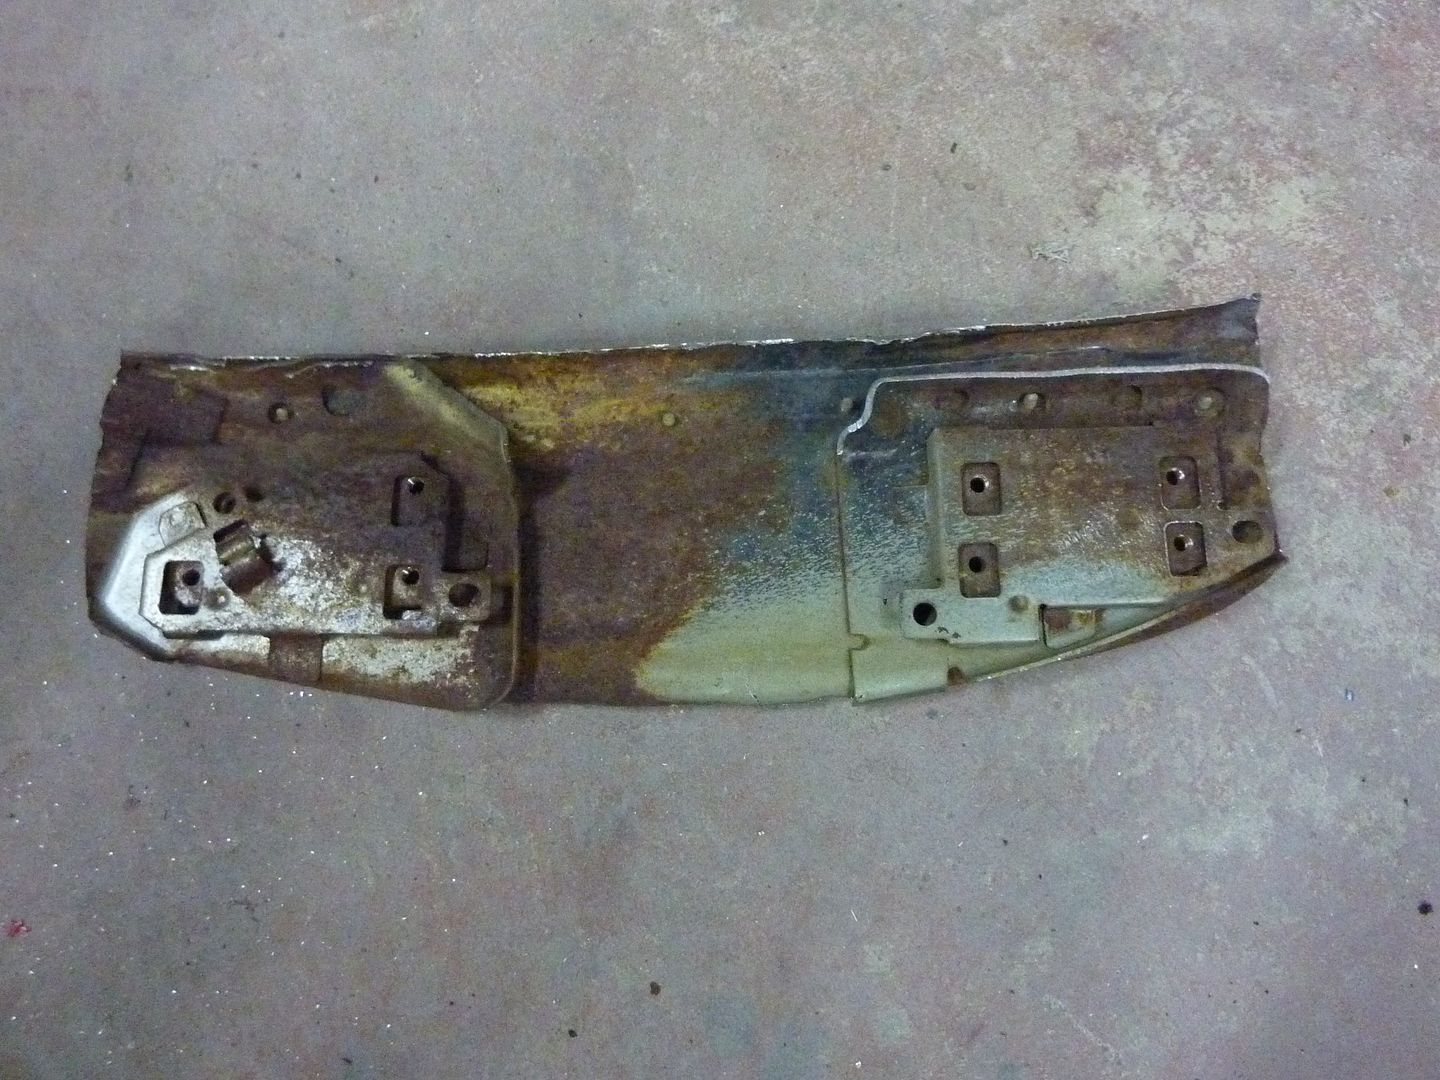
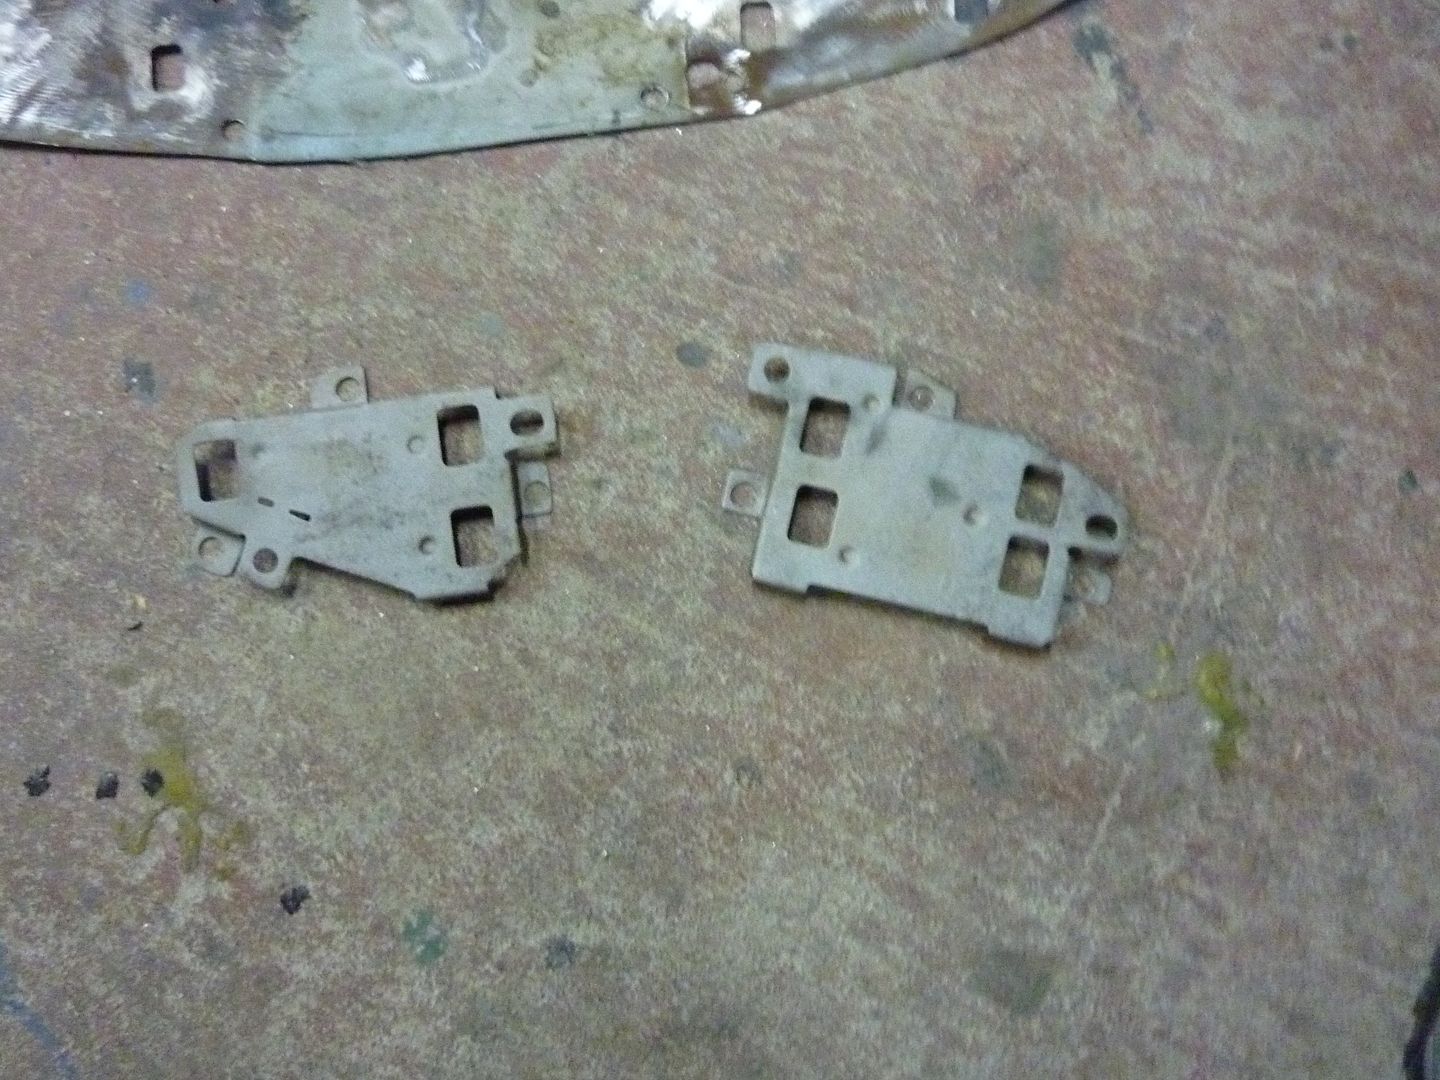
Once I had them, I took off the brackets which hold the threaded piece of steel. I forgot to take a picture of the actual threaded piece. I'll do that when I do the other door.
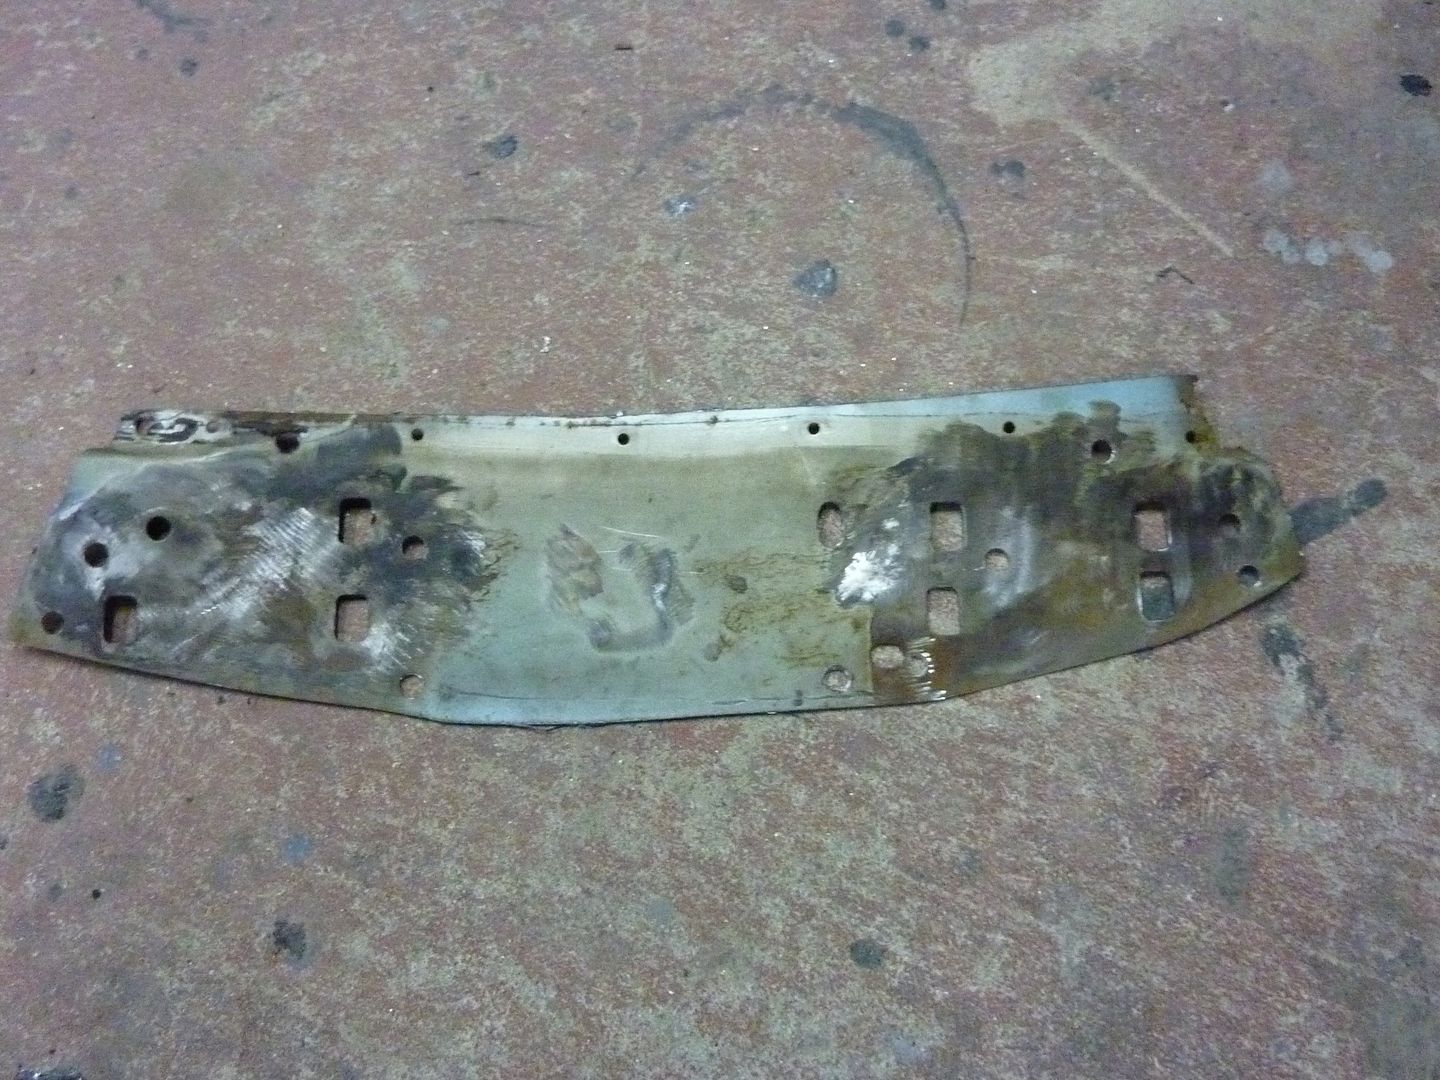
There was also a piece of steel that added strength to the front of the door. I took that off also. Here's what I was left with after some trimming
Here's what I have done so far and how I did it.
Door with weld on hinges
I cleaned up the area around the hinges
Then I bent some 1/4" round bar so it would fit the corner of the hinges. This allowed me to put the new hinge in the same spot as the weld on
Old hinge
New hinge in place. When I took the weld on hinges off, I originally wanted to try and take them off in one piece. I very quickly realized that wasn't going to happen so out came the grinder with cutting blade and air hammer.
You can see that the new hinge is a bit shorter than the old one was. That's okay, it will still work.
Once the hinge was in place, I used a black felt pen and marked the holes. I then used the front piece that I got from Jeff as a template. I used the holes for the door seals to align the pieces
The bolt holes that I marked and the holes in the template piece weren't an exact fit, so I just made the holes slightly bigger. For this I used an air saw as well as a die grinder with a metal cutting tip
I held onto the threaded piece of steel and tried the new hinges
And the door's on the car
I haven't finished aligning the door yet, but once I have it where I'm happy with it, I'll drill a couple guide holes in each hinge so I can put them back in the same place. Once that's done, I plan on welding the brackets that hold the threaded pieces in place. That will be a bit tricky as I need to weld inside the door. Once I have the driver's side door done, I'll post some more pics.


 02-14-2012, 10:24 PM
#146
On The Tree
Thread Starter
iTrader: (4)
Join Date: Mar 2009
Location: British Columbia, Canada
Posts: 132
Likes: 0
Received 0 Likes
on
0 Posts
Well it's been a while since I last updated. Haven't been in the shop for a while. Had a block off with the girls out of town a while back, but ended up with a sinus infection and -25 celcius (without windchill) weather made me not want to head out. Well the girls are gone again and I hit the shop.
Thought I'd get the other door done. Weld on hinges gone
Template from donor door
Template in place
Holes marked
Drilled some holes
Then out came the die grinder with cutting tip
After about 20 minutes of sounding like I was at the dentist
Before I put the door on, I thought I would rebuild all the hinges first. So had to take the passenger side door back off and did all the hinges.
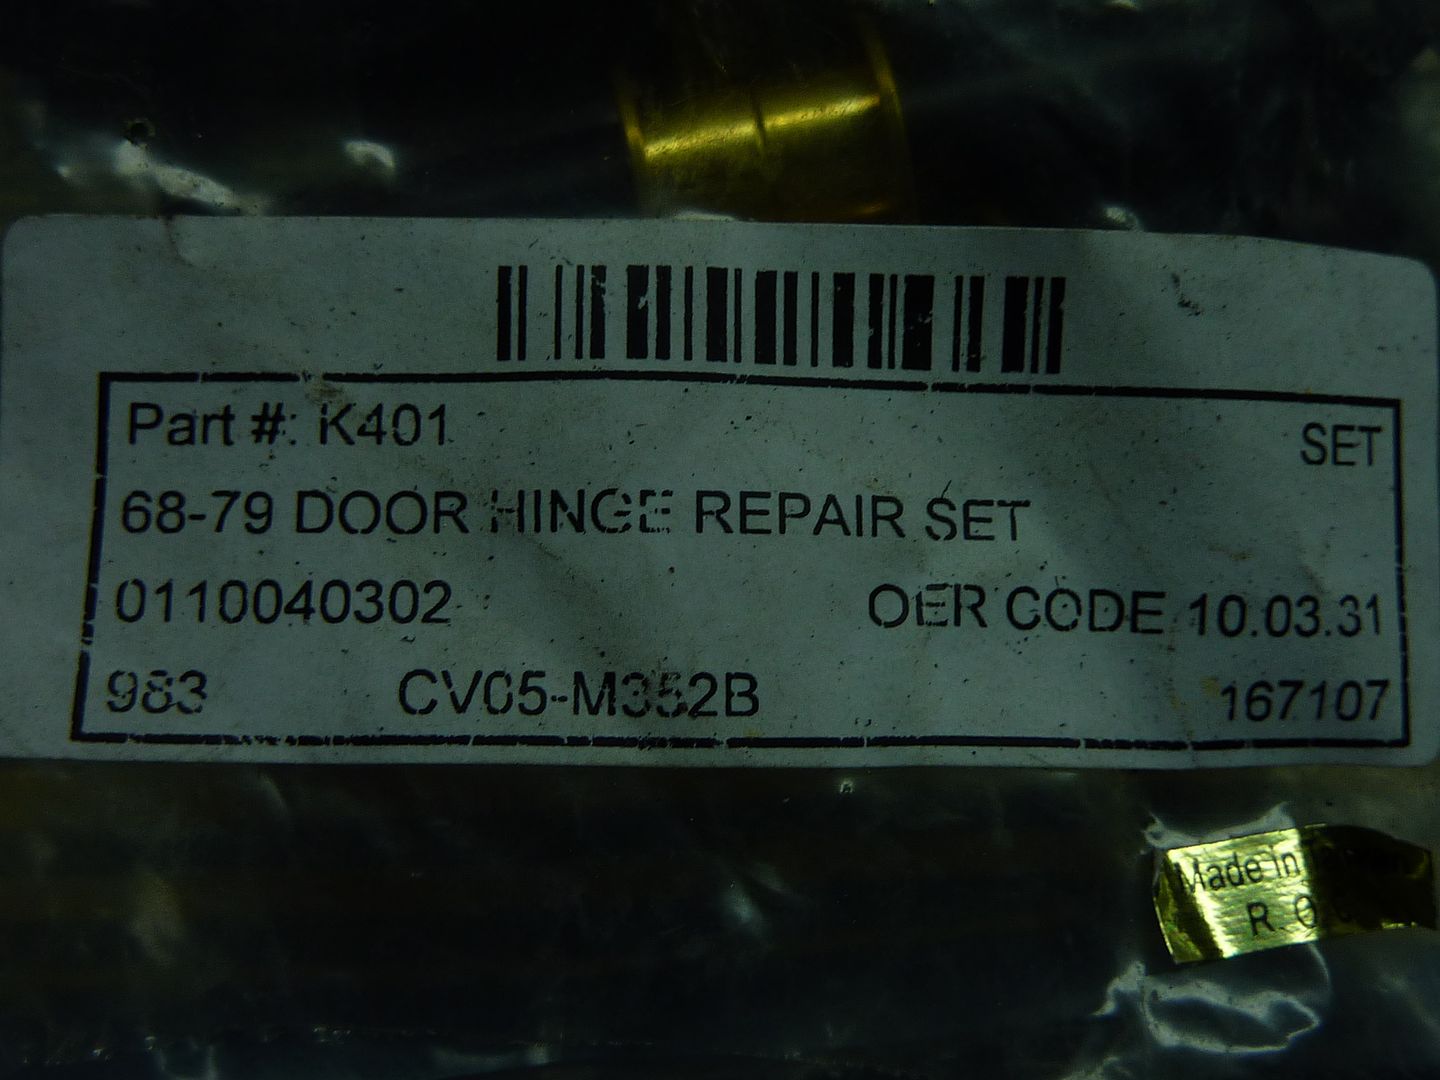
Here's what you need to rebuild each pair of hinges (one side)
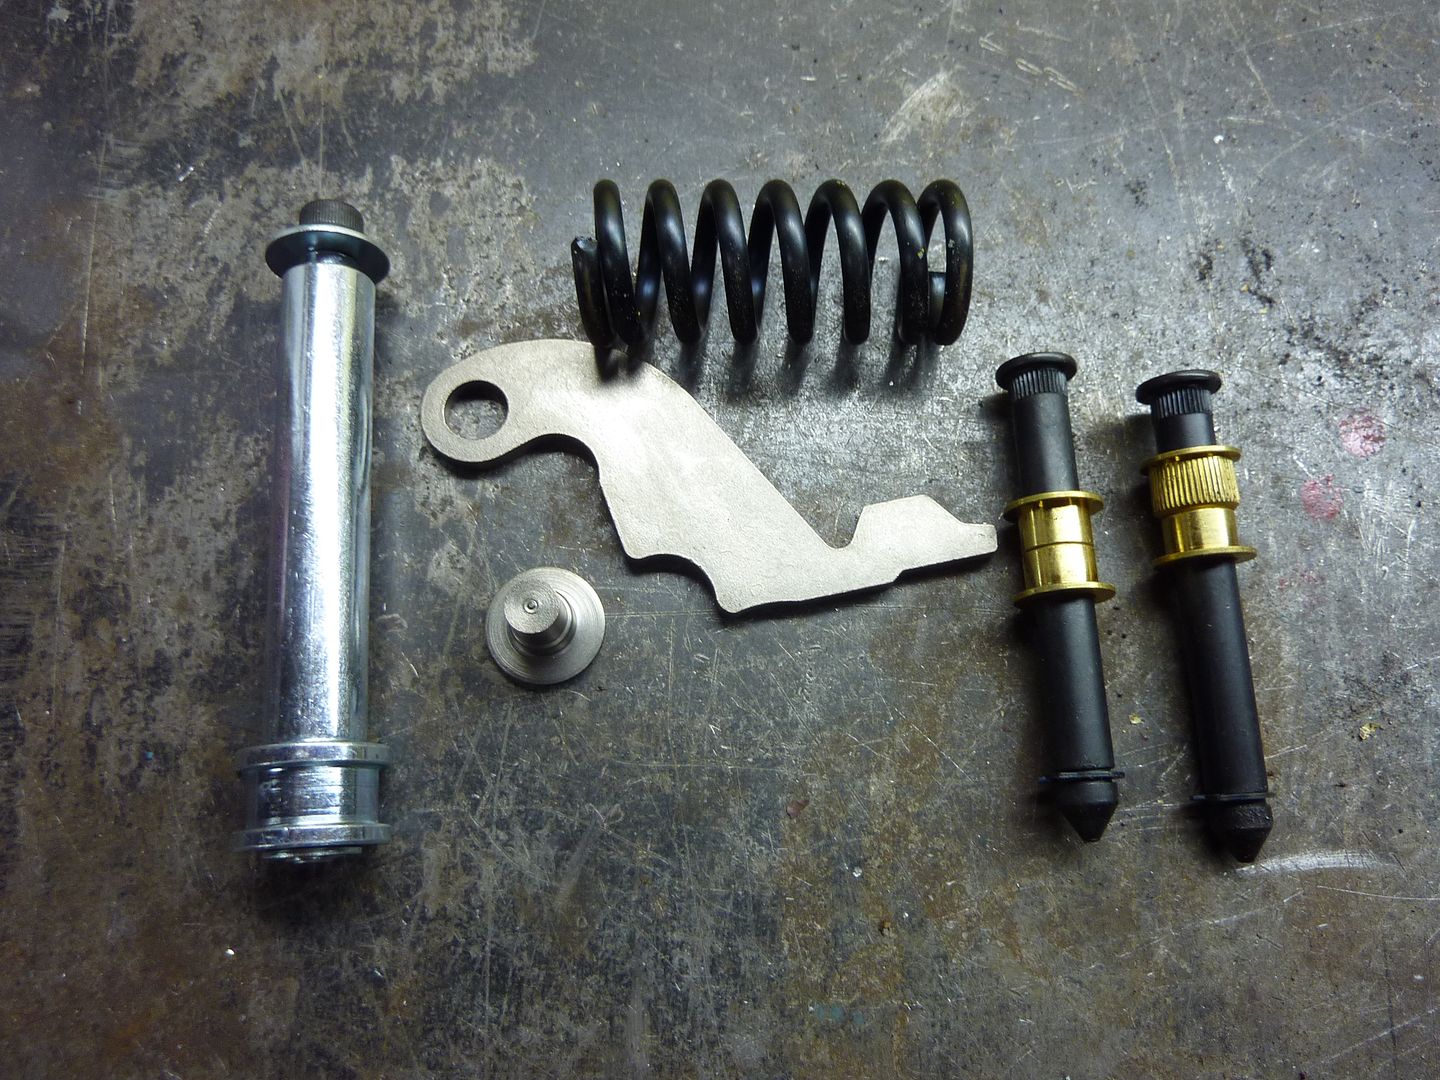
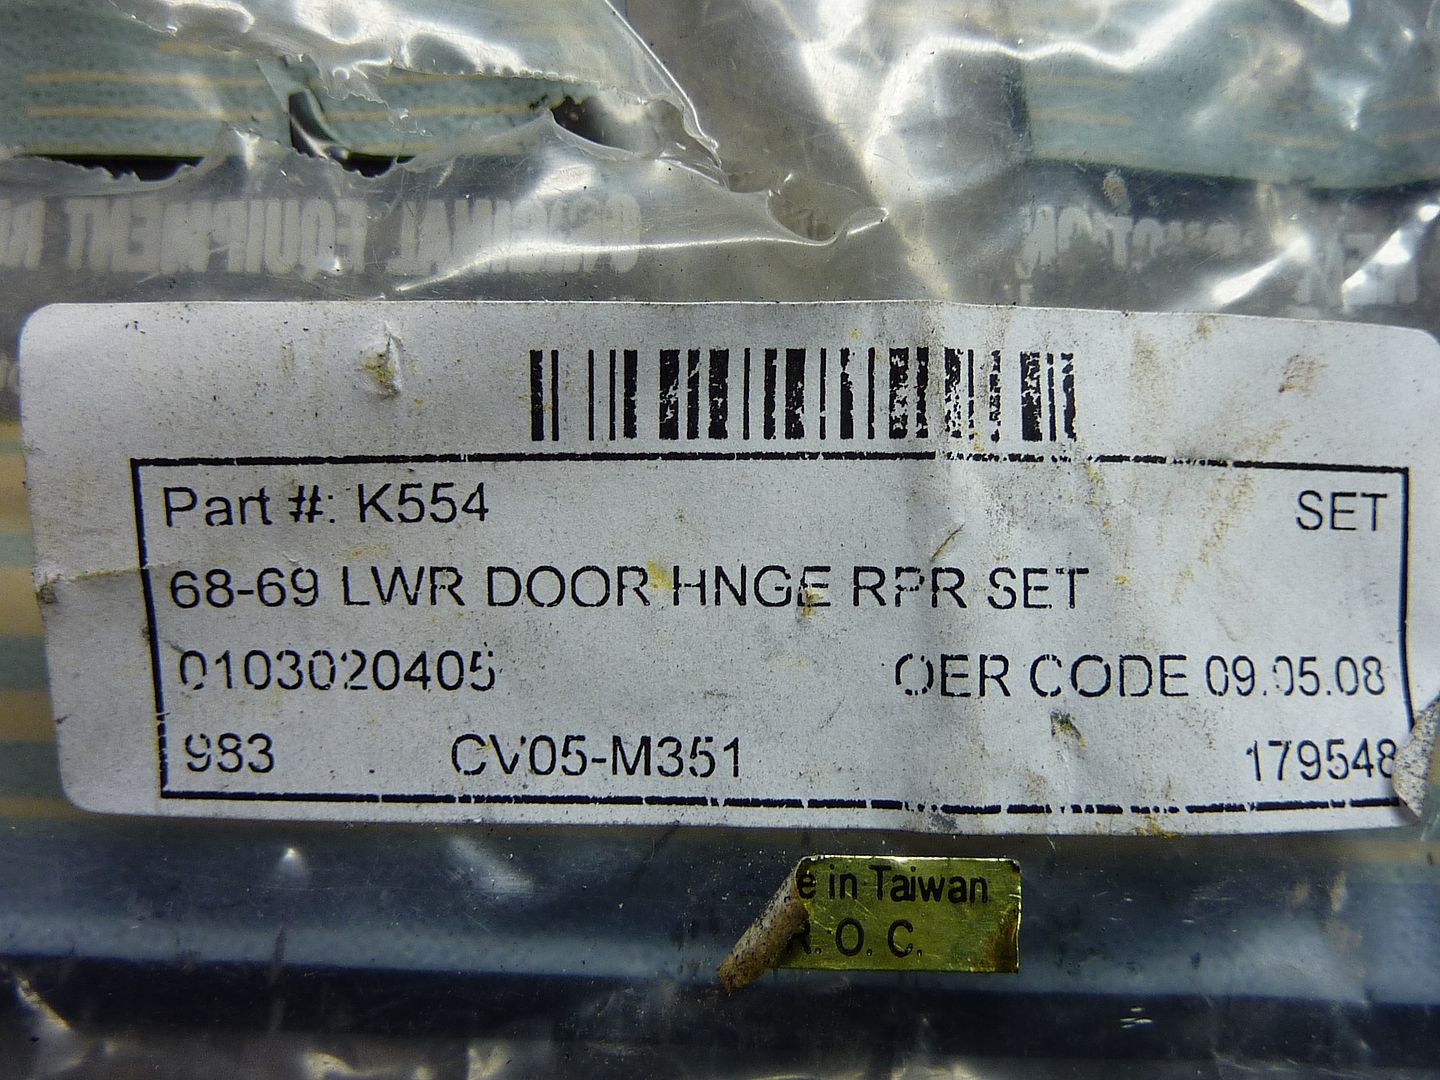
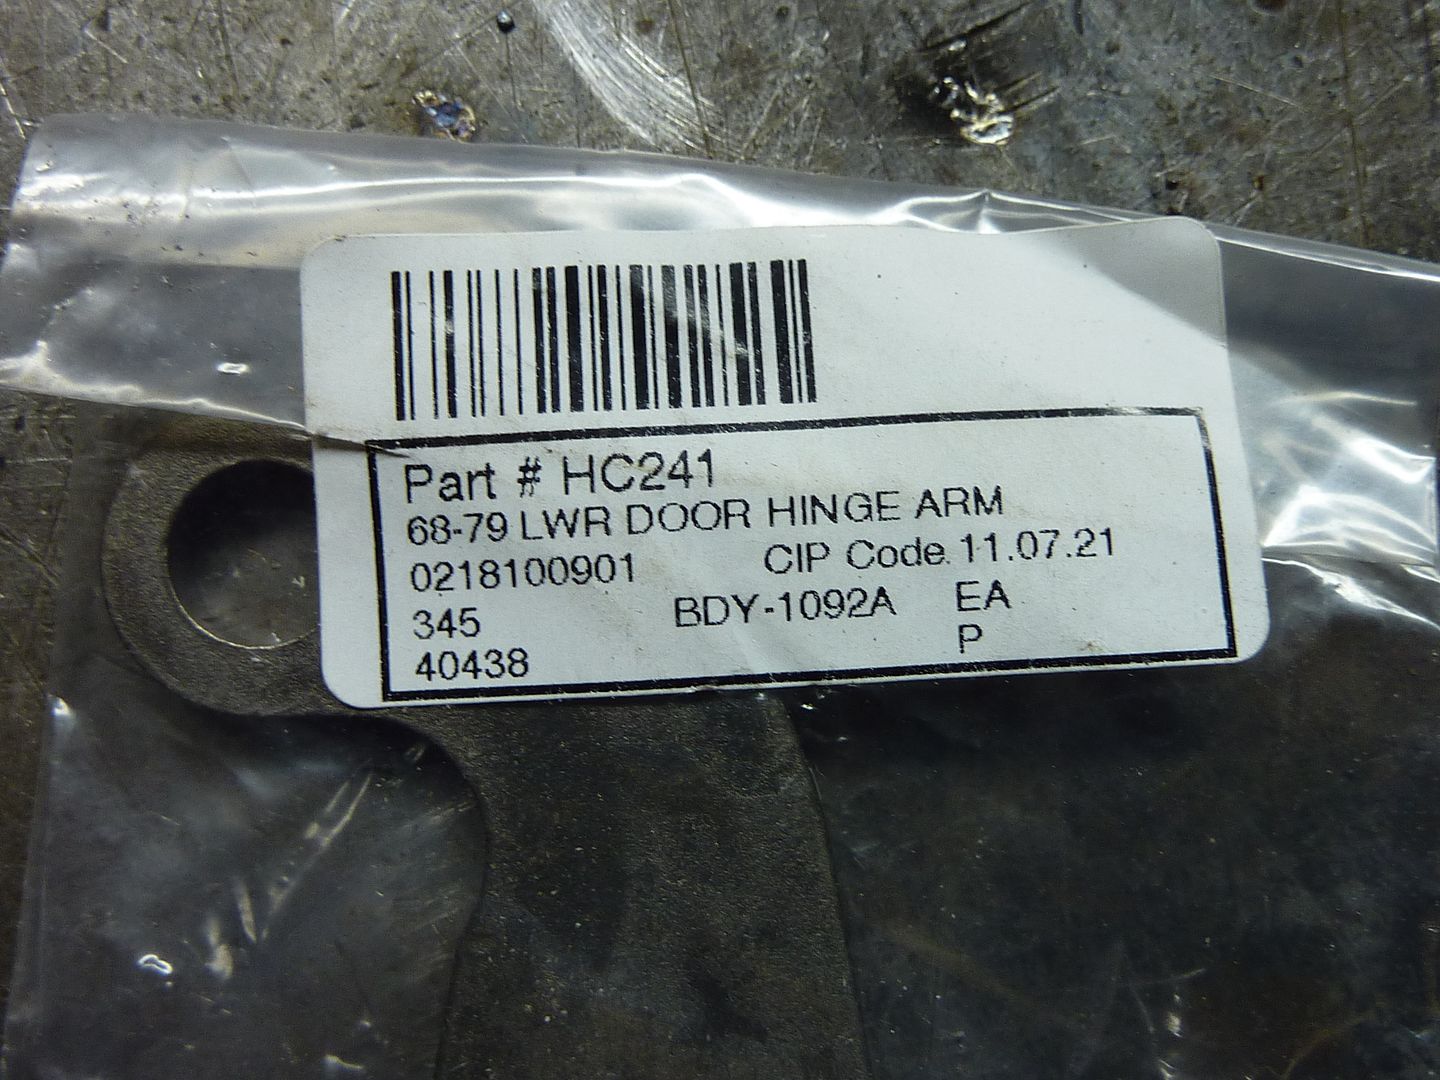
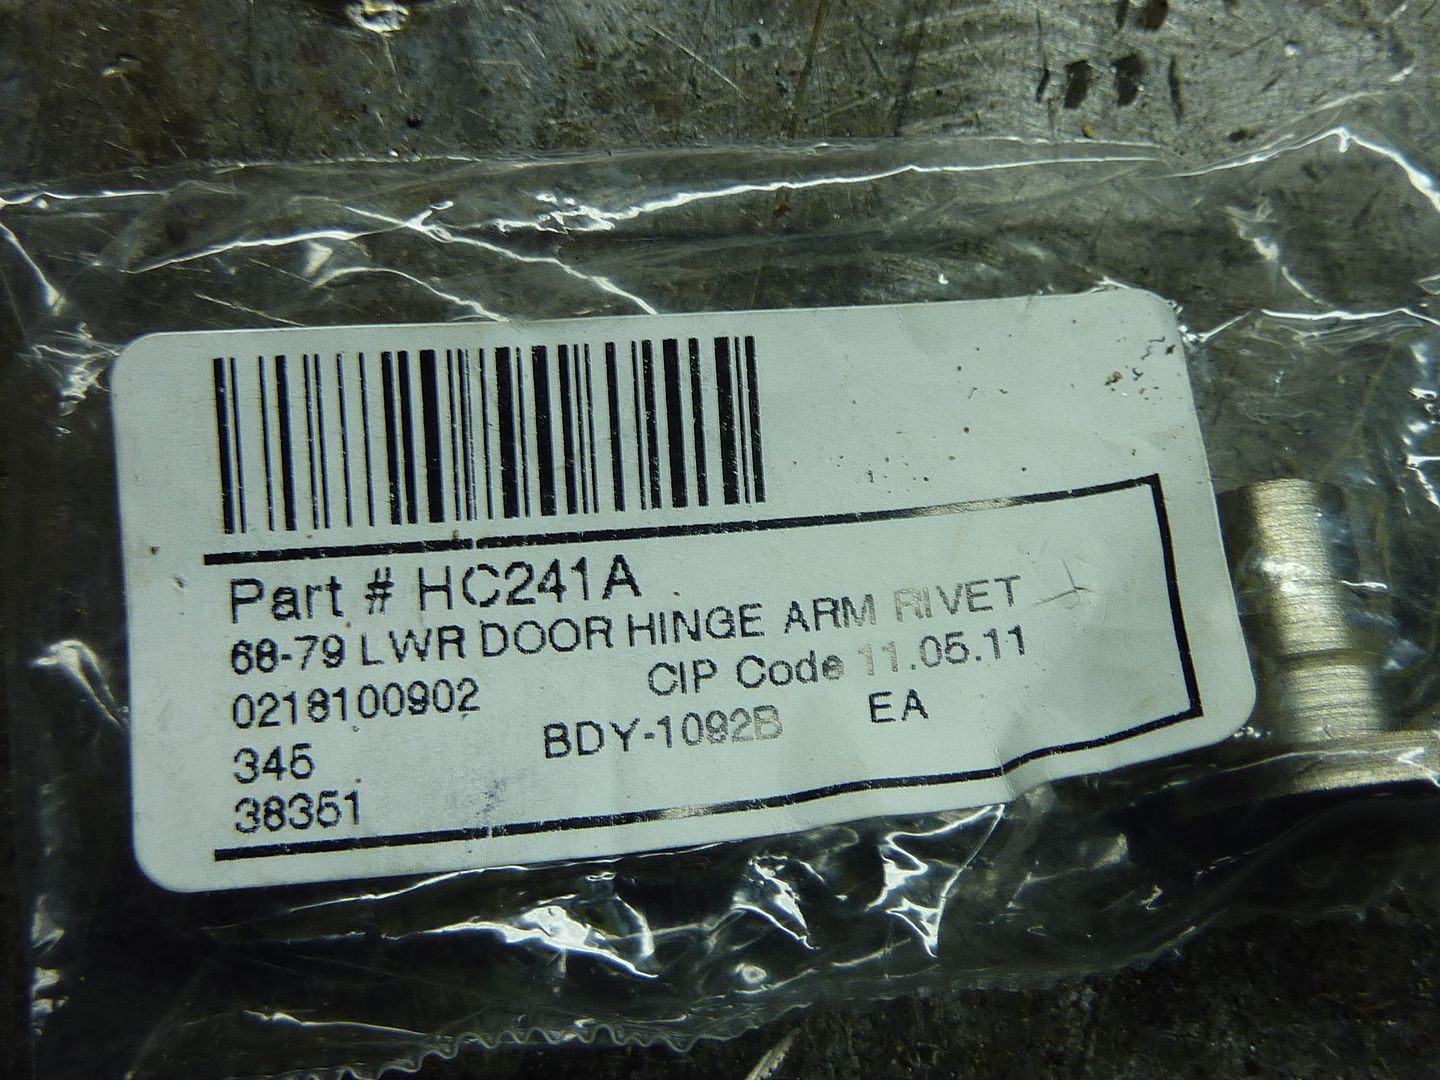
For those that want to rebuild their hinges, here are the part numbers from Classic Industies
First thing I had to do was grind off the ends of all the pins
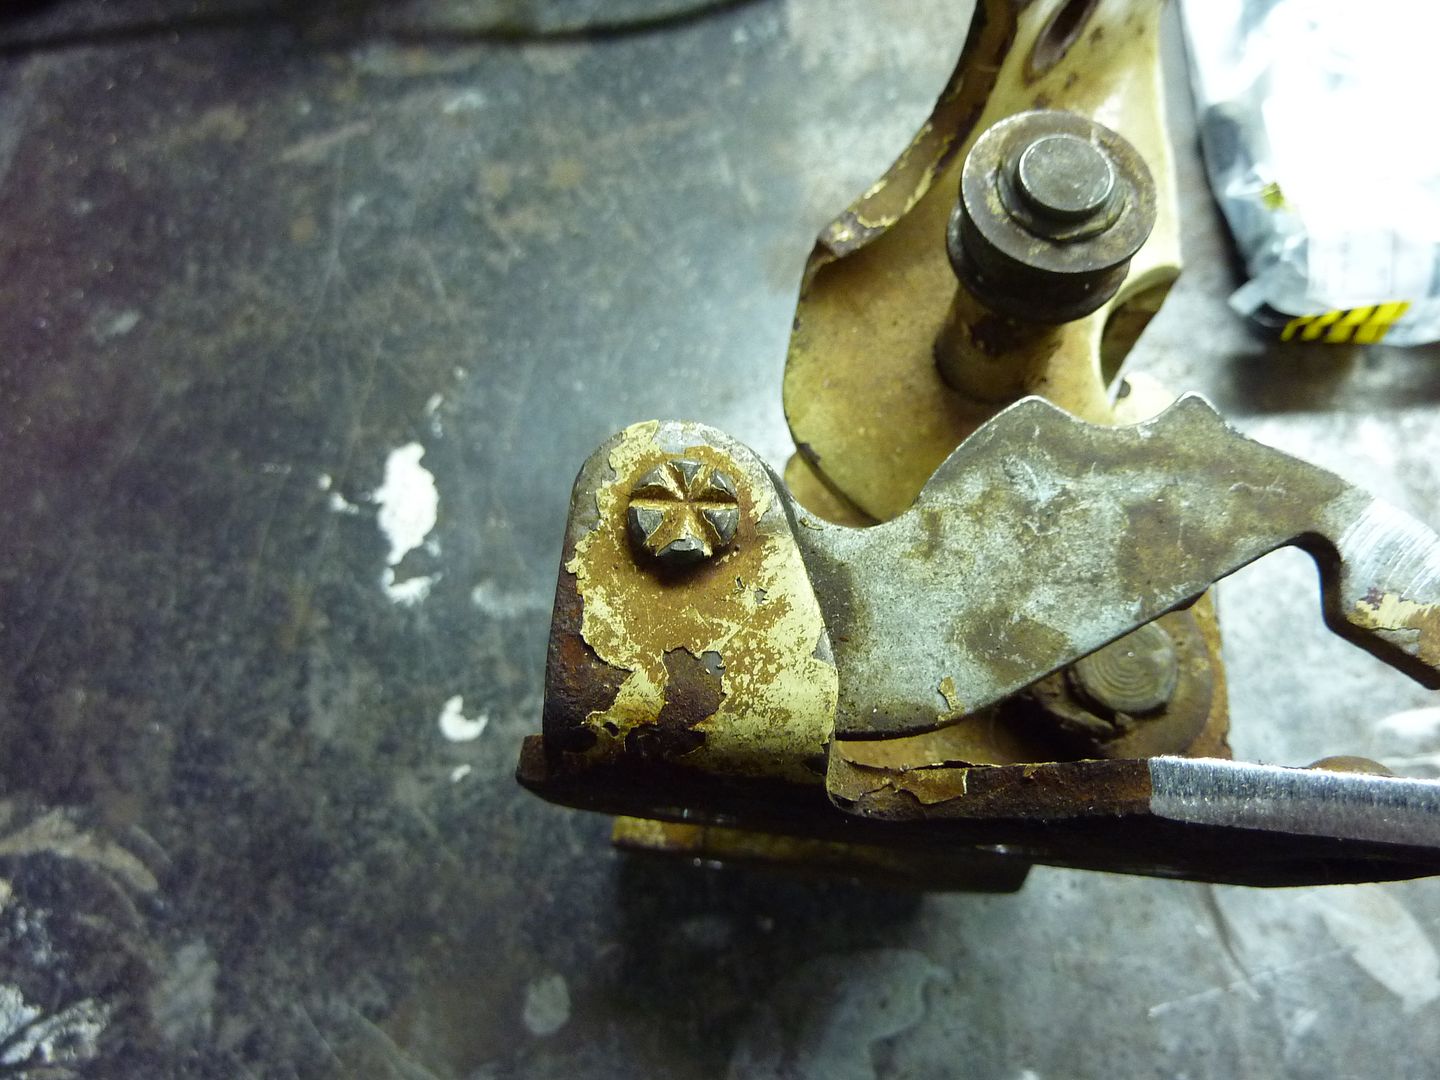
Once all the ends were ground off, I used a hammer to pound the pins out. They cam out pretty easy. Once all the pins were out, the new ones went in. It's pretty straight forward though.
02-14-2012, 10:25 PM
#147
On The Tree
Thread Starter
iTrader: (4)
Join Date: Mar 2009
Location: British Columbia, Canada
Posts: 132
Likes: 0
Received 0 Likes
on
0 Posts
Before rebuild
Rebuilt
Decided to replace the spring arms. Since I don't have the tool GM used to split the end of the pin, I decided to weld it in place
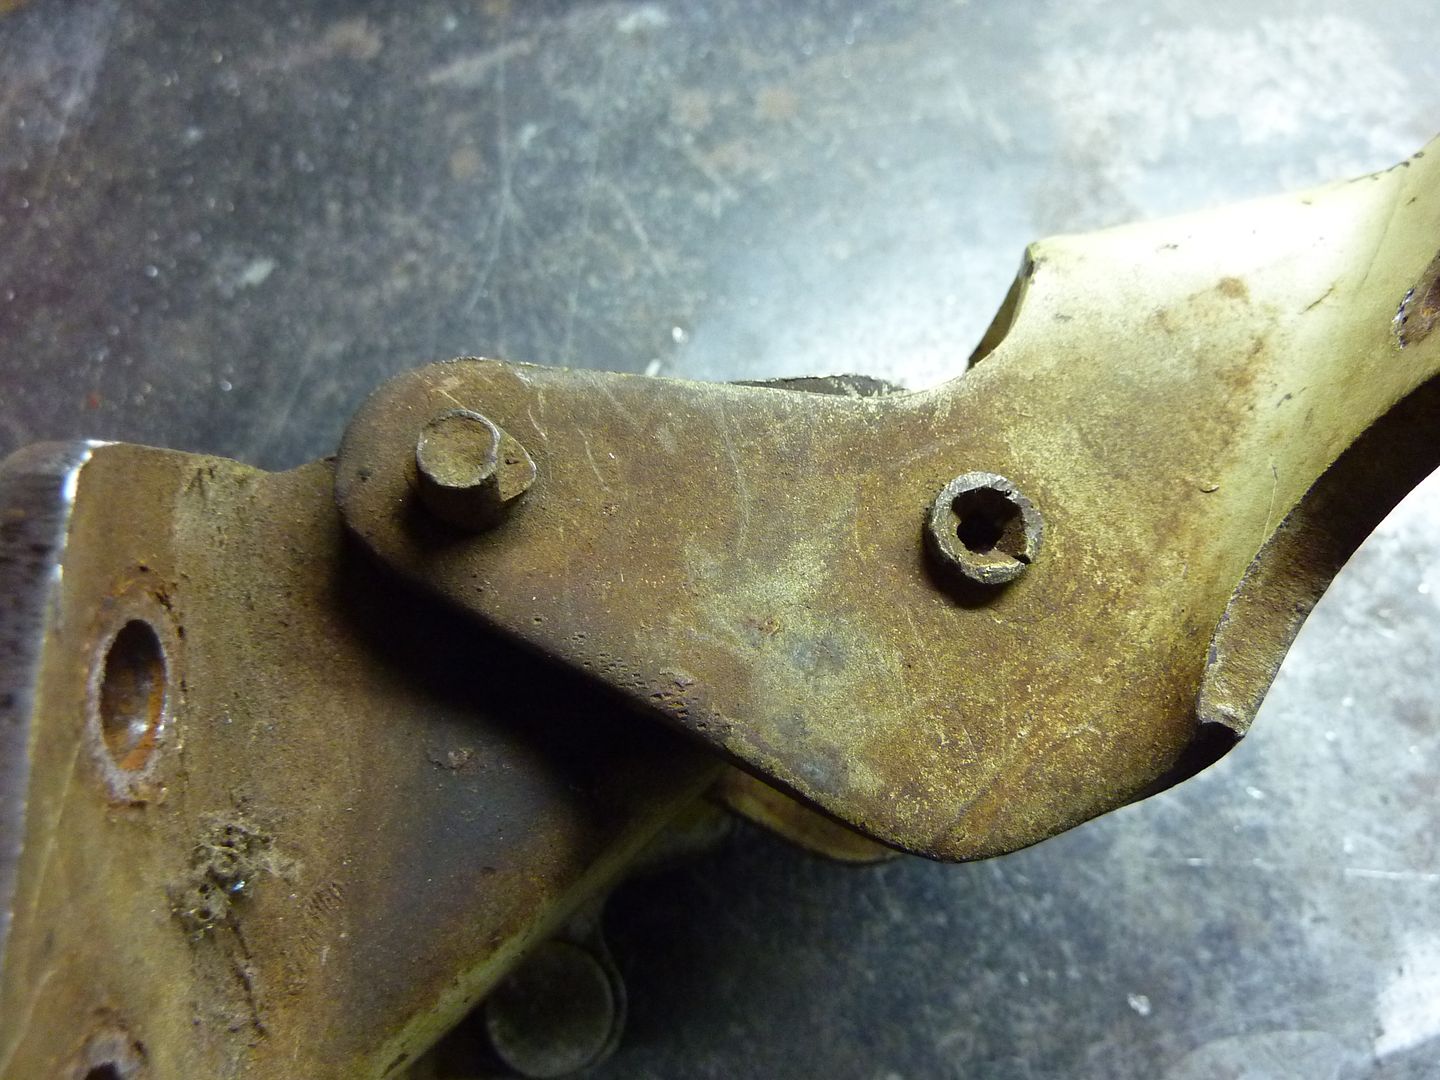
The passenger side hinge is pretty basic. You just replace one pin. In the picture that has all the parts, you'll see that the pins have brass bushes on them. The one with the same size bushings is for the passenger side. The one with the different size bushings is the driver's side.
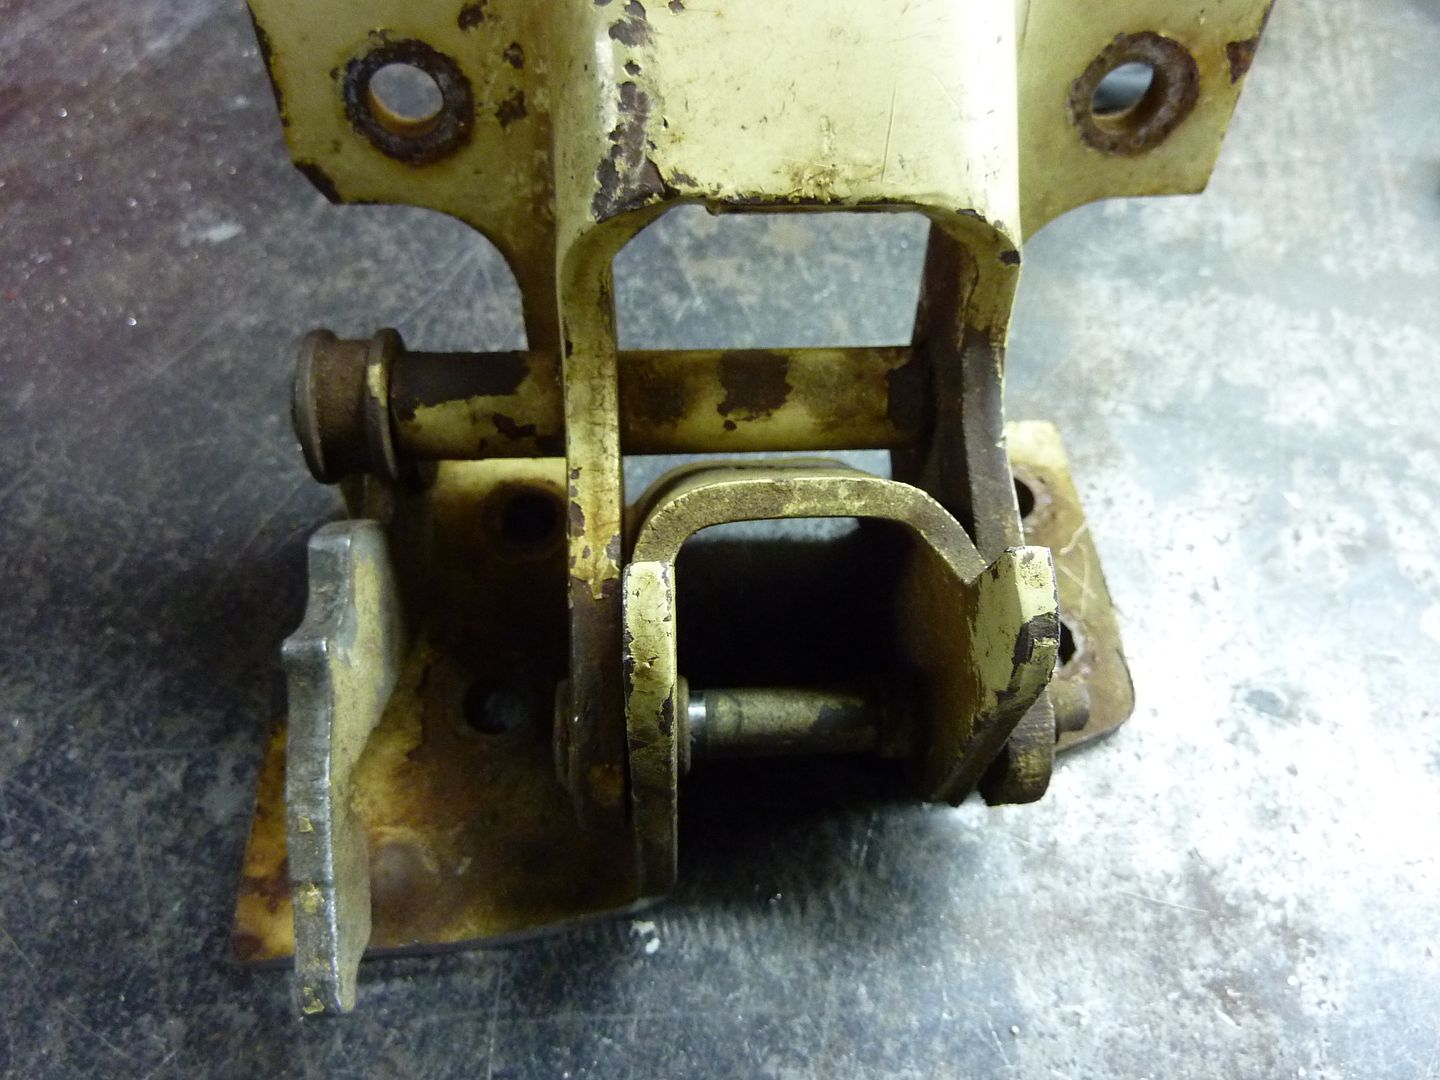
The rebuild of all the hinges went really smooth expect for the driver's side with the spring. It turned out to be quite warn out. I didn't want to get a new one though, so I decided to fix what I had. First I had to run it through the cabinet blaster to get the rust off it. I then noticed that the area around the bushings were quite warn.
One of the holes wasn't that bad so I was able to put the bushing in and run the pin though. This allowed me to figure out where the bushing was supposed to sit on the side that was really warn out. You can see the area around the bushing where it's warn.
Broke out the welder and built it up
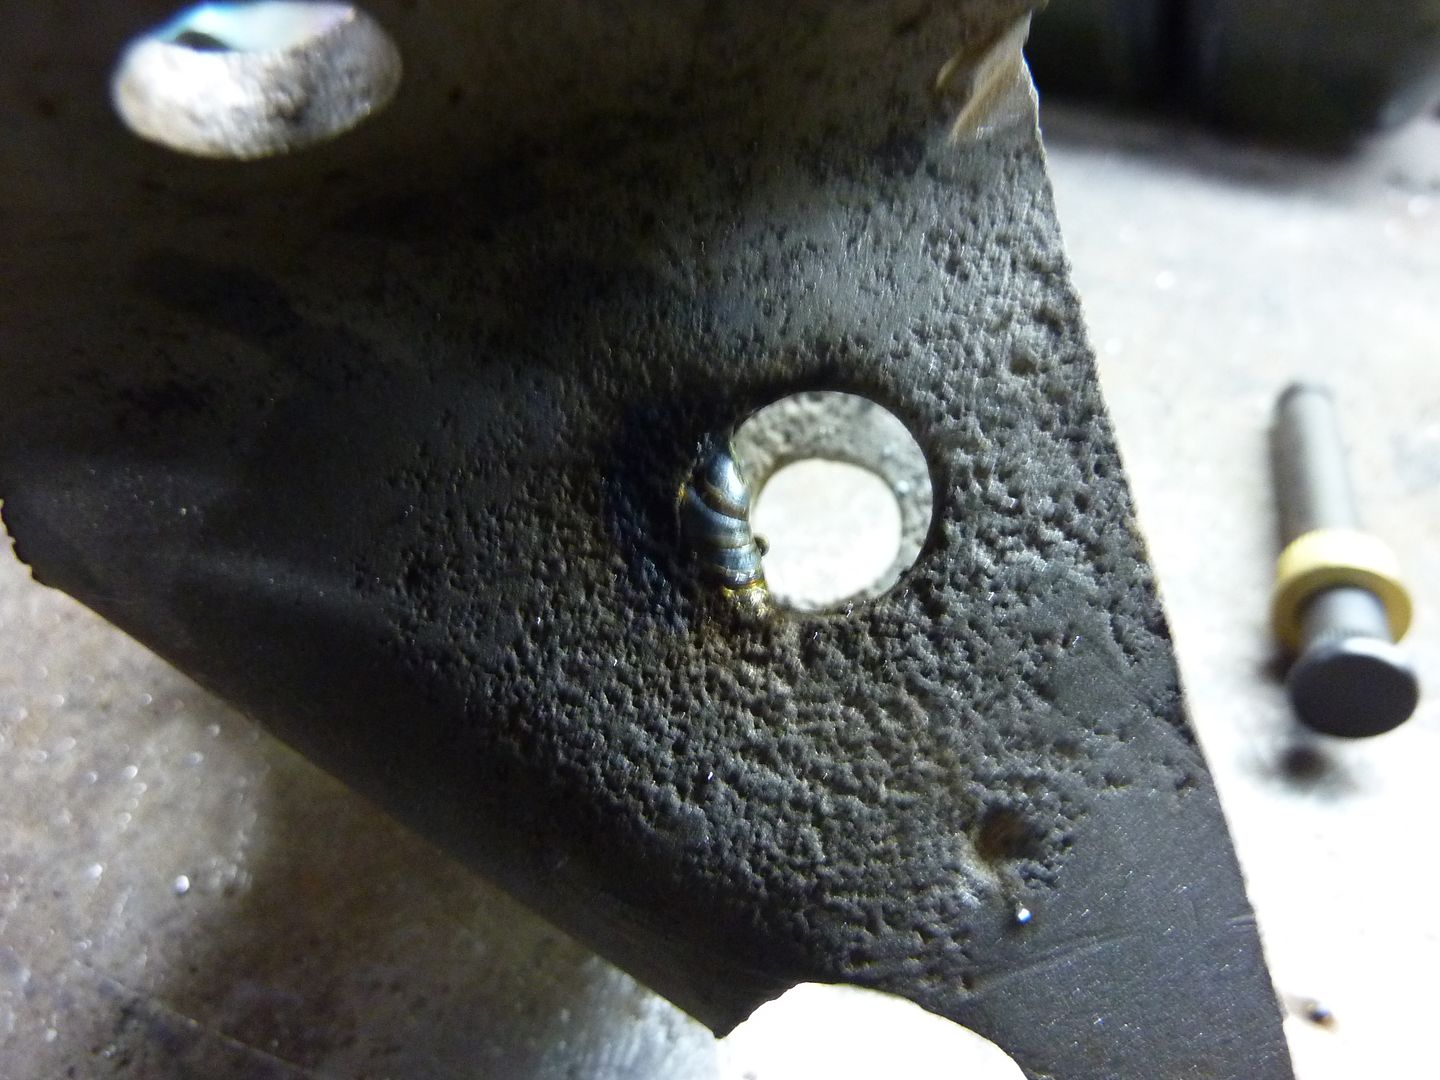
After some cleaning up
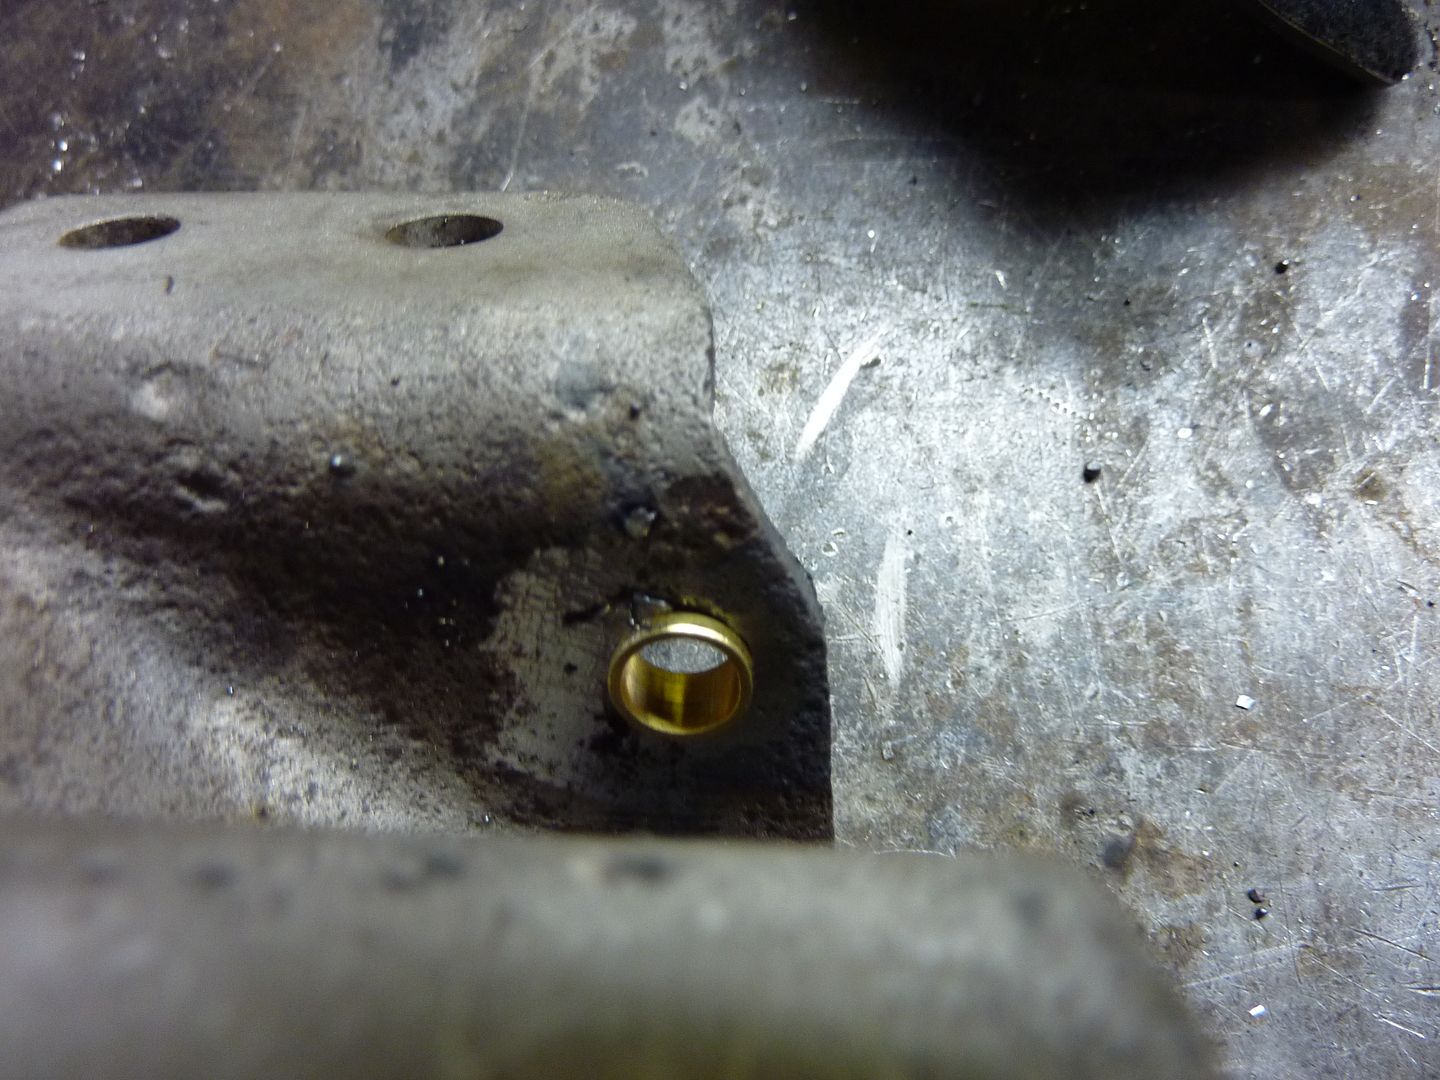
The pin fit nicely. Hinge back together
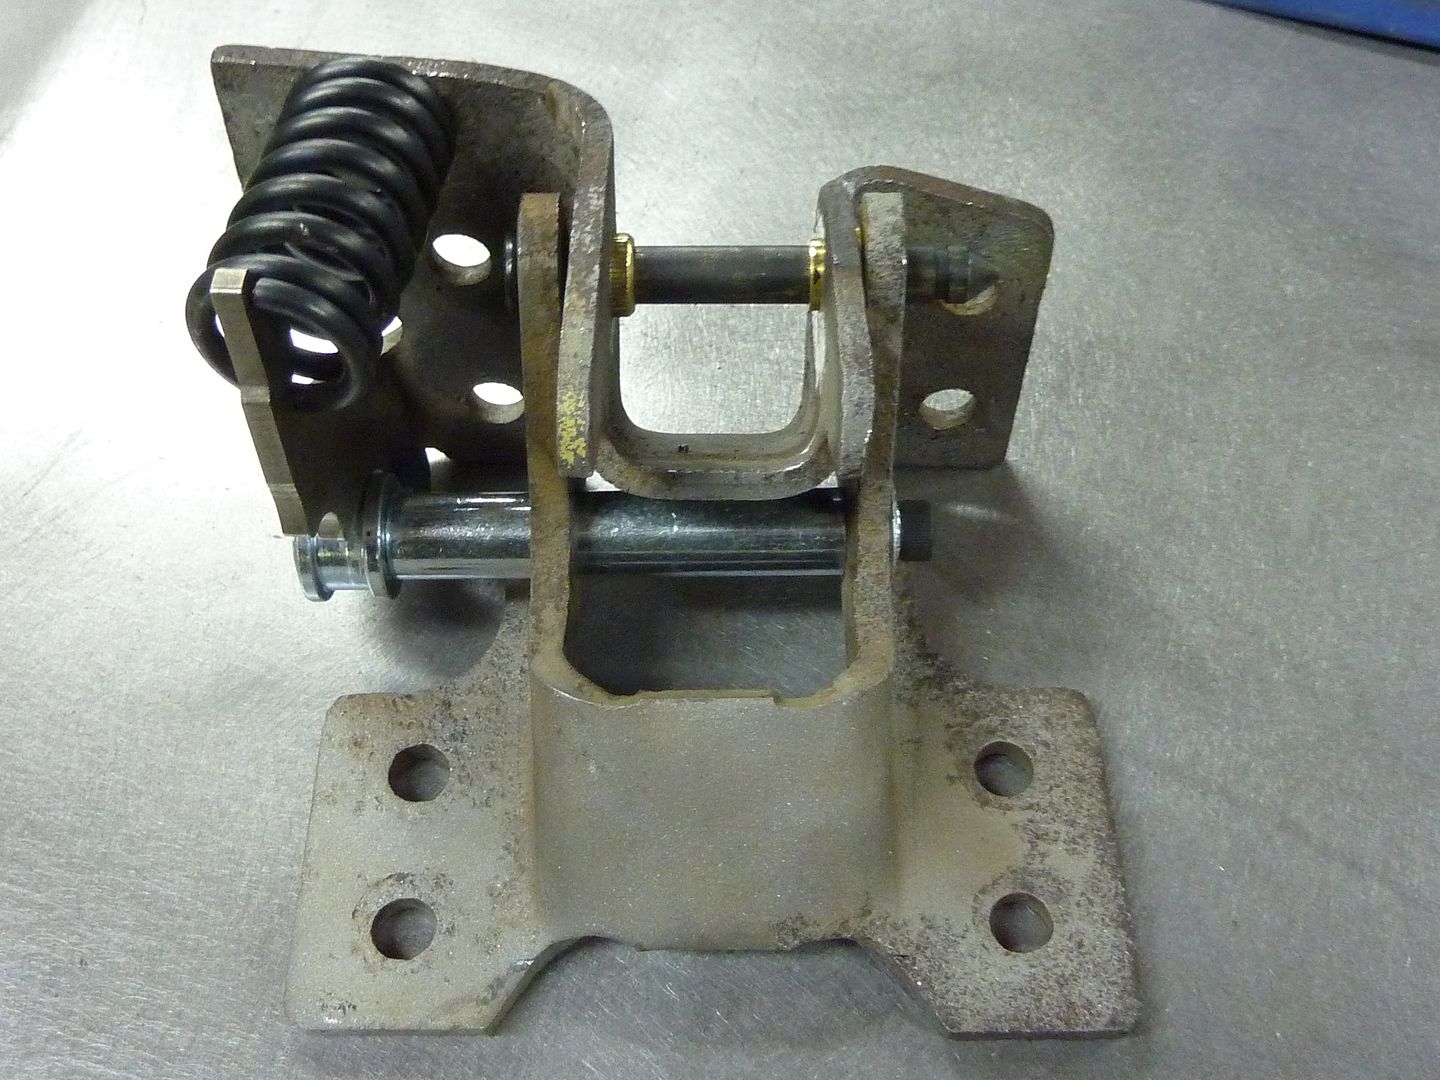
And it works
Called it a night there.
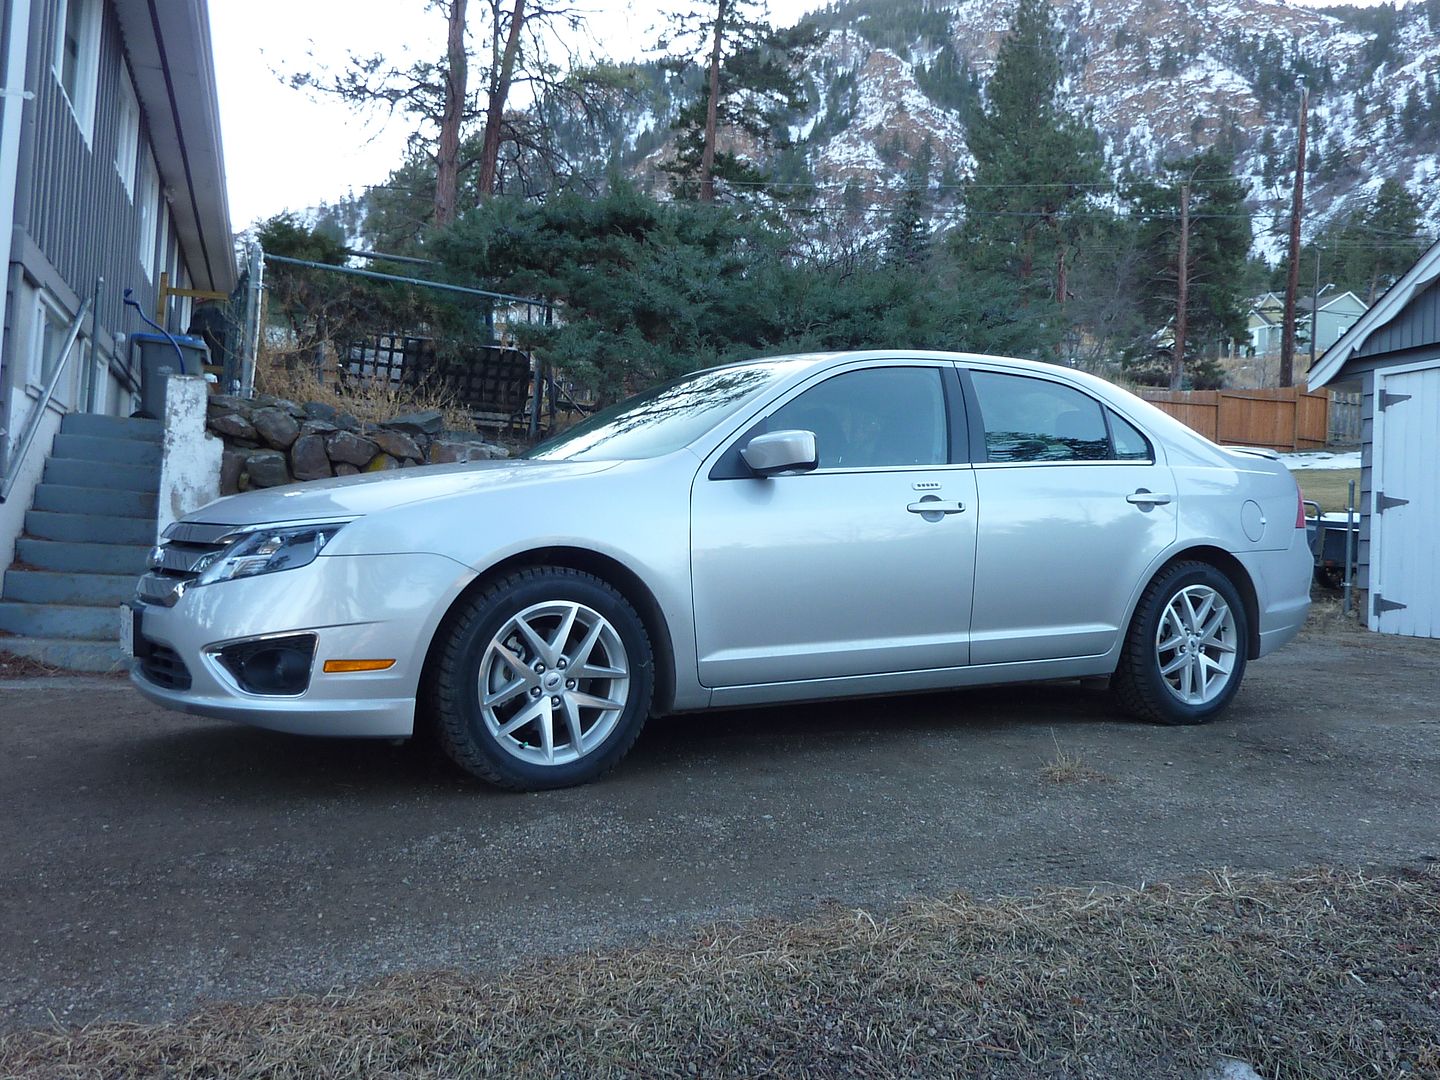
Also made a new purchase recently. I had a 2007 Nissan Murano that I was selling privately. I got a call from a dealership claiming to have a potential buyer and wanted me to bring it in so they could see it. I thought "what the hell, I'll humour them and see what they have to say". Well they got the last laugh. I left that day with a 2011 Ford Fusion. I know I know....it's a Ford. But it's get mid 30's for fuel economy. Can't argue with that. Plus full leather package, awesome stereo, sunroof, etc. It's a really nice car.

Rebuilt
Decided to replace the spring arms. Since I don't have the tool GM used to split the end of the pin, I decided to weld it in place
The passenger side hinge is pretty basic. You just replace one pin. In the picture that has all the parts, you'll see that the pins have brass bushes on them. The one with the same size bushings is for the passenger side. The one with the different size bushings is the driver's side.
The rebuild of all the hinges went really smooth expect for the driver's side with the spring. It turned out to be quite warn out. I didn't want to get a new one though, so I decided to fix what I had. First I had to run it through the cabinet blaster to get the rust off it. I then noticed that the area around the bushings were quite warn.
One of the holes wasn't that bad so I was able to put the bushing in and run the pin though. This allowed me to figure out where the bushing was supposed to sit on the side that was really warn out. You can see the area around the bushing where it's warn.
Broke out the welder and built it up
After some cleaning up
The pin fit nicely. Hinge back together
And it works
Called it a night there.
Also made a new purchase recently. I had a 2007 Nissan Murano that I was selling privately. I got a call from a dealership claiming to have a potential buyer and wanted me to bring it in so they could see it. I thought "what the hell, I'll humour them and see what they have to say". Well they got the last laugh. I left that day with a 2011 Ford Fusion. I know I know....it's a Ford. But it's get mid 30's for fuel economy. Can't argue with that. Plus full leather package, awesome stereo, sunroof, etc. It's a really nice car.
Last edited by scherp69; 02-18-2012 at 09:56 AM.
02-15-2012, 10:54 AM
#149
they also have oversized bushings so you can just drill the hinges. that's what I did on my DS door.
ps - I stick to fords when traveling for business... I'm a fan of the taurus and fusion. I mean, for a ho-hum commuter (that will still probably whup my GTO), that is. Though you should have stuck it out for the 2013s...
ps - I stick to fords when traveling for business... I'm a fan of the taurus and fusion. I mean, for a ho-hum commuter (that will still probably whup my GTO), that is. Though you should have stuck it out for the 2013s...
 03-02-2012, 06:13 PM
#151
On The Tree
Thread Starter
iTrader: (4)
Join Date: Mar 2009
Location: British Columbia, Canada
Posts: 132
Likes: 0
Received 0 Likes
on
0 Posts
Thanks guys.
Time for an update. Not a huge update, but it's one none the less....and as always lots of pics.
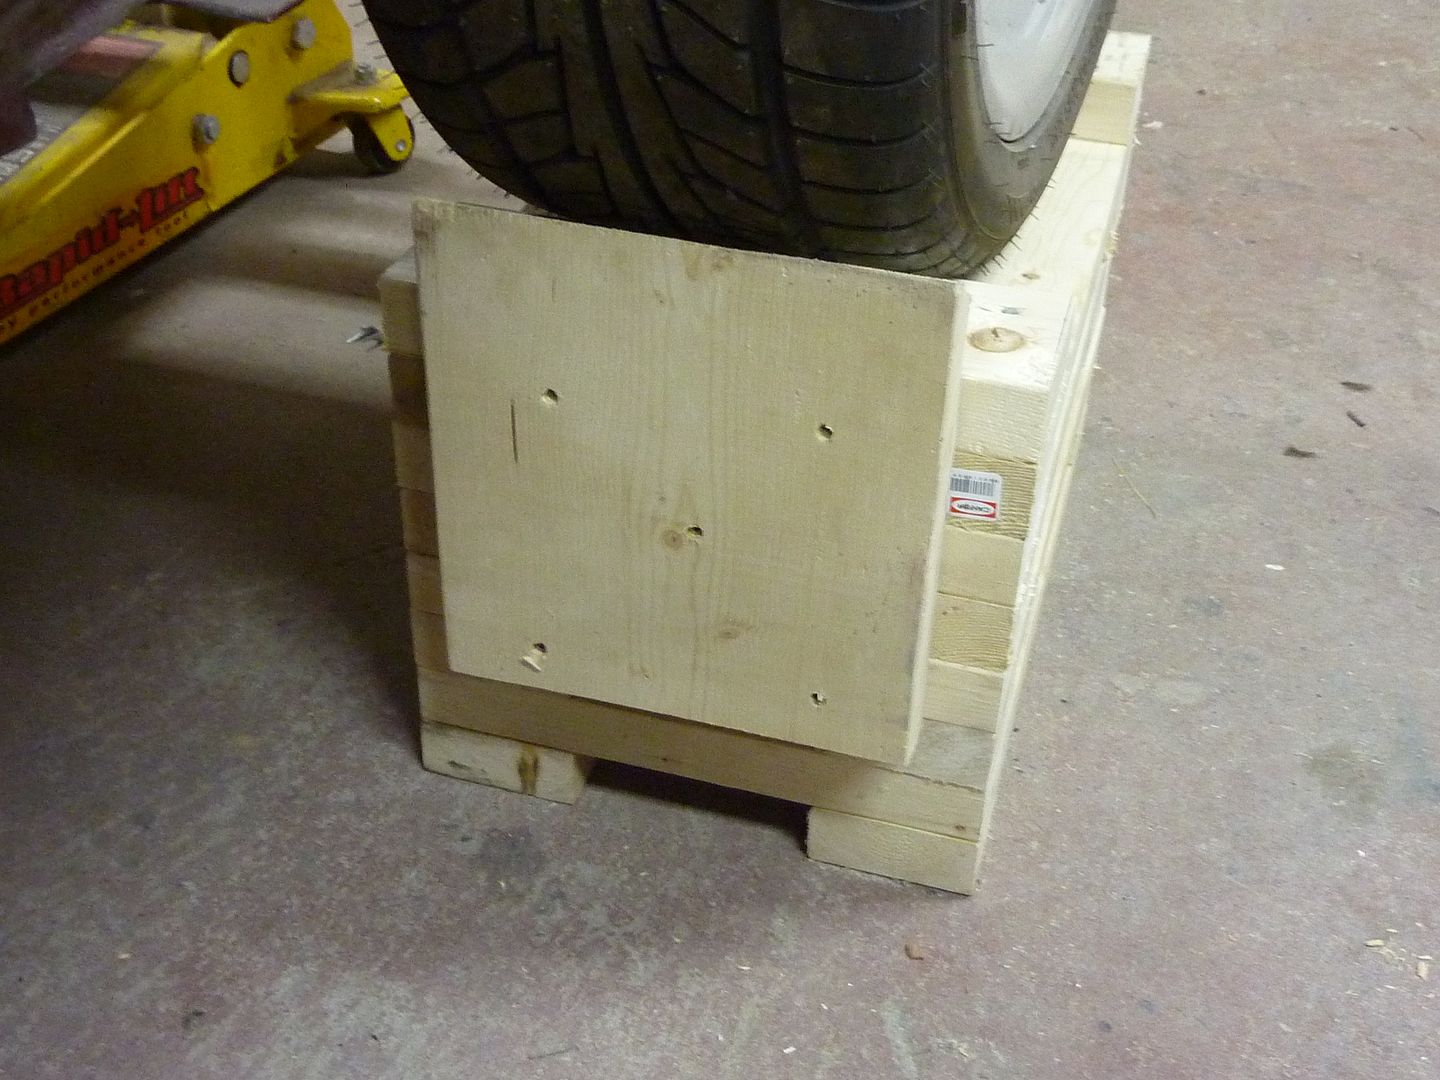
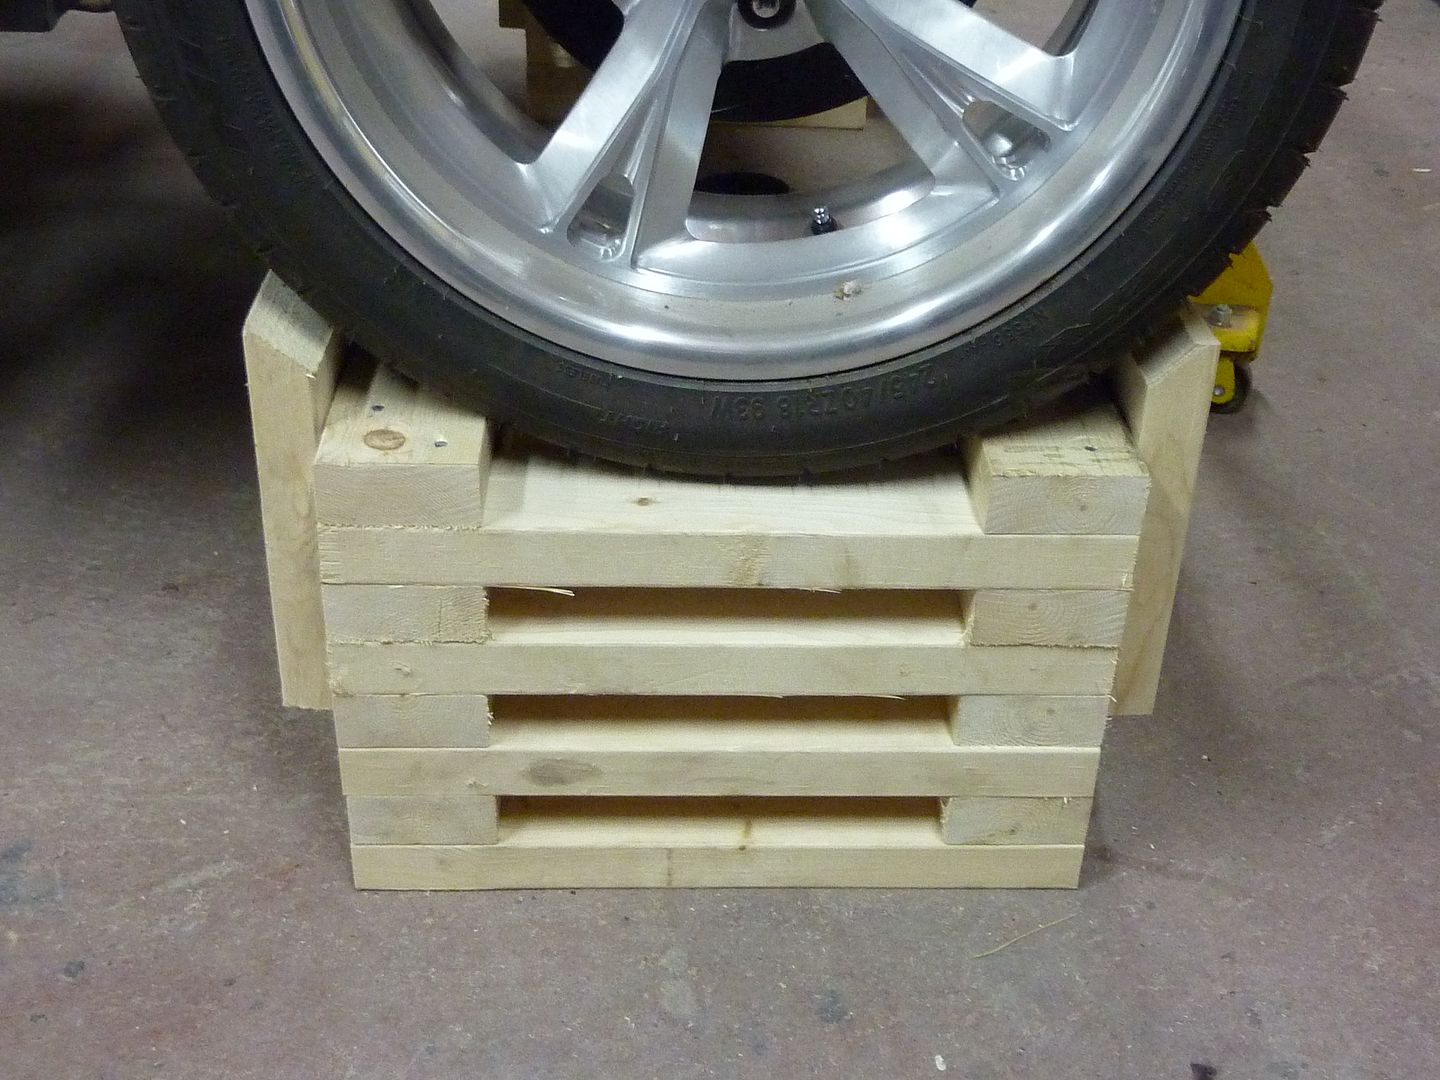
I've wanted to make some 2x4 wheel stands for a while, just needed to actually do it. So I did. The back ones are 18" x 16" and the front ones are 18" x 12". I wanted to add extra boards on the ends just in case the car ever rolls. Here's how they turned out.
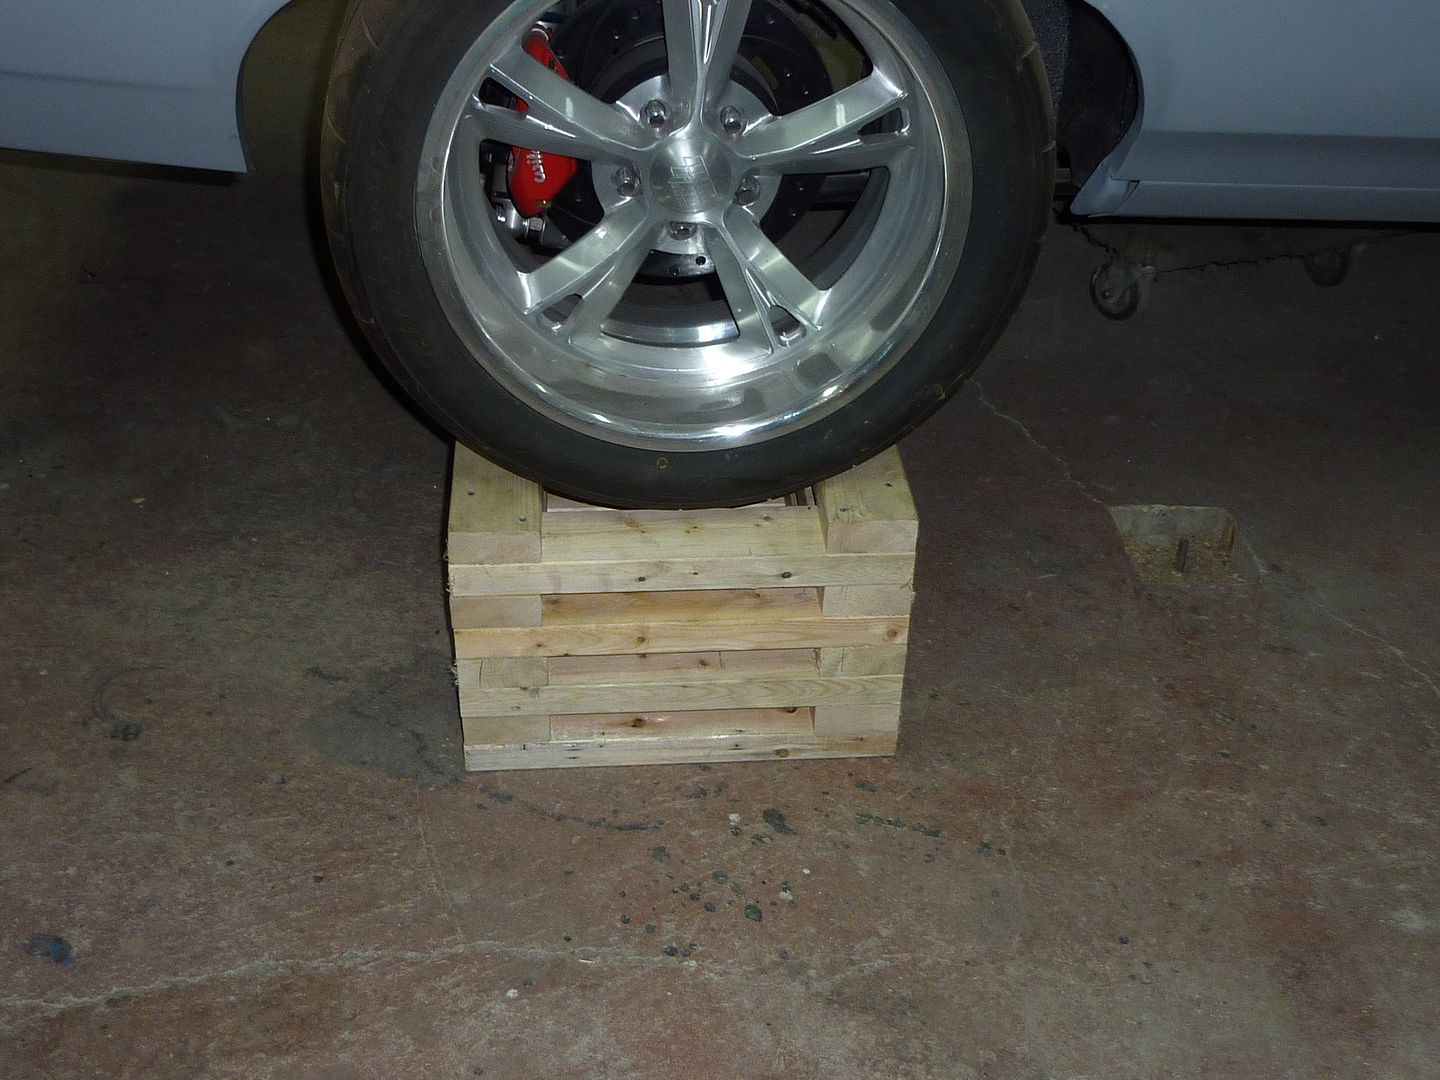
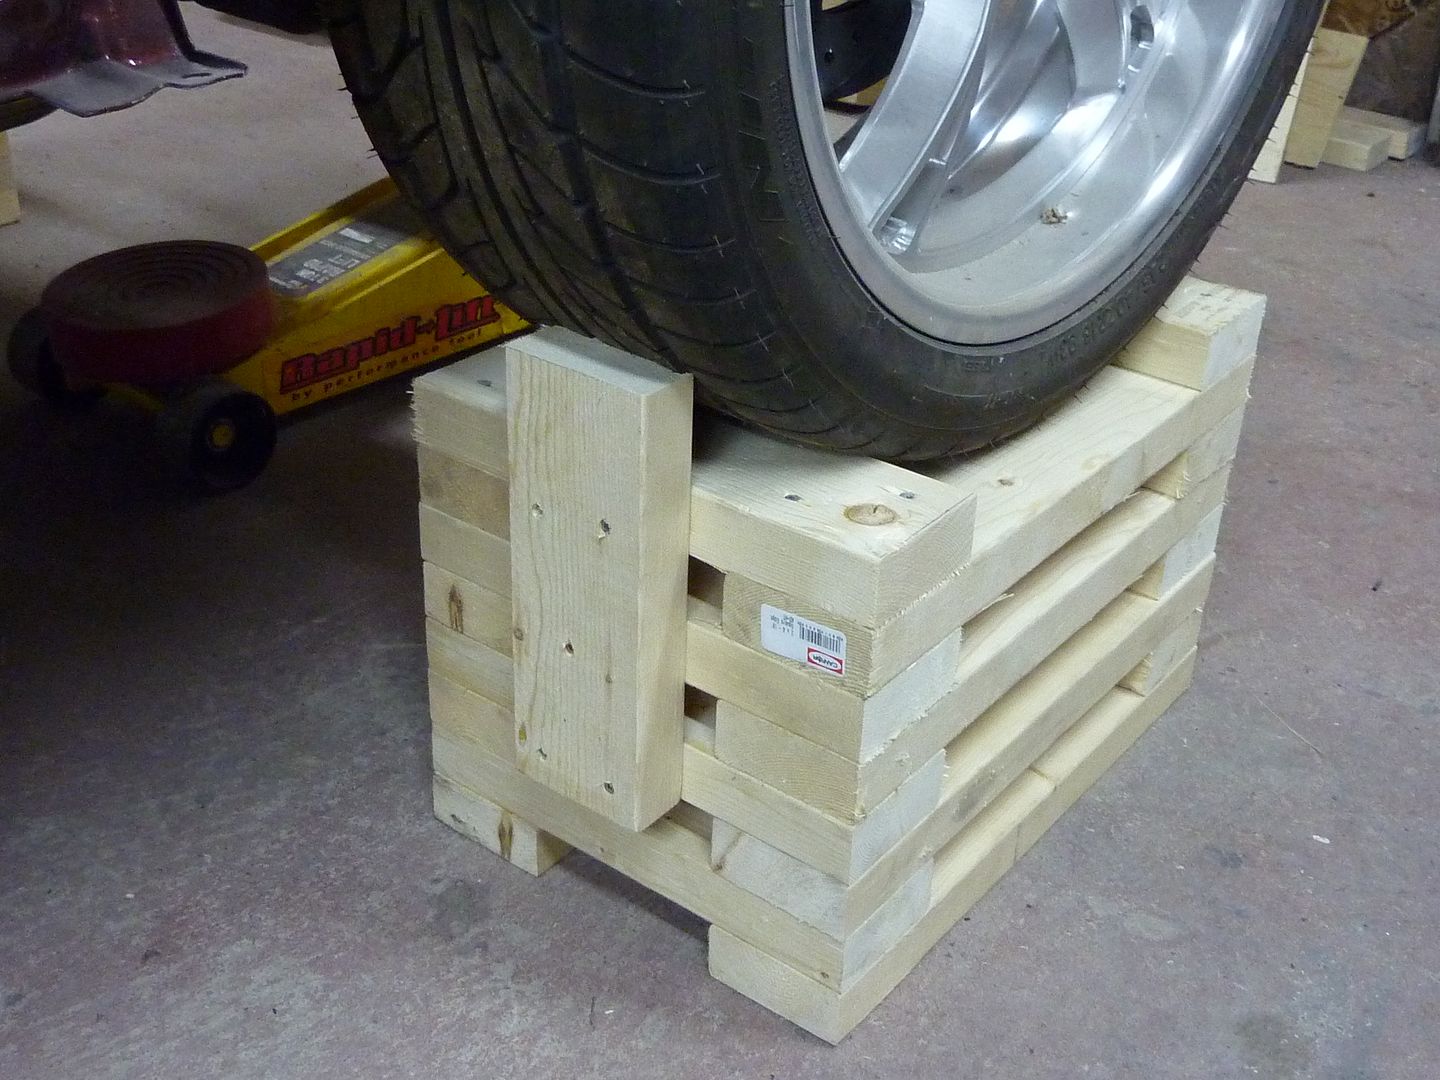
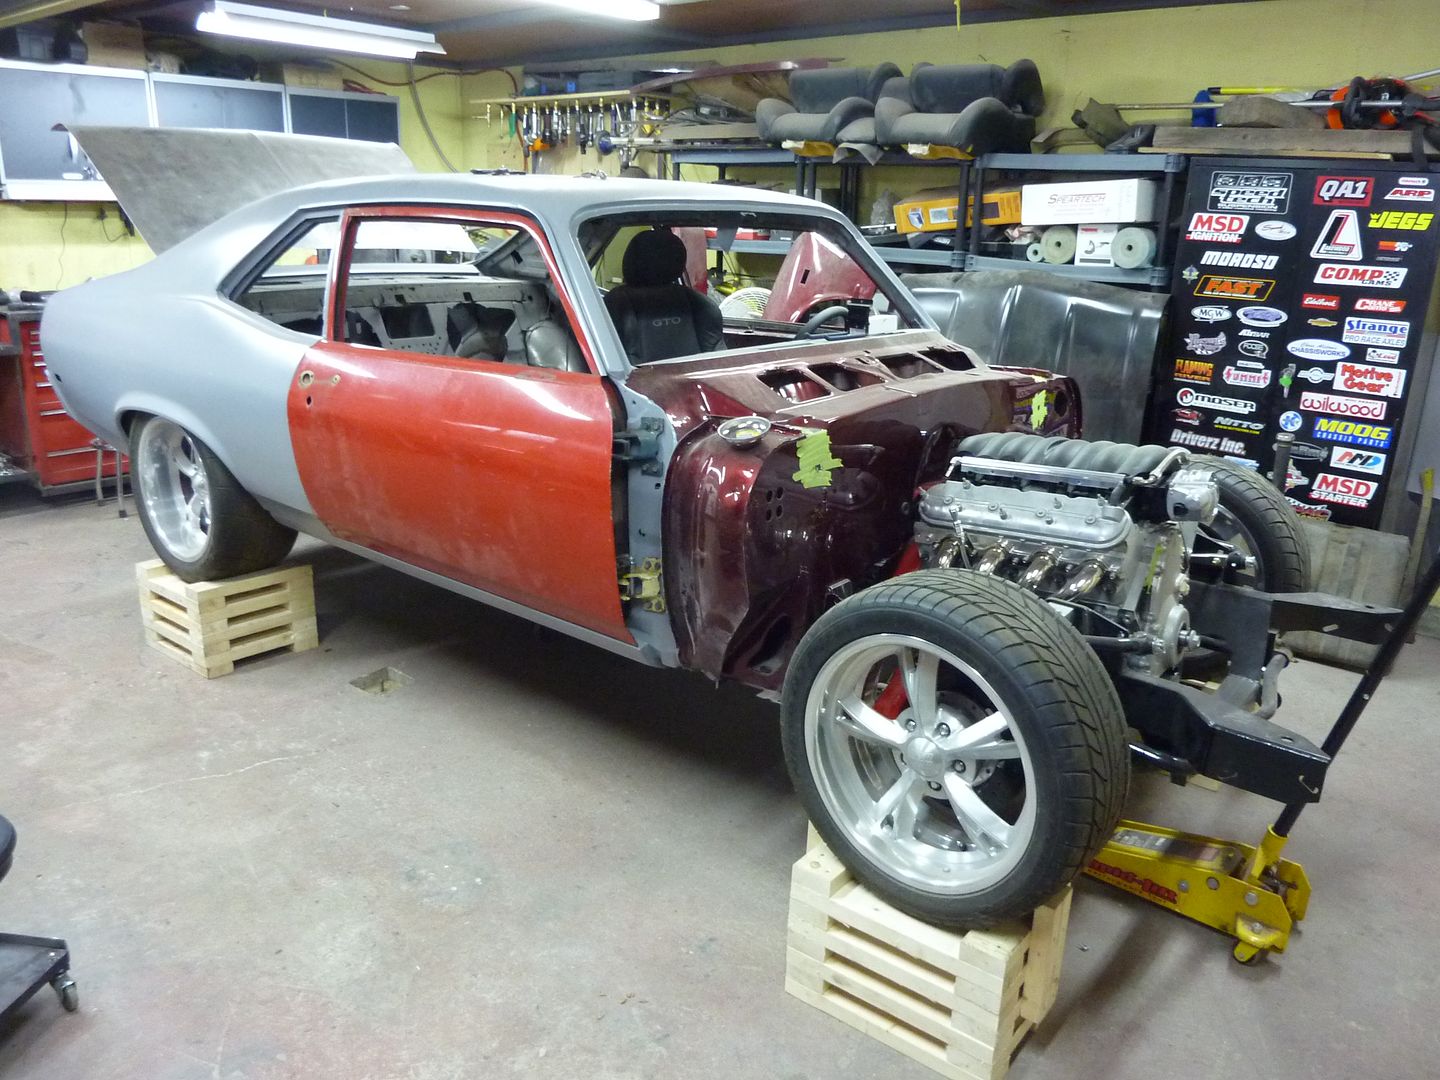
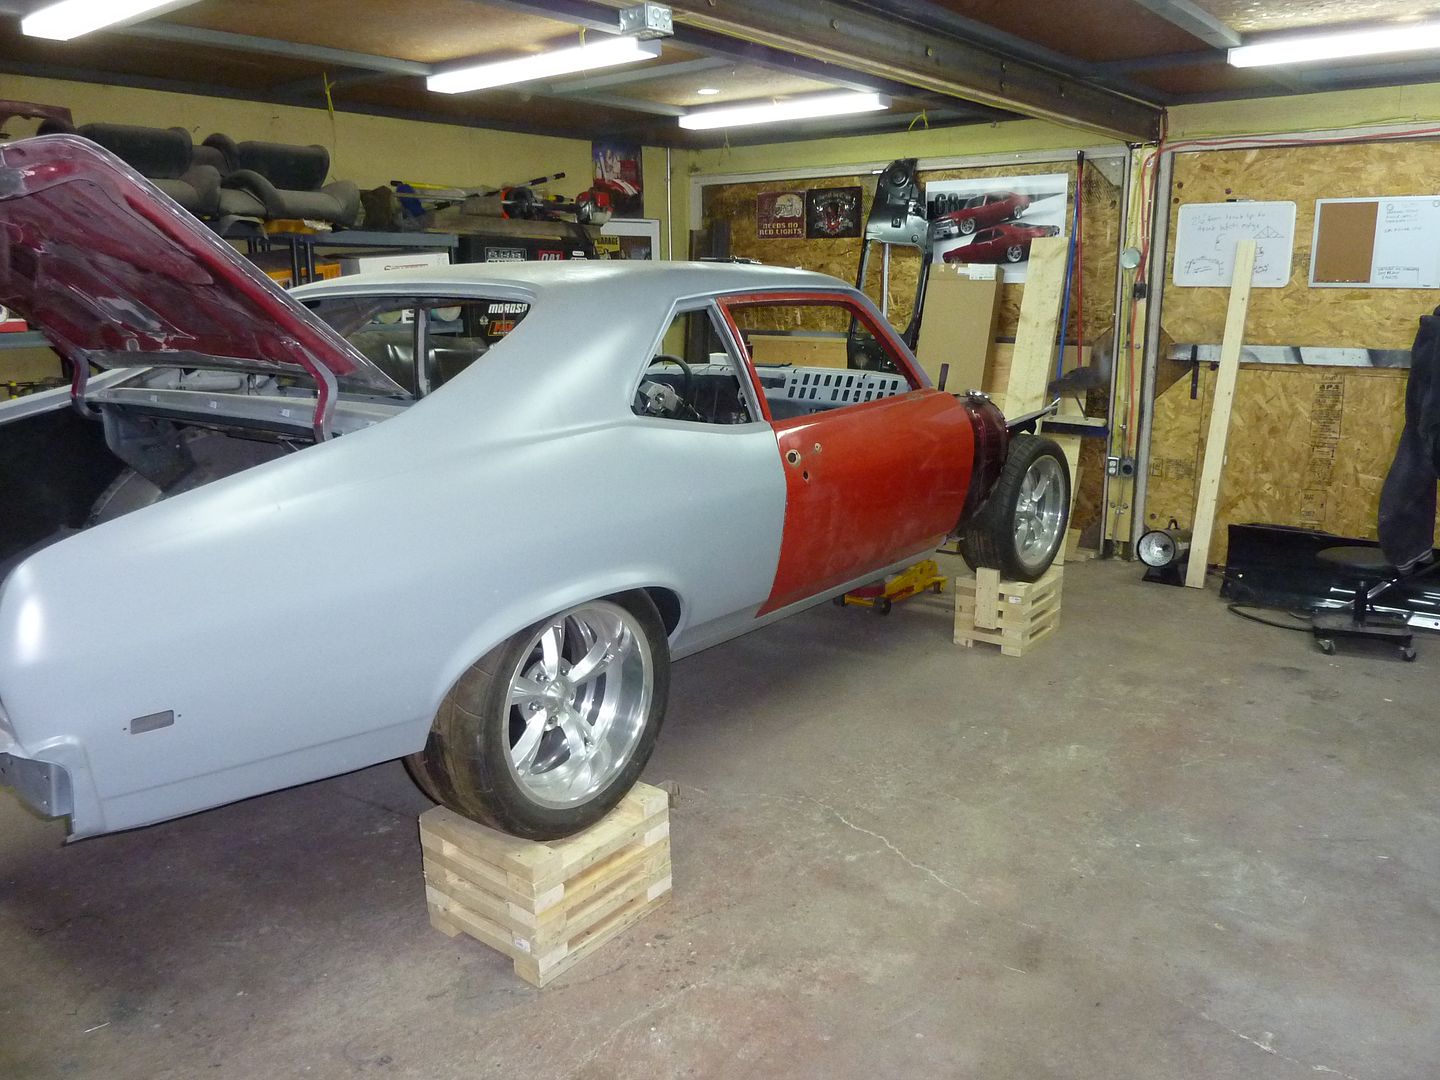
I originally put 2x4's on each end of the front stands but thought it would be better to use some 2x6. Looks better.
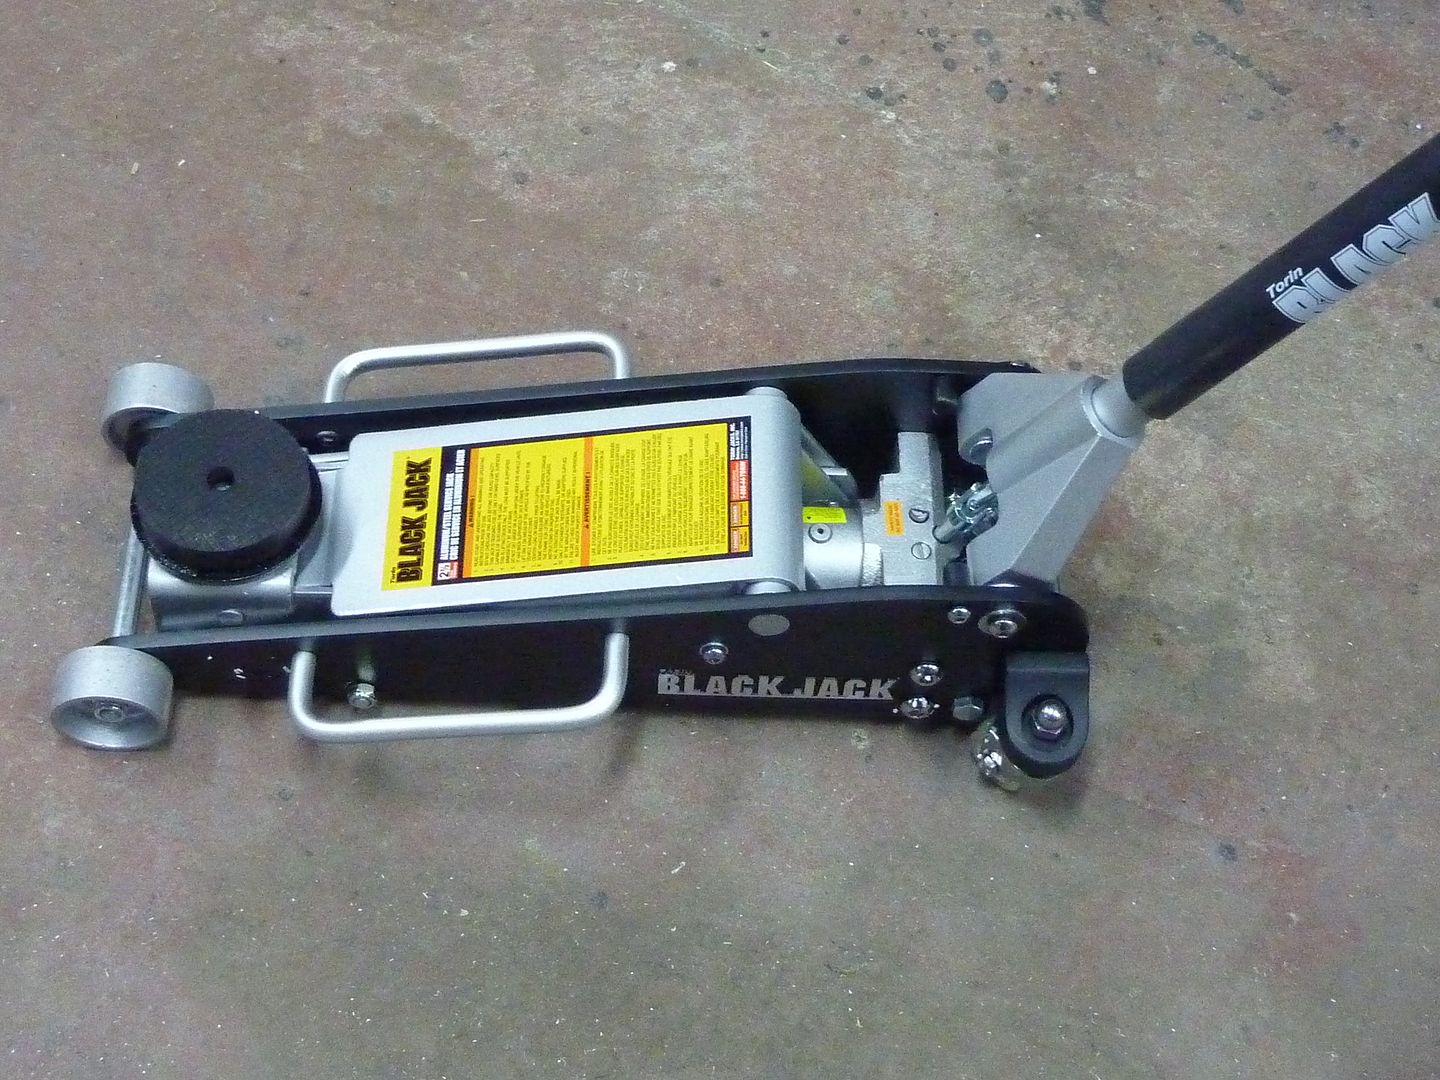
I also picked up a couple new tools. Aluminum floor jack from Costco. It was only $100 so we'll see how it holds up.
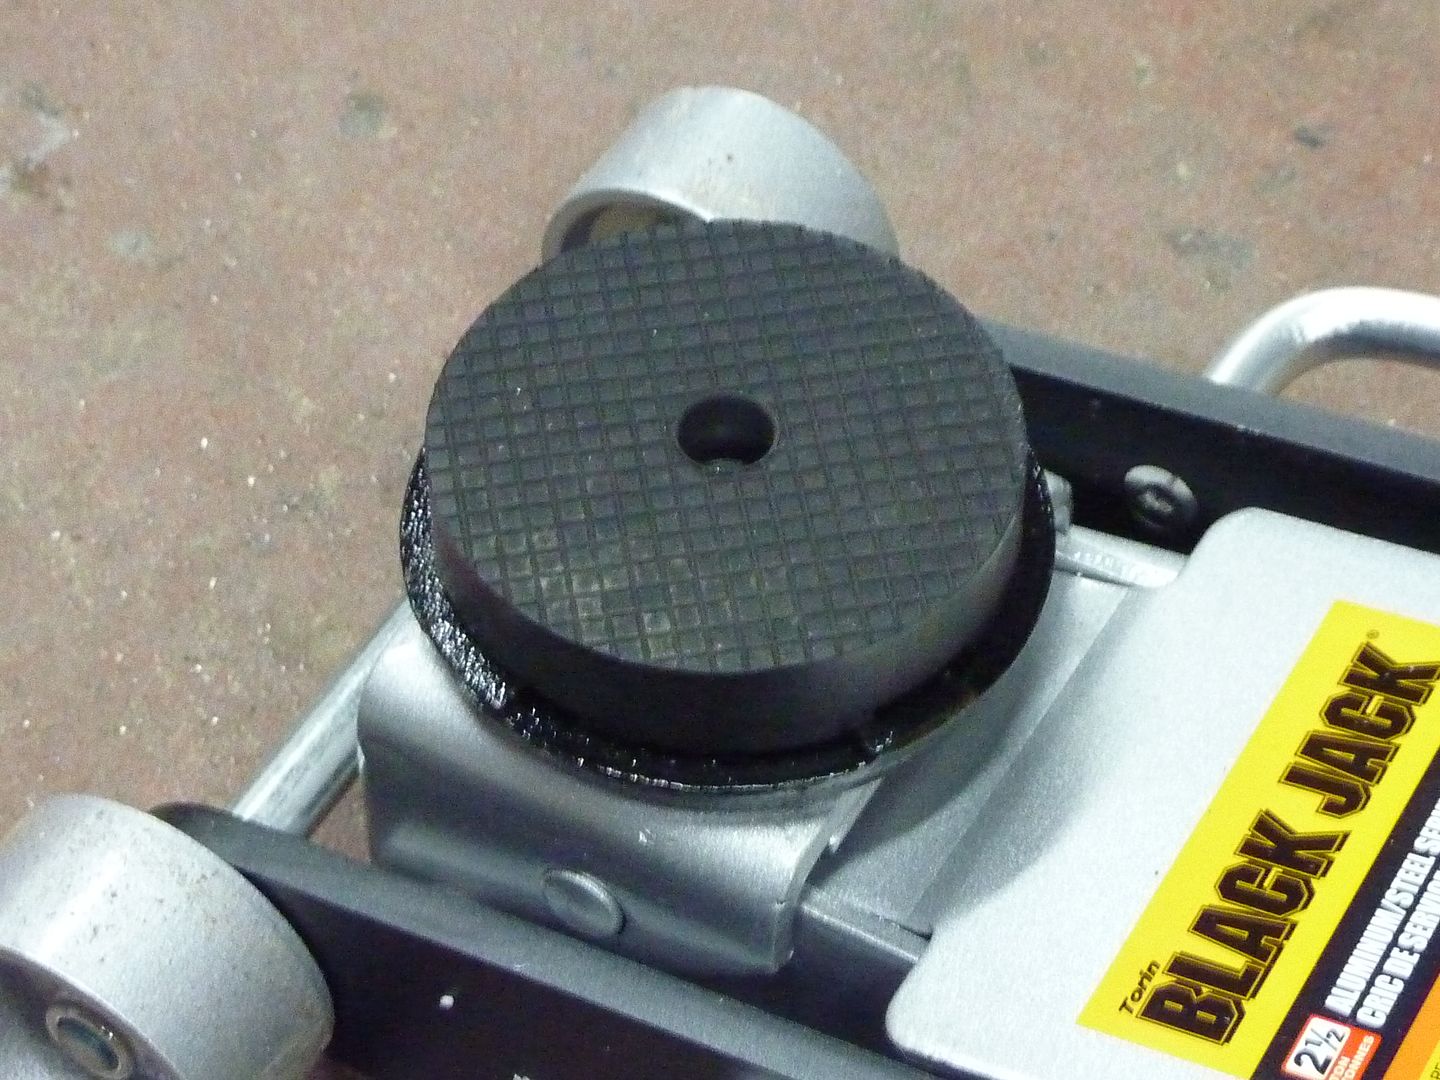
Also got some rubber pads for both floor jacks
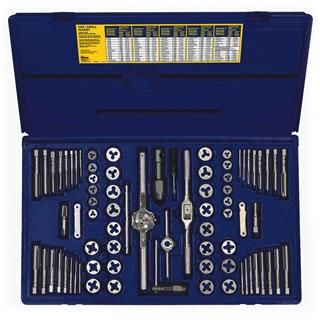
The other day I got a surprise in the mail. I got an envelope from the dealership where I bought my Fusion. I opened it up and to my shock, it was a cheque for $1000. I went online and realized that they had a $1000 cash back offer during the time period when I bought my car. So I thought I would treat myself. I've wanted to get a new tap and die kit for a while so I picked up the Irwin/Hanson 76 piece. I forgot to take a pic so this is taken from their website.
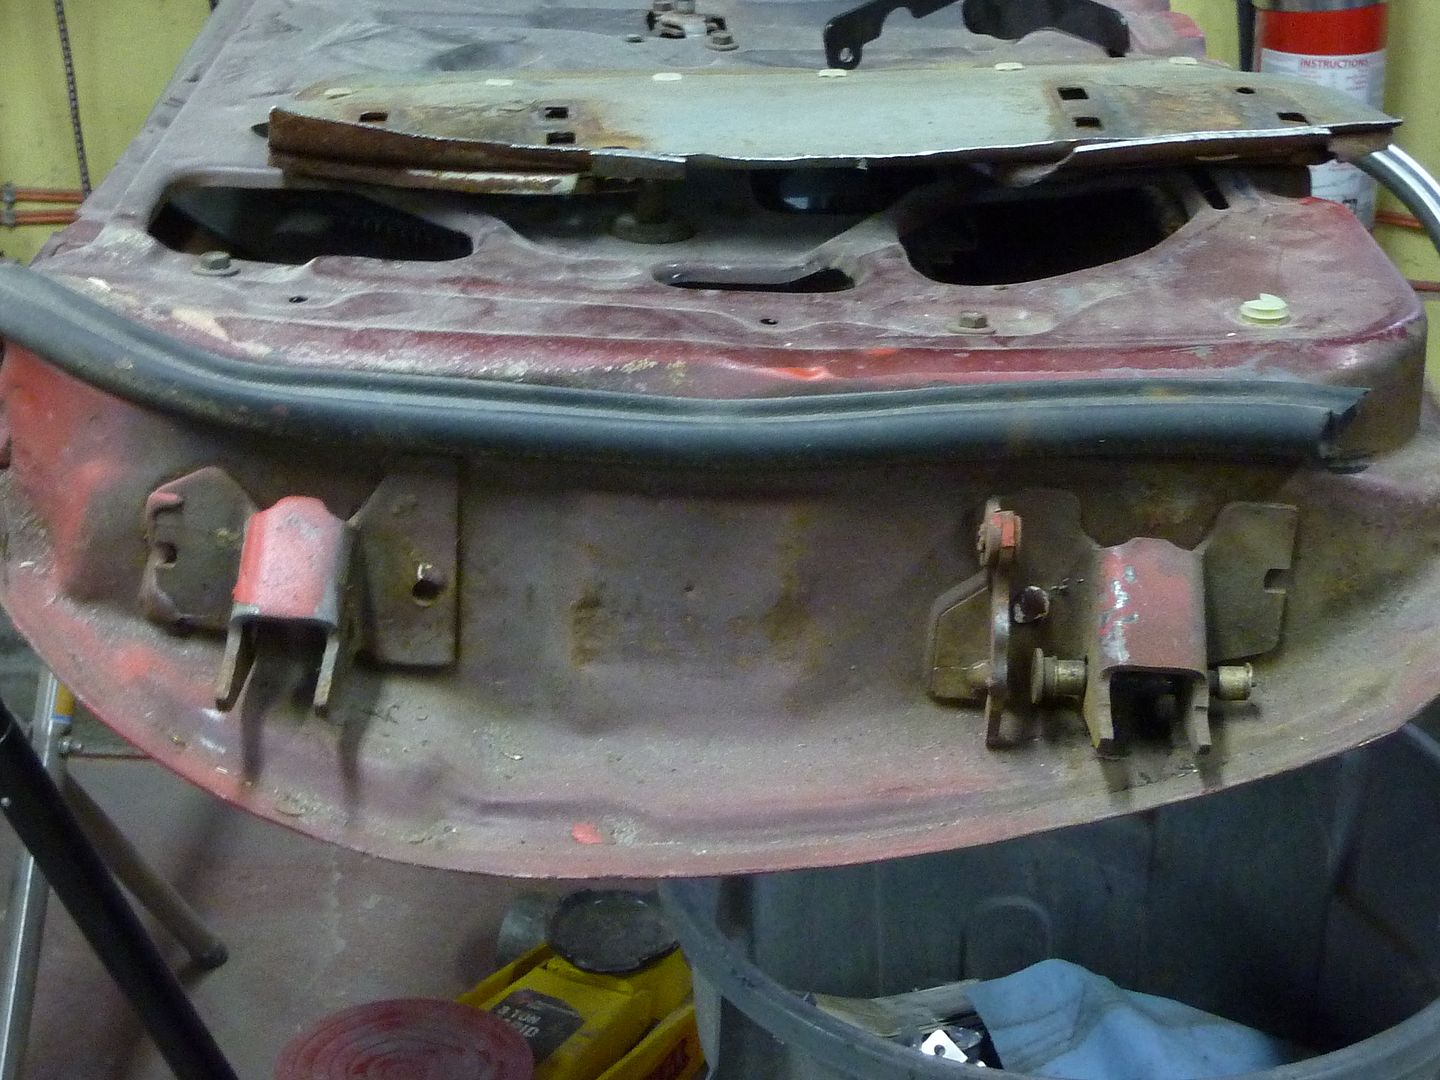
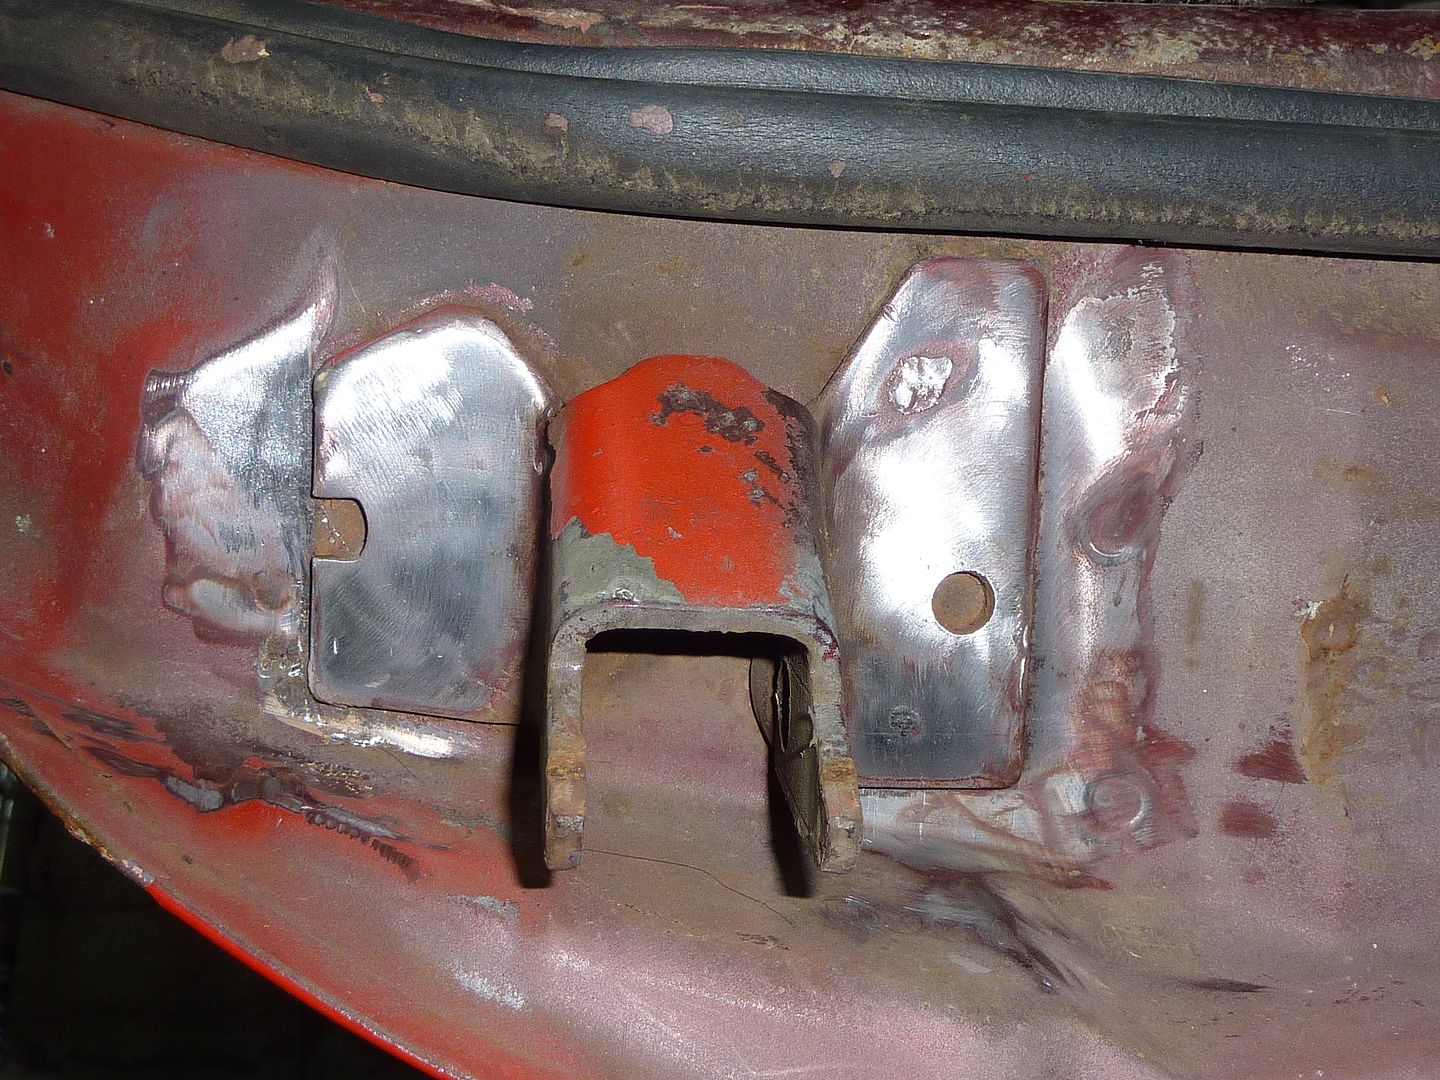
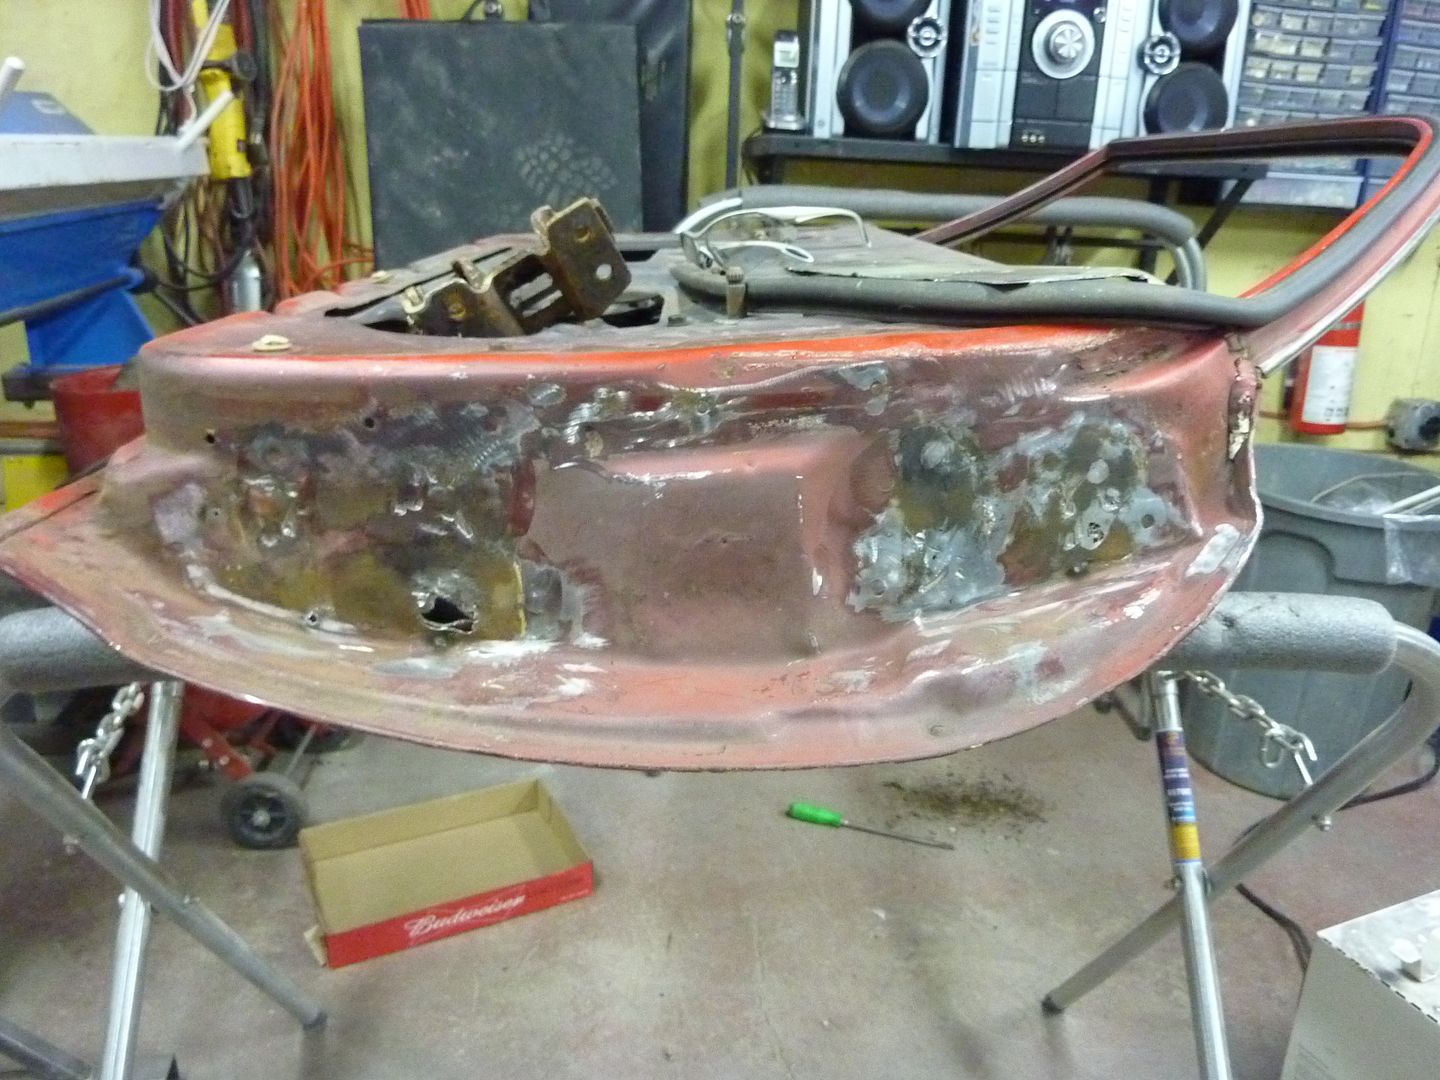
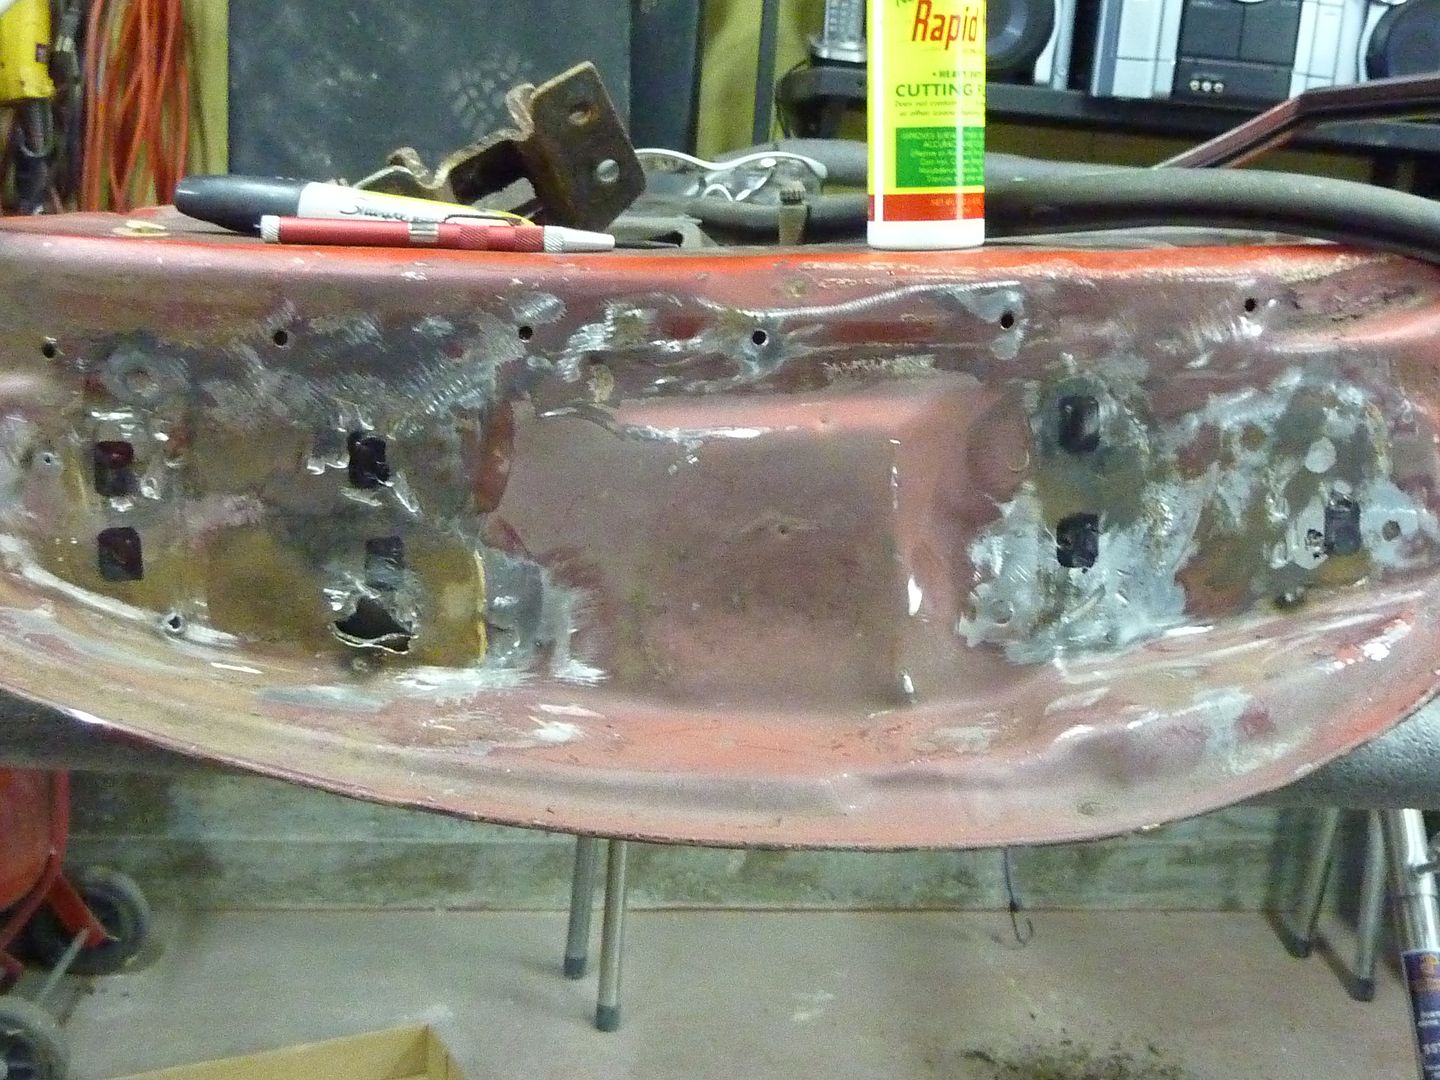
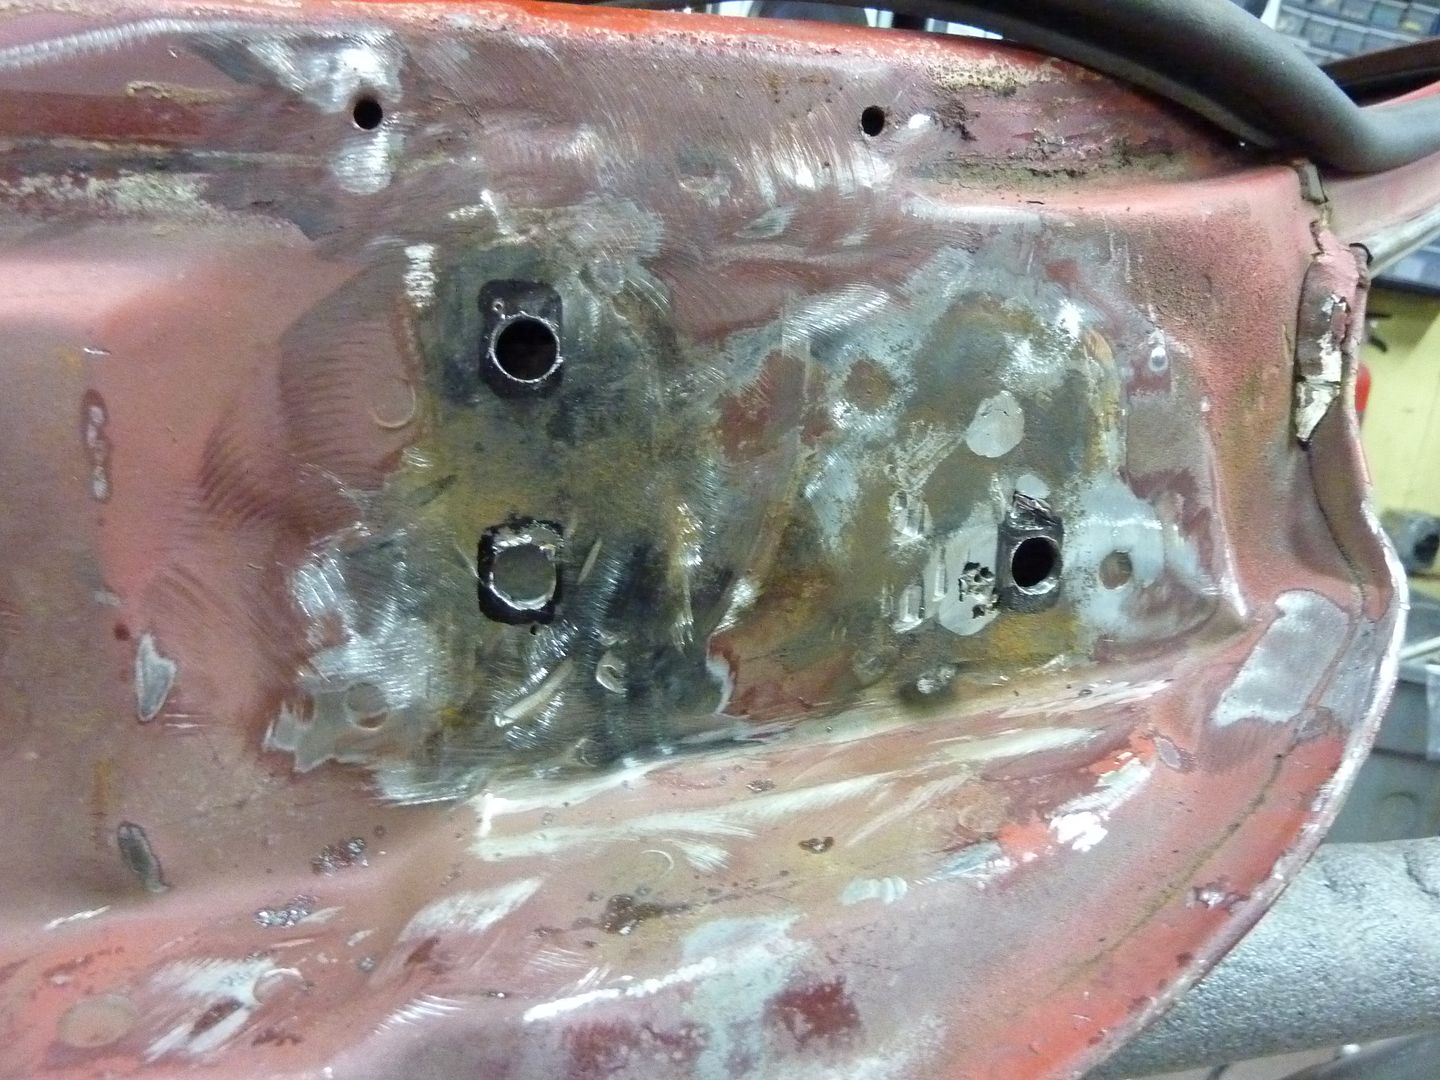
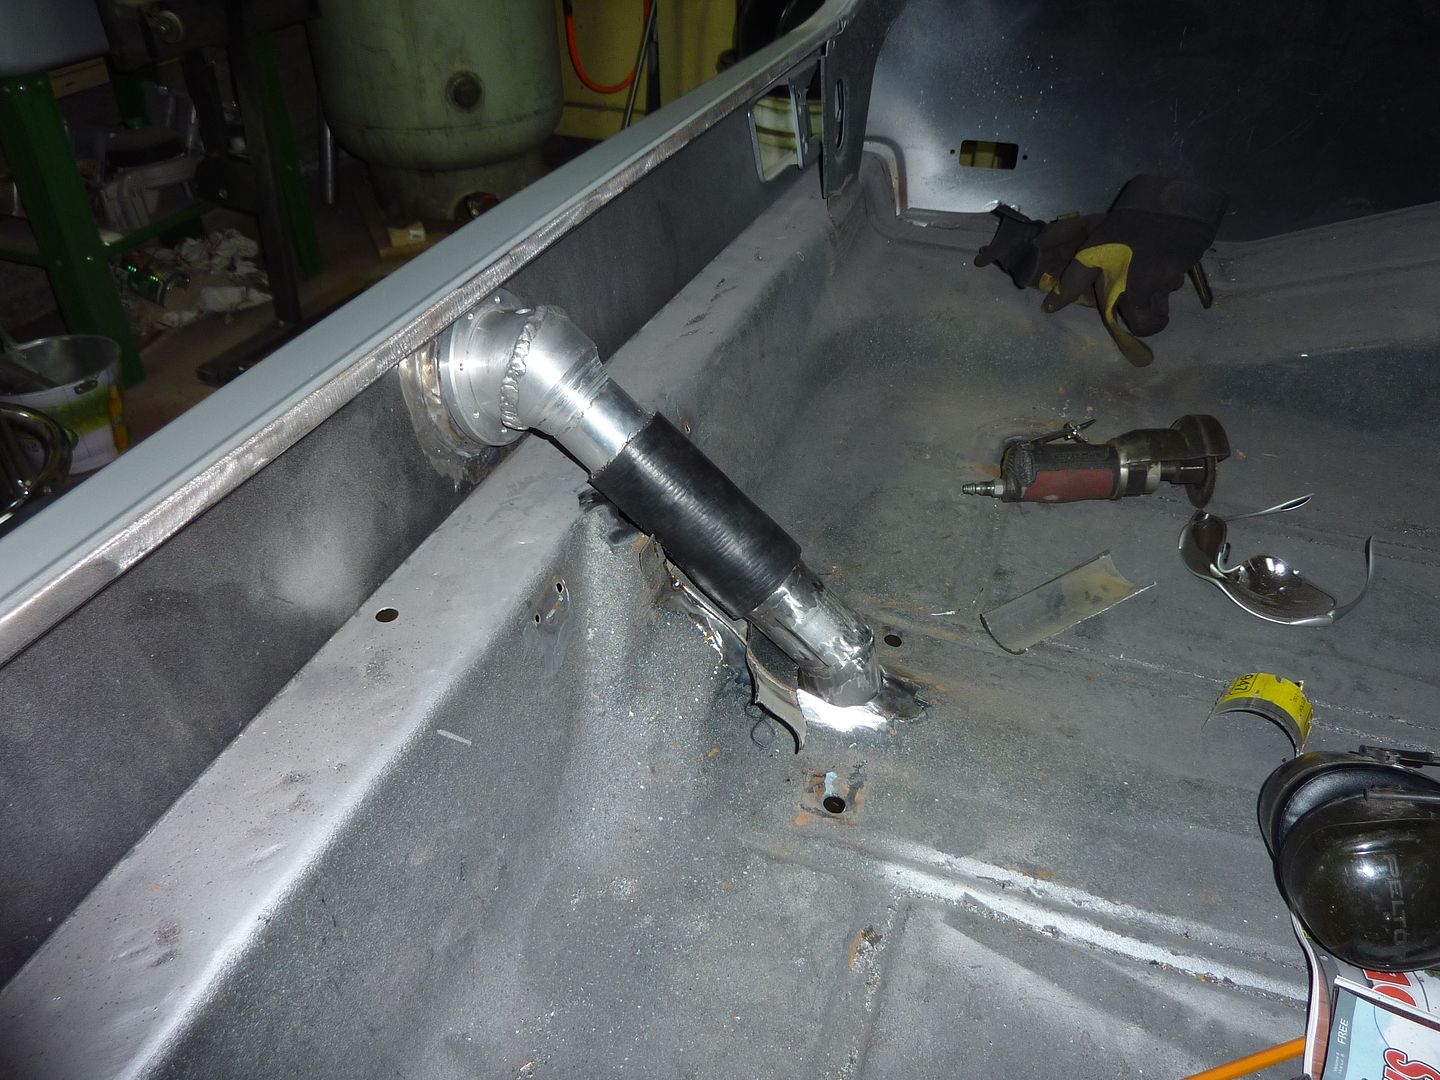
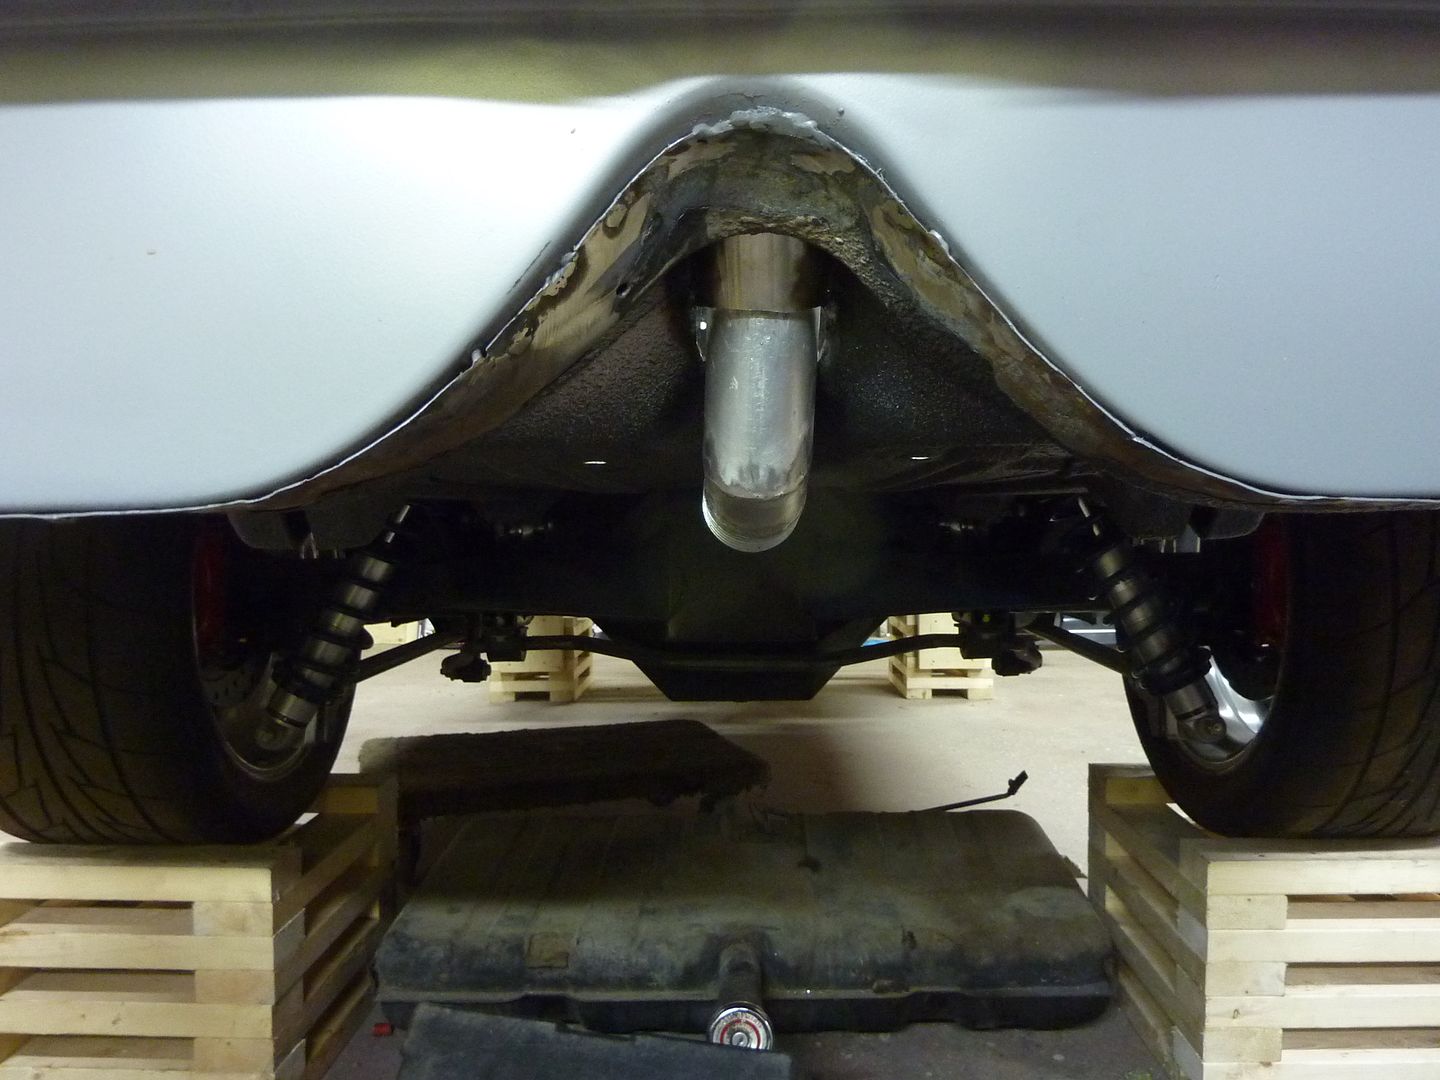
Well enough of that and onto the progress on the car. I decided that it was time to work on the filler neck. Damn it has taken a while to get it all into place. Here's some pics of how it progressed.
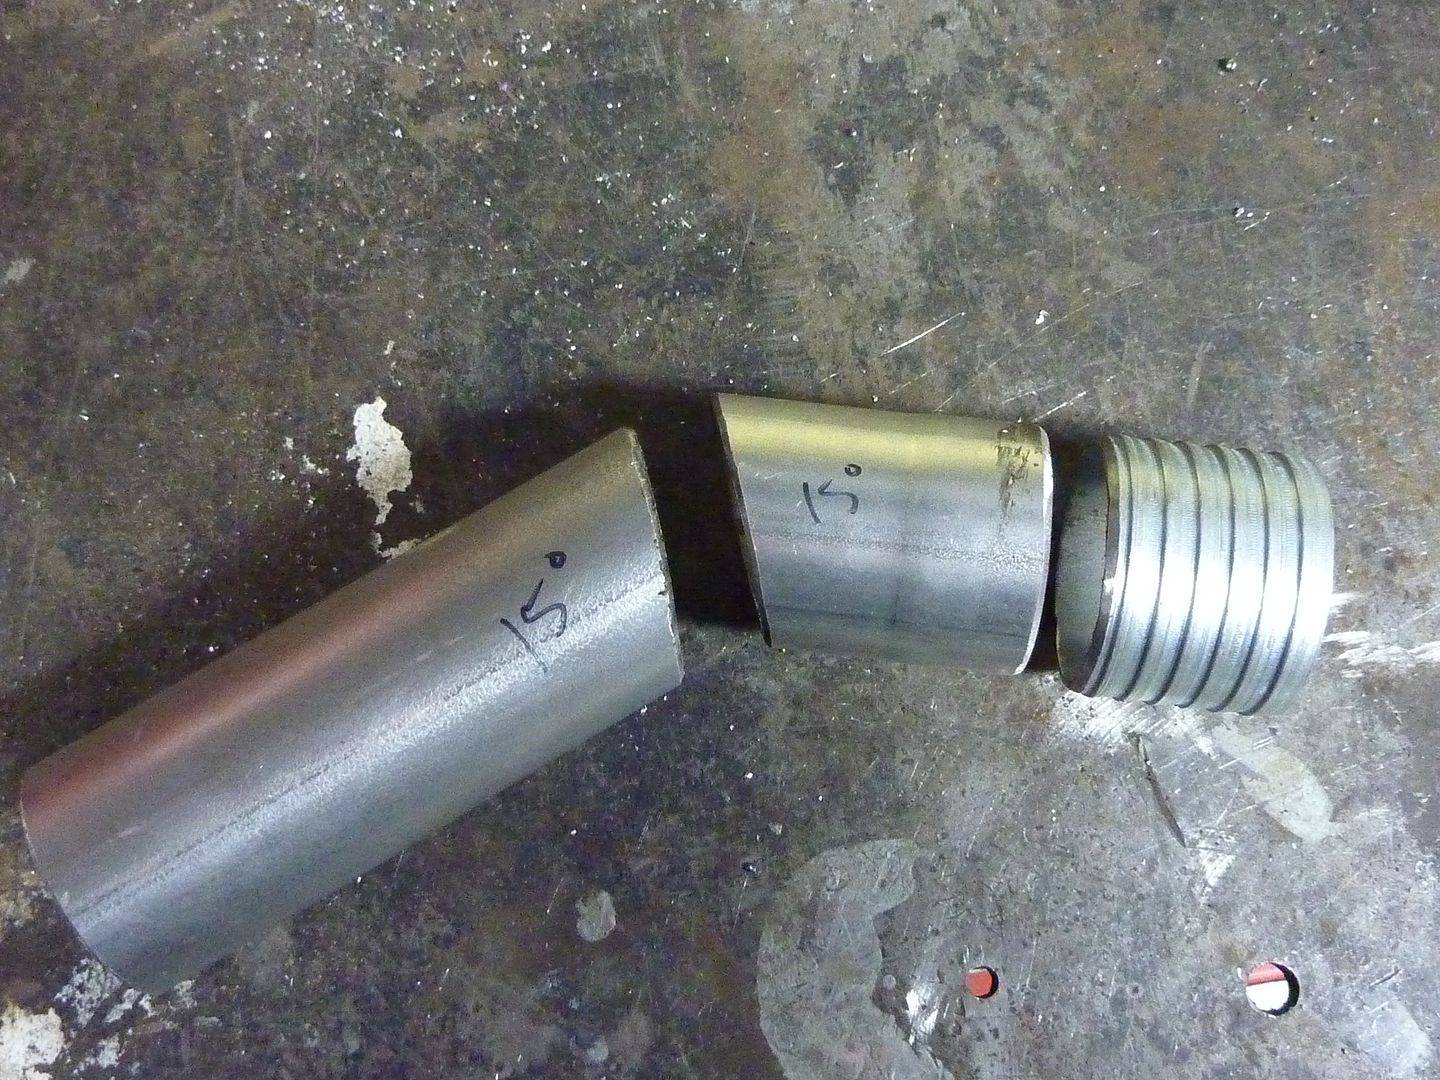
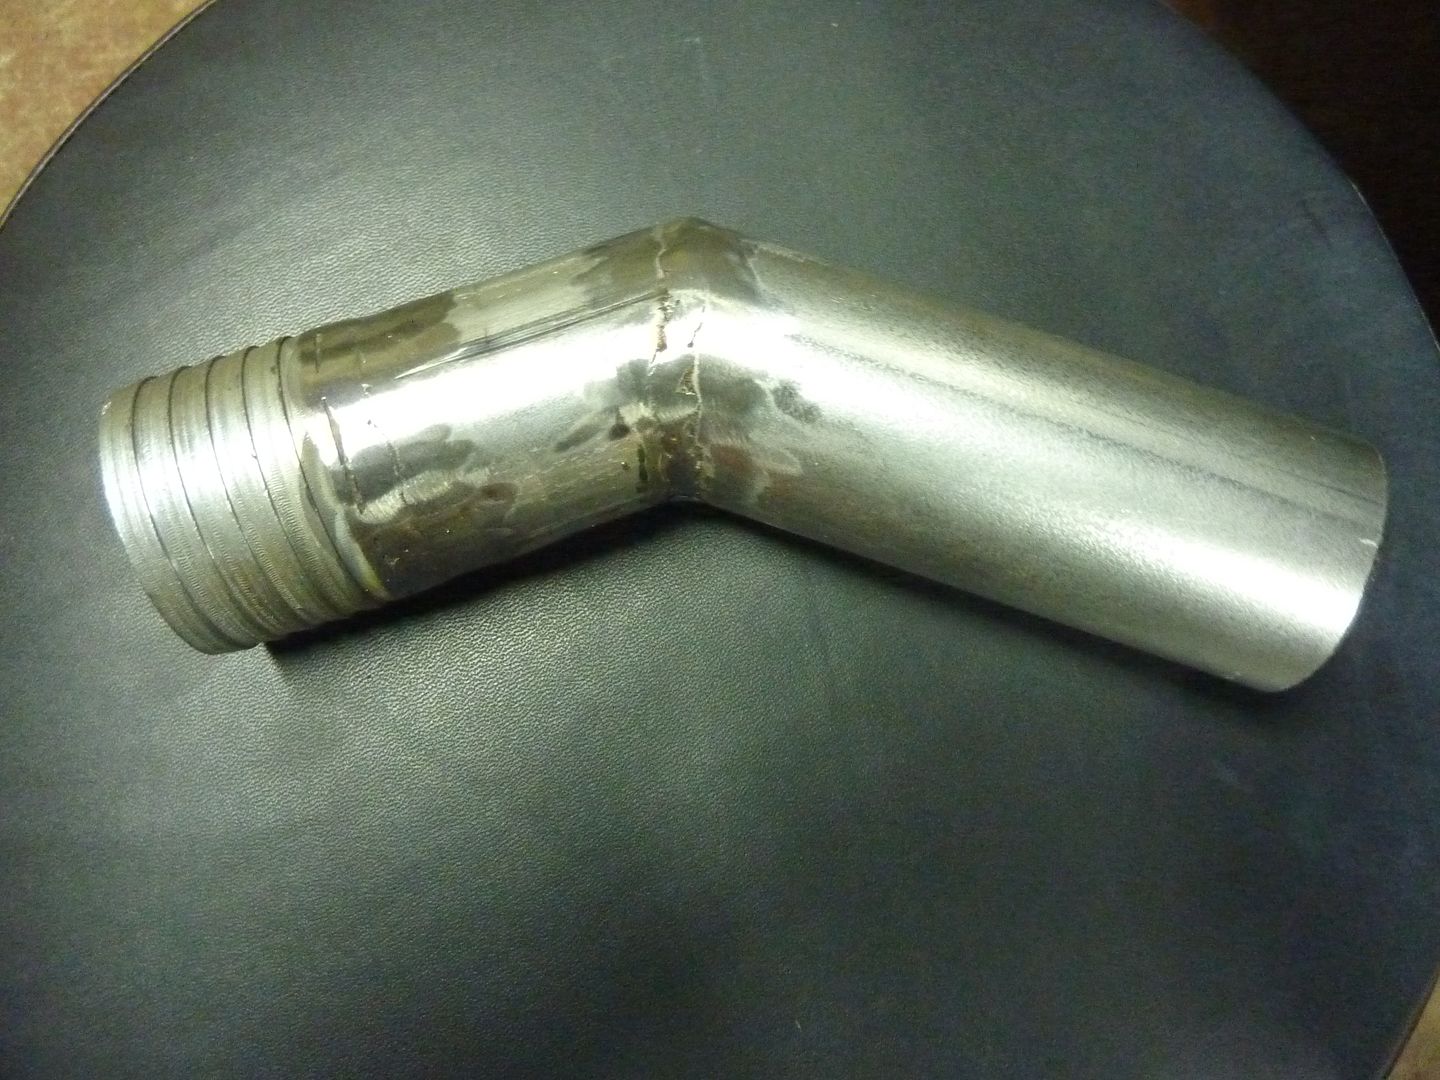
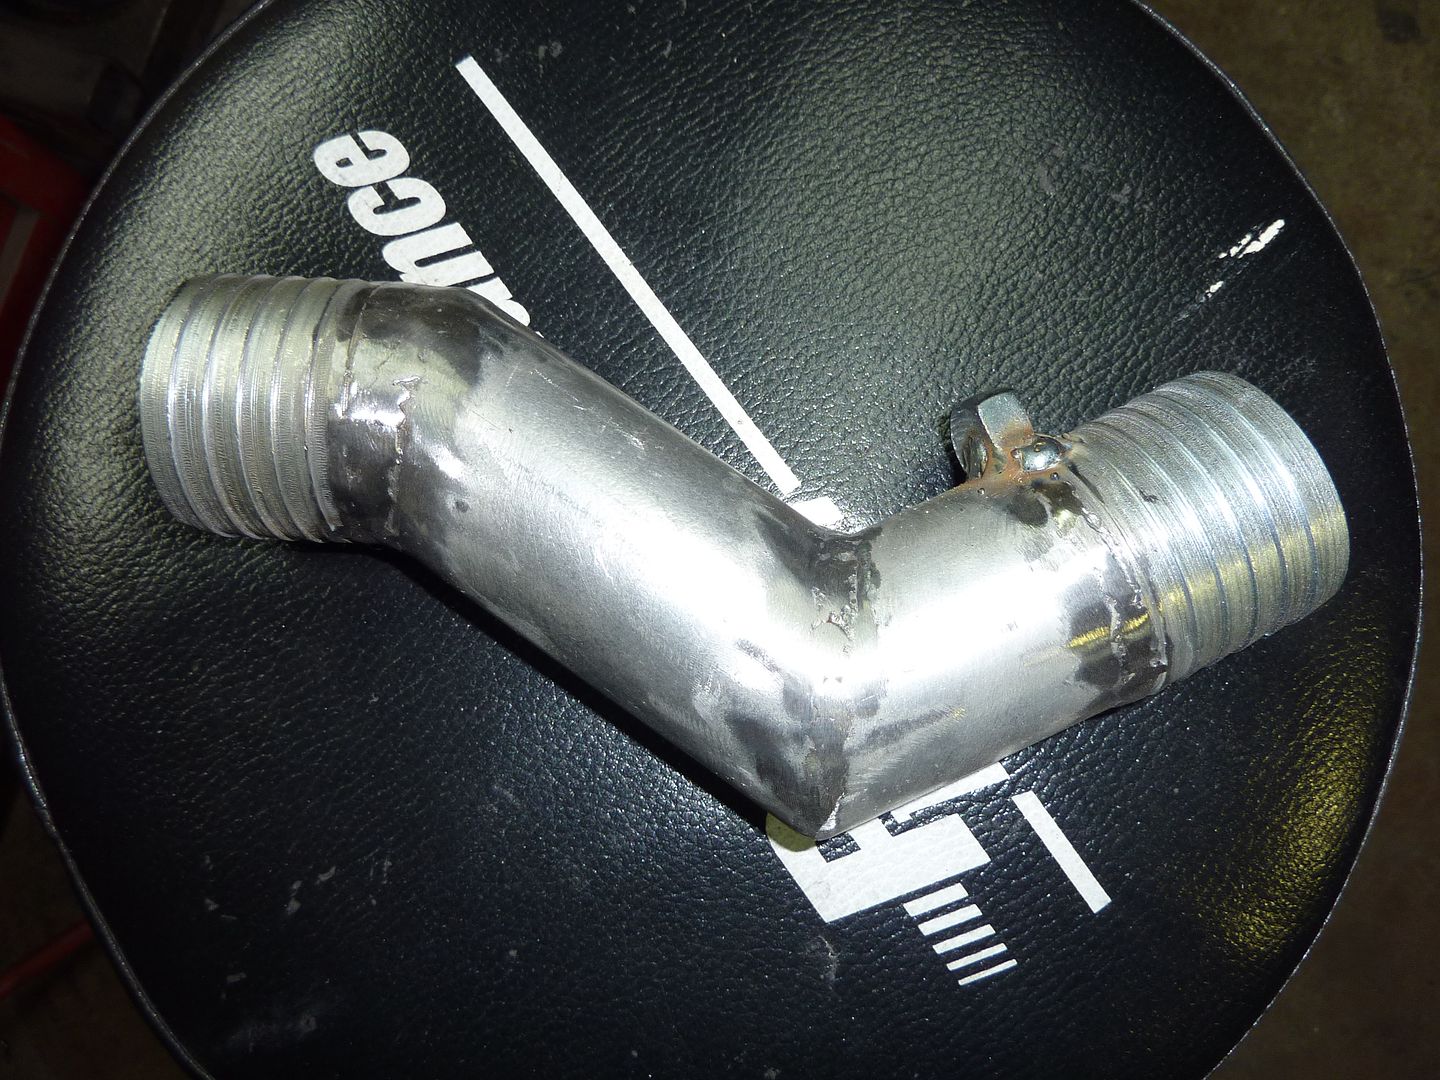
When I first got the Ridetech filler neck with their gas cap, I noticed that down tube was set off to a slight angle to accommodate for Camaros. I wanted mine to go straight down so I ended up cutting it so it could be welded on straight. I took it to a local welder and you can see the butcher job they did on welding it back together.

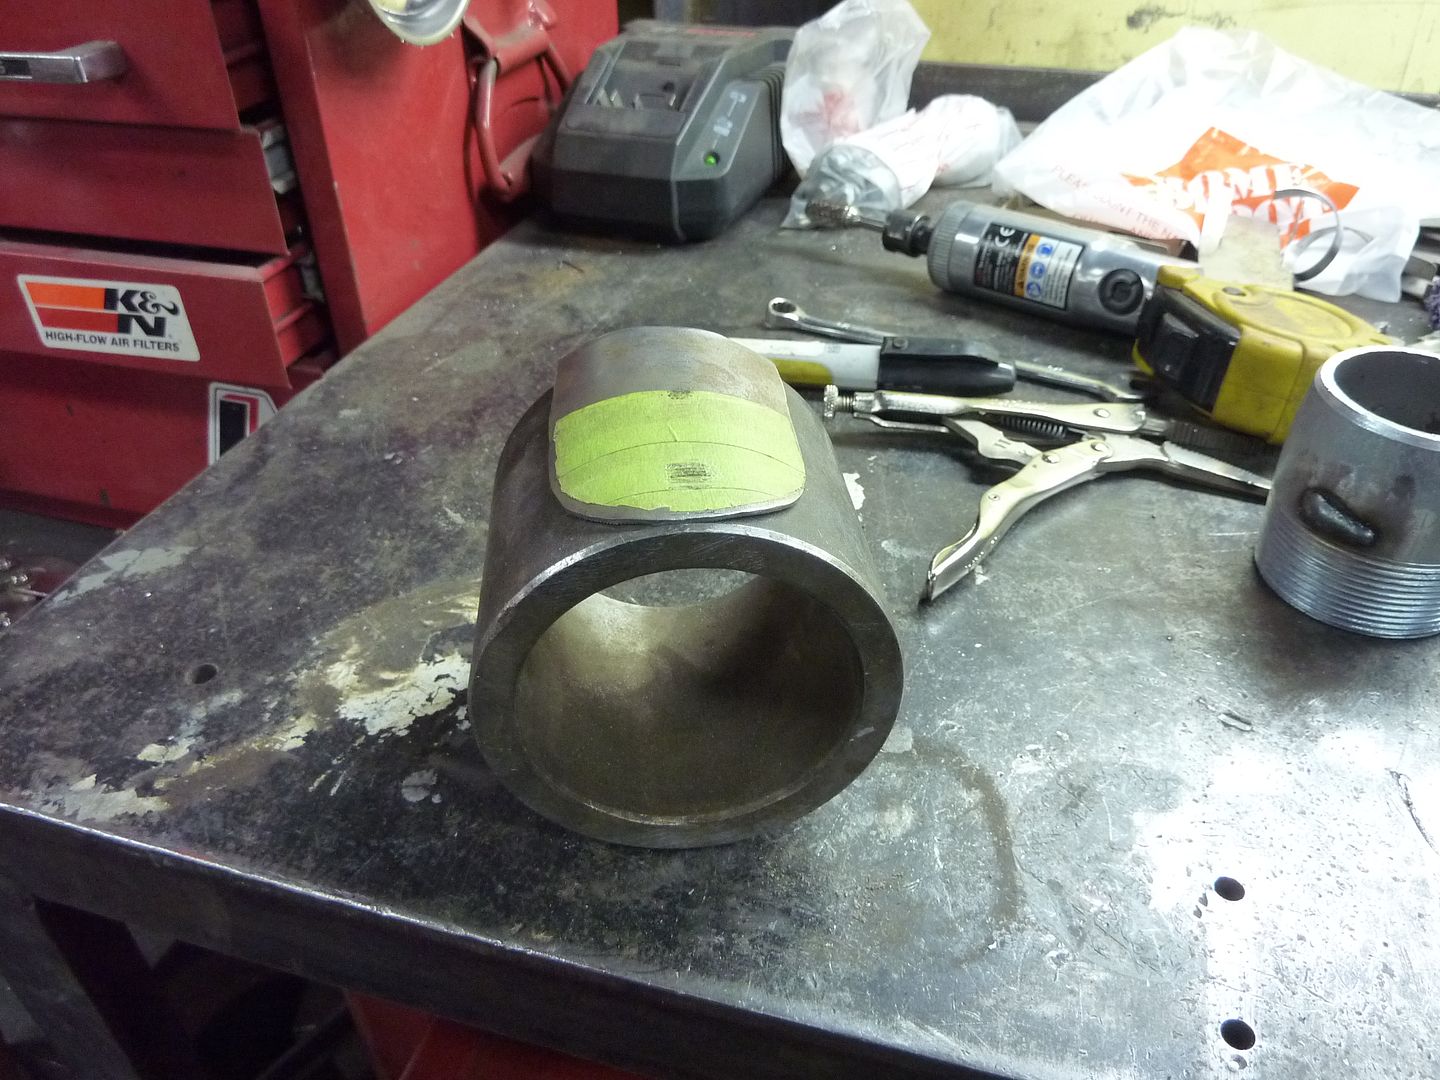
I decided to use 2" exhaust for the filler tube going through the floor
Time for an update. Not a huge update, but it's one none the less....and as always lots of pics.
I've wanted to make some 2x4 wheel stands for a while, just needed to actually do it. So I did. The back ones are 18" x 16" and the front ones are 18" x 12". I wanted to add extra boards on the ends just in case the car ever rolls. Here's how they turned out.
I originally put 2x4's on each end of the front stands but thought it would be better to use some 2x6. Looks better.
I also picked up a couple new tools. Aluminum floor jack from Costco. It was only $100 so we'll see how it holds up.
Also got some rubber pads for both floor jacks
The other day I got a surprise in the mail. I got an envelope from the dealership where I bought my Fusion. I opened it up and to my shock, it was a cheque for $1000. I went online and realized that they had a $1000 cash back offer during the time period when I bought my car. So I thought I would treat myself. I've wanted to get a new tap and die kit for a while so I picked up the Irwin/Hanson 76 piece. I forgot to take a pic so this is taken from their website.
Well enough of that and onto the progress on the car. I decided that it was time to work on the filler neck. Damn it has taken a while to get it all into place. Here's some pics of how it progressed.
When I first got the Ridetech filler neck with their gas cap, I noticed that down tube was set off to a slight angle to accommodate for Camaros. I wanted mine to go straight down so I ended up cutting it so it could be welded on straight. I took it to a local welder and you can see the butcher job they did on welding it back together.
I decided to use 2" exhaust for the filler tube going through the floor
03-02-2012, 06:13 PM
#152
On The Tree
Thread Starter
iTrader: (4)
Join Date: Mar 2009
Location: British Columbia, Canada
Posts: 132
Likes: 0
Received 0 Likes
on
0 Posts
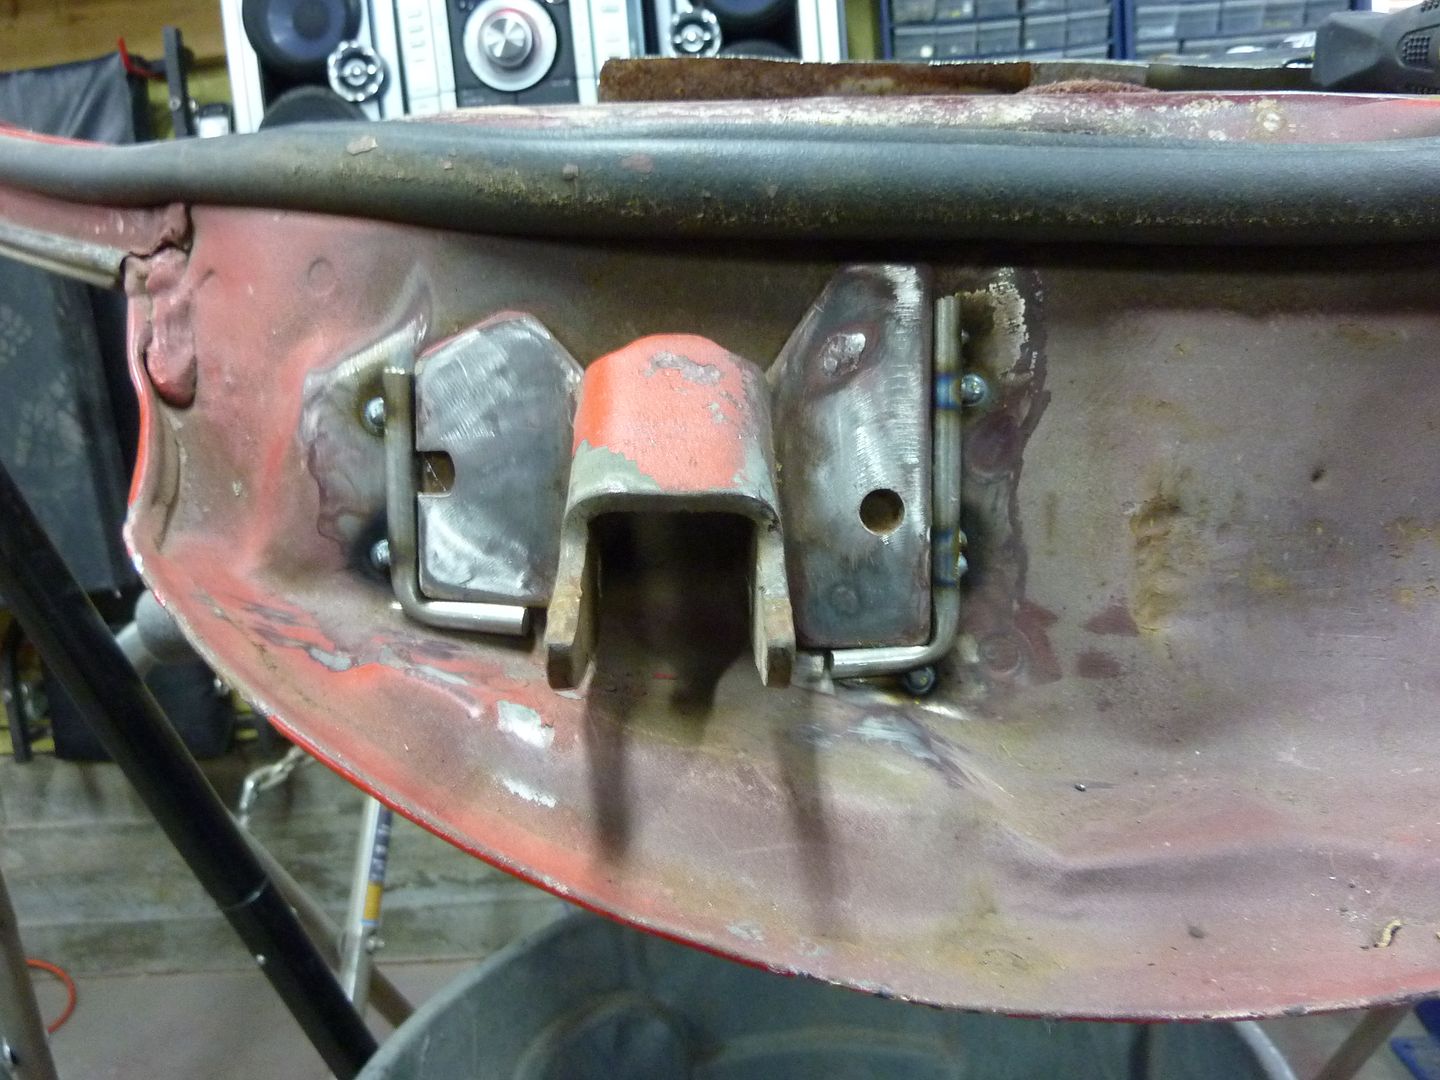
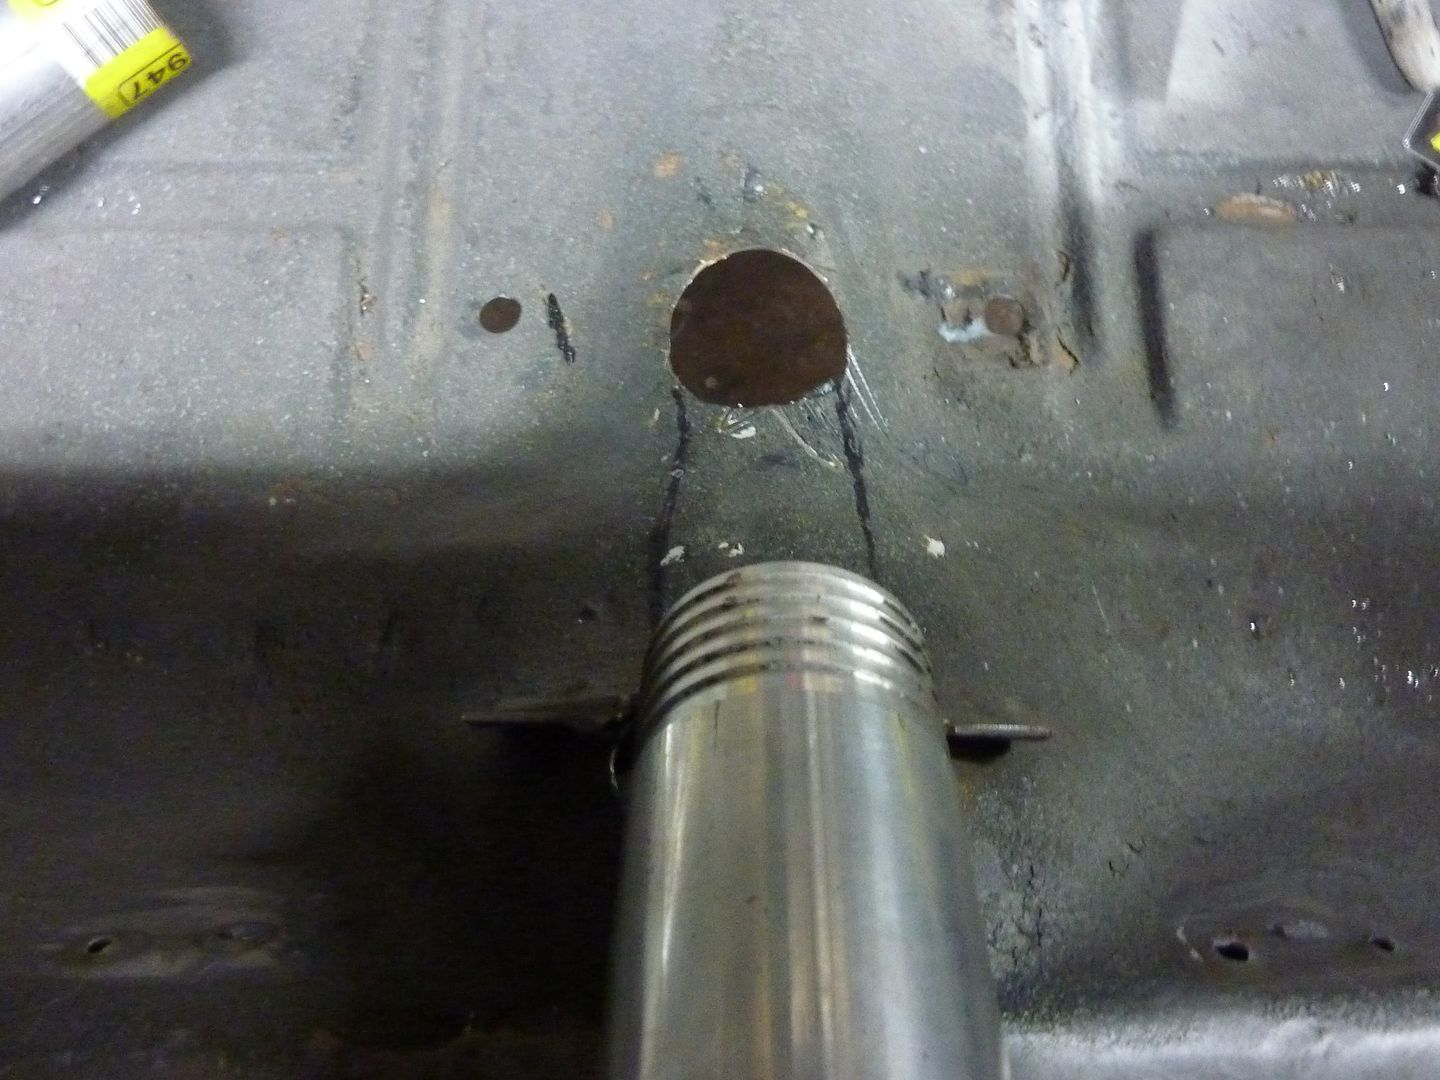
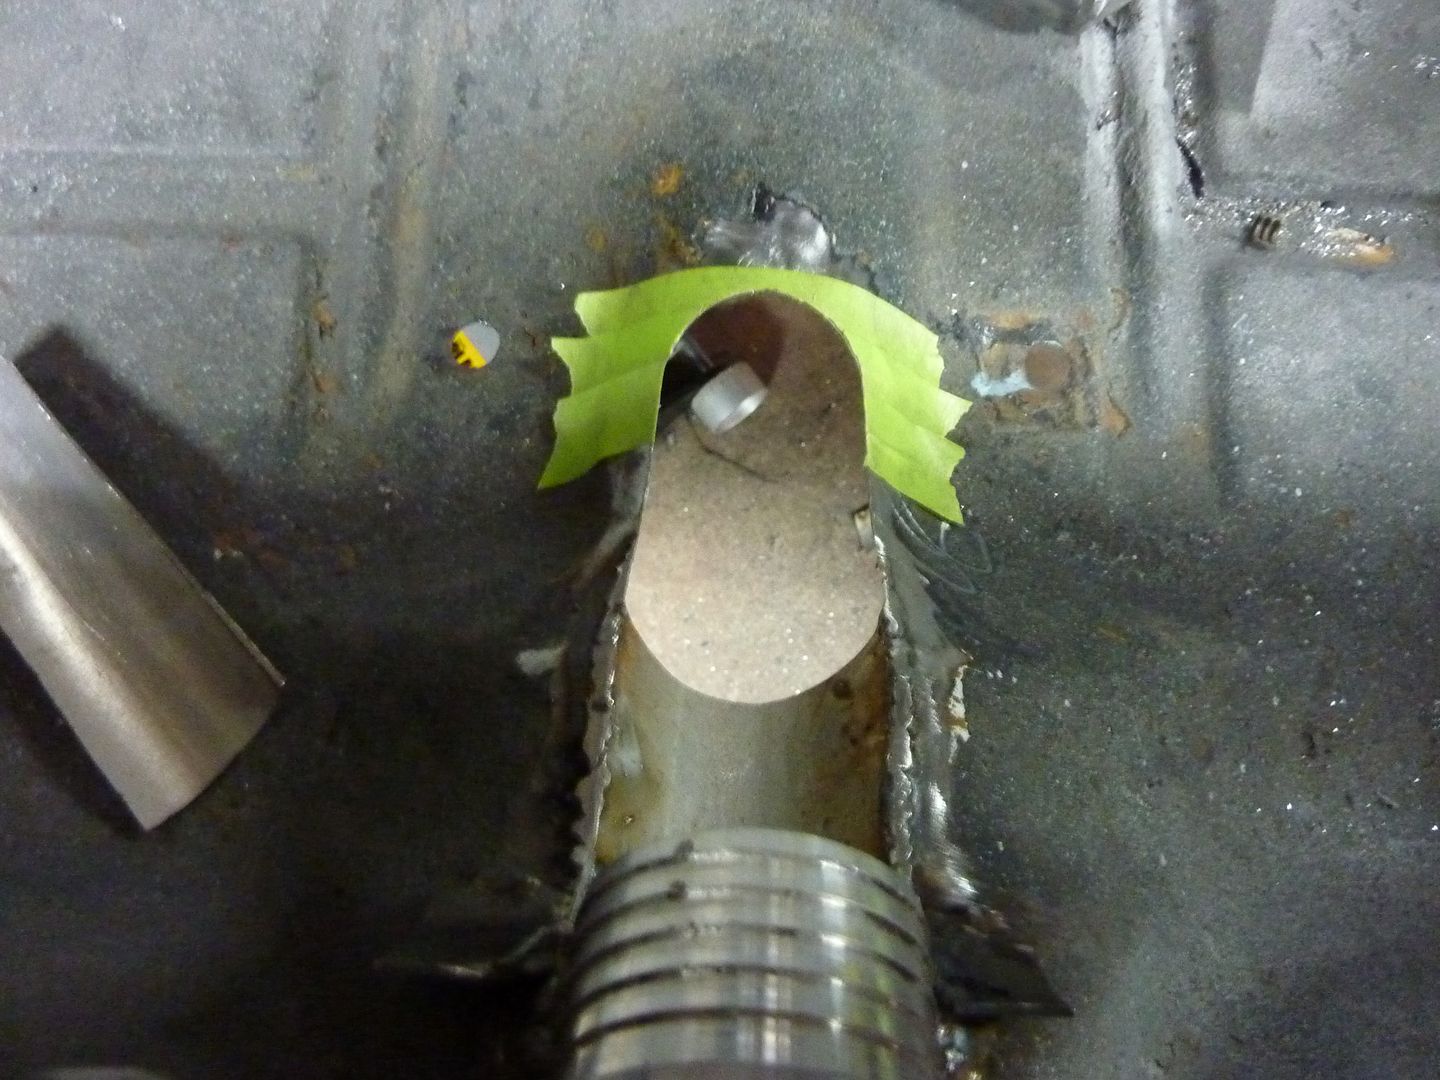
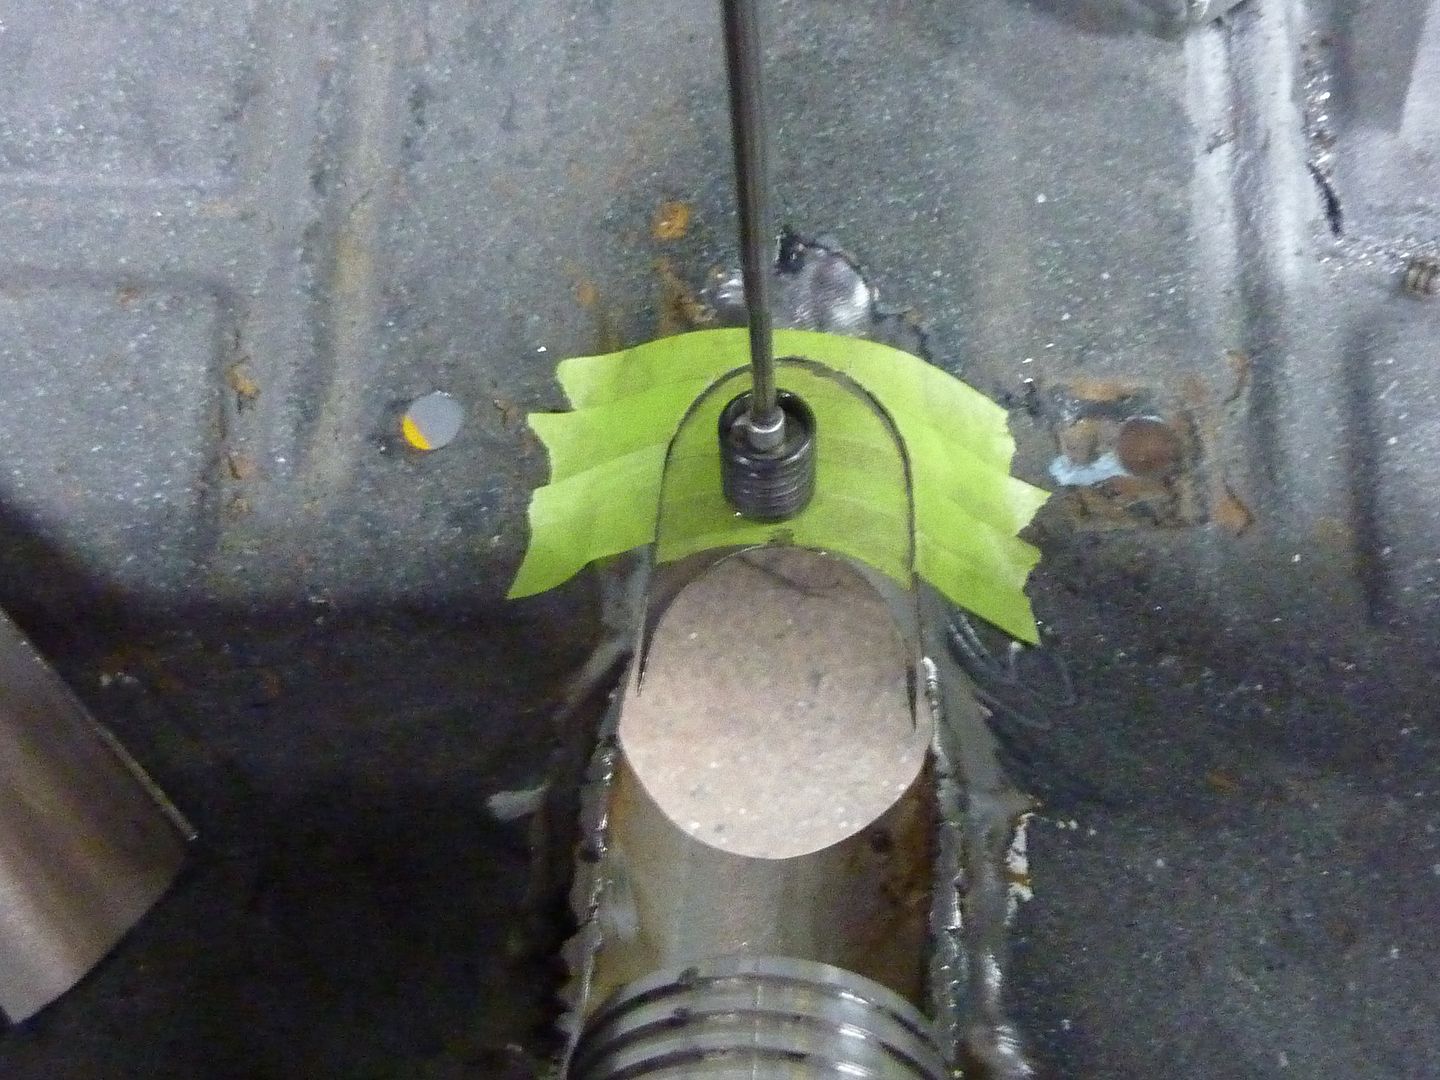
Test fit going through the floor
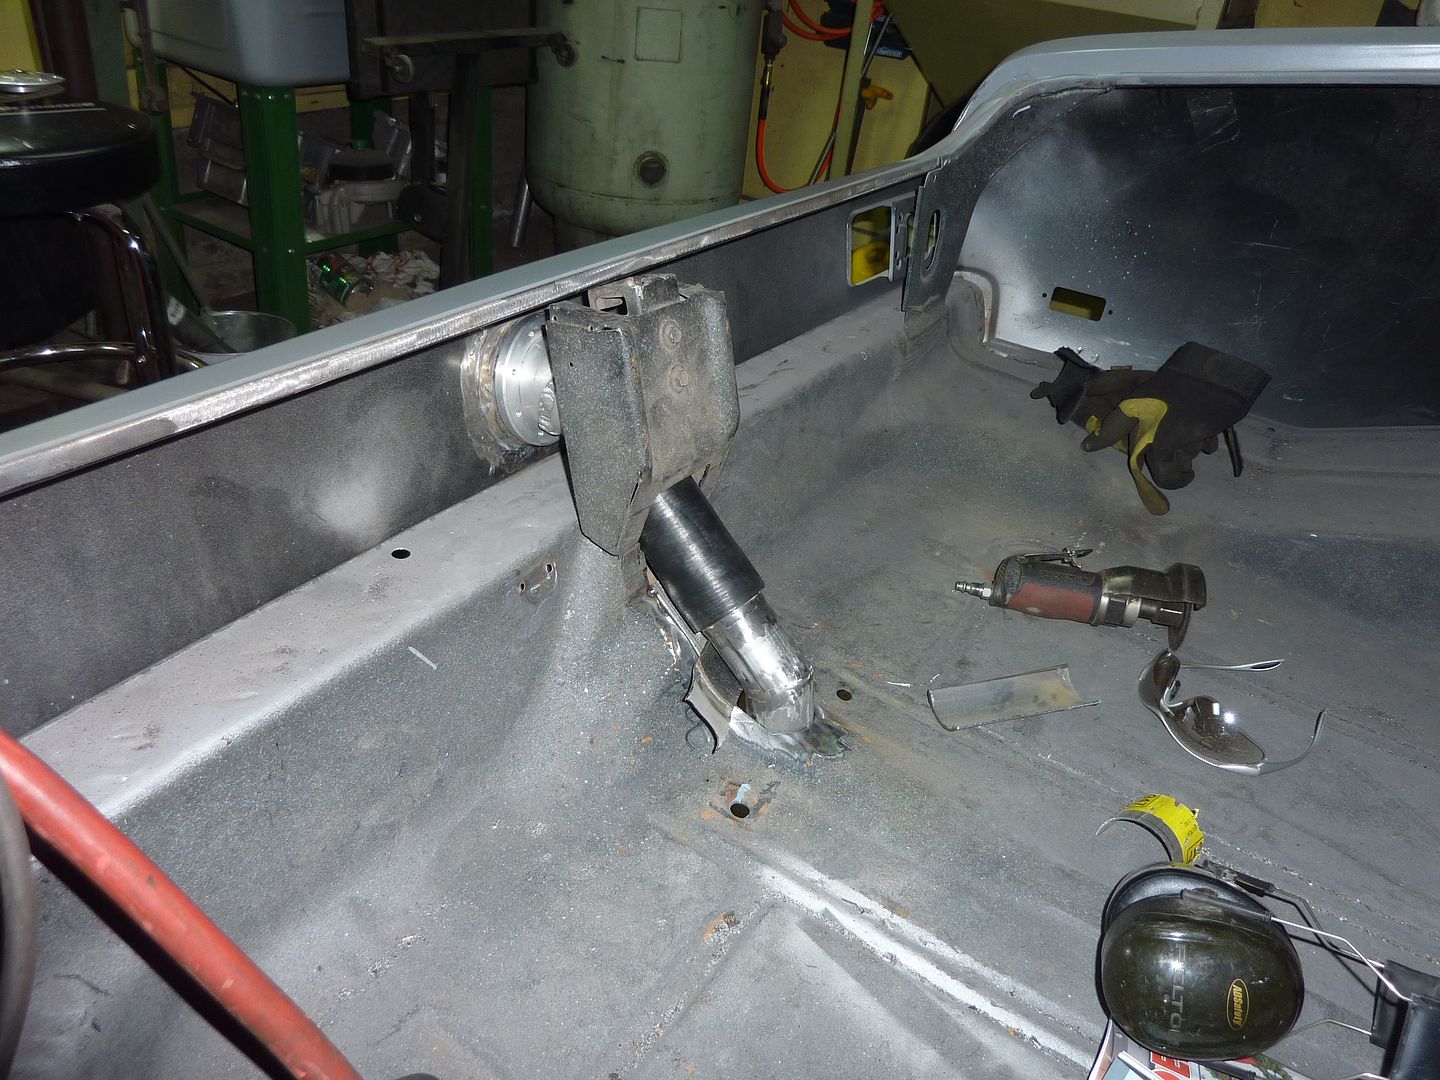
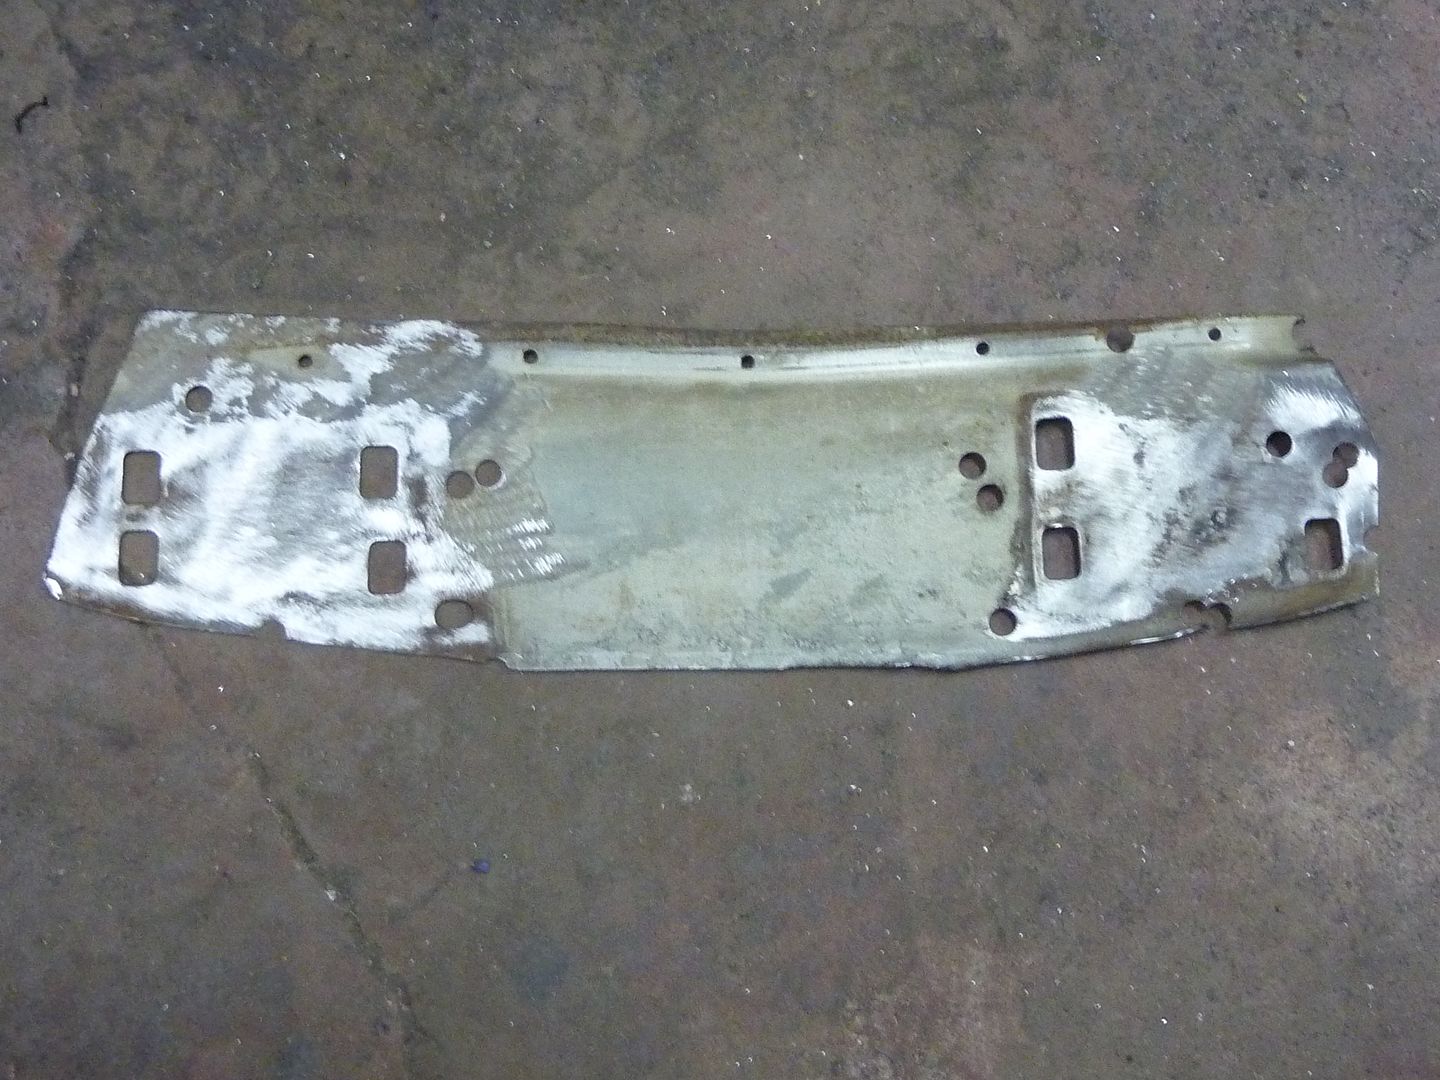
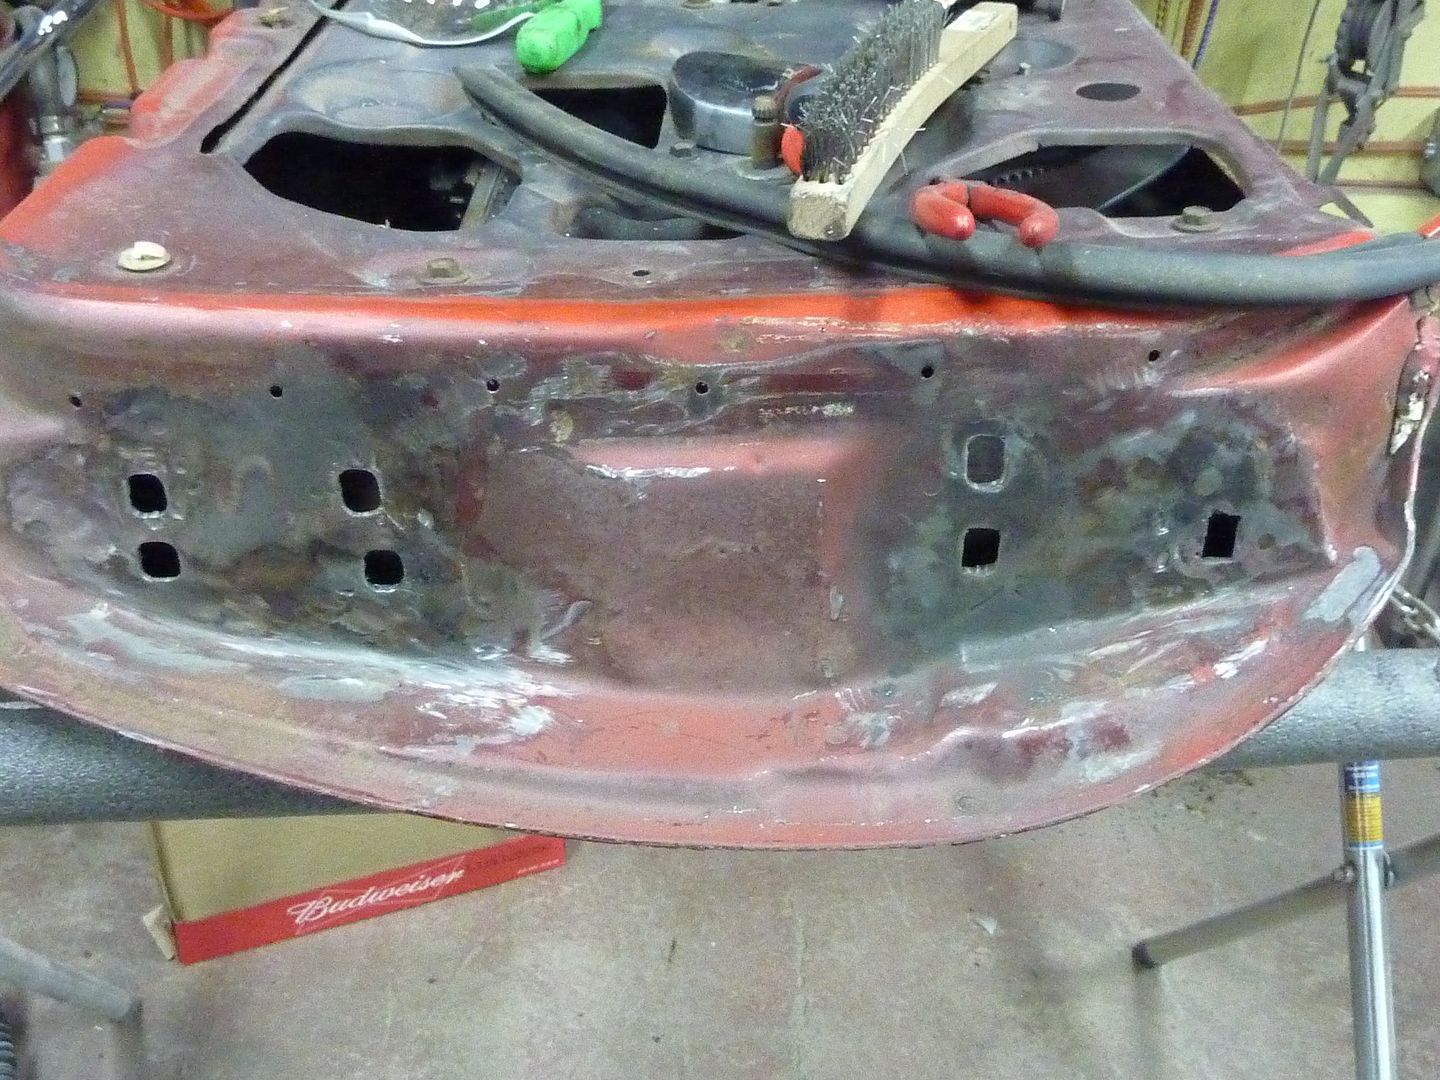
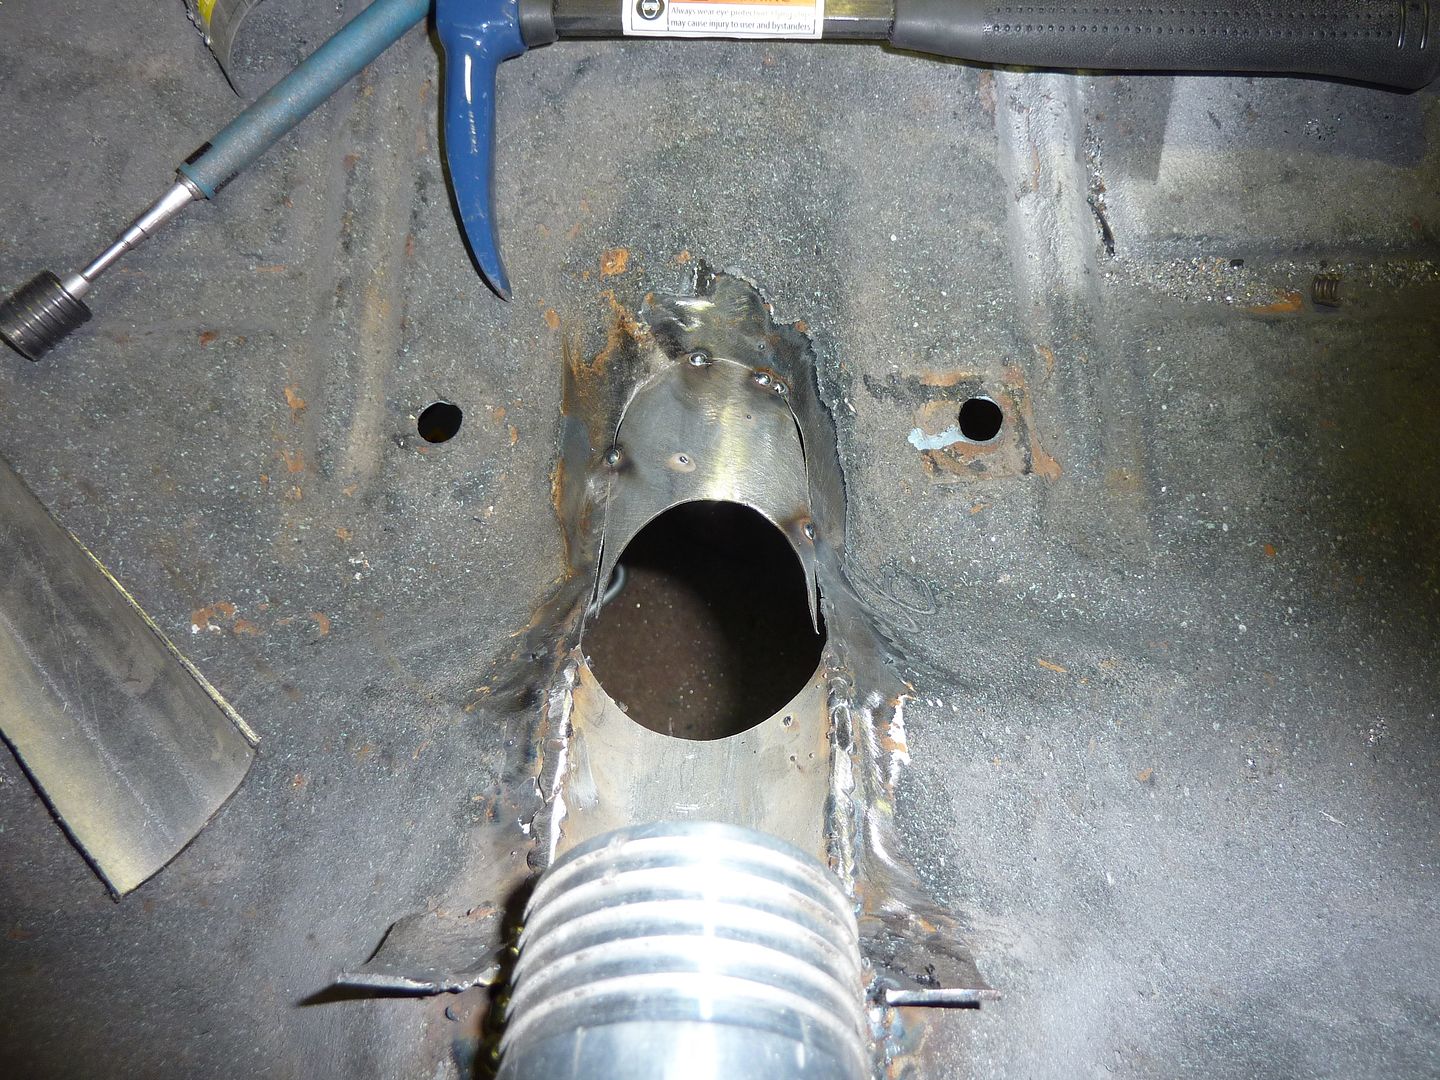
Once I got the angle where I liked it, I started to fill in the holes in the floor
This allowed me to put the bottom of the tube on and finish it. The tab sticking out is going to be welded to the floor to make it more sturdy once welded into place.
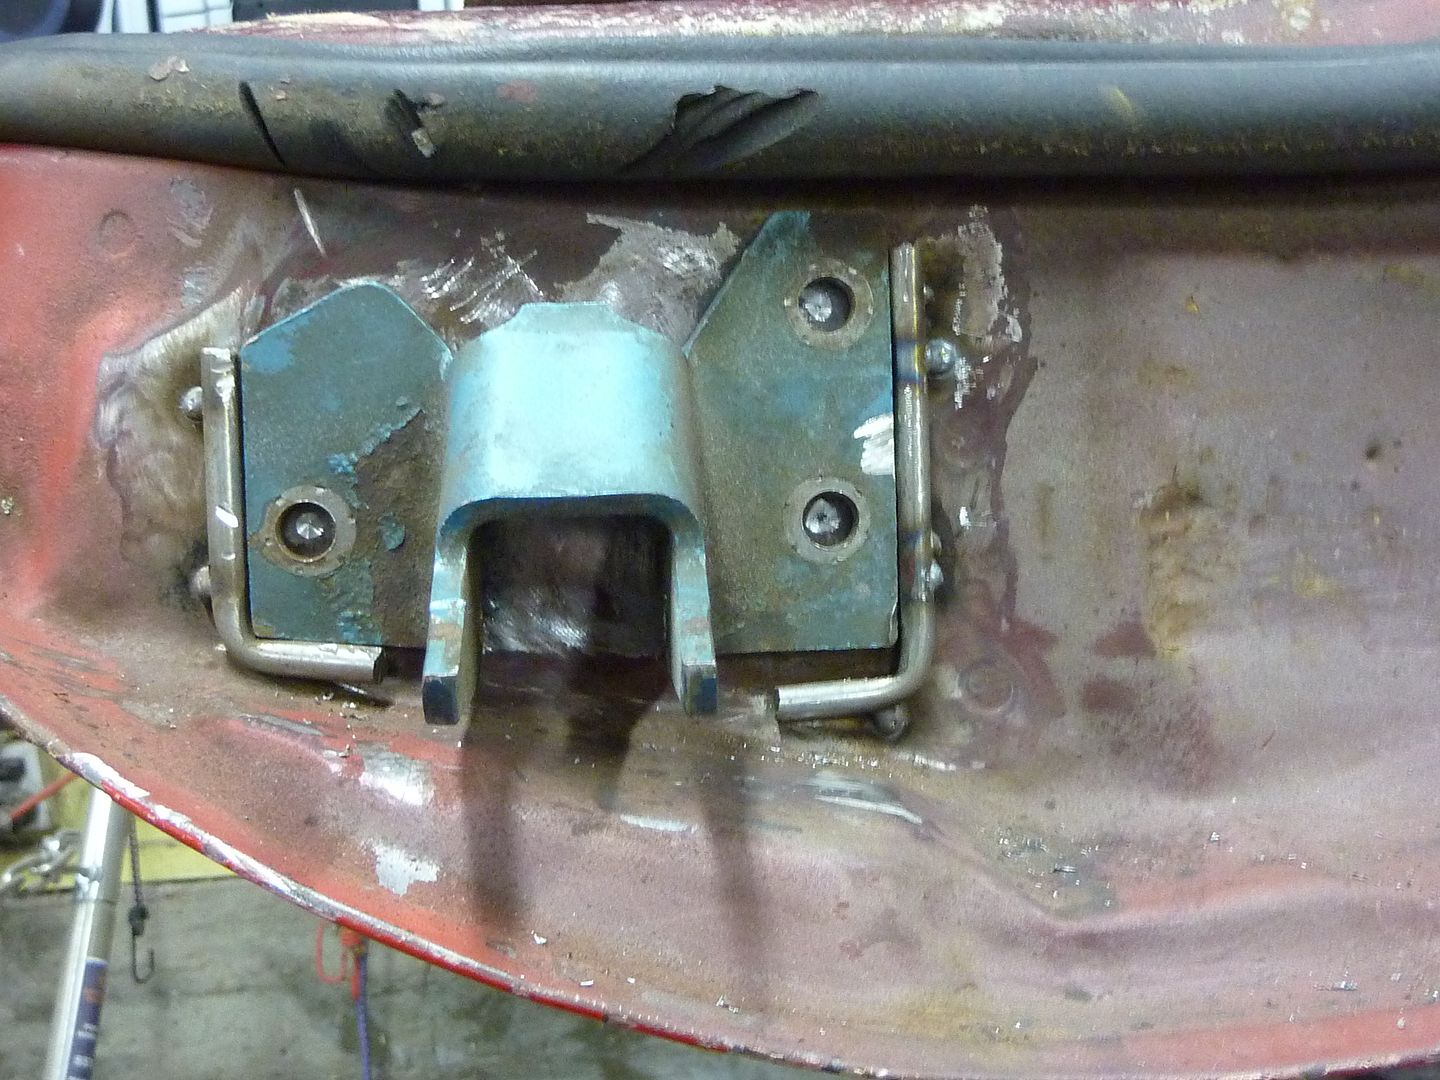
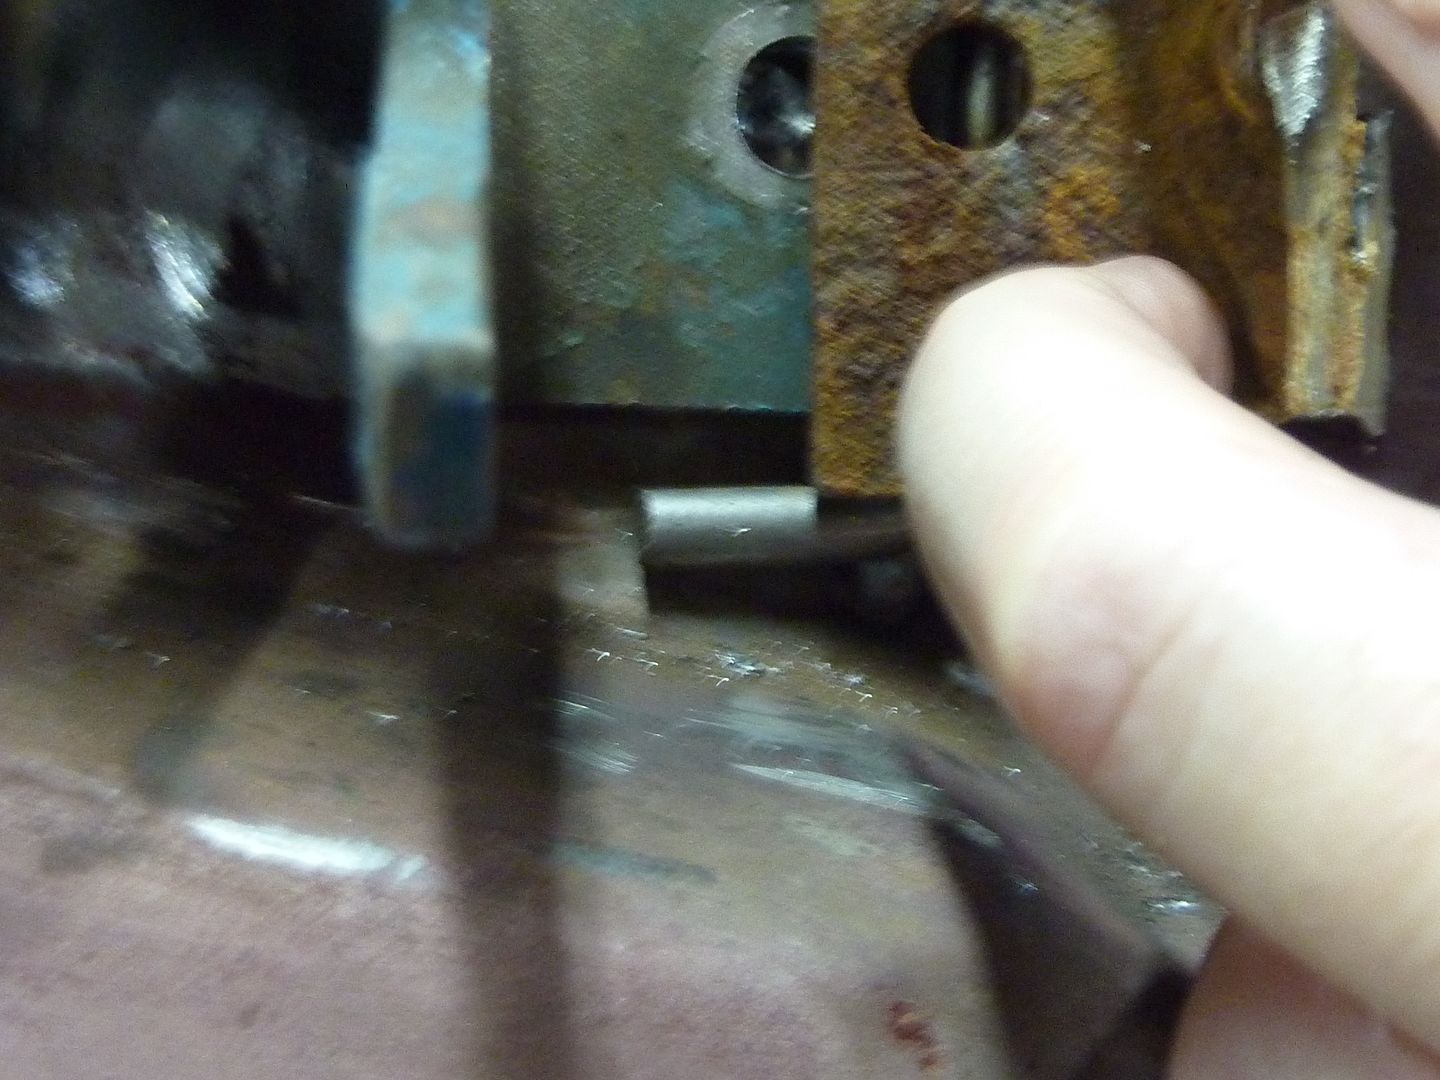
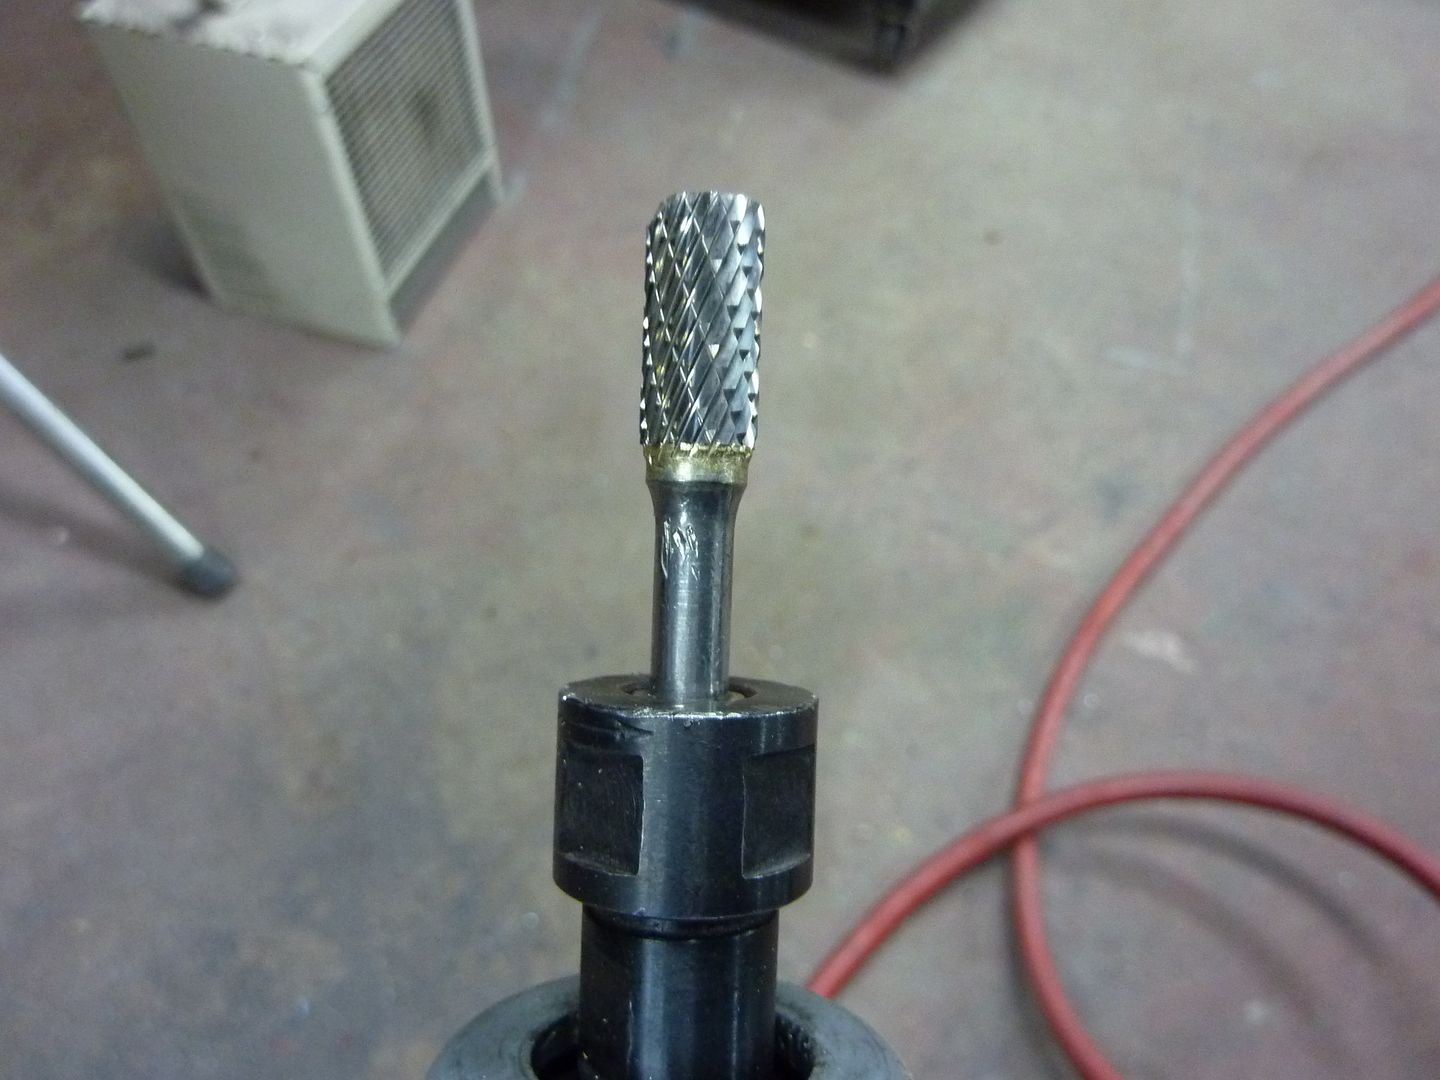
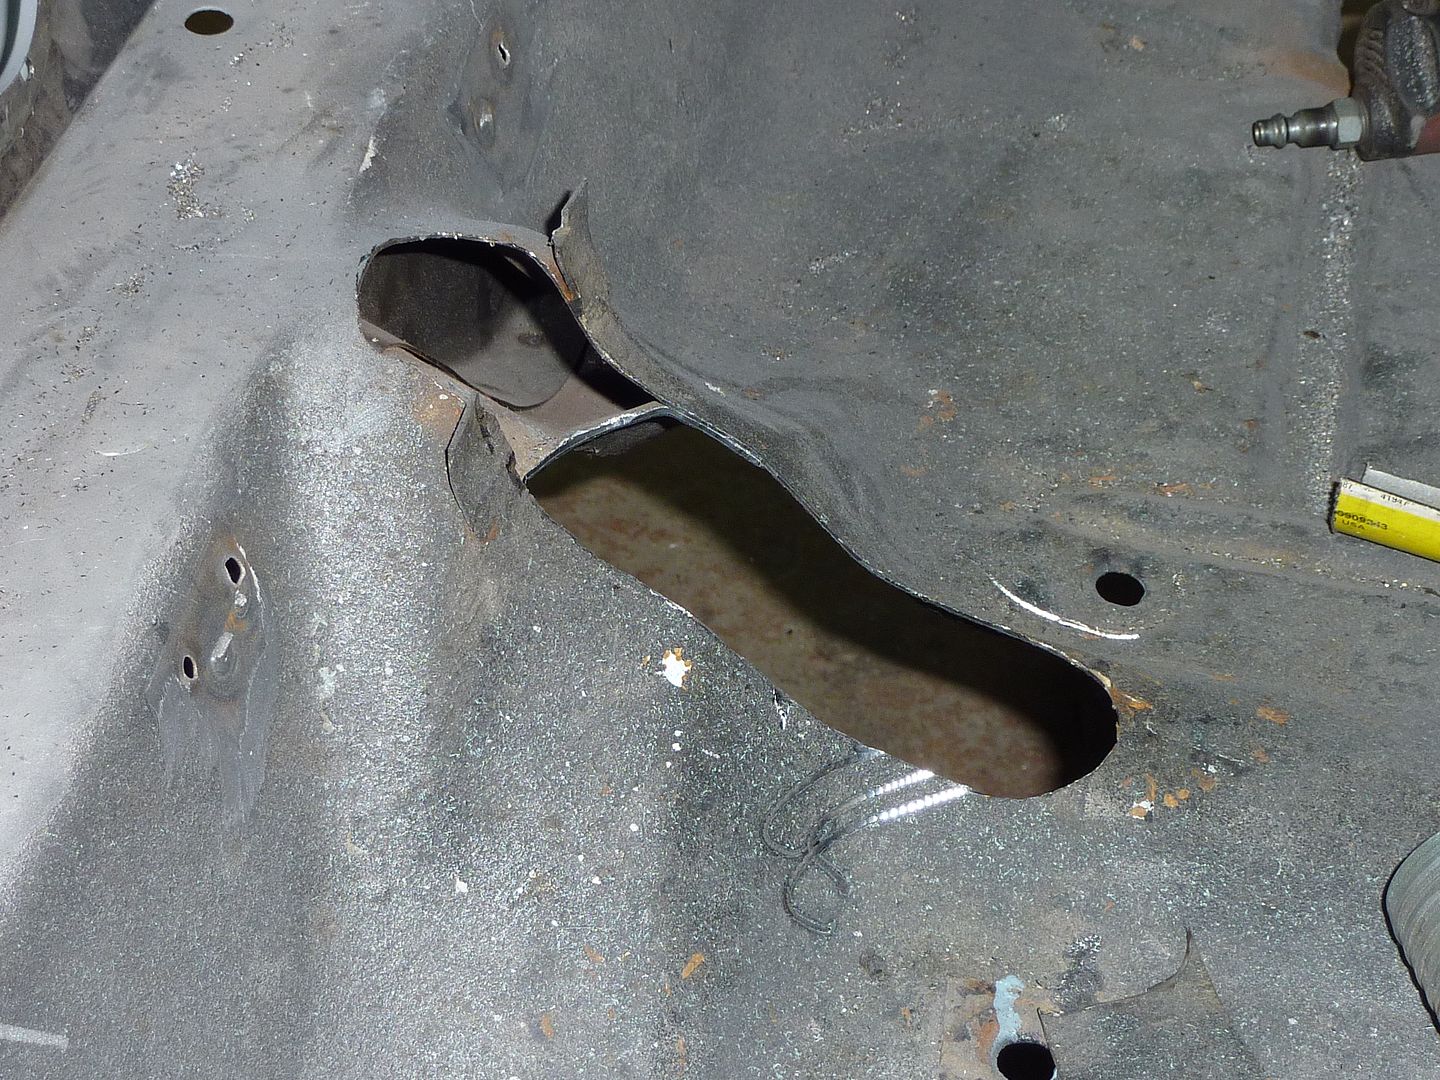
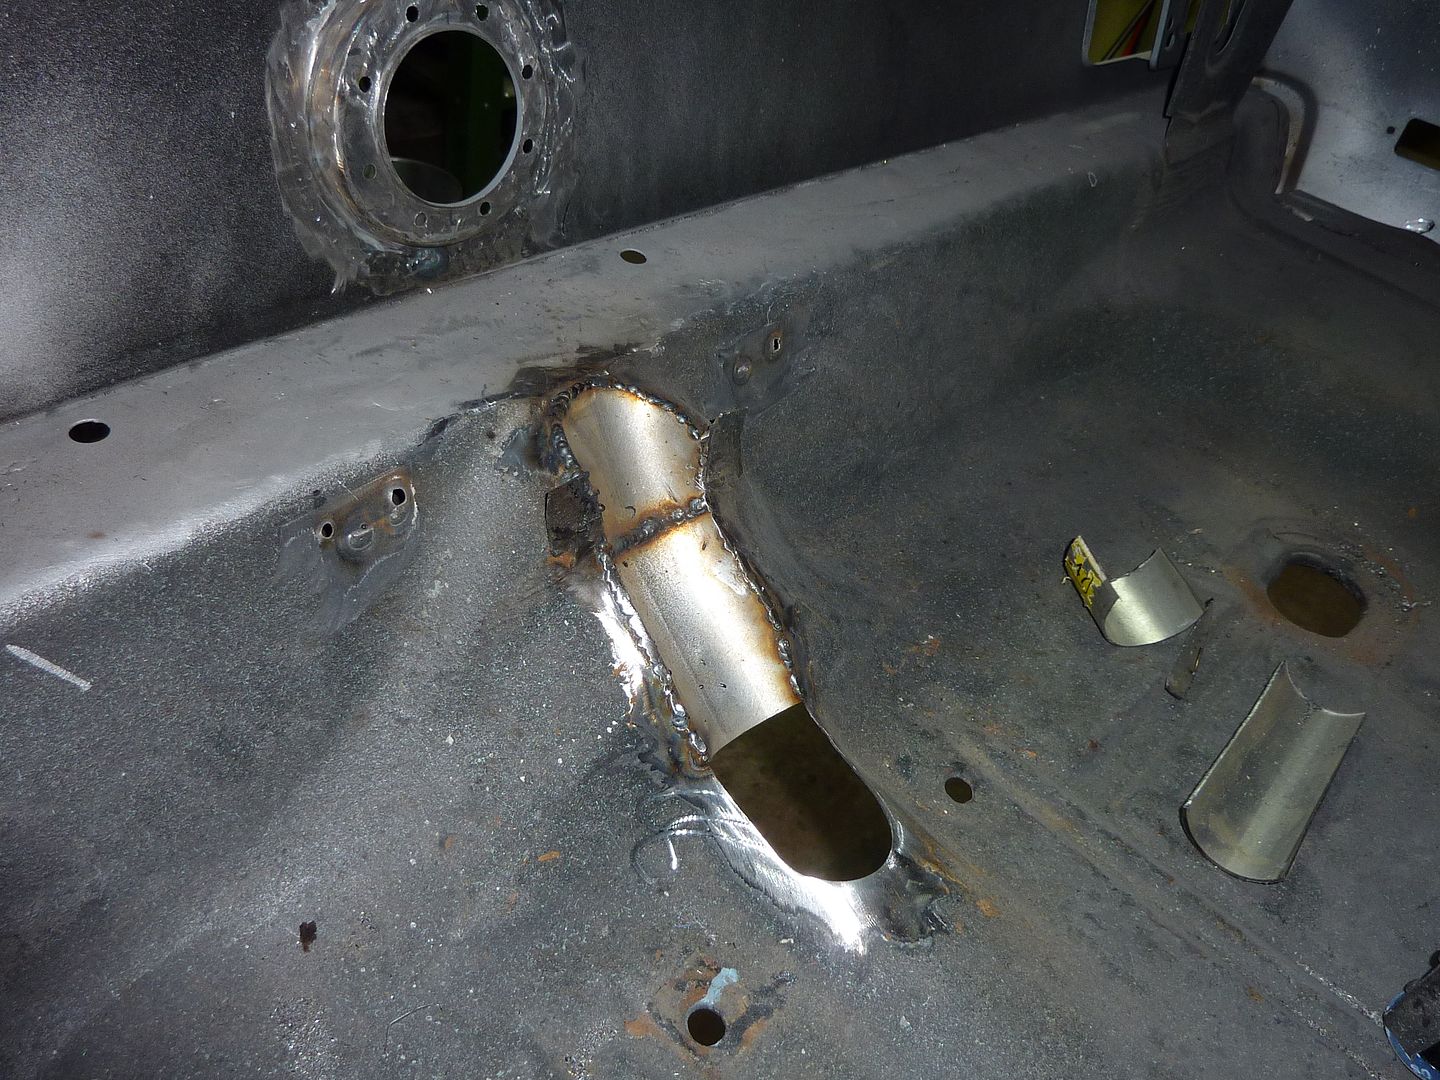
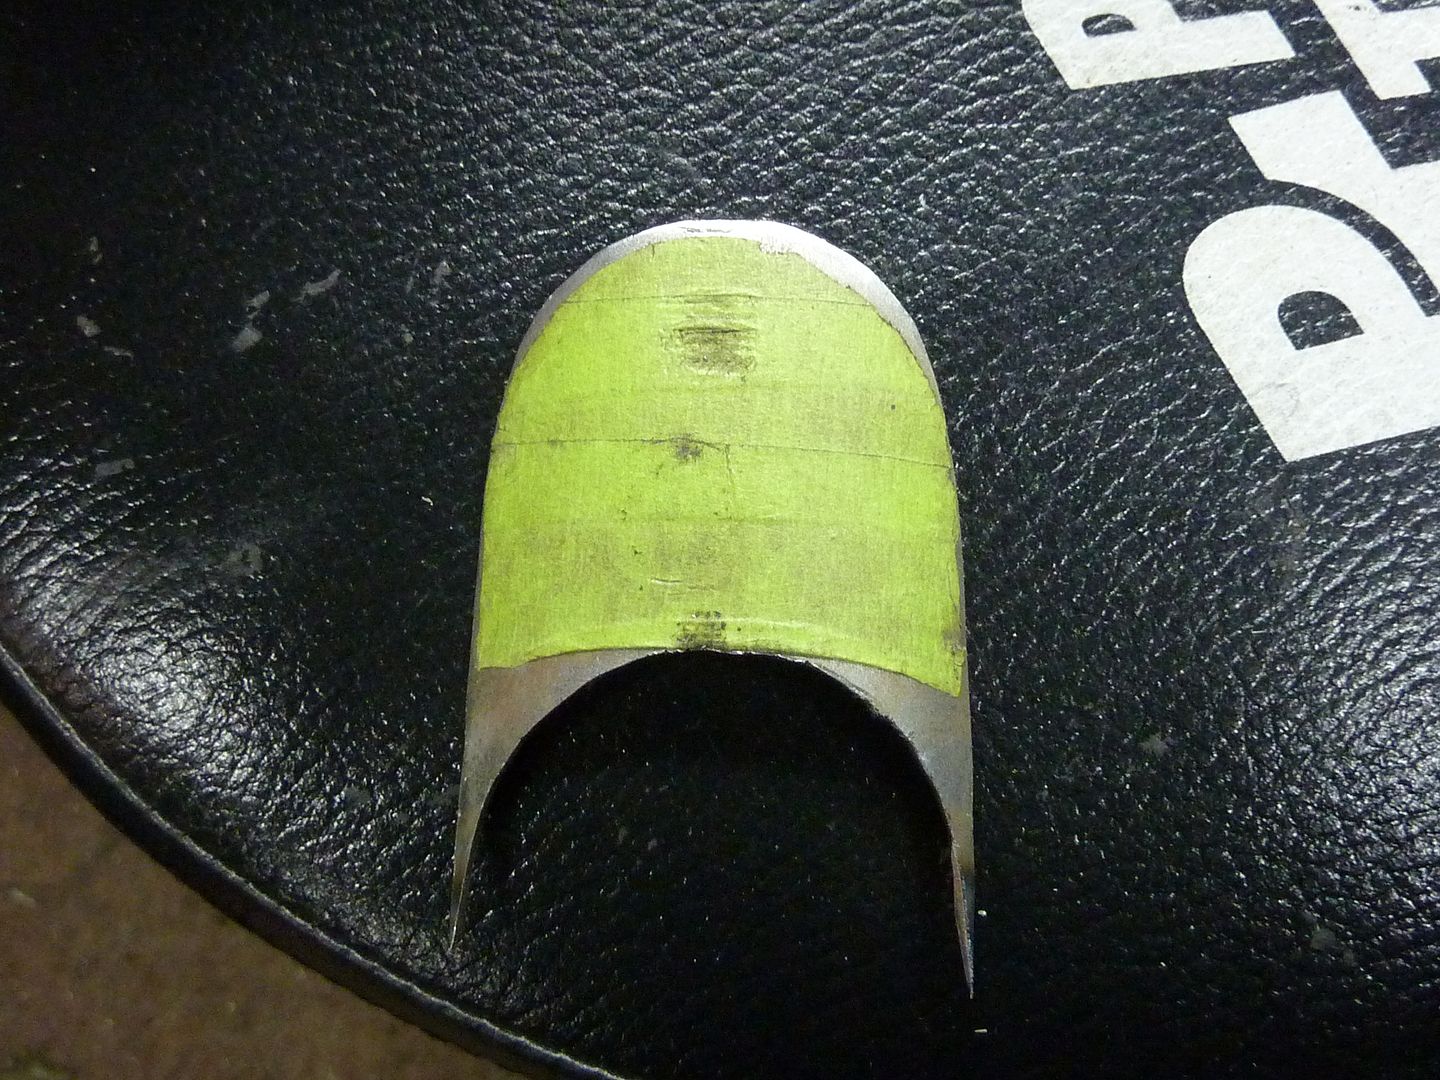
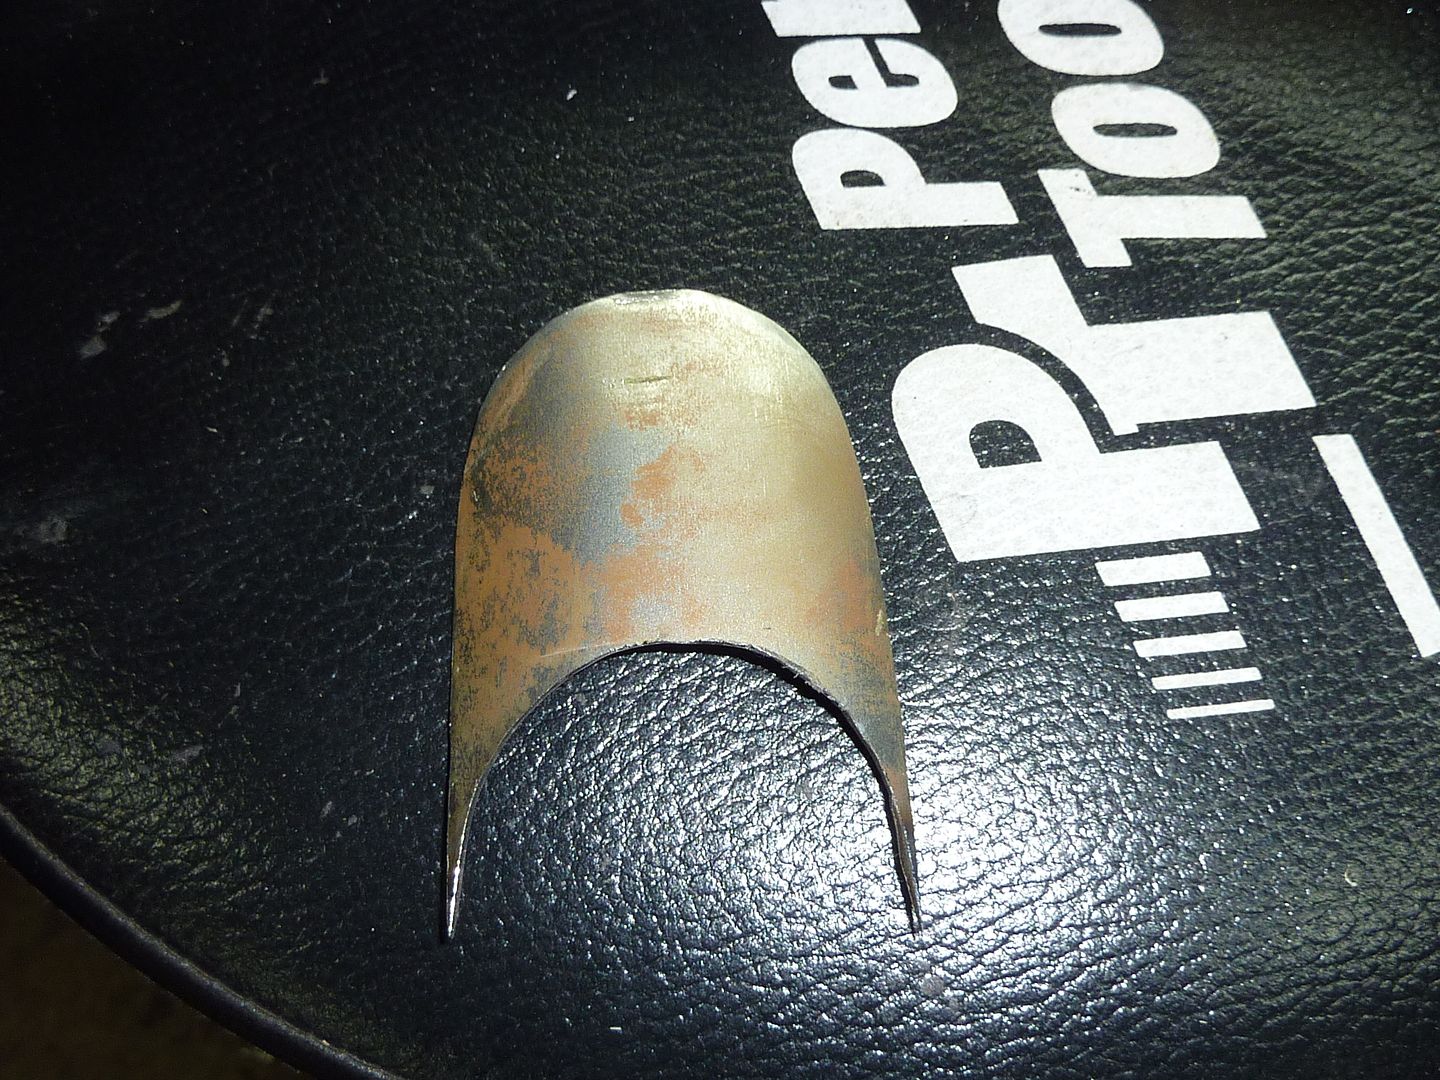
Once I had that done, I found out that I cut the hole in the floor too far forward. So I had to make a patch. Since the area where the patch was going was rounded, I used a round piece of steel and a body hammer to shape it.

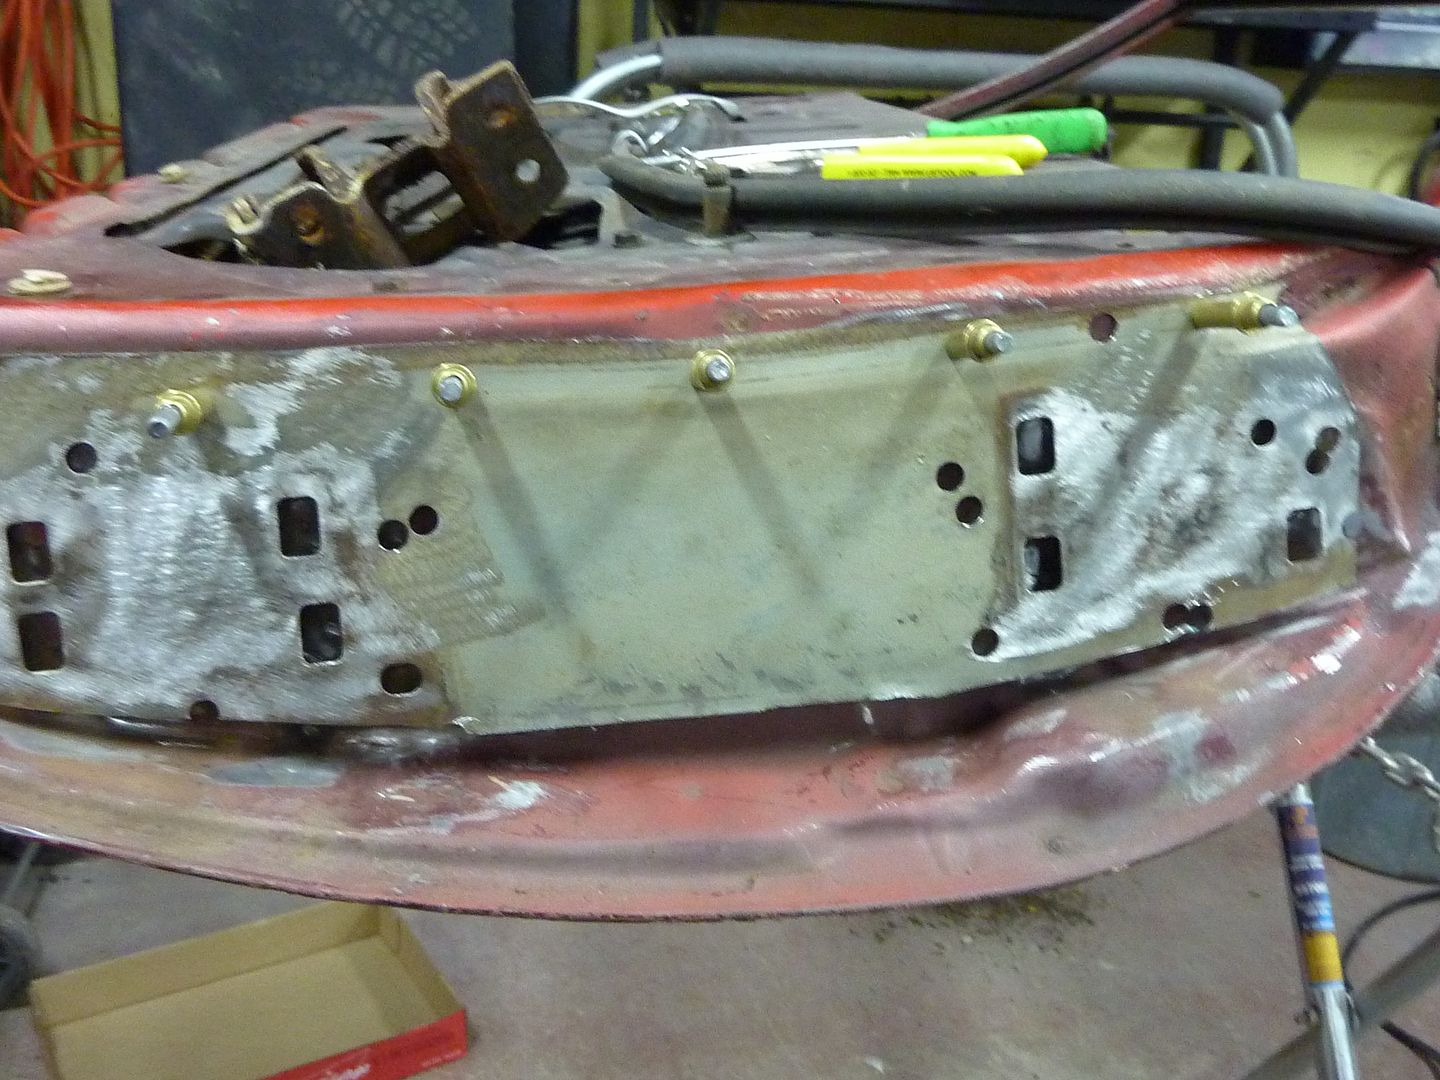
And here's an idea of how it will look in place. What would you guys suggest that I do to the inside of the filler tube to prevent it from rusting? I'm not sure if I should paint it or not as it will have gas running through it, but I want to try and stop any rust from coming while I complete the car.
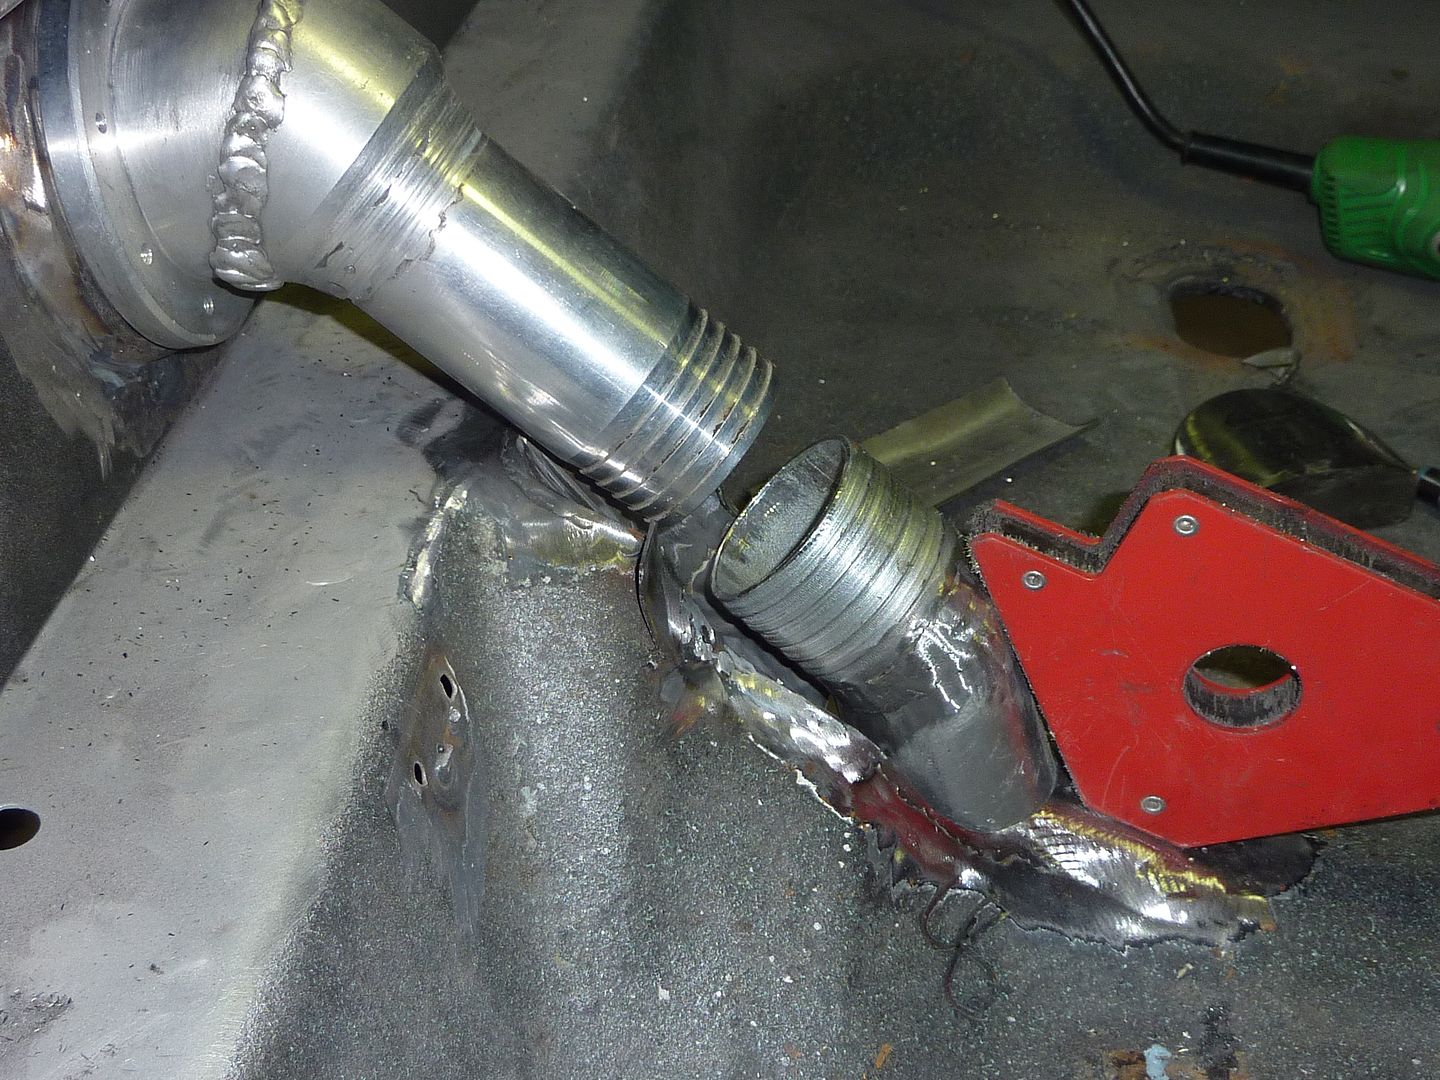
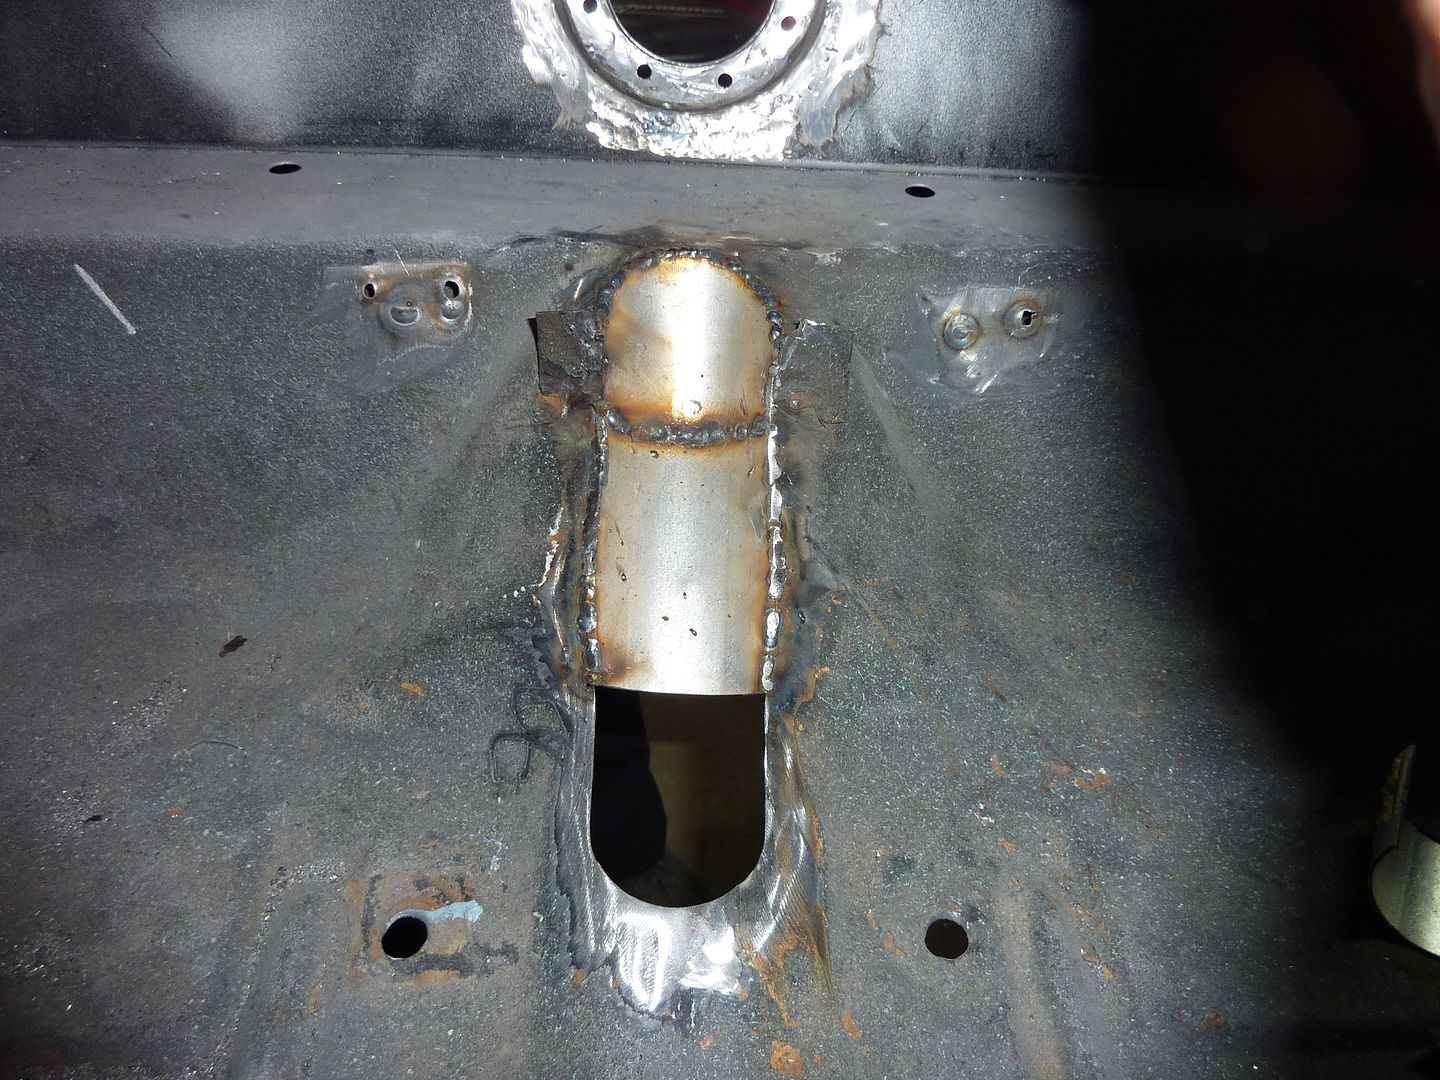
Here's how it will look from the back. The bumper will cover it up
Once I got the angle where I liked it, I started to fill in the holes in the floor
This allowed me to put the bottom of the tube on and finish it. The tab sticking out is going to be welded to the floor to make it more sturdy once welded into place.
Once I had that done, I found out that I cut the hole in the floor too far forward. So I had to make a patch. Since the area where the patch was going was rounded, I used a round piece of steel and a body hammer to shape it.
And here's an idea of how it will look in place. What would you guys suggest that I do to the inside of the filler tube to prevent it from rusting? I'm not sure if I should paint it or not as it will have gas running through it, but I want to try and stop any rust from coming while I complete the car.
Here's how it will look from the back. The bumper will cover it up
03-02-2012, 06:14 PM
#153
On The Tree
Thread Starter
iTrader: (4)
Join Date: Mar 2009
Location: British Columbia, Canada
Posts: 132
Likes: 0
Received 0 Likes
on
0 Posts
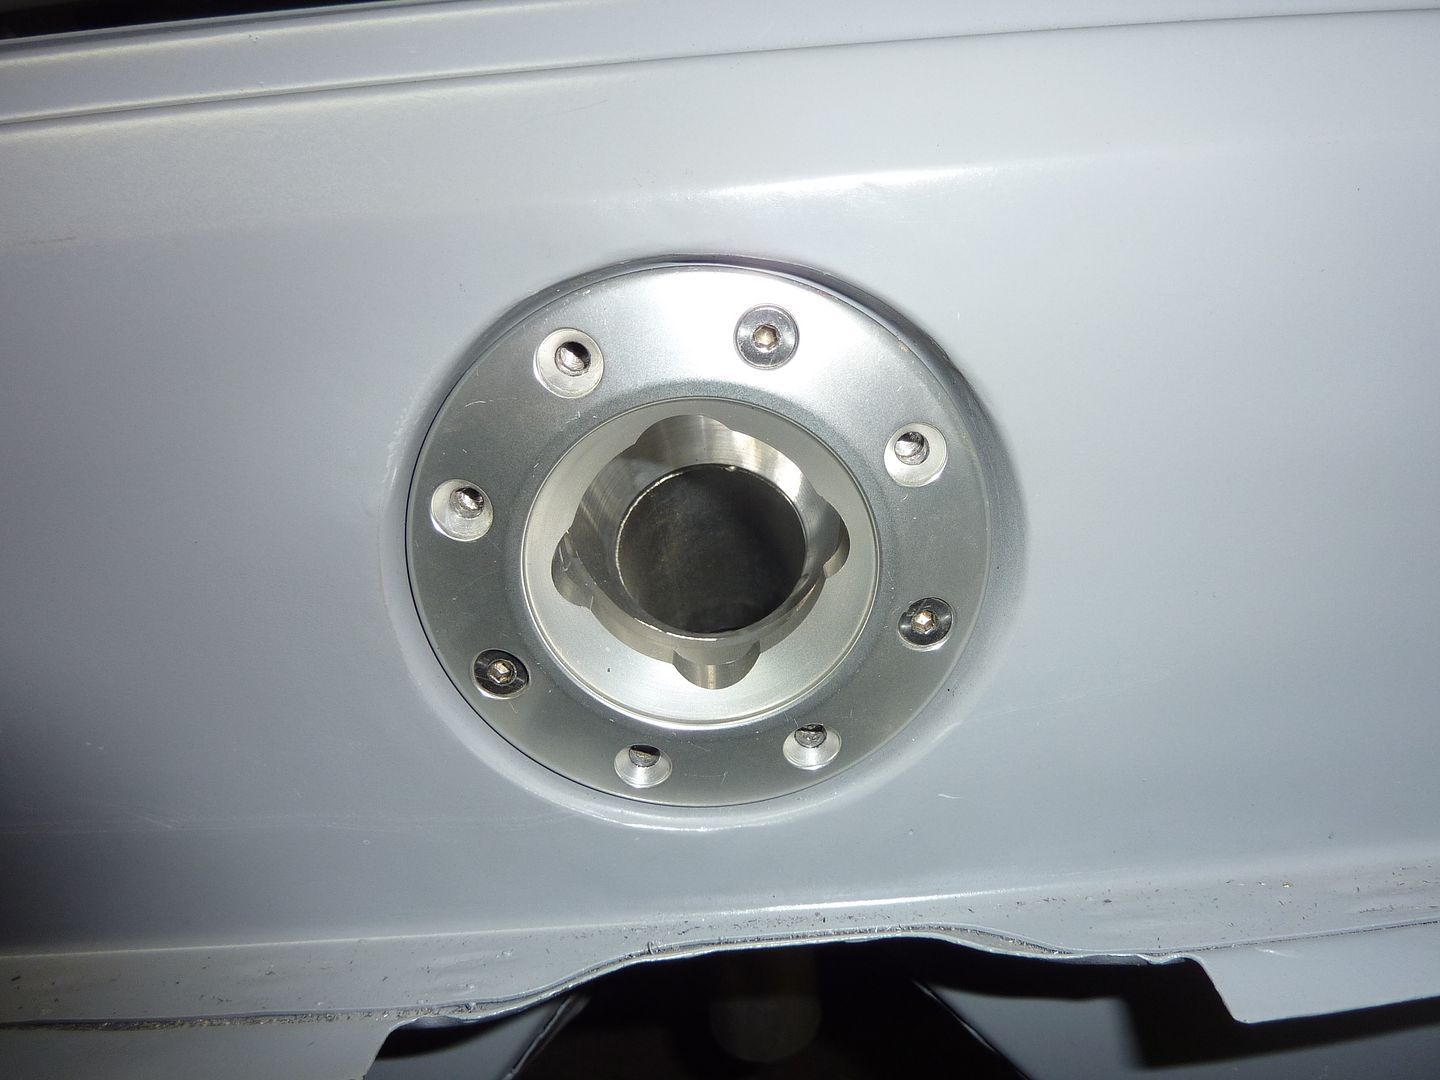
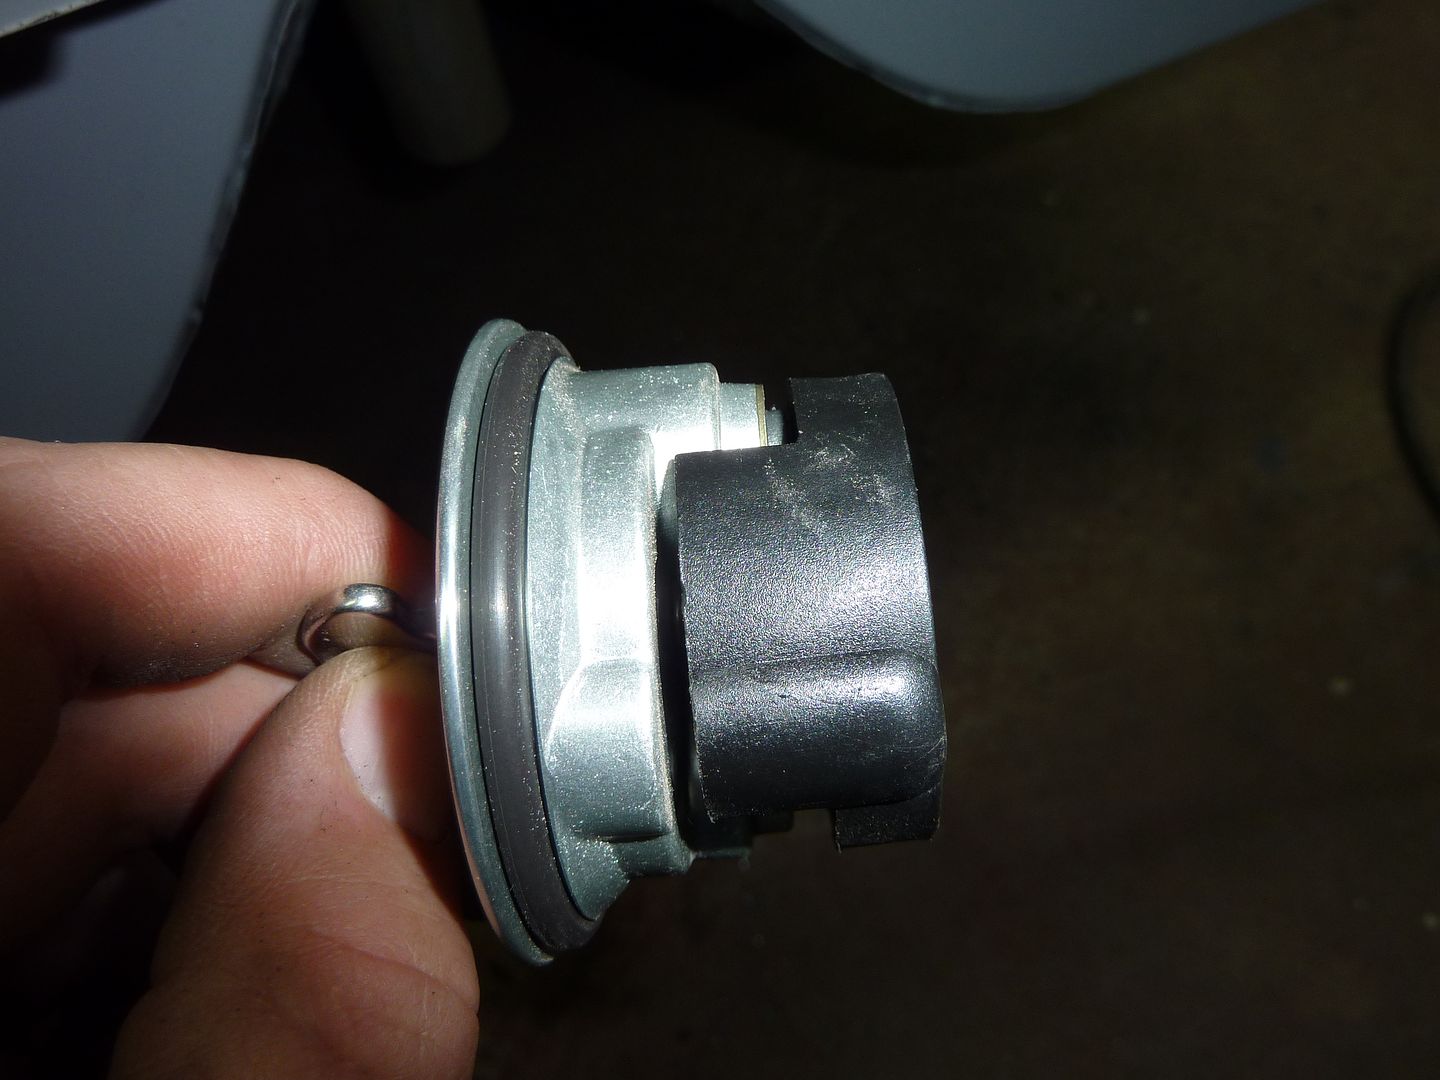
I also realized that I have never posted any pics of the Ridetech filler cap in place. Here's a few

I also bought a couple new parts. First thing I got was a LS3 valley cover. I was reading another thread that was discussing PCV valves. I checked my current valley cover and found it doesn't have a pcv tube on it. So I checked ebay and found a 2011 Camaro take off valley cover for $15.95. With shipping it cost me $50 but still a lot cheaper than buying a new one. I also ordered a Norris Motorsports PCV catch can. Should be here next week.
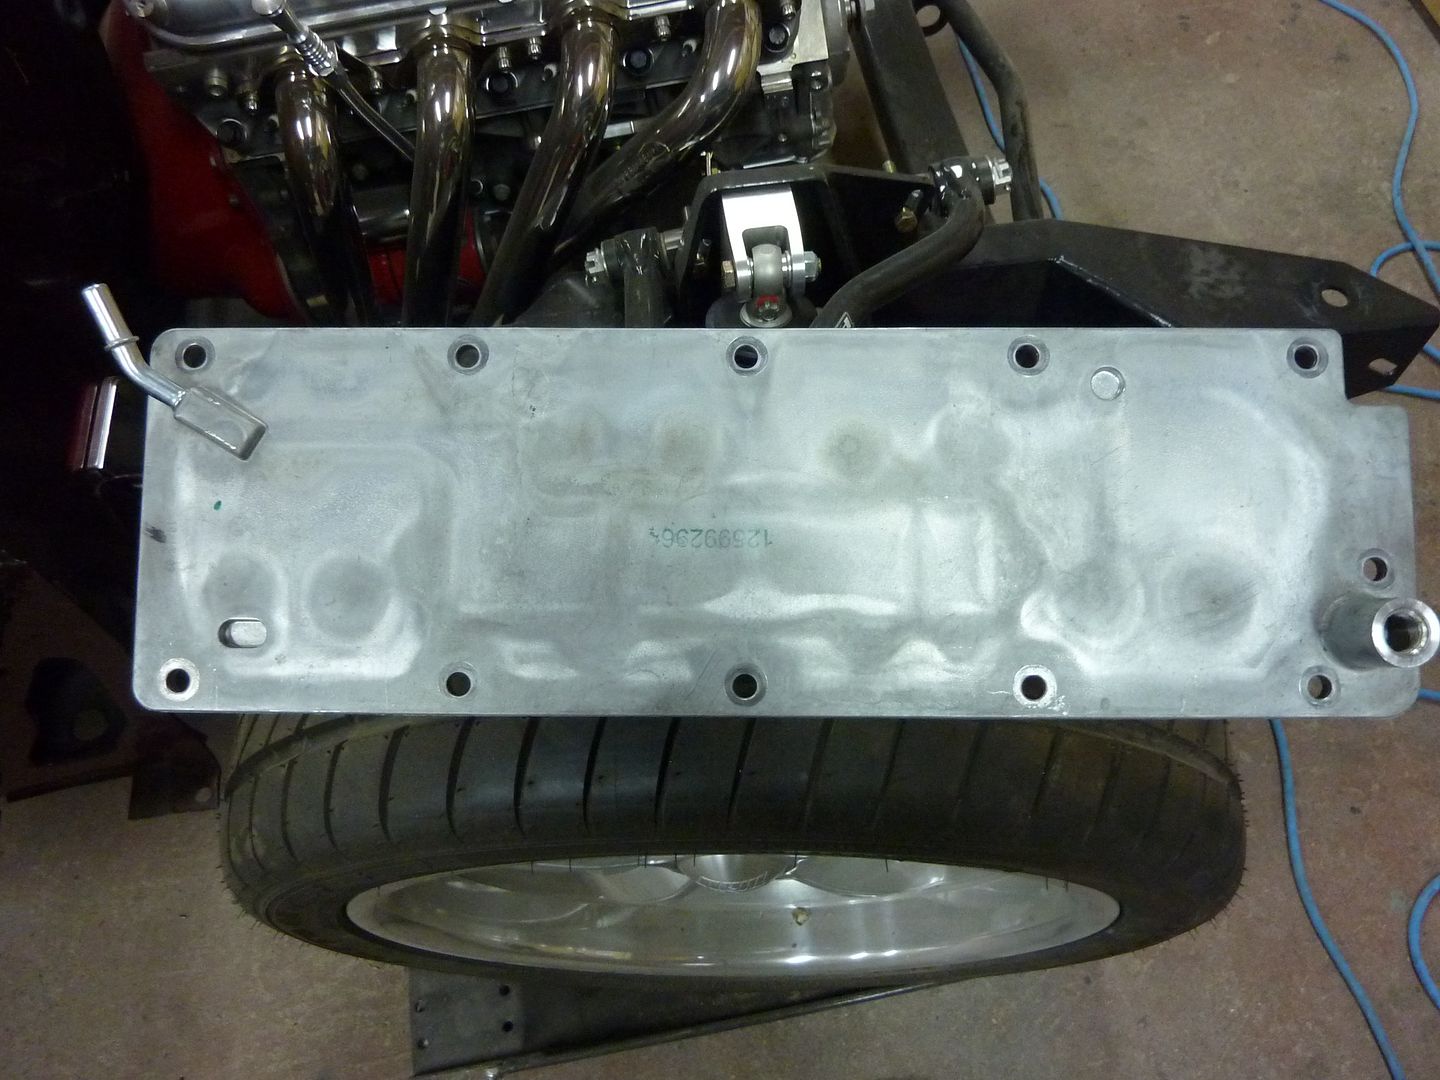
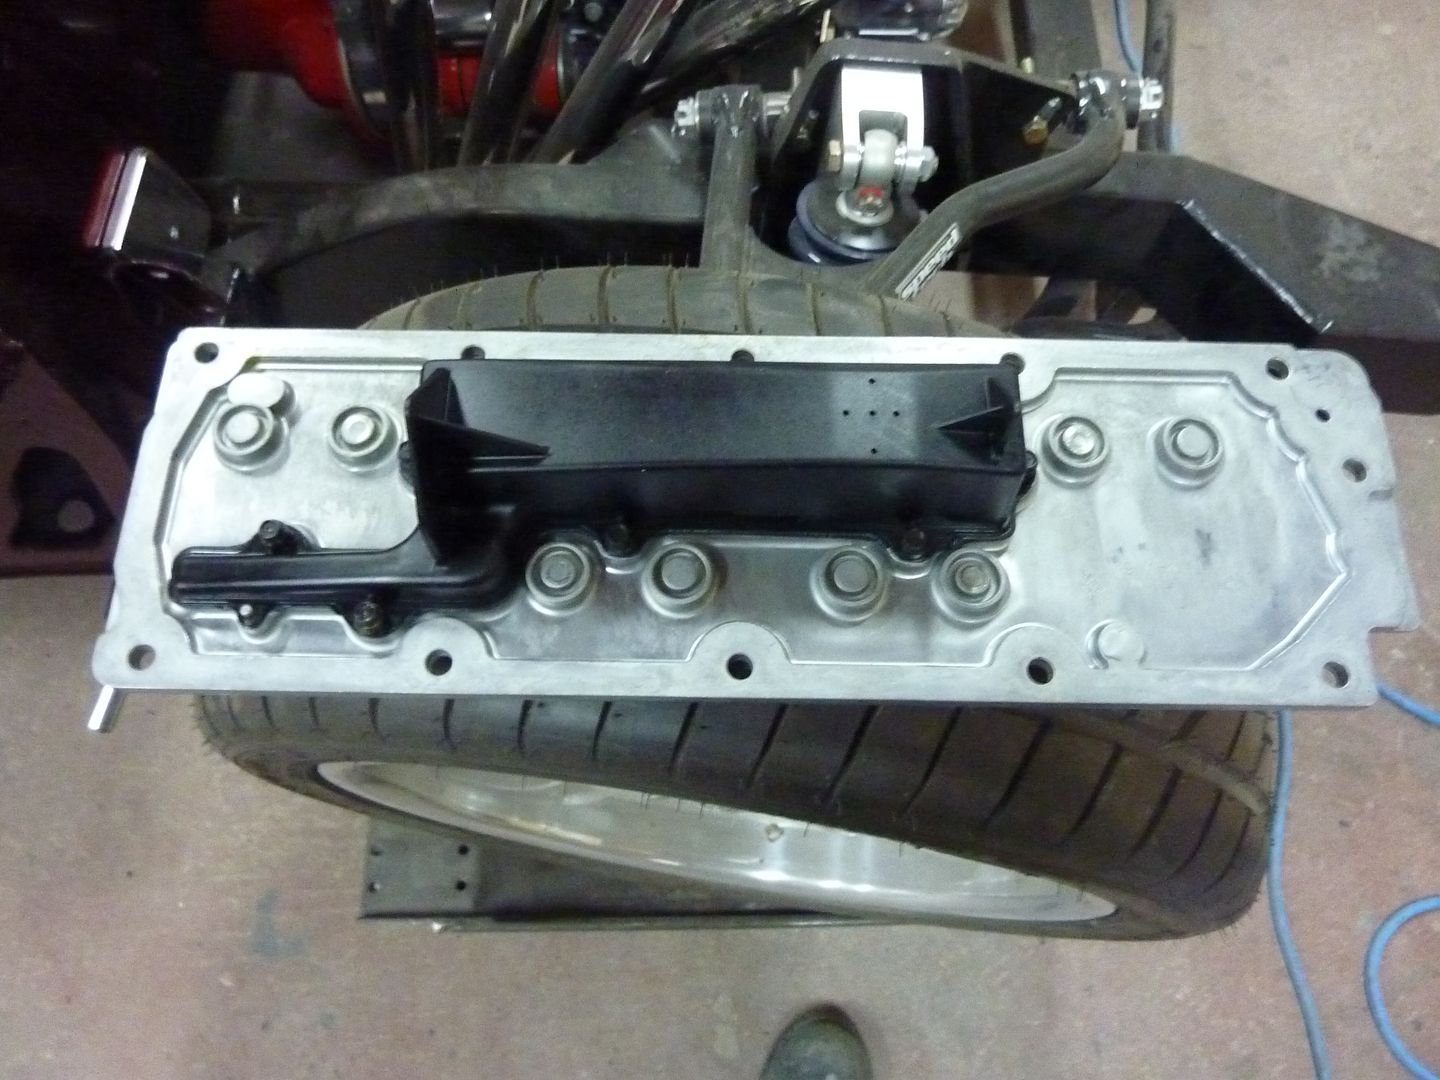
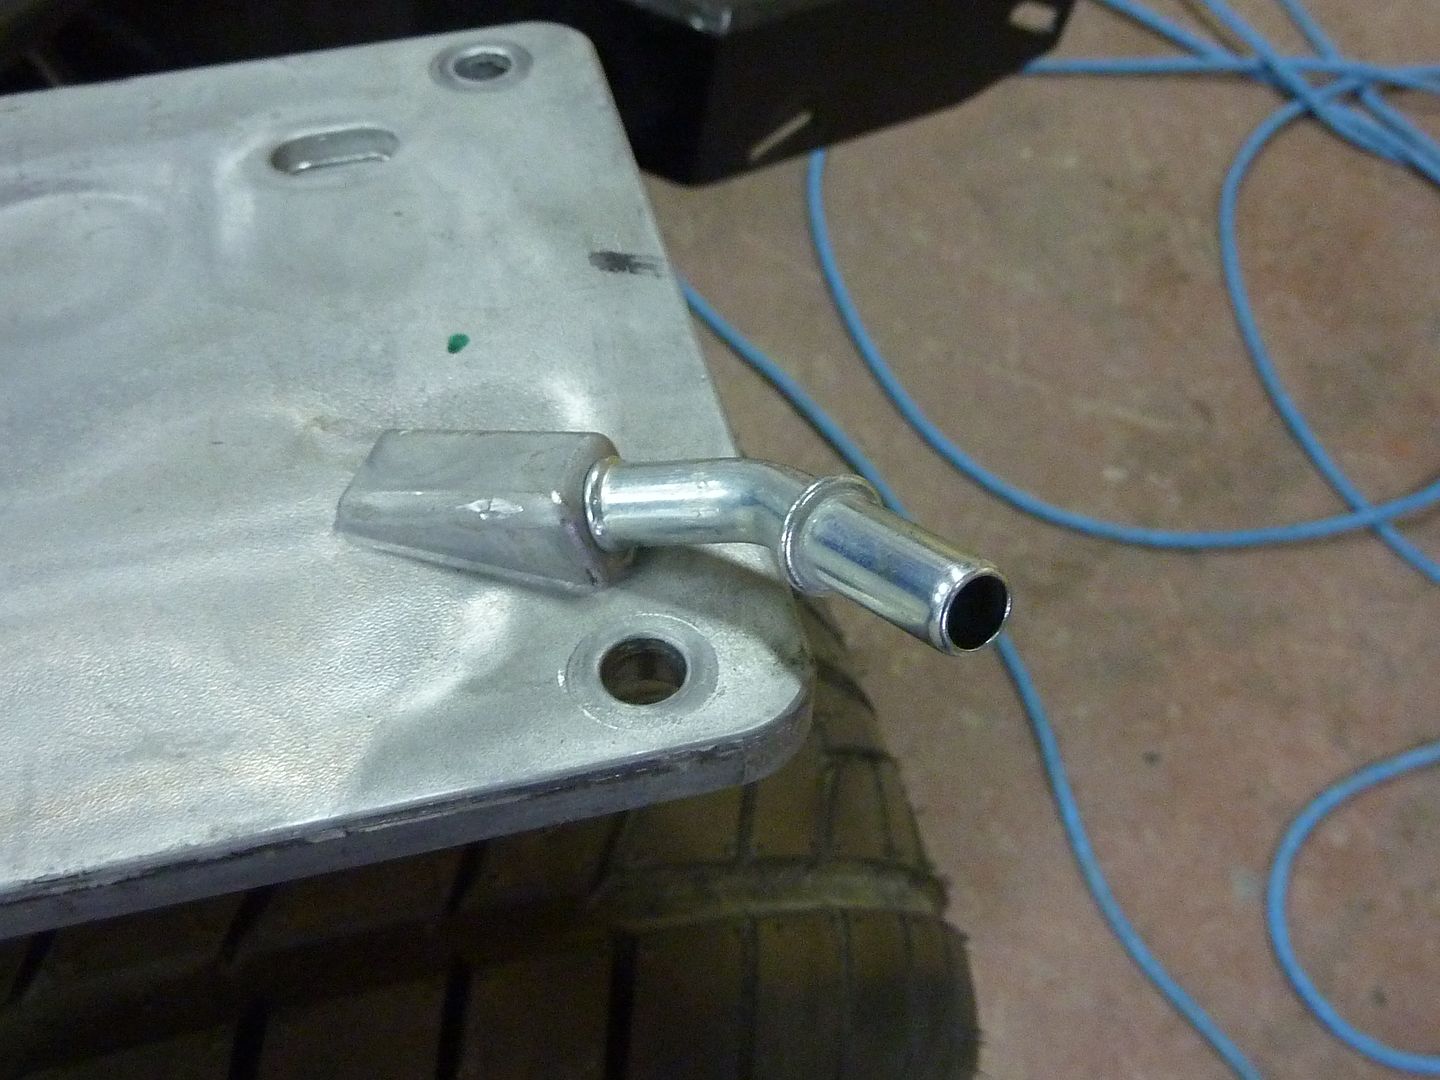
Here's the one currently on the motor
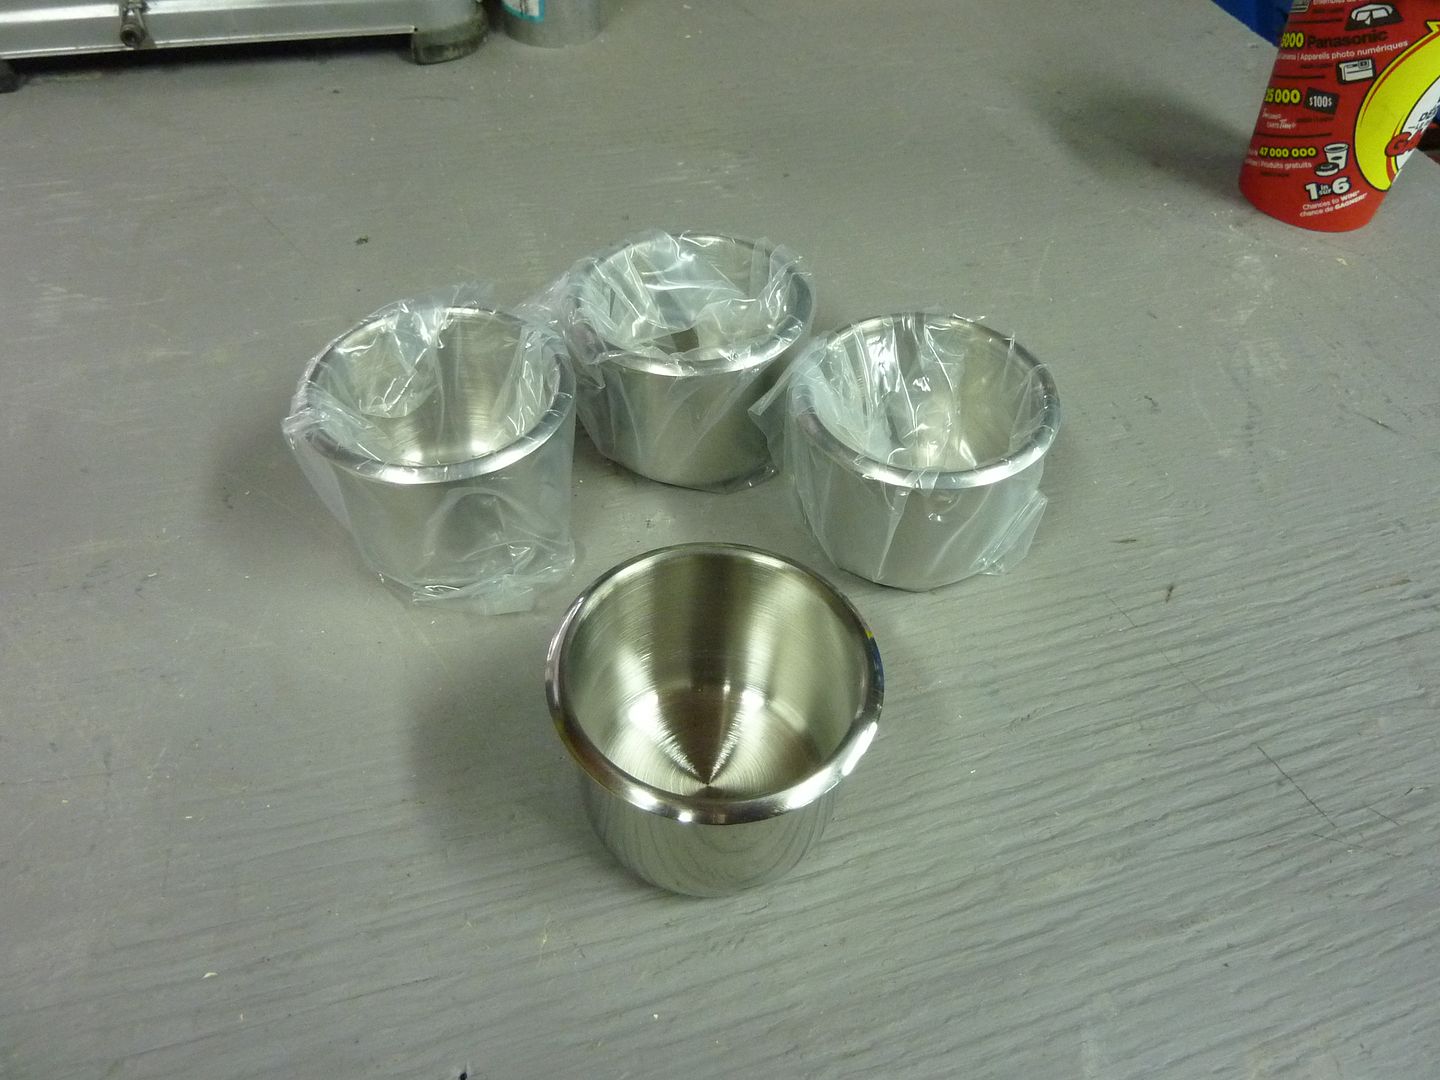
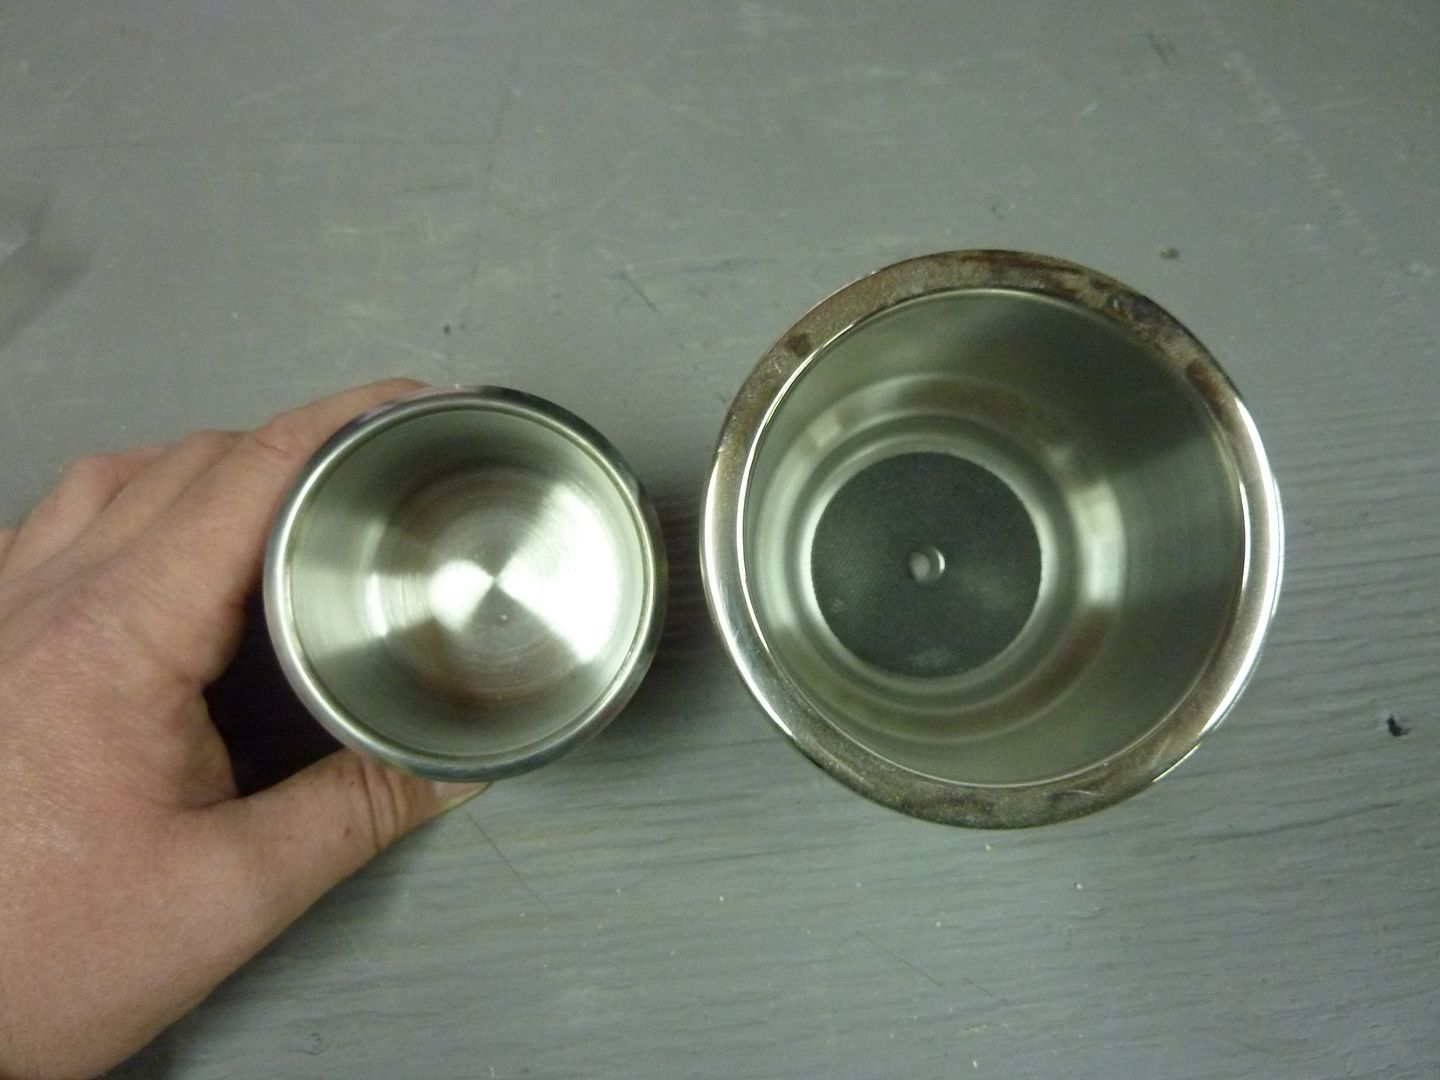
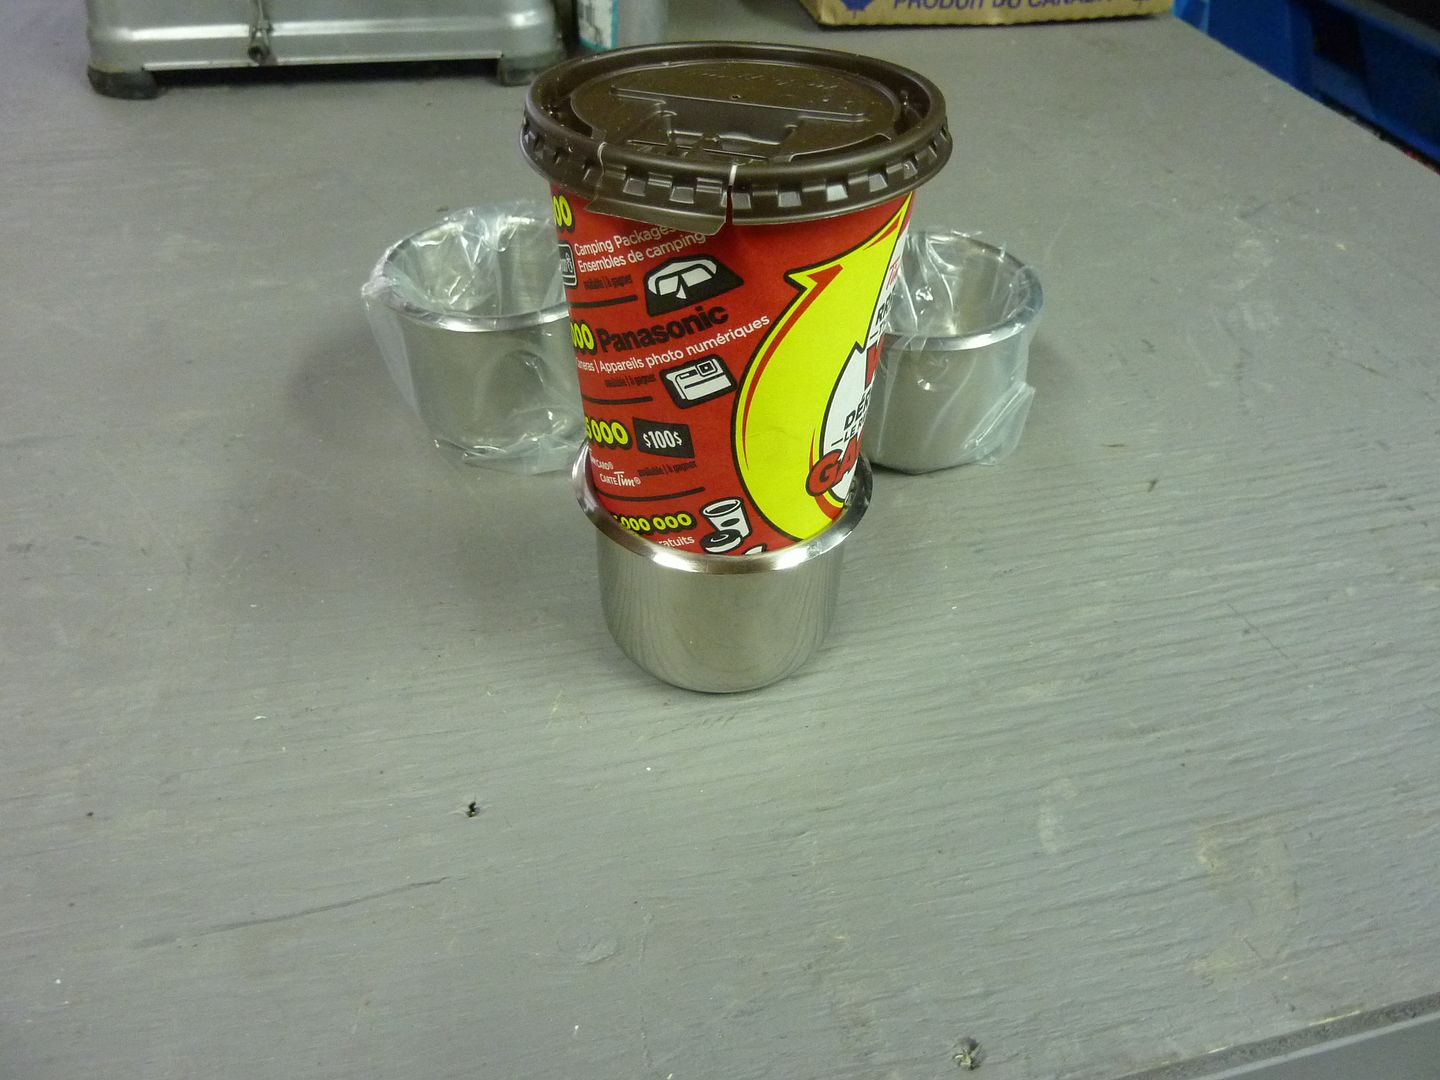
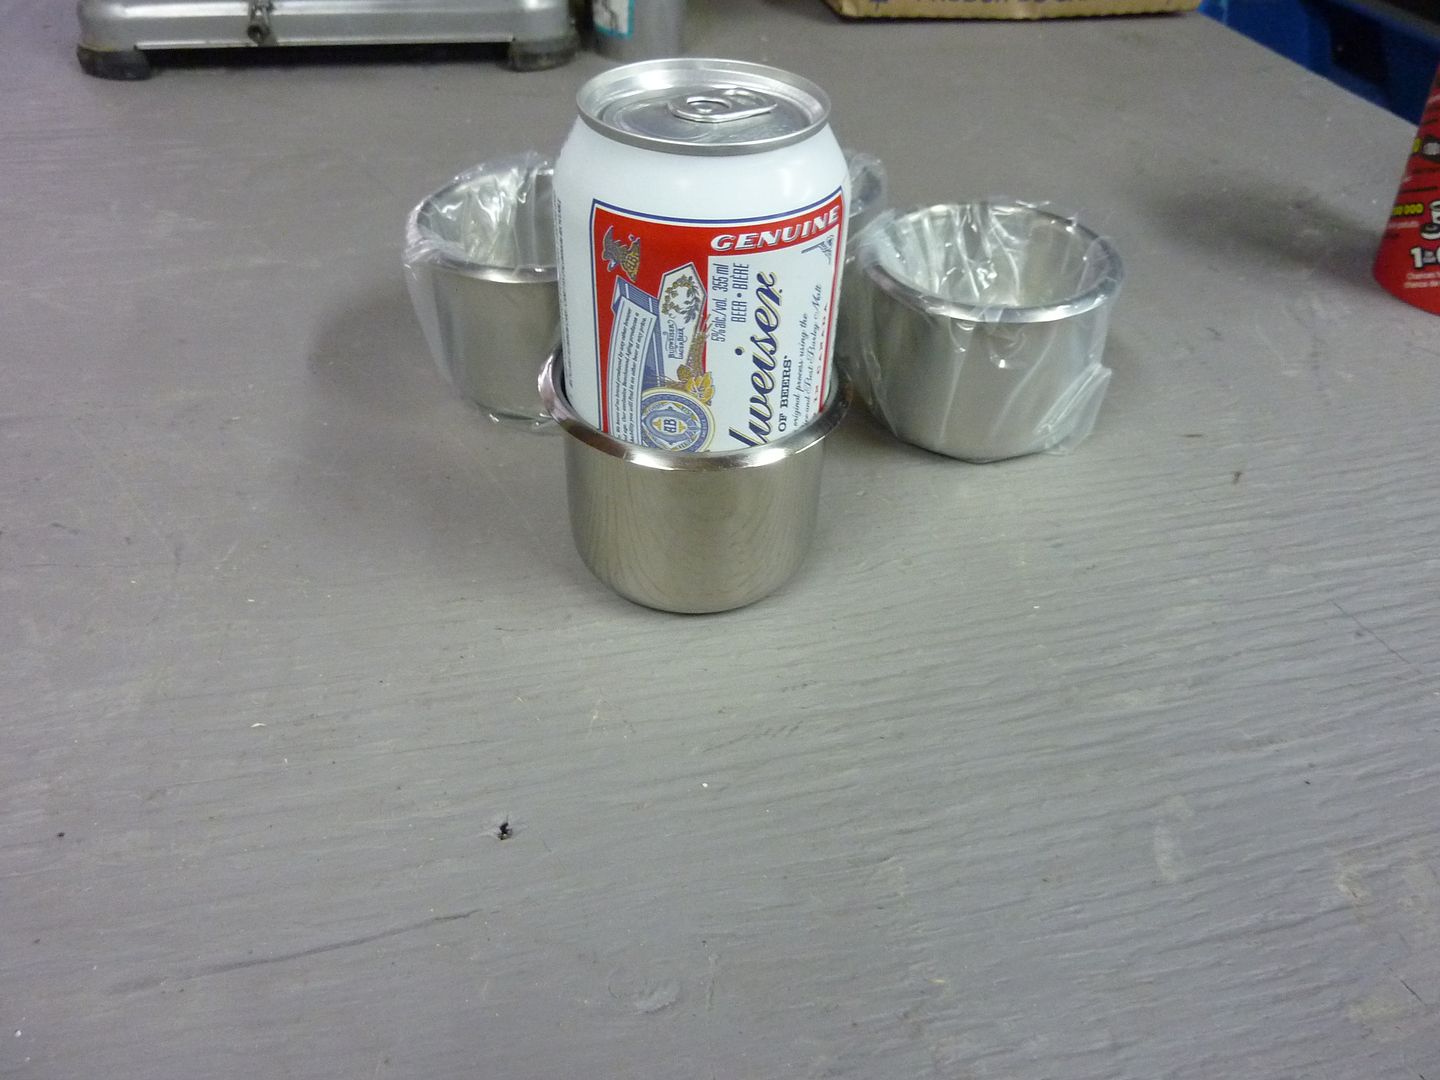
I also found on another thread where someone bought some cup holders from a poker supply store. I really didn't like the size of the cup holders that I have, so I checked a poker supply store. I picked up 4 stainless holders for $32 shipped. I can't fit a pop bottle into the new ones, but cans and the bottles of water that we buy fit, so they will do

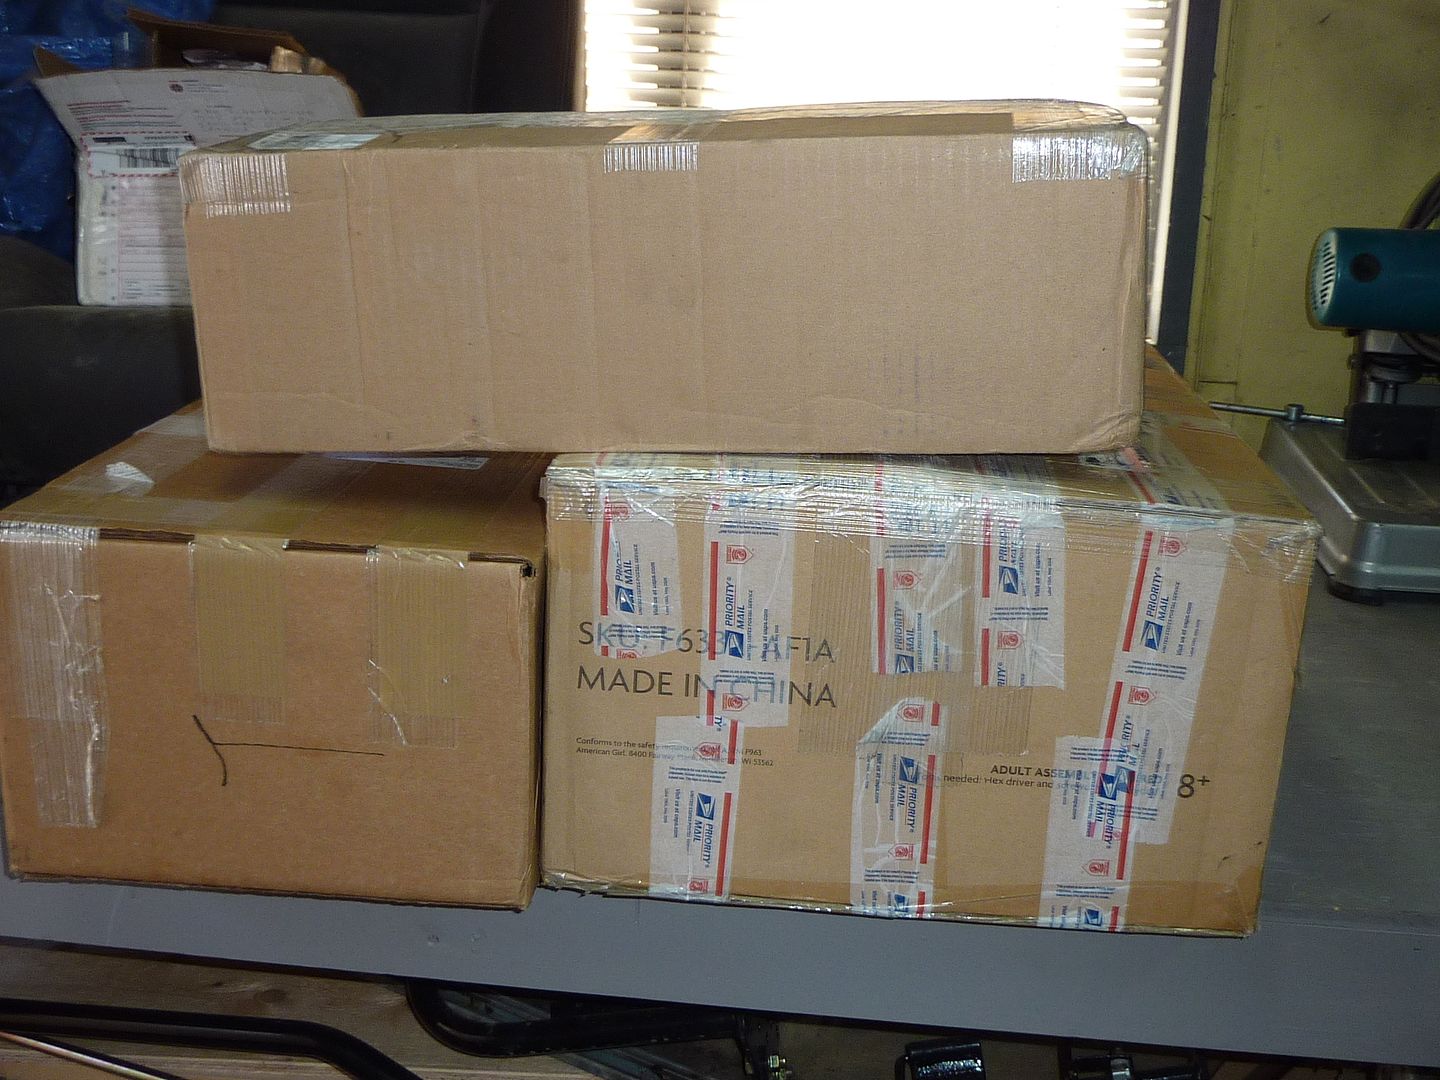
We're heading to Vegas (yes again...it's just so cheap to go) on Monday so I have a couple new parts waiting for me at the border. I've got new valve covers and my serpentine kit waiting. The nice thing about getting the serpentine kit out of the way is the only two big items I have left to buy is the gas tank and the radiator. It's very very faint, but I can actually start to see the light.
I also bought a couple new parts. First thing I got was a LS3 valley cover. I was reading another thread that was discussing PCV valves. I checked my current valley cover and found it doesn't have a pcv tube on it. So I checked ebay and found a 2011 Camaro take off valley cover for $15.95. With shipping it cost me $50 but still a lot cheaper than buying a new one. I also ordered a Norris Motorsports PCV catch can. Should be here next week.
Here's the one currently on the motor
I also found on another thread where someone bought some cup holders from a poker supply store. I really didn't like the size of the cup holders that I have, so I checked a poker supply store. I picked up 4 stainless holders for $32 shipped. I can't fit a pop bottle into the new ones, but cans and the bottles of water that we buy fit, so they will do
We're heading to Vegas (yes again...it's just so cheap to go) on Monday so I have a couple new parts waiting for me at the border. I've got new valve covers and my serpentine kit waiting. The nice thing about getting the serpentine kit out of the way is the only two big items I have left to buy is the gas tank and the radiator. It's very very faint, but I can actually start to see the light.
 03-10-2012, 11:44 AM
#155
On The Tree
Thread Starter
iTrader: (4)
Join Date: Mar 2009
Location: British Columbia, Canada
Posts: 132
Likes: 0
Received 0 Likes
on
0 Posts
Thanks. Yeah the wheel stands are pretty slick. Must admit though...I borrowed the idea from another forum. Nice cheap way to get the car in the air.
I haven't had a chance to get anymore work done on the car as we were in Vegas last week, but I thought I'd show what I picked up on the way home.
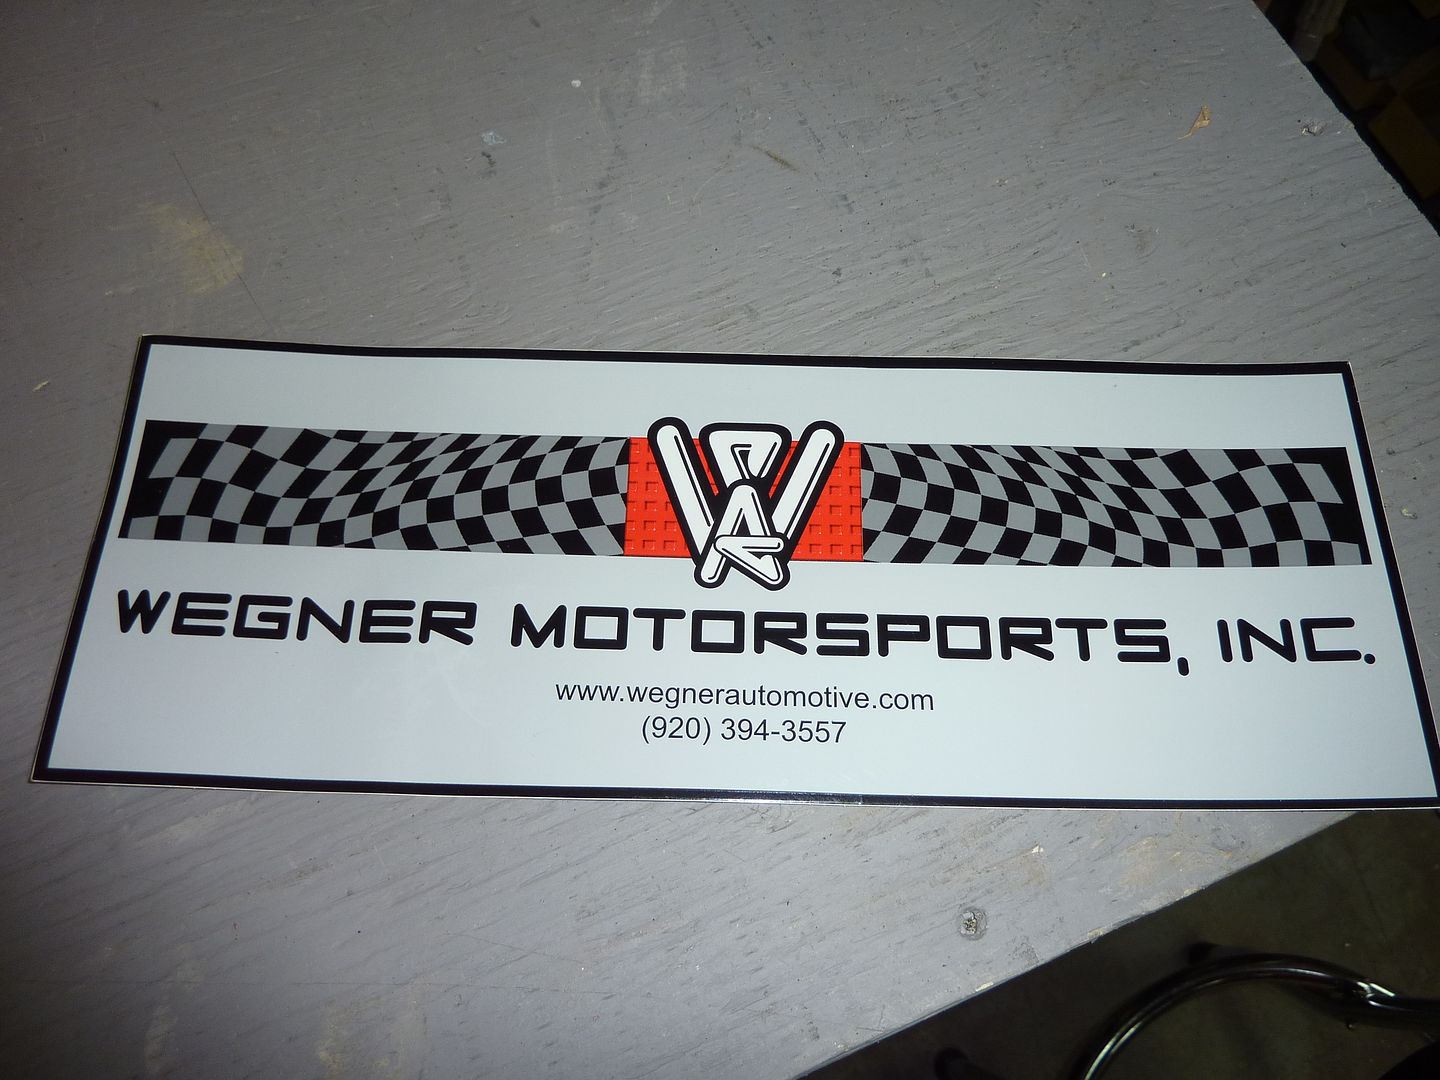
I decided to get Wegner Motorsports new diamond cut serpentine kit. From what I understand, this kit was designed with help from Frank at Prodigy for pro-touring cars. The kit usually comes in black with the diamond cuts for accents, but Casey at Wegner did one for me in polished and it turned out amazing. I talked with Casey a few times and I must say that Wegner has amazing customer service. Would highly recommend them. He even put the kit together once it came back from the polisher so he could send me a picture of how it turned out before it shipped.
On to the pics:
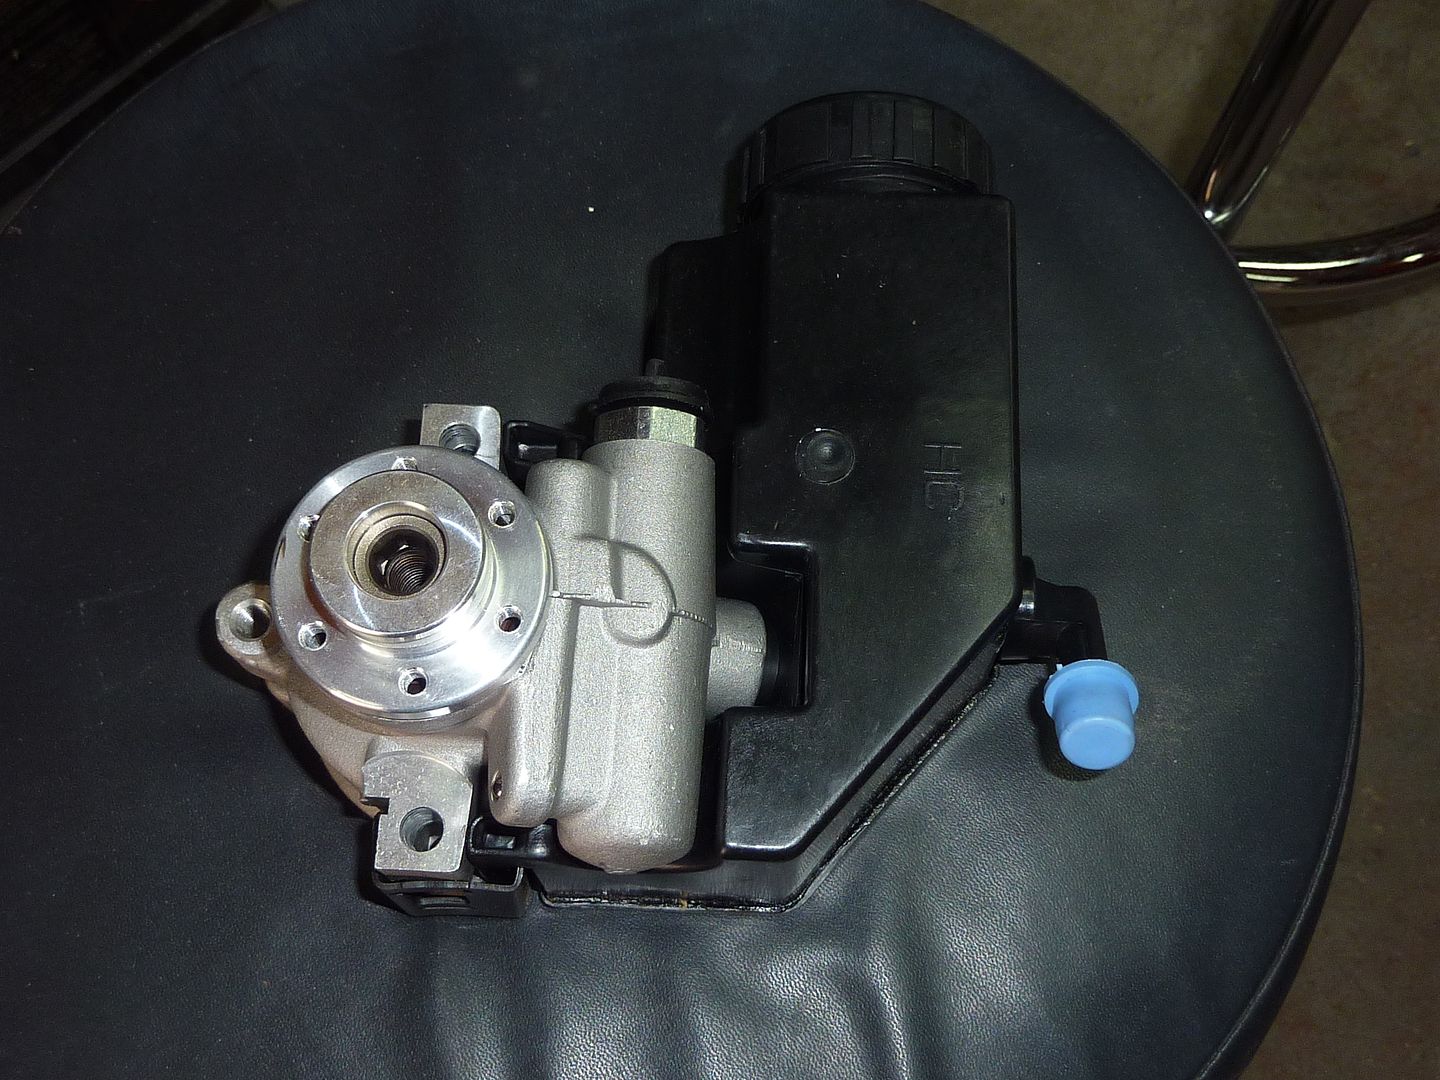
All the goodies that came with the kit. The only part I'm not sure of is the power steering pump. I completely forgot to tell Casey that I was running r&p and am not sure if the high flow pump is the one I need. I read somewhere that I should be using the low flow one. I have an email into Unisteer and Casey to confirm.

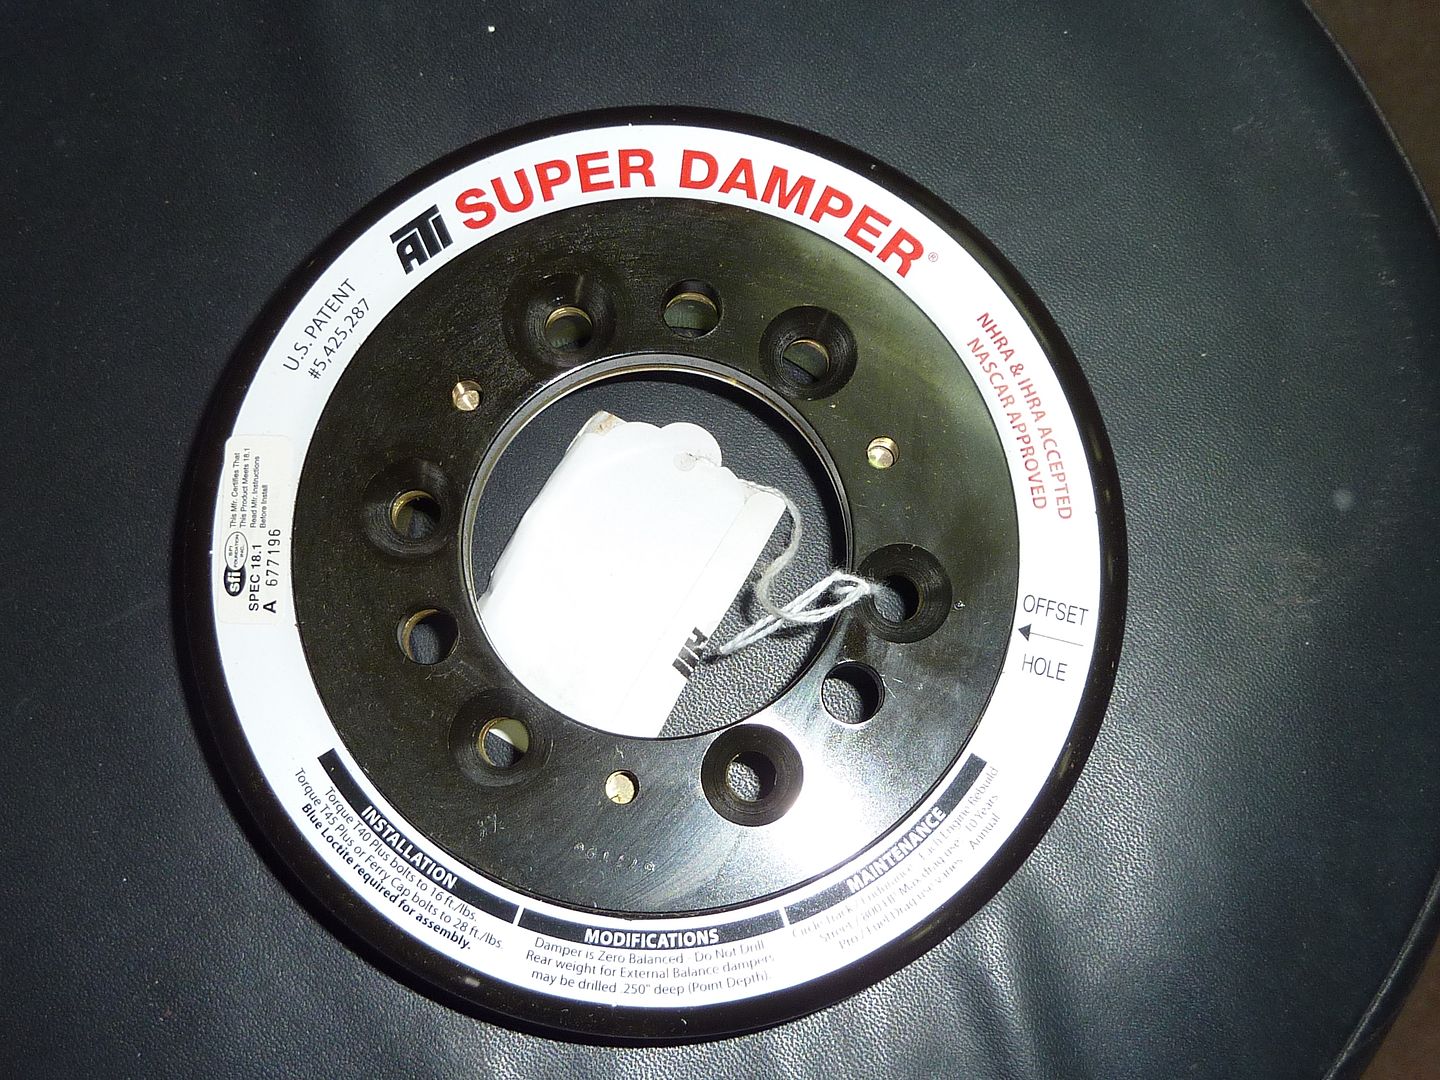
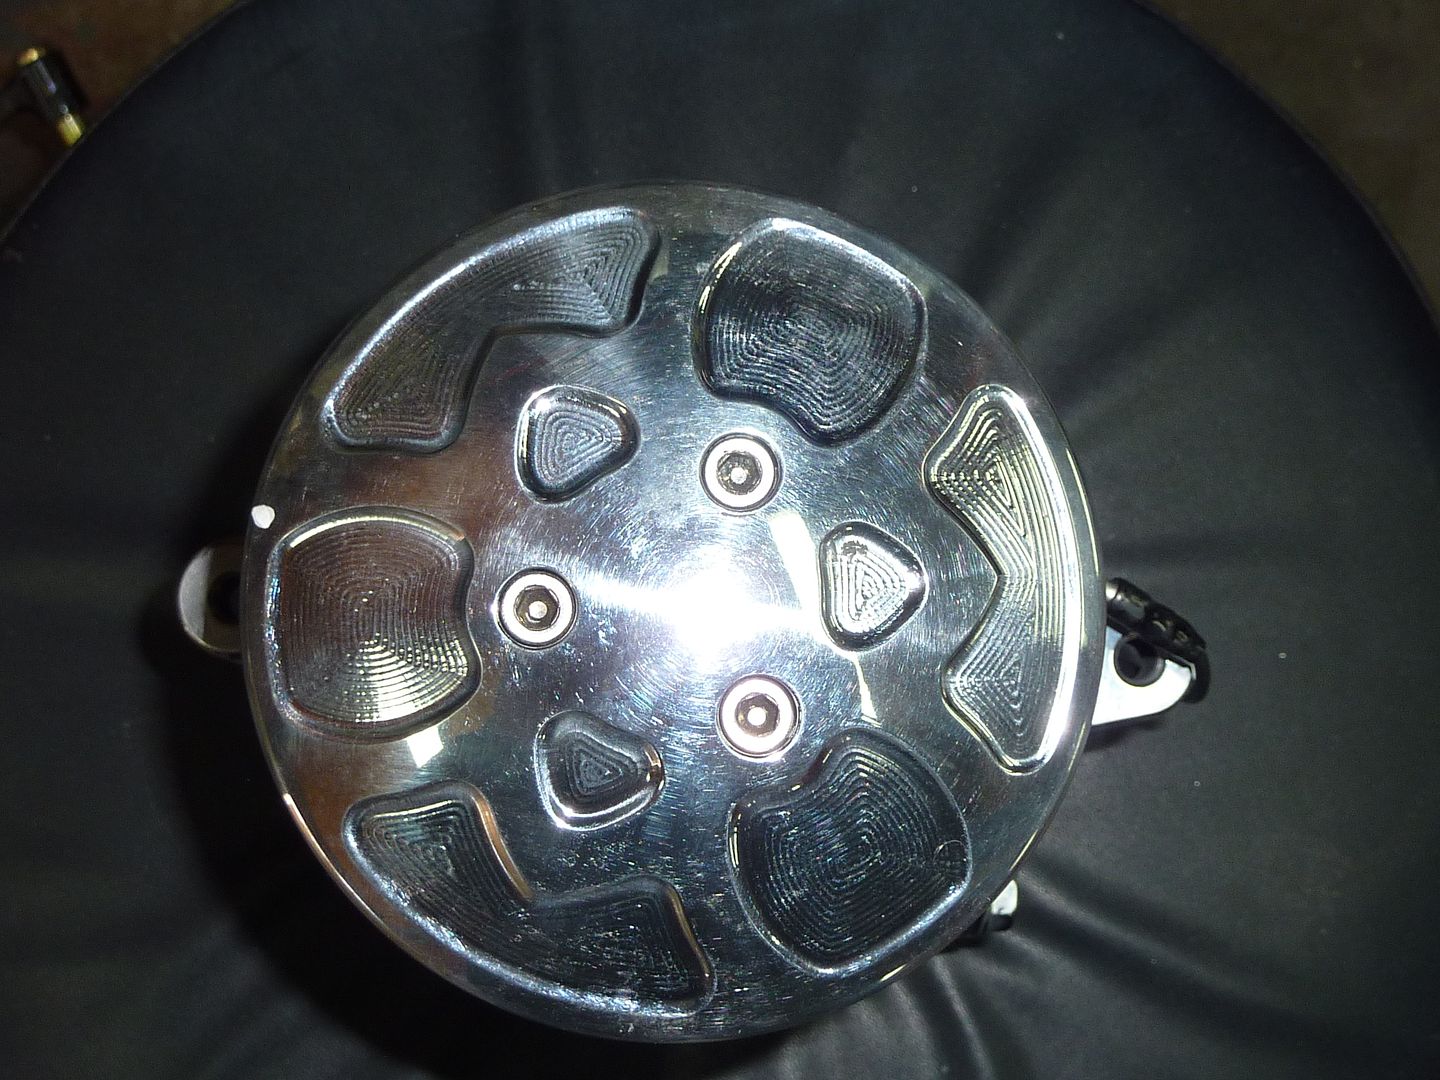
Here's a pic of the pulleys. You can see the diamond cutting on the front accents
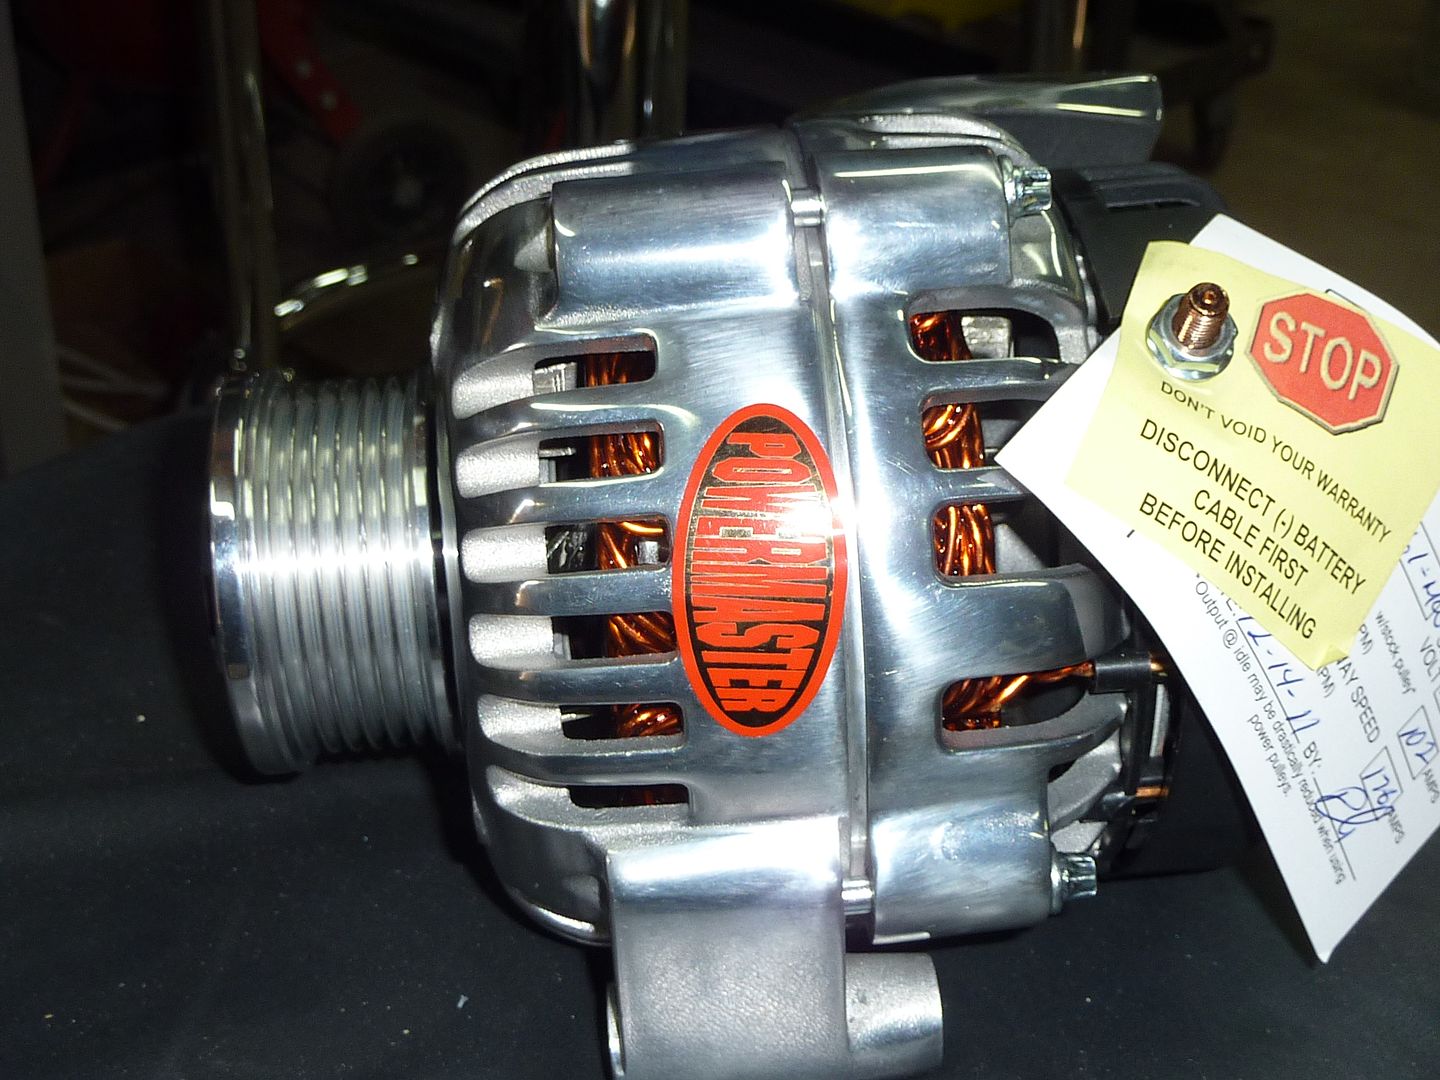
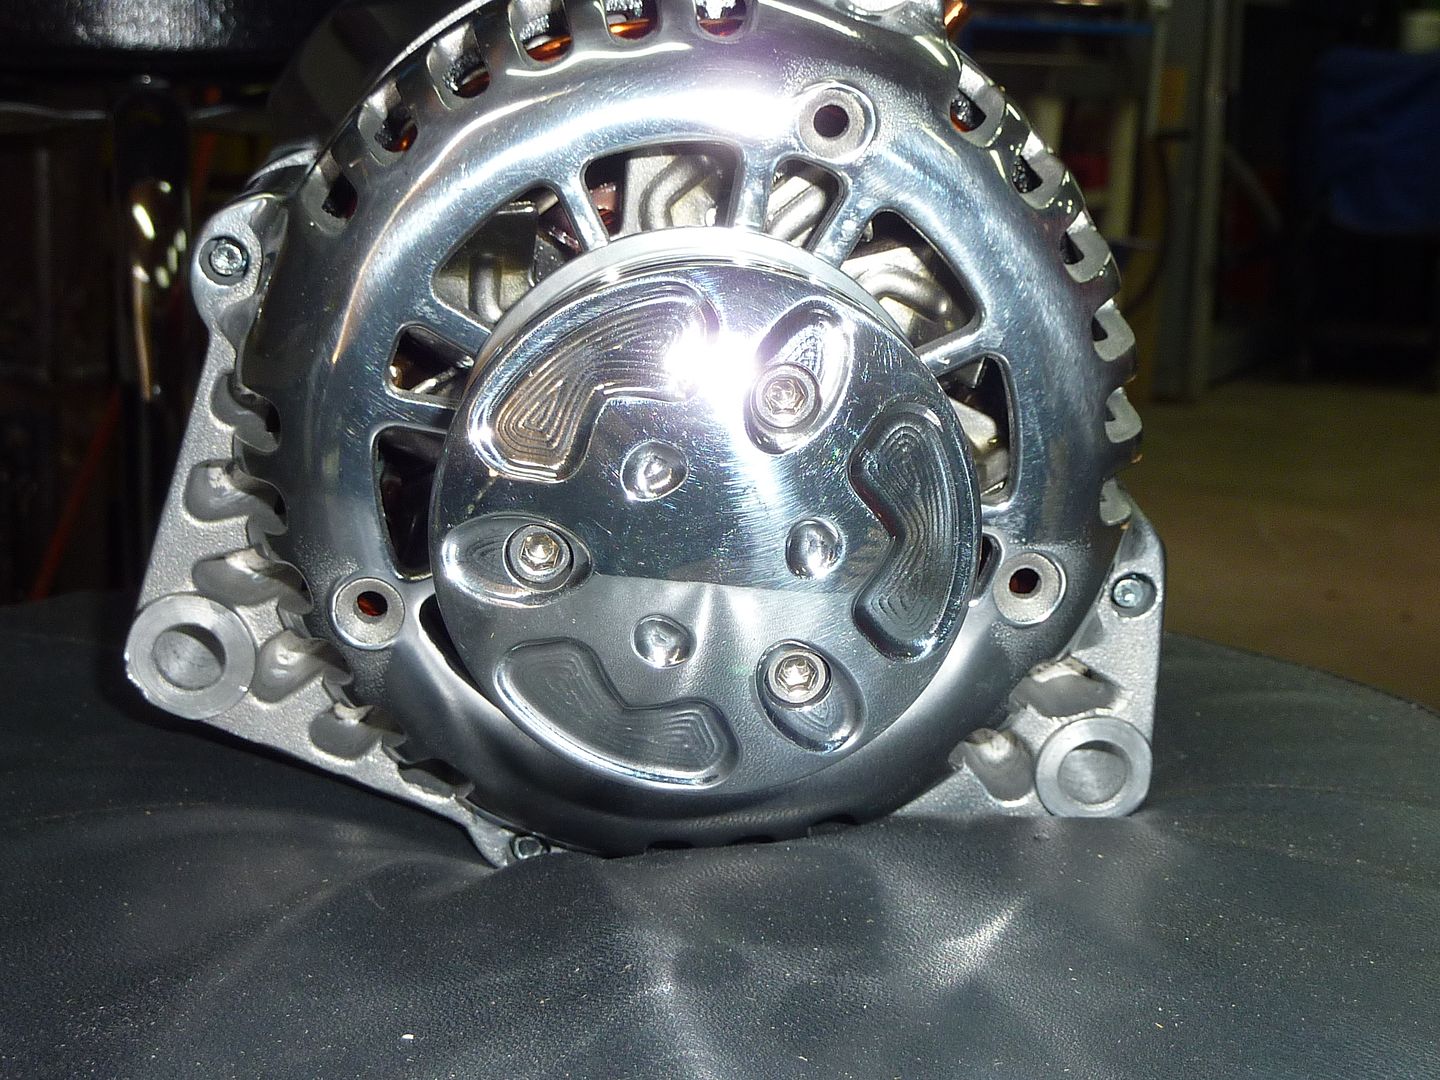

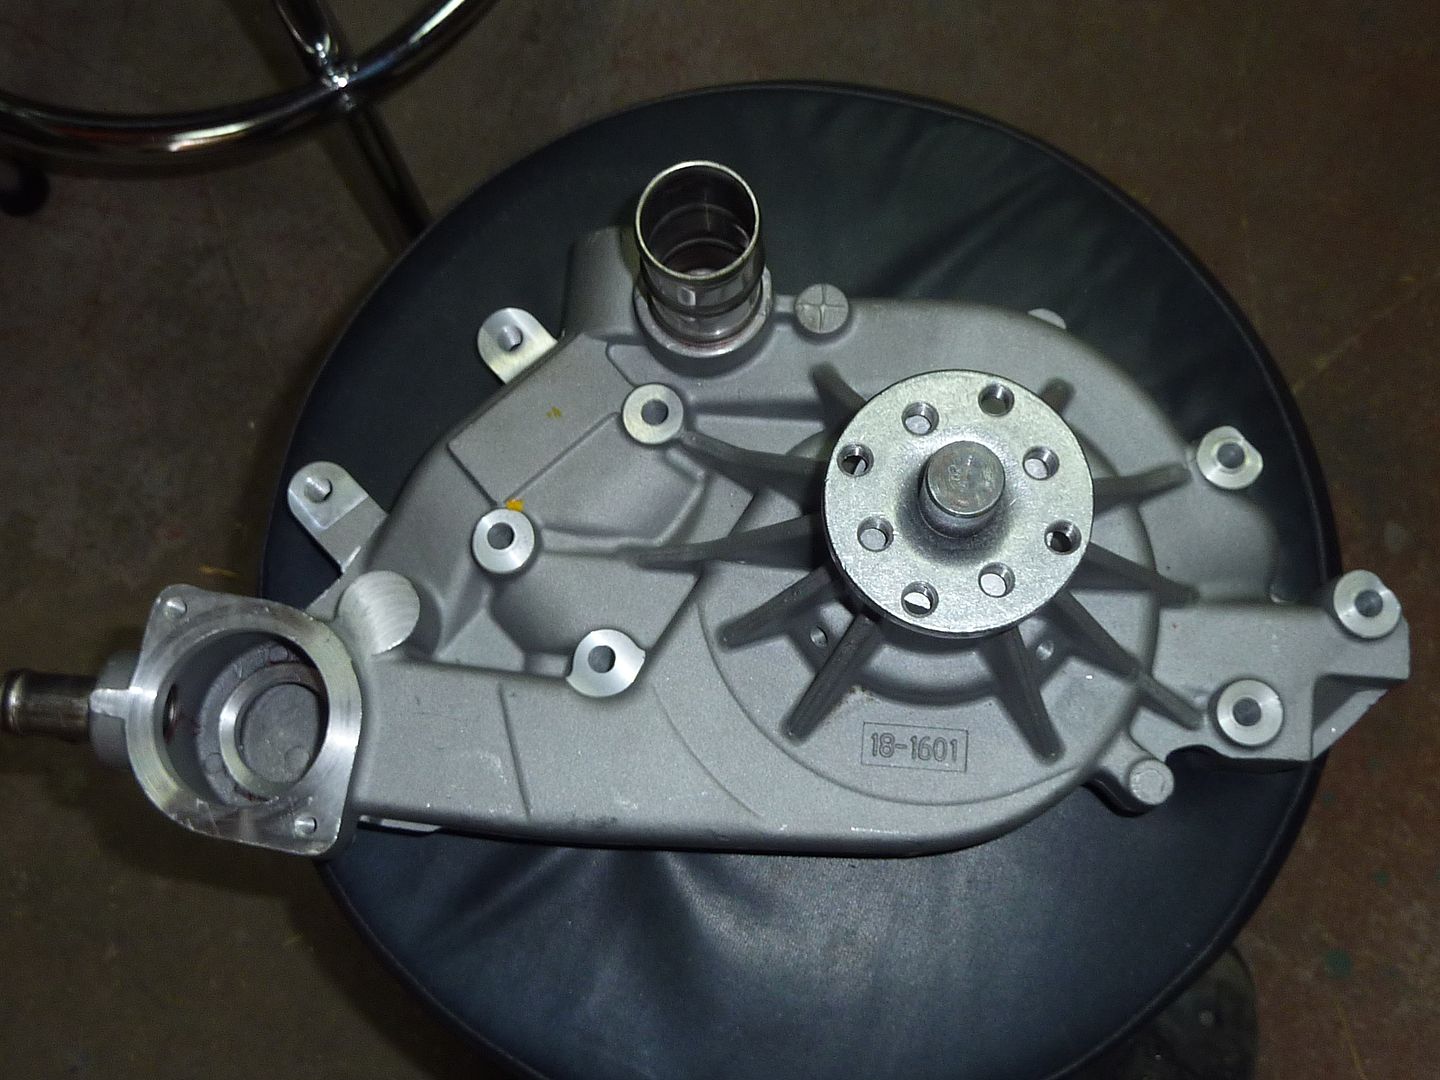
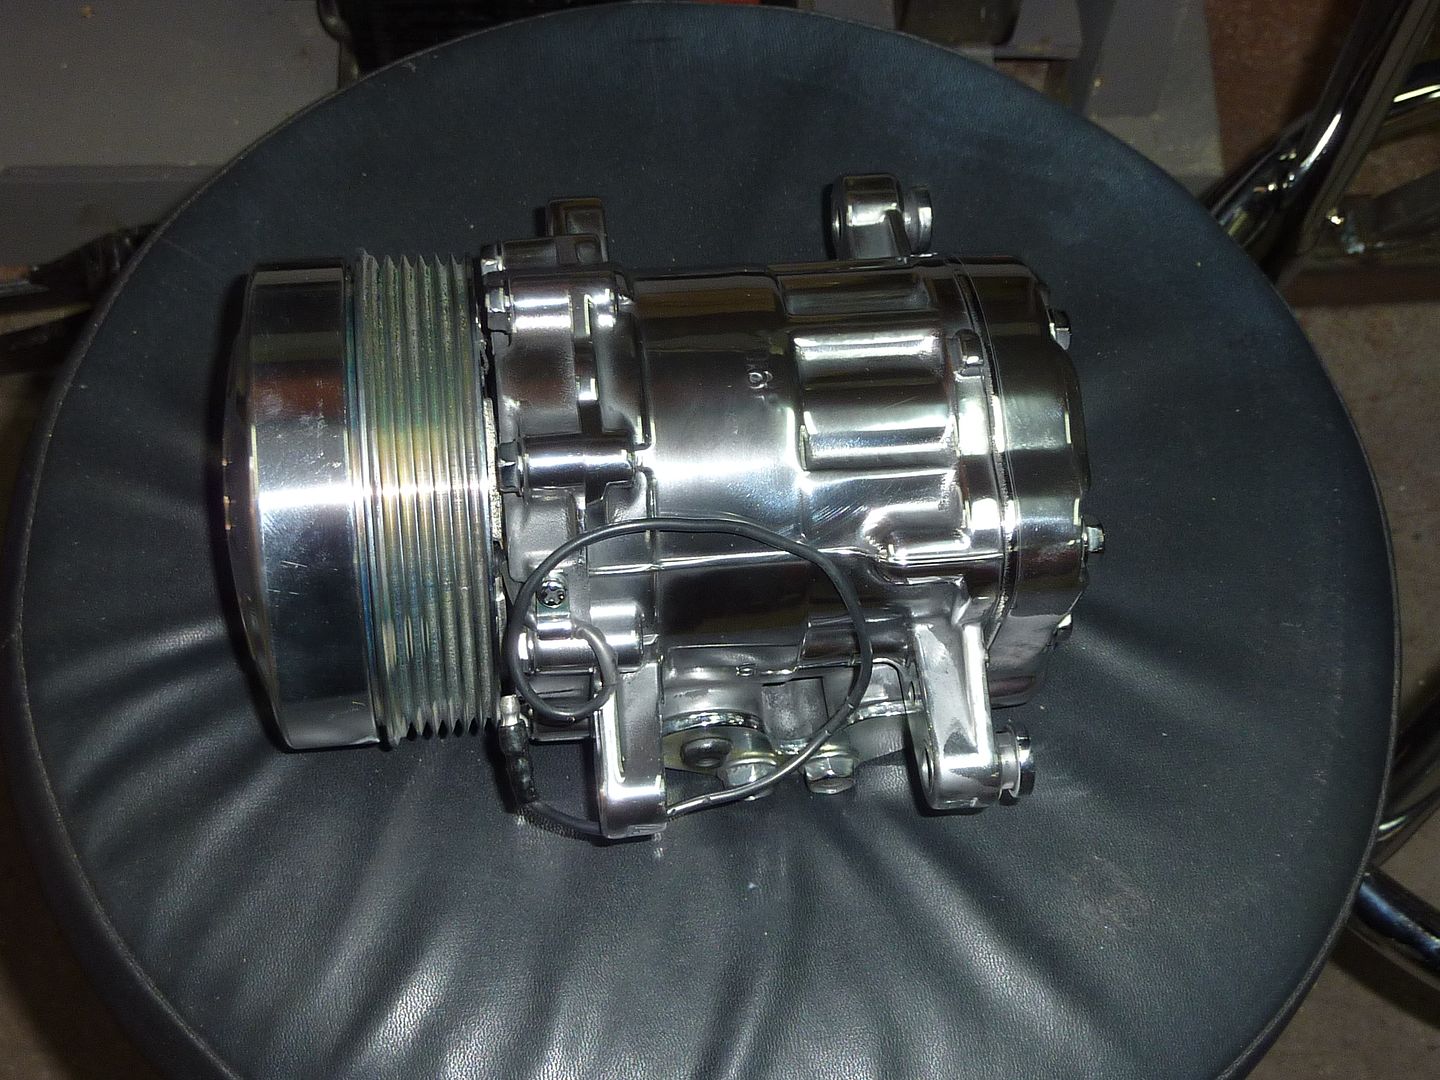
Not everything, but most of the other parts
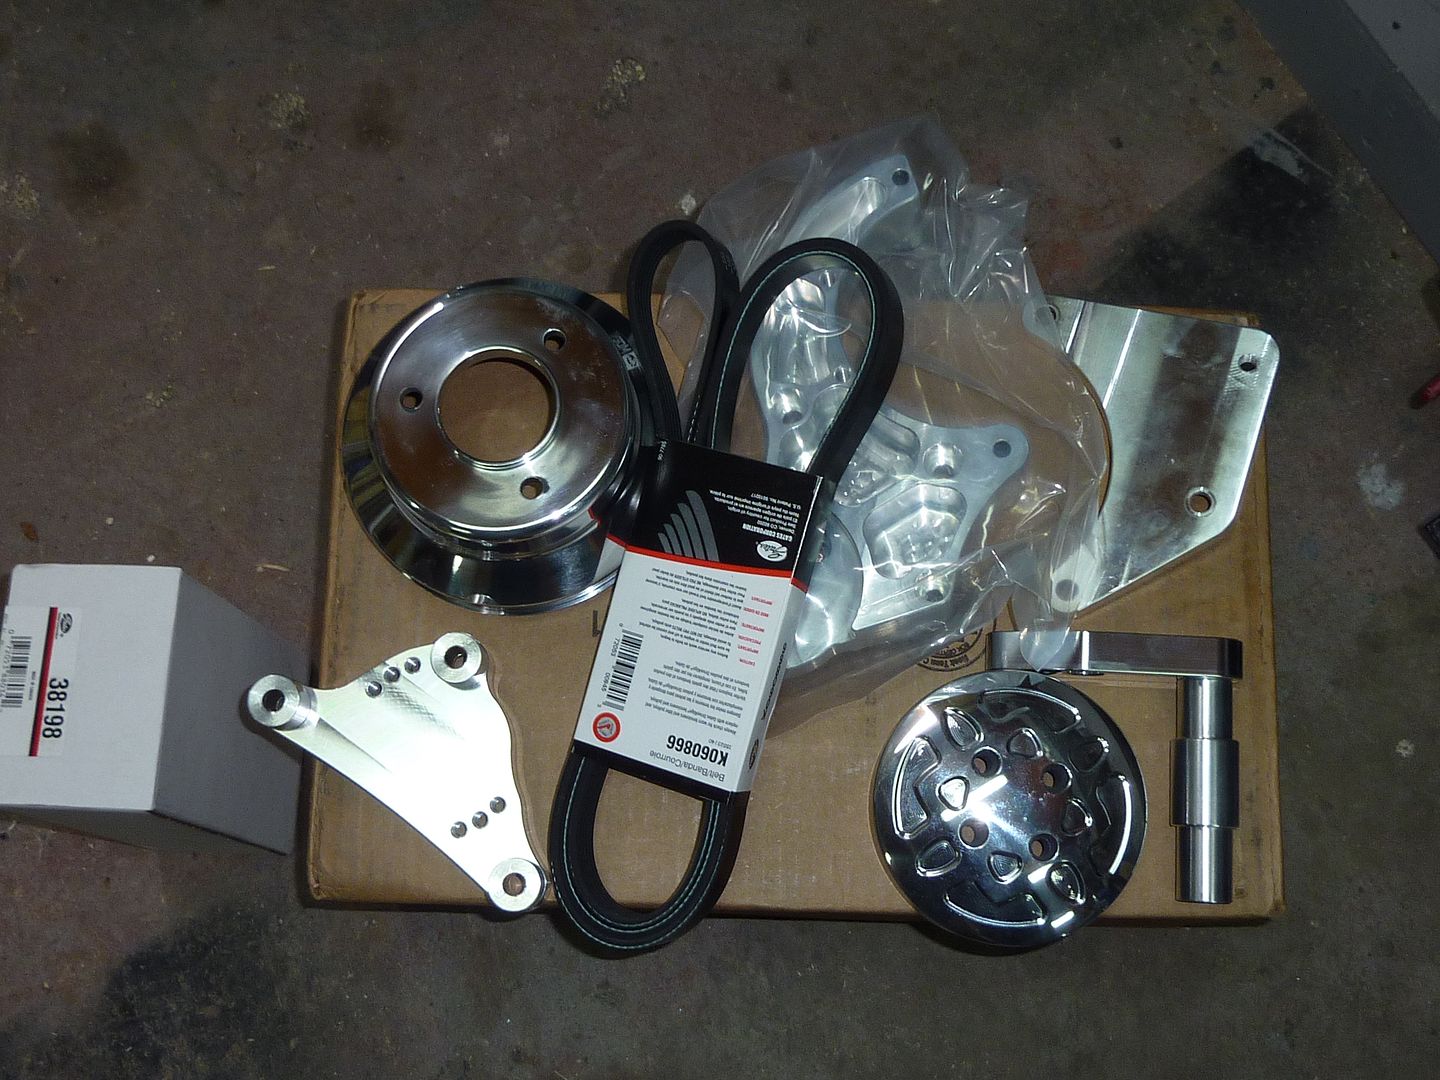
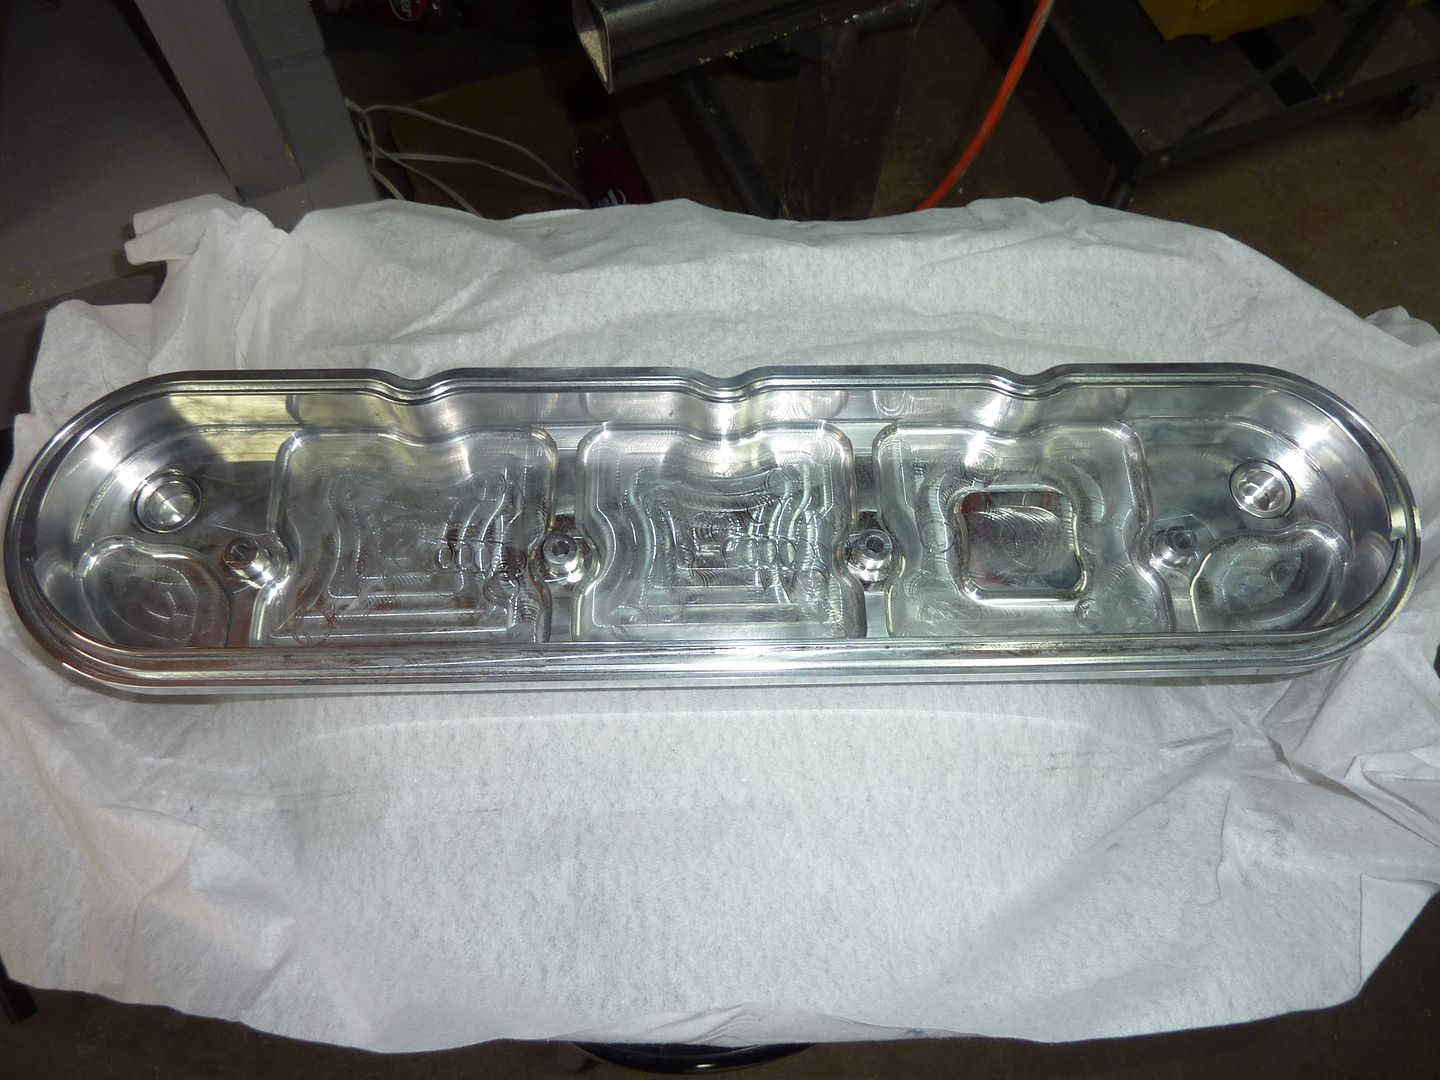
I also picked up these from Casey. They are very nice for anyone looking for new valve covers

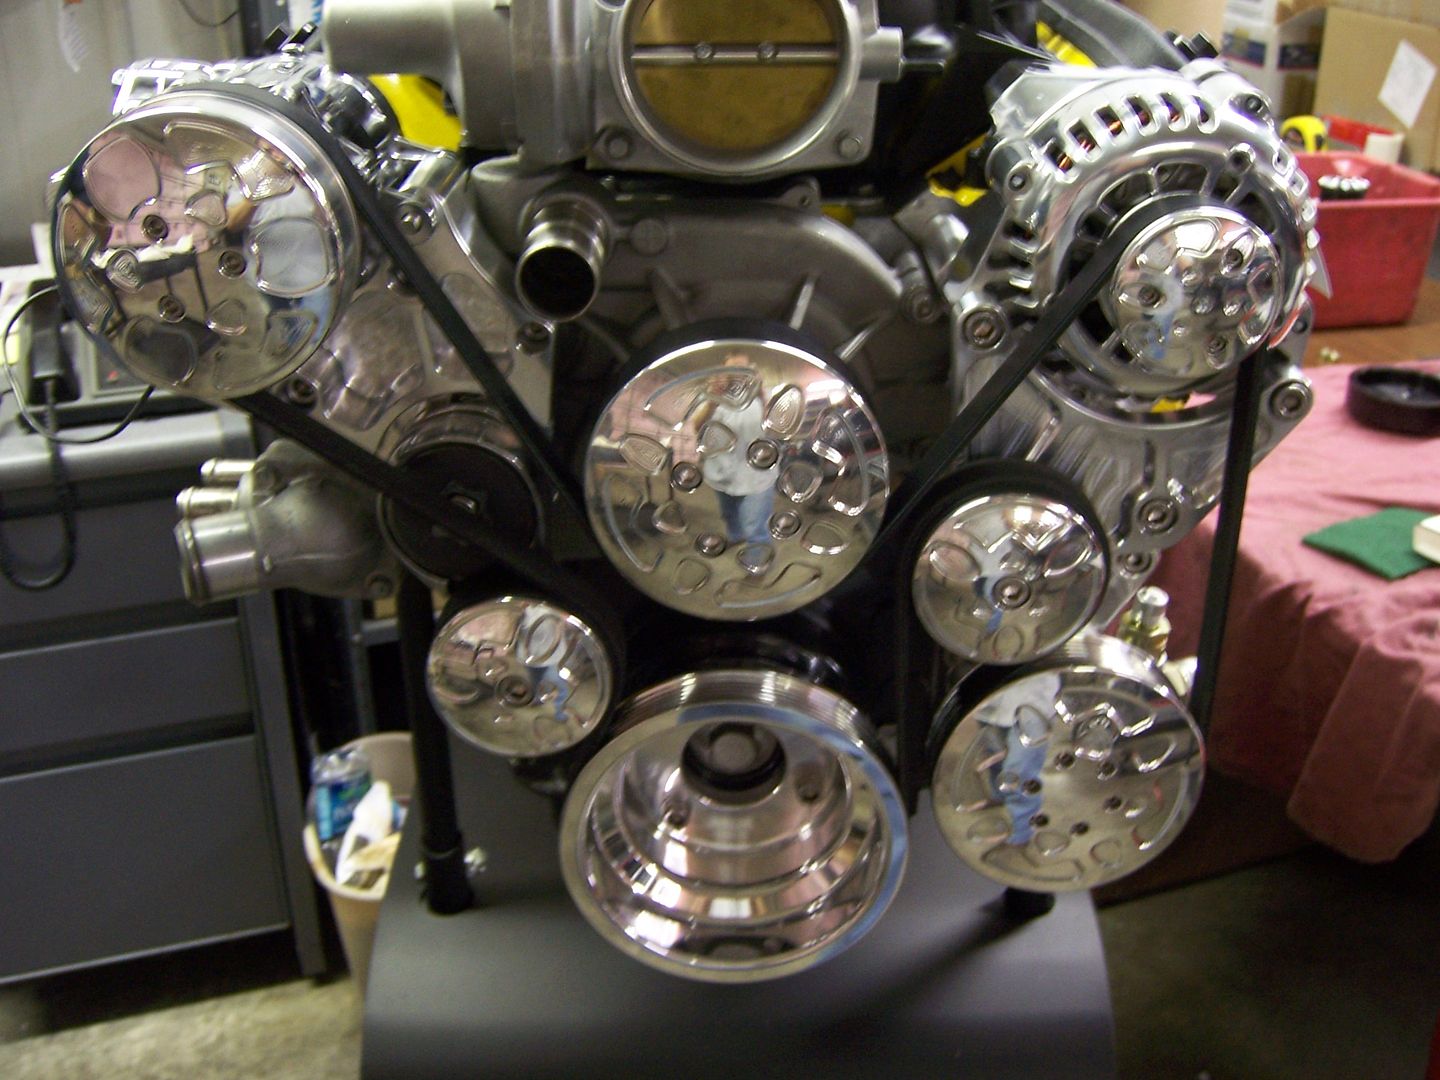
I haven't had a chance to put the kit on yet as I've decided I'm going to paint the motor as soon as it warms up enough, but here's a pic that Casey sent me showing the kit installed. You can see how much the belt wraps around the power steering pulley. This is supposed to help with running wider tires on the front.
I hope to get some more work done on the car this week and will update when I do.
I haven't had a chance to get anymore work done on the car as we were in Vegas last week, but I thought I'd show what I picked up on the way home.
I decided to get Wegner Motorsports new diamond cut serpentine kit. From what I understand, this kit was designed with help from Frank at Prodigy for pro-touring cars. The kit usually comes in black with the diamond cuts for accents, but Casey at Wegner did one for me in polished and it turned out amazing. I talked with Casey a few times and I must say that Wegner has amazing customer service. Would highly recommend them. He even put the kit together once it came back from the polisher so he could send me a picture of how it turned out before it shipped.
On to the pics:
All the goodies that came with the kit. The only part I'm not sure of is the power steering pump. I completely forgot to tell Casey that I was running r&p and am not sure if the high flow pump is the one I need. I read somewhere that I should be using the low flow one. I have an email into Unisteer and Casey to confirm.
Here's a pic of the pulleys. You can see the diamond cutting on the front accents
Not everything, but most of the other parts
I also picked up these from Casey. They are very nice for anyone looking for new valve covers
I haven't had a chance to put the kit on yet as I've decided I'm going to paint the motor as soon as it warms up enough, but here's a pic that Casey sent me showing the kit installed. You can see how much the belt wraps around the power steering pulley. This is supposed to help with running wider tires on the front.
I hope to get some more work done on the car this week and will update when I do.
 03-10-2012, 07:51 PM
#158
On The Tree
Thread Starter
iTrader: (4)
Join Date: Mar 2009
Location: British Columbia, Canada
Posts: 132
Likes: 0
Received 0 Likes
on
0 Posts
03-10-2012, 08:32 PM
#159
You're right, I should be adding more heaters and snow tracks  In a lot of places in BC I would agree but where I live, it's very similar to the weather you get in Arizona. They actually consider it to be desert like and it's not uncommon to see 35 Celcius and hotter (95 F). Besides I just like to be cool and say that it has air
03-13-2012, 08:46 PM
#160
On The Tree
Thread Starter
iTrader: (4)
Join Date: Mar 2009
Location: British Columbia, Canada
Posts: 132
Likes: 0
Received 0 Likes
on
0 Posts
Spent some time in the shop the past couple days. Got some more work done on the console:
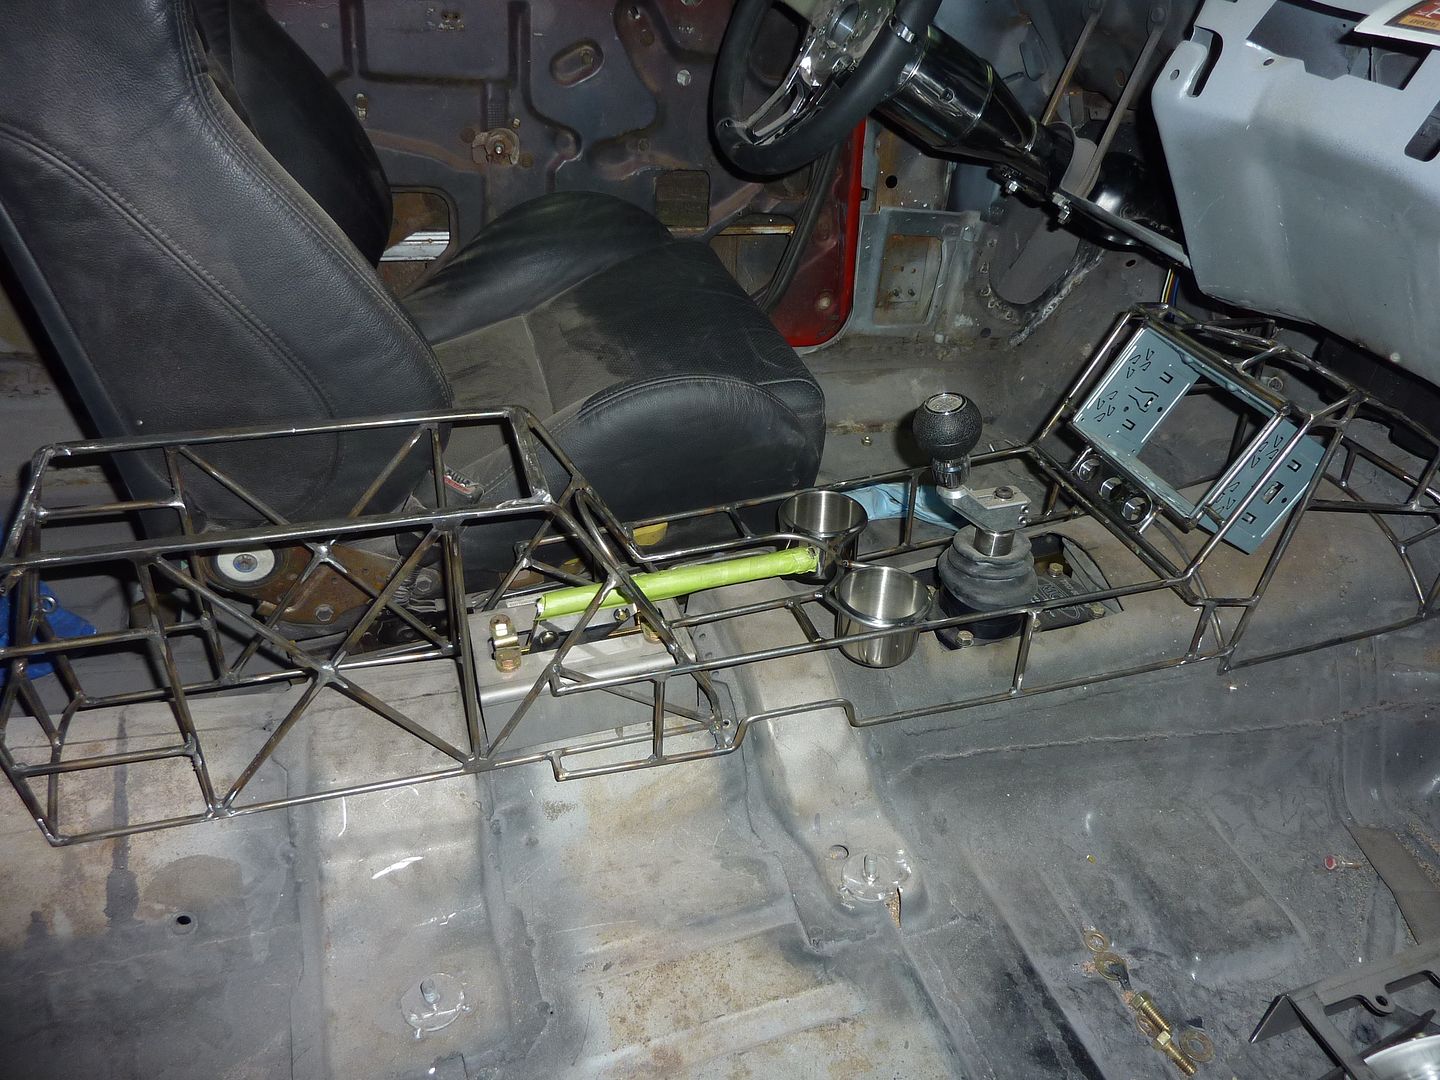


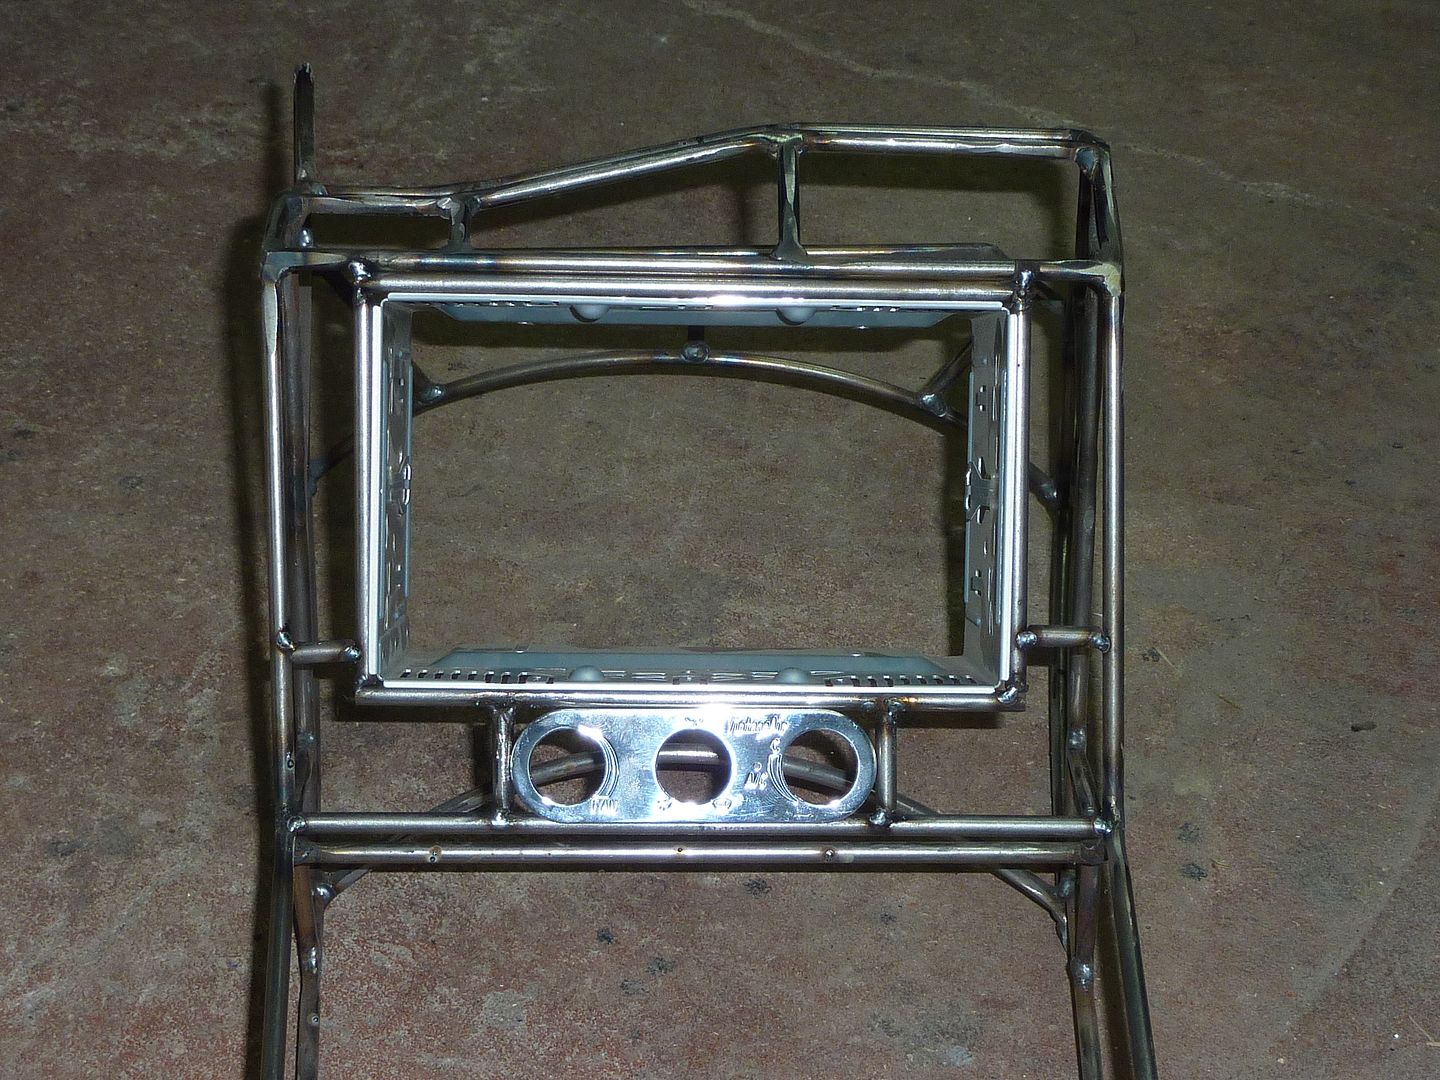

Looks like Mickey Mouse
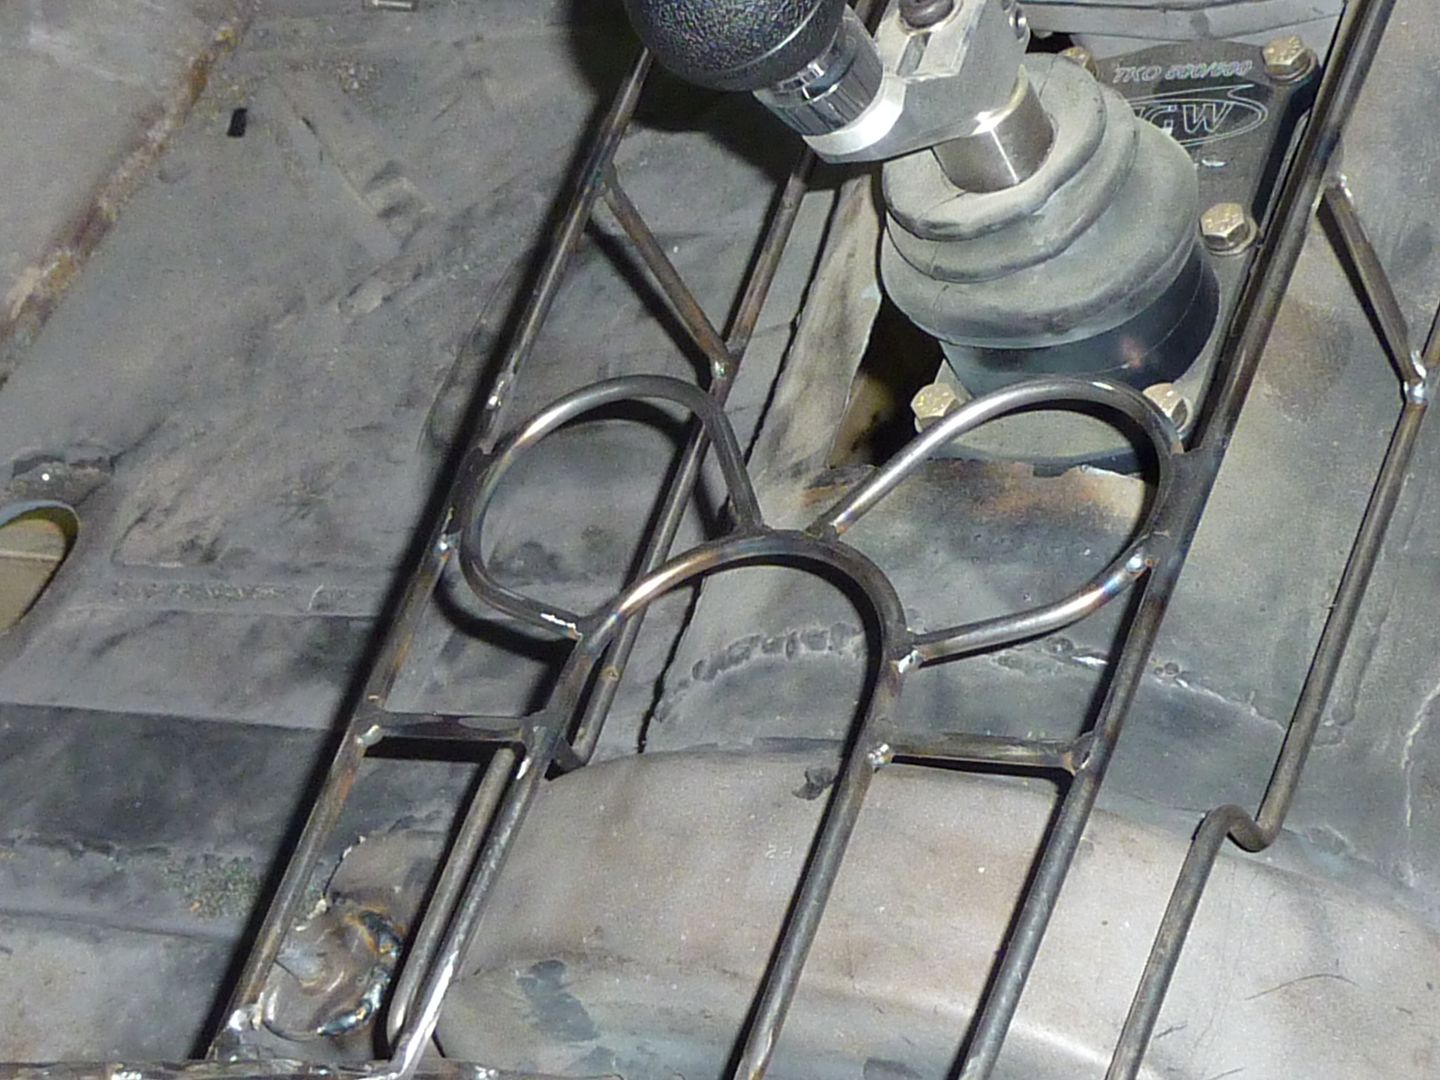
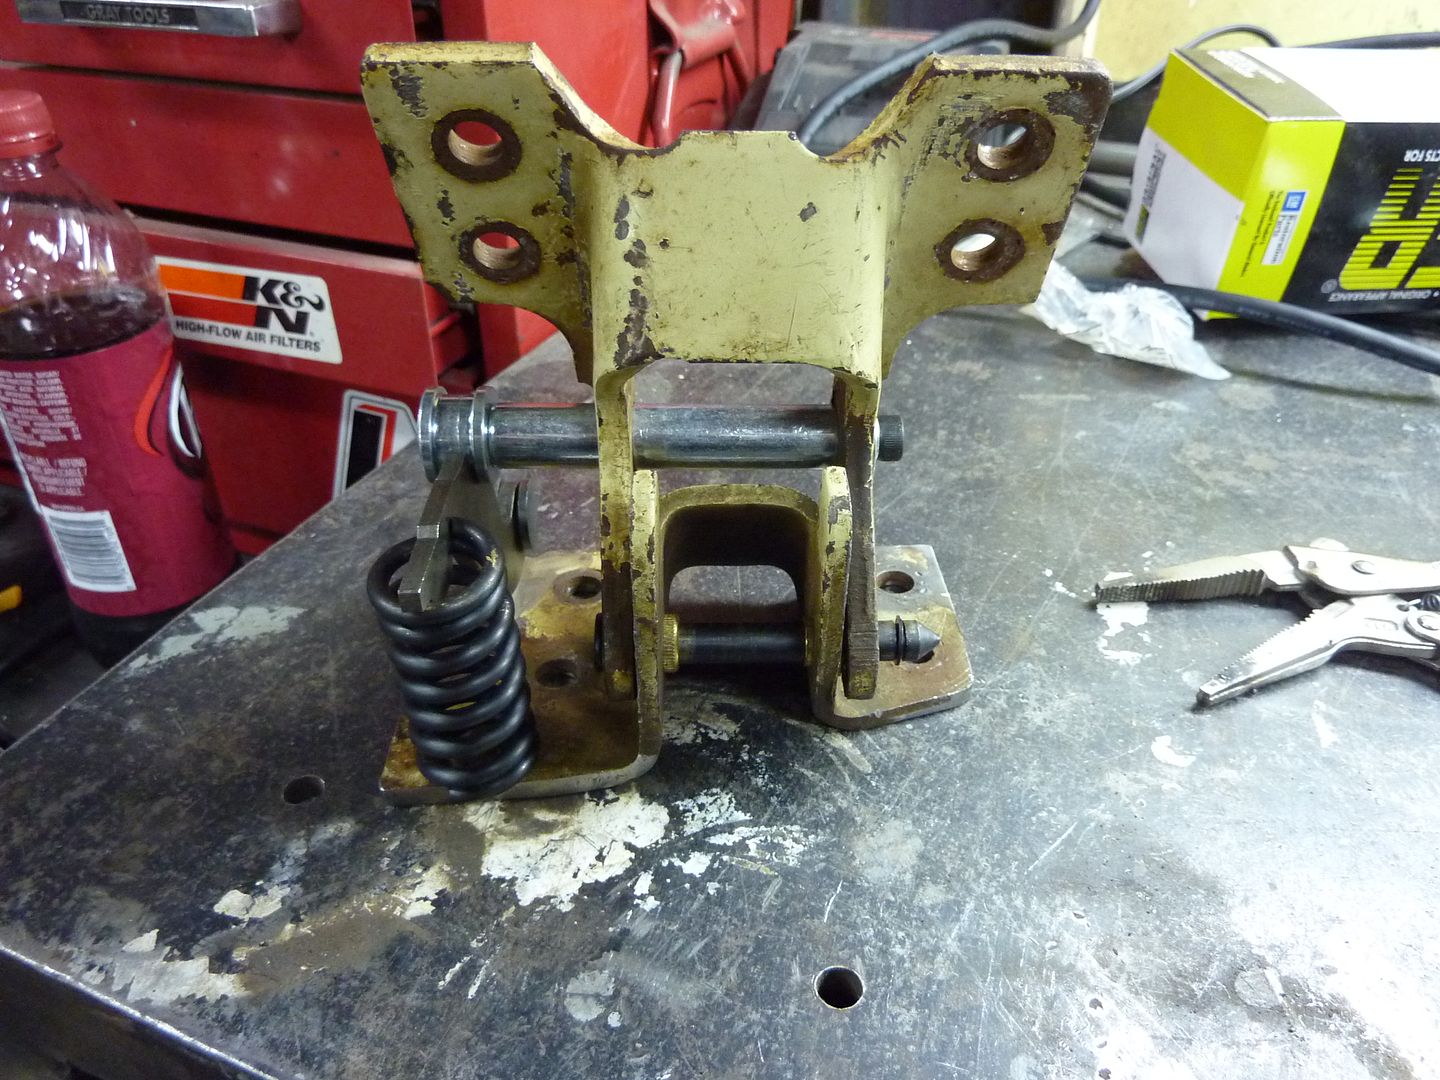
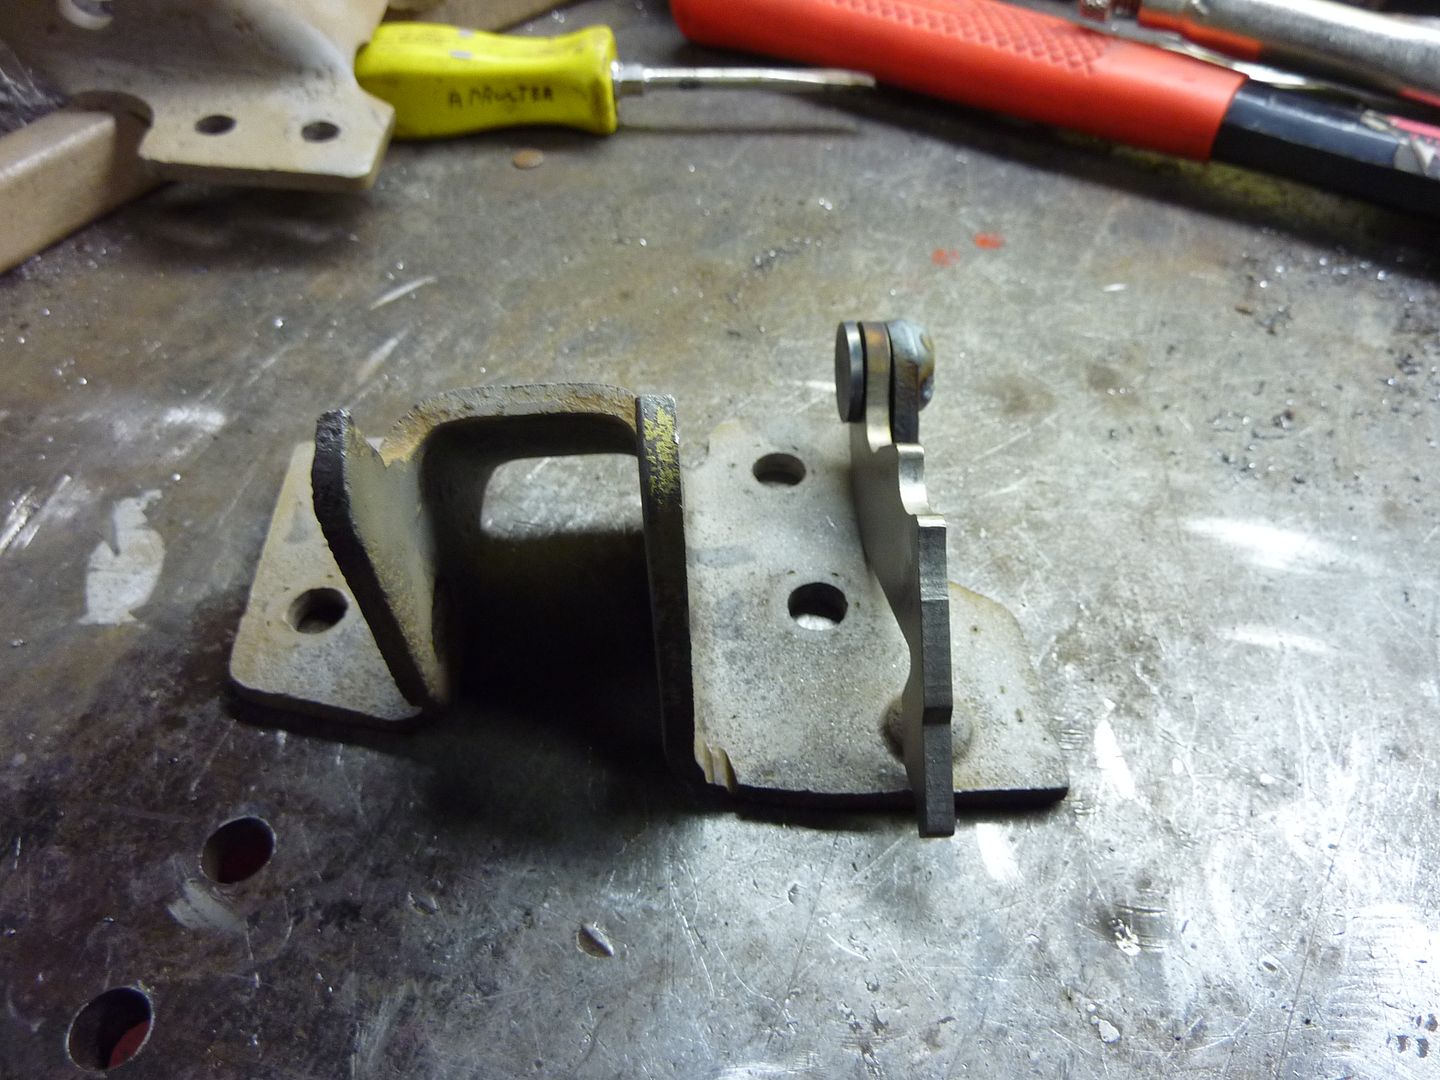
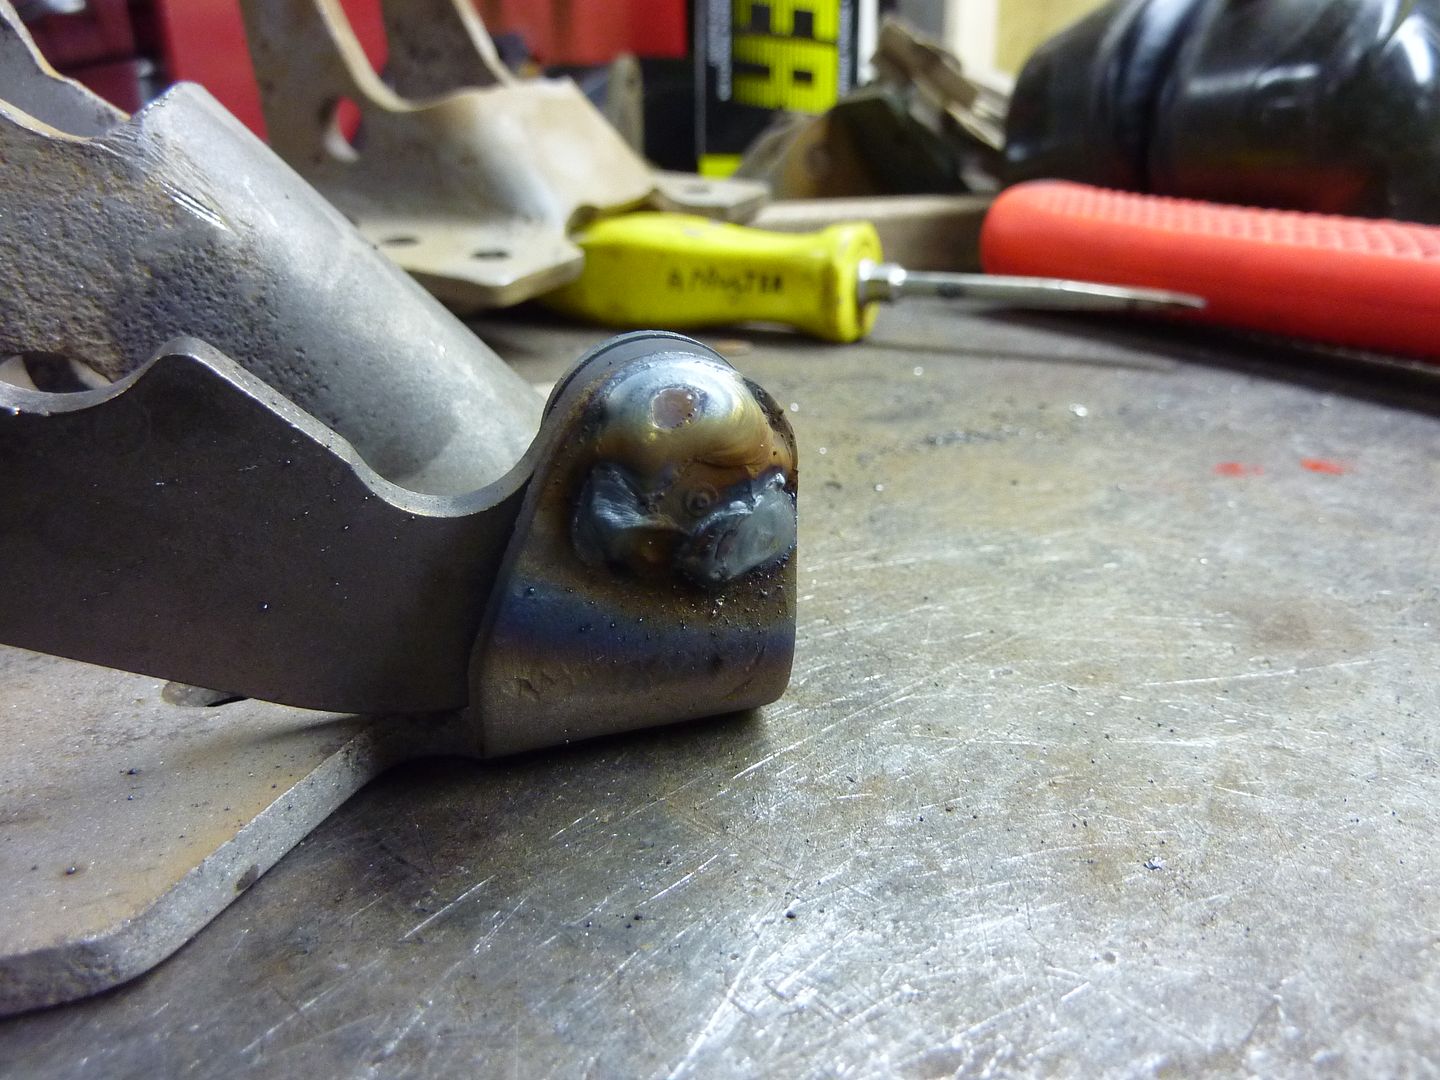
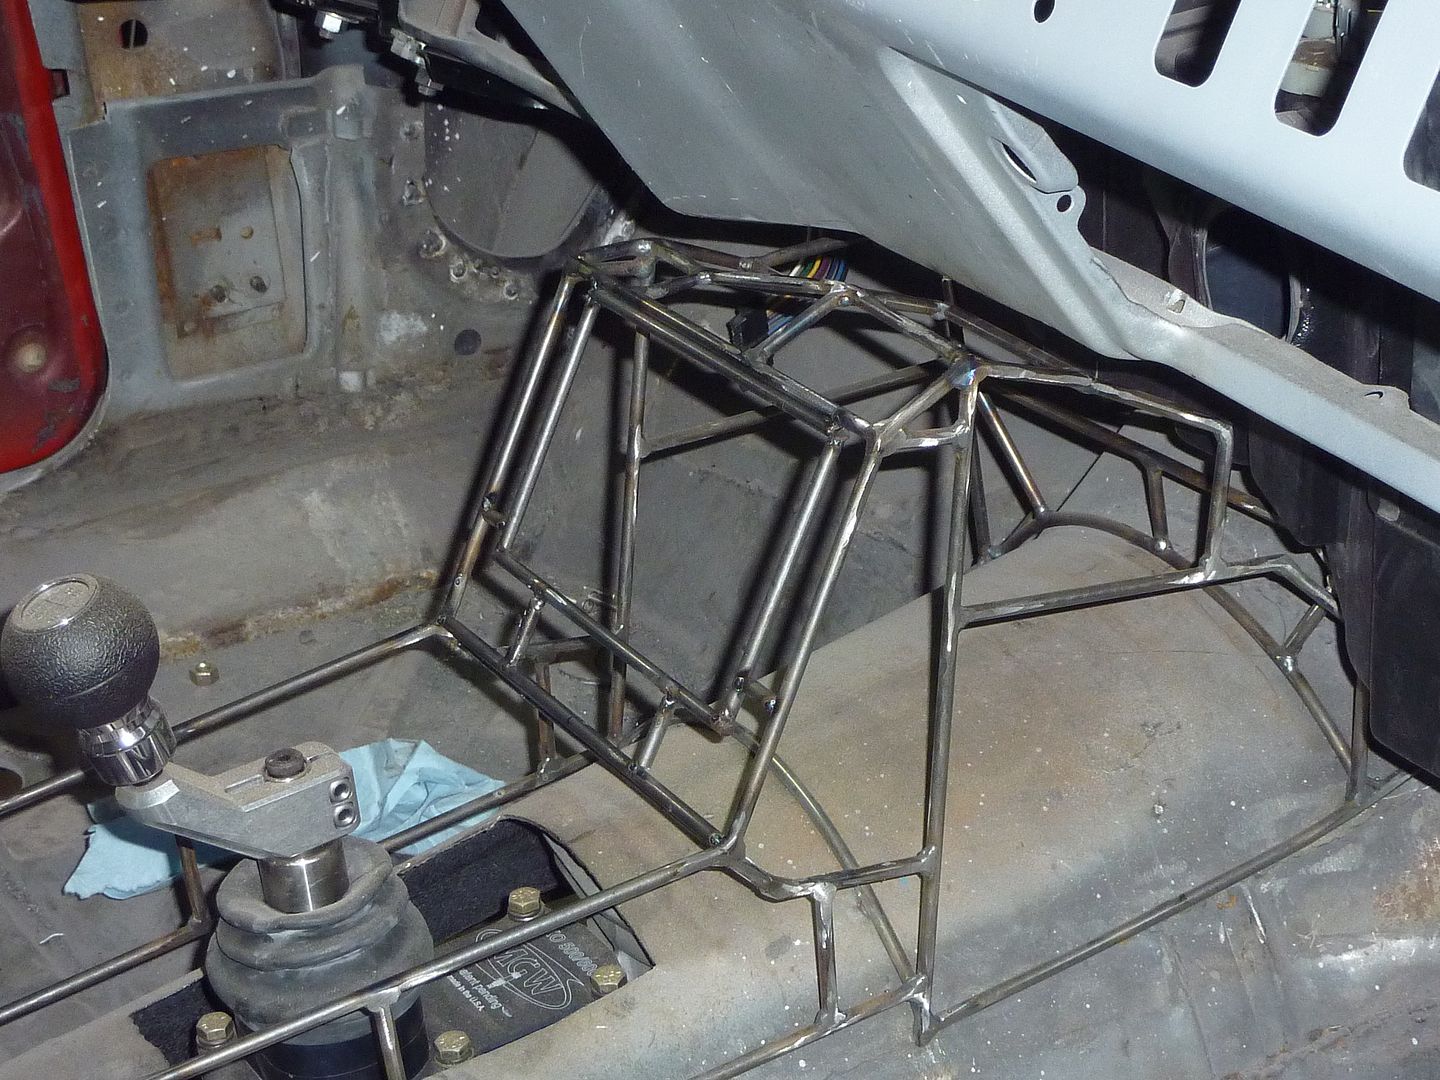
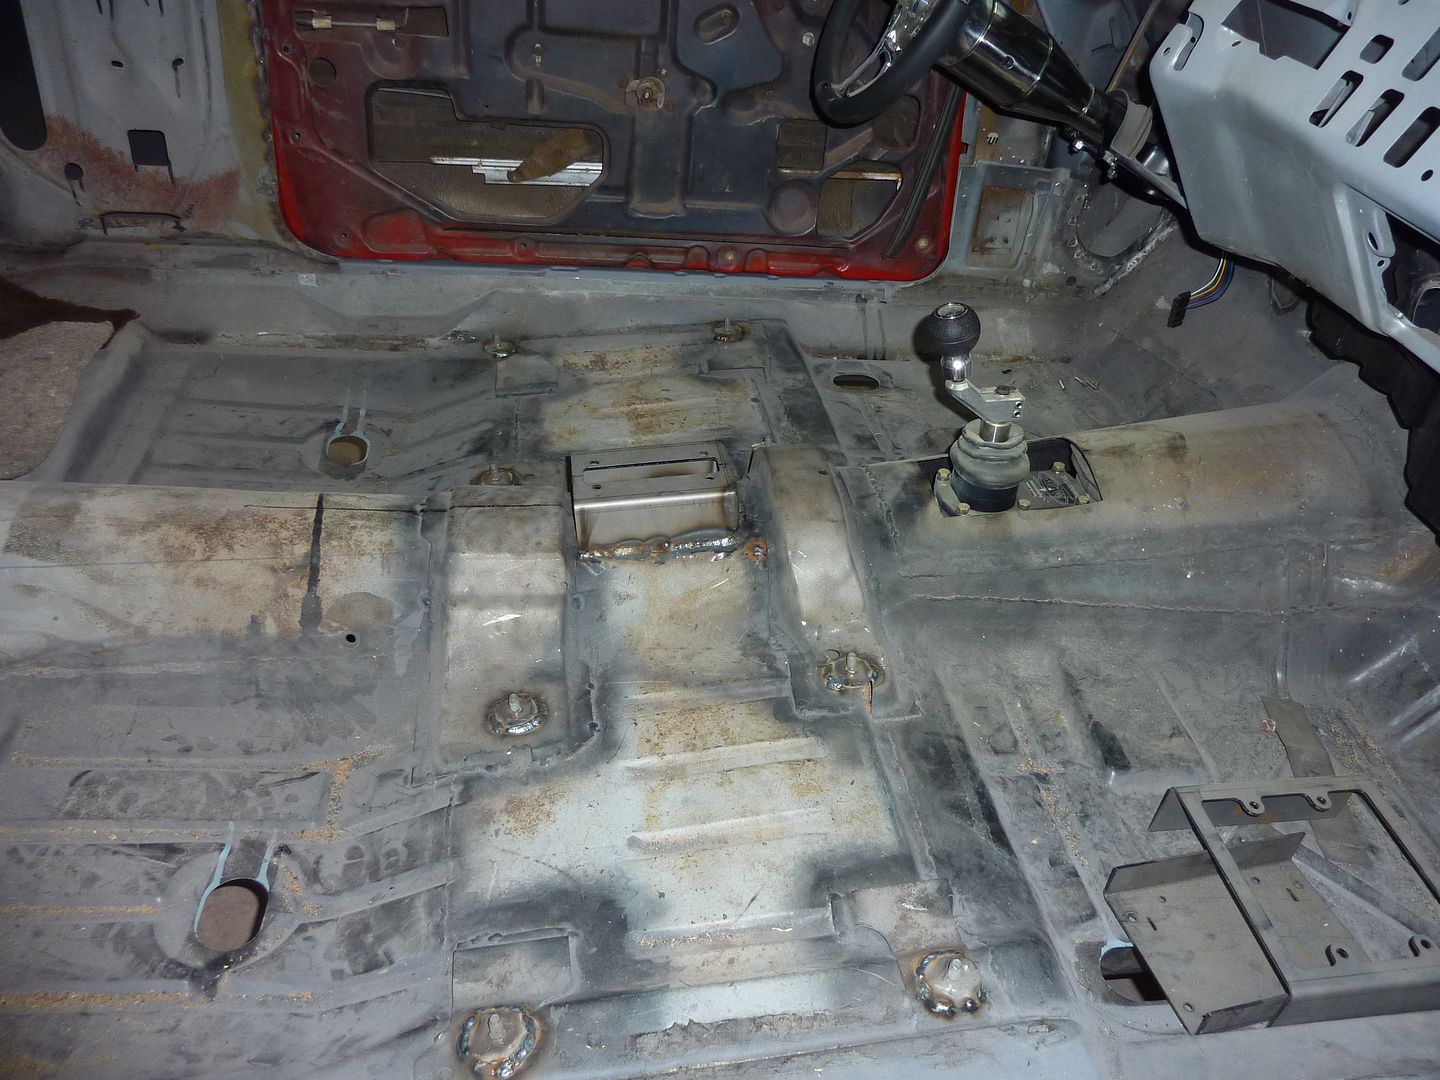
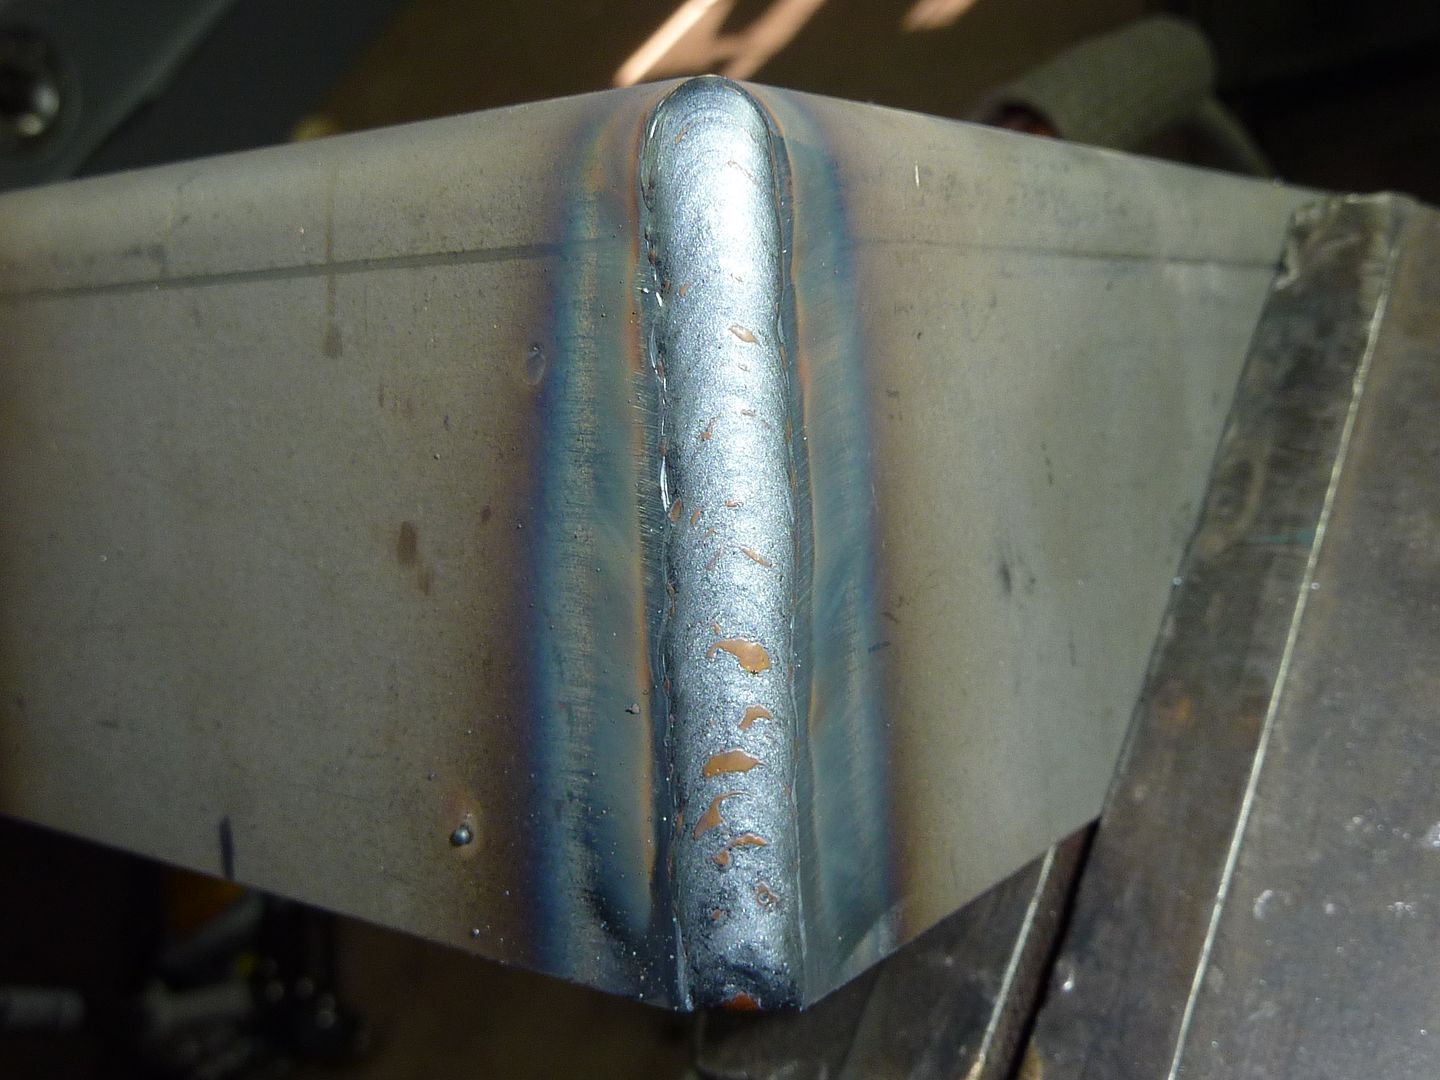
Welded the parking brake bracket from Ironworks onto the floor
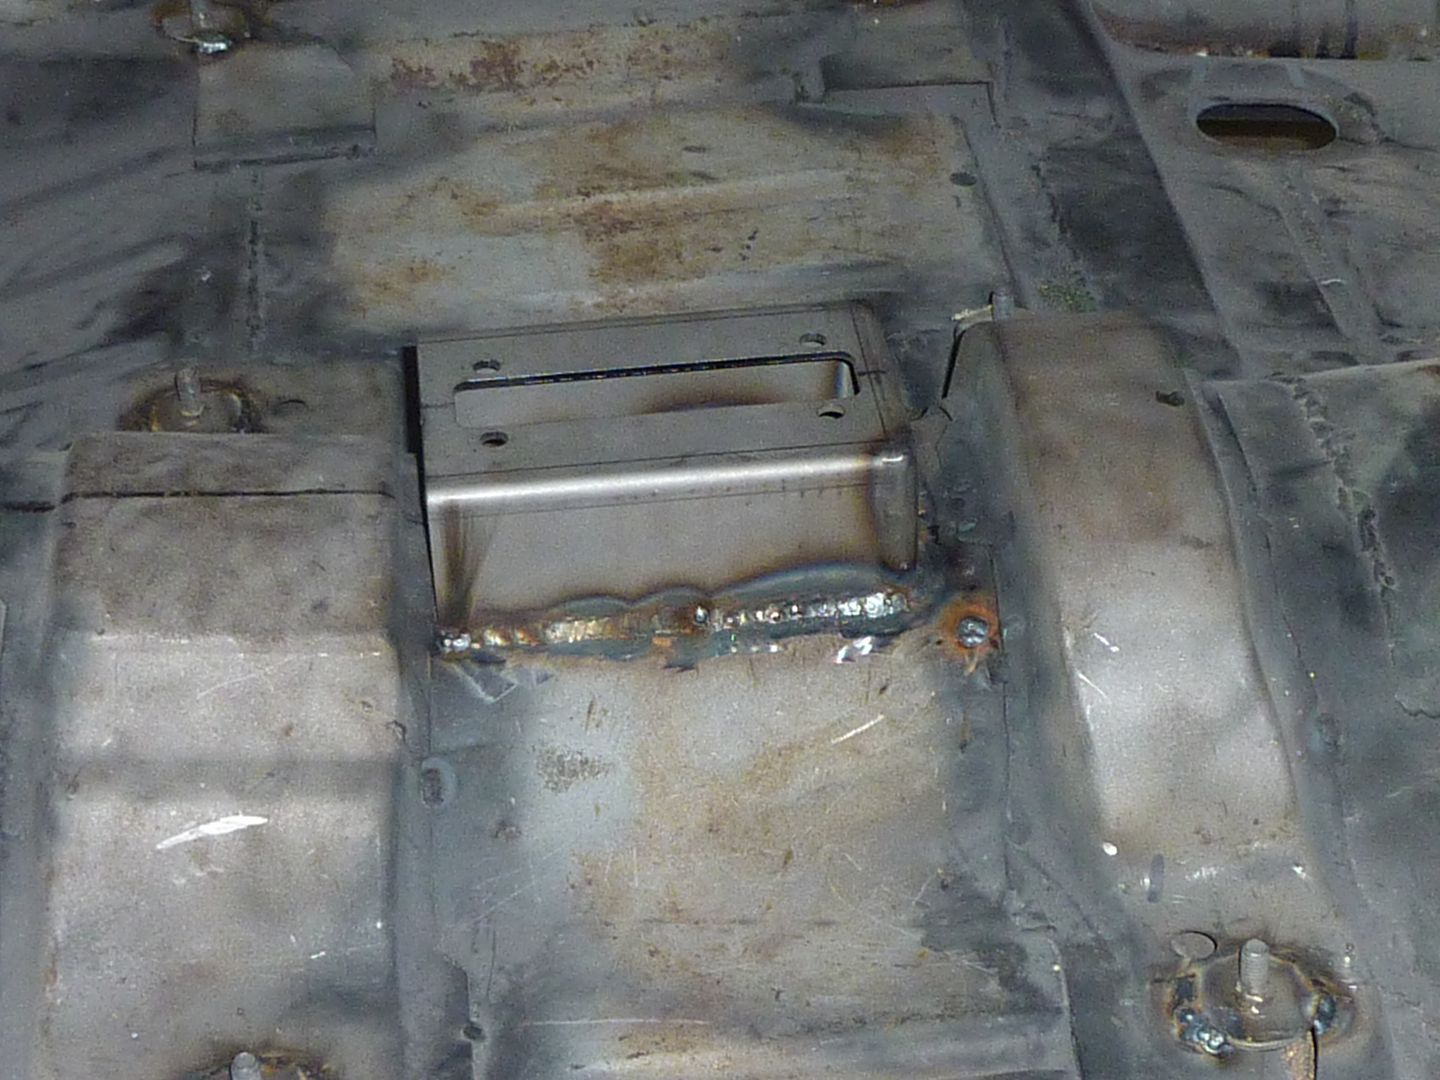
When I started doing this build, I had tried welding only a couple times. I've tried to teach myself by practicing and watching videos and reading. Not until today have I had a weld that after words I stopped and looked at it for several minutes. Not that it comes even close to the quality of welds that Ironworks puts out, but maybe since it was a part built and supplied by them it inspired me. I know there may still be some criticism, but I'm pretty happy with this:
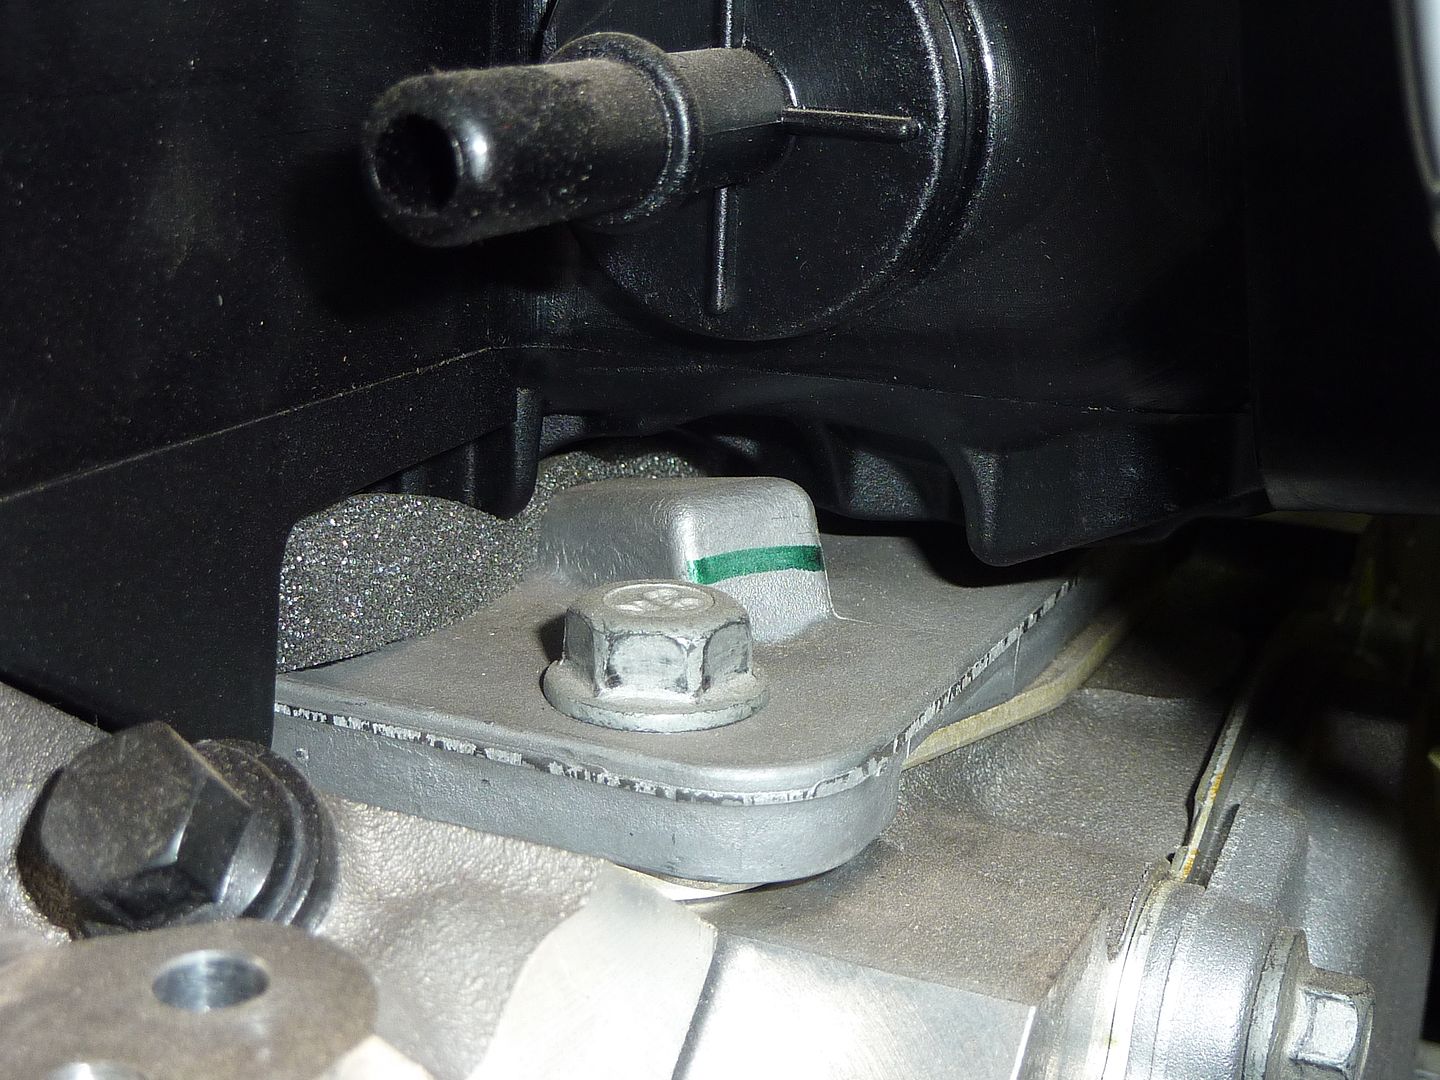
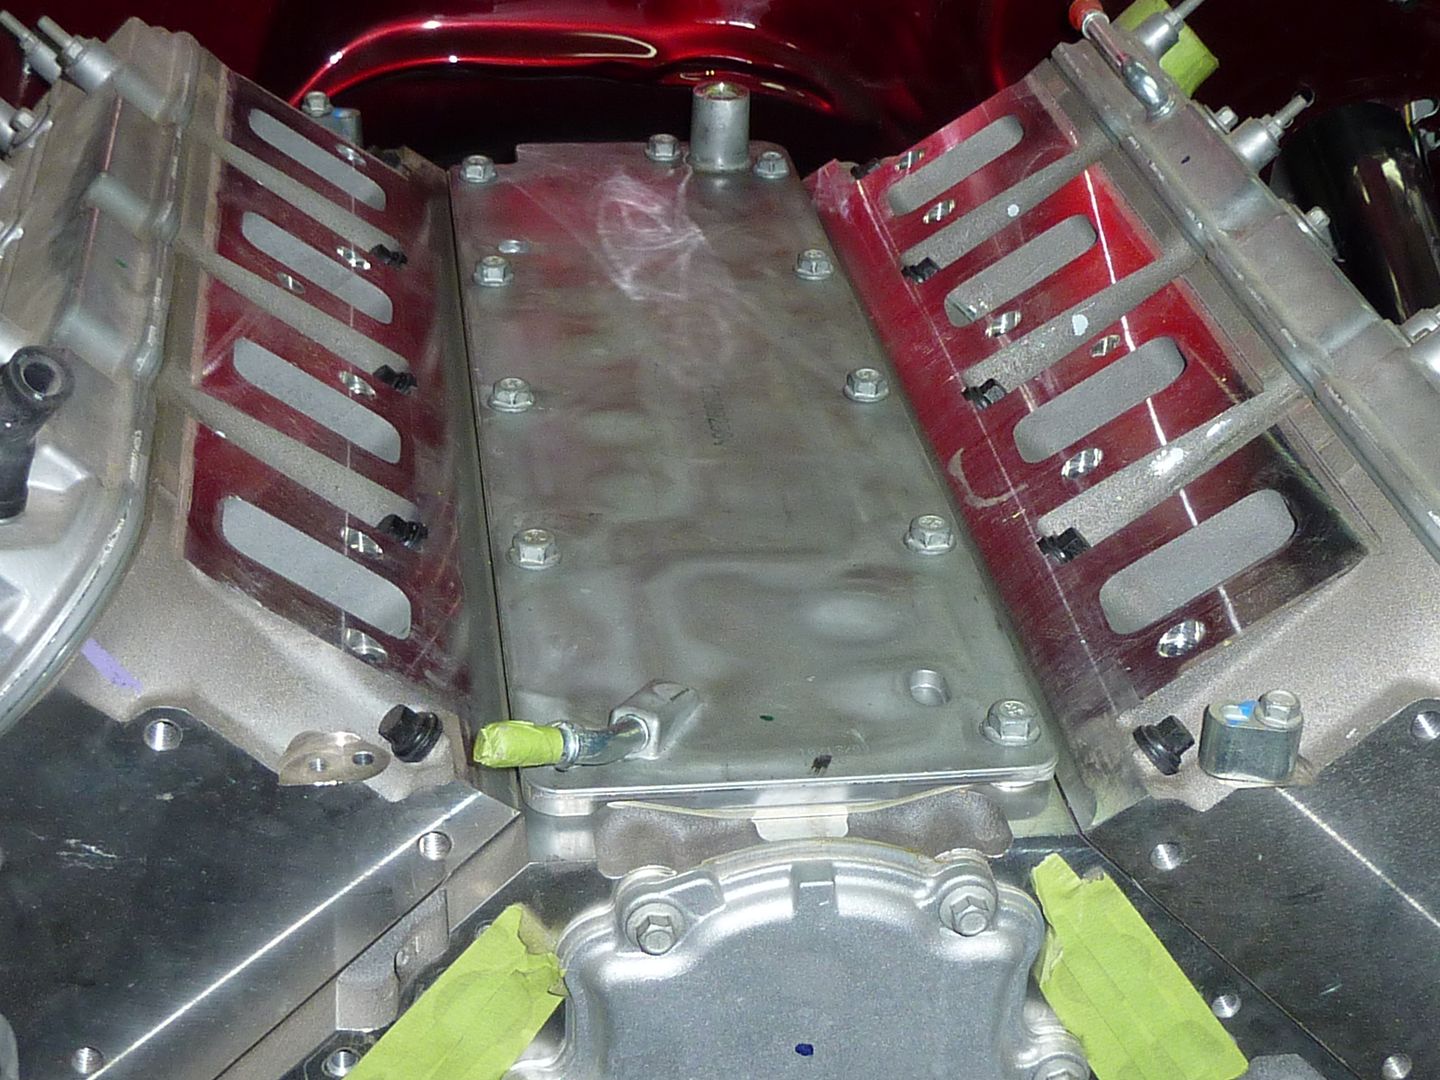
Swapped out the old valley cover and put the new one with the pcv tube on it in
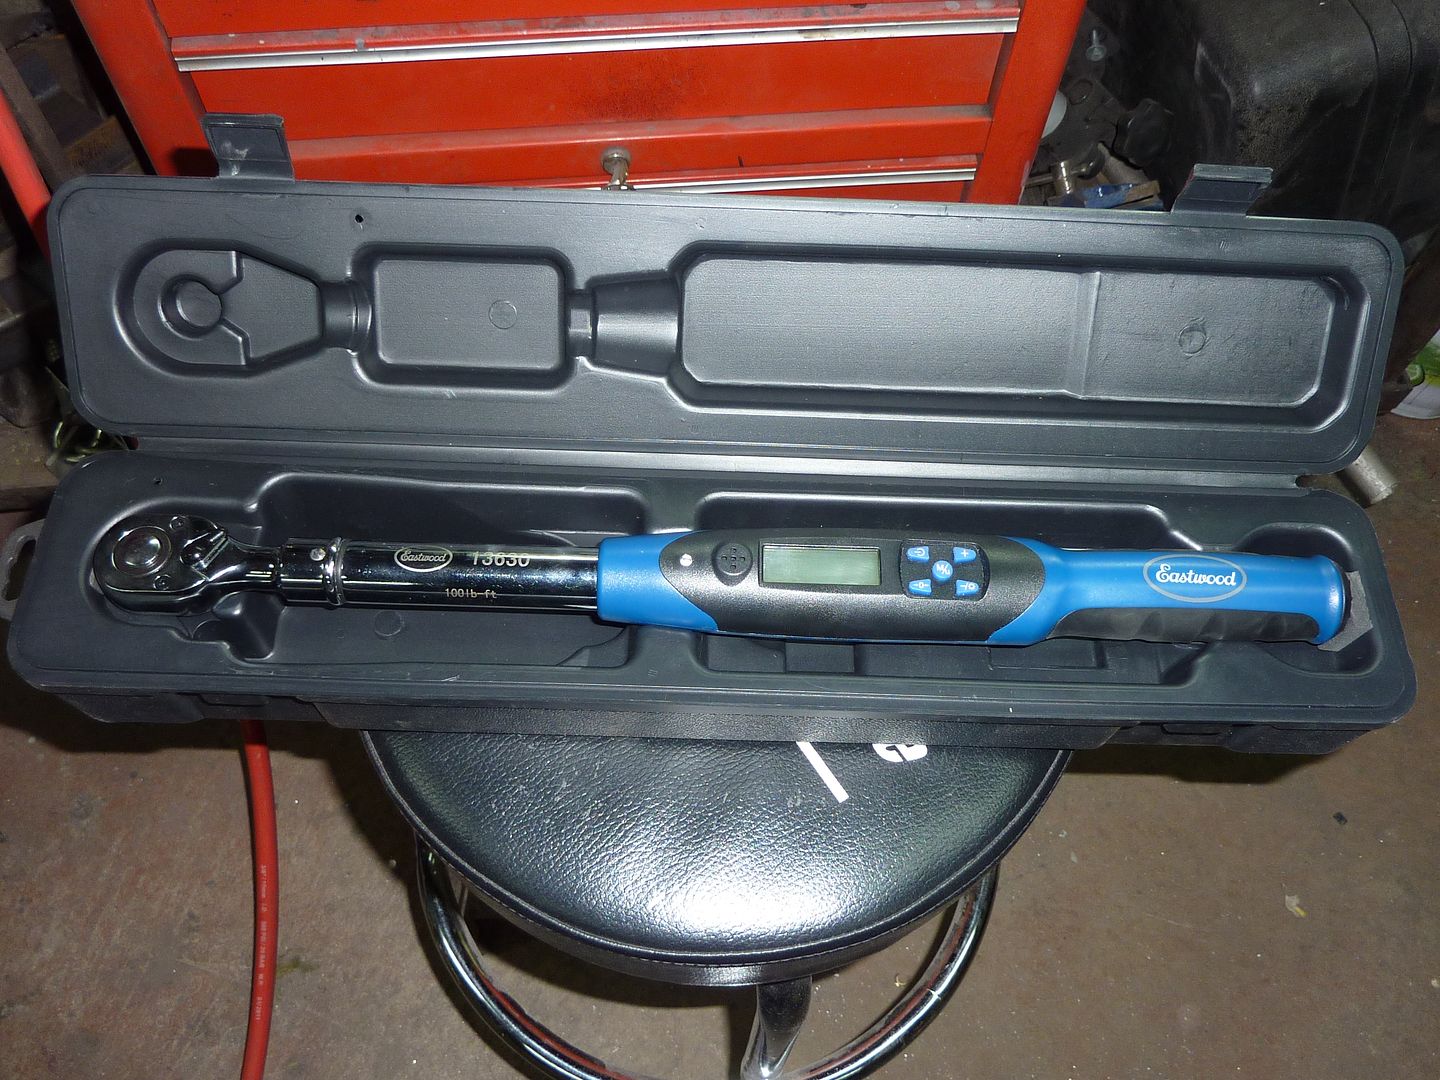
This allowed me to try my new Eastwood digital torque wrench

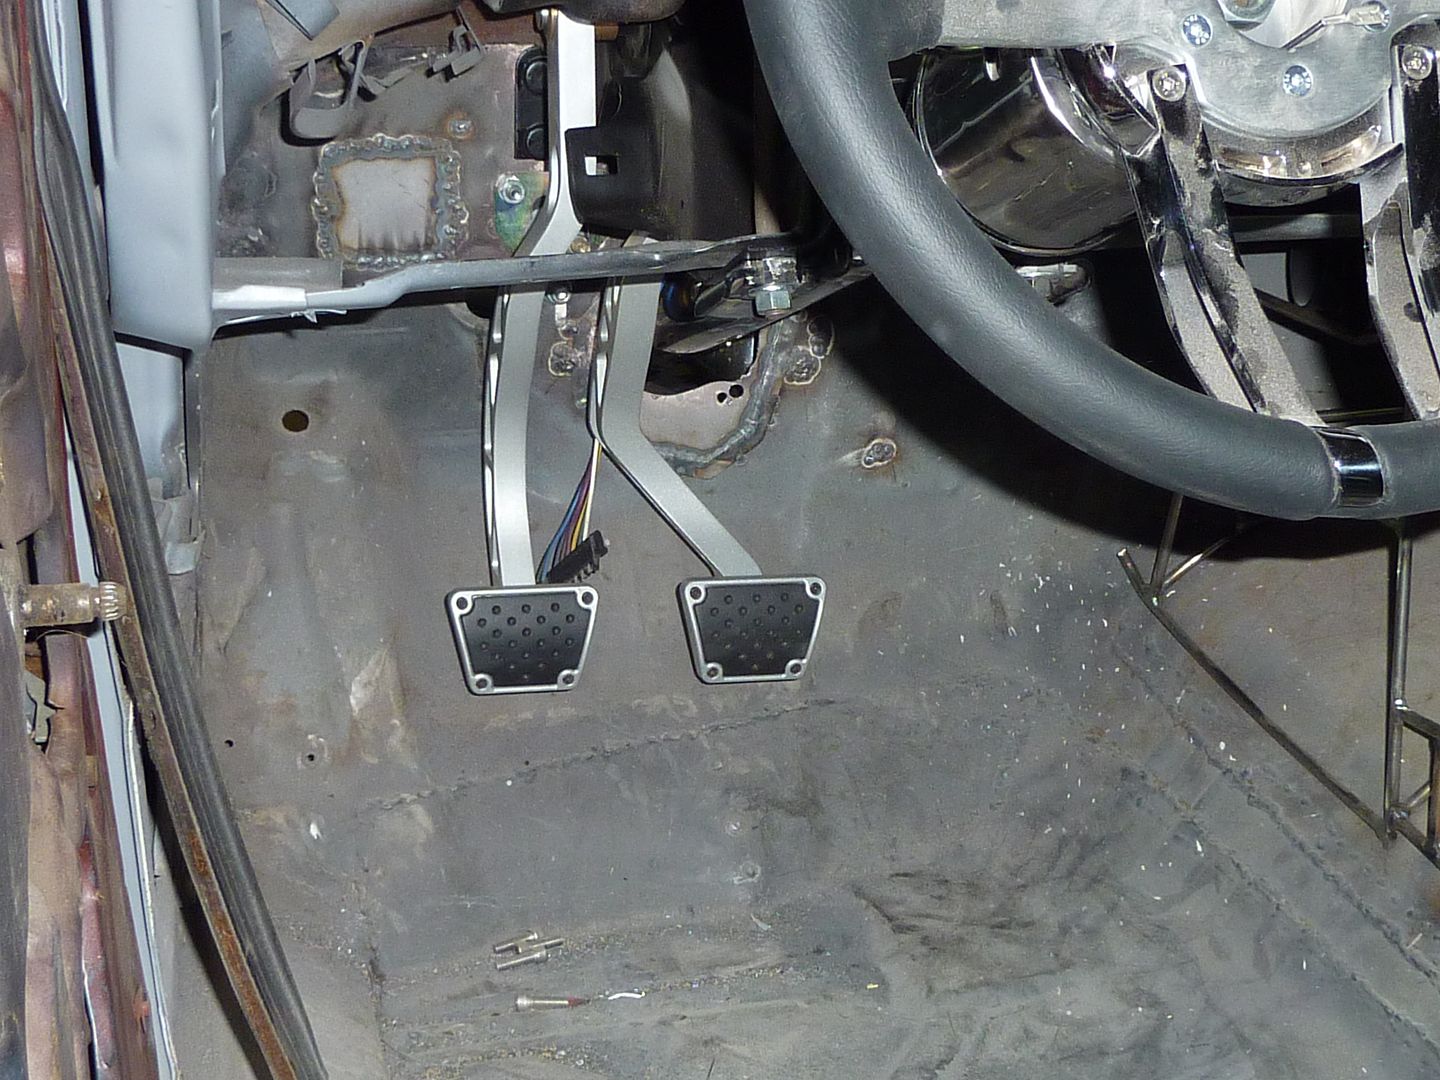
And I got the Clayton Machine Works brake/clutch pedal assembly installed. Going to mock up the drive by wire pedal soon.
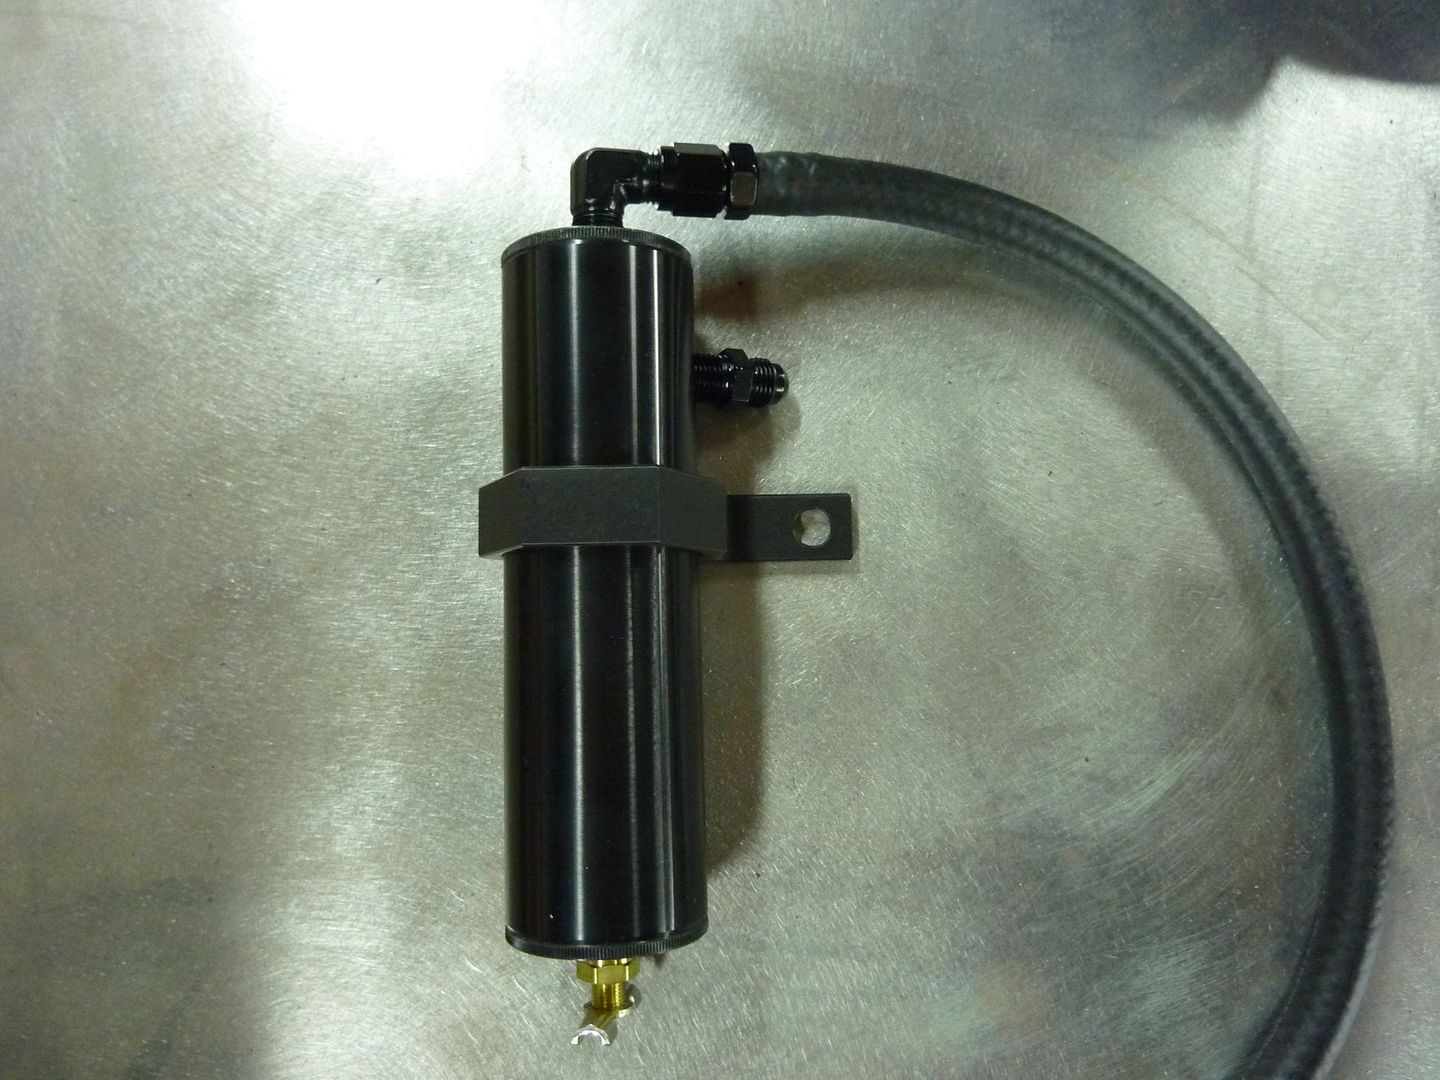
Got this in the mail today. It's a pcv catch can from Mike Norris Motorsports.
Looks like Mickey Mouse
Welded the parking brake bracket from Ironworks onto the floor
When I started doing this build, I had tried welding only a couple times. I've tried to teach myself by practicing and watching videos and reading. Not until today have I had a weld that after words I stopped and looked at it for several minutes. Not that it comes even close to the quality of welds that Ironworks puts out, but maybe since it was a part built and supplied by them it inspired me. I know there may still be some criticism, but I'm pretty happy with this:
Swapped out the old valley cover and put the new one with the pcv tube on it in
This allowed me to try my new Eastwood digital torque wrench
And I got the Clayton Machine Works brake/clutch pedal assembly installed. Going to mock up the drive by wire pedal soon.
Got this in the mail today. It's a pcv catch can from Mike Norris Motorsports.
Last edited by scherp69; 03-13-2012 at 08:54 PM.