When you click on links to various merchants on this site and make a purchase, this can result in this site earning a commission. Affiliate programs and affiliations include, but are not limited to, the eBay Partner Network.
I absolutely love this thread! Kudos to you on your hard work, and your excellent pictures. This is seriously the best write up I have seen. I plan on using your work to help guide me along with my build.
I'll be sure to ask for help with any hangups I encounter.
I absolutely love this thread! Kudos to you on your hard work, and your excellent pictures. This is seriously the best write up I have seen. I plan on using your work to help guide me along with my build.
I'll be sure to ask for help with any hangups I encounter.
Thanks man for the kind words.. Love comments like these, it keeps me pushing.. So thank you..
Yeah man if you have any question hit me up would gladly help out.. You doing it in a Z or G
Also guys I am collecting parts right now, like brake lines, tires.. really thats it.. lol What I have left on the car is to run my brake lines, mount tires, bleed clutch and brakes. Fill coolant.. Get alignment, Wrap car and then dyno..
List is small.. But the holiday time is killing me..
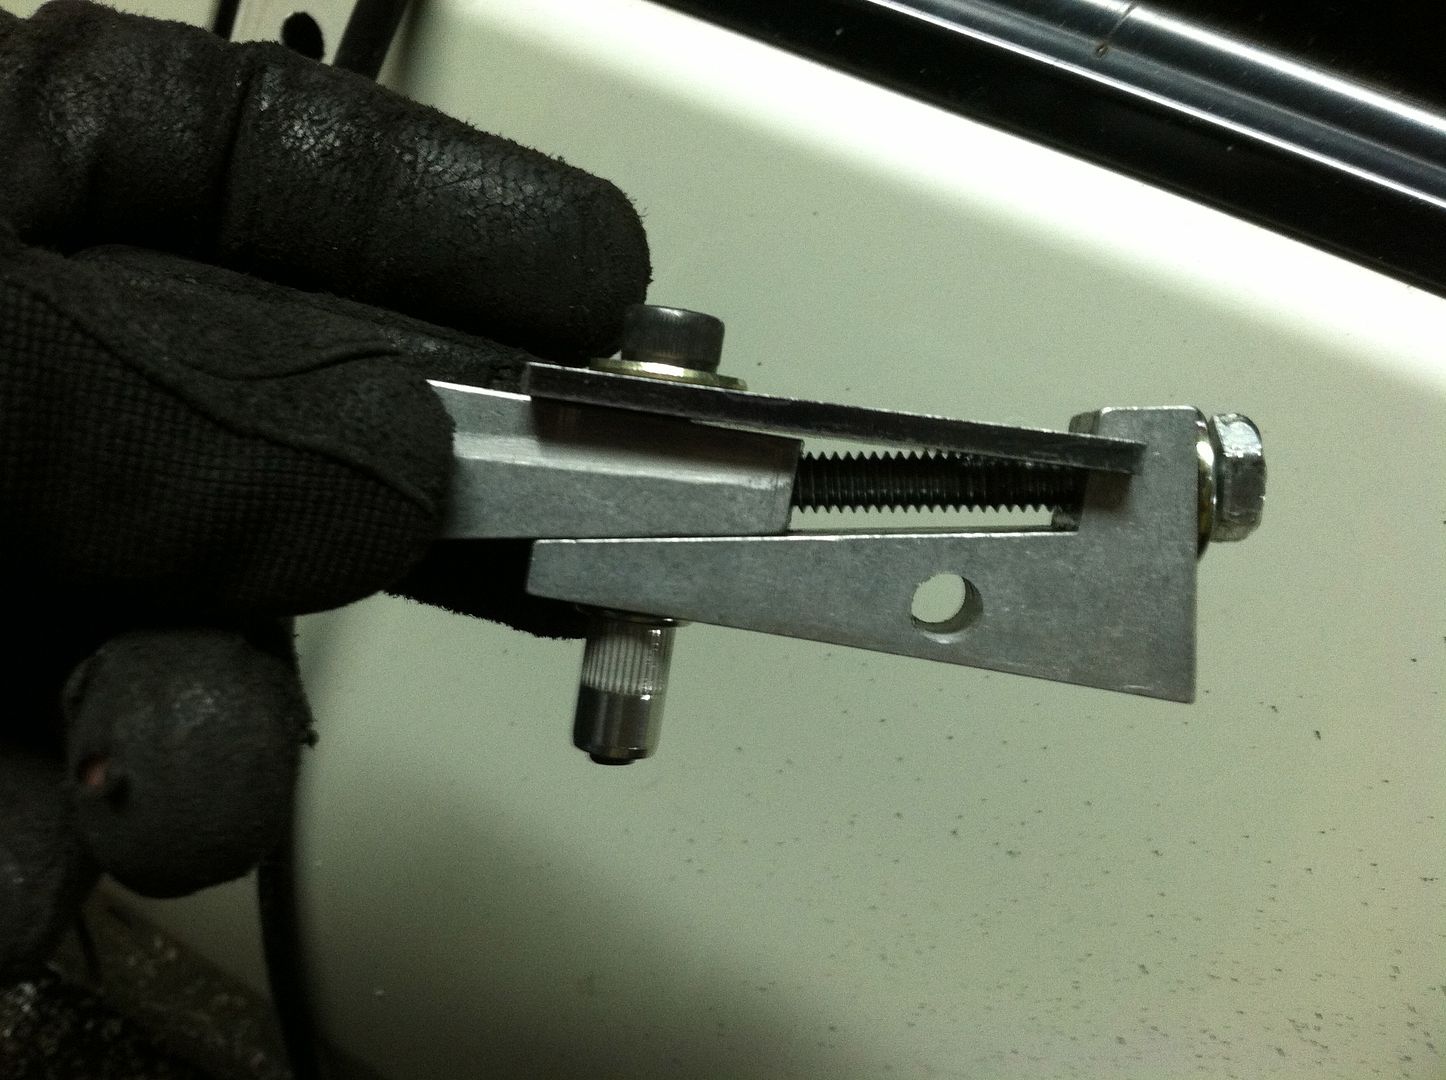
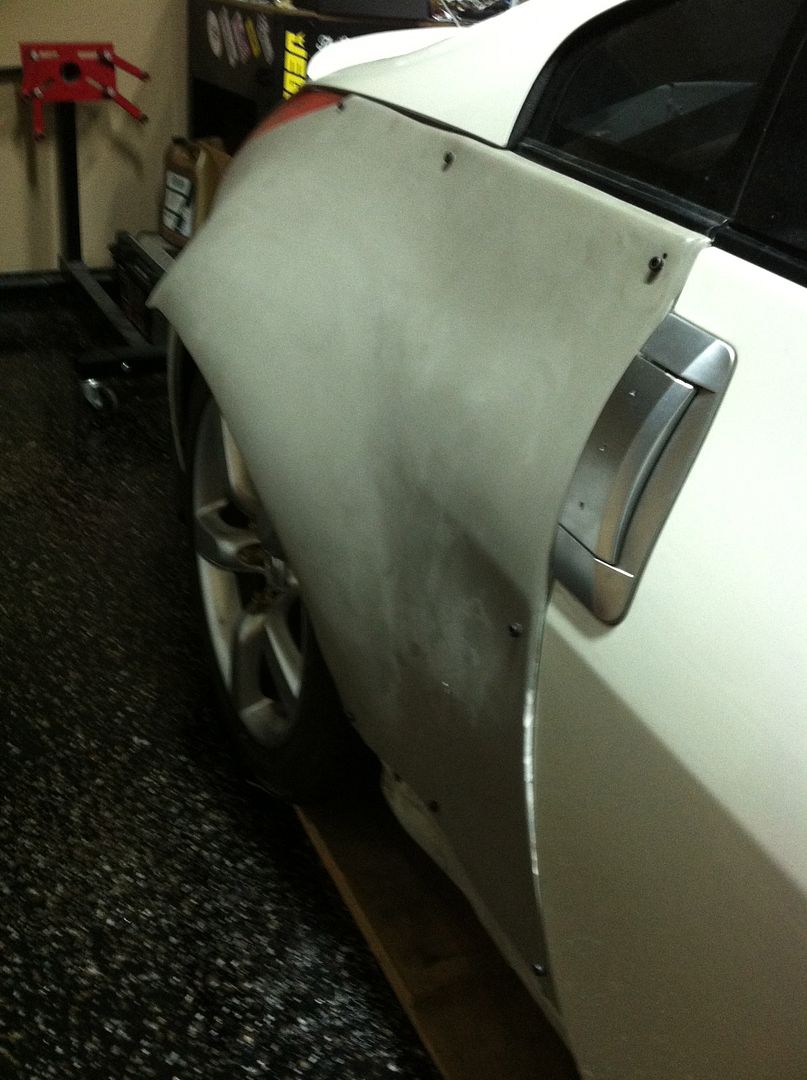
Well finally got my Rivnut tool in the mall.. So know I can install all 24 rivnuts for my overfenders..
More pics on the install by the end of the week
just curious as to why you chose that tool over the rivnut tool that looks like a rivet gun, I used rivnuts on everything on my build and that seems like it would have taken an eternity.
just curious as to why you chose that tool over the rivnut tool that looks like a rivet gun, I used rivnuts on everything on my build and that seems like it would have taken an eternity.
So I do have the other tool also but its not in metric..
and the man reason I picked this one up is to do more heaver duty rivnuts.. Like this is for my 6mm steel rivnuts.. and those are a bitch to do with the other tool..
Okay finally got to installing my Rivet nuts, but first lets talk beer...
So I have not been drinking beer a lot lately, trying to cut back.. don't need that beer gut.. With that being said, I had to show case this local TX beer brewery.. Thirsty Planet Brewery, Now I just went there on a beer tour and had a blast. My favorite beer out of the bunch had to be their Smokey Porter. This was absolutely mind blowing. Every season they choose a locate TX BBQ spot for the Smokey Porter and the beers contained malts smoked by them.. The beer it self smelled like a BBQ joint. I just feel in Love with this beer.
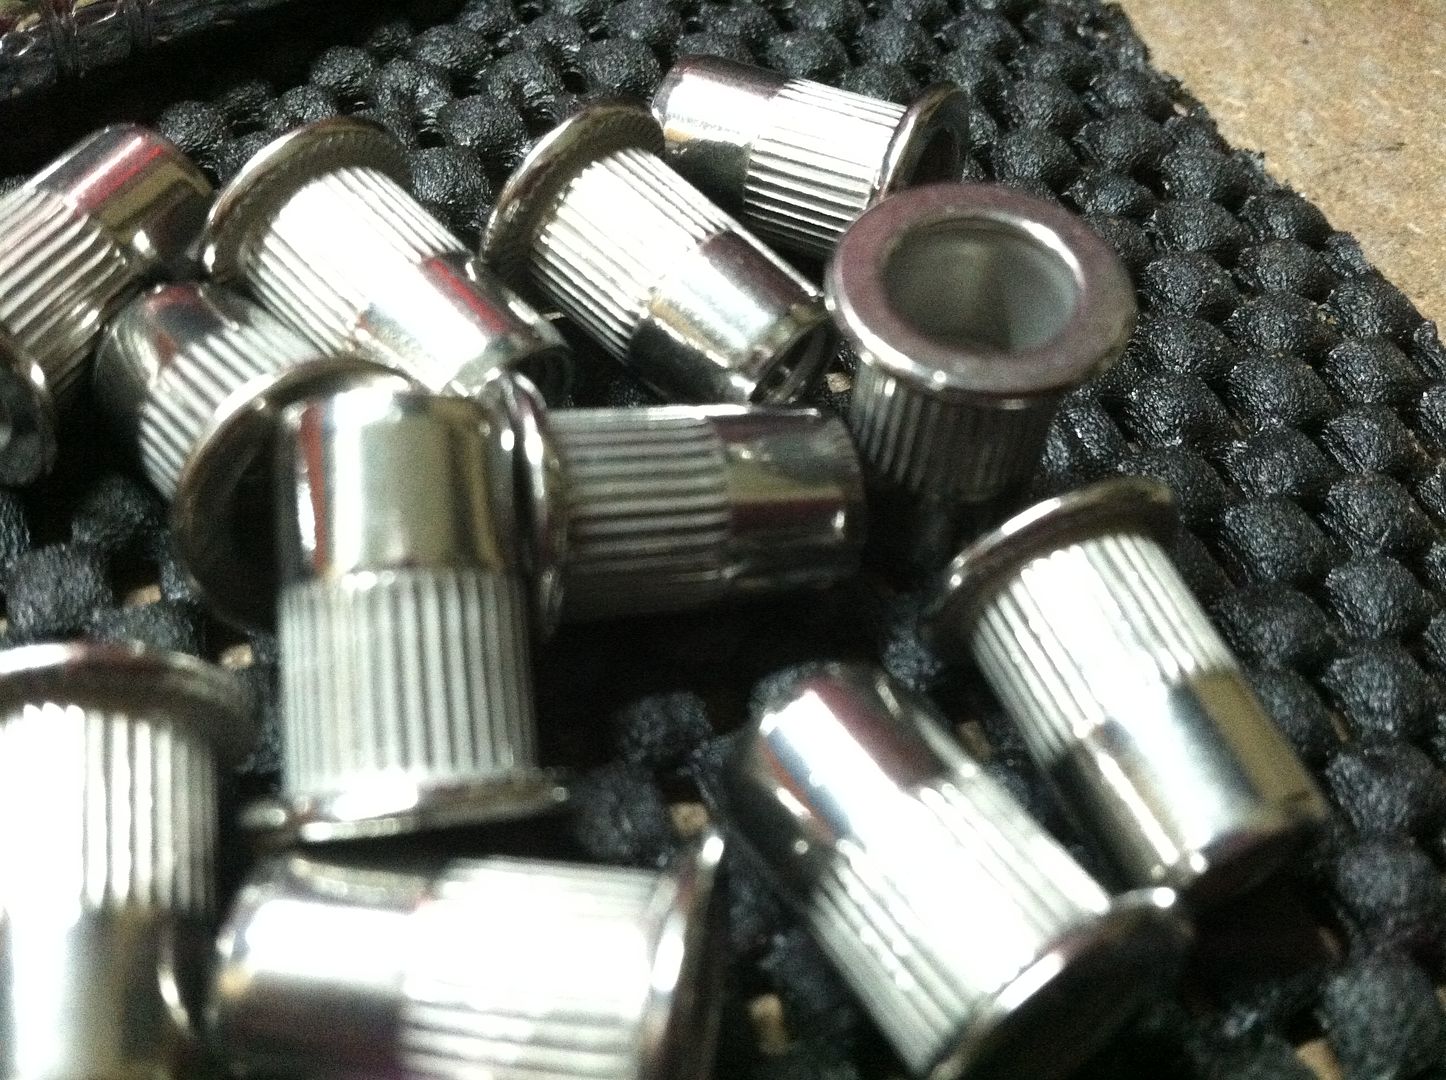
lets start with the rivet nuts them self. I decided to do 6mm Steel Rivets. Wanted the Steel so they don't strip on me.
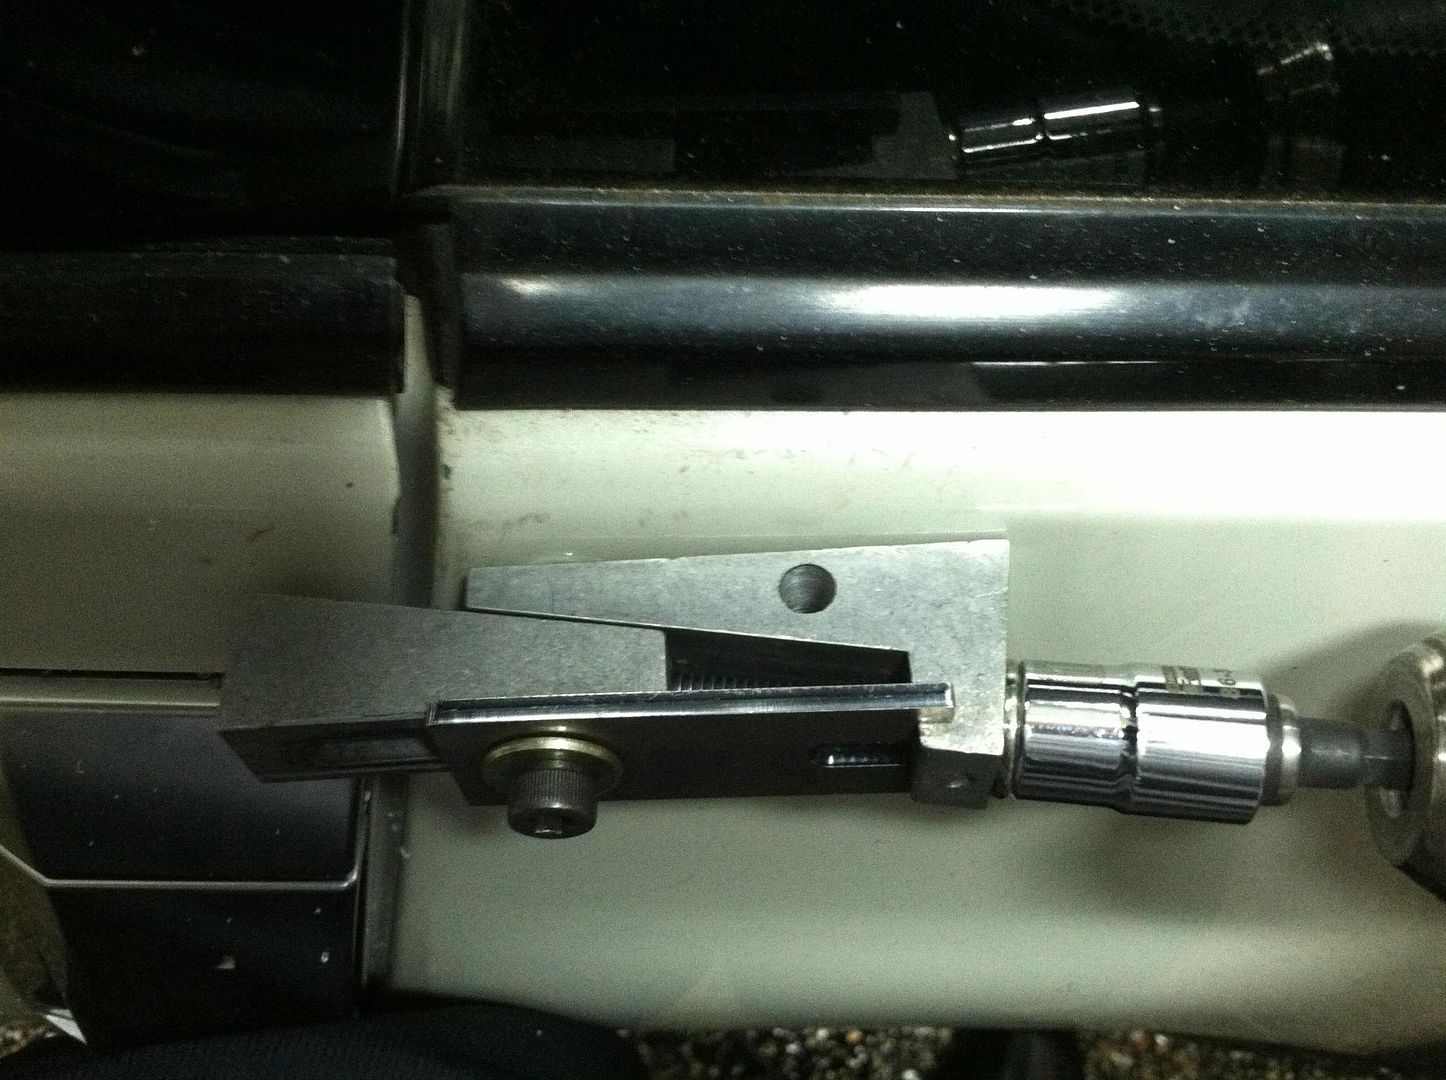
Here is the tool I am using to install them. And before everyone ask why not use the other hand tool like a rivetgun. Well I do have that tool too but it is in standard sizes and would be a bitch to install steel rivetnuts.
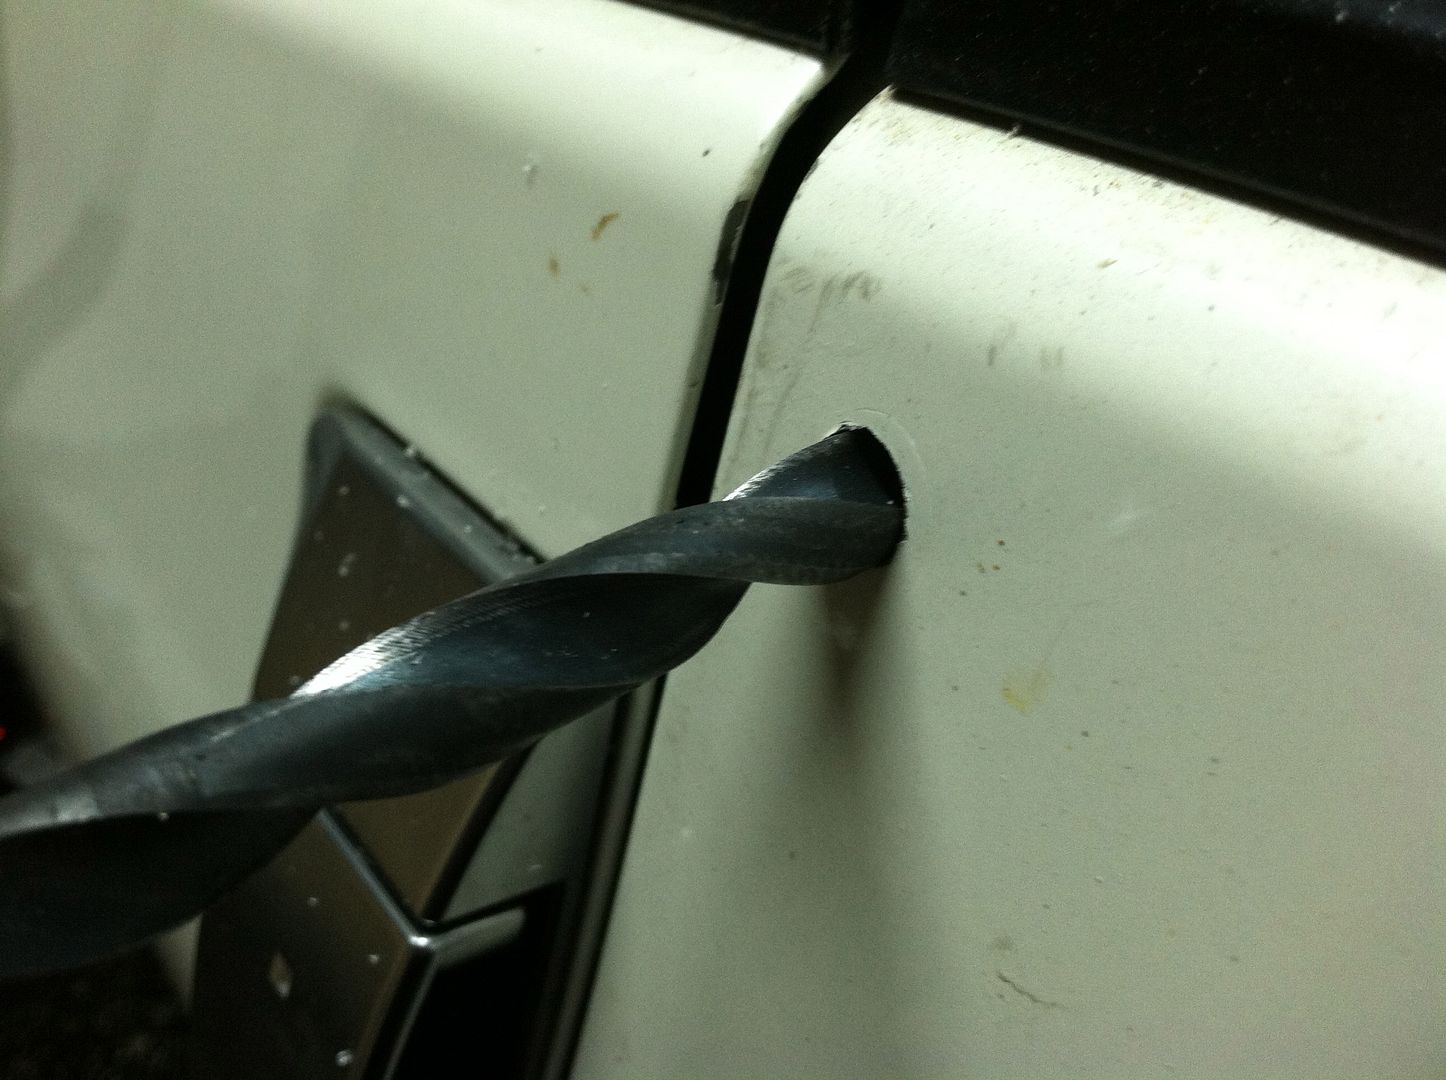
I already mocked up the fenders with your normal rivets so the holes were there, but need to be bigger to install the rivet nuts. Nothing a drill can't solve
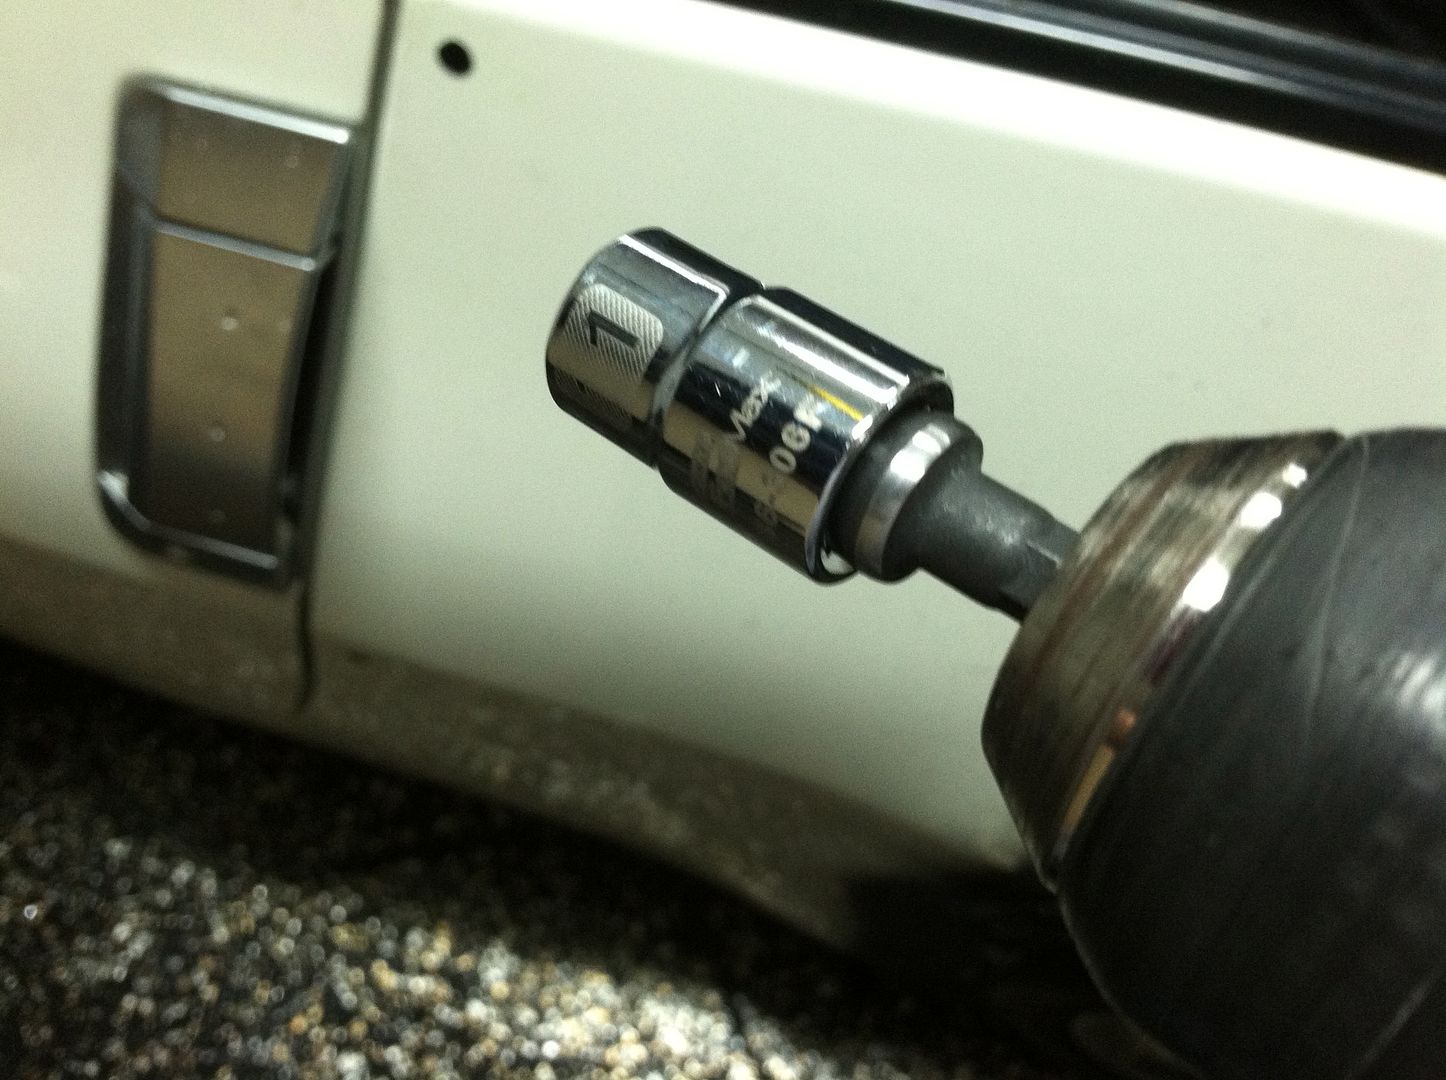
Picked up a socket to drill bit adapter so I can use my drill to install them.. Used a 11mm socket
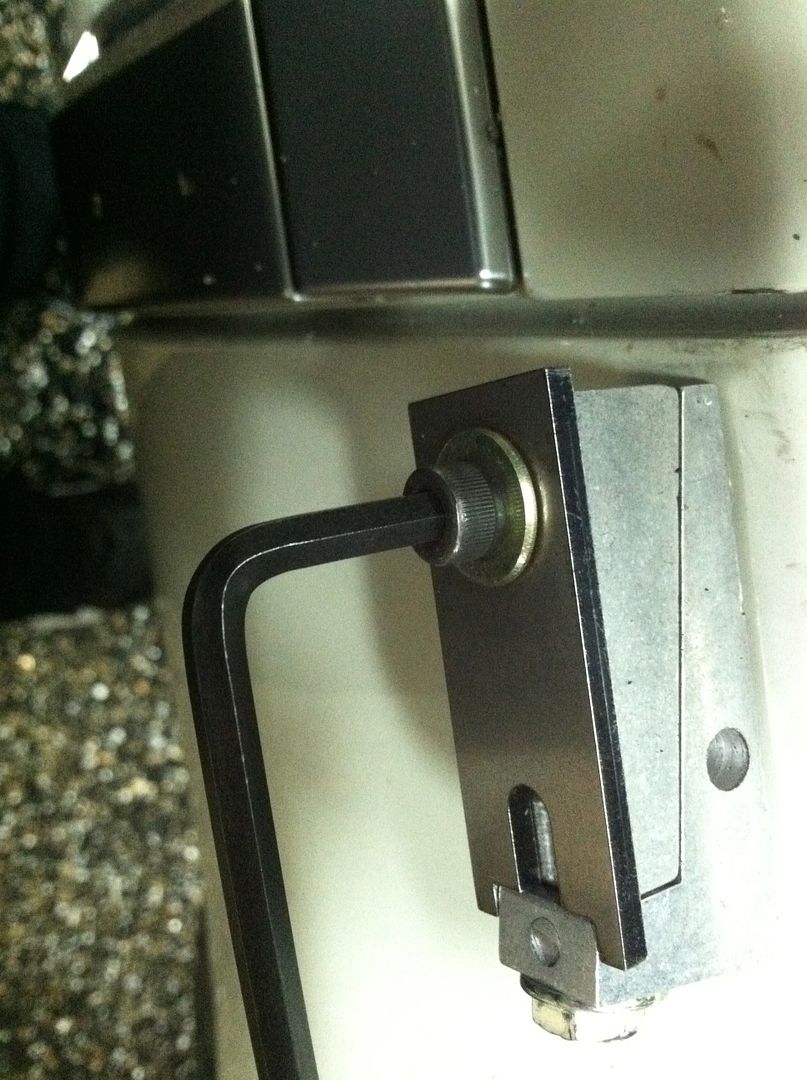
Getting ready to install the rivet nut. You are going to hold down the tool cause its going to want to twist on you if you don't
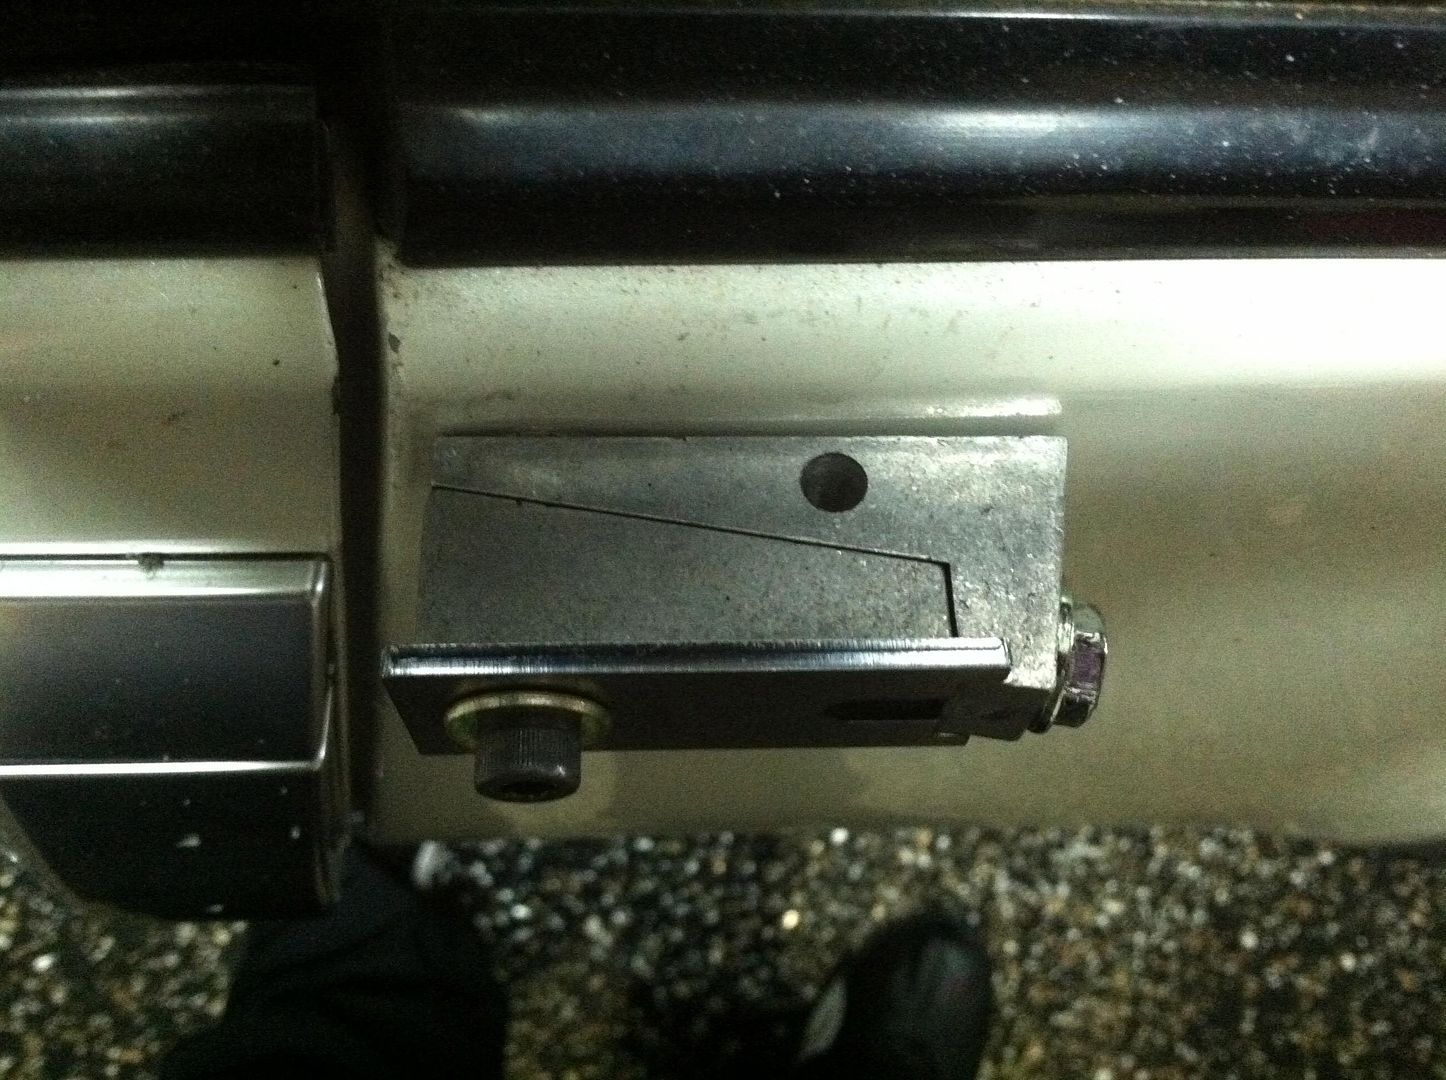
This is what it looks like once you have completed the install.
All you have to do is unscrew the 6mm from the rivet not add.....
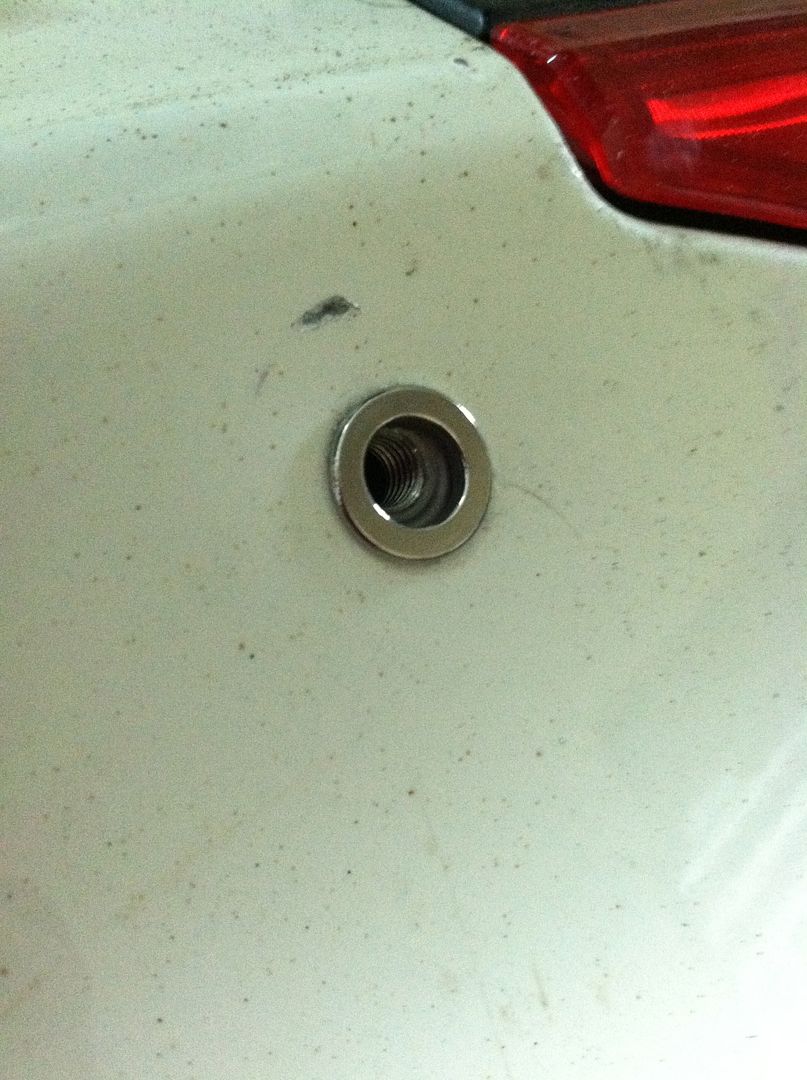
BAM!!! we got a nice little rivet nut..
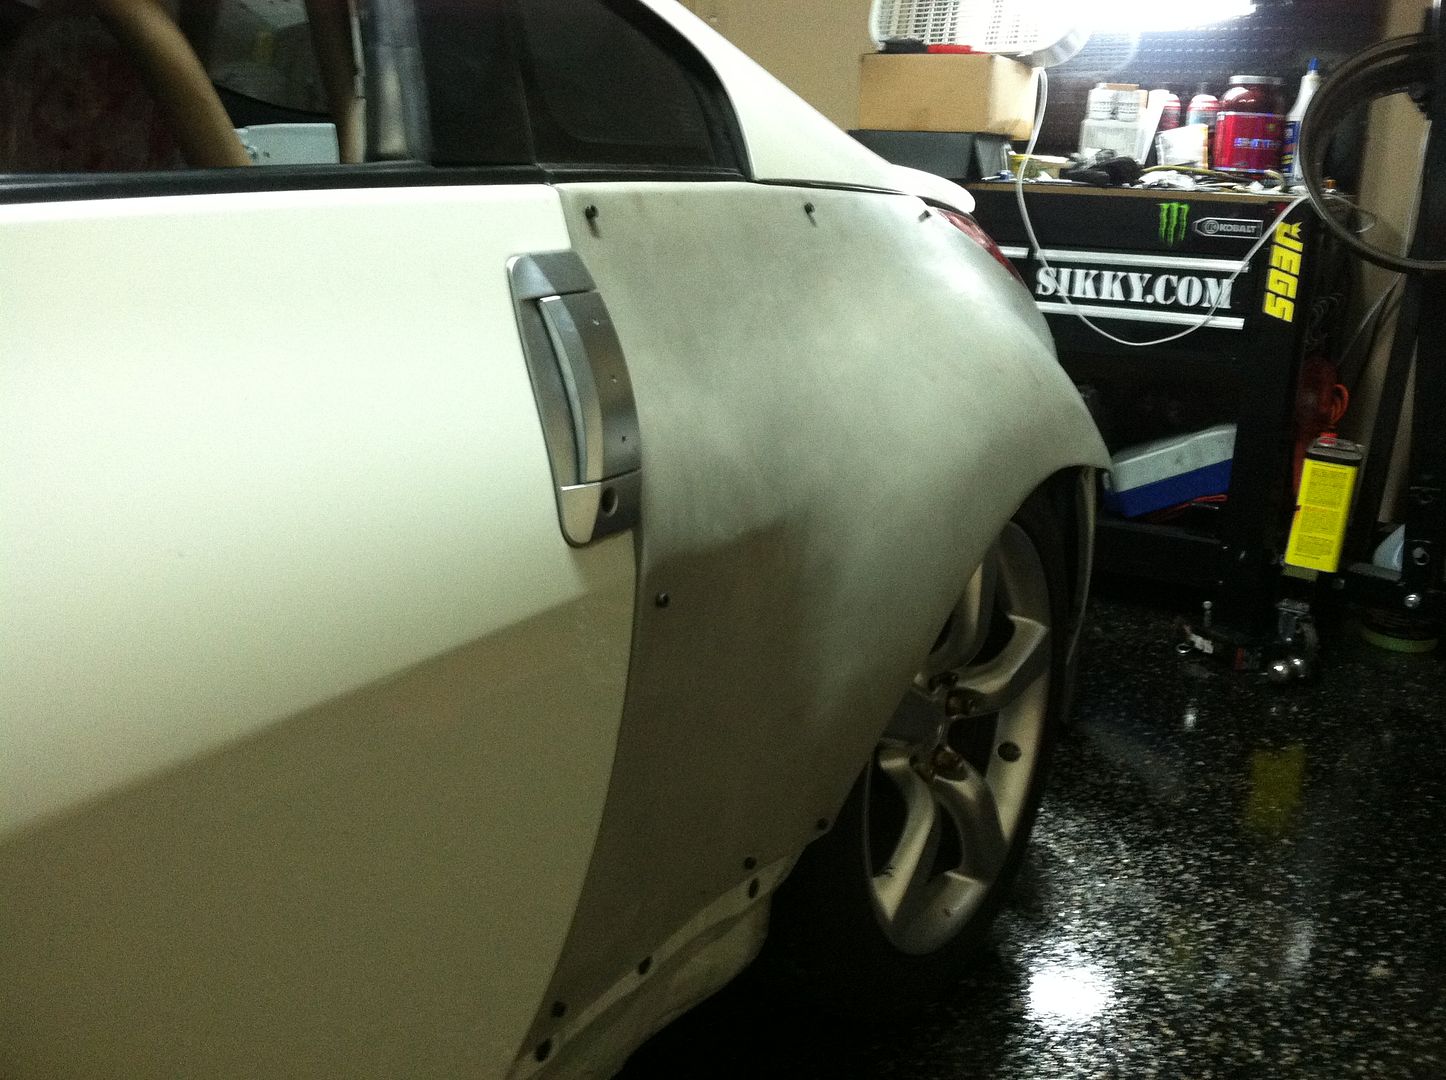
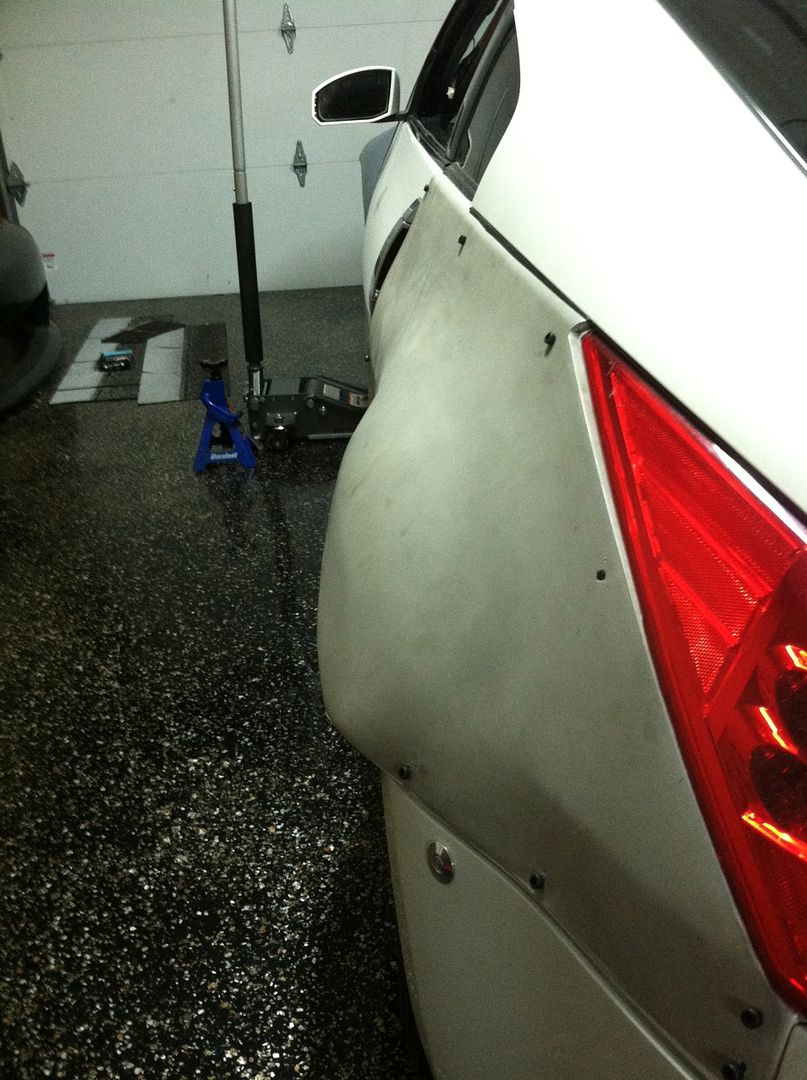
After I installed all 24 rivet nuts, 12 on each side. I mounted the over fenders.
The other side
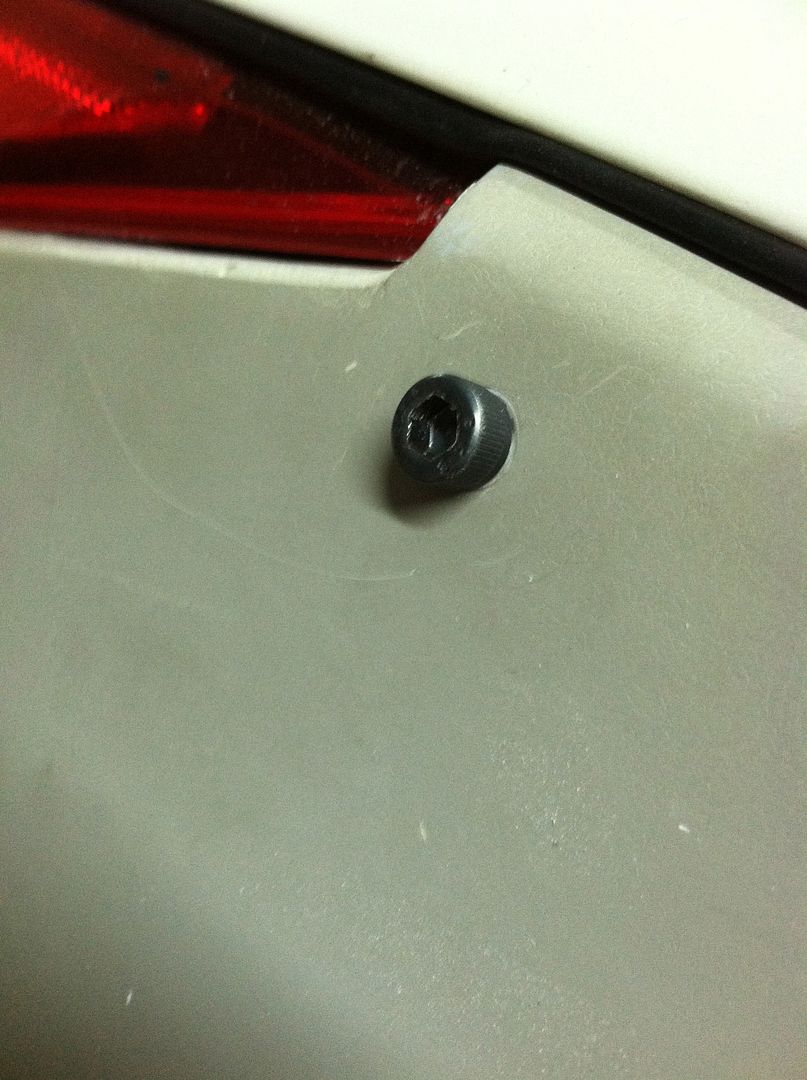
At the moment I am using these temp allen bolts to make sure everything is good.. Later I will install these:
So I just linked up with a guy named Shawn that does a lot of CF work for Indy cars, we are going to be working on a few things on the Z but the first thing that is up to bat is my EndPlates. Here is a little tease on what we are working on for my Endplates for the BCL wing. I am mocking up some designs now and Shawn is going to do his thing to make these things badass. Can't wait..
This build is everything I love cars for... Doesn't matter the "use" you have done the best attention to detail and focus on the end game I have seen...
Was a good build with a lot of attention to detail, but it seemed like you rushed the fenders.
All that attention to detail just to slap some eBay headlights, wavy bondo wide body kit, and riveted fenders? I expect those from a drift car just don't see why you paid such attention to detail with everything else just to slap some fenders on there like you plan to destroy the body anyways.
This build is everything I love cars for... Doesn't matter the "use" you have done the best attention to detail and focus on the end game I have seen...
I am simply amazed... and dat beer doe... rawr!!!
Thanks man for the kind words, glad you like the build.. I try my best to pay attention to all the details..
Was a good build with a lot of attention to detail, but it seemed like you rushed the fenders.
All that attention to detail just to slap some eBay headlights, wavy bondo wide body kit, and riveted fenders? I expect those from a drift car just don't see why you paid such attention to detail with everything else just to slap some fenders on there like you plan to destroy the body anyways.
Just my .02
I don't see how you say I rushed the fenders... I cut and welded them and water/smoked proofed them. (which most don't do) I also rivetnut them on which almost no drift cars do..
As for the the overfenders I got them from a pro D1NZ driver so nothing off the self.
And you don't have to like the route I choose for the lights or the use of the car, thats your .02 has you stated. But hey it is what it is a "Drift car" it will get beat up so have to plan ahead. It would be dumb of me to think nothing will happen to the body.
With that being said I might switch back to my 06 headlights and use these as backup.
But thanks for your opinion.. Hope you still keep watch/reading
Royal T. Insane build! Quick question, and I skimmed through all the pages so I might have missed it but, are you SD tuning? Reason I ask why, I do not see a maf only a IAT sensor (I believe thats what I see). Currently doing the swap on my car and am trying to figure out the intake setup. Thanks

 10-07-2014, 08:44 AM