
Smoothed Truck Intakes
 05-09-2012, 04:34 PM
#61
TECH Fanatic
Thread Starter
check out my web site in my sig
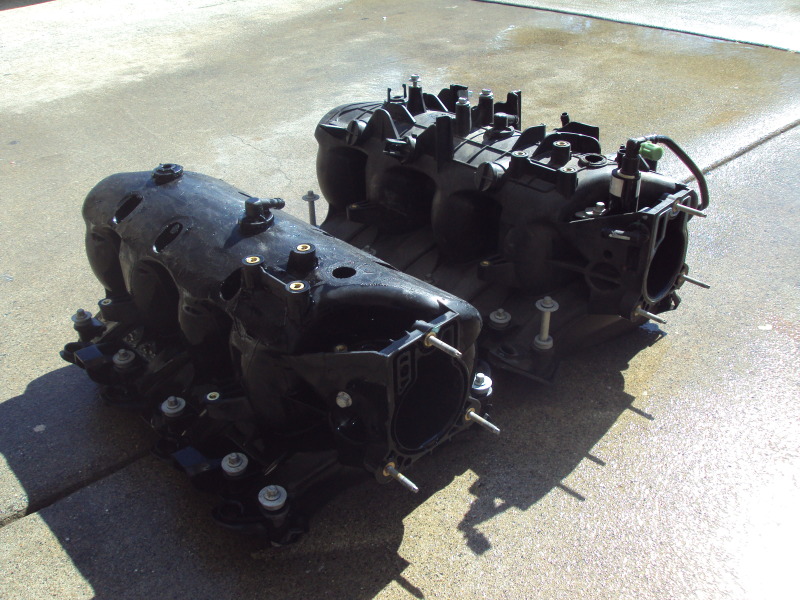
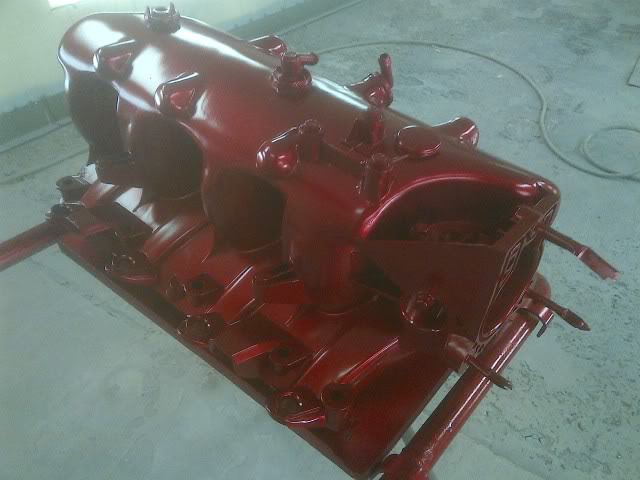
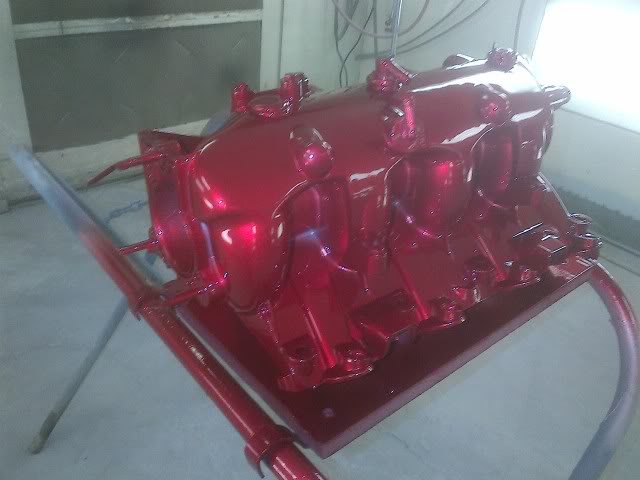
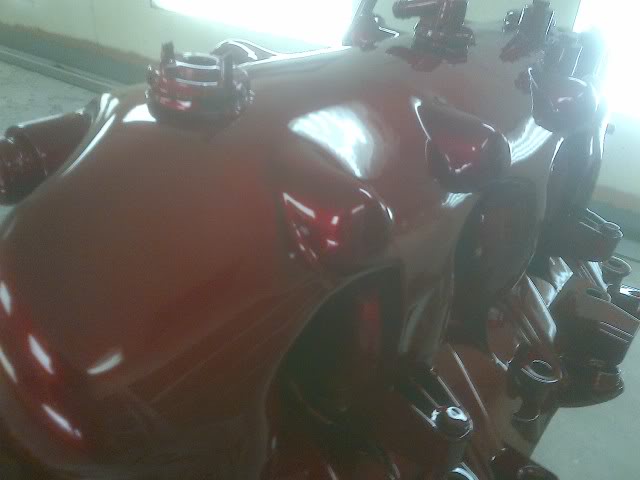
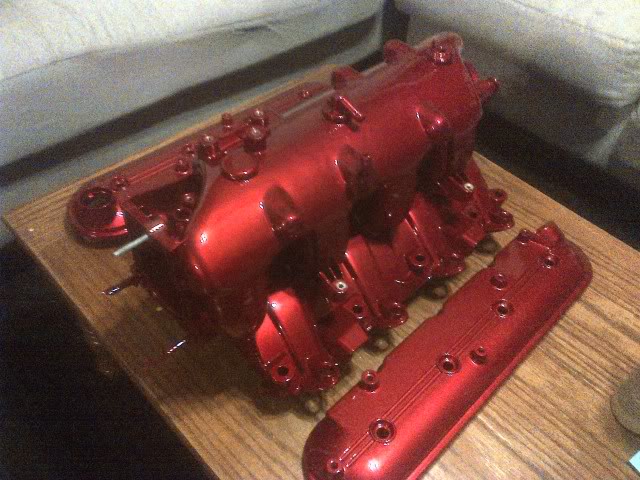
i used fiberglass and body filler to smooth it
carbide bits to grind it down
cut the bottm of a old evap and filled the cup of it with platic filler and smoothed it as well
but give it a look in my blogs as i have pics posted all the time
i used fiberglass and body filler to smooth it
carbide bits to grind it down
cut the bottm of a old evap and filled the cup of it with platic filler and smoothed it as well
but give it a look in my blogs as i have pics posted all the time


 06-22-2012, 11:17 AM
#63
TECH Enthusiast
iTrader: (9)
Join Date: Apr 2005
Location: springfield MO
Posts: 526
Likes: 0
Received 0 Likes
on
0 Posts

so is there a better product to fill or cover these holes after removal. I want to do mine too but now boxchev has made me question the capability of the fiberglass.
06-22-2012, 01:36 PM
#64
Teching In

Join Date: May 2012
Location: Hamilton, Ontario
Posts: 10
Likes: 0
Received 0 Likes
on
0 Posts
Custom 68, im almost done smoothing mine but i had trouble finding the proper nylon so i bought another truck intake. They r easy to find and very cheap. Then i just cut out the pieces i needed to fill the holes. I used a high temp 2 part plastic weld product to glue the pieces in.
06-22-2012, 01:44 PM
#65
TECH Enthusiast
iTrader: (9)
Join Date: Apr 2005
Location: springfield MO
Posts: 526
Likes: 0
Received 0 Likes
on
0 Posts
ok sounds good, I have an extra I was going to start and didnt know what I might get into. I did see another that just used that 2 part epoxy and glued a thin piece of aluminum over the top for the holes he had to cut out. It could be made to look good I bet.
I will start slow. I had a busted one and I think I threw it away it was on an engine I had then I got another so it wont hurt to start.
I will start slow. I had a busted one and I think I threw it away it was on an engine I had then I got another so it wont hurt to start.
06-22-2012, 02:21 PM
#66
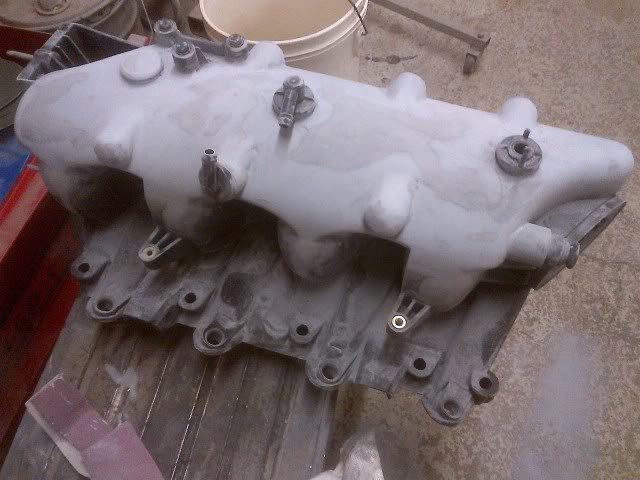
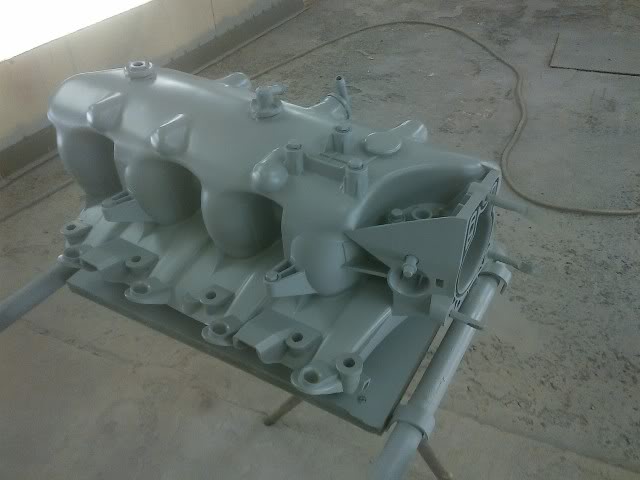
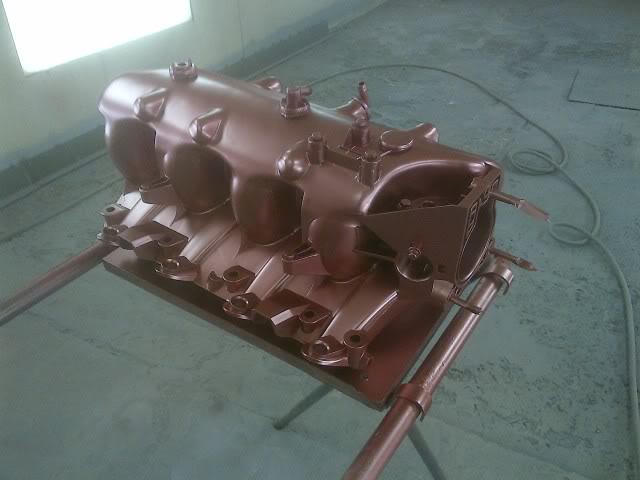
As mentioned a page back. I was unsure on exactly what type of plastic material the intake was made of. Come to find out it is made of Nylon 66 which apparently is the same as a cooking spatula.

Cut them up to the size you need to cover any holes. Maybe 1/8 to 1/4in bigger. And use a plastic welder to melt/weld the to pieces of plastic together. Then rough up the plastic with a coarse grit sand paper anywhere from 24-40 grit should do it.
Clean and degrease the intake again. Then I was going to use a 2 part plastic epoxy filler to go over the intake. BONDO body filler will not and should not be used here. Again just like polyester fiberglass resin the polyester body filler will not stick to the plastic. Eventually all of that crap would release from the plastic over time if you do.
I ditched this project cause I bought an LS6 intake. If anyone is interested I have my intake for sale. Everything is already chopped off and grinded down for you. Just need to fill the holes and go over it with some epoxy plastic filler. I have map sensor and gaskets to toss in with it. Will also sell the epoxy and cleaner/prep to clean the epoxy before you spread it one.
This is what I have.
http://www.urethanesupply.com/Hardse...Cartridge-Kit/
http://www.urethanesupply.com/Filler...1/Filler-Prep/
 07-31-2012, 09:56 AM
#71
As mentioned a page back. I was unsure on exactly what type of plastic material the intake was made of. Come to find out it is made of Nylon 66 which apparently is the same as a cooking spatula.
Cut them up to the size you need to cover any holes. Maybe 1/8 to 1/4in bigger. And use a plastic welder to melt/weld the to pieces of plastic together. Then rough up the plastic with a coarse grit sand paper anywhere from 24-40 grit should do it.
Clean and degrease the intake again. Then I was going to use a 2 part plastic epoxy filler to go over the intake. BONDO body filler will not and should not be used here. Again just like polyester fiberglass resin the polyester body filler will not stick to the plastic. Eventually all of that crap would release from the plastic over time if you do.
I ditched this project cause I bought an LS6 intake. If anyone is interested I have my intake for sale. Everything is already chopped off and grinded down for you. Just need to fill the holes and go over it with some epoxy plastic filler. I have map sensor and gaskets to toss in with it. Will also sell the epoxy and cleaner/prep to clean the epoxy before you spread it one.
This is what I have.
http://www.urethanesupply.com/Hardse...Cartridge-Kit/
http://www.urethanesupply.com/Filler...1/Filler-Prep/


 10-31-2012, 07:24 AM
#77
Teching In

Join Date: Mar 2012
Posts: 4
Likes: 0
Received 0 Likes
on
0 Posts
 [/QUOTE]
My god that looks great....Do you have to leave those three post on towards the front/passenger side? Also, on those pieces that protrude out the side (no clue what there called) did you just sand them round and it didnt make a hole in the intake?
10-31-2012, 10:22 AM
#79
Teching In

Join Date: Jan 2011
Posts: 4
Likes: 0
Received 0 Likes
on
0 Posts
Can anyone get a measurement from the crank center line to the top of the throttle body or intake on one of these. I've seen a couple diagrams showing about 20" but that's tithe top of a non-shaved intake looks like this might save you 1/2" or so.
Thanks
Thanks
10-31-2012, 11:22 AM
#80
Staging Lane
Join Date: Oct 2012
Location: Saskatchewan
Posts: 66
Likes: 0
Received 0 Likes
on
0 Posts
Those 3 posts are for the throttle body cable, so it depends if you are using DBW. Im sure you could fab something up to a differnt location for a bracket if needed. Those boobie shaped things can be cut off but, that would leave large holes that would need to be filled. I ground them round and plastic welded any holes that were left.(minor seams and one hole in the center of the middle one on the passenger side)