
93' 240SX 5.3L Turbo Build....
 04-13-2012, 01:11 PM
#1
On The Tree
Thread Starter
iTrader: (5)

Join Date: Jun 2007
Posts: 118
Likes: 0
Received 0 Likes
on
0 Posts
Guys
Been on the forum for a while and been using it for a lot of information but mostly just parts swapping and lurking. I figured I would throw up my build.....
This is pretty picture intensive, and all the posts up until now are copied from other forums....
March 18, 2012
Guys
I've got the itch to do a build over the spring/summer......
The plan is to keep the 5.3 stock with the exception of some supporting mods (rod bolts, head studs, HG's, Z06 cam, etc) and try to make ~500rwhp.
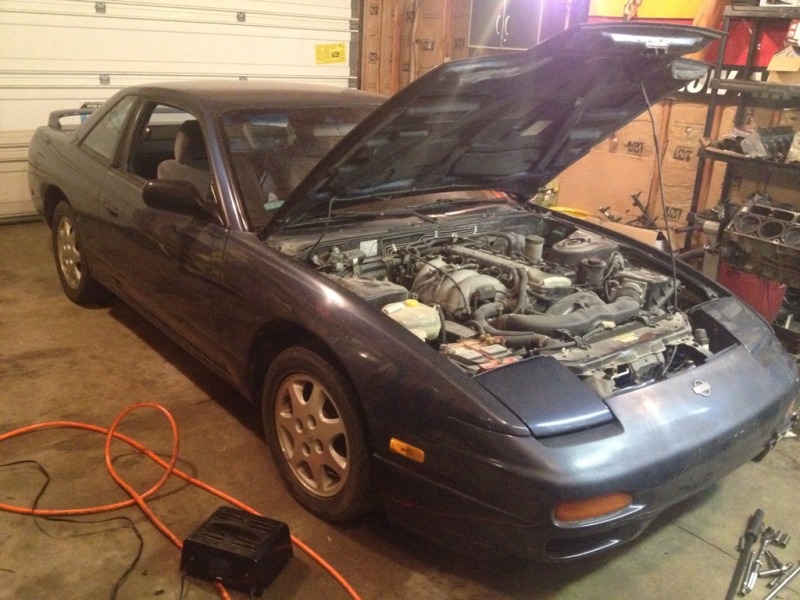
I picked up the car on Saturday (3/17/2012)
Details:
1993 S13 SE Coupe
Sapphire Blue
120k Miles
5spd
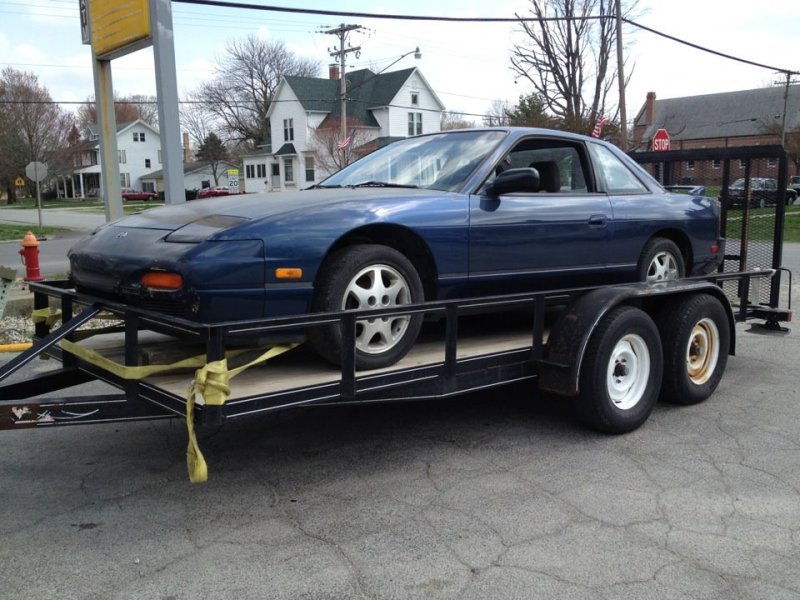
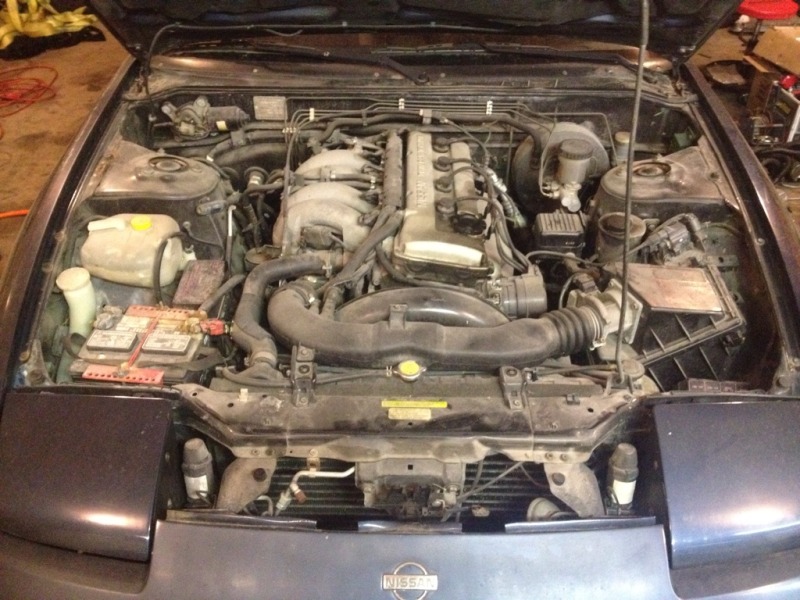
This car is the most solid S13 I've seen personally in a long time (for Central IL anyways) Virtually no rust, rockers/rails are perfect and completely unmolested with the exception of a blitz Nur-Spec cat-back. The hood clear coat is peeling but the rest of the car is in real good shape. The engine was hydrolocked, the owner let it go for real cheap! If anyone needs any DOHC KA parts.....let me know, the whole drivetrain is coming out.
I only had time to pick up the car on Saturday and had to get back home so its still sitting on the trailer. I hope to get the car back home this weekend and start pulling the engine. I'm pretty motivated to get this car done so hopefully things will be accomplished on a quick time frame.
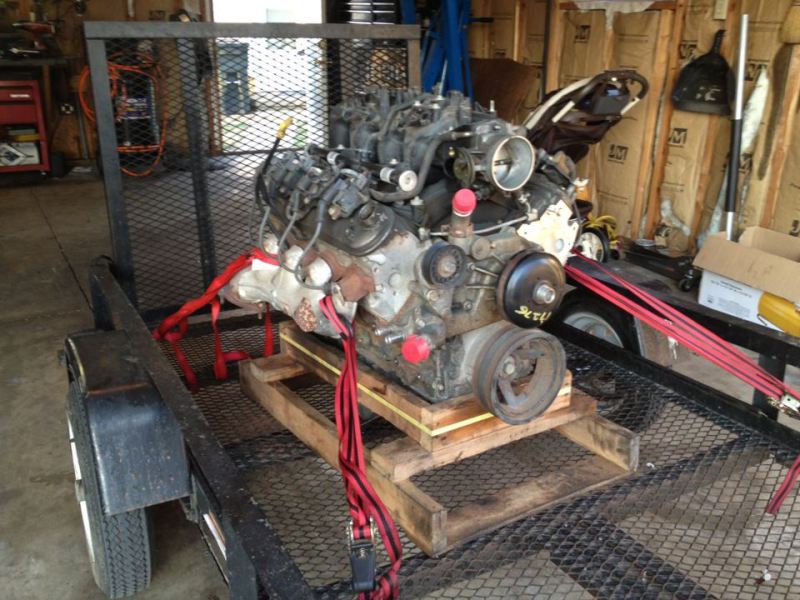
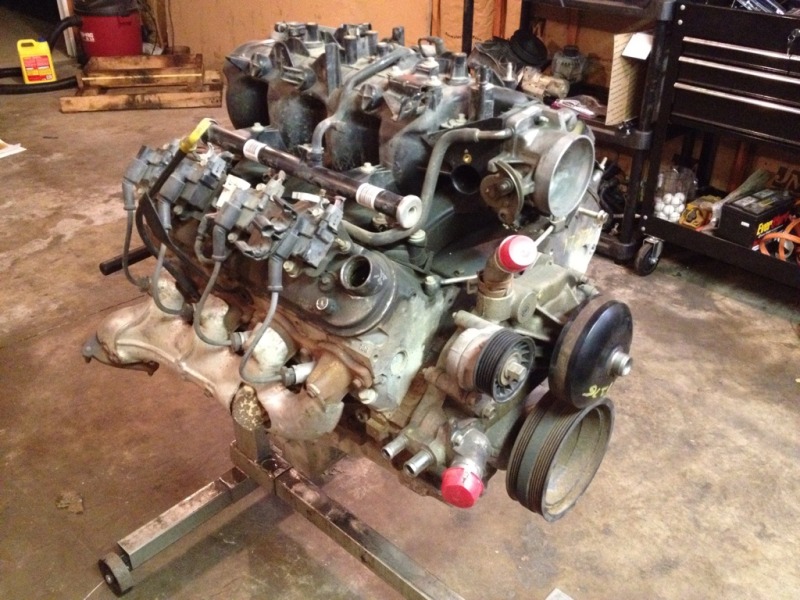
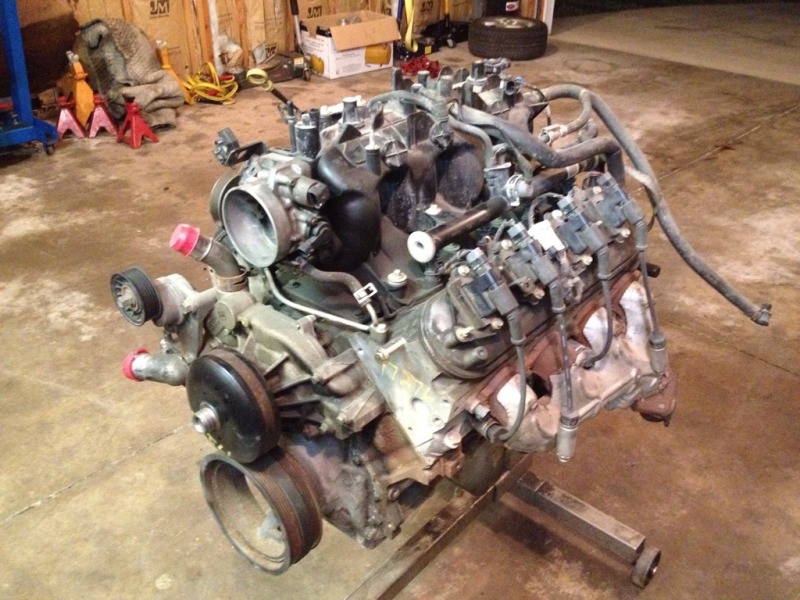
I picked up the engine last Thursday (3/15/2012.) 90k miles out of an 01' silverado
I'll probably get the car at least up and running NA and then move toward the turbo setup as I acquire parts....
This will be a 6spd car (provided I can find a T56) that'll mainly serve as a street bruiser, but I'm sure a few drag strip outings will happen as well.
No it wont be fast, and yes it'll be made up of mostly store-bought pre-fabricated parts so I know this project will suck :whacko:
March 19, 2012
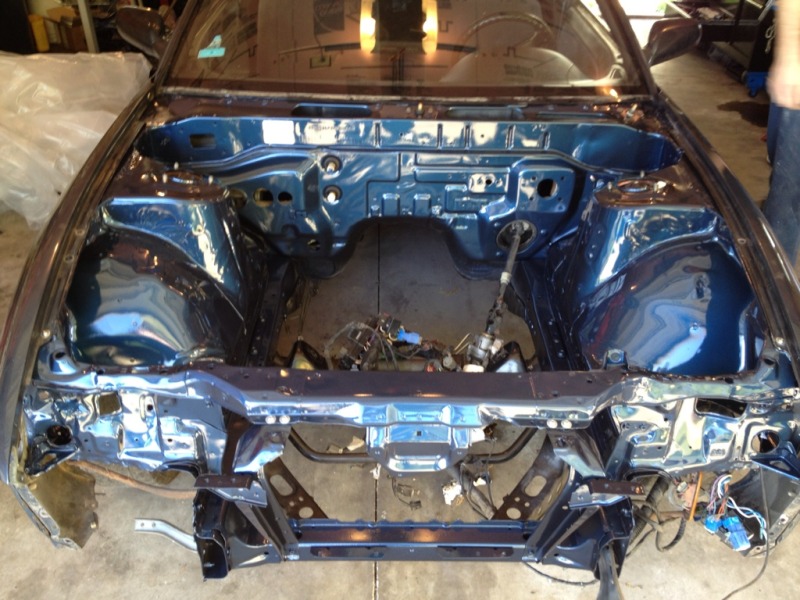
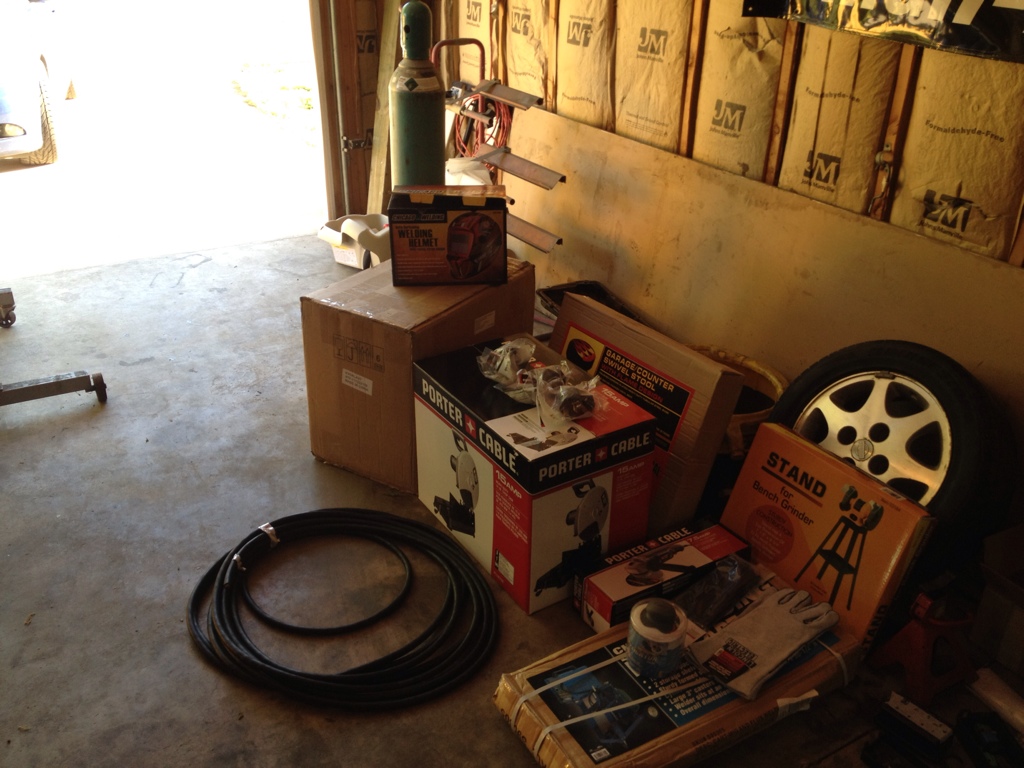
Did some parts removal and clean-up tonight. Here's where it sits....
Hopefully picking up my LS1 intake/TB/water pump and the correct PS Pump this weekend....
Been on the forum for a while and been using it for a lot of information but mostly just parts swapping and lurking. I figured I would throw up my build.....
This is pretty picture intensive, and all the posts up until now are copied from other forums....
March 18, 2012
Guys
I've got the itch to do a build over the spring/summer......
The plan is to keep the 5.3 stock with the exception of some supporting mods (rod bolts, head studs, HG's, Z06 cam, etc) and try to make ~500rwhp.
I picked up the car on Saturday (3/17/2012)
Details:
1993 S13 SE Coupe
Sapphire Blue
120k Miles
5spd
This car is the most solid S13 I've seen personally in a long time (for Central IL anyways) Virtually no rust, rockers/rails are perfect and completely unmolested with the exception of a blitz Nur-Spec cat-back. The hood clear coat is peeling but the rest of the car is in real good shape. The engine was hydrolocked, the owner let it go for real cheap! If anyone needs any DOHC KA parts.....let me know, the whole drivetrain is coming out.
I only had time to pick up the car on Saturday and had to get back home so its still sitting on the trailer. I hope to get the car back home this weekend and start pulling the engine. I'm pretty motivated to get this car done so hopefully things will be accomplished on a quick time frame.
I picked up the engine last Thursday (3/15/2012.) 90k miles out of an 01' silverado
I'll probably get the car at least up and running NA and then move toward the turbo setup as I acquire parts....
This will be a 6spd car (provided I can find a T56) that'll mainly serve as a street bruiser, but I'm sure a few drag strip outings will happen as well.
No it wont be fast, and yes it'll be made up of mostly store-bought pre-fabricated parts so I know this project will suck :whacko:
March 19, 2012
Did some parts removal and clean-up tonight. Here's where it sits....
Hopefully picking up my LS1 intake/TB/water pump and the correct PS Pump this weekend....
 04-13-2012, 01:13 PM
#2
On The Tree
Thread Starter
iTrader: (5)
Join Date: Jun 2007
Posts: 118
Likes: 0
Received 0 Likes
on
0 Posts
March 20, 2012
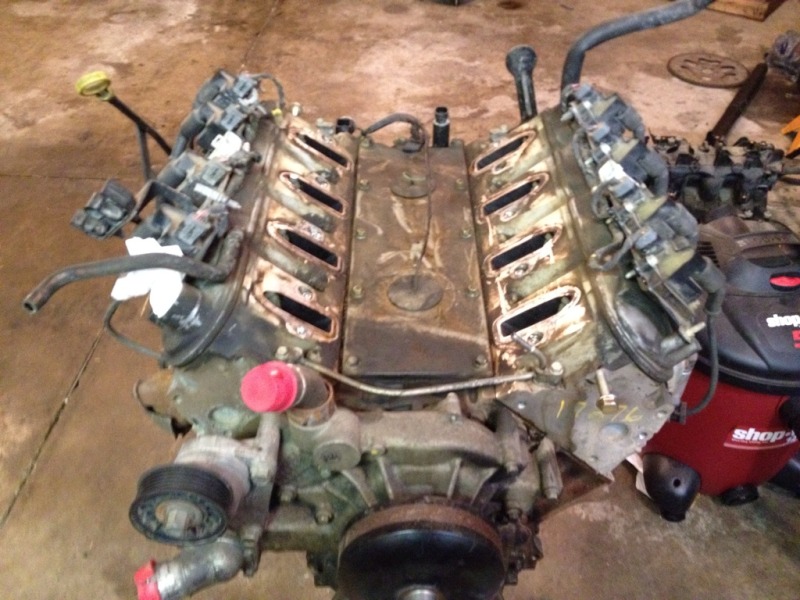
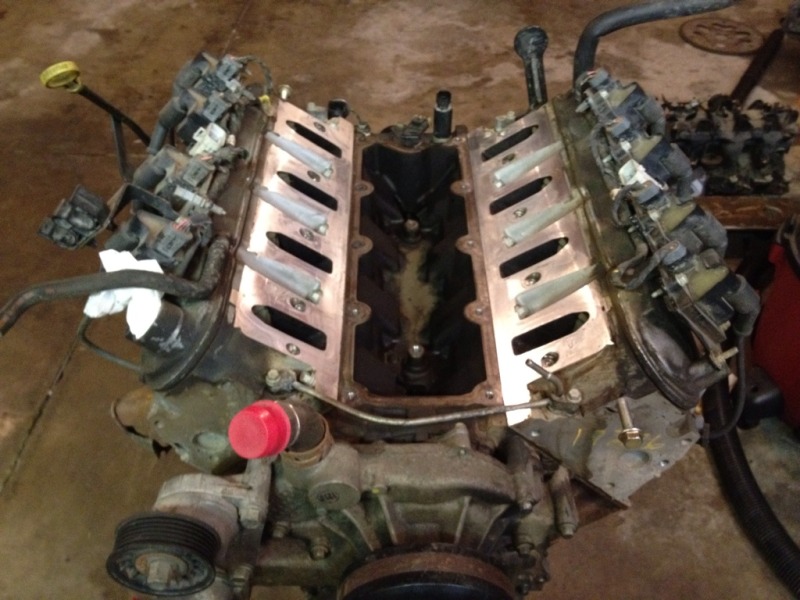
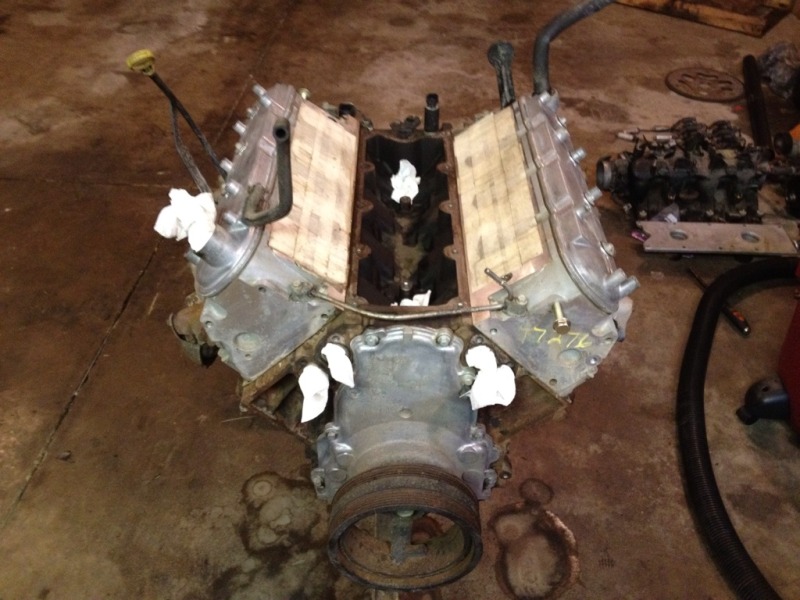
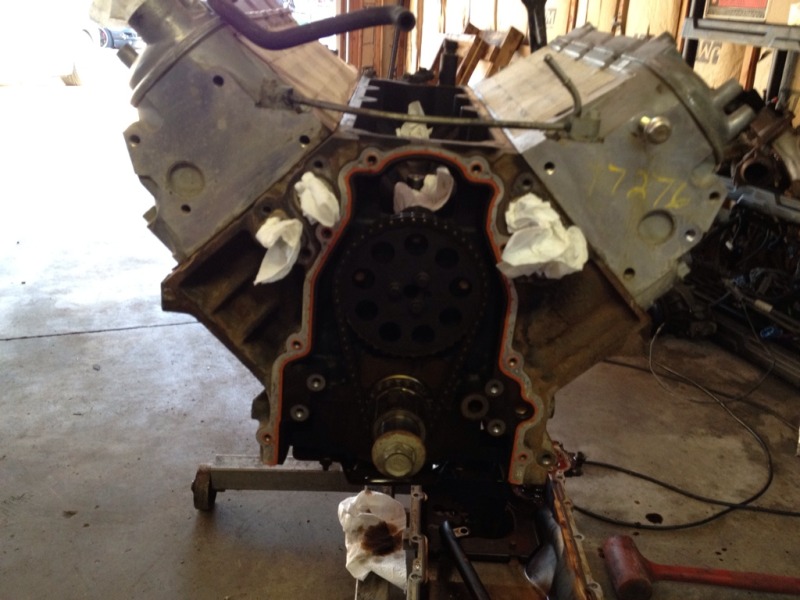
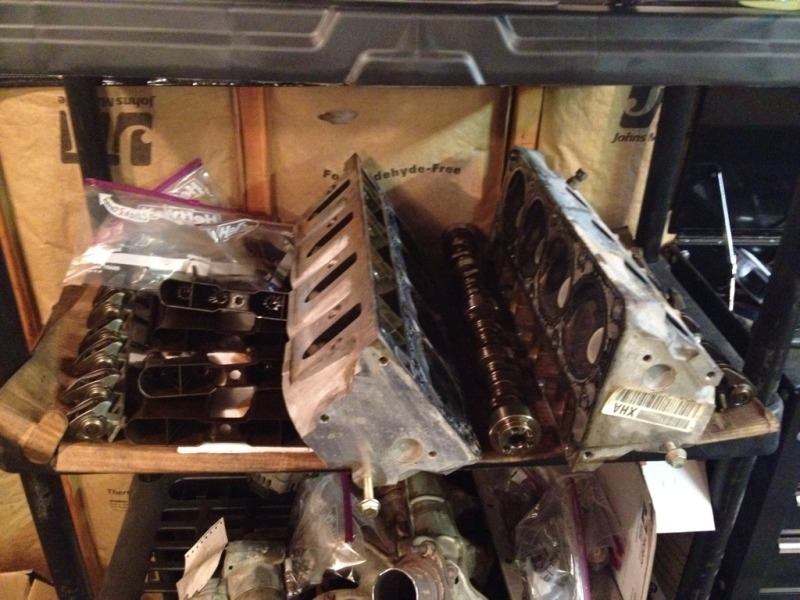
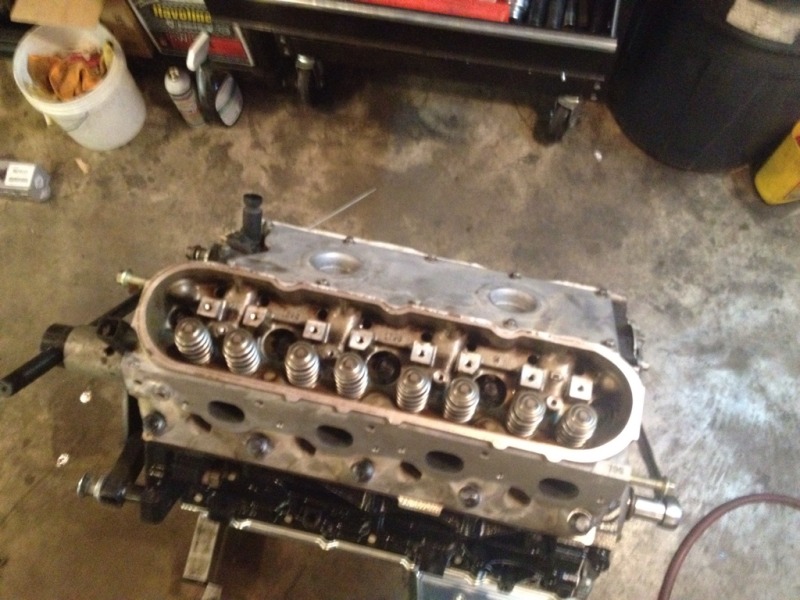
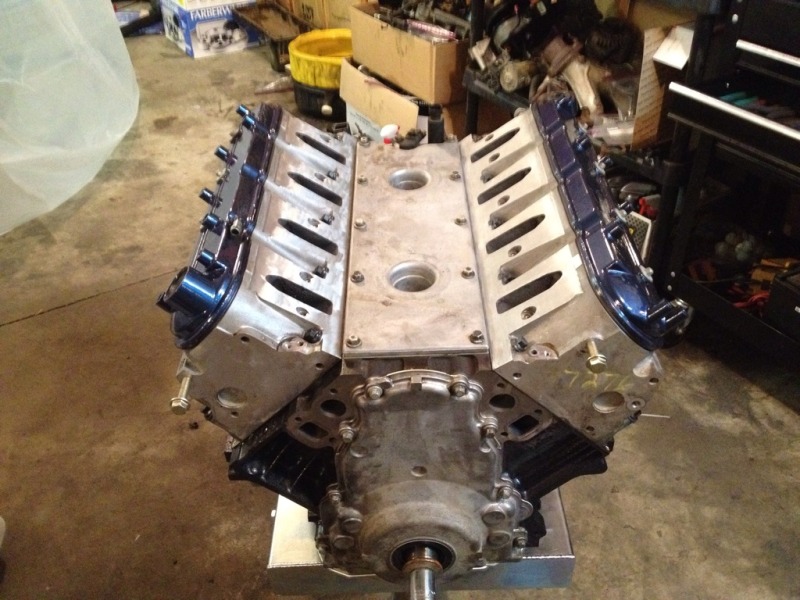
More engine teardown tonight.... Since I plan on doing headgaskets and studs the heads have to come off, and might as well pull the cam too...
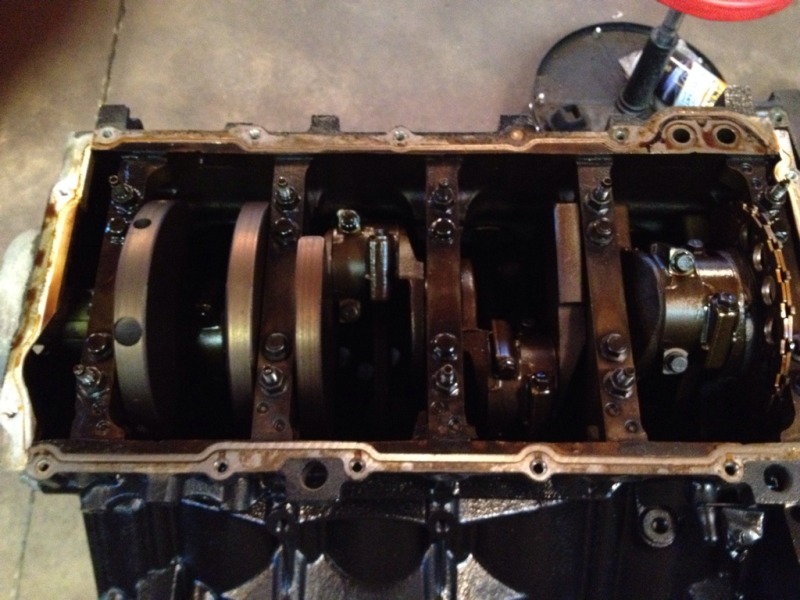
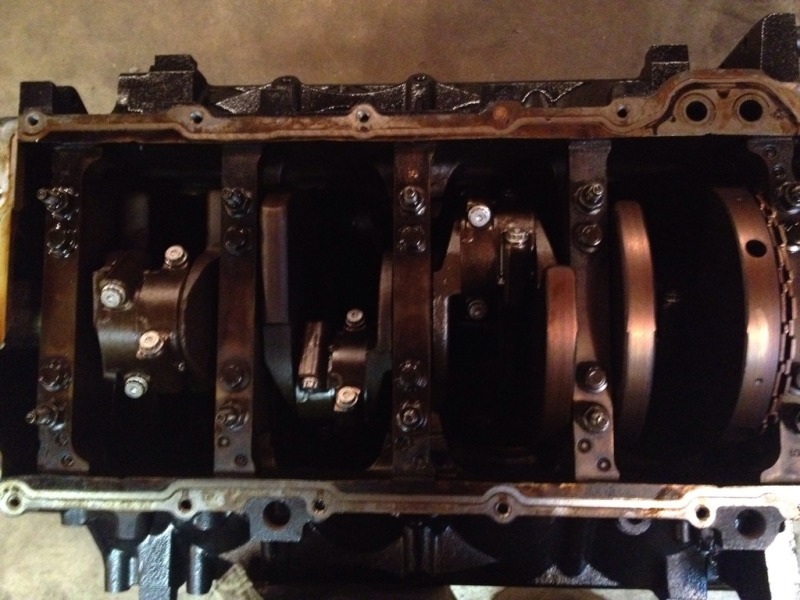
Oil pan off, checked the rod caps, no excessive play noted. I'll likely throw some rod bolts in it since the pan is off
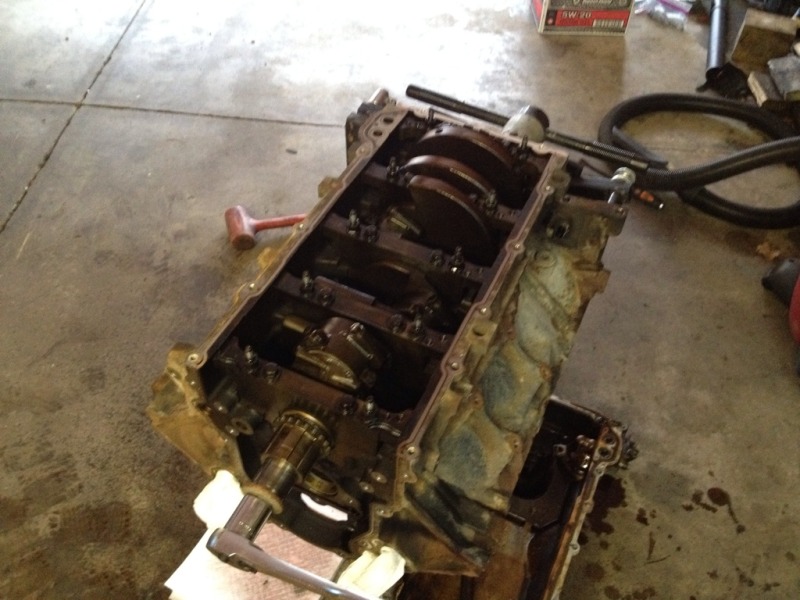
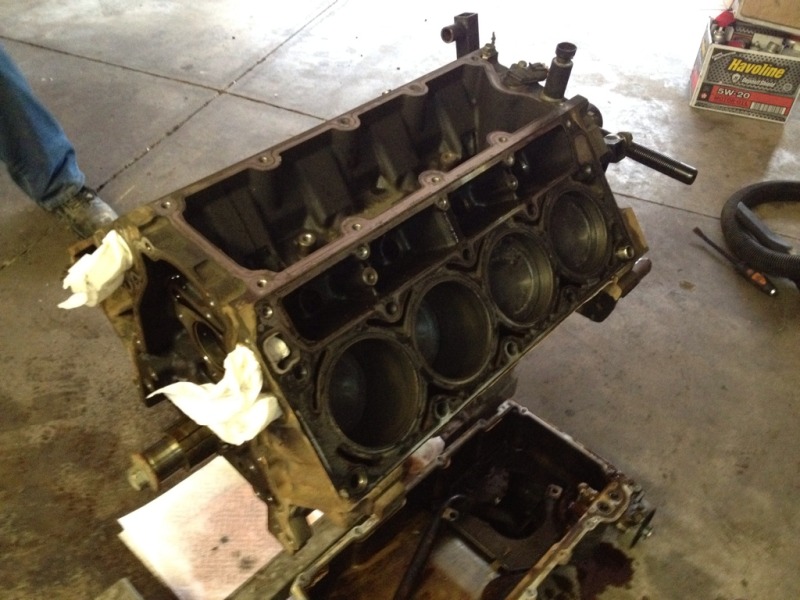
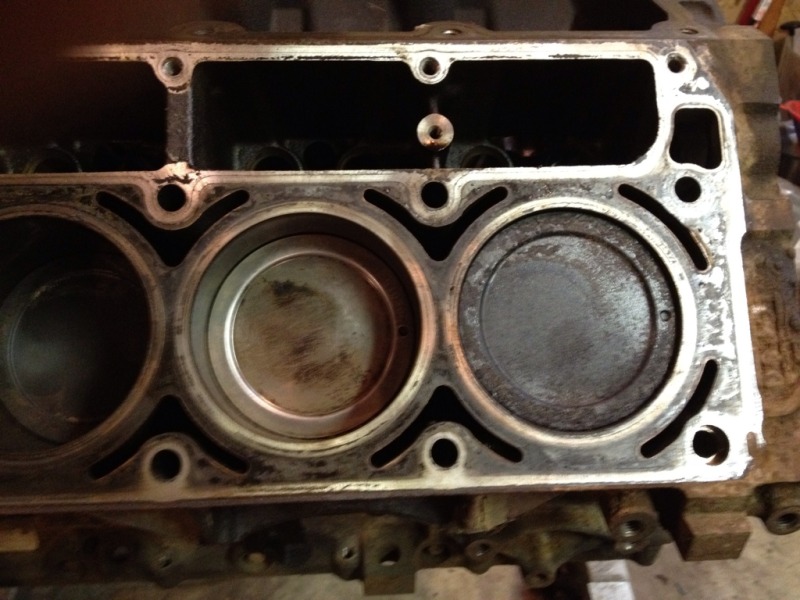
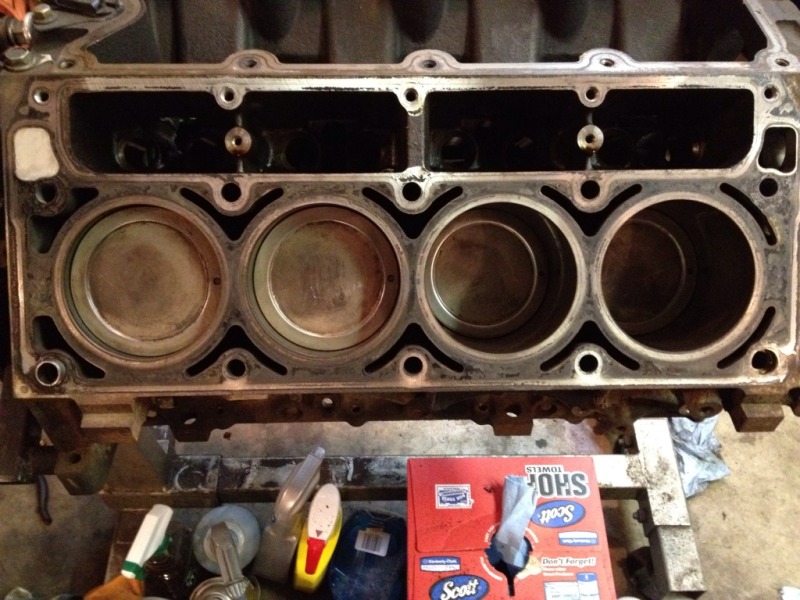
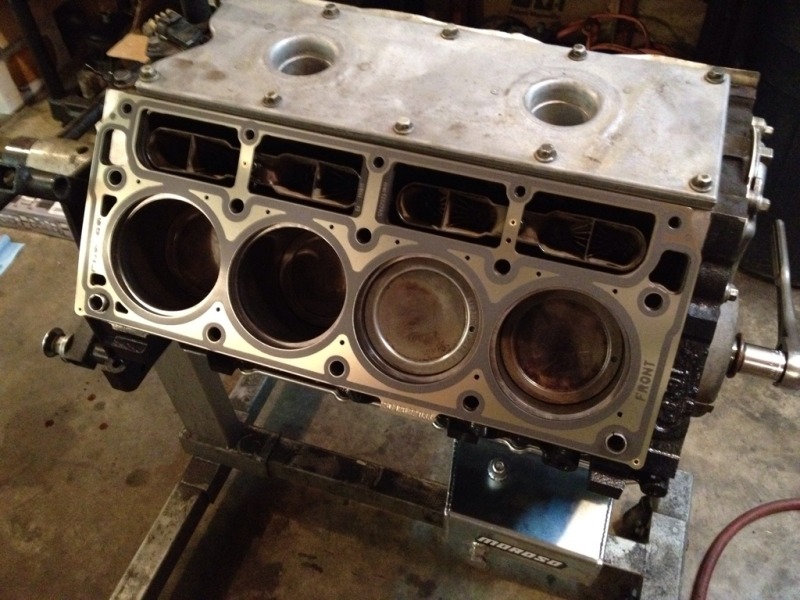
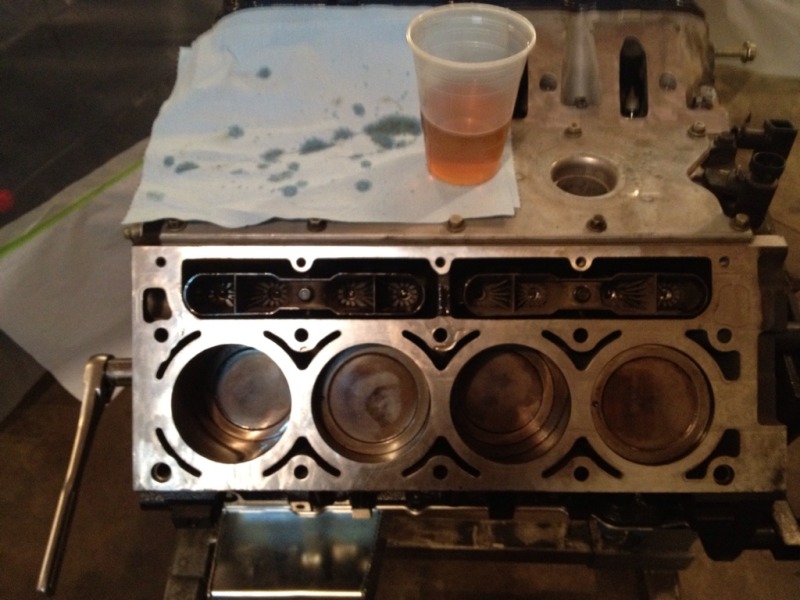
Some buildup on the piston tops but crosshatching is still on all of the walls....looks about like a 100k mile engine to me
Trying to stay somewhat organized
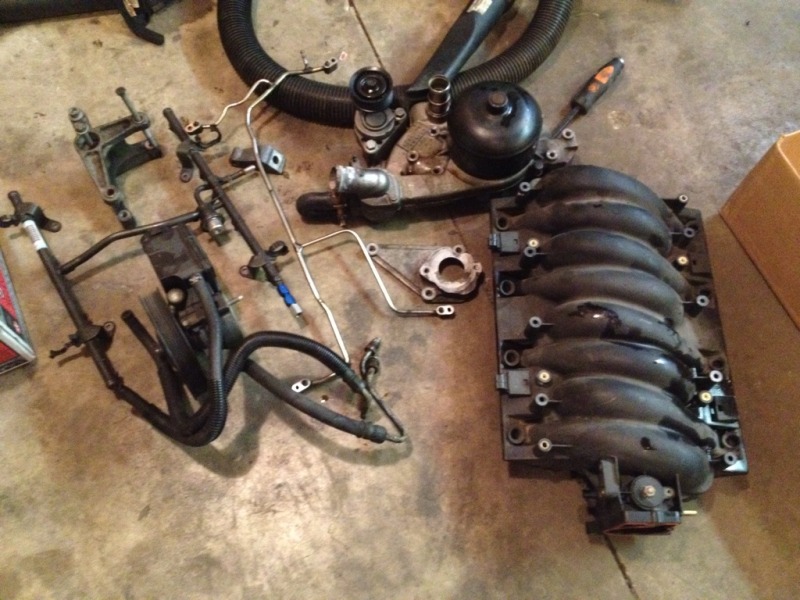
Picked up a majority of the car accessories tonight as well....
March 24, 2012
What an evening......much progress made....
Me and a friend picked up the car tonight to bring it back to the garage....and I got right to work...
Unmolested.....
During the pickup process, we made a detour so I could pick up my LS6 cam and lifters.....
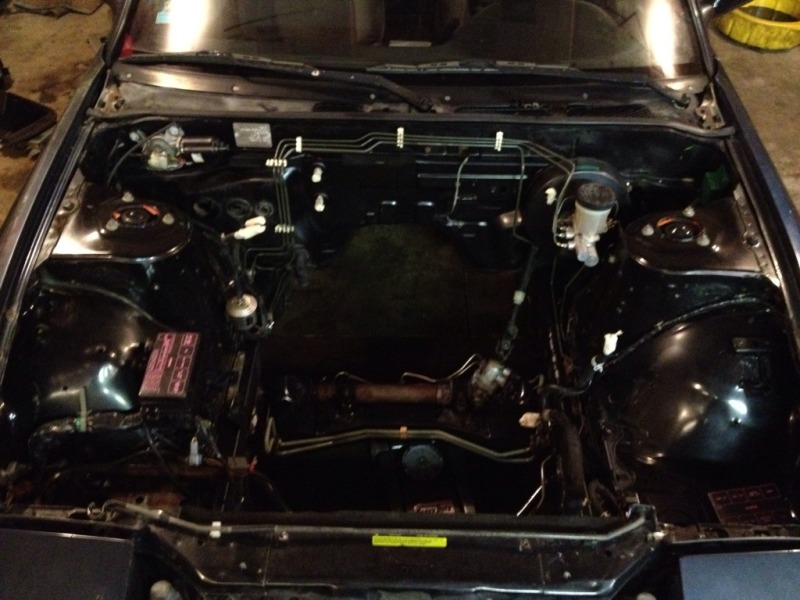
Part of the way through I wanted to see how well the engine bay would clean up, so I did a small area with some simple green....
I got the engine about 3/4 of the way up out of the engine bay and my cherry picker took a complete crap on me. One of the seals pissed all of the fluid out, so that was a little bit of a hiccup but 6 total hours and a few cuss words later...

Been up 24 hours now....its time for a cold one
Cheers!
More engine teardown tonight.... Since I plan on doing headgaskets and studs the heads have to come off, and might as well pull the cam too...
Oil pan off, checked the rod caps, no excessive play noted. I'll likely throw some rod bolts in it since the pan is off
Some buildup on the piston tops but crosshatching is still on all of the walls....looks about like a 100k mile engine to me
Trying to stay somewhat organized
Picked up a majority of the car accessories tonight as well....
March 24, 2012
What an evening......much progress made....
Me and a friend picked up the car tonight to bring it back to the garage....and I got right to work...
Unmolested.....
During the pickup process, we made a detour so I could pick up my LS6 cam and lifters.....
Part of the way through I wanted to see how well the engine bay would clean up, so I did a small area with some simple green....
I got the engine about 3/4 of the way up out of the engine bay and my cherry picker took a complete crap on me. One of the seals pissed all of the fluid out, so that was a little bit of a hiccup but 6 total hours and a few cuss words later...
Been up 24 hours now....its time for a cold one
Cheers!
04-13-2012, 01:14 PM
#3
On The Tree
Thread Starter
iTrader: (5)
Join Date: Jun 2007
Posts: 118
Likes: 0
Received 0 Likes
on
0 Posts
March 25, 2012
Did some more work on the car today.....not much to show but extremely time consuming!
Piston cleanup
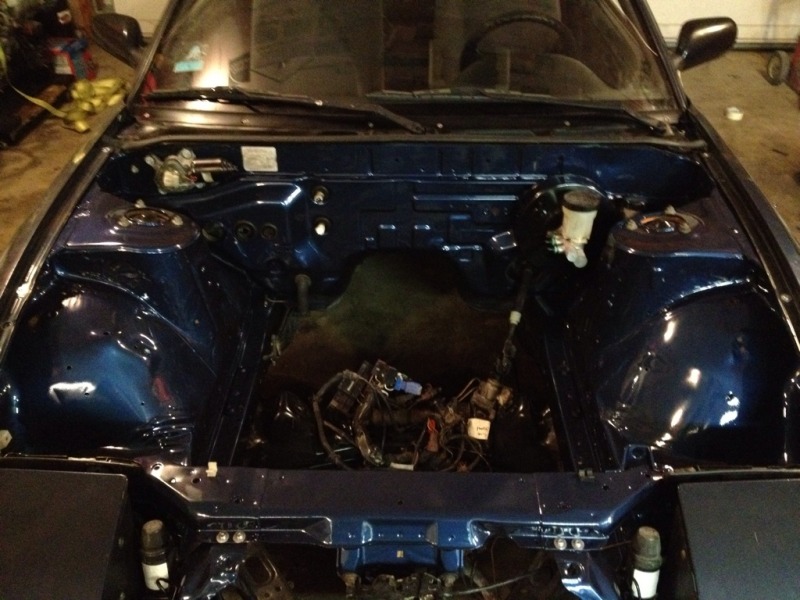
Did a pretty thorough cleaning of the engine bay. Removed the wiring harness, removed the clutch master and line, and yanked the throttle cable
March 29, 2012
Finally got my new roloc pads in, did some more clean-up tonight
Hopefully making some more progress in the engine bay next week and getting a coat of paint on it!
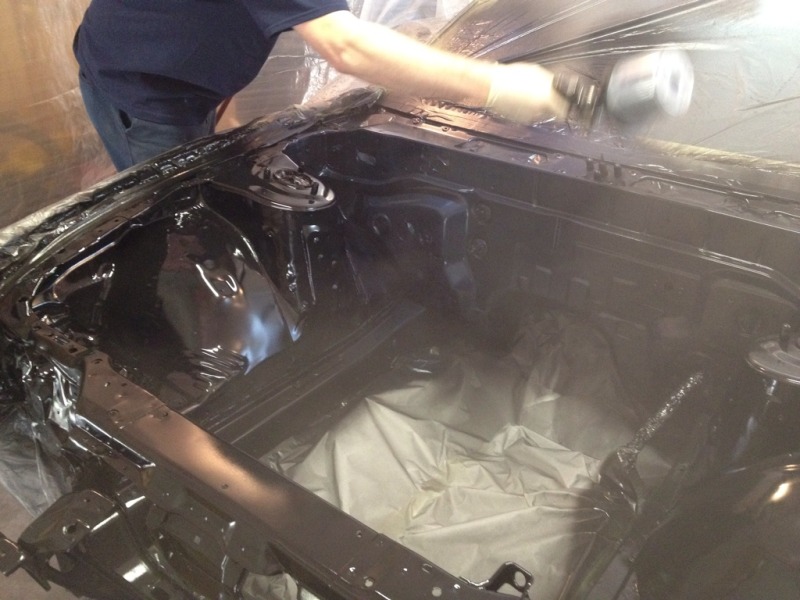
April 2, 2012
Its pretty much ready for paint, hopefully this weekend
April 3, 2012
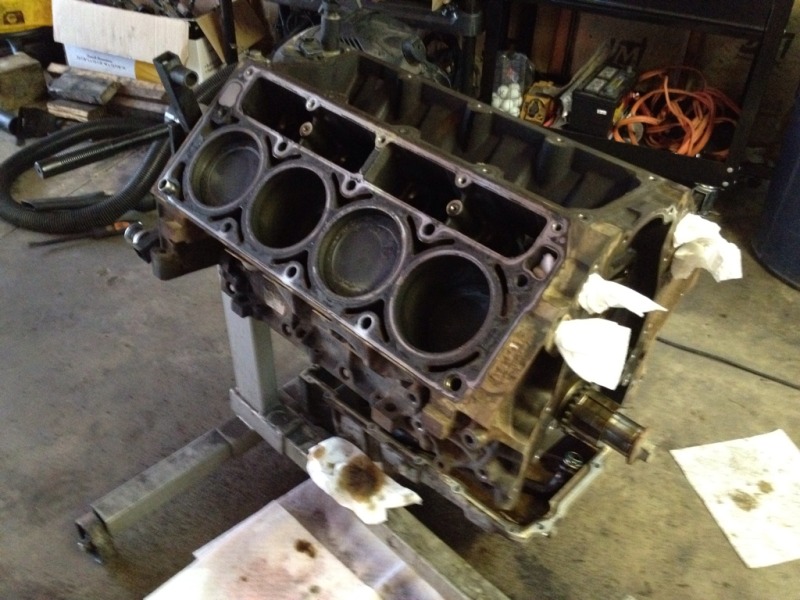
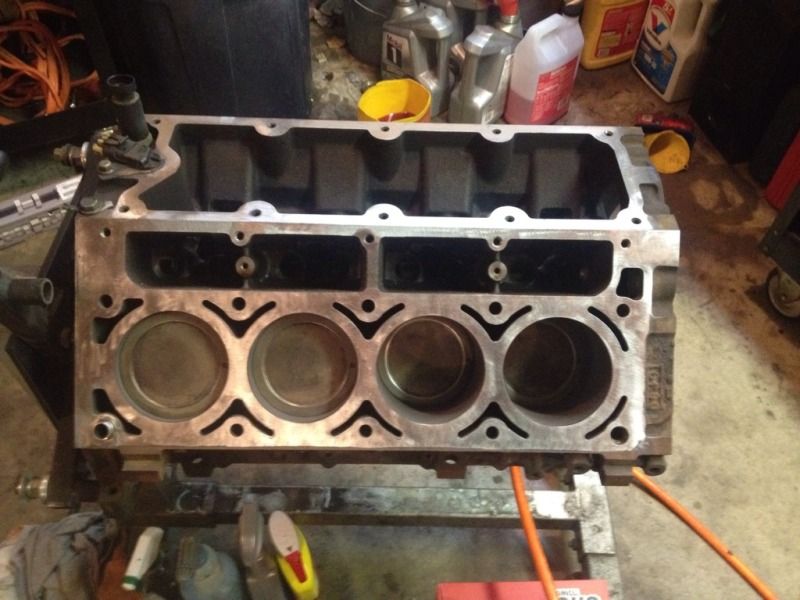
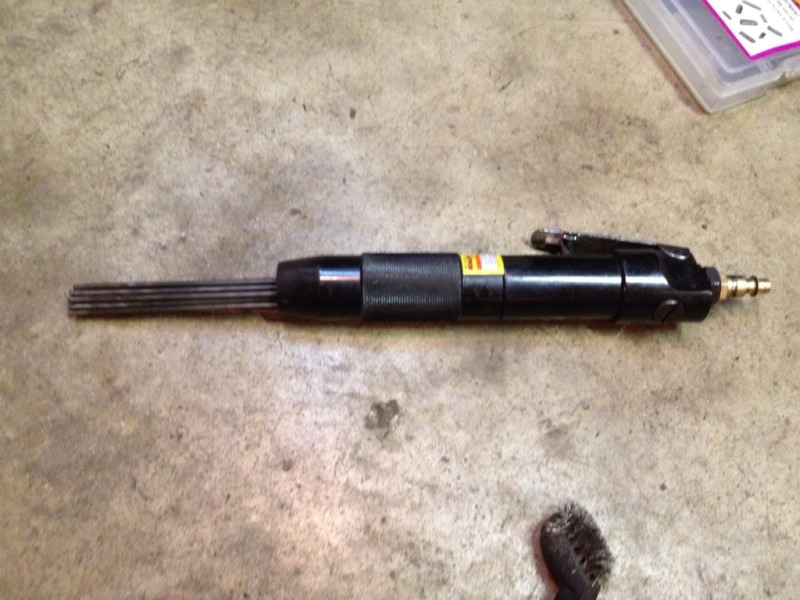
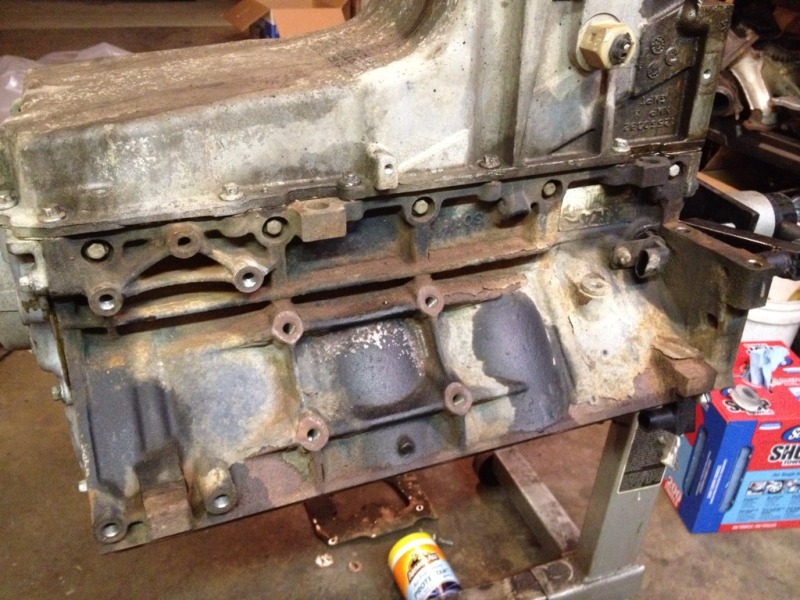
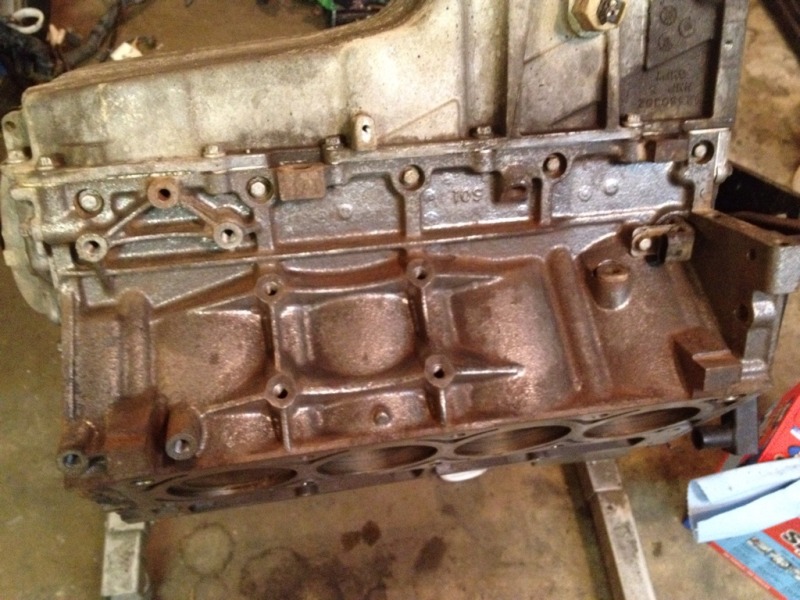
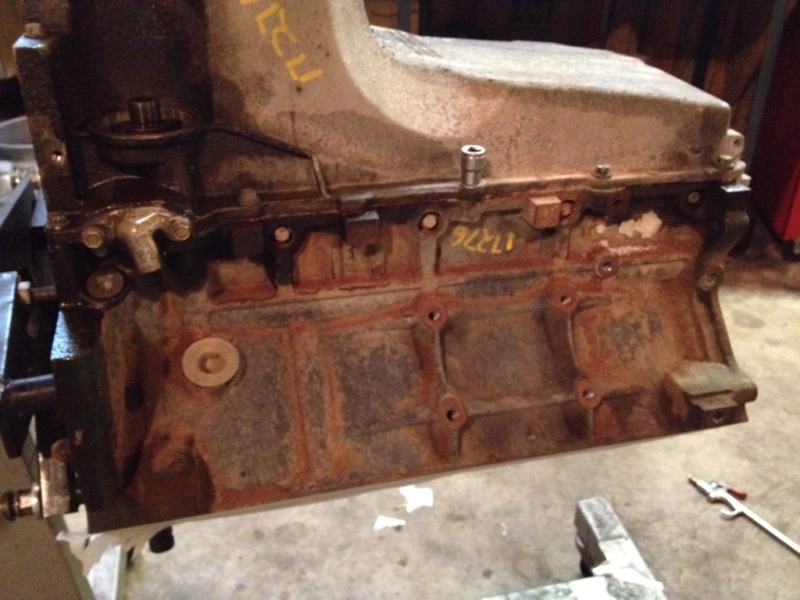
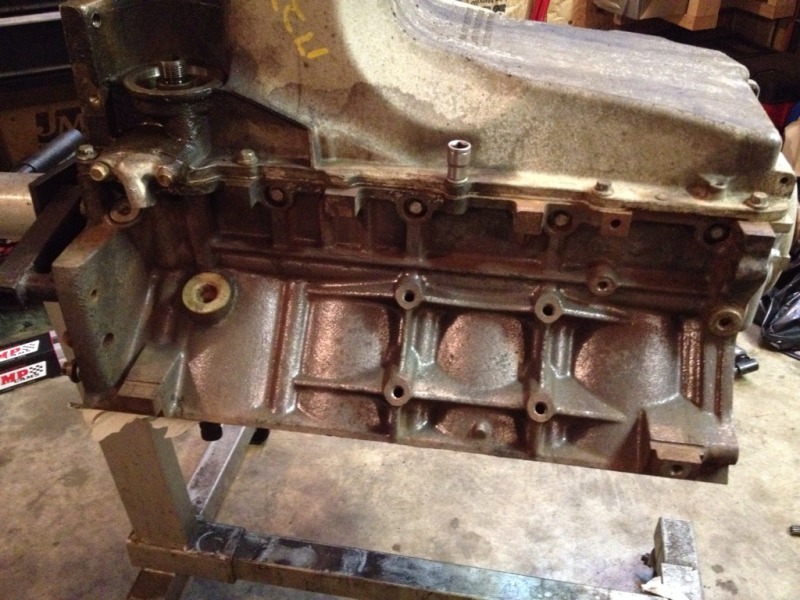
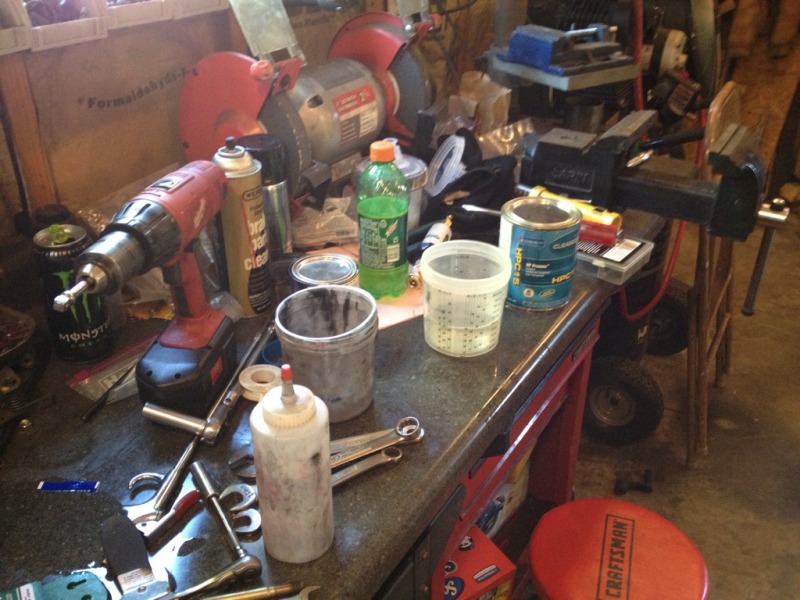
Got to work on cleaning up the block some more after picking up this nifty little tool....
Needle Scaler
Here we have the crummy looking 5.3.....
and after about 30 mins of work
And some hi-temp black...I'm not using this pan so I didnt mask any of the top but I did put some little rubber caps on all of the bolts.
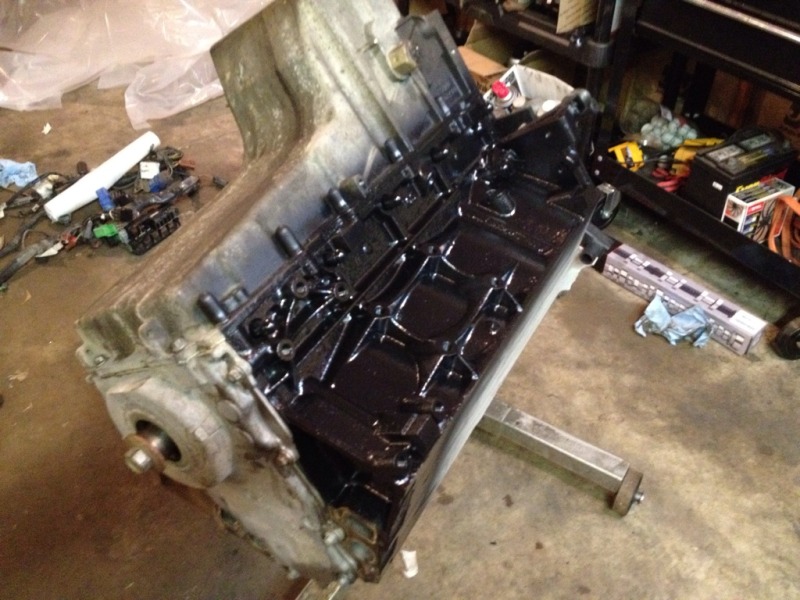
Other side...
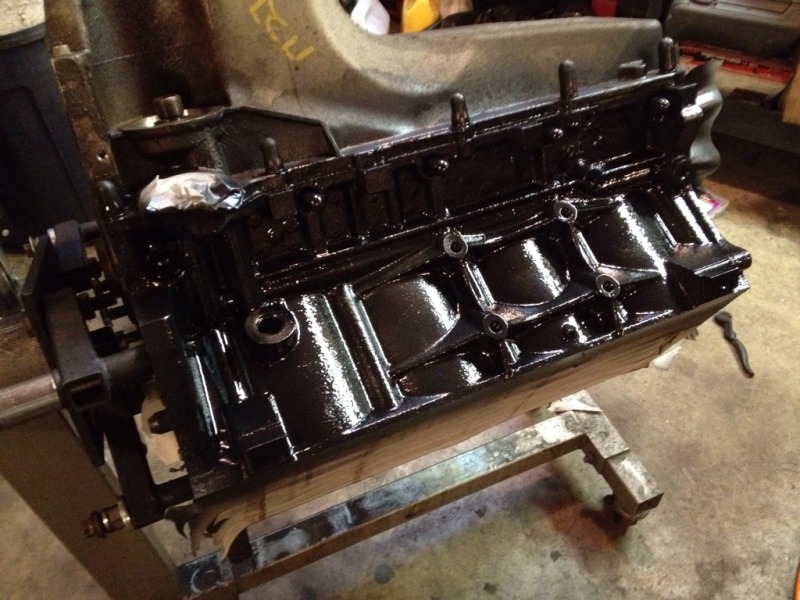
After drying
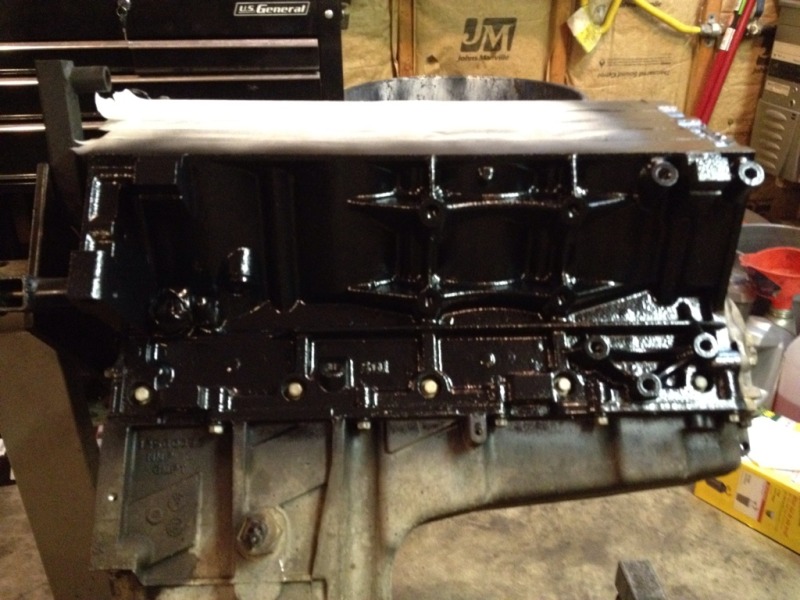
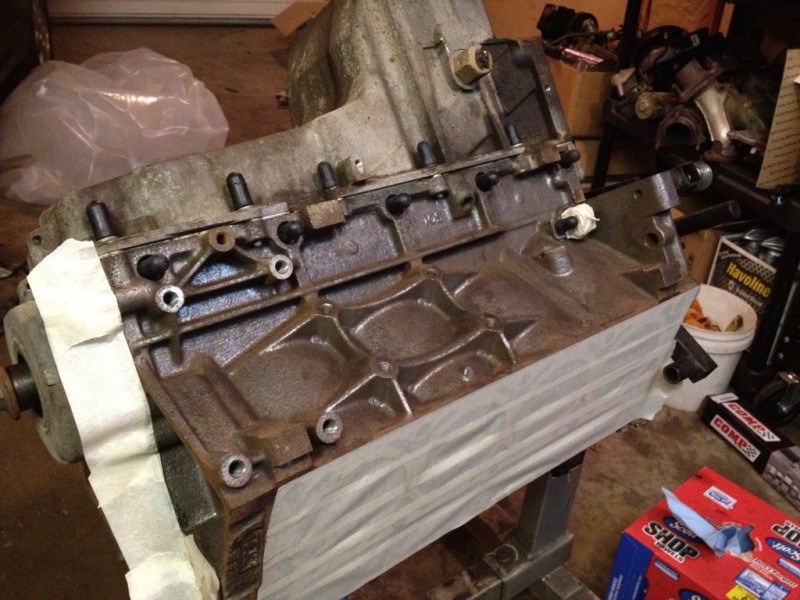
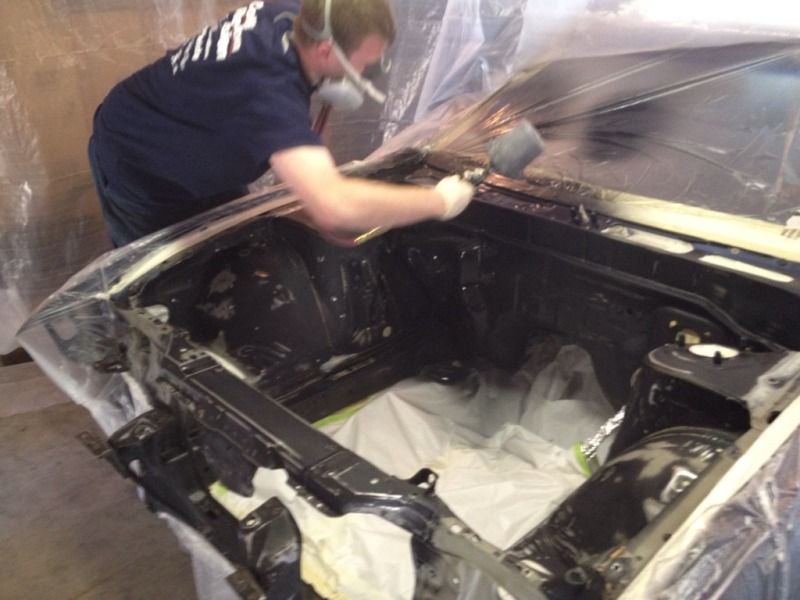
Did some taping in prep for paint on friday...
Did some more work on the car today.....not much to show but extremely time consuming!
Piston cleanup
Did a pretty thorough cleaning of the engine bay. Removed the wiring harness, removed the clutch master and line, and yanked the throttle cable
March 29, 2012
Finally got my new roloc pads in, did some more clean-up tonight
Hopefully making some more progress in the engine bay next week and getting a coat of paint on it!
April 2, 2012
Its pretty much ready for paint, hopefully this weekend
April 3, 2012
Got to work on cleaning up the block some more after picking up this nifty little tool....
Needle Scaler
Here we have the crummy looking 5.3.....
and after about 30 mins of work
And some hi-temp black...I'm not using this pan so I didnt mask any of the top but I did put some little rubber caps on all of the bolts.
Other side...
After drying
Did some taping in prep for paint on friday...
04-13-2012, 01:15 PM
#4
On The Tree
Thread Starter
iTrader: (5)
Join Date: Jun 2007
Posts: 118
Likes: 0
Received 0 Likes
on
0 Posts
April 4, 2012
It felt like christmas today in the garage.....ton of **** showed up. I got right to work....
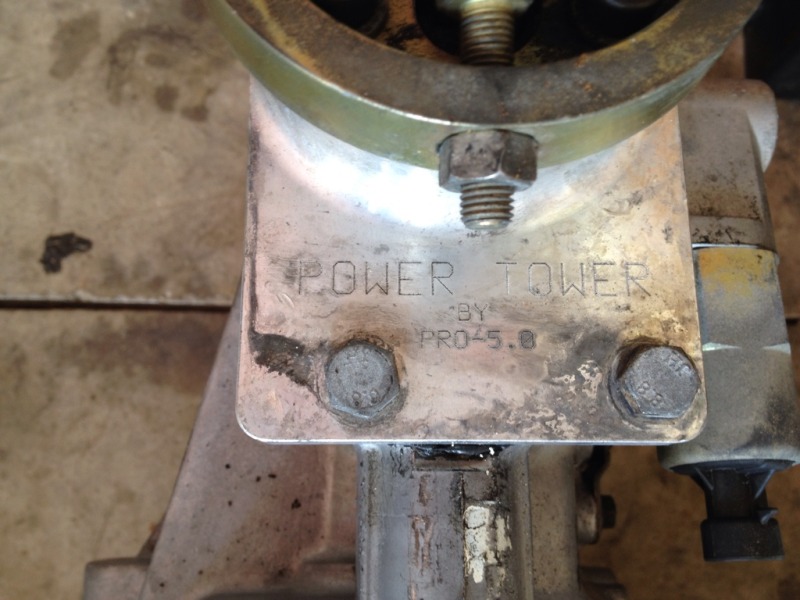
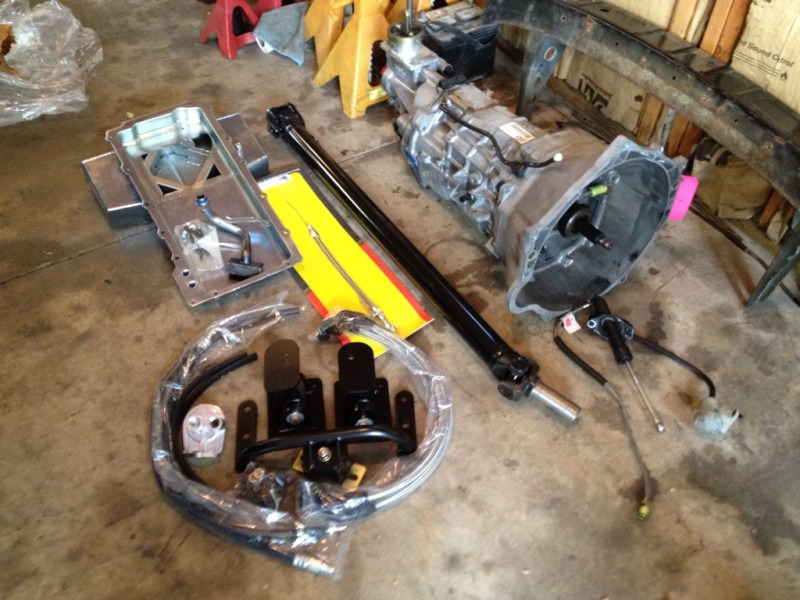
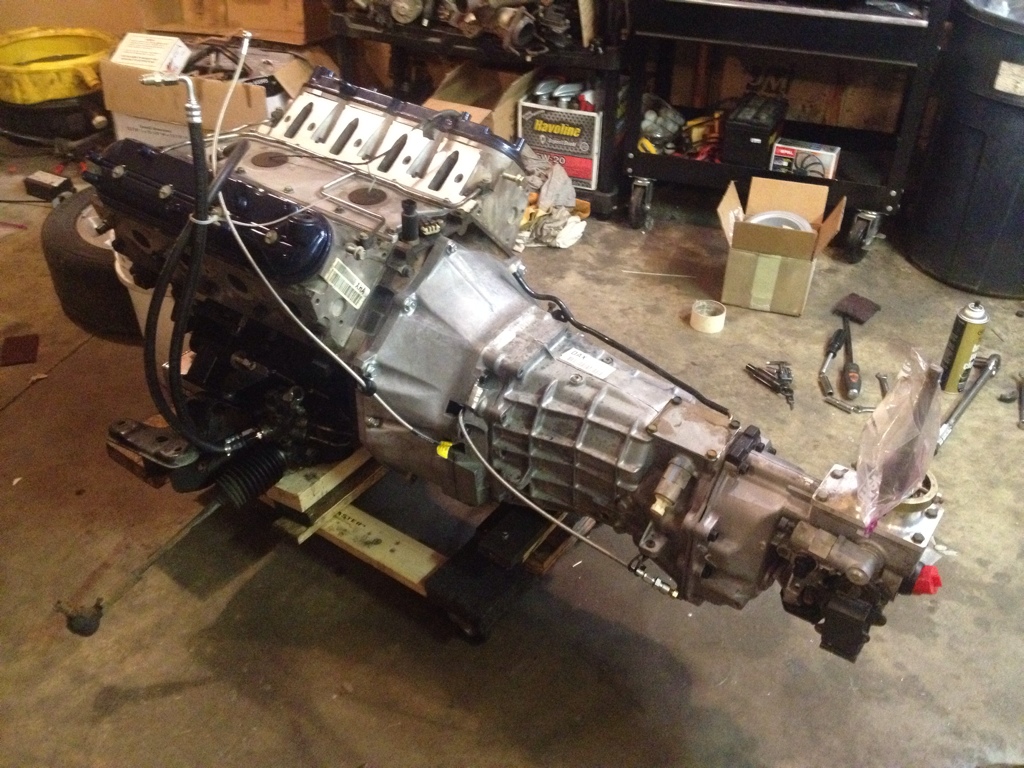
T56 arrived...
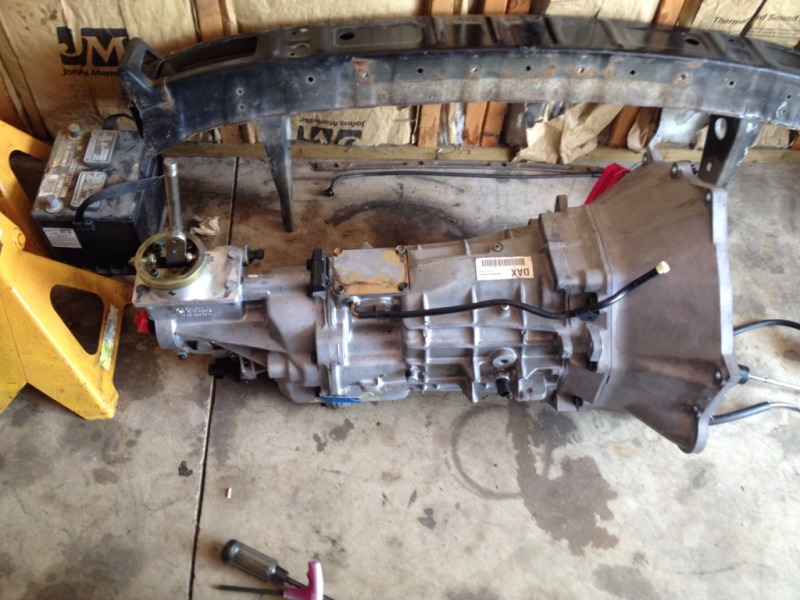

Bonus Pro 5.0 Shifter
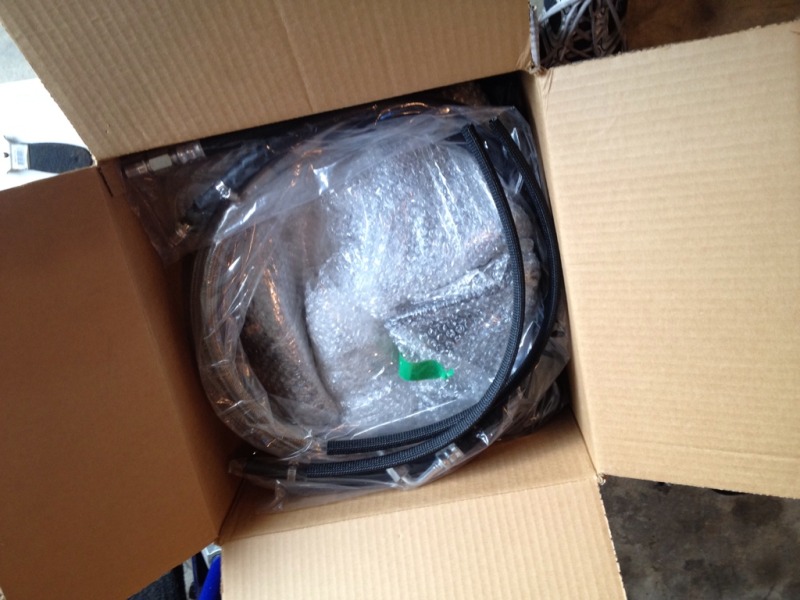
Shortly after that showed up, the mount kit, oil pan, driveshaft, and misc accessories showed up...
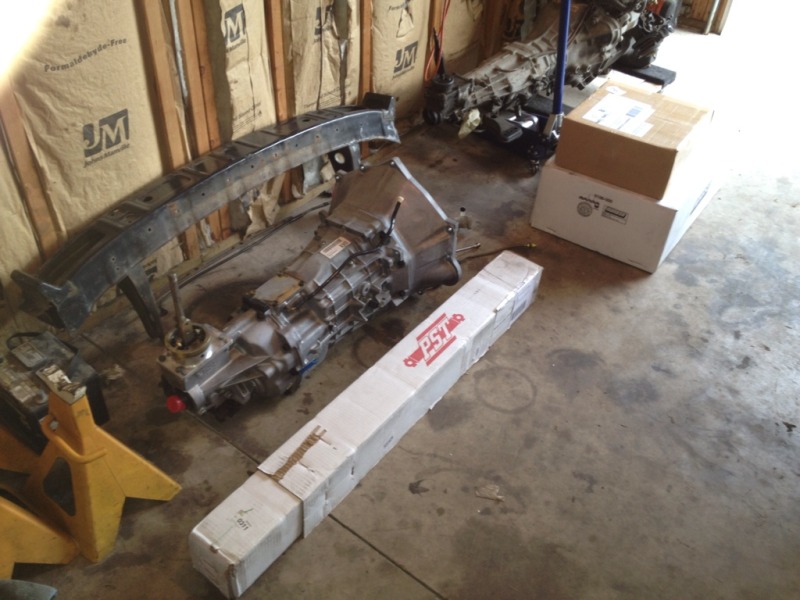
Power steering lines, remote oil filter kit, etc
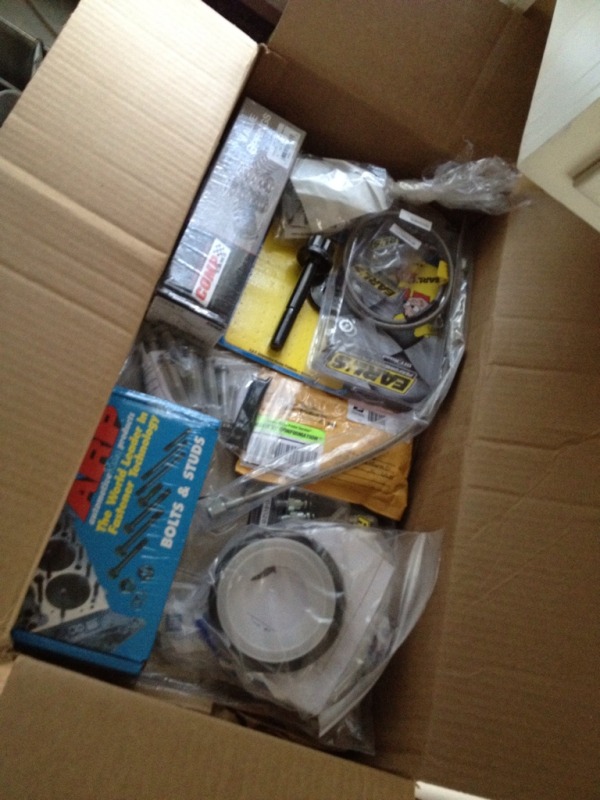
Checked everything over..
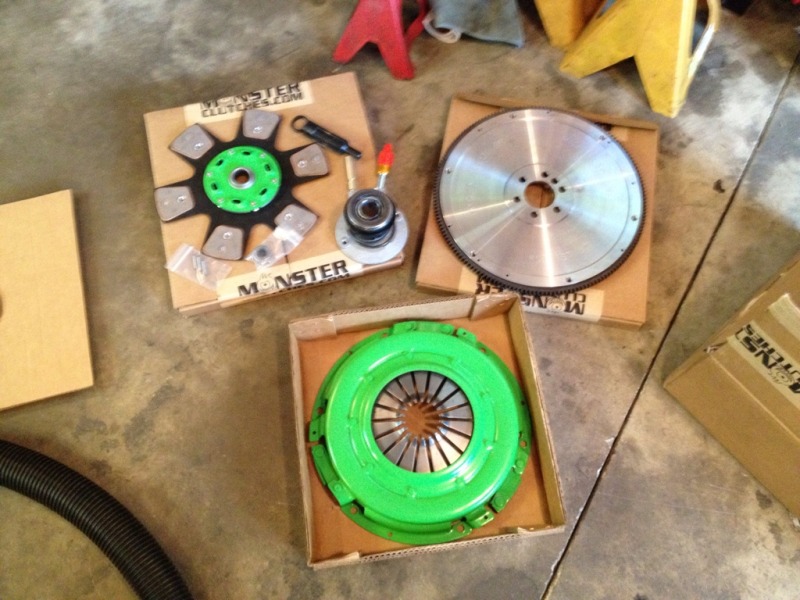
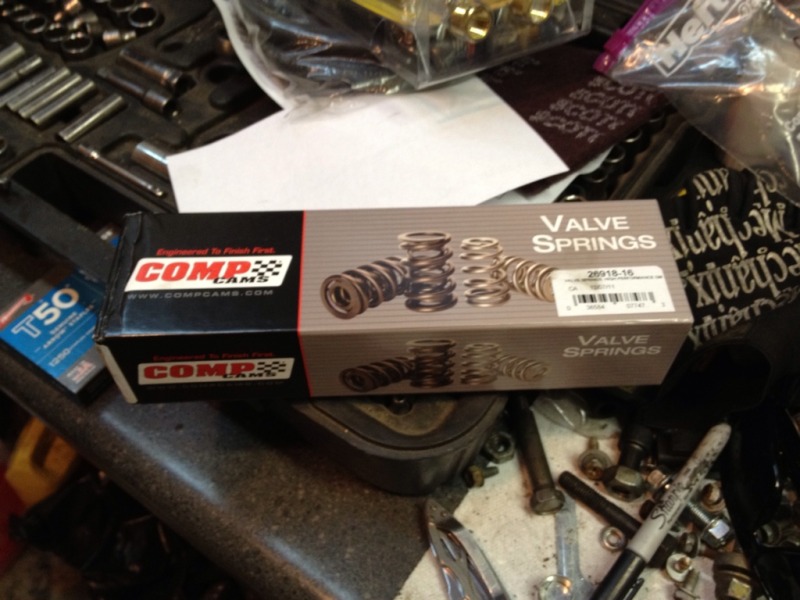
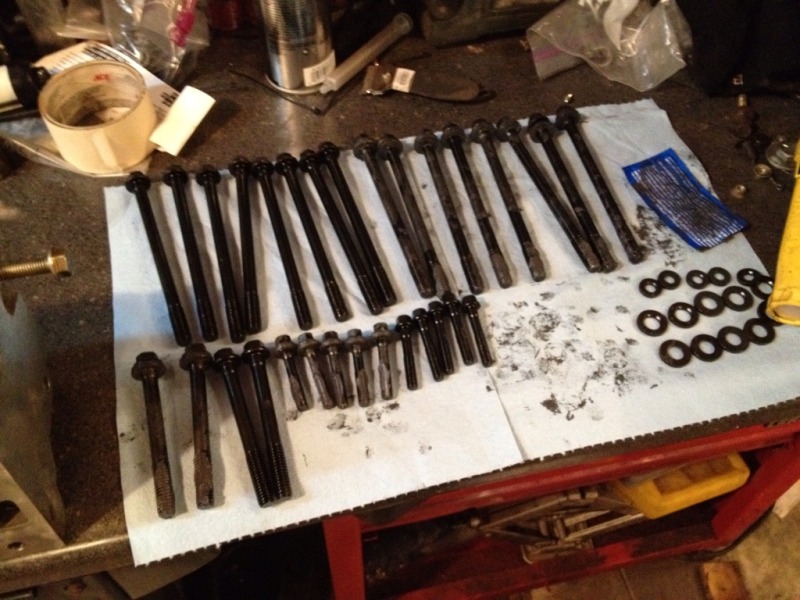
OEM Gaskets, ARP Headbolts, Comp Springs, Fittings for the clutch slave remote bleeder, ARP Crank Pulley Bolt
Monster Stage 3 clutch & Flywheel with new slave/pilot
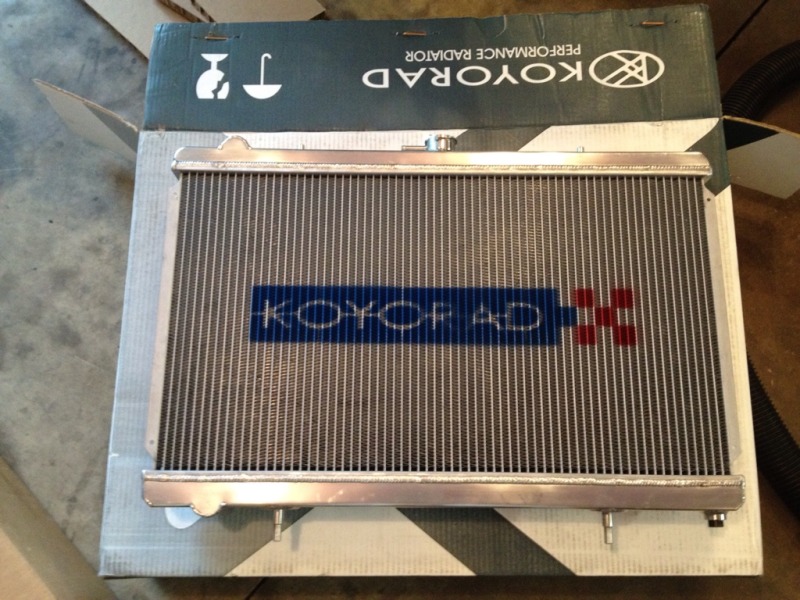
Koyo Radiator
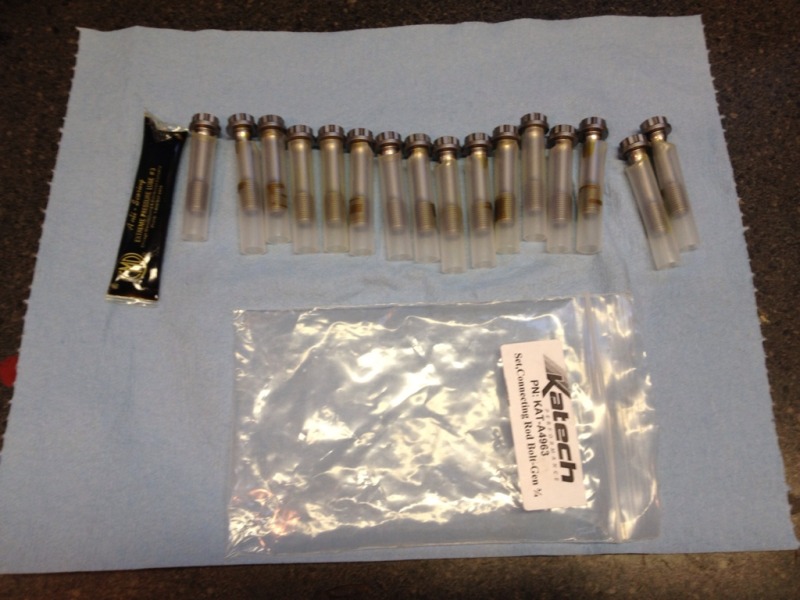
I then installed the Katech Rod Bolts.....that was a tedious process...
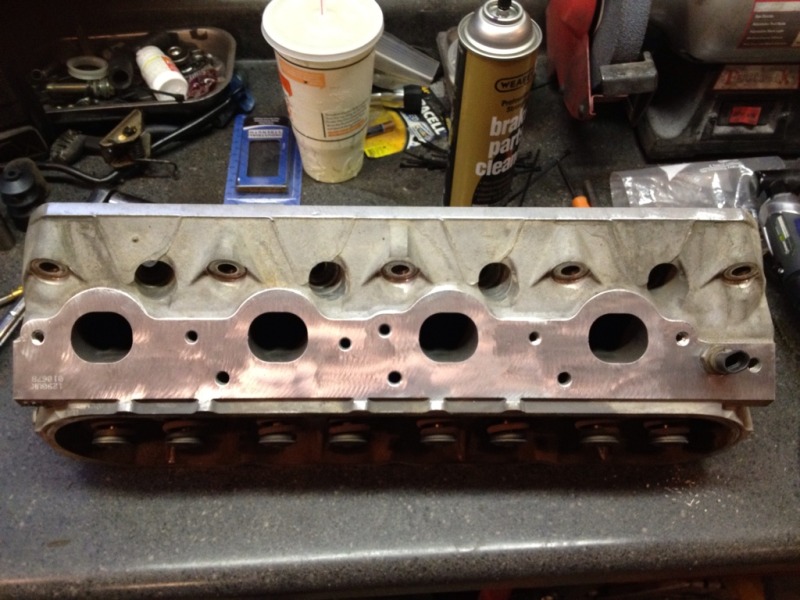
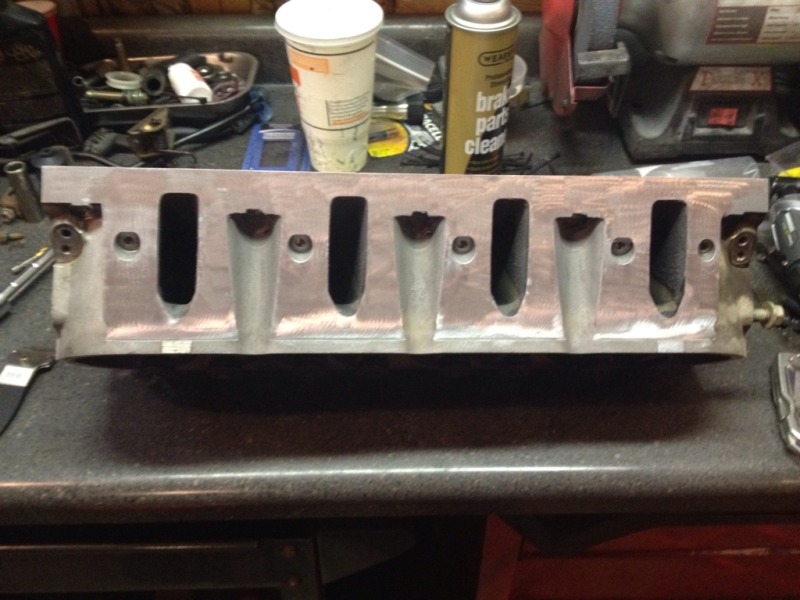
Then I moved on to the heads for the spring install....
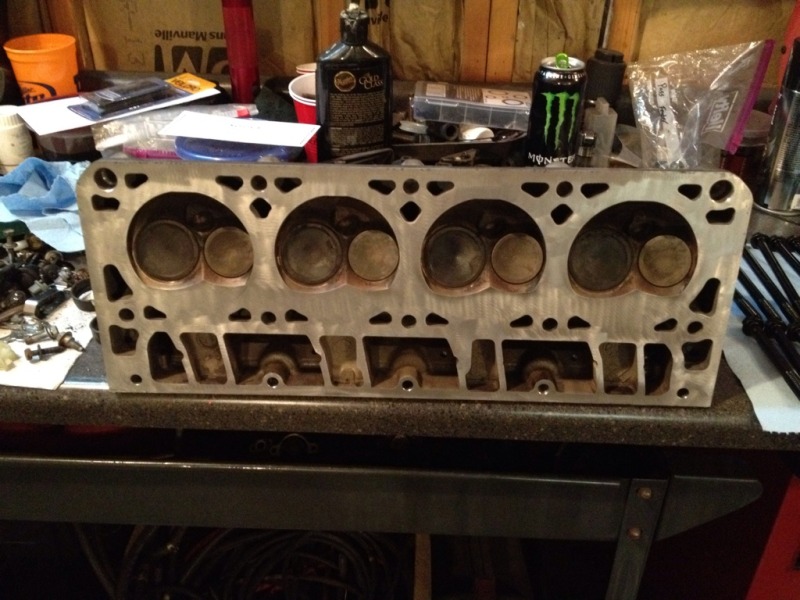
First head done...

And the second..
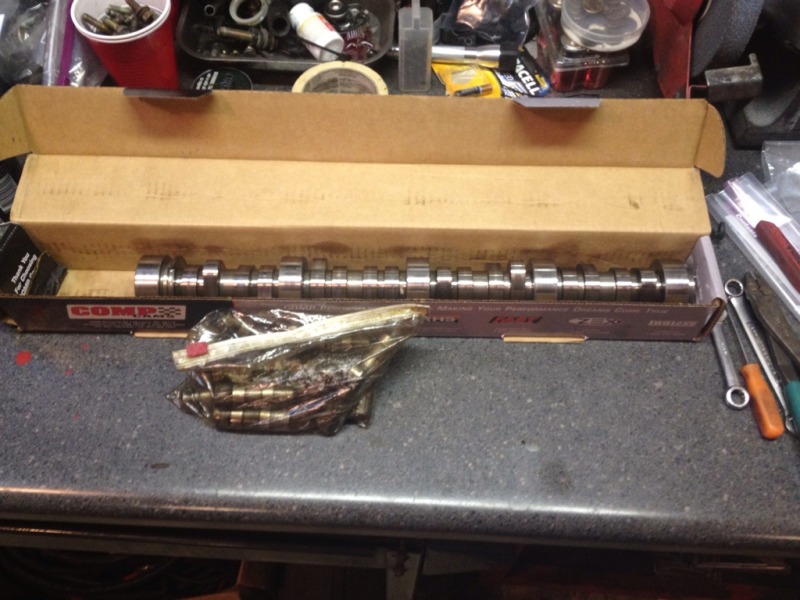
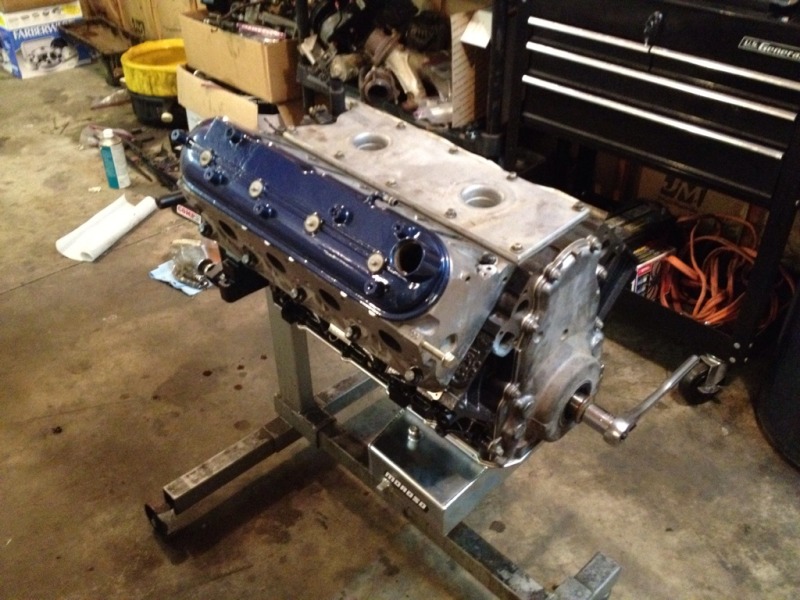
Decided to keep moving forward....LS6 cam installed
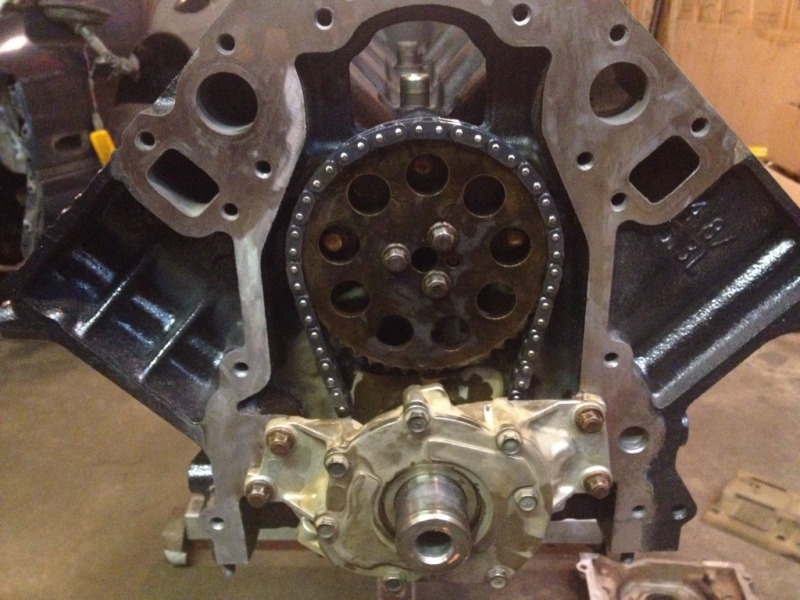
Engine timed, LS2 chain and pump installed
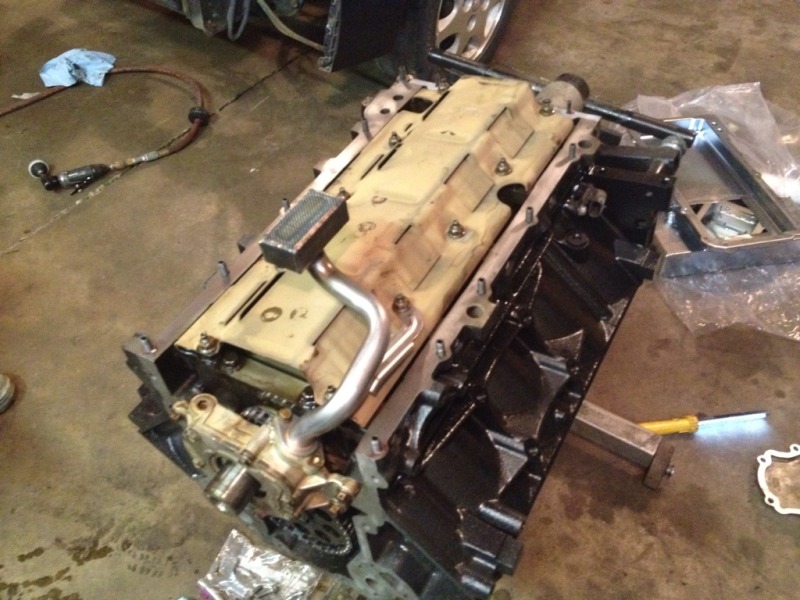
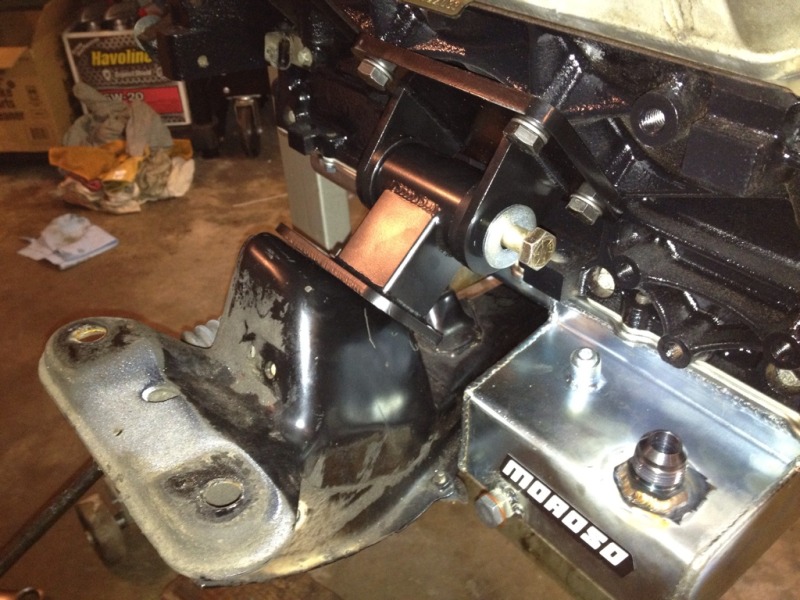
Windage tray and modified front sump installed
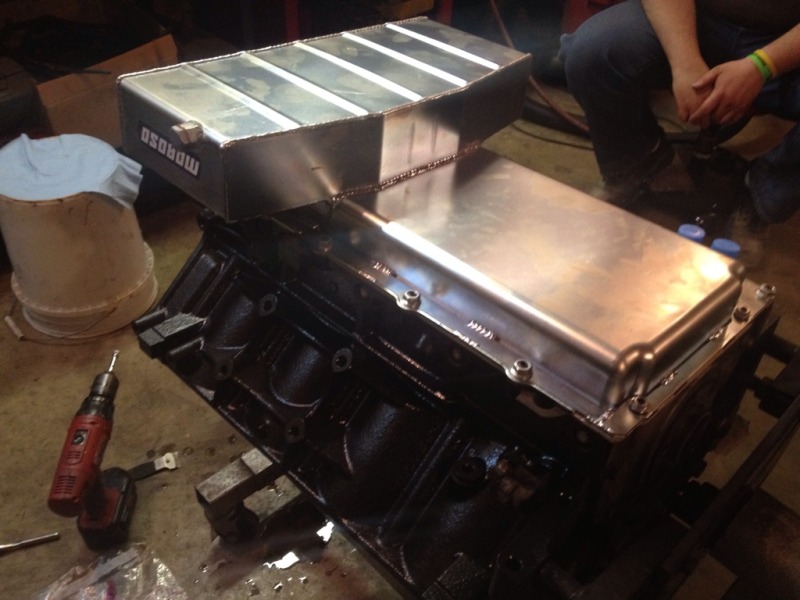
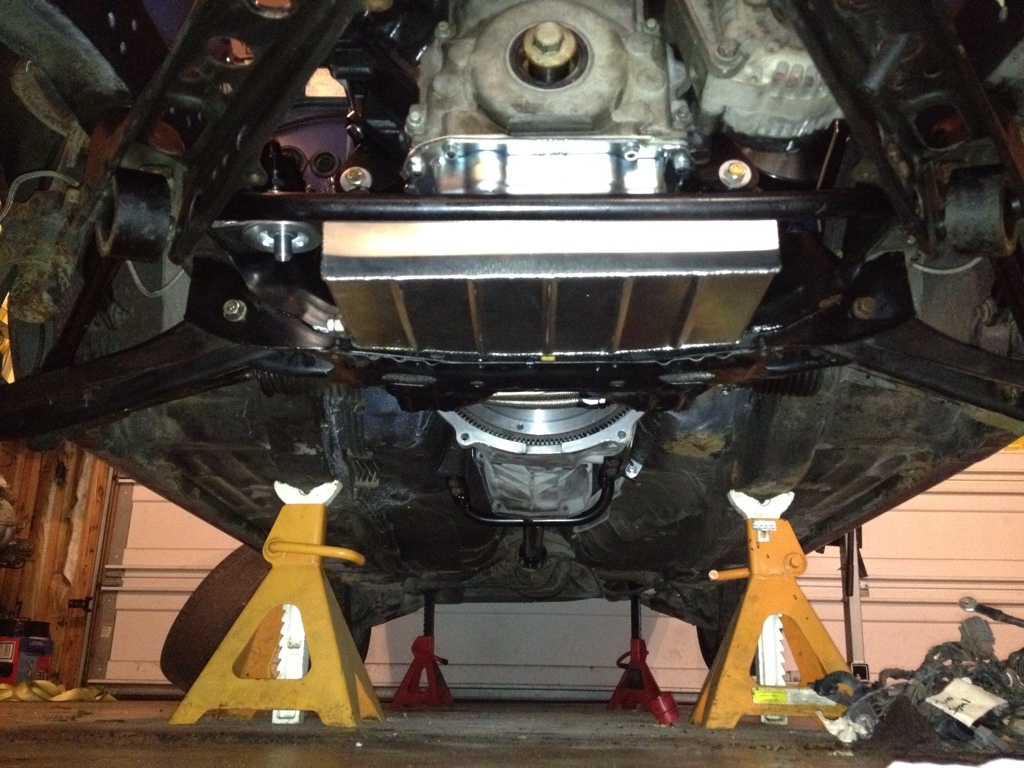
Moroso pan with trap doors and Moroso stud kit installed...
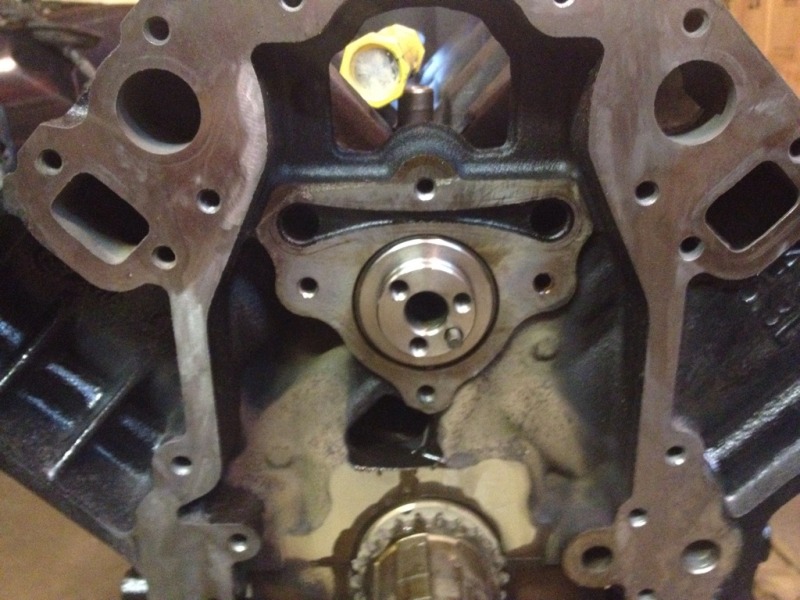
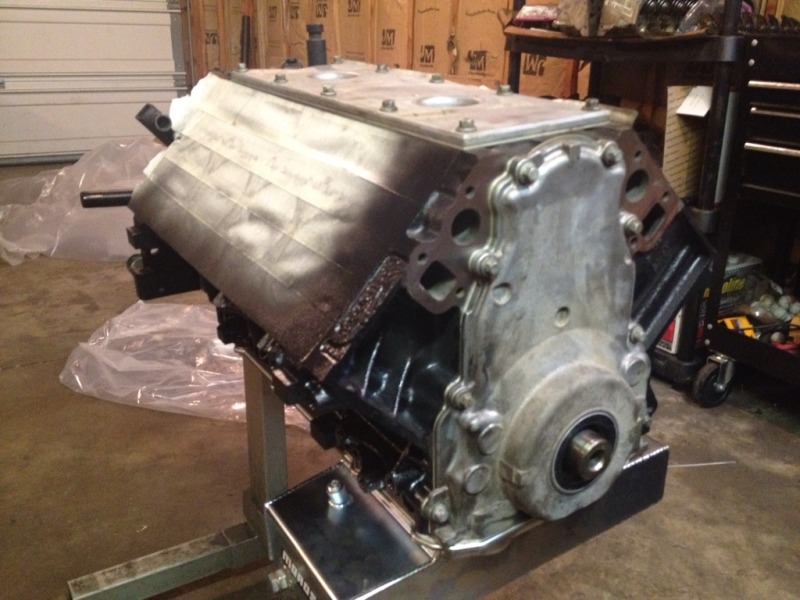
New front seal, timing cover, and valley cover installed...
And now its time to get some sleep....
Peace!
It felt like christmas today in the garage.....ton of **** showed up. I got right to work....
T56 arrived...
Bonus Pro 5.0 Shifter
Shortly after that showed up, the mount kit, oil pan, driveshaft, and misc accessories showed up...
Power steering lines, remote oil filter kit, etc
Checked everything over..
OEM Gaskets, ARP Headbolts, Comp Springs, Fittings for the clutch slave remote bleeder, ARP Crank Pulley Bolt
Monster Stage 3 clutch & Flywheel with new slave/pilot
Koyo Radiator
I then installed the Katech Rod Bolts.....that was a tedious process...
Then I moved on to the heads for the spring install....
First head done...
And the second..
Decided to keep moving forward....LS6 cam installed
Engine timed, LS2 chain and pump installed
Windage tray and modified front sump installed
Moroso pan with trap doors and Moroso stud kit installed...
New front seal, timing cover, and valley cover installed...
And now its time to get some sleep....
Peace!
04-13-2012, 01:15 PM
#5
On The Tree
Thread Starter
iTrader: (5)
Join Date: Jun 2007
Posts: 118
Likes: 0
Received 0 Likes
on
0 Posts
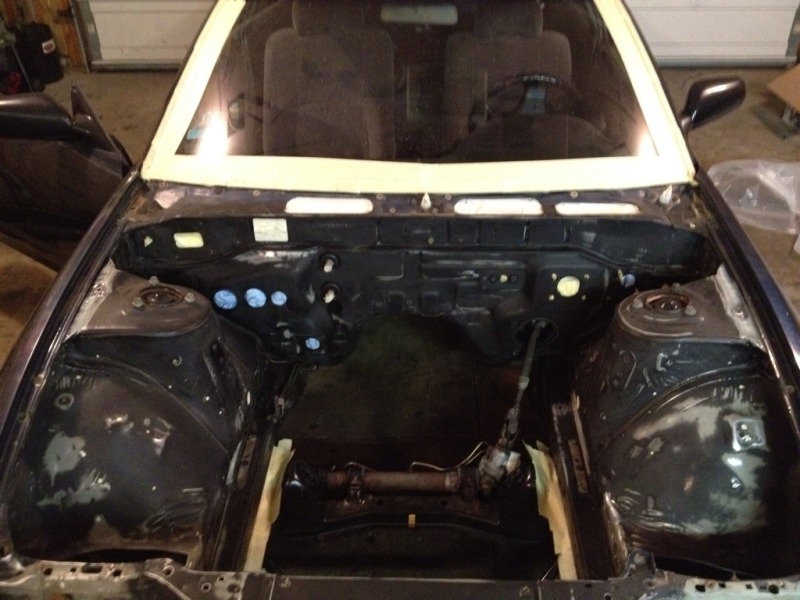
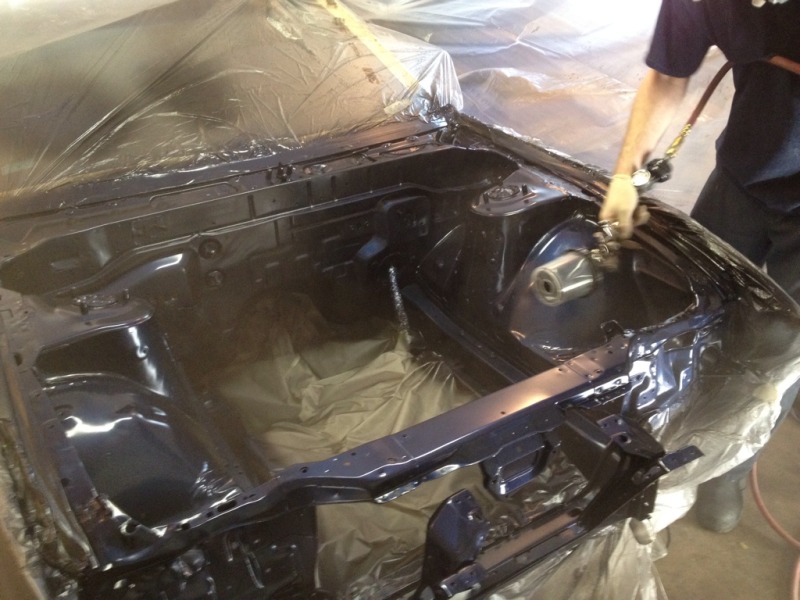
April 5, 2012
Another busy day....
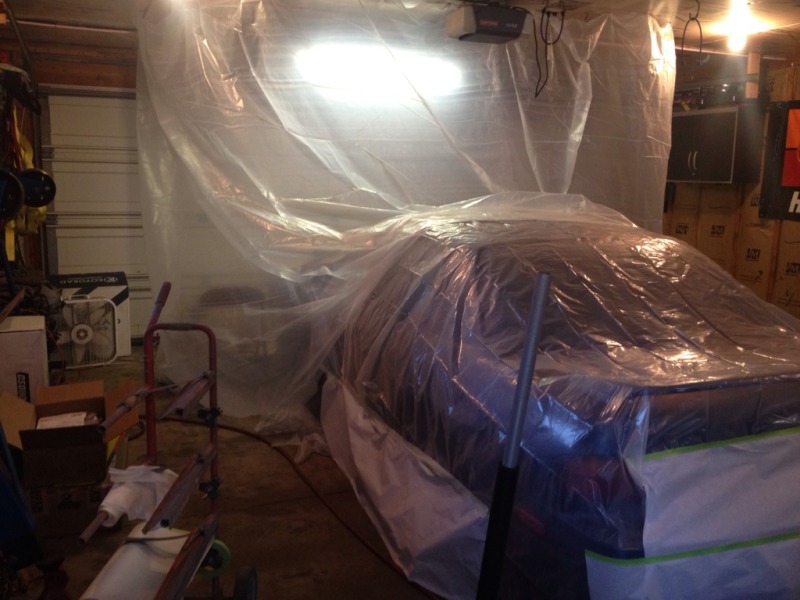
Started off setting up the makeshift paint booth in my garage to get the engine bay finished up. This should be wrapped up tomorrow afternoon.
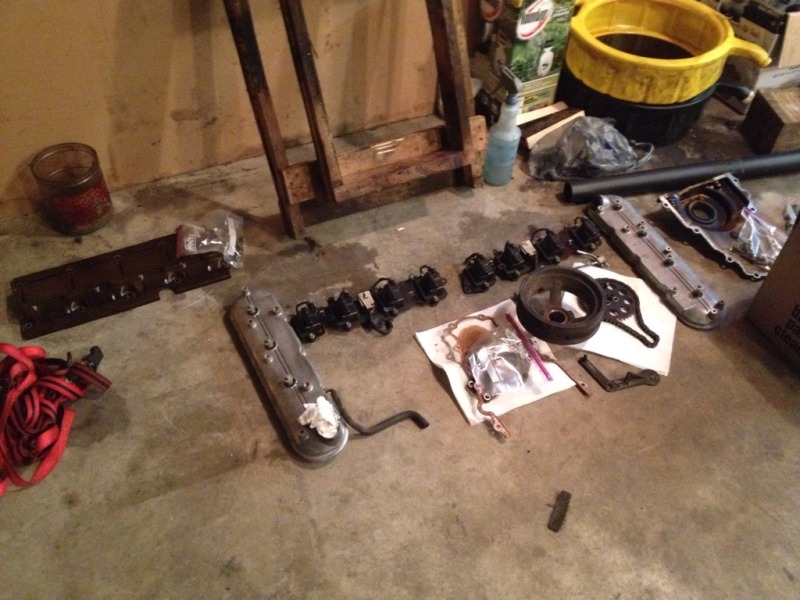
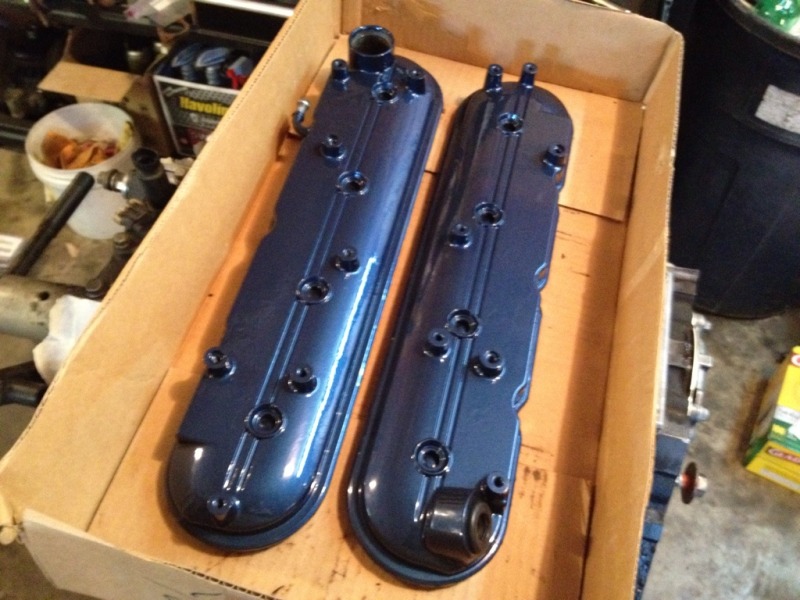
Already had picked up the paint supplies so my buddy shot and cleared the valve covers for me.
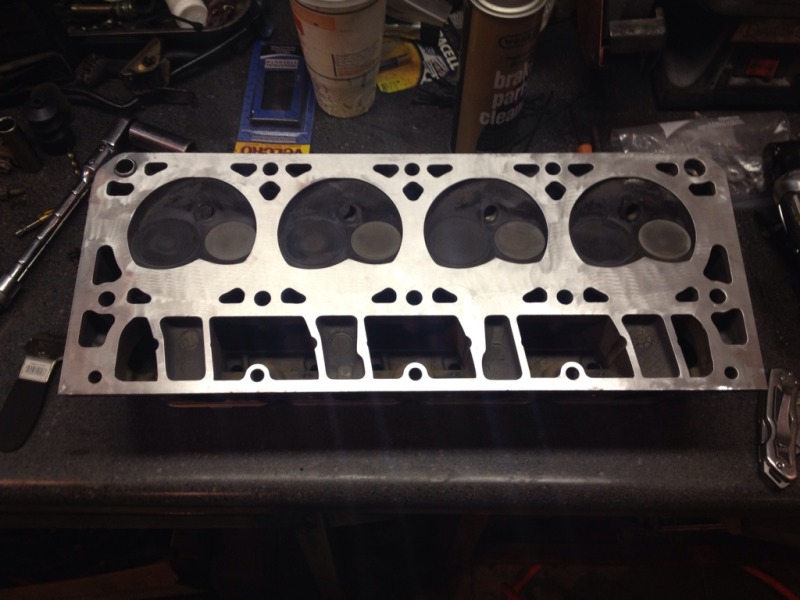
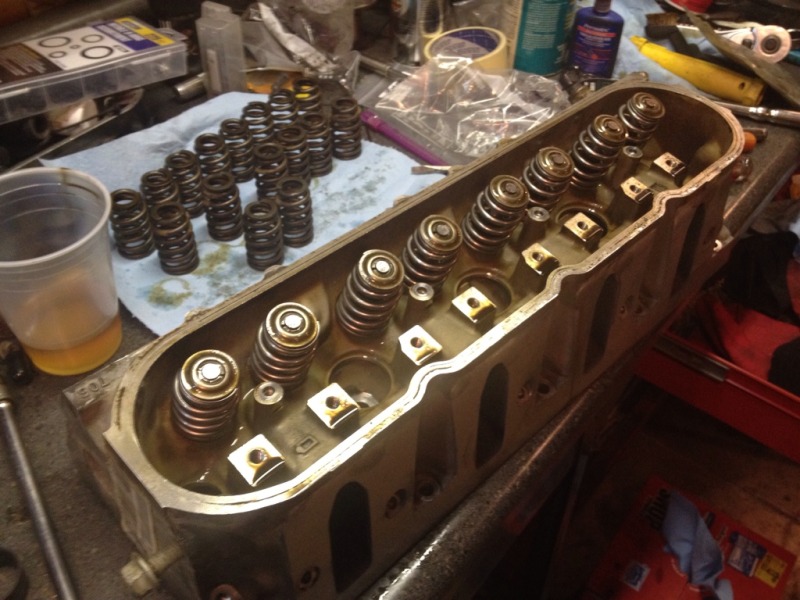
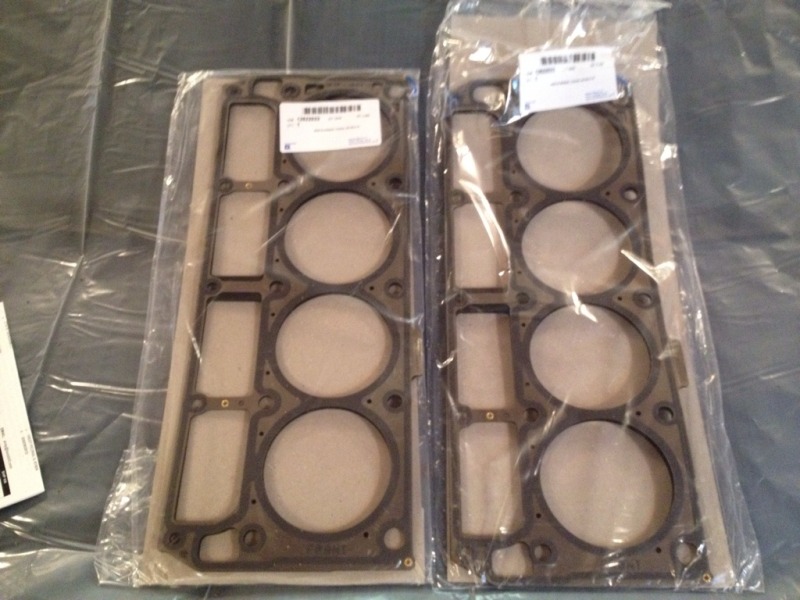
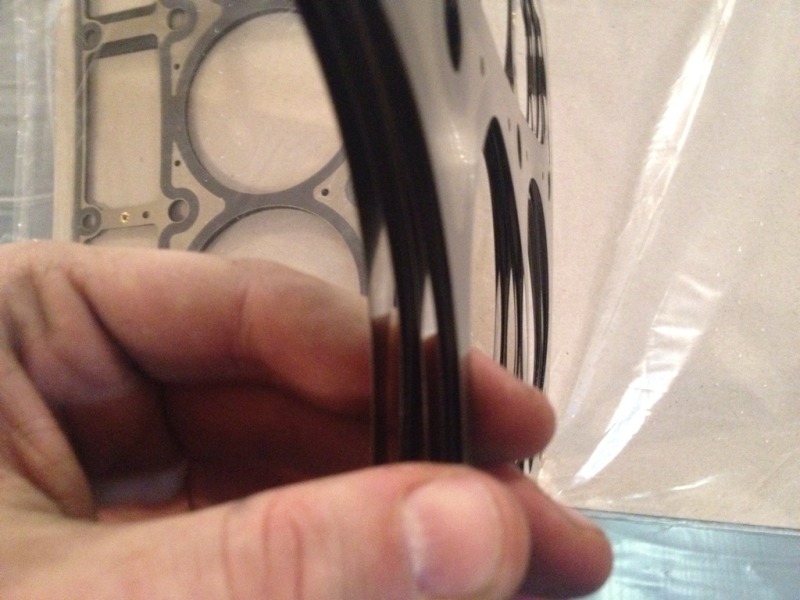
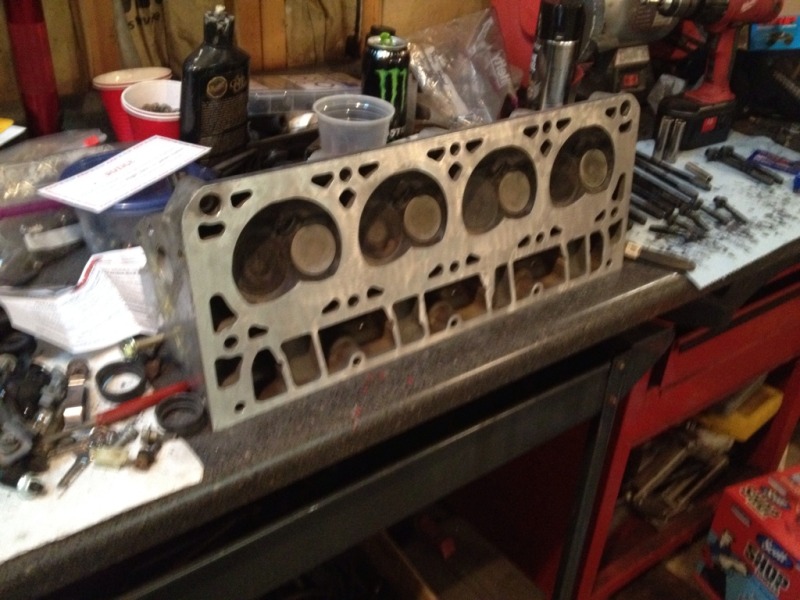
After that I continued progress on the engine. These are LS9 MLS head gaskets
Trays and lifters installed P-side
Final cylinder head cleanup
Prepping the ARP Head Bolt kit
Cylinder head torqued down
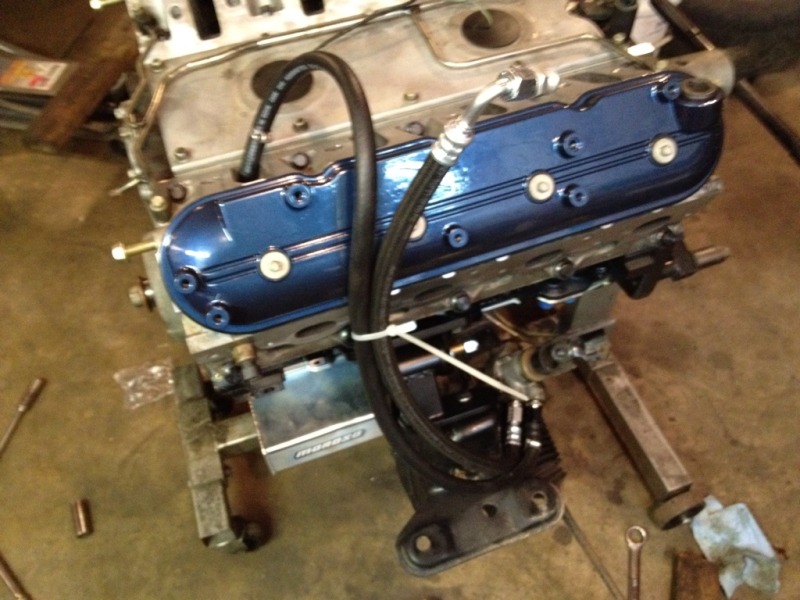
I still need to install the pushrods and rockers but I put the valve cover on to keep anything out
Same process, driver's side
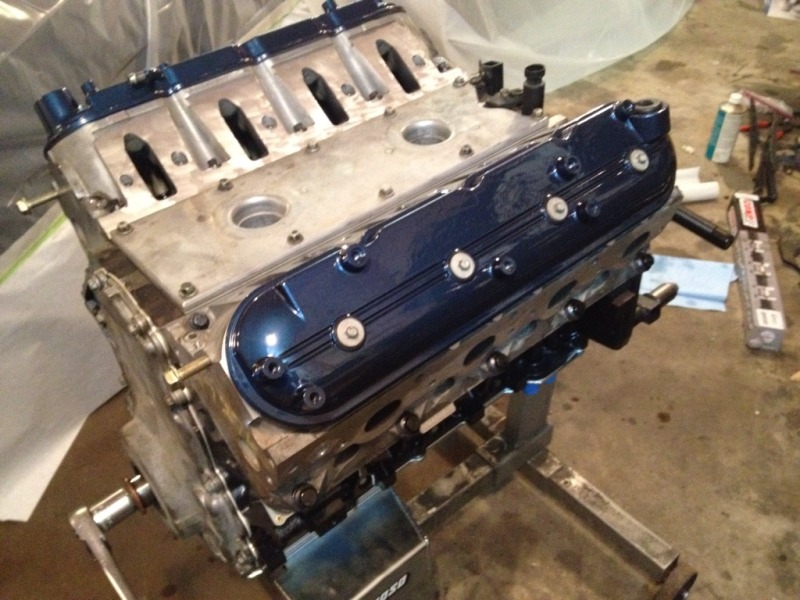
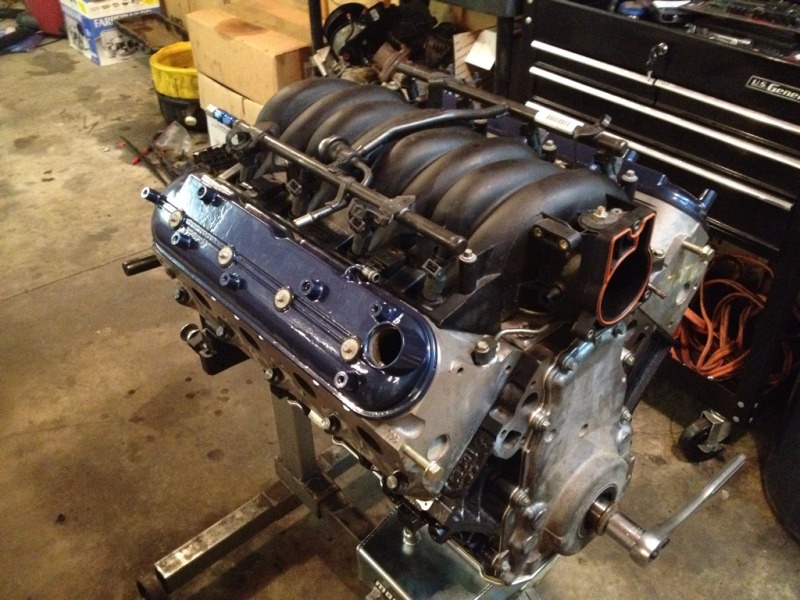
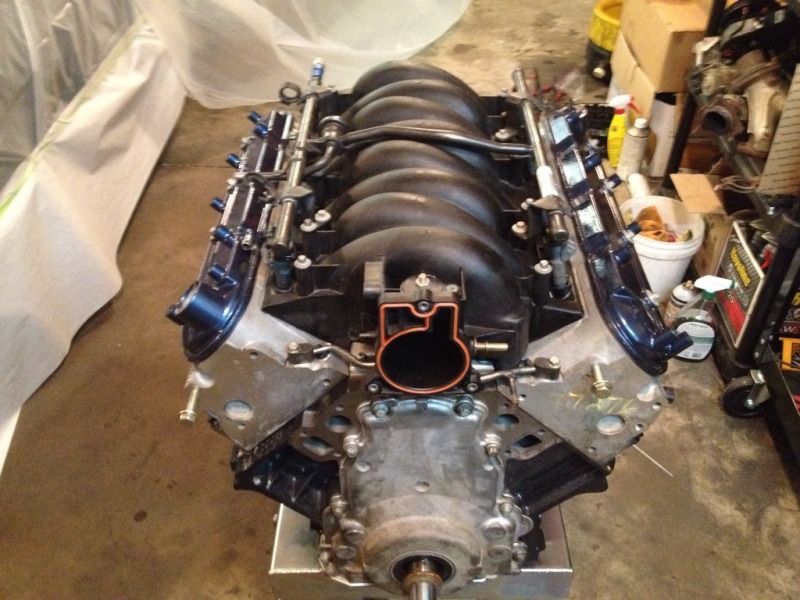
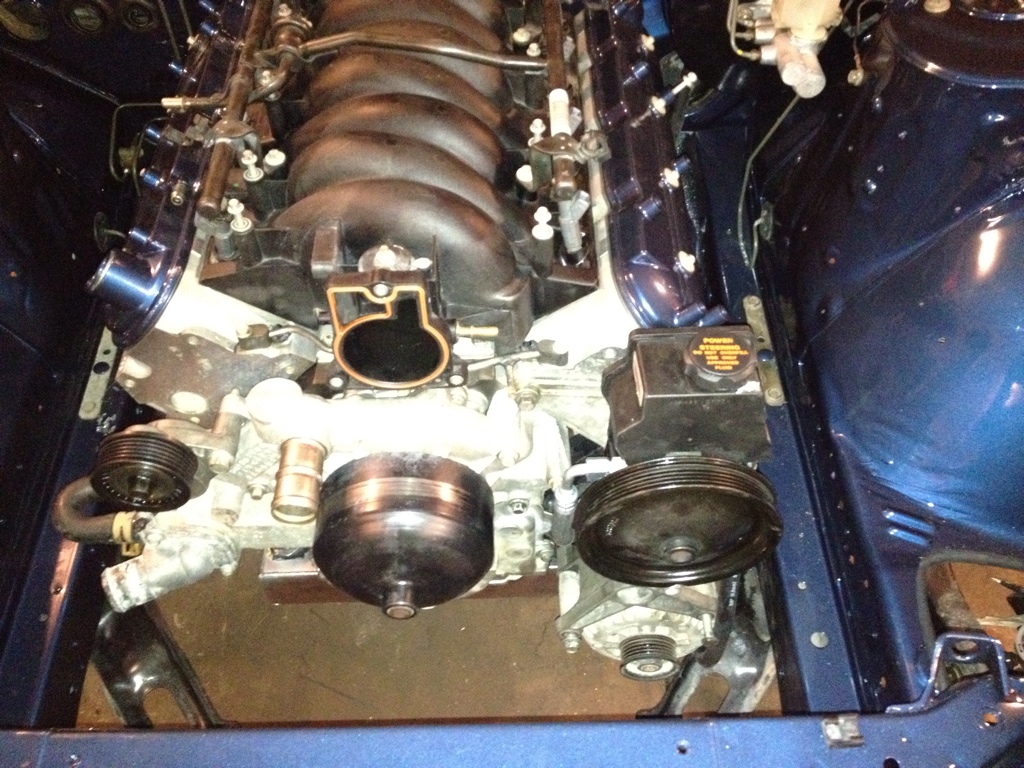
LS1 intake manifold cleaned up and bolted on
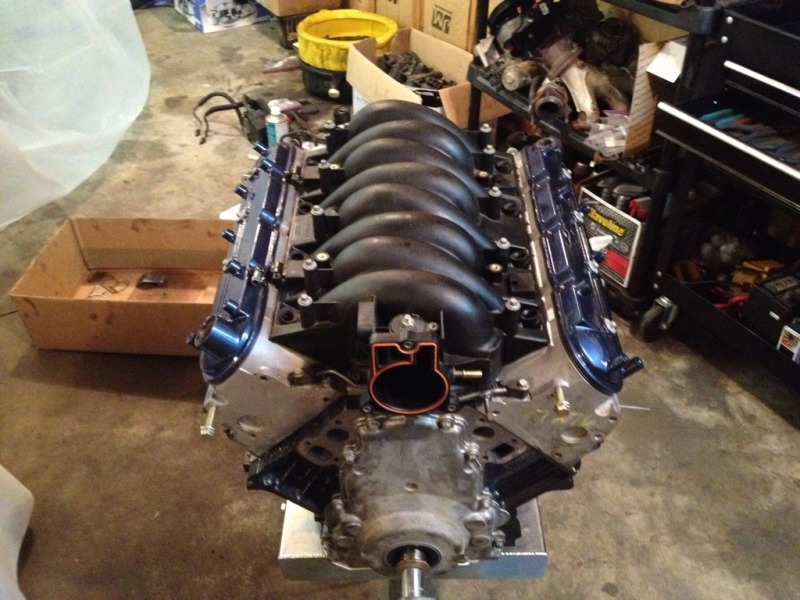
Got the stock injectors in for now
Cheers
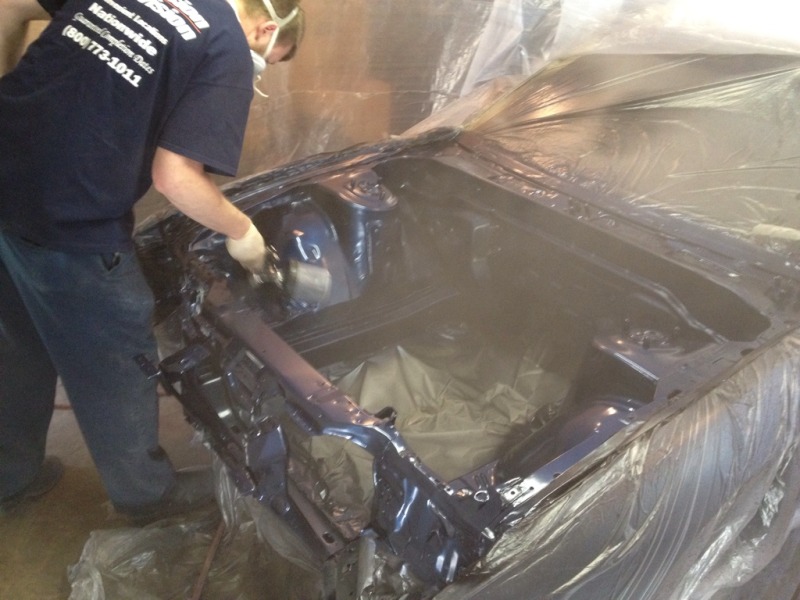
April 6, 2012
Seemed like a great day to get some more work done.....
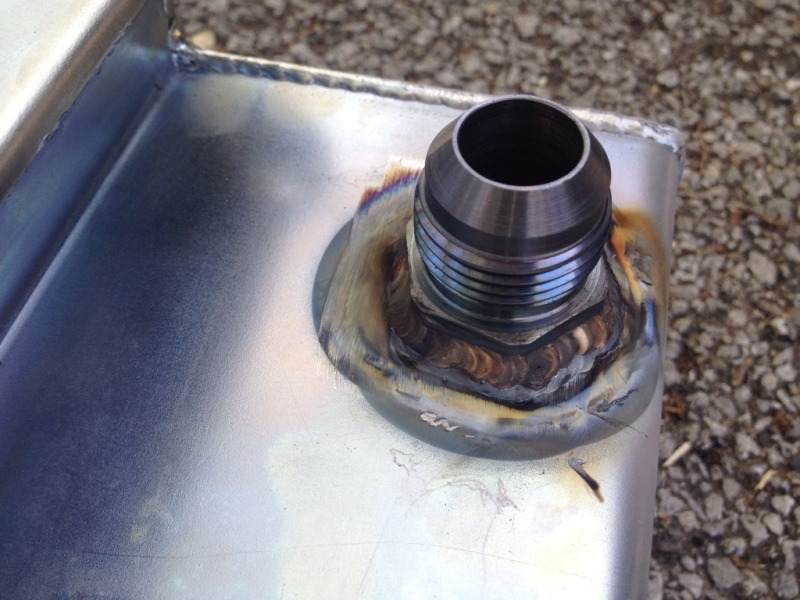
Had the bung welded to the oil pan for the turbo oil return line
A friend did a HUGE favor for me and has been helping me through the prep process. Today he came over and we wrapped this job up.
Started off with a tinted sealer
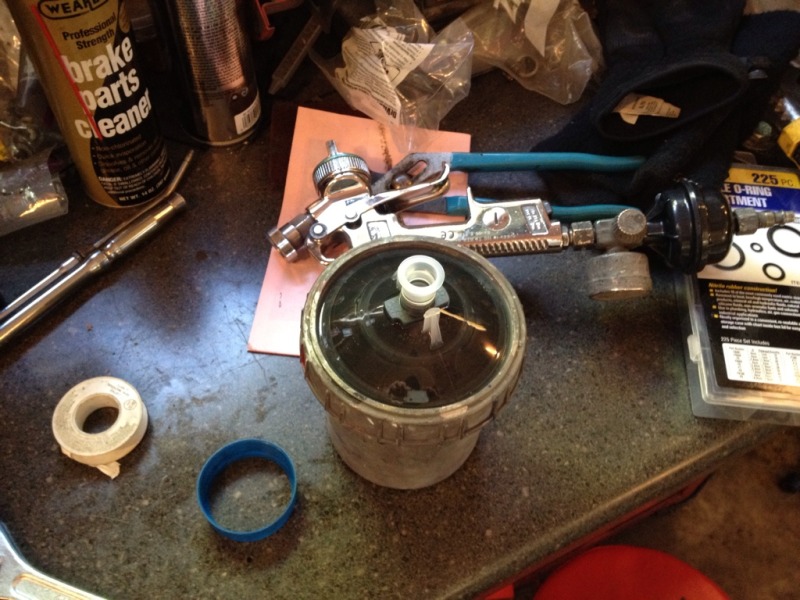
Going on...
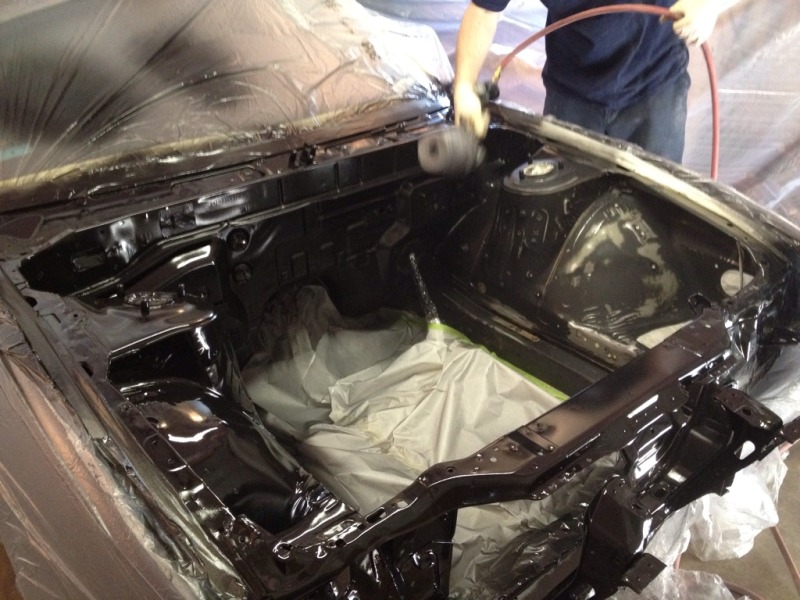
Now comes the base coat
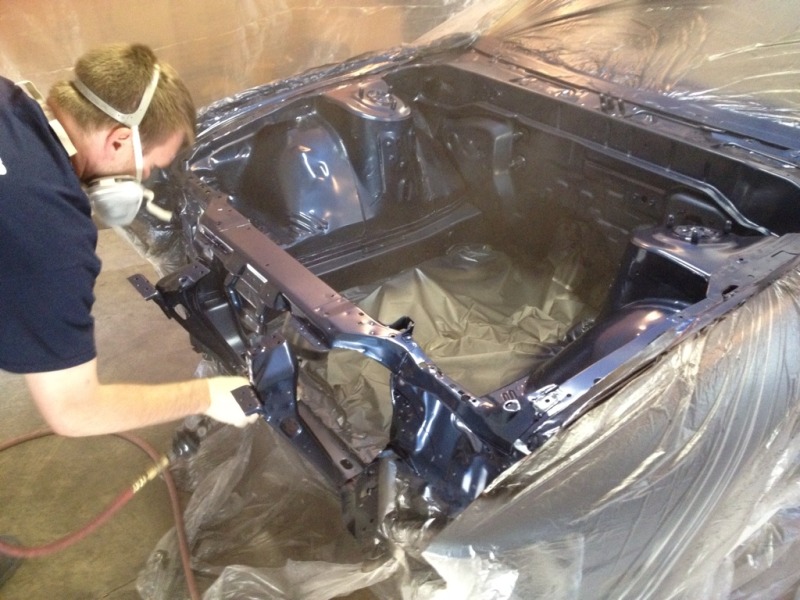
And top it off with some clear
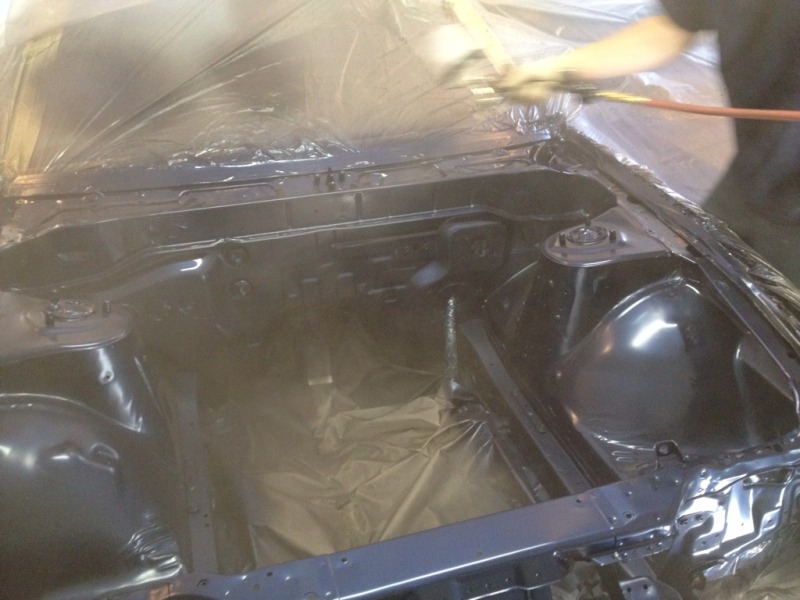
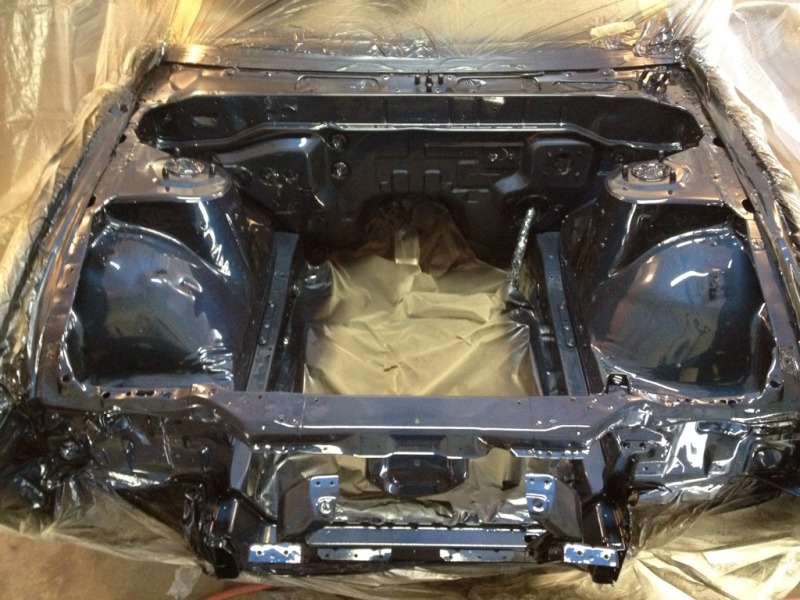
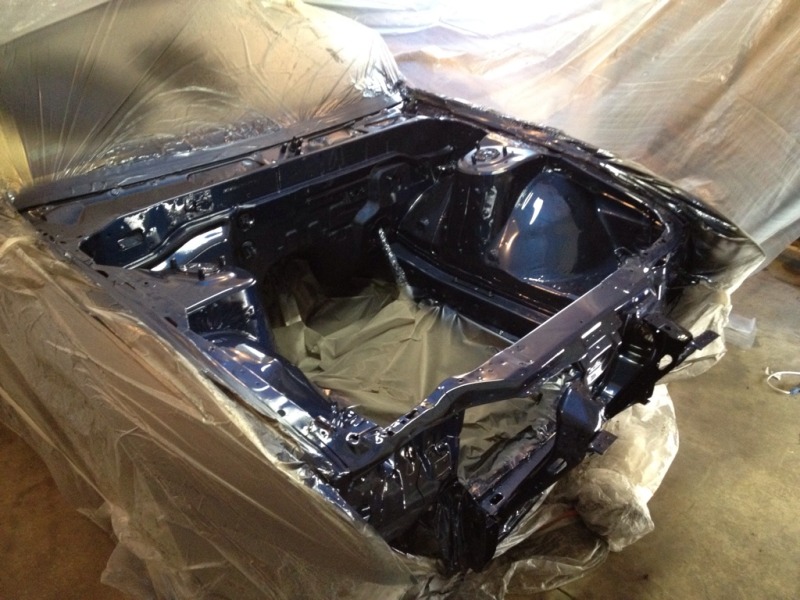
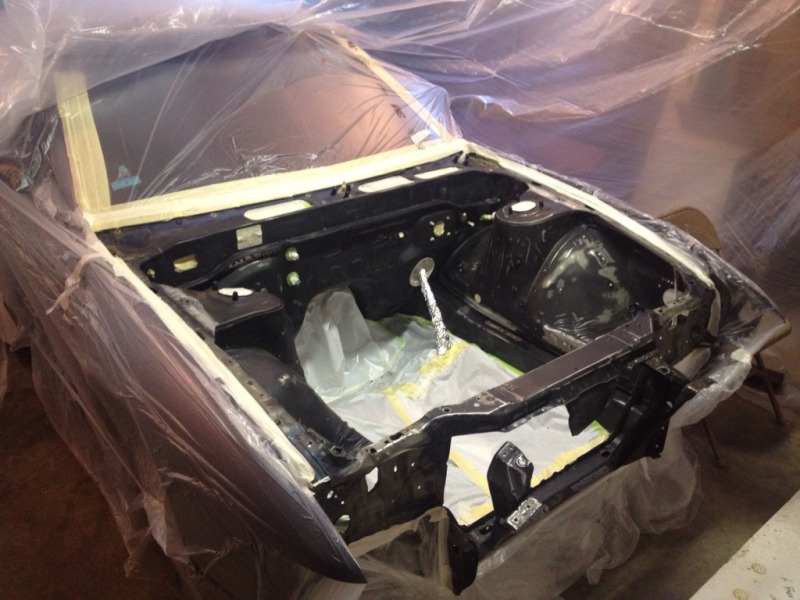
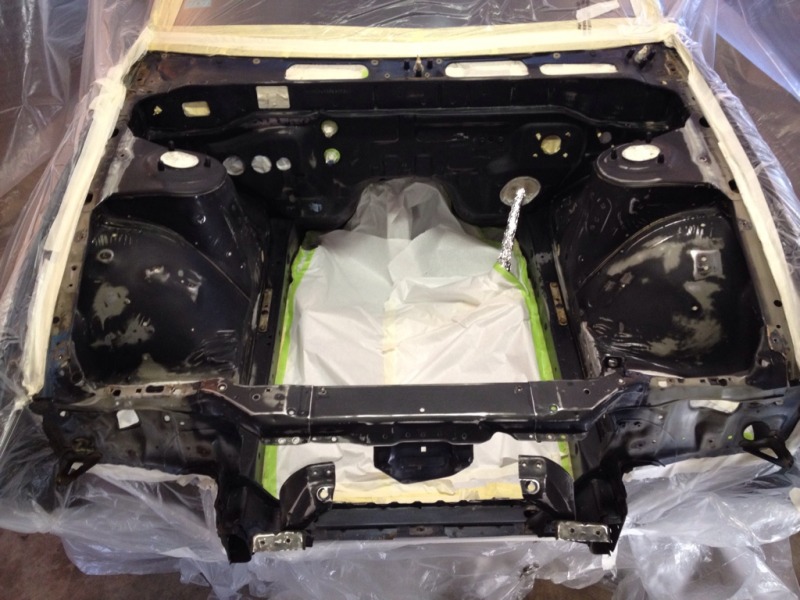
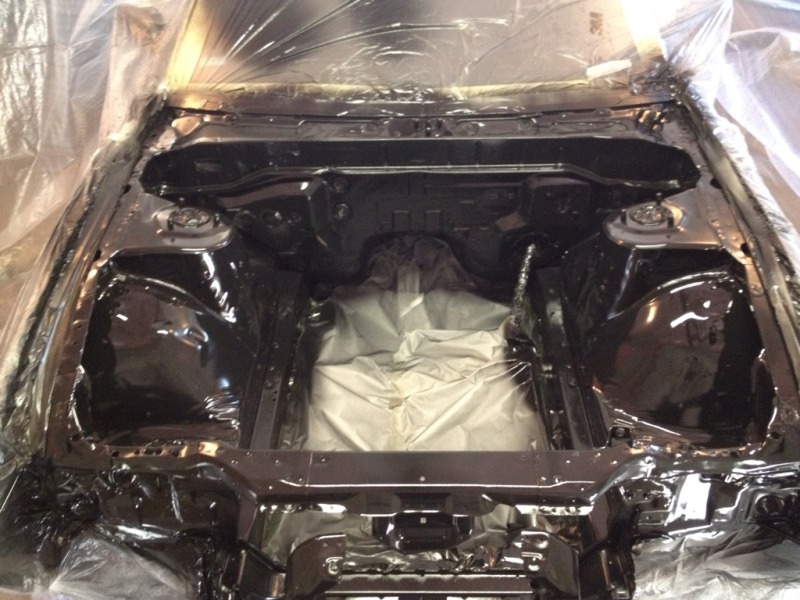
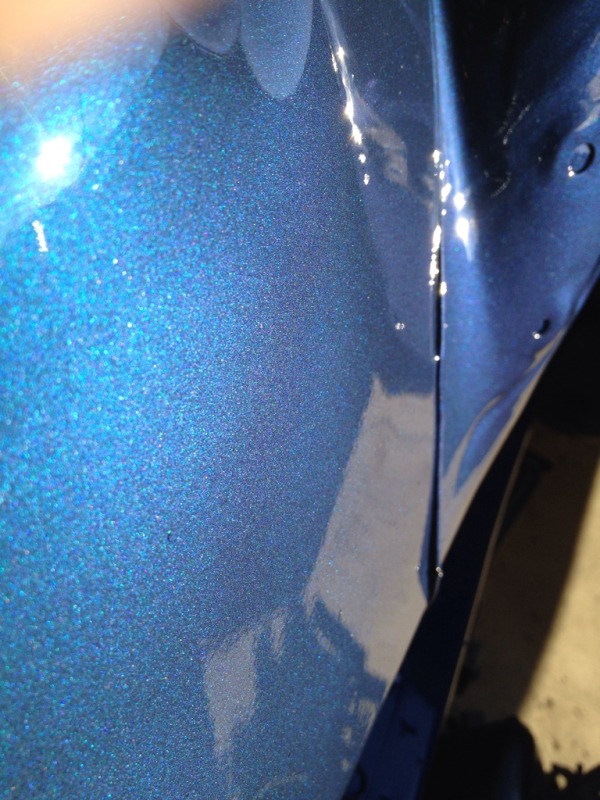
The paint is tack free after 15 minutes so we gave it some extra time and stuck the harness over the subframe and pulled off all the tape and gave it some sun light
The color really looks awesome!
Another busy day....
Started off setting up the makeshift paint booth in my garage to get the engine bay finished up. This should be wrapped up tomorrow afternoon.
Already had picked up the paint supplies so my buddy shot and cleared the valve covers for me.
After that I continued progress on the engine. These are LS9 MLS head gaskets
Trays and lifters installed P-side
Final cylinder head cleanup
Prepping the ARP Head Bolt kit
Cylinder head torqued down
I still need to install the pushrods and rockers but I put the valve cover on to keep anything out
Same process, driver's side
LS1 intake manifold cleaned up and bolted on
Got the stock injectors in for now
Cheers
April 6, 2012
Seemed like a great day to get some more work done.....
Had the bung welded to the oil pan for the turbo oil return line
A friend did a HUGE favor for me and has been helping me through the prep process. Today he came over and we wrapped this job up.
Started off with a tinted sealer
Going on...
Now comes the base coat
And top it off with some clear
The paint is tack free after 15 minutes so we gave it some extra time and stuck the harness over the subframe and pulled off all the tape and gave it some sun light
The color really looks awesome!
04-13-2012, 01:15 PM
#6
On The Tree
Thread Starter
iTrader: (5)
Join Date: Jun 2007
Posts: 118
Likes: 0
Received 0 Likes
on
0 Posts
April 7, 2012
I'll have to check that out.
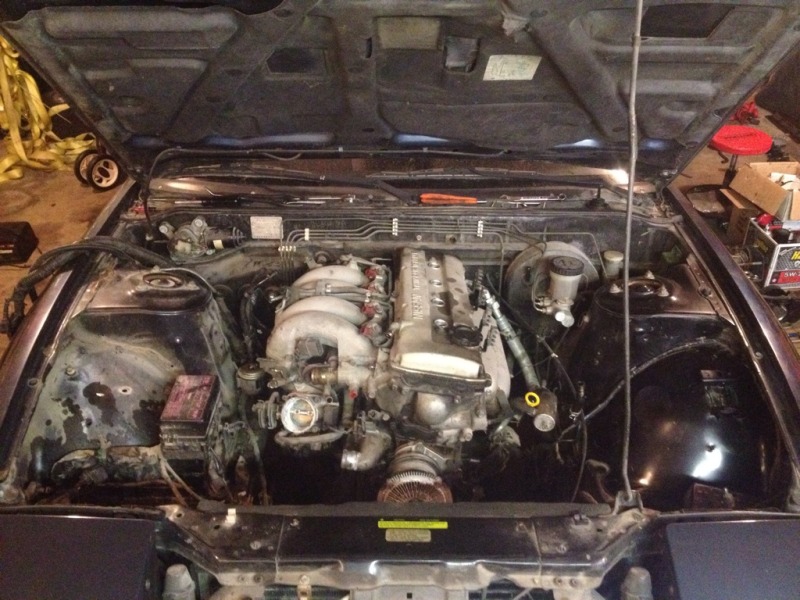
I spent most of the weekend doing a timing belt/fuel injector job on a Z from bloomigton. I did finish up this evening and got the 240 pulled back in to start tossing some parts back on it. Not much to look at but here it is
April 8, 2012
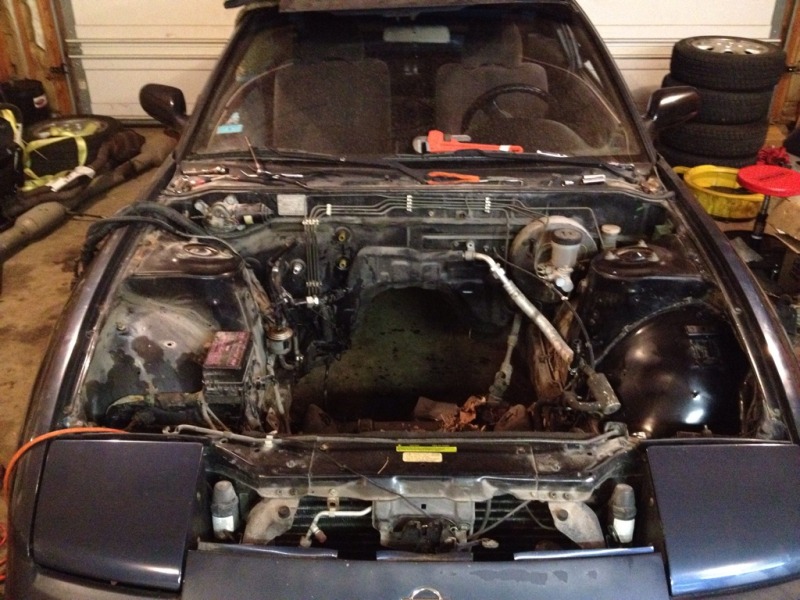
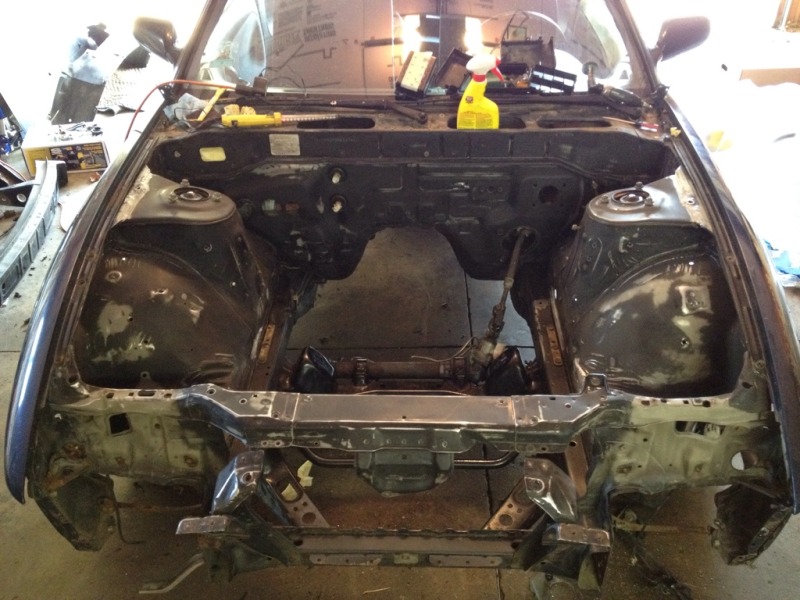
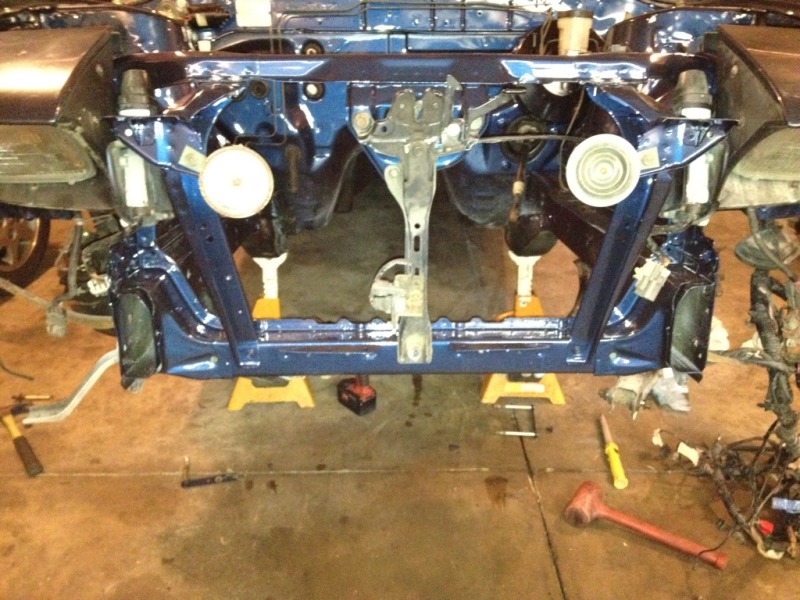
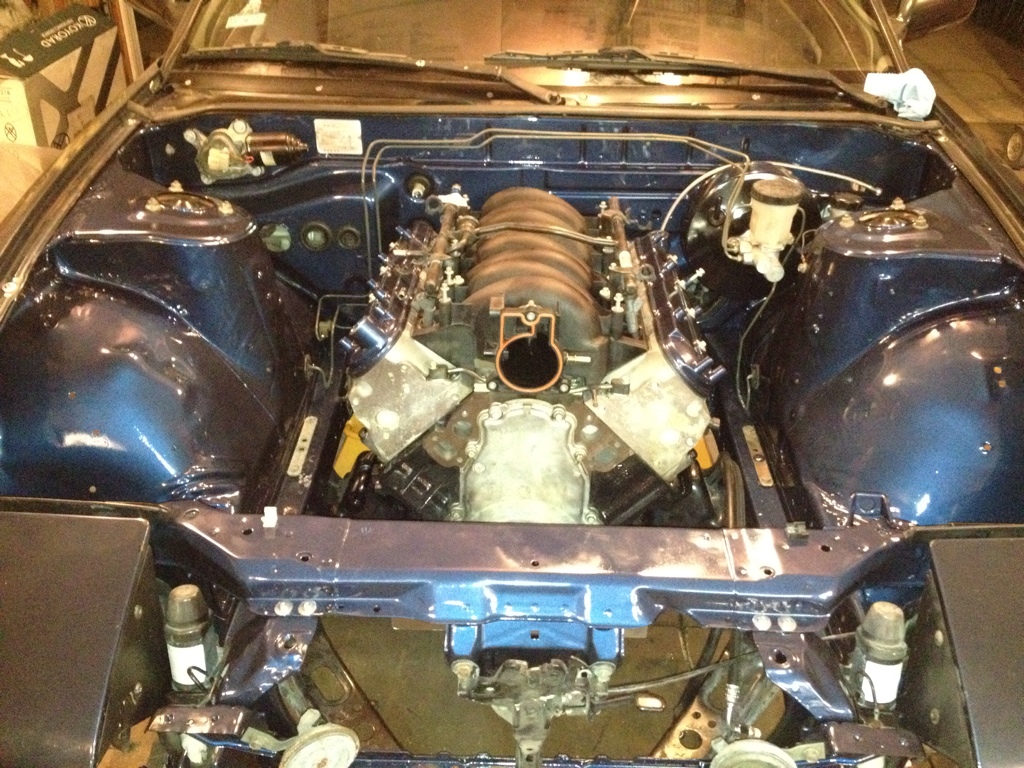
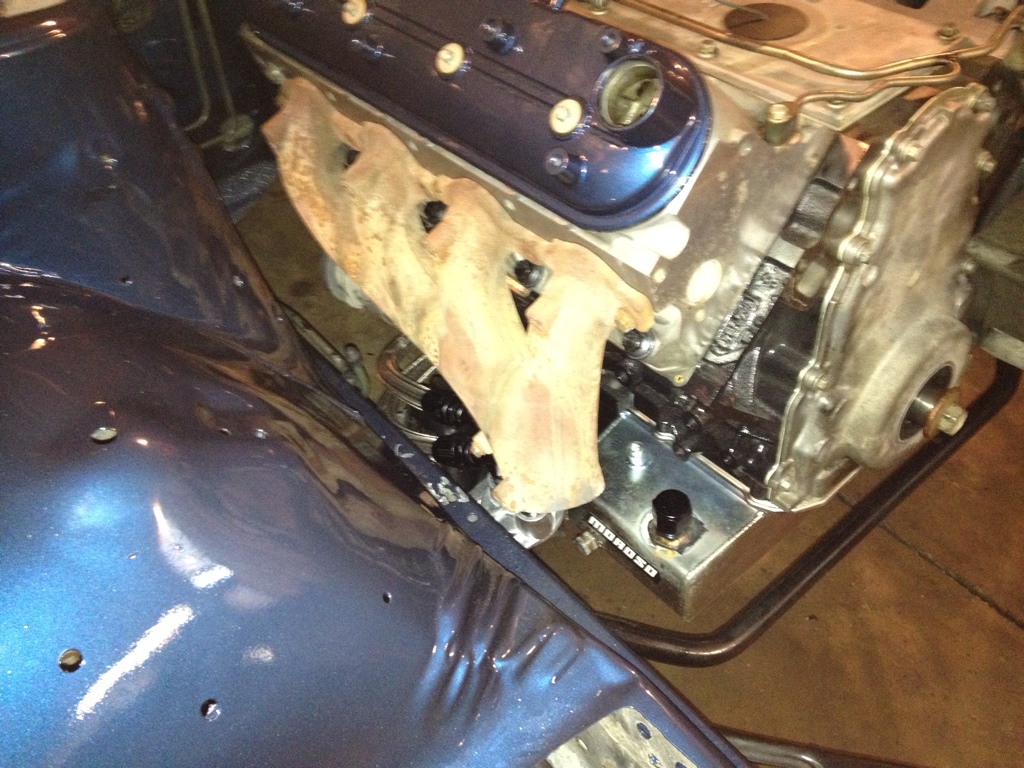
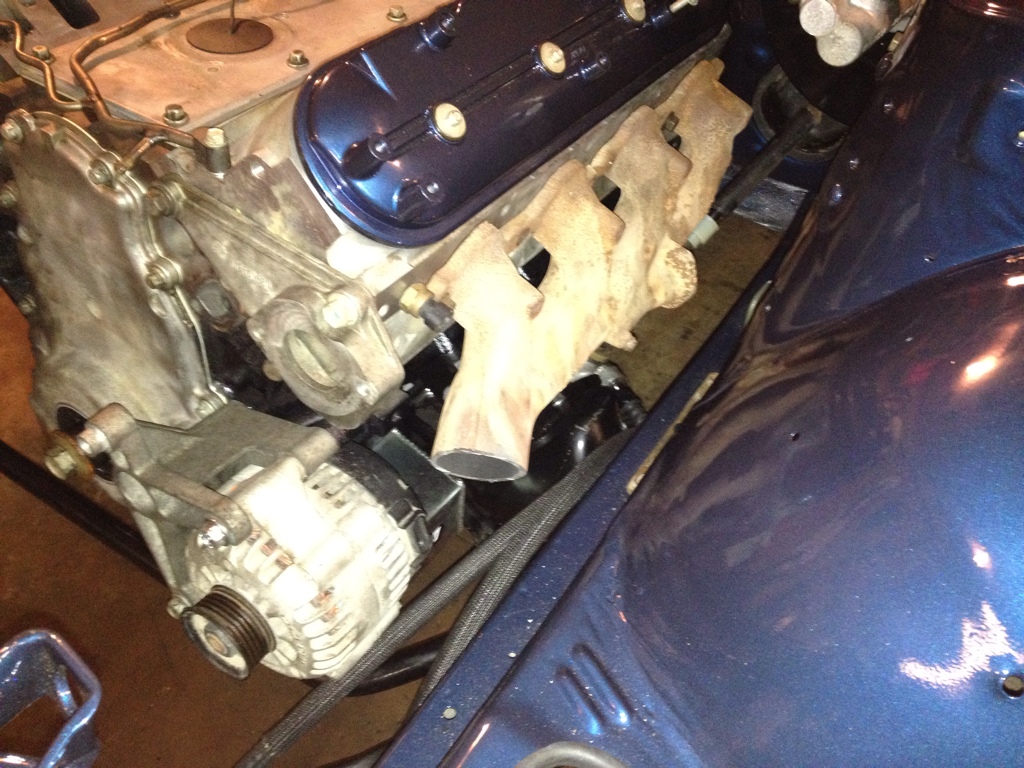
Got a little time after the family festivities. I got the front end way up in the air and pulled the front subframe.
The plan is to dolly the engine/trans under the car and hoist it up into place rather than go in from the top
Everything removed
P side mounted to the subframe
D side mounted to the subframe
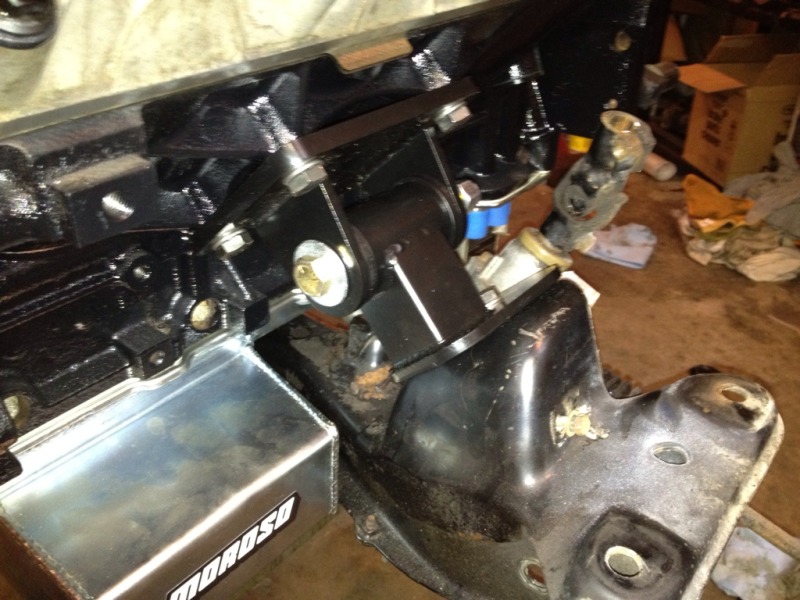
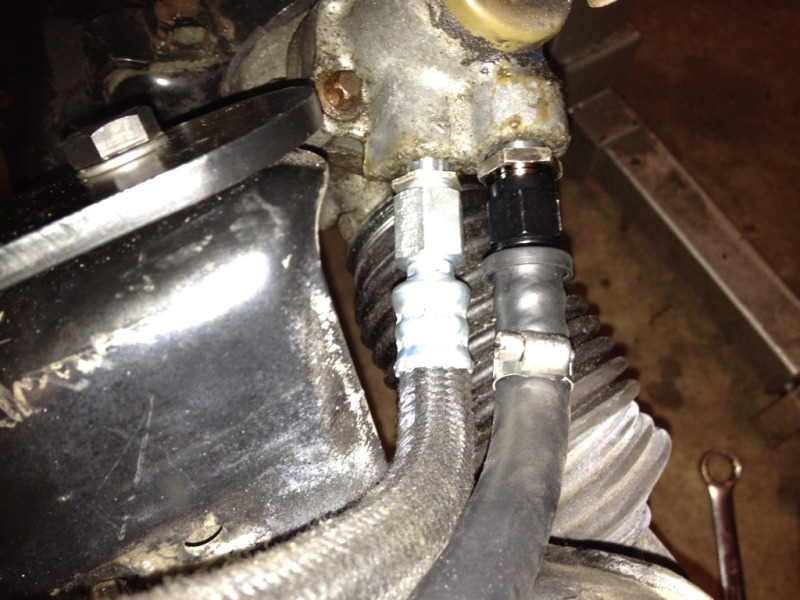
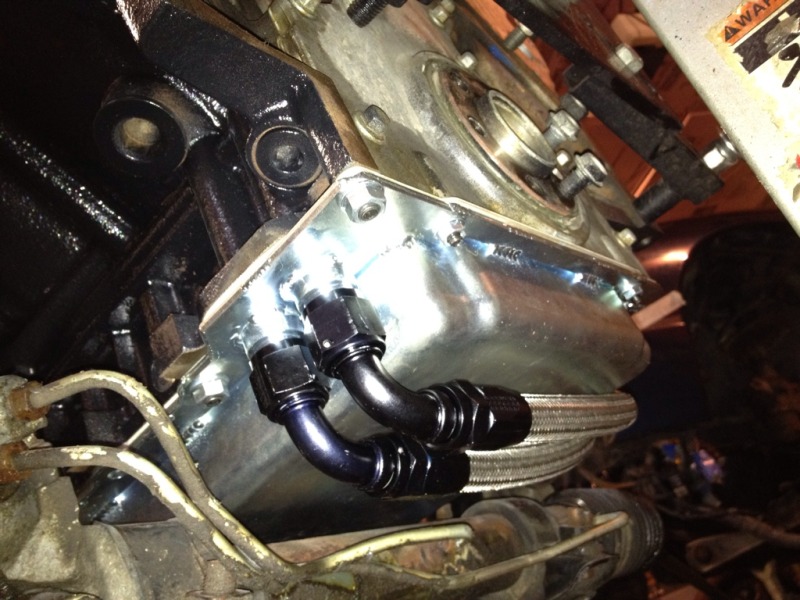
Power Steering lines to adapt to the GM Pump
Oil Filter Relocation kit
April 9, 2012
Big night tonight!
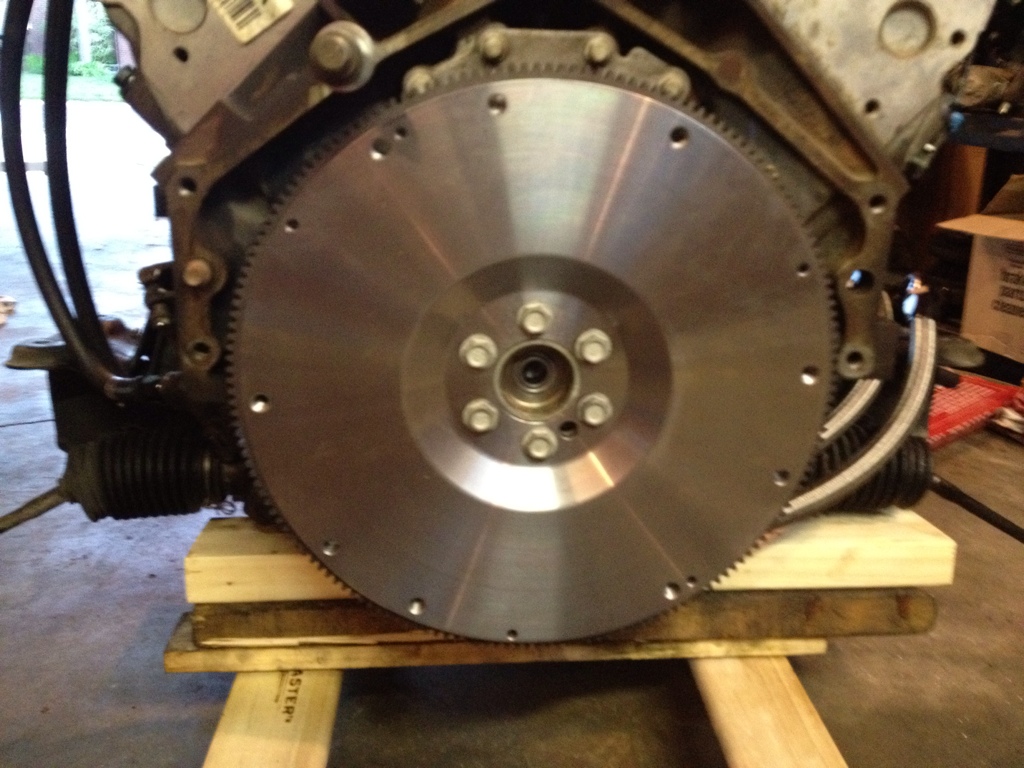
Monster Steel Flywheel installed
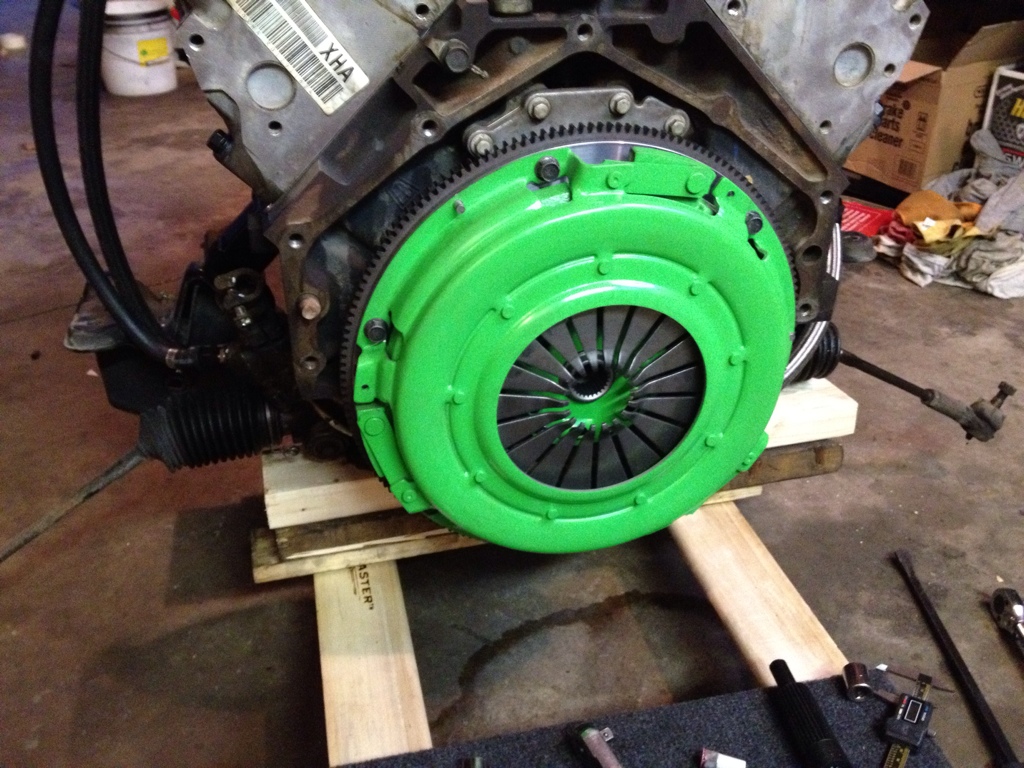
Monster stage 3 6-puck installed
New GM slave cylinder
AN-4 fittings for remote bleeder and wilwood master cylinder
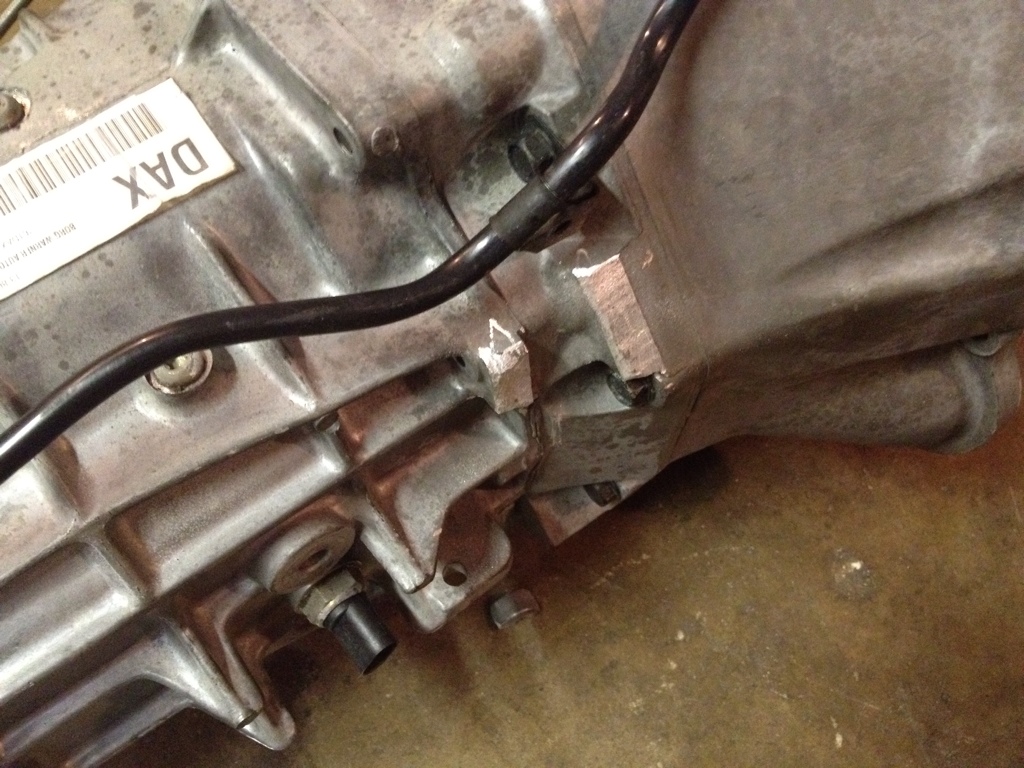
Ears ground off transmission for trans tunnel clearance
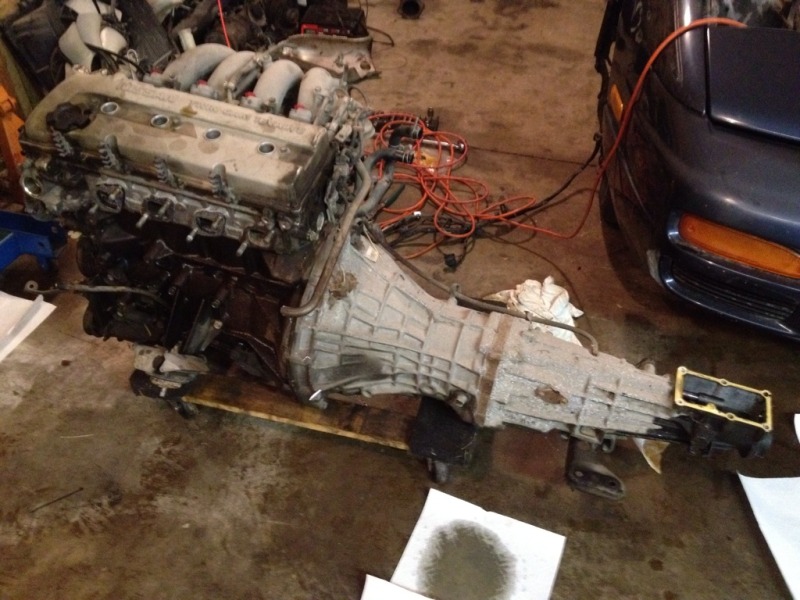
Transmission mated to engine on dolly
And with the help of about 4 people here it sits...
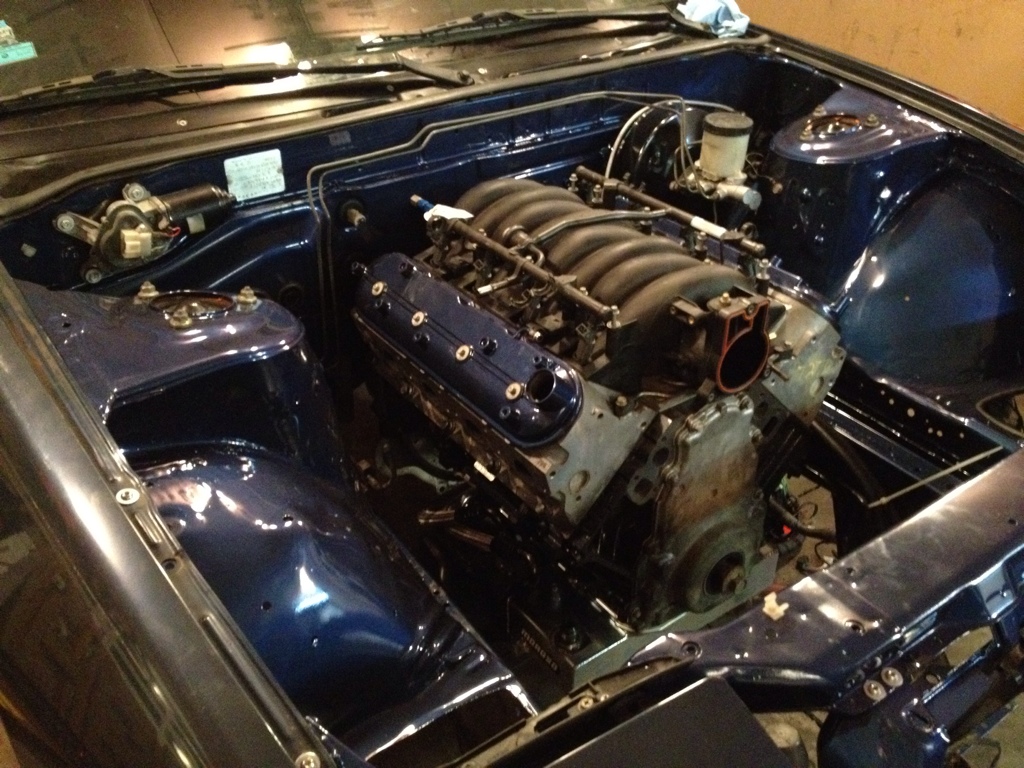
Transmission crossmember
April 10, 2012
Kinda took it easy tonight....last night put the hurt on me, lol
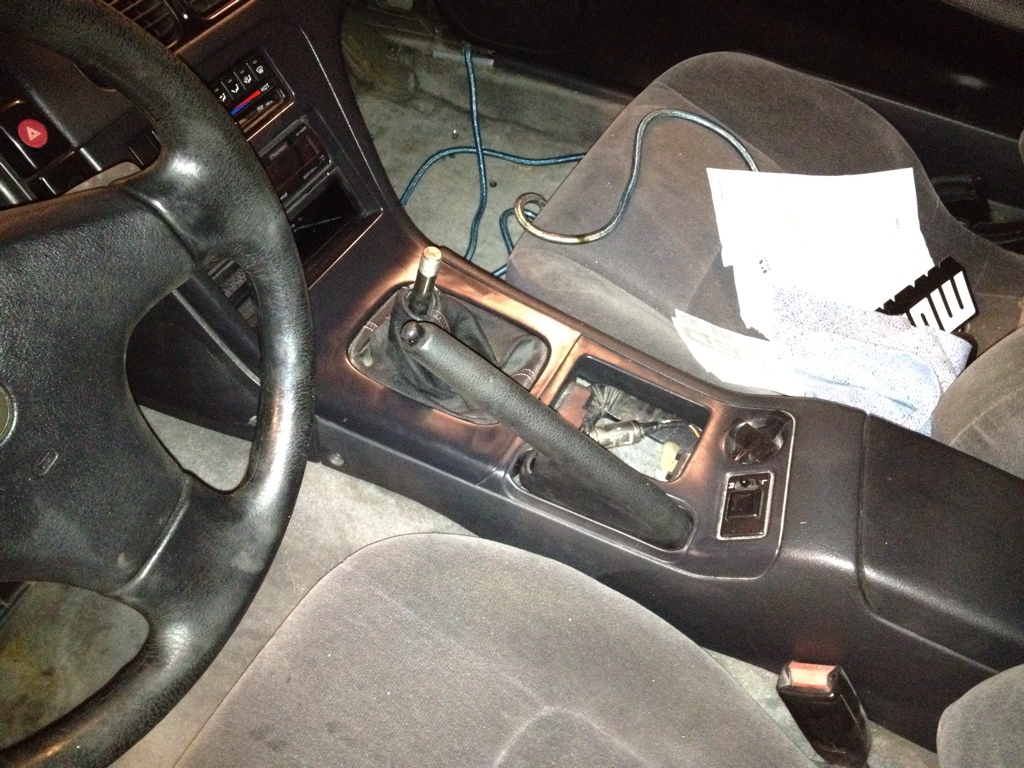
I think im going to remove the pro 5.0 shifter and put the factory one back in it. From what I've read this shifter sits a little more forward than the factory one and it looks like I may bust some knuckles going into the forward pattern gears
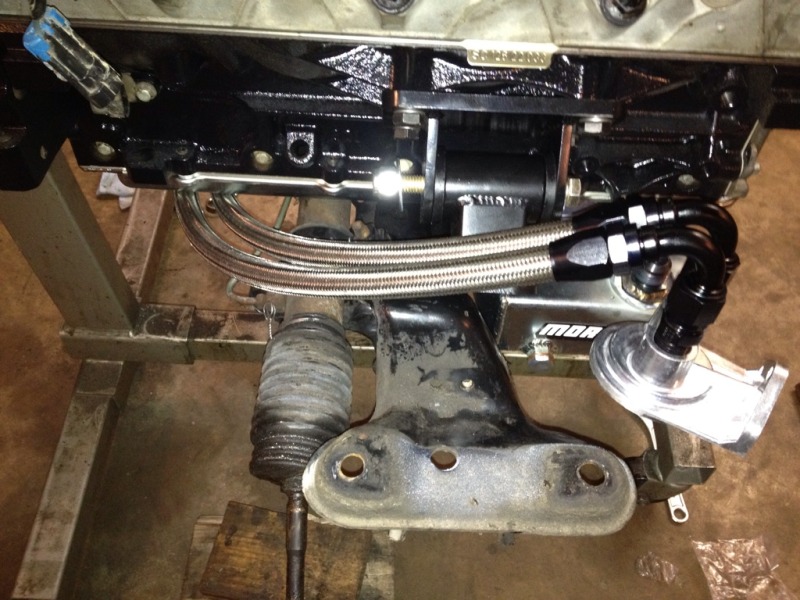
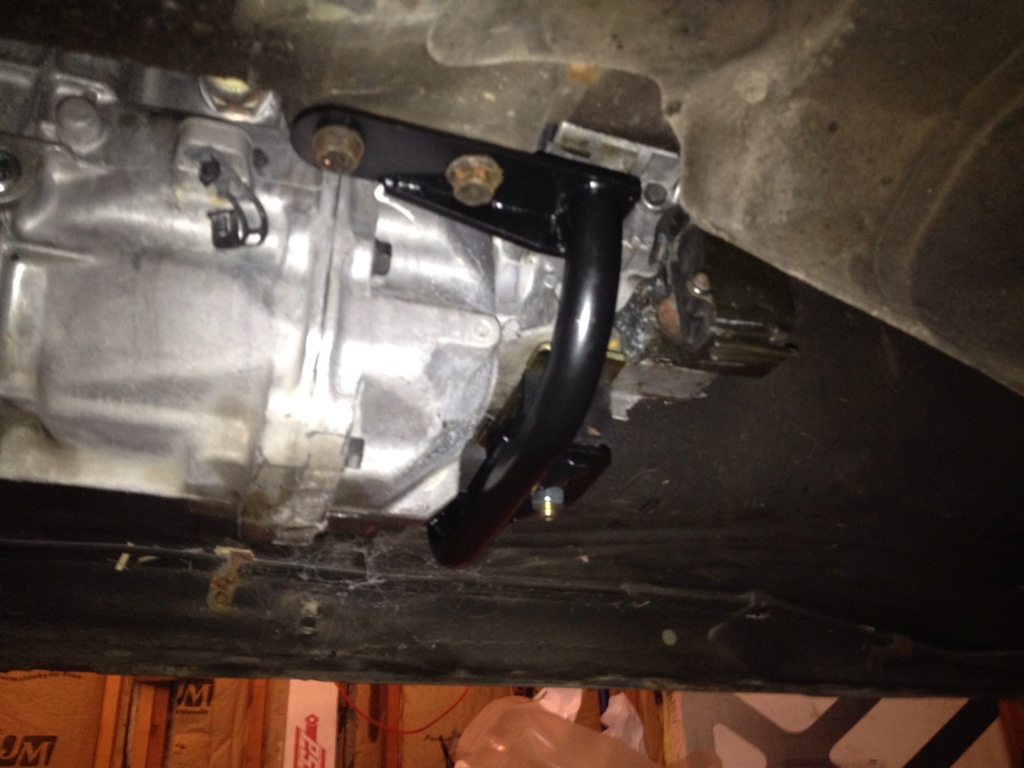
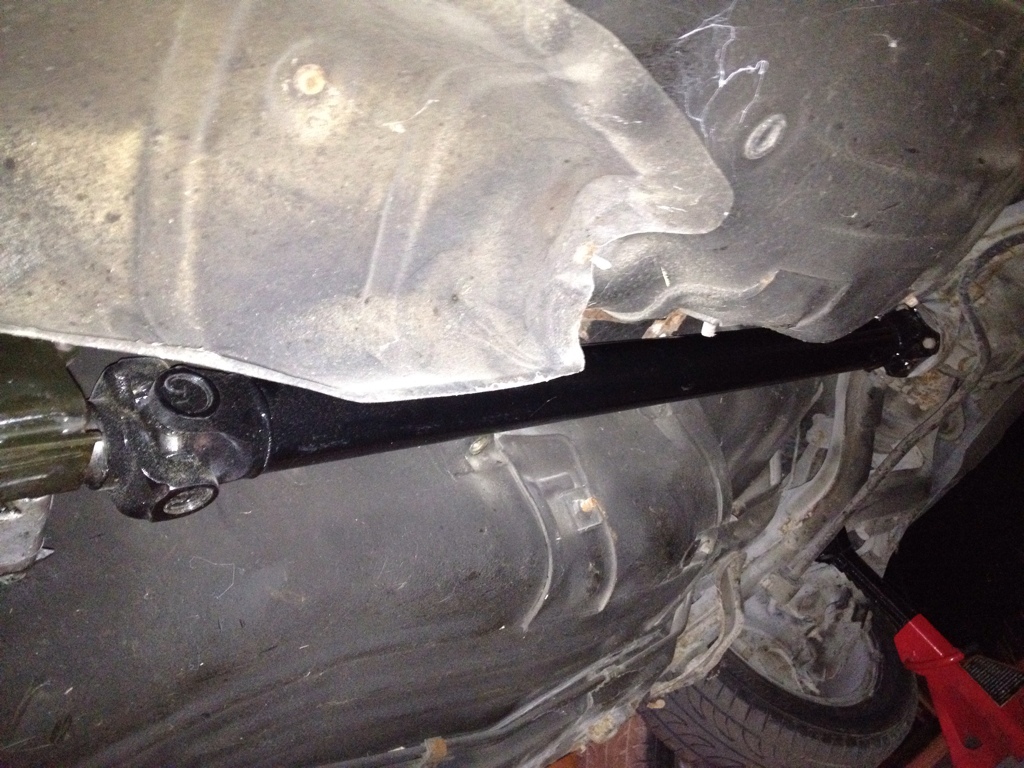
Driveshaft installed
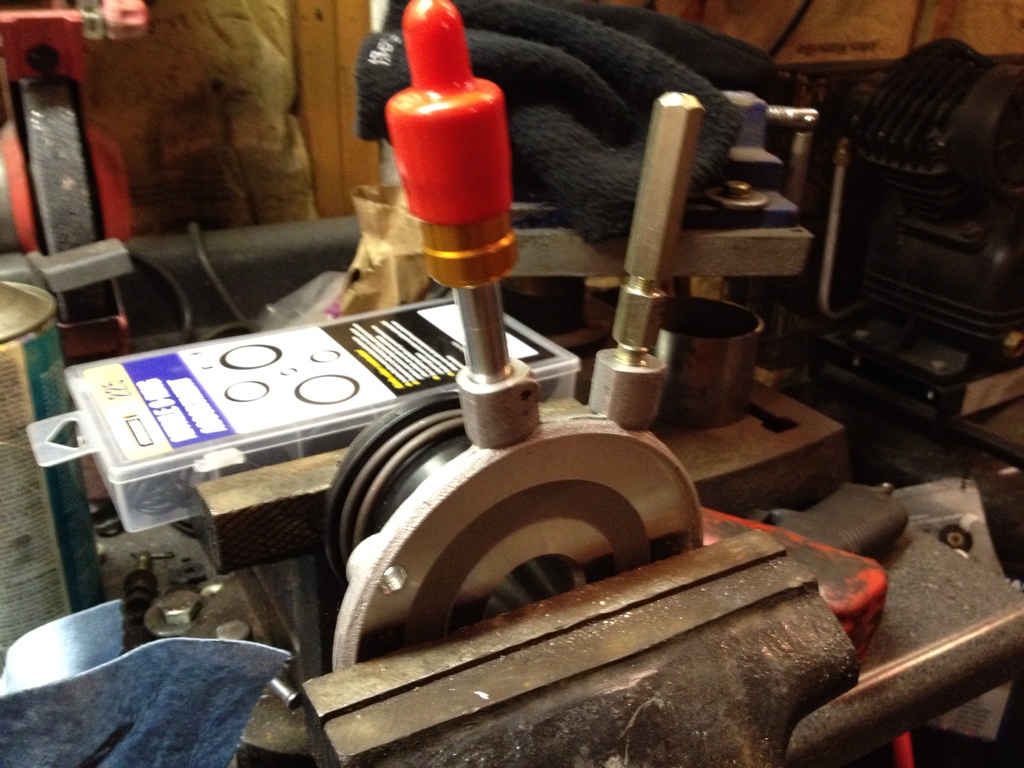
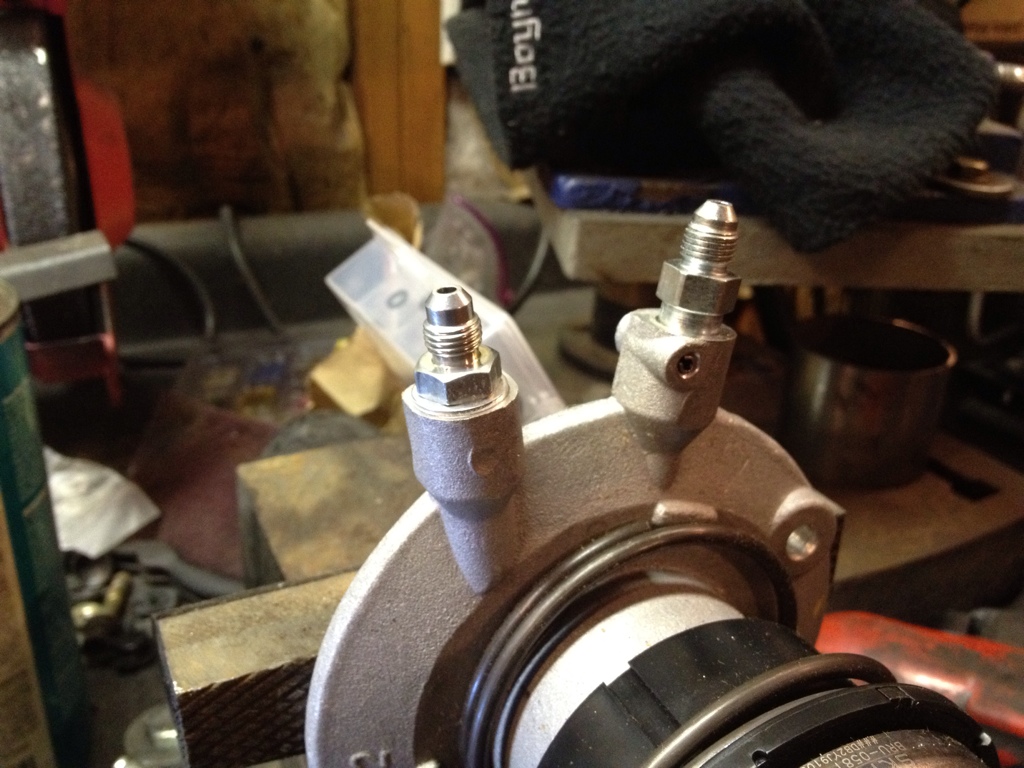
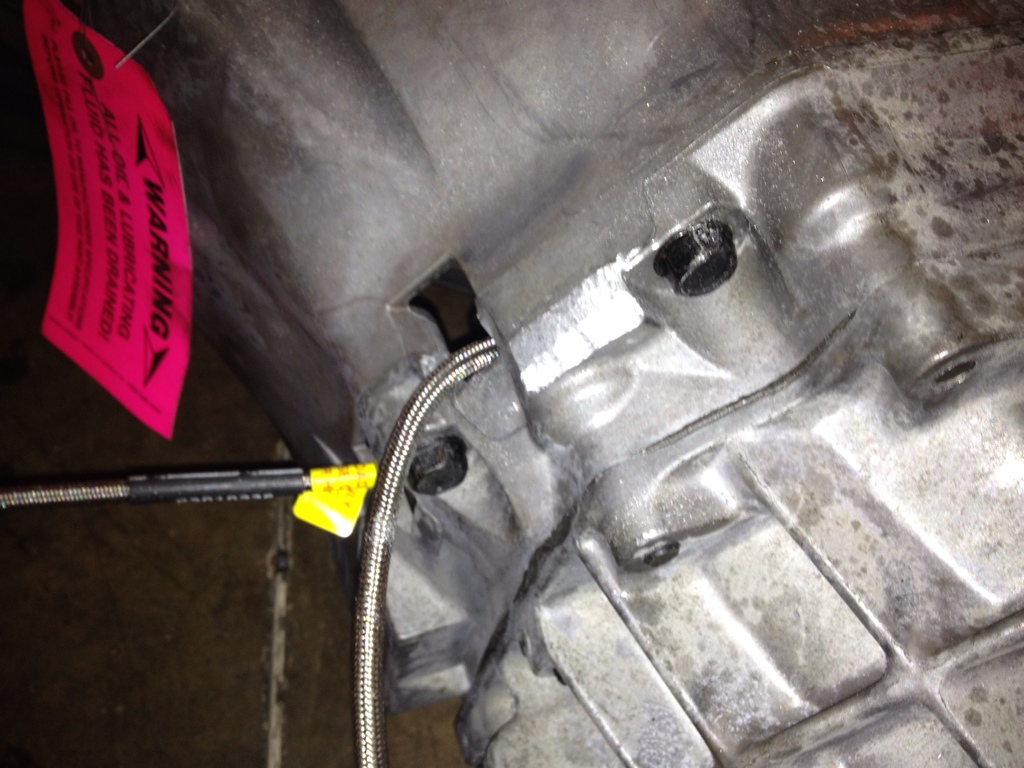
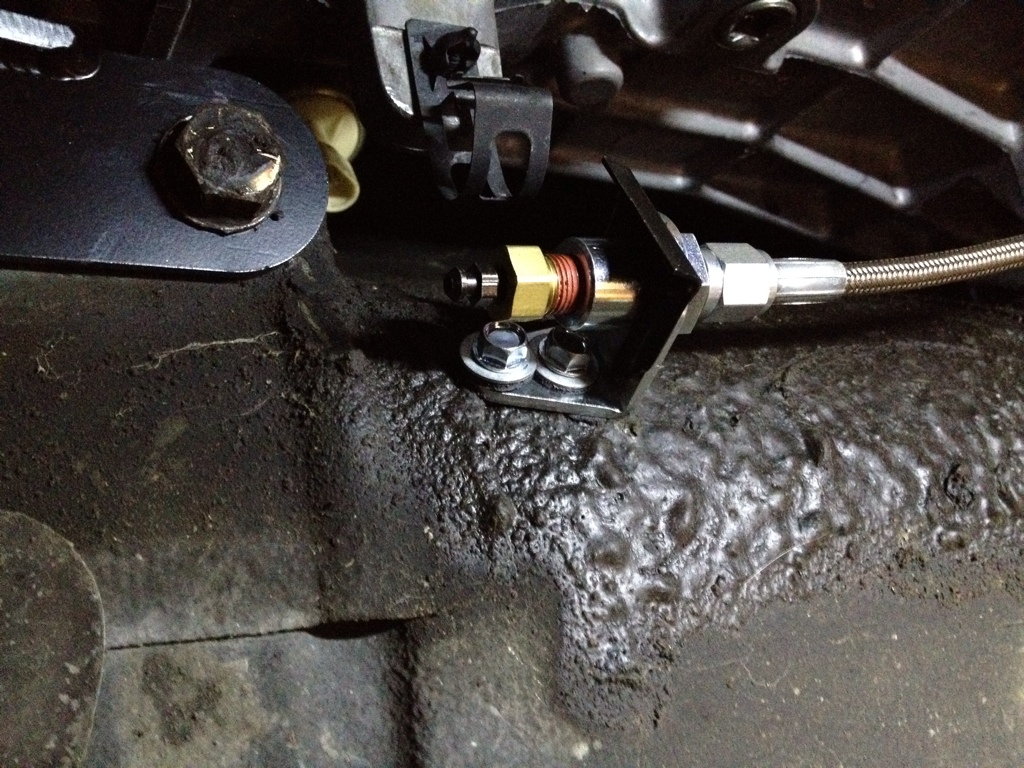
Remote clutch bleed and bracket
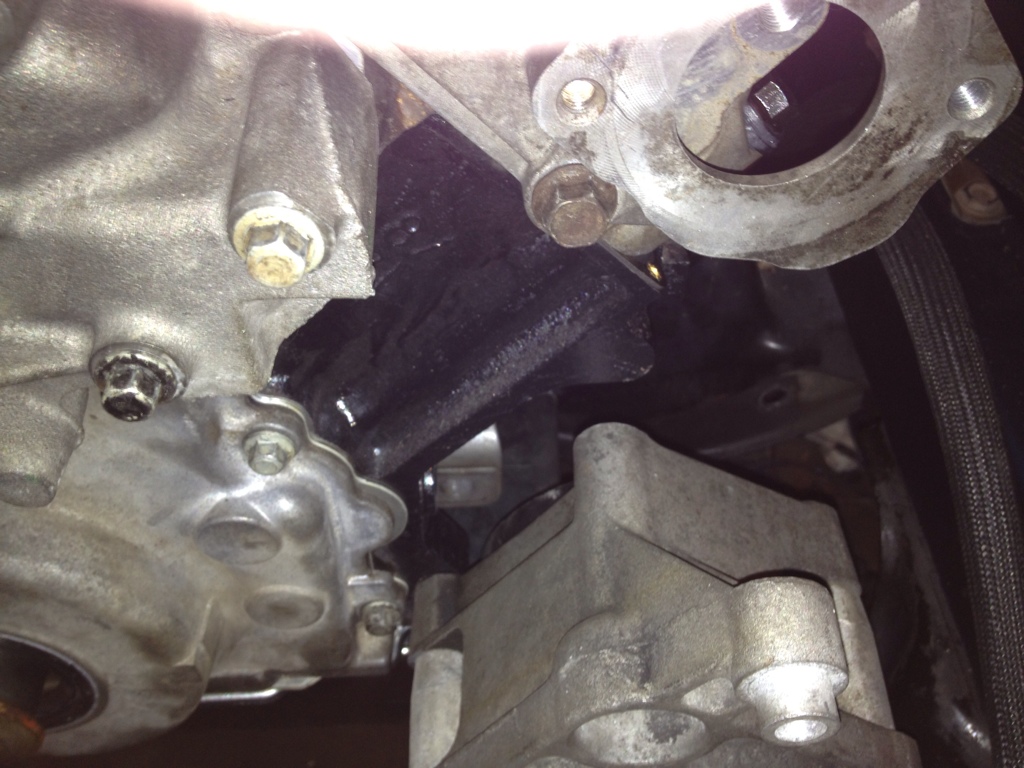
I was not aware of this, but the 5.3 does not come provisioned for the F-body bracket (which makes sense) so it looks like I'm going to have to drill and tap that bolt hole on the ear of the block
Went ahead and fit up the water pump and PS pump
I'll have to check that out.
I spent most of the weekend doing a timing belt/fuel injector job on a Z from bloomigton. I did finish up this evening and got the 240 pulled back in to start tossing some parts back on it. Not much to look at but here it is
April 8, 2012
Got a little time after the family festivities. I got the front end way up in the air and pulled the front subframe.
The plan is to dolly the engine/trans under the car and hoist it up into place rather than go in from the top
Everything removed
P side mounted to the subframe
D side mounted to the subframe
Power Steering lines to adapt to the GM Pump
Oil Filter Relocation kit
April 9, 2012
Big night tonight!
Monster Steel Flywheel installed
Monster stage 3 6-puck installed
New GM slave cylinder
AN-4 fittings for remote bleeder and wilwood master cylinder
Ears ground off transmission for trans tunnel clearance
Transmission mated to engine on dolly
And with the help of about 4 people here it sits...
Transmission crossmember
April 10, 2012
Kinda took it easy tonight....last night put the hurt on me, lol
I think im going to remove the pro 5.0 shifter and put the factory one back in it. From what I've read this shifter sits a little more forward than the factory one and it looks like I may bust some knuckles going into the forward pattern gears
Driveshaft installed
Remote clutch bleed and bracket
I was not aware of this, but the 5.3 does not come provisioned for the F-body bracket (which makes sense) so it looks like I'm going to have to drill and tap that bolt hole on the ear of the block
Went ahead and fit up the water pump and PS pump
04-13-2012, 01:18 PM
#7
On The Tree
Thread Starter
iTrader: (5)
Join Date: Jun 2007
Posts: 118
Likes: 0
Received 0 Likes
on
0 Posts
Caught up on the posting....
Last night I only played around for a little while. I managed to get the clutch line fit up to the master cylinder and I also put the front suspension back in the car and got it cleaned up a bit
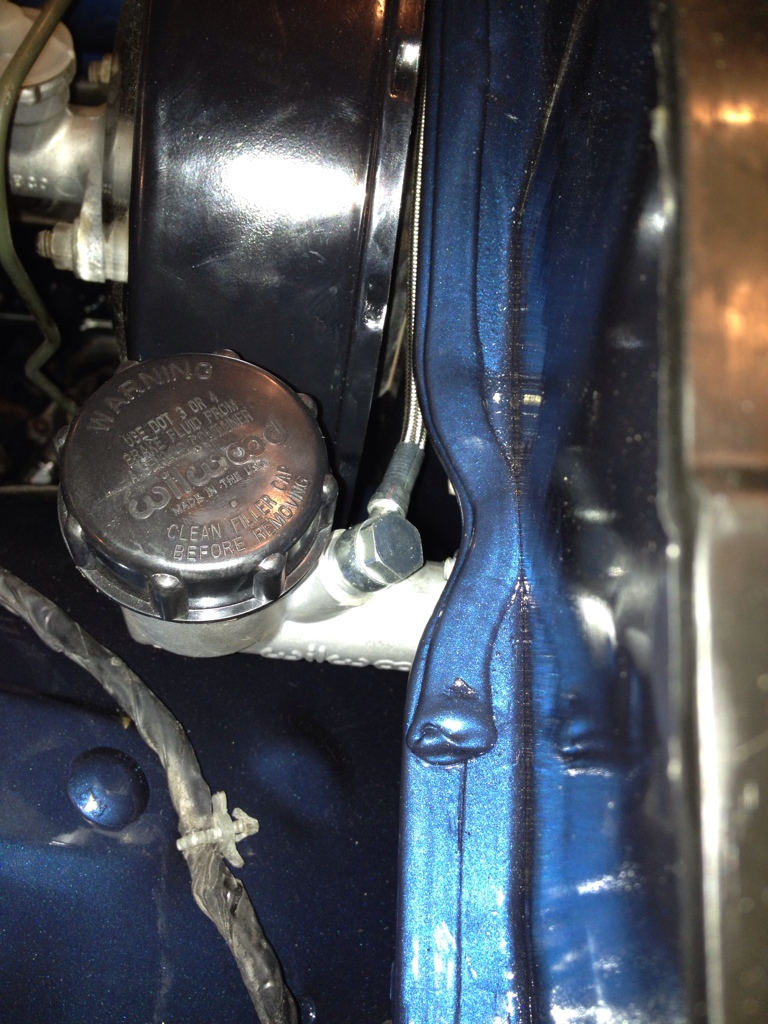
Last night I only played around for a little while. I managed to get the clutch line fit up to the master cylinder and I also put the front suspension back in the car and got it cleaned up a bit
Trending Topics


 05-03-2012, 11:08 AM
#12
On The Tree
Thread Starter
iTrader: (5)
Join Date: Jun 2007
Posts: 118
Likes: 0
Received 0 Likes
on
0 Posts
Ended up finding a tri-ax that makes everything perfect 
Forgot to post some updates....we'll back date a little bit
April 16
Spent the weekend with my little one, so nothing was done out in the garage. However, I did pick myself up some nice birthday presents....
Pile o' goods...
Everlast PowerPro 164 TIG/Stick/Plasma Cutter

Got the extension cord wired up, plugs added....powered up

Put together the welder cart
Plasma and Stick torches
Got both of these over the weekend on clearance at farm & fleet for $100
Got everything together
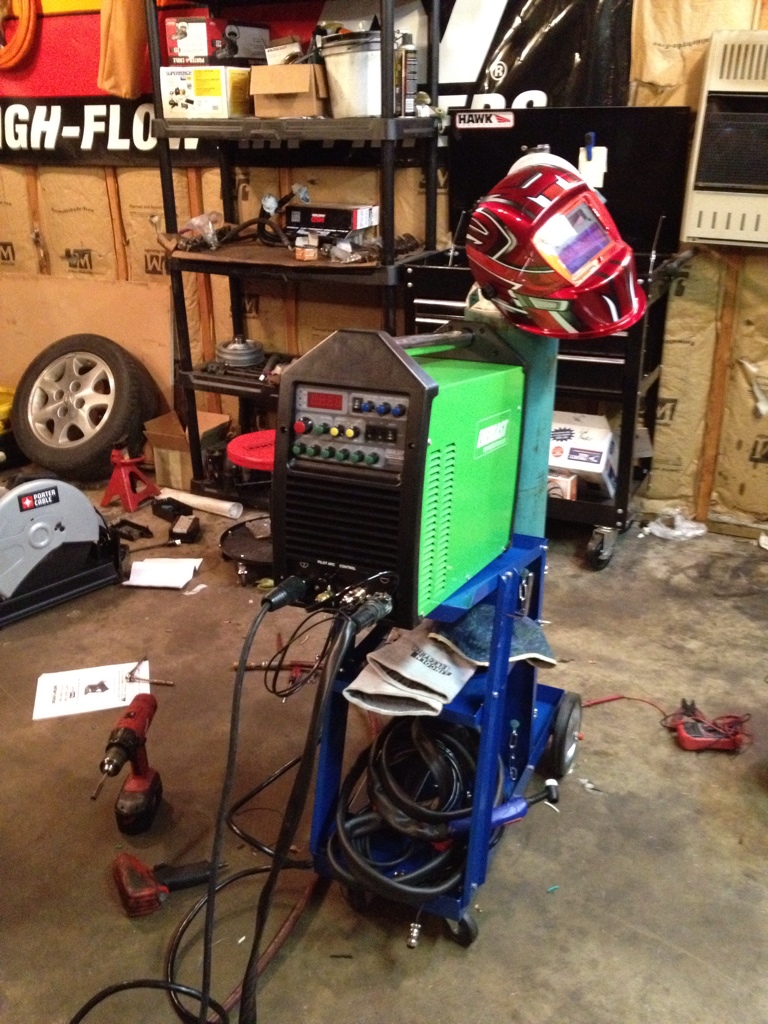
Fooled around a little with the plasma
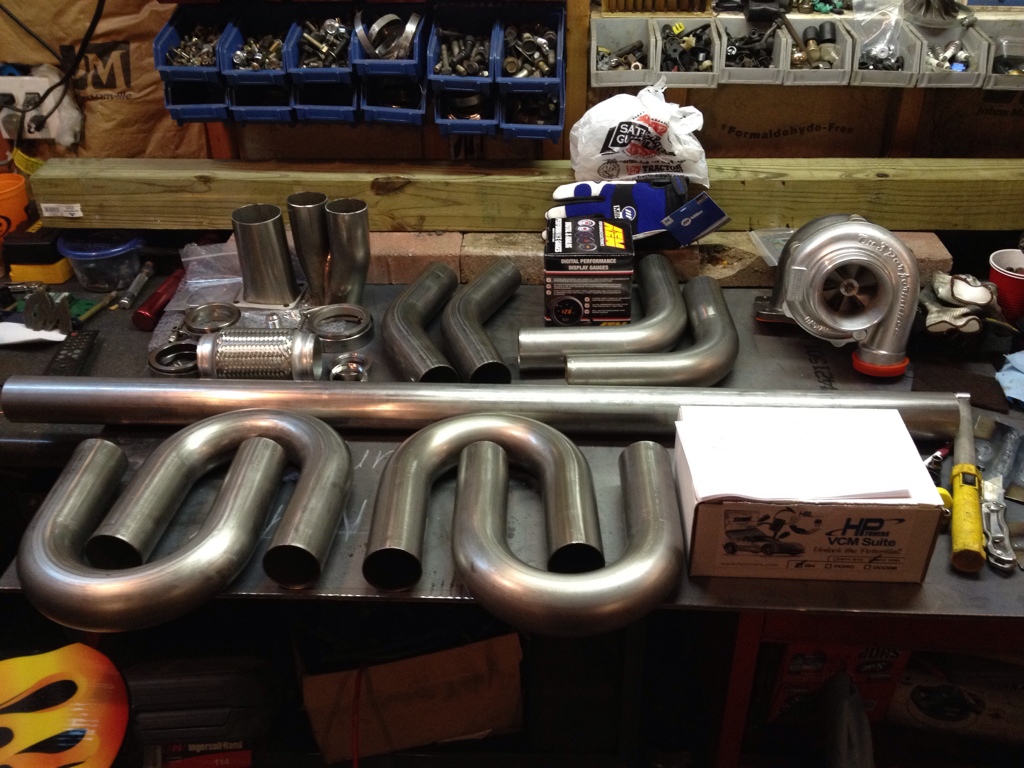
All of the stainless exhaust pieces should be here by Friday. Hope to make some good headway on the turbo hotside provided I can get this welding setup figured out!
April 17
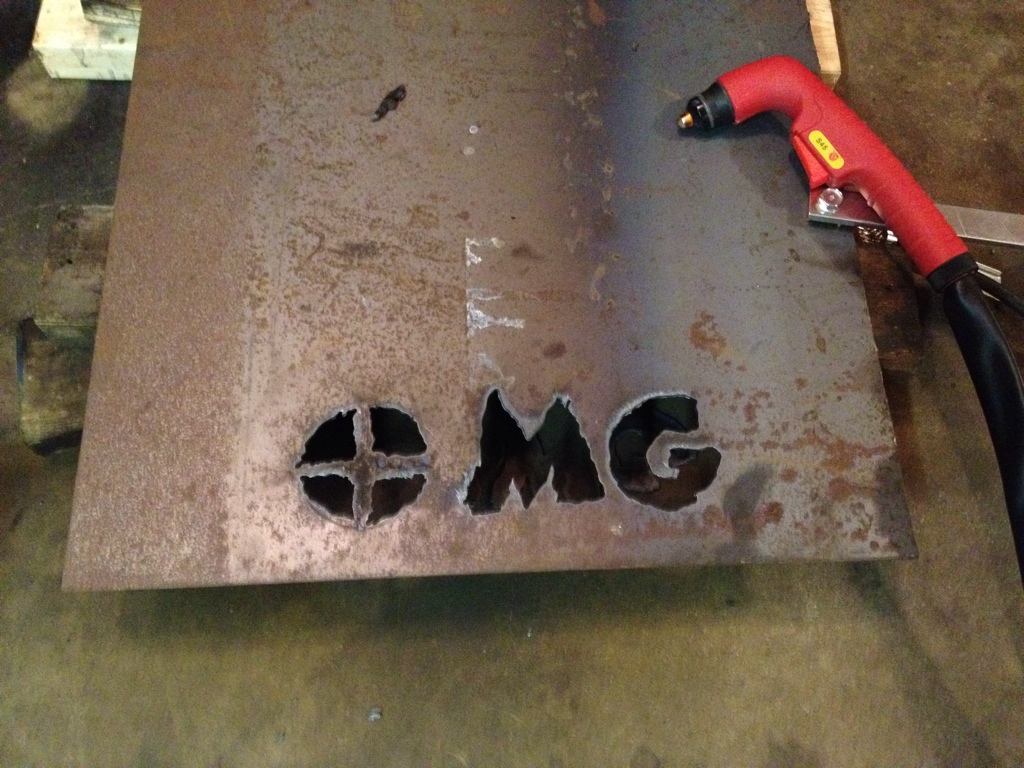
Started off the evening with some scrap metal I picked up.....
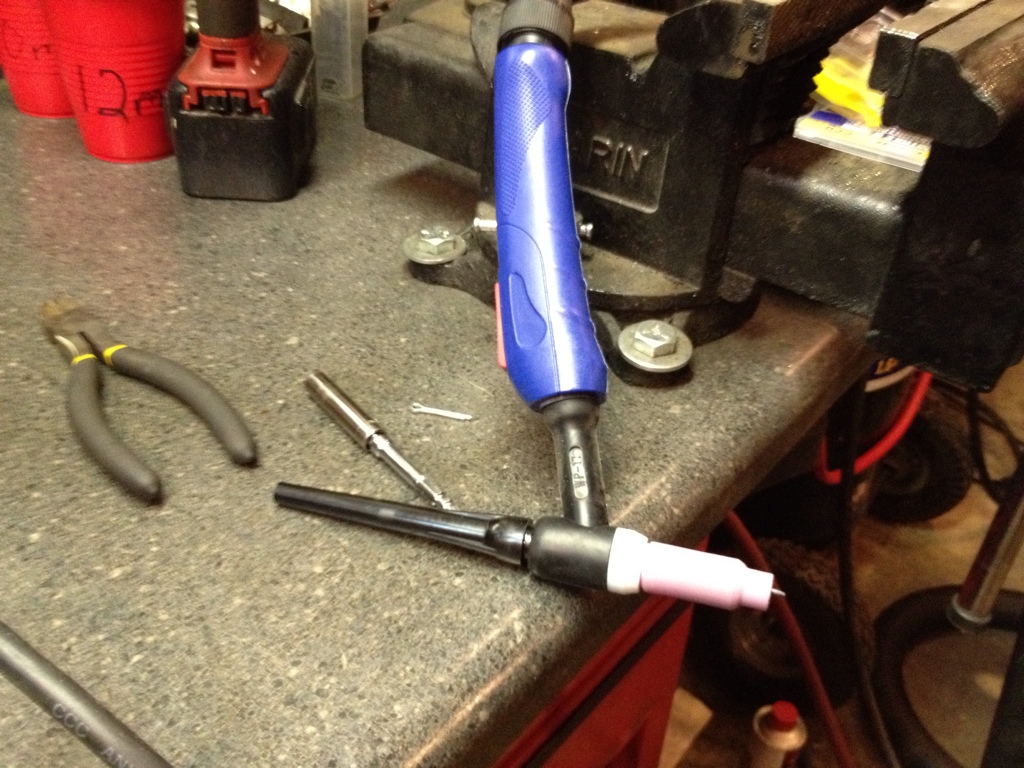
I setup the welder with some rather ambiguous settings just to give it a shot....
I could only find 2% thoriated rod at the welding supply store, so I just picked up a 3 pack. I'm leaning more towards using a 2% lanthanated rod. Gonna try tomorrow to find some locally.
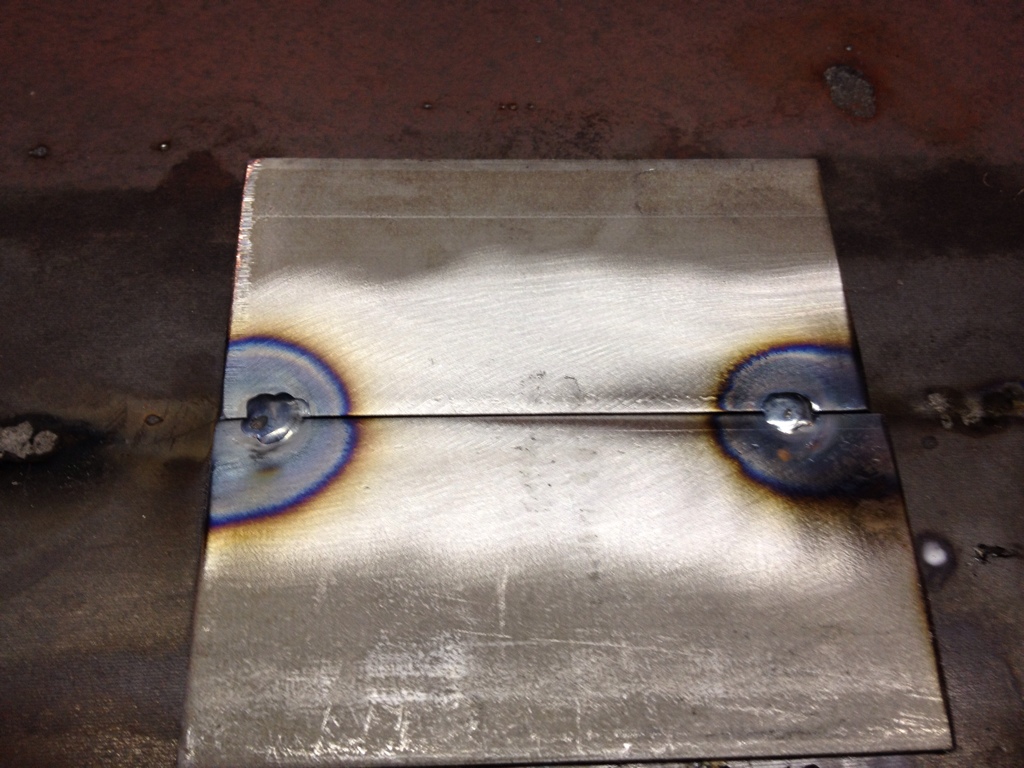
It didnt turn out terrible for my first time, I can see this is going to need lots of practice!
After that I cut off the manifold flanges

Mocked up...
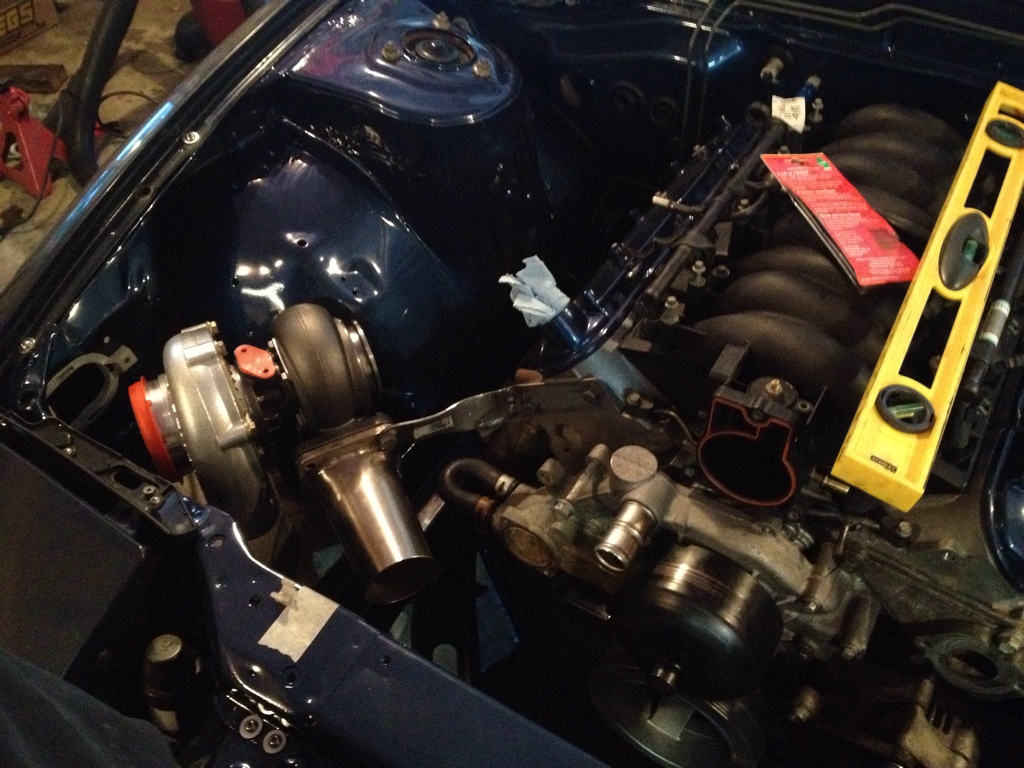
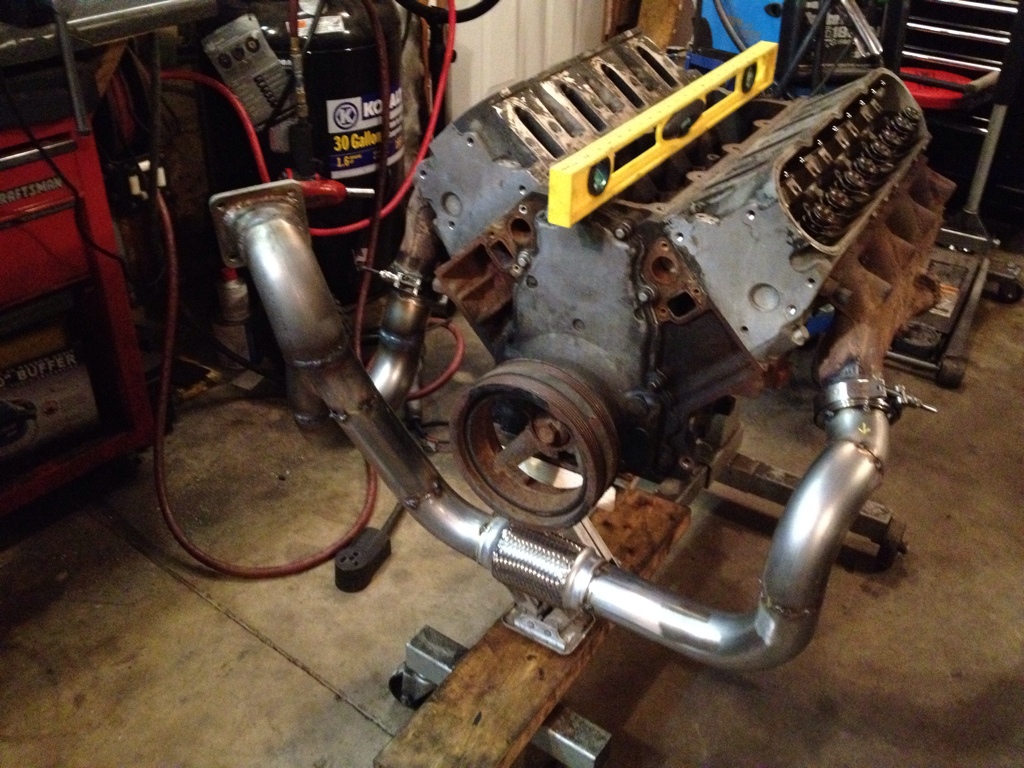
I also was battling getting the engine level and even from side to side last week. I finally noticed that the trans was hitting the tunnel just a little on the drivers side of the upper firewall. I dropped the engine/crossmember tonight and gave it a little lovin. The engine is now right where I want it and level....
April 19
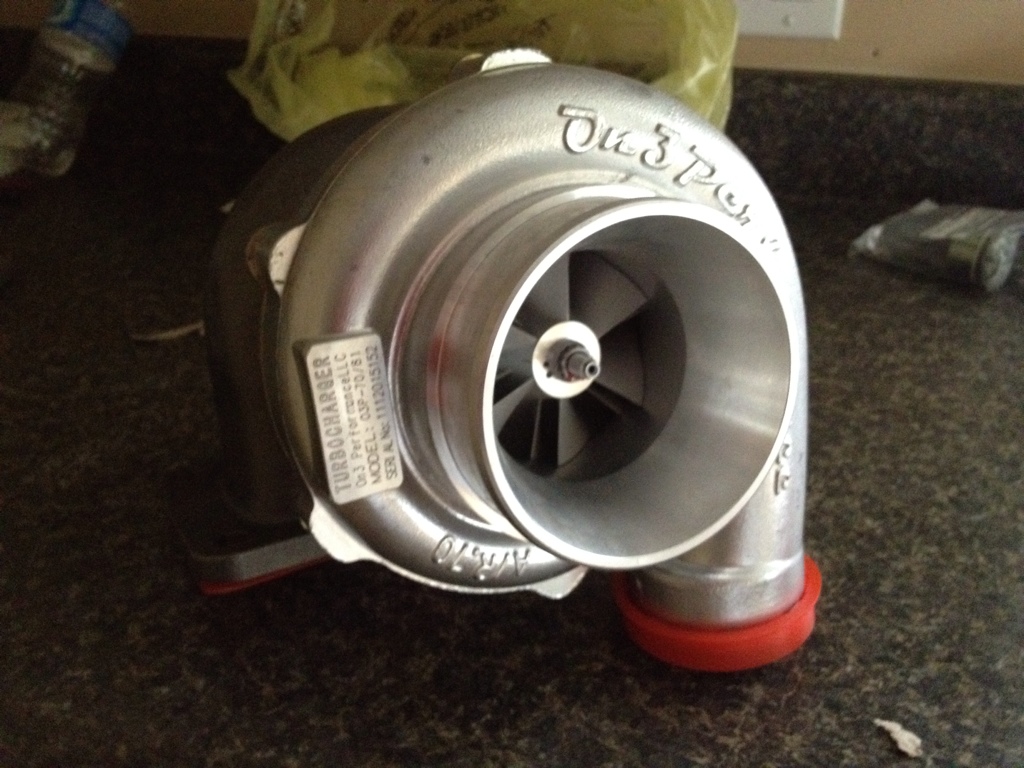
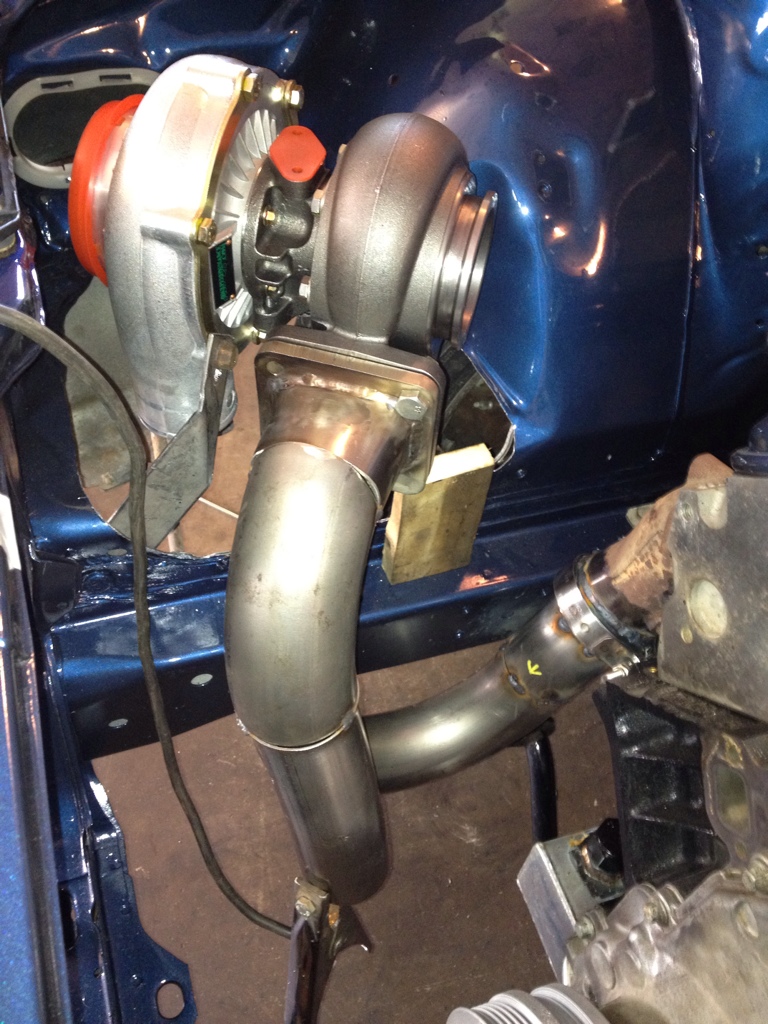
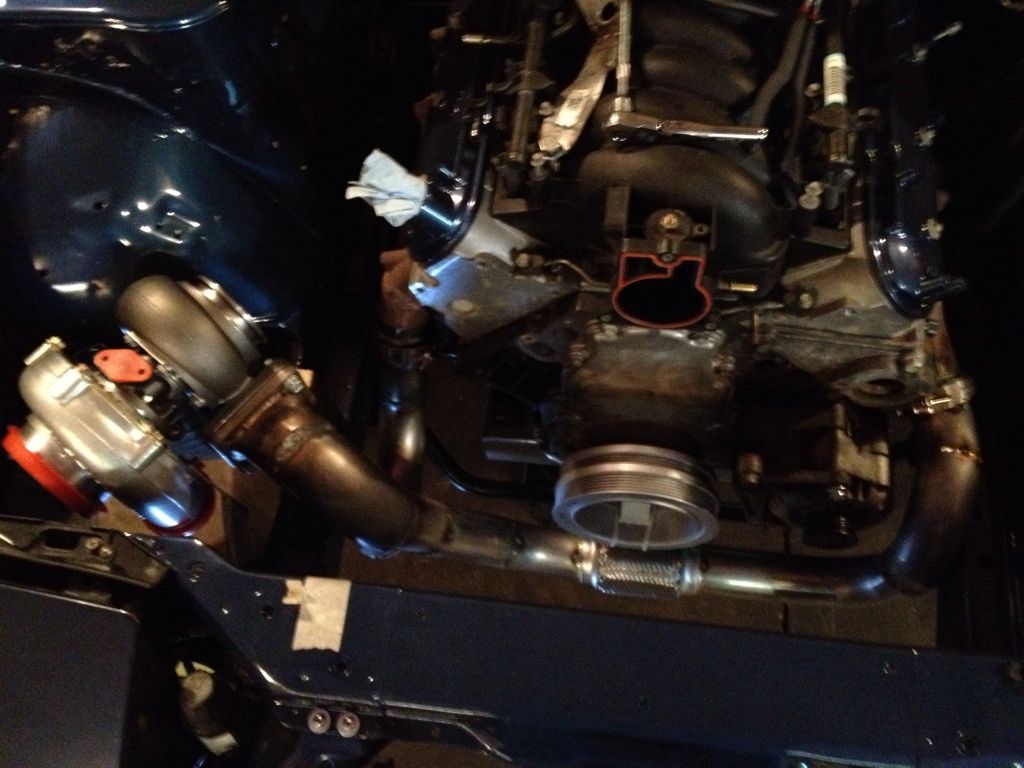
Turbo arrived...
70mm compressor
.96 AR
 [/quote]
April 20
I guess I'm jumping in head first at this welding thing....
Looking forward to learning this too....
April 23
The machine is pretty awesome, I am loving it so far, but it can get quite frusterating when you're used to seeing those pretty little welds on pieces you buy and trying to duplicate them with minimal success....lol
I am making some progress....I didn't get as much done over the weekend as I was hoping for
Made up some temp brackets to hold the turbo where I wanted it
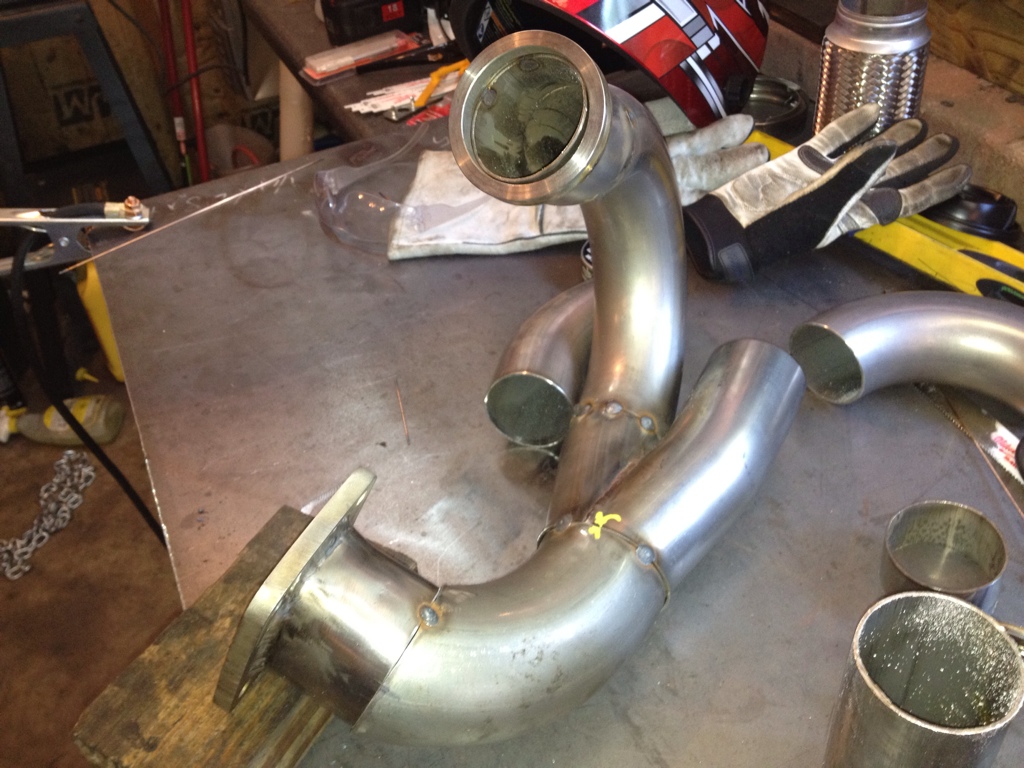
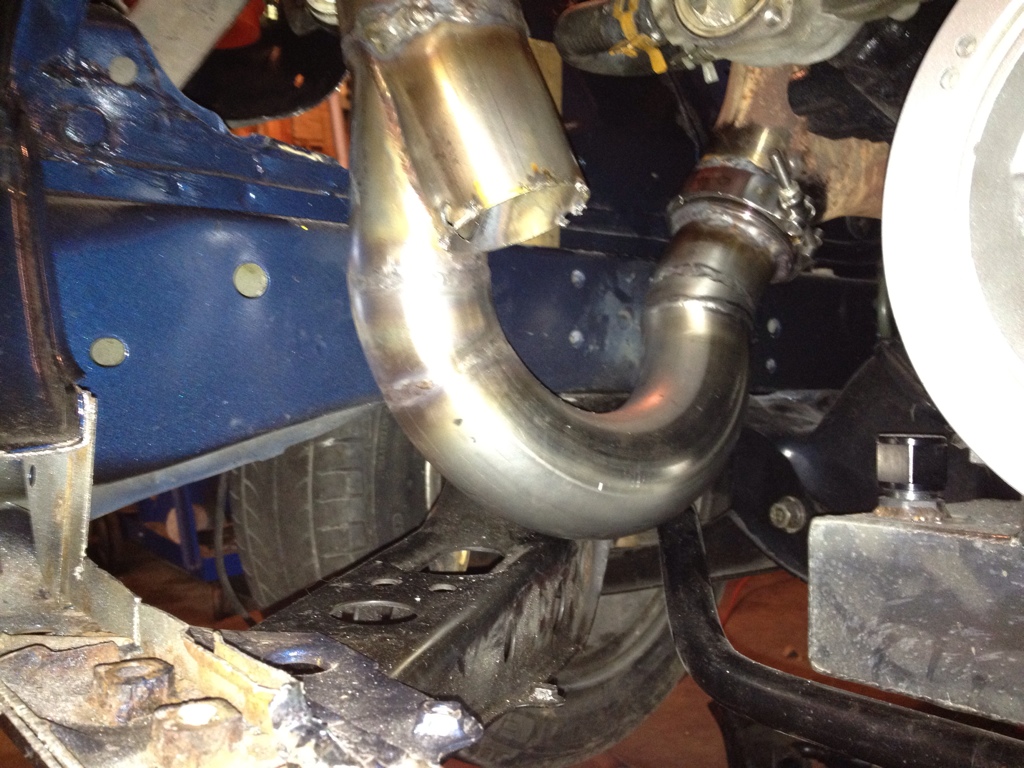
Welded the 3" form to the T4 flange
Skipped some photo opportunities but I got the vband flanges welded on to the manifolds and drivers side mated up to the 2-1 collector
Pulled it out to try some welding....I suck so far
Went back with a much lower amperage to try some test beads
Tonight I started on the passenger side
Making sure I am somewhat level
After a few hours of checking, grinding, checking, grinding, and so on, I finally brought the two together
Again, underside
Test fit up some stuff
The plan is to try and use all the spare tubing I had from making this setup to better my TIG'ing. I definiately have a challenge with the thermostat housing I'll have to overcome. It doesnt run into the exhaust but it comes pretty close. I'm also not happy at all with the weld on the 3" turbo form to the 90 down....I got the 90 from a friend and it was a different gauge pipe and I couldnt figure out the best way to run the welder to join them, I'll have to do some fancy clean up work...or just header wrap it
April 24
Borrowed another junker for mock-up purposes
I went back at some TIGing tonight....starting to finally see some better results as I learn how to manipulate the arc and dip my stick

April 26
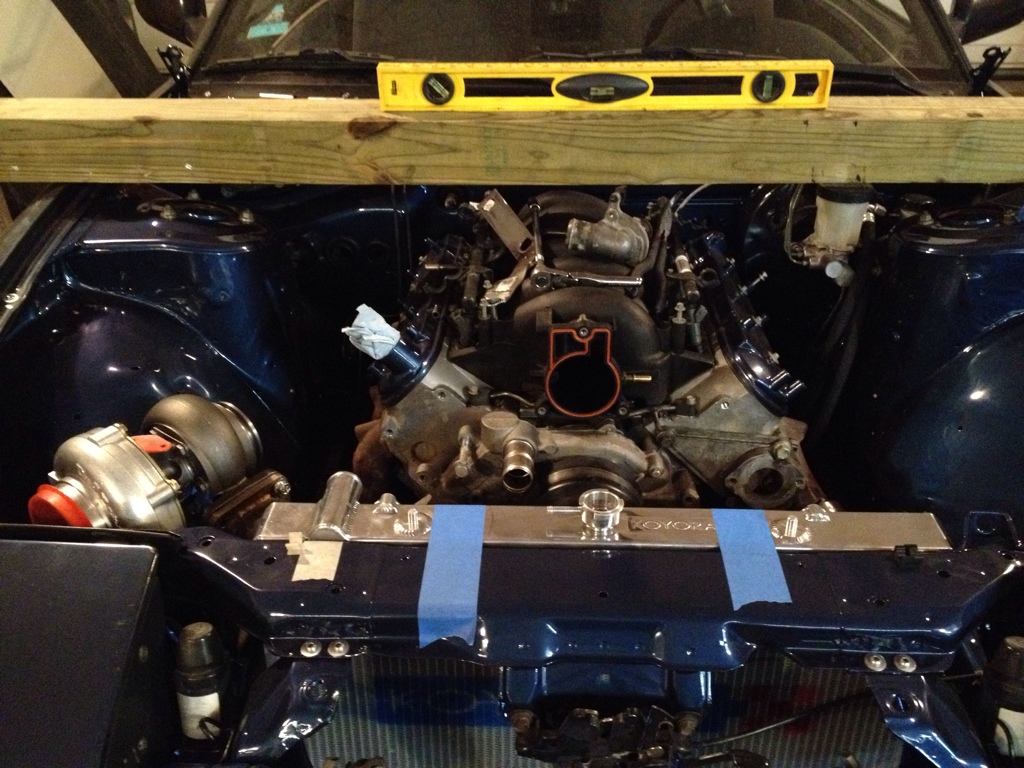
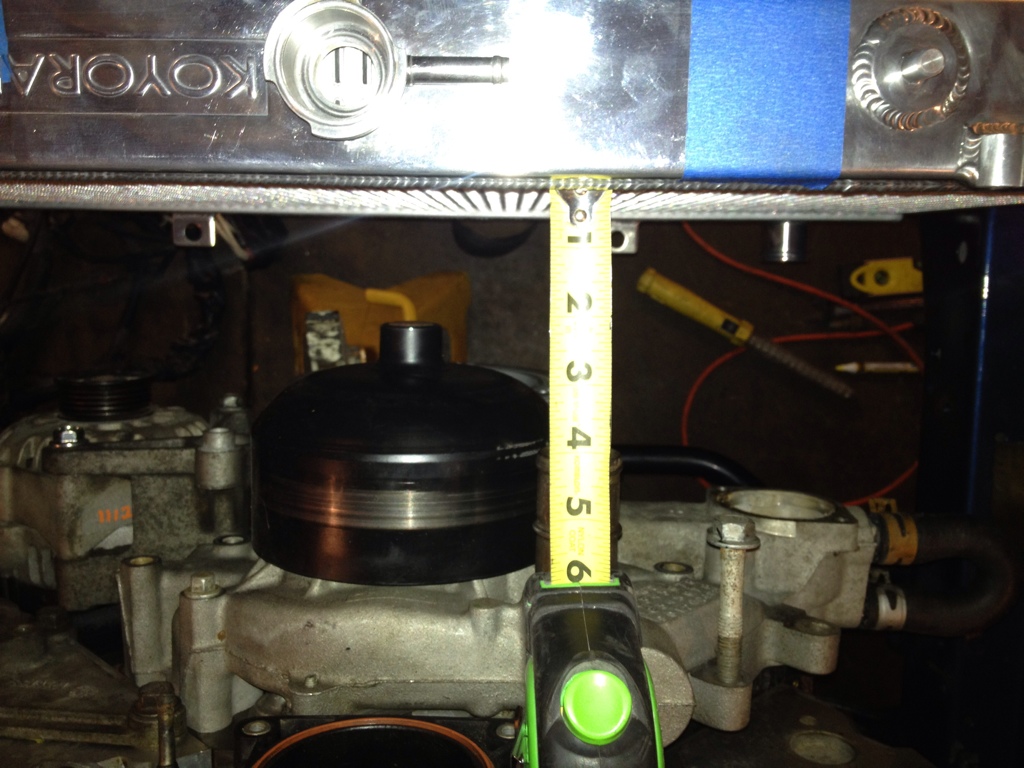
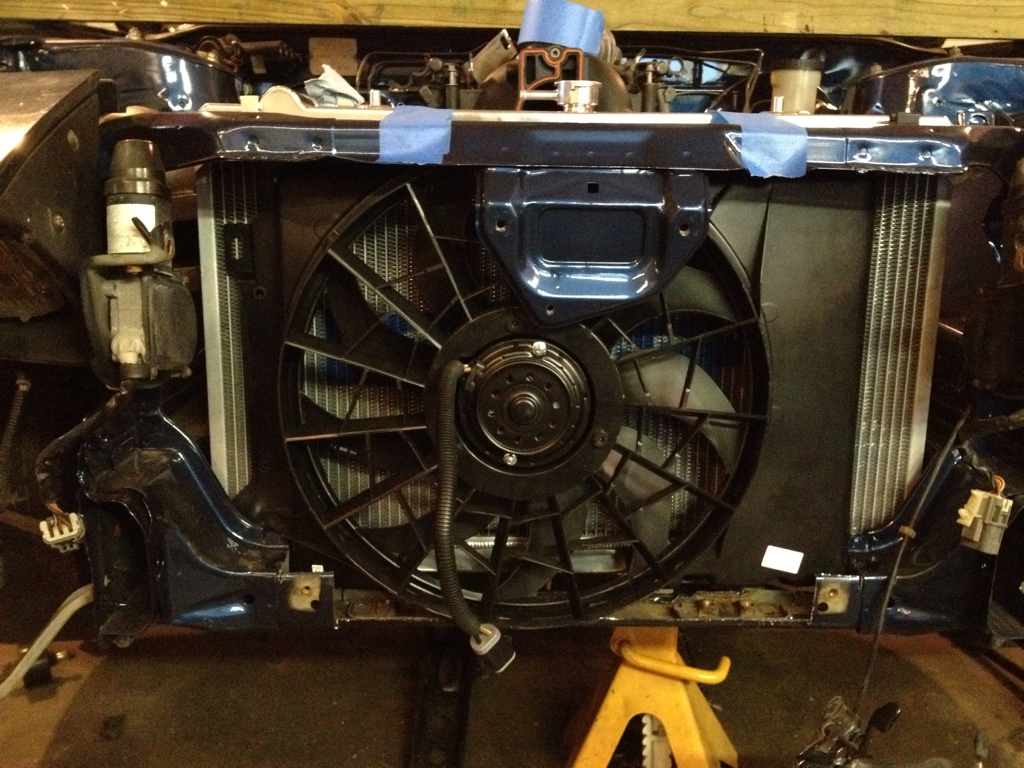
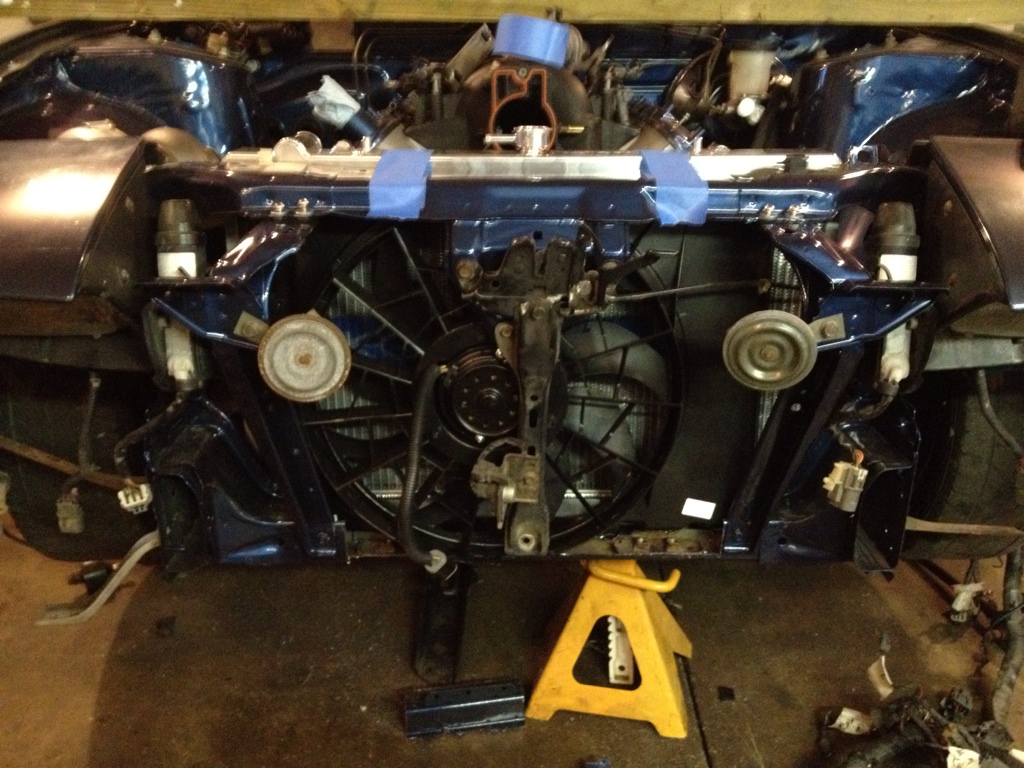
Switched directions tonight and started playing with the cooling system a little....
I have about 0 clearance between the water pump pulley and the radiator.
The fan I really liked is from a 3.8L Taurus which many RX7 guys rave about. It supposedly flows in the lower to mid 3000cfm range. The problem I am faced with is that it can only be setup as a puller (sits between engine and the radiator) and the fans are directional. By putting the fan where I did, it looks like I'm going to have to make some kind of secondary shroud in front of it to keep the air generated by forward movement out of the way of the fan (which would be a little combatitive.) I think I can make it work, and I'm more compelled to considering the extra space I have now in front of the radiator and the fan doesnt really block anything
Pissed around with the TIG again tonight for a bit...I think I'm starting to get it down...
Forgot to post some updates....we'll back date a little bit
April 16
Spent the weekend with my little one, so nothing was done out in the garage. However, I did pick myself up some nice birthday presents....
Pile o' goods...
Everlast PowerPro 164 TIG/Stick/Plasma Cutter
Got the extension cord wired up, plugs added....powered up
Put together the welder cart
Plasma and Stick torches
Got both of these over the weekend on clearance at farm & fleet for $100
Got everything together
Fooled around a little with the plasma
All of the stainless exhaust pieces should be here by Friday. Hope to make some good headway on the turbo hotside provided I can get this welding setup figured out!
April 17
Started off the evening with some scrap metal I picked up.....
I setup the welder with some rather ambiguous settings just to give it a shot....
I could only find 2% thoriated rod at the welding supply store, so I just picked up a 3 pack. I'm leaning more towards using a 2% lanthanated rod. Gonna try tomorrow to find some locally.
It didnt turn out terrible for my first time, I can see this is going to need lots of practice!
After that I cut off the manifold flanges
Mocked up...
I also was battling getting the engine level and even from side to side last week. I finally noticed that the trans was hitting the tunnel just a little on the drivers side of the upper firewall. I dropped the engine/crossmember tonight and gave it a little lovin. The engine is now right where I want it and level....
April 19
Turbo arrived...
70mm compressor
.96 AR
[/quote]April 20
I guess I'm jumping in head first at this welding thing....
Looking forward to learning this too....
April 23
The machine is pretty awesome, I am loving it so far, but it can get quite frusterating when you're used to seeing those pretty little welds on pieces you buy and trying to duplicate them with minimal success....lol
I am making some progress....I didn't get as much done over the weekend as I was hoping for
Made up some temp brackets to hold the turbo where I wanted it
Welded the 3" form to the T4 flange
Skipped some photo opportunities but I got the vband flanges welded on to the manifolds and drivers side mated up to the 2-1 collector
Pulled it out to try some welding....I suck so far
Went back with a much lower amperage to try some test beads
Tonight I started on the passenger side
Making sure I am somewhat level
After a few hours of checking, grinding, checking, grinding, and so on, I finally brought the two together
Again, underside
Test fit up some stuff
The plan is to try and use all the spare tubing I had from making this setup to better my TIG'ing. I definiately have a challenge with the thermostat housing I'll have to overcome. It doesnt run into the exhaust but it comes pretty close. I'm also not happy at all with the weld on the 3" turbo form to the 90 down....I got the 90 from a friend and it was a different gauge pipe and I couldnt figure out the best way to run the welder to join them, I'll have to do some fancy clean up work...or just header wrap it
April 24
Borrowed another junker for mock-up purposes
I went back at some TIGing tonight....starting to finally see some better results as I learn how to manipulate the arc and dip my stick
April 26
Switched directions tonight and started playing with the cooling system a little....
I have about 0 clearance between the water pump pulley and the radiator.
The fan I really liked is from a 3.8L Taurus which many RX7 guys rave about. It supposedly flows in the lower to mid 3000cfm range. The problem I am faced with is that it can only be setup as a puller (sits between engine and the radiator) and the fans are directional. By putting the fan where I did, it looks like I'm going to have to make some kind of secondary shroud in front of it to keep the air generated by forward movement out of the way of the fan (which would be a little combatitive.) I think I can make it work, and I'm more compelled to considering the extra space I have now in front of the radiator and the fan doesnt really block anything
Pissed around with the TIG again tonight for a bit...I think I'm starting to get it down...
05-03-2012, 11:08 AM
#13
On The Tree
Thread Starter
iTrader: (5)
Join Date: Jun 2007
Posts: 118
Likes: 0
Received 0 Likes
on
0 Posts
April 30
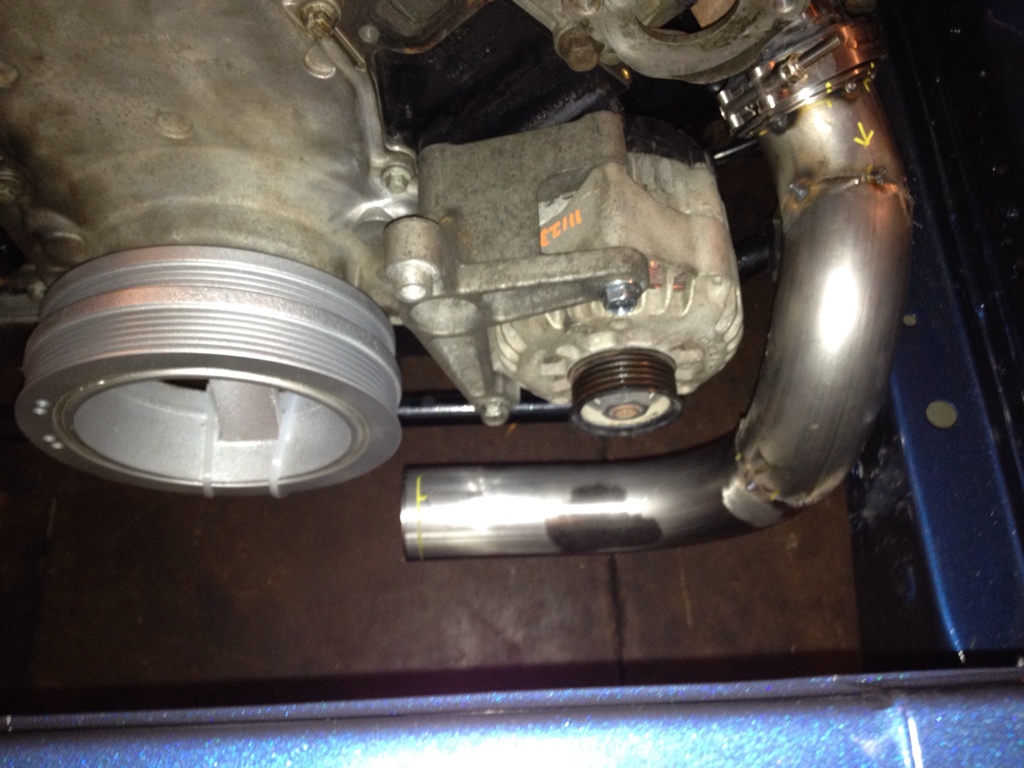
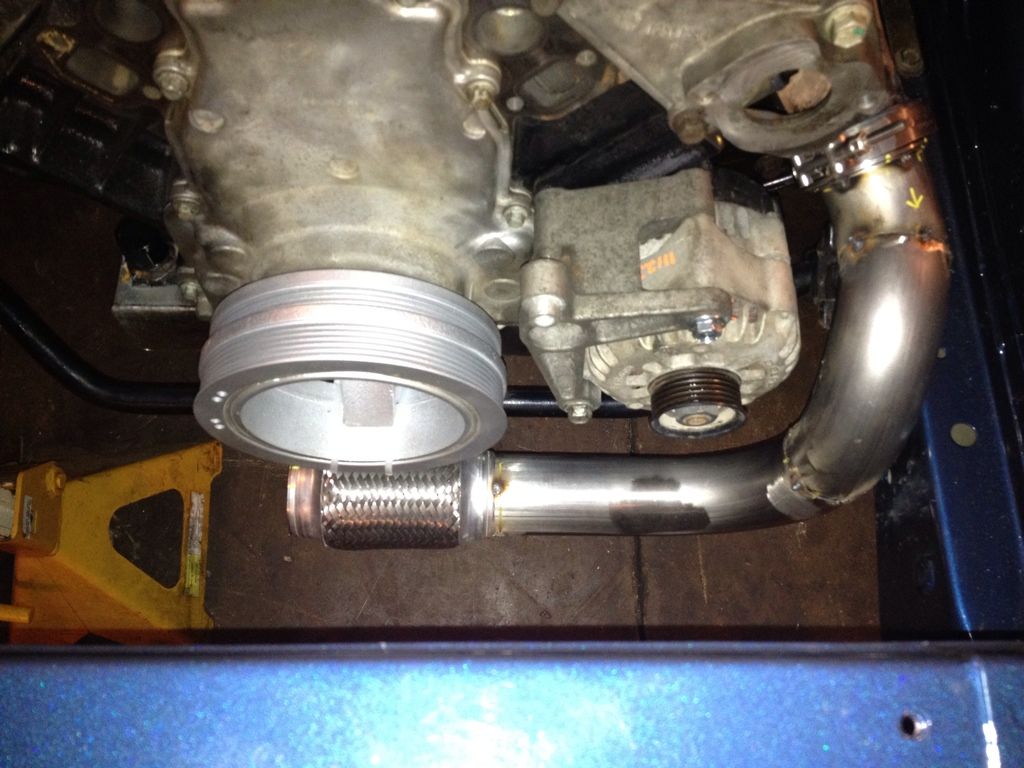
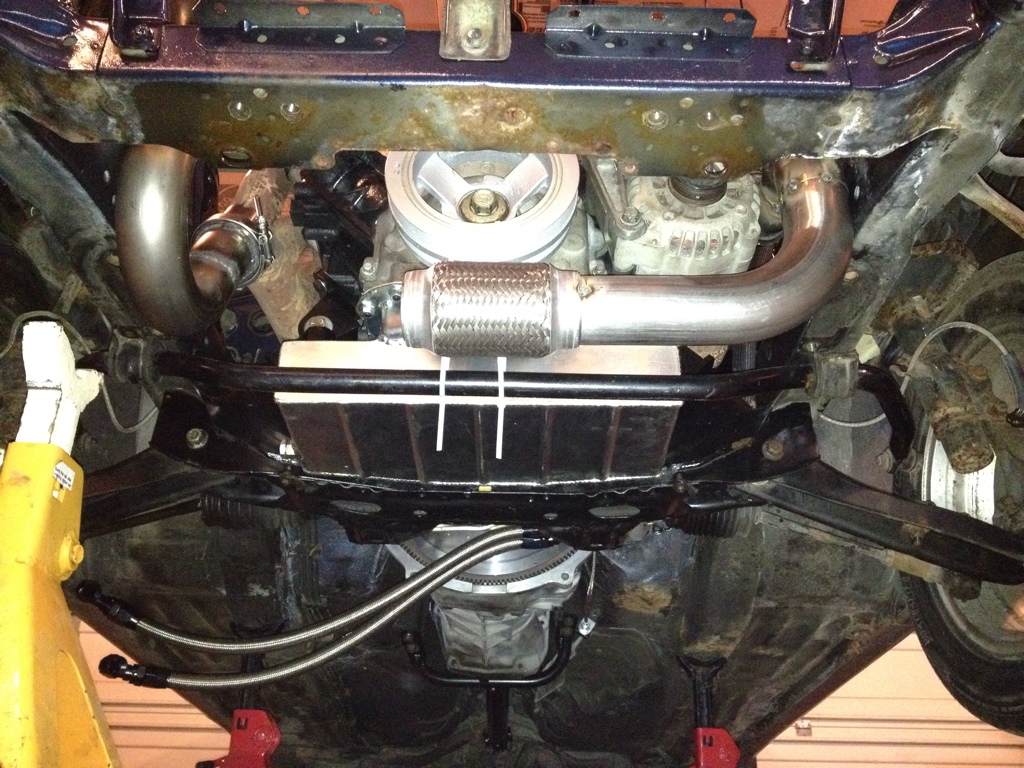
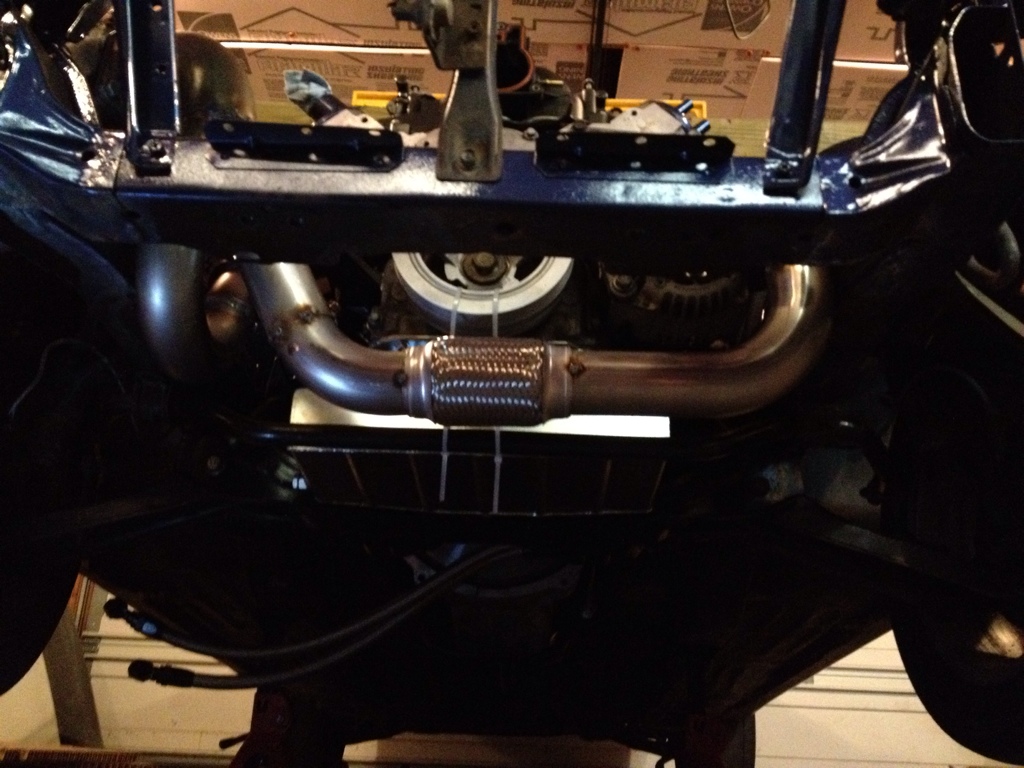
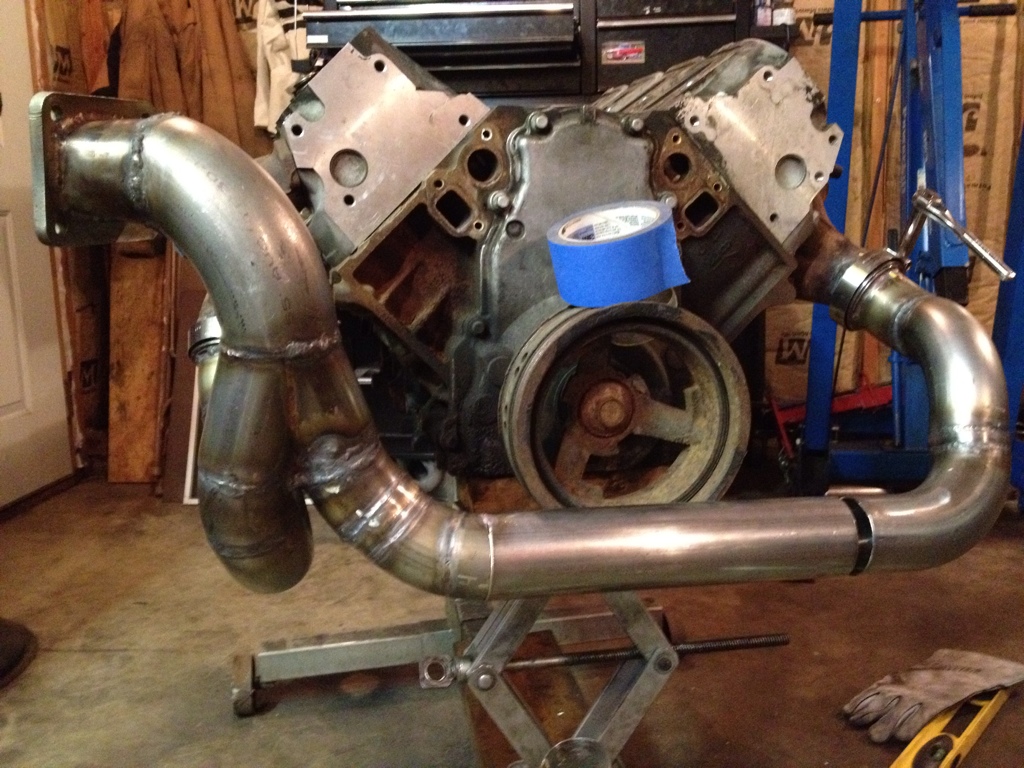
I was not happy with the way the turbo hotside was plumbed because I tried to cut as little off the pipes as possible. Due to this, the pipes wanted to hit the lower powerbars (they connect the subframe to the front core support) I would have needed to space them down about 1/2" which isnt what I wanted to do....
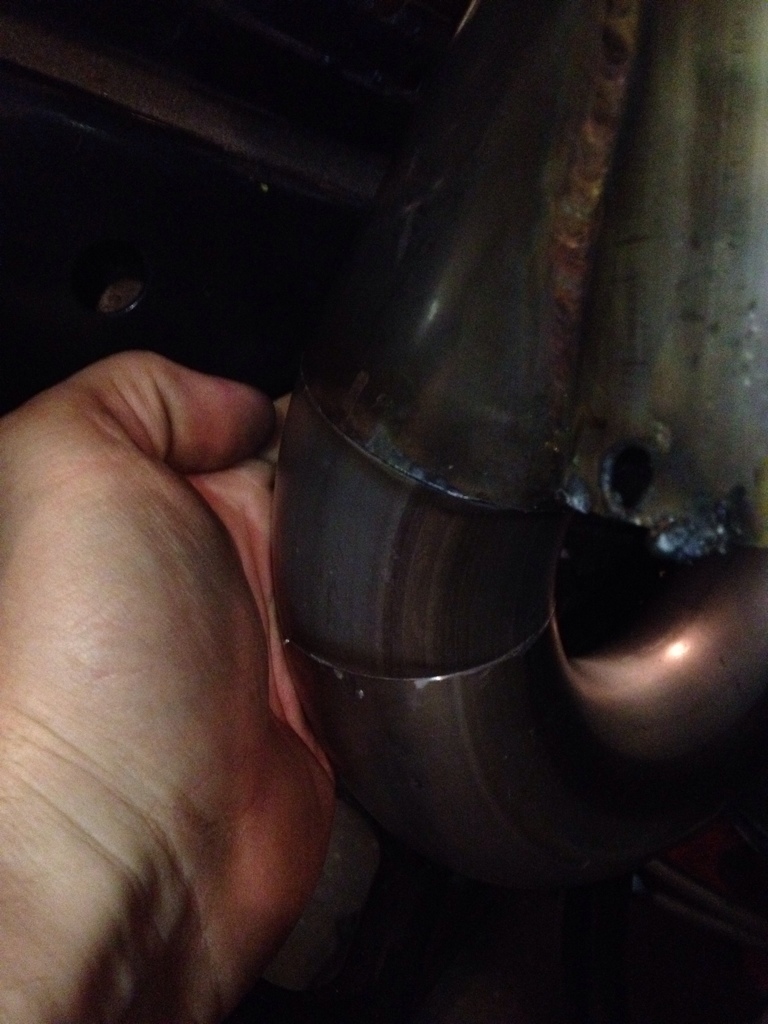
So tonight I went to work fixing that. I cut about 1/2 to 3/4 off each side of the lower "U" bend and started fitting it up
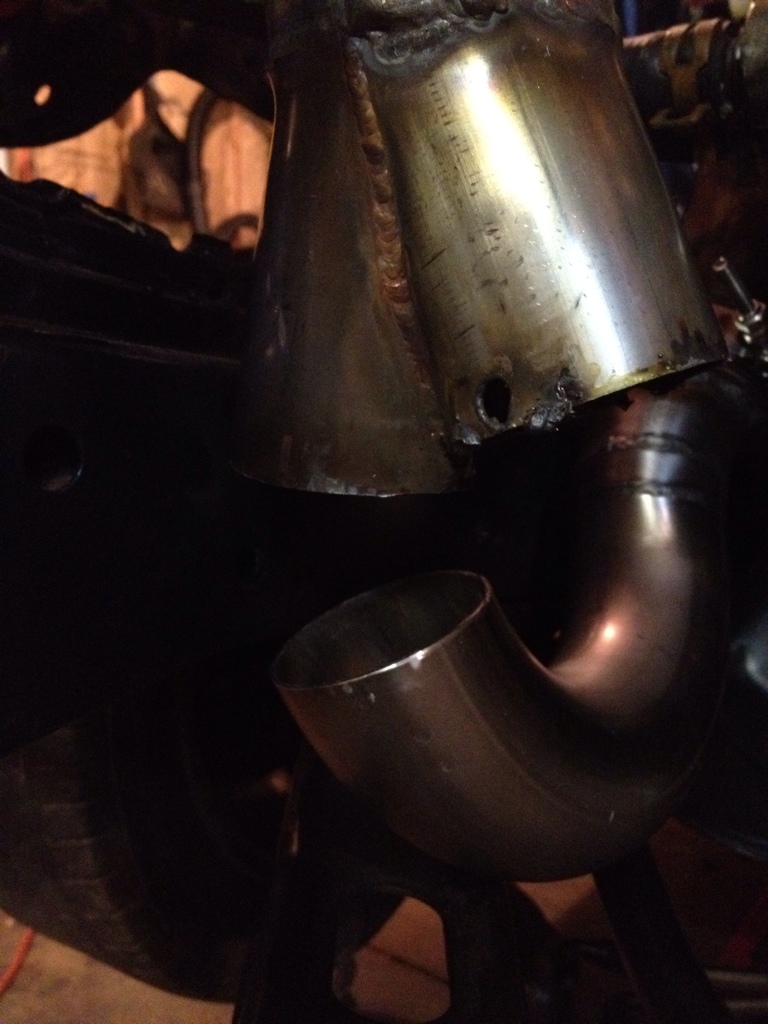
(nevermind that hole I blew through one of the pipes)
Here's the gap I had to span
I got to thinking "now how could I find the best way to mock up this pipe instead of cutting and grinding a million times. Its a rather primitive idea but I think contains a spark of genius, lol. I took this Mt. Dew bottle....
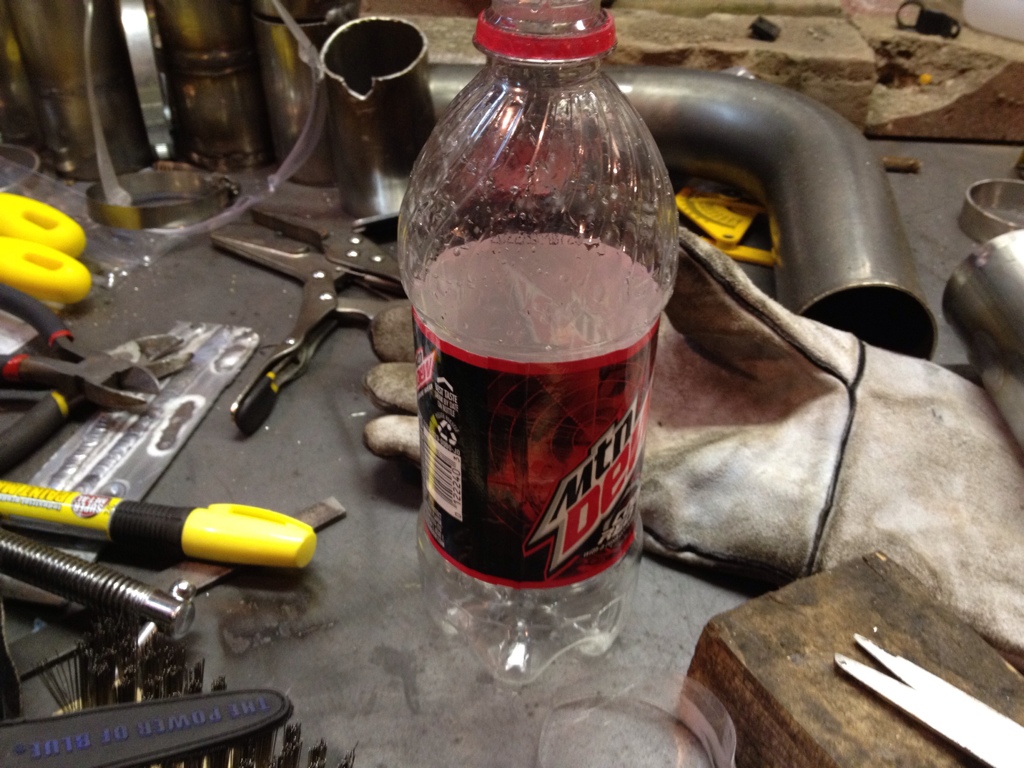
Cut it up, you can see the round part barely slips over the size pipe I'm working with....
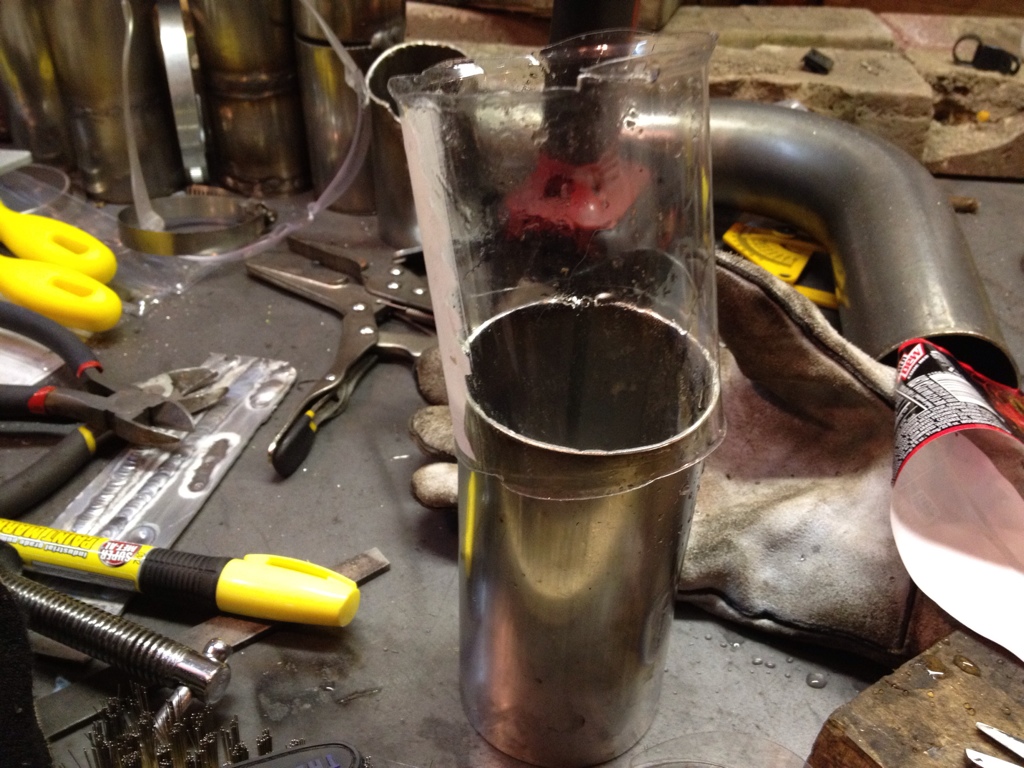
Now how to get it snug? Cut it down the middle! It naturally curls itself up making it tighter
Then I put it on the pipe
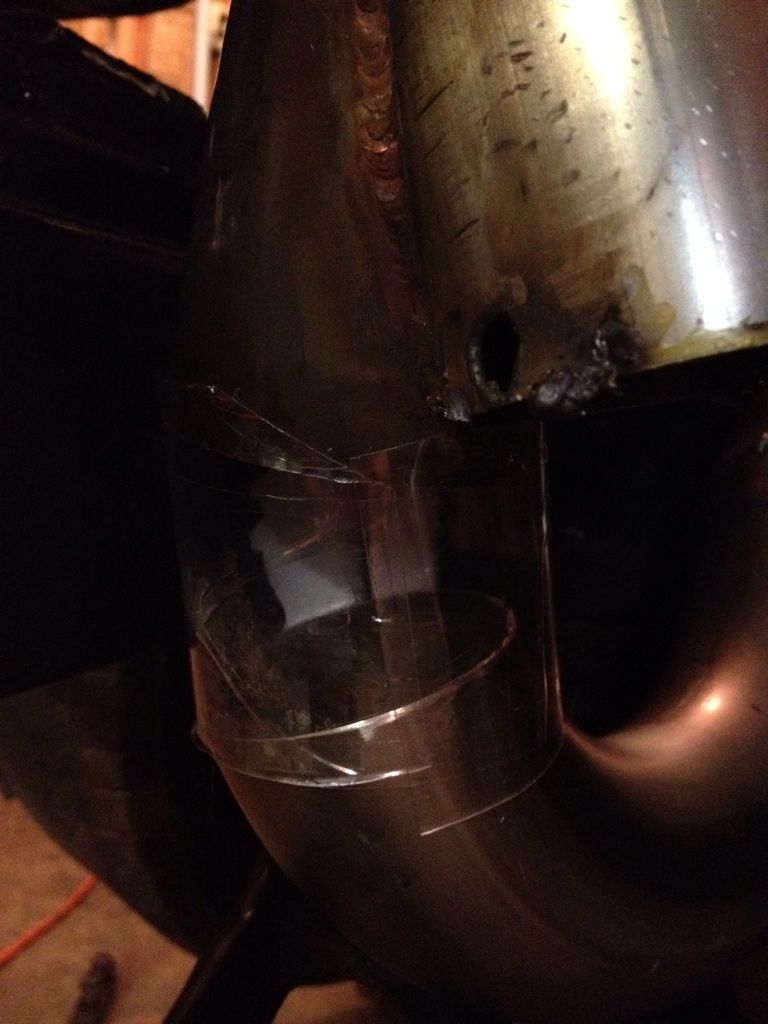
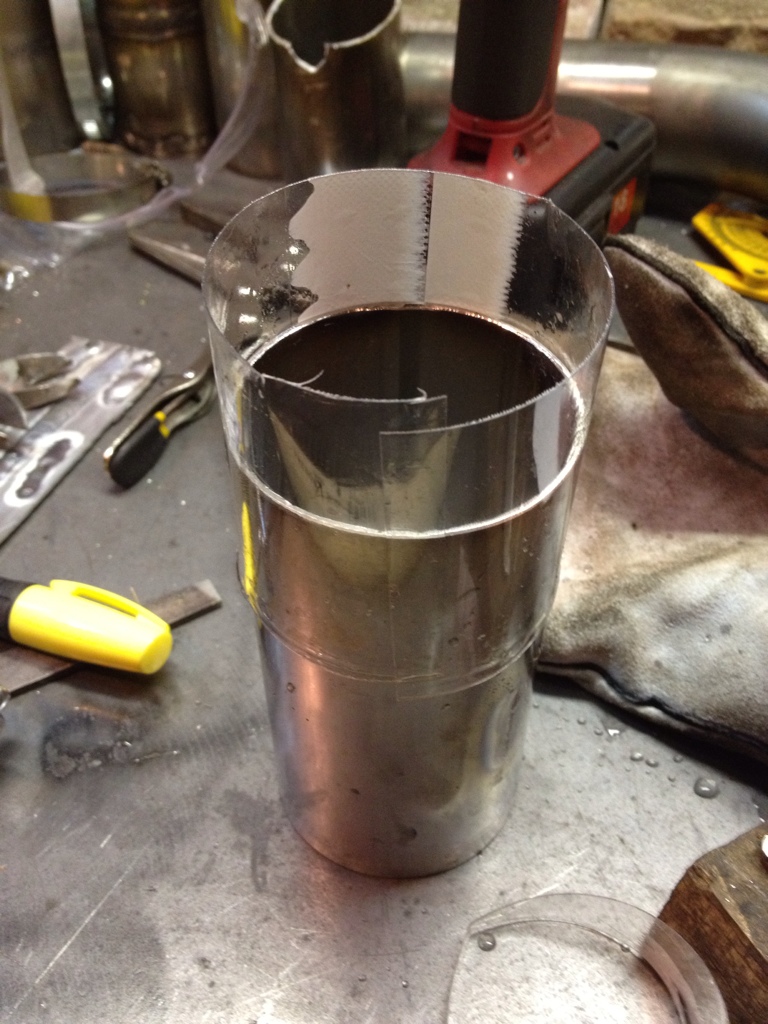
Next I traced the outlines of where I could see through the pipe (not pictured) I then wrapped it around the middle of a 90 and traced the outline of the plastic. I **** you not I made two cuts on either side of the 90 and would up with this....
All welded up
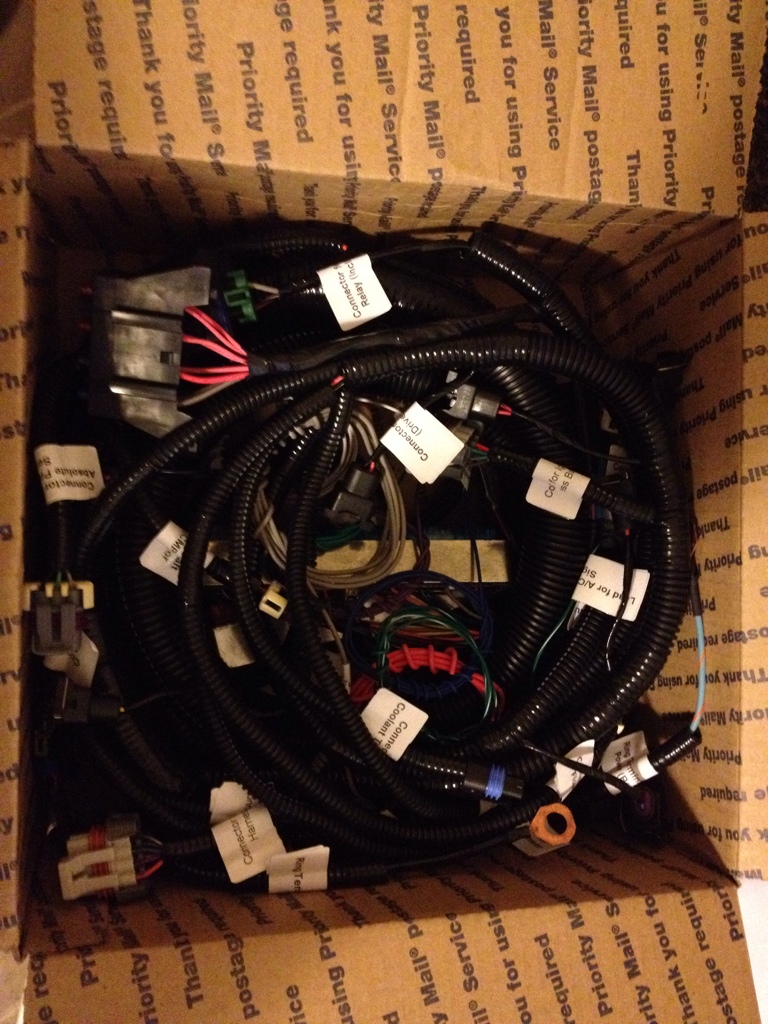
Oh yeah, the wiring harness came today!
May 2
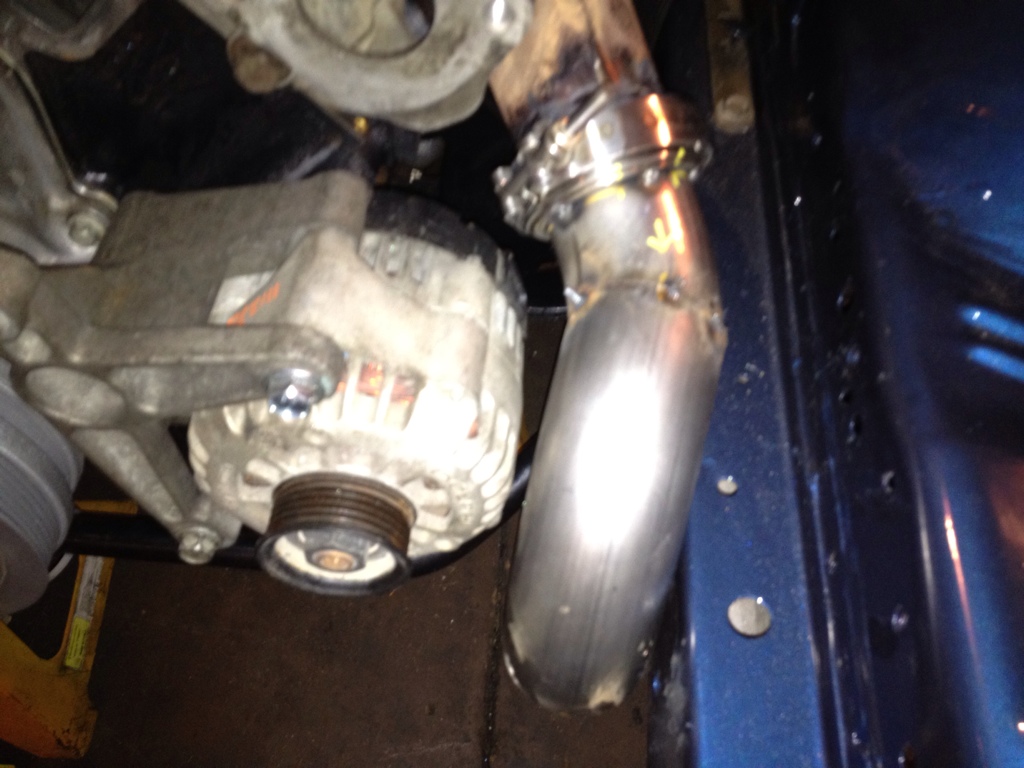
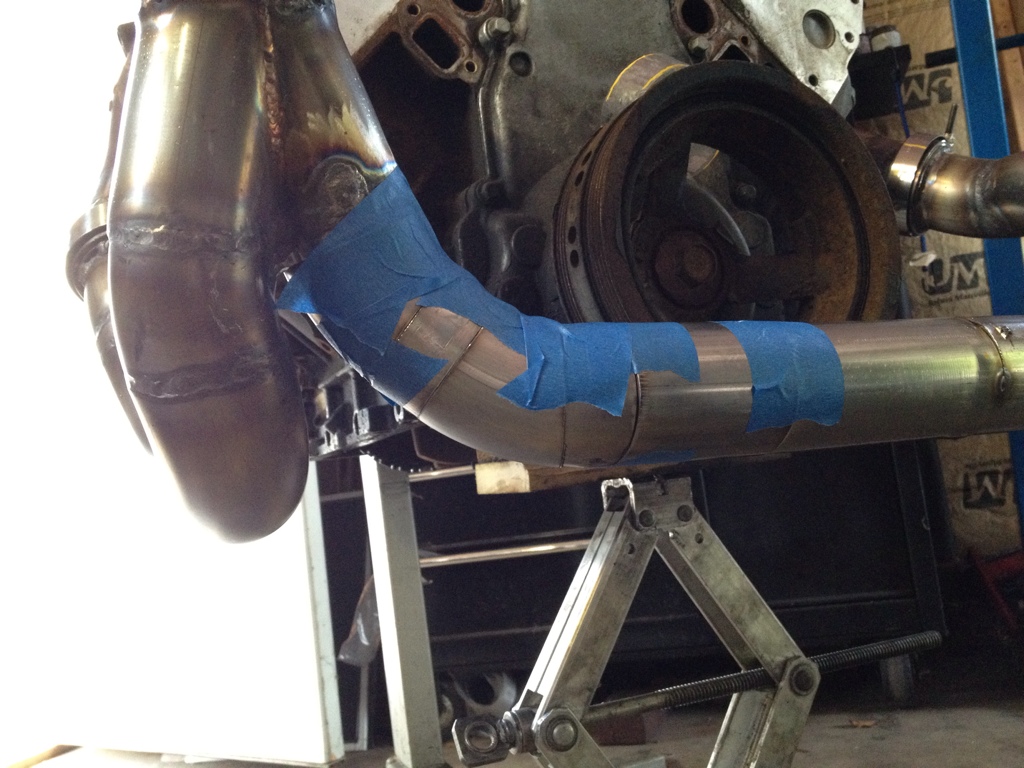
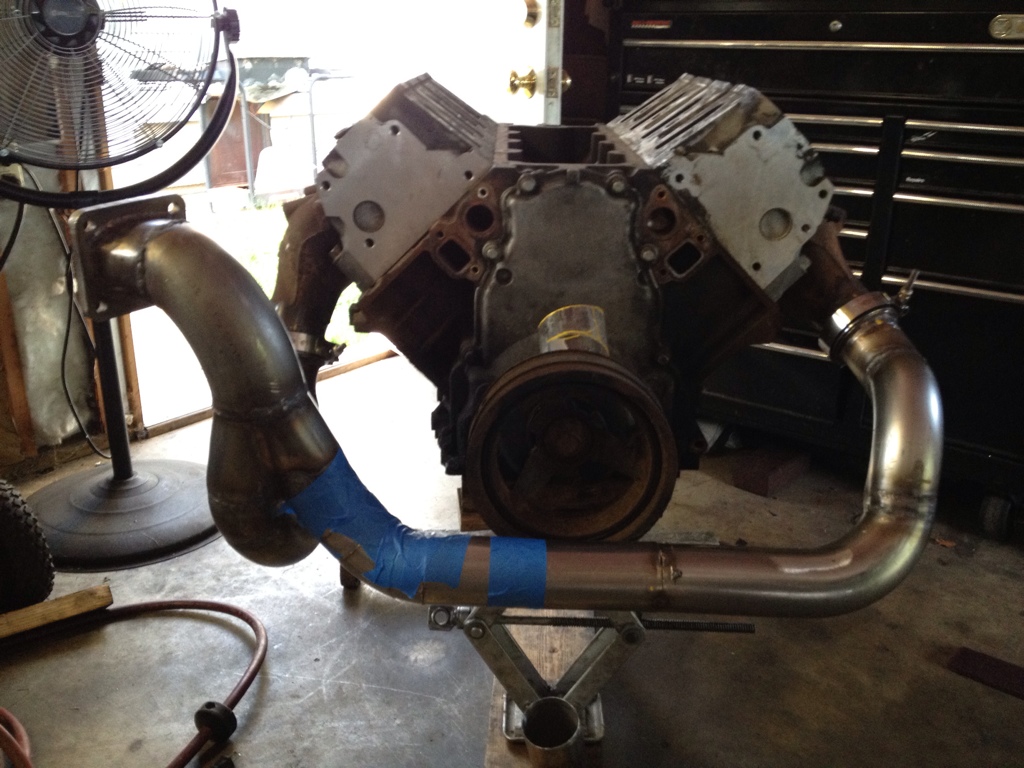
Went over to the passenger side tonight to get the routing to clear that side power bar.....
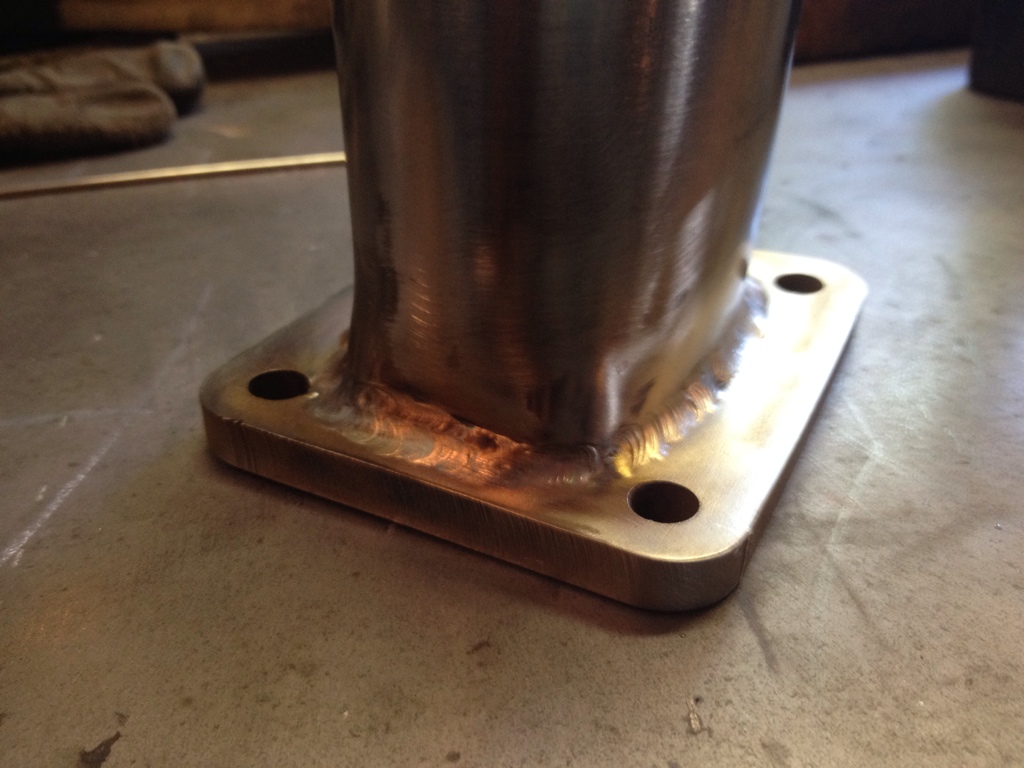
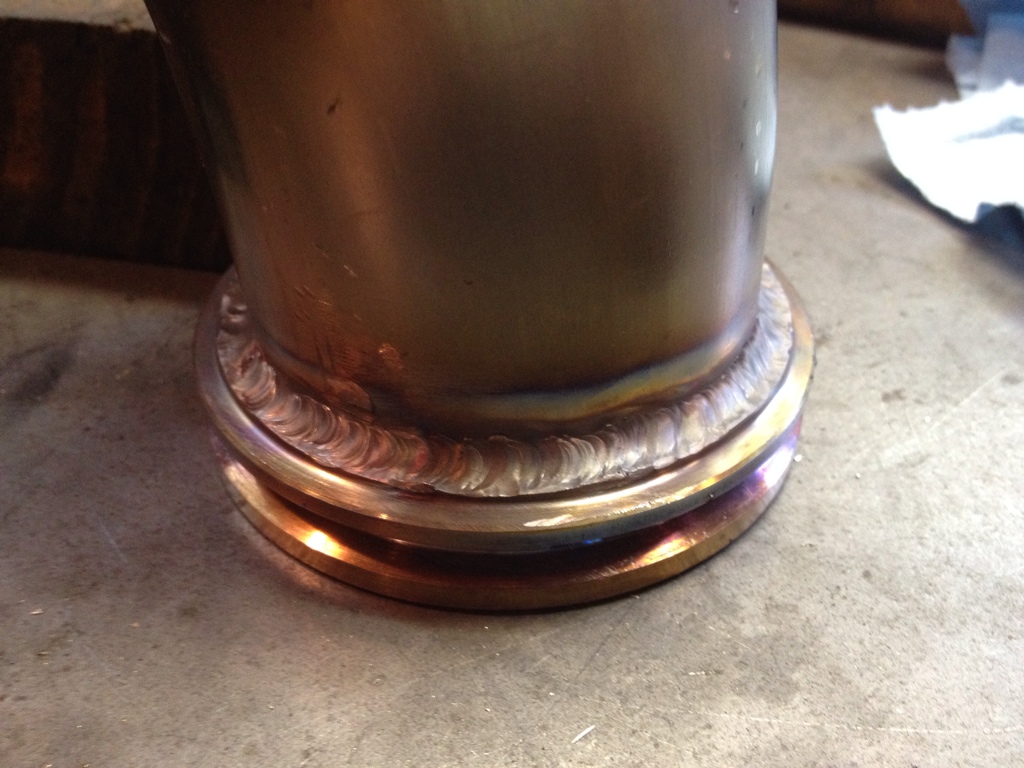
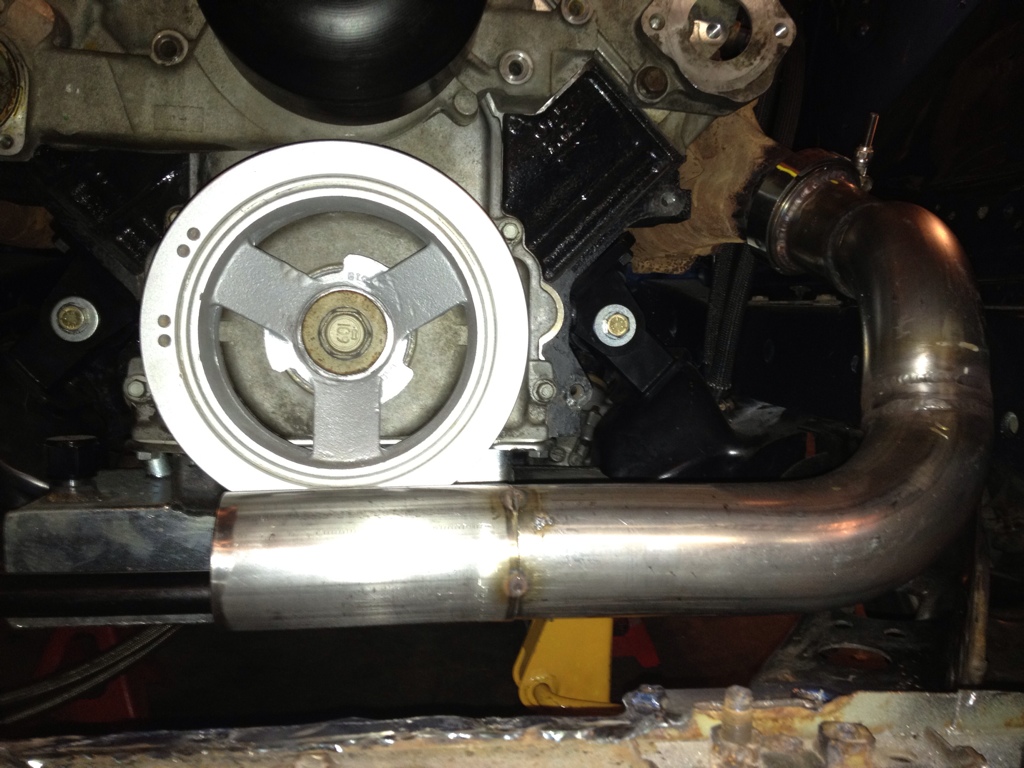
V-band welded in
Spent hours just getting this damned thing where I wanted it....guh

I was not happy with the way the turbo hotside was plumbed because I tried to cut as little off the pipes as possible. Due to this, the pipes wanted to hit the lower powerbars (they connect the subframe to the front core support) I would have needed to space them down about 1/2" which isnt what I wanted to do....
So tonight I went to work fixing that. I cut about 1/2 to 3/4 off each side of the lower "U" bend and started fitting it up
(nevermind that hole I blew through one of the pipes
)Here's the gap I had to span
I got to thinking "now how could I find the best way to mock up this pipe instead of cutting and grinding a million times. Its a rather primitive idea but I think contains a spark of genius, lol. I took this Mt. Dew bottle....
Cut it up, you can see the round part barely slips over the size pipe I'm working with....
Now how to get it snug? Cut it down the middle! It naturally curls itself up making it tighter
Then I put it on the pipe
Next I traced the outlines of where I could see through the pipe (not pictured) I then wrapped it around the middle of a 90 and traced the outline of the plastic. I **** you not I made two cuts on either side of the 90 and would up with this....
All welded up
Oh yeah, the wiring harness came today!
May 2
Went over to the passenger side tonight to get the routing to clear that side power bar.....
V-band welded in
Spent hours just getting this damned thing where I wanted it....guh
05-03-2012, 11:44 AM
#16
On The Tree
Thread Starter
iTrader: (5)
Join Date: Jun 2007
Posts: 118
Likes: 0
Received 0 Likes
on
0 Posts
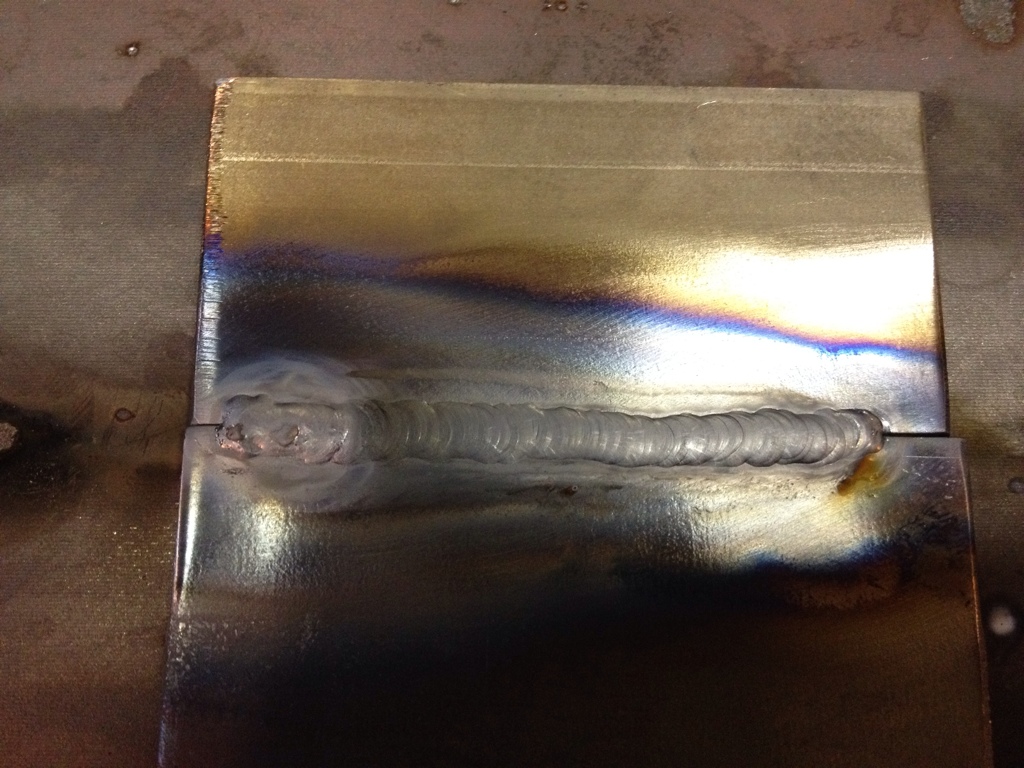
I will say that from an outsider's perspective, TIG welding is very intimidating. After getting in and around it, it is not that difficult. My biggest challenge so far is finding comfortable positions to weld with. Being uncomfortable while trying to do a weld is probably one of your biggest enemies!
05-05-2012, 12:43 AM
#18
On The Tree
Thread Starter
iTrader: (5)
Join Date: Jun 2007
Posts: 118
Likes: 0
Received 0 Likes
on
0 Posts
Made some more progress tonight. I had to get real creative with the joint on the collector that tails over to the driver's side. Initially when I was welding it at the seam by the collector it was significantly difficult to get to because its on the backside and I ended up putting a hole in the pipe. After hours of trying to fix it I said F it and cut the pipe back off and took a little different approach.
I finally got it welded on and worked on connecting the driver's side again....
I had to make several cuts to a 90 bend to get it to sit how I wanted on the bottom...I ended up with this....
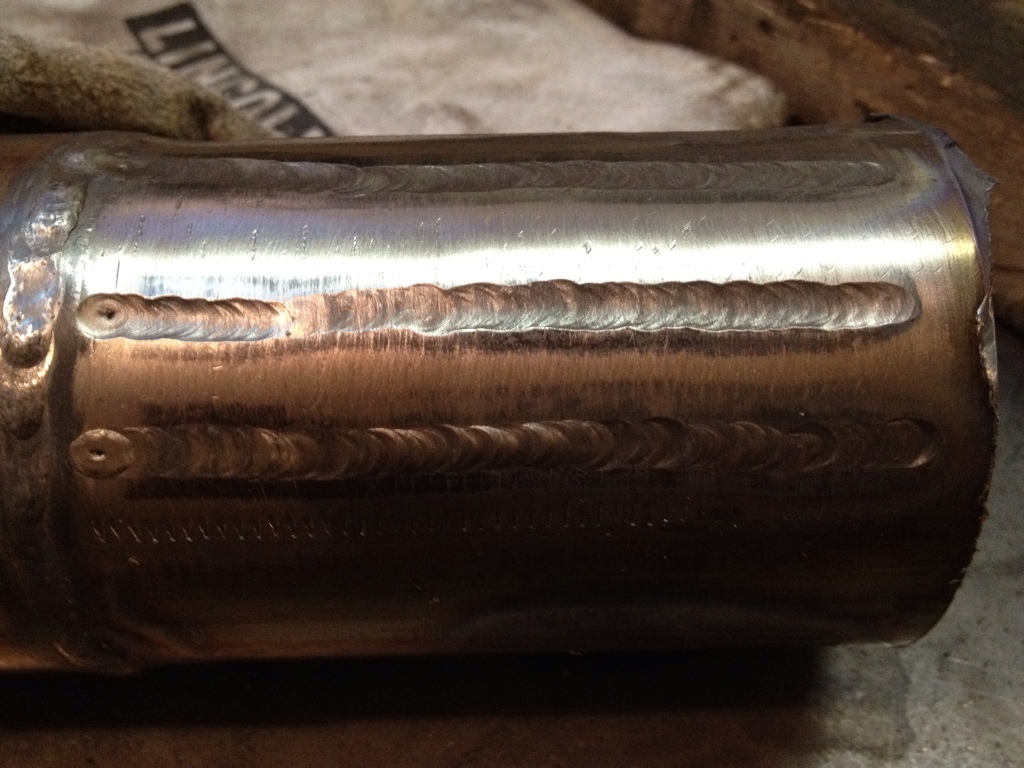
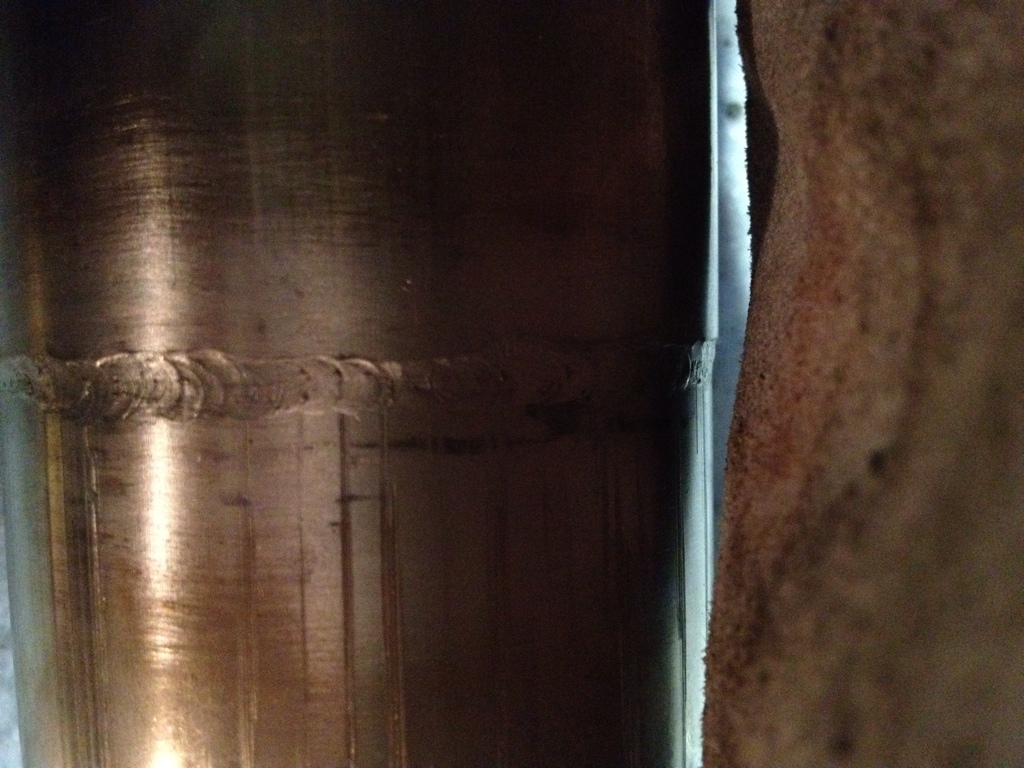
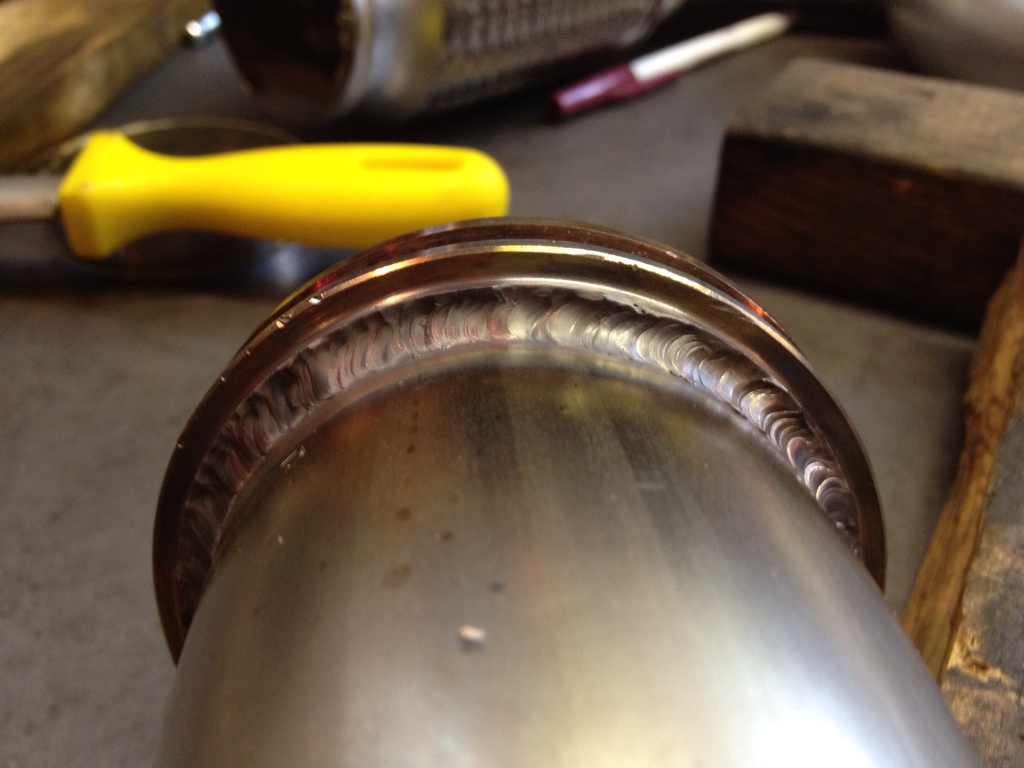
Something clicked tonight and I was jamming out on some pretty "low amperage" welds. I think it was a combination of significantly better pre-cleaning of the pipes, and ensuring all 360 degrees butted up against the pipe. On this section of pipe I used zero filler rod....
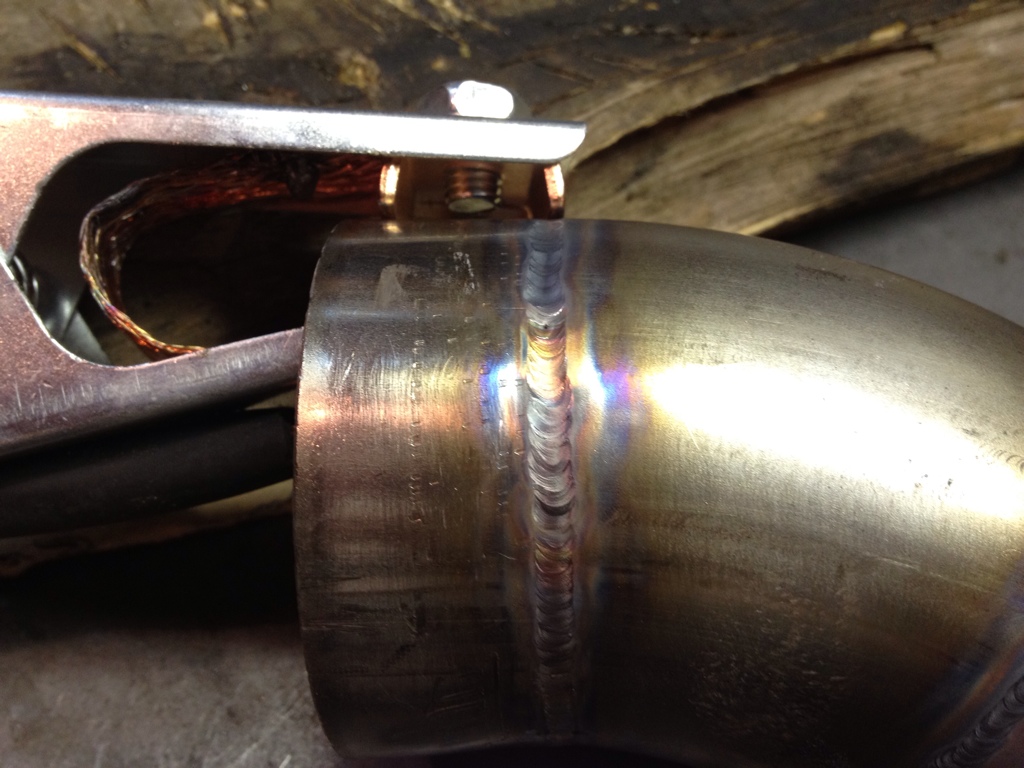
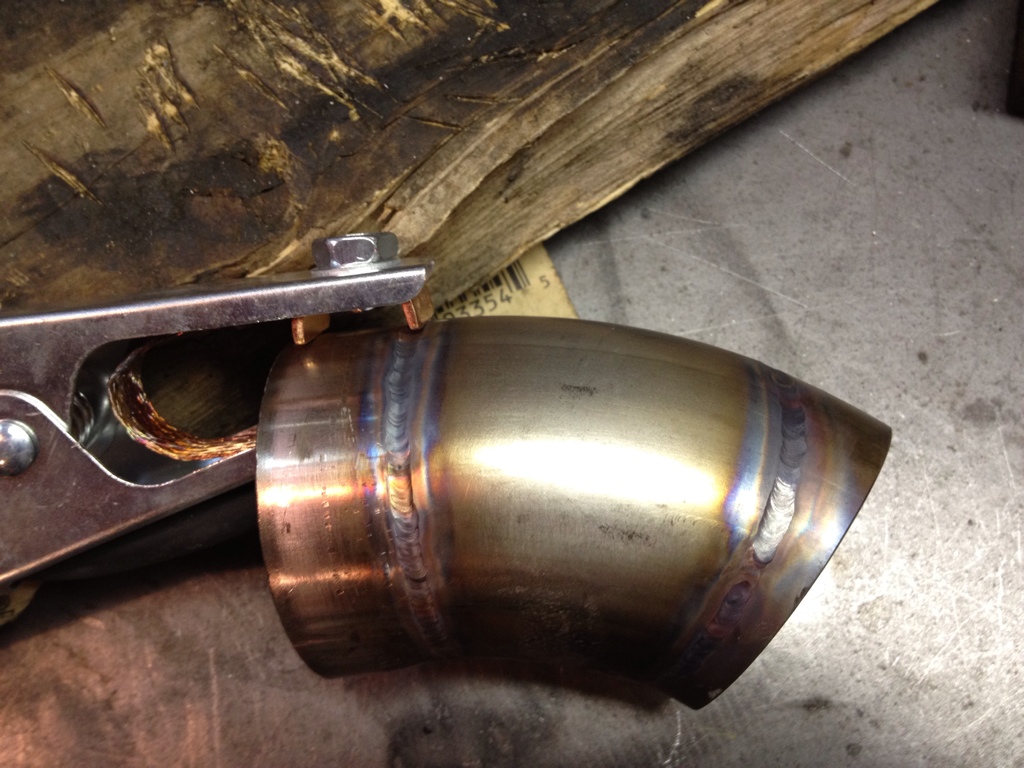
Got the crossover pipe where I wanted and sectioned for a v-band. I decided to remove the flex section and just directly connect them. I plan on putting some solid rod against the turbo flange connecting it to the bottom part of the turbo piping to brace it
Flanges wont be here until next week so I'm at a little standstill
I finally got it welded on and worked on connecting the driver's side again....
I had to make several cuts to a 90 bend to get it to sit how I wanted on the bottom...I ended up with this....
Something clicked tonight and I was jamming out on some pretty "low amperage" welds. I think it was a combination of significantly better pre-cleaning of the pipes, and ensuring all 360 degrees butted up against the pipe. On this section of pipe I used zero filler rod....
Got the crossover pipe where I wanted and sectioned for a v-band. I decided to remove the flex section and just directly connect them. I plan on putting some solid rod against the turbo flange connecting it to the bottom part of the turbo piping to brace it
Flanges wont be here until next week so I'm at a little standstill