
69 Buick GS 415/T56
 09-21-2012, 10:02 PM
#61
On The Tree
Thread Starter
Join Date: Nov 2011
Location: South east Wisconsin
Posts: 159
Likes: 0
Received 0 Likes
on
0 Posts
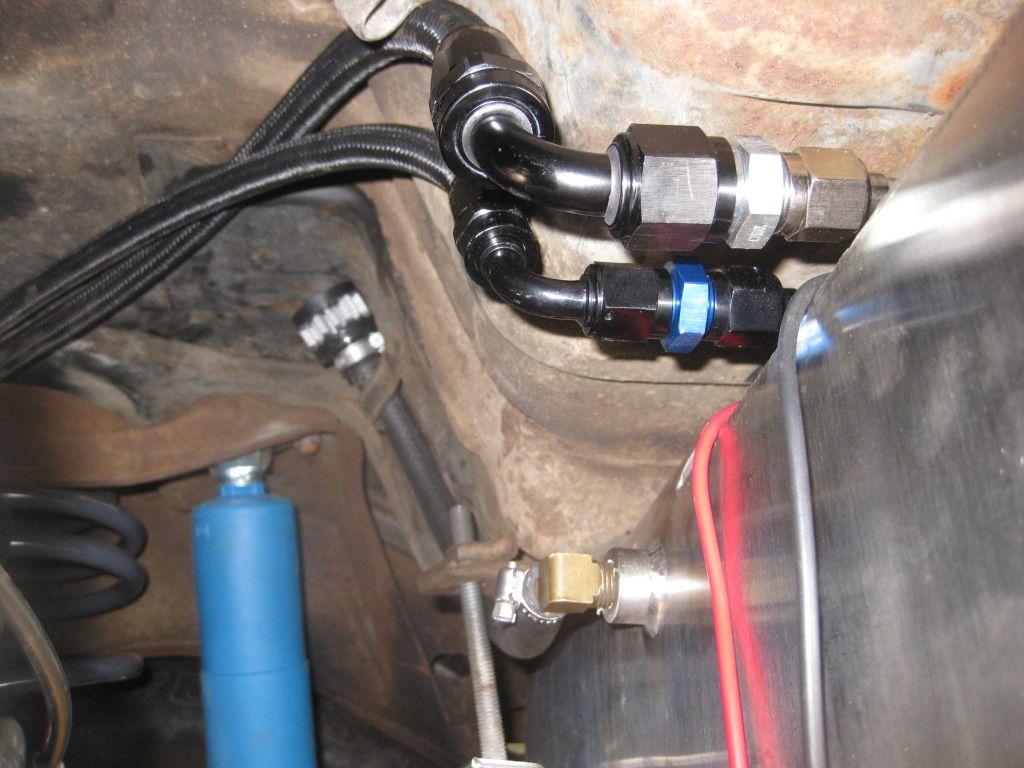
I forgot there was an issue with the tank filler neck. It was about 3" too long. And when you look at the supplied filler neck you can see that they added exactly 3" when they made it originally....Why??? Oh well just have to cut it down and re tig it.
 09-25-2012, 09:04 PM
#62
On The Tree
Thread Starter
Join Date: Nov 2011
Location: South east Wisconsin
Posts: 159
Likes: 0
Received 0 Likes
on
0 Posts
Moving along! Almost there! Been bouncing around from the harness to the fuel system to the exhaust to the clutch pedals and back and forth. The latest hiccup is that my harness is for a 24x reluctor and I have 58x which I just discovered So Now I have to either exchane the harness or else see if there is an adapter plug for the crank sensor and the cam position sensor.
So Now I have to either exchane the harness or else see if there is an adapter plug for the crank sensor and the cam position sensor.
09-25-2012, 10:42 PM
#63

Racetronix probably has something that would work. Maybe you can call holley and see what they think. Not sure if the lingenfelter box would work, but from everything I've ever read it's pretty much garbage. Good idea but poorly-executed (that's what I've read, not what I've seen, so grain-of-salt and all that).
Do you have any more pictures of how the pedal itself mounts inside? Just something I've been wondering about as I collect parts.
Do you have any more pictures of how the pedal itself mounts inside? Just something I've been wondering about as I collect parts.
09-26-2012, 07:20 AM
#64
On The Tree
Thread Starter
Join Date: Nov 2011
Location: South east Wisconsin
Posts: 159
Likes: 0
Received 0 Likes
on
0 Posts
Racetronix probably has something that would work. Maybe you can call holley and see what they think. Not sure if the lingenfelter box would work, but from everything I've ever read it's pretty much garbage. Good idea but poorly-executed (that's what I've read, not what I've seen, so grain-of-salt and all that).
Do you have any more pictures of how the pedal itself mounts inside? Just something I've been wondering about as I collect parts.
Do you have any more pictures of how the pedal itself mounts inside? Just something I've been wondering about as I collect parts.
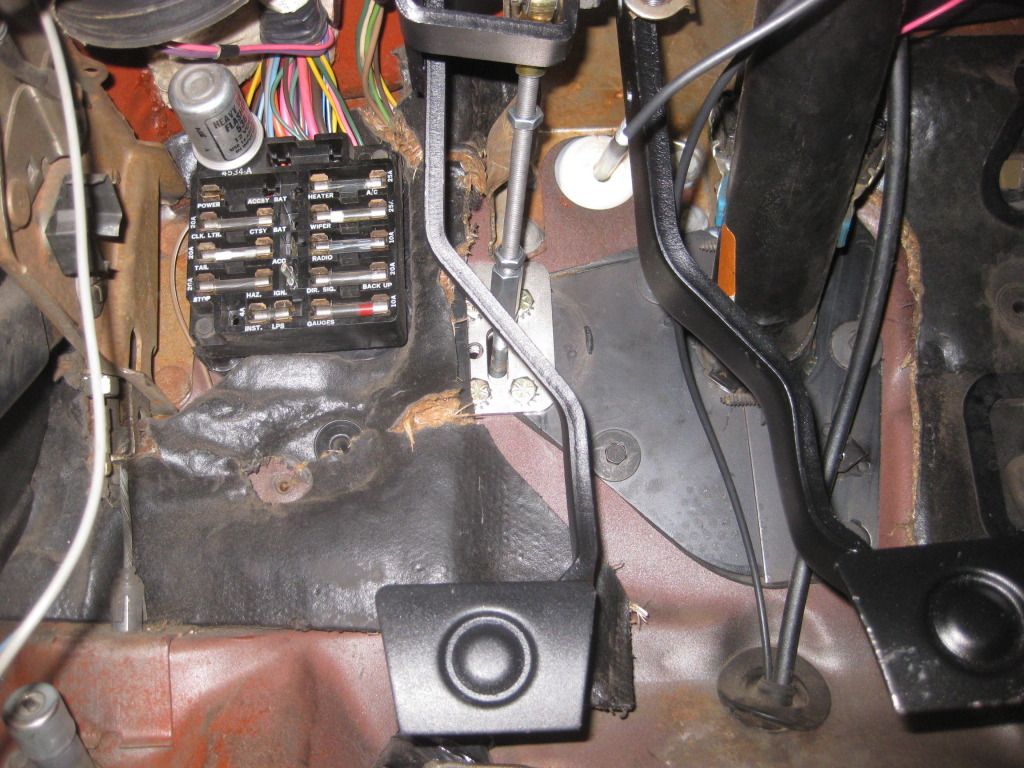
As far as the pedal assembly, my pedasl for the GS is actually different then the chevelles. American powertrain originally sent me a pedal set up for a 68-72 chevelle which was mounted different and would not work. Get in contact with them for their pedals, as soon as I recieved the right ones, it was a no brainer install.
10-06-2012, 10:30 AM
#65
On The Tree
Thread Starter
Join Date: Nov 2011
Location: South east Wisconsin
Posts: 159
Likes: 0
Received 0 Likes
on
0 Posts
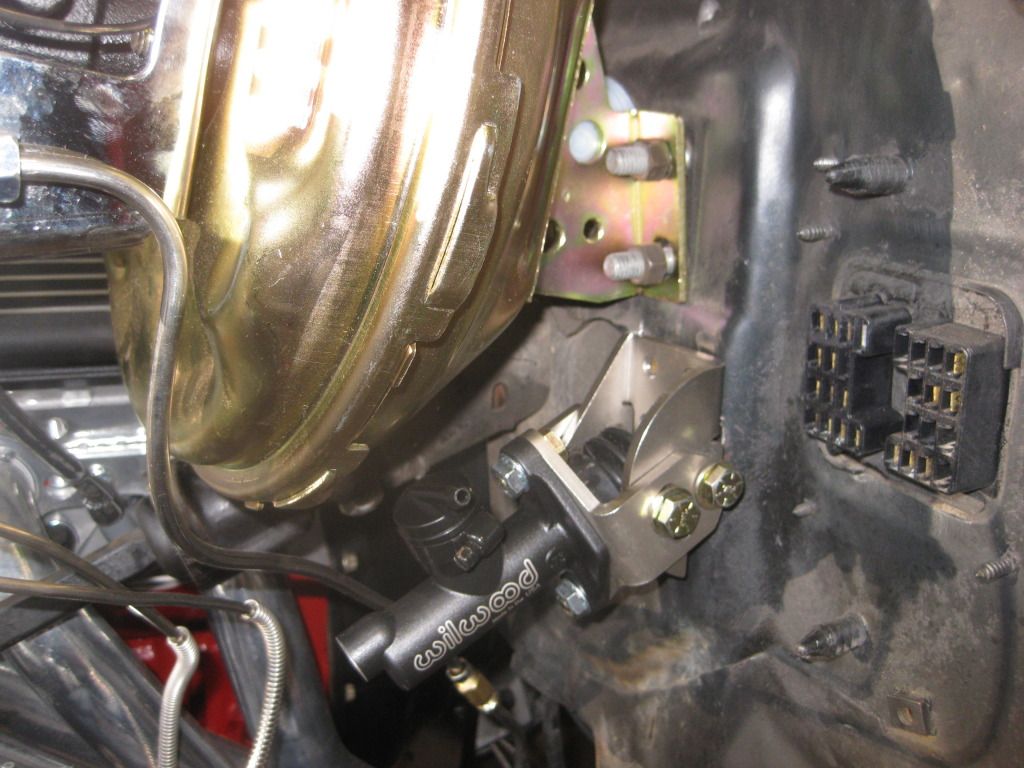
Got going on the car for a bit yesterday, its always 1 step forward 2 steps back or another 5 minute job!!! I realized that the pushrod for the clutch master was cocked slightly when tightened to the firewall and rubbed. So I unbolted it again did some trimmin and shimmin and made sure the rod was lined up properly. I even had to put an extra washer on the ball swivel mount on the clutch pedal. Anyone who is installing your clutch master, take your time!
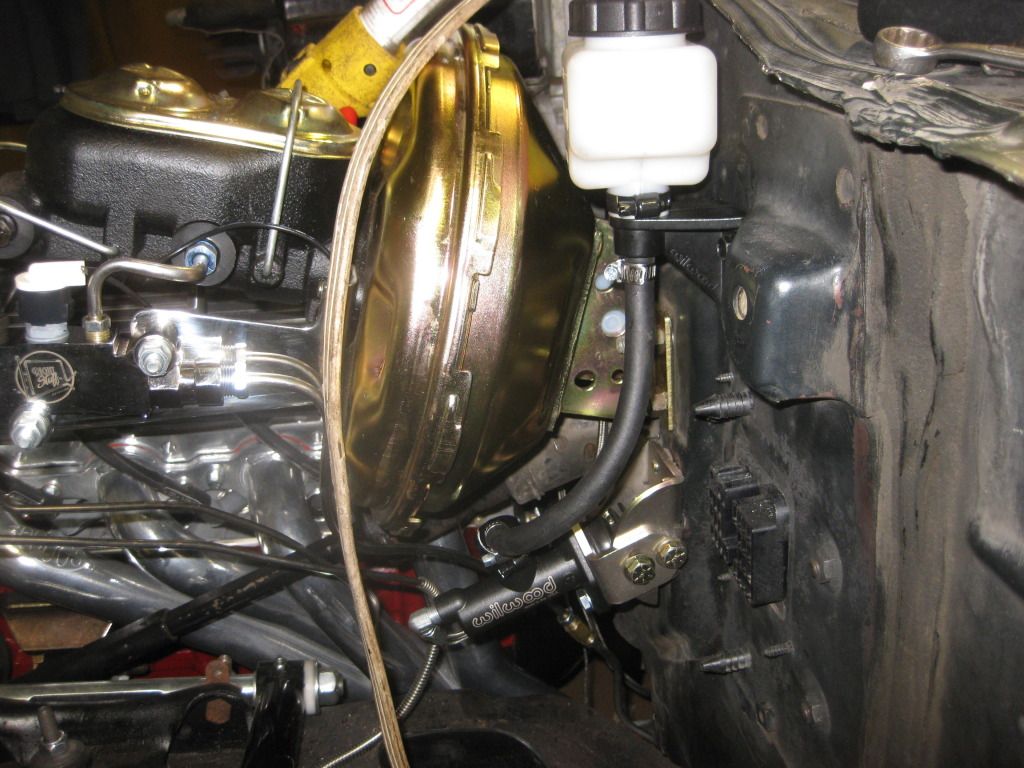
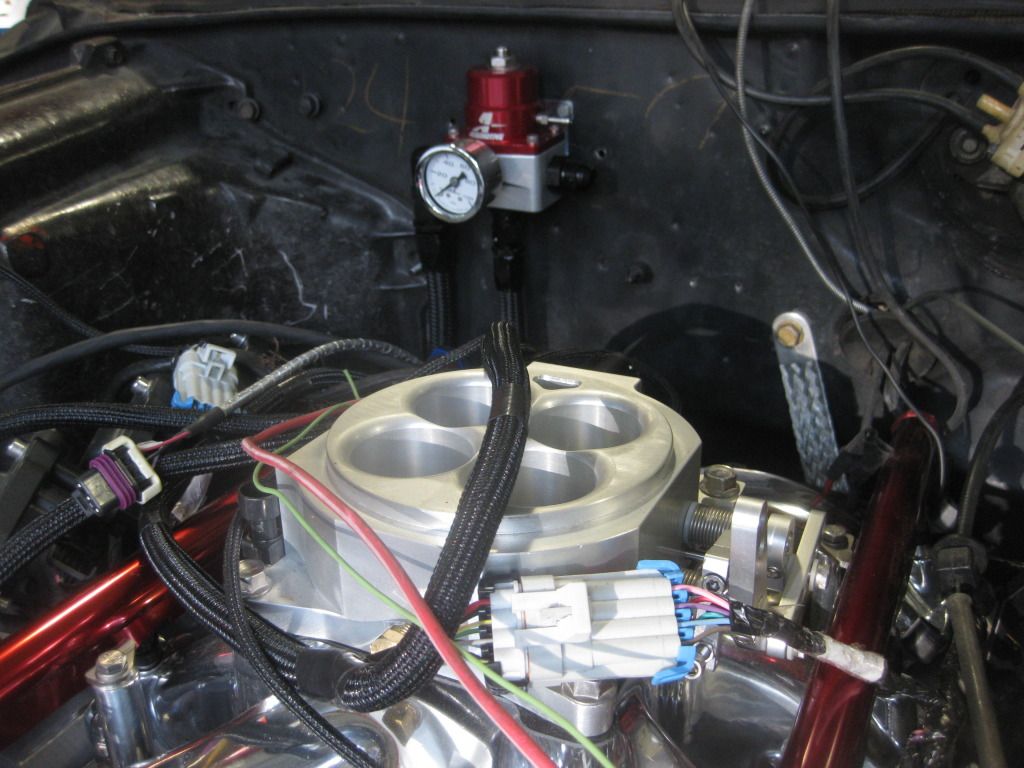
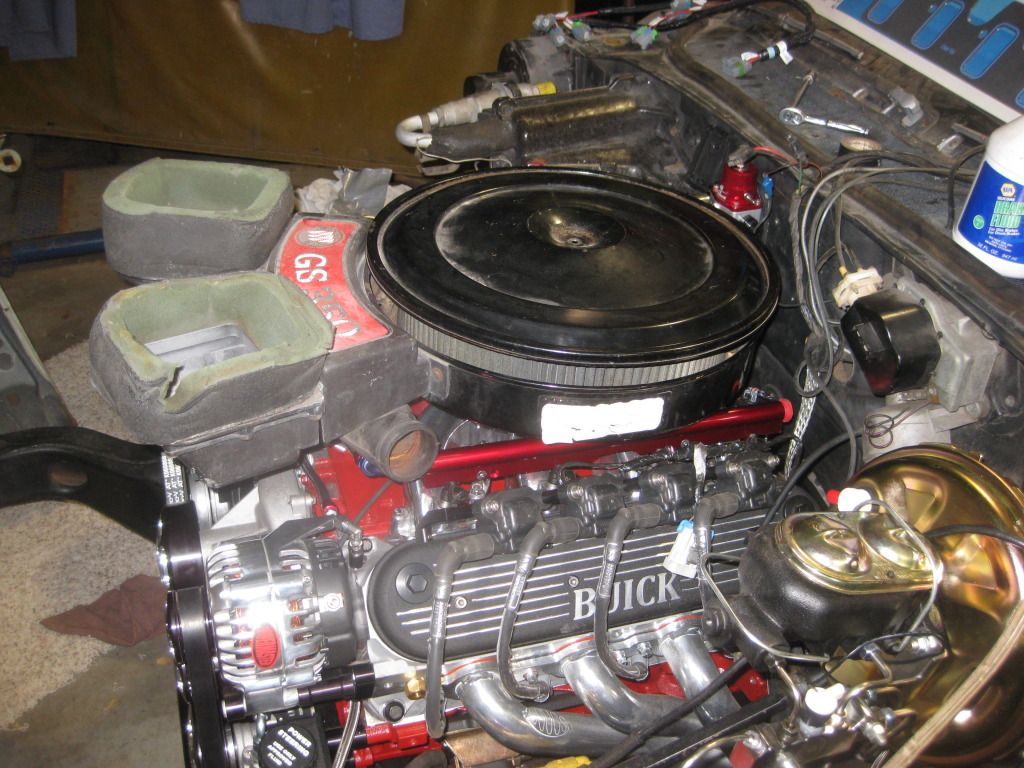
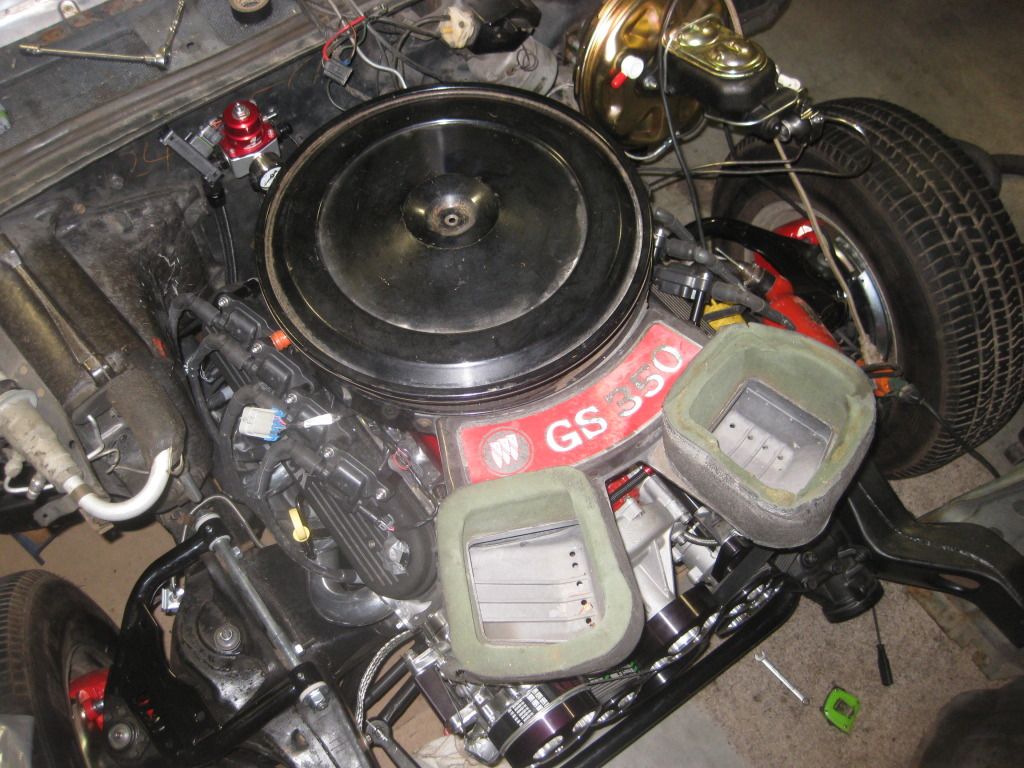
After I properly mounted the clutch master and reservoir we ran the new ls3 harness to make sure everything worked and finally bolted the intake on. Its looking good with the factory air cleaner.
You think many people will know its not really a "Buick" engine?
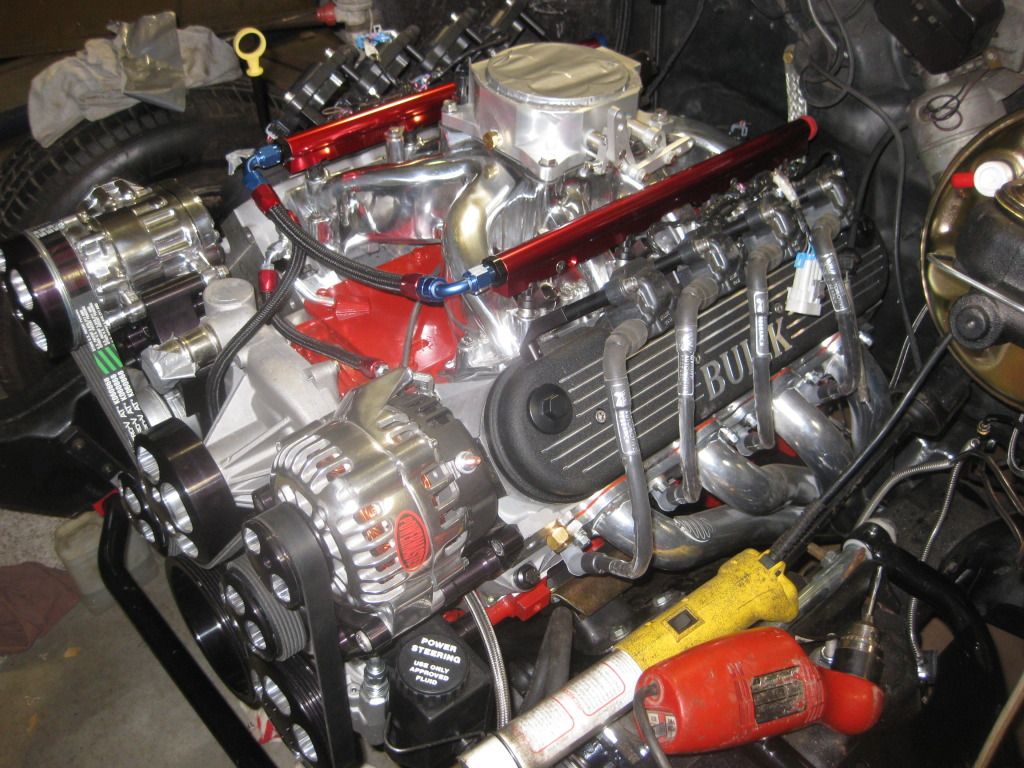
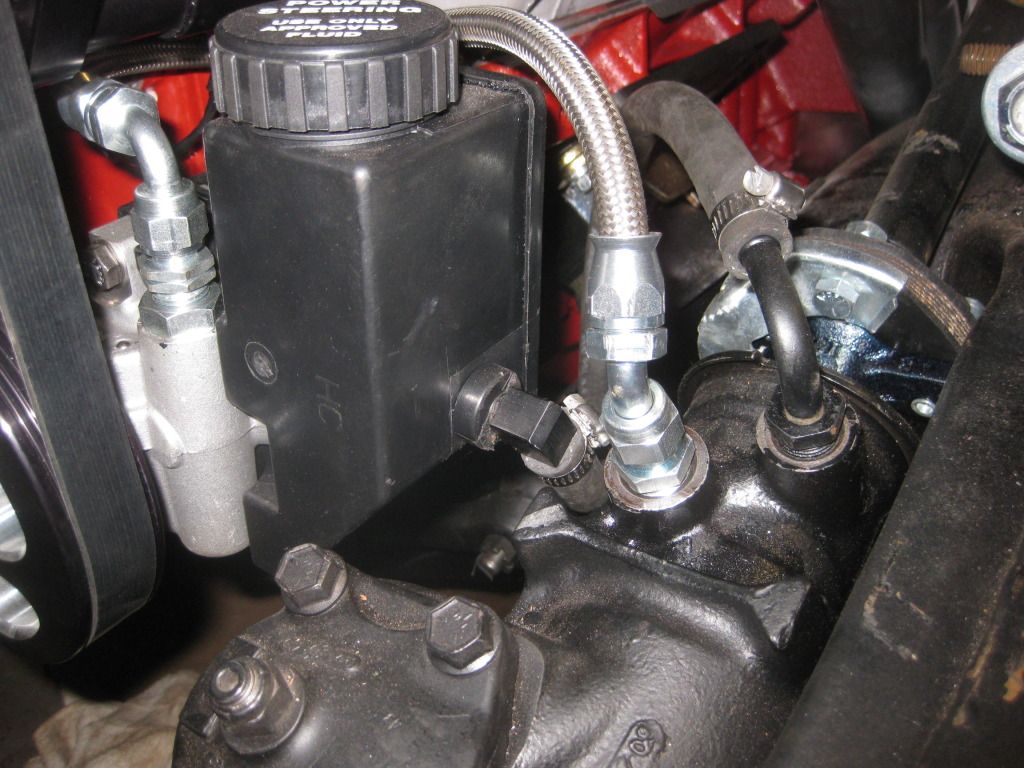
Had to custom make power steering lines, fortunately there is a speed shop in milwaukee that had the pressure fittings in stock.
After I properly mounted the clutch master and reservoir we ran the new ls3 harness to make sure everything worked and finally bolted the intake on. Its looking good with the factory air cleaner.
You think many people will know its not really a "Buick" engine?
Had to custom make power steering lines, fortunately there is a speed shop in milwaukee that had the pressure fittings in stock.
10-08-2012, 06:35 AM
#69
TECH Fanatic
OK so that did not work, lets try again.
Since the swap I have made a few upgrades:
Full UMI tubular control arms with the roto joints.
4 corner coil overs, with relocated rear shock mounts to the front of the axle.
New convertible top (not a task for the weak of heart).
Right now the car is in storage until we find a spot here, I really miss the car!
10-08-2012, 08:28 AM
#70
On The Tree
Thread Starter
Join Date: Nov 2011
Location: South east Wisconsin
Posts: 159
Likes: 0
Received 0 Likes
on
0 Posts
No worries, I always try to read as much A body threads as I can. I lie what you have done with the goat. How much power are you making with that magnacharger?
10-08-2012, 09:44 PM
#72
On The Tree
Thread Starter
Join Date: Nov 2011
Location: South east Wisconsin
Posts: 159
Likes: 0
Received 0 Likes
on
0 Posts
The clutch master was purchased from American Powertrain, it was in their hydraboost clutch kit, Thats the best I could tell ya without looking at it(car is at the shop).
10-09-2012, 06:00 AM
#73
TECH Fanatic
I am having technical difficulties with the photo uploads, no surprise there. Power is an unknown at this point, Magnasun estimates 550, having had more powerful engines in the past, I think they are pretty close. The plan is to do some tuning next spring to sort the trans shift patterns.
10-09-2012, 08:01 PM
#75
On The Tree
Thread Starter
Join Date: Nov 2011
Location: South east Wisconsin
Posts: 159
Likes: 0
Received 0 Likes
on
0 Posts
No sure if this ok to post a link or not but here is your one stop shop for manual transmissions.
http://americanpowertrain.com/
http://americanpowertrain.com/
10-09-2012, 08:24 PM
#76
On The Tree
Thread Starter
Join Date: Nov 2011
Location: South east Wisconsin
Posts: 159
Likes: 0
Received 0 Likes
on
0 Posts
Did some more wiring today and put the front clip on. Went to put my new aluminum radiator in and discovered(had it in a box since I received it) that it was not the dual pass that I ordered with both inlet and outlet on the pas side. So I called Jason Dillon at dillon radiators and he is sending me out the right one. I also requested that a 3/8 pipe thread bung be installed for the temp sensor sender to activate my fans. Is this a good spot to put it, the fans activate at 180 and shut off at 170. The problem is that both heads are used already, passenger side has the temp sensor for the engine harness, the drivers side has the sender for my electric temp gauge.
I bought the auto meter ls adapter for the temp sender. It has the metric thread that threads into the head and is necked down to an 1/8" npt thread. My Sun Pro electric temp guage has the 1/8" npt thread sender but the sender part that feeds into the head through the adapter would not fit through the adapter. So I had to drill out the adapter with a 21/64 bit to clear the sender, another size bigger and the threads for the 1/8 npt would have been damaged.
What have others done for there temp gauges and fan temp sensors? Maybe I will start a new thread on this one.
So I called Jason Dillon at dillon radiators and he is sending me out the right one. I also requested that a 3/8 pipe thread bung be installed for the temp sensor sender to activate my fans. Is this a good spot to put it, the fans activate at 180 and shut off at 170. The problem is that both heads are used already, passenger side has the temp sensor for the engine harness, the drivers side has the sender for my electric temp gauge.I bought the auto meter ls adapter for the temp sender. It has the metric thread that threads into the head and is necked down to an 1/8" npt thread. My Sun Pro electric temp guage has the 1/8" npt thread sender but the sender part that feeds into the head through the adapter would not fit through the adapter. So I had to drill out the adapter with a 21/64 bit to clear the sender, another size bigger and the threads for the 1/8 npt would have been damaged.
What have others done for there temp gauges and fan temp sensors? Maybe I will start a new thread on this one.
10-09-2012, 08:42 PM
#77

I am using my E38 ECM to turn my fans on and off through relays. I have a 3rd relay that is controlled by the A/C switch and will turn on one fan anytime the A/C compressor is activated.
10-09-2012, 09:28 PM
#78
On The Tree
Thread Starter
Join Date: Nov 2011
Location: South east Wisconsin
Posts: 159
Likes: 0
Received 0 Likes
on
0 Posts
I would assume that holley has that option for their harness, I do not have it though. So I need to explore other options, just another 5 minute job!
10-10-2012, 11:23 PM
#79
On The Tree
Thread Starter
Join Date: Nov 2011
Location: South east Wisconsin
Posts: 159
Likes: 0
Received 0 Likes
on
0 Posts
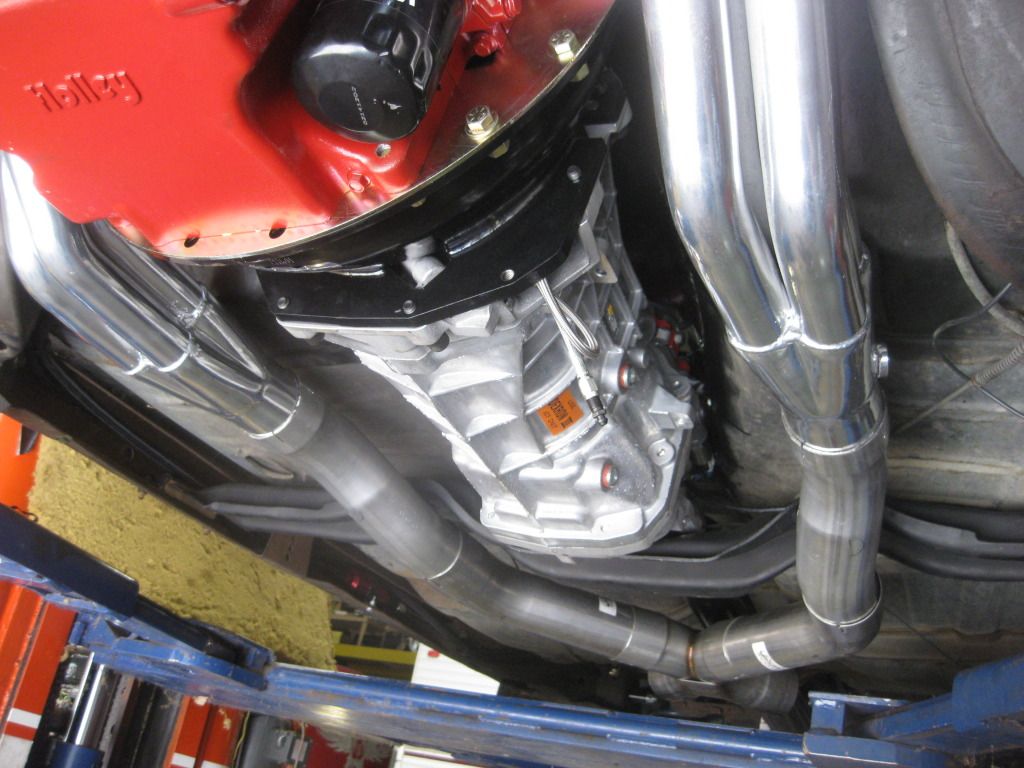
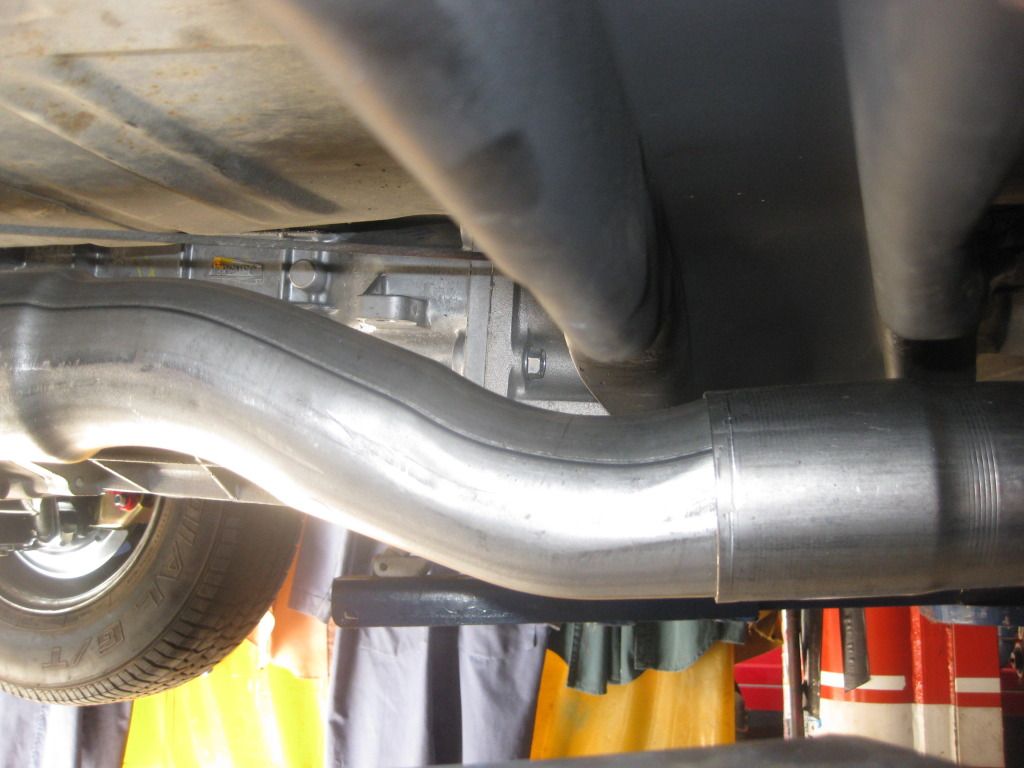
Hung the rest of the Pypes 3" exhaust today. There will be plenty of fine tuning. No matter what I did, I could not avoid contact issue, couldnt get the tail pipes to line up right. I finally put the tail pipes up tight on the spring perches above the rear end and gave up on it for now. I put the car down on the ground to check clearances, bounce it around a little and I discover that the brake line tabs that I welded on the top of the axle tubes contact the tail pipes when you put some heavy weight on the rear end. Cut them off with the sawzall, put all that effort into welding and painting make it look pretty to cut them off!!!!!. Oh well when I pull the car all apart in the future for a restoration I will make it look pretty again.
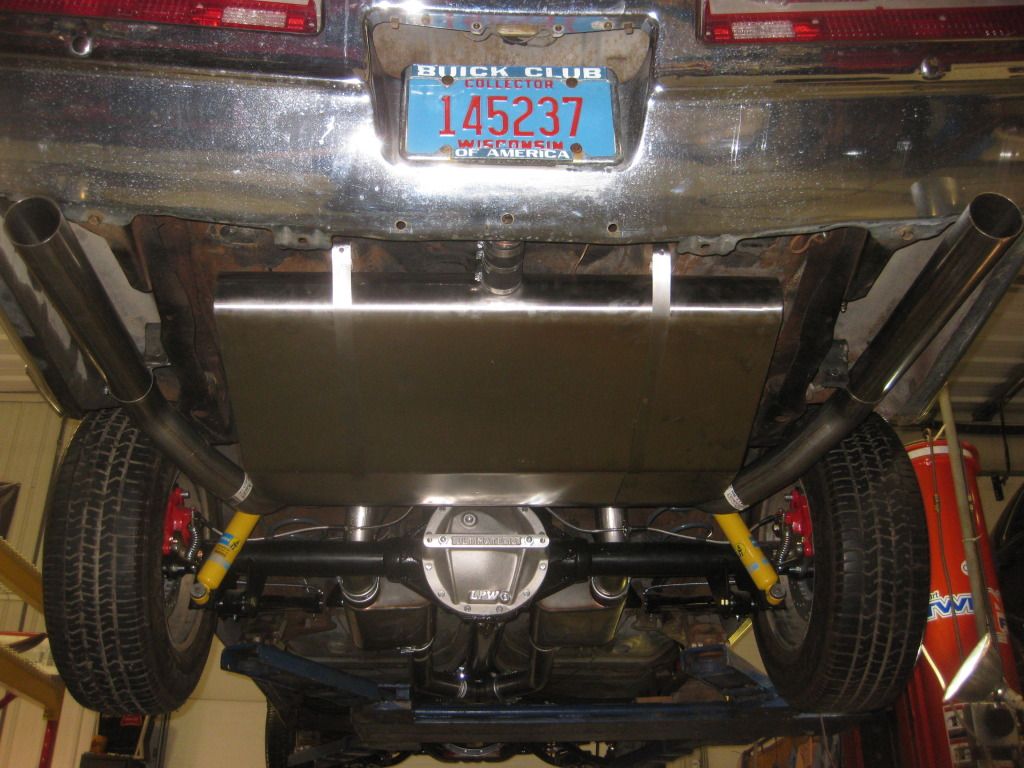
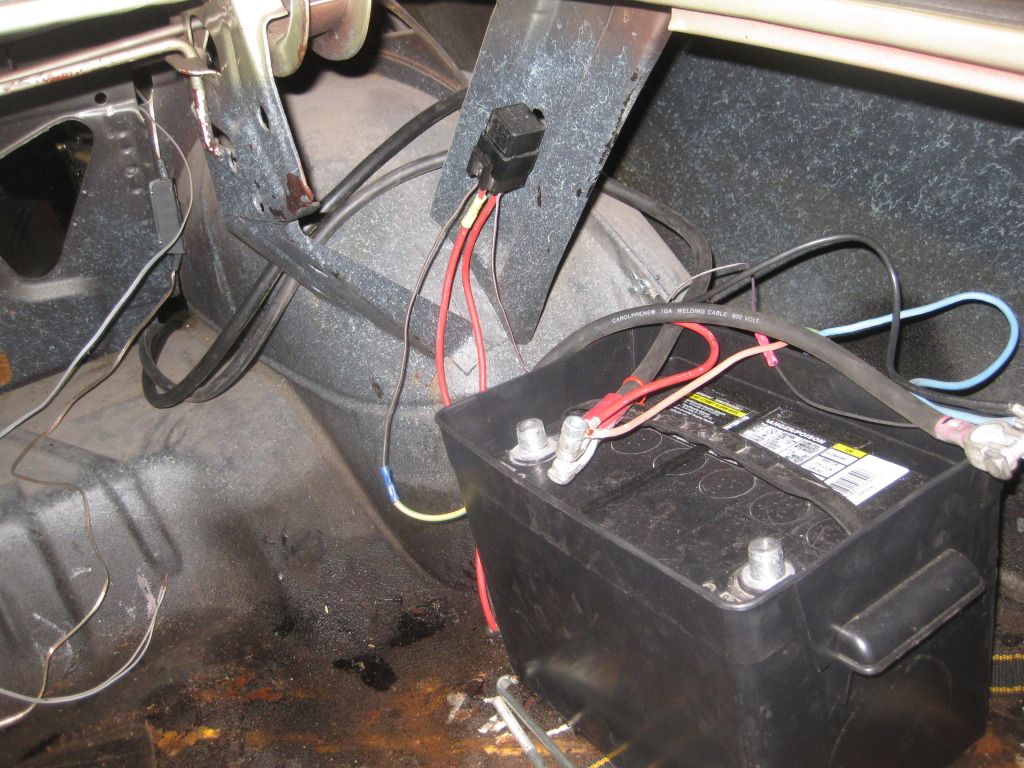
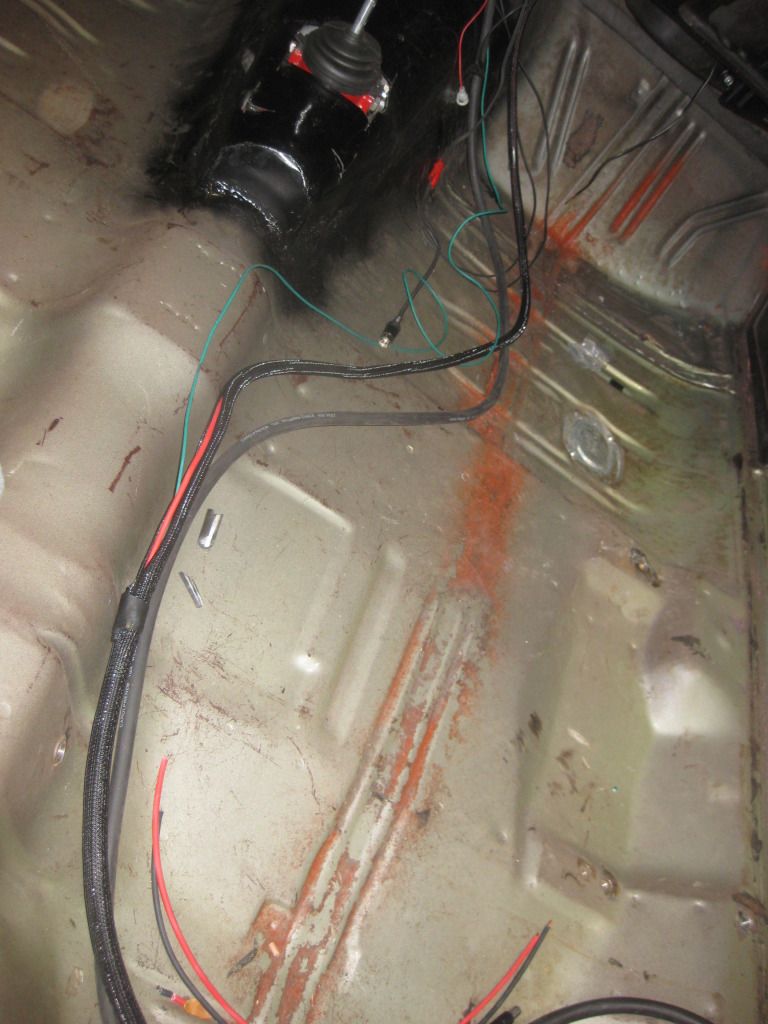
Got all the power wired up to the trunk, I got a bit carried away with grounds, didnt have to drill too many holes!
Other than that did a bunch of double checking, ran some of the vacum lines that needed plumbing. Now I am waiting on my radiator and I need to figure out my breather lines/pcv. I will probably just rig something half *** up for now.
Heres the car with the front clip on. Progress!

. I finally put the tail pipes up tight on the spring perches above the rear end and gave up on it for now. I put the car down on the ground to check clearances, bounce it around a little and I discover that the brake line tabs that I welded on the top of the axle tubes contact the tail pipes when you put some heavy weight on the rear end. Cut them off with the sawzall, put all that effort into welding and painting make it look pretty to cut them off!!!!!. Oh well when I pull the car all apart in the future for a restoration I will make it look pretty again.Got all the power wired up to the trunk, I got a bit carried away with grounds, didnt have to drill too many holes!
Other than that did a bunch of double checking, ran some of the vacum lines that needed plumbing. Now I am waiting on my radiator and I need to figure out my breather lines/pcv. I will probably just rig something half *** up for now.
Heres the car with the front clip on. Progress!