
Rebuilding Dad's Panoz; LS1 swap
 09-26-2012, 10:01 PM
#61
TECH Fanatic
Thread Starter
iTrader: (9)
Join Date: Dec 2006
Location: Va Beach
Posts: 1,240
Likes: 0
Received 0 Likes
on
0 Posts
Dug into my Z06 to deal with the failed lifters and found out just how much metal went through the motor. Pulled the motor for rebuild and am now back to work on the Panoz.


Katech manual tensioner added. Not much to the front end of the motor.... KISS

Coilpacks bolted up and C5 shorty header being test fit.

New 22 gallon ATL cell

Katech manual tensioner added. Not much to the front end of the motor.... KISS
Coilpacks bolted up and C5 shorty header being test fit.
New 22 gallon ATL cell


 09-28-2012, 10:31 AM
#64
I'm impressed, very nice build. The old engine looks someone got POed and started swinging away with a heavy sledge hammer. You're fortunate the damage seems contained to the motor, but... ouch.
I'm definitely following this build, as I've got roughly the same drive train setup in mine.
I'm definitely following this build, as I've got roughly the same drive train setup in mine.


 10-14-2012, 06:54 PM
#67
TECH Fanatic
Thread Starter
iTrader: (9)
Join Date: Dec 2006
Location: Va Beach
Posts: 1,240
Likes: 0
Received 0 Likes
on
0 Posts
Putting my broken LS6 to good use test fitting the engine/trans.

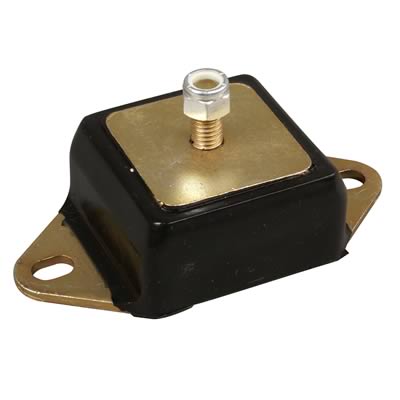
Need to fab mounts. Going make an adapter plate and use a Jeep CJ7 poly mount.

Removed the old riveted heat shielding from the trans tunnel and welded all the holes up.


Need to fab mounts. Going make an adapter plate and use a Jeep CJ7 poly mount.
Removed the old riveted heat shielding from the trans tunnel and welded all the holes up.
10-22-2012, 08:27 PM
#68
TECH Fanatic
Thread Starter
iTrader: (9)
Join Date: Dec 2006
Location: Va Beach
Posts: 1,240
Likes: 0
Received 0 Likes
on
0 Posts
Old dash panel full of holes dents removed.

New dash panel installed. Need to grind some of the welds down a bit. Added another piece of angle iron to support the left side.

New dash panel installed. Need to grind some of the welds down a bit. Added another piece of angle iron to support the left side.
10-28-2012, 09:28 PM
#69
TECH Fanatic
Thread Starter
iTrader: (9)
Join Date: Dec 2006
Location: Va Beach
Posts: 1,240
Likes: 0
Received 0 Likes
on
0 Posts
After much trial and error the engine mounts are done. Used a Prothane poly mount for a Jeep CJ7 and was able to make an adapter plate to use the existing pedestal on the chassis.


Engine as far back as it can go. Bellhousing clears nicely.

Shifter lines up in the existing tunnel cover.

Engine as far back as it can go. Bellhousing clears nicely.
Shifter lines up in the existing tunnel cover.

 11-10-2012, 04:15 PM
#72
TECH Fanatic
Thread Starter
iTrader: (9)
Join Date: Dec 2006
Location: Va Beach
Posts: 1,240
Likes: 0
Received 0 Likes
on
0 Posts
New window net mount tabs for the Joe's Racing mount kit.


Harnessbar fabbed and installed. Thanks to my buddy Mills for the help cutting and welding on this one.


Finally time to head off to powdercoat.
Harnessbar fabbed and installed. Thanks to my buddy Mills for the help cutting and welding on this one.
Finally time to head off to powdercoat.
11-18-2012, 06:48 PM
#73
TECH Fanatic
Thread Starter
iTrader: (9)
Join Date: Dec 2006
Location: Va Beach
Posts: 1,240
Likes: 0
Received 0 Likes
on
0 Posts
Decided to clean up the passenger side floor before powdercoating. Over the years extra seat mount bars where added haphazardly to fit various seats. Cut them out and filled all the holes leaving the originals.


Cut out the area where the remote shifter went.


Cut out the area where the remote shifter went.
Last edited by Cobra4B; 11-19-2012 at 11:14 PM.
12-02-2012, 07:59 PM
#74
TECH Fanatic
Thread Starter
iTrader: (9)
Join Date: Dec 2006
Location: Va Beach
Posts: 1,240
Likes: 0
Received 0 Likes
on
0 Posts
Stock 40k mile clutch from my old yellow Z06. Have had this thing in my shed for like 7 years. Nothing wrong with it, but was having my rear diff replaced under warranty and took that time to put in a Luk Stage-II clutch with a Fidanza flywheel; driveline has to be removed for both jobs.
After 7 years in a box in my shed.

After some elbow grease with a wirewheel and scouring pad.

Clutch along with lightweight flywheel. Taking it all to get the flywheel resurfaced and the assembly balanced tomorrow.

After 7 years in a box in my shed.
After some elbow grease with a wirewheel and scouring pad.
Clutch along with lightweight flywheel. Taking it all to get the flywheel resurfaced and the assembly balanced tomorrow.
12-10-2012, 10:17 PM
#75
TECH Fanatic
Thread Starter
iTrader: (9)
Join Date: Dec 2006
Location: Va Beach
Posts: 1,240
Likes: 0
Received 0 Likes
on
0 Posts
Resurfaced light weight chromoly flywheel

Less than .001" runout on bellhousing face

Max rotational runout of bellhousing center bore vs. crank centerline .003". Max tolerance .005"... good to go!

Now to install the clutch and mate with the gearbox

Less than .001" runout on bellhousing face
Max rotational runout of bellhousing center bore vs. crank centerline .003". Max tolerance .005"... good to go!
Now to install the clutch and mate with the gearbox
Last edited by Cobra4B; 12-11-2012 at 08:32 AM.
12-11-2012, 12:33 PM
#76
TECH Fanatic
Thread Starter
iTrader: (9)
Join Date: Dec 2006
Location: Va Beach
Posts: 1,240
Likes: 0
Received 0 Likes
on
0 Posts
Calipers refreshed and ready for pickup from Hayworth Racing Brakes. Had the old powdercoat stripped off down to the original hard-coat anodizing. Calipers were inspected and rebuilt with new seals and hardware. Fresh decals too.


12-12-2012, 04:58 PM
#77
Staging Lane
iTrader: (12)

Join Date: Jan 2010
Location: Grayslake, IL
Posts: 85
Likes: 0
Received 0 Likes
on
0 Posts

Very nice build! Looks like it's gonna be a blast when it's all put together.
Just an FYI, blocking off the heater core ports entirely will affect the coolant flow. It's better to connect them together with something like this:
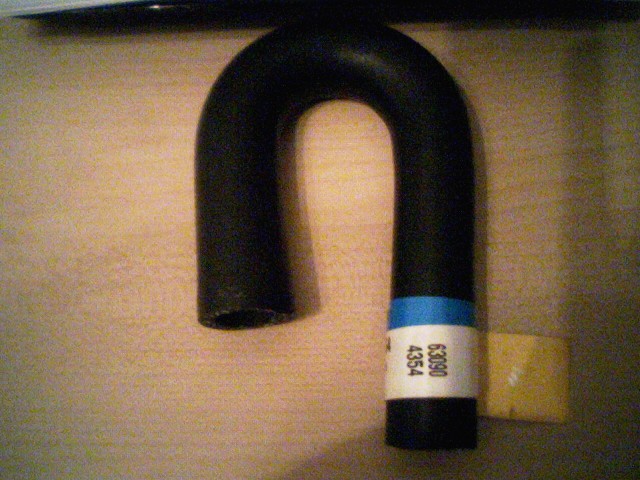
Just an FYI, blocking off the heater core ports entirely will affect the coolant flow. It's better to connect them together with something like this:
12-12-2012, 06:55 PM
#78
TECH Fanatic
Thread Starter
iTrader: (9)
Join Date: Dec 2006
Location: Va Beach
Posts: 1,240
Likes: 0
Received 0 Likes
on
0 Posts
T-stat has holes in it to allow coolant flow between the circuits when it's closed. When it opens it blocks the bypass circuit and flows through the cooling circuit just fine.
http://www.pirate4x4.com/tech/billav...mmersRadReview

In this system:
1. The water pump pumps coolant out of the lower two ports on its back side and into the block.
2. Coolant circulates through the engine block...
3. ... and through the cylinder heads.
4. The steam tubes carry steam and a small amount of coolant to the top of the radiator where the steam is separated from the coolant and collects just beneath the rad cap seal.
5. Coolant returning from the cylinder heads enters the two upper round ports on the left and right back sides of the pump
6. Some coolant circulates through the water pump's bypass circuit and is again pumped back through the engine. This keeps the circuit flowing when the thermostat is closed.
7. Hot coolant exiting from the engine that doesn't follow the pump's internal bypass circuit exits the water pump via the top 1-1/4" port and enters the top of the radiator.
8. Hot coolant flows across and down through the radiator, cooling as it goes.
9. Cooled coolant exits the radiator via the lower 1-1/2" outlet and returns to the inlet side of the water pump.
10. Returning coolant is blocked from re-entering the water pump inlet if the thermostat is closed. When the coolant on the inside (engine side) of the thermostat reaches the temperature of the thermostat (e.g. 190� F) the thermostat opens and the cool coolant enters the water pump inlet to be circulated through the engine again, starting over at #1. Both the "heater in" and "heater out" ports are plugged.
11. In the event of a system over-pressure condition, the rad cap opens and burps excess coolant and steam out of the system to be collected by the overflow tank.
http://www.pirate4x4.com/tech/billav...mmersRadReview
In this system:
1. The water pump pumps coolant out of the lower two ports on its back side and into the block.
2. Coolant circulates through the engine block...
3. ... and through the cylinder heads.
4. The steam tubes carry steam and a small amount of coolant to the top of the radiator where the steam is separated from the coolant and collects just beneath the rad cap seal.
5. Coolant returning from the cylinder heads enters the two upper round ports on the left and right back sides of the pump
6. Some coolant circulates through the water pump's bypass circuit and is again pumped back through the engine. This keeps the circuit flowing when the thermostat is closed.
7. Hot coolant exiting from the engine that doesn't follow the pump's internal bypass circuit exits the water pump via the top 1-1/4" port and enters the top of the radiator.
8. Hot coolant flows across and down through the radiator, cooling as it goes.
9. Cooled coolant exits the radiator via the lower 1-1/2" outlet and returns to the inlet side of the water pump.
10. Returning coolant is blocked from re-entering the water pump inlet if the thermostat is closed. When the coolant on the inside (engine side) of the thermostat reaches the temperature of the thermostat (e.g. 190� F) the thermostat opens and the cool coolant enters the water pump inlet to be circulated through the engine again, starting over at #1. Both the "heater in" and "heater out" ports are plugged.
11. In the event of a system over-pressure condition, the rad cap opens and burps excess coolant and steam out of the system to be collected by the overflow tank.
Last edited by Cobra4B; 12-12-2012 at 07:09 PM.
12-14-2012, 12:17 AM
#79
TECH Fanatic
Thread Starter
iTrader: (9)
Join Date: Dec 2006
Location: Va Beach
Posts: 1,240
Likes: 0
Received 0 Likes
on
0 Posts
Surface rust was coming back on the clutch so I painted it with 2000 degree rattle-can.

Installed with ARP hardware... new engine stand came in handy.

Installed with ARP hardware... new engine stand came in handy.
12-16-2012, 07:52 PM
#80
TECH Fanatic
Thread Starter
iTrader: (9)
Join Date: Dec 2006
Location: Va Beach
Posts: 1,240
Likes: 0
Received 0 Likes
on
0 Posts
Quartermaster throw-out bearing shimmed and installed.


Got everything put together... ready to go in the chassis.

Got the hubs/brakes off the rear axle finally.


Got everything put together... ready to go in the chassis.
Got the hubs/brakes off the rear axle finally.