
Build thread- 1952 Chevy truck
 03-14-2013, 09:27 PM
#41
Staging Lane
Thread Starter
iTrader: (2)
Join Date: Jun 2012
Location: Grand Junction
Posts: 75
Likes: 0
Received 0 Likes
on
0 Posts
Got the radiator fitted in. Looks like the intake duct and hoses are going to be quite the ordeal to do. Thinking a 90 degree elbow to mount he filter over the AC on the passenger side. But we will see.


 **** Yea!! Love the build, It will be sick as **** when you are done. Subscribed. Some killer craftsmanship right there that is
07-08-2013, 11:40 PM
**** Yea!! Love the build, It will be sick as **** when you are done. Subscribed. Some killer craftsmanship right there that is
07-08-2013, 11:40 PM
#43
Staging Lane
Thread Starter
iTrader: (2)
Join Date: Jun 2012
Location: Grand Junction
Posts: 75
Likes: 0
Received 0 Likes
on
0 Posts
Holy crap it has been entirely too long since I have posted or really been able to do anything on the truck. Got an awesome opportunity to switch jobs and the sudden change up of my 7 year routine has taken a little getting used to. ha ha
The intake elbow dilemma was solved when I popped the hood on my 05 silverado and realized that my K&N intake had the EXACT boot I needed! (and only $21 shipped from K&N)

Got some hoses that fit the new radiator set-up but really not happy with them, so I think I might try to bend up some thin wall stainless tubing for the permanent solution. Also the "Push/Pull" fan I bought moves about 10% of the air in the "push" configuration than it does in the "pull". Unfortunately I need the push, I tried flipping the blade over but it hits the shroud, so I am working on that solution now.
Got the seats fit in and deleted all the wiring not needed in them, still need to build a beefier sub-floor for them to mount, but I want to wait until I know how big my trans/drive line tunnel will be first. They fit nice though, Really glad I scored some power ones that have 5" of up/down adjustment. Not 100% sure if I will keep the headrest, delete them, or even just make them smaller.


Also picked up a Lokar shifter for a good deal, I just need to modify the linkage to clear the OEM Shift range sensor. Which brings me to the latest issue. I can not for the life of me find the harness for this sensor. So if anyone is out junk yard shopping and comes across one let me know. I'll make it worth your trouble to get it and ship it my way!
Also My phone died while attempting to upload the new photos to Photo Bucket, So I Will post them up tomorrow for your viewing pleasure.
The intake elbow dilemma was solved when I popped the hood on my 05 silverado and realized that my K&N intake had the EXACT boot I needed! (and only $21 shipped from K&N)
Got some hoses that fit the new radiator set-up but really not happy with them, so I think I might try to bend up some thin wall stainless tubing for the permanent solution. Also the "Push/Pull" fan I bought moves about 10% of the air in the "push" configuration than it does in the "pull". Unfortunately I need the push, I tried flipping the blade over but it hits the shroud, so I am working on that solution now.
Got the seats fit in and deleted all the wiring not needed in them, still need to build a beefier sub-floor for them to mount, but I want to wait until I know how big my trans/drive line tunnel will be first. They fit nice though, Really glad I scored some power ones that have 5" of up/down adjustment. Not 100% sure if I will keep the headrest, delete them, or even just make them smaller.
Also picked up a Lokar shifter for a good deal, I just need to modify the linkage to clear the OEM Shift range sensor. Which brings me to the latest issue. I can not for the life of me find the harness for this sensor. So if anyone is out junk yard shopping and comes across one let me know. I'll make it worth your trouble to get it and ship it my way!
Also My phone died while attempting to upload the new photos to Photo Bucket, So I Will post them up tomorrow for your viewing pleasure.
Last edited by jmespe1; 07-08-2013 at 11:45 PM.
07-09-2013, 12:39 AM
#44

On my swap I cut the water pump outlet down to make it shorter so I had more room for the bend. I cut it just before the second band and then clamped it behind that band and I never had a problem with it. Just something to consider if you need a little more room.
07-09-2013, 01:32 AM
#45
Staging Lane
Thread Starter
iTrader: (2)
Join Date: Jun 2012
Location: Grand Junction
Posts: 75
Likes: 0
Received 0 Likes
on
0 Posts
Room isn't much of an issue on the pump side. But the placement of the upper neck on the radiator is dead center putting it slightly in front of the throttle body, even with the lower profile elbow it's tight. I'm going to talk to the radiator shop about having it moved to the far left side to space things out a little better. Otherwise I may just make the tube come at the upper neck from the side- which will be easy with bent pipe and ugly if I Frankenstein a bunch of hoses together. ha ha
08-03-2013, 09:53 PM
#47
Staging Lane
Thread Starter
iTrader: (2)
Join Date: Jun 2012
Location: Grand Junction
Posts: 75
Likes: 0
Received 0 Likes
on
0 Posts
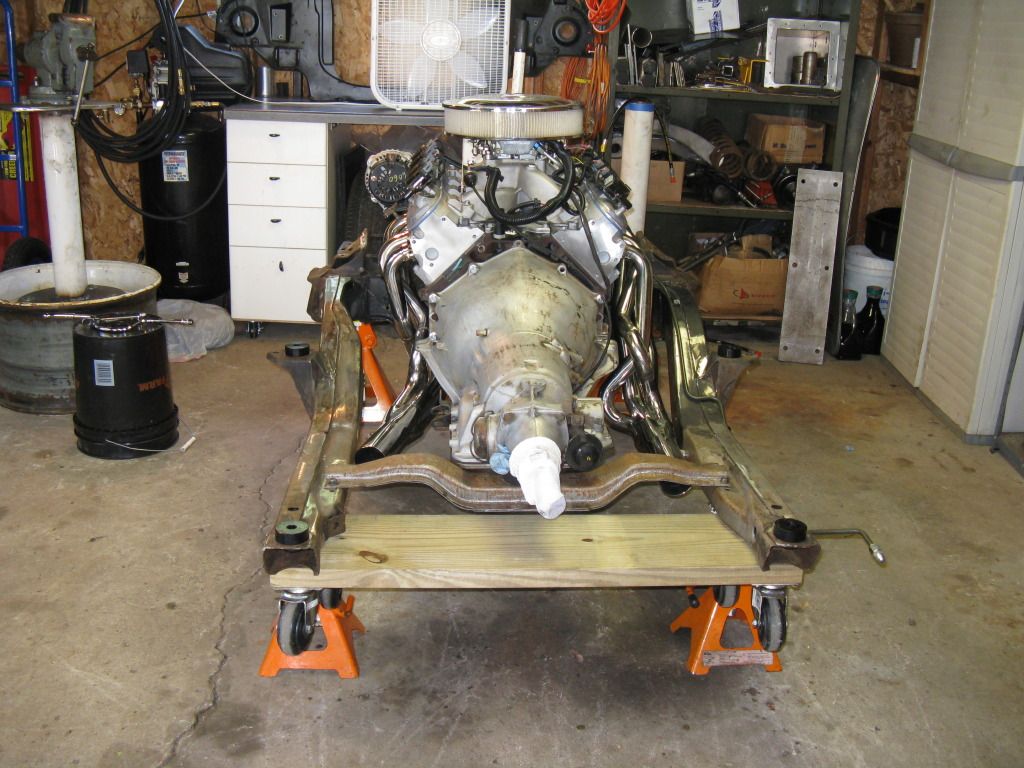
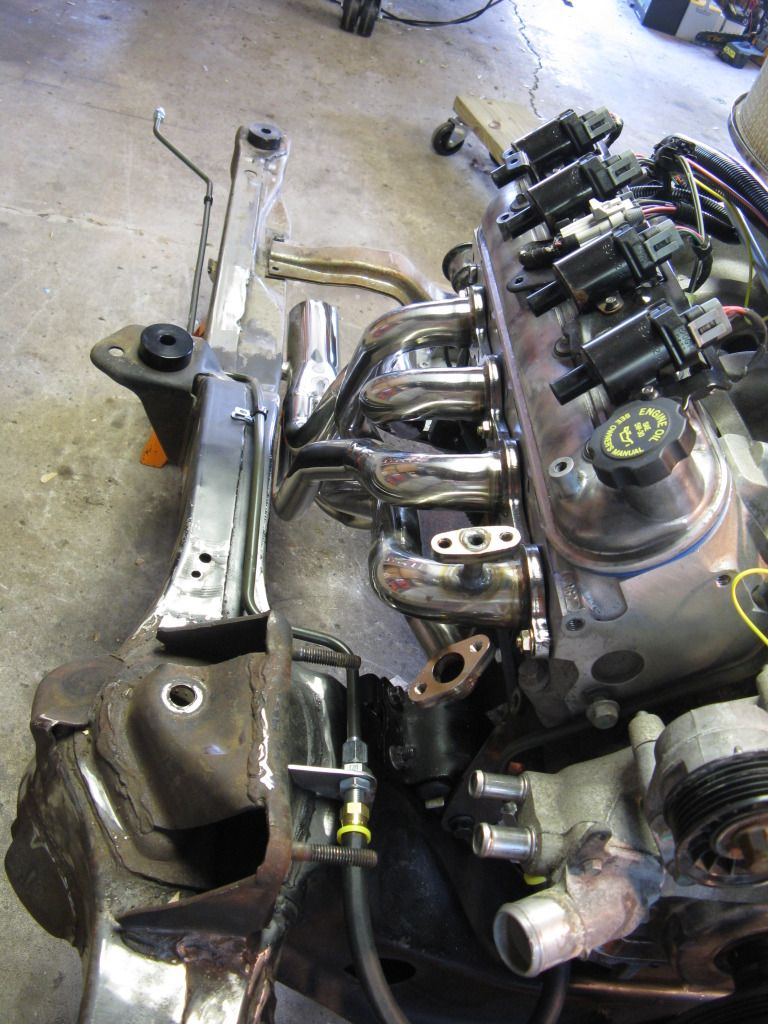
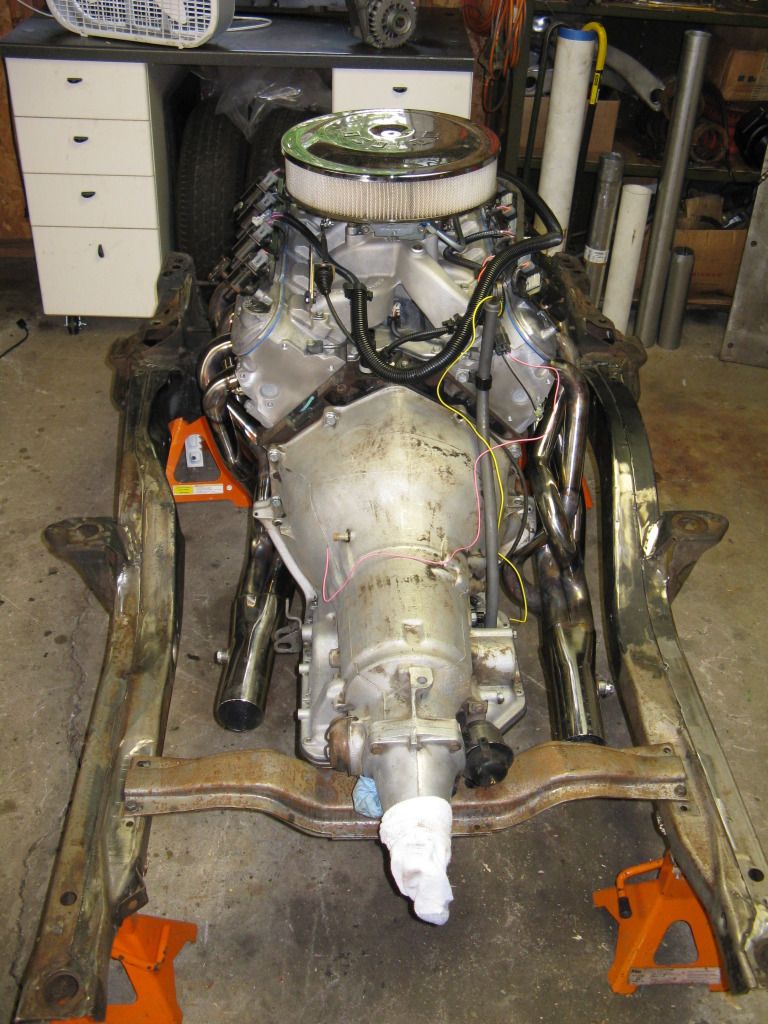
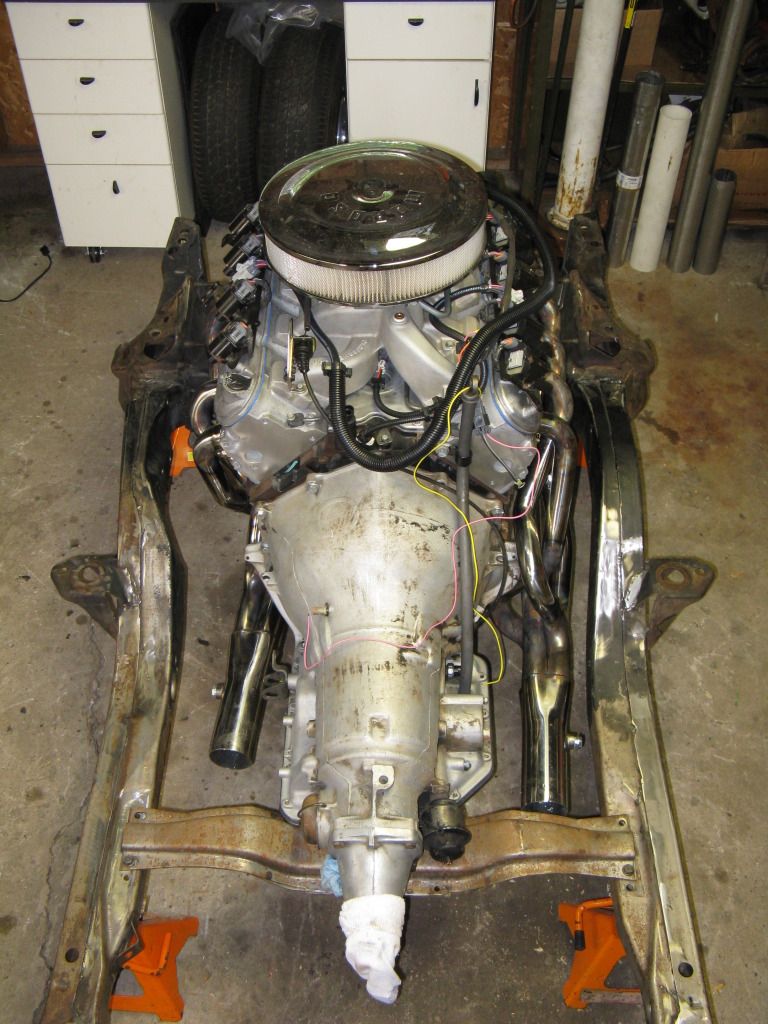
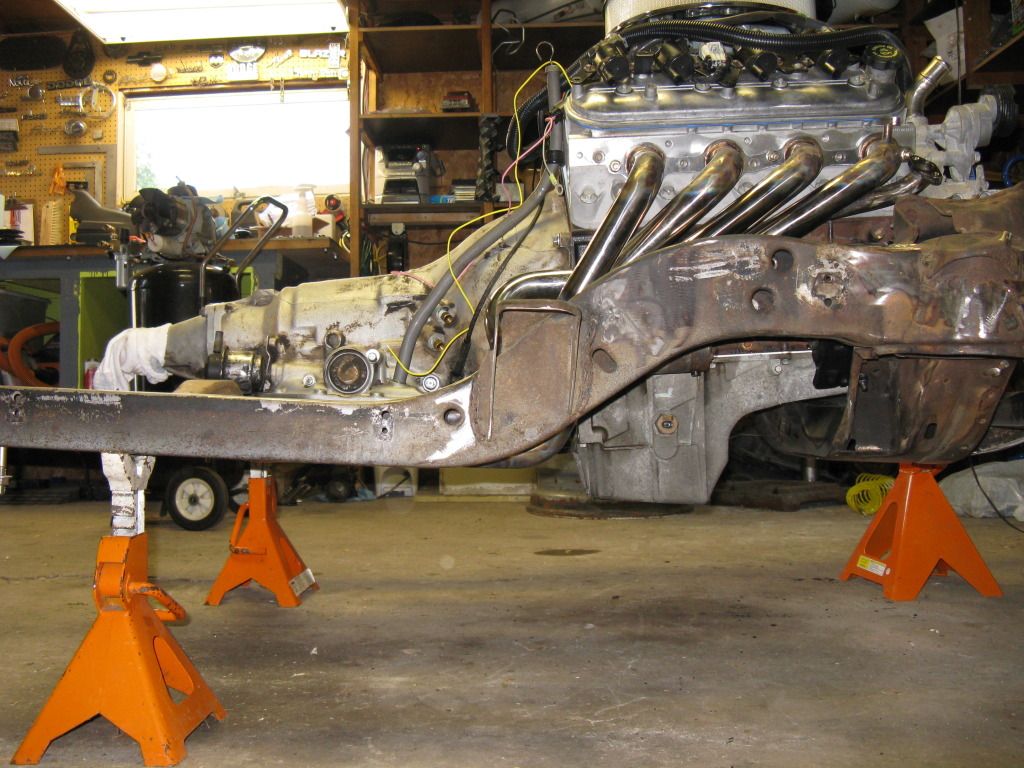
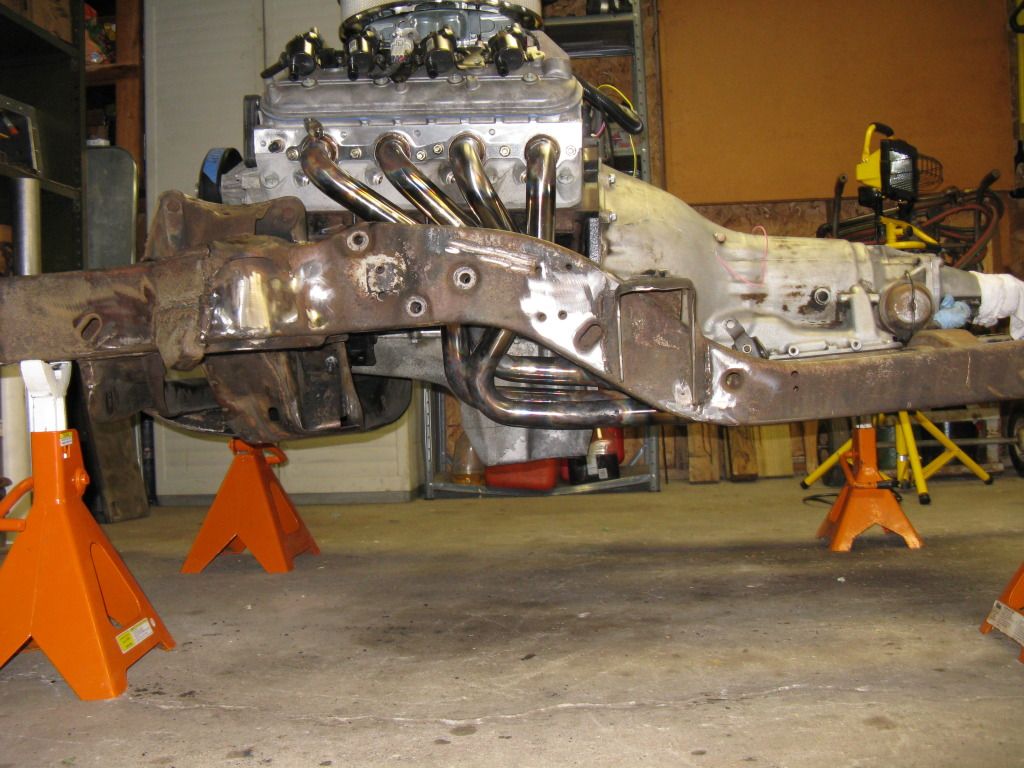
Spent all day chopping the cab up (thank god for plasma cutters) and finishing up the wiring and hose routing. Fluids are in(and not leaking) and new headers are on. All i need is for NAPA to finish making my power steering lines and I should be ready to turn this thing over finally.

I cross braced the hell out of the cab since I would be removing alot of it's structural support. I wasn't as messy during the cutting, but its been to long of a day to clean up now. ha ha

Here is the final wiring (and my messy garage) the second photo shows the grommet that will enter the firewall above the bell housing so that all wiring will be hidden from view once the engine bay is finished.


I also purchased a "push/pull" fan on ebay unfortunately it moved about 10% of the air in the push wiring as it does in the pull. in order to flip the blade over I had to take the dome shape out of the supplied shroud. I baked it at 350 for 10 minutes then set a gallon of water on it. now the blade is flipped with no rubbing.

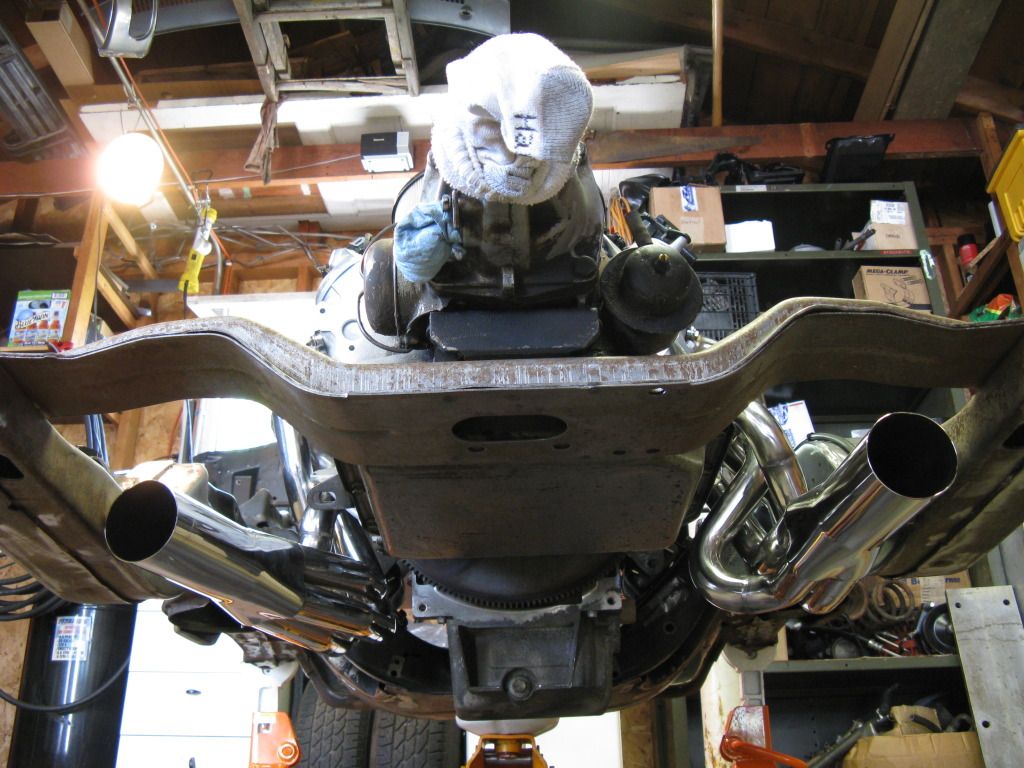
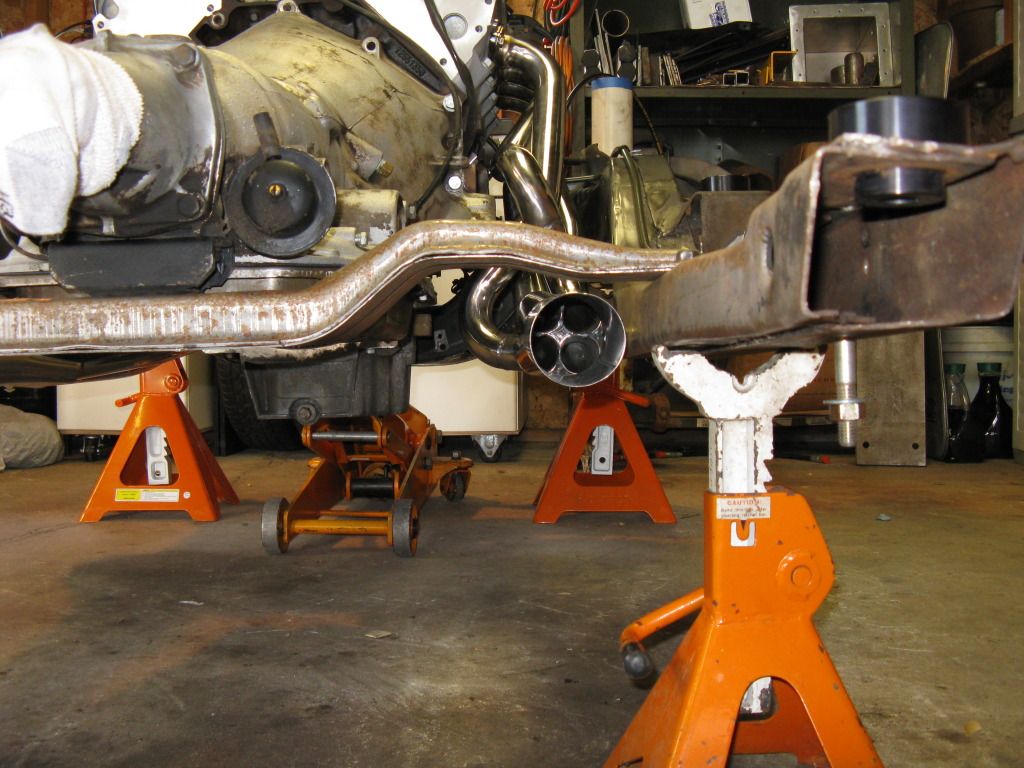
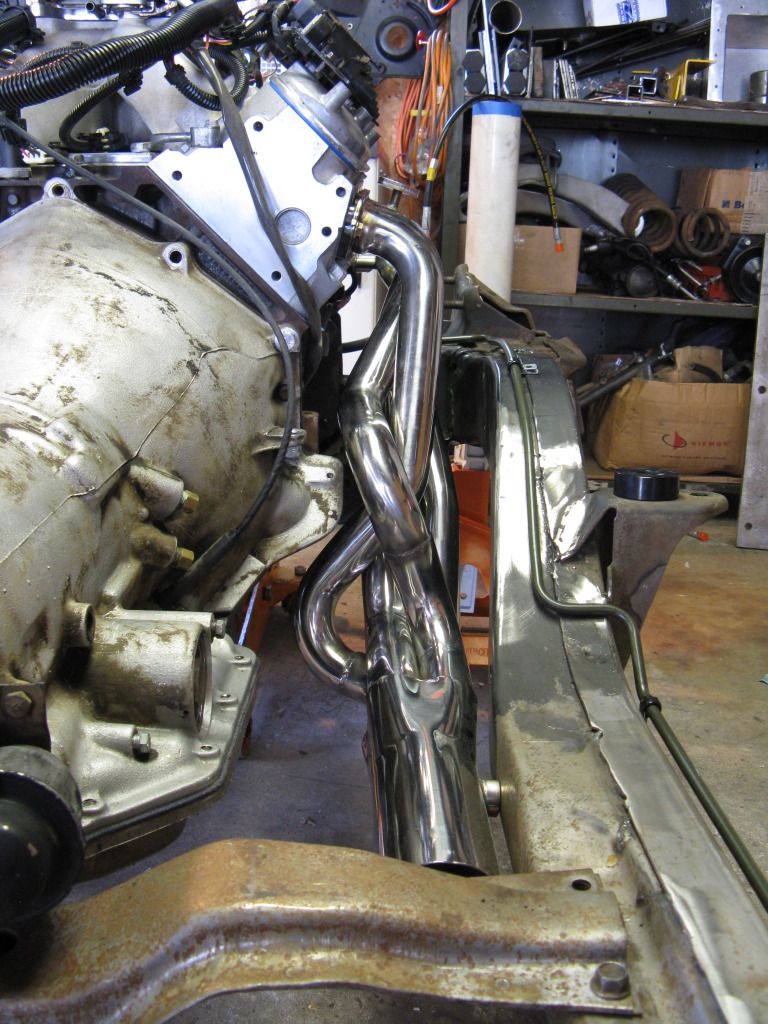
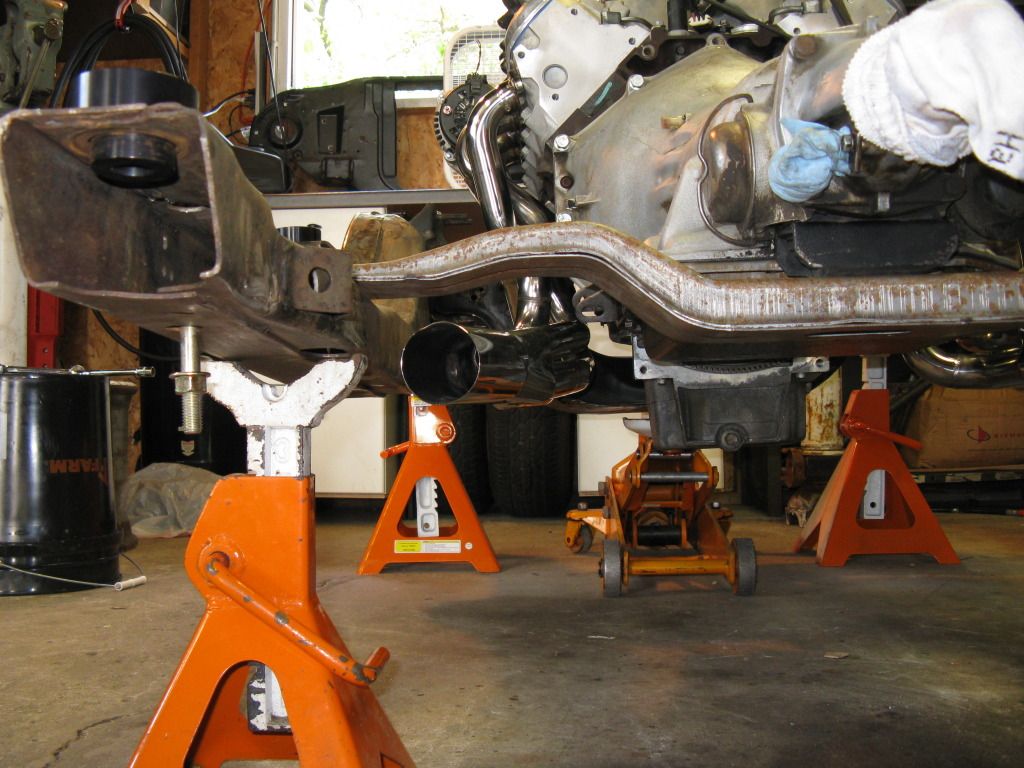
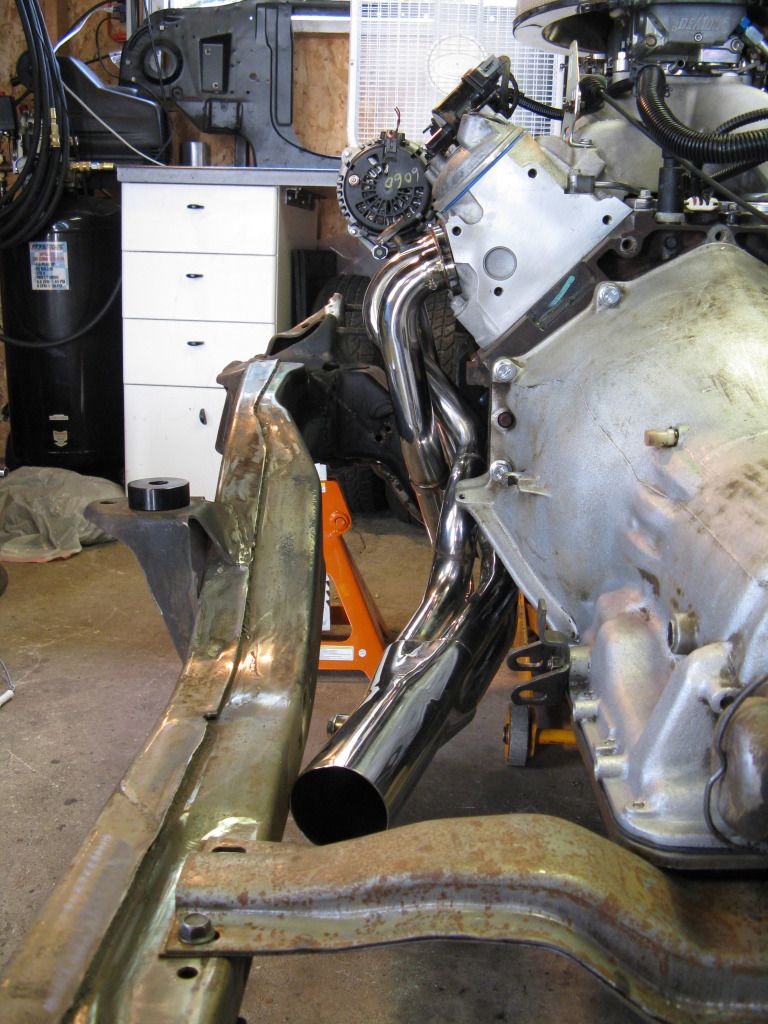
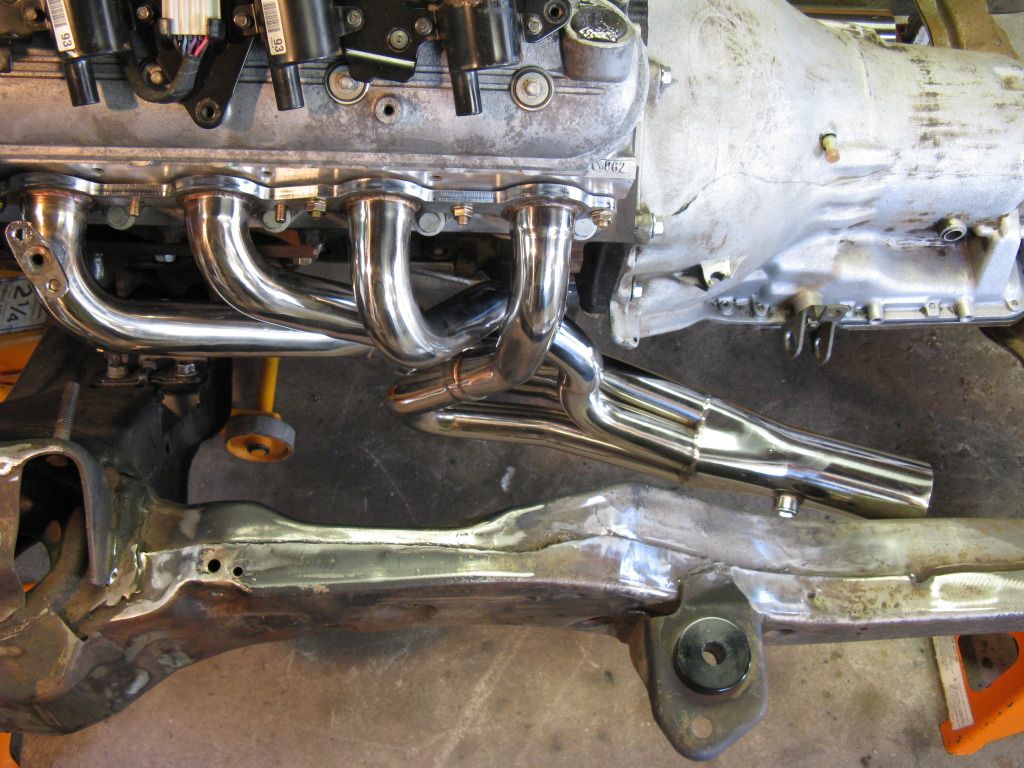
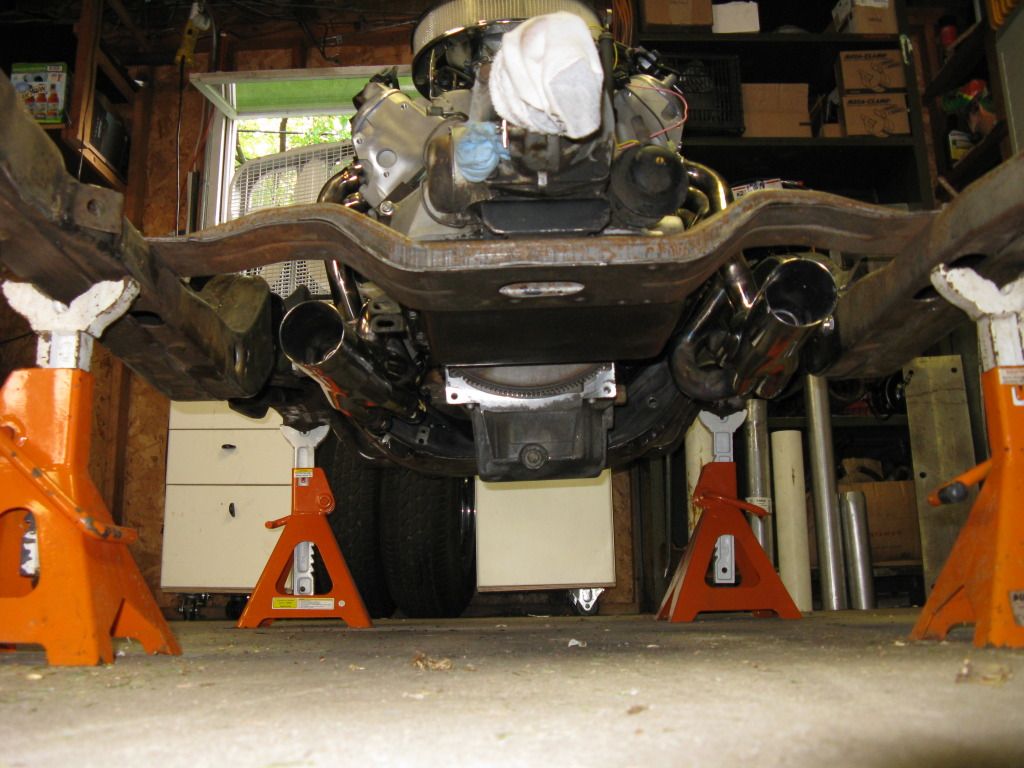
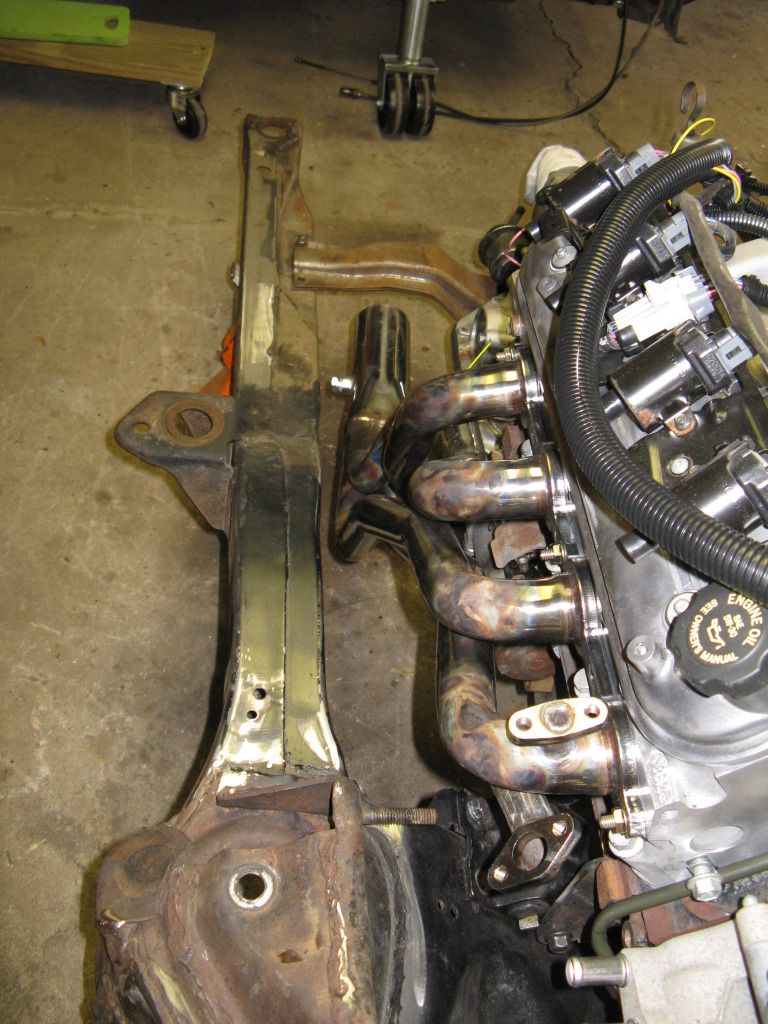
I picked up a set or used Sanderson LS134 block huggers and as you can see still have some slight fitment issues. unfortunately placing the motor mounts dead center made me have to find a rearward exiting header, which then presents a starter clearance issue. primarily on the battery feed terminal and i still have to notch the frame on that side.


Still alot of work to do to it, but at least it is taking form. Firewall will need to be recessed for the engine clearance and the exhaust routing figured out to not be on the trans cooler and fuel lines.
I cross braced the hell out of the cab since I would be removing alot of it's structural support. I wasn't as messy during the cutting, but its been to long of a day to clean up now. ha ha
Here is the final wiring (and my messy garage) the second photo shows the grommet that will enter the firewall above the bell housing so that all wiring will be hidden from view once the engine bay is finished.
I also purchased a "push/pull" fan on ebay unfortunately it moved about 10% of the air in the push wiring as it does in the pull. in order to flip the blade over I had to take the dome shape out of the supplied shroud. I baked it at 350 for 10 minutes then set a gallon of water on it. now the blade is flipped with no rubbing.
I picked up a set or used Sanderson LS134 block huggers and as you can see still have some slight fitment issues. unfortunately placing the motor mounts dead center made me have to find a rearward exiting header, which then presents a starter clearance issue. primarily on the battery feed terminal and i still have to notch the frame on that side.
Still alot of work to do to it, but at least it is taking form. Firewall will need to be recessed for the engine clearance and the exhaust routing figured out to not be on the trans cooler and fuel lines.
08-06-2013, 01:22 PM
#48
Great progress! And I like your budget saving fan fittment solution! Hope the wife wasn't home to catch you playing in her stove!
I have an idea for the header fittment that may work. For my Nova 5.3 swap I scored a set of Ebay 4th gen headers. With a buddy using an oxy torch to heat the primaries I used an 8' leverl arm to bend the primaries and position the collector to where I needed them.
Overhead
Under Low
RH low
RH High
RH Front
LH Low
LH High
LH Side
After:
Overhead
Overhead 2
Under
RH Front
RH Side
LH Side
Maybe you could use some heat and muscle to pull the collector away from the starter. Since you are notching the frame anyway...Best of luck!
08-11-2013, 07:59 PM
#49
Staging Lane
Thread Starter
iTrader: (2)
Join Date: Jun 2012
Location: Grand Junction
Posts: 75
Likes: 0
Received 0 Likes
on
0 Posts
Well I got everything primed as full and tried to fire her today. Starts up and dies immediately. Only getting 2 pulses on the injectors and then it dies. I'm guessing that the passlock is still active on my PCM. So that's a bummer. But the second it did run sounded good.
 08-12-2013, 07:25 AM
#52
Staging Lane
Thread Starter
iTrader: (2)
Join Date: Jun 2012
Location: Grand Junction
Posts: 75
Likes: 0
Received 0 Likes
on
0 Posts
Actually that is incorrect. VATS refers to "vehicle anti theft system" There is no different anti theft system based on what engine you have. There are multiple anti theft systems used by GM over the course of the last 25 years.
VATS was the first generation of GM anti theft system that had a resistor pellet built into the shank of the key. Unfortunately this made it easy for anyone to check it with a multimeter and bypass the VATS system (among other inherent design flaws). Thus the intro of PASS LOCK in the mid 90s (and used most commonly until 2008). PASSLOCK uses a resistor value built into the ignition cylinder making it so that a key must be physically turned in the cylinder to activate it. PASSLOCK 1 uses a single blade while PASSLOCK2 uses a double bladed key. The newest version (which is still not very new) is PASSKEY 3 . PASSKEY 3 has a RF chip in the key that must be within a specific distance of the reader, usually placed around the ignition cylinder. The origional VATS is now referred to as PASSKEY or PASSKEY 2 to avoid confusion.
Since VATS was the first version everyone always refers to everything as that when speaking about programming or tuning. I thought they were the same thing until I started working at best buy and had to do hundreds of remote starts on both systems,
Last edited by jmespe1; 08-12-2013 at 07:32 AM.
08-12-2013, 08:55 AM
#53

jmespe1 I had that same fan on my 49 truck , after awhile the shroud melted and the fan dug into the radiator , I fabed up a aluminum support and it worked great after that , luckly I caught it before it leaked , just a heads up
nice work ,, great welds , must be tig
nice work ,, great welds , must be tig
08-12-2013, 10:48 PM
#54
Staging Lane
Thread Starter
iTrader: (2)
Join Date: Jun 2012
Location: Grand Junction
Posts: 75
Likes: 0
Received 0 Likes
on
0 Posts
Thanks for the heads up on the fan. I will make an aluminum support for it to mount off he fan body and just allow the plastic shroud to act as a temp screen from large debris. Also those welds are all MIG using a MIllermatic 211 on 220v
I got the truck started. It was just the passlock not being turned off in the tune. Here is a brief video. I don't have the radiator in yet, wanted to make sure it ran before I got that and the belt drive done. Ill get some longer run videos up in the next few days.
http://i28.photobucket.com/albums/c2...ps334d1086.mp4
 08-12-2014, 12:34 AM
#56
Staging Lane
Thread Starter
iTrader: (2)
Join Date: Jun 2012
Location: Grand Junction
Posts: 75
Likes: 0
Received 0 Likes
on
0 Posts
Perfect timing Doug! I've been through a pretty hectic year so far. I finally got some work done on the truck yesterday. I started the firewall and trans/ driveline tunnel. Didn't get too far since the steel shop didn't get my whole order to me in time. Hopefully I'll finish that this week.


I think I'm gonna run a new body camaro engine cover. I think it will be easy to mod to look clean when the hood is open. I donated my dry filter to a customers car for the time being. I'm gonna try to do a longer air intake to hide the filter and clean up the bay.
I also scored a full ridetech E3 air ride control system complete with 4 shock waves and height sensors for only $953!!! I hope to have the steering and that air ride management completed by the end of the month. Fingers crossed.
08-12-2014, 01:07 PM
#57

From which company you got the full ridetech E3 air ride control system complete with 4 shock waves and height sensors for only $953? I have a 54 Chevy truck and would like to do something like this soon.
 08-12-2014, 01:17 PM
#58
Staging Lane
Thread Starter
iTrader: (2)
Join Date: Jun 2012
Location: Grand Junction
Posts: 75
Likes: 0
Received 0 Likes
on
0 Posts
I got lucky on eBay. Found a guy that had the system on his bel air and wanted to go back to coil overs. He said the air was too complicated. Super nice guy and equipment that barely looked used at all. The shockwaves are going to find their way onto my buddies 59 fairlane.
08-13-2014, 10:53 PM
#60
Staging Lane
Thread Starter
iTrader: (2)
Join Date: Jun 2012
Location: Grand Junction
Posts: 75
Likes: 0
Received 0 Likes
on
0 Posts
Ha ha. Yeah. I spent a lot of time and effort on making sure all my wiring would be clean and hidden. But I'm shaving the entire truck. I think having the larger engine cover might look nicer with smoothed firewall and inner fenders. I would of course fiberglass it and paint it to match so It wasn't as boring.