
My 1965 Buick Skylark L92/6L80 Swap


 09-11-2012, 04:17 PM
#42

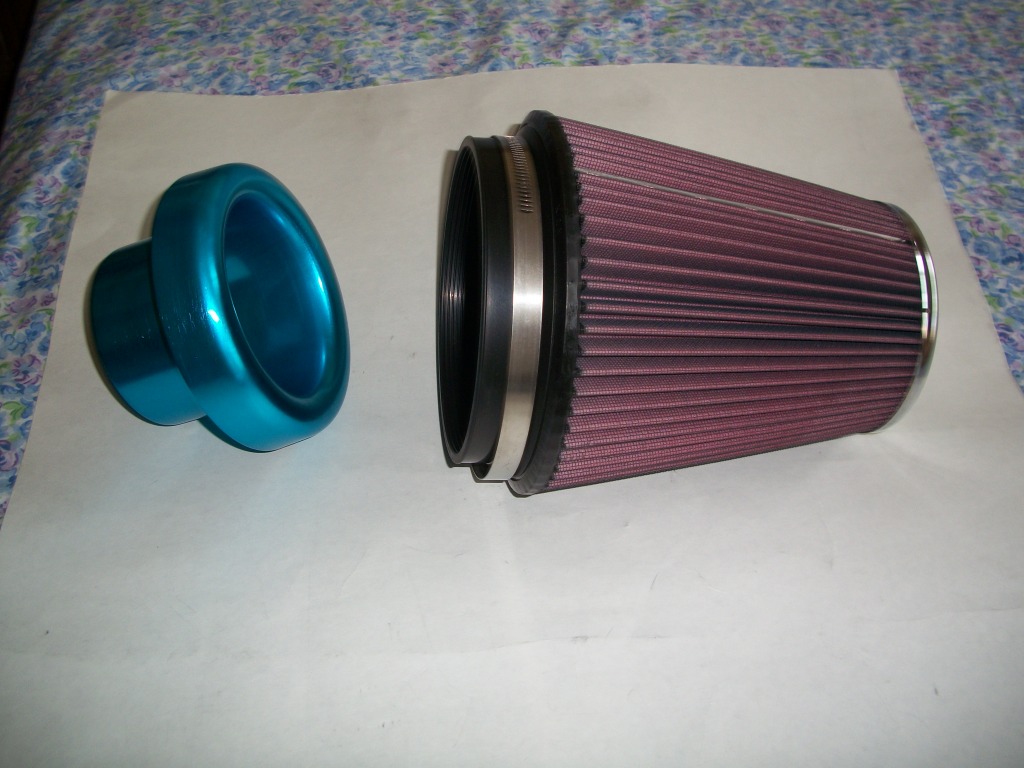
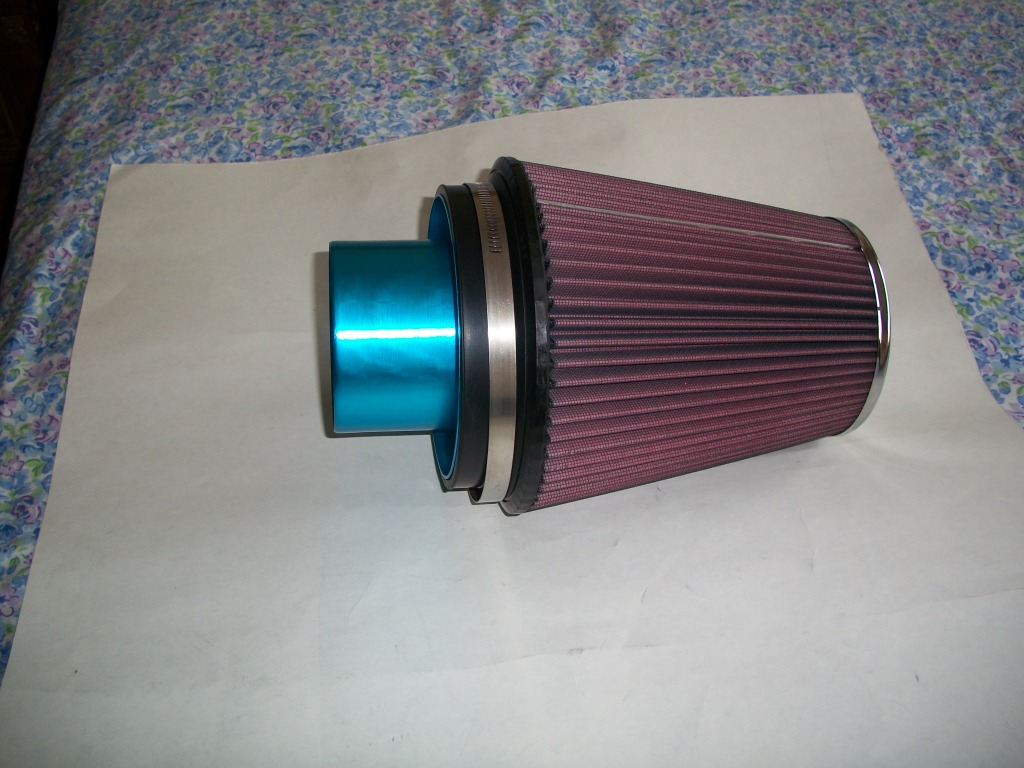
My K&N air filter came in today. Now that I have the actual part on hand I can start taking measurements and begin the construction of my cold air intake box. Here are a couple of pictures. I used as a baseline the airfilter K&N uses in their cold air intake system for the 2010 Camaro. I picked one that is 1.5" longer for a tad more capacity as I have the room for it.
Last edited by 1989GTA; 09-11-2012 at 05:00 PM.
09-11-2012, 04:53 PM
#43
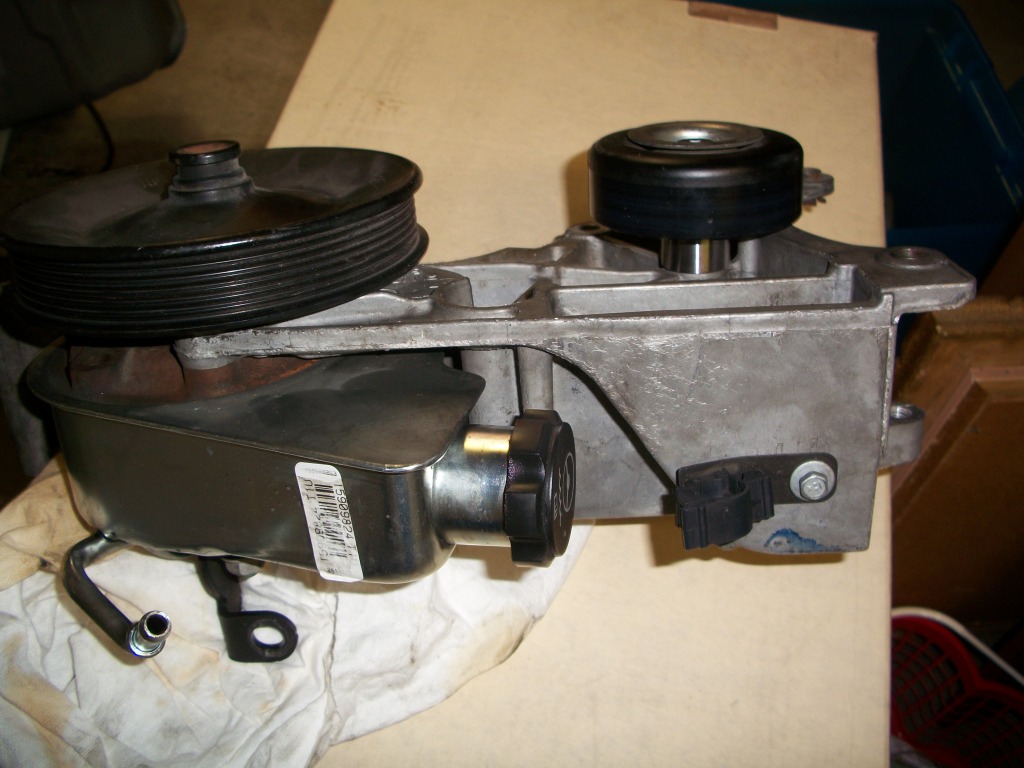
The Misumi USA spacer and 10mm x 160mm bolt came in today. This is for the relocation of the idler pulley that gets in the way of the throttle body when using a LS3 intake manifold and throttle body on a L92 motor. See post 28 for the other part of the modification. This looks like it will work out real well with the test fitting. I want to thank the forum member who led the way on how to do the pulley relocation. It makes things so simple and cheap. By the way I had them use stainless steel to make the spacer. Hardly any difference in price. Here are a couple of pictures. I forgot to say that the spacer is 20mm thick, 30mm wide with a 10mm hole.

Last edited by 1989GTA; 09-11-2012 at 10:24 PM.
09-13-2012, 06:18 PM
#45
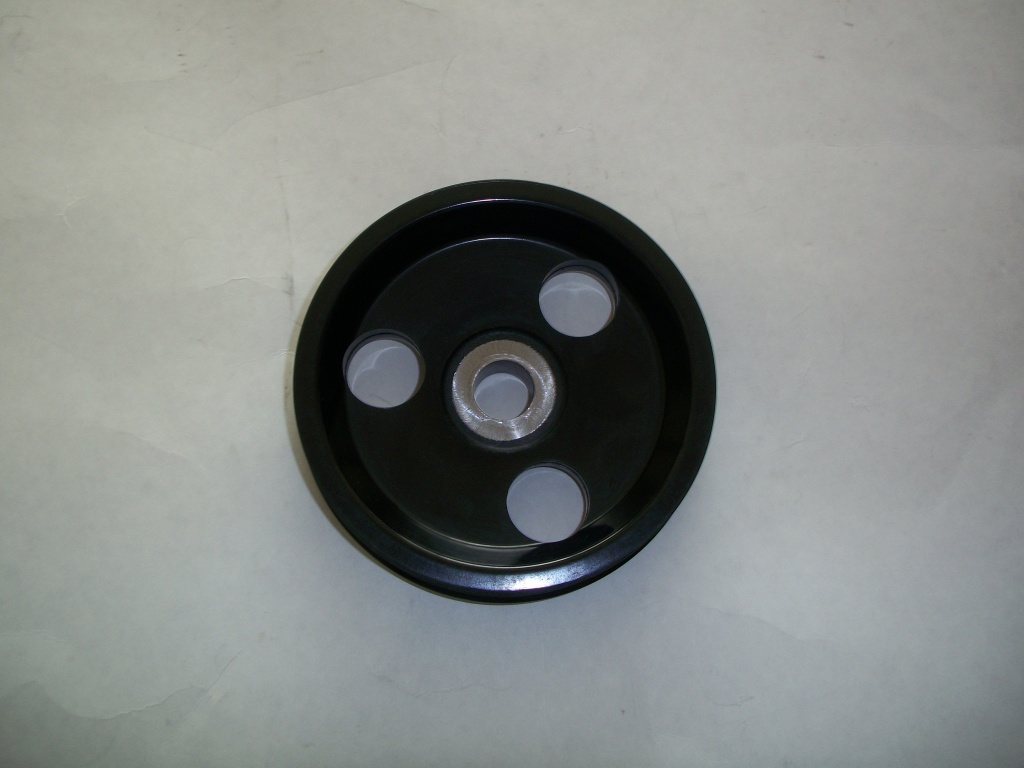
My smaller power steering pump pulley came in today. It will replace the one shown in post 43 second picture. Hopefully heading off another potential problem of the PS pulley hitting the PS steering gearbox. Here is a picture.
09-14-2012, 06:38 PM
#47
Yes it is. I want to think people such as yourself who have lead the way in the LSX swaps into the GM A-body cars. It helps people like me to try and avoid potential problems ahead of time.
09-16-2012, 04:11 PM
#48
When I bought the Skylark it did not come with the battery hold downs. So I looked to see what was available and only came up with replacement units. I also wanted to update the battery hold downs to the new style if I could. I did not find exactly what I wanted so I ordered a tray, clamp and bolt that I thought might work. Well the tray part would not work out without some major work.
So, what to do? I decided to modify the factory battery tray to the new style of holding the battery in place. It turned out to not be that hard to do since I already had the clamp and bolt for mock up to see what was needed. Here is a picture of it before it goes out for powder coating.
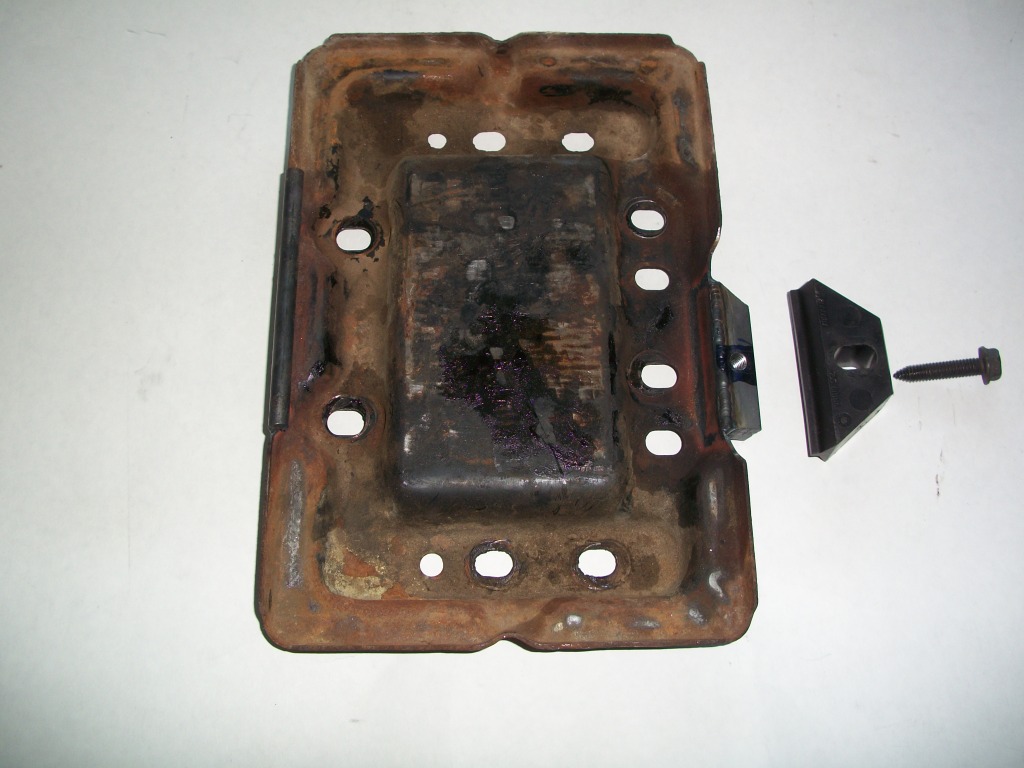
..and with the battery clamped to the tray.

So, what to do? I decided to modify the factory battery tray to the new style of holding the battery in place. It turned out to not be that hard to do since I already had the clamp and bolt for mock up to see what was needed. Here is a picture of it before it goes out for powder coating.
..and with the battery clamped to the tray.
Last edited by 1989GTA; 09-16-2012 at 06:38 PM.
09-17-2012, 06:00 PM
#50
From what I have read no because there is a pressure relief valve inside the pump like on an engine oil pump. Now for horsepower you might have a point and that thought has and is going through my mind.
09-17-2012, 06:49 PM
#51
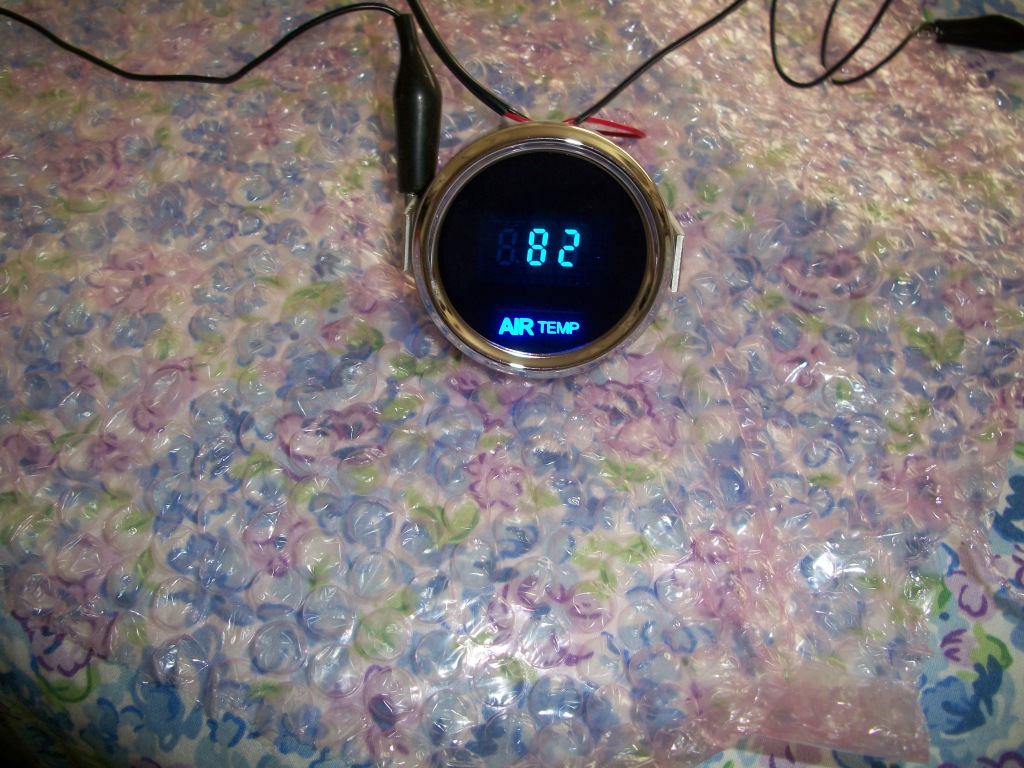
Another item came in today. It is my Dakota outside air temperature guage. I had a spot for one more guage in my dash and I was at first thinking about a clock but then realized my radio has a digital clock in it. So I went for the outside air temp guage. Here is a picture of it.
09-18-2012, 12:10 AM
#52
TECH Fanatic
iTrader: (15)
Join Date: Jun 2006
Location: Janesville WI
Posts: 1,155
Likes: 0
Received 0 Likes
on
0 Posts

I was asking myself this same question when I read about the smaller pulley.
When I road raced my 02 Z28 it would super heat the fluid to the point that it would belch out the cap (common problem) so I have been worried about this issue w other builds.
I hope it all works though, as I want to run the truck style accessory drive on my Buick/L92 swap also.
I'm guessing if anything it would only be a problem at the track, or maybe not at all with the different pump design (truck vs f-body).
09-18-2012, 12:16 PM
#53
Great thread! Lost of good info and pics.
I was asking myself this same question when I read about the smaller pulley.
When I road raced my 02 Z28 it would super heat the fluid to the point that it would belch out the cap (common problem) so I have been worried about this issue w other builds.
I hope it all works though, as I want to run the truck style accessory drive on my Buick/L92 swap also.
I'm guessing if anything it would only be a problem at the track, or maybe not at all with the different pump design (truck vs f-body).
09-18-2012, 08:03 PM
#54
Staging Lane
Join Date: Apr 2012
Posts: 94
Likes: 0
Received 0 Likes
on
0 Posts
You lucky dog. I copied your part number and ordered the same Amazon deal on the Griffin LS rad. Mine came today, delivered for $247. No such luck on the trans cooler like you. I am still plenty happy. 
My Griffin dual pass radiator came in today. Couple of things I noticed that were different than I had in my mind. One is it has a drain plug. Another is the filler neck is on the passenger side. Last it appears to be set up for a transmission cooler. These are all positives that I had not expected. Maybe after looking at so many radiator posibilities my mind went into overload. 
I new about the steam line vent which was a deciding factor. Total cost from Amazon.com was $247. That was within my budget. My Derale dual fan radiator shroud came in yesterday. A very nice piece. I will post a picture of it later. Here is a picture of the radiator.

I new about the steam line vent which was a deciding factor. Total cost from Amazon.com was $247. That was within my budget. My Derale dual fan radiator shroud came in yesterday. A very nice piece. I will post a picture of it later. Here is a picture of the radiator.
Last edited by likes cars; 09-18-2012 at 09:32 PM.
09-18-2012, 10:54 PM
#55
I figured mine must have been a canceled order or some such thing and I just happened to order it at the right time. So instead of building a new one they just shipped that one to me. It is a nice radiator. Has the drain plug and steam vent tube which a lot of radiators do not come with.
At the moment I am fabrication the pieces that are necessary to hold the radiator in place including the dual electric fans. I will post some pictures when I am done. Once the radiator and fans are in place I can start constrution of my cold air intake. I need to know how much room I will have for the 4" CAI tube so I can proceed on that front.
At the moment I am fabrication the pieces that are necessary to hold the radiator in place including the dual electric fans. I will post some pictures when I am done. Once the radiator and fans are in place I can start constrution of my cold air intake. I need to know how much room I will have for the 4" CAI tube so I can proceed on that front.
09-20-2012, 05:12 PM
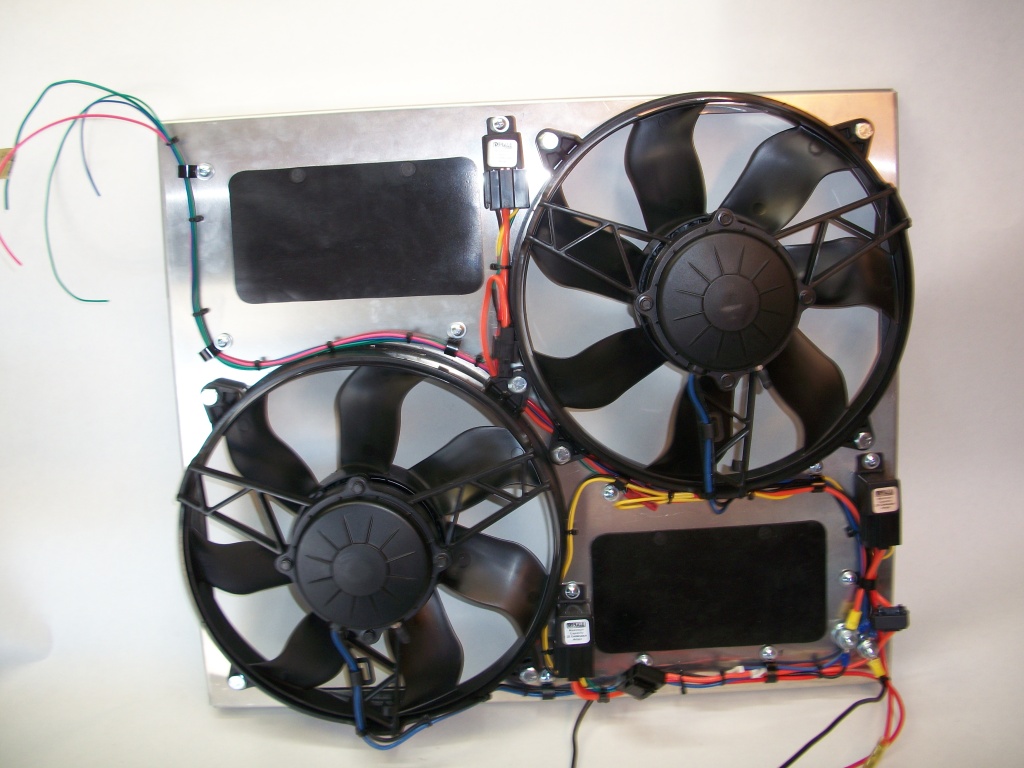
#56
Just finished up wiring my Derale dual radiator fans. The upper left are the wires that control the relays plus ignition voltage. Three of the wires control the relays. One relay for fan #1, one relay for fan #2 and the third relay is controled by the A/C switch and will turn on the upper right fan anytime the A/C is turned on. The bottom left three wires are battery power for each fan and one ground wire. Probably better ways to do it but here is what I did.
09-26-2012, 02:36 PM
#57
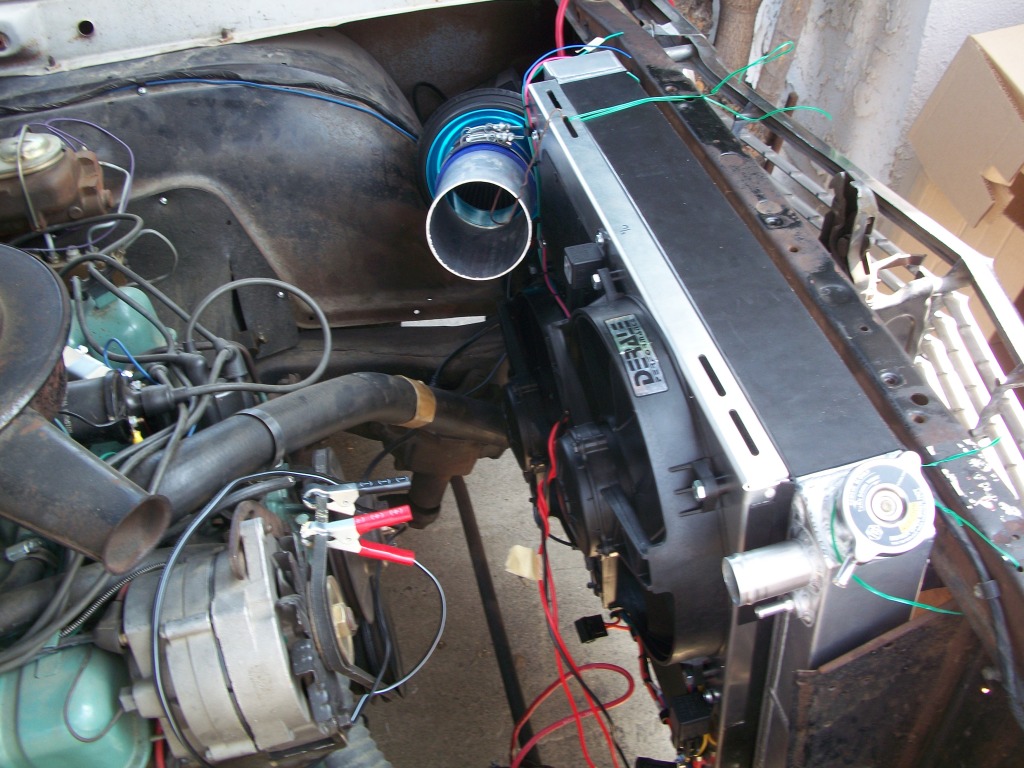
Test fitting the radiator, fans and cold air intake. Everthing looks good so far. I will be using a 4" 90 degree aluminum elbow with a 8" leg and a 6" CLR for the cold air intake tubing. This looks like it will fit perfect. I was thinking I would have to add some straight but it does not look like I will need to. Here is a picture.
Last edited by 1989GTA; 09-26-2012 at 02:42 PM.
10-05-2012, 08:03 PM
#59
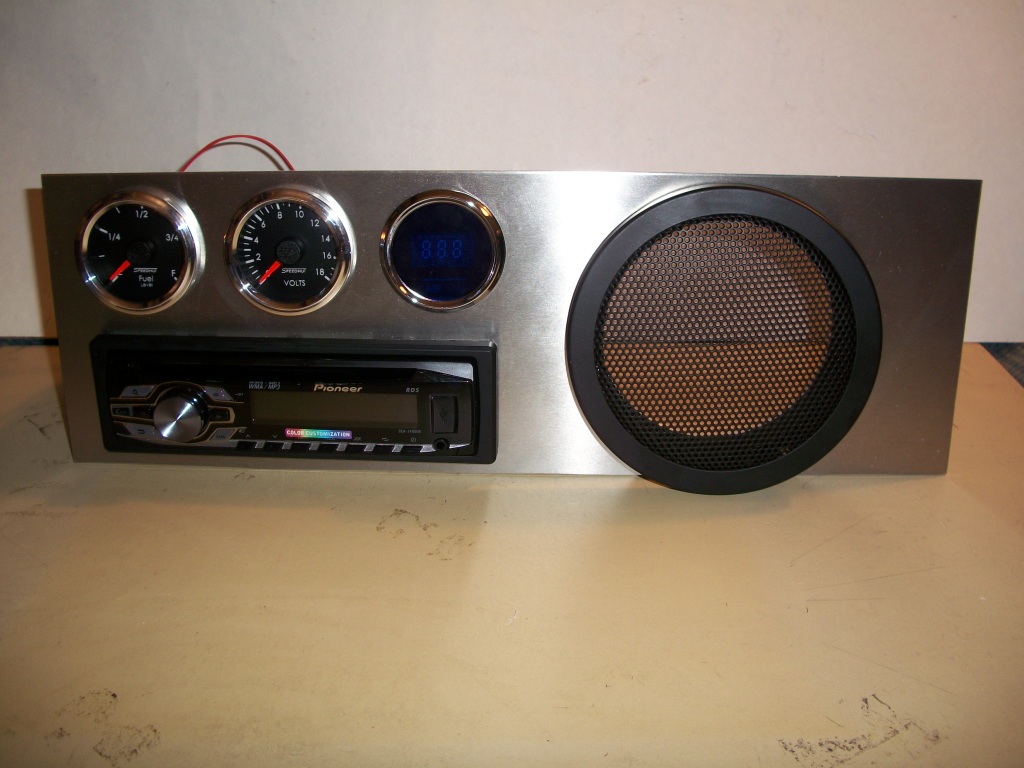
Worked on the right hand dash panel today. Got it cut out for the gauges, radio and speaker. I still need to profile the right hand side of the panel beyond the speaker. Here is a progress picture. The gauge on the right is a Dakota Digital outside air temperature gauge as shown above in this thread. The speaker cover is just propped up there for the picture.
10-06-2012, 02:45 PM
#60
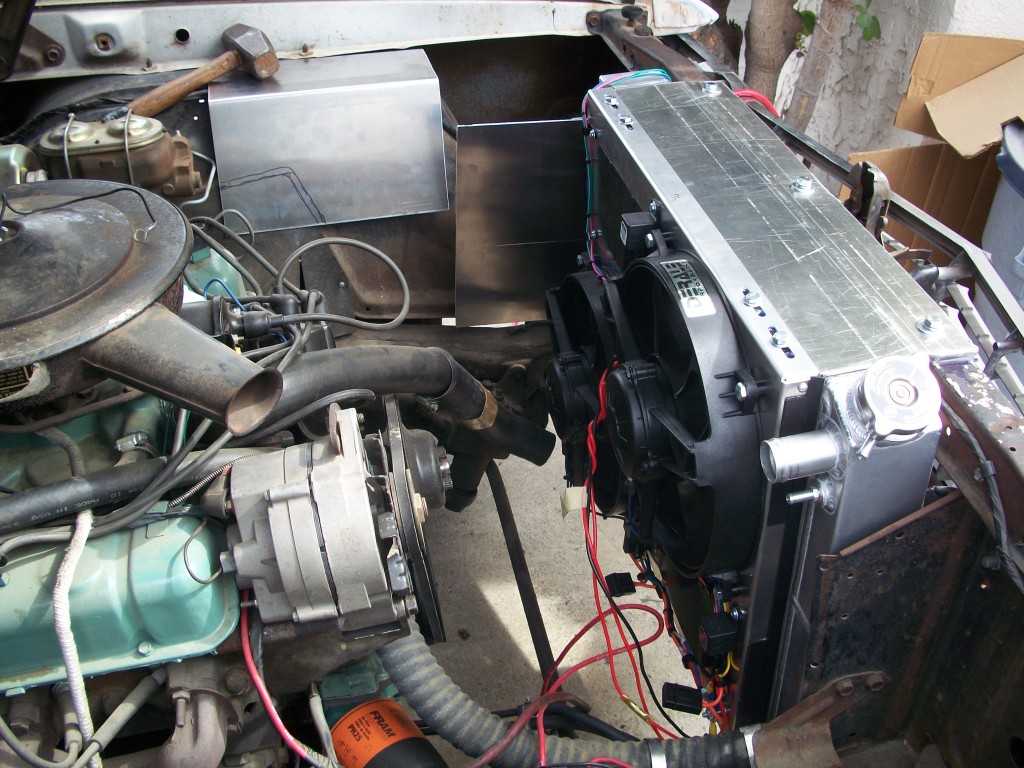
Finally have all the pieces to fully fit in my radiator and have done so. Also at the far end of the radiator you can see the front piece of my cold air intake box sticking out to the left. Need to cut a 4.125" circle in it for the tubing and make the other pieces. To the left of that is a piece of bent sheet aluminum where my E38 ECM will mount along with the relay/fuse box and a couple of terminal strips. Here is the updated picture.
Last edited by 1989GTA; 10-06-2012 at 07:12 PM.

