
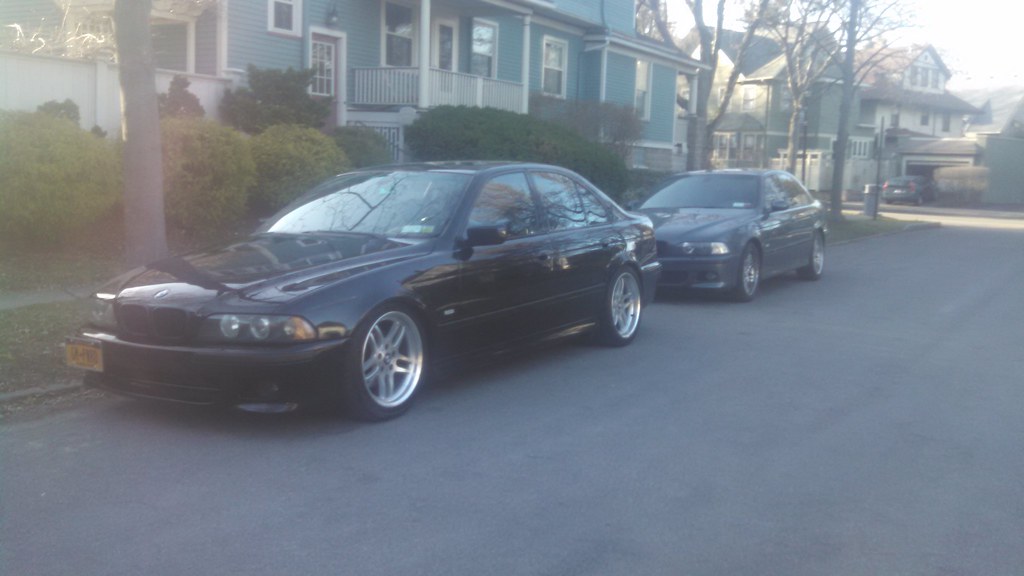
LQ4/T56 into 2001 BMW 540i
 03-22-2015, 09:03 AM
#421


^Absolutely. You need to employ the same tactics she uses on you - constant persuasion over time (such as her nagging for a new sofa set or carpet). Recently I was browsing C5 Z06 prices just to see where they were, and she says "You can have one of those if you get rid of the BMW." And only a few years ago, any fast toy would have been out of the question!

 04-20-2015, 11:02 AM
#422
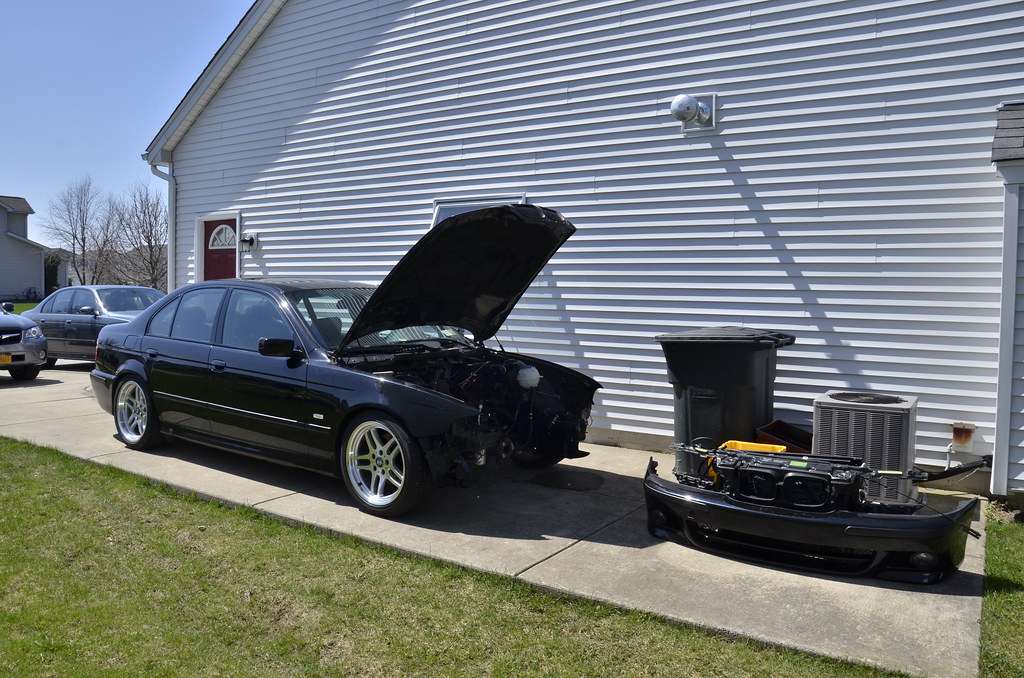
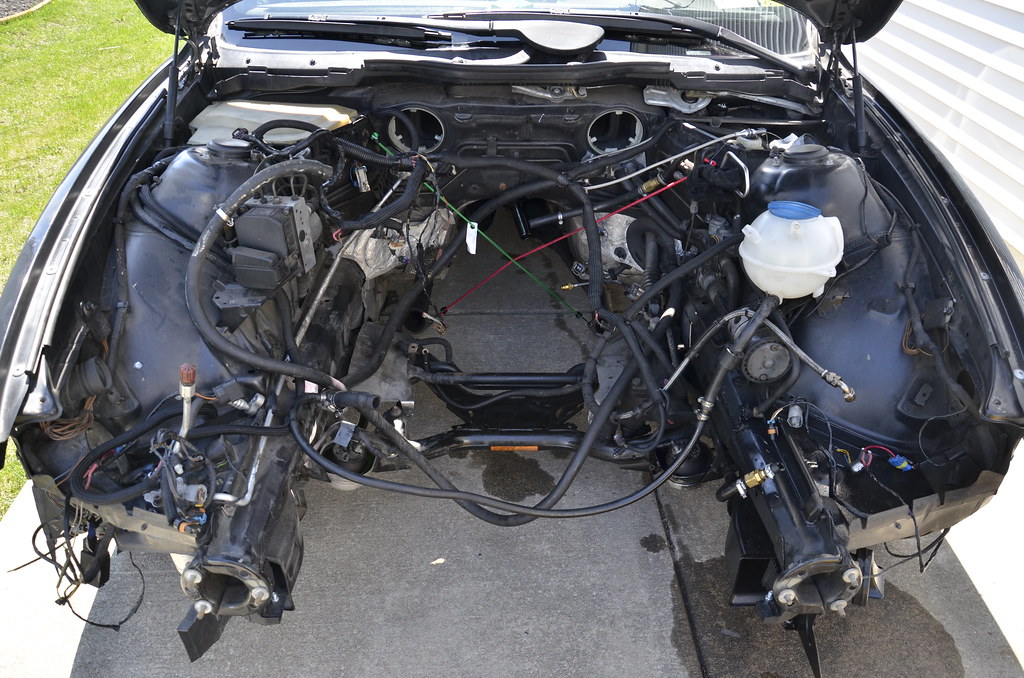
So, some spring updates. I replaced the overflow bottle as the old one was discolored, replaced the kidney grills with new ones, and raised/adjusted/leveled the coilovers.
Took the car to be tuned at New Era, Mike did a nice job, although it proved difficult to tune.
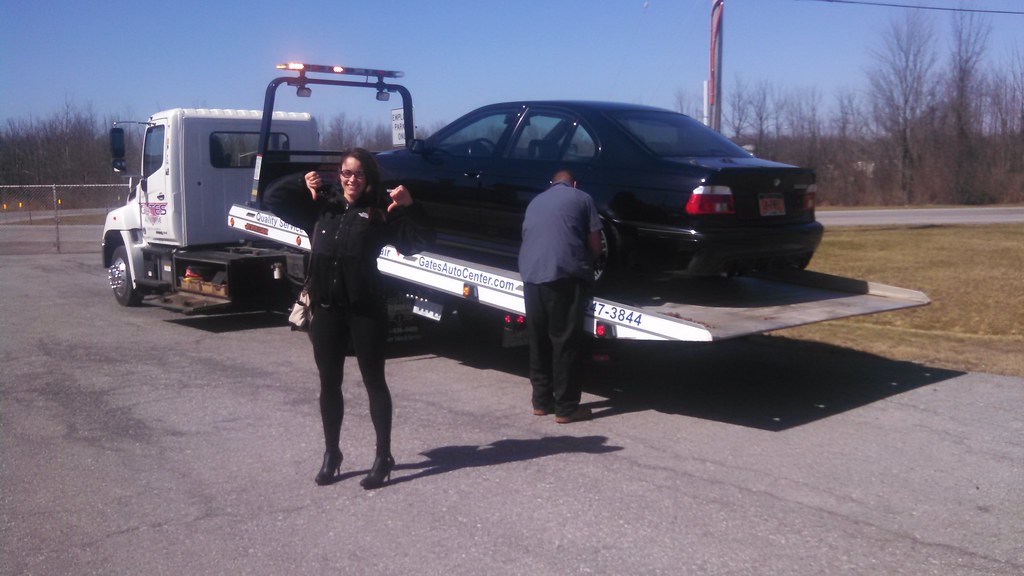
Drove it to work every day for a week and generally enjoyed it. Went to Rochester to visit a friend:
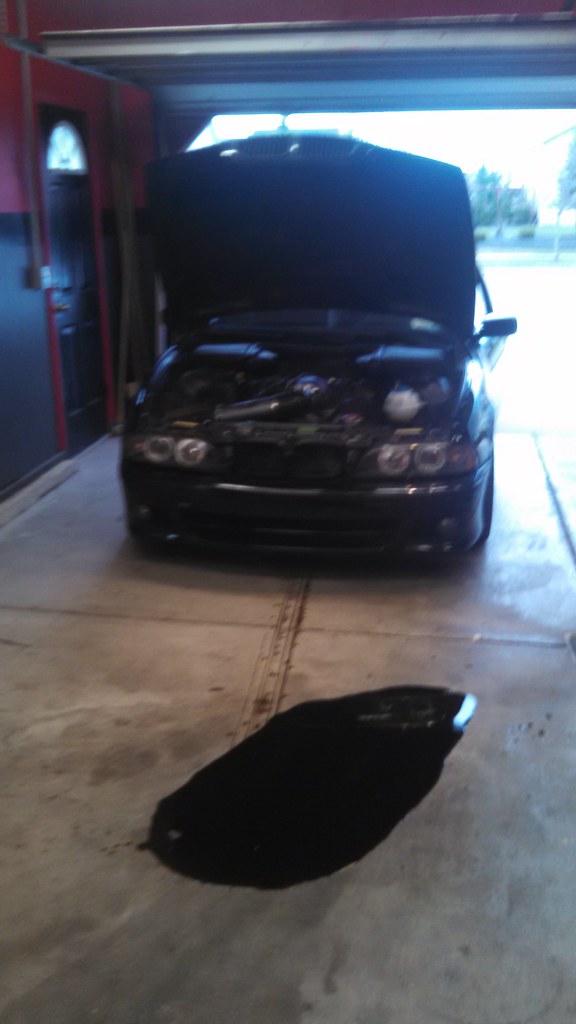
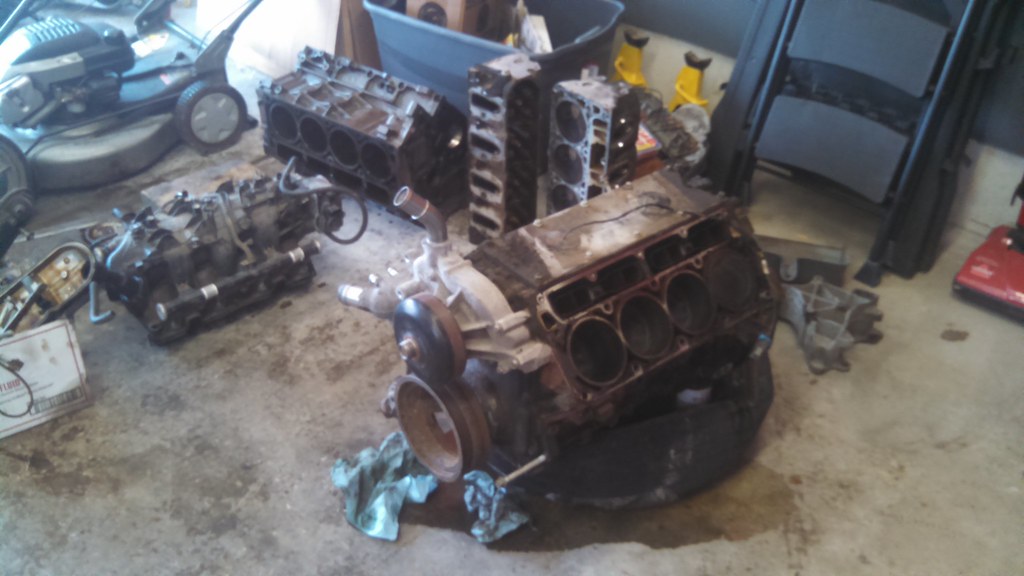
On the drive back, about 60 miles from home, I got a random miss that turned into a tap, which quickly turned into a light knock 30 seconds later
Got it home, pulled it into the garage, and we get this

Oil Pan Doritos
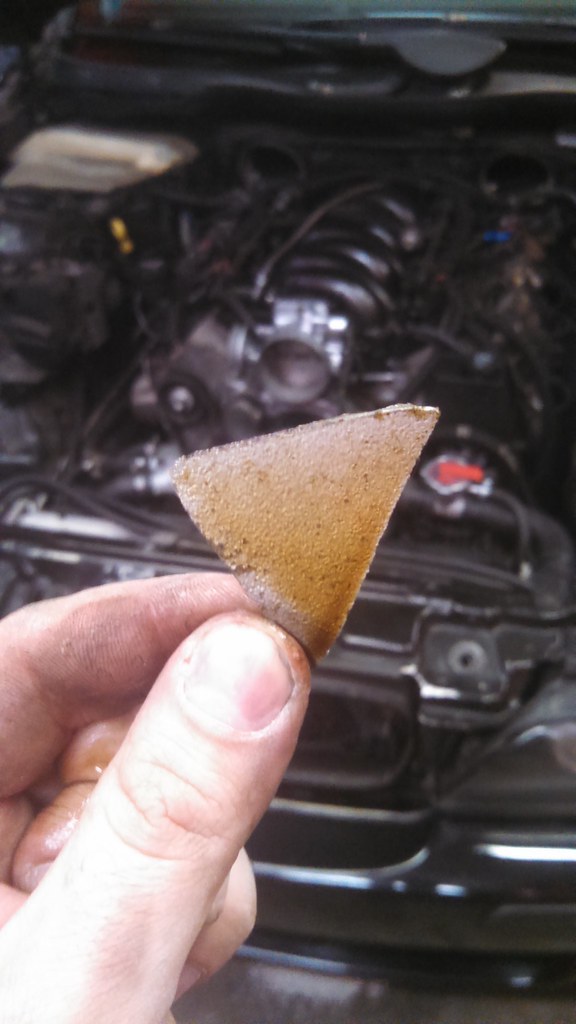
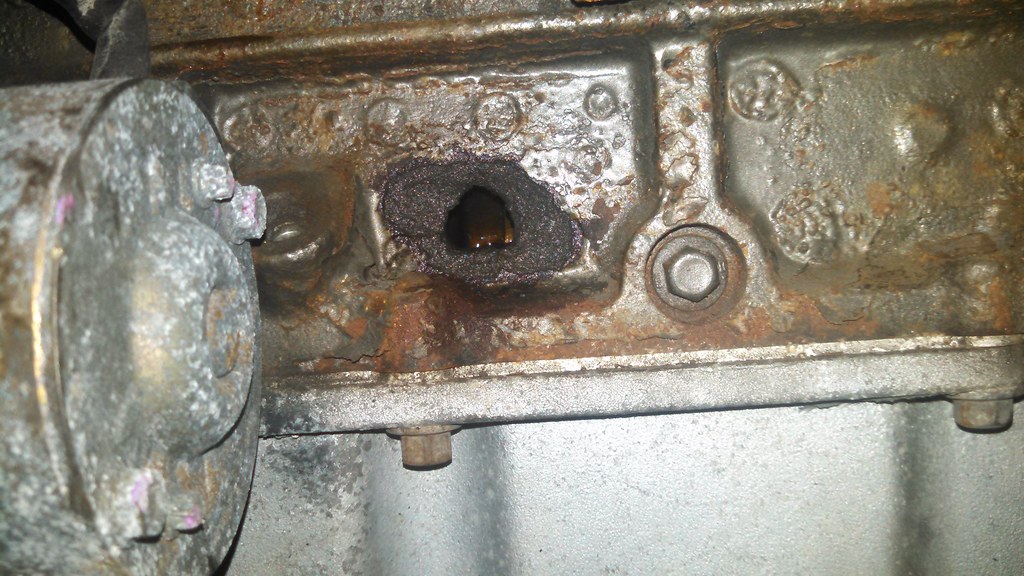
All caused by this
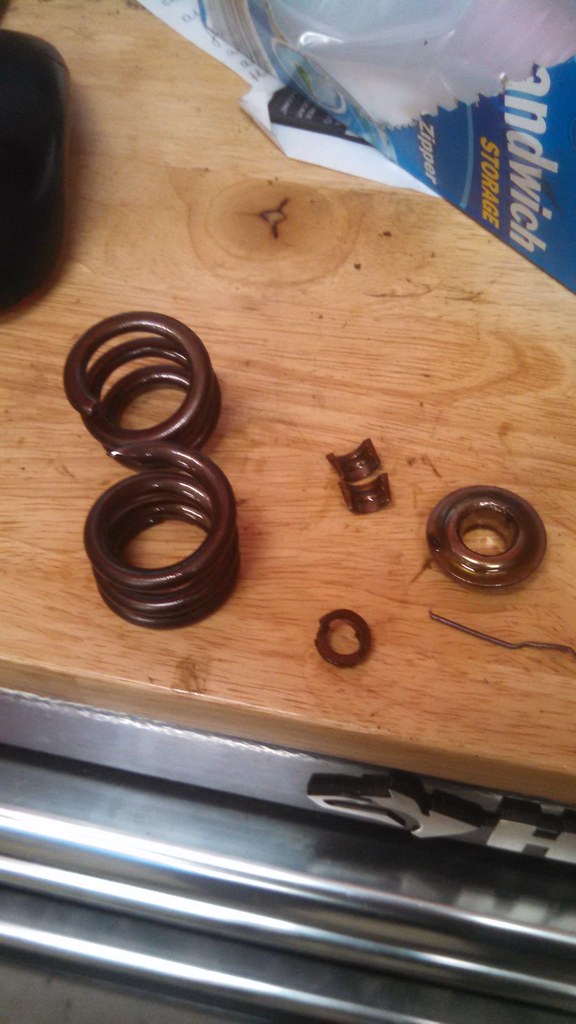
Spring broke, dropped a valve, valve met piston, broke the rod, and sent it through the pan and block. So, now I'll need a replacement block and heads - the valve made some big gouges on the inside of the combustion chamber - currently on the hunt for a dropout just like I had. The spring was a single beehive, PRC 1518 good to .600 (my cam is .588 on both intake/exhaust). I bought the cam, springs, and pushrods as part of a package deal sold by Texas Speed. Spoke to them and they will be replacing all 16 springs for me with a stronger set, along with other seals, seats, and retainers. Just kind of ironic since I only drove the car maybe 300 miles after putting it on the road...if it had happened just a few hundred miles sooner, it would have been late last year, and I'd have been able to spend all winter fixing it. But, it is what it is, so gotta move forward.
Day after the motor blew - 90 mins in
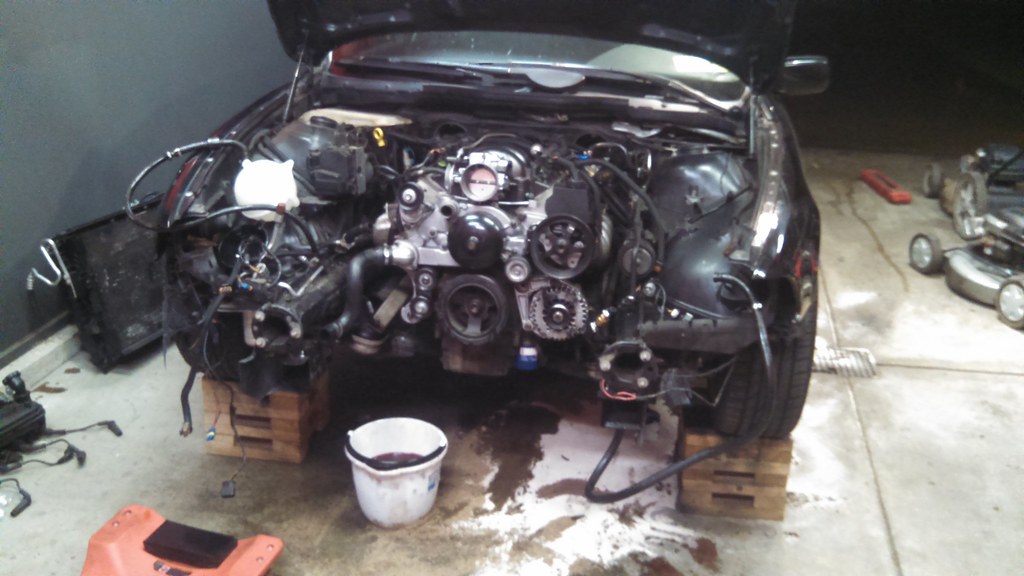
Another few hours on Tuesday got me here
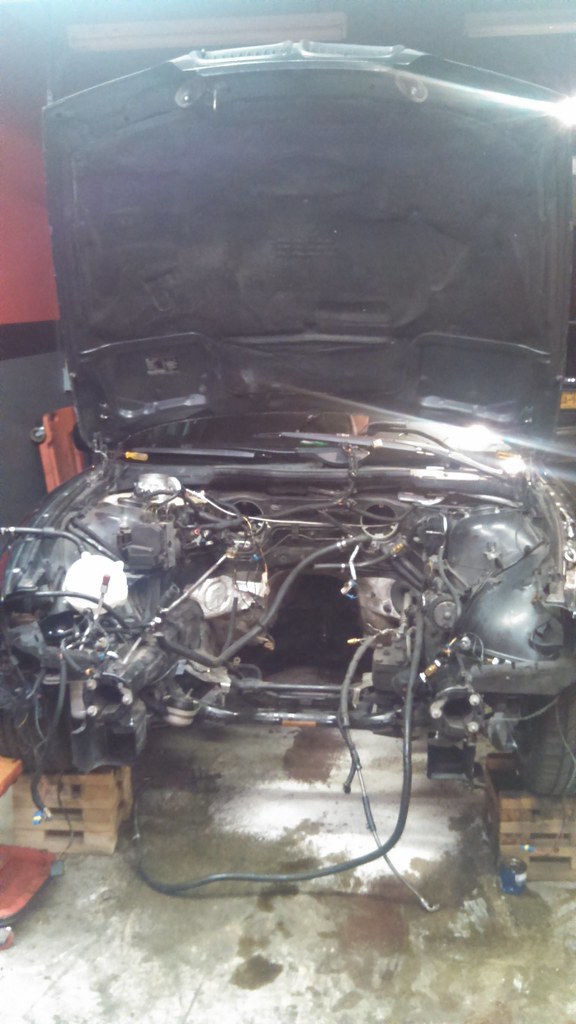
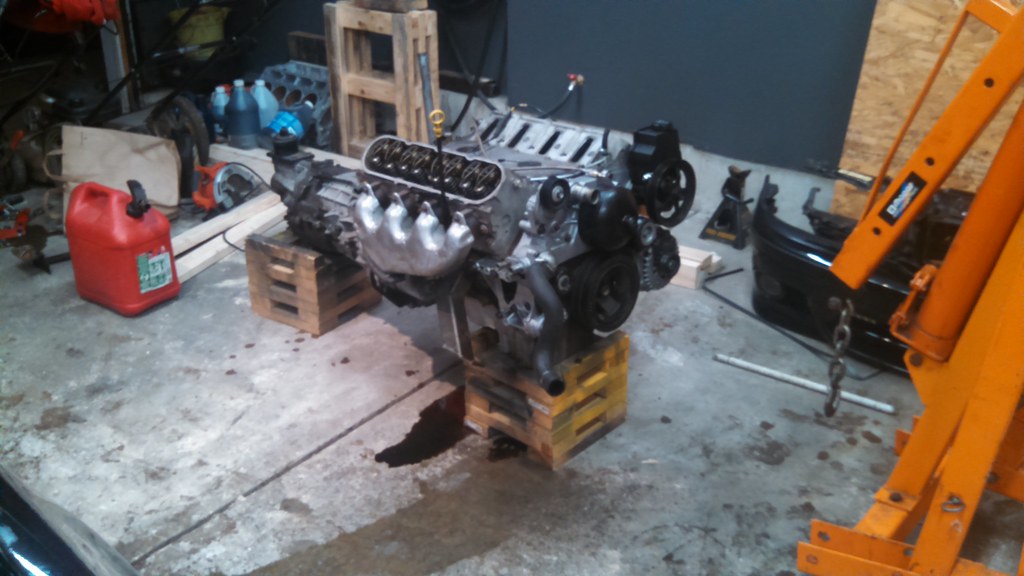
Had a buddy stop by and help me "put it in storage"
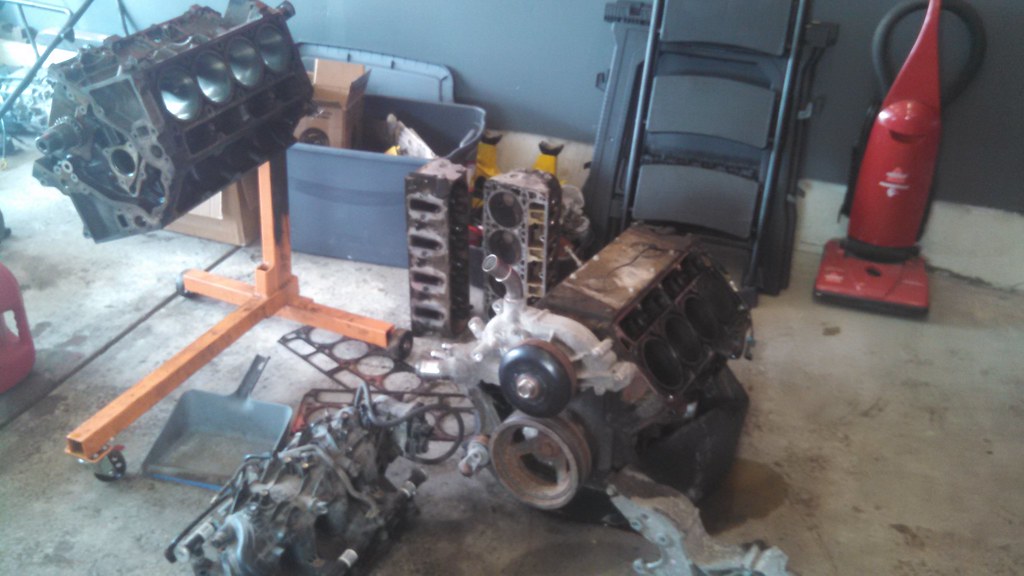
So, it sits for now until I can find a new motor. I only had a chance to pull the one head, and it was trashed. Still need to put the motor on a stand and pull the pan and accessories/front cover to see if the lifters/cam survived.
Took the car to be tuned at New Era, Mike did a nice job, although it proved difficult to tune.
Drove it to work every day for a week and generally enjoyed it. Went to Rochester to visit a friend:
On the drive back, about 60 miles from home, I got a random miss that turned into a tap, which quickly turned into a light knock 30 seconds later
Got it home, pulled it into the garage, and we get this
Oil Pan Doritos
All caused by this
Spring broke, dropped a valve, valve met piston, broke the rod, and sent it through the pan and block. So, now I'll need a replacement block and heads - the valve made some big gouges on the inside of the combustion chamber - currently on the hunt for a dropout just like I had. The spring was a single beehive, PRC 1518 good to .600 (my cam is .588 on both intake/exhaust). I bought the cam, springs, and pushrods as part of a package deal sold by Texas Speed. Spoke to them and they will be replacing all 16 springs for me with a stronger set, along with other seals, seats, and retainers. Just kind of ironic since I only drove the car maybe 300 miles after putting it on the road...if it had happened just a few hundred miles sooner, it would have been late last year, and I'd have been able to spend all winter fixing it. But, it is what it is, so gotta move forward.
Day after the motor blew - 90 mins in
Another few hours on Tuesday got me here
Had a buddy stop by and help me "put it in storage"
So, it sits for now until I can find a new motor. I only had a chance to pull the one head, and it was trashed. Still need to put the motor on a stand and pull the pan and accessories/front cover to see if the lifters/cam survived.
Last edited by LQ4-E39; 04-20-2015 at 11:09 AM.


 04-21-2015, 02:29 PM
#427
$2,000 premium over an iron block for 80lbs savings and less displacement? no thanks. even an LS2 block, which would keep my displacement, is a Gen4 and not set up for my Gen3 harness. besides, the beauty of an iron block is cheap replacement in case of an "oops"...much like this one.
04-22-2015, 07:53 AM
#428
Keep the cubes
$2,000 premium over an iron block for 80lbs savings and less displacement? no thanks. even an LS2 block, which would keep my displacement, is a Gen4 and not set up for my Gen3 harness. besides, the beauty of an iron block is cheap replacement in case of an "oops"...much like this one.
04-28-2015, 12:33 PM
#429
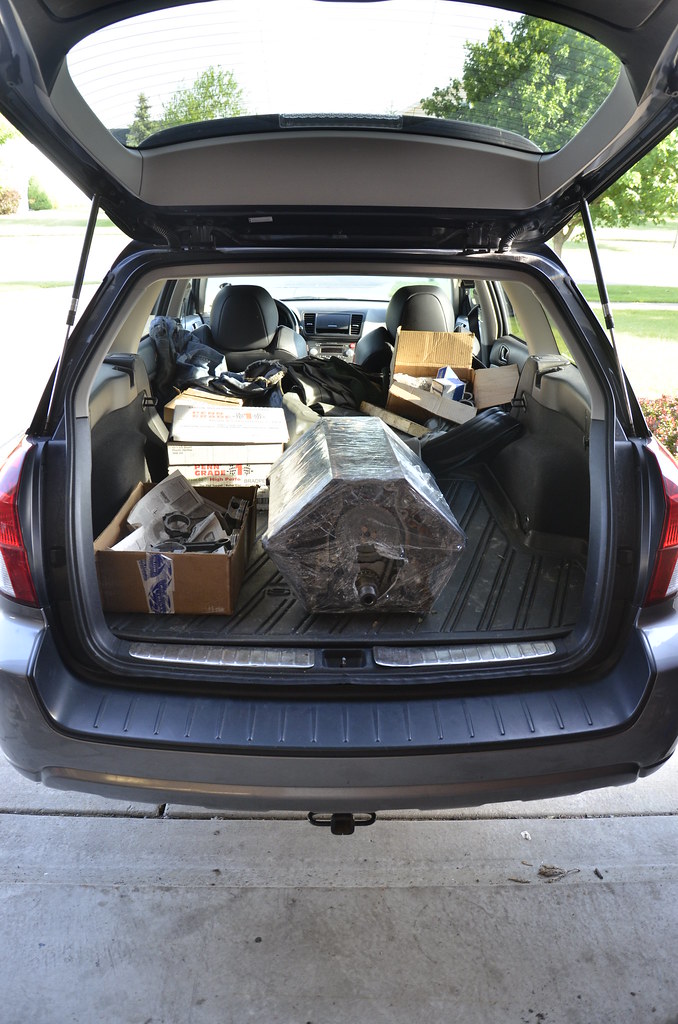
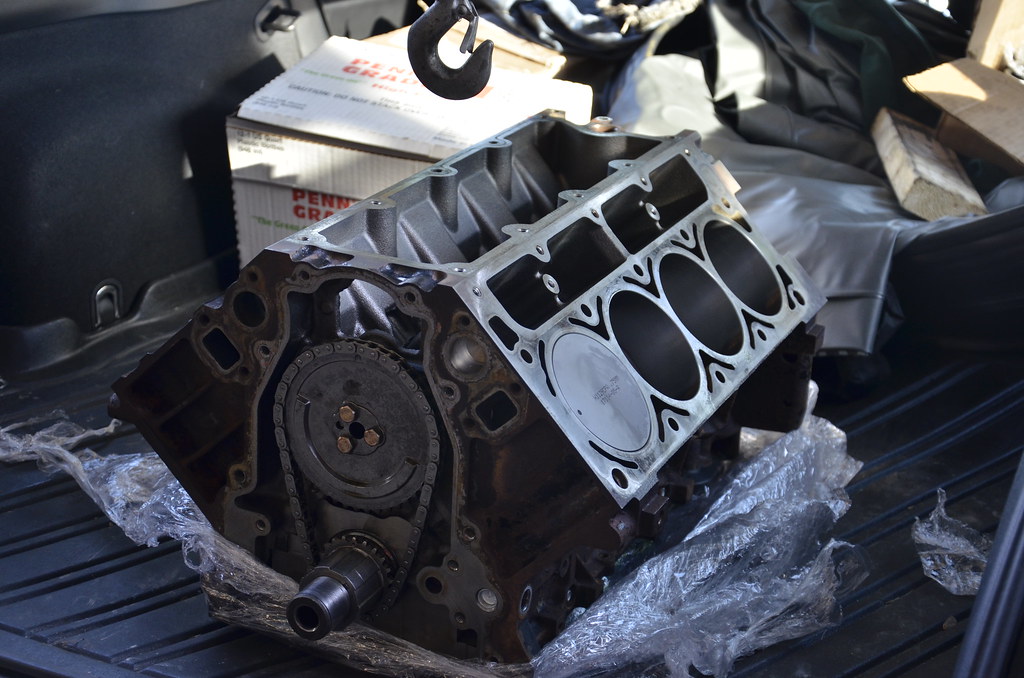
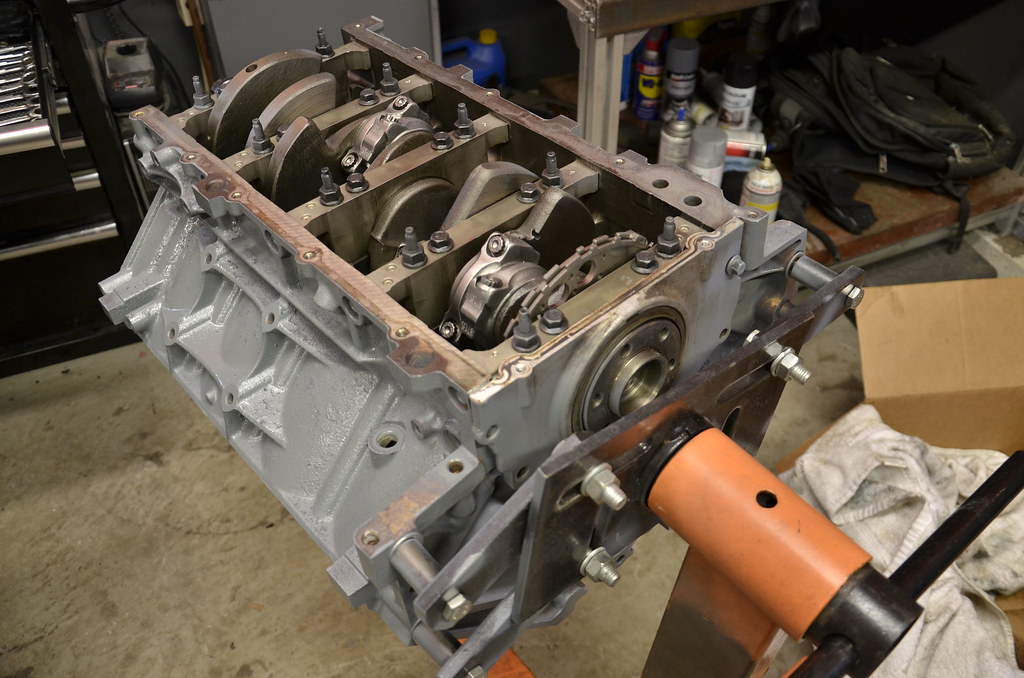
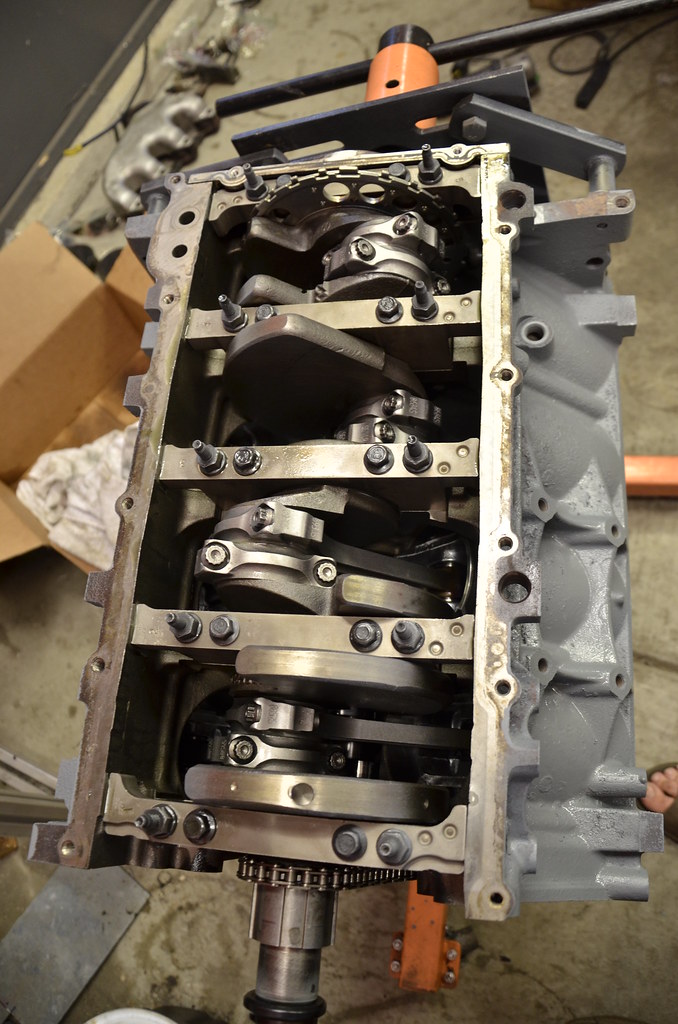
Which brings us to this past weekend. Was cleaning up the garage a bit on Sunday morning, on a whim decided to hop on the local Craigslist and do the usual search for "6.0". Lo and behold there was one locally for cheap, with a "slight knock", For my purposes, perfect! It came with some nice parts that will help recoup some costs. Loaded her up and had it home before noon. Not much info on the motor other than that it "came out of a steak truck" (LOL) and had aluminum 317 heads (so, it was at least a 2001+).
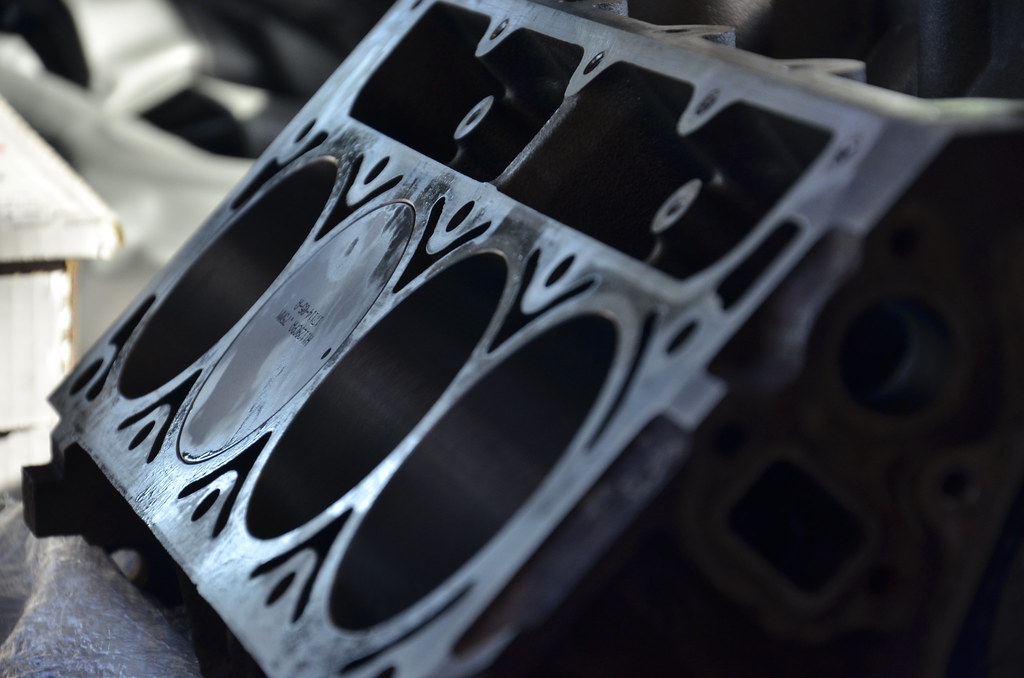
Yanked the intake and heads and checked bores, they looked great for unknown mileage.
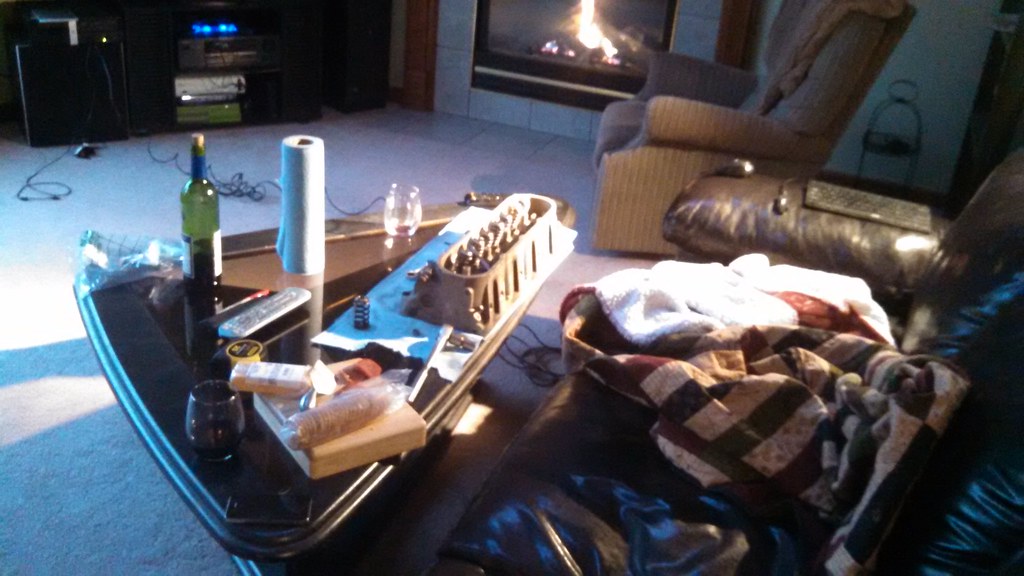
Removed the remaining 15 valve springs at my super fancy cylinder head service bench. Wine and cheese come standard
Awaiting these LS2 full floating rods/pistons, should be here tomorrow - can't say no to more compression while I'm in there!

Tonight I'm borrowing a friend's engine crank to finally put the new motor on the stand. I had my old man drop off the power washer last night (and fixed a broken switch on it), so as soon as it's completely torn down, I will drag the block over to the neighbor's front yard and start cleaning it up.
Yanked the intake and heads and checked bores, they looked great for unknown mileage.
Removed the remaining 15 valve springs at my super fancy cylinder head service bench. Wine and cheese come standard
Awaiting these LS2 full floating rods/pistons, should be here tomorrow - can't say no to more compression while I'm in there!
Tonight I'm borrowing a friend's engine crank to finally put the new motor on the stand. I had my old man drop off the power washer last night (and fixed a broken switch on it), so as soon as it's completely torn down, I will drag the block over to the neighbor's front yard and start cleaning it up.
04-28-2015, 10:15 PM
#430
$2,000 premium over an iron block for 80lbs savings and less displacement? no thanks. even an LS2 block, which would keep my displacement, is a Gen4 and not set up for my Gen3 harness. besides, the beauty of an iron block is cheap replacement in case of an "oops"...much like this one.


 06-04-2015, 07:26 AM
#436
quick update - between the day job and working on the car I am pulling some 16+ hour days here (and will be for the next week)
the good news is that things are moving right along with no issues (aside from misplacing my tube of RTV and spending 45 mins looking for it).
Tuesday 6pm, motor picked up from builder. Bottom end (crank, pistons, rods) assembled, otherwise a totally bare block
 IMG_20150602_170056_314 by Norbert Ogiba, on Flickr
Tuesday 11pm
Block cleaned, masked, painted, all block coolant and oil plugs installed, oil tray on, cleaned and prepped oil pan/windage tray/pickup tube/oil pipes. Head dowels in. Crank and cam sensors in, along with valley cover and knock sensors. Had to call it quits as I was waiting on the oil barbell plug and a new timing chain. I love Summit Racing
 IMG_20150602_220307_082 by Norbert Ogiba, on Flickr
Wednesday 11pm
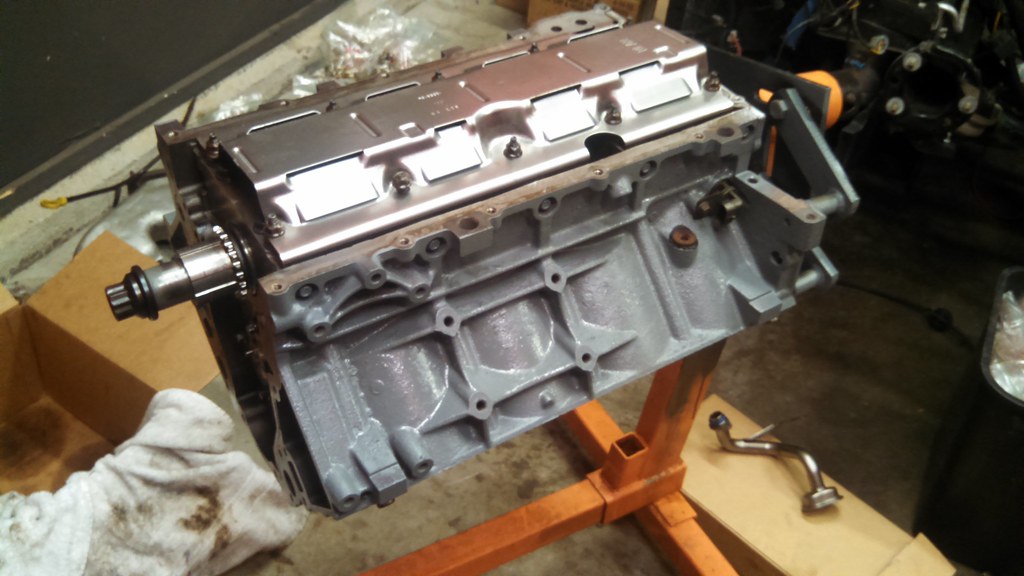
New timing chain installed and motor timed (LOL), cam bolts loctited and torqued. Oil pump installed, oil pickup tube inspected and installed (don't screw up that o-ring!) Rear cover and main seal installed, balancer pulled on to align front cover and main seal, both covers aligned and torqued. Oil pan and accessories installed, sealed and torqued, alignment checked. Deck surface cleaned, headgaskets and heads installed and ARP bolts torqued in sequence to spec. Wrapped up the night by installing and torquing 8 new spark plugs.
 IMG_20150603_221917_087 by Norbert Ogiba, on Flickr
I am taking a ton of pictures with my other camera for documentation's sake but don't have time to make my usual very long winded post so those will have to wait until a few weeks from now
the good news is that things are moving right along with no issues (aside from misplacing my tube of RTV and spending 45 mins looking for it).
Tuesday 6pm, motor picked up from builder. Bottom end (crank, pistons, rods) assembled, otherwise a totally bare block
IMG_20150602_170056_314 by Norbert Ogiba, on FlickrTuesday 11pm
Block cleaned, masked, painted, all block coolant and oil plugs installed, oil tray on, cleaned and prepped oil pan/windage tray/pickup tube/oil pipes. Head dowels in. Crank and cam sensors in, along with valley cover and knock sensors. Had to call it quits as I was waiting on the oil barbell plug and a new timing chain. I love Summit Racing
IMG_20150602_220307_082 by Norbert Ogiba, on FlickrWednesday 11pm
New timing chain installed and motor timed (LOL), cam bolts loctited and torqued. Oil pump installed, oil pickup tube inspected and installed (don't screw up that o-ring!) Rear cover and main seal installed, balancer pulled on to align front cover and main seal, both covers aligned and torqued. Oil pan and accessories installed, sealed and torqued, alignment checked. Deck surface cleaned, headgaskets and heads installed and ARP bolts torqued in sequence to spec. Wrapped up the night by installing and torquing 8 new spark plugs.
IMG_20150603_221917_087 by Norbert Ogiba, on FlickrI am taking a ton of pictures with my other camera for documentation's sake but don't have time to make my usual very long winded post so those will have to wait until a few weeks from now
06-09-2015, 10:49 AM
#437
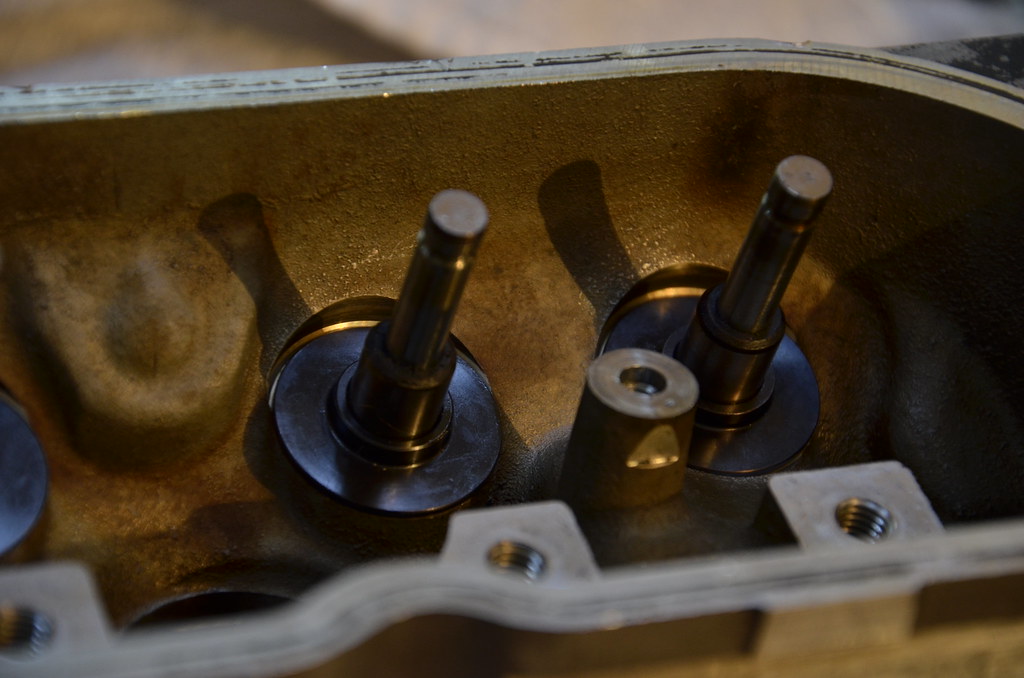
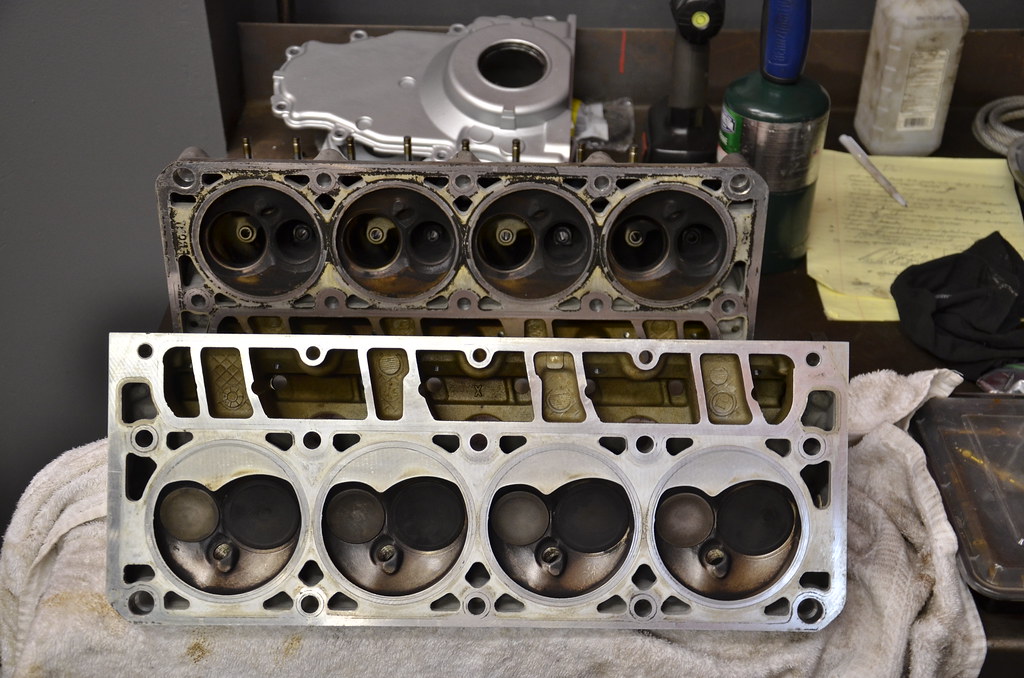
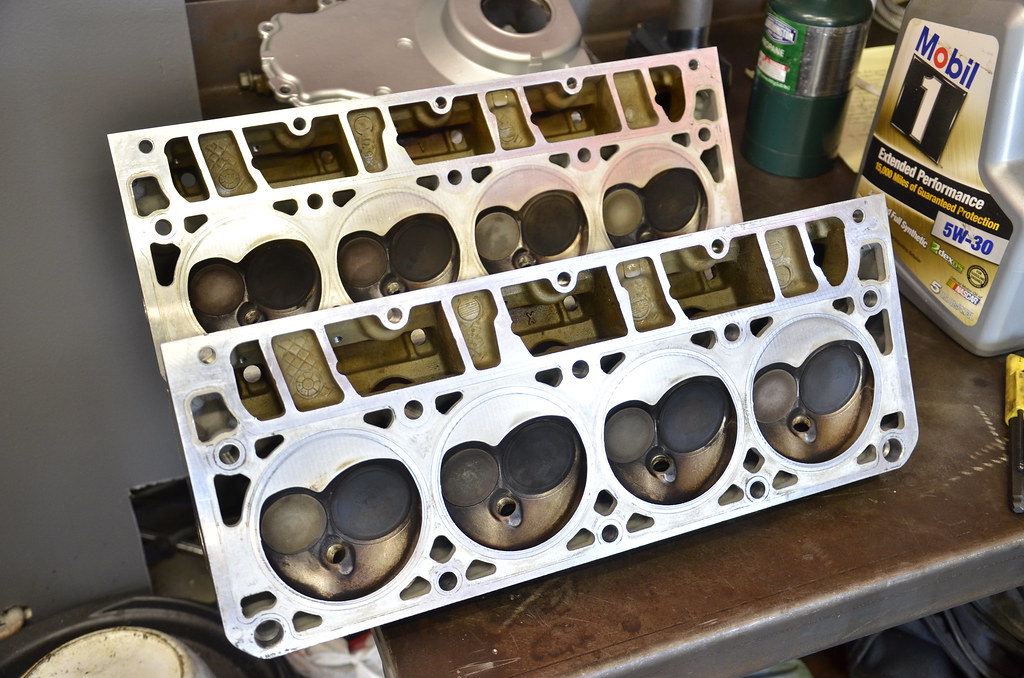
Cylinder Head Cleaning and Reassembly
Since one of my 317 heads was trashed from the bent/broken valve in the initial mishap, I decided to go down a different route with heads and grab a used set of 241s locally - they were very clean, low mileage, and the price was right. Although they don't technically flow as well as 317s, I was willing to give them a try since I did not have to mill them to bring up compression.
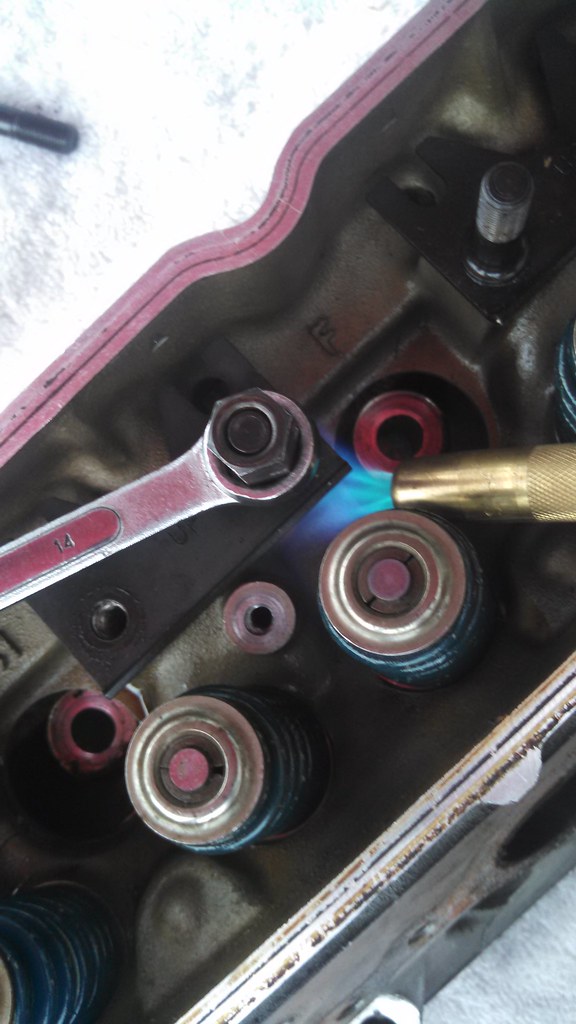
The heads came assembled with stock springs and valves, but the previous owner had installed a set of stud-style rocker mounts (with loctite), so I spent an evening with a handheld MAP torch coaxing them out.
 IMG_20150530_200448_163 by Norbert Ogiba, on Flickr
Before pictures - heads were removed from a 2002 Pontiac Trans Am with 50,000 miles.
 _DSC3835 by Norbert Ogiba, on Flickr
 _DSC3836 by Norbert Ogiba, on Flickr
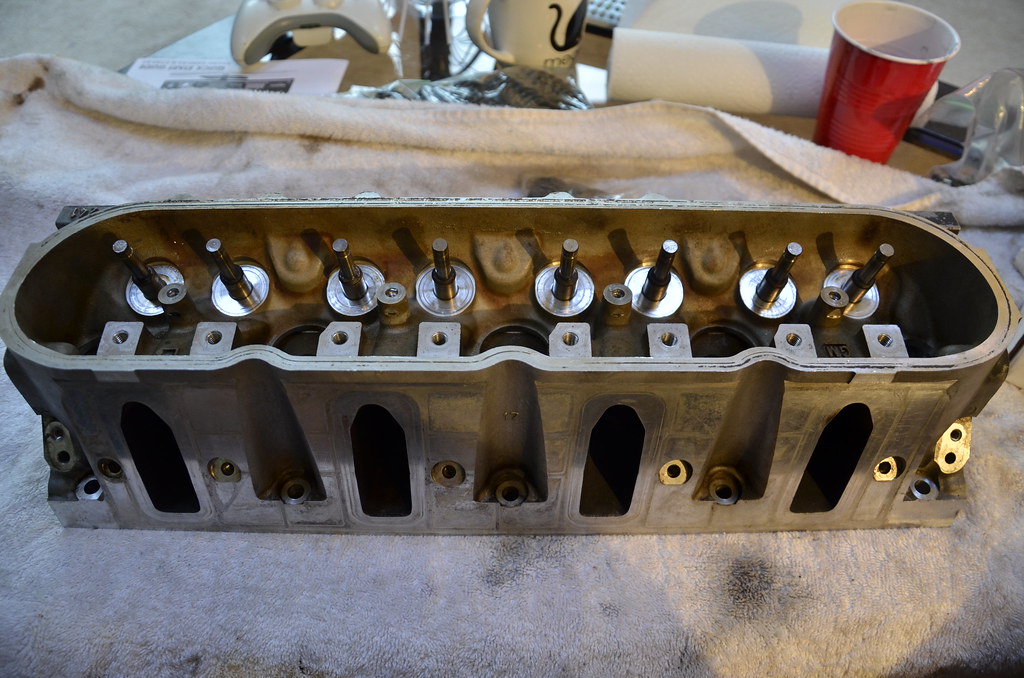
I cleaned all surfaces with a rag and isopropyl alcohol to remove grease and dirt, and then ran a plastic scraping tool over all surfaces to remove the last of the old gasket material. They came out looking very nice.
Bare valve seat base
 _DSC3838 by Norbert Ogiba, on Flickr
Seats installed
 _DSC3839 by Norbert Ogiba, on Flickr
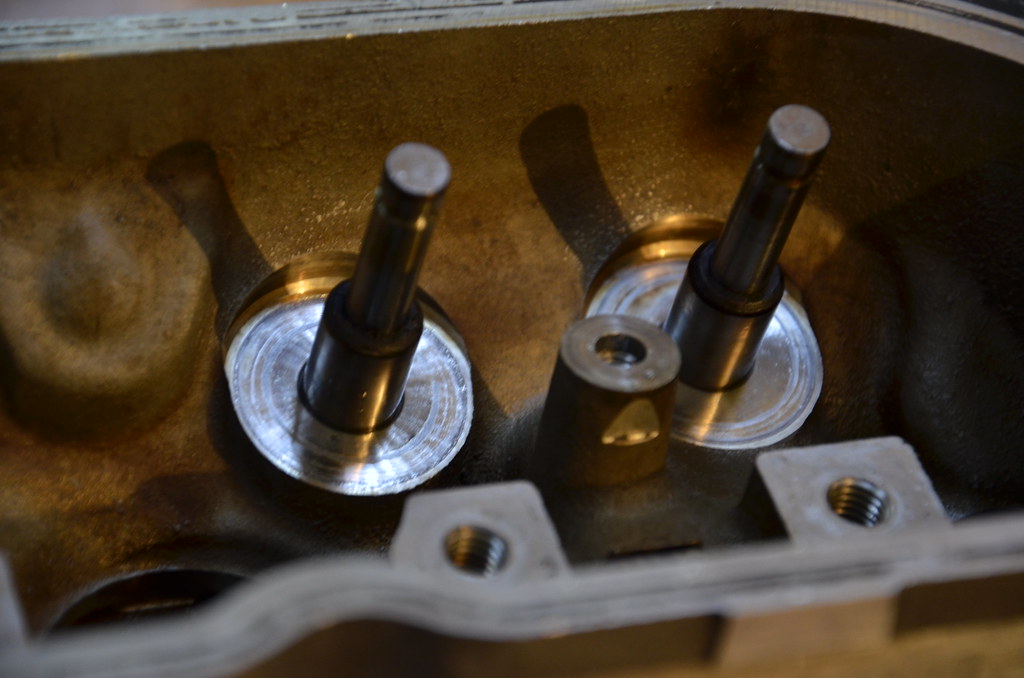
Brand new PRC dual valve springs with Titanium valve retainers.
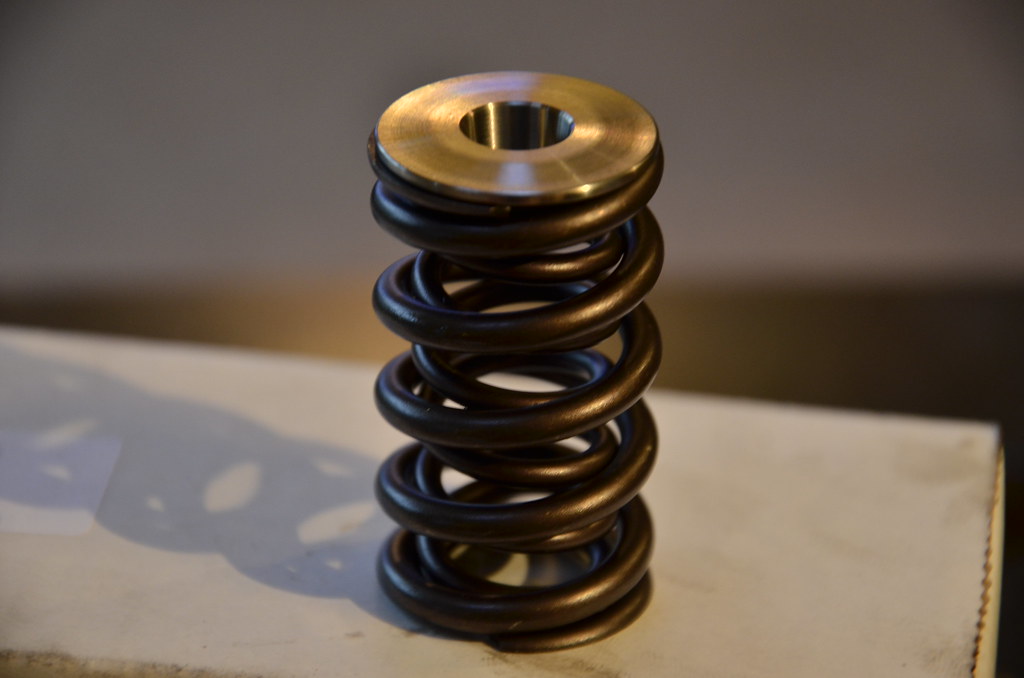 _DSC3841 by Norbert Ogiba, on Flickr
Installed using my homemade spring compressor.
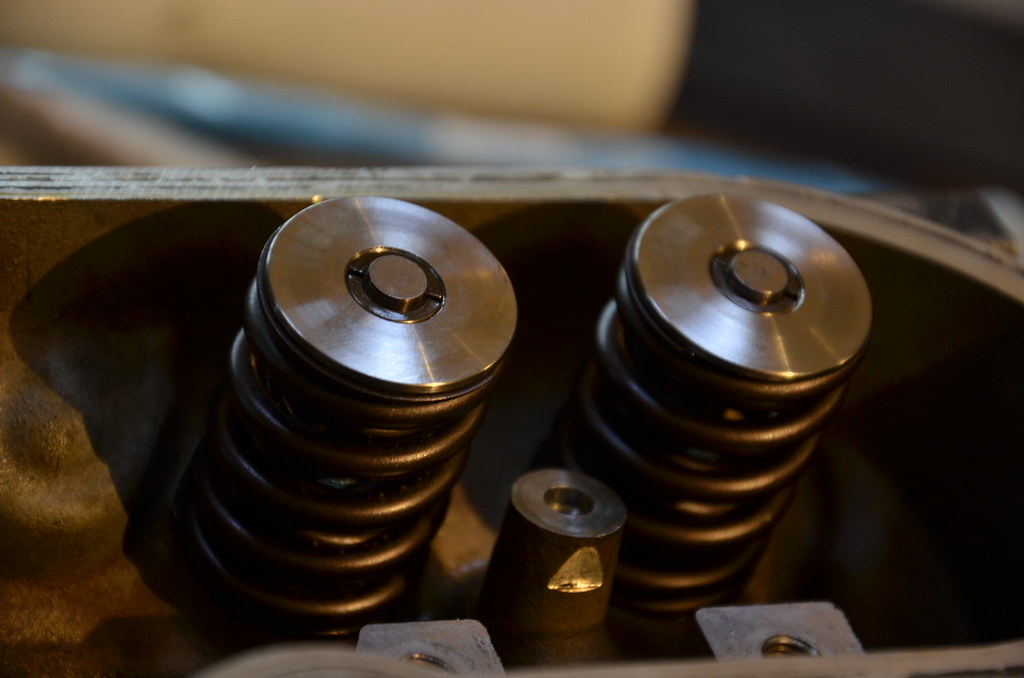 _DSC3842 by Norbert Ogiba, on Flickr
Before and after cleaning service on the heads, all done by hand. I actually really enjoyed this part.
 _DSC3844 by Norbert Ogiba, on Flickr
The heads came out really nicely in the end. Of course I installed all new GM OEM valve seats and seals in addition to the dual springs and Ti retainers. The factory valve locks were in good shape and were reused.
 _DSC3850 by Norbert Ogiba, on Flickr
Since one of my 317 heads was trashed from the bent/broken valve in the initial mishap, I decided to go down a different route with heads and grab a used set of 241s locally - they were very clean, low mileage, and the price was right. Although they don't technically flow as well as 317s, I was willing to give them a try since I did not have to mill them to bring up compression.
The heads came assembled with stock springs and valves, but the previous owner had installed a set of stud-style rocker mounts (with loctite), so I spent an evening with a handheld MAP torch coaxing them out.
IMG_20150530_200448_163 by Norbert Ogiba, on FlickrBefore pictures - heads were removed from a 2002 Pontiac Trans Am with 50,000 miles.
_DSC3835 by Norbert Ogiba, on Flickr_DSC3836 by Norbert Ogiba, on FlickrI cleaned all surfaces with a rag and isopropyl alcohol to remove grease and dirt, and then ran a plastic scraping tool over all surfaces to remove the last of the old gasket material. They came out looking very nice.
Bare valve seat base
_DSC3838 by Norbert Ogiba, on FlickrSeats installed
_DSC3839 by Norbert Ogiba, on FlickrBrand new PRC dual valve springs with Titanium valve retainers.
_DSC3841 by Norbert Ogiba, on FlickrInstalled using my homemade spring compressor.
_DSC3842 by Norbert Ogiba, on FlickrBefore and after cleaning service on the heads, all done by hand. I actually really enjoyed this part.
_DSC3844 by Norbert Ogiba, on FlickrThe heads came out really nicely in the end. Of course I installed all new GM OEM valve seats and seals in addition to the dual springs and Ti retainers. The factory valve locks were in good shape and were reused.
_DSC3850 by Norbert Ogiba, on Flickr
06-09-2015, 11:14 AM
#438
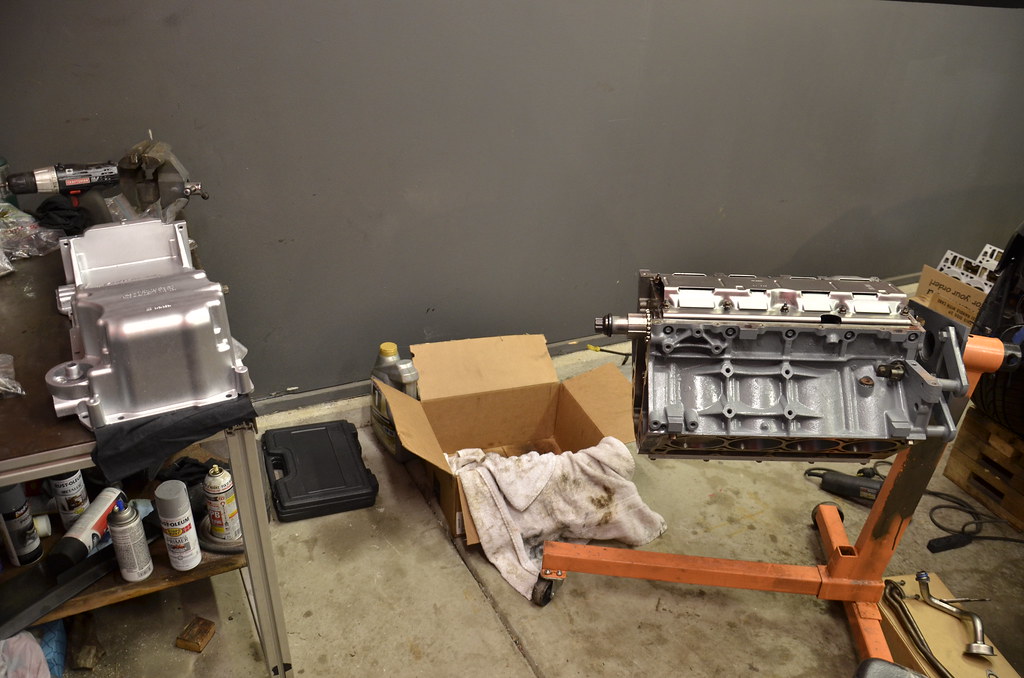
Engine block cleanup and paint
Bottom end came back from the machine shop on Tuesday June 2nd, so I jumped right in.
 _DSC3854 by Norbert Ogiba, on Flickr
 _DSC3855 by Norbert Ogiba, on Flickr
Unwrapping the goodies
 _DSC3856 by Norbert Ogiba, on Flickr
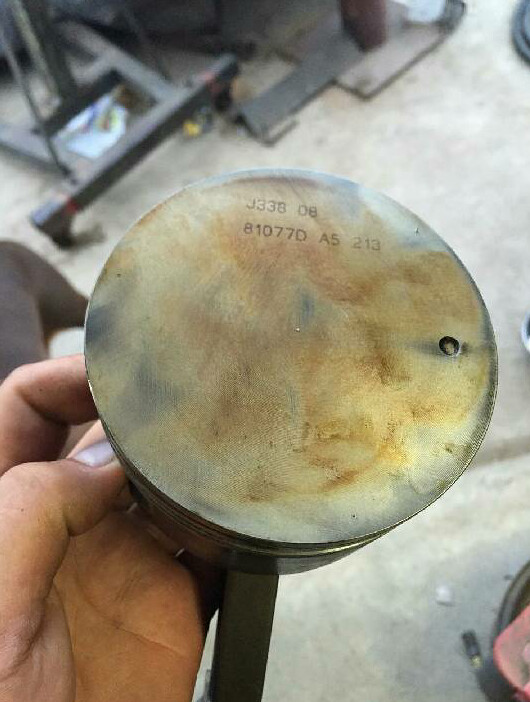
Flat-top piston goodness. My builder oiled the motor lightly to prevent flash corrosion on deck surfaces
 _DSC3857 by Norbert Ogiba, on Flickr
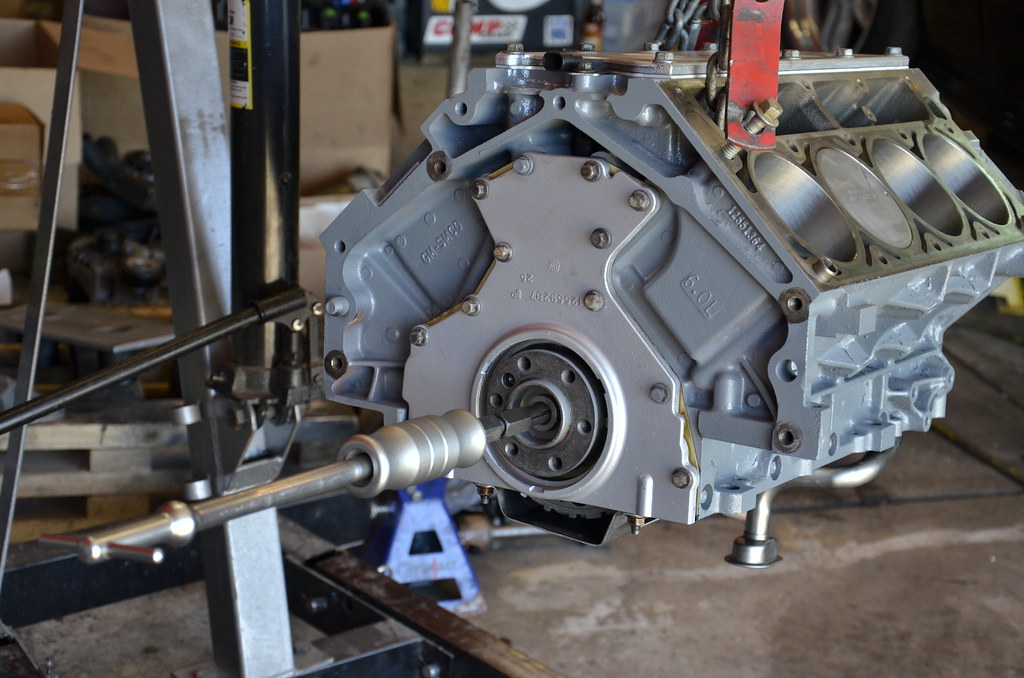
Up on the stand, degreased, taped, and ready for paint
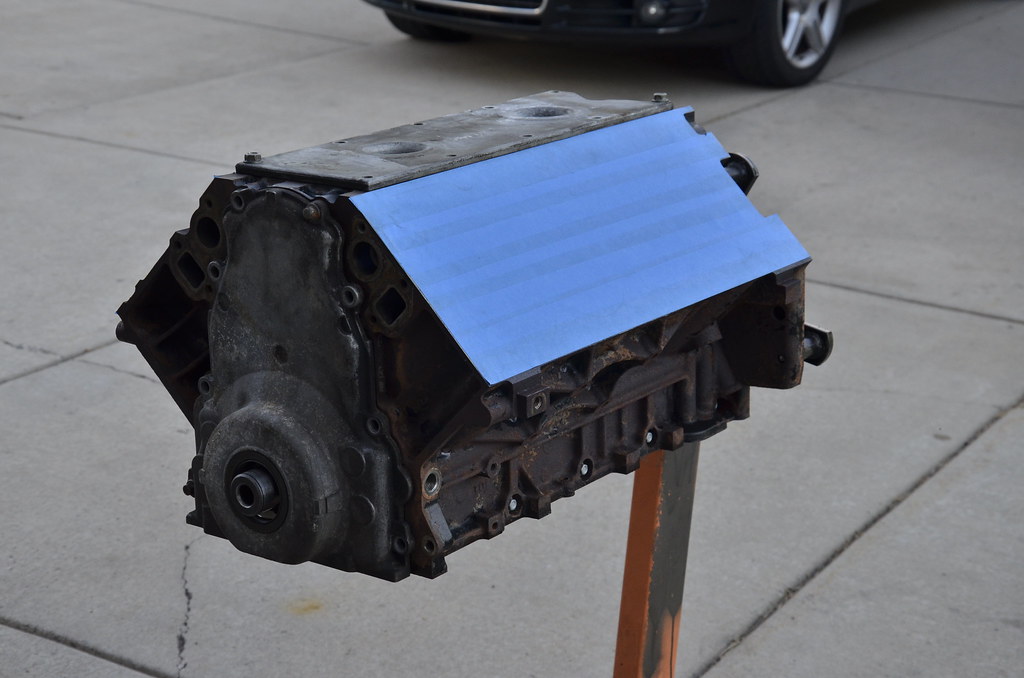 _DSC3858 by Norbert Ogiba, on Flickr
I had a set of nasty looking front and rear covers laying around, so rather than tape off those areas, I just snugged them up with 2 bolts to keep the paint out of the internals.
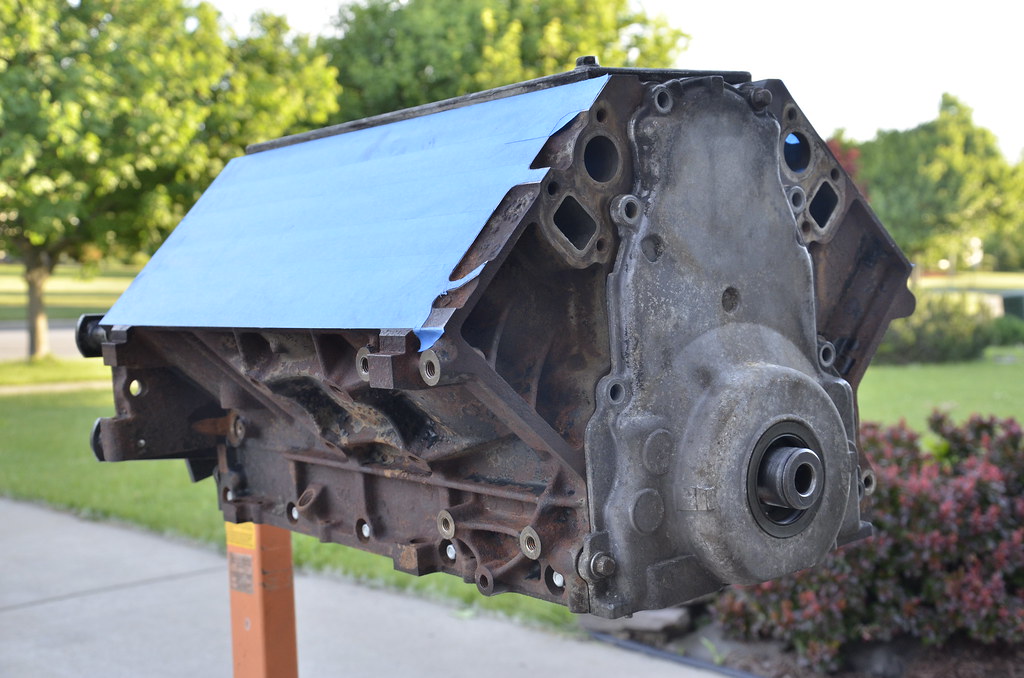 _DSC3859 by Norbert Ogiba, on Flickr
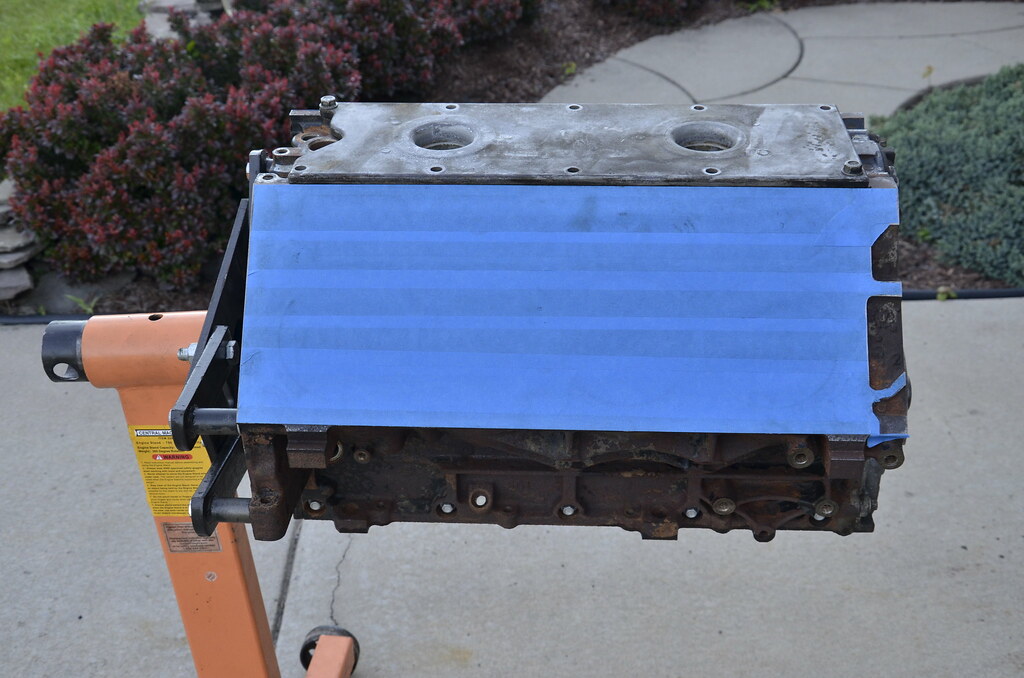 _DSC3860 by Norbert Ogiba, on Flickr
I chose a high high engine primer to start with, followed by medium gray high heat engine enamel. The idea was a nice "clean" color that would make leaks easy to spot, and not draw too much attention. I was going to go with an aluminum alloy silver, but since this is an iron block, it wouldn't have looked "right" on the porous iron texture.
 _DSC3861 by Norbert Ogiba, on Flickr
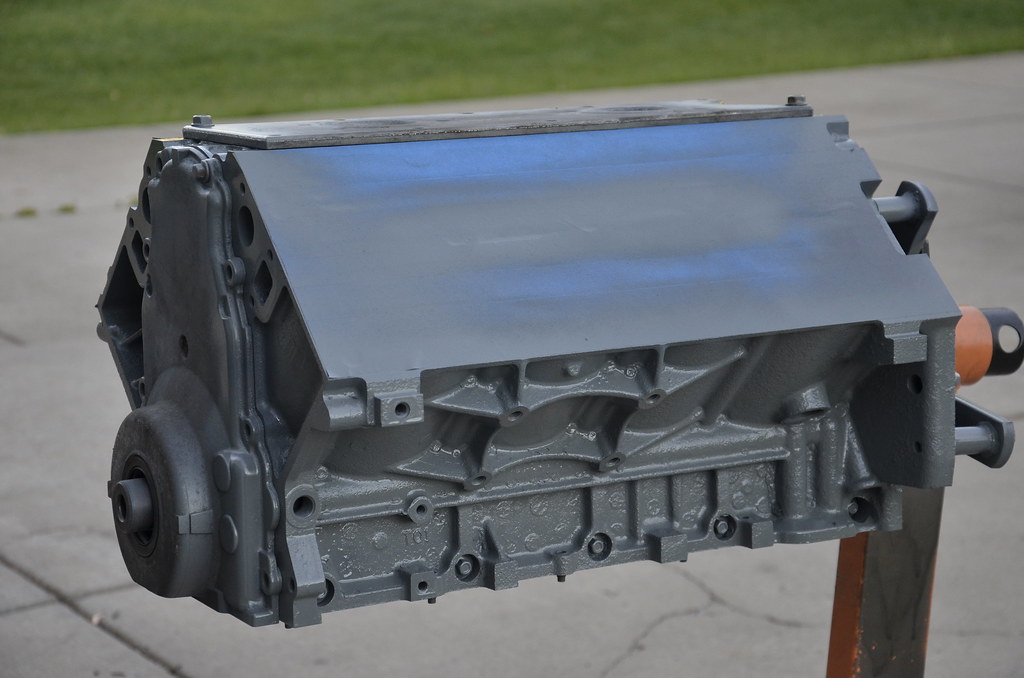
.
Certainly won't win any concourse awards but I like how it came out.
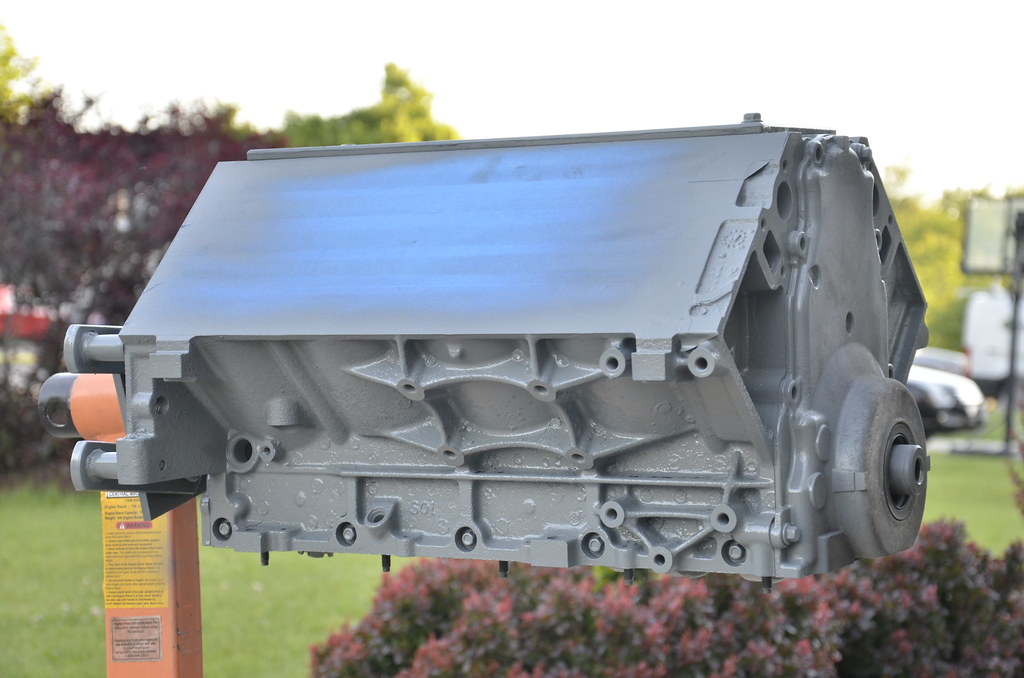 _DSC3862 by Norbert Ogiba, on Flickr
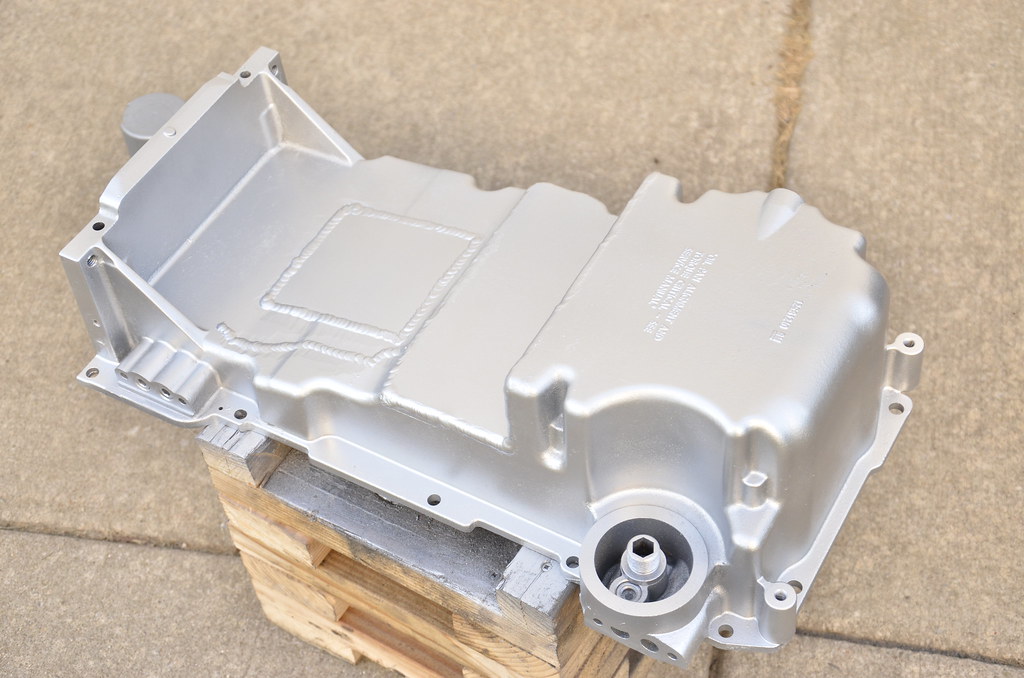
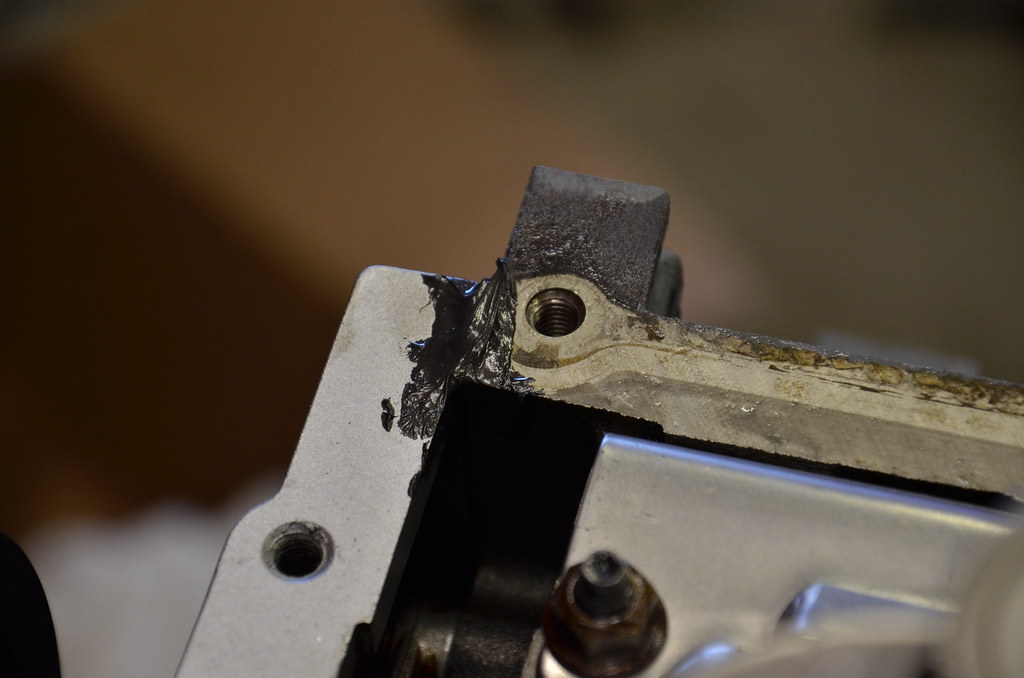
Oil pan was welded up by a local shop and got a fresh coat of silver aluminum color paint.
 _DSC3863 by Norbert Ogiba, on Flickr
Bottom end came back from the machine shop on Tuesday June 2nd, so I jumped right in.
_DSC3854 by Norbert Ogiba, on Flickr_DSC3855 by Norbert Ogiba, on FlickrUnwrapping the goodies
_DSC3856 by Norbert Ogiba, on FlickrFlat-top piston goodness. My builder oiled the motor lightly to prevent flash corrosion on deck surfaces
_DSC3857 by Norbert Ogiba, on FlickrUp on the stand, degreased, taped, and ready for paint
_DSC3858 by Norbert Ogiba, on FlickrI had a set of nasty looking front and rear covers laying around, so rather than tape off those areas, I just snugged them up with 2 bolts to keep the paint out of the internals.
_DSC3859 by Norbert Ogiba, on Flickr_DSC3860 by Norbert Ogiba, on FlickrI chose a high high engine primer to start with, followed by medium gray high heat engine enamel. The idea was a nice "clean" color that would make leaks easy to spot, and not draw too much attention. I was going to go with an aluminum alloy silver, but since this is an iron block, it wouldn't have looked "right" on the porous iron texture.
_DSC3861 by Norbert Ogiba, on Flickr.
Certainly won't win any concourse awards but I like how it came out.
_DSC3862 by Norbert Ogiba, on FlickrOil pan was welded up by a local shop and got a fresh coat of silver aluminum color paint.
_DSC3863 by Norbert Ogiba, on Flickr
06-09-2015, 11:53 AM
#439
Bottom End Assembly
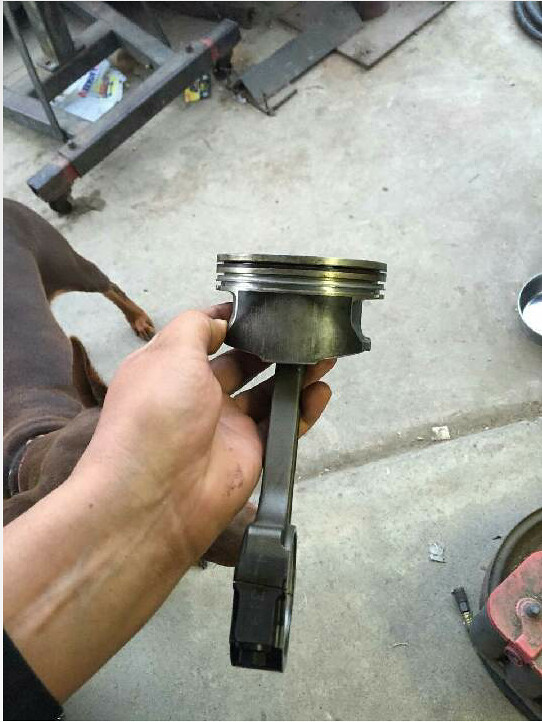
Scat I Beam Forged Rods, ARP hardware
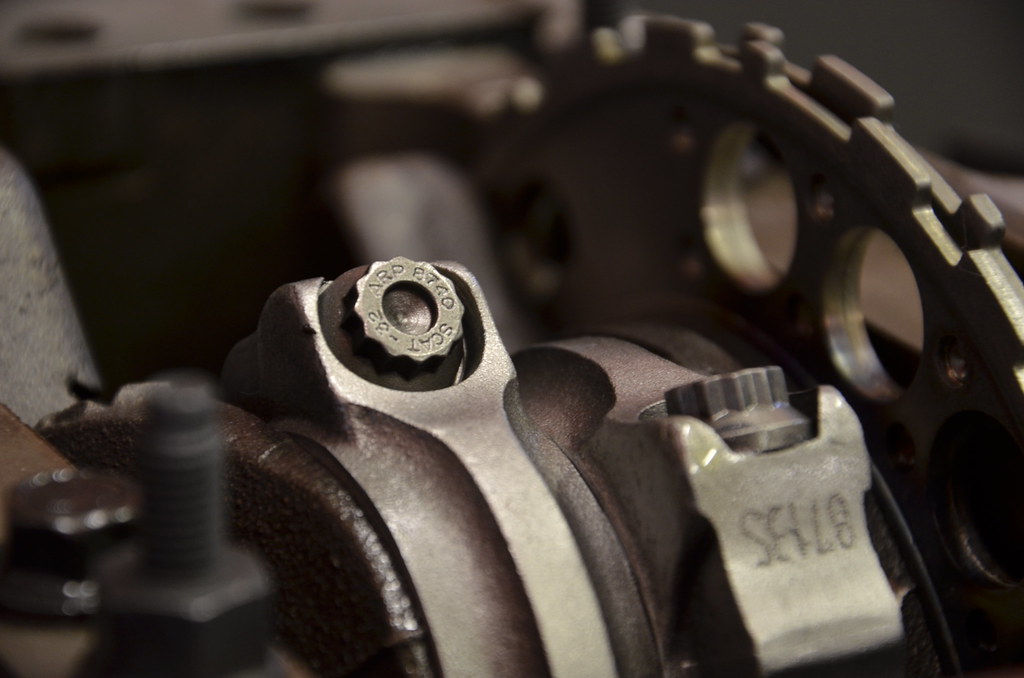 _DSC3868 by Norbert Ogiba, on Flickr
 _DSC3870 by Norbert Ogiba, on Flickr
The stock crank was in good shape, so it was reused - rod journals were within clearance and were just polished, but the mains needed to be ground .010 with appropriate size Clevite "P" bearings installed.
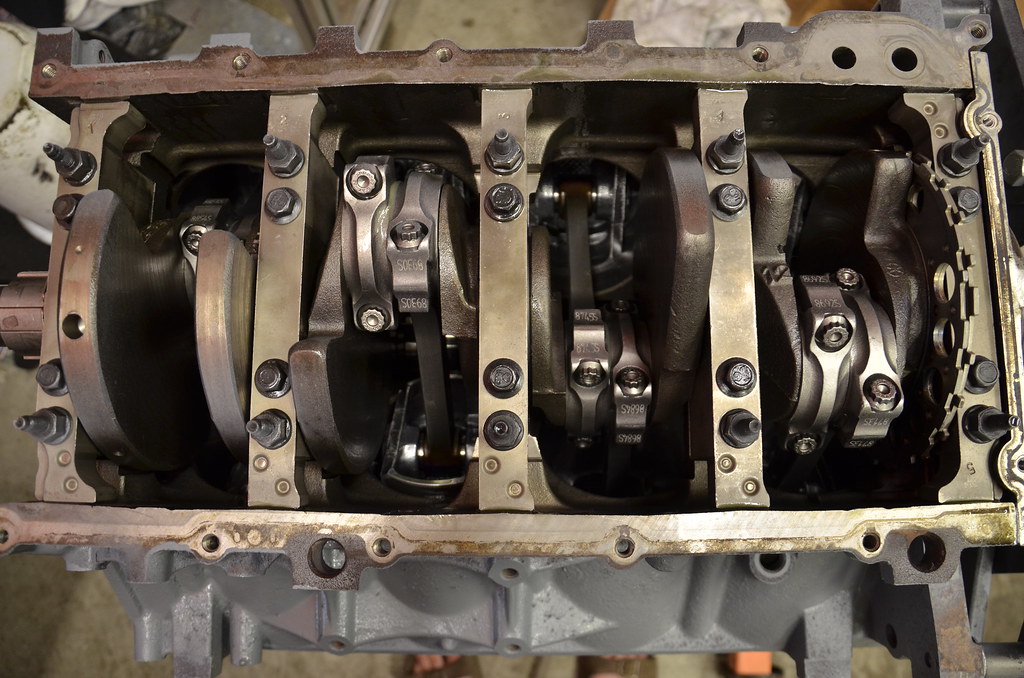 _DSC3872 by Norbert Ogiba, on Flickr
 _DSC3873 by Norbert Ogiba, on Flickr
 _DSC3874 by Norbert Ogiba, on Flickr
Ready for the oil pan.
 _DSC3875 by Norbert Ogiba, on Flickr
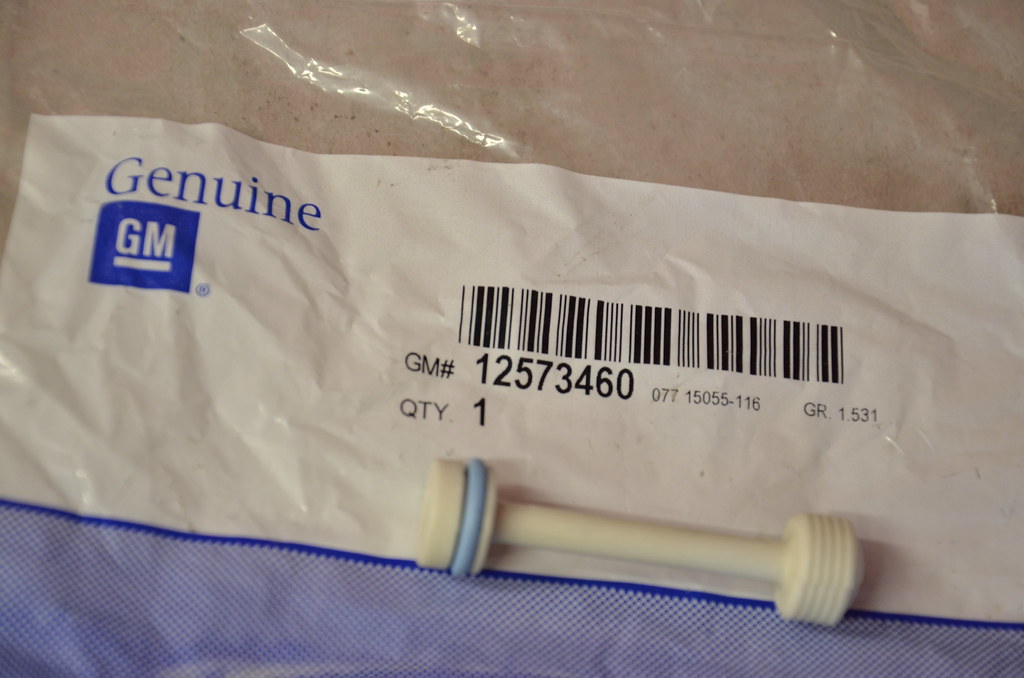
A new oil galley barbell plug was installed as the old one's o-ring had grown brittle and dry.
 _DSC3876 by Norbert Ogiba, on Flickr
A new OEM GM LS2 timing chain replaced the weaker factory Gen 3 chain.
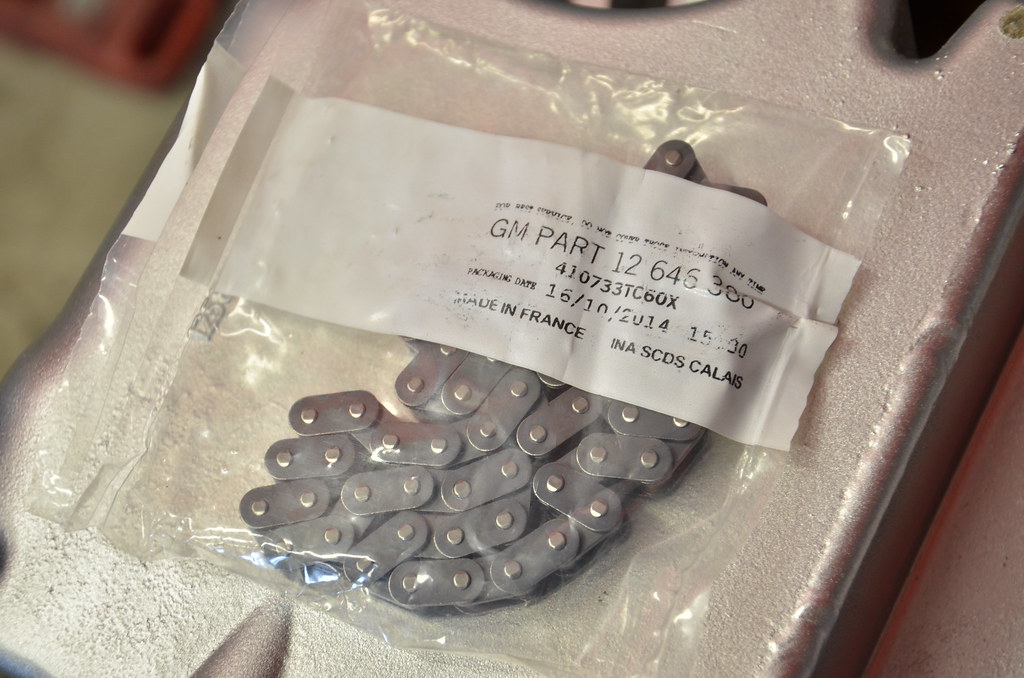 _DSC3877 by Norbert Ogiba, on Flickr
I have to find the pictures, but I also disassembled the stock oil pump and scrubbed every component. Nothing special to report besides the typical oil staining and deposits. The pressure relief spring was not stuck, but I still cleaned the spring bore to make sure it moved perfectly.
Oil pump was installed over new timing set followed by front and rear covers, which each received a new main seal. Oil control tray, was installed followed by the pickup tube (don't pinch that o-ring!). Lastly the balancer was pressed on using my homemade tool (M16x2 threaded rod, washers, nuts, thrust bearing)
 _DSC3881 by Norbert Ogiba, on Flickr
Pilot bearing was replaced with a new OEM unit
 _DSC3880 by Norbert Ogiba, on Flickr
Dab of RTV at the corners of the front and rear covers seals them against the oil pain
 _DSC3882 by Norbert Ogiba, on Flickr
I removed the windage tray, internal pan oil tubes, and pickup tube, and cleaned them with warm soapy water to make sure no foreign material was hiding in there. Cleaned them up and blew out with compressed air to make them like new.
 _DSC3883 by Norbert Ogiba, on Flickr
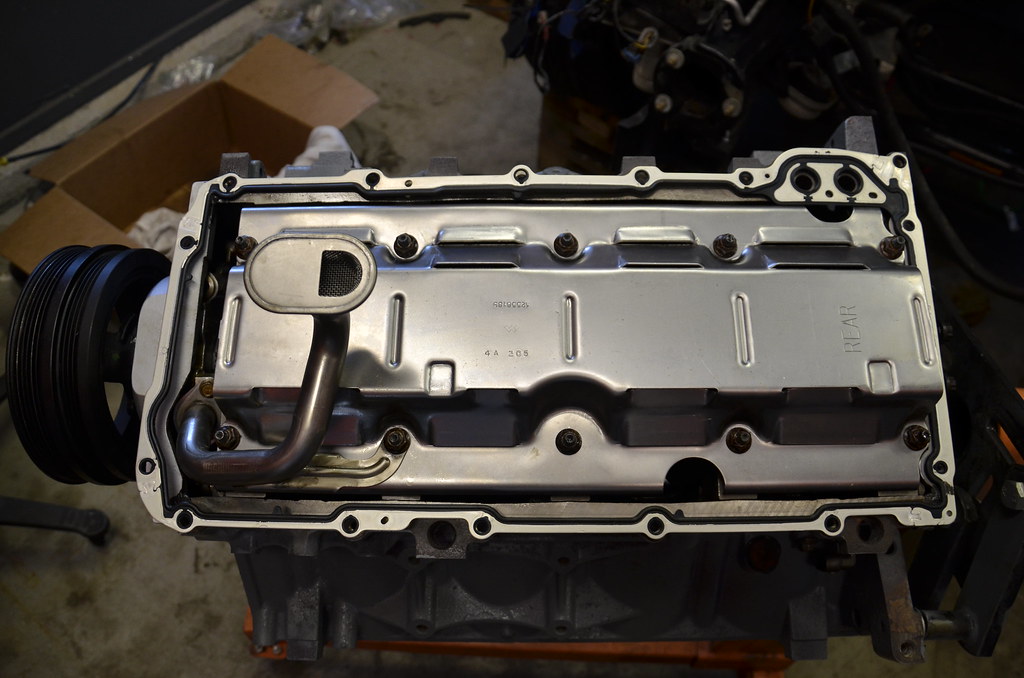
Oil pan on, aligned, and torqued.
 _DSC3884 by Norbert Ogiba, on Flickr
Scat I Beam Forged Rods, ARP hardware
_DSC3868 by Norbert Ogiba, on Flickr_DSC3870 by Norbert Ogiba, on FlickrThe stock crank was in good shape, so it was reused - rod journals were within clearance and were just polished, but the mains needed to be ground .010 with appropriate size Clevite "P" bearings installed.
_DSC3872 by Norbert Ogiba, on Flickr_DSC3873 by Norbert Ogiba, on Flickr_DSC3874 by Norbert Ogiba, on FlickrReady for the oil pan.
_DSC3875 by Norbert Ogiba, on FlickrA new oil galley barbell plug was installed as the old one's o-ring had grown brittle and dry.
_DSC3876 by Norbert Ogiba, on FlickrA new OEM GM LS2 timing chain replaced the weaker factory Gen 3 chain.
_DSC3877 by Norbert Ogiba, on FlickrI have to find the pictures, but I also disassembled the stock oil pump and scrubbed every component. Nothing special to report besides the typical oil staining and deposits. The pressure relief spring was not stuck, but I still cleaned the spring bore to make sure it moved perfectly.
Oil pump was installed over new timing set followed by front and rear covers, which each received a new main seal. Oil control tray, was installed followed by the pickup tube (don't pinch that o-ring!). Lastly the balancer was pressed on using my homemade tool (M16x2 threaded rod, washers, nuts, thrust bearing)
_DSC3881 by Norbert Ogiba, on FlickrPilot bearing was replaced with a new OEM unit
_DSC3880 by Norbert Ogiba, on FlickrDab of RTV at the corners of the front and rear covers seals them against the oil pain
_DSC3882 by Norbert Ogiba, on FlickrI removed the windage tray, internal pan oil tubes, and pickup tube, and cleaned them with warm soapy water to make sure no foreign material was hiding in there. Cleaned them up and blew out with compressed air to make them like new.
_DSC3883 by Norbert Ogiba, on FlickrOil pan on, aligned, and torqued.
_DSC3884 by Norbert Ogiba, on Flickr
06-09-2015, 12:17 PM
#440
love this project! liking all the pics of you going through the newest motor, i have an lq4 that i will be going through like you did, but i have a set of 243s to put on it. was going to bring the heads to a machine shop to have them gone through, but i may just try it myself now