
1985 Monte Carlo SS 6.2l (ls3) / 4l80e swap

 09-28-2013, 07:40 PM
#82
TECH Enthusiast
Thread Starter
iTrader: (5)
Join Date: Aug 2008
Location: Middletown, DE
Posts: 691
Likes: 0
Received 0 Likes
on
0 Posts

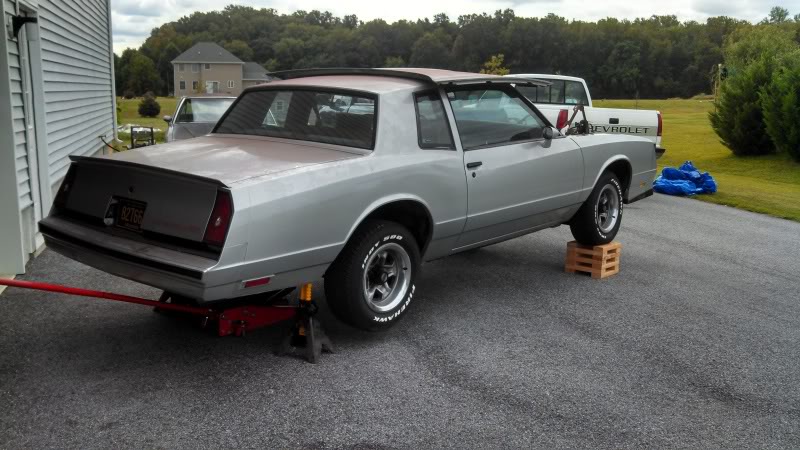
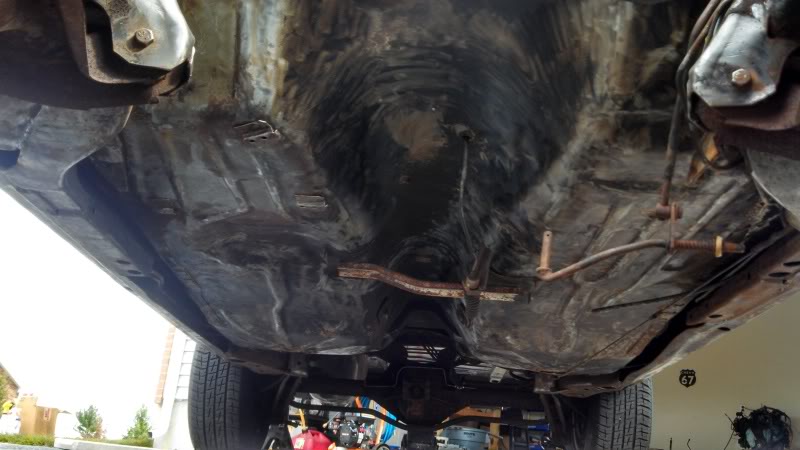
Alright guys, another update and it is a great one! Finally, 7 months in the making the car finally was able to see the light of day and I was so very stoked for this day. We ended up doing everything I wanted to do all yesterday, started around 9:30am and got home around 10:30 pm....so it was a very long day but wouldnt have changed the outcome at all.
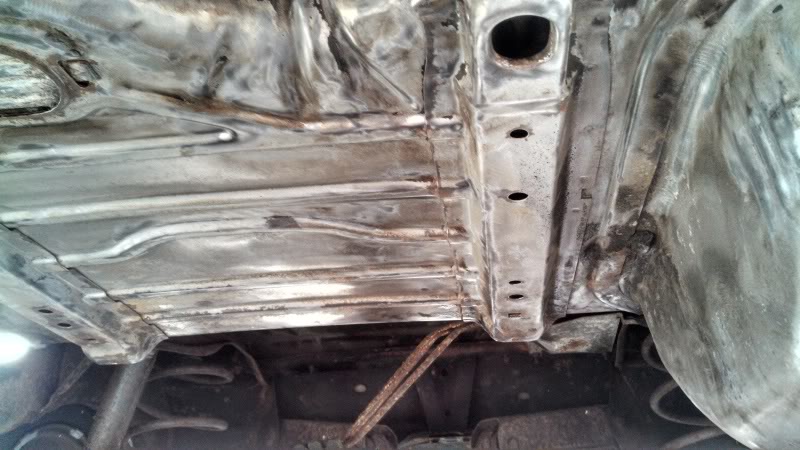
Car was first finished prepping with the grinder and after that we pulled her out into the sunlight and started the 3 step process for the RustSeal. Anyways, I will let the pictures do the talking! Enjoy....
The next 4 pictures are all pre painting and pre first two steps but I just wanted a before and after affect for you guys
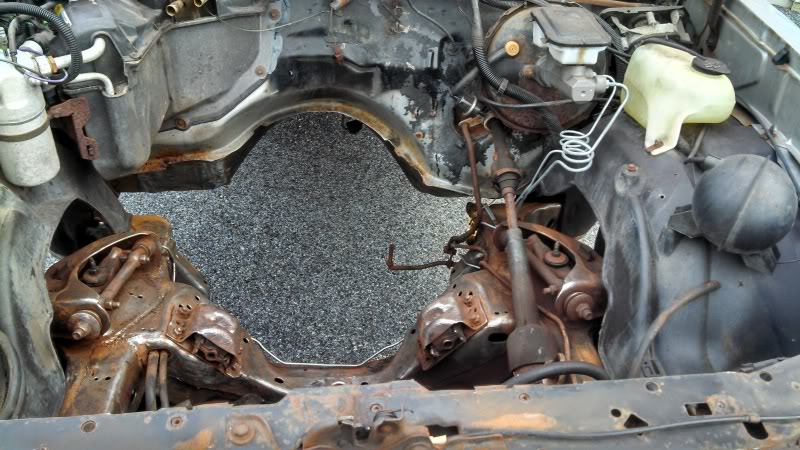
Drum roll please.......
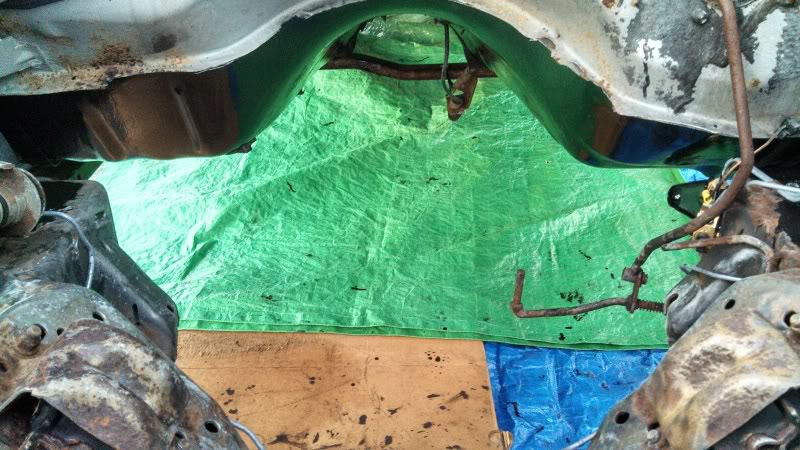
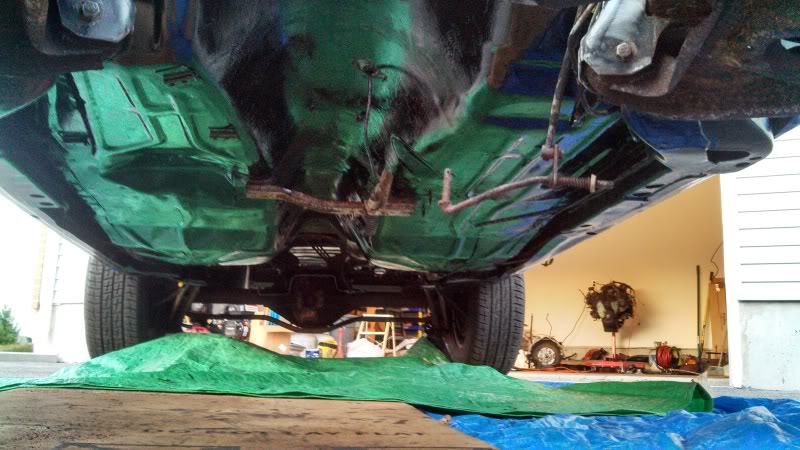
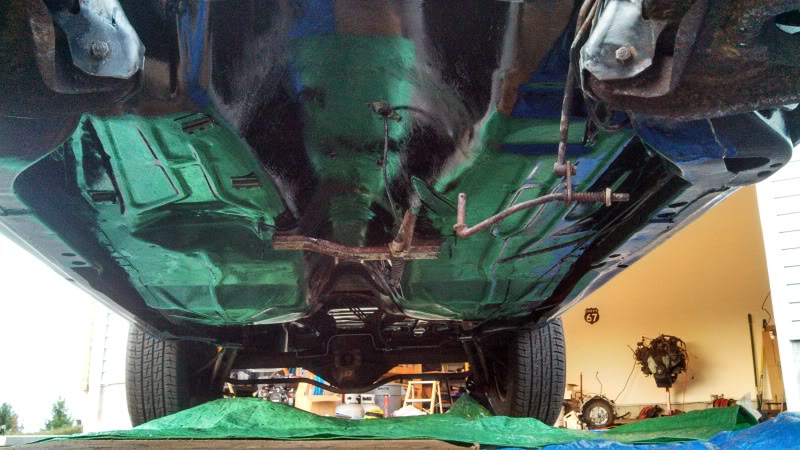
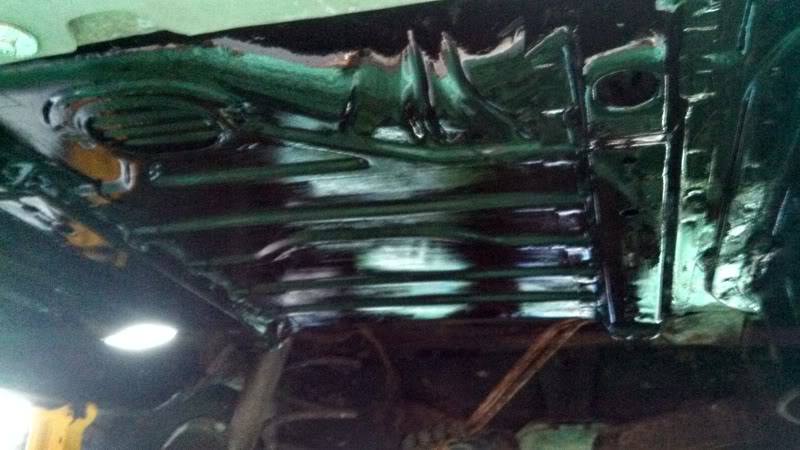
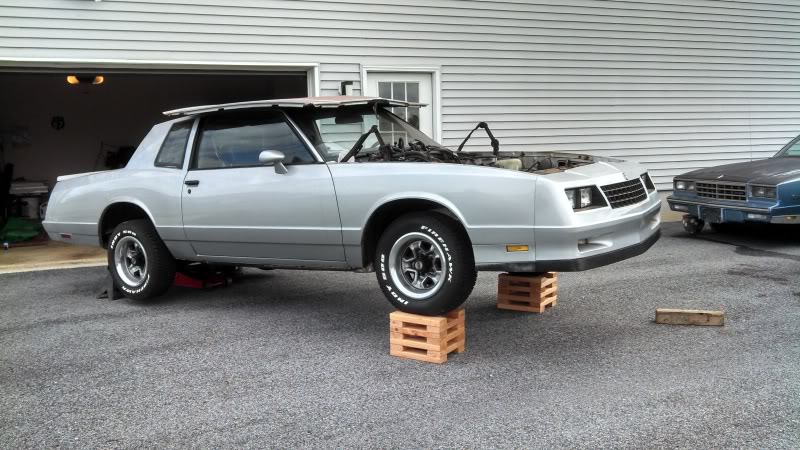
These are about 12 hrs after last coating....so its a bit more dry than the other pictures
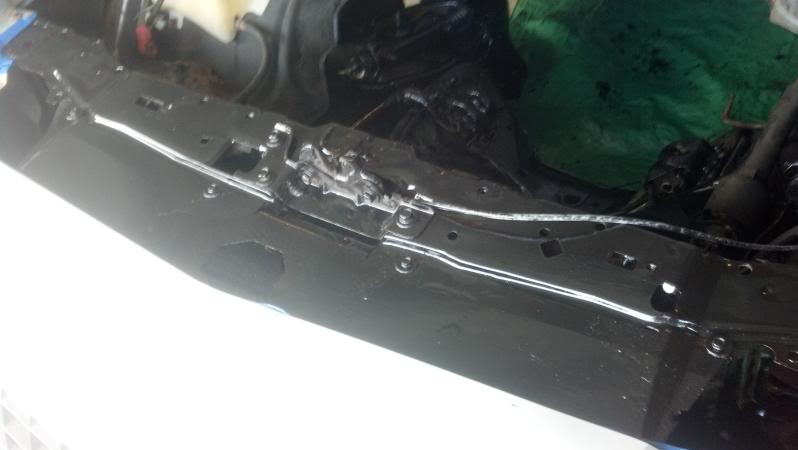
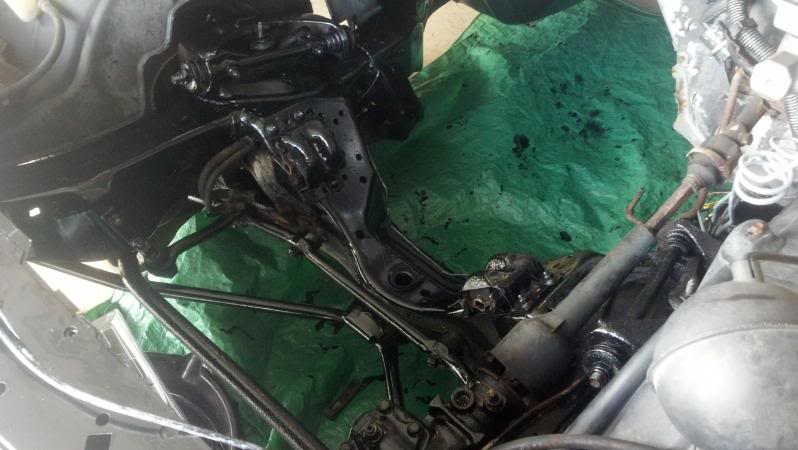
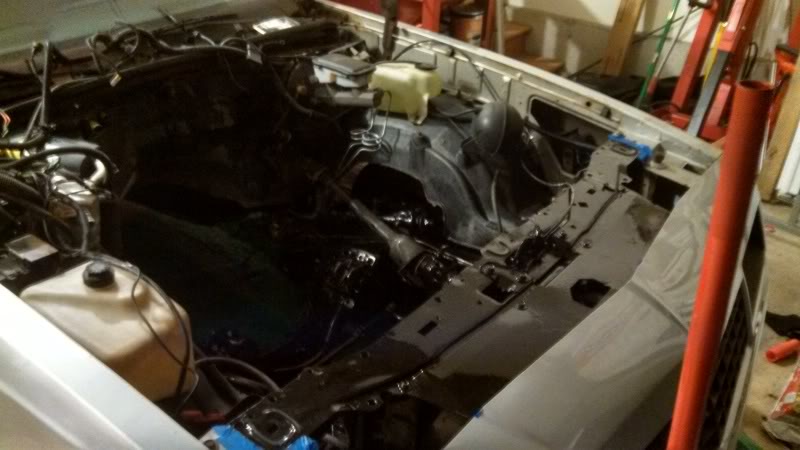
So that is it for the pictures. I didnt end up doing the steering shaft since I plan to do the Jeep steering shaft upgrade and the firewall since I have planned to do the A/C box mod and while that is out I will do the firewall with this stuff.
Next on the agenda, next Thursday I plan to get the 8.5 GN rear and the boxed rear CA's mounted. Once that is completed it is going to the shop for the Vette gas pedal installation/mod and A/C box mod. After that, motor/trans are just about ready for installation. Cant wait!
Car was first finished prepping with the grinder and after that we pulled her out into the sunlight and started the 3 step process for the RustSeal. Anyways, I will let the pictures do the talking! Enjoy....


The next 4 pictures are all pre painting and pre first two steps but I just wanted a before and after affect for you guys


Drum roll please.......


These are about 12 hrs after last coating....so its a bit more dry than the other pictures


So that is it for the pictures. I didnt end up doing the steering shaft since I plan to do the Jeep steering shaft upgrade and the firewall since I have planned to do the A/C box mod and while that is out I will do the firewall with this stuff.
Next on the agenda, next Thursday I plan to get the 8.5 GN rear and the boxed rear CA's mounted. Once that is completed it is going to the shop for the Vette gas pedal installation/mod and A/C box mod. After that, motor/trans are just about ready for installation. Cant wait!
09-29-2013, 07:41 PM
#83
Teching In
Join Date: Aug 2013
Posts: 36
Likes: 0
Received 0 Likes
on
0 Posts
I have an '88 SS! Love reading your build. I'm trying to make up my mind on what engine to roll with. I was dead set on a Chevy big block 502 or Chevy's 8.1L...that was until I came across this site. Now I'm very confused...just too many choices...which, is a good thing! Anyway, keep up the great work...and keep the pictures coming! Thanks for sharing with us...
09-29-2013, 08:20 PM
#84
TECH Enthusiast
Thread Starter
iTrader: (5)
Join Date: Aug 2008
Location: Middletown, DE
Posts: 691
Likes: 0
Received 0 Likes
on
0 Posts
I have an '88 SS! Love reading your build. I'm trying to make up my mind on what engine to roll with. I was dead set on a Chevy big block 502 or Chevy's 8.1L...that was until I came across this site. Now I'm very confused...just too many choices...which, is a good thing! Anyway, keep up the great work...and keep the pictures coming! Thanks for sharing with us...
Really hoping that the process keeps up with this pace so I can get this damn motor in the car ASAP!
10-01-2013, 06:37 PM
#85
TECH Enthusiast
Thread Starter
iTrader: (5)
Join Date: Aug 2008
Location: Middletown, DE
Posts: 691
Likes: 0
Received 0 Likes
on
0 Posts
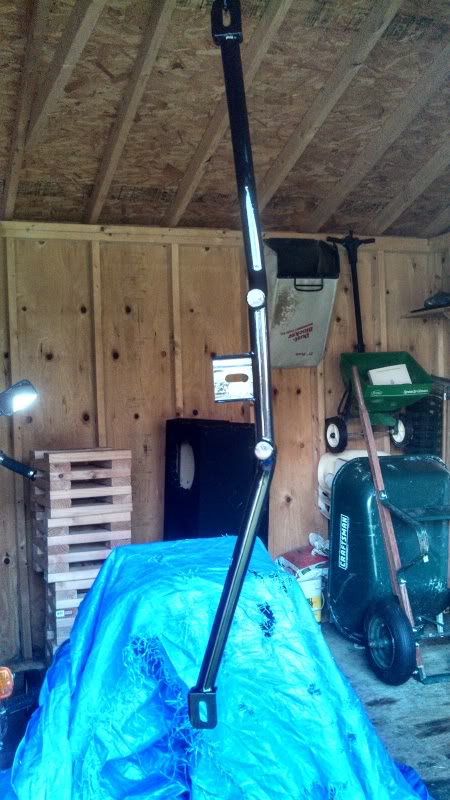
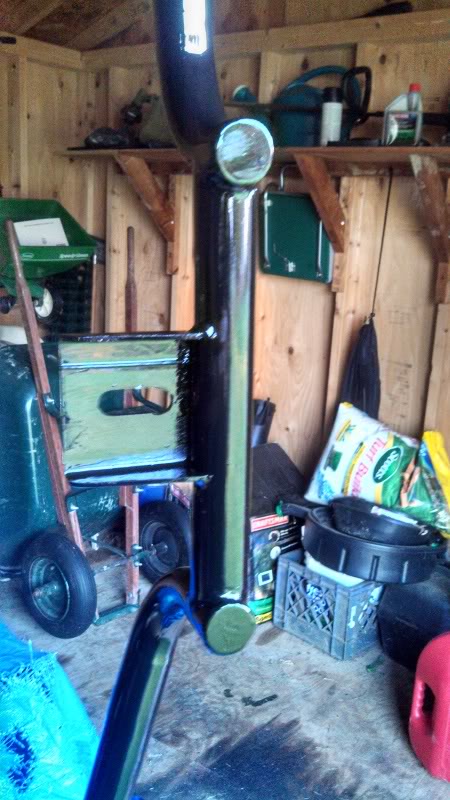
Ok, so today after work I figured to get more stuff coated with the RustSeal. I got the rear control arms and the IceMan 4l80e trans coated with the paint. Since both were smooth surfaces, I went to the Lowes and grabbed a sponge type brush and I must say it came out great! Once these dry, Thursday we are going to swap out the 8.5 GN rear with these in the car and taking out the old rusty ones....After this stuff, I have the GN tank and the tank straps to go and the underneath is complete!
Anyways, heres the pictures. Enjoy
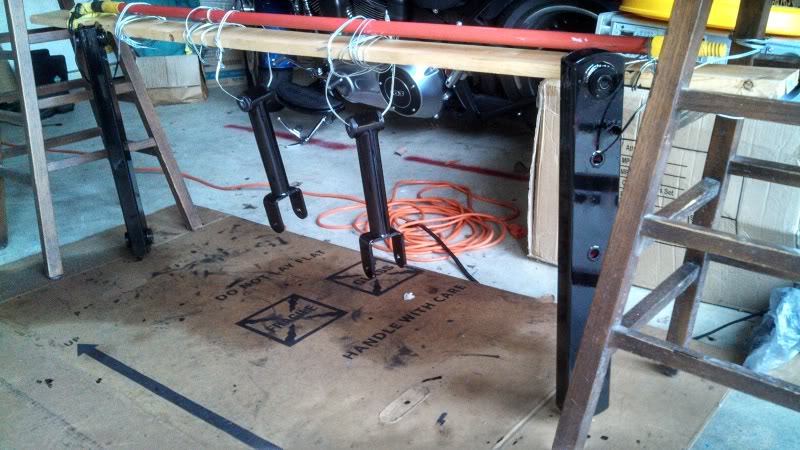
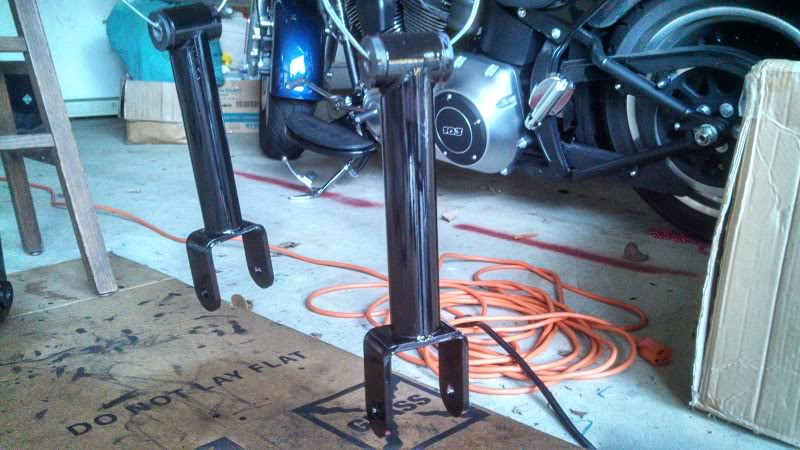

Hopefully Saturday the car will be gone from one garage and back to the shop to get the gas pedal mounted and A/C box modded.
Anyways, heres the pictures. Enjoy


Hopefully Saturday the car will be gone from one garage and back to the shop to get the gas pedal mounted and A/C box modded.
10-05-2013, 01:03 PM
#86
TECH Enthusiast
Thread Starter
iTrader: (5)
Join Date: Aug 2008
Location: Middletown, DE
Posts: 691
Likes: 0
Received 0 Likes
on
0 Posts
Well, car is out of the garage from my buddy's place and back to the shop for a few mods....At the shop we plan to get the gas pedal modded and installed in the car, add new upper bushings to the ears of the GN rear and depending on how I feel about getting the rest of the parts needed for install, we might just toss the motor and trans in there so I can atleast say its in there. I wanted to try and do it here at my house with a few buddies assisting but since it will be there in a garage, and so will the motor and trans , mind as well do it right?
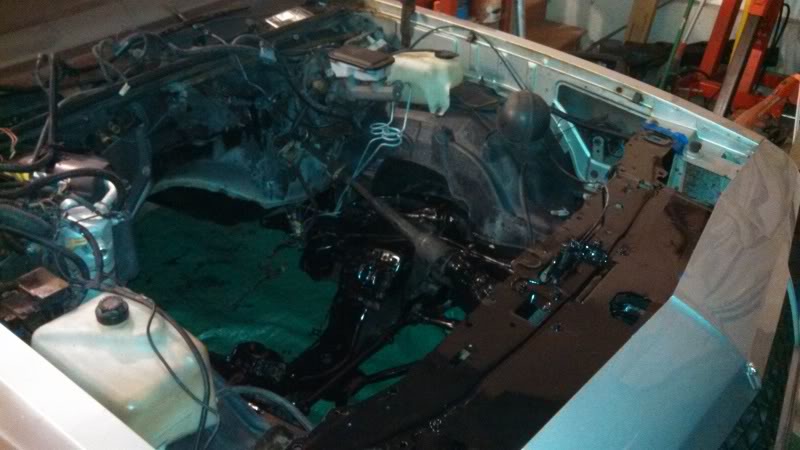
Another thing that will be happening which came out of a ''well why not'', once the car is mocked up for the motor and trans and ready for final install, its going a few miles down the road to where the rear quarter panel got fixed to have the inner tubs, and firewall sprayed a satin black finish. As well as the inner fenders to get re-sprayed silver so once the motors in there everything will look nice and painted.
Also, I have my harness from Current Performance being tweaked by my buddy's Uncle who has the same motor in his Vette and he respliced his harness. The main part of the harness to the computer originally draped over the center of the valve cover and I am just not going to have that, so he is going to extend some wires and pull back some so it will be more clean and the main portion of the harness will come out on the back of the valve cover so I can route it under the brake booster and mount my Computer in the dead area of the driver side inner tub near the firewall.
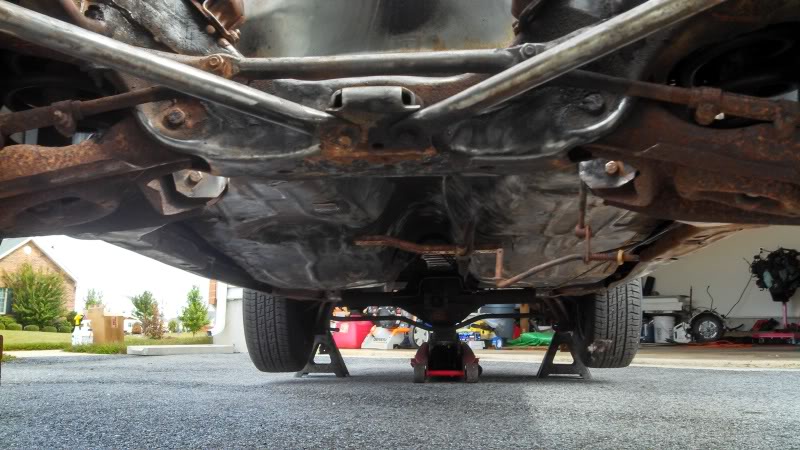
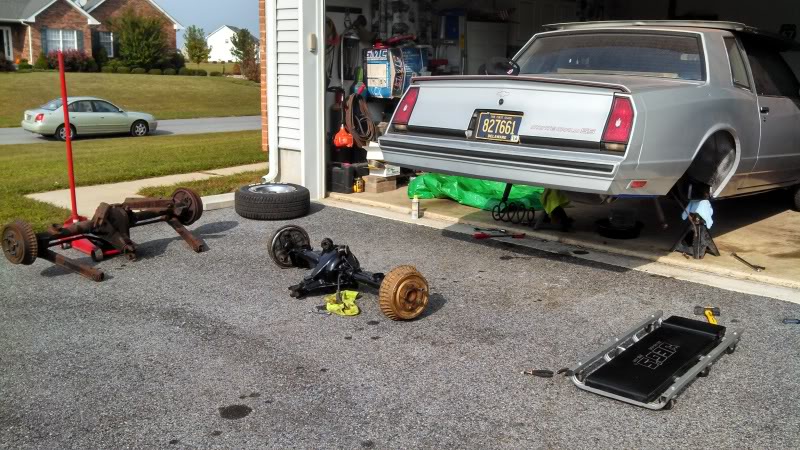
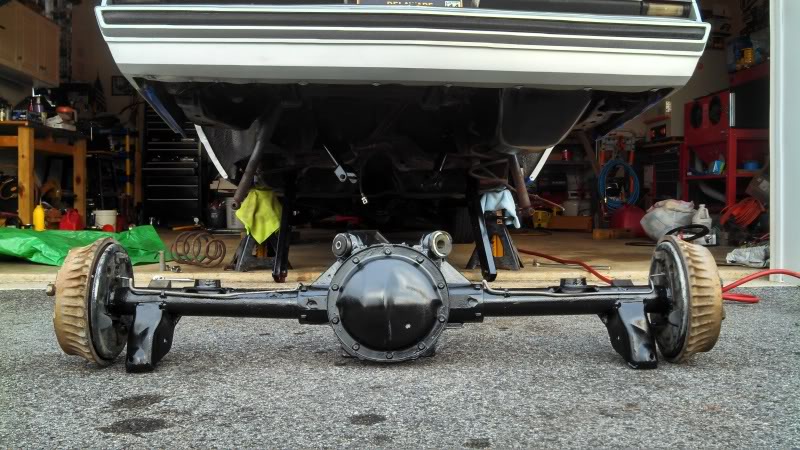
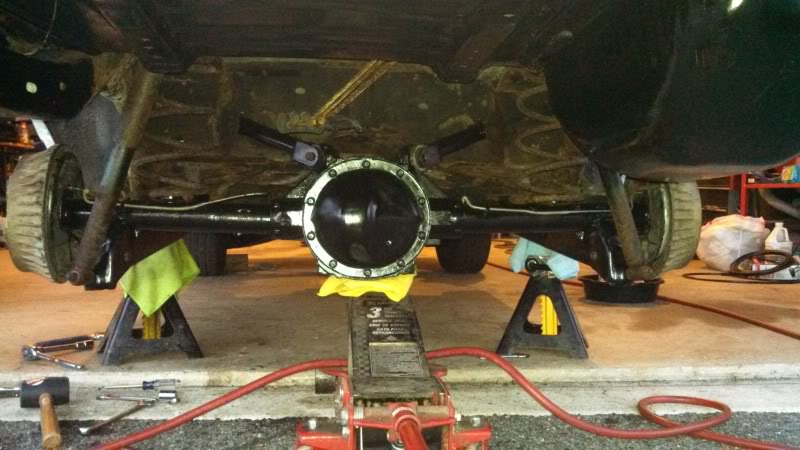
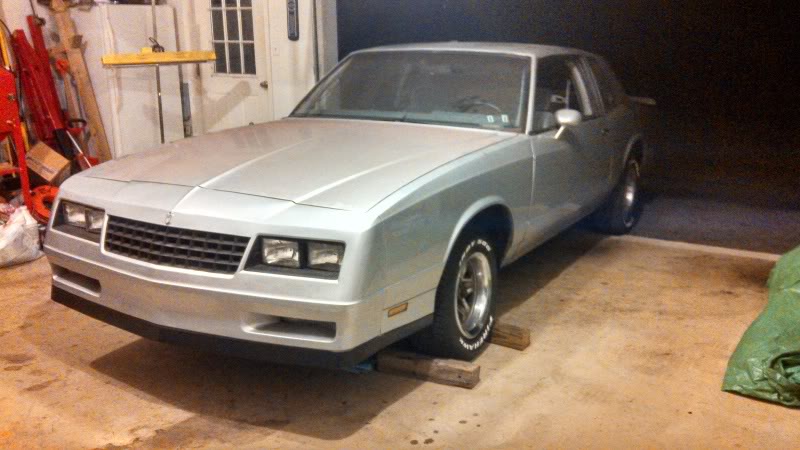
Anyways, as for current updates....GN rear is in, the rear boxed CA's are in and she finally got her hood back on for the first time in 8 months....So feels like a good chunk of work has been done for this thing lately. As you will see, I still have painting to do underneath where the rear is on the floors and some spots on the frame I missed due to being Dusk when we were finishing up painting the back end of the undercarriage. But anyways, heres more pics for you guys. Enjoy
Out with the old, in with the new

Forgot how she looked with a hood on her, lol
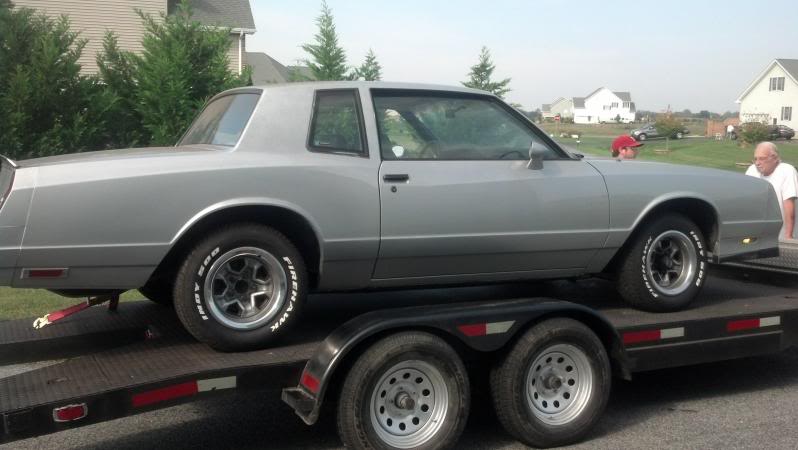
On the trailor, not sure if you can see the frame or not but it came out well IMO just now shows the imprefections on the bottom of the car a little more now, haha
So this will be the last update for a little while since I have to wait my turn at his shop. So hopefully the weekend starting on the 20th or so, it will start getting wrenched on again. So hopefully 3 weeks after that it will have the motor and trans bolted down for good with the engine bay painted. Than its time for all the other fun stuff!
Another thing that will be happening which came out of a ''well why not'', once the car is mocked up for the motor and trans and ready for final install, its going a few miles down the road to where the rear quarter panel got fixed to have the inner tubs, and firewall sprayed a satin black finish. As well as the inner fenders to get re-sprayed silver so once the motors in there everything will look nice and painted.
Also, I have my harness from Current Performance being tweaked by my buddy's Uncle who has the same motor in his Vette and he respliced his harness. The main part of the harness to the computer originally draped over the center of the valve cover and I am just not going to have that, so he is going to extend some wires and pull back some so it will be more clean and the main portion of the harness will come out on the back of the valve cover so I can route it under the brake booster and mount my Computer in the dead area of the driver side inner tub near the firewall.
Anyways, as for current updates....GN rear is in, the rear boxed CA's are in and she finally got her hood back on for the first time in 8 months....So feels like a good chunk of work has been done for this thing lately. As you will see, I still have painting to do underneath where the rear is on the floors and some spots on the frame I missed due to being Dusk when we were finishing up painting the back end of the undercarriage. But anyways, heres more pics for you guys. Enjoy
Out with the old, in with the new


Forgot how she looked with a hood on her, lol

On the trailor, not sure if you can see the frame or not but it came out well IMO just now shows the imprefections on the bottom of the car a little more now, haha

So this will be the last update for a little while since I have to wait my turn at his shop. So hopefully the weekend starting on the 20th or so, it will start getting wrenched on again. So hopefully 3 weeks after that it will have the motor and trans bolted down for good with the engine bay painted. Than its time for all the other fun stuff!
12-07-2013, 11:10 PM
#87
TECH Enthusiast
Thread Starter
iTrader: (5)
Join Date: Aug 2008
Location: Middletown, DE
Posts: 691
Likes: 0
Received 0 Likes
on
0 Posts
Well, finally was able to get back onto getting some progress done on the car and making it ready for the l92/4l80e to go in. Since the last update of swapping the rear suspension and painting the undercarriage, the harness was modded to lay better with the car ls3 intake and computer harness routed so it will be in a better position. Other than that it was just getting some odd and end parts like the trans dipstick tube and such. '
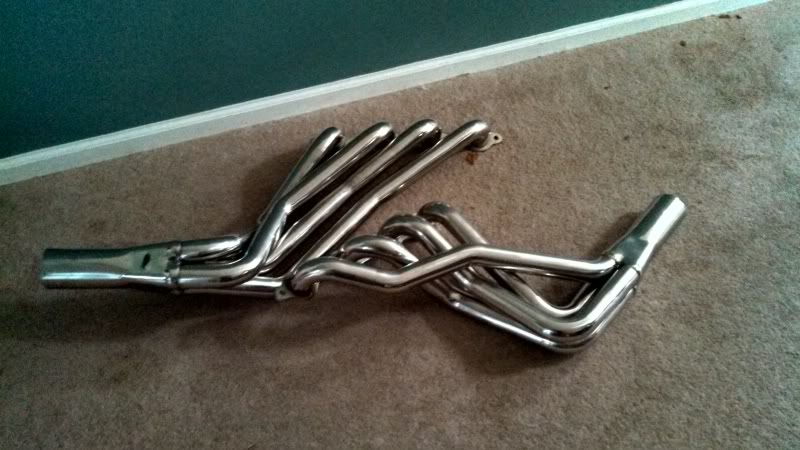
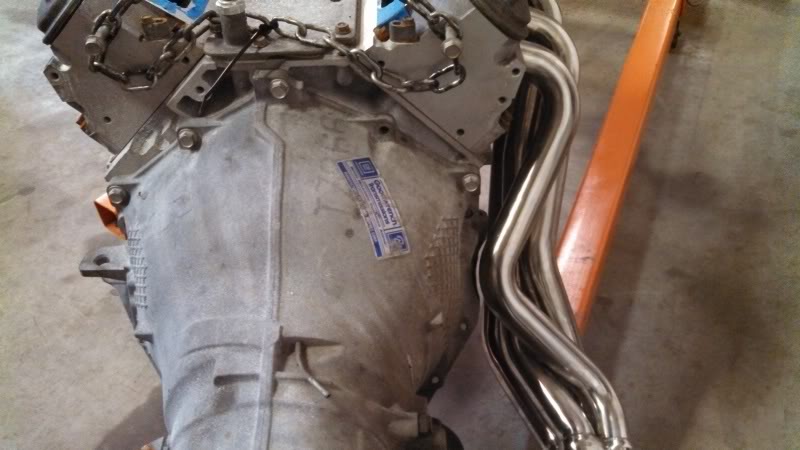
I did bite the bullet and go ahead with purchasing the TSP 1-3/4 inch Stainless Steel long tube headers meant for a 98-02 F-body, so we will see how it fits in the car.
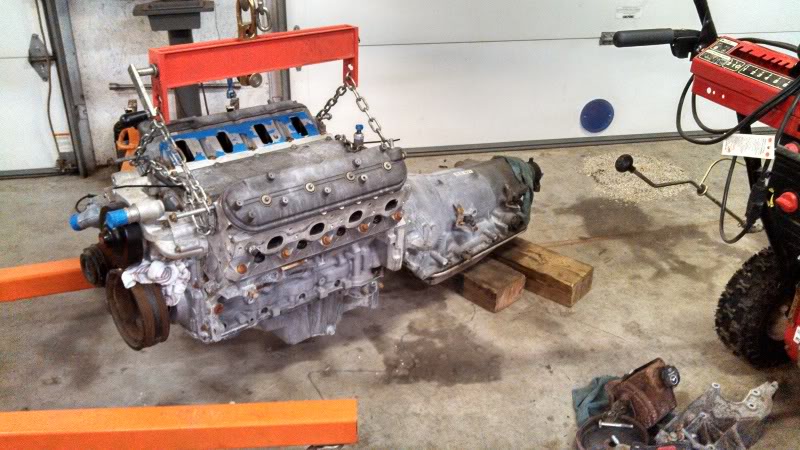
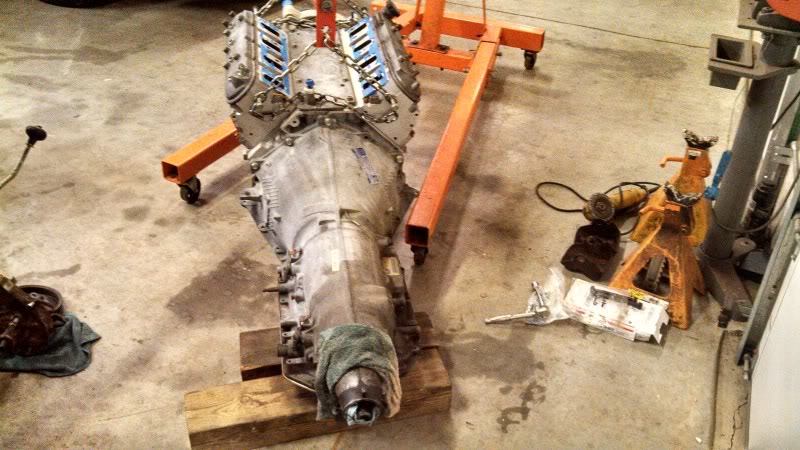
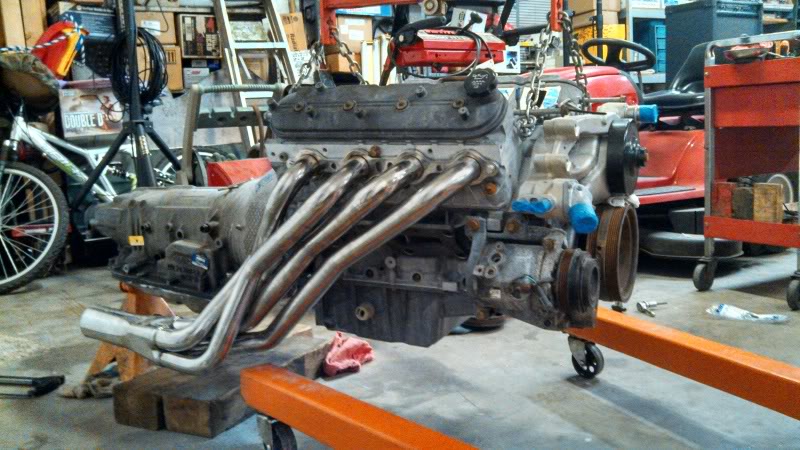
Motor and trans has been moved to the shop from storage, I have chased a lot of threads since a lot of them had that aluminum cleaner in them. Now that its at the shop, I went ahead and mounted the trans to the motor, lacking the converter for the fact we are just mocking right now. But I will say, with the engine hoist not letting the motor and trans lay straight inside the legs for some reason and trying to get the right angle for the dowl pins to line up.....boy was it a chore for a one man crew, lol
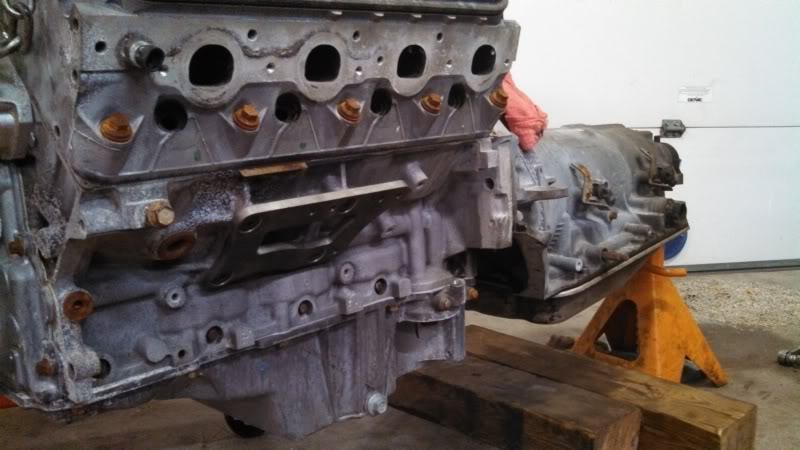
Newbie here got it all bolted together and ready for install....Til the headers were bolted on. Found out that the passenger side trans needed clearance for the headers, so off went a ear and a lot of aluminum, lol. After that was modded, I went ahead and test fit the driver side and that fit with no trans mods. Although I thought I was in the clear, I soon found out that the motor mounts and adapter plates needed tweaking to clear the headers.
After all that, the drivetrain was finally ready for install but unfortunately we ran out of time and were having issues with trying to get the motor and trans in at once with this car (hoist was just about on the front bumper and crank pulley still was a good 4 inches from clearing the core support) so we called it a night. Disappointed since I was finally able to take days off from work to work on the car since the last update and this is all I got. I plan to get back to it on Weds , but I will have my mechanic there so things should move quicker than with just me and my buddy from tonight. Anyways, heres the pictures and I will keep you guys informed on the headers and how they fit. If you are like me, I would take SS headers over ceramic coated any day of the week!
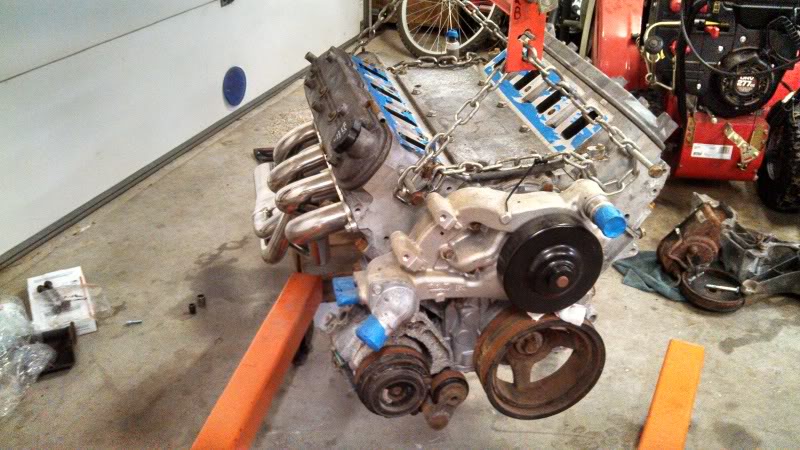
New TSP SS 1-3/4 headers
beefy motor meet beefy HD trans!
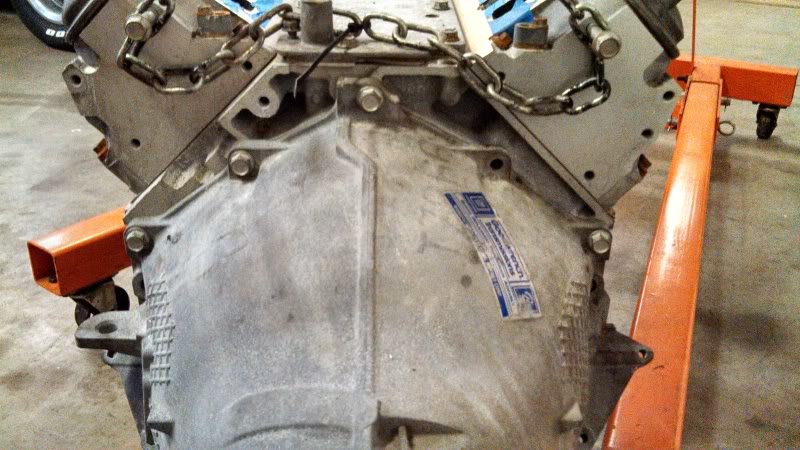
This happen with everyone? Seems like the same hole has no hole to bolt into....my 700r4 in my fullsize was the same with the 5.3 and I believe thats the bolt to hold the tranny dip stick
1 inch set back plate bolted to the motor
old SBC mount to the bracket
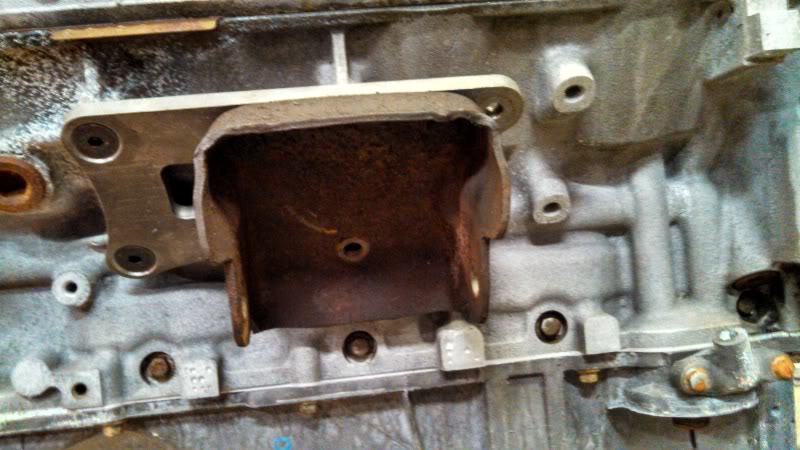
Spot of the mount and bracket driver side that needed modding. Same went with the passenger side, but that was just the old SBC mount

Passenger side mount modded
Driver side mount and bracket modded. Not pictured but we smoothed the back side of the old SBC mount to lay smooth on the bracket better for a better mounting surface since it had that U shape bump

mounted
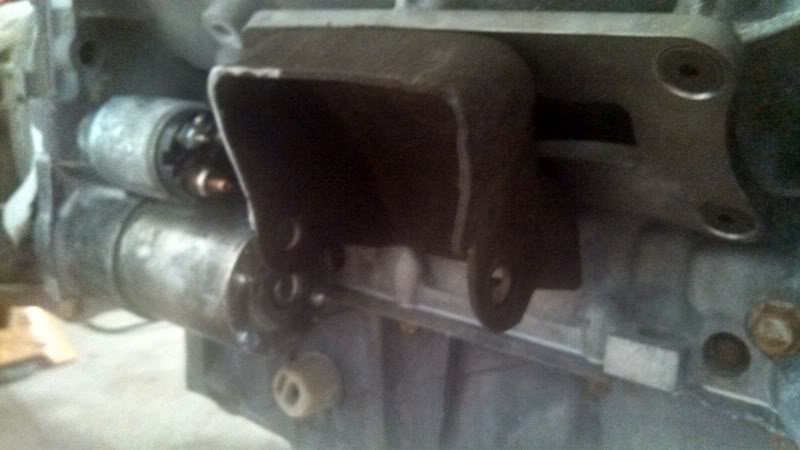
Not pictured but can if anyone is needed to see the header to mount clearnce on the driver side, but its close. But all this test fitting was with no gasket for the headers so you have to thing it will give a little even if its a 1/16th inch clearance its a lot for cars, lol. And also, the starter does fit without any issues with these headers as well, which is a good thing.
Before notching
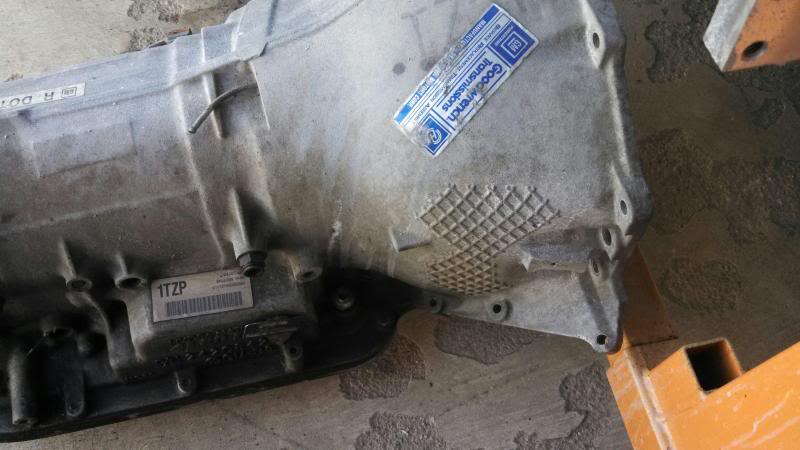
After
So thats it for now until Weds....hoping to have a good day of atleast getting the motor and trans bolted in the bay for mock up and see how the headers fit. I do have the Jeep steering shaft to swap in for more clearnce as well. After the test fit, the car will go to the body shop to have the engine bay cleaned and painted. Than back here to final install the drive train. After that, I have yet to decide if its going back to my house to get things like PS lines, wiring connected, radiator hoses and radiator mounted, ect. Decision weighs mainly on if I have my garage at my house open and if not, well its staying at the shop.
Any thoughts on the shifter setup is greatly appreciated as well, havent gotten a clear cut answer whether the stock cable can be modded or not.
I did bite the bullet and go ahead with purchasing the TSP 1-3/4 inch Stainless Steel long tube headers meant for a 98-02 F-body, so we will see how it fits in the car.
Motor and trans has been moved to the shop from storage, I have chased a lot of threads since a lot of them had that aluminum cleaner in them. Now that its at the shop, I went ahead and mounted the trans to the motor, lacking the converter for the fact we are just mocking right now. But I will say, with the engine hoist not letting the motor and trans lay straight inside the legs for some reason and trying to get the right angle for the dowl pins to line up.....boy was it a chore for a one man crew, lol
Newbie here got it all bolted together and ready for install....Til the headers were bolted on. Found out that the passenger side trans needed clearance for the headers, so off went a ear and a lot of aluminum, lol. After that was modded, I went ahead and test fit the driver side and that fit with no trans mods. Although I thought I was in the clear, I soon found out that the motor mounts and adapter plates needed tweaking to clear the headers.
After all that, the drivetrain was finally ready for install but unfortunately we ran out of time and were having issues with trying to get the motor and trans in at once with this car (hoist was just about on the front bumper and crank pulley still was a good 4 inches from clearing the core support) so we called it a night. Disappointed since I was finally able to take days off from work to work on the car since the last update and this is all I got. I plan to get back to it on Weds , but I will have my mechanic there so things should move quicker than with just me and my buddy from tonight. Anyways, heres the pictures and I will keep you guys informed on the headers and how they fit. If you are like me, I would take SS headers over ceramic coated any day of the week!
New TSP SS 1-3/4 headers

beefy motor meet beefy HD trans!


This happen with everyone? Seems like the same hole has no hole to bolt into....my 700r4 in my fullsize was the same with the 5.3 and I believe thats the bolt to hold the tranny dip stick

1 inch set back plate bolted to the motor

old SBC mount to the bracket

Spot of the mount and bracket driver side that needed modding. Same went with the passenger side, but that was just the old SBC mount

Passenger side mount modded

Driver side mount and bracket modded. Not pictured but we smoothed the back side of the old SBC mount to lay smooth on the bracket better for a better mounting surface since it had that U shape bump

mounted


Not pictured but can if anyone is needed to see the header to mount clearnce on the driver side, but its close. But all this test fitting was with no gasket for the headers so you have to thing it will give a little even if its a 1/16th inch clearance its a lot for cars, lol. And also, the starter does fit without any issues with these headers as well, which is a good thing.
Before notching

After

So thats it for now until Weds....hoping to have a good day of atleast getting the motor and trans bolted in the bay for mock up and see how the headers fit. I do have the Jeep steering shaft to swap in for more clearnce as well. After the test fit, the car will go to the body shop to have the engine bay cleaned and painted. Than back here to final install the drive train. After that, I have yet to decide if its going back to my house to get things like PS lines, wiring connected, radiator hoses and radiator mounted, ect. Decision weighs mainly on if I have my garage at my house open and if not, well its staying at the shop.
Any thoughts on the shifter setup is greatly appreciated as well, havent gotten a clear cut answer whether the stock cable can be modded or not.
12-08-2013, 12:09 AM
#88
While you have that engine sitting out, see if that thermostat sending unit is a 2 or 3 wire. If it is a 2 wire, remove it and take it to get a thread matching 3 wire sending unit and connector harness. Two wires will go to the original plug, and the third wire will go to the factory temperature gauge.
12-08-2013, 08:29 AM
#89
TECH Enthusiast
Thread Starter
iTrader: (5)
Join Date: Aug 2008
Location: Middletown, DE
Posts: 691
Likes: 0
Received 0 Likes
on
0 Posts
While you have that engine sitting out, see if that thermostat sending unit is a 2 or 3 wire. If it is a 2 wire, remove it and take it to get a thread matching 3 wire sending unit and connector harness. Two wires will go to the original plug, and the third wire will go to the factory temperature gauge.
 12-08-2013, 01:46 PM
#93
There are 3 ways to learn about doing something wrong man.....
The right way, the wrong way, and the "WHAT THE **** WAS I THINKING OF WHEN I DID THAT ****!?!?!?" way.
The third way is the way that tends to be the best learning method because it usually involves having to unload some dead presidents from your wallet to make it right.
Take, for example, the headers on my S-10 project. Cheap shorty headers that were a good deal but not exactly made the greatest in the world. I have blown out 4 collector gaskets so far costing me an extra $100 in exhaust work and $25 in gaskets. The extra exhaust work was because I wanted to redo the exhaust to try to cure the problem. They stayed in for 3 days. So my extra cash was completely wasted. Next project I take on, or the next large chunk of cash I get, I plan to purchase the long tube headers for this truck and hope like hell they fit well enough to not cause too many problems. After that will be my dropping the truck off and having to spend well over $1000 to have custom headers made at a local shop with my already having a bunch of mandrel bent pieces on hand. Or I will just buy the V-band flanges and clamps and have him replace the collectors.

Last edited by BigEd_72455; 12-08-2013 at 03:21 PM.
12-08-2013, 02:19 PM
#94
12-08-2013, 04:07 PM
#96
TECH Enthusiast
Thread Starter
iTrader: (5)
Join Date: Aug 2008
Location: Middletown, DE
Posts: 691
Likes: 0
Received 0 Likes
on
0 Posts
Appreciate it ...I figure I mind as well find them again on ebay and see if I have to dis out more money, if not I will just give them to my buddy since hes doing the same swap in a monte.
Yea, i am pretty sure this wont be the only Fock up lol.....Hell I am a newbie and was left by myself, I was bound to screw something up ahha.
Trans, yes .....motor probably not. I get heckled for saying I will put a coat of paint on a aluminum block. But I am going to get the valve covers, water pump, front accesorires/brackets all painted matte black so it should clean up alot better. That will happen when the rest of the car is at the body shop getting the bay sprayed same matte black. Right now just worried about mocking this heavy combo.
There are 3 ways to learn about doing something wrong man.....
The right way, the wrong way, and the "WHAT THE **** WAS I THINKING OF WHEN I DID THAT ****!?!?!?" way.
The third way is the way that tends to be the best learning method because it usually involves having to unload some dead presidents from your wallet to make it right.
Take, for example, the headers on my S-10 project. Cheap shorty headers that were a good deal but not exactly made the greatest in the world. I have blown out 4 collector gaskets so far costing me an extra $100 in exhaust work and $25 in gaskets. The extra exhaust work was because I wanted to redo the exhaust to try to cure the problem. They stayed in for 3 days. So my extra cash was completely wasted. Next project I take on, or the next large chunk of cash I get, I plan to purchase the long tube headers for this truck and hope like hell they fit well enough to not cause too many problems. After that will be my dropping the truck off and having to spend well over $1000 to have custom headers made at a local shop with my already having a bunch of mandrel bent pieces on hand. Or I will just buy the V-band flanges and clamps and have him replace the collectors.
Trans, yes .....motor probably not. I get heckled for saying I will put a coat of paint on a aluminum block. But I am going to get the valve covers, water pump, front accesorires/brackets all painted matte black so it should clean up alot better. That will happen when the rest of the car is at the body shop getting the bay sprayed same matte black. Right now just worried about mocking this heavy combo.
 12-08-2013, 04:35 PM
#100
TECH Enthusiast
Thread Starter
iTrader: (5)
Join Date: Aug 2008
Location: Middletown, DE
Posts: 691
Likes: 0
Received 0 Likes
on
0 Posts
Another question, anyone keep the stock guages working somehow? Money for auto meters is going to be a stretch and unlike my fullsize, I do not want to run with any guages not working. I've heard that there is a way, but thats way beyond my comprehension. My oil pressure and volt work in my fullsize but that is it. My speedo, fuel and temp do not work. If it was possible to get stockers to work for now, I am completely game.