When you click on links to various merchants on this site and make a purchase, this can result in this site earning a commission. Affiliate programs and affiliations include, but are not limited to, the eBay Partner Network.
I'm so glad to see I'm not the only one with vehicle A.D.D.! Lol nice work all around! Especially since this has gone from an LS swap to a frame off resto mod (along with the other S10, Fiero C3500 distractions!)
so I tried two different ones on my truck and both gave wildly different pressures at the rail. no way to adjust it down to 4 bar.
an acquaintance of mine had similar problems on his bone stock 5.3 volvo swap.
the fix was a switch to the stock truck return type set up. tuning was a breeze after that was sussed.
Dang, I'd heard some god stuff and some bad stuff about them.
I guess I'll do some more research and try to make a decision.
I've got an LS3 intake and already have some billet rails and liked the simplicity of a returnless setup.
I'm so glad to see I'm not the only one with vehicle A.D.D.! Lol nice work all around! Especially since this has gone from an LS swap to a frame off resto mod (along with the other S10, Fiero C3500 distractions!)
Yeah its a bit of a disaster, at least I know I'm down to the last little bit on the Fiero and the El Camino is finally being reassembled and not taken apart any further. Plus I've decided the dually is going to be on the far back burner until the time is right to do anything with it (plus it won't rob funds from the other stuff).
you might add a mech gauge so you can verify 58psi at the rail if you are having tuning issues. I have some -6 an M/F adapters with a 1/8 npt if you need one. bought a bunch in bulk.
you might add a mech gauge so you can verify 58psi at the rail if you are having tuning issues. I have some -6 an M/F adapters with a 1/8 npt if you need one. bought a bunch in bulk.
Yea that could come in handy, message me and we can work out a time and price.
Jessica
The thing with the corvette filter reg is you need to use a gm or wix. The cheaper ones are garbage.
I do have a wix one, I think the one on the frame is from Speedway though.
I'll try it out and if it doesn't work I'll switch to the wix.
After all the comments and talking with people I am kind of second guessing my plan.
I'm going to route and set the fuel lines up in some way so that I can switch to a stand alone regulator and return if I need to.
So I plan to run soft lines from the tank to the filter and a hard line up to the firewall and a soft line up to the fuel rail. If I need to change things I can add another hard line and switch out the Corvette filter for a normal style one. Then mount the regulator in the engine bay and add a setion of soft line for the return.
Threw my spare wheels on the frame just so it'd fit better on the movers dollies. Plus it makes me feel more accomplished, I'm going to work on getting ready to test fit the engine as well.
I don't know what your original plan was, but having short runs of flexible line in the rear and in the front will give you a lot of options in the future. Both in the GTO and the Cougar I have hard line making the long run along the length of the car, but then I switch over to AN hose from there. Also, if you plan to have a return style regulator in the future run the extra hardline now.
I don't know what your original plan was, but having short runs of flexible line in the rear and in the front will give you a lot of options in the future. Both in the GTO and the Cougar I have hard line making the long run along the length of the car, but then I switch over to AN hose from there. Also, if you plan to have a return style regulator in the future run the extra hardline now.
Andrew
Thanks for the advice! I like where I've mounted the filter for servicing in the future, but I could move it to the rear frame maybe. That would allow me to run a short line from the tank to filter and then hard line up to the front. If I do this I'll probably just run two lines and cap one off for future use because I won't be able to run it once I put the body on the frame.
Do I have to run a flex line into the filter (outlet side) or can I run hard line into it? Doesn't it need flex lines so the hard line doesn't fatigue?
I ran hard lines from the tank to the filter in my GTO and looking back I think a short run of flexible hose is better. I think the hard line carried some of the fuel pump noise so it got louder. Soft lines isolate the noise better.
The Corvette filter/regulator is really supposed to be mounted in the rear so the return line is better. I would move it to the rear and then run a parallel hard line for a future return line.
Andrew
Thanks for the input, I went out and looked at the frame and there is a spot to mount it in the rear and I should still be able to run hard line to it from the front. I also think it'll be a pretty small increase in cost to add the return line for possible future use. Now I'm just figuring out what fittings I will need to buy to make all this work. The shopping cart gets pricey pretty fast (as we all know).
I'm just going to order the hard lines and fittings and wait to do the flex lines when I have the body back on the frame, so it'll be easier to estimate how much I need and also split up the cost.
So this past week Portland got pretty good and covered in snow, luckily my area got only 4 inches or so on the roads (about 6" I measured in my yard).
I just wait it out if I can...none of my cars are really suited for this type of weather.
So I spent a lot of time with my furry friends, in the warmer house
Not to be too off topic but I love these two, especially the big maine coon
The clam shells I pulled off my 305 were in OK shape, but there was one crack on one of them. Guess that little engine had a lot of torque after all.
The other one doesn't have any issues
I drilled a hole in the end of the crack, grund/cut out the material along the crack and welded up the crack and hole.
I think my weld had good penetration and I think this will work out fine.
Cleaned up the mounts for paint
Ready to bolt on the engine adapter plate.
I'm going to get a set of poly mounts before I put the engine in for good (I've never thought much about using rubber in a performance application), I'm just going to use them to test fit the engine, trans and headers.
I also went ahead and moved the fuel filter/regulator, and my hard lines should be here Monday (didn't order anything for the soft lines yet).
I think thats less than 2' from the fuel tank so should make for a short run of hose.
Despite the cold I've been able to make some progress :-D
Jessica
lookin good! cant wait for a return to normal weather aka 42*F and raining
I agree! I'm really jealous of the heat in your garage this last week. I Just heard I won't be working Monday because of the solid sheet of ice in our parking lot so I guess I may get started on my hard lines if they arrive early enough. Then back to working on the body I guess .
Jessica
Got the hard lines, and my flare tool did a good job on the first end.
Its a good thing I only need to flare 4 ends because its a cheap harbor freight flare kit.
I decided to take the little mini snow plow on an adventure to my parents frozen neighborhood. It was a very sideways trip but it was fun!
I should have the hard lines done this week if they are as cooperative as the brake lines were :-)
Jessica
So using hard lines was the best advice you guys could have given me!
So easy to work with, it was even better than working with the hard brake lines.
Decided to run both supply and return, and if I need to ditch the Corvette filter/reg in the future I'm all set to do it easily while the body is on the car.
I ran out of clamps (because I never planned to need more with my old plumbing plan).
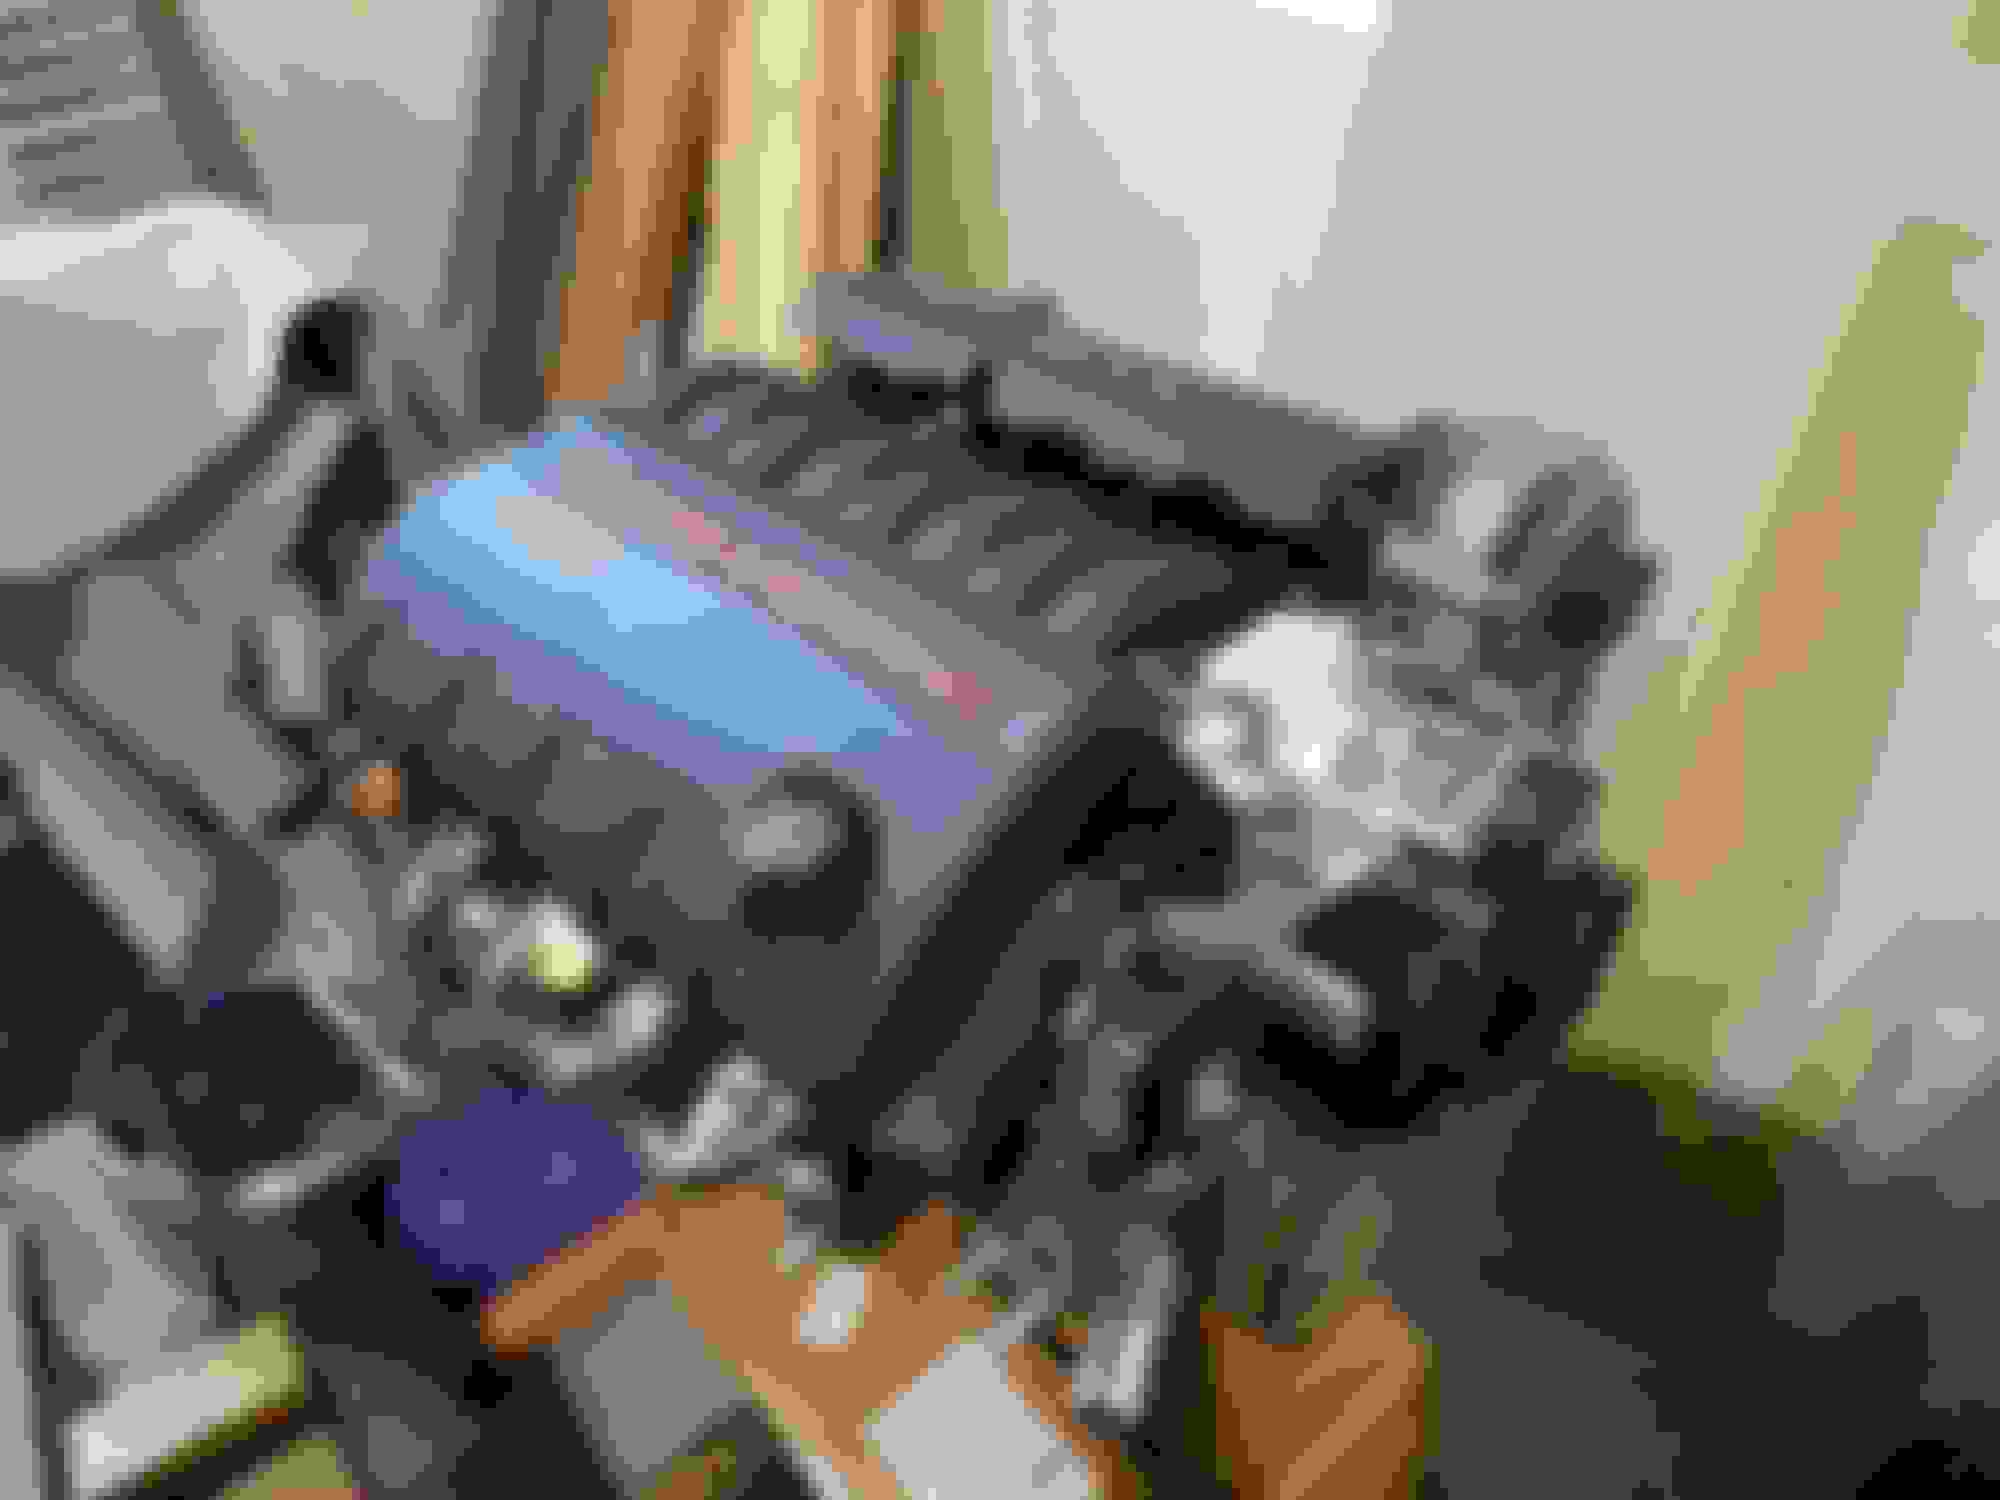
Decided to take the engine mounts to the engine and make sure those work right
Just an excuse to show off the engine
I'm going to start cleaning the bottom of the body off, then I'll weld on the driveshaft safety loop bracket and anything else that I missed when I replaced the floors.
So I'm not sure if this part of the project is worse or better than the frame cleaning. At this point its a lot easier and I didn't have to pull out a grinder or sand blaster so thats great small victories people!
Luckily there isn't that much undercoat and the messiest part of the belly was removed when I replaced the floor pans.
The rear is mostly dusty. Whoever sprayed the undercoat missed a ton of stuff and the gas tank was in the way.
Took about an hour or so to get all situated under the car and scrape this off. I used a propane torch for some of it but most of it came off with a putty knife.
The majority of the undercoat is in the wheel well. No rust to be found so far, just red oxide paint/primer and overspray from the factory paint.
Thats the factory color, light blue I believe, its not bare metal even though it looks that way in pics
After about 4 or 5 hours thats what I'd accomplished, not too shabby. I'm just going to slowly work my way around the bottom of the car by section until its done, then I'll go back and seam seal the parts that need it because a lot of the old stuff is just falling off. After some welding on the floors I'll be ready to paint it all.
Jessica
Well I've been scraping undercoat off for what seams like forever...I finished both wheel wells and the bottom of the cubby. I also got my driveshaft loop bracket ready to weld onto the floor pan. I found one stress crack in the cubby sheet metal and another piece of metal with broken spot welds. At least I'm finding these things now while I can fix them.
I also got a set of these for free :-)
One of them has a crack but if I use them I plan to fill in the logos and some other things anyways to make them smooth. I know they trap heat above the coils, and I'm more interested in power than style, but they'd be kind of cool to throw on before a cruise in and the price was right.
Anyways, I keep forgetting to take my phone under the car for pictures but I'm getting further along. I was dreading doing this part of the project and had been putting it off but its getting there and its really the only thing holding me back from putting the body back on the frame.
Jessica

 01-08-2017, 08:53 AM


 .
.