
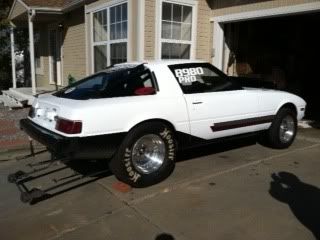
79 RX7 LS 5.3 Turbo. (8.93 @ 153mph)
 12-11-2012, 01:50 PM
#1
If anyone wants to see this build thread with pictures it can be seen here.
https://www.theturboforums.com/threa...3-75mm.362857/
Plan to cycle in cheap junk yard motors in as they let go.
Basic run down...
Chassis
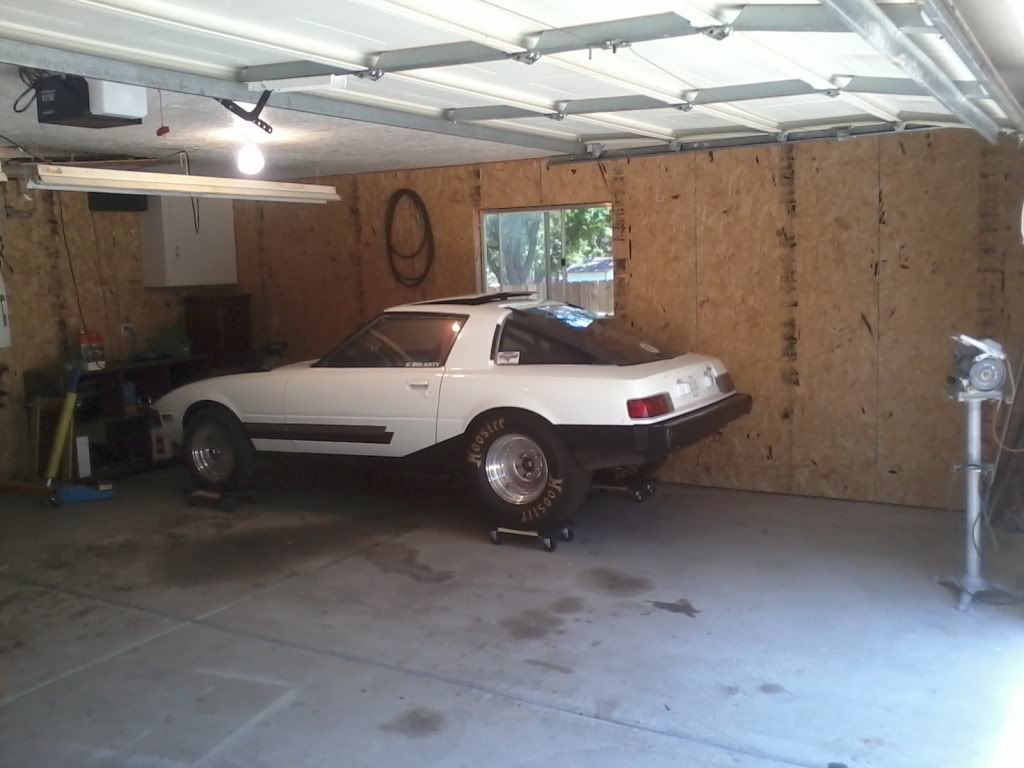
79 rx7 back halfed. Was 2400lbs with the old th350 and all iron SBC.
Currie 9 inch with 35 spine moser axles and spool
3.25 gears 29" tires.
competition engineering ladder bars and wheelie bars
Front factory struts with power disk brakes
Drums in the back
Cheap junkyard 5.3
ARP head studs
LS9 GM MLS HG's
Cheap OEM ZR1 Cam
PAC 1218 calce sprins.
317 6.0 heads.
AEM EMS PNP
120lb injectors
Magnafuel 750 pump
1/2 fuel lines
E85 Fuel.
Built Power glide. PTC custom spec'd 9.5" converter by Dusty.
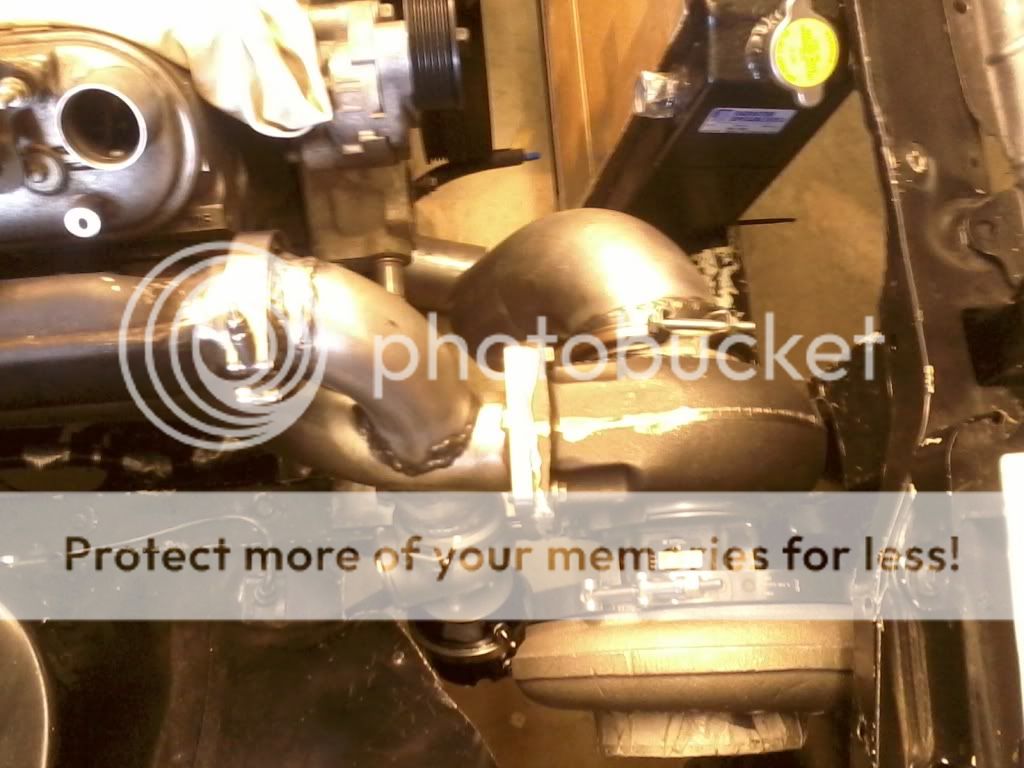
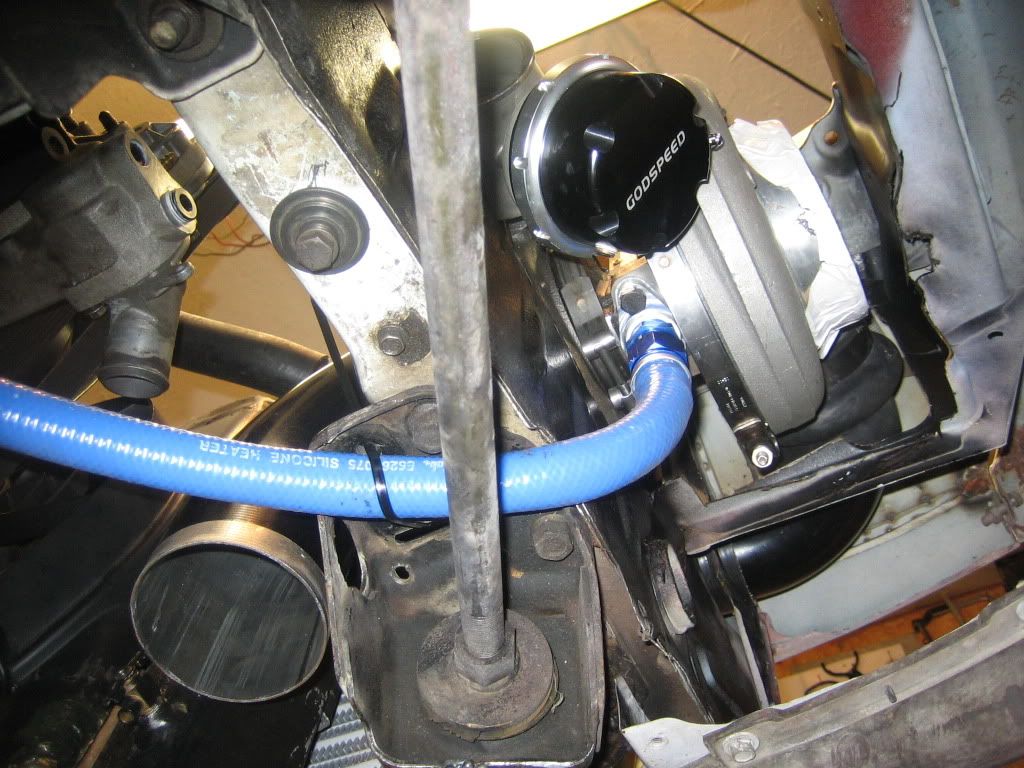
BW S400SX3 turbo. (75mm) 1.10 AR T4 exh. housing.
Turbo kit consists of stamped SS 98 F-body manifolds. and 2.5" Mild steel piping.
Don't plan to rev it over 6000. Boost to be determined... Probably in 20+ range.
On to the pics.,,
Chassis...
$8 moving dollys (rated at 1k each, work great!)
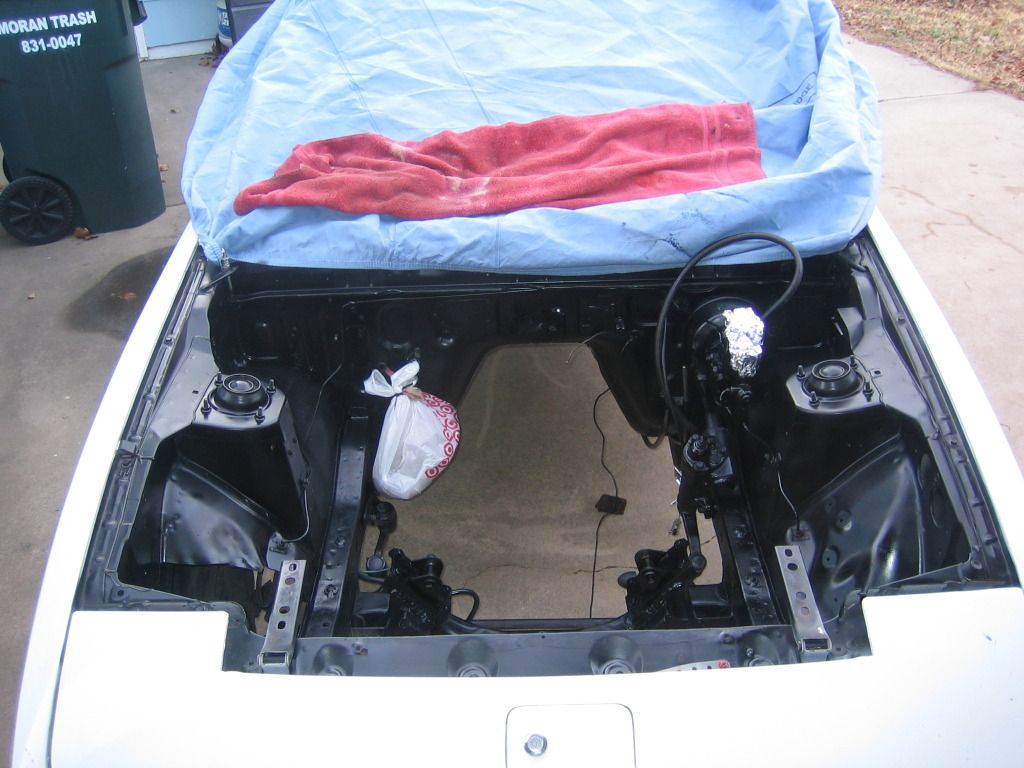
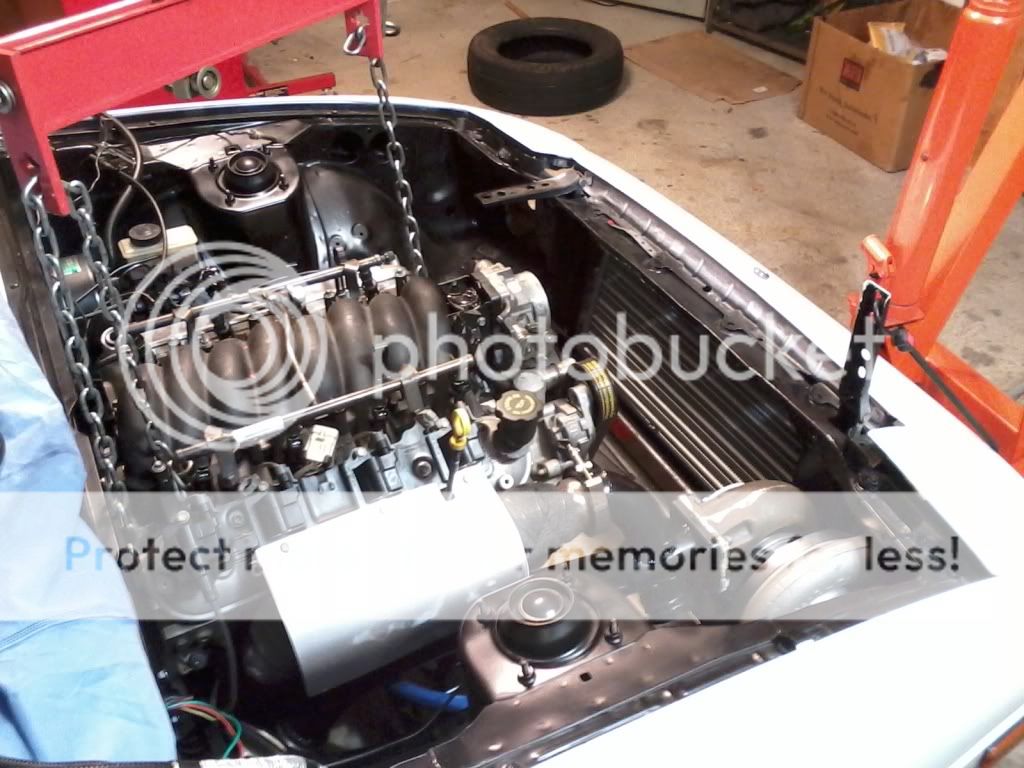
Cleaned up the bay.
before...

After...
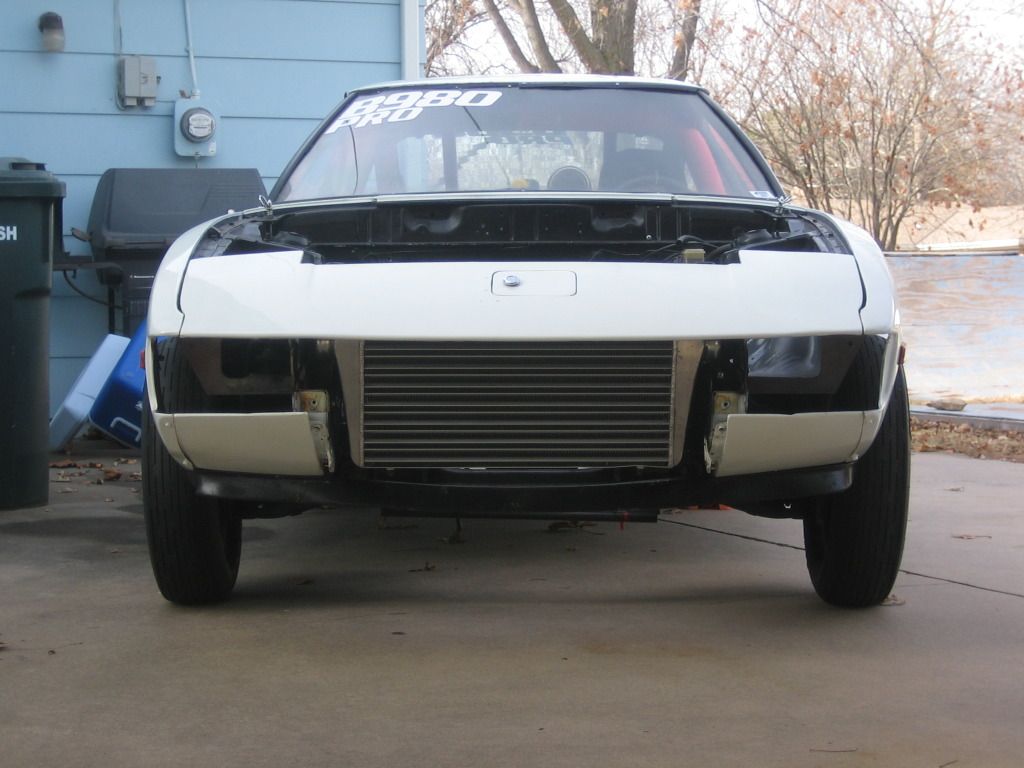
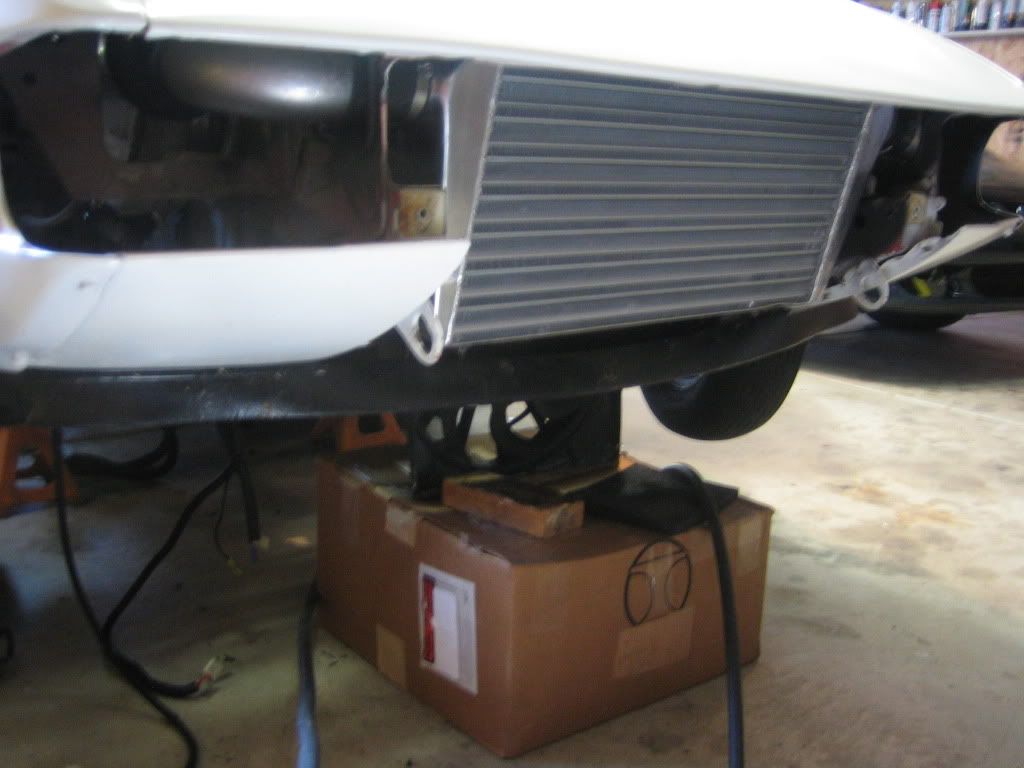
Random inter-cooler shot. (31x12x4)
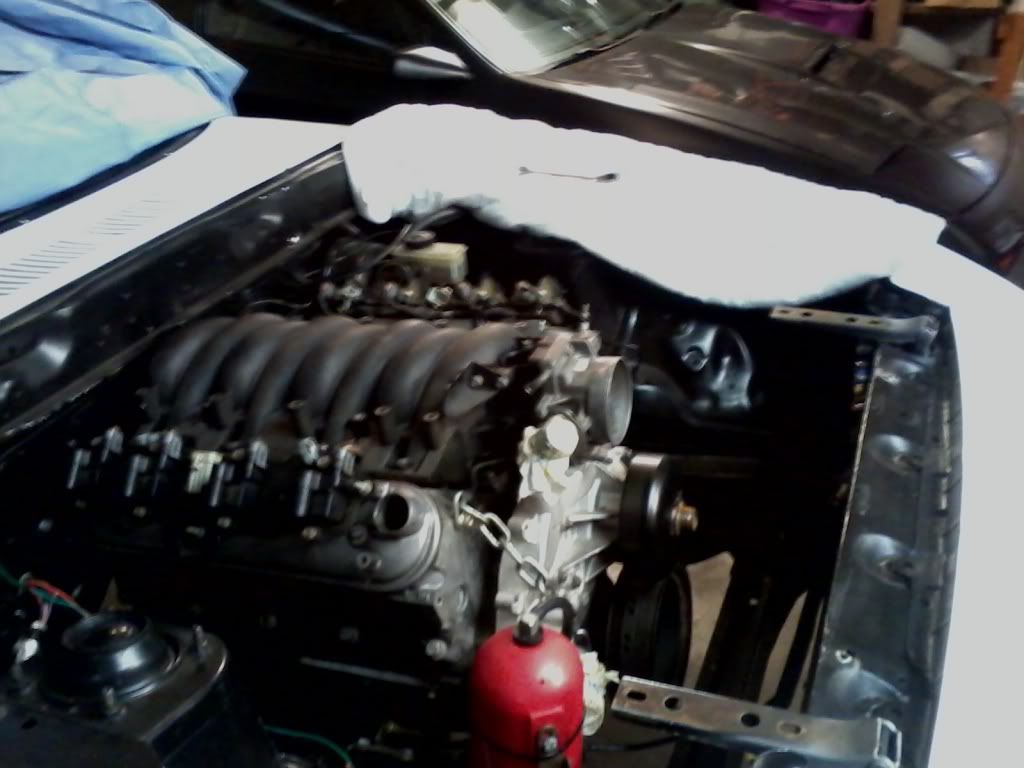
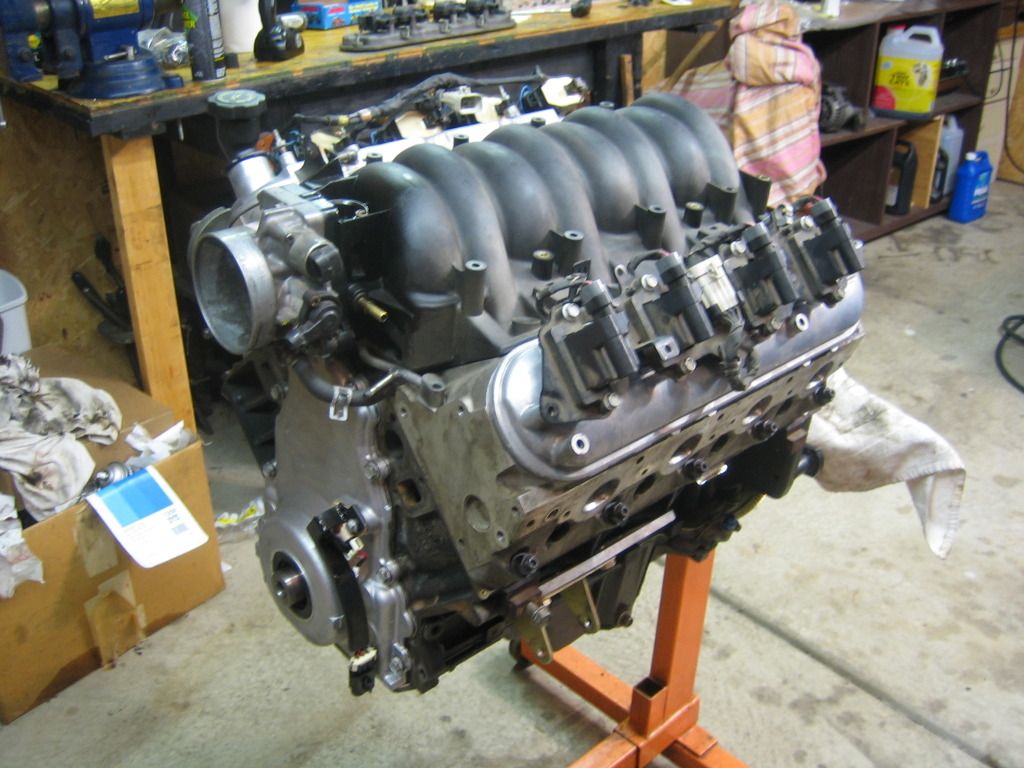
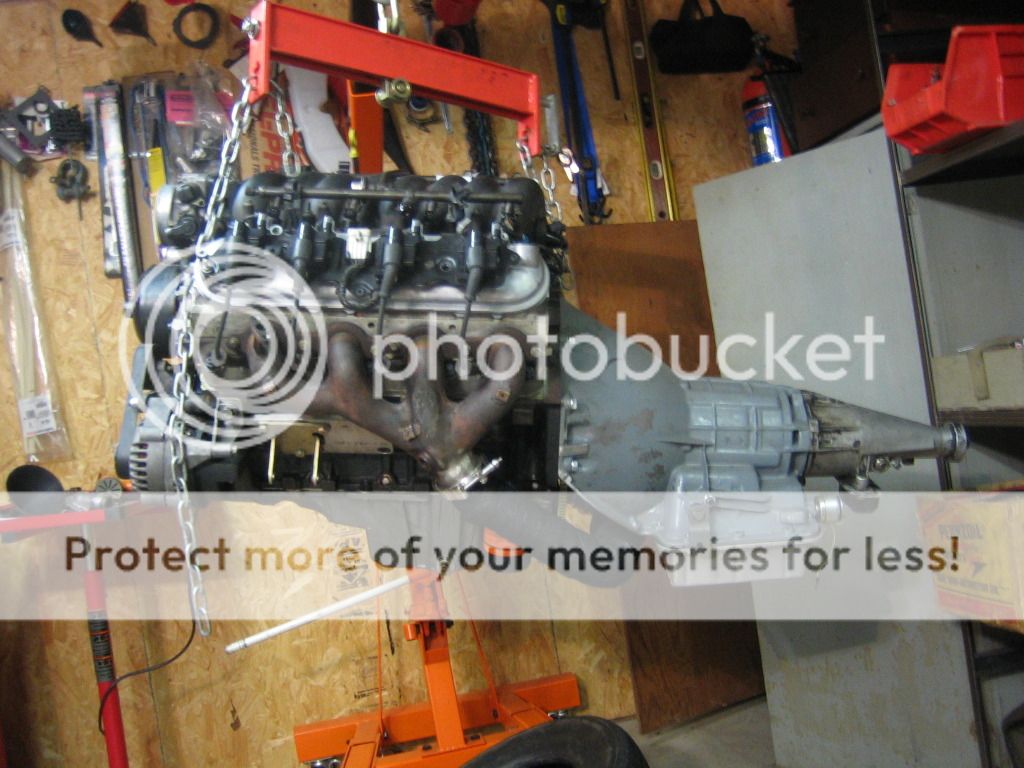
Test fit motor. Little closer to the steering box thatn I'd like.
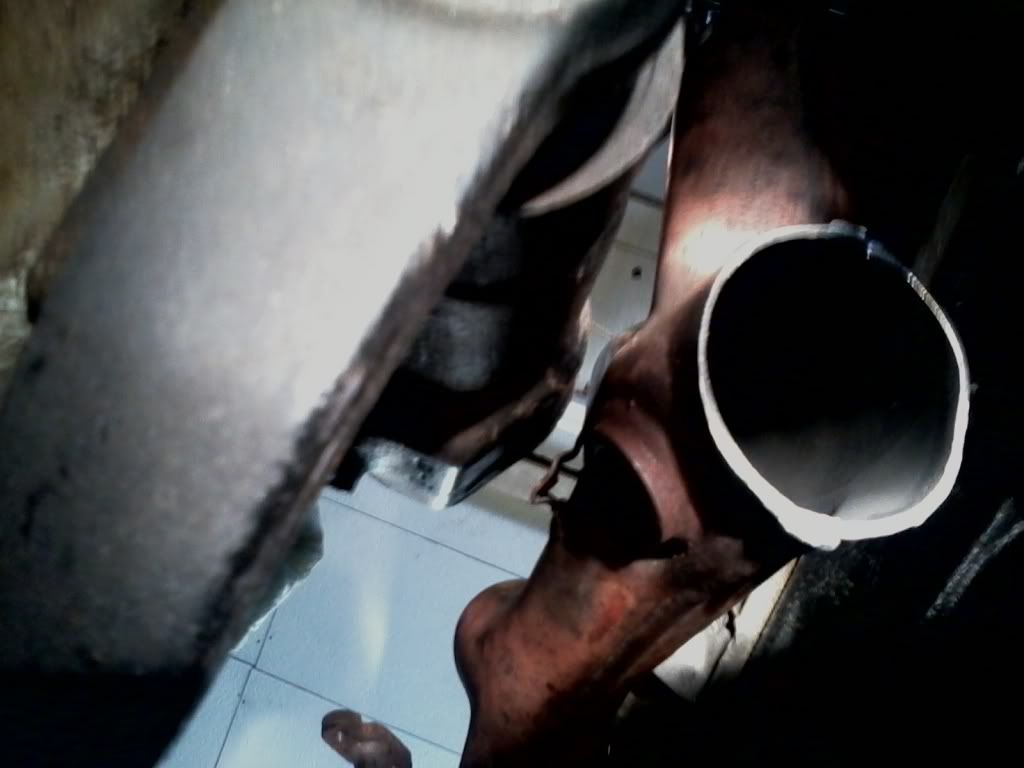
Looking up from the bottom....
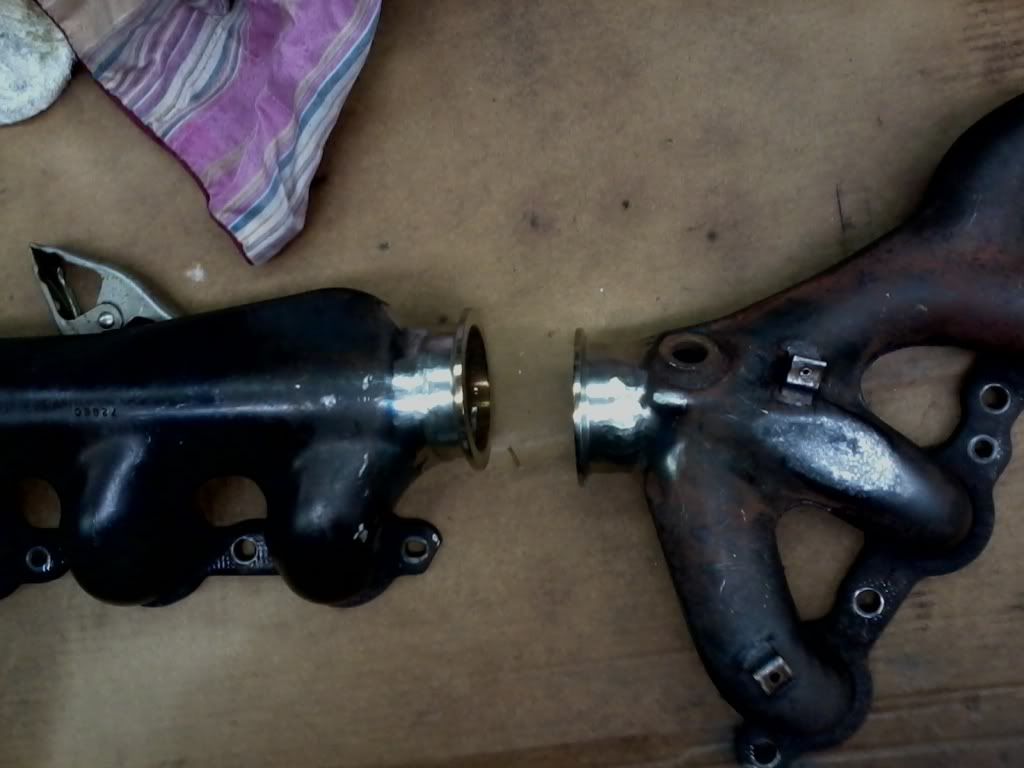
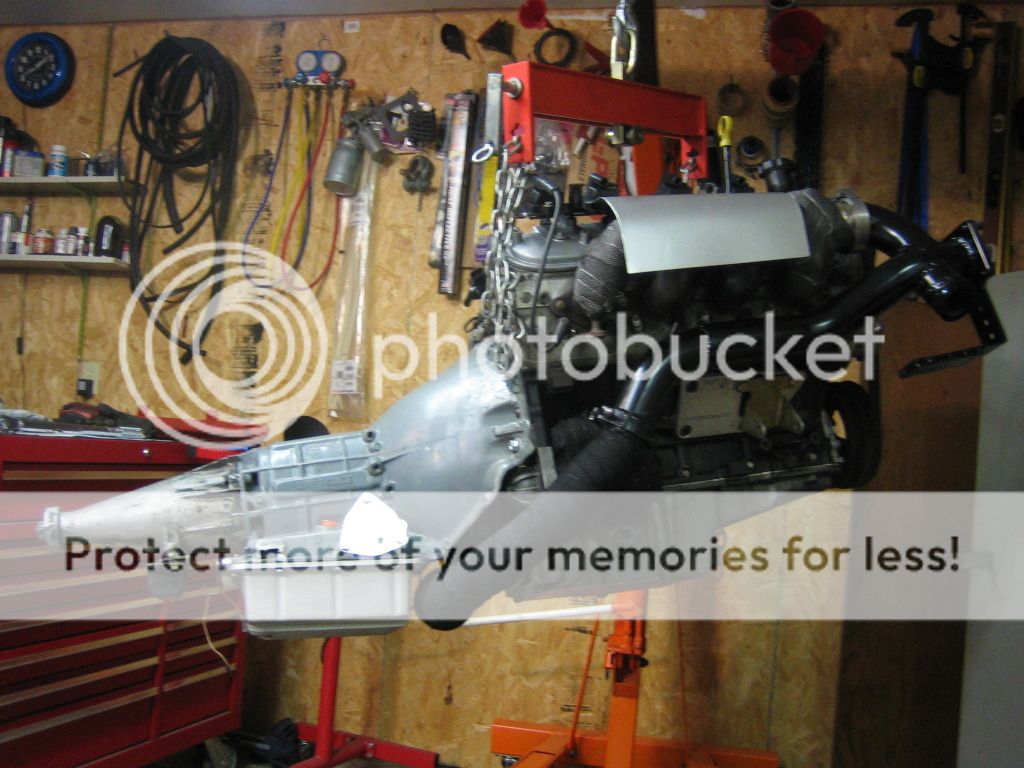
Cut up and welded the manifolds. Used a mig and tri-gas. Actually welds nice, for me anyway.
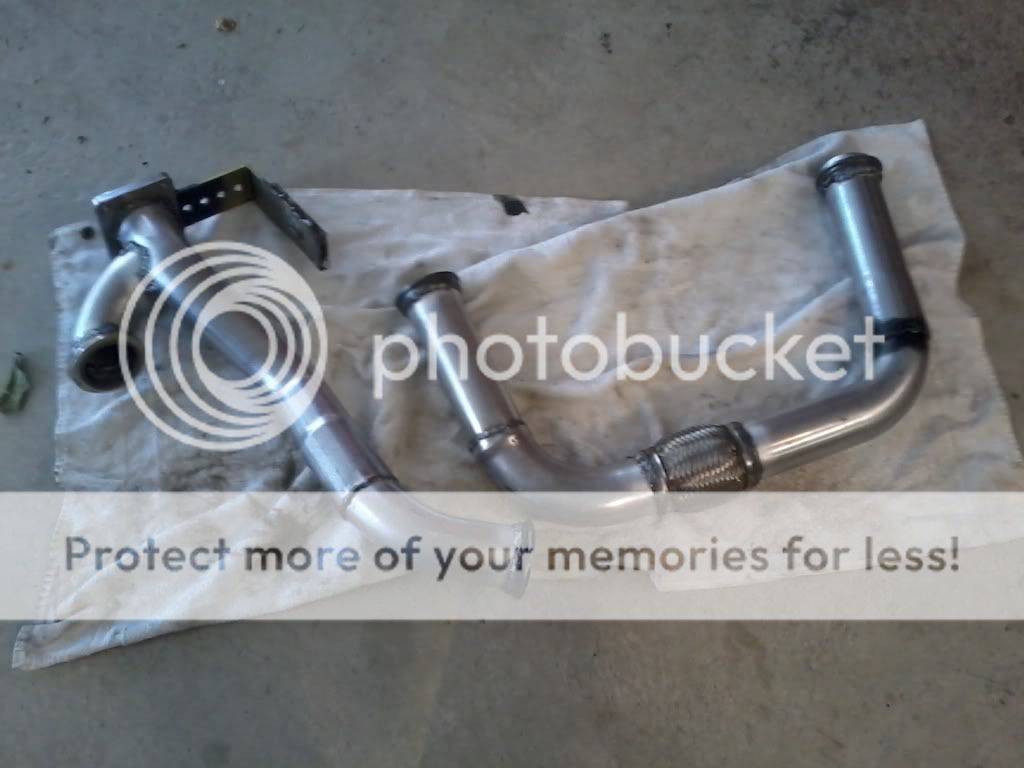
Hot side done.
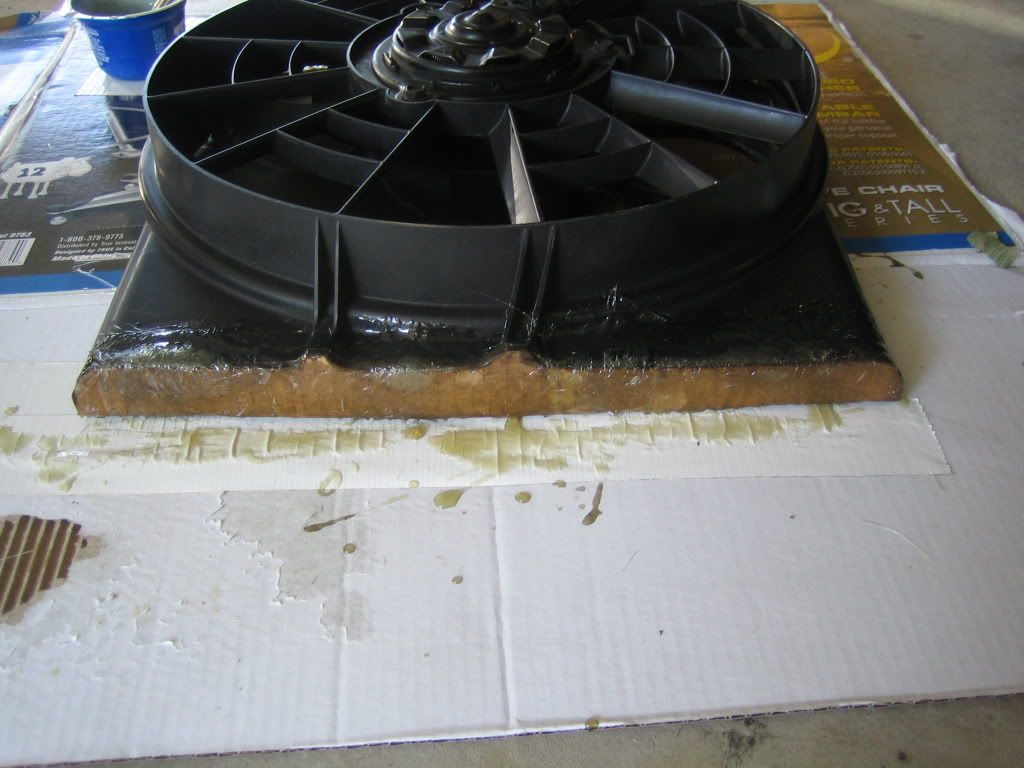
Got the Taurus E-fan glassed up. Still need to sand/paint and add mounts.
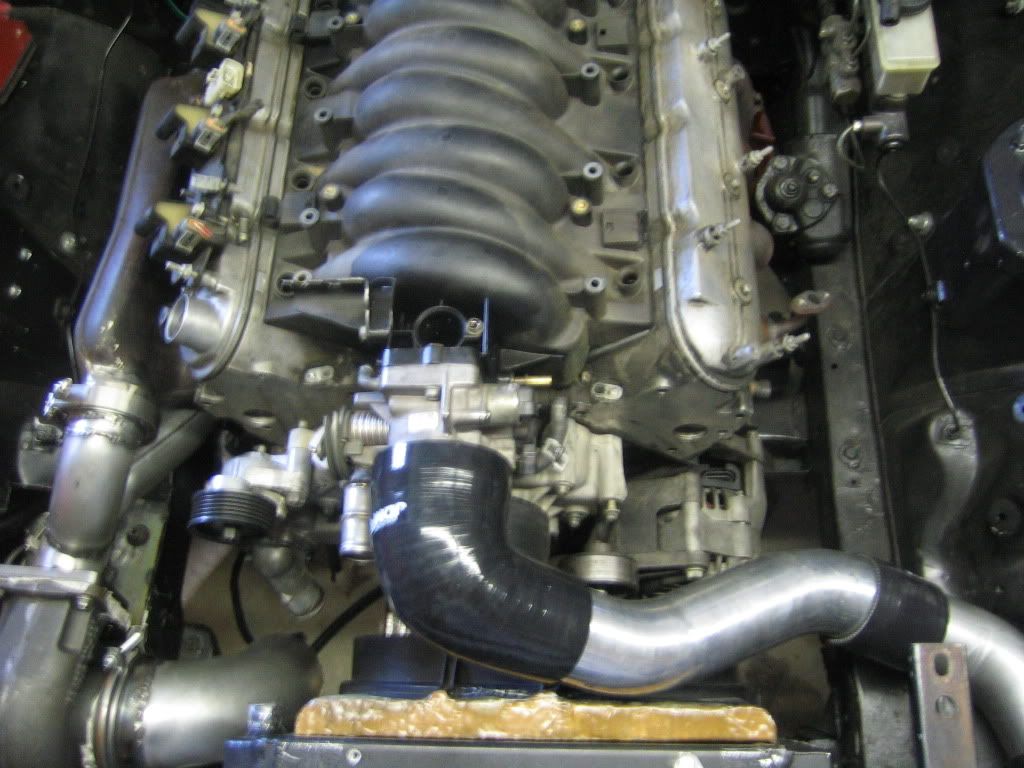
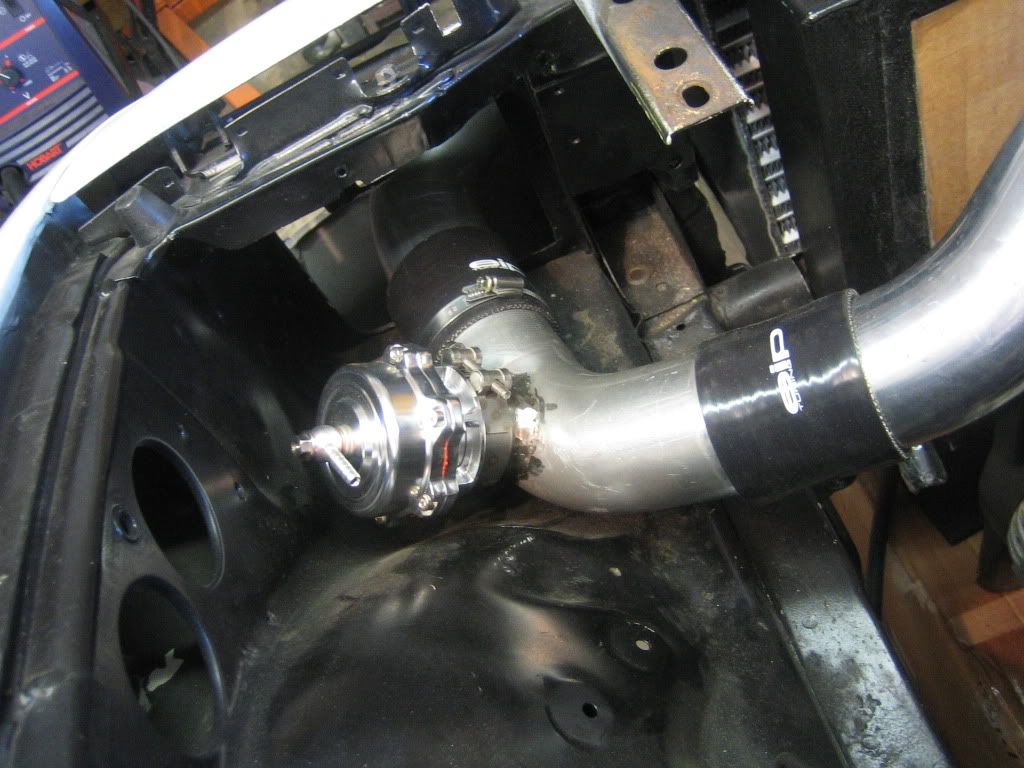
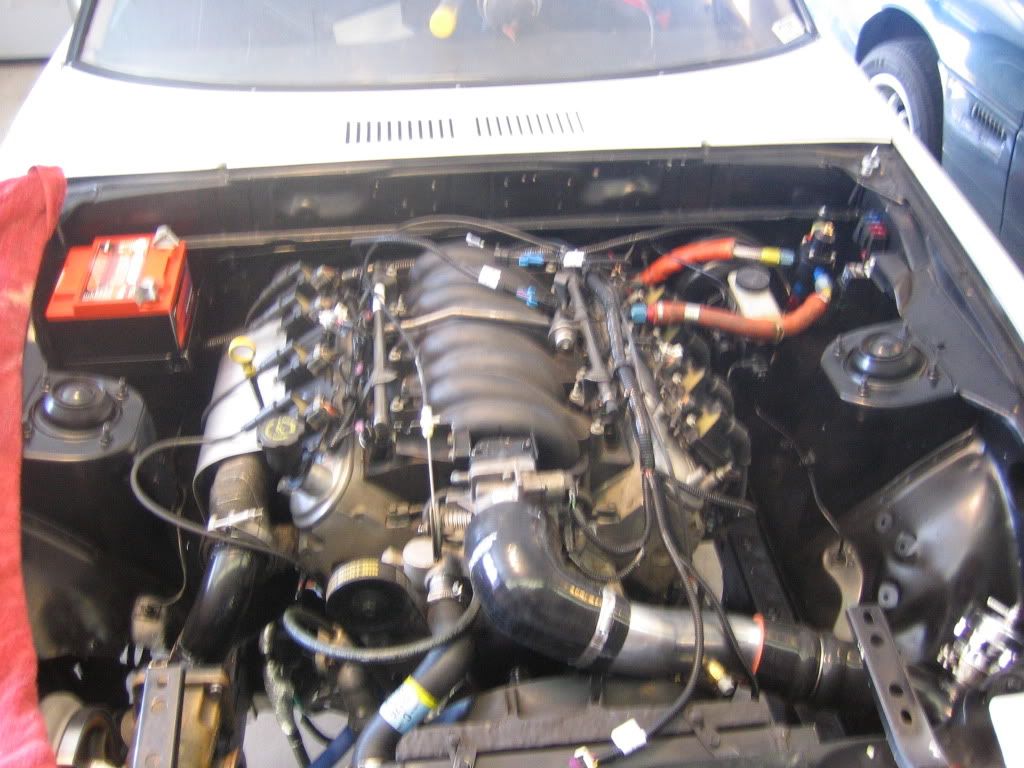
Charge piping is all mocked up and in place. Welded Beads on all the piping. BOV welded in.
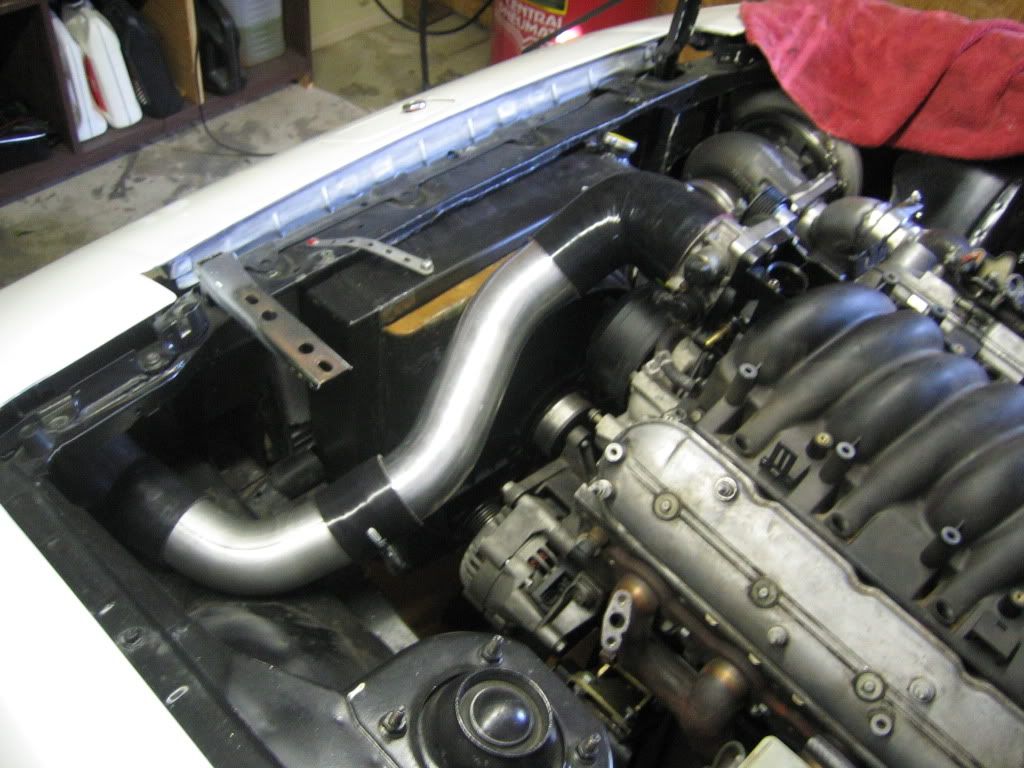
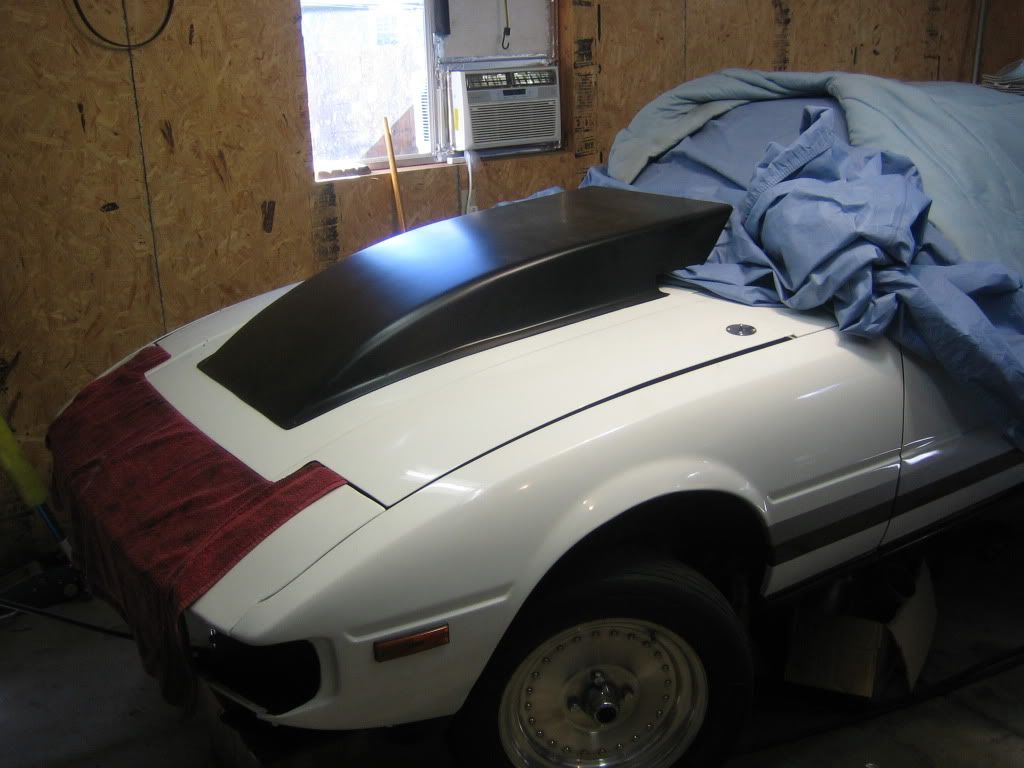
I was a little nervous about hood clearance by the throttle body. Cut the webbing out of the hood (6lbs worth!) and test fit it. Fits great. I have springs under the rear pins, but it sits nice and flush when pinned.
https://www.theturboforums.com/threa...3-75mm.362857/
Plan to cycle in cheap junk yard motors in as they let go.
Basic run down...
Chassis
79 rx7 back halfed. Was 2400lbs with the old th350 and all iron SBC.
Currie 9 inch with 35 spine moser axles and spool
3.25 gears 29" tires.
competition engineering ladder bars and wheelie bars
Front factory struts with power disk brakes
Drums in the back
Cheap junkyard 5.3
ARP head studs
LS9 GM MLS HG's
Cheap OEM ZR1 Cam
PAC 1218 calce sprins.
317 6.0 heads.
AEM EMS PNP
120lb injectors
Magnafuel 750 pump
1/2 fuel lines
E85 Fuel.
Built Power glide. PTC custom spec'd 9.5" converter by Dusty.
BW S400SX3 turbo. (75mm) 1.10 AR T4 exh. housing.
Turbo kit consists of stamped SS 98 F-body manifolds. and 2.5" Mild steel piping.
Don't plan to rev it over 6000. Boost to be determined... Probably in 20+ range.
On to the pics.,,
Chassis...
$8 moving dollys (rated at 1k each, work great!)
Cleaned up the bay.
before...
After...
Random inter-cooler shot. (31x12x4)
Test fit motor. Little closer to the steering box thatn I'd like.
Looking up from the bottom....
Cut up and welded the manifolds. Used a mig and tri-gas. Actually welds nice, for me anyway.
Hot side done.
Got the Taurus E-fan glassed up. Still need to sand/paint and add mounts.
Charge piping is all mocked up and in place. Welded Beads on all the piping. BOV welded in.
I was a little nervous about hood clearance by the throttle body. Cut the webbing out of the hood (6lbs worth!) and test fit it. Fits great. I have springs under the rear pins, but it sits nice and flush when pinned.
Last edited by Forcefed86; 07-11-2017 at 07:54 PM.
 12-11-2012, 02:34 PM
#2
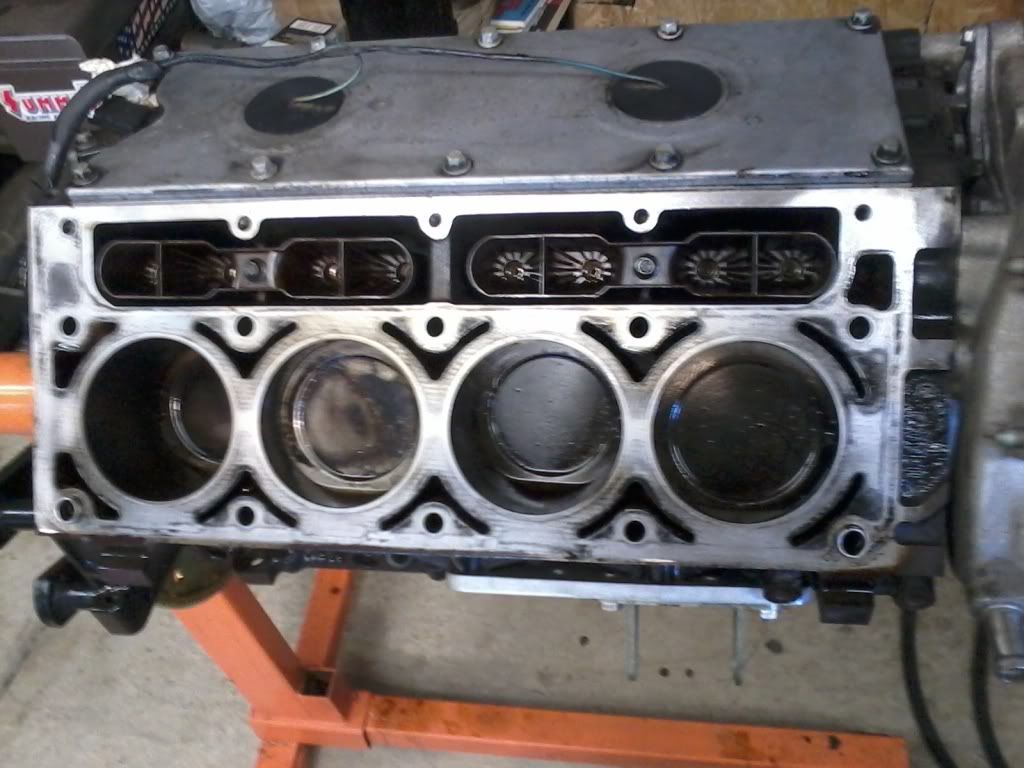
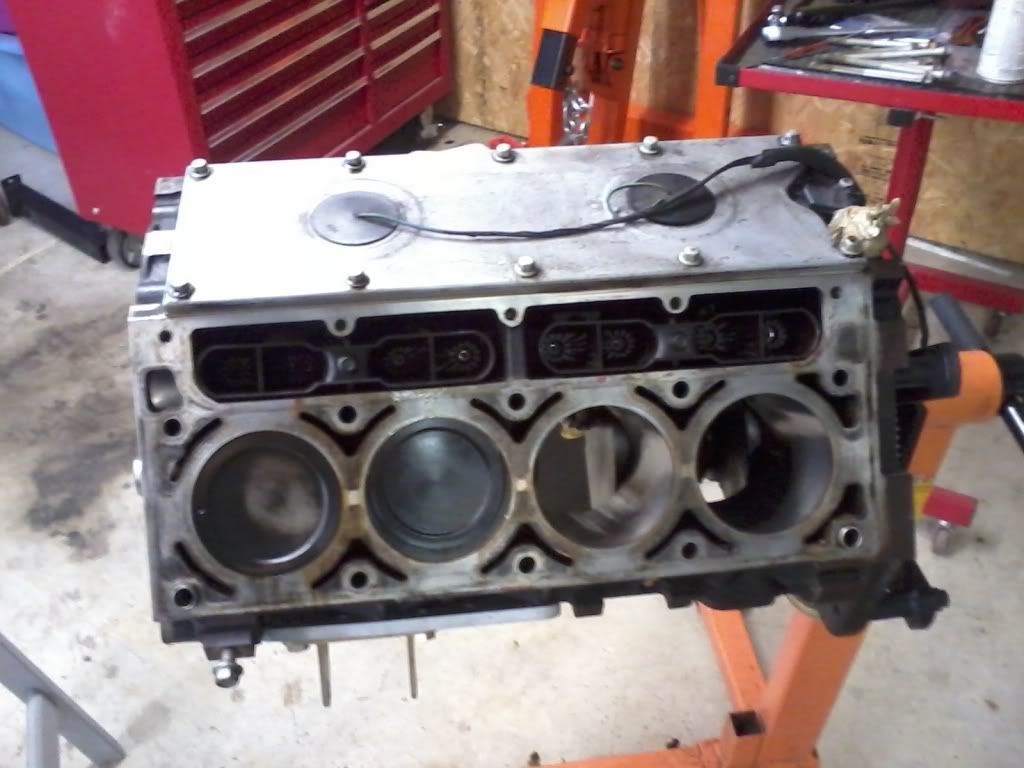
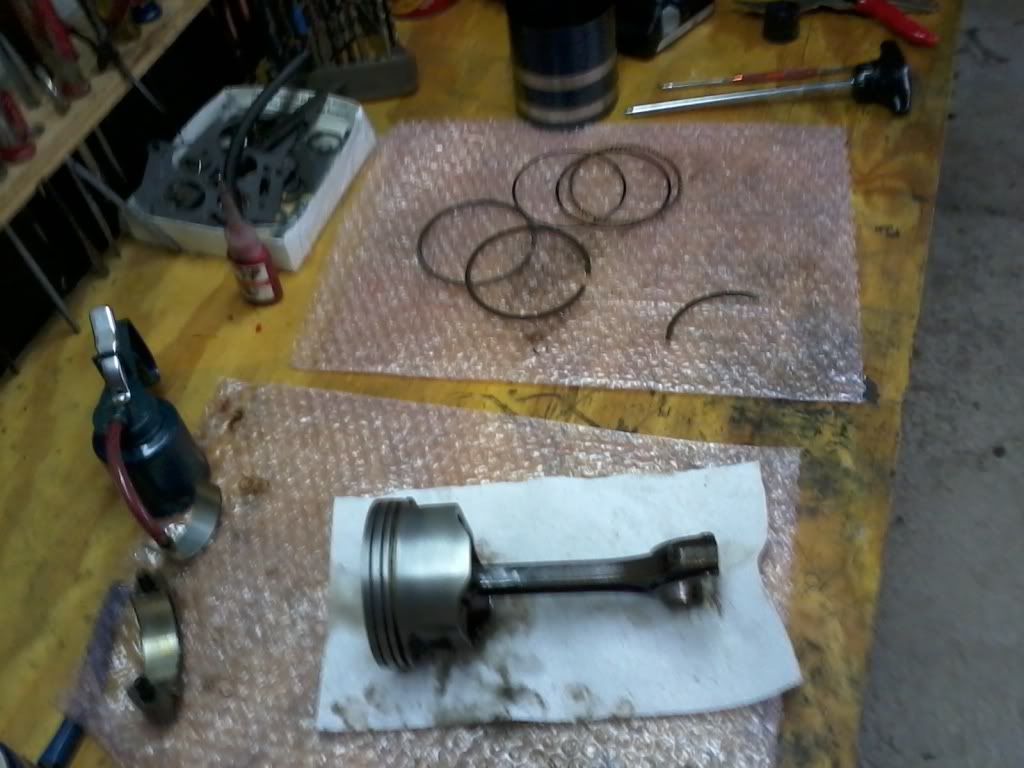
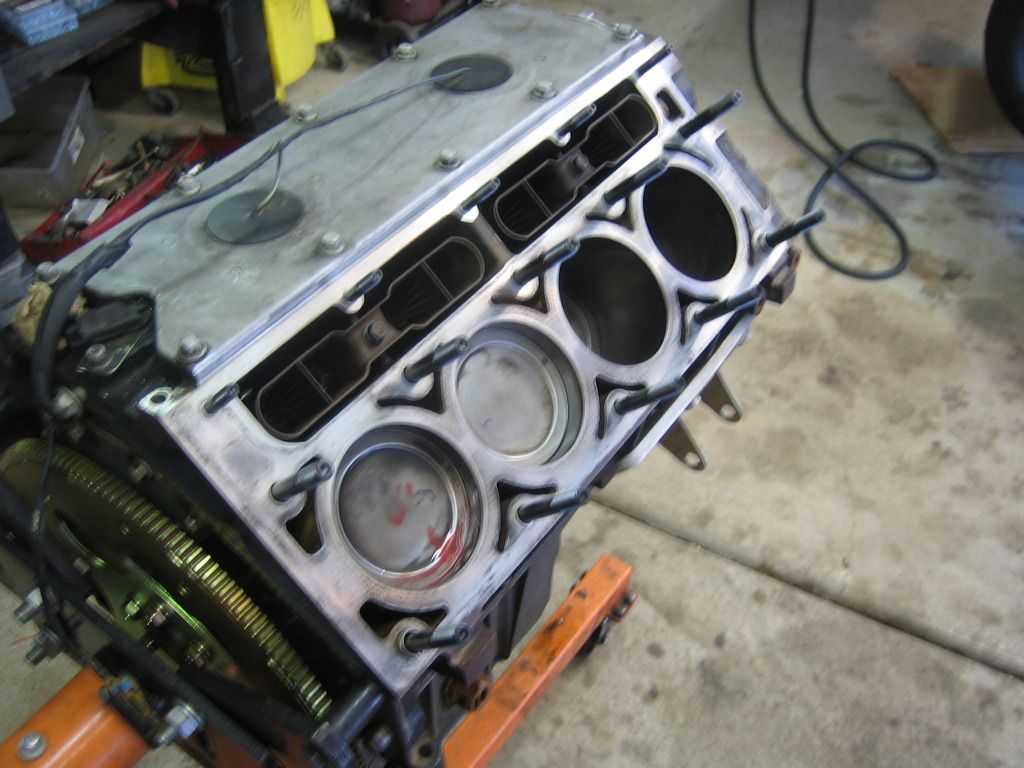
Pulled the motor apart a bit to inspect things. Glad I did. This "Ran great when pulled" engine had two broken pistons. All the bearings looked good, other rods/pistons all check out as well. So... in the junkyard spirit of this build I bought 2 used piston/ rod assemblies for $25. Did a quick hone on the 2 bad cylinders as well.
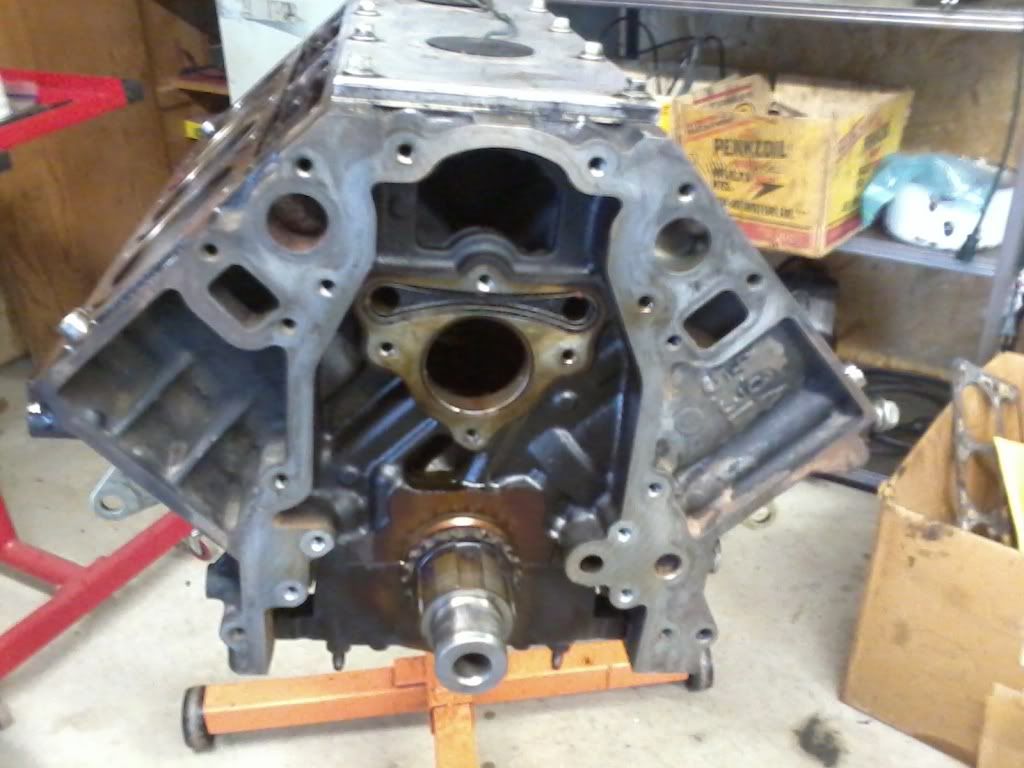
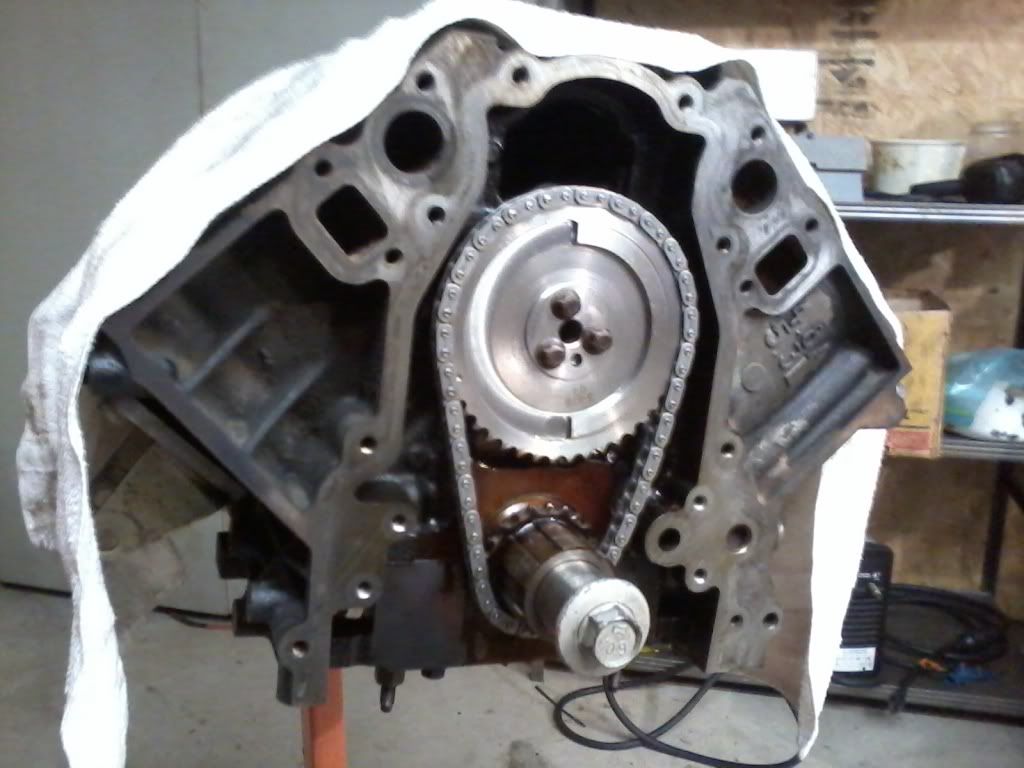
Cleaned things up a bit and threw the ZR1 cam in. All the roller lifters looked good, gonna run them "as is" too. Got the new LS3 style cam gear with pick up installed. Going to run a LS3 style timing cover with cam pick up on the front.
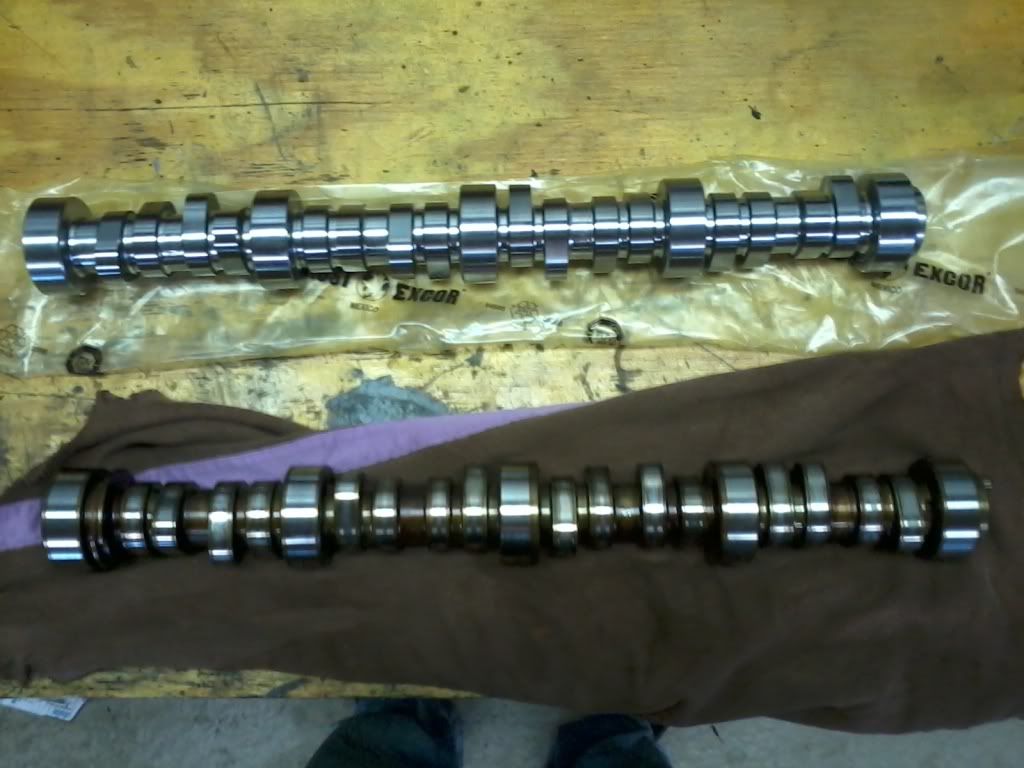
new correct cam gear and chain.
2 used piston/rod assemblies showed up a few days later. $25 well spent!
Cleaned all the pistons up and re-gapped all the rings to .028 on the top and .030 ...ish. Torqued all the mains with the angle gauge. Ordered the LS6 rod bolts.
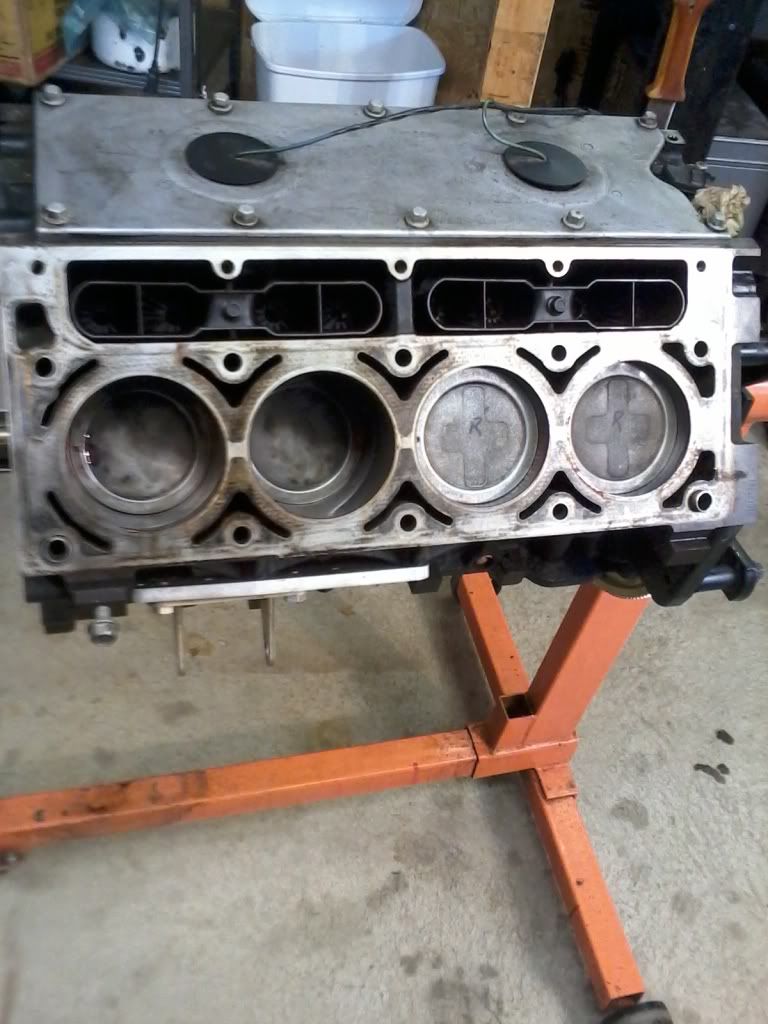
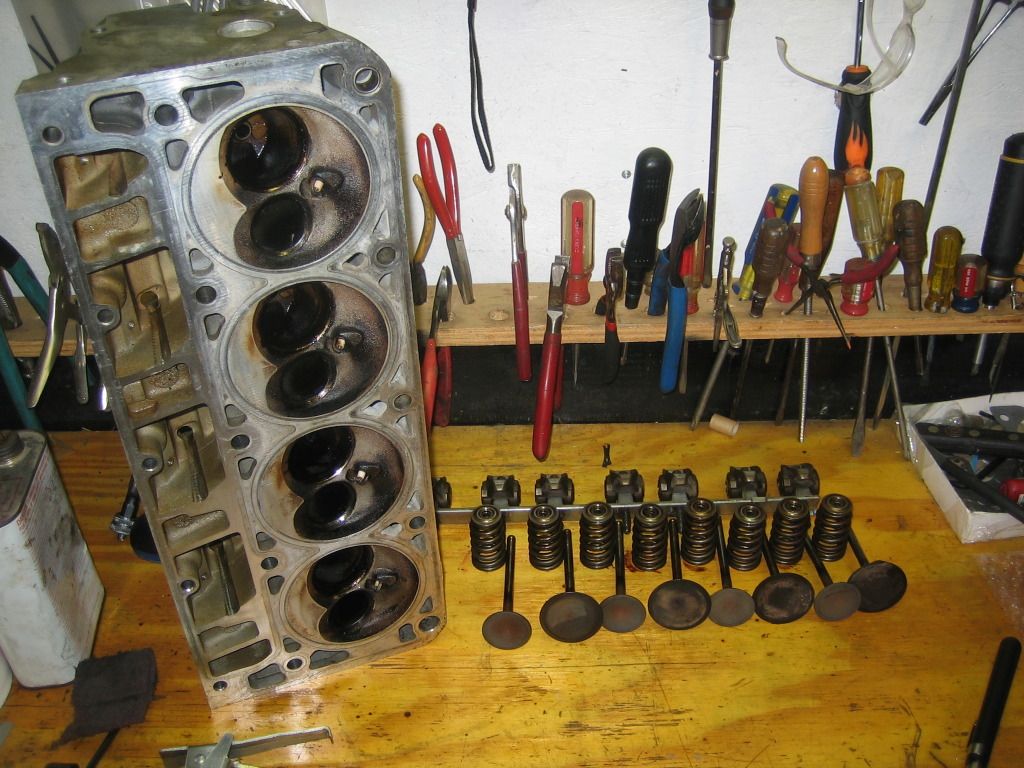
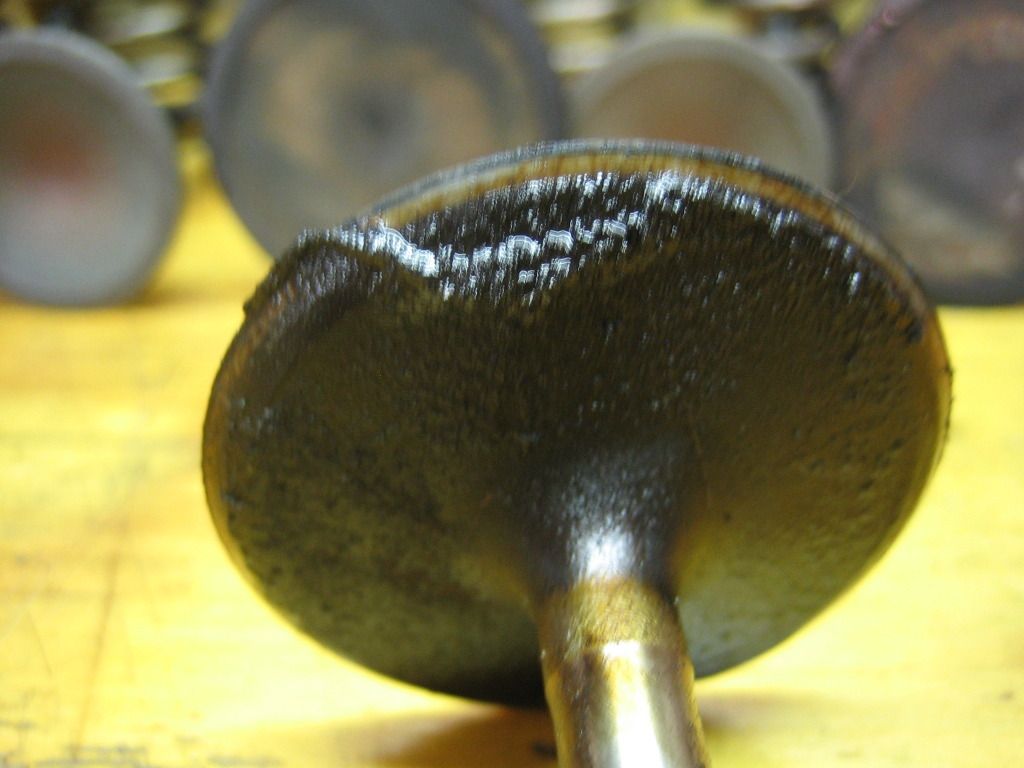
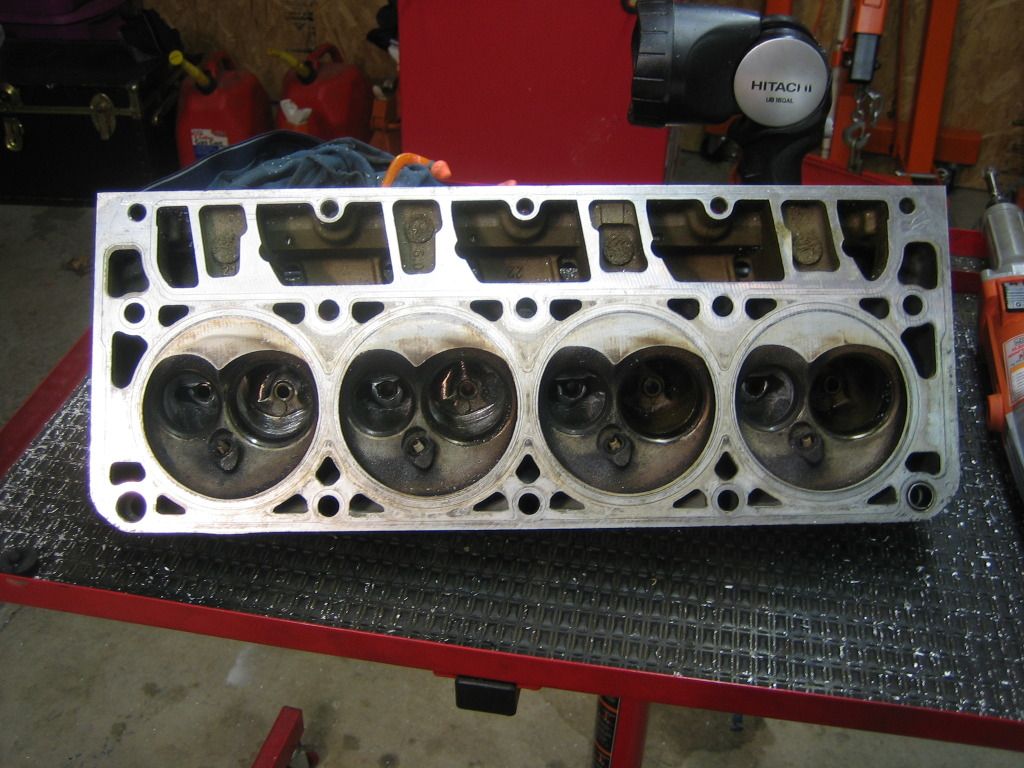
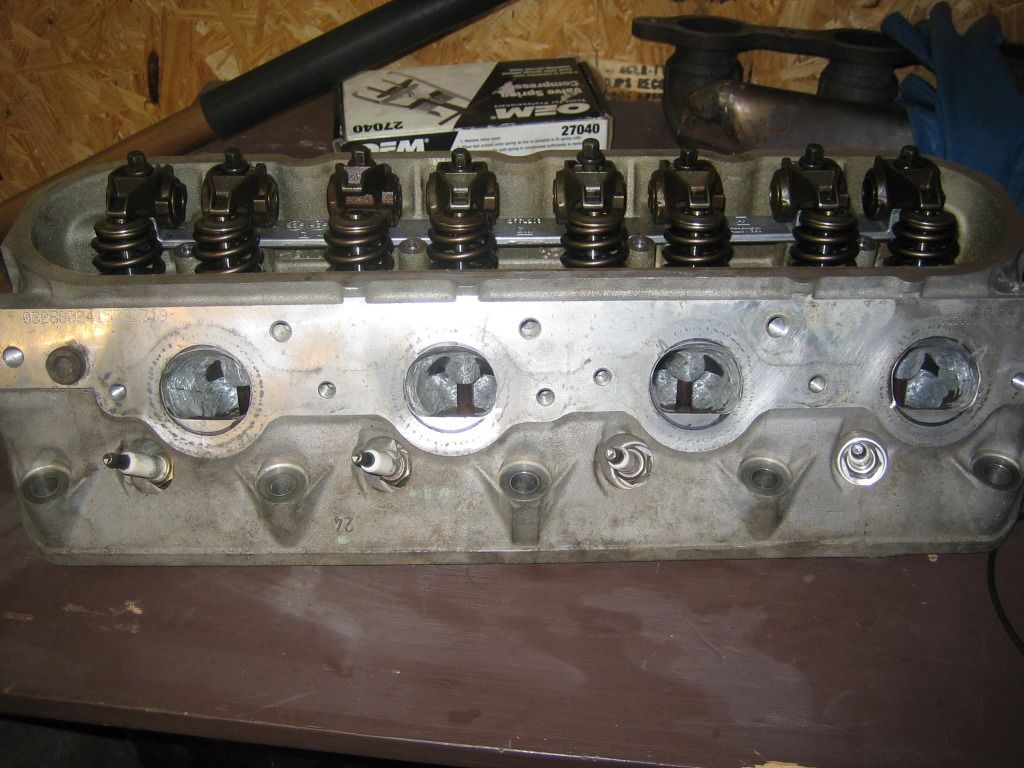
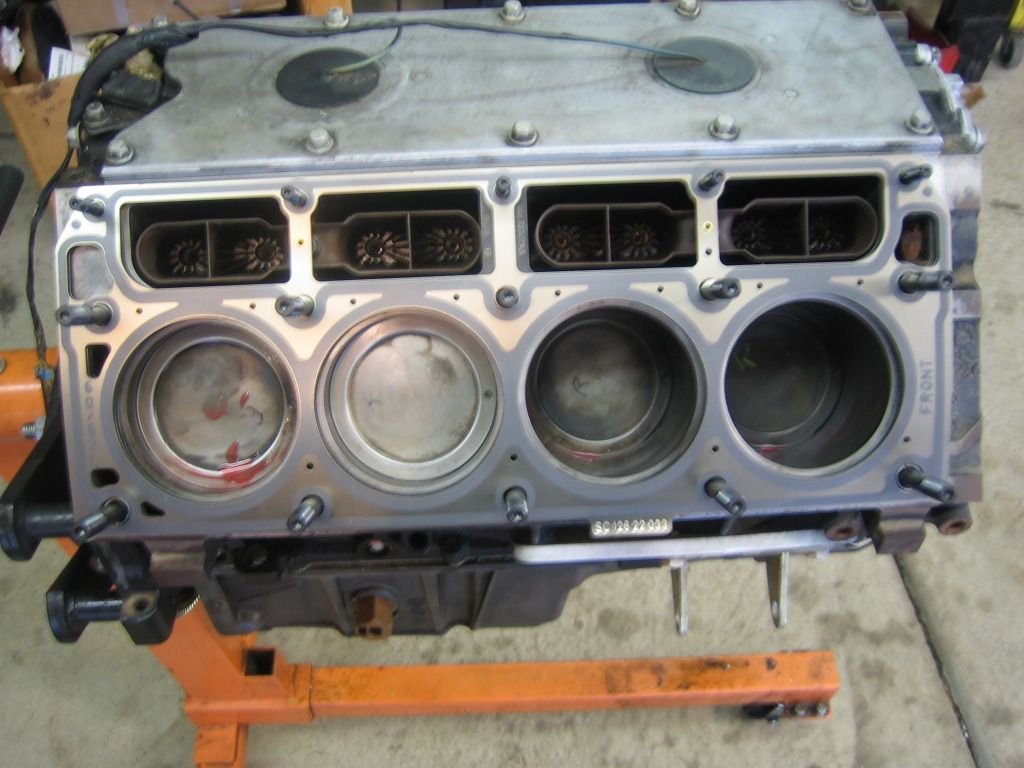
Cleaned and did a speedy port job on the 317 (6.0) heads. Took the large hump down in the intake runner,cleaned up the bowls, port matched the lower half of the exhaust port and trimmed down the valve guides.
Leaving the rough cut "port job" to create turbulence in the airflow.
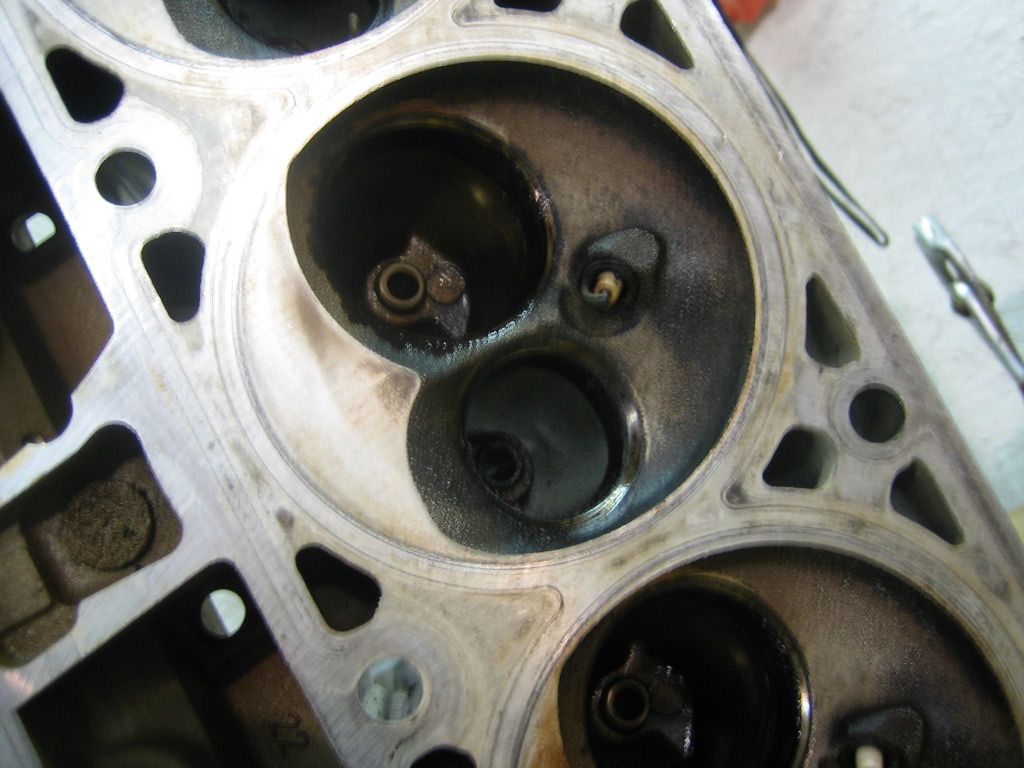
New PAC1218 springs installed. These heads were run by a friend last year. Carb'd E85 setup. You can see the black tar goo all around the intake valves and ports. Hope to get the long block put together this weekend.

Cleaned things up a bit and threw the ZR1 cam in. All the roller lifters looked good, gonna run them "as is" too. Got the new LS3 style cam gear with pick up installed. Going to run a LS3 style timing cover with cam pick up on the front.
new correct cam gear and chain.
2 used piston/rod assemblies showed up a few days later. $25 well spent!
Cleaned all the pistons up and re-gapped all the rings to .028 on the top and .030 ...ish. Torqued all the mains with the angle gauge. Ordered the LS6 rod bolts.
Cleaned and did a speedy port job on the 317 (6.0) heads. Took the large hump down in the intake runner,cleaned up the bowls, port matched the lower half of the exhaust port and trimmed down the valve guides.
Leaving the rough cut "port job" to create turbulence in the airflow.
New PAC1218 springs installed. These heads were run by a friend last year. Carb'd E85 setup. You can see the black tar goo all around the intake valves and ports. Hope to get the long block put together this weekend.
Last edited by Forcefed86; 05-04-2016 at 11:27 AM.
12-11-2012, 02:38 PM
#3
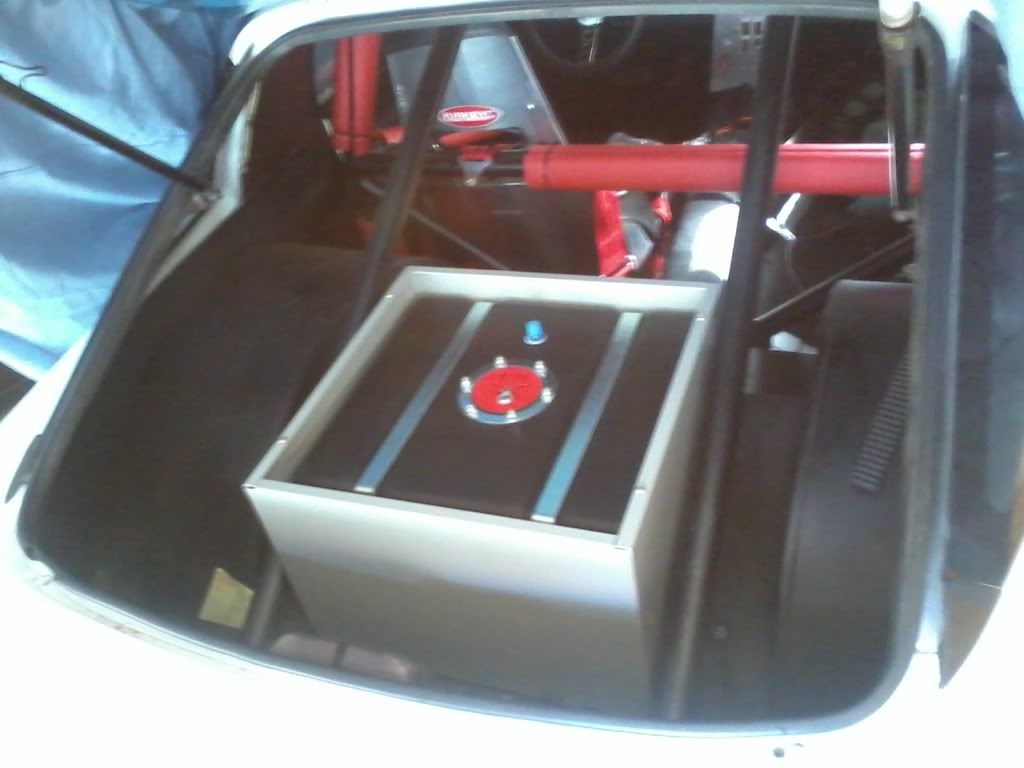
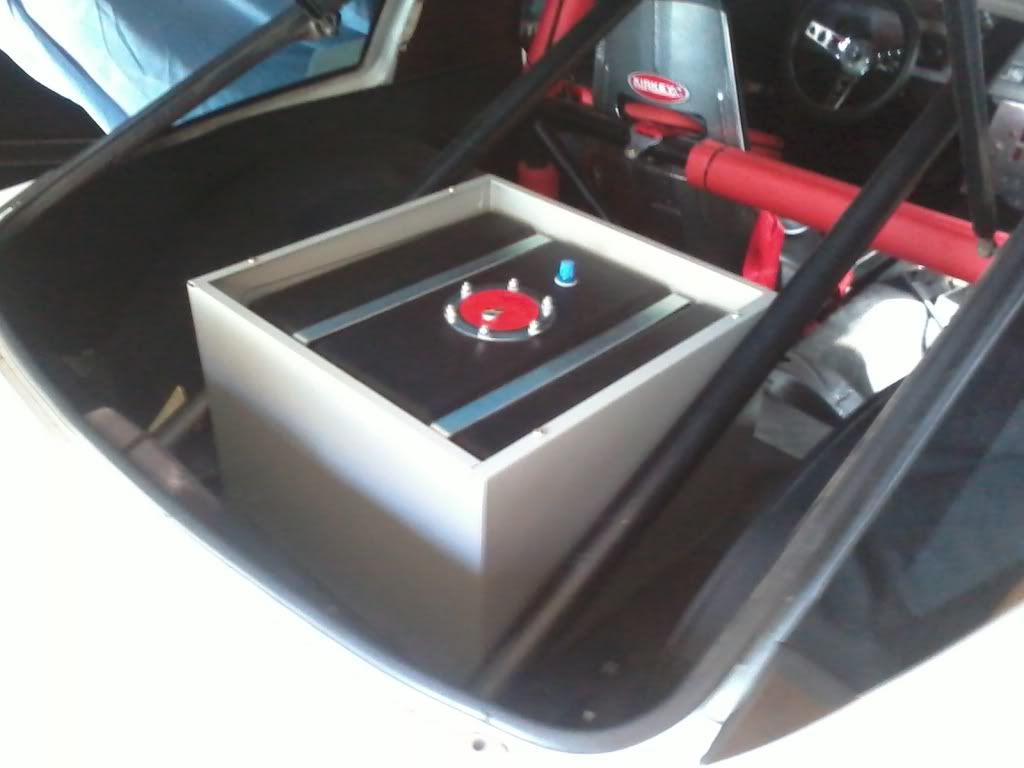
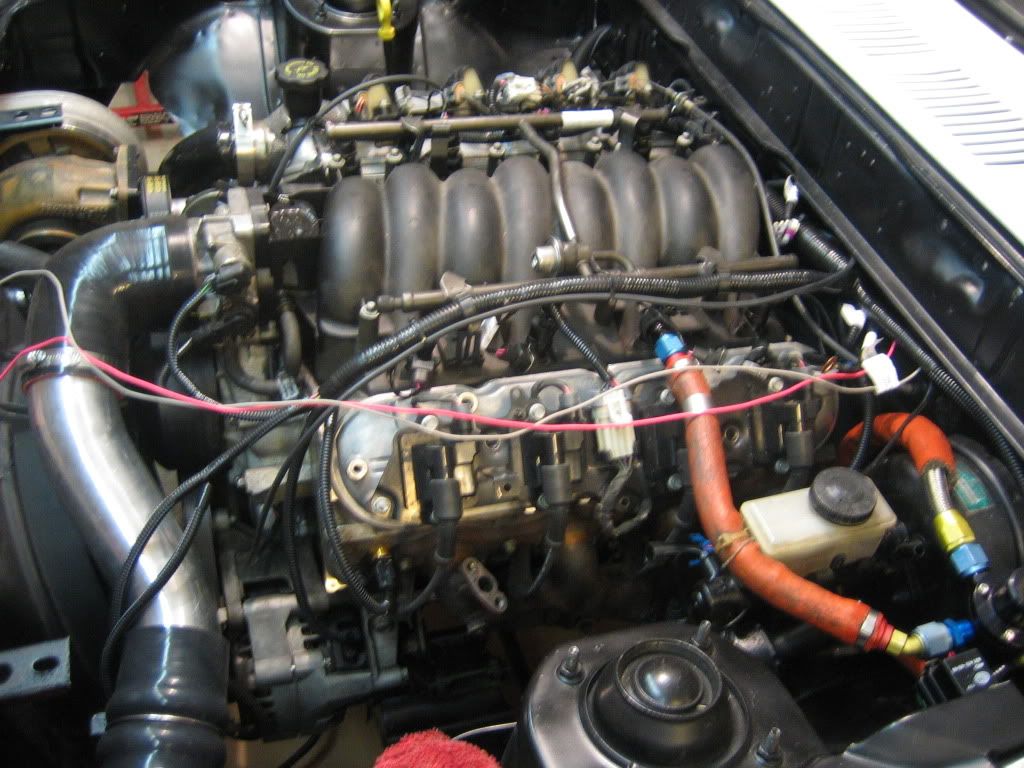
Fuel cell with "Fire Wall Box" mocked up.
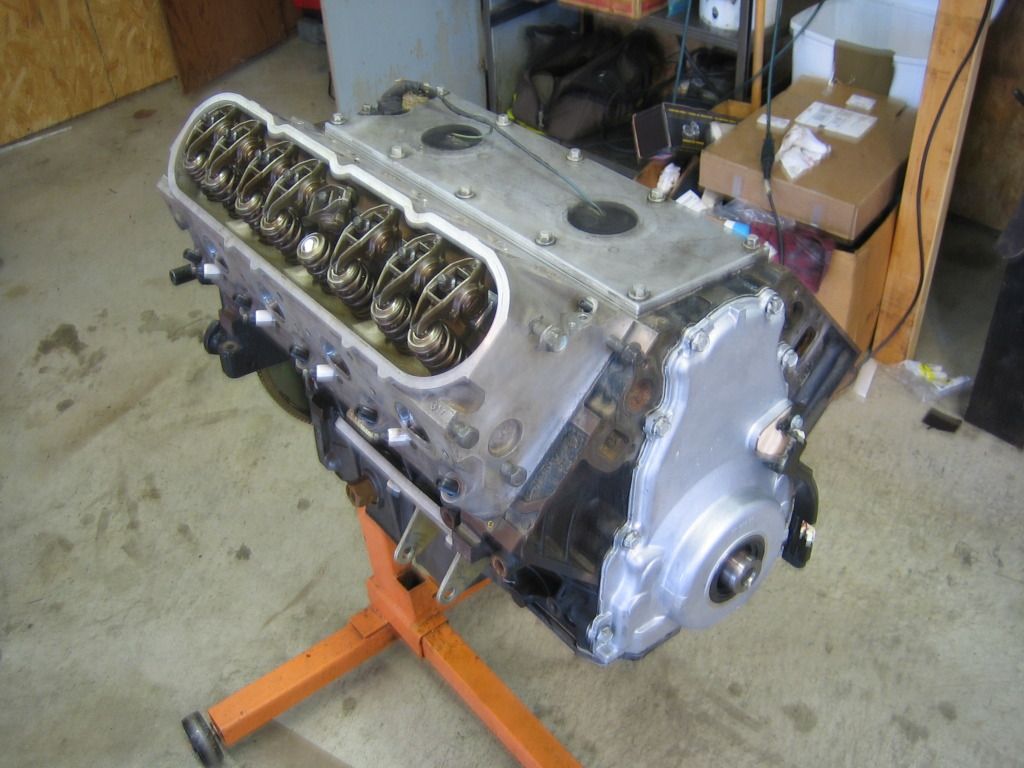
Final assy on Long block is getting close
LS2 Timing cover w FWD cam pick-up is done.
ARP stud kit and LS9 7 layer MLS Hg's are all in and torqued.
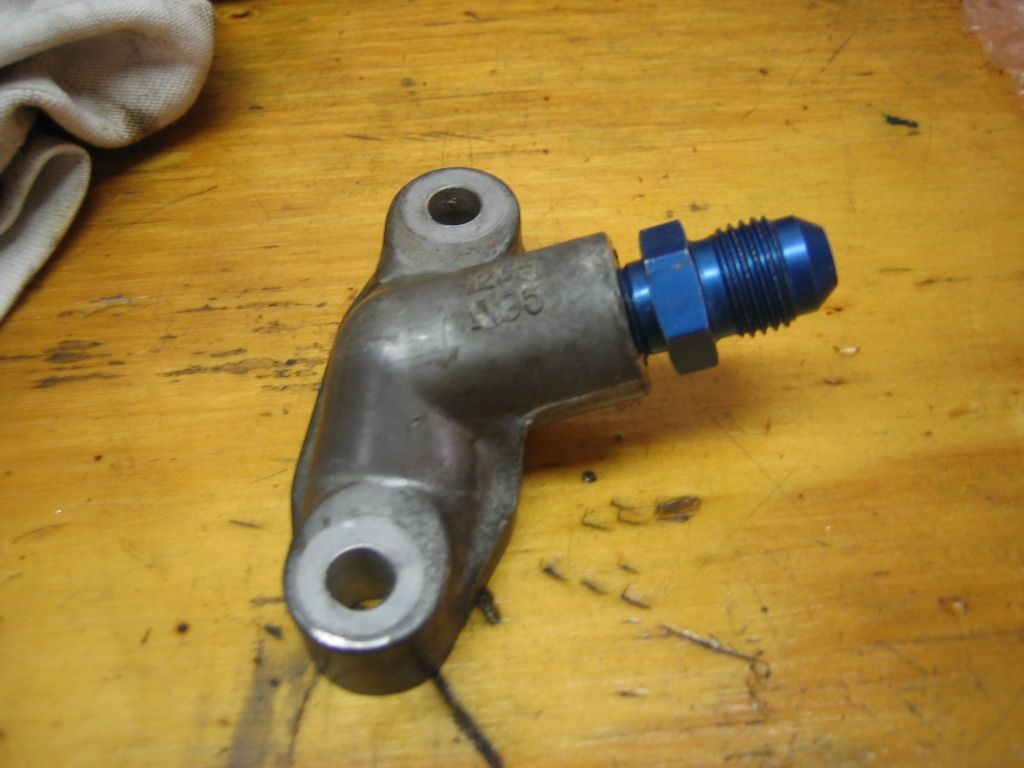
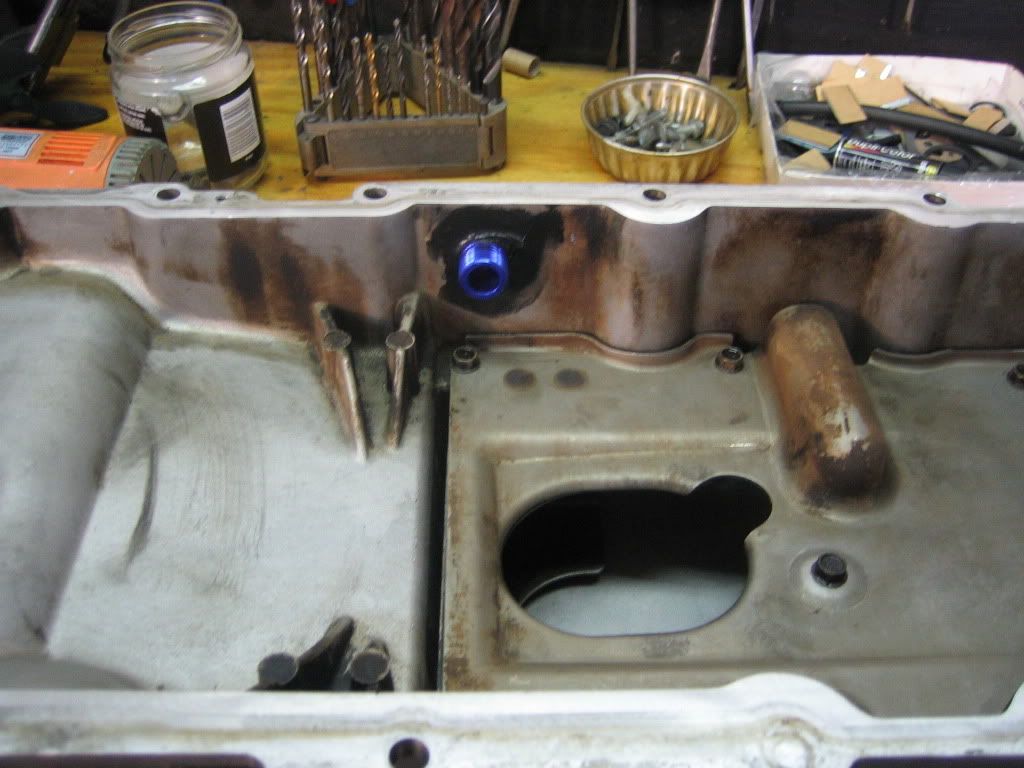
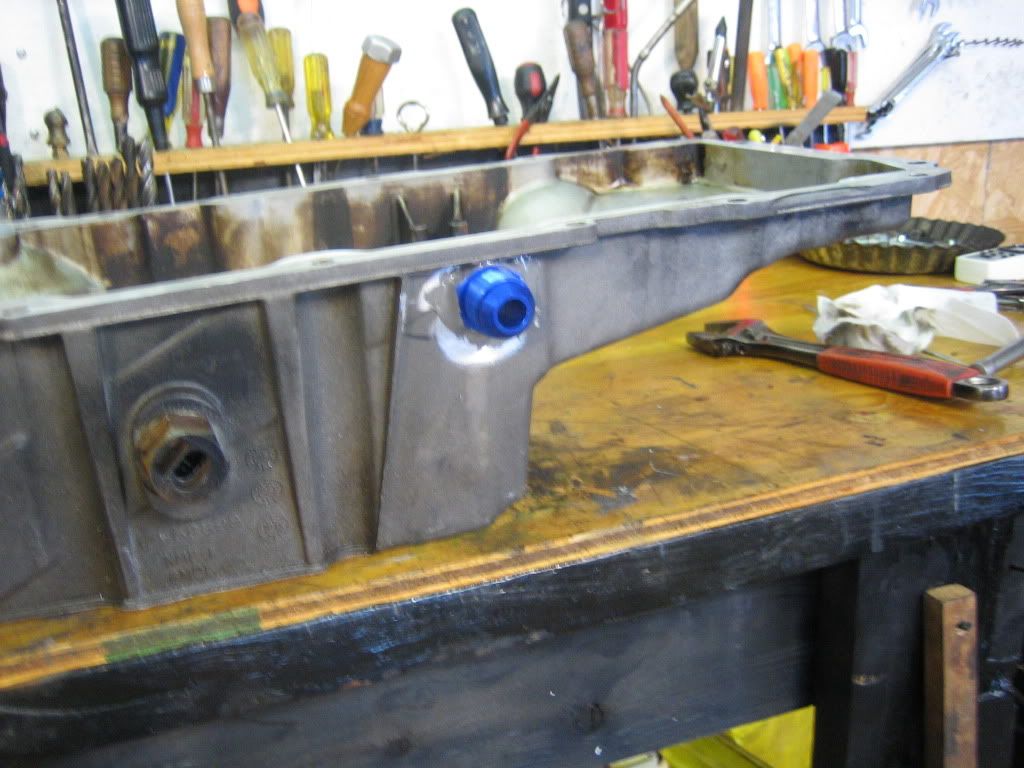
Turbo oil supply done.
Waiting on drill/tap set to finish up oil pan drain.
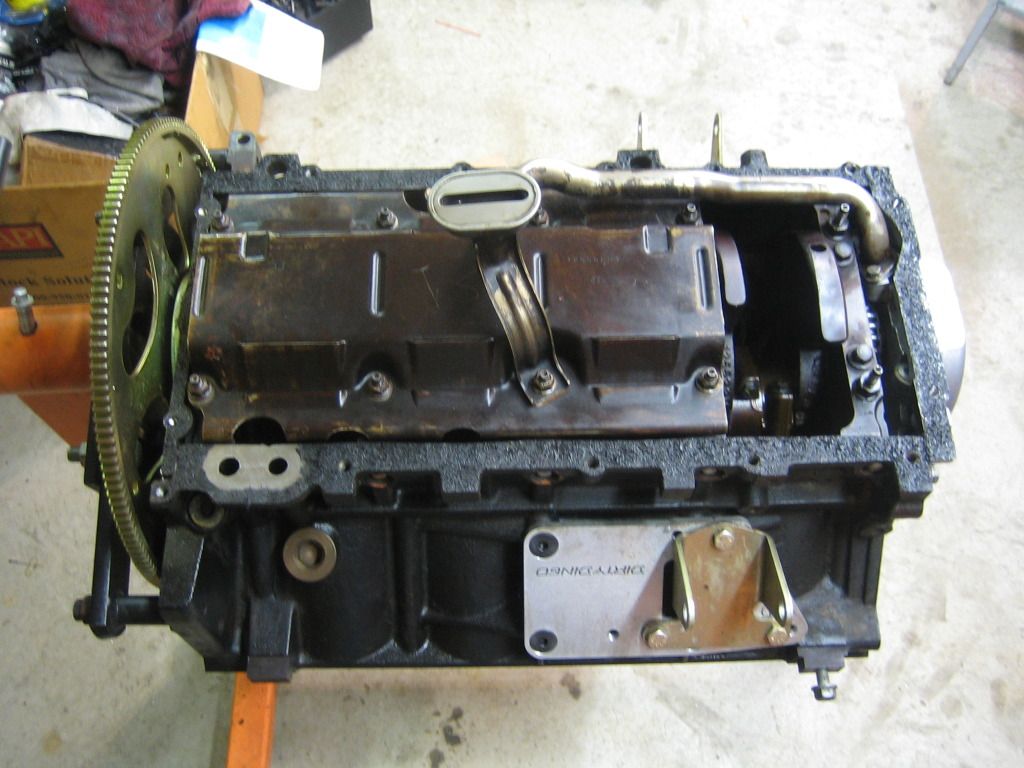

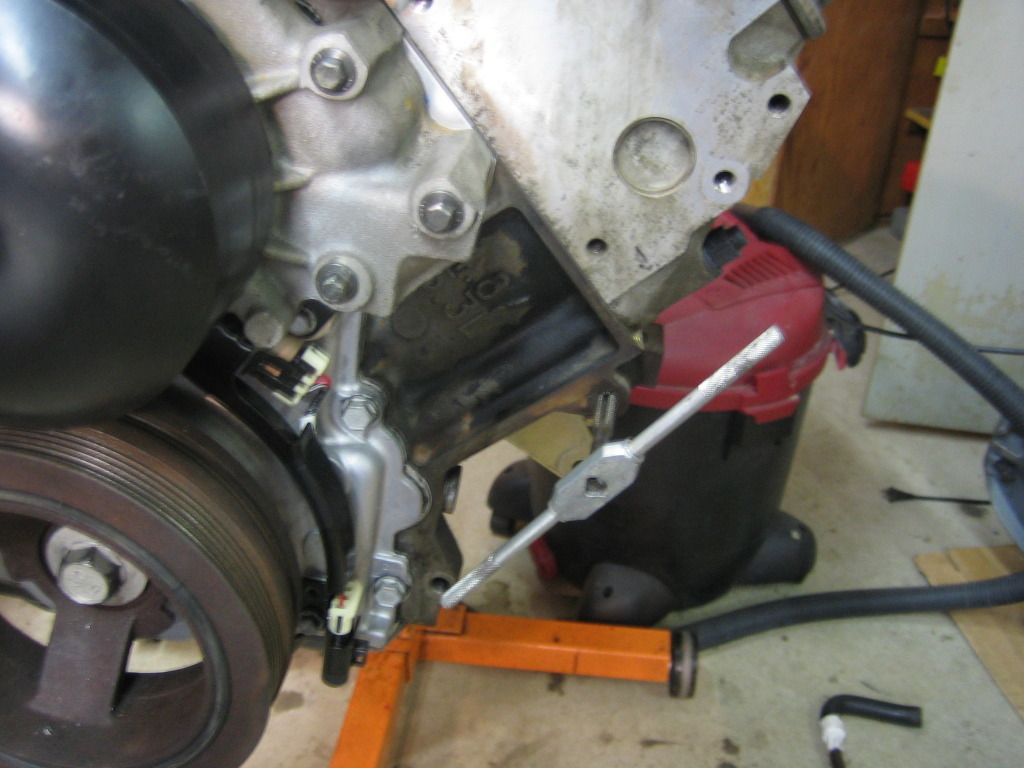
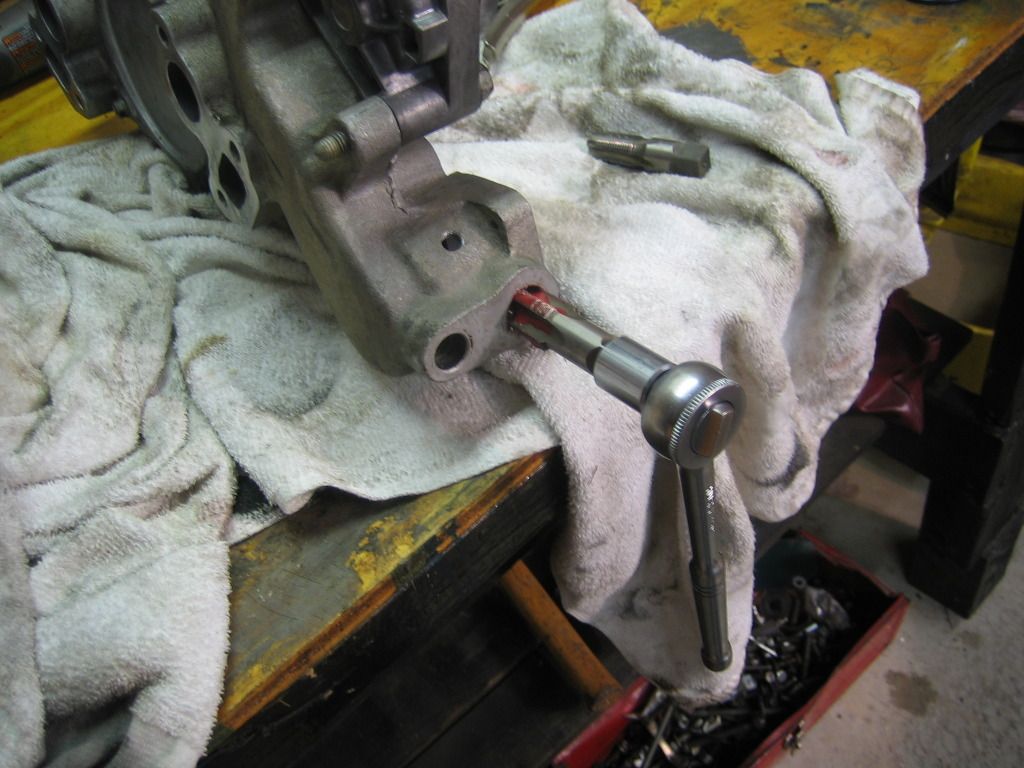
Drilled and tapped the block for the F-body alternator mount.
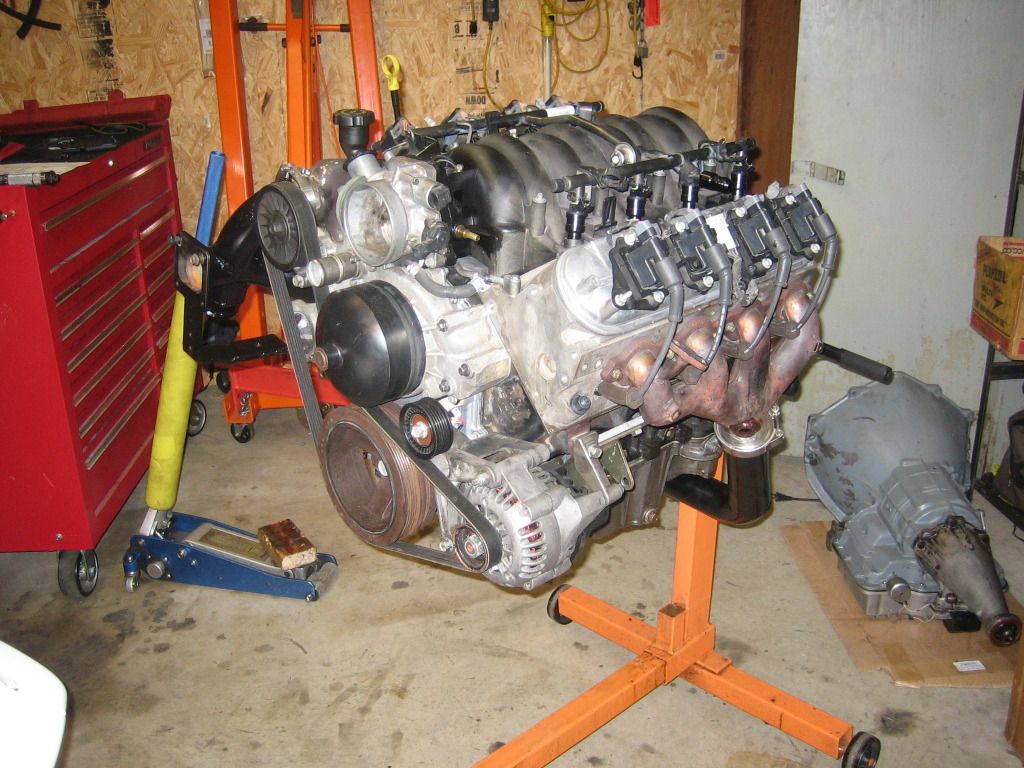
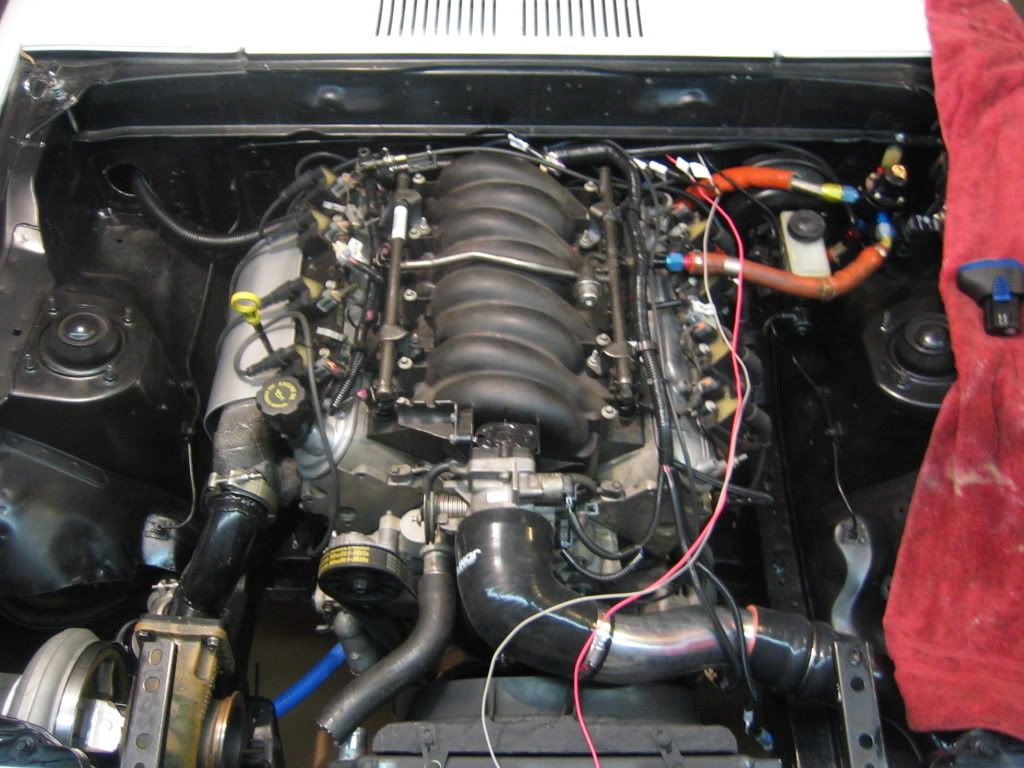
mounted manifolds.
Installed balancer.
Got the belt routing and size figured out. Just waiting on an idler pulley to finish that.
Coilpacks and plugs done
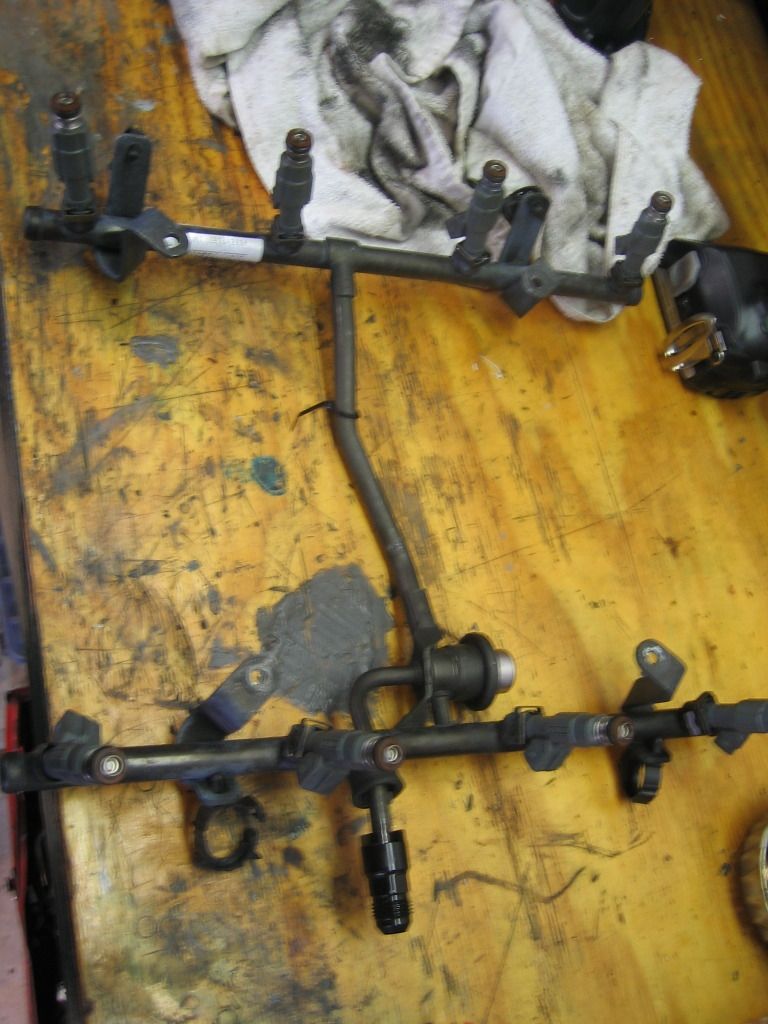
120lb Fuel injectors installed
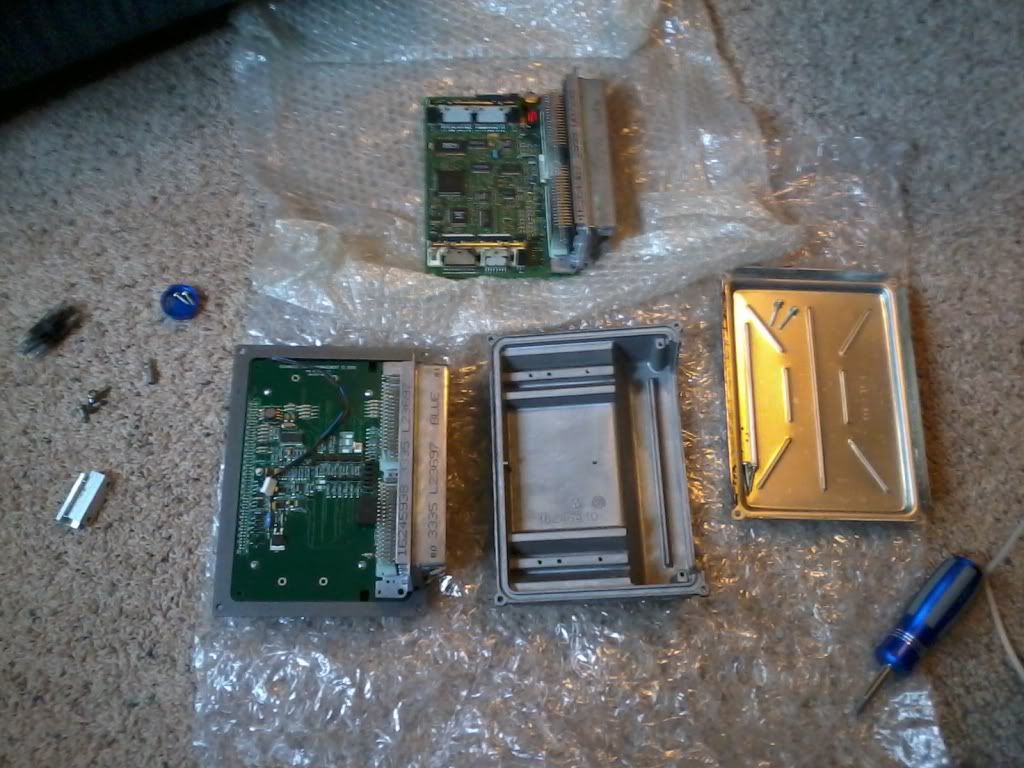
Aem EMS assembled.
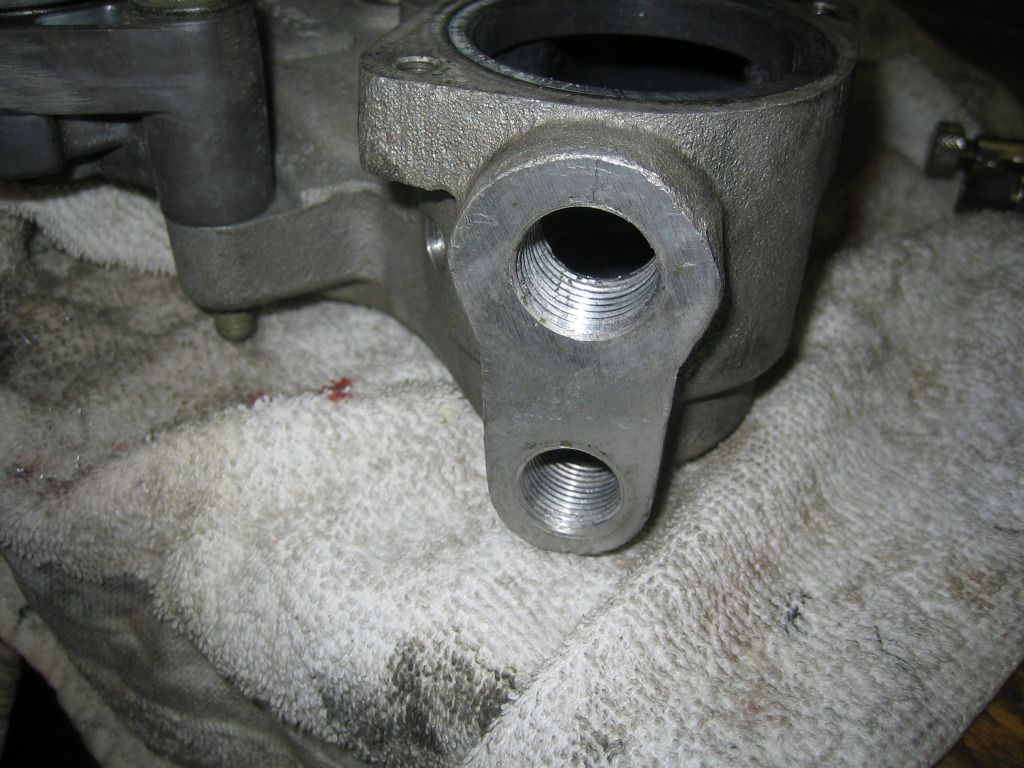
Tapped the heater plugs for the water pump. Also drilled/tapped a 1/8t hole on the low side of the thermo housing for the steam port return.
Had to drop the driver side coilpacks about 2" to clear the -8 fuel fitting I installed. Worked out well, I was able to use the f-body spark plug wires I had after lowering the coils.
Going to use LT1 plug set on the passenger side.
Final assy on Long block is getting close
LS2 Timing cover w FWD cam pick-up is done.
ARP stud kit and LS9 7 layer MLS Hg's are all in and torqued.
Turbo oil supply done.
Waiting on drill/tap set to finish up oil pan drain.
Drilled and tapped the block for the F-body alternator mount.
mounted manifolds.
Installed balancer.
Got the belt routing and size figured out. Just waiting on an idler pulley to finish that.
Coilpacks and plugs done
120lb Fuel injectors installed
Aem EMS assembled.
Tapped the heater plugs for the water pump. Also drilled/tapped a 1/8t hole on the low side of the thermo housing for the steam port return.
Had to drop the driver side coilpacks about 2" to clear the -8 fuel fitting I installed. Worked out well, I was able to use the f-body spark plug wires I had after lowering the coils.
Going to use LT1 plug set on the passenger side.
12-14-2012, 07:57 PM
#4
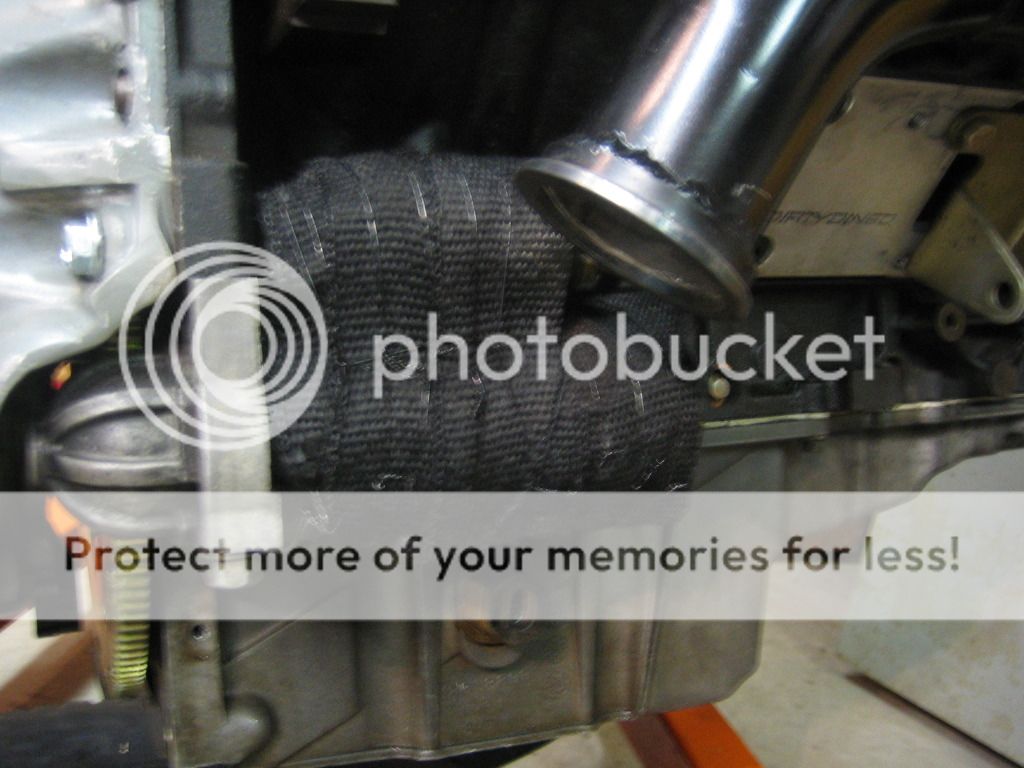
Re-did my crossover for more ground clearance. Painted/wrapped it. Triple wrapped it under the converter area.
Wrapped passenger header. Made a heat shield for plugs.
Wrapped starter.
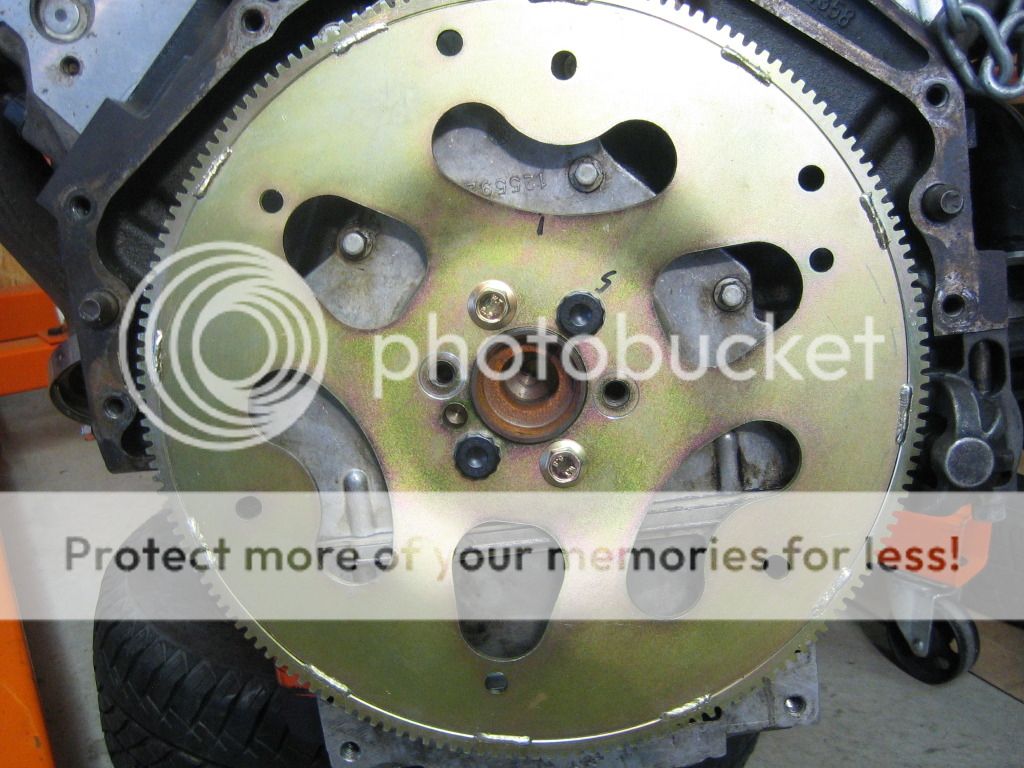
Cheap *** SFI flexplate I bought came with "grade 8" bolts that immediately stripped out when I tried to torque them. Ended up buying ARP flexplate bolts.
Luckily just the cheap bolts were chewed up and not the crank threads.
Wrapped passenger header. Made a heat shield for plugs.
Wrapped starter.
Cheap *** SFI flexplate I bought came with "grade 8" bolts that immediately stripped out when I tried to torque them. Ended up buying ARP flexplate bolts.
Luckily just the cheap bolts were chewed up and not the crank threads.
Last edited by Forcefed86; 12-17-2012 at 09:57 PM.
 12-18-2012, 12:21 PM
#7
I'd like to see any of the frame and mount mods that you had to use or did..
looking at the belt routing. IMO, I'd be looking for more belt wrap around the crank and water pump pulley's. I would think that you are going to end up with a lot of slipage. But hopefully it will work out for you.
I have a 79' also in the side yard that needs a new engine.. .LOL..
keep the posts coming !
BC
Trending Topics
12-18-2012, 01:18 PM
#8
Thanks all...
Wish I took better pictures. The frame has some extruded square tubing welded to it across the entire length of the car. This also helps support the rearend setup. The eng. bay has 1/4" steel plates welded to the K-member. It was previously setup for a SBC. So I used the LSX to SBC "dirty dingo" engine mounts and it was pretty much a bolt-on affair.
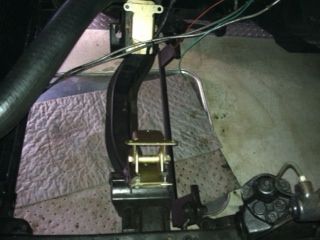
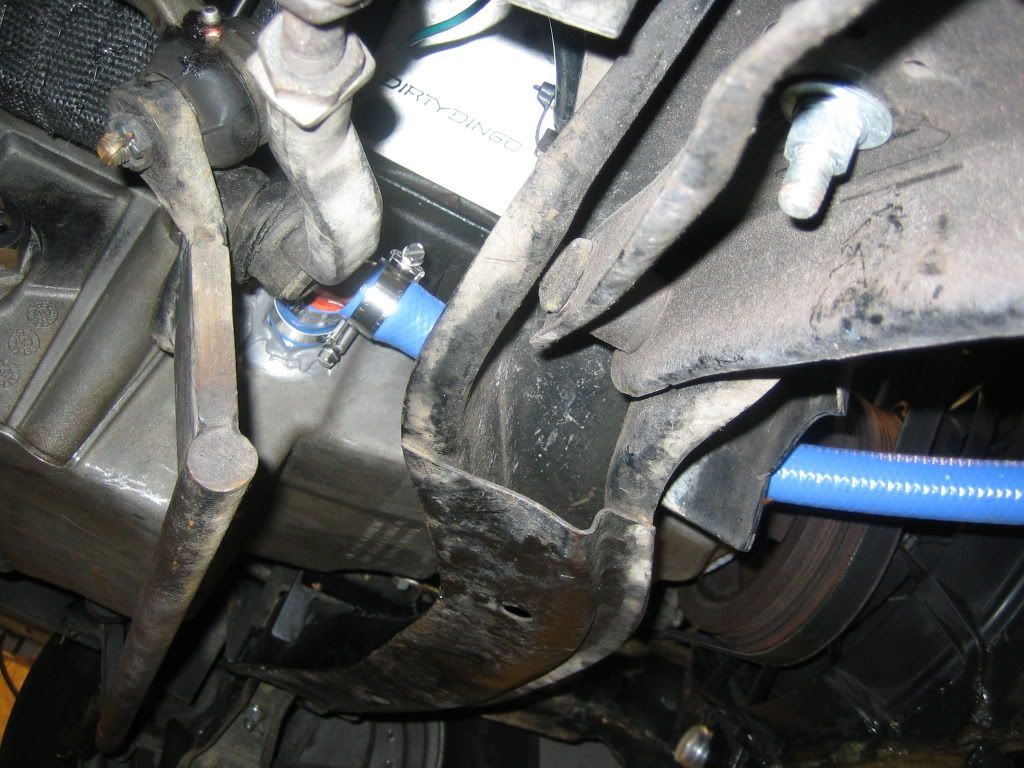
The steering linkage was cut and lowered 2.5" with steel blocks. You can see it a little here.
Guess I didn't post the final belt routing. Its a little close by upper rad. hose but seems to clear with my mockup hose and clamp installed.
Few guys on the "norotors" forum have there belts done this way. They don't complain about slippage. The RPM's won't ever see much north of 6k. I'm hoping this will work out. I can always add another pulley on the alternator mount if I need more wrap on the crank.

Wish I took better pictures. The frame has some extruded square tubing welded to it across the entire length of the car. This also helps support the rearend setup. The eng. bay has 1/4" steel plates welded to the K-member. It was previously setup for a SBC. So I used the LSX to SBC "dirty dingo" engine mounts and it was pretty much a bolt-on affair.
The steering linkage was cut and lowered 2.5" with steel blocks. You can see it a little here.
Guess I didn't post the final belt routing. Its a little close by upper rad. hose but seems to clear with my mockup hose and clamp installed.
Few guys on the "norotors" forum have there belts done this way. They don't complain about slippage. The RPM's won't ever see much north of 6k. I'm hoping this will work out. I can always add another pulley on the alternator mount if I need more wrap on the crank.
02-11-2013, 01:25 PM
#9
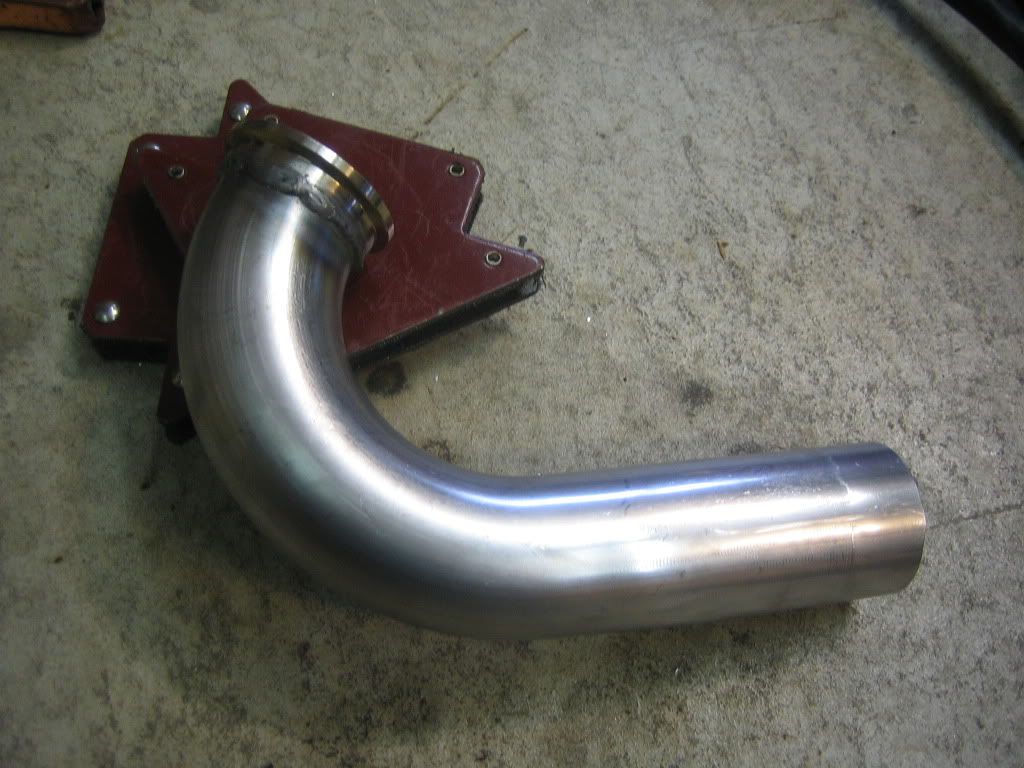
2" WG dump tube finished.
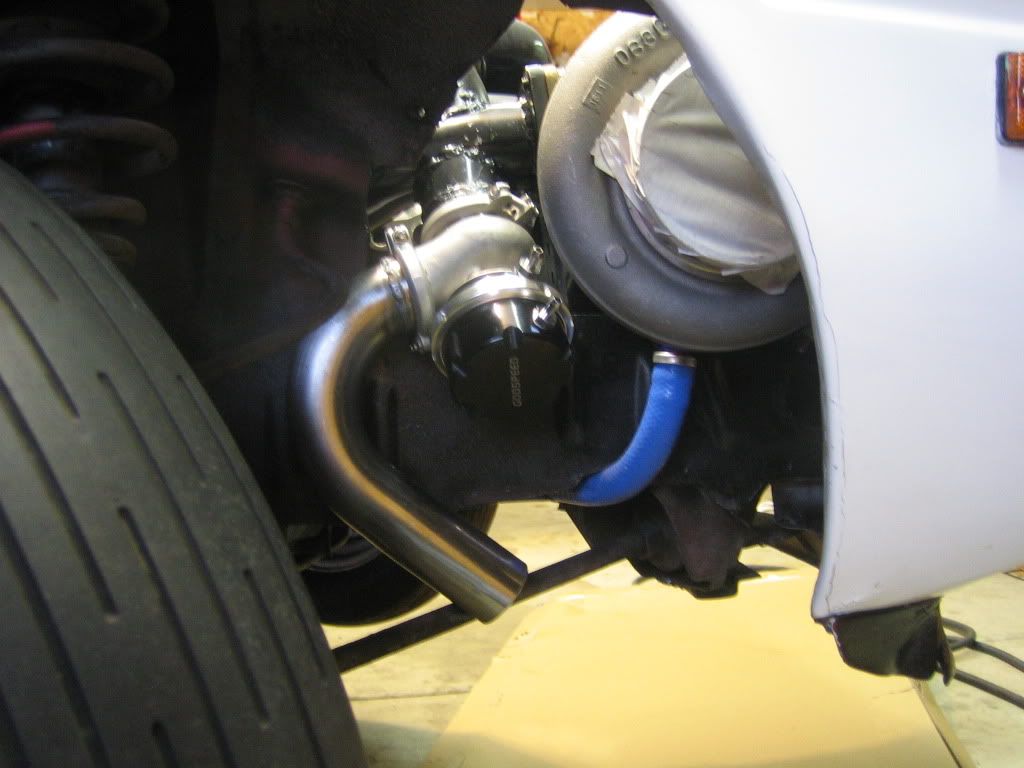
Turbo drain done. 3/4" ID silicone tubing.
Mechanical guage for coolant temp ghetto rig....
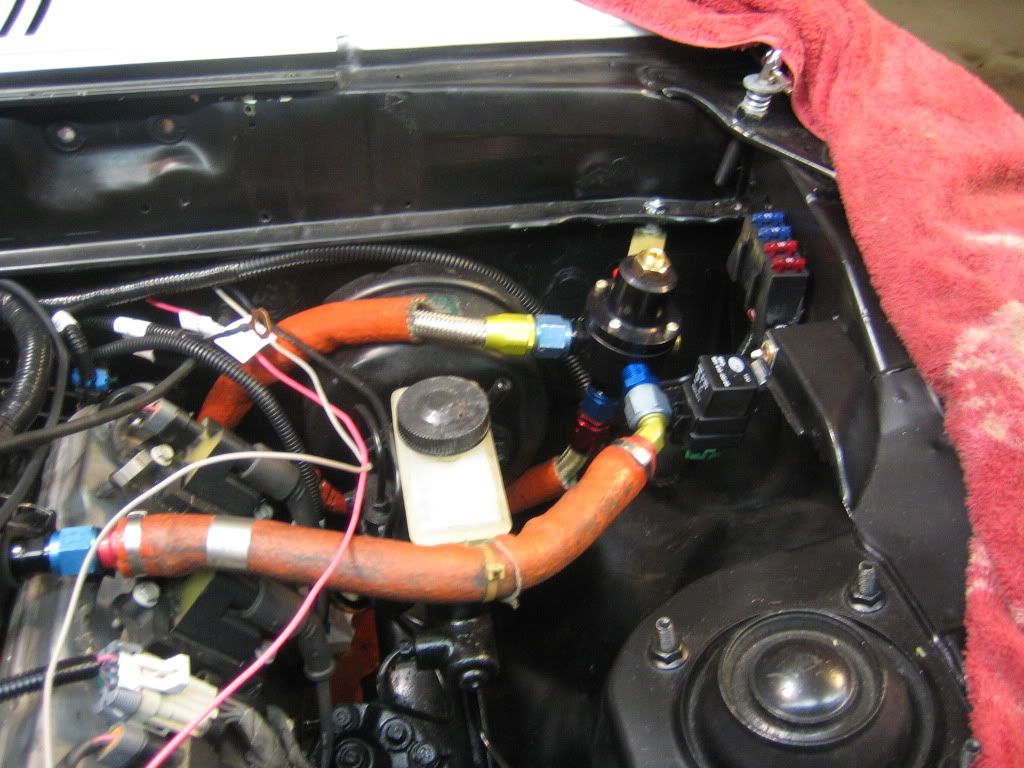
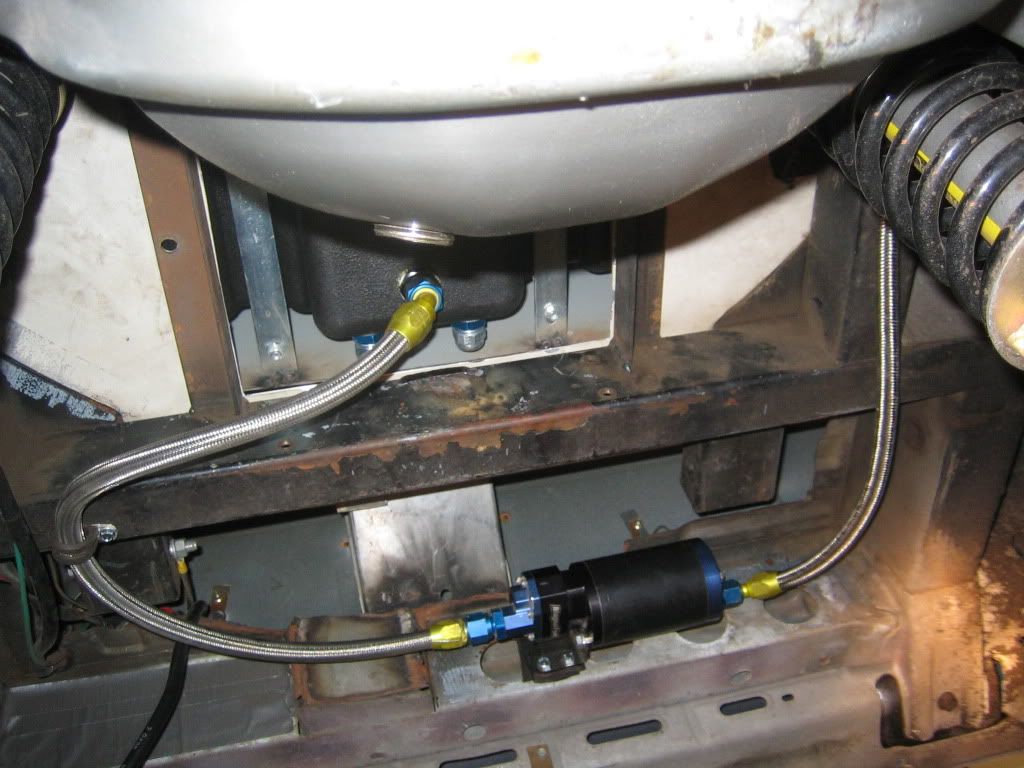
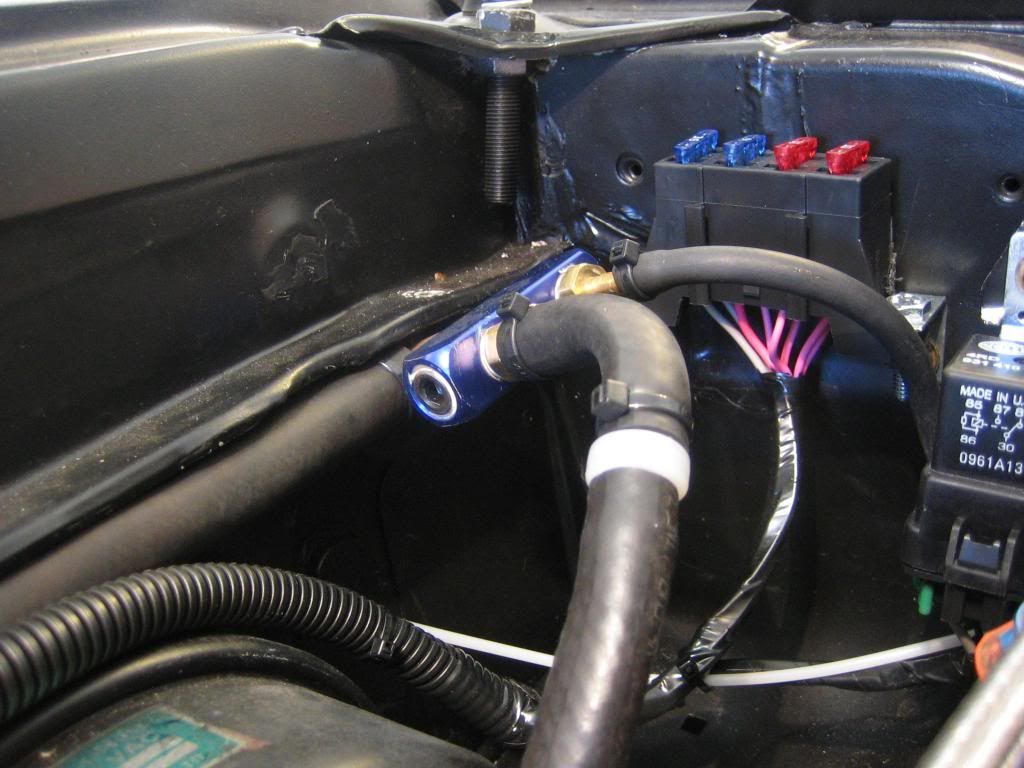
Fuel cell is mounted. Safety vent installed with -8 return. Fuel pump mounted, lines ran. 1/2" SS hard lines along the length of the body. -8 braided for the rest. Regulator mounted.

Finishing up wiring...
Turbo drain done. 3/4" ID silicone tubing.
Mechanical guage for coolant temp ghetto rig....
Fuel cell is mounted. Safety vent installed with -8 return. Fuel pump mounted, lines ran. 1/2" SS hard lines along the length of the body. -8 braided for the rest. Regulator mounted.
Finishing up wiring...
03-27-2013, 11:40 AM
#11
Still don't have a shop heater and fighting snow and cold weather in KS...
But It lives!
Decided to go with the 925 Odyssey battery. (22lbs) Didn't have alot of room left under the hood and I wanted the battery up front so I didn't have to deal with the battery boxes shutoff switches and 12ft of battery cable. Removed the charging lugs on the rear bumper and all the old wiring etc for the rear mounted battery.
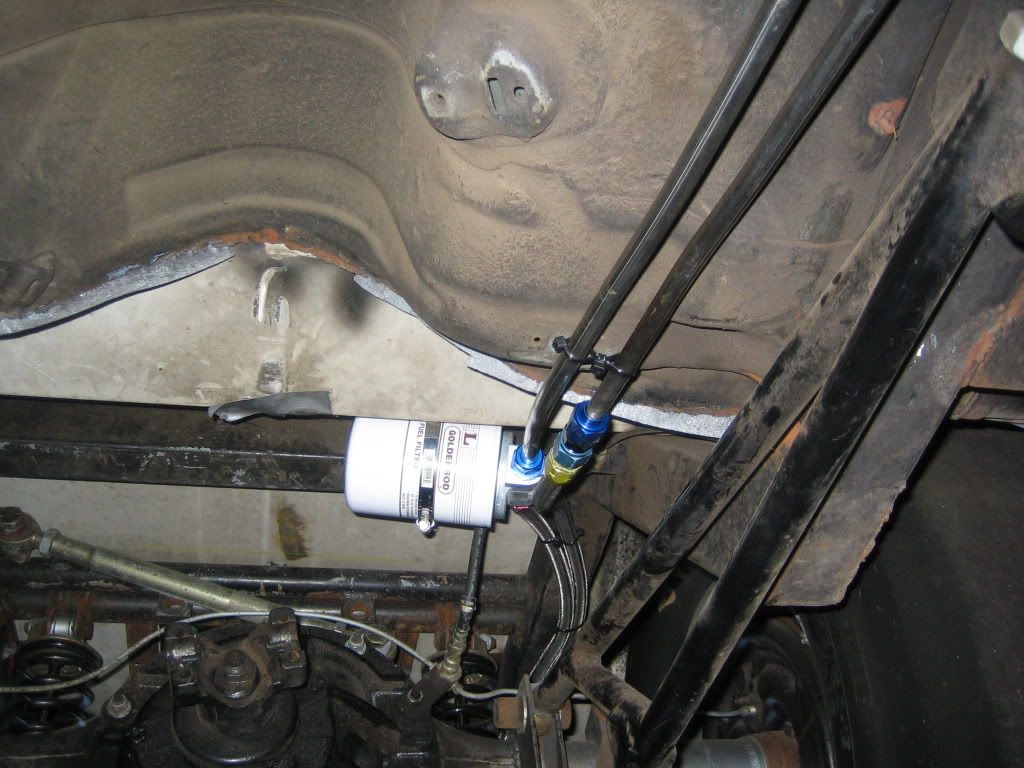
Welded up a little angle iron mount and test fit the hood. Plenty of clearance. also wired up the alternator charge cable (2g) and ground wire. Got the upper and lower radiator hoses, steam vent, throttle cable, and IAT sensor done. Went with the cheapo "golden rod" filter again. Installed and finished up the fuel return. Fuel plumbing is done.

Horrible video I know. I'll get something better up soon.
It's kinda nutty but this video was taken with the fuel pump completely off. There is no check valve in the system. The large amount of vacuum and the huge injectors are pulling fuel from the tank all by themselves. Makes me think I have leaky injectors or something. I did pressure test all the injectors with fuel injector cleaner before installing with the same ghetto coke bottle rig U used as a pre-oiler.
Pre luber/injector /testercleaner...

Vids


But It lives!
Decided to go with the 925 Odyssey battery. (22lbs) Didn't have alot of room left under the hood and I wanted the battery up front so I didn't have to deal with the battery boxes shutoff switches and 12ft of battery cable. Removed the charging lugs on the rear bumper and all the old wiring etc for the rear mounted battery.
Welded up a little angle iron mount and test fit the hood. Plenty of clearance. also wired up the alternator charge cable (2g) and ground wire. Got the upper and lower radiator hoses, steam vent, throttle cable, and IAT sensor done. Went with the cheapo "golden rod" filter again. Installed and finished up the fuel return. Fuel plumbing is done.
Horrible video I know. I'll get something better up soon.
It's kinda nutty but this video was taken with the fuel pump completely off. There is no check valve in the system. The large amount of vacuum and the huge injectors are pulling fuel from the tank all by themselves. Makes me think I have leaky injectors or something. I did pressure test all the injectors with fuel injector cleaner before installing with the same ghetto coke bottle rig U used as a pre-oiler.
Pre luber/injector /testercleaner...
Vids
Last edited by Forcefed86; 03-29-2013 at 06:49 AM.
03-27-2013, 06:00 PM
#12
TECH Resident
iTrader: (21)

Join Date: Aug 2006
Location: Wichita KS
Posts: 947
Likes: 0
Received 0 Likes
on
0 Posts

Ok now lets take all that out and put it into my car and begin all over with the rx7, how bout it? haha. Awesome to see it started up, never got to see the last rx7 run so looking forward to this one.
03-29-2013, 08:37 AM
#15
8 Second Club
04-13-2013, 07:39 PM
#16
Trans and driveshaft are back in with no leaks.
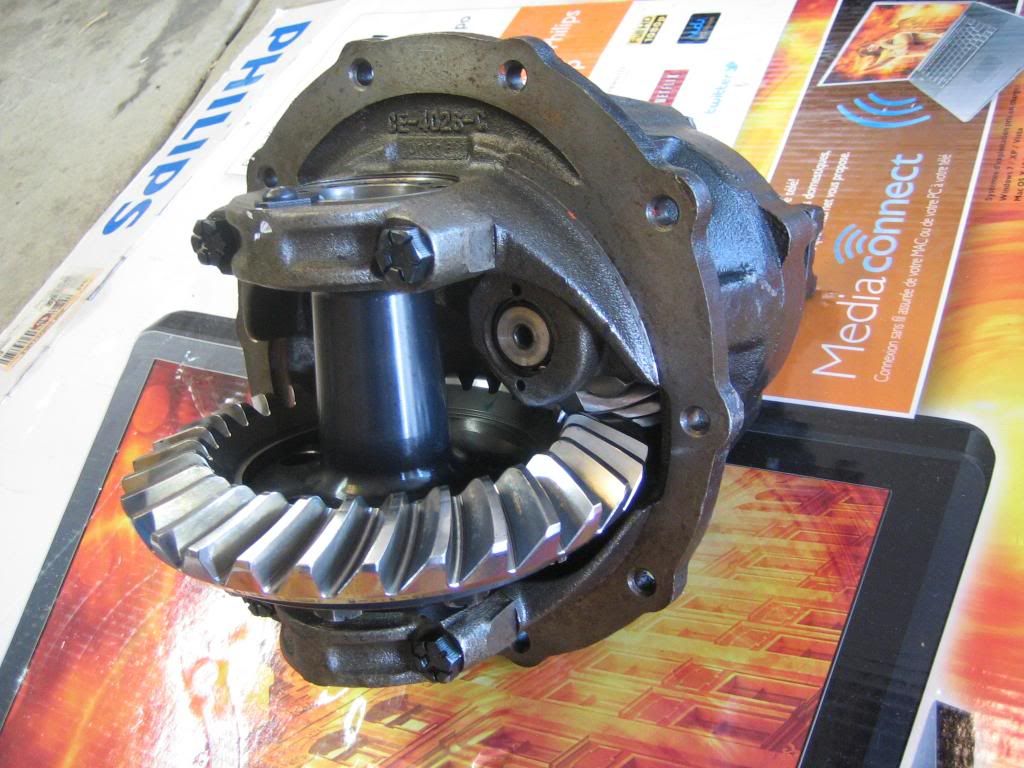
Got the 3.10 "nascar" gears installed. ($130)
They are polished and lightened.
Trans and driveshaft are in.
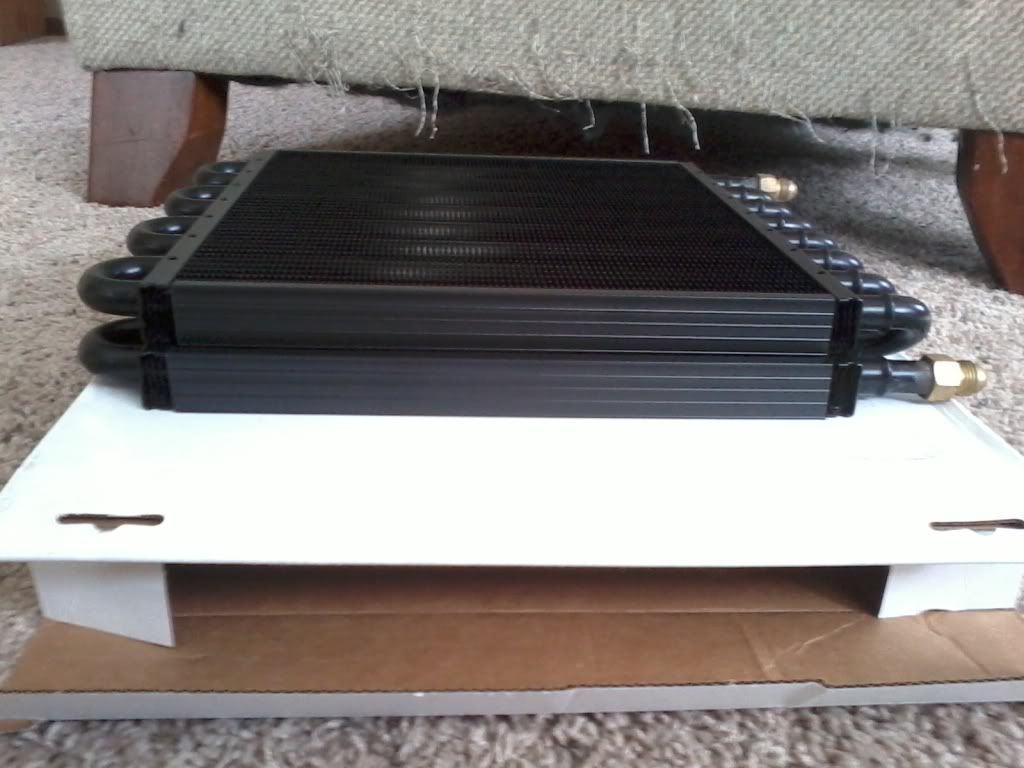
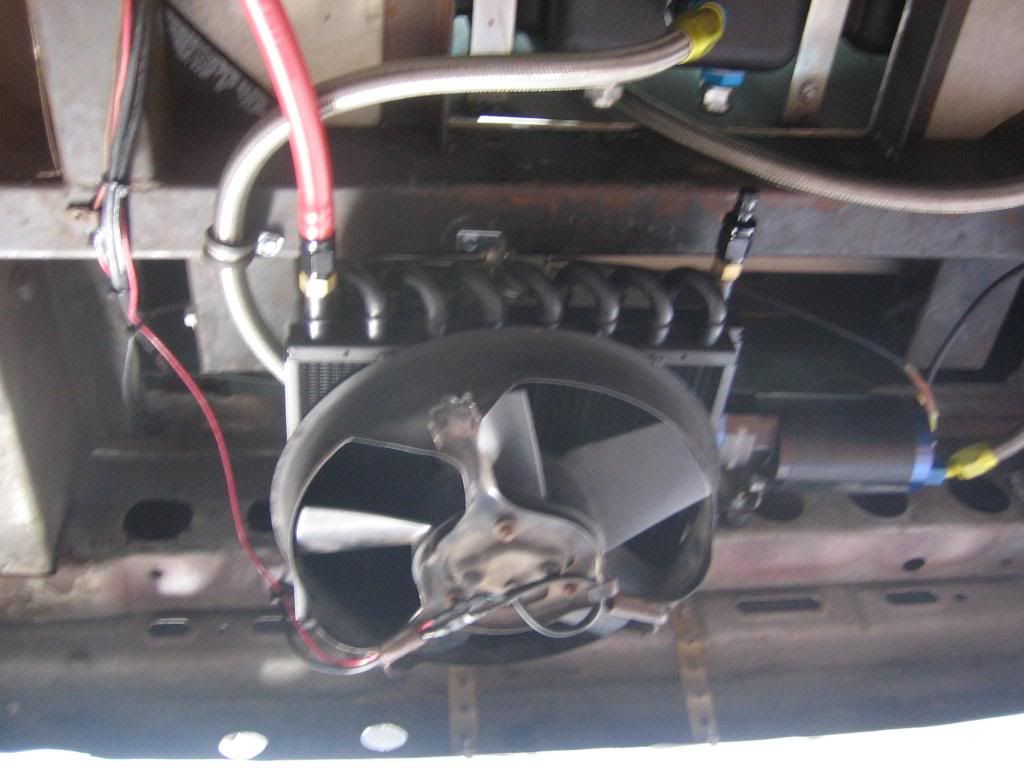
Ended up with this Derale dual core trans cooler. 10x14.5. ($72 shipped) Tack welded my old grand national intercooler fan I had to it and mounted it in the back.
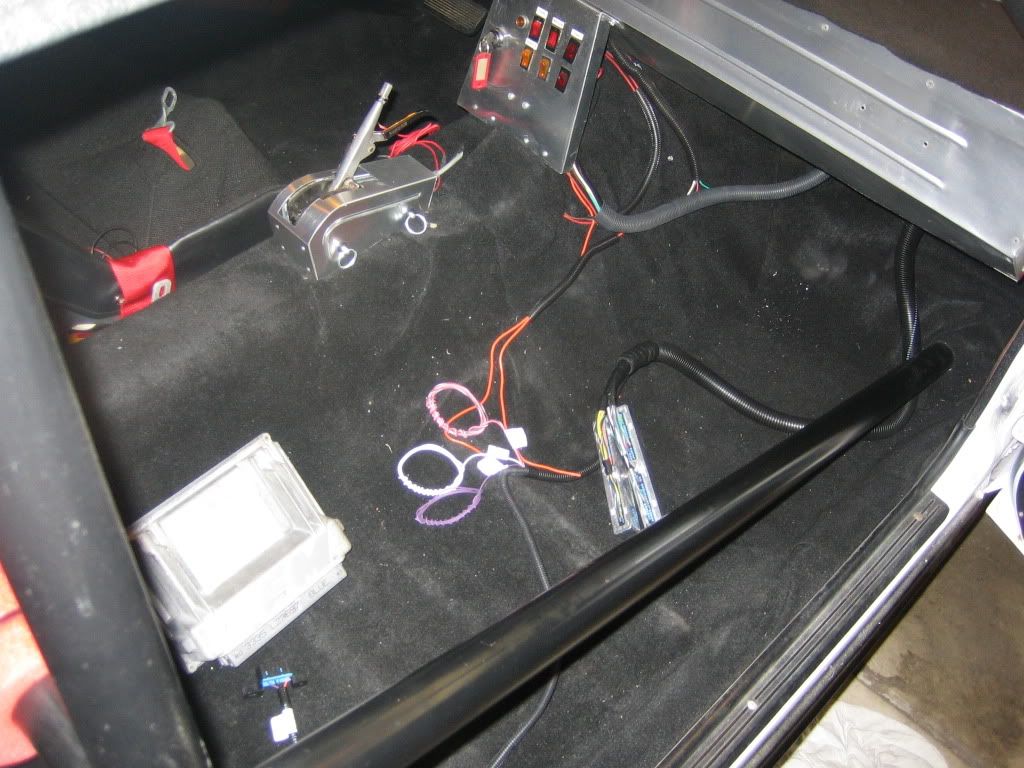
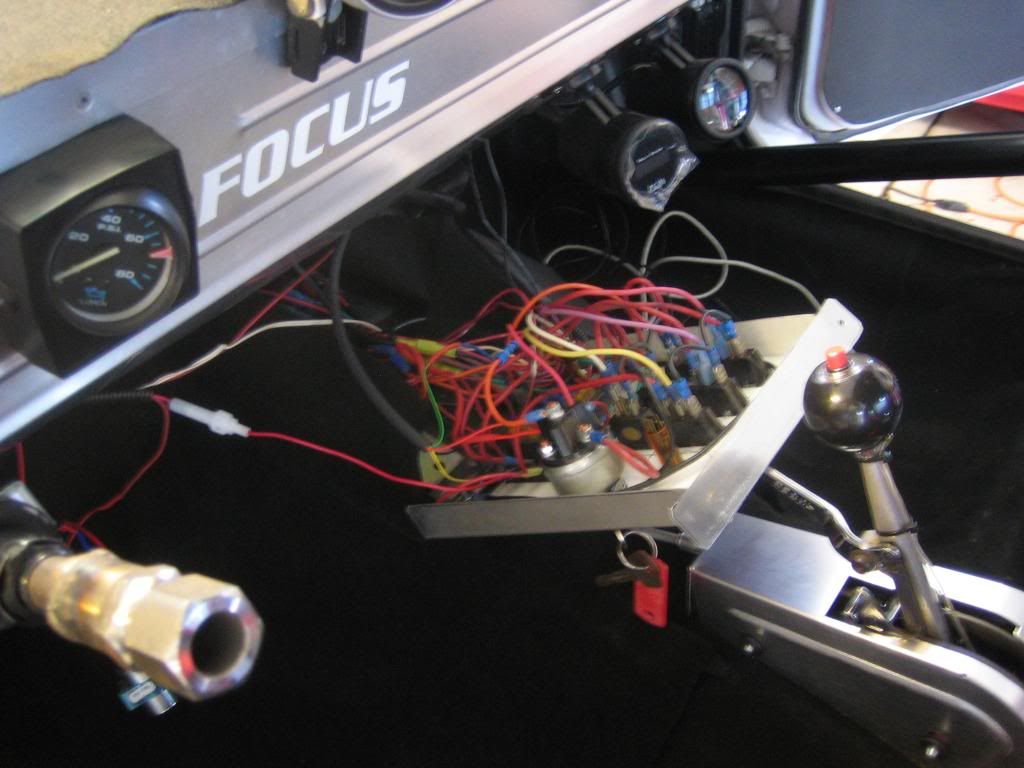
Went to town on some wiring... Center console has hinges on the bottom and swings out for access. WB02, trans temp, trans brake, fuel pump, Rad and trans fan, and rear brake lights and turn signals all done.

Used a cheap harbor freight aluminum air tool splitter for a vacuum block.
Very boring video of a turn signal. Used a $20 golf cart universal signal kit. Had a built in brake light provision as well!

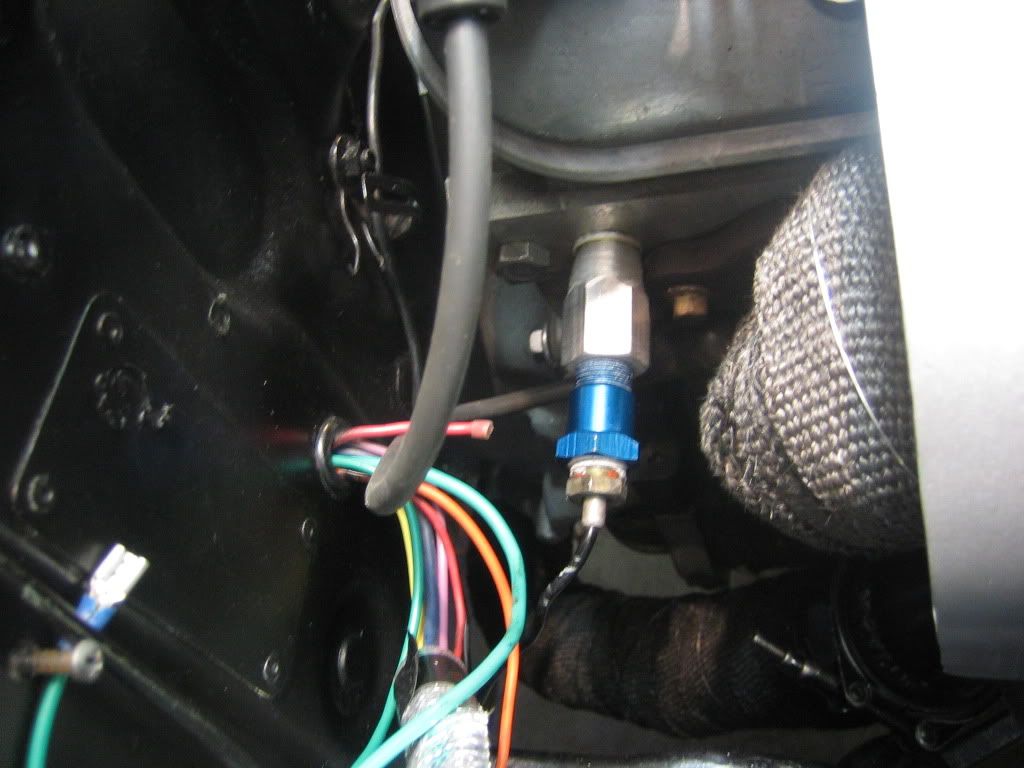
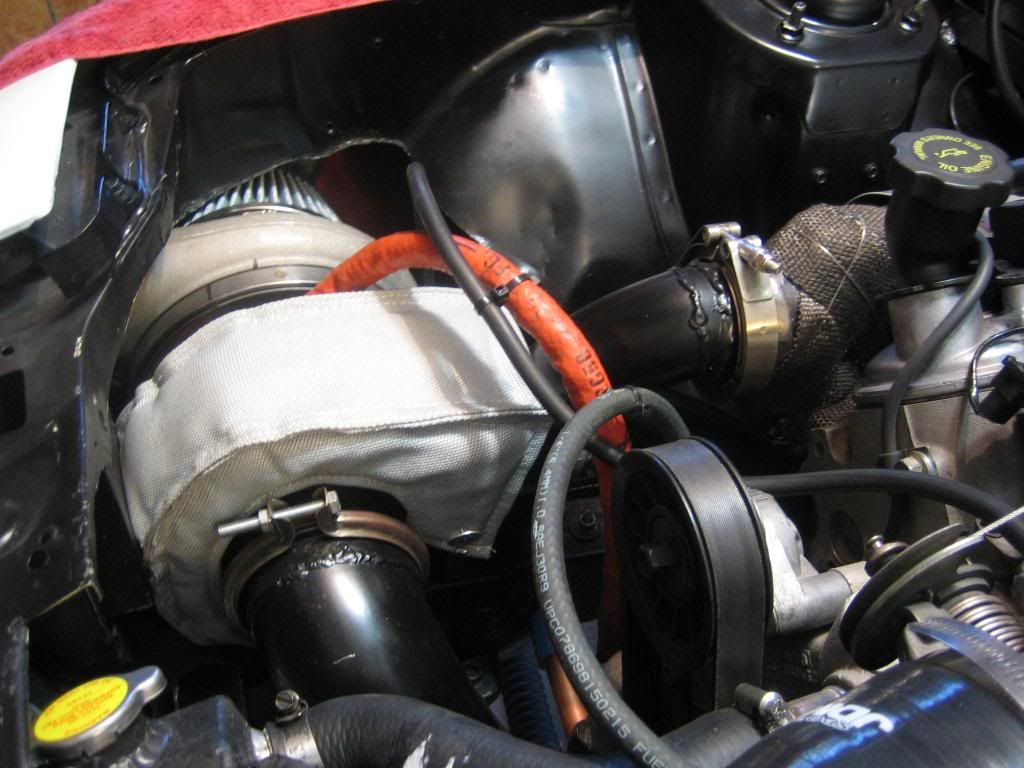
Turbo blanket and oil line shielding
Got the 3.10 "nascar" gears installed. ($130)
They are polished and lightened.

Trans and driveshaft are in.
Ended up with this Derale dual core trans cooler. 10x14.5. ($72 shipped) Tack welded my old grand national intercooler fan I had to it and mounted it in the back.

Went to town on some wiring... Center console has hinges on the bottom and swings out for access. WB02, trans temp, trans brake, fuel pump, Rad and trans fan, and rear brake lights and turn signals all done.


Used a cheap harbor freight aluminum air tool splitter for a vacuum block.

Very boring video of a turn signal. Used a $20 golf cart universal signal kit. Had a built in brake light provision as well!
Turbo blanket and oil line shielding
Last edited by Forcefed86; 04-14-2013 at 09:48 AM.


