
Beginners build on a 72 Nova
 12-20-2012, 06:34 AM
#1
Teching In
Thread Starter

Join Date: Dec 2012
Posts: 34
Likes: 0
Received 0 Likes
on
0 Posts
Hey everyone. I have this posted on the nova forums as well, but i figured that i would share here as well. ok. I recently picked up a 72 2door for 500 bucks. I knew that i wanted to do a project build for a long time and ive always loved the nova's, so i started looking around for a car after getting the wifes blessing. I found this one for 700 and managed to talk him down to 500. The car is in pretty bad shape, but it was pretty strait and had a clean title, so i figured id give it a shot. Now this project will take some time, becuase of the budget.Ok, so on to the the pics. OH yea, this is my first time at anything like this so if im not doing somthing right on the build, go easy on me, and im always willing to take any sugestions yall may have.
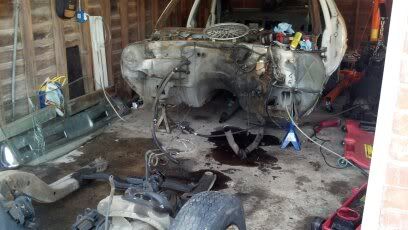
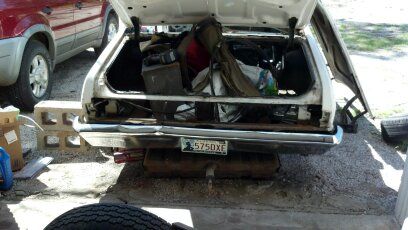
Here is the car on the trailor after bringing it home.
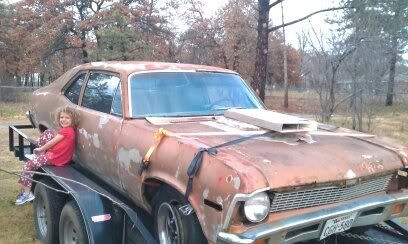
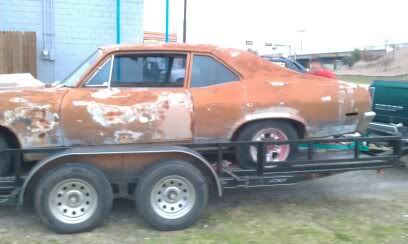
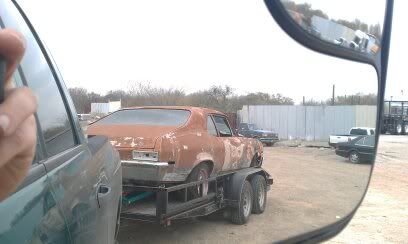
like i said, it looks pretty rough. It didnt have a motor or trans. After getting it home and decoding the VIN, It says that it was made in california and came out with the 307 factory.
It looks as though somone before me tried to make it into a drag car or somthing because the motor mounts were welded in and there was a huge hole in the trans tunnel. They had also tried to cover the holes in the fire wall with aluminum siding.
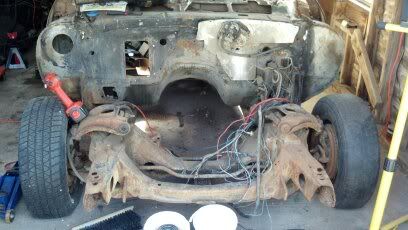
Here i have taken the front clip off to check out the subframe and what not.
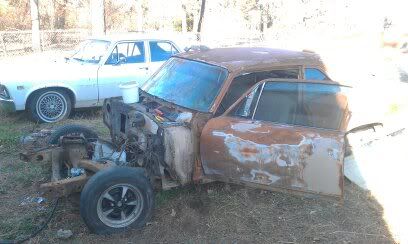
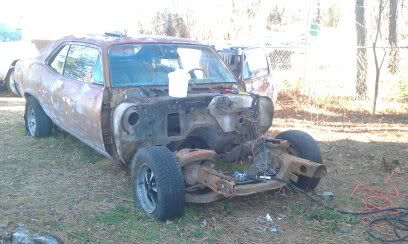
you can see some of the siding left on the firewall. Ive already removed some of it.
I didnt get a pic of it, but the subframe had a huge rust hole on the drivers side by the lower A arm. Also the front and rear window areas are rusted out so bad that i can stick my whole had in between the window and the roof.
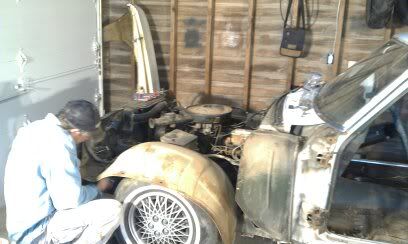
After looking everything over, and seeing what needed to be replaced, i decided id need a donar car. So i found this 72 4 door for 600 running and driving.
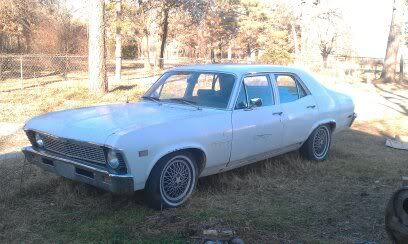
Now i know that some people may be thinking why tear up a perfectly good car. Well. i need parts, and this was the best way for me to get them. The subframe will go under my car. It also has power steering as mine didnt, The roof area will be cut out and used on mine, and all sorts of little things that add up quick if trying to buy new. so here i am tearing apart the white car.

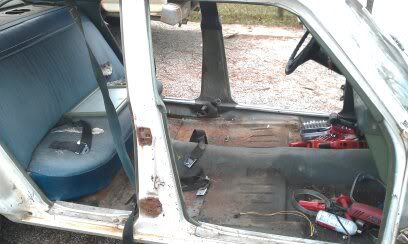
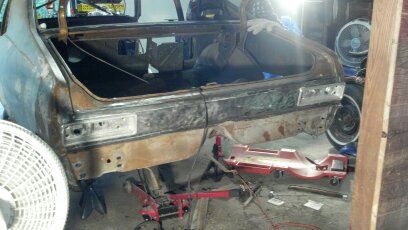
After getting the doors and seats off the car, we pulled it into the garage for more scavaging.
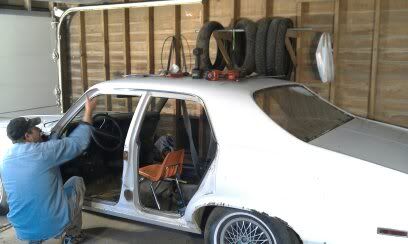
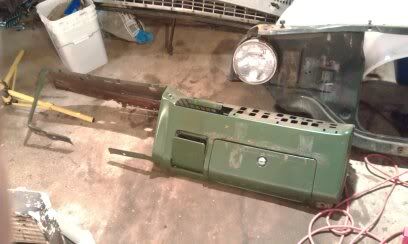
Now the dash on my car had been cut and drilled and totaly ruined. so we took the one off the the white car.
After getting the dash off mine i ran into alot of rust where the dash meets the area around the winshield wiper area.
So i cut out the bad areas on my car and replaced them with patch panels from the white car. I keep forgeting to take pics, but here is the dash after all the areas were replaced.
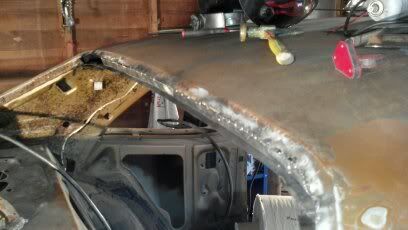
Next its on the the windshield roof area. Like i said, i keep forgeting to take pics so ill have to describe some of it..Sorry.
Anyway, the rust and rot around the windshield was bad so i knew it ll needed to be replaced. I couldnt find replacment parts on the net so i had to turn to the white car again.
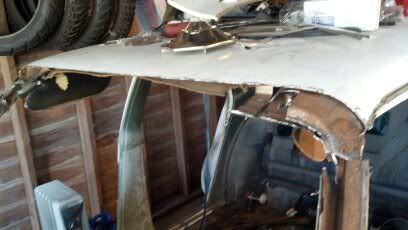
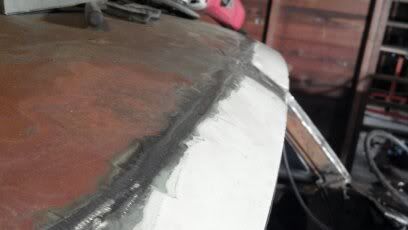
After getting the peices cut out i realized that the roof on the white car was an inch shorter in width. For some reason id have thought that they would be the same. I even measured, but not geeod enough i guess. Oh well its only metal. ill have to add a filler peice.
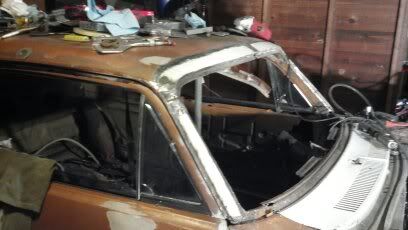
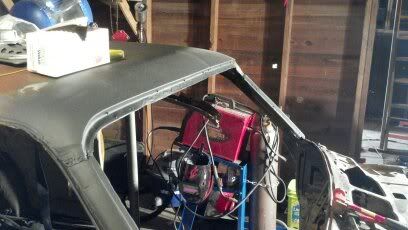
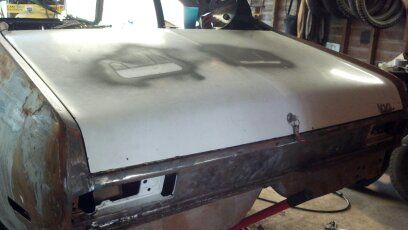
And here it is all sanded with some rust primer on it to cover it untill im ready to do the body work and what not. Will post more pics soon.
Here is the car on the trailor after bringing it home.
like i said, it looks pretty rough. It didnt have a motor or trans. After getting it home and decoding the VIN, It says that it was made in california and came out with the 307 factory.
It looks as though somone before me tried to make it into a drag car or somthing because the motor mounts were welded in and there was a huge hole in the trans tunnel. They had also tried to cover the holes in the fire wall with aluminum siding.
Here i have taken the front clip off to check out the subframe and what not.
you can see some of the siding left on the firewall. Ive already removed some of it.
I didnt get a pic of it, but the subframe had a huge rust hole on the drivers side by the lower A arm. Also the front and rear window areas are rusted out so bad that i can stick my whole had in between the window and the roof.
After looking everything over, and seeing what needed to be replaced, i decided id need a donar car. So i found this 72 4 door for 600 running and driving.
Now i know that some people may be thinking why tear up a perfectly good car. Well. i need parts, and this was the best way for me to get them. The subframe will go under my car. It also has power steering as mine didnt, The roof area will be cut out and used on mine, and all sorts of little things that add up quick if trying to buy new. so here i am tearing apart the white car.
After getting the doors and seats off the car, we pulled it into the garage for more scavaging.
Now the dash on my car had been cut and drilled and totaly ruined. so we took the one off the the white car.
After getting the dash off mine i ran into alot of rust where the dash meets the area around the winshield wiper area.
So i cut out the bad areas on my car and replaced them with patch panels from the white car. I keep forgeting to take pics, but here is the dash after all the areas were replaced.
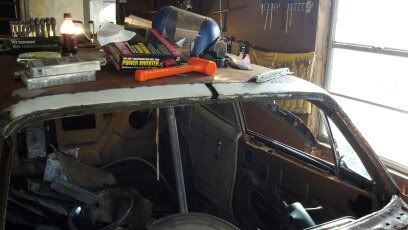
Next its on the the windshield roof area. Like i said, i keep forgeting to take pics so ill have to describe some of it..Sorry.
Anyway, the rust and rot around the windshield was bad so i knew it ll needed to be replaced. I couldnt find replacment parts on the net so i had to turn to the white car again.
After getting the peices cut out i realized that the roof on the white car was an inch shorter in width.
And here it is all sanded with some rust primer on it to cover it untill im ready to do the body work and what not. Will post more pics soon.
 12-20-2012, 06:51 AM
#2
Teching In
Thread Starter
Join Date: Dec 2012
Posts: 34
Likes: 0
Received 0 Likes
on
0 Posts
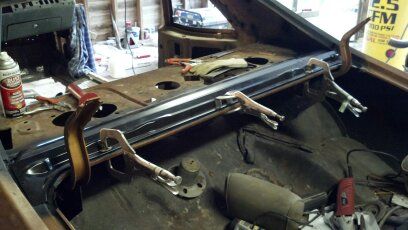
Now its on to the subframe area.
before and after
and here is the swap from the white car
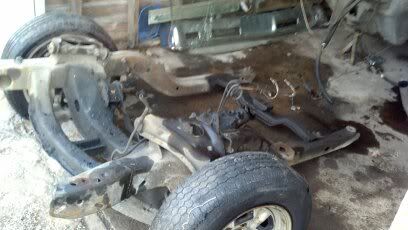
Here is the newer subframe with power steering.
and here is a test fit into my car with the inline six.
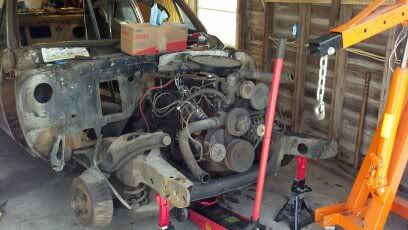
Everything looks good and measures strait from coner to corner.
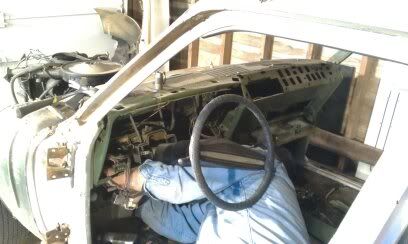
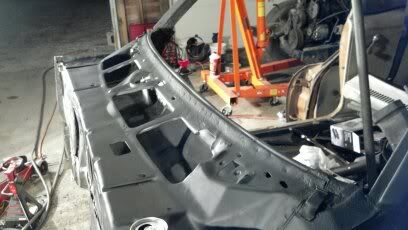
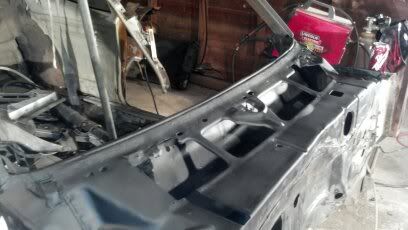
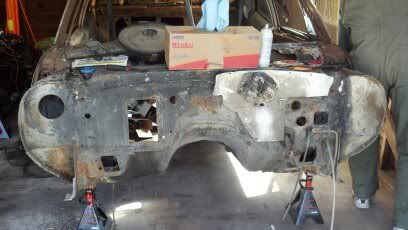
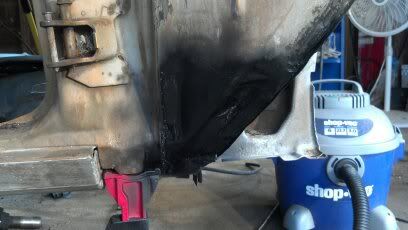
Now its on the the firewall. The PO had taken a sledge hamer to it to make room for a newer style hei distributer, And realy made it look like crap. So i took the body hammers and went to town smoothing it out, and leaving room for a new HEI as well.
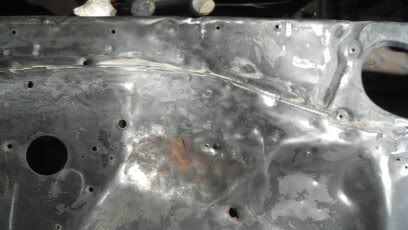
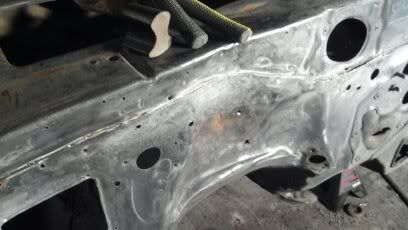
It turned out ok i guess for a newbie..
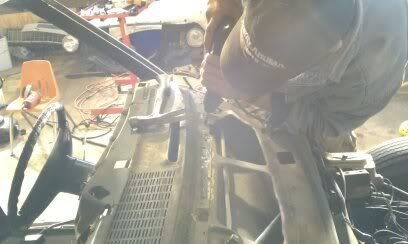
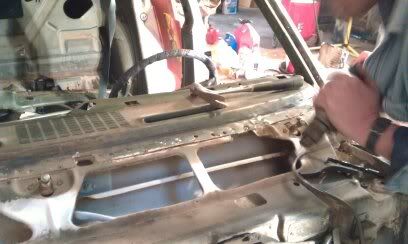
After looking around the air cowel i noticed there was some surface rust under the dirt so i hit it with the wire wheel nd most of it fell off onto the ground, so now i need to replace that as well. i ended up cutting a patch panel from the other car as to save a few dollars.
all welds ground and then painted.
I also had to remove almost a walmart sack full of pine needles and leaves from in there. Also while i was in there i hit everything with the wire wheel and then sprayed the rust encapsulator on everything.
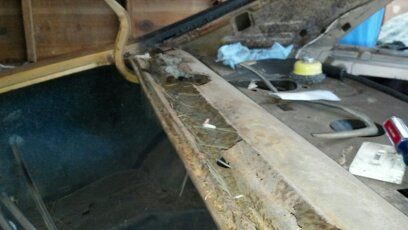
Stay tuned as im almost done with the rear window.
before and after
and here is the swap from the white car
Here is the newer subframe with power steering.
and here is a test fit into my car with the inline six.
Everything looks good and measures strait from coner to corner.
Now its on the the firewall. The PO had taken a sledge hamer to it to make room for a newer style hei distributer, And realy made it look like crap. So i took the body hammers and went to town smoothing it out, and leaving room for a new HEI as well.
It turned out ok i guess for a newbie..
After looking around the air cowel i noticed there was some surface rust under the dirt so i hit it with the wire wheel nd most of it fell off onto the ground, so now i need to replace that as well. i ended up cutting a patch panel from the other car as to save a few dollars.
all welds ground and then painted.
I also had to remove almost a walmart sack full of pine needles and leaves from in there. Also while i was in there i hit everything with the wire wheel and then sprayed the rust encapsulator on everything.
Stay tuned as im almost done with the rear window.
 12-20-2012, 07:49 AM
#4
Teching In
Thread Starter
Join Date: Dec 2012
Posts: 34
Likes: 0
Received 0 Likes
on
0 Posts
Hmmm, didnt realy think about that. If i use that harness, it could save me some time. Itll take some work with that one as well. Whom ever owned it before me didnt know anything about wiring, and there was alot of duct tape patches in the harness...lol. I have to rethink my plan, thanks for pointing that out for me.
12-20-2012, 08:14 AM
#5
Just thinking since you say you've never done anything like this before, it would be easier and quicker so you wouldn't get burned out on it by trying to do everything all at once. On a side note, it you still wanted to keep the BCM for the auto headlights, dome light delay and retained accessory power functions, you could add it. I have one in my '71 C10 and everything works on it.
12-20-2012, 08:30 AM
#6
Sapper, first off welcome to LS1Tech! Secondly, total score on both cars! Third, not that I am a pro at this car thing either, but you seem to be doing a very nice job for someone who has little experience with cars!
A word of caution. I am restoring a 73' 4-door Nova and dropping in a carb'd 5.3L, and have already ran into this headache: The 4 door and 2 door have many differences! the 4D roof is about 1" taller, hence the windshield is taller. I know because I am searching for a replacement windshield! Also, 4D front doors are shorter then the 2D by several inches (both have the same wheelbase).
Also, per personal interest, I am in need of a manual steering gear. Any interest in selling your steering gear, steering arm, pitman arm and rag joint? Let me know thanks.
You know LS engines do not have distributors right? Well, most don't and it would be in the front anyway. What engine are you planning to drop in there??
Keep up the good work, don't forget to take pics! Subscribed!
A word of caution. I am restoring a 73' 4-door Nova and dropping in a carb'd 5.3L, and have already ran into this headache: The 4 door and 2 door have many differences! the 4D roof is about 1" taller, hence the windshield is taller. I know because I am searching for a replacement windshield! Also, 4D front doors are shorter then the 2D by several inches (both have the same wheelbase).
Also, per personal interest, I am in need of a manual steering gear. Any interest in selling your steering gear, steering arm, pitman arm and rag joint? Let me know thanks.
Now its on the the firewall. The PO had taken a sledge hamer to it to make room for a newer style hei distributer, And realy made it look like crap. So i took the body hammers and went to town smoothing it out, and leaving room for a new HEI as well.
Keep up the good work, don't forget to take pics! Subscribed!
12-20-2012, 08:47 AM
#7
Teching In
Thread Starter
Join Date: Dec 2012
Posts: 34
Likes: 0
Received 0 Likes
on
0 Posts
Sapper, first off welcome to LS1Tech! Secondly, total score on both cars! Third, not that I am a pro at this car thing either, but you seem to be doing a very nice job for someone who has little experience with cars!
A word of caution. I am restoring a 73' 4-door Nova and dropping in a carb'd 5.3L, and have already ran into this headache: The 4 door and 2 door have many differences! the 4D roof is about 1" taller, hence the windshield is taller. I know because I am searching for a replacement windshield! Also, 4D front doors are shorter then the 2D by several inches (both have the same wheelbase).
Also, per personal interest, I am in need of a manual steering gear. Any interest in selling your steering gear, steering arm, pitman arm and rag joint? Let me know thanks.
You know LS engines do not have distributors right? Well, most don't and it would be in the front anyway. What engine are you planning to drop in there??
Keep up the good work, don't forget to take pics! Subscribed!
A word of caution. I am restoring a 73' 4-door Nova and dropping in a carb'd 5.3L, and have already ran into this headache: The 4 door and 2 door have many differences! the 4D roof is about 1" taller, hence the windshield is taller. I know because I am searching for a replacement windshield! Also, 4D front doors are shorter then the 2D by several inches (both have the same wheelbase).
Also, per personal interest, I am in need of a manual steering gear. Any interest in selling your steering gear, steering arm, pitman arm and rag joint? Let me know thanks.
You know LS engines do not have distributors right? Well, most don't and it would be in the front anyway. What engine are you planning to drop in there??
Keep up the good work, don't forget to take pics! Subscribed!
As far as the personal question, ill pm you. Thanks
Trending Topics
12-20-2012, 08:49 AM
#8
Teching In
Thread Starter
Join Date: Dec 2012
Posts: 34
Likes: 0
Received 0 Likes
on
0 Posts
Just thinking since you say you've never done anything like this before, it would be easier and quicker so you wouldn't get burned out on it by trying to do everything all at once. On a side note, it you still wanted to keep the BCM for the auto headlights, dome light delay and retained accessory power functions, you could add it. I have one in my '71 C10 and everything works on it.
12-20-2012, 09:30 AM
#9
Great start ! And welcome on board.
You can recover some. Cash If any of the 4 door part are still usable, sale them on Craigslist of some of the forums.
Seem you have the skill to get this project done right...but if you need any advise on the swap part of the project, there are many X body thread to research h, or just ask !
Keep the post and update coming...
BC
Last edited by bczee; 07-31-2013 at 01:27 PM.
12-20-2012, 09:49 AM
#10
in for the long haul. this is a great blank slate, despite all the headaches you're going to experience.
what are your plans for the car overall? driver, straight-line bruiser, PT machine? You really need to know what you want to do before you get in too deep, otherwise you're going to be wasting time and money on things you'll replace later (I know from experience).
what are your plans for the car overall? driver, straight-line bruiser, PT machine? You really need to know what you want to do before you get in too deep, otherwise you're going to be wasting time and money on things you'll replace later (I know from experience).
12-20-2012, 09:53 AM
#11
FYI, there's some great info at LT1swap.com. Also, schematics for the OEM wiring can be found in the 'best of electrical' section over at Steve's.
And don't forget to hit the 'x-body swap thread' for ideas and help, and check out the 'lots of swap info' link in my sig for my build notes (including pinouts from a 2000 LQ4, which is almost identical to yours).
And don't forget to hit the 'x-body swap thread' for ideas and help, and check out the 'lots of swap info' link in my sig for my build notes (including pinouts from a 2000 LQ4, which is almost identical to yours).
12-20-2012, 10:02 AM
#12
Teching In
Thread Starter
Join Date: Dec 2012
Posts: 34
Likes: 0
Received 0 Likes
on
0 Posts
in for the long haul. this is a great blank slate, despite all the headaches you're going to experience.
what are your plans for the car overall? driver, straight-line bruiser, PT machine? You really need to know what you want to do before you get in too deep, otherwise you're going to be wasting time and money on things you'll replace later (I know from experience).
what are your plans for the car overall? driver, straight-line bruiser, PT machine? You really need to know what you want to do before you get in too deep, otherwise you're going to be wasting time and money on things you'll replace later (I know from experience).
I have read your build threads and i have learned quite a few things, Thanks
12-20-2012, 10:16 AM
#13
Teching In
Thread Starter
Join Date: Dec 2012
Posts: 34
Likes: 0
Received 0 Likes
on
0 Posts
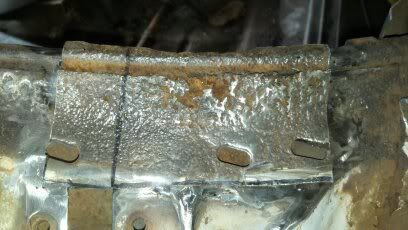
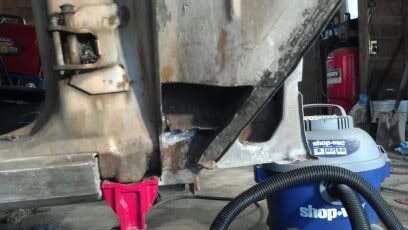
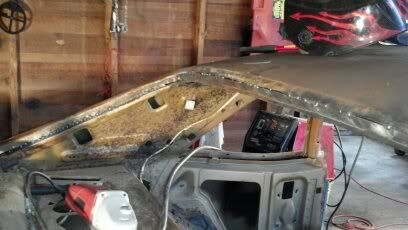
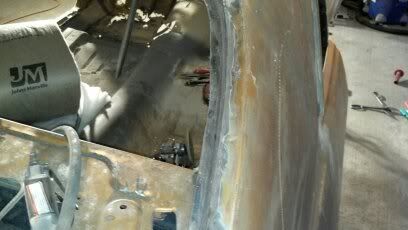
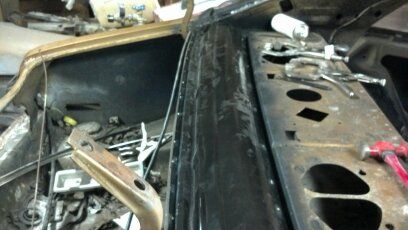
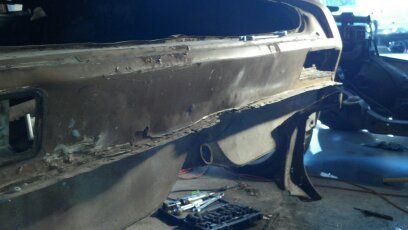
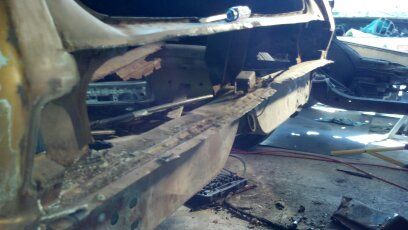
Ok so ive got the rear window done, and that was a chore. I was pretty bad. Almost to the point of looking for another parts car for the rear roof section, But i think ive managed to pull this one off.
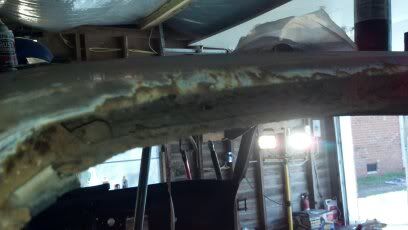
So this is basicly what i started with. i wasne realy sure if i was going to be able to handle this area, But with a lot of starring and and plotting and patiance i moved forward.
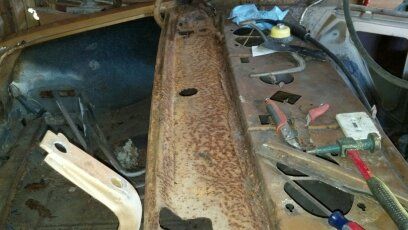
I bought a piece of 4x8 18 guage metal for 53bucks at the local metal shop, and after cutting out sections of bad metal at a time to keep the body lines, i would cut out a strip of the sheet metal with my cutoff wheel and tack it into place.
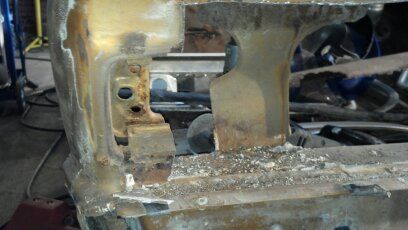
After i would remove a bad peice of metal i would shoot some rust encapsulator inbetween the roof and the rear support to hopefully not let this happen again.
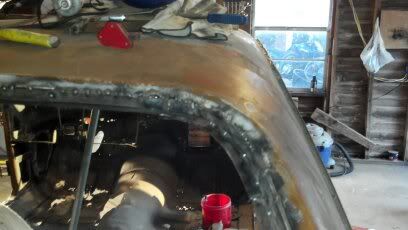
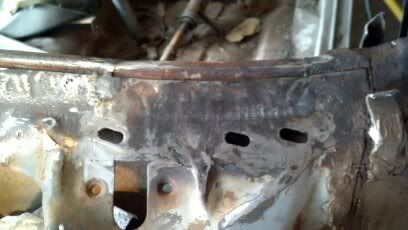
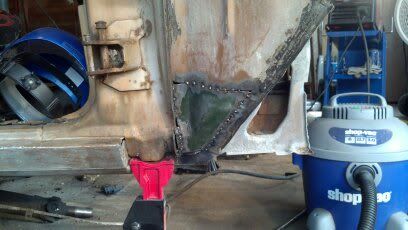
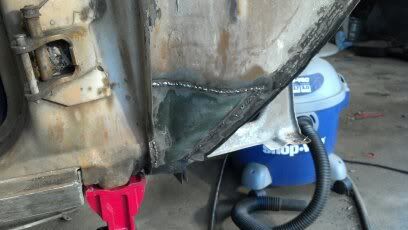
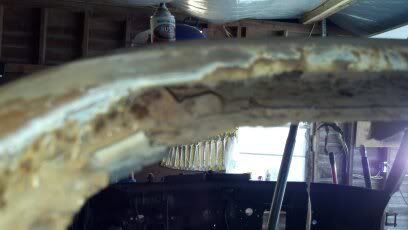
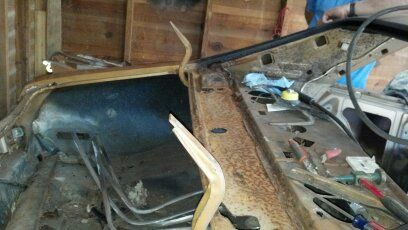
After all the tacking was done and a solid bead was created i used my angle grinder to grind down the weld in the middle of the channel to give it that natural curved look, like it did from the factory. I know the pics arent the greatest. I was using my cell phone. Then i moved onto the outer spot welds, completed them and then used a 80grit flap wheel to smooth it out. The areas on the sail panel, i had to heat up with a hot knife and resperator to move the lead out of the way so i can clean it up and weld that area as well.
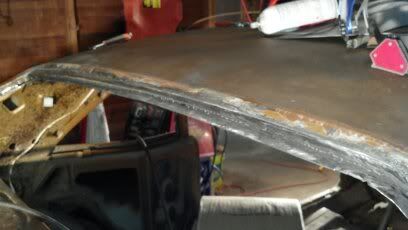
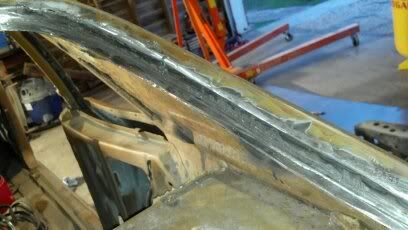
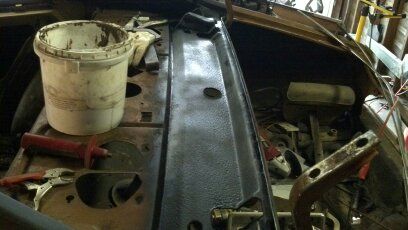
Once all is said and done in that department, this is what i ended up with, and i dont think it turned out so bad. The hardest parts was keeping the overlap on the top part the same as the factory was.
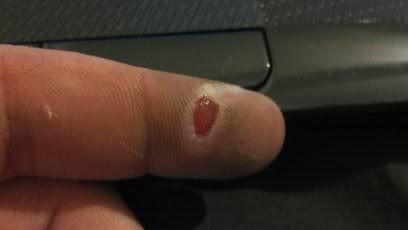
Oh and one other thing. No matter how small the project, if your going to use the grinder, use gloves. I can hurt a little bit.
Untill next time. Im in the process of cleaning up the doors and putting the door handles back on as the previus owner removed them and filled the holes with bondo. Stay tuned.
So this is basicly what i started with. i wasne realy sure if i was going to be able to handle this area, But with a lot of starring and and plotting and patiance i moved forward.
I bought a piece of 4x8 18 guage metal for 53bucks at the local metal shop, and after cutting out sections of bad metal at a time to keep the body lines, i would cut out a strip of the sheet metal with my cutoff wheel and tack it into place.
After i would remove a bad peice of metal i would shoot some rust encapsulator inbetween the roof and the rear support to hopefully not let this happen again.
After all the tacking was done and a solid bead was created i used my angle grinder to grind down the weld in the middle of the channel to give it that natural curved look, like it did from the factory. I know the pics arent the greatest. I was using my cell phone. Then i moved onto the outer spot welds, completed them and then used a 80grit flap wheel to smooth it out. The areas on the sail panel, i had to heat up with a hot knife and resperator to move the lead out of the way so i can clean it up and weld that area as well.
Once all is said and done in that department, this is what i ended up with, and i dont think it turned out so bad. The hardest parts was keeping the overlap on the top part the same as the factory was.
Oh and one other thing. No matter how small the project, if your going to use the grinder, use gloves. I can hurt a little bit.
Untill next time. Im in the process of cleaning up the doors and putting the door handles back on as the previus owner removed them and filled the holes with bondo. Stay tuned.
12-20-2012, 10:22 AM
#14
Teching In
Thread Starter
Join Date: Dec 2012
Posts: 34
Likes: 0
Received 0 Likes
on
0 Posts
Hey all, its been a while since ive had some new pics updated, so here we go with some new improvments.
I got a few parts in the mail a while back. I order the rear window to trunk panel, the floor pans and the rear qtr panel patch peices. on with the work.
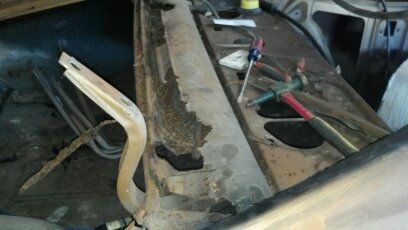
Here is a few pics of the rear window panel in its worst shape.
After all the metal was removed this is what was left. More surface rust. lol
After some wire wheeling and some rust converter and paint, this is now sealed up to prevent further rust.


Well i ended up buying a hole punch from HF and it worked well for making great spot welds. After about an hour or two of making sure the panel was perfect i clamped it down and tacked and filled it in. I was realy surpised of the fit, i didnt have to mod it very much if any at all. Turned out great if you ask me.
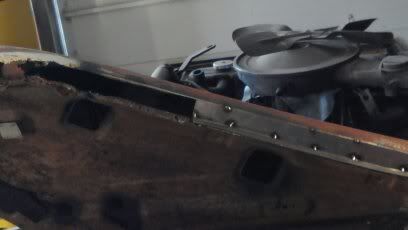
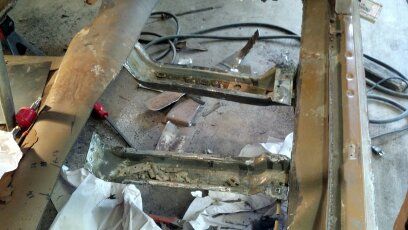
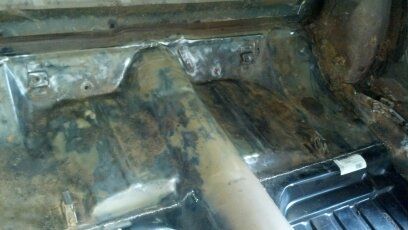
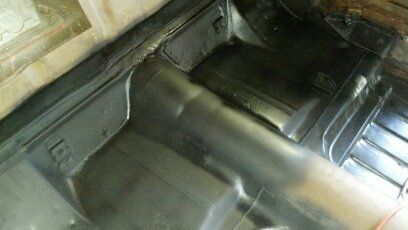
Next up is the floor pans. here is one of them that was unpacked.
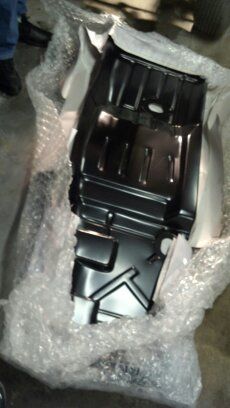
And here is the rust
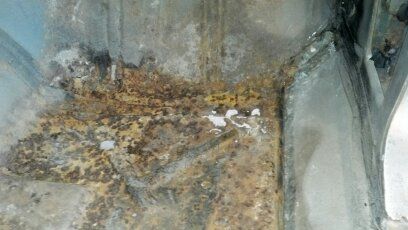
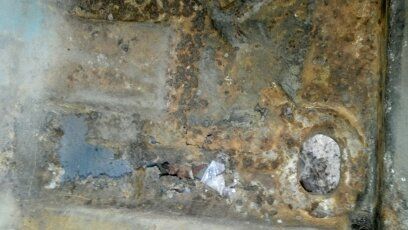
After cutting out the rust i was pretty much left with a floorless car.
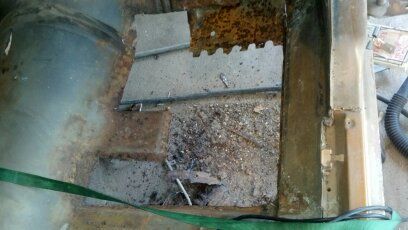
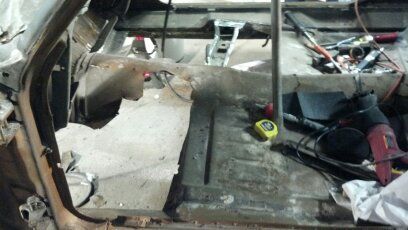
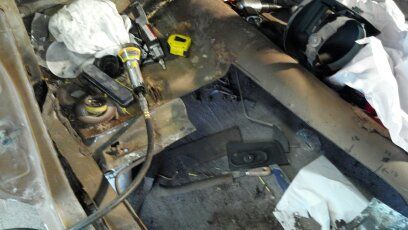
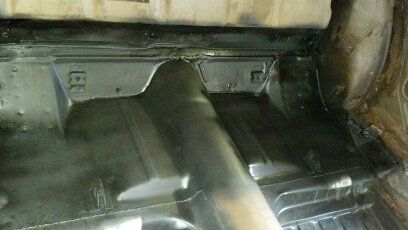
Here we have one side welded in and not to bad. I need to watch myself, ive noticed that im getting to the point rushing things and i dont want that, so somtimes ill just walk away for a while and then try again when im more focused on what im doing. After getting the pas side done i had to patch a hole in the tunnel from the PO hacking it up, i cut out part of the tunnel from the parts car.
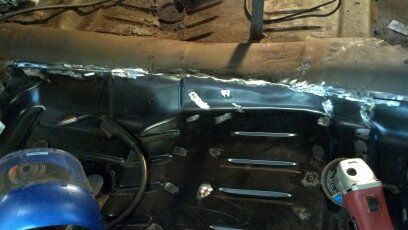

And there is the rest of the floor welded in, just have a little more grinding to do.
I got a few parts in the mail a while back. I order the rear window to trunk panel, the floor pans and the rear qtr panel patch peices. on with the work.
Here is a few pics of the rear window panel in its worst shape.
After all the metal was removed this is what was left. More surface rust. lol
After some wire wheeling and some rust converter and paint, this is now sealed up to prevent further rust.
Well i ended up buying a hole punch from HF and it worked well for making great spot welds. After about an hour or two of making sure the panel was perfect i clamped it down and tacked and filled it in. I was realy surpised of the fit, i didnt have to mod it very much if any at all. Turned out great if you ask me.
Next up is the floor pans. here is one of them that was unpacked.
And here is the rust
After cutting out the rust i was pretty much left with a floorless car.
Here we have one side welded in and not to bad. I need to watch myself, ive noticed that im getting to the point rushing things and i dont want that, so somtimes ill just walk away for a while and then try again when im more focused on what im doing. After getting the pas side done i had to patch a hole in the tunnel from the PO hacking it up, i cut out part of the tunnel from the parts car.
And there is the rest of the floor welded in, just have a little more grinding to do.
12-20-2012, 10:27 AM
#15
Teching In
Thread Starter
Join Date: Dec 2012
Posts: 34
Likes: 0
Received 0 Likes
on
0 Posts
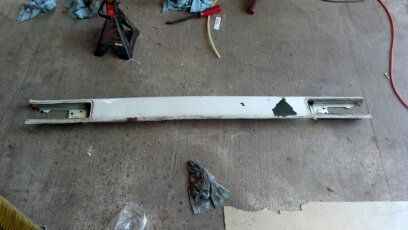
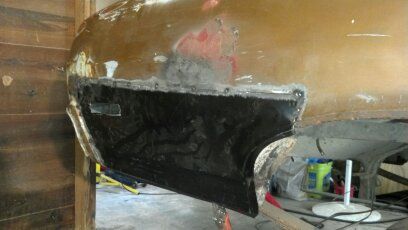
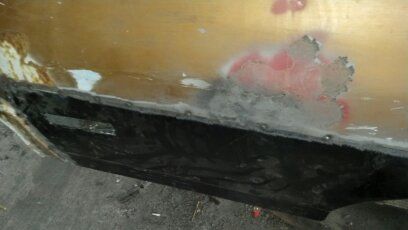
Next up is the tail panel. I didnt buy a new one and decided to stick with the broke theme and salvage one from the parts car.
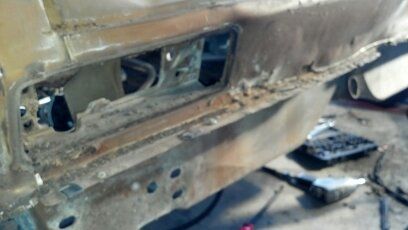
The tail panel had been hit and warped before so i decided to replace it.
And here is the replacment peice.
And here it is welded back in and the spare trunk lid.
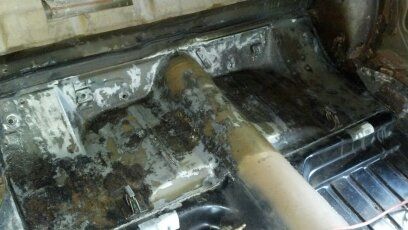
Here is the rear patch that i put in. I forgot to take a pic of how bad it was before i cut it out. I also had to patch the inner wheel well. nothing to bad.
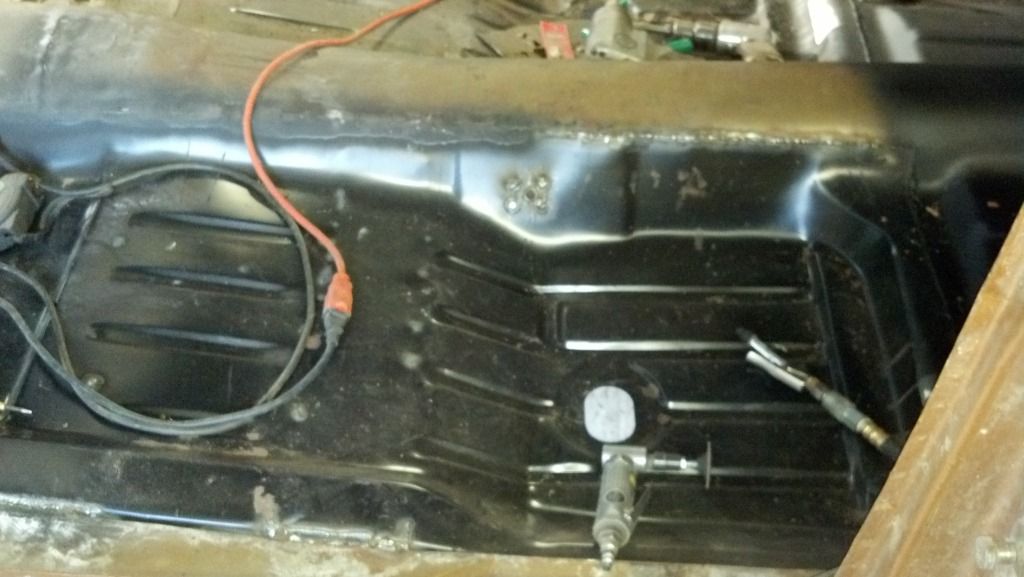
And last but not least here is the rest of the floor pan. I had to de rust it with the wire wheel and some rust convertor.

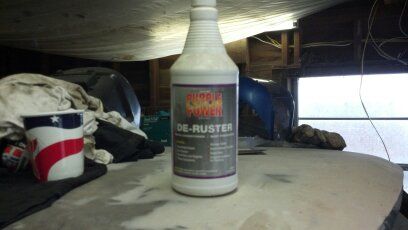
This is the convertor that i picked up at the local part store. It seem to work pretty good.
 .
.
Well thats all i have for now. Ill post more when i get some more stuff done. So far i think that everything is going good. And well be making good steps forwad from here i hope. Stay tuned.
The tail panel had been hit and warped before so i decided to replace it.
And here is the replacment peice.
And here it is welded back in and the spare trunk lid.
Here is the rear patch that i put in. I forgot to take a pic of how bad it was before i cut it out. I also had to patch the inner wheel well. nothing to bad.
And last but not least here is the rest of the floor pan. I had to de rust it with the wire wheel and some rust convertor.
This is the convertor that i picked up at the local part store. It seem to work pretty good.
.Well thats all i have for now. Ill post more when i get some more stuff done. So far i think that everything is going good. And well be making good steps forwad from here i hope. Stay tuned.
12-20-2012, 10:36 AM
#16
Teching In
Thread Starter
Join Date: Dec 2012
Posts: 34
Likes: 0
Received 0 Likes
on
0 Posts
Ok Guys and Gals,
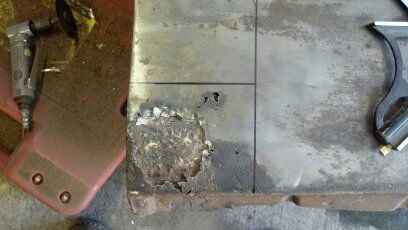
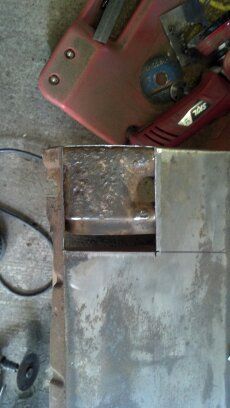
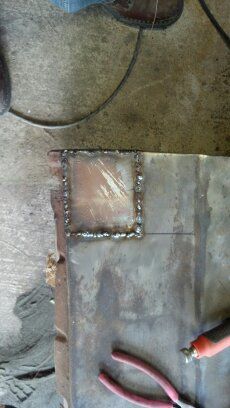
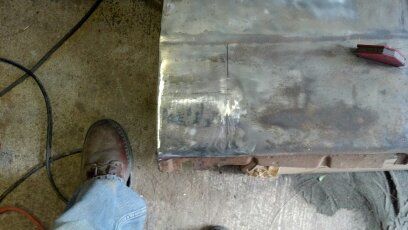
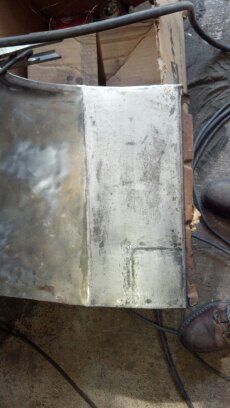
Here is some updates on the nova. Been a little slow for a while, but at least steady. Ok so i finished the underside of the car with alot of wire wheeling, and some undercoating. I didnt get any pics of the part, kinda hard with all that dust and what not..lol. So while the underneath was curing i decided to work on the fender.The fender was in ok shape. it had some surface pitting but not to deep so with the sand blaster i striped the rust off and got it cleaned up. the worst part was the lower part was rusted pretty good so i figured id better cut it out and patch it. i used a piece of the old quater panel so the thickness would be the same. After squaring off my cut, i cut it out and cleaned it up underneath, then sealed it. After using the piece of metal that i cut out i used it for a template for the new patch. after tracing it out, i used the cut off wheel in cut it out. After cleaning the area up for welding, i used a magnet to hold it in place while i tacked it down on the corners. then i stitch welded it back in. Used my flap wheel to cut down the welds, and then sealed it with sealer.

Ok so i have made a lot more progress, and i have more pics, just need to get time to write it up. So stay tuned.
Here is some updates on the nova. Been a little slow for a while, but at least steady. Ok so i finished the underside of the car with alot of wire wheeling, and some undercoating. I didnt get any pics of the part, kinda hard with all that dust and what not..lol. So while the underneath was curing i decided to work on the fender.The fender was in ok shape. it had some surface pitting but not to deep so with the sand blaster i striped the rust off and got it cleaned up. the worst part was the lower part was rusted pretty good so i figured id better cut it out and patch it. i used a piece of the old quater panel so the thickness would be the same. After squaring off my cut, i cut it out and cleaned it up underneath, then sealed it. After using the piece of metal that i cut out i used it for a template for the new patch. after tracing it out, i used the cut off wheel in cut it out. After cleaning the area up for welding, i used a magnet to hold it in place while i tacked it down on the corners. then i stitch welded it back in. Used my flap wheel to cut down the welds, and then sealed it with sealer.
Ok so i have made a lot more progress, and i have more pics, just need to get time to write it up. So stay tuned.
12-20-2012, 11:23 AM
#19
Teching In
Thread Starter
Join Date: Dec 2012
Posts: 34
Likes: 0
Received 0 Likes
on
0 Posts
Thanks for that info. I would have had to replace them anyway. The PO of the white car had shoved wood between the pan and the frame to hold it up then screwed siding sheet metal over that.. Lol oh well.