
67 Camaro swap, project "belly button"
 02-18-2013, 11:00 PM
#1
TECH Apprentice
Thread Starter
YEAH YEAH YEAH, ANOTHER first gen camaro LS conversion, hence the name project "belly button" everyone has one right! I hope to make mine stand out from the crowd and maintain as much of a budget as possible so follow along.
Alright after about two years of working on my car, browsing and posting on several of your threads (thanks G-Mag, TSnow, BMF5150, the artist formerly known as Klimaxx etc.) I have decided to get a thread of my own going. Hopefully someone out there will follow along patiently and learn from my mistakes, lol. Here goes the story:
Back in 1992 my father and I purchased this 1967 camaro for $500.00 in Yorba Linda California because it was not running and needed to be towed out of the owners mother's driveway. My father tinkered with the brakes but no serious work happened to the car. It mostly sat in the garage while I went to college, started a family, got married etc. FINALLY a few years ago the day came when he said I could have the car and a game plan was set up.
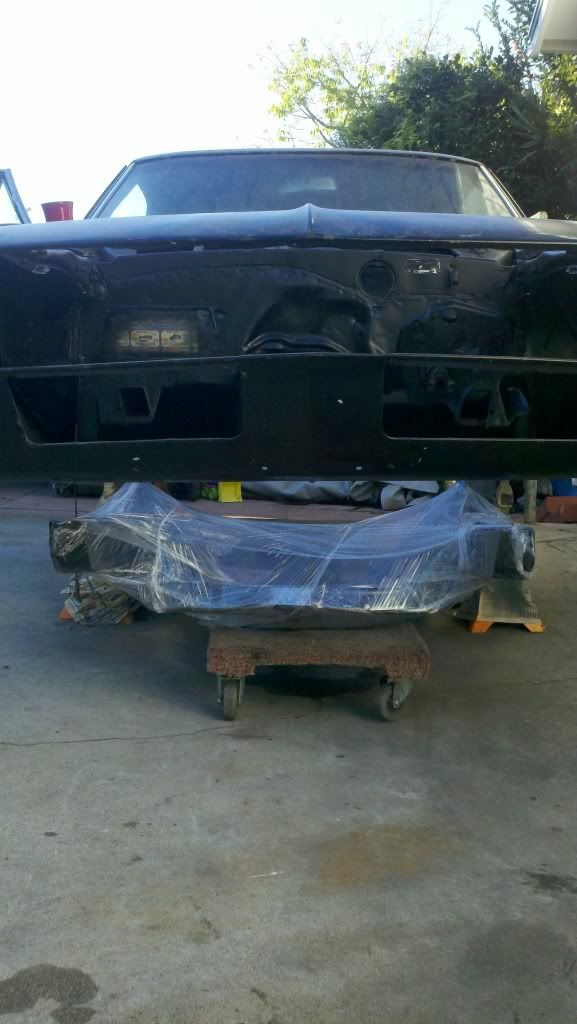
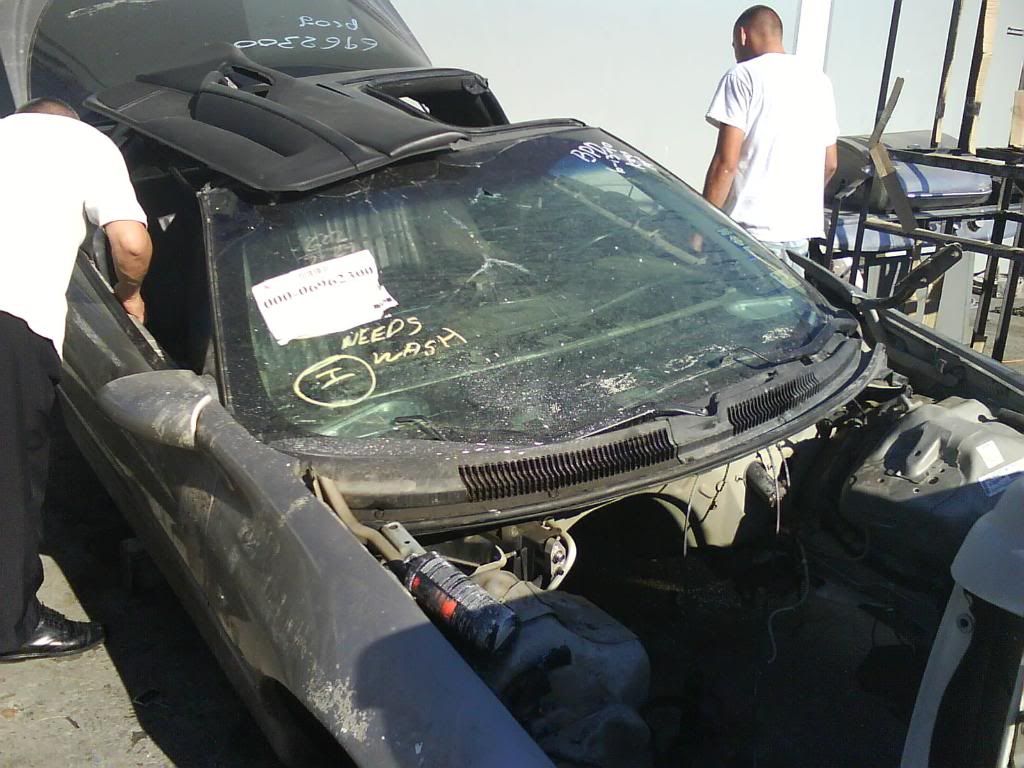
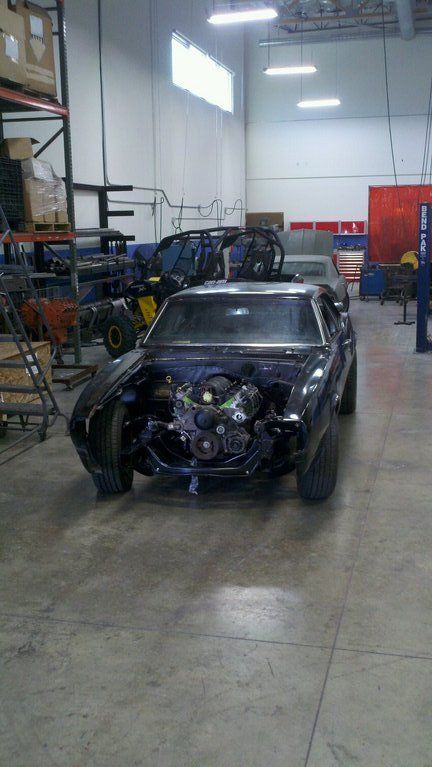
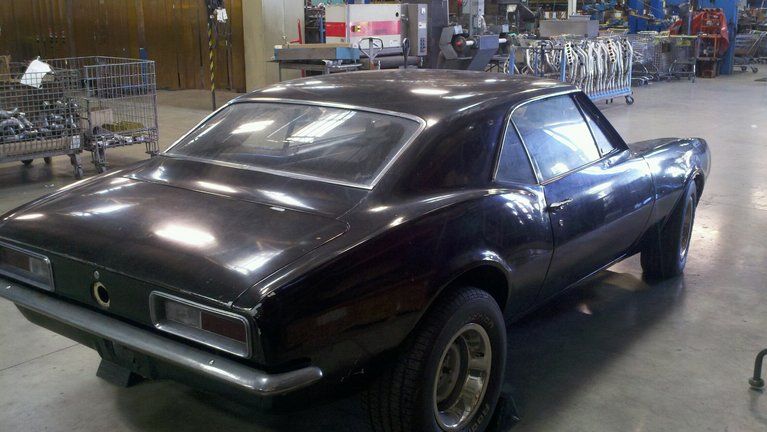
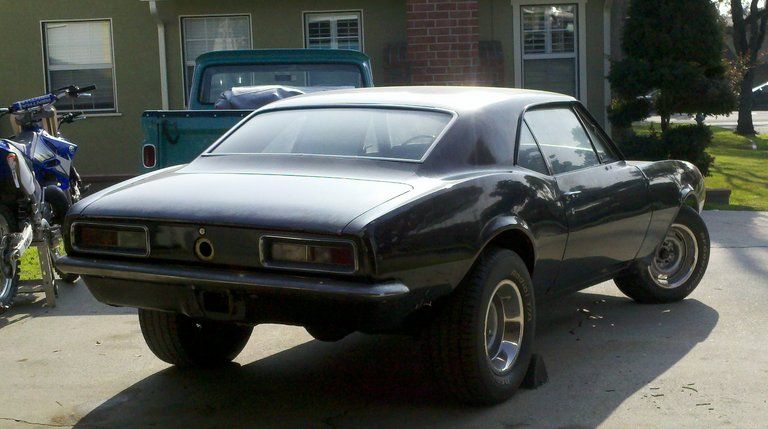
Here is the car after being garaged for about 10 years:
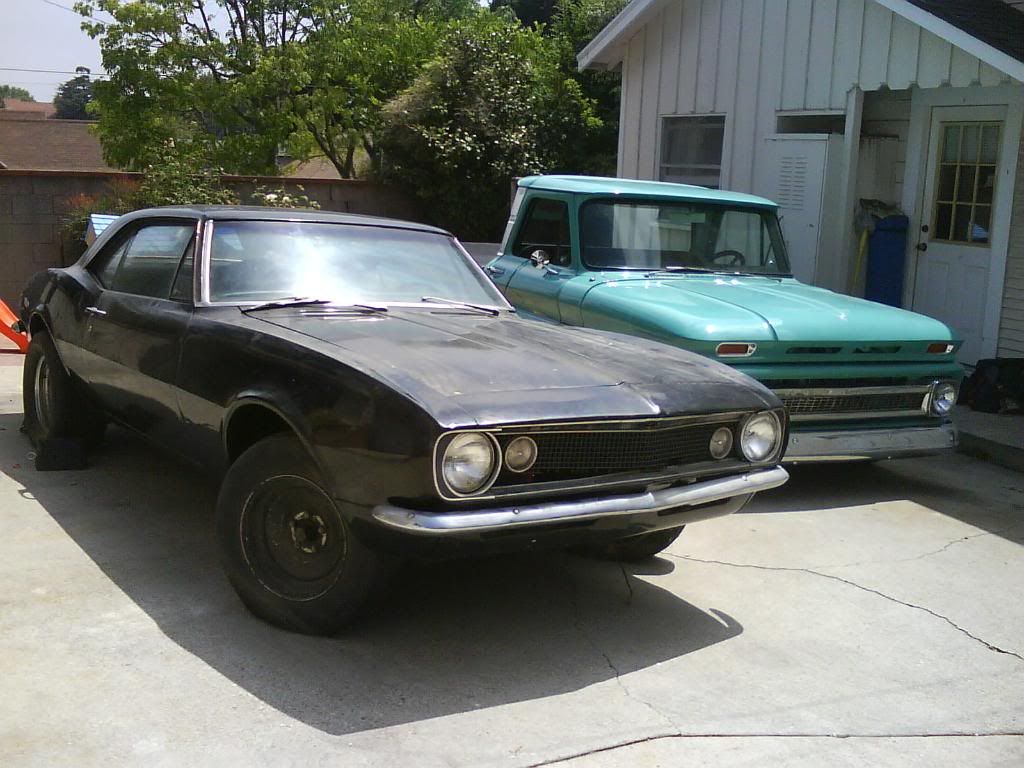
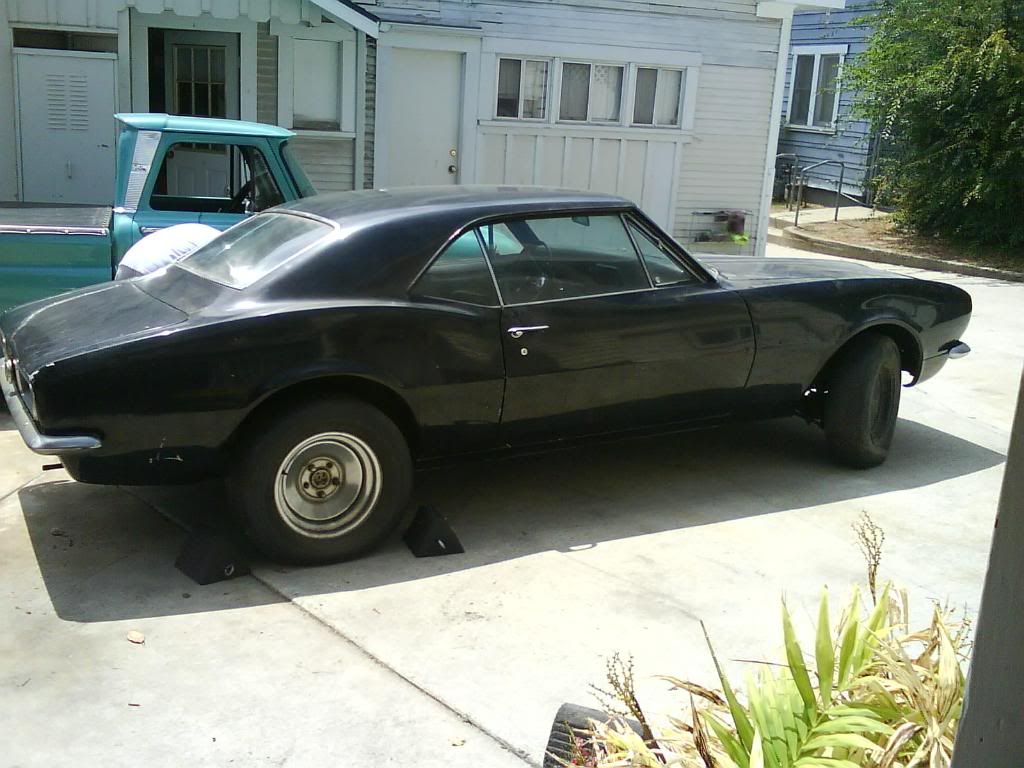
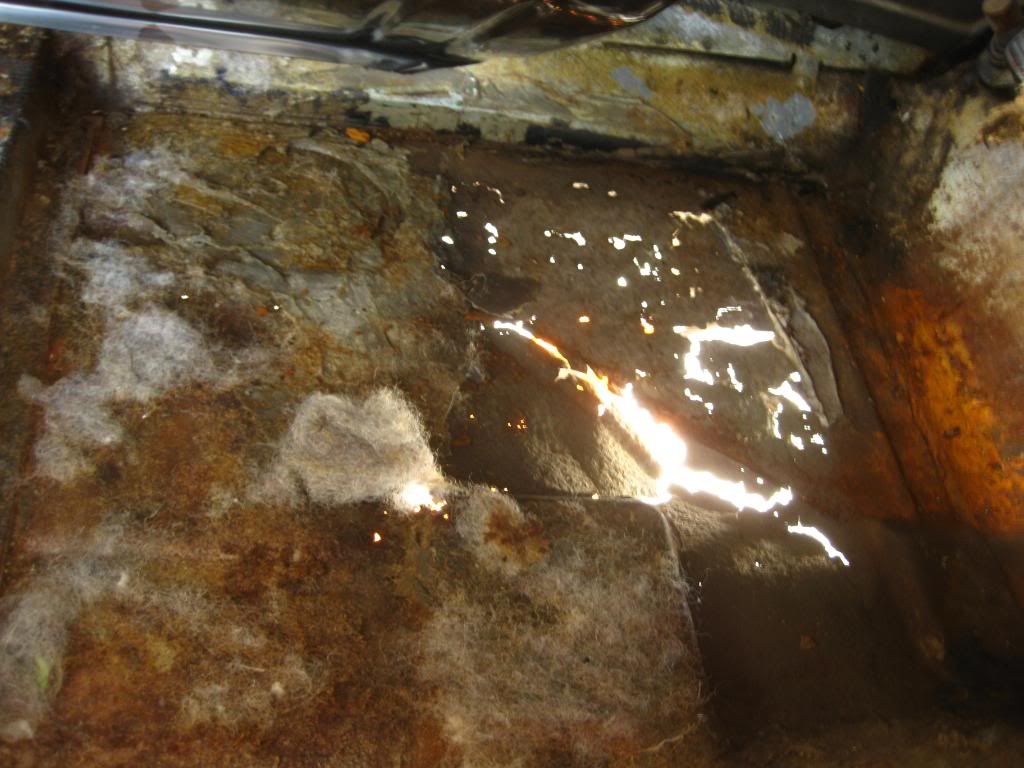
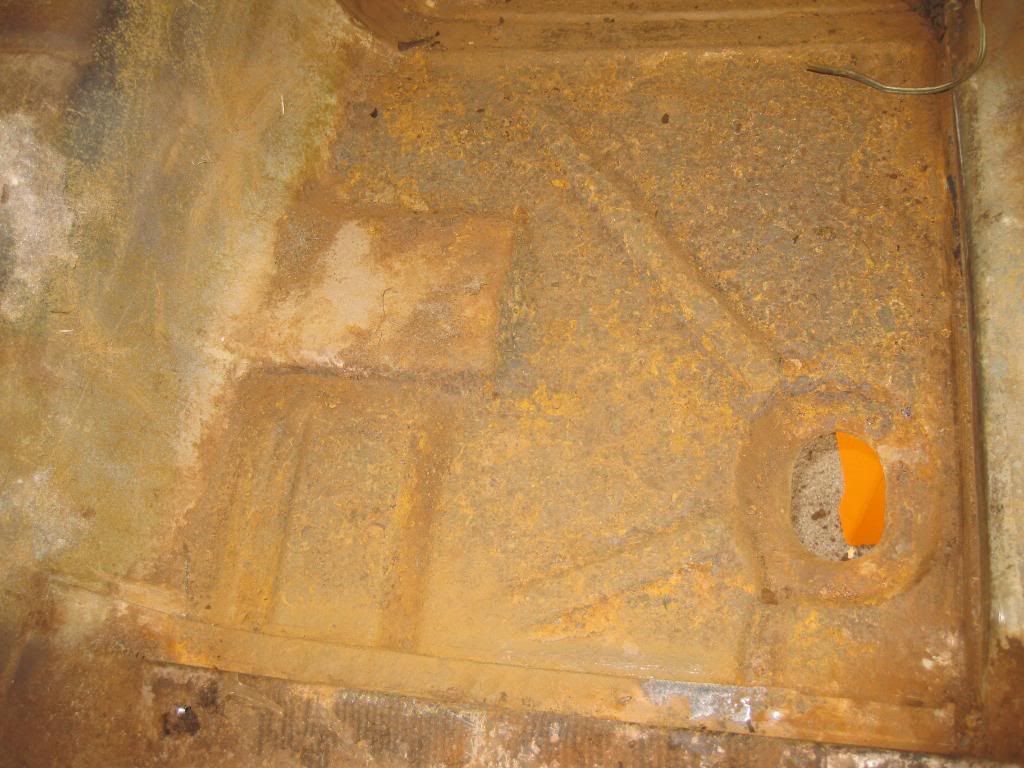
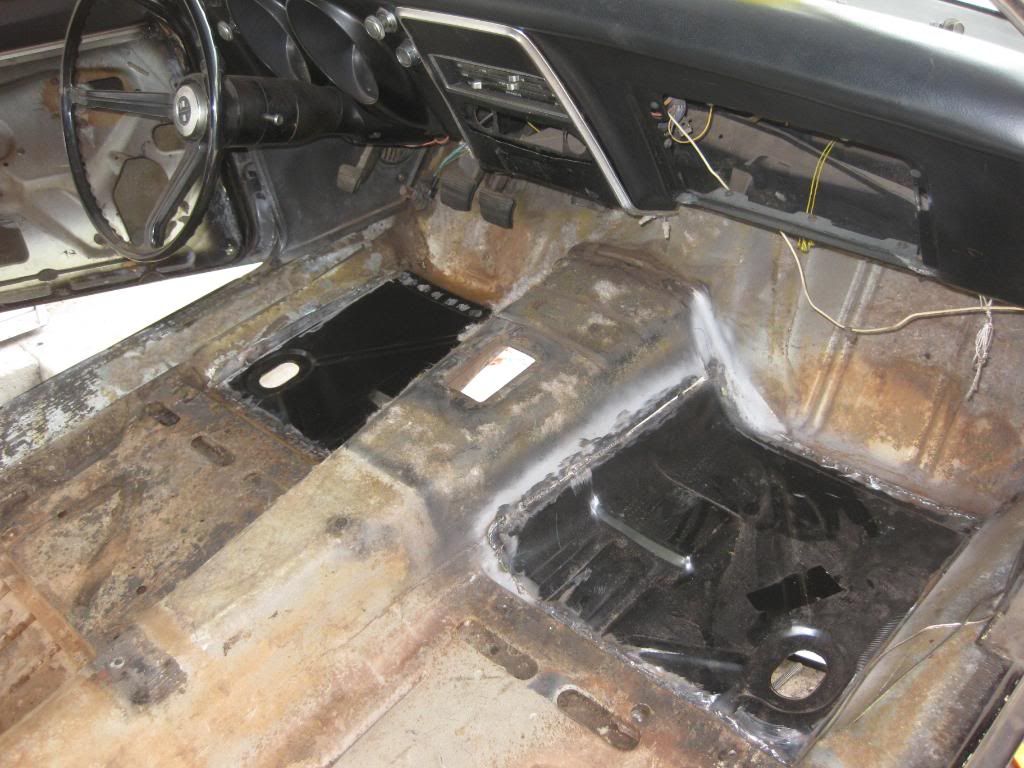
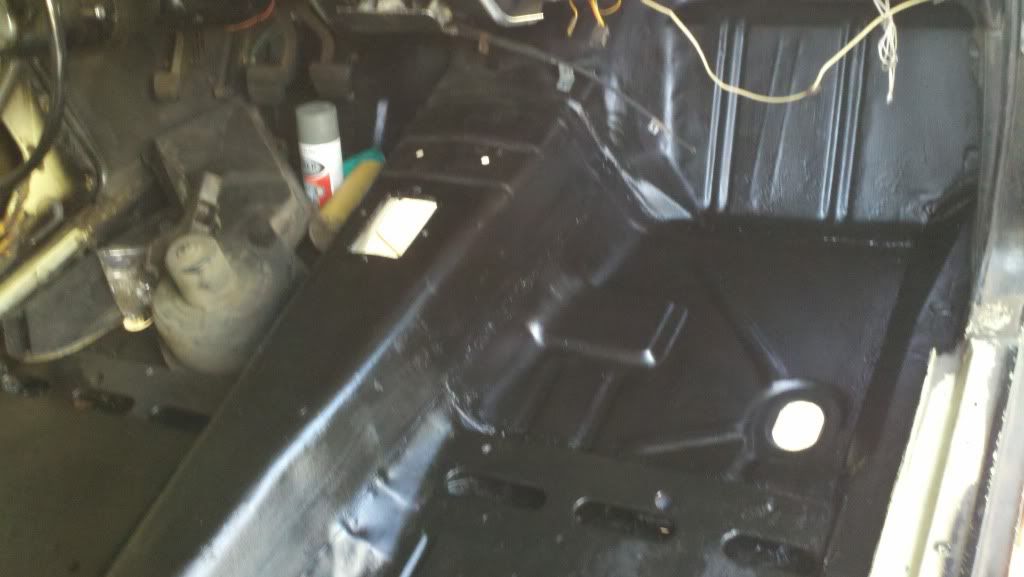
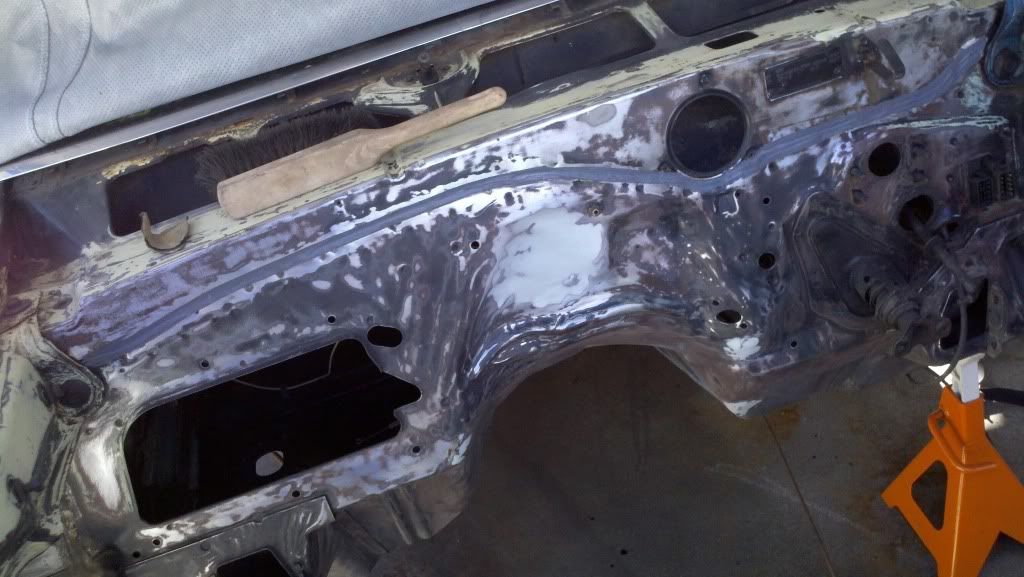
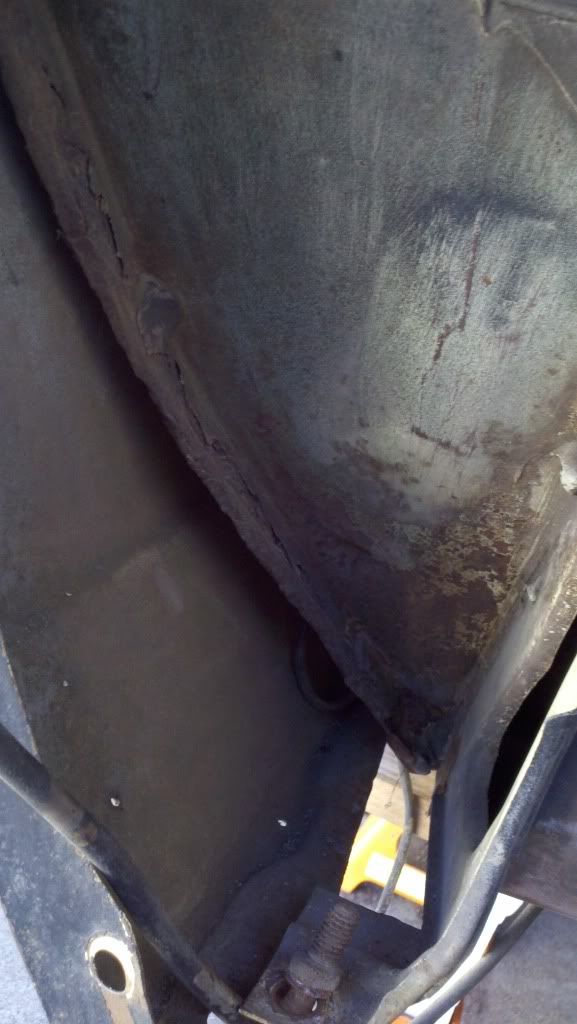
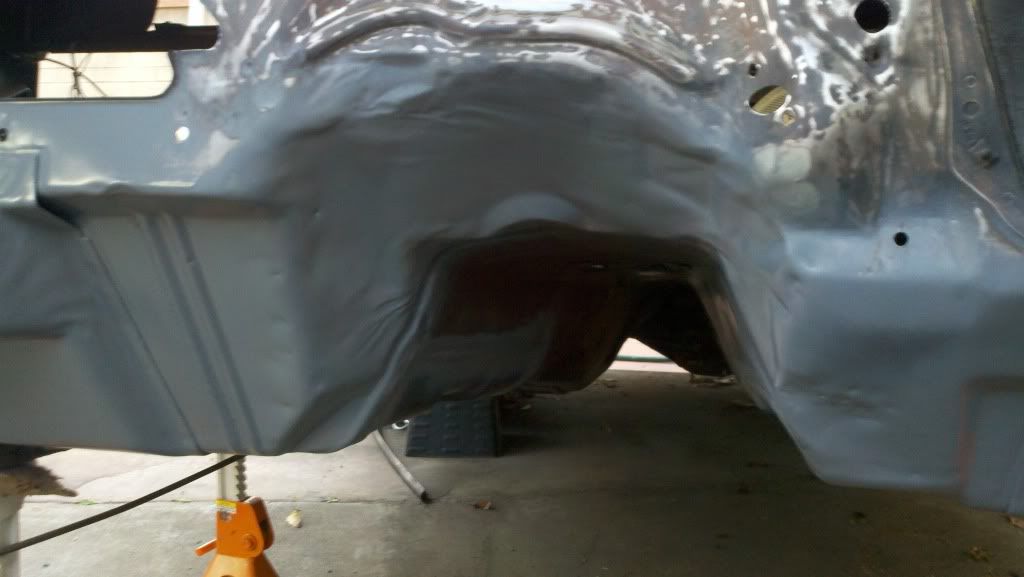
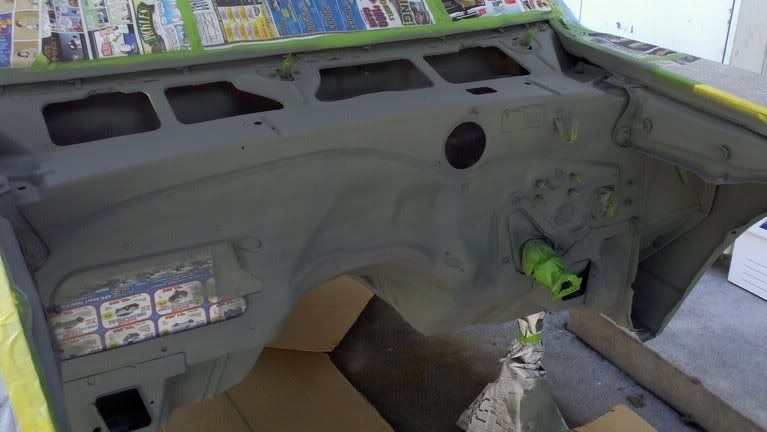
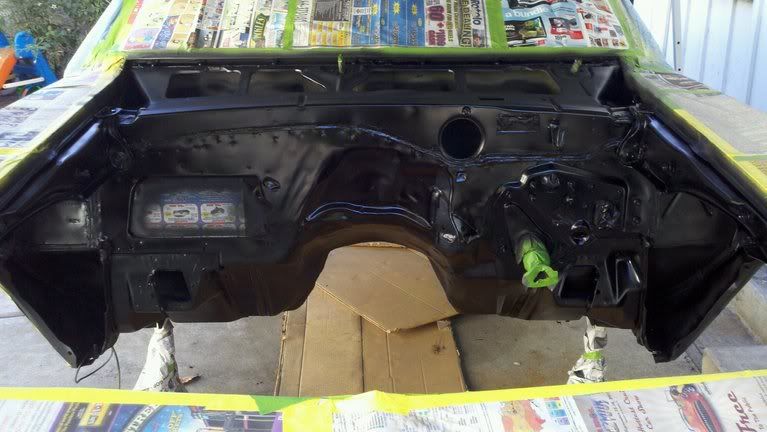
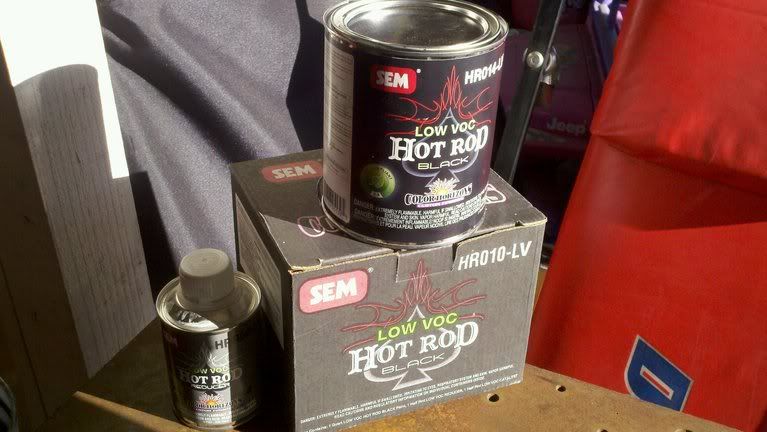
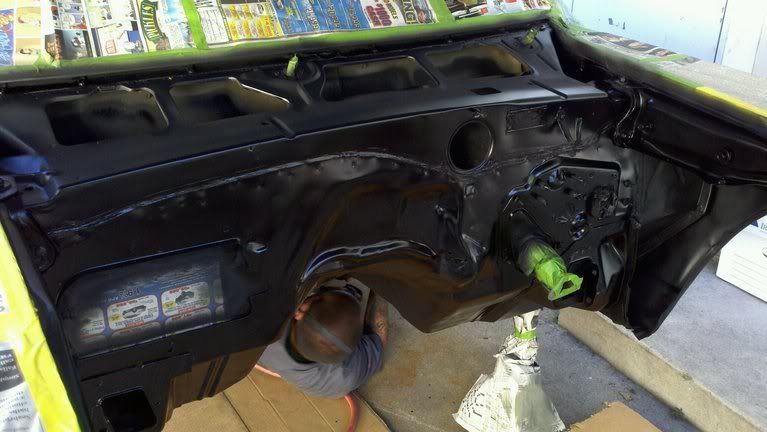
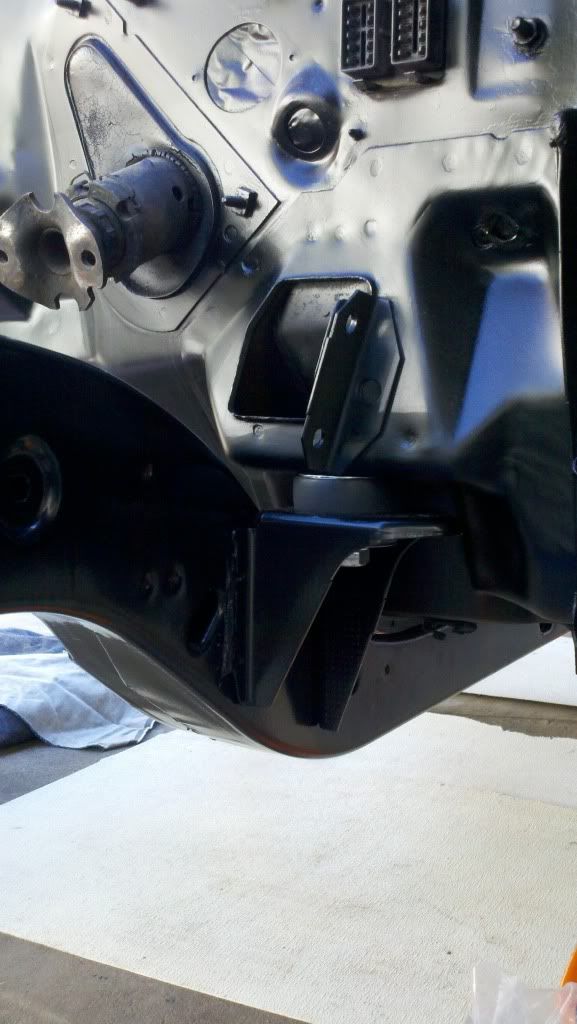
The plan now is to install a pull out 2002 SS camaro LS1/T56 in the car. Of course I came across a few bumps in the road along the way and I ended up replacing front floor pans, powdercoated the inner fenderwells, subframe and all components, even the radiator core support got powdercoated. My buddy and I prepped and painted the firewall and underside of the car as well.
Off to powdercoat:
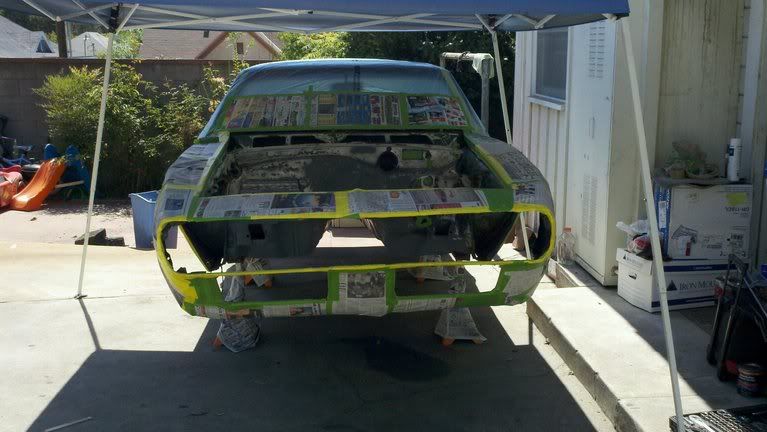
Paint/prep:
Firewall work:
Prepped for paint:
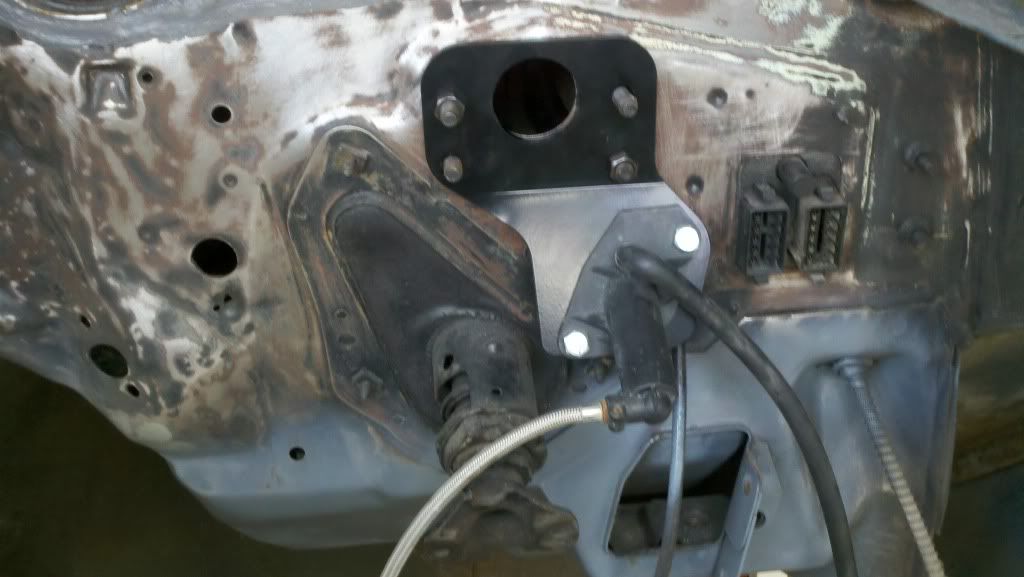
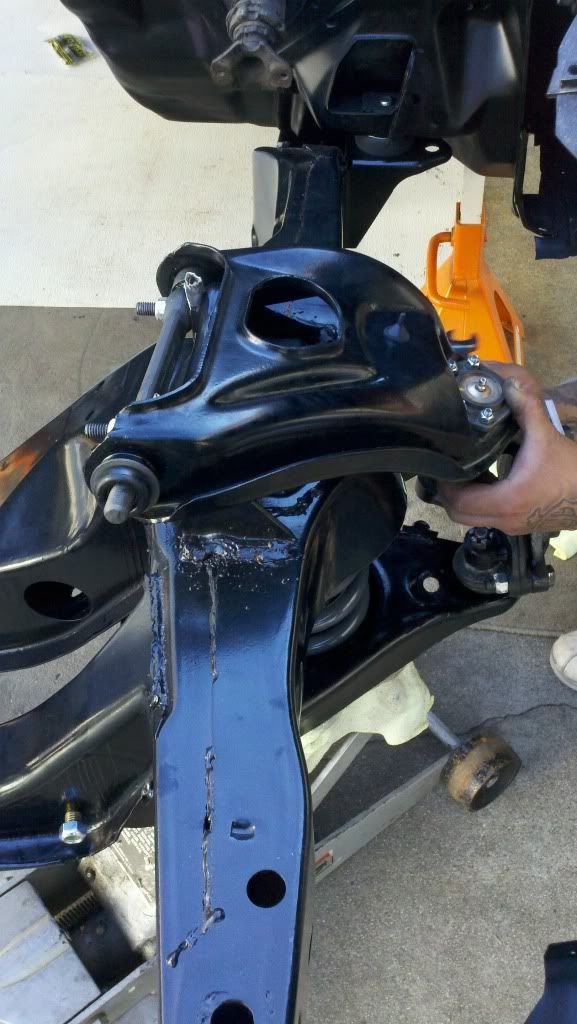
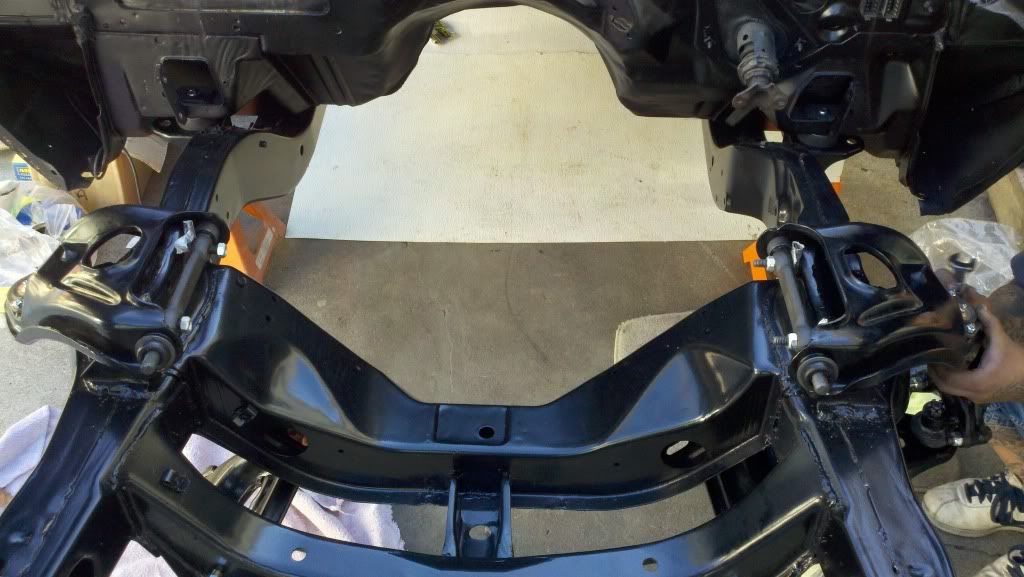
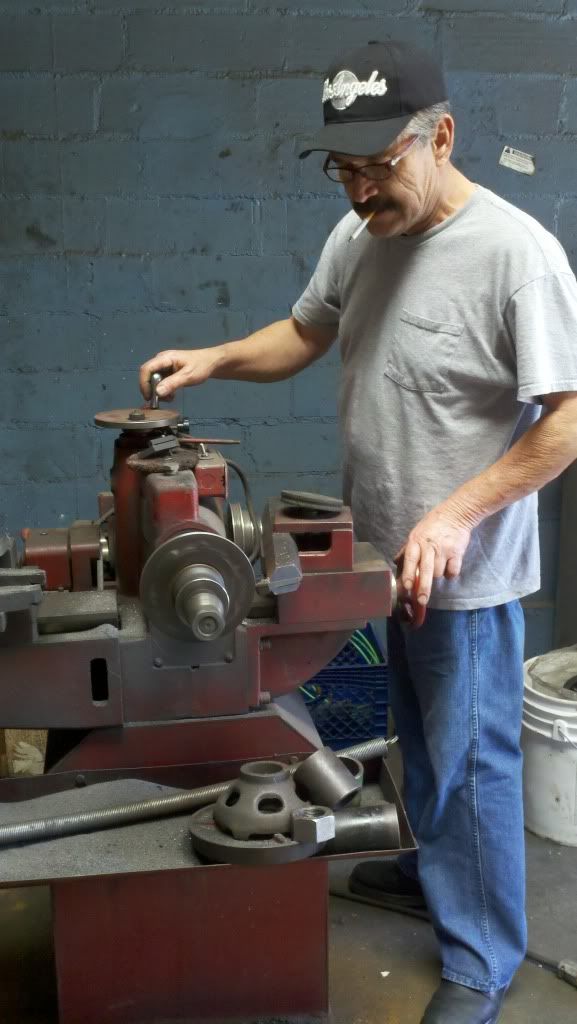
From there we installed the powdercoated subframe, a-arms, spindles etc. with new Moog ball joints, bushings etc. I also added the LS1/fourth gen camaro brake adapters and my dad turned the hubs to fit the rotors:
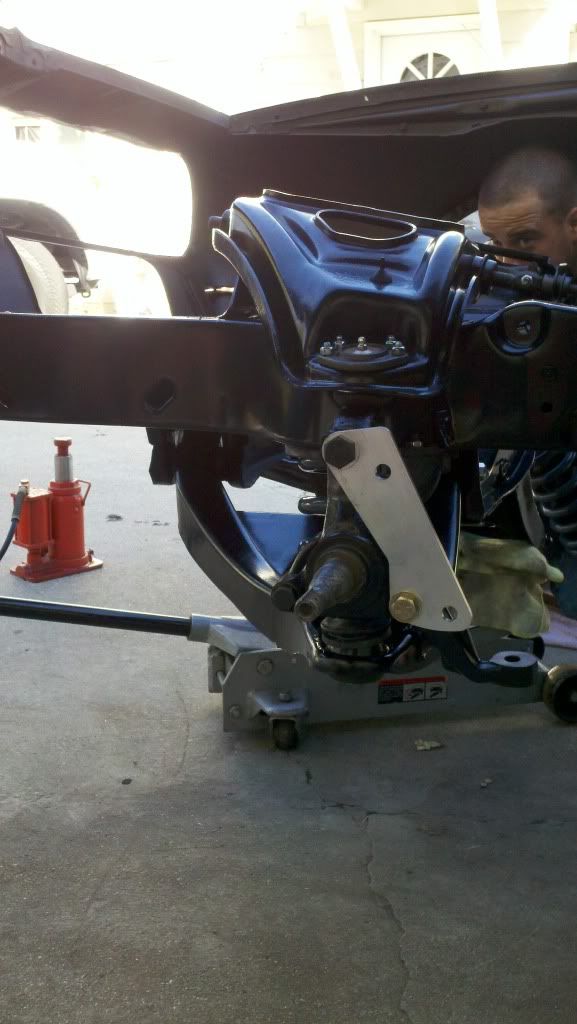
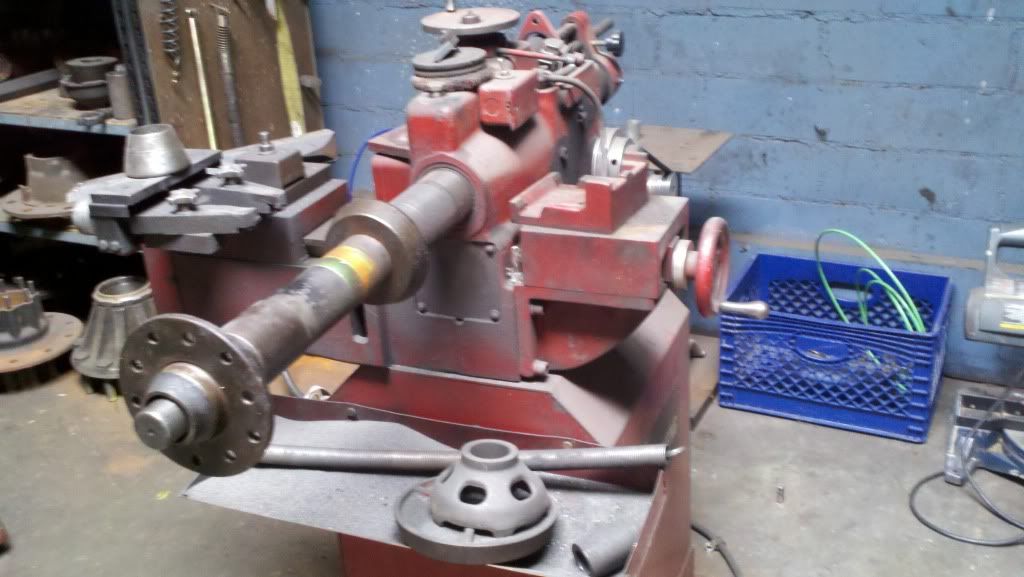
Using tractor trailer heavy duty drum lathe to turn down hubs (dad's a pro with this machine, old school!)
I also prepped and painted all of the suspension components and even scored a set of original short Z-28 steering arms from the guy I bought the brake kit from, he traded me straight across for my originals, score!
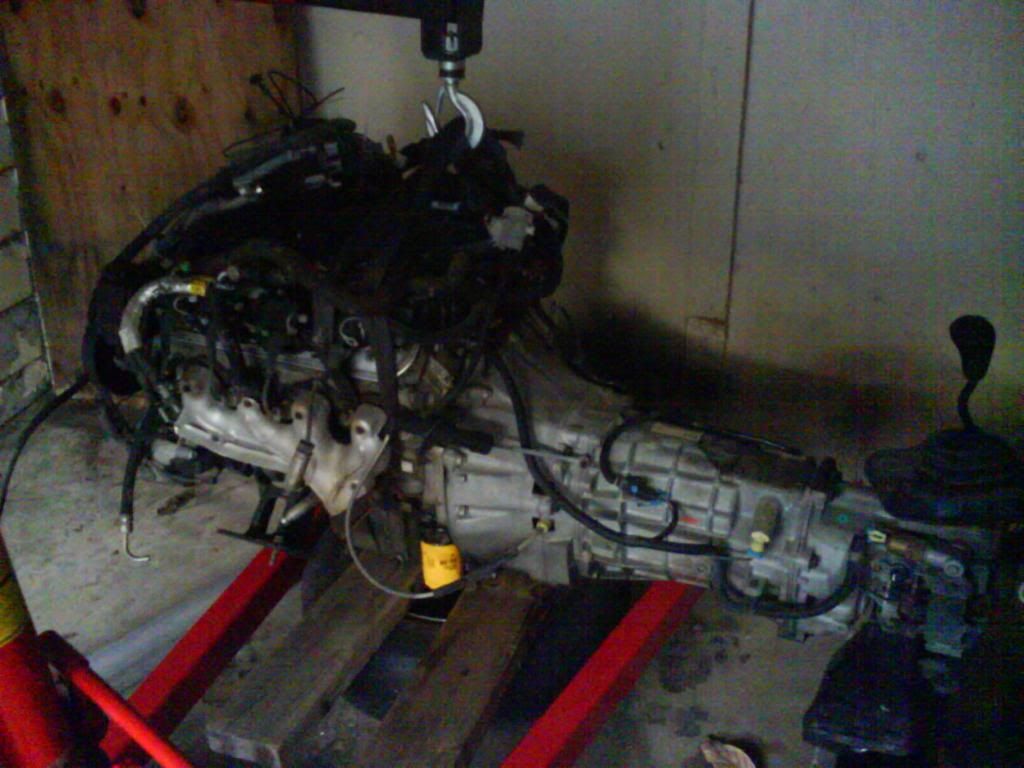
The donor engine and trans came from a roll over 2002 SS camaro. I found receipts etc and contacted the original owner of the car in Texas and he said it was FAST so be careful, he and his friend were both fine after the wreck, and that he babied the car and only drove it on long road trips to visit his in-laws. The combo has about 90K on it (yeah I know that is a little high but I got a sweet deal on the combo).
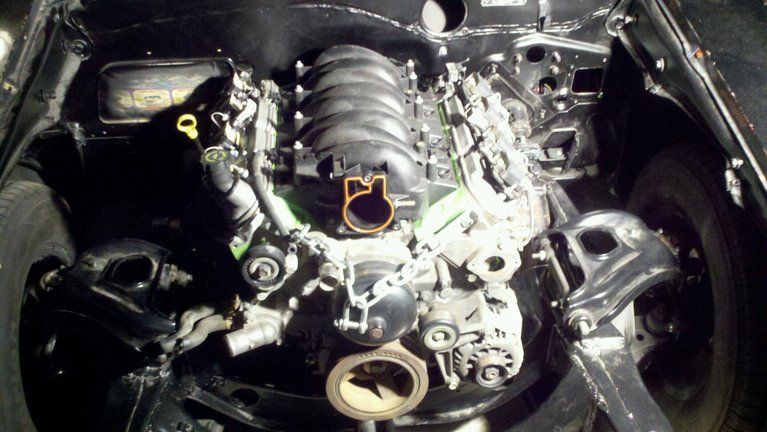
I currently am at a point in the build where I am fitting the engine/trans in the car using 1" setback plates and ATS adjustable crossmember. I am psyched because Doug Thorley used my car as the mock up car for their brand new 67-69 camaro LS conversion headers and all I can say is Nick and Jaime are top notch professional guys and the product is SWEET (they have pics posted on their facebook page so check them out!!!). Step design/stainless steel long tubes, they should go into production soon so keep an eye out. I'll let Nick post more information about that.
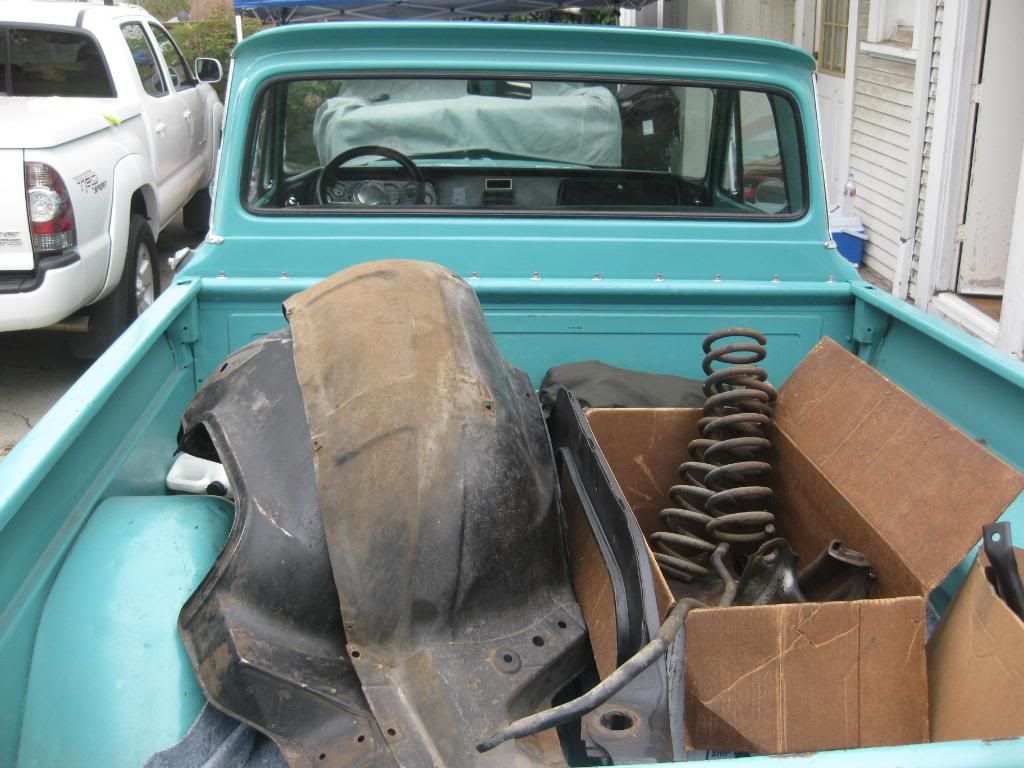
I also recently purchased a vaporworx tank since I picked up some extra work and felt that that was one area where I should spend a little more on the project so as not to have starvation issues etc. Plus Carl is a local/nice guy to deal with:-)
Anyway, I have TONS more work that I have done to the car over the past few years so feel free to ask any questions (for example I have converted the tailshaft of the trans for mechanical speedo, AAW classic update it to be installed, POR 15 on inside floor pans, DSE minitubs POSSIBLY this summer, hotchkis 3" drop springs all around etc.). I hope to get the engine fired up this summer but with work, kids, new house time is tighter than a June bride!
Couple recent pics:

So a few questions for everyone:
1. What should I do to the motor prior to firing it up again (it has been sitting a while but I did hear it run when I purchased it). Timing chain, oil pump, LS7 clutch/slave/master? Any suggestions on what chain, oil pump to get?
2. Do you all have any input regarding keeping the stock GM computer and harness and have Jon at Speartech re-work it or should I ditch that, save up funds, and get the Holley Dominator or Avenger computer/harness.
3. Any thoughts about the DSE minitubs? Anyone done it? I am not a great welder but I do have friends who can help with this if needed. I'm not sure it is necessary given that I will be keeping the leaf springs. BUT there is a little rust where the rear shocks mount so that will need attending to and minitubs might take care of that.
Let me know what you think guys, it feels great to FINALLY get this thread started after YEARS of lurking on Tsnows and others. There are GREAT projects here and standards are high on these first gen camaro builds but I will do my best with project belly button.
Alright after about two years of working on my car, browsing and posting on several of your threads (thanks G-Mag, TSnow, BMF5150, the artist formerly known as Klimaxx etc.) I have decided to get a thread of my own going. Hopefully someone out there will follow along patiently and learn from my mistakes, lol. Here goes the story:
Back in 1992 my father and I purchased this 1967 camaro for $500.00 in Yorba Linda California because it was not running and needed to be towed out of the owners mother's driveway. My father tinkered with the brakes but no serious work happened to the car. It mostly sat in the garage while I went to college, started a family, got married etc. FINALLY a few years ago the day came when he said I could have the car and a game plan was set up.
Here is the car after being garaged for about 10 years:
The plan now is to install a pull out 2002 SS camaro LS1/T56 in the car. Of course I came across a few bumps in the road along the way and I ended up replacing front floor pans, powdercoated the inner fenderwells, subframe and all components, even the radiator core support got powdercoated. My buddy and I prepped and painted the firewall and underside of the car as well.
Off to powdercoat:
Paint/prep:
Firewall work:
Prepped for paint:
From there we installed the powdercoated subframe, a-arms, spindles etc. with new Moog ball joints, bushings etc. I also added the LS1/fourth gen camaro brake adapters and my dad turned the hubs to fit the rotors:
Using tractor trailer heavy duty drum lathe to turn down hubs (dad's a pro with this machine, old school!)
I also prepped and painted all of the suspension components and even scored a set of original short Z-28 steering arms from the guy I bought the brake kit from, he traded me straight across for my originals, score!
The donor engine and trans came from a roll over 2002 SS camaro. I found receipts etc and contacted the original owner of the car in Texas and he said it was FAST so be careful, he and his friend were both fine after the wreck, and that he babied the car and only drove it on long road trips to visit his in-laws. The combo has about 90K on it (yeah I know that is a little high but I got a sweet deal on the combo).
I currently am at a point in the build where I am fitting the engine/trans in the car using 1" setback plates and ATS adjustable crossmember. I am psyched because Doug Thorley used my car as the mock up car for their brand new 67-69 camaro LS conversion headers and all I can say is Nick and Jaime are top notch professional guys and the product is SWEET (they have pics posted on their facebook page so check them out!!!). Step design/stainless steel long tubes, they should go into production soon so keep an eye out. I'll let Nick post more information about that.
I also recently purchased a vaporworx tank since I picked up some extra work and felt that that was one area where I should spend a little more on the project so as not to have starvation issues etc. Plus Carl is a local/nice guy to deal with:-)
Anyway, I have TONS more work that I have done to the car over the past few years so feel free to ask any questions (for example I have converted the tailshaft of the trans for mechanical speedo, AAW classic update it to be installed, POR 15 on inside floor pans, DSE minitubs POSSIBLY this summer, hotchkis 3" drop springs all around etc.). I hope to get the engine fired up this summer but with work, kids, new house time is tighter than a June bride!
Couple recent pics:
So a few questions for everyone:
1. What should I do to the motor prior to firing it up again (it has been sitting a while but I did hear it run when I purchased it). Timing chain, oil pump, LS7 clutch/slave/master? Any suggestions on what chain, oil pump to get?
2. Do you all have any input regarding keeping the stock GM computer and harness and have Jon at Speartech re-work it or should I ditch that, save up funds, and get the Holley Dominator or Avenger computer/harness.
3. Any thoughts about the DSE minitubs? Anyone done it? I am not a great welder but I do have friends who can help with this if needed. I'm not sure it is necessary given that I will be keeping the leaf springs. BUT there is a little rust where the rear shocks mount so that will need attending to and minitubs might take care of that.
Let me know what you think guys, it feels great to FINALLY get this thread started after YEARS of lurking on Tsnows and others. There are GREAT projects here and standards are high on these first gen camaro builds but I will do my best with project belly button.

 02-19-2013, 07:42 AM
#4
I wouldn't worry too much about starting it up, they don't drain back a bunch of oil.
I 2nd keeping the factory harness and computer, unless for some reason you don't think it will be sufficient. Will have to remove anti theft and emissions though.
I 2nd keeping the factory harness and computer, unless for some reason you don't think it will be sufficient. Will have to remove anti theft and emissions though.
02-19-2013, 11:45 AM
#5
TECH Apprentice
Thread Starter
Thanks for the comments/replies everyone. Any opinions about the oil pump/timing chain replacement? Also, regarding the stock PCM, I figured I will need a reworked harness/re-flash computer to get it running. THEN I will have to take it to a dyno for tuning. In total I think that will come out to be $1,500 - $1,800. The Holley set up ($1,800 for Dominator $1,200 for Avenger) has the self learn option so I will not have to take it to the dyno right? Especially if I decide to add a cam in the future. Does anyone have any input on that (feel free to PM if you prefer not to post public)? As a side note, I really DO like the idea of keeping everything GM/OEM. I just need to learn HP tuners and find a good dyno tuner here in So. Cal. Thoughts? I will be sure to post more pics soon as I continue to make progress on this.
Thoughts? I will be sure to post more pics soon as I continue to make progress on this.
02-19-2013, 12:01 PM
#6
TECH Apprentice
iTrader: (1)
Join Date: Aug 2008
Location: Va Beach
Posts: 304
Likes: 0
Received 0 Likes
on
0 Posts

Here's a link to my build thread for my 67 LS1 swap, I think it address every question you just asked. http://www.lateral-g.net/forums/show...=16169&page=13
But in short, 90k is nothing, keep the factory pcm and harness, plug everything in, power to the red wire, and ign to the pink wire and fuel pump relays. Did you by chance get the relay box under the hood? that makes it even easier. No tune, wait till you put a cam in it, but you will have the get the VATS (anti theft) turned off in the computer and the emissions delete as suggested above.
But in short, 90k is nothing, keep the factory pcm and harness, plug everything in, power to the red wire, and ign to the pink wire and fuel pump relays. Did you by chance get the relay box under the hood? that makes it even easier. No tune, wait till you put a cam in it, but you will have the get the VATS (anti theft) turned off in the computer and the emissions delete as suggested above.
02-19-2013, 02:14 PM
#7
TECH Apprentice
Thread Starter
Here's a link to my build thread for my 67 LS1 swap, I think it address every question you just asked. http://www.lateral-g.net/forums/show...=16169&page=13
But in short, 90k is nothing, keep the factory pcm and harness, plug everything in, power to the red wire, and ign to the pink wire and fuel pump relays. Did you by chance get the relay box under the hood? that makes it even easier. No tune, wait till you put a cam in it, but you will have the get the VATS (anti theft) turned off in the computer and the emissions delete as suggested above.
But in short, 90k is nothing, keep the factory pcm and harness, plug everything in, power to the red wire, and ign to the pink wire and fuel pump relays. Did you by chance get the relay box under the hood? that makes it even easier. No tune, wait till you put a cam in it, but you will have the get the VATS (anti theft) turned off in the computer and the emissions delete as suggested above.
Trending Topics
02-19-2013, 06:56 PM
#9
TECH Apprentice
Thread Starter
Thanks Jake! I am subscribed to your thread as well. Great work on your project so far! I'm hoping you get that started up this summer as well. Are you sticking with the stock GM computer/harness also?
02-19-2013, 09:00 PM
#10
$1500 - $1800 is high for a harness, PCM and dyno tune. We have a harness for that application, brand new for $499. PCM with tune for $200. I agree with previous post that dyno tune should only be necessary once you put the cam in.
Jon
PSI
Jon
PSI
__________________

Your Source for LSX Conversion Parts!
www.psiconversion.com
Ebay Store
Facebook/psiconversion
Instagram/psiconversion
'Dont Let EFI Pass You By!'
Your Source for LSX Conversion Parts!
www.psiconversion.com
Ebay Store
Facebook/psiconversion
Instagram/psiconversion
'Dont Let EFI Pass You By!'
02-22-2013, 06:37 AM
#11
TECH Fanatic

Join Date: Nov 2010
Posts: 1,679
Likes: 0
Received 0 Likes
on
0 Posts
What are your plans for the car, if your setting it up and it will be done I would go with psi or some aftermarket harness, if your going to be looking at adding performance stuff, ie cam shaft,blower , or other u might wana look at Holley efi with it self learn fuel tables!!
02-22-2013, 11:40 AM
#12
TECH Apprentice
Thread Starter
What are your plans for the car, if your setting it up and it will be done I would go with psi or some aftermarket harness, if your going to be looking at adding performance stuff, ie cam shaft,blower , or other u might wana look at Holley efi with it self learn fuel tables!!
 02-22-2013, 12:21 PM
#13
Looking good Daniel. I have been waiting for your thread and glad you decided to start one. That is pretty cool about being the mule for Doug Thorley's headers. Did that score you a good deal on a set? I am subscribed so now I'll be watching as you move forward. Keep up the good work.
02-22-2013, 12:48 PM
#14
TECH Apprentice
Thread Starter
Looking good Daniel. I have been waiting for your thread and glad you decided to start one. That is pretty cool about being the mule for Doug Thorley's headers. Did that score you a good deal on a set? I am subscribed so now I'll be watching as you move forward. Keep up the good work.
02-22-2013, 04:06 PM
#15

Congrats, looks like your making some good progress on this project. Could you do us fellow swappers a favor and answer some typical questions regarding your parts combination thus far? This info will give us all an indication of what to expect from the general fitment of these new headers. Since all headers are prototyped with the eng/trans located in a particular location and with a distinct group of components in place, what are/is:
1.)the frame stands used on your car, short and wide or tall and narrow? 2.)the oil pan used on your car (and did you notch the crossmember for
clearance?)
3.)the eng/trans inclination angle used in the mock-up
4.)the trans crossmember that was used, if any
5.)the distance between your passenger side cylinder head and the firewall
6.)the distance your collectors hang below the subframe (picture would be
great on this one as ground clearance is critical to almost everybody).
There's been so many of these swaps done and documented now (I've done a few my self)that I (and others) can tell from your answers to just these few questions whether these headers would be a good fit for our projects and help to build the knowledge base for this swap. Keep up the good work and thanks for sharing your project.
Todd
02-22-2013, 06:03 PM
#16
TECH Apprentice
Thread Starter
Congrats, looks like your making some good progress on this project. Could you do us fellow swappers a favor and answer some typical questions regarding your parts combination thus far? This info will give us all an indication of what to expect from the general fitment of these new headers. Since all headers are prototyped with the eng/trans located in a particular location and with a distinct group of components in place, what are/is:
1.)the frame stands used on your car, short and wide or tall and narrow? 2.)the oil pan used on your car (and did you notch the crossmember for
clearance?)
3.)the eng/trans inclination angle used in the mock-up
4.)the trans crossmember that was used, if any
5.)the distance between your passenger side cylinder head and the firewall
6.)the distance your collectors hang below the subframe (picture would be
great on this one as ground clearance is critical to almost everybody).
There's been so many of these swaps done and documented now (I've done a few my self)that I (and others) can tell from your answers to just these few questions whether these headers would be a good fit for our projects and help to build the knowledge base for this swap. Keep up the good work and thanks for sharing your project.
Todd
1.)the frame stands used on your car, short and wide or tall and narrow? 2.)the oil pan used on your car (and did you notch the crossmember for
clearance?)
3.)the eng/trans inclination angle used in the mock-up
4.)the trans crossmember that was used, if any
5.)the distance between your passenger side cylinder head and the firewall
6.)the distance your collectors hang below the subframe (picture would be
great on this one as ground clearance is critical to almost everybody).
There's been so many of these swaps done and documented now (I've done a few my self)that I (and others) can tell from your answers to just these few questions whether these headers would be a good fit for our projects and help to build the knowledge base for this swap. Keep up the good work and thanks for sharing your project.
Todd
1.)the frame stands used on your car, short and wide or tall and narrow?
Frame stands are standard small block, Tall/Narrow stands as described by Mr. Pozzi here:
http://www.pozziracing.com/camaro_engine.htm
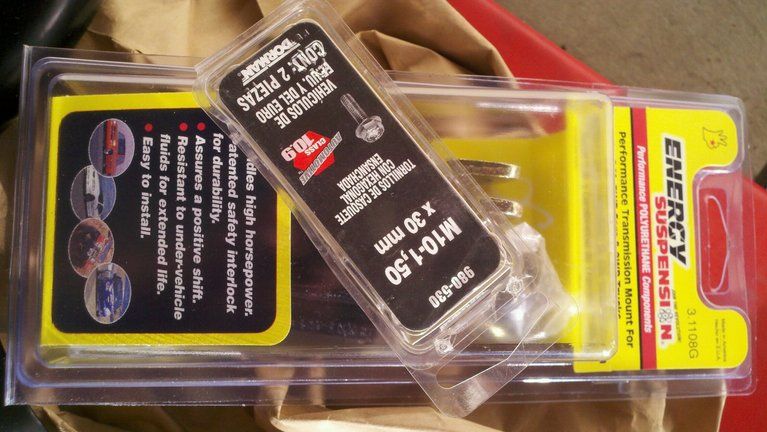
Motor mounts are Energy suspension motor mount (3.1114G) and I DID use the metal torque plate, some guys do not.
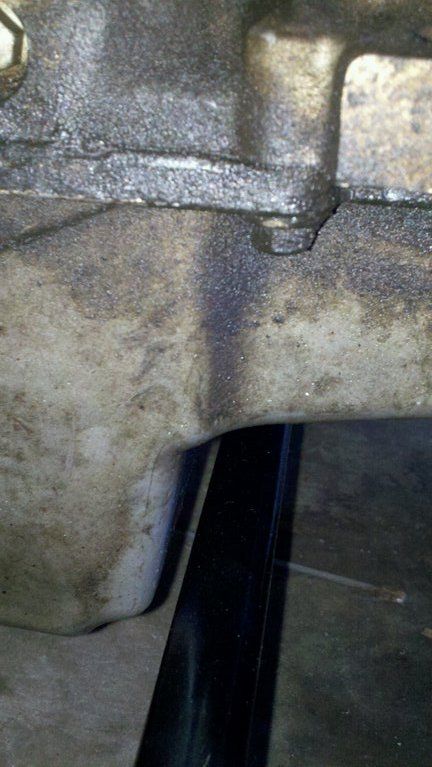
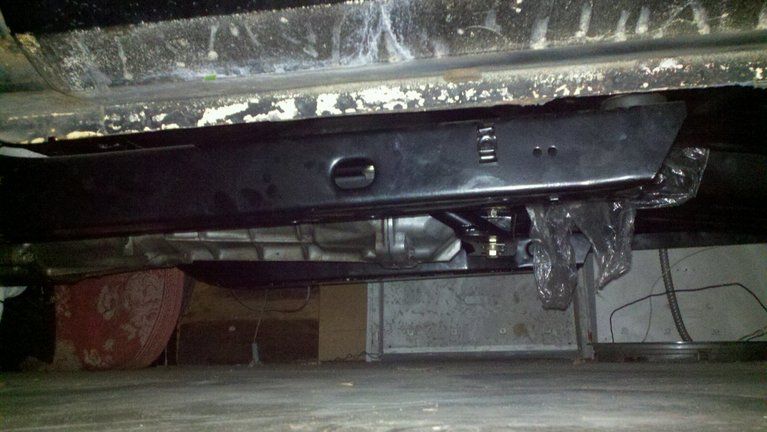
2.)the oil pan used on your car (and did you notch the crossmember for
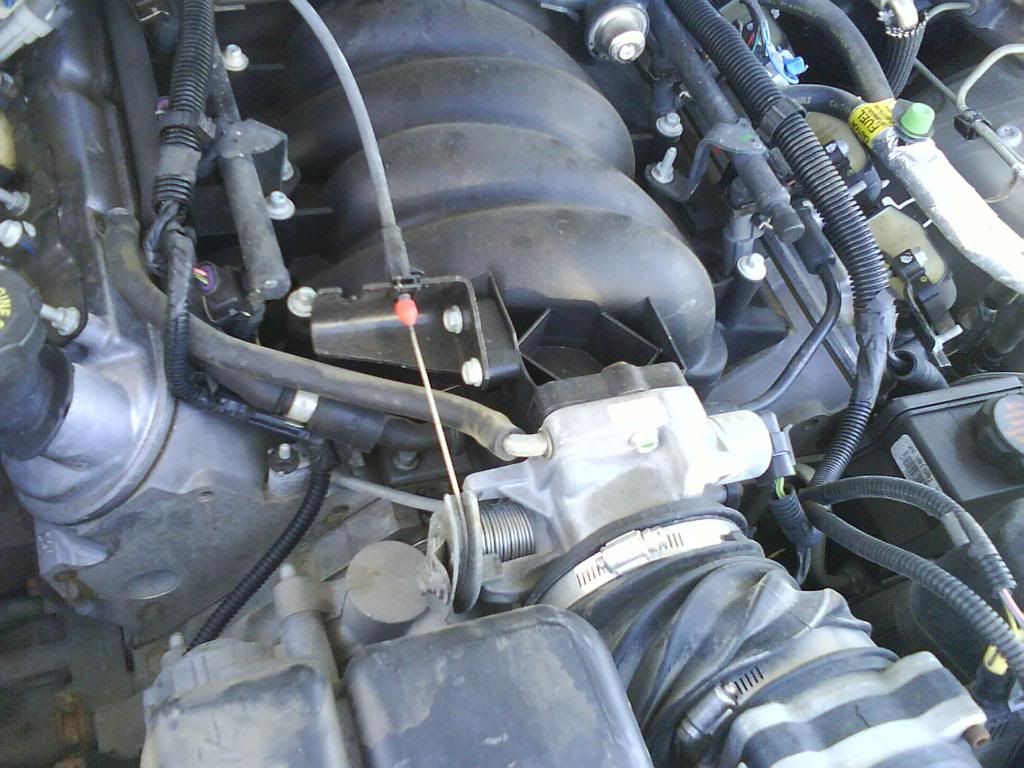
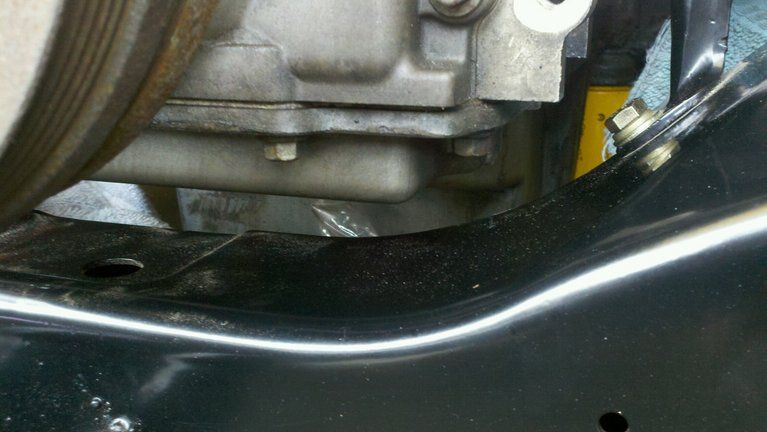
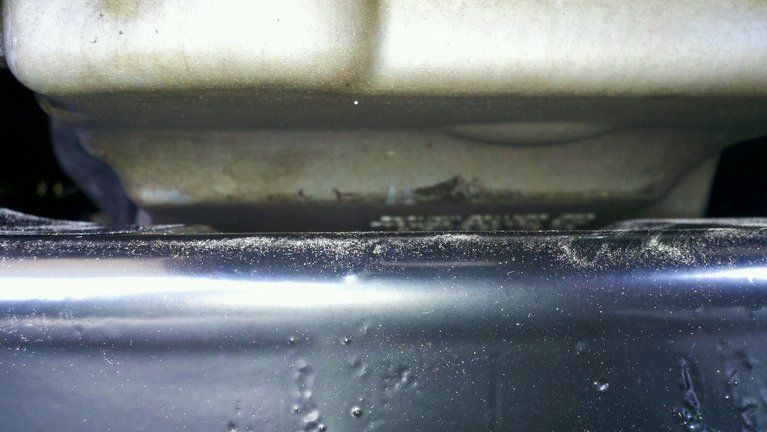
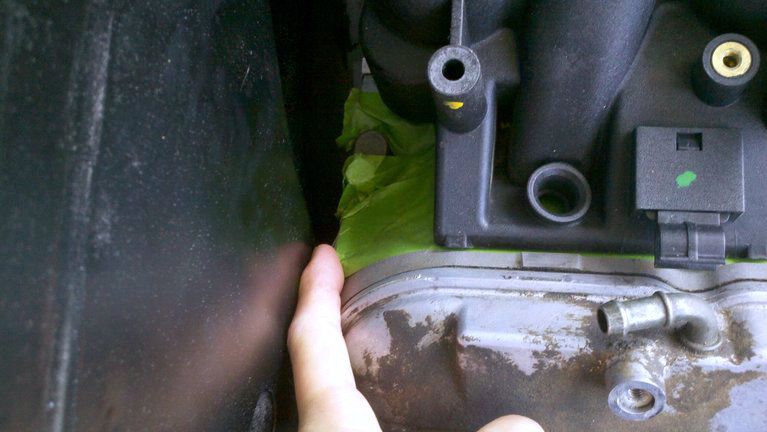
clearance?) I tried to "get away" with using the stock F body pan that came with my engine but in the end I am going to get the Mast oil pan for my application (have not ordered it yet, currently the Fbody pan is set and linkage barely clears)
Shots with Fbody pan clearance:

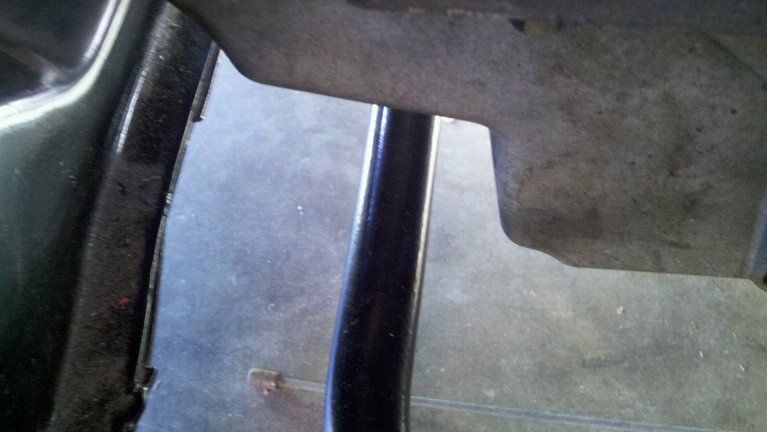
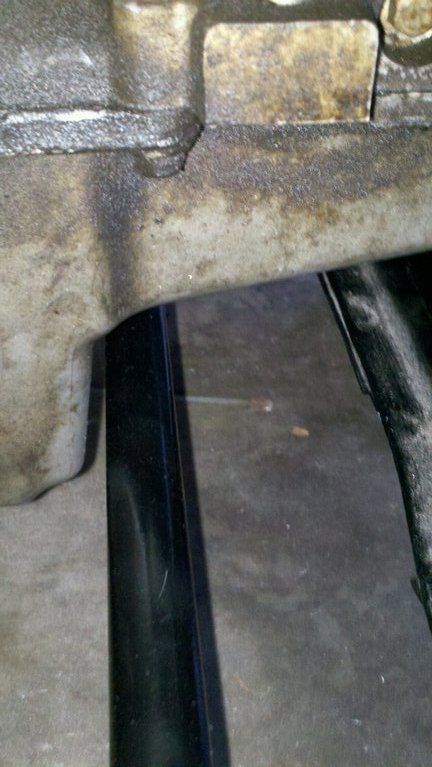
Linkage barely touches lock to lock. Also, keep in mind that I am using 67 idler arm which is slightly longer and keeps the center link more parallel to the crossmember as opposed to the 68/69 idlers that cause the centerlink to be at a slight angle away from the crossmember.
Shots of oil pan to crossmember clearance:
3.)the eng/trans inclination angle used in the mock-up
Engine/Trans is at approximately 3 degrees.
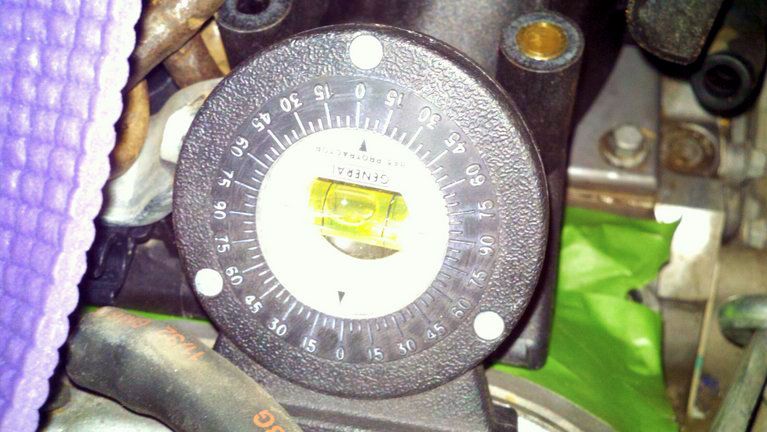
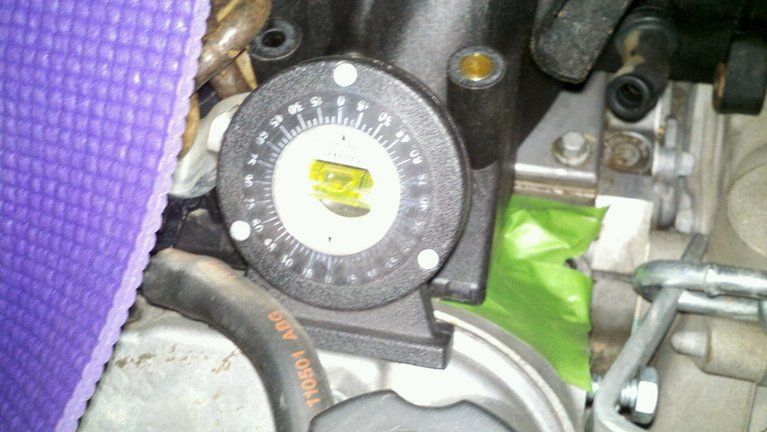
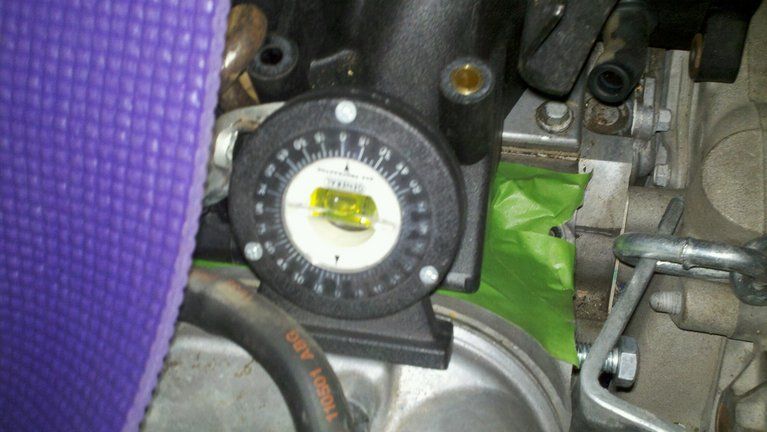
Bad photos, I will try to update later.
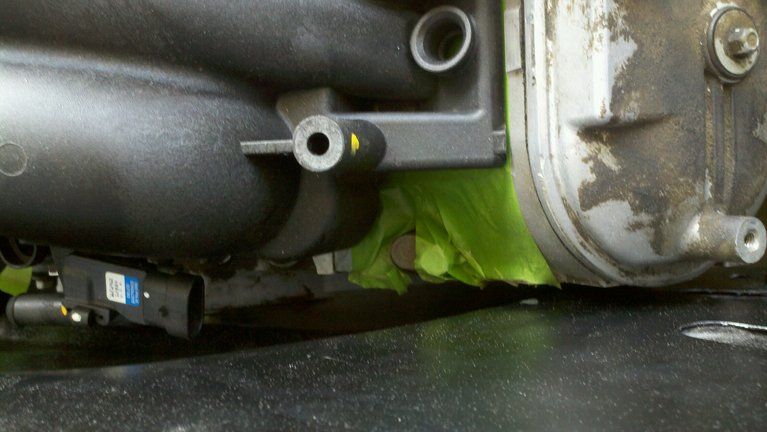
4.)the trans crossmember that was used, if any
I decided to use the ATS adjustable crossmember because I knew I was going to move the engine back and forth for fitment and did not want to mess with mocking up a new one or drilling holes in my subframe since it was already powder coated (note to self, mock parts before powdercoat/paint, lol)
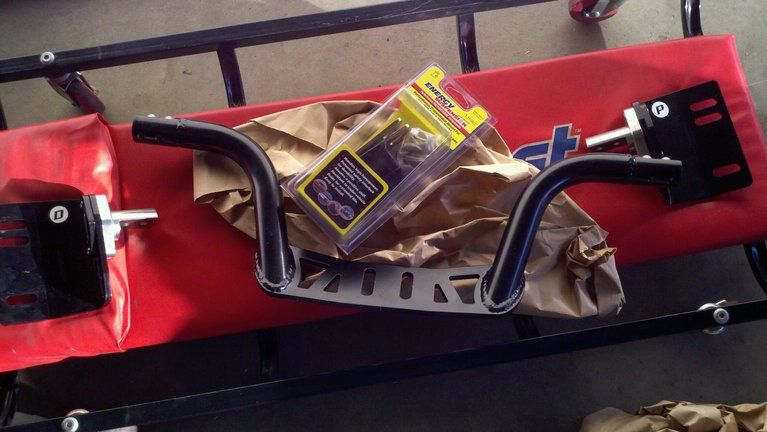
trans mount/bolts
5.)the distance between your passenger side cylinder head and the firewall
Passenger side head to firewall is approximately 1" or slightly more. I will try to get pics with tape when I get home.
6.)the distance your collectors hang below the subframe (picture would be
great on this one as ground clearance is critical to almost everybody).
I don't have this shot yet, I am awaiting my headers to arrive once they go into production. Currently Nick and Jaime are finishing up the Jig and will get my set sent soon.
NOW:
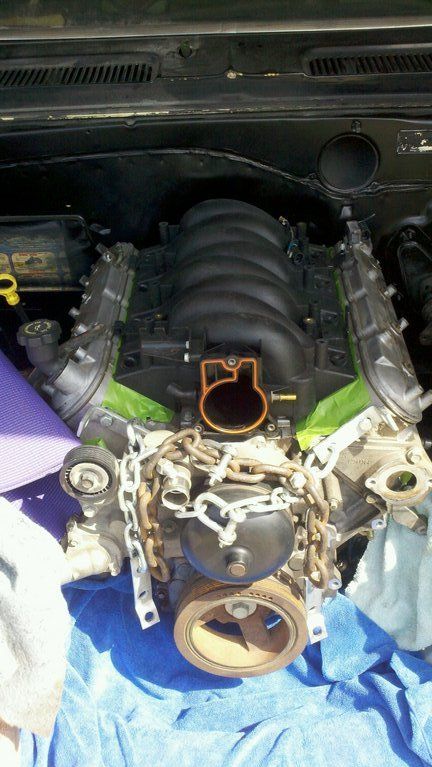
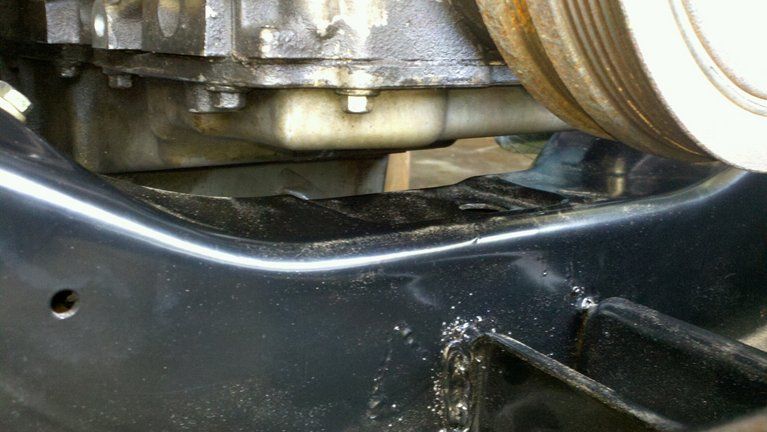
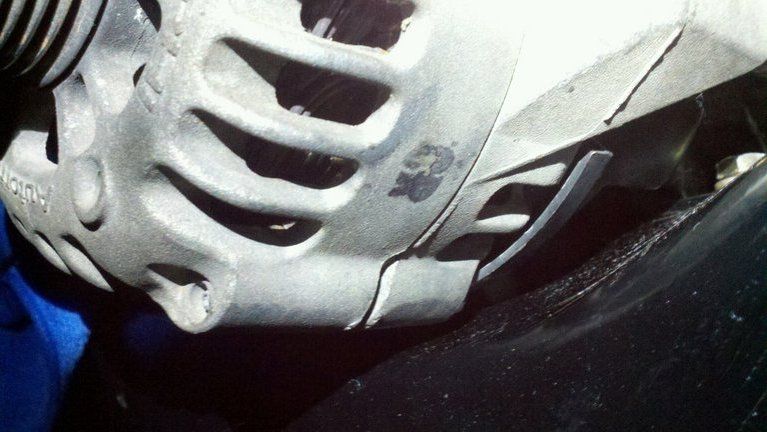
Some problems I encountered with the 12611 Hooker 1 3/8 setback plates were engine close to firewall on passenger side but I would have been okay with that.
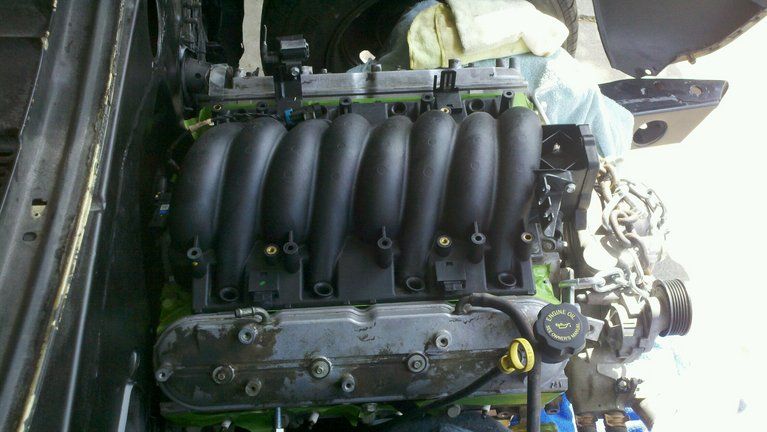
Problem with this was that my alternator with Fbody accessories was hitting the crossmember. Also, there was issue with the T56 transmission hitting the trans tunnel right behind the bellhousing. And this was WITHOUT the extra metal torque plates on the motor mounts.
I solved this by using the standard 1" set back plates similar to carshop, pertronix, dingo and others and the torque plates:
The Doug Thorley headers are very versatile in the sense that you can use different engine locations fore or aft and still have room around the steering box. I will ask Nick or Jaime to chime in here more regarding that header and fitment and even provide us with pics of the headers mocked up on the car:-) If you have any more questions do let me know.
Last edited by MisterD; 02-22-2013 at 06:13 PM.
02-22-2013, 09:09 PM
#17
I really appreciate the thorough answers and the pics...is the last picture of the alternator the position with the Hooker plates or after you moved it forward with the new plates?
Much appreciated,
Todd
Much appreciated,
Todd
02-24-2013, 09:41 PM
#18
TECH Apprentice
Thread Starter
02-26-2013, 03:26 PM
#19
Launching!

Join Date: Jun 2010
Posts: 231
Likes: 0
Received 0 Likes
on
0 Posts
What up MisterD, I just ran into this thread. Nice to see that you finally got a thread going man. The car looks good. I would love to see the car in person some time. Im trying to get mine done before June but will see.
Keep up the work man and maybe we can meet up soon.
Keep up the work man and maybe we can meet up soon.
02-26-2013, 03:30 PM
#20
TECH Apprentice
Thread Starter
Hey Sako! Great to hear from you and glad you found the thread! I hope you, your wife and son are all doing well. Yes, stop by or give me a call any time to check out the project. I am waiting on a new vaporworx tank so that will get me started on the back half of the car, install hotchkis springs, run fuel lines, new moser going in, brakes etc. Should be fun:-) All this while coaching my daughter's baseball team, MUST FIND MORE TIME.... Hit me up sometime.