
69 Chevelle - LS1 T56 Swap
 04-05-2013, 03:48 PM
#1
On The Tree
Thread Starter
iTrader: (4)

Join Date: Dec 2011
Location: San Francisco
Posts: 134
Likes: 0
Received 0 Likes
on
0 Posts
CHANGE OF DIRECTION - LS1 swap with a T56 now  can never make up our minds!
Hey all, so i started off debating using my 454 or doing an LS swap in my 69 chevelle. Ended up selling the 454, now i have a 1969 396 block (bore to 402) that i wanted to mate with a TCI 700r4 for the extra gear, better daily driving, mpg and freeway.
now im back at it again, debating the LS swap. can anyone direct me to a good thread on a 69 LS Swap? what trans would be best with the LS or can i use a 700r4 with an LS engine?
Im thinkin LS1 or LS2 but dont know much about this stuff. not sure what kinda money that will run or how cheap i could do it nor do i know much about how much work it will be. I would like a powerful car, reliable, can be daily driver if i choose, smooth ride for long or short distance, and good mpg.
please let me know.
can never make up our minds!Hey all, so i started off debating using my 454 or doing an LS swap in my 69 chevelle. Ended up selling the 454, now i have a 1969 396 block (bore to 402) that i wanted to mate with a TCI 700r4 for the extra gear, better daily driving, mpg and freeway.
now im back at it again, debating the LS swap. can anyone direct me to a good thread on a 69 LS Swap? what trans would be best with the LS or can i use a 700r4 with an LS engine?
Im thinkin LS1 or LS2 but dont know much about this stuff. not sure what kinda money that will run or how cheap i could do it nor do i know much about how much work it will be. I would like a powerful car, reliable, can be daily driver if i choose, smooth ride for long or short distance, and good mpg.
please let me know.
Last edited by swandude805; 04-09-2015 at 02:49 PM.
 04-05-2013, 03:56 PM
#2
On The Tree
Thread Starter
iTrader: (4)
Join Date: Dec 2011
Location: San Francisco
Posts: 134
Likes: 0
Received 0 Likes
on
0 Posts
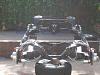
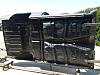
Here is what im workin with. idk if maybe it would just be better for me to use the 396 and do some sort of work to it to make it the quality im lookin for. is there a set up that will get me better mpg or make it similar to what the LS performs like. I have seen bolt up EFI carbs/manifolds. is this somethin to look into?
its in for paint right now...
this link is the build thread on TC http://www.chevelles.com/forums/show...t=dream&page=4

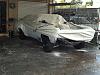
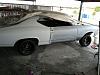
its in for paint right now...
this link is the build thread on TC http://www.chevelles.com/forums/show...t=dream&page=4


 04-05-2013, 04:28 PM
#3

Do a search or check here through the a-body swap guides.
https://ls1tech.com/forums/conversio...2-gm-body.html
If you're looking for a 69' specific here is a nice build thread you can read.
https://ls1tech.com/forums/conversio...velle-ls3.html
Yes, you can use your 700r4 with a LS motor. Here's a thread that talks about it.
https://ls1tech.com/forums/conversio...questions.html
For an understanding of budget here is a thread I believe most have read and used.
https://ls1tech.com/forums/conversio...de-1500-a.html
The search engine on this site isn't the greatest but still very helpful. This site will be a great help with most questions. Just take your time and figure our what your goals are for the car. It can be done for cheap but like most will tell you "you get what you pay for."
04-05-2013, 04:48 PM
#4
There are many great swap threads to research on.
What are your plans for Output power wise?.. that might help with the Transmission question on what to use.. I would go with a newer 4L60/80e trans.. that way you can tune them as you like with the EFI. You can use the 700R4, but you have to rig up the TV cable. Research as others have already done this.
if you plan on putting any good amount of HP/TQ.. I would go with a 4L80e. But a well built 4L60e or 700r4 will handle the power ok.
As far as a EFI.. OEM is good, or you can go aftermarket..Its really your choice.. Keep us posted on the build.
BC
04-07-2013, 08:48 AM
#5
TECH Fanatic
I agree with bczee, the goal of the project will dictate the necessary combination. Just be sure to research a menu of parts, as many don't play well with others.
08-13-2013, 11:06 PM
#6
On The Tree
Thread Starter
iTrader: (4)
Join Date: Dec 2011
Location: San Francisco
Posts: 134
Likes: 0
Received 0 Likes
on
0 Posts
hey all, this is going to be my build thread for the LS swap now, the car build is already on the link i posted from team chevelle. so here is the update...
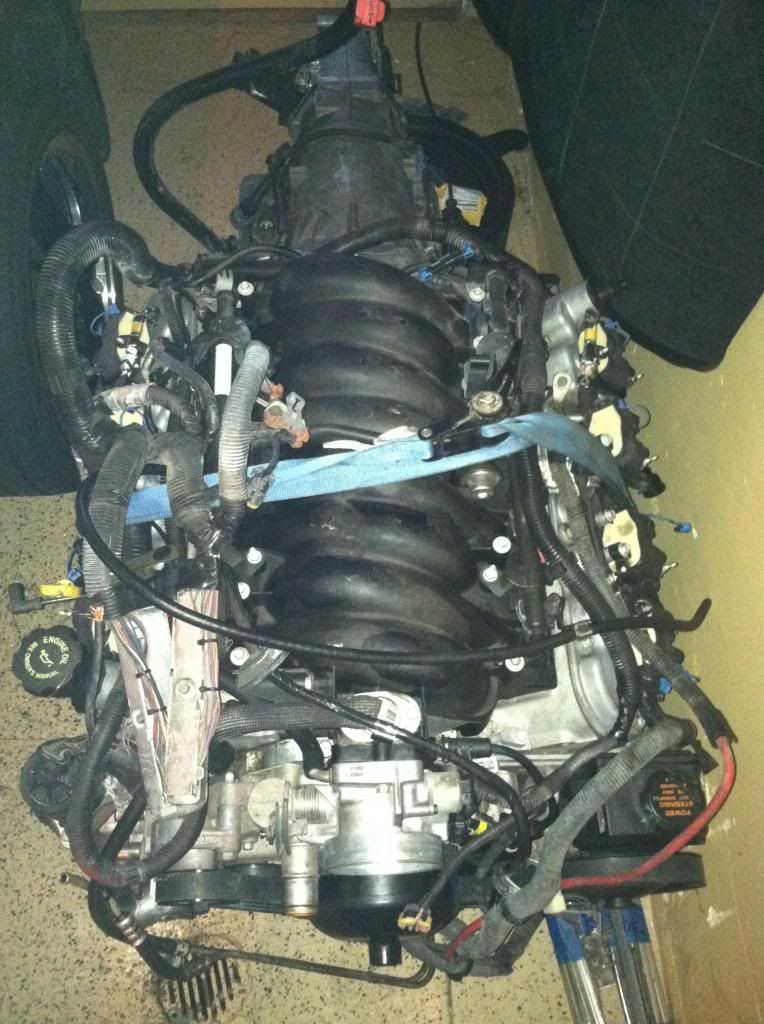
I pulled the trigger, sold my 396 for 2500, bought a 68 chevelle for 3k, got it running and sold it for 6500. a lot to follow right? so with that 6500 i paid the last bit of my paint job on the Chevelle so it should be out in October. I had some cash to spare so i picked up a 98 Trans Am engine with 72k miles on it for $2800 delivered to my door. it came with everything from the radiator and fans back to the trans (no exhaust manifolds).
I hope to make 400+hp if i can...lemme kno if it sounds possible with what i throw up here. Let me know your advice and tips on what im purchasing and doing as i go because im new to all this and i dont know the best about how things will perform or be compatible with each other. Thanks!
This is a complete and stock 98 T/A LS1 (stock 806 heads) with a 4l60e. I have already started the upgrades. here is what i picked up...
$300-LS6 intake -on CL, low miles, w/ LS6 coolant lines and plugs for the LS1 lines
$500-2003 Z06 243 heads with the stock springs (68k miles)
$65-refurbished unused LS6 ported oil pump
Next purchases:
>Texas Speed Cam Package:
-228r 112or114lsa
-PRC 1518 .650" Single Beehive Springs
-will the stock rockers be fine with this set up?
-hardened 7.400 pushrods,
-which cam should i go with for a car i plan to drive it a lot?
>LS2 Timing Chain
-should i replace the gears also, if so which ones are good?
>LS2 lifter trays and LS7 Lifters
>Dougs Swap Headers
any suggestions are throttle body and other bolt ons? or just use the stock LS1?
Trending Topics
08-14-2013, 09:10 AM
#8
I suppose there is something to be said for getting everything at once but $2800 for that combo and $500 for heads sounds pretty high, unless it's only got 10k miles on it or something like that. A sunk cost at this point though, and if you heard it run it's probably worth it.
The 98 model was an odd year in terms of something, the harness or ecm pins colors I think? The exact thing that is different escapes me but I know I've read several times that there was something different about it than later years. Maybe it's the block, I don't know. Might be worth checking into; whether I'm even close to right or completely wrong I'm sure someone will chime in (the same applies to everything below as well).
-Stock rockers should be fine.
-Timing set should come with a gear. You just want to make sure your cam matches the gear in terms of number of bolts and that it matches the crank reluctor wheel. LS1s were 24X crank, 1X, 3 bolt cams I think.
-An off-the-shelf cam grind such as one that pops up all the time in the classifieds would work, TR224 is a popular one. I had one in an ls1 and liked it. Unlike old SBC/BBC stuff there reason not to buy a used cam with these motors (unless it's simply been damaged or you want a custom grind).
-Stock tb is probably fine as well. You could spend more but what would the benefit be in this situation? I only bought a Fast because I couldn't use a DBW with my harness.
-Only other bolt on that springs to mind would be a trans cooler and a catch can, and neither of those are musts.
If your chevelle is a front disc car, go ahead and relocate the frame-mounted brake prop valve or your headers will probably hit it.
Might as well get arp head bolts as well, the factory stuff is torque to yield. If you pull a head two or three times you've broken even.
10-07-2013, 04:15 PM
#9
On The Tree
Thread Starter
iTrader: (4)
Join Date: Dec 2011
Location: San Francisco
Posts: 134
Likes: 0
Received 0 Likes
on
0 Posts
a small update...
Got the engine torn down, heads off, harness off, pan etc down to just the short block.... ordered the following upgrades which just came in so stay tuned for the images:
-1998 70k miles, LS1/4L60E (complete with extras delivered)- $2800
-LS6 intake and coolant lines (replacing the LS1) - $300
-LS6 03 Vette 243 cylinder heads (replacing the LS1 806's) - $500
-TSP (Texas Speed & Performance) LS7 lifter & LS2 trays - $190
-TSP Cam Package [TSP 228r 112 lsa/PRC 1518 .650 single beehive springs/7.4 hardened chomoly pushrods] - $640
-Hubbard LS6 refurbished ported oil pump - $90
-TSP LS2 chain & gears - $110
-TSP Cam retainer
Total to date is about - $5k
Last edited by swandude805; 10-07-2013 at 04:18 PM. Reason: none of the links to the pics posted

 10-07-2013, 10:39 PM
#11
On The Tree
Thread Starter
iTrader: (4)
Join Date: Dec 2011
Location: San Francisco
Posts: 134
Likes: 0
Received 0 Likes
on
0 Posts
So in my first few posts hopefully you saw the link to the build thread on Chevelles.com for the story line of my build. Been doing it alone at the house for the most part and now in two locations. Some at the fam�s place in Central Ca which is where the car is now being painted (has only been touched by another mechanic for body/paint) and the engine is being worked on by me at my place in the Bay Area. If you saw my selection of tools you may laugh but then feel bad haha
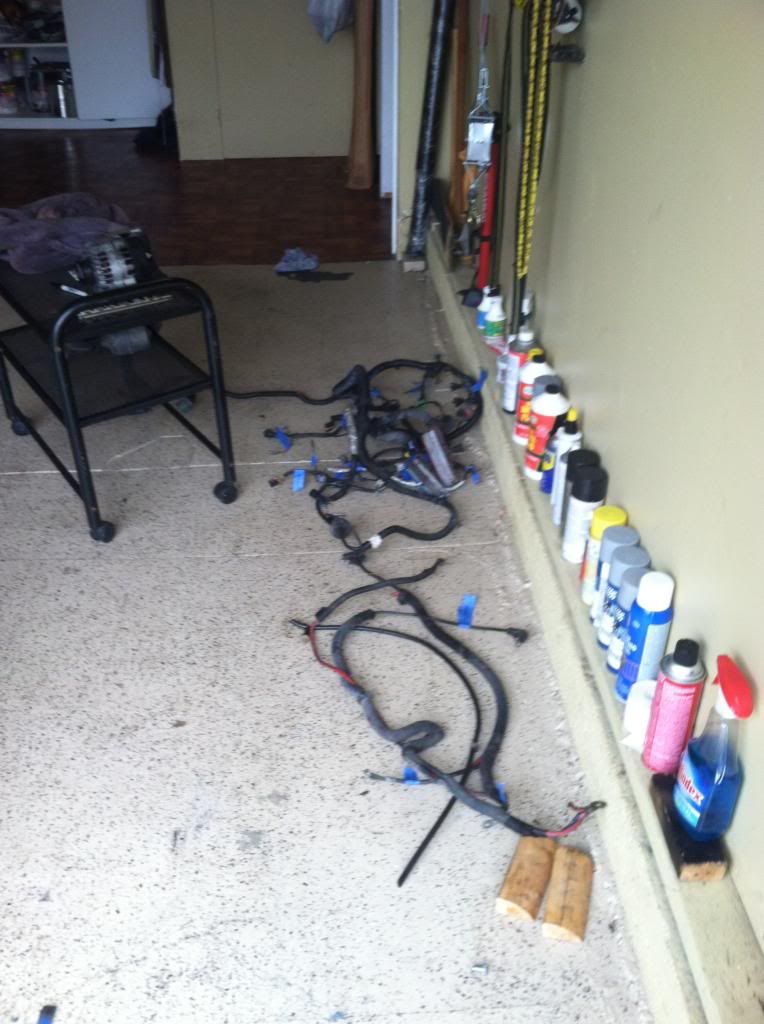
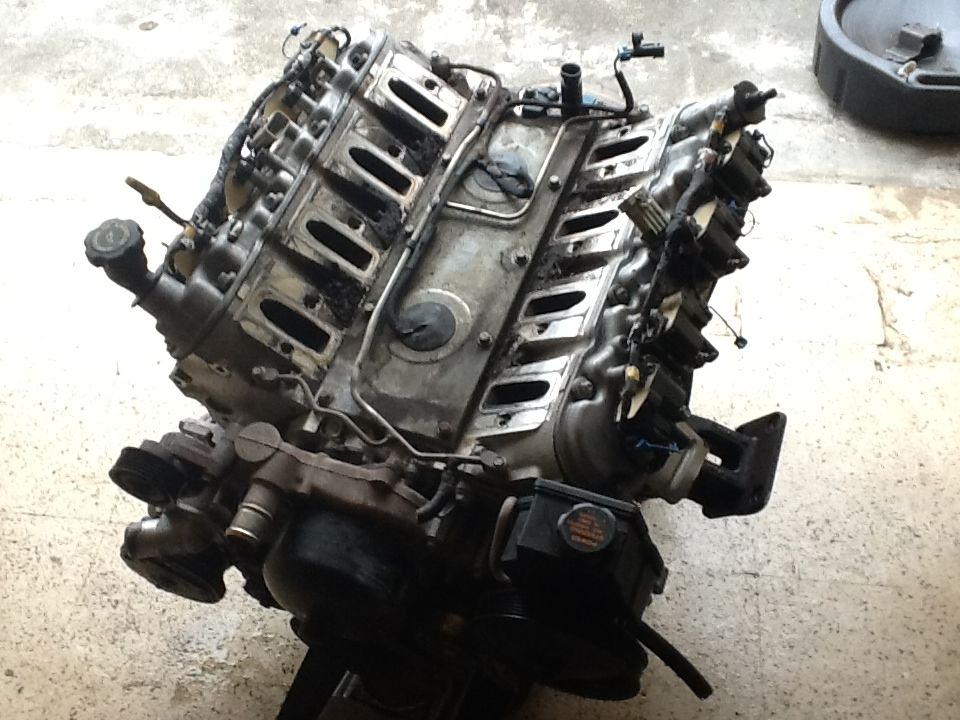
The first steps I took with this LS set up was to take all the wiring harness off so that I could see what I was really working with. My plan is to relocate the coils and try to clean up as much wiring as possible. I have been debating using the stock harness which I know works or getting the $$$ extended painless style harness so I can also reposition/hide the computer. Still work to be done there but that�s down the road so since I am undecided I have labeled my harness up and tossed it aside.
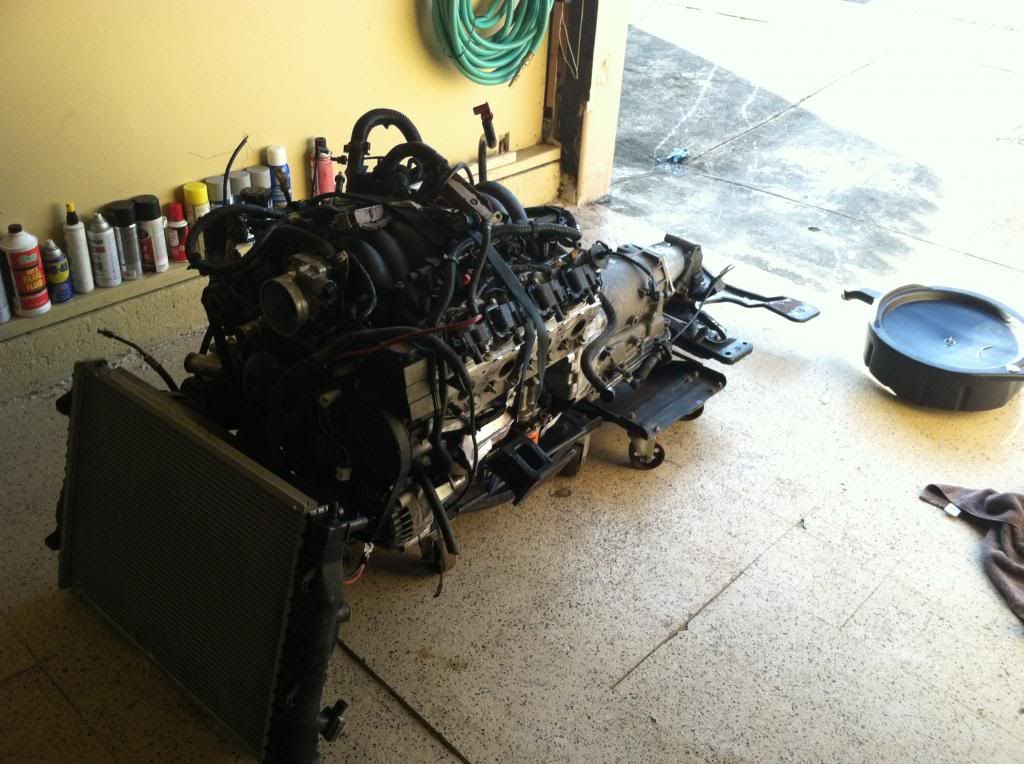
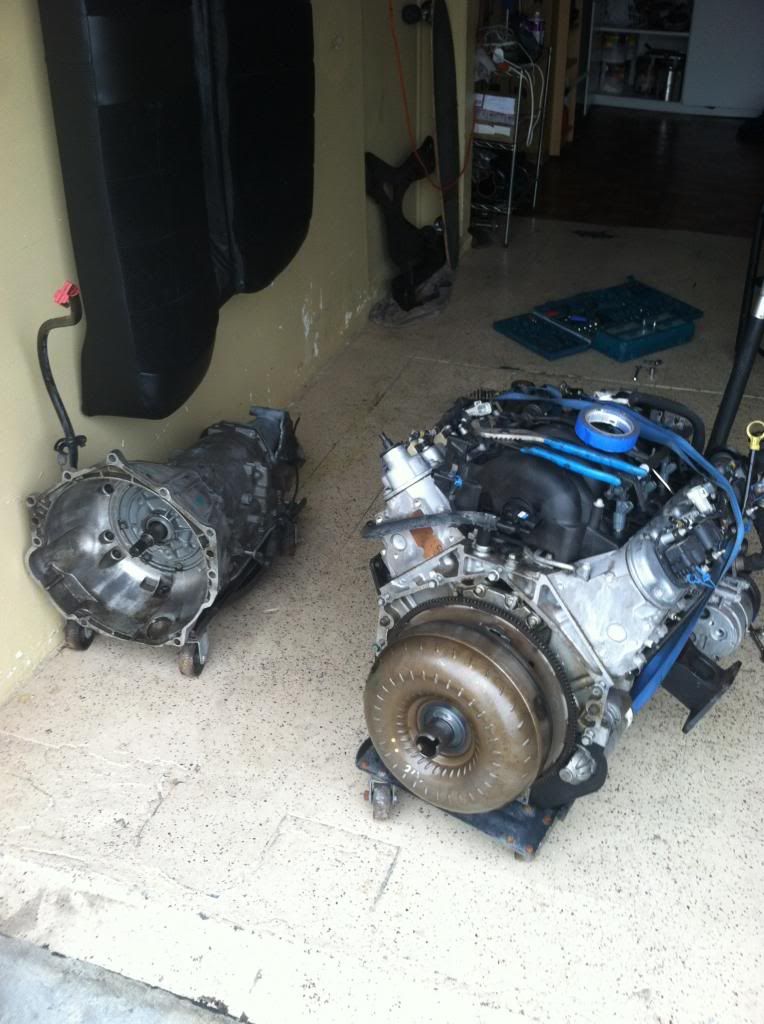
Then I un-married the trans and engine so it was easier to work with. When I moved out to go to college 6 years ago I left my tools, stands, hoist at home in Central CA so now I make due in the Bay Area with what I can occasionally borrowing tools when I go back to see the fam.
Once I got the harness off I removed the fuel lines and injectors etc. This is where I started to bag and label things because all of the small bolts and clips. WHEN YOUR POPPING OFF YOUR INJECTORS MAKE SURE YOUR FLOOR IS CLEAN SO YOU DON�T LOSE THE CLIPS AND PUT THEM AWAY, I LEFT MINE IN A PILE WHICH I LATER STEPPED ON AND SPENT THE DAY (LUCKILY) WITH A CLIP WEDGED IN THE BOTTOM OF MY SHOE (LOST NONE!). Intake and fuel rails removed.
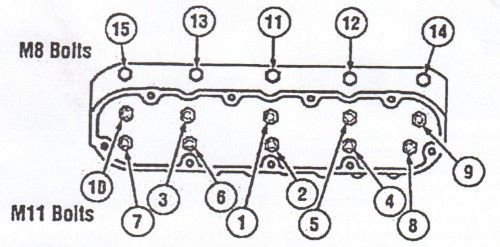
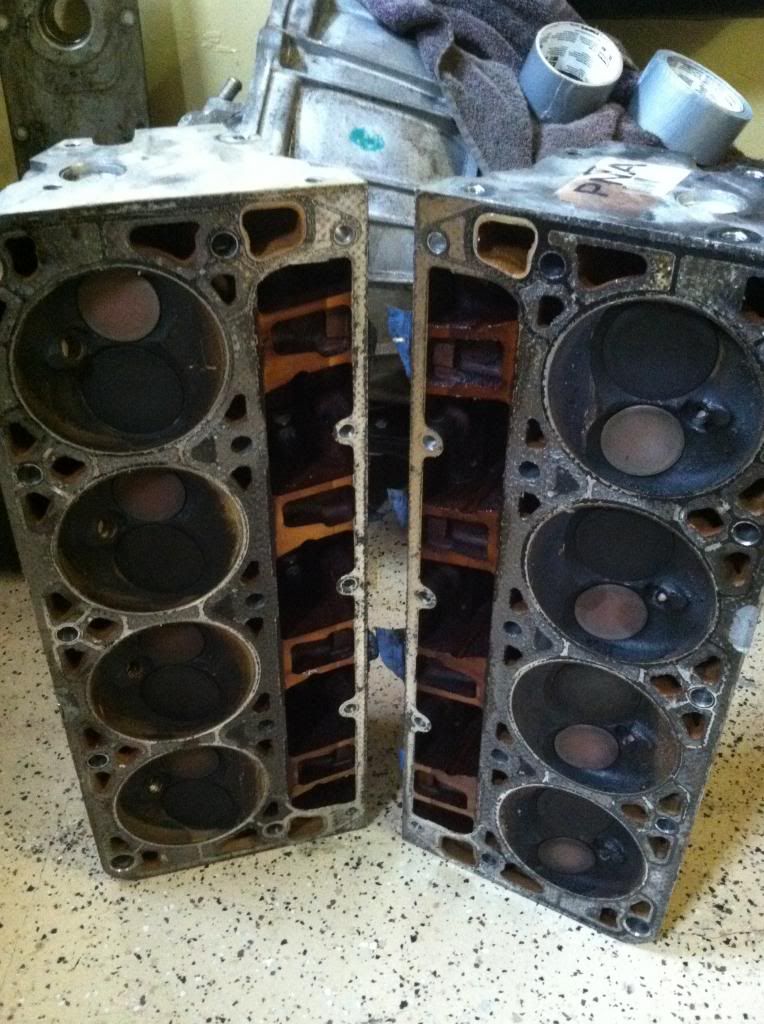
Next I removed the coil packs and valve covers each separately since I will be upgrading to 243 heads and relocating the coil packs. I also unbolted all the rockers keeping them in order to be re-used and boxed em up, took the pushrods out as well. Then I began to remove the heads. When doing this MAKE SURE YOU FOLLOW THE RIGHT PATTERN SO YOU DON�T DAMAGE ANYTHING. Here is the Head Bolt Removal Pattern I used.
This is what I found: (link to the convo about it) https://ls1tech.com/forums/conversio...ater-help.html
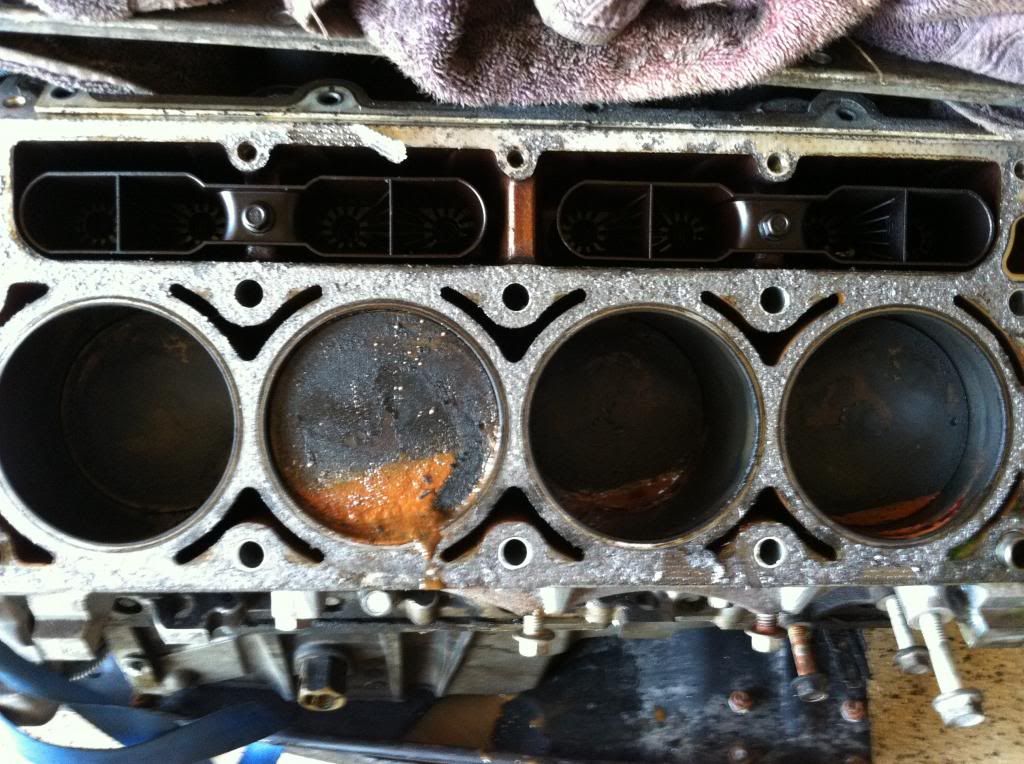
I basically decided that the piston top is probably harmless, the water was fine because there was not rust so it was probably from sitting and when I cleaned it all up it looked normal and the piston wall wasn�t bad enough and was only in cylinder 8 so im continuing on. (I feel like once I get it going it wont be long before ill be swapping the ls1/4l60e for some bigger turbo LSx with a t56 lol
Heads themselves didn�t look too bad
The first steps I took with this LS set up was to take all the wiring harness off so that I could see what I was really working with. My plan is to relocate the coils and try to clean up as much wiring as possible. I have been debating using the stock harness which I know works or getting the $$$ extended painless style harness so I can also reposition/hide the computer. Still work to be done there but that�s down the road so since I am undecided I have labeled my harness up and tossed it aside.

Then I un-married the trans and engine so it was easier to work with. When I moved out to go to college 6 years ago I left my tools, stands, hoist at home in Central CA so now I make due in the Bay Area with what I can occasionally borrowing tools when I go back to see the fam.

Once I got the harness off I removed the fuel lines and injectors etc. This is where I started to bag and label things because all of the small bolts and clips. WHEN YOUR POPPING OFF YOUR INJECTORS MAKE SURE YOUR FLOOR IS CLEAN SO YOU DON�T LOSE THE CLIPS AND PUT THEM AWAY, I LEFT MINE IN A PILE WHICH I LATER STEPPED ON AND SPENT THE DAY (LUCKILY) WITH A CLIP WEDGED IN THE BOTTOM OF MY SHOE (LOST NONE!). Intake and fuel rails removed.

Next I removed the coil packs and valve covers each separately since I will be upgrading to 243 heads and relocating the coil packs. I also unbolted all the rockers keeping them in order to be re-used and boxed em up, took the pushrods out as well. Then I began to remove the heads. When doing this MAKE SURE YOU FOLLOW THE RIGHT PATTERN SO YOU DON�T DAMAGE ANYTHING. Here is the Head Bolt Removal Pattern I used.

This is what I found: (link to the convo about it) https://ls1tech.com/forums/conversio...ater-help.html

I basically decided that the piston top is probably harmless, the water was fine because there was not rust so it was probably from sitting and when I cleaned it all up it looked normal and the piston wall wasn�t bad enough and was only in cylinder 8 so im continuing on. (I feel like once I get it going it wont be long before ill be swapping the ls1/4l60e for some bigger turbo LSx with a t56 lol
Heads themselves didn�t look too bad
 10-07-2013, 11:26 PM
#12
On The Tree
Thread Starter
iTrader: (4)
Join Date: Dec 2011
Location: San Francisco
Posts: 134
Likes: 0
Received 0 Likes
on
0 Posts
NOTE: when taking off the intake/heads/valley cover etc. be very careful about how you clean it and move parts since there will probably be grease and dirt caked everywhere. Even though I was taking the oil pan off and swapping most of the internals anyways, I still was blocking all holes off and scraping as much crud off as I could in each step to keep it from getting into the next areas I was exposing.
Now I was required to get the torque converter off so I could mount it to a cheap $50 harbor freight engine stand that I could get rid of after since the nice one is back at the fams house. It was a paint buy I used a large ALAN WRENCH (idk why it was but it wasn’t fun). I put the wrench on the bolt head and against the block so that when I turned it, the wrench being against the block would keep the plate from moving. I didn’t take pics but could explain more later if needed. Anyway on the alan wrench I used a long socket extension on its end to extend its handle for leverage (if you can picture all this ill be amazed!) and it worked and came off. They will definitely be replaced with different bolts.
After I got the block down and was searching for parts on CL like the LS6 heads and intake and coolant lines, I was informed that the LS6 PCV valley cover conversion was basically necessary. So I removed the valley cover. Be careful cus my cover had some water around the knock sensors which weren’t too bad but I will be replacing anyways since I have it this far and probably replacing the knock sensor harness as well. Ill post pics later in the process when I get there. I didn’t know much about this at first and wasn’t taking many pictures but I followed the LS how to write up step by step and I think my write up would be identical. Follow the link from the step where he removes the knock sensor harness to the step where he finishes grinded the block. I didn’t not put my cover back on at this point.
http://www.ls1howto.com/?article=18
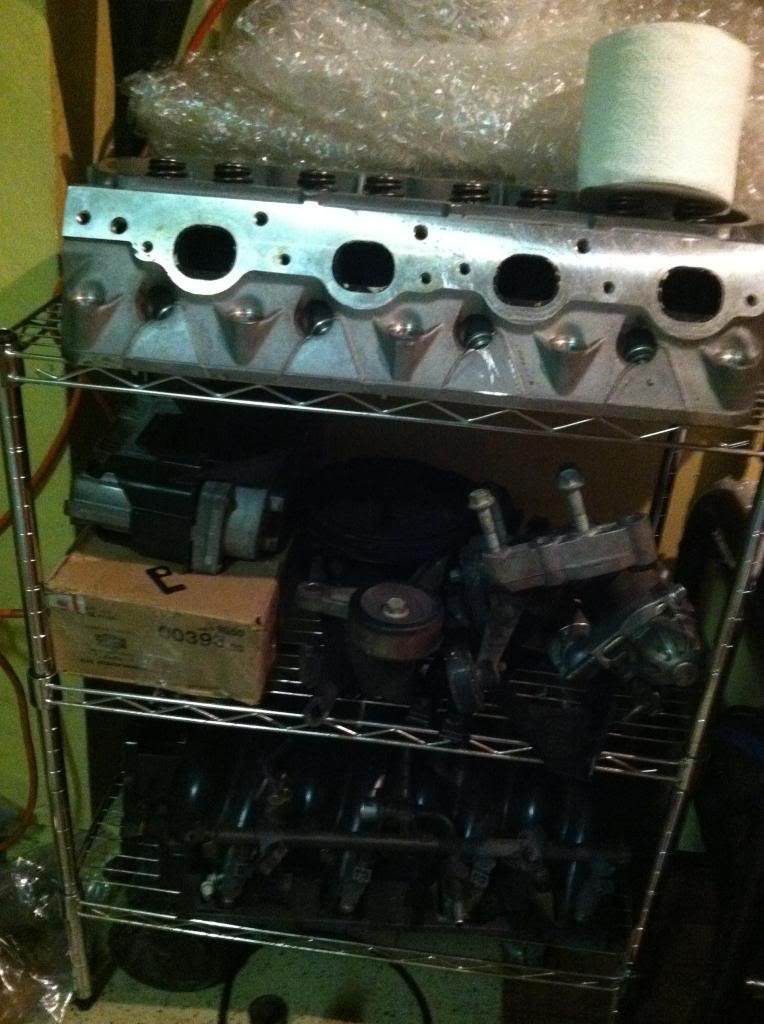
Now that the block was pretty bare on top, I moved to the pulleys and accessories which was pretty straight forward and kept the bolts labeled, together, or back in the block. The power steering pump was trick to get off but I was able to get a wrench in there. The pulleys are on the middle shelf and here are some 03 Z06 243 heads that were pretty clean I found on CL for $500 shipped on the top shelf. Also got the LS6 intake and coolant lines from CL for $300 which you will see on the bottom shelf.
Then I scraped the head gaskets and valley cover gaskets off gently. I also cleaned the pistons and cylinders which I will post pics of later. I used a RED/Maroon scotch pad scrubber and brake cleaner/ throttle body cleaner here. Don’t scrub to hard and be careful when your scrubber starts to wear down and flake of so that it doesn’t get all in the block. When I scraped the gaskets I was also holding my shop vac by my hand at all times. Sucks it up before it can fall anywhere. I also cleaned the block which came out clean enough that I debated painting it and dealing with possible chipped paint later but I wanted a fresh painted engine to start so I painted anyway. To clean the block I put a small wire brush on a dremmel for the small areas and used the scotch brite pad for the rest. Let it soak in oven cleaner then would hit it repeating this process until the grease was off. I then cleaned it all over and over with a clean towel and some rub. Forget what its called right now so I can look but its what body shops use to clean parts right before they paint them to get the chemicals and greases off. I made sure to tape things off as I went.
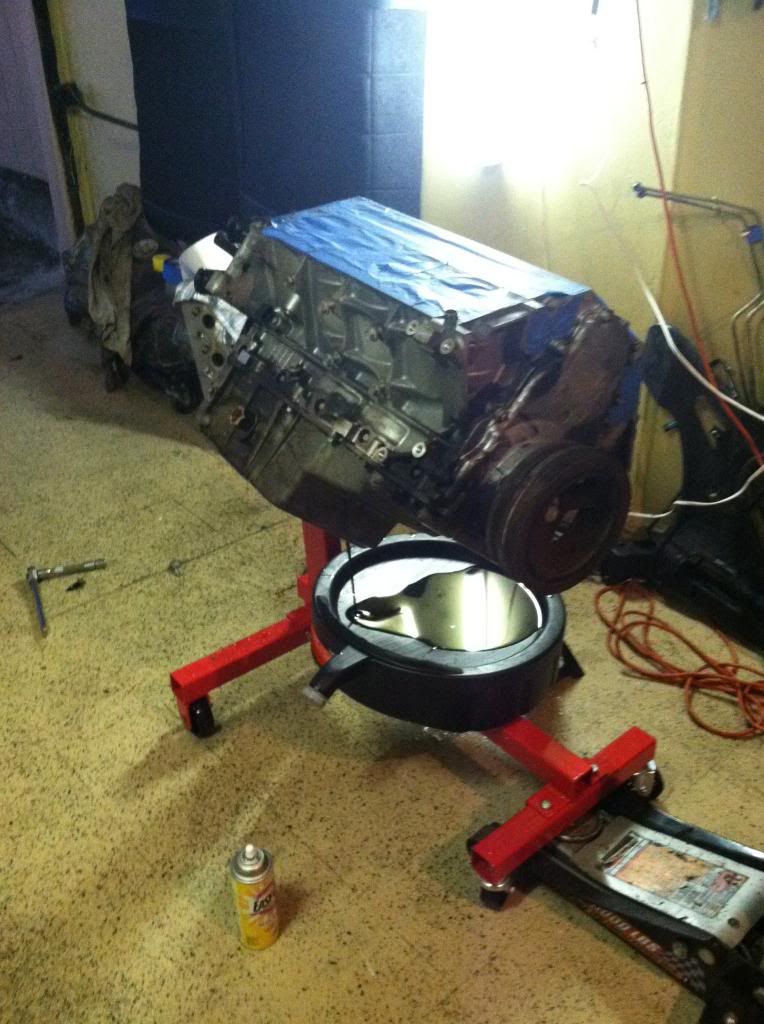
Now I was required to get the torque converter off so I could mount it to a cheap $50 harbor freight engine stand that I could get rid of after since the nice one is back at the fams house. It was a paint buy I used a large ALAN WRENCH (idk why it was but it wasn’t fun). I put the wrench on the bolt head and against the block so that when I turned it, the wrench being against the block would keep the plate from moving. I didn’t take pics but could explain more later if needed. Anyway on the alan wrench I used a long socket extension on its end to extend its handle for leverage (if you can picture all this ill be amazed!) and it worked and came off. They will definitely be replaced with different bolts.
After I got the block down and was searching for parts on CL like the LS6 heads and intake and coolant lines, I was informed that the LS6 PCV valley cover conversion was basically necessary. So I removed the valley cover. Be careful cus my cover had some water around the knock sensors which weren’t too bad but I will be replacing anyways since I have it this far and probably replacing the knock sensor harness as well. Ill post pics later in the process when I get there. I didn’t know much about this at first and wasn’t taking many pictures but I followed the LS how to write up step by step and I think my write up would be identical. Follow the link from the step where he removes the knock sensor harness to the step where he finishes grinded the block. I didn’t not put my cover back on at this point.
http://www.ls1howto.com/?article=18
Now that the block was pretty bare on top, I moved to the pulleys and accessories which was pretty straight forward and kept the bolts labeled, together, or back in the block. The power steering pump was trick to get off but I was able to get a wrench in there. The pulleys are on the middle shelf and here are some 03 Z06 243 heads that were pretty clean I found on CL for $500 shipped on the top shelf. Also got the LS6 intake and coolant lines from CL for $300 which you will see on the bottom shelf.

Then I scraped the head gaskets and valley cover gaskets off gently. I also cleaned the pistons and cylinders which I will post pics of later. I used a RED/Maroon scotch pad scrubber and brake cleaner/ throttle body cleaner here. Don’t scrub to hard and be careful when your scrubber starts to wear down and flake of so that it doesn’t get all in the block. When I scraped the gaskets I was also holding my shop vac by my hand at all times. Sucks it up before it can fall anywhere. I also cleaned the block which came out clean enough that I debated painting it and dealing with possible chipped paint later but I wanted a fresh painted engine to start so I painted anyway. To clean the block I put a small wire brush on a dremmel for the small areas and used the scotch brite pad for the rest. Let it soak in oven cleaner then would hit it repeating this process until the grease was off. I then cleaned it all over and over with a clean towel and some rub. Forget what its called right now so I can look but its what body shops use to clean parts right before they paint them to get the chemicals and greases off. I made sure to tape things off as I went.


Last edited by swandude805; 10-07-2013 at 11:28 PM. Reason: left info out
10-07-2013, 11:29 PM
#13
On The Tree
Thread Starter
iTrader: (4)
Join Date: Dec 2011
Location: San Francisco
Posts: 134
Likes: 0
Received 0 Likes
on
0 Posts
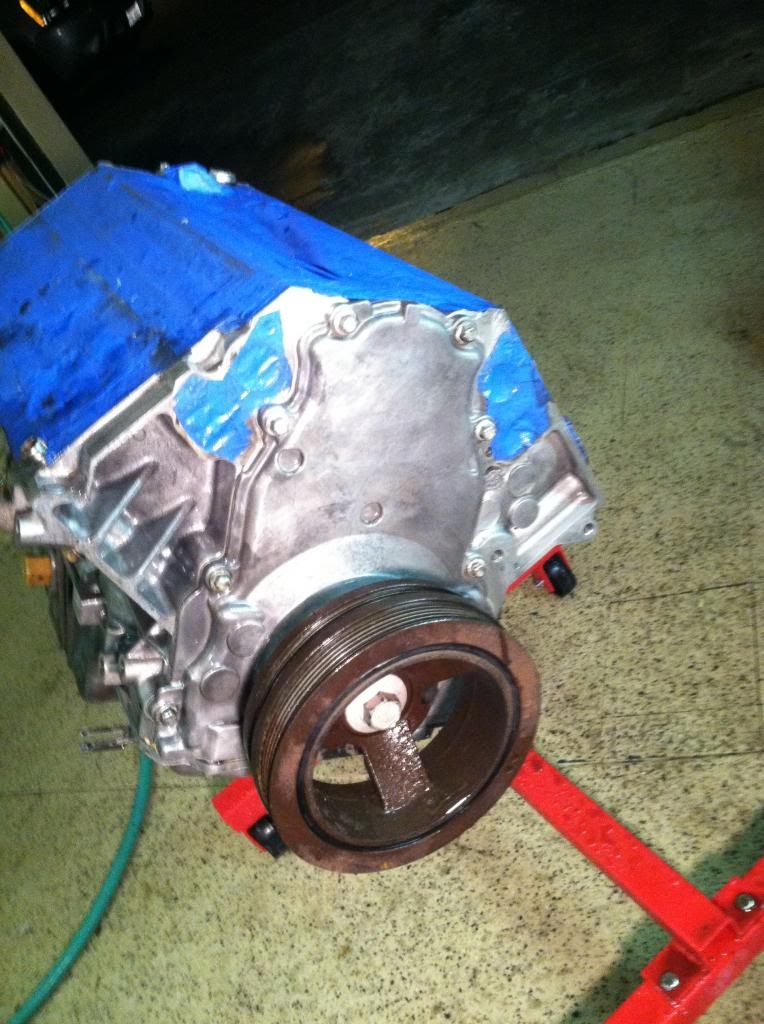
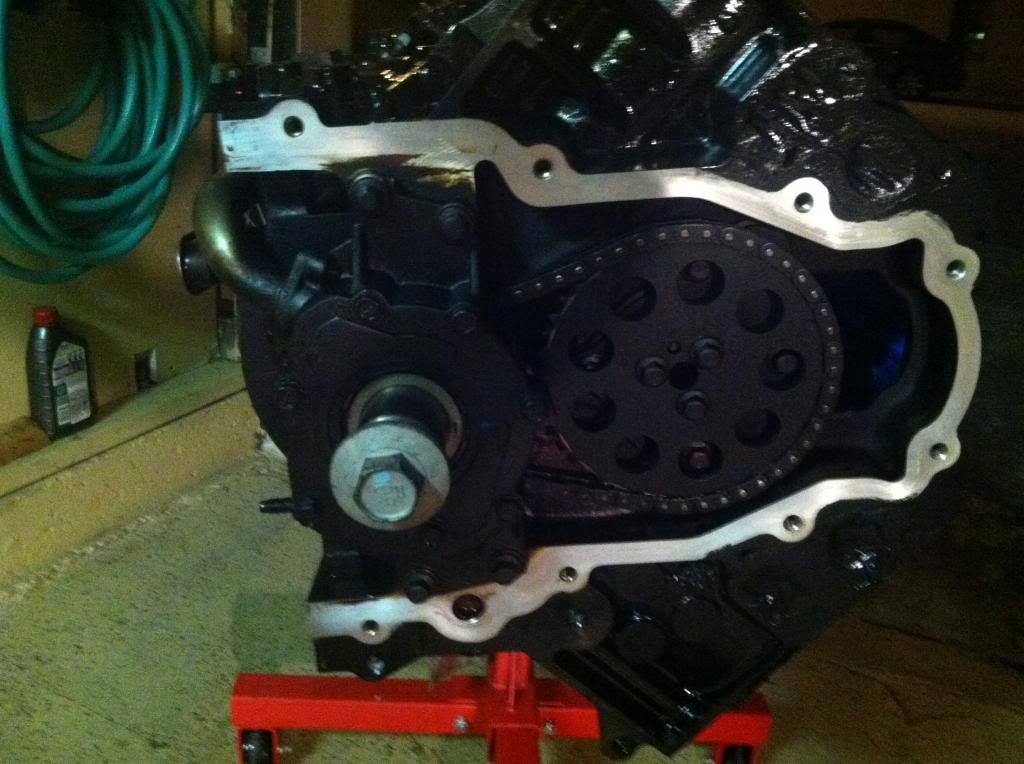
Then the fun began and I started painting with high heat enamel paint, about 3-5 coats I think.
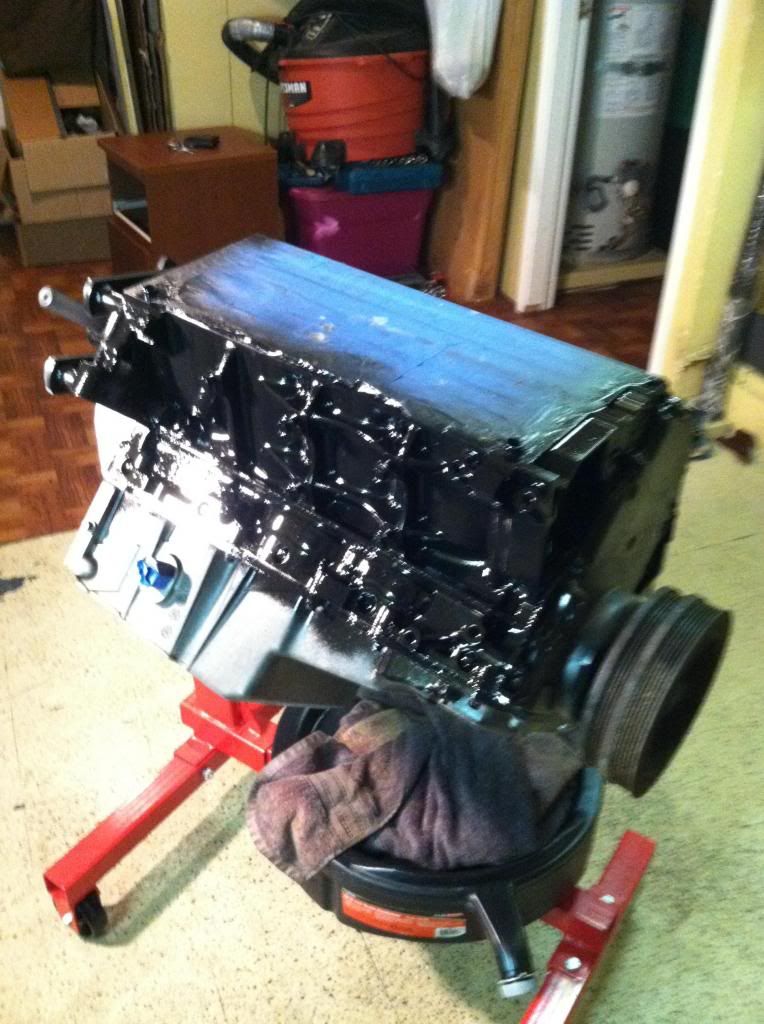
After I had it painted, I took off the oil pan and timing cover which will be painted separately. The crank pulley was trick to do and I didn�t want to spend excess money on tools so here is how I did it�
For about $120 or so I cant remember, I RENTED these tools: (remember its 48 hours so that if you�re told so you can bring them back and get your money back. I went to return mine days later and was told I could keep em since I exceeded the time, luckily I know them all by name at O�Reillys and have spent TOO much money between my car, engine and flipping a 68 chevelle recently that they let me return it..once you return them you get your money back so that�s the cool part! $0 spent here.)
1. The regular style puller
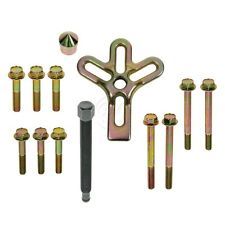
2. The �Oldsmobile� puller I believe its called
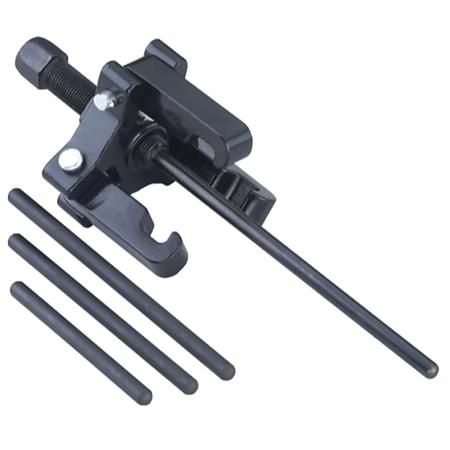
I put used the 2nd one with the longer bolt from the 1st puller like so: (after looking at it, I think I could have used the rods like in the 2nd pic and just got away with that one, which I recommend since the socket did scuff the tip of the crank from turning with pressure on it, but it has no effect luckily)

The socket keeps the bolt from going into the crank which gives it more length to pull the pulley off, im not the best at explaining but it all worked out.
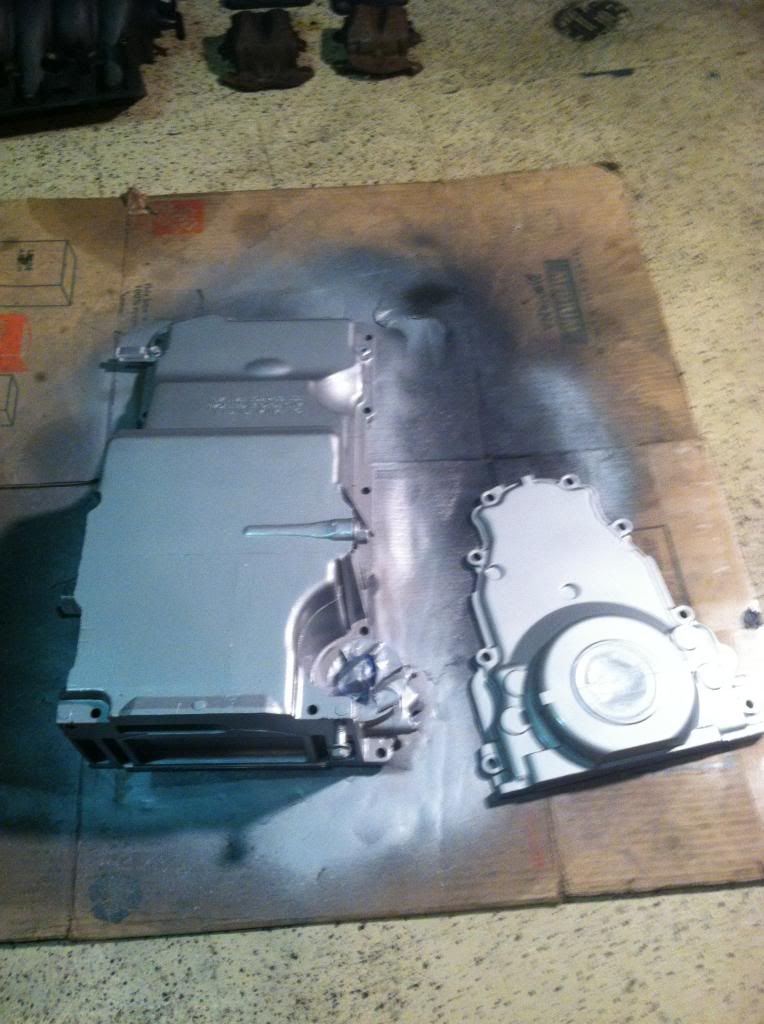
After that was off I removed the bolts and pulled the oil filter, oil pan, and timing cover. I don�t remember anything really tricky here, but there are 2 long bolts at the back of the oil pan I didn�t notice at first which would hold you up. I read to be careful with them as well cus they are fragile or easy to bend.

I then used the same cleaning process for the block on the oil pan and timing cover. Painted them with the high heat enamel using many coats and a final clear coat. I like to use my heat gun between coats as well cus I feel like it cooks it on and helps it dry all at once. I painted the timing cover before I replaced the crank gear seal so I didn�t have to work about paint on it etc.

After I had it painted, I took off the oil pan and timing cover which will be painted separately. The crank pulley was trick to do and I didn�t want to spend excess money on tools so here is how I did it�
For about $120 or so I cant remember, I RENTED these tools: (remember its 48 hours so that if you�re told so you can bring them back and get your money back. I went to return mine days later and was told I could keep em since I exceeded the time, luckily I know them all by name at O�Reillys and have spent TOO much money between my car, engine and flipping a 68 chevelle recently that they let me return it..once you return them you get your money back so that�s the cool part! $0 spent here.)
1. The regular style puller

2. The �Oldsmobile� puller I believe its called

I put used the 2nd one with the longer bolt from the 1st puller like so: (after looking at it, I think I could have used the rods like in the 2nd pic and just got away with that one, which I recommend since the socket did scuff the tip of the crank from turning with pressure on it, but it has no effect luckily)

The socket keeps the bolt from going into the crank which gives it more length to pull the pulley off, im not the best at explaining but it all worked out.
After that was off I removed the bolts and pulled the oil filter, oil pan, and timing cover. I don�t remember anything really tricky here, but there are 2 long bolts at the back of the oil pan I didn�t notice at first which would hold you up. I read to be careful with them as well cus they are fragile or easy to bend.

I then used the same cleaning process for the block on the oil pan and timing cover. Painted them with the high heat enamel using many coats and a final clear coat. I like to use my heat gun between coats as well cus I feel like it cooks it on and helps it dry all at once. I painted the timing cover before I replaced the crank gear seal so I didn�t have to work about paint on it etc.
 10-07-2013, 11:33 PM
#14
On The Tree
Thread Starter
iTrader: (4)
Join Date: Dec 2011
Location: San Francisco
Posts: 134
Likes: 0
Received 0 Likes
on
0 Posts
Here are the parts so far I gathered to sale on CL and help refund some of the new parts cost!

And here are the parts that arrived
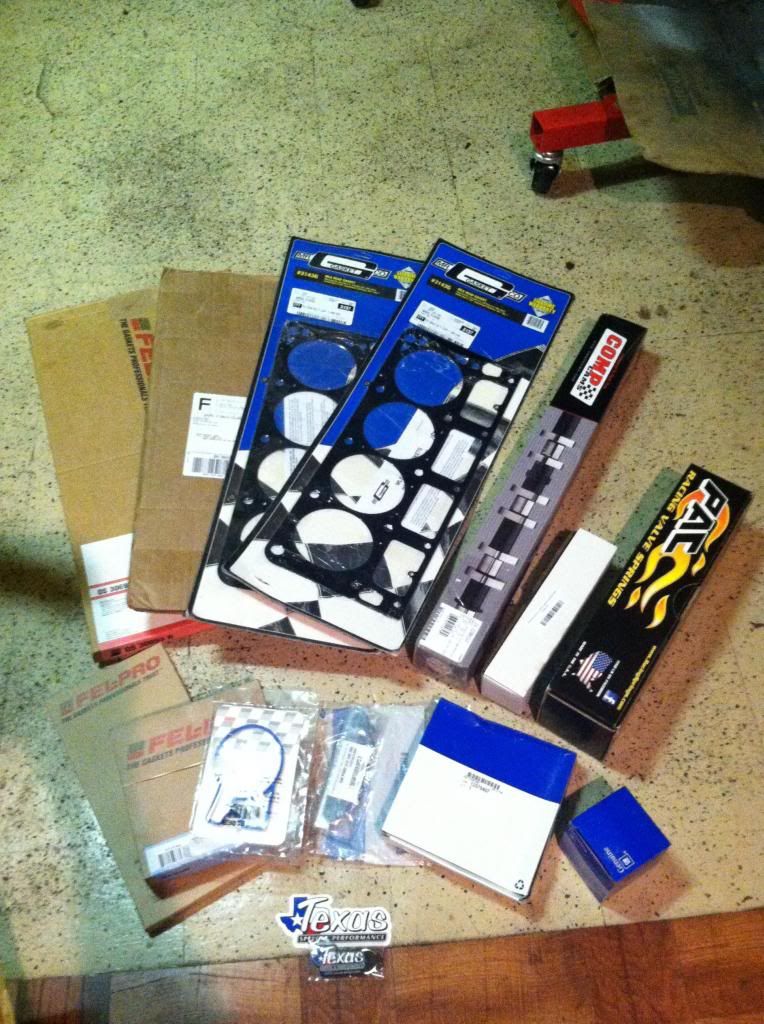
The parts list from my prior post is:
-1998 70k miles, LS1/4L60E (complete with extras delivered)- $2800
-LS6 intake and coolant lines (replacing the LS1) - $300
-LS6 03 Vette 243 cylinder heads (replacing the LS1 806's) - $500
-TSP (Texas Speed & Performance) LS7 lifter & LS2 trays - $190
-TSP Cam Package [TSP 228r 112 lsa/PRC 1518 .650 single beehive springs/7.4 hardened chomoly pushrods] - $640
-Hubbard LS6 refurbished ported oil pump - $90
-TSP LS2 chain & gears - $110
Still waiting on the new TSP cam retainer $50, got a new oil pump seal separately $5 and crank gear seal from O�reilly�s $20.
10-08-2013, 09:46 AM
#16
Staging Lane

Join Date: May 2003
Posts: 66
Likes: 0
Received 0 Likes
on
0 Posts

That's an easy swap. I did a 69 Chevelle for a bud back in 2000 with using everything out of a 98 Camaro. an man, I mean everything. Steering column, entire wire harness, instrument cluster, radiator, wiper motor, cats, all emissions underhood. . Flowmaster exhaust, K&N filter, 285 hp, 302 tq to the wheels with 3.42 gear and it gets 25 mpg blazing down the freeway doing 80 with windows down and stereo blasting. Its a blast to drive. Good luck
10-09-2013, 12:13 PM
#17
On The Tree
Thread Starter
iTrader: (4)
Join Date: Dec 2011
Location: San Francisco
Posts: 134
Likes: 0
Received 0 Likes
on
0 Posts
That's an easy swap. I did a 69 Chevelle for a bud back in 2000 with using everything out of a 98 Camaro. an man, I mean everything. Steering column, entire wire harness, instrument cluster, radiator, wiper motor, cats, all emissions underhood. . Flowmaster exhaust, K&N filter, 285 hp, 302 tq to the wheels with 3.42 gear and it gets 25 mpg blazing down the freeway doing 80 with windows down and stereo blasting. Its a blast to drive. Good luck
10-10-2013, 06:32 AM
#18
Staging Lane
Join Date: May 2003
Posts: 66
Likes: 0
Received 0 Likes
on
0 Posts
Stock F body accy drive with low alternator and ditched the AC. I made my own mounts and floated the alternator between the steering box and crossmember. I did have to notch the rear of the x member for oil pan clearance then simply re-boxed it. I will see if I can dig up some pics and post them here
10-10-2013, 05:57 PM
#19
On The Tree
Thread Starter
iTrader: (4)
Join Date: Dec 2011
Location: San Francisco
Posts: 134
Likes: 0
Received 0 Likes
on
0 Posts
oh ok so to get my oil pan to work i would have to modify my crossmember? thats a bummer! is there an oil pan i can get that will have all the appropriate sensors and all for my set up? which do people use and recommend?
10-10-2013, 07:05 PM
#20
On The Tree
Thread Starter
iTrader: (4)
Join Date: Dec 2011
Location: San Francisco
Posts: 134
Likes: 0
Received 0 Likes
on
0 Posts
Next update…
ps. Here is a nice little tool, a link to all the torque specs. If its in inch lbs I just convereted it to ft lbs. not sure if that’s best practice but im making it all work with what I have.
http://www.ls1howto.com/index.php?category=1
So I followed another “LS how to” to take down the cam, gears, timing chain etc. For the removal and install steps use this link, I think it was plenty detailed and hopefully it covered all I needed to know.
http://www.ls1howto.com/?article=23
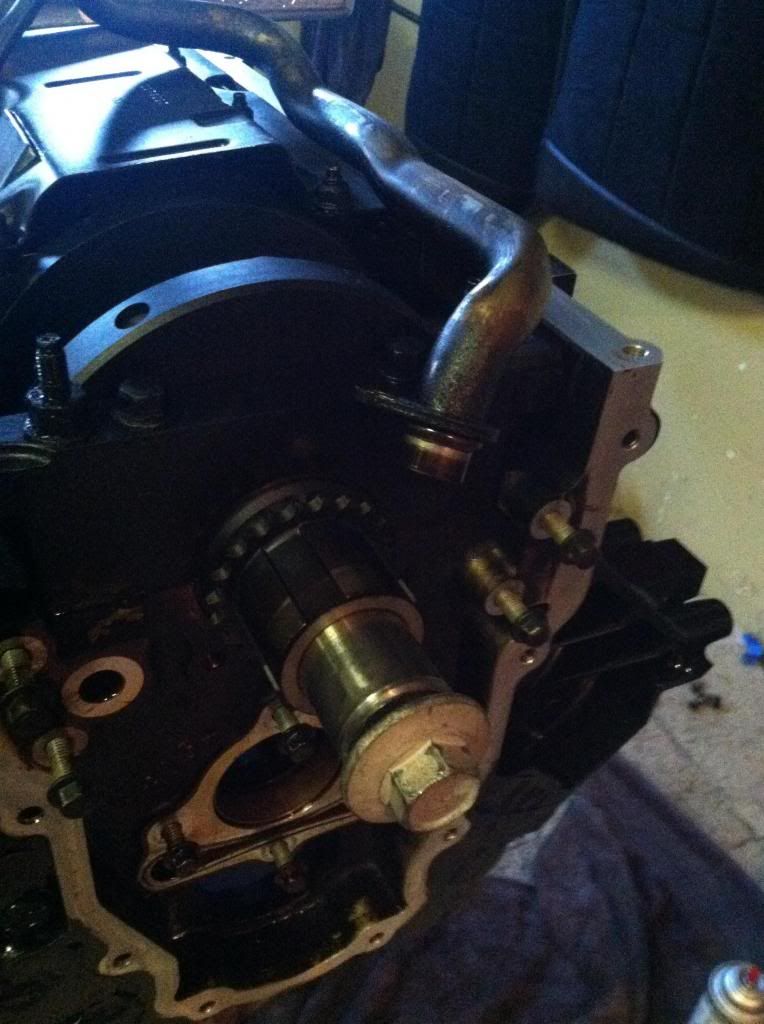
before I started taking it down, took off the cover. Cleaned the surfaces with the scotch bright pad but you wanna be careful not to put deep grooves in the block or scrub so much that you make the surface uneven.
Took the cam gear off simply by unbolting it, then letting the chain hang.

Removed the original cam retainer plate and cam slowly being careful not to damage the cam bearings.
After checking my cam retainer plate, there is a gasket on it which I thought was a little smooth and hard to feel with my finger so I figured I should replace it while I had it down this far. Ordered for $50 at TSP. pulled out the new cam (TSP 228r 112LSA) it was somewhat lubed already but I added some assembly lube anyways. Put it in gently.

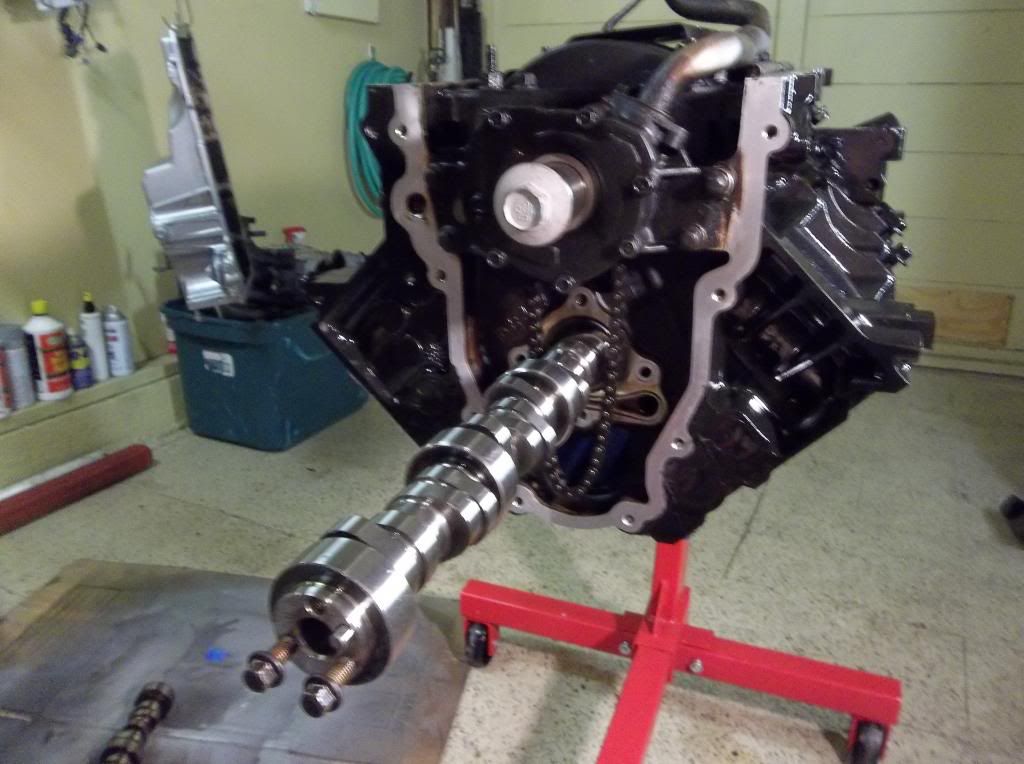
When you go to put your cam in also check your cam bearings, its hard to see. I searched some threads here on LStech and decided not to go that far and replace mine. I think they will be ok. After I put the cam in I decided to take it back out and change the oil pump and other parts first so that I didn’t have to worry about it falling out or getting dinged in the engine. Removed the oil pump following the same “LS how to” link. Bought the new oil pump O ring for my Hubbard Refurbished Ported LS6 oil pump! The directions tell you but when installing the pump and O ring be very careful not to pinch it and to make sure its on right. I put it on the tube rather than in the pump then messed with it a while to get it fitted back on the block. It can take some time to get the pump gears aligned and get the pickup tube in right.
I was also going to replace my crank gear but it looked fine, just like the new one I had got in my TSP timing kit so I didn’t bother removing and replacing it.
ps. Here is a nice little tool, a link to all the torque specs. If its in inch lbs I just convereted it to ft lbs. not sure if that’s best practice but im making it all work with what I have.
http://www.ls1howto.com/index.php?category=1
So I followed another “LS how to” to take down the cam, gears, timing chain etc. For the removal and install steps use this link, I think it was plenty detailed and hopefully it covered all I needed to know.
http://www.ls1howto.com/?article=23
before I started taking it down, took off the cover. Cleaned the surfaces with the scotch bright pad but you wanna be careful not to put deep grooves in the block or scrub so much that you make the surface uneven.

Took the cam gear off simply by unbolting it, then letting the chain hang.

Removed the original cam retainer plate and cam slowly being careful not to damage the cam bearings.
After checking my cam retainer plate, there is a gasket on it which I thought was a little smooth and hard to feel with my finger so I figured I should replace it while I had it down this far. Ordered for $50 at TSP. pulled out the new cam (TSP 228r 112LSA) it was somewhat lubed already but I added some assembly lube anyways. Put it in gently.


When you go to put your cam in also check your cam bearings, its hard to see. I searched some threads here on LStech and decided not to go that far and replace mine. I think they will be ok. After I put the cam in I decided to take it back out and change the oil pump and other parts first so that I didn’t have to worry about it falling out or getting dinged in the engine. Removed the oil pump following the same “LS how to” link. Bought the new oil pump O ring for my Hubbard Refurbished Ported LS6 oil pump! The directions tell you but when installing the pump and O ring be very careful not to pinch it and to make sure its on right. I put it on the tube rather than in the pump then messed with it a while to get it fitted back on the block. It can take some time to get the pump gears aligned and get the pickup tube in right.

I was also going to replace my crank gear but it looked fine, just like the new one I had got in my TSP timing kit so I didn’t bother removing and replacing it.
Last edited by swandude805; 10-10-2013 at 07:23 PM.