
1966 C10 Shortbed Build Thread
 04-14-2013, 09:39 PM
#1
10 Second Club
Thread Starter

Join Date: Apr 2013
Location: Carlinville, IL
Posts: 317
Likes: 0
Received 0 Likes
on
0 Posts
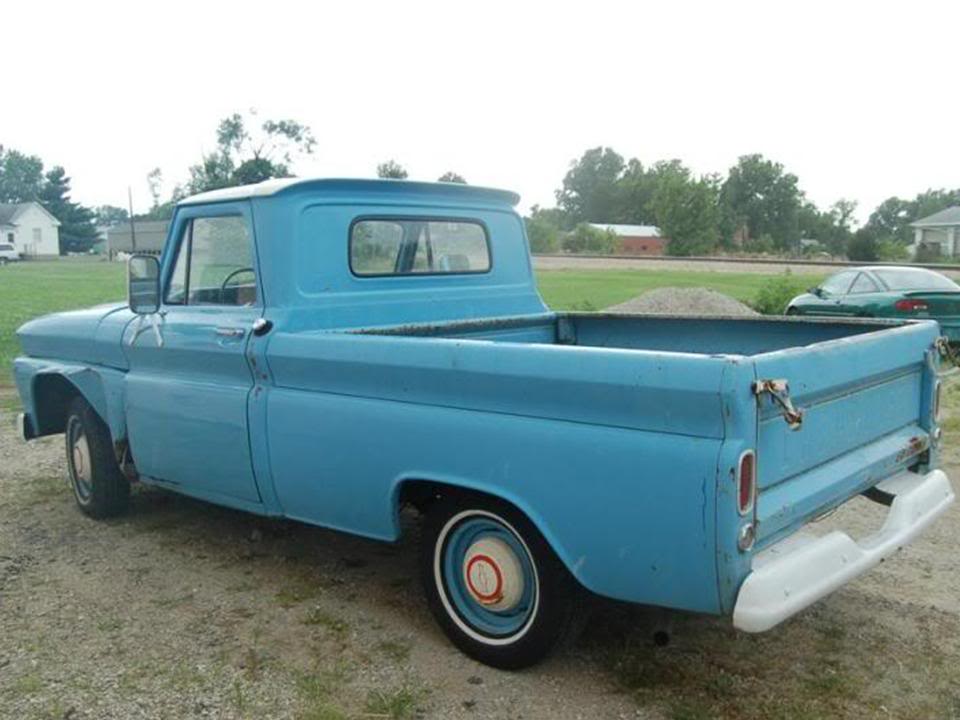
As promised on my introduction page, here is my build thread of the 1966 Chevy Shortbed that my son elkydragger and I are doing at his shop "Joe's Garage" for my wife.
My son also has two build threads going for my 65 El Camino drag car....
https://ls1tech.com/forums/drag-raci...car-build.html
and his rear engined dragster....
https://ls1tech.com/forums/forced-in...-dragster.html
Since I started this thread, we have added a future project in case he gets bored with the dragster....
https://ls1tech.com/forums/drag-raci...car-build.html
This started out looking like an easy project but as they always are, NOTHING is easy.
When done, it will have an LR4 4.8 Liter and 4L60E and rebuilt Posi 12 bolt. The motor and trans are from a previously cherry (read wrecked) 1999 Silverado. In the pics you will also see a progression of the shop as we were building it.
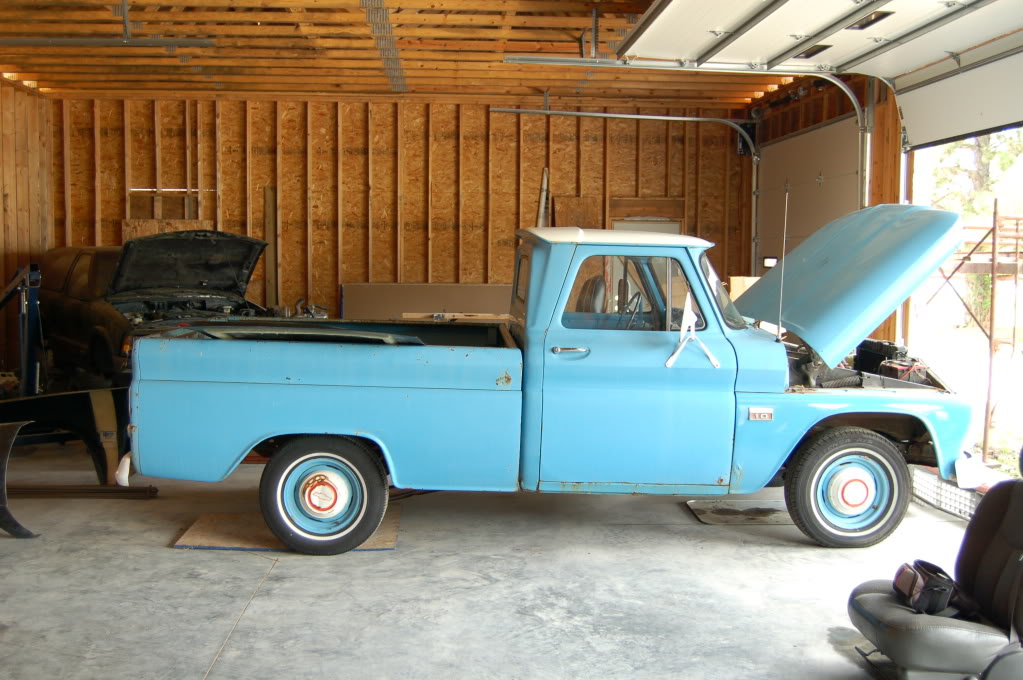
The more we dug into the truck, the deeper we got and what started out as a quick cleanup and drive turned into a top to bottom refurb.
My son also has two build threads going for my 65 El Camino drag car....
https://ls1tech.com/forums/drag-raci...car-build.html
and his rear engined dragster....
https://ls1tech.com/forums/forced-in...-dragster.html
Since I started this thread, we have added a future project in case he gets bored with the dragster....
https://ls1tech.com/forums/drag-raci...car-build.html
This started out looking like an easy project but as they always are, NOTHING is easy.

When done, it will have an LR4 4.8 Liter and 4L60E and rebuilt Posi 12 bolt. The motor and trans are from a previously cherry (read wrecked) 1999 Silverado. In the pics you will also see a progression of the shop as we were building it.

The more we dug into the truck, the deeper we got and what started out as a quick cleanup and drive turned into a top to bottom refurb.

Last edited by 65drag; 12-28-2013 at 09:32 AM.
 04-14-2013, 09:41 PM
#2
10 Second Club
Thread Starter
Join Date: Apr 2013
Location: Carlinville, IL
Posts: 317
Likes: 0
Received 0 Likes
on
0 Posts
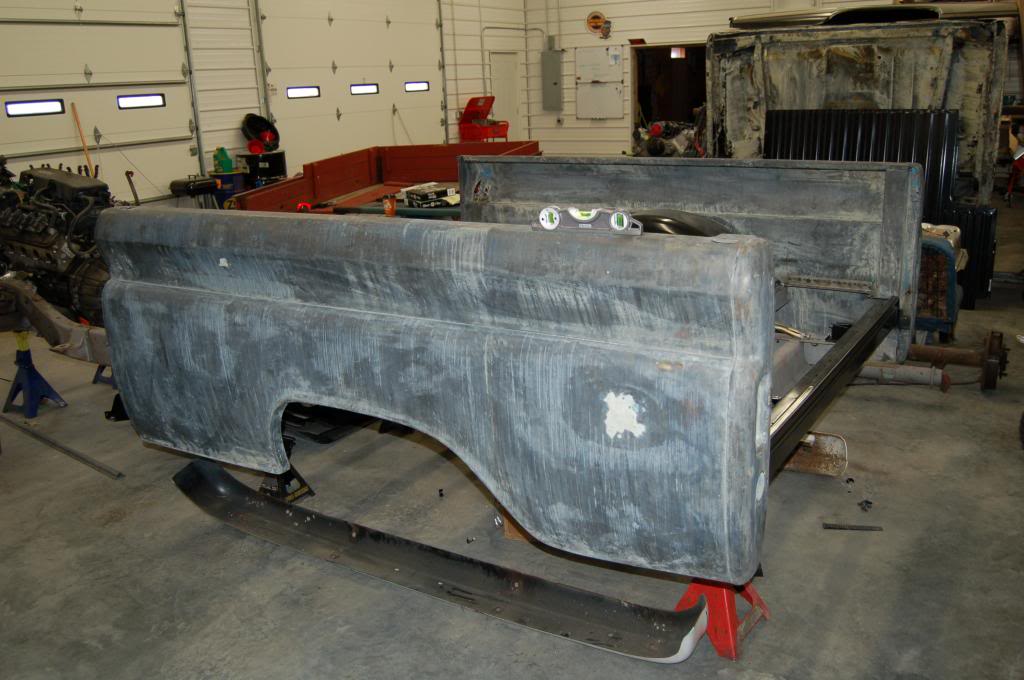
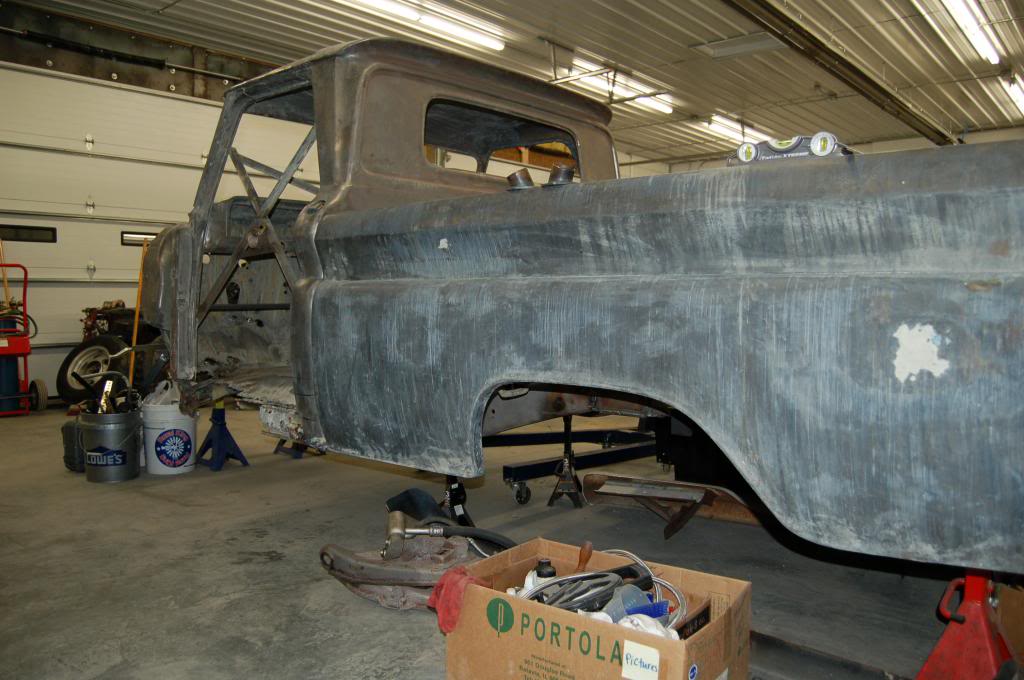
We actually started this build a couple of years ago, but I am just getting around to documenting it. We are a long way from being done and we have lots of other projects and real jobs to do as well. The bed sides are all we are using from the original bed because those are not yet being reproduced.
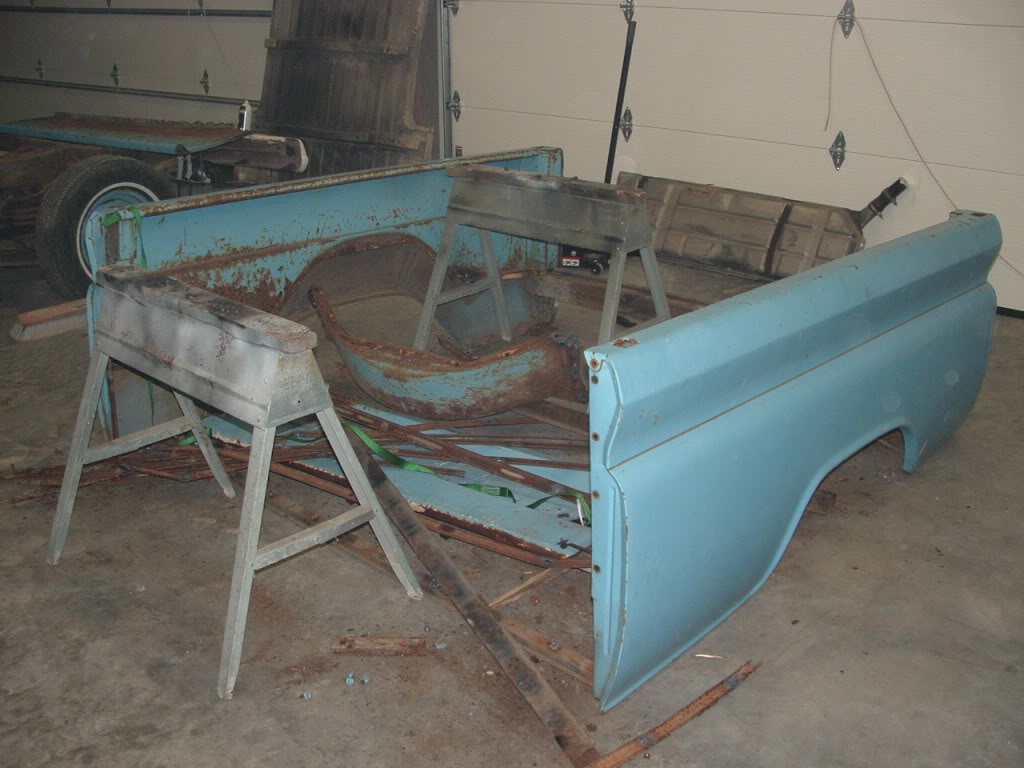
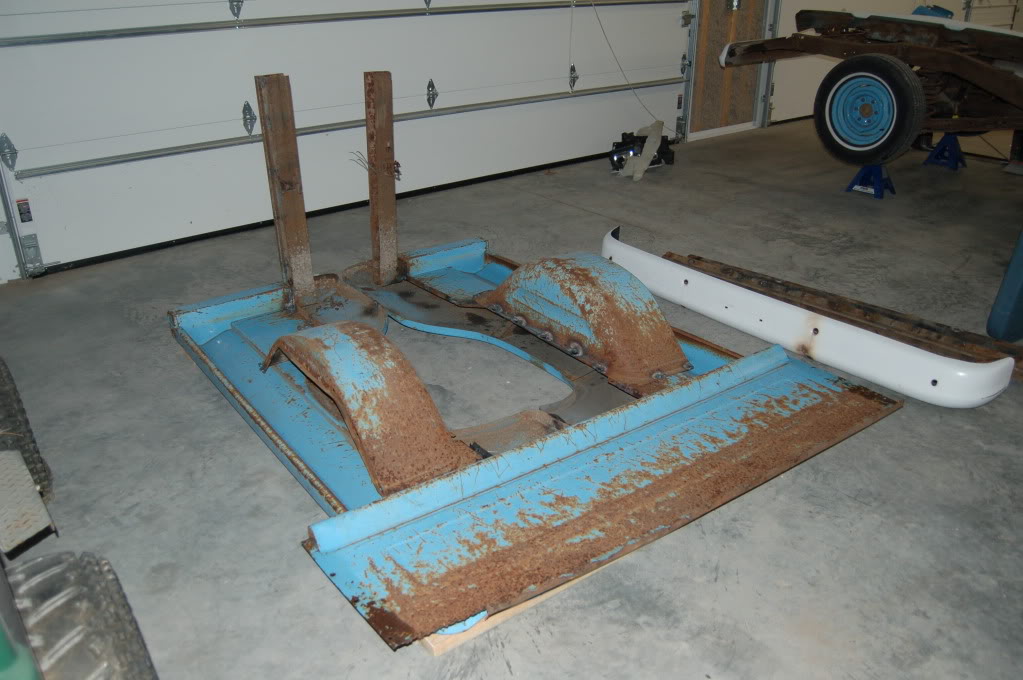
As usual, cab corners and rockers are a must to replace. Along with that, we already know the floor pans will need some attention too.


As usual, cab corners and rockers are a must to replace. Along with that, we already know the floor pans will need some attention too.


Last edited by 65drag; 11-24-2018 at 07:24 PM.
04-14-2013, 09:50 PM
#3
10 Second Club
Thread Starter
Join Date: Apr 2013
Location: Carlinville, IL
Posts: 317
Likes: 0
Received 0 Likes
on
0 Posts
The real problem with this truck is it has spent it's entire life in the midwest winters and has been used and abused before I got ahold of it. It was "restored" maybe 10 years ago, but was put right back into service as a daily work truck.

Here is the aforementioned "previously cherry" Silverado donor. This WAS actually a nice truck before the deceleration trama. When I bought it, there was a wheelbase variance of 10" from left to right. Amazingly there was nothing wrong with the drive train.
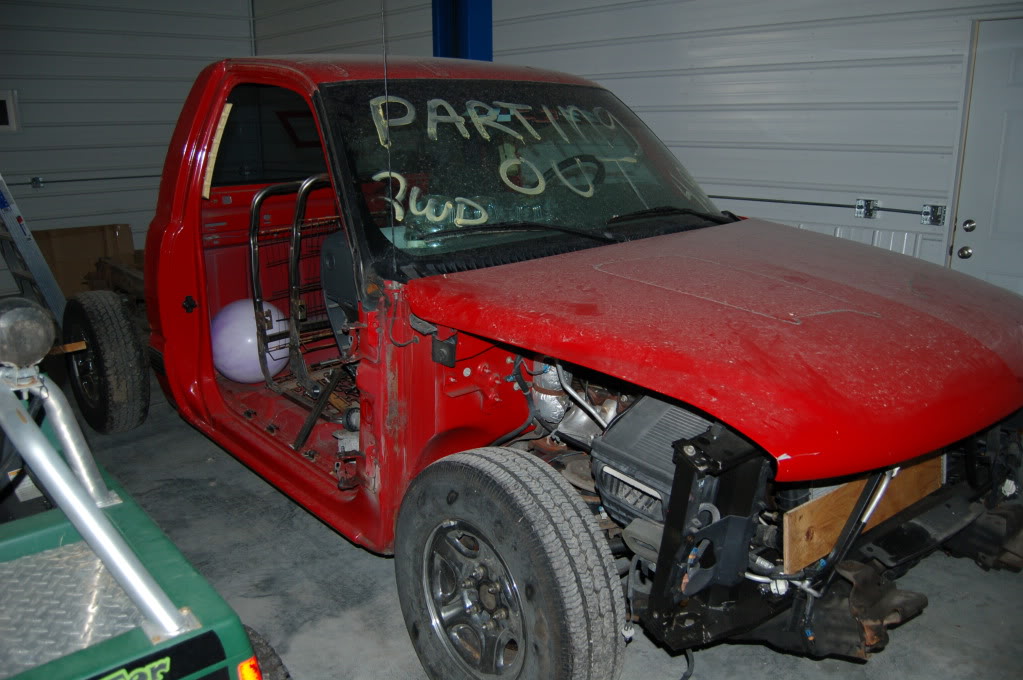
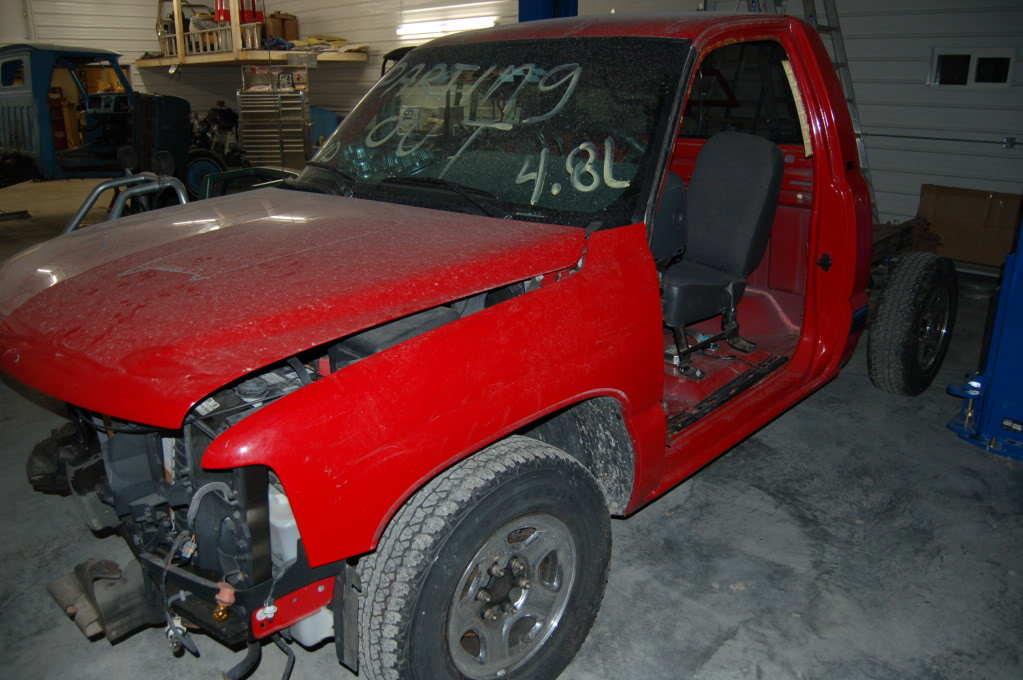

Here is the aforementioned "previously cherry" Silverado donor. This WAS actually a nice truck before the deceleration trama. When I bought it, there was a wheelbase variance of 10" from left to right. Amazingly there was nothing wrong with the drive train.


 04-14-2013, 09:55 PM
#5
10 Second Club
Thread Starter
Join Date: Apr 2013
Location: Carlinville, IL
Posts: 317
Likes: 0
Received 0 Likes
on
0 Posts
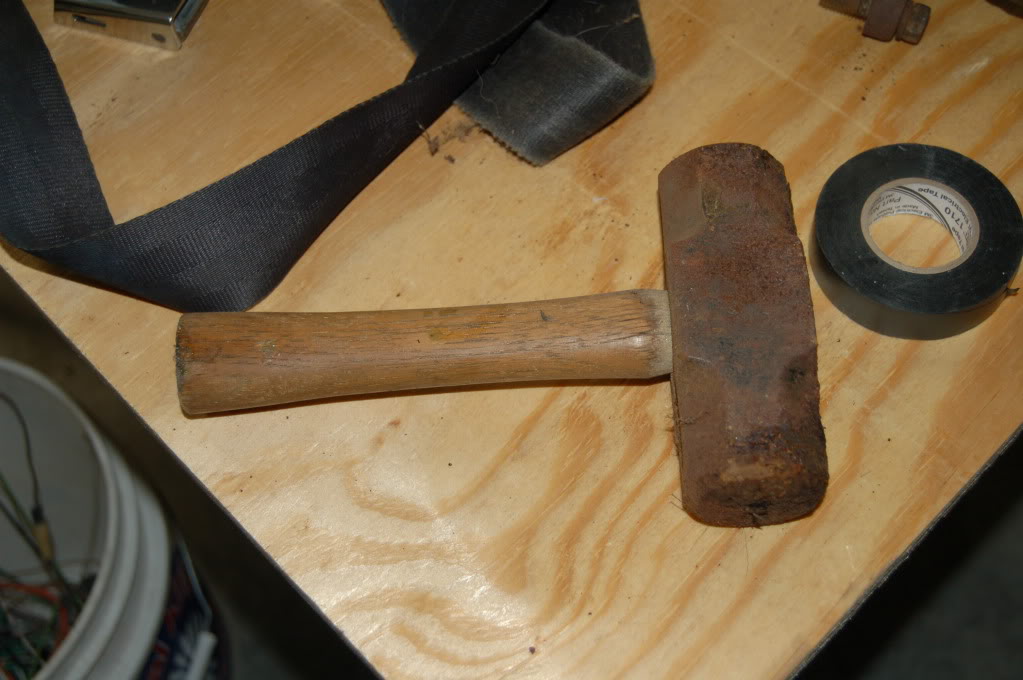
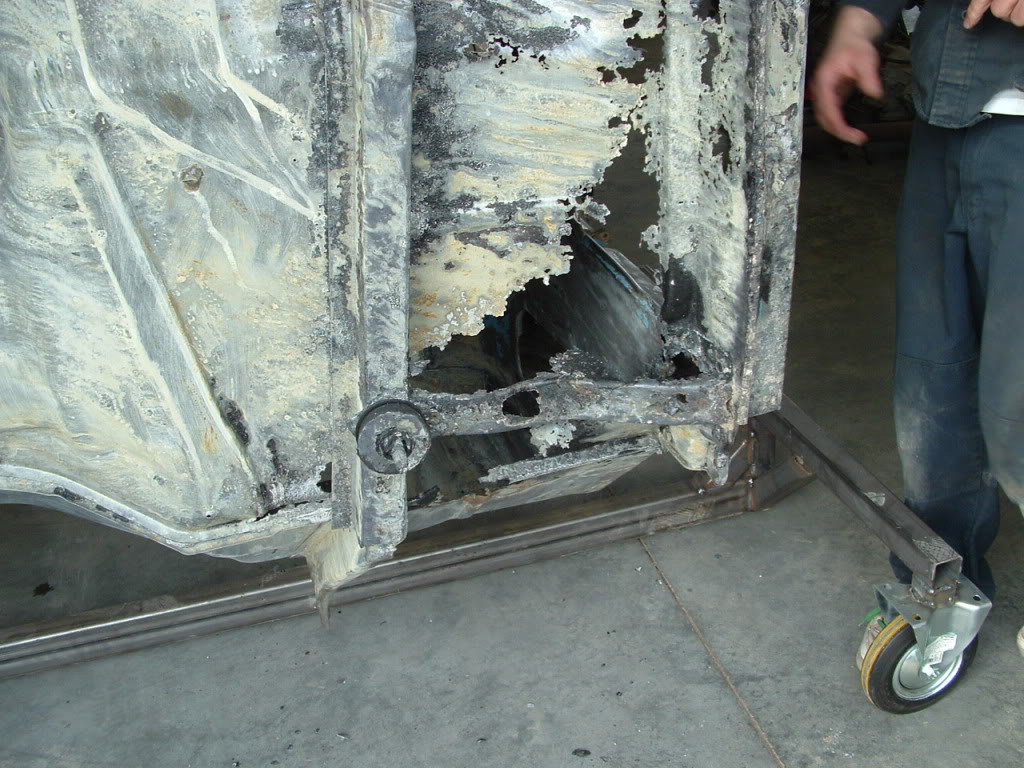
It's amazing what you find in the nooks and crannies when you're tearing a vehicle apart. This was in the cab corner behind the seat.
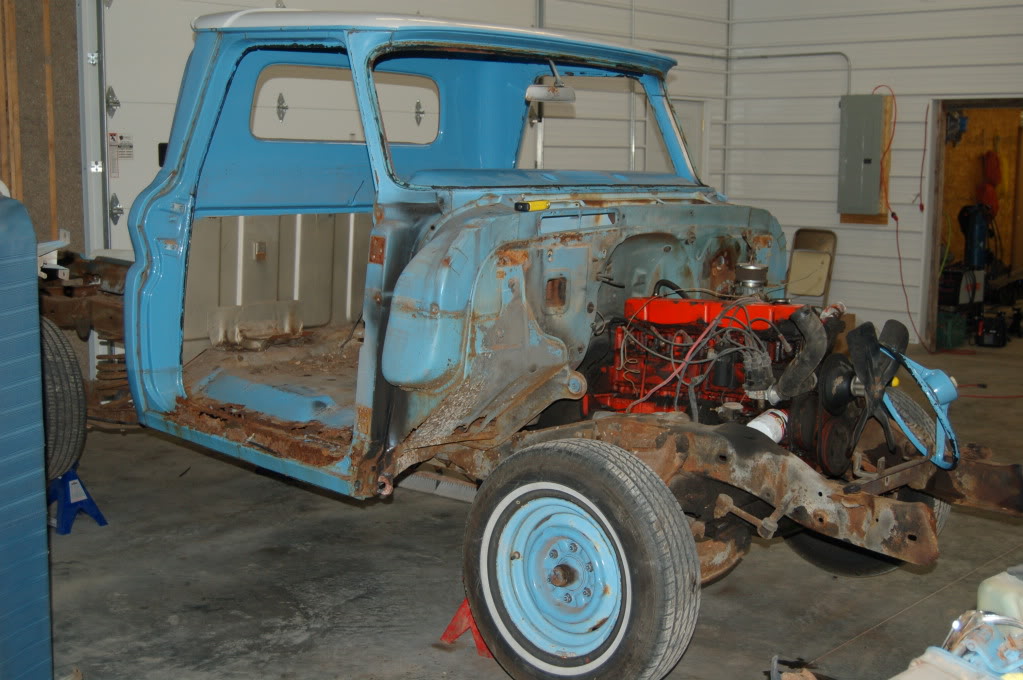
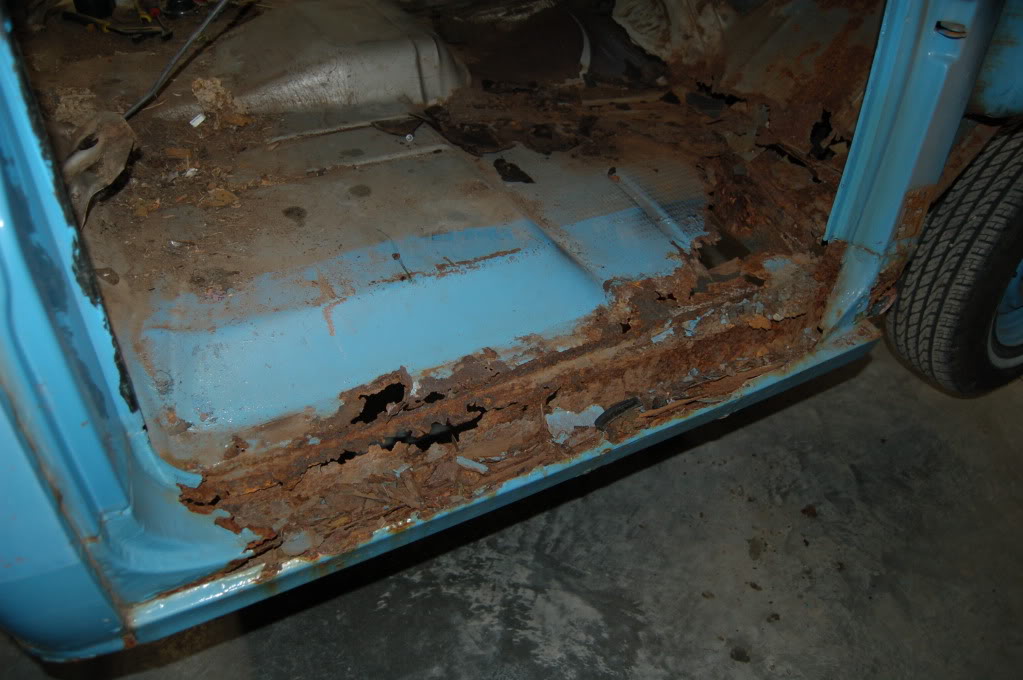
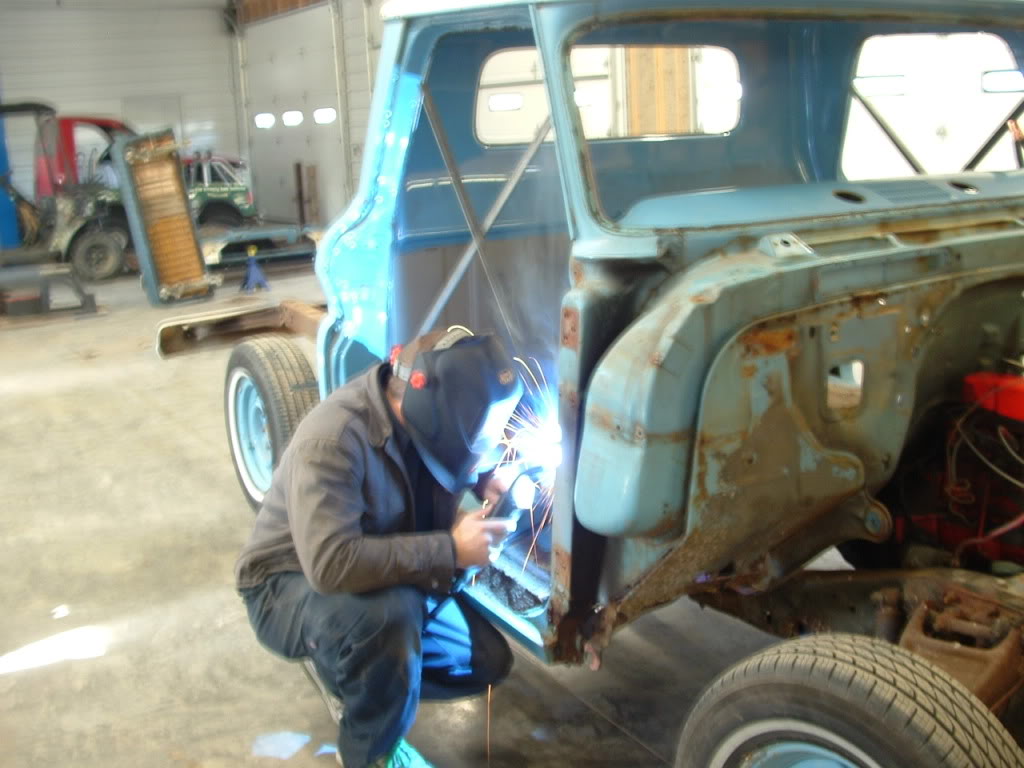
This shot was from before we had the overhead heater in the shop and it was about 40 degrees outside that night so it was probably about 41 degrees inside. Joe is doing the ice pick check to see how much of the floor pan needs replaced.

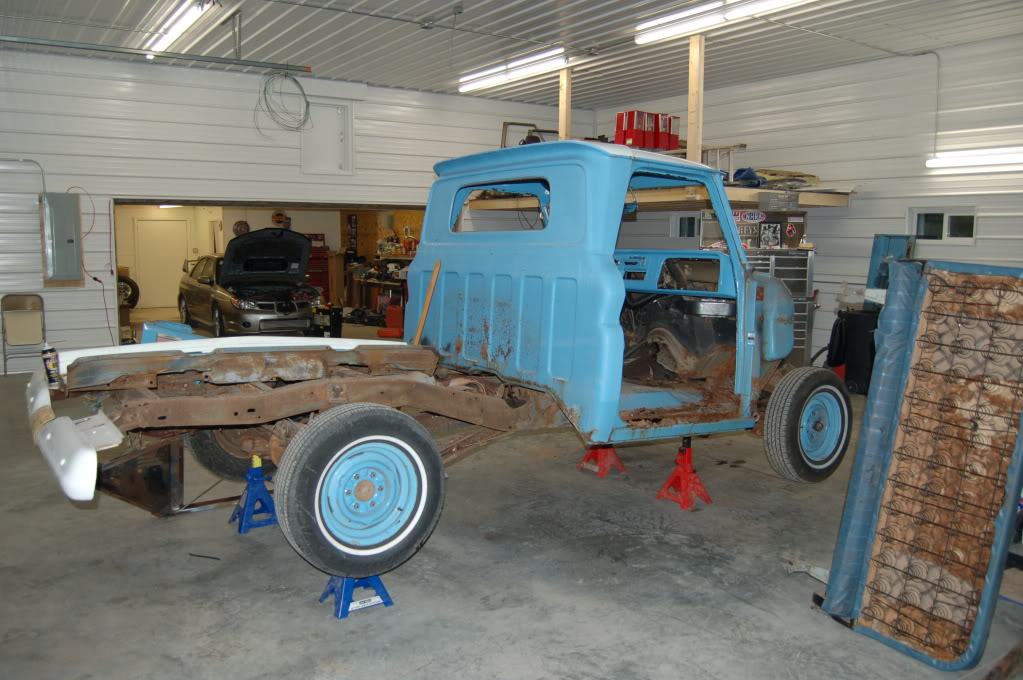
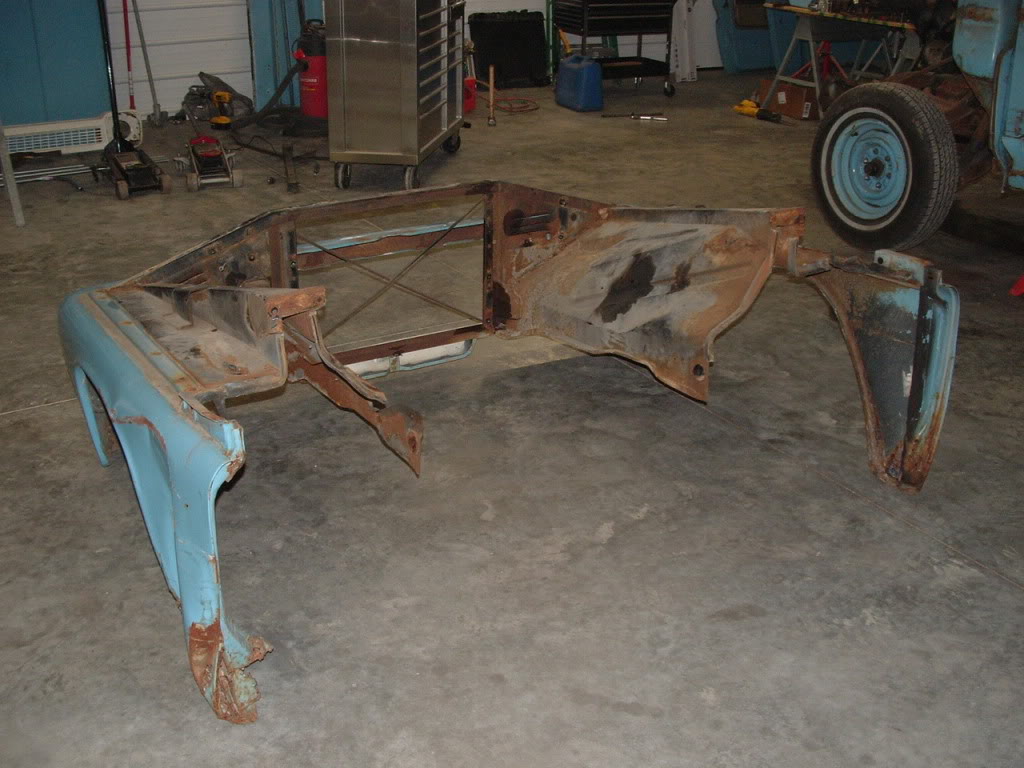
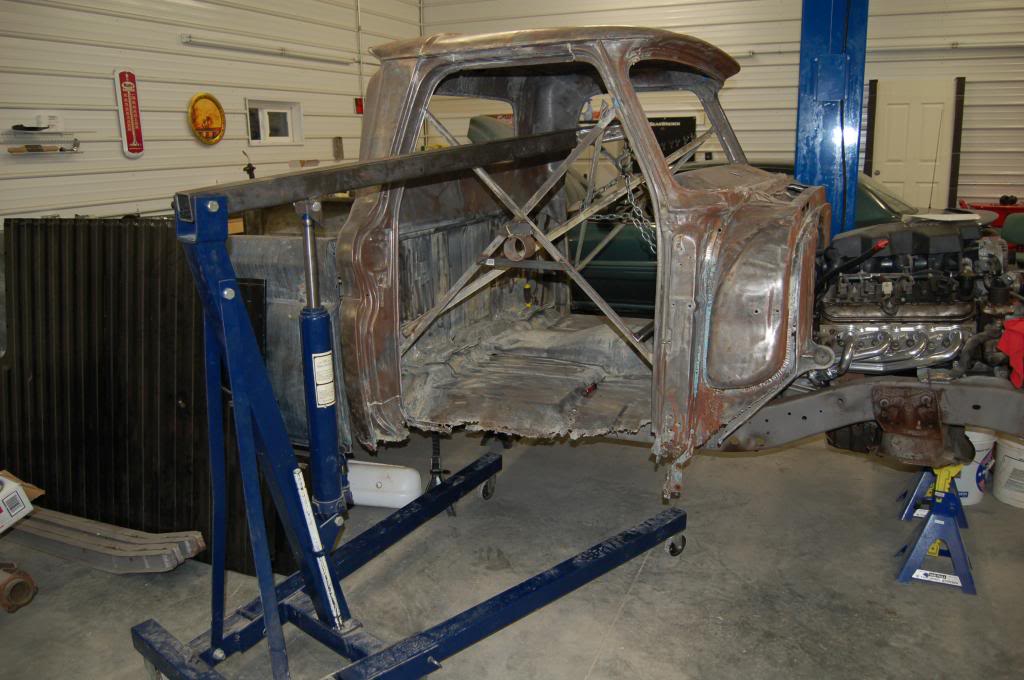
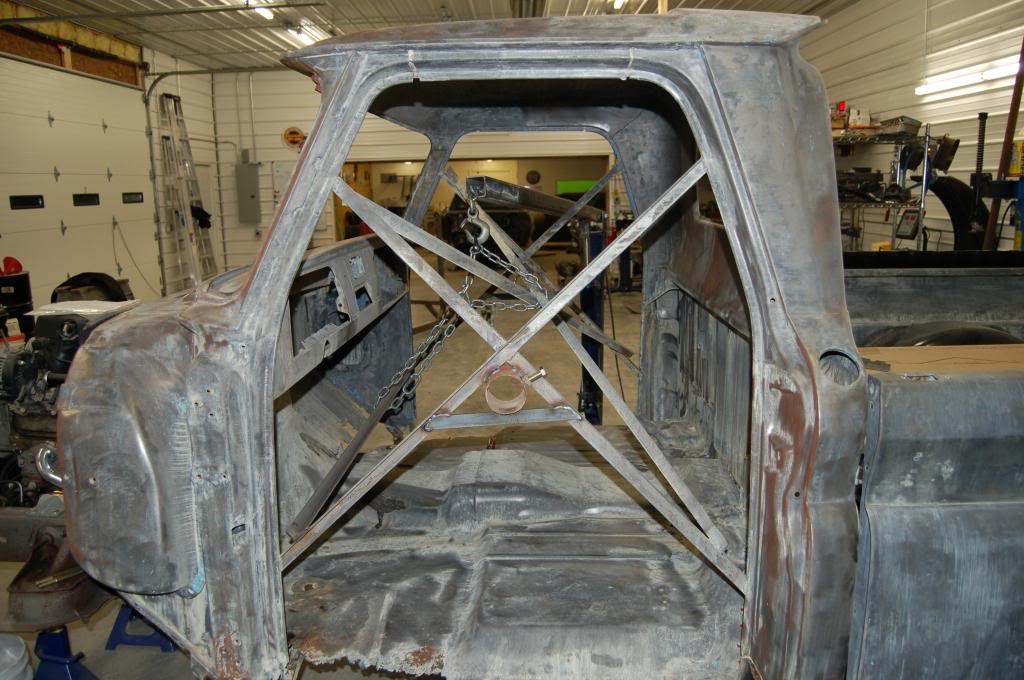
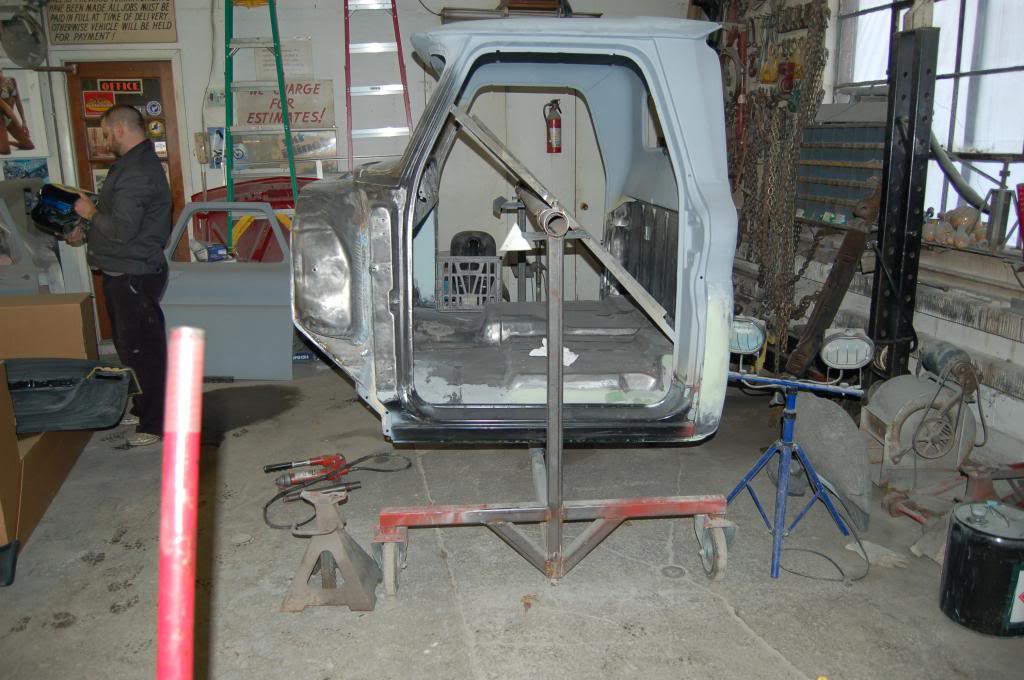
Here is the beginning of the serious part of the tear down. We weren't sure how much surgery was going to be required on the cab but we knew how much it could be so we shored up the basic structure so the doors would fit when we start putting it back together.

This shot was from before we had the overhead heater in the shop and it was about 40 degrees outside that night so it was probably about 41 degrees inside. Joe is doing the ice pick check to see how much of the floor pan needs replaced.

Here is the beginning of the serious part of the tear down. We weren't sure how much surgery was going to be required on the cab but we knew how much it could be so we shored up the basic structure so the doors would fit when we start putting it back together.

Last edited by 65drag; 04-15-2013 at 06:38 AM.
04-14-2013, 10:10 PM
#6
10 Second Club
Thread Starter
Join Date: Apr 2013
Location: Carlinville, IL
Posts: 317
Likes: 0
Received 0 Likes
on
0 Posts
I don't care that much for eBay, but it allowed me to piece together an entire N.O.S. doghouse instead of buying new repop Korean junk.
The people who owned this truck before me used it mercilessly. There was a clunk every time you let the clutch out. We found out what it was when we removed the rear end. The U-bolts that hold the axle to the trailing arms were both loose and the clunk we were hearing was the whole axle rotating until pinion snubber hit the frame. Yes we are building a whole new axle from another donor truck.

Starting the frame rehab here. Need some structural upgrades and a good blasting.
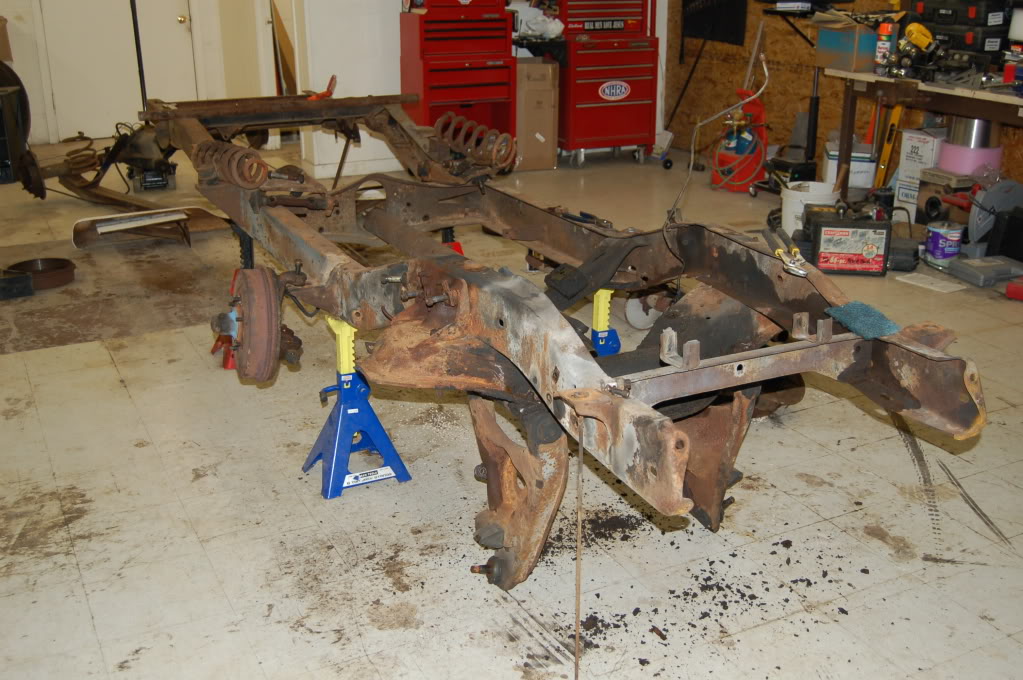
That's all for tonight, I'll try to update this later in the week.
04-14-2013, 10:29 PM
#7
TECH Resident
iTrader: (21)

Join Date: Aug 2006
Location: Wichita KS
Posts: 947
Likes: 0
Received 0 Likes
on
0 Posts

Nice, looks like a lot of work ahead for you but seems you're up the the task. Just met a local guy today doing the swap in a 59 chevy shortbed so actually sparked my interest and will keep an eye on this.
Trending Topics
04-16-2013, 10:06 AM
#8
10 Second Club
Thread Starter
Join Date: Apr 2013
Location: Carlinville, IL
Posts: 317
Likes: 0
Received 0 Likes
on
0 Posts
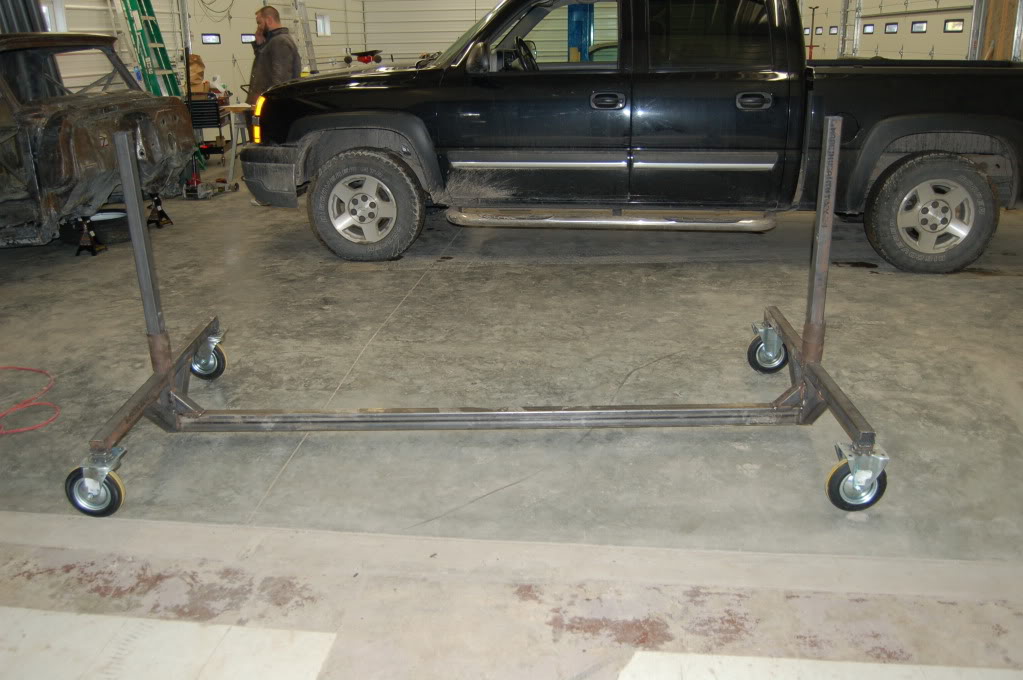
We custom built a rotisserie for the cab to sit on because we knew there would be tons of work to get it in shape.
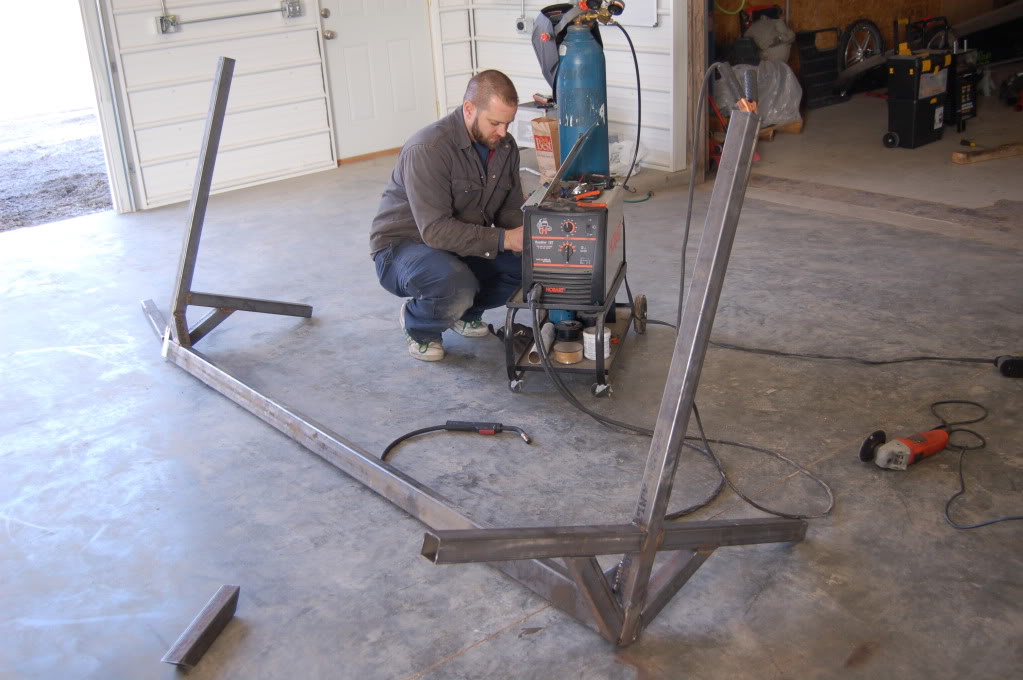
2x2 and 2x3 box tubing with 3" round tubing for the cross shaft, Harbour Freight castors. Everything included under $200 and about 3 hours to build. We will cut it back apart when we're done for easy storage and modify it to fit the next project.
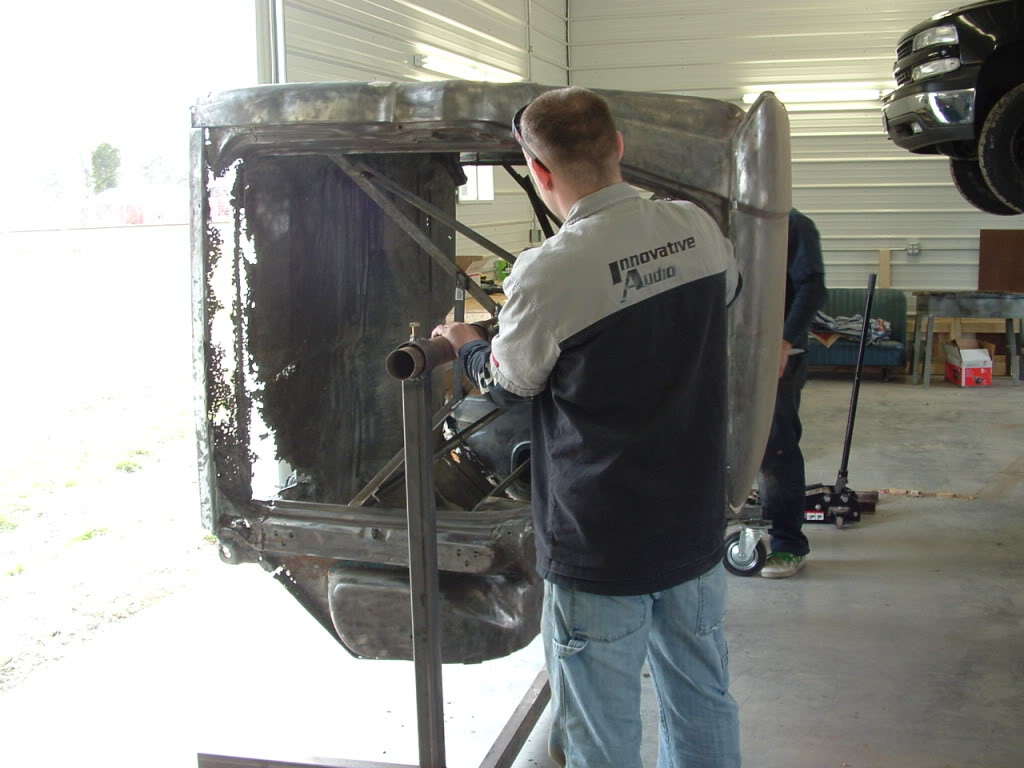
Back from the acid dipper and mounted up. My son's friend Corey surveying the damage.


 04-16-2013, 10:16 AM
#10
10 Second Club
Thread Starter
Join Date: Apr 2013
Location: Carlinville, IL
Posts: 317
Likes: 0
Received 0 Likes
on
0 Posts
A good acid bath holds nothing back, except previous body putty and road grime, so it is best to clean as much of that stuff off before you get it dipped.
While the cab is off to the body shop for the serious fixes, we are getting the frame in shape. Back from the blasters, spend your money wisely on a "good" blasting business. I got this done cheap, but it was half-assed and I'll have to spend more time on it cleaning it up.
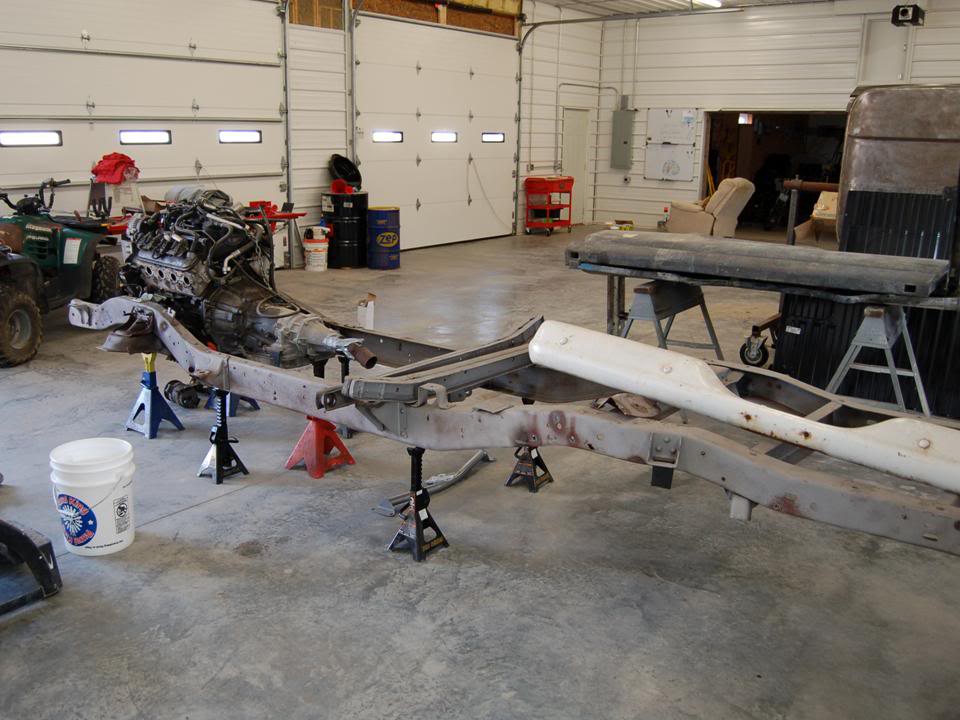
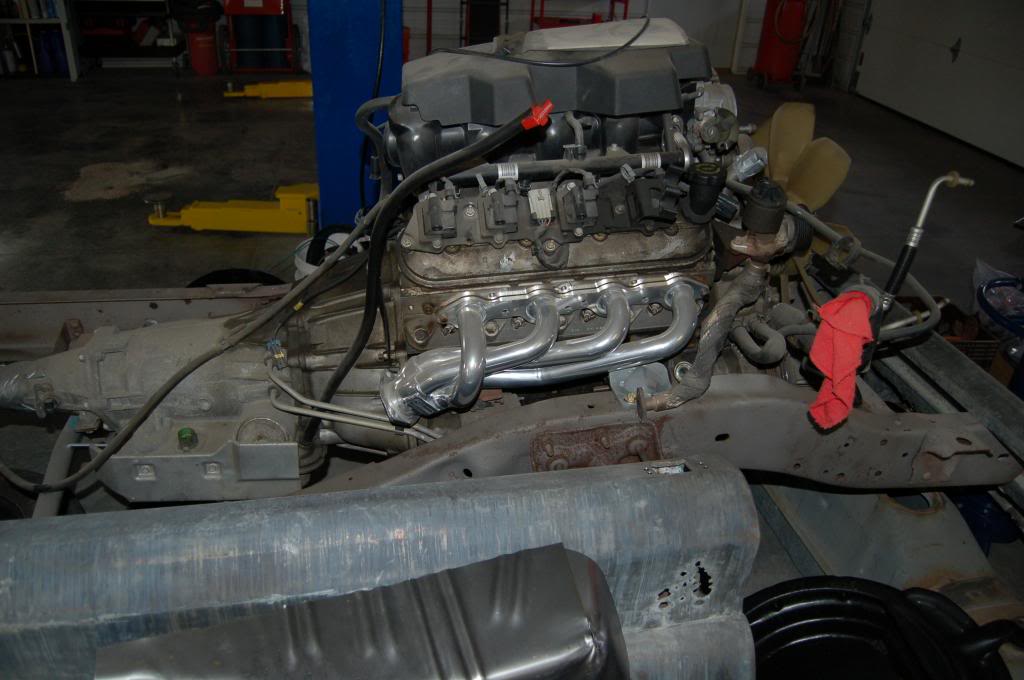
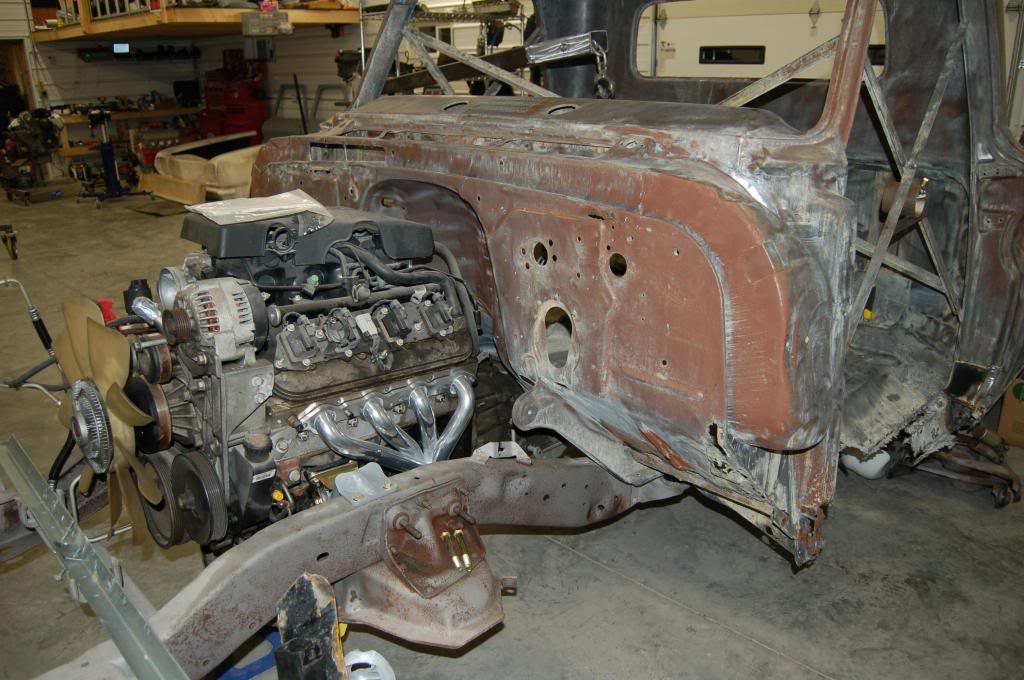
Motor and trans in for initial mock up. CPP makes some pretty good pieces including the LS swap motor mounts specific to this truck and 4L60E trans swap mount.
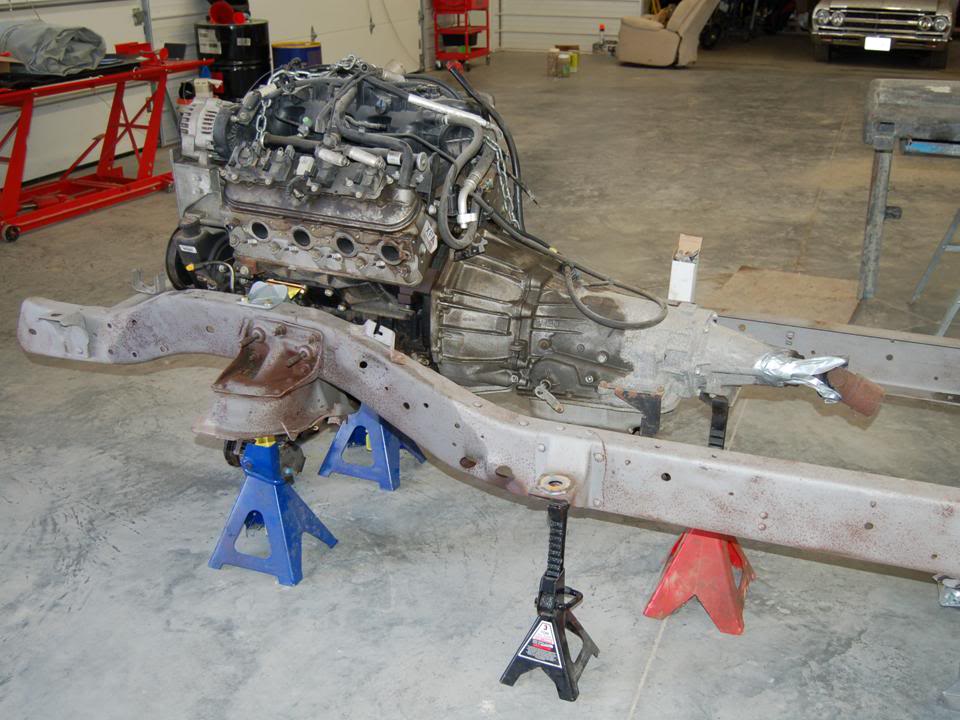

While the cab is off to the body shop for the serious fixes, we are getting the frame in shape. Back from the blasters, spend your money wisely on a "good" blasting business. I got this done cheap, but it was half-assed and I'll have to spend more time on it cleaning it up.

Motor and trans in for initial mock up. CPP makes some pretty good pieces including the LS swap motor mounts specific to this truck and 4L60E trans swap mount.

Last edited by 65drag; 04-17-2013 at 07:14 PM.
04-16-2013, 10:25 AM
#11
10 Second Club
Thread Starter
Join Date: Apr 2013
Location: Carlinville, IL
Posts: 317
Likes: 0
Received 0 Likes
on
0 Posts
Headers are from Sanderson, thermal coated and pricey but they sure do fit and look nice. They are made for an LS swap into a mini Blazer but they work great for my needs.
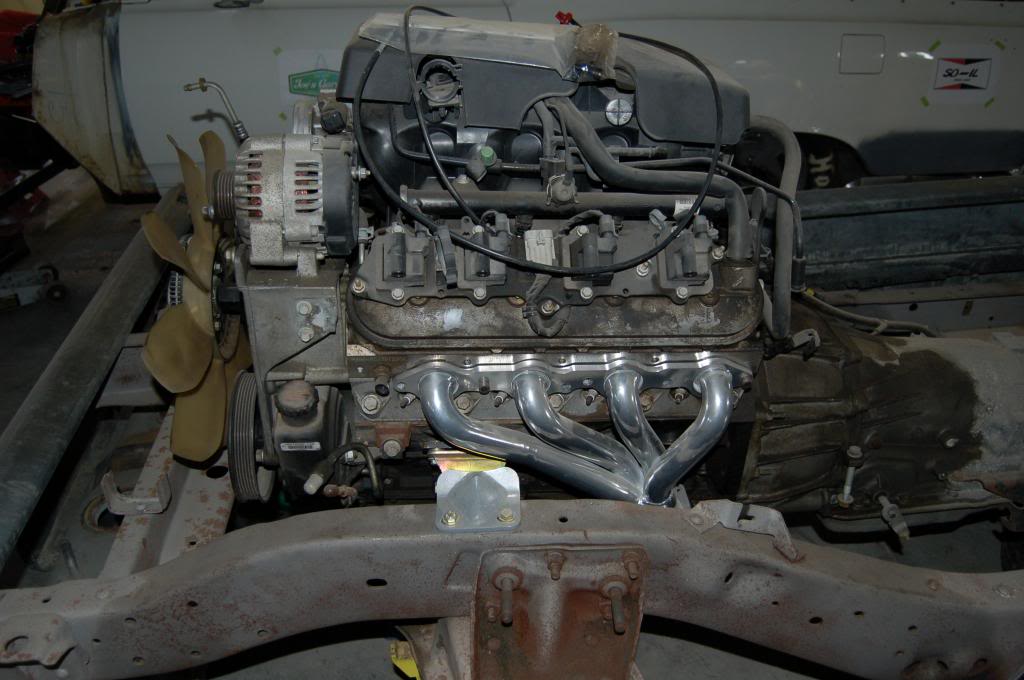
Here is a neat set of engine stands for when you have a motor in waiting. Not just sitting on the ground and makes it easy to roll around out of your way. They just bolt up to the motor mount bosses. I got these off of ebay.


Here is a neat set of engine stands for when you have a motor in waiting. Not just sitting on the ground and makes it easy to roll around out of your way. They just bolt up to the motor mount bosses. I got these off of ebay.

Last edited by 65drag; 04-16-2013 at 08:46 PM.
04-16-2013, 10:43 AM
#12
10 Second Club
Thread Starter
Join Date: Apr 2013
Location: Carlinville, IL
Posts: 317
Likes: 0
Received 0 Likes
on
0 Posts
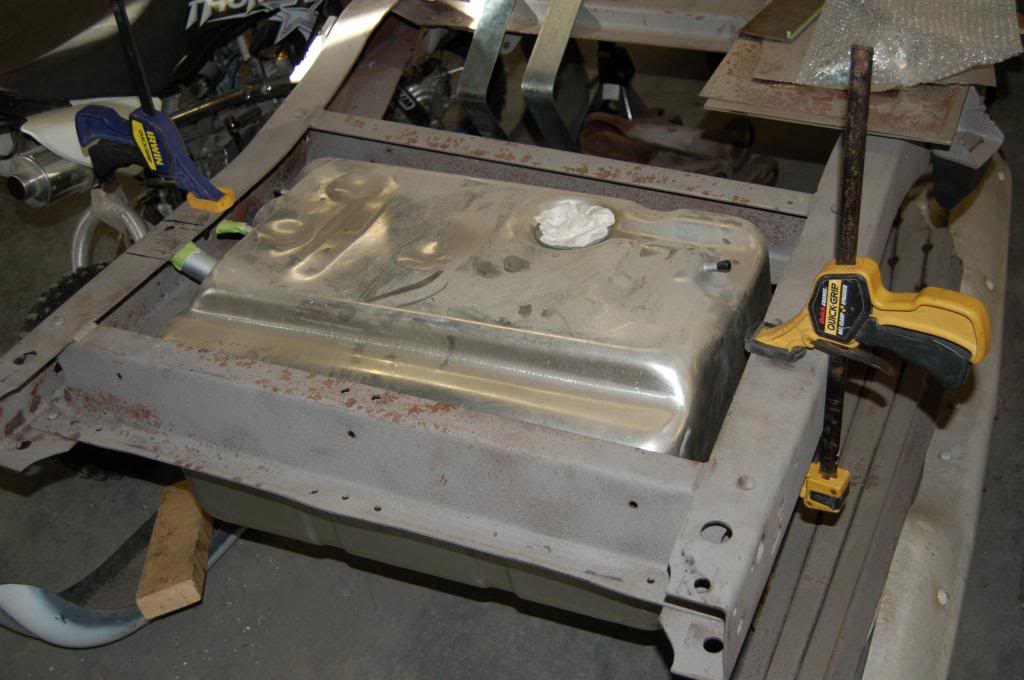
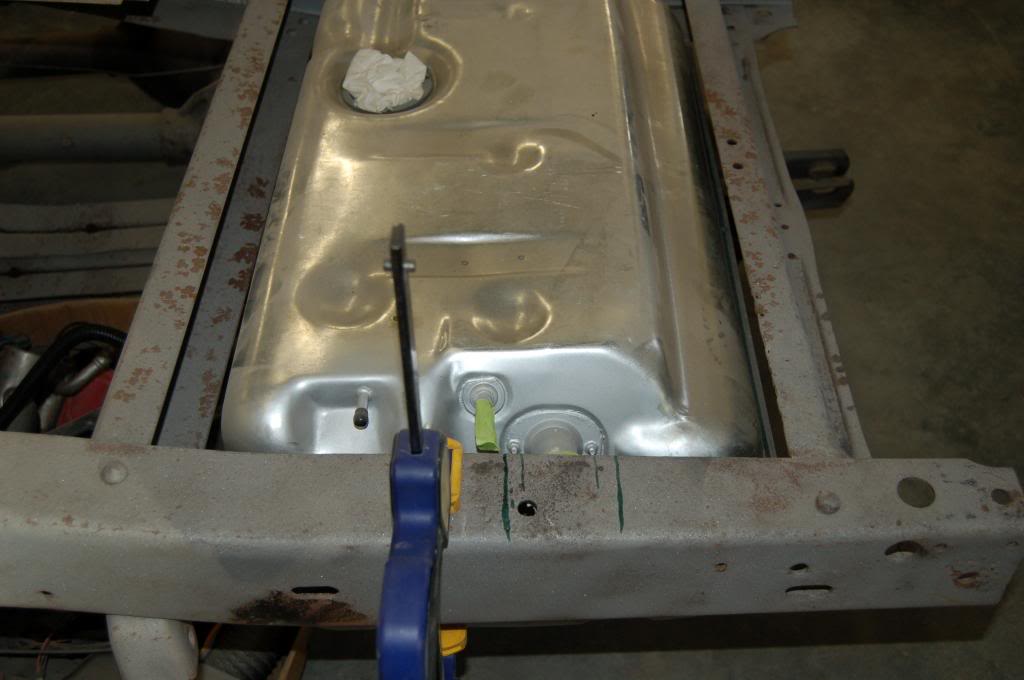
Still not totally sold on this setup. This is a gas tank for an early full sized Blazer. It fits, with some mods to the frame, but it just seems like a compromise. I'll keep looking for something better.

 04-16-2013, 11:02 AM
#13
10 Second Club
Thread Starter
Join Date: Apr 2013
Location: Carlinville, IL
Posts: 317
Likes: 0
Received 0 Likes
on
0 Posts
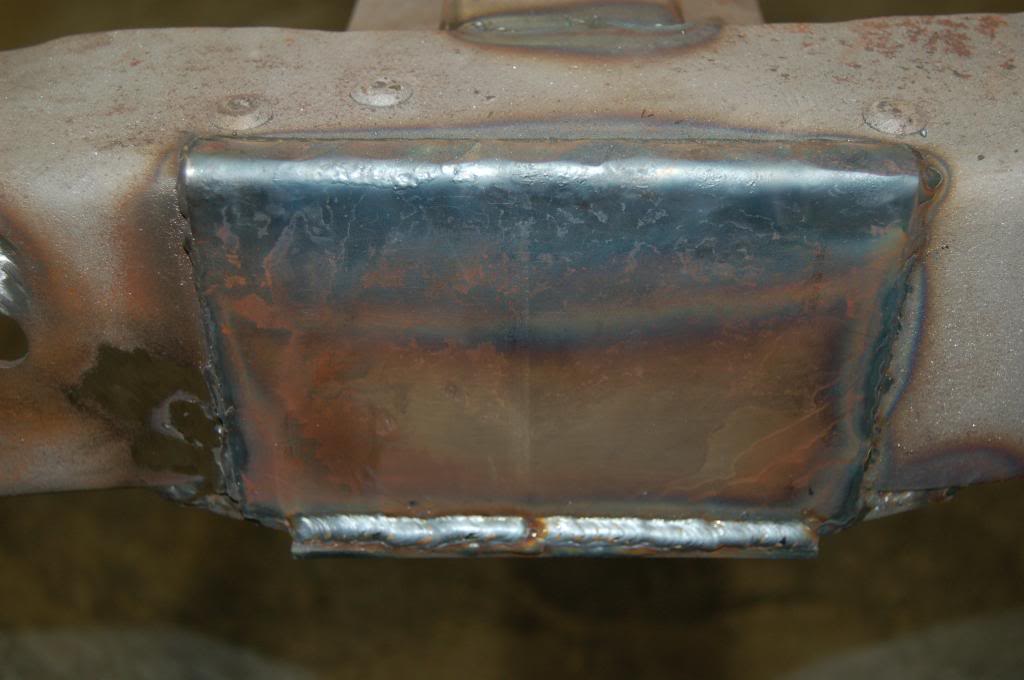
Doing some small frame patching and stiffening.

Here is the CPP LS Motor mount swap kit. They are nice and come complete with mounting offset plates and bolts.
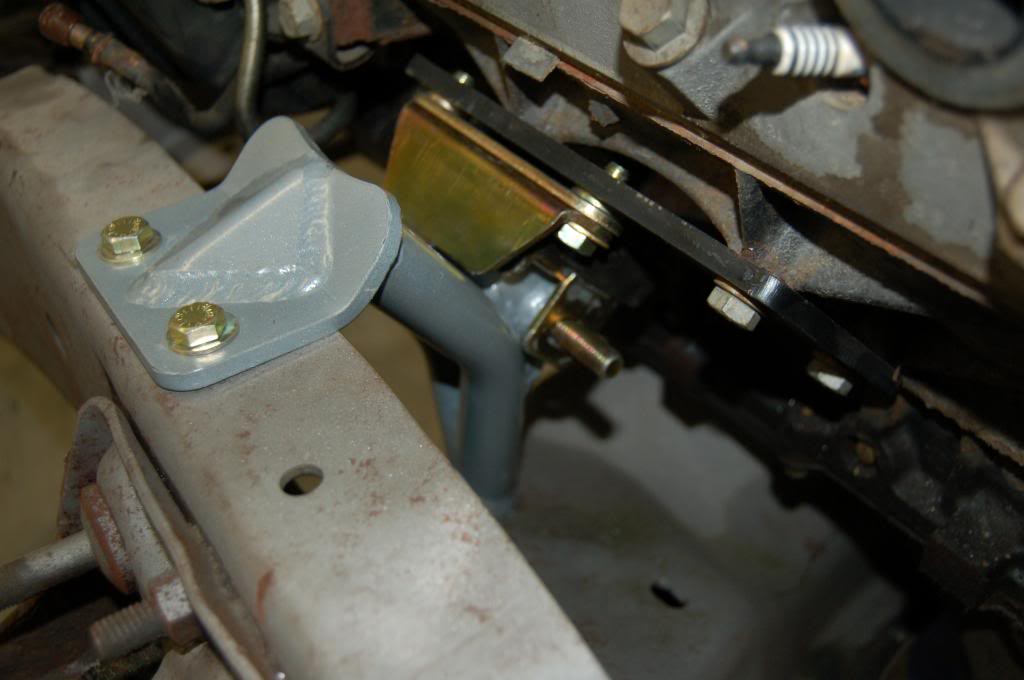


Here is the CPP LS Motor mount swap kit. They are nice and come complete with mounting offset plates and bolts.

Last edited by 65drag; 04-16-2013 at 08:48 PM.
04-16-2013, 11:05 AM
#14
10 Second Club
Thread Starter
Join Date: Apr 2013
Location: Carlinville, IL
Posts: 317
Likes: 0
Received 0 Likes
on
0 Posts
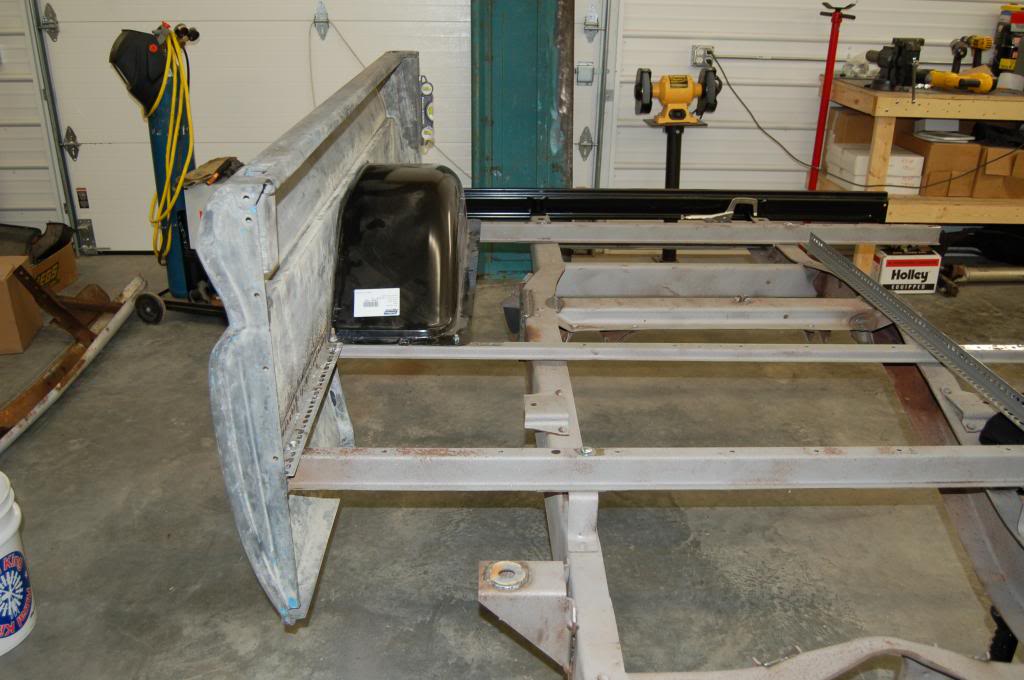
Using the original bed sides because no one repops them yet. All you can get are small patch panels and end caps. Luckily, these are not in too bad of shape.
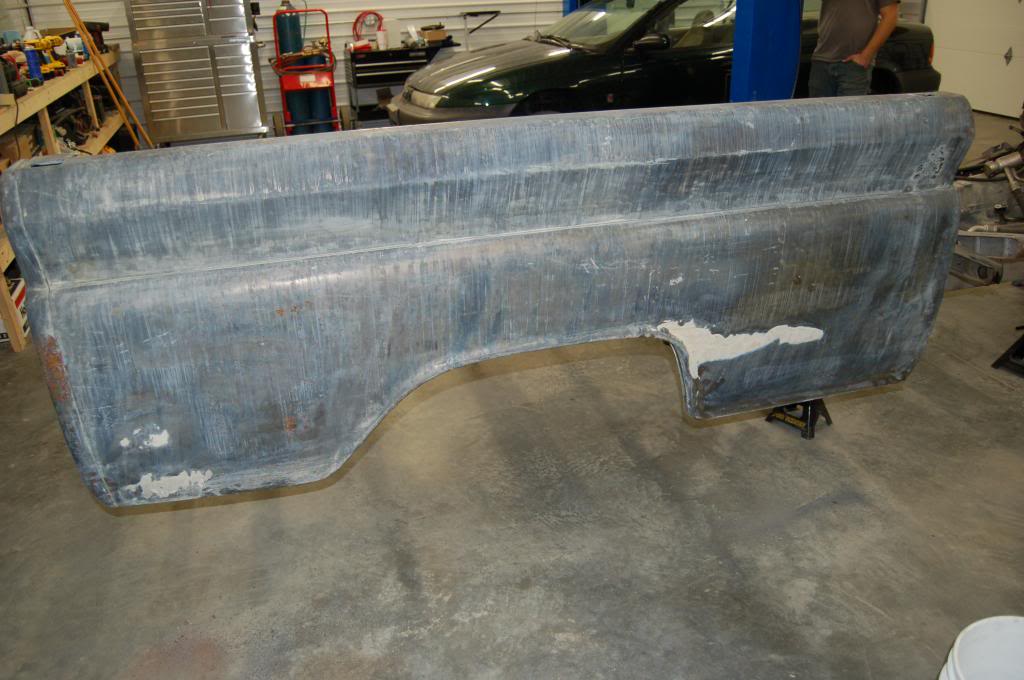
Fitting up some new wheelhouses.

Fitting up some new wheelhouses.


Last edited by 65drag; 04-16-2013 at 08:50 PM.
04-16-2013, 11:10 AM
#15
10 Second Club
Thread Starter
Join Date: Apr 2013
Location: Carlinville, IL
Posts: 317
Likes: 0
Received 0 Likes
on
0 Posts
Starting to assemble the bed. I am NOT going back with a wood floor that will rot in 10 years. Instead, I did some lengthy research and figured out how to put a regular metal pickup bed floor in it. I'll show that later. This is my son Joe who is doing a little carving to make a rear bed sill for a wood floor fit a metal floor.


Last edited by 65drag; 04-16-2013 at 11:30 AM.
04-16-2013, 11:28 AM
#16
10 Second Club
Thread Starter
Join Date: Apr 2013
Location: Carlinville, IL
Posts: 317
Likes: 0
Received 0 Likes
on
0 Posts
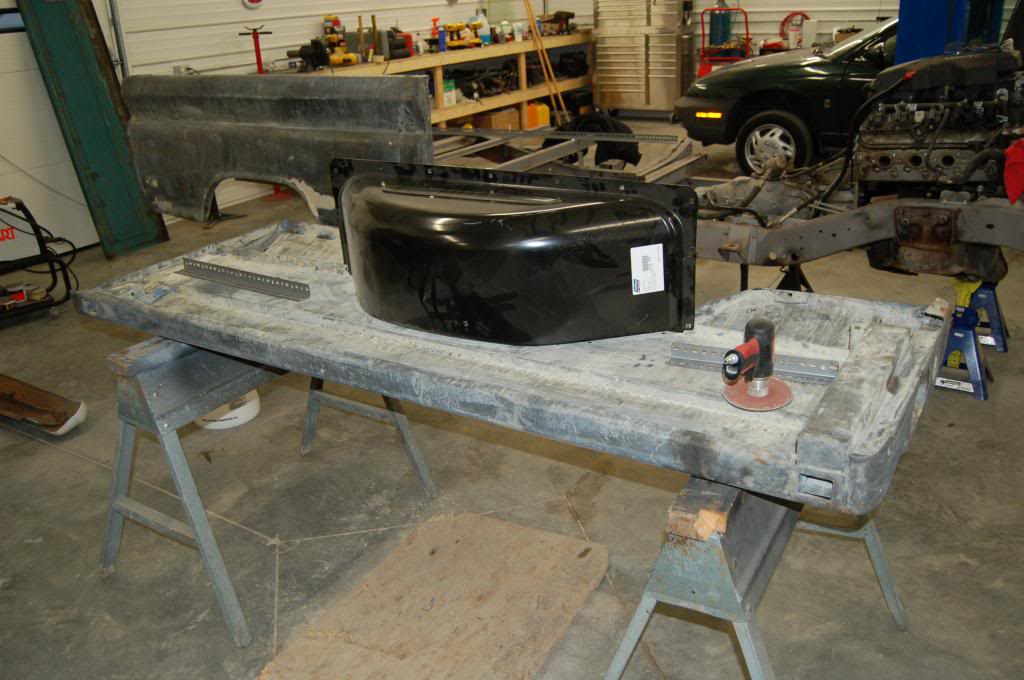
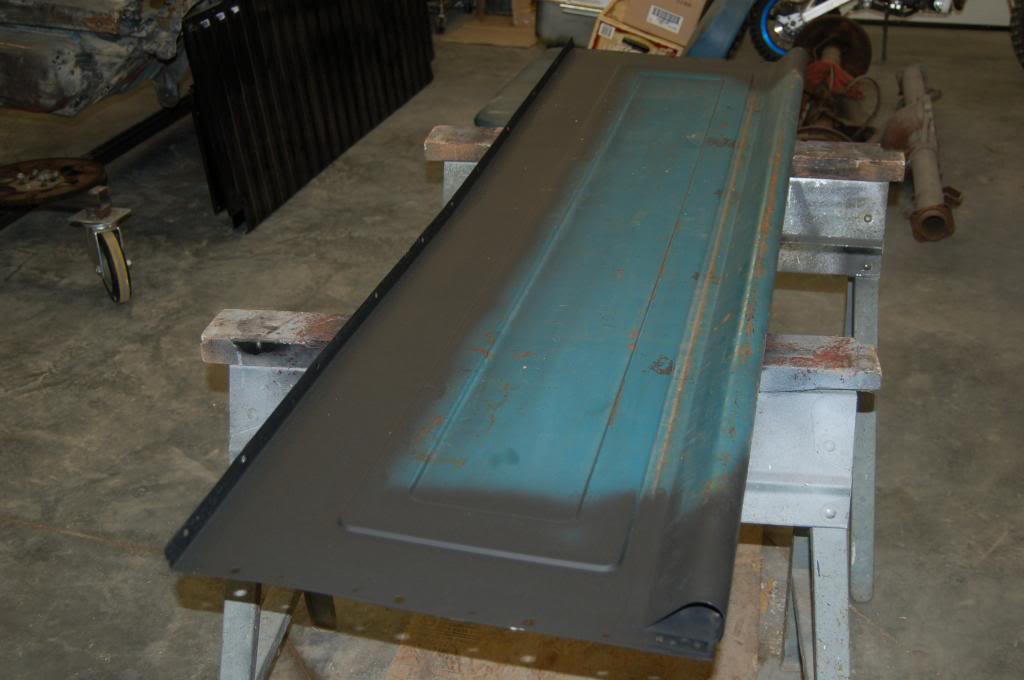
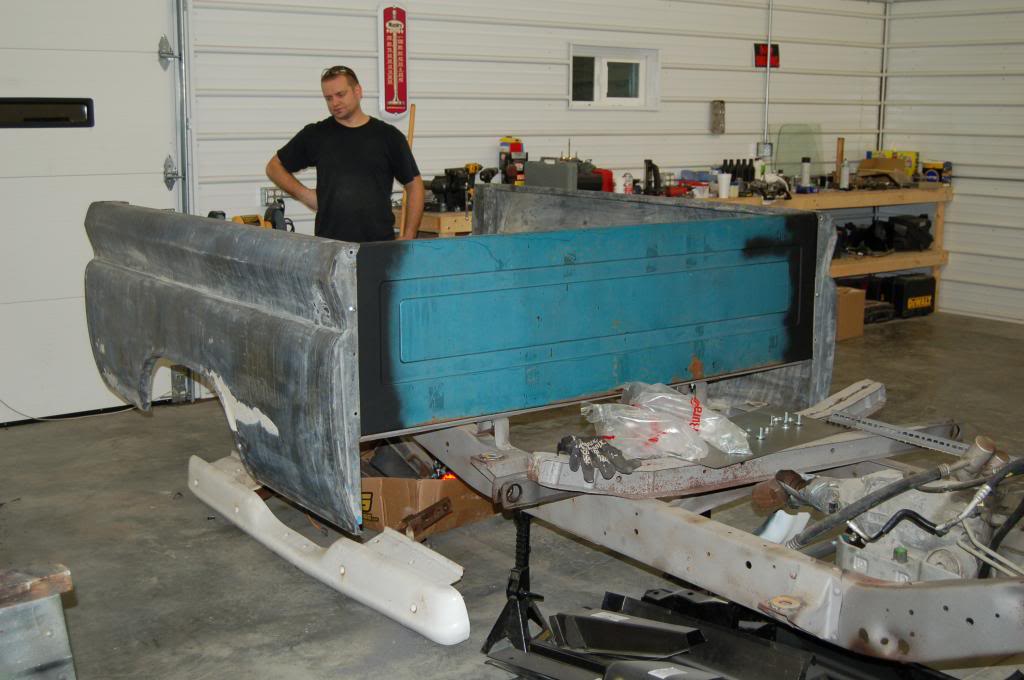
Picked up an ebay bed front and saved a few bucks over a new one. When we are finished with the bed, we are going to bedliner the whole thing so as long as the metal is solid it doesn't have to be mirror smooth.


Last edited by 65drag; 04-17-2013 at 09:17 AM.
04-16-2013, 11:35 AM
#17
10 Second Club
Thread Starter
Join Date: Apr 2013
Location: Carlinville, IL
Posts: 317
Likes: 0
Received 0 Likes
on
0 Posts
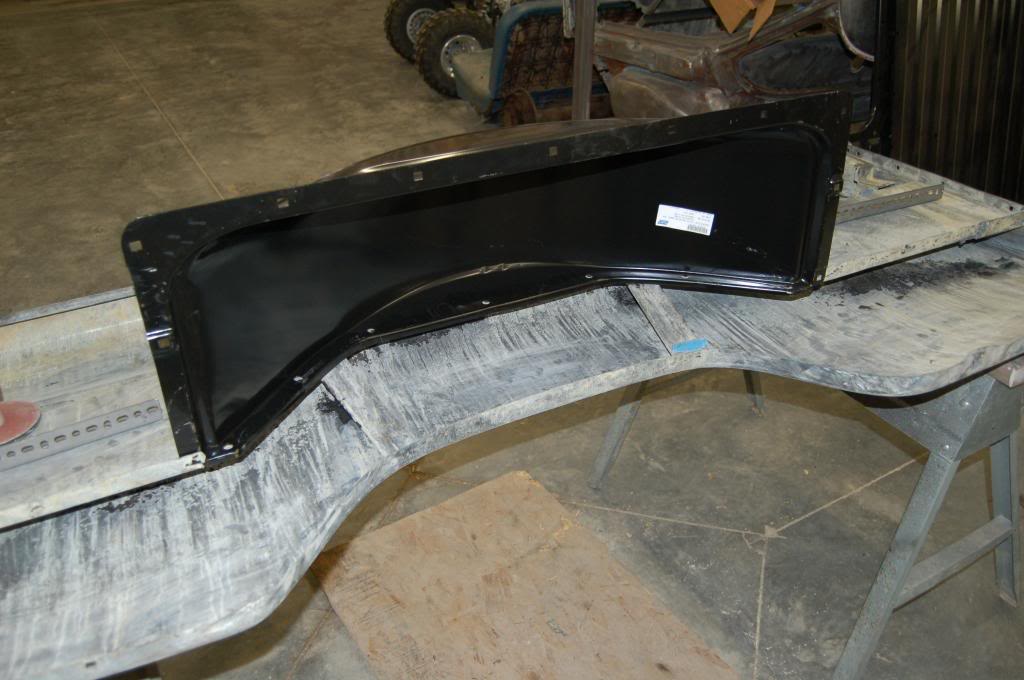
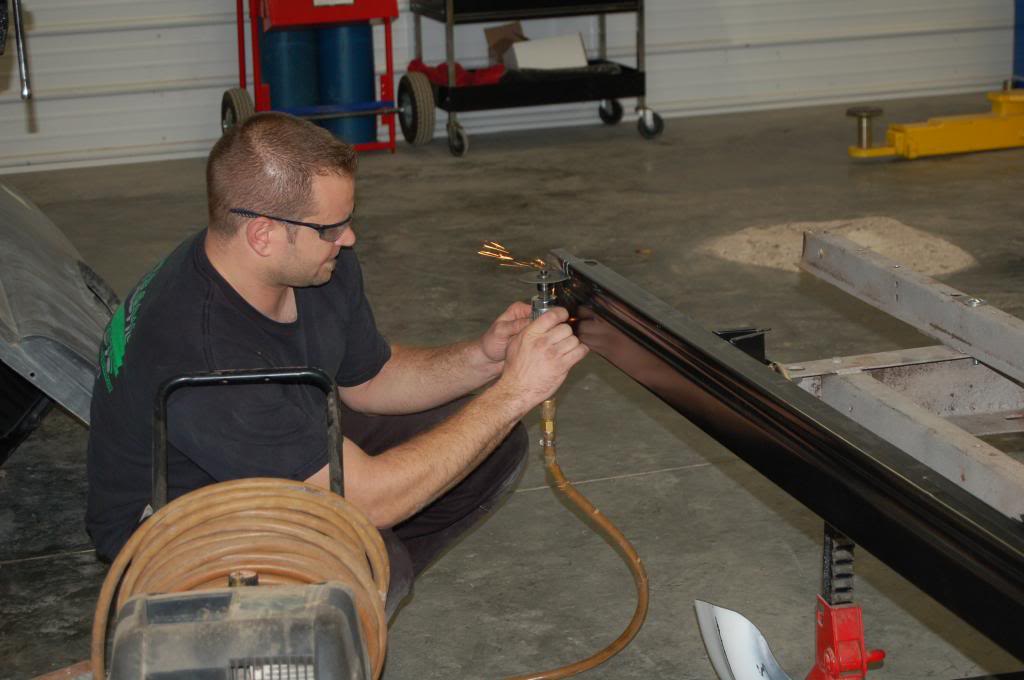
Both front stake pockets were a mess so we are just going to eliminate them and smooth over the holes in the top of the bed rail.
As with most truck motor LS's, a couple of exhaust bolts were broken so Joe is drilling them for an easy out.
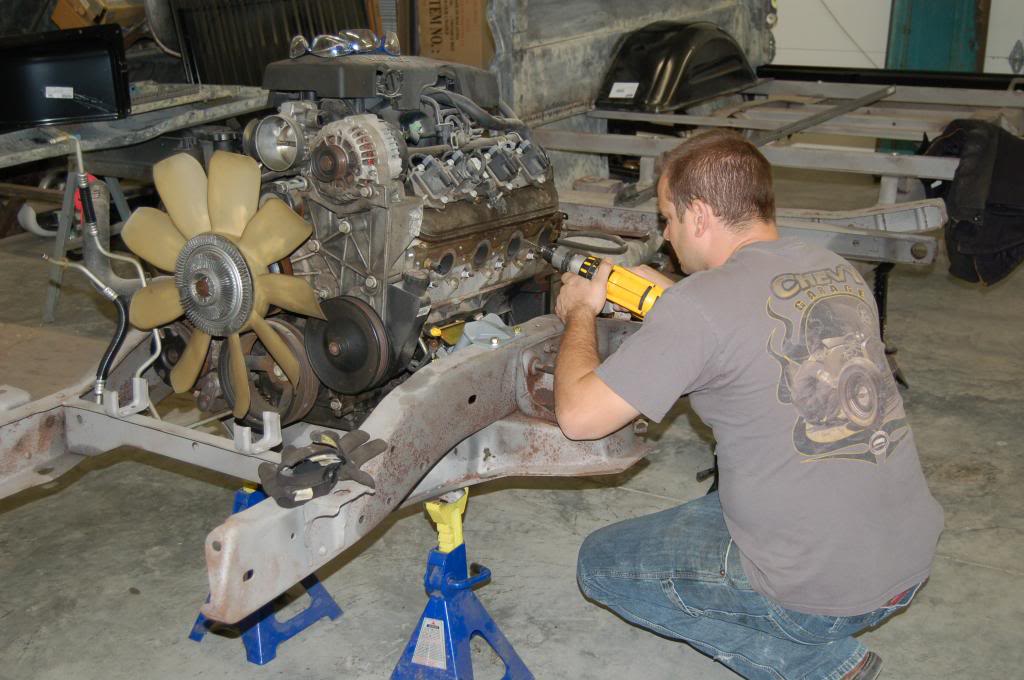

As with most truck motor LS's, a couple of exhaust bolts were broken so Joe is drilling them for an easy out.

Last edited by 65drag; 04-16-2013 at 11:56 AM.
04-16-2013, 11:51 AM
#18
10 Second Club
Thread Starter
Join Date: Apr 2013
Location: Carlinville, IL
Posts: 317
Likes: 0
Received 0 Likes
on
0 Posts
Setting the cab back on to check fit to bed and motor/trans.
Since these pics, I have made a bracket for the lift that lifts the cab from inside of the top of the door jambs and balances the cab perfectly. I'll get some pics of that later.
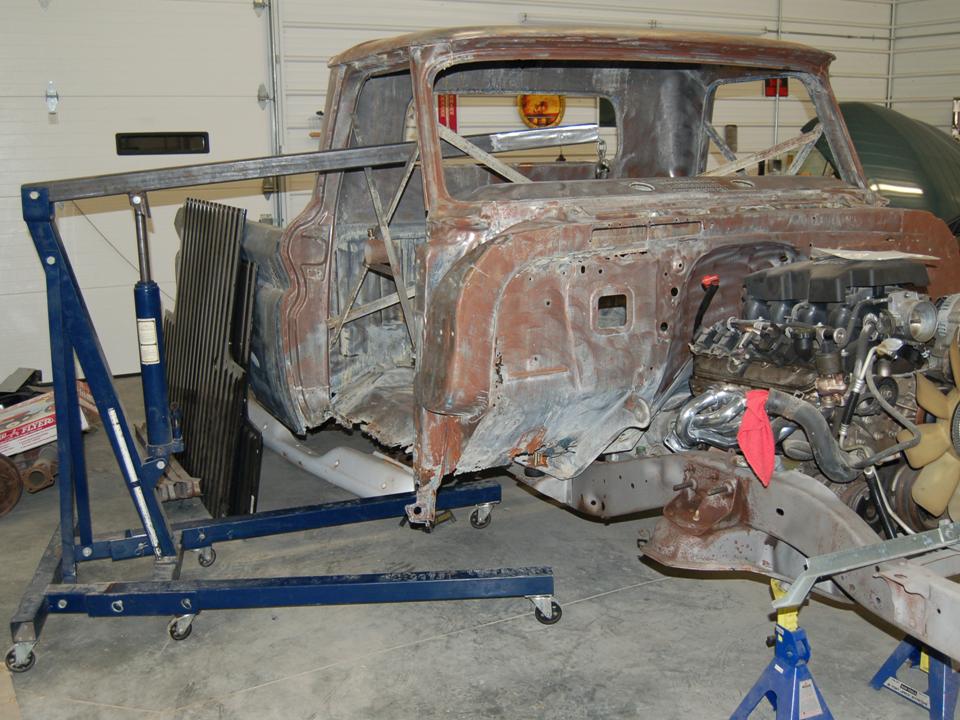

Since these pics, I have made a bracket for the lift that lifts the cab from inside of the top of the door jambs and balances the cab perfectly. I'll get some pics of that later.


Last edited by 65drag; 04-16-2013 at 11:58 AM.
04-16-2013, 11:56 AM
#19
10 Second Club
Thread Starter
Join Date: Apr 2013
Location: Carlinville, IL
Posts: 317
Likes: 0
Received 0 Likes
on
0 Posts
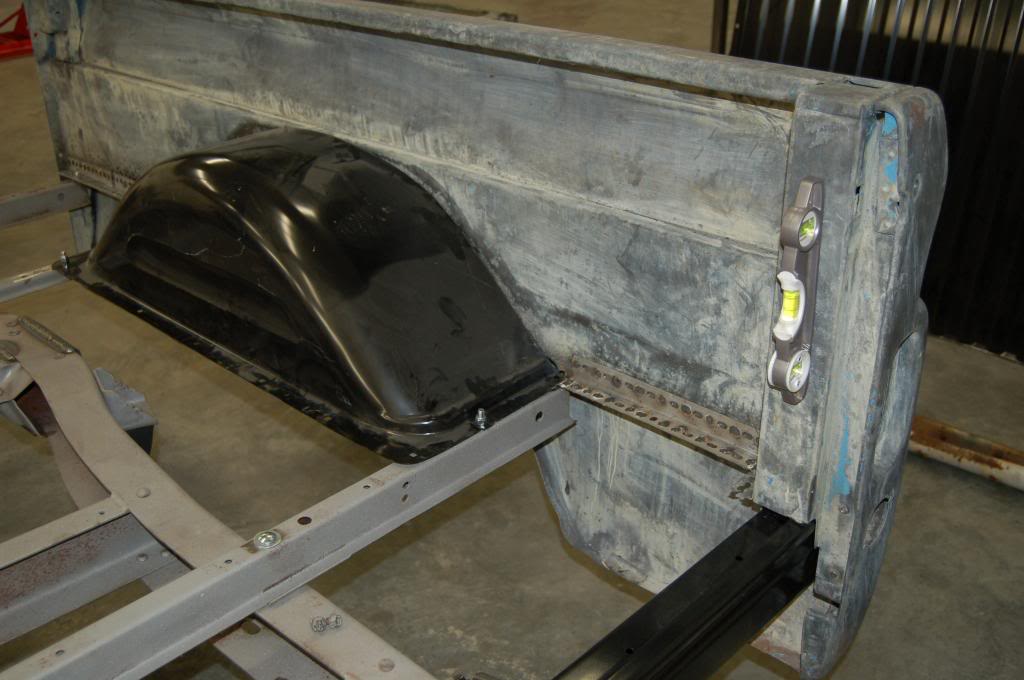
With new cab support pucks in place, we have nice clearance on the bellhousing and trans.
The bed will be adjusted to height to match the cab.
Got the doors from a donor in Arizona. Nice to have originals that have never seen a day of road salt. They are straight and in primer ready to go.
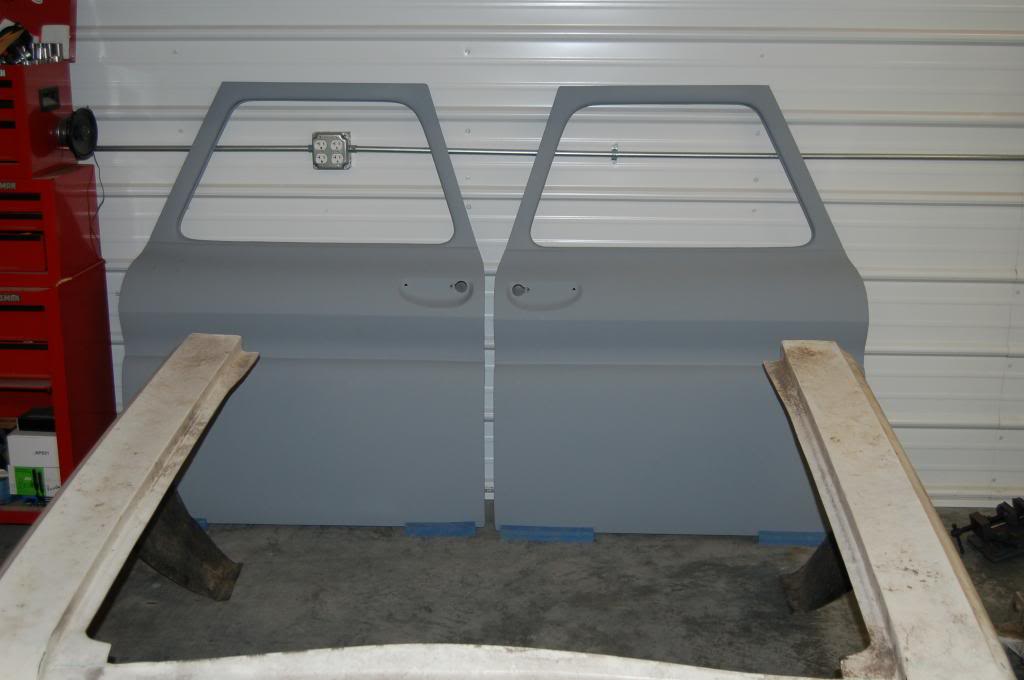

The bed will be adjusted to height to match the cab.

Got the doors from a donor in Arizona. Nice to have originals that have never seen a day of road salt. They are straight and in primer ready to go.
 04-17-2013, 09:26 AM
#20
10 Second Club
Thread Starter
Join Date: Apr 2013
Location: Carlinville, IL
Posts: 317
Likes: 0
Received 0 Likes
on
0 Posts
Joe and I took a trip to the body shop yesterday to check out the progress my friend George has made on the cab. Starting to really take shape. This thing was a nightmare to get started and has to go together like a jigsaw pussle because so many different panels need work and they all connect to each other.
The floor pan patches are made quite well and fit nice.

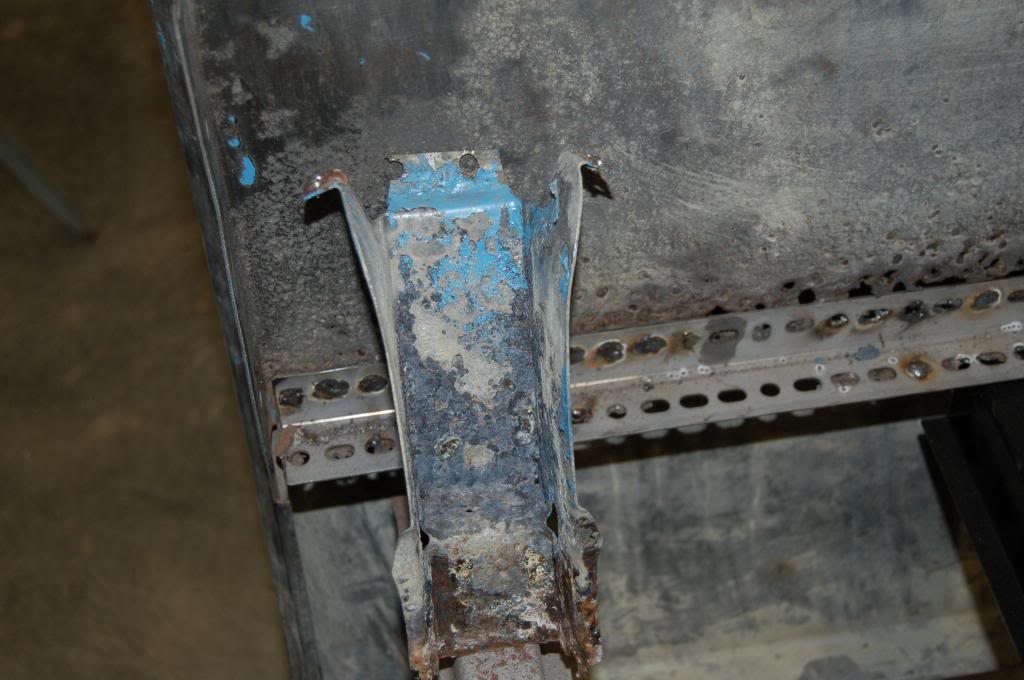
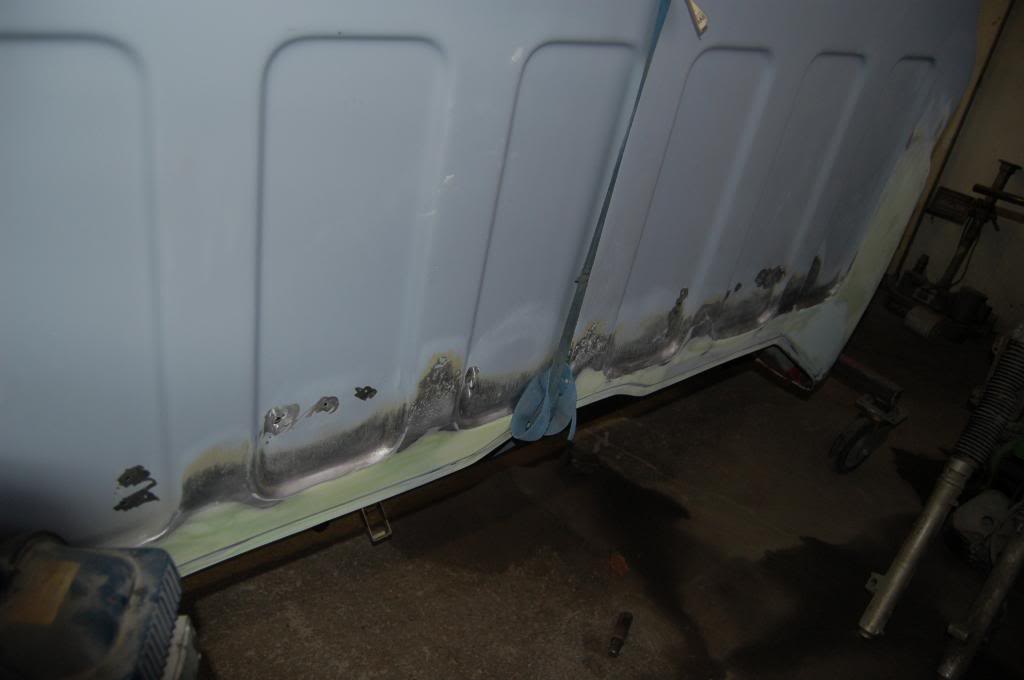
Where you see body filler all across the rear was rusted away and required all new custom bent pieces to reconnect top to bottom. The only thing holding the rear of the cab together were the gas tank supports from the floor to the inside of the back of the cab. The holes you see are where the gas tank supports were spot welded to the back of the cab. Since I am removing the tank from inside the cab, there is no reason to have the supports still in there.

The floor pan patches are made quite well and fit nice.

Where you see body filler all across the rear was rusted away and required all new custom bent pieces to reconnect top to bottom. The only thing holding the rear of the cab together were the gas tank supports from the floor to the inside of the back of the cab. The holes you see are where the gas tank supports were spot welded to the back of the cab. Since I am removing the tank from inside the cab, there is no reason to have the supports still in there.

Last edited by 65drag; 04-19-2013 at 08:17 AM.