
Pacesetter Header Mods For Gbody- Update
 06-02-2013, 07:19 PM
#1

So I handled the passenger side issue with the headers rubbing the frame without needing to hammer the tubes. Now I was to tackle the driver side with these Fbody headers.
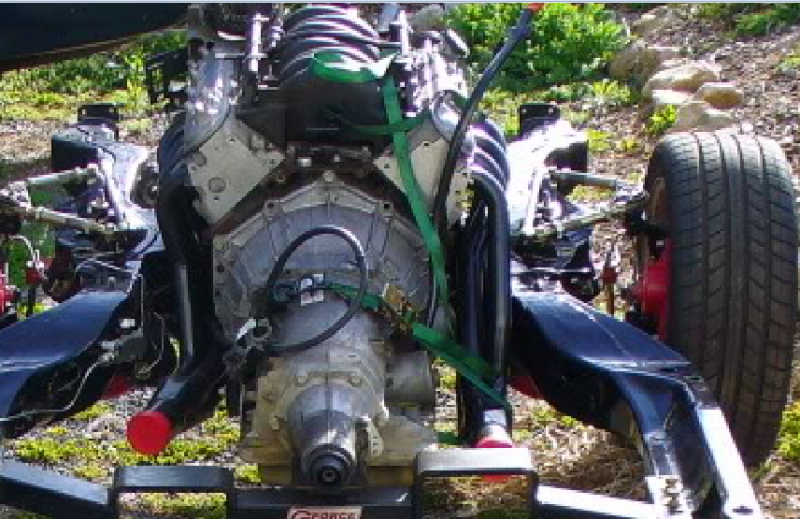
Here is how it looks under the body. *NOT MY PIC* I think I found this pic on the gbody forums.
My Pics Below


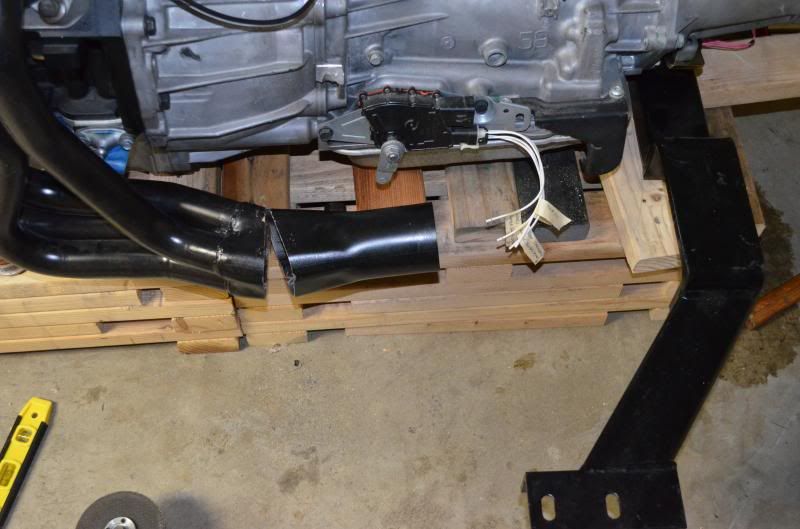
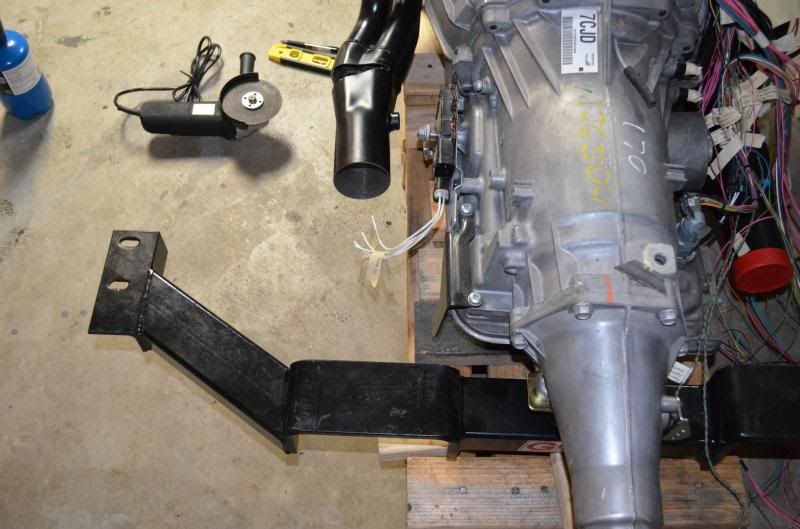
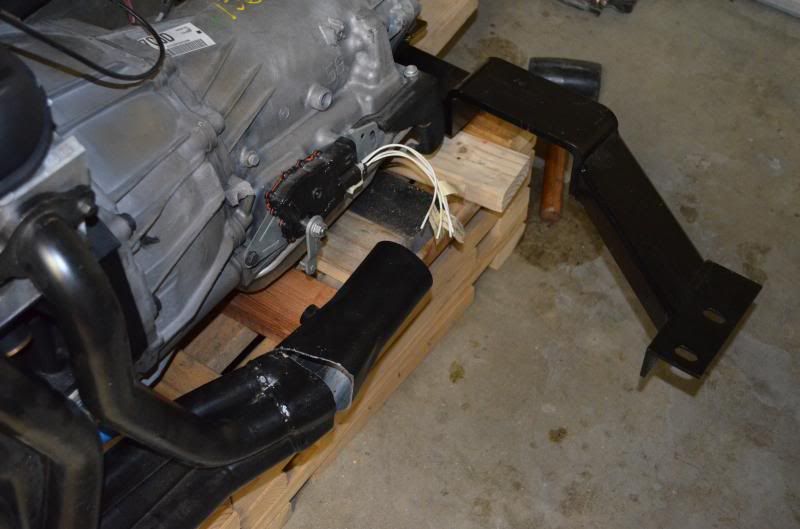
Even a little interference with O2 sensor and shifter bracket. Both passenger and driver O2 bungs will need to be relocated to the opposite sides.
I know some have had success with heating the headers and with a large cheater pipe bend them into the direction they want. Well I don't own the proper acetylene torch for this, and a small torch will not handle the job. So after sitting down and looking at the headers for a while and a few drinks I decided to cut them.

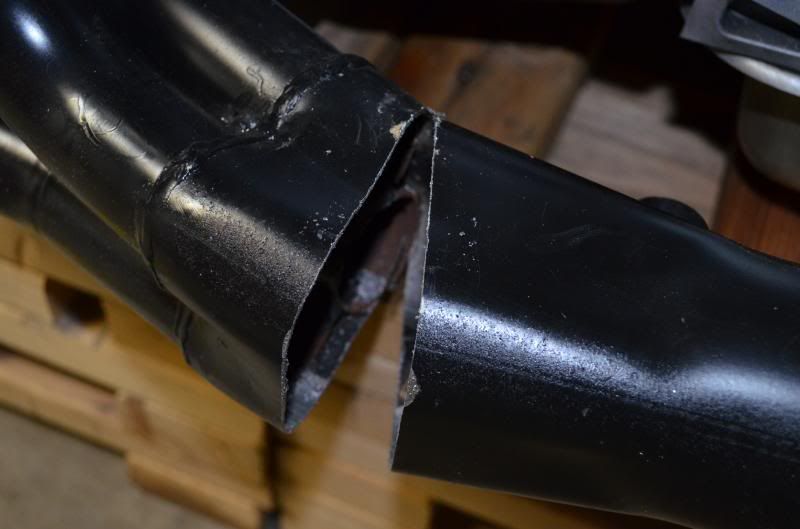
After cutting it I had already committed, and then realized why I do not drink, and sobered up quick. ahaha
So I sad FK! it and bent it out a little to get it to be straight.
Kinda happy with it, but I hate where I made the cut. All that's needed how to to make a template, cut up some sheet metal and weld in the patch.
Has anyone else attempted this before?
--------------------------------------------------------
UPDATE
Just got the headers back from being welded.
Passenger sides tubes were cut at the flange and then pulled away from the frame for clearance.
Before

After Re welded all around.
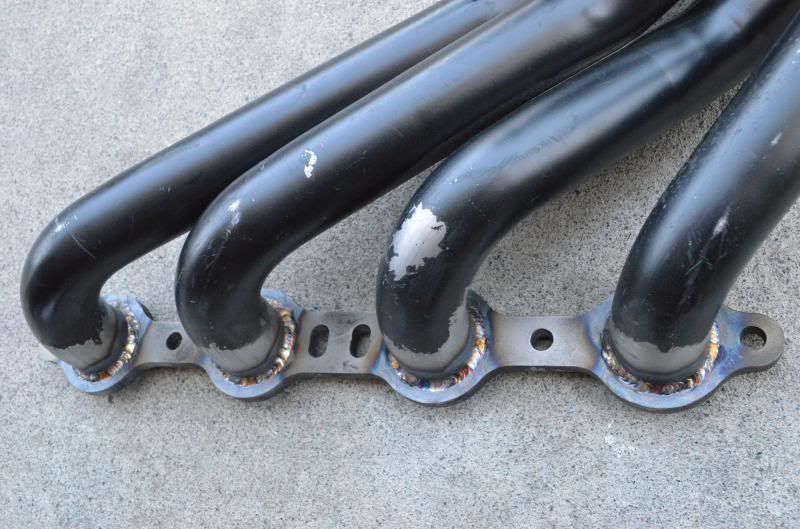
Driver side, Before Fbody headers.
After I cut them and bent it straight.
After, After being patched up and welded.
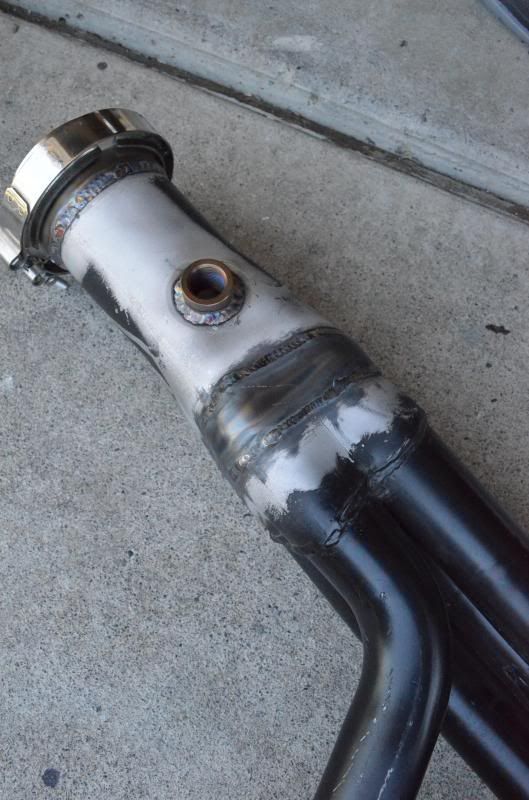
Since both headers were bent and modified to either be bent straight or clear the frame I could hardly get the O2 sensors to go in. So I had some O2 bungs welded on the opposite side.
**Guess I didn't think about it or maybe I forgot to tell the guy, but the O2 sensor bungs I bought were kind of long. Guess I should have had him cut them down and then weld them. I may need to cut them down on the outside so the O2 sensor is actually sticking out further**
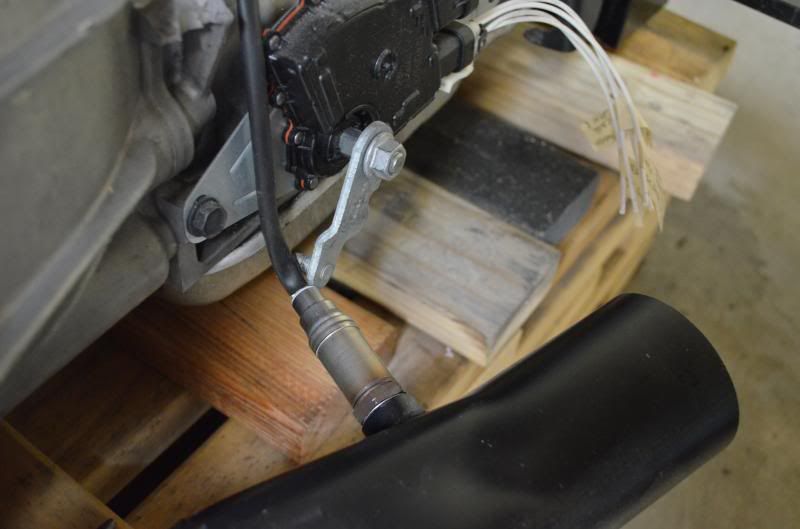
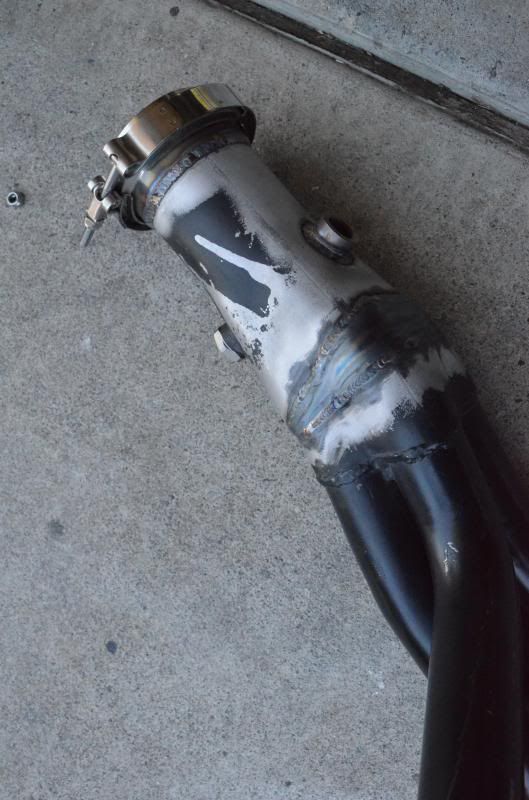
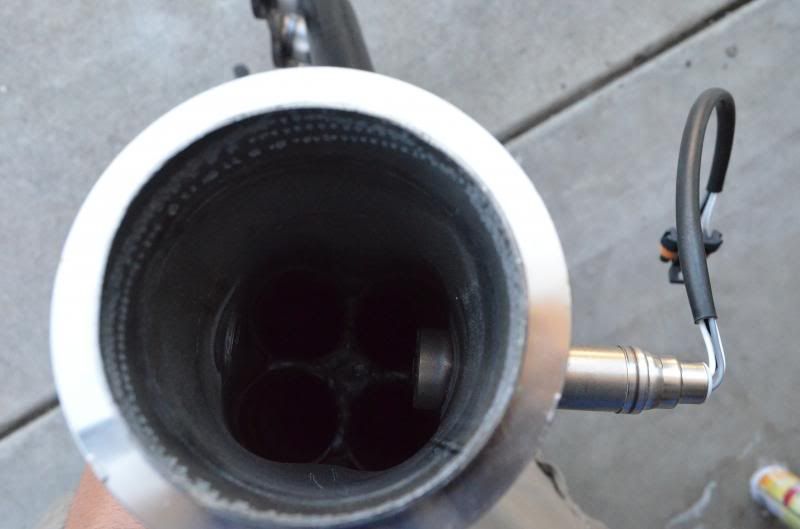
Pic of inside the headers WITH O2 sensor in.
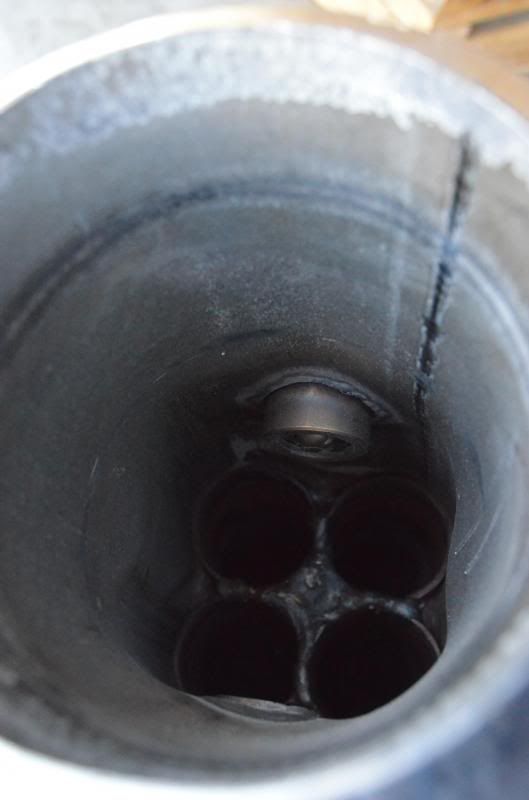
Another shot.
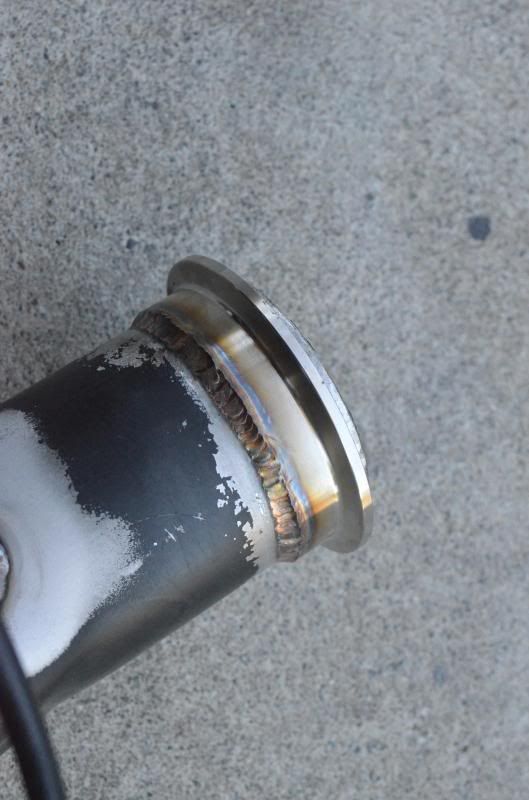
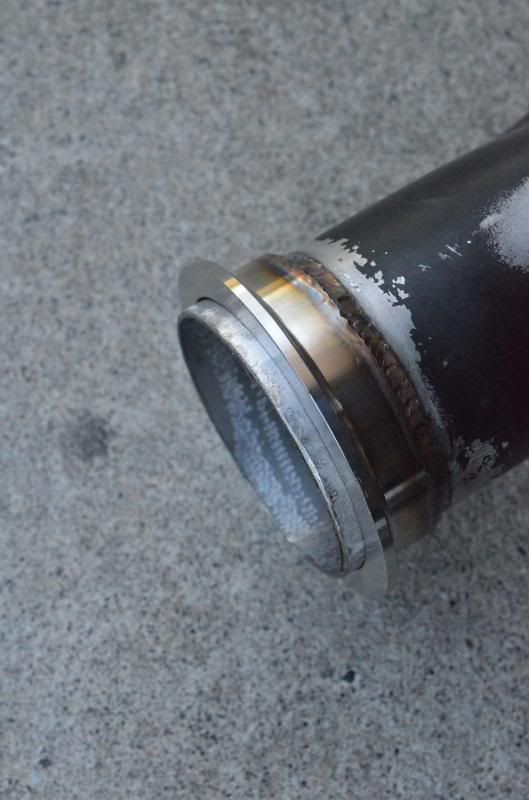
Also had Vbands put on.
- 1. I did not like the way the headers bend out at an angle and straight into my driver side frame.
- 2. The headers were not pointing straight for the humps in the trans crossmember
Here is how it looks under the body. *NOT MY PIC* I think I found this pic on the gbody forums.
My Pics Below
Even a little interference with O2 sensor and shifter bracket. Both passenger and driver O2 bungs will need to be relocated to the opposite sides.
I know some have had success with heating the headers and with a large cheater pipe bend them into the direction they want. Well I don't own the proper acetylene torch for this, and a small torch will not handle the job. So after sitting down and looking at the headers for a while and a few drinks
I decided to cut them.After cutting it I had already committed, and then realized why I do not drink, and sobered up quick. ahaha
So I sad FK! it and bent it out a little to get it to be straight.
Kinda happy with it, but I hate where I made the cut. All that's needed how to to make a template, cut up some sheet metal and weld in the patch.
Has anyone else attempted this before?
--------------------------------------------------------
UPDATE
Just got the headers back from being welded.
Passenger sides tubes were cut at the flange and then pulled away from the frame for clearance.
Before
After Re welded all around.
Driver side, Before Fbody headers.
After I cut them and bent it straight.
After, After being patched up and welded.
Since both headers were bent and modified to either be bent straight or clear the frame I could hardly get the O2 sensors to go in. So I had some O2 bungs welded on the opposite side.
**Guess I didn't think about it or maybe I forgot to tell the guy, but the O2 sensor bungs I bought were kind of long. Guess I should have had him cut them down and then weld them. I may need to cut them down on the outside so the O2 sensor is actually sticking out further**
Pic of inside the headers WITH O2 sensor in.
Another shot.
Also had Vbands put on.
Last edited by BOXCHEV; 08-08-2013 at 12:37 PM.
 06-02-2013, 10:45 PM
#2
Anyone used these? Just came across them. Guess cheaper then plugging the orignal O2 bungs and welding new ones on the other side. This should help with the clearing issues for O2 sensors.
http://www.ebay.com/itm/Angle-Adapter-4-Oxygen-Sensor-Extender-02-Bung-Extension-Adaptor-HHO-O2-Spacer-/181081852810?pt=Race_Car_Parts&vxp=mtr&hash=item2a2951cb8a
http://www.ebay.com/itm/Angle-Adapter-4-Oxygen-Sensor-Extender-02-Bung-Extension-Adaptor-HHO-O2-Spacer-/181081852810?pt=Race_Car_Parts&vxp=mtr&hash=item2a2951cb8a
06-03-2013, 11:02 AM
#3
TECH Fanatic
iTrader: (27)

What if you cut the rest of the piece off and flipped it 180*. That might straighten out the tubes enough and you would just have to butt weld it rather than putting a patch in. Also, your O2 sensor would be on the opposite side and more than likely give you more room.
06-03-2013, 04:52 PM
#4
TECH Resident
iTrader: (13)
Join Date: Mar 2008
Location: On the coast of somewhere
Posts: 779
Likes: 0
Received 1 Like
on
1 Post
Please show us a pic(if you can) of how low they hang in comparison with the tranny. Been wanting to try this cut and weld method. Just never could find a cheap set of headers to "sacrifice" with consideration of it not working out. Looks like it will.
06-08-2013, 09:54 AM
#5

What if you cut the rest of the piece off and flipped it 180*. That might straighten out the tubes enough and you would just have to butt weld it rather than putting a patch in. Also, your O2 sensor would be on the opposite side and more than likely give you more room.
I too have have had many nights of alcohol induced engineering...the key to getting the project done is to either stop drinking, or really start slamming beers


 06-08-2013, 04:45 PM
#7
What if you cut the rest of the piece off and flipped it 180*. That might straighten out the tubes enough and you would just have to butt weld it rather than putting a patch in. Also, your O2 sensor would be on the opposite side and more than likely give you more room.
Trending Topics
06-08-2013, 07:57 PM
#8
11 Second Club
iTrader: (8)
Join Date: Jan 2002
Location: SILSBEE TX
Posts: 1,782
Likes: 0
Received 0 Likes
on
0 Posts

I had a like problem on left side with my coated"race only" pacesetter 10-11 years ago ( still running same set of headers @ 78k miles ) I cut about 1/2 way threw the header on the >> inside << of the colecter and then closed up the gap ( this way I did not need to patch- just close the gap and weld up the seam, went to auto supplier and get a spray can of high temp crome paint and spray once-twice a year, not a perfect match but close not seen as I used /still do HEADER WRAP ( MOST IF NOT ALL MAKERS SAY NOT TO USE WRAP AS IT WILL SWEAT and cause rust, I have no rust problem as I spray 1-2 time a year( as stated for 10-11 years )
Also, why are your O2 sensor on the inside? did you order the headers for your car ? or just pick them from surplus,? mine from Texas Speed came with the sensor on the outside, I would plug the inside hole( get a oil pan plug at parts supplier) and get a "old time" spark plug anty foul adpater and weld on the outside of both heaters
just my .02' Johnny
Last edited by SS SLP2; 06-08-2013 at 08:06 PM.
06-08-2013, 10:01 PM
#9
Teching In

Join Date: May 2013
Location: Kennewick
Posts: 18
Likes: 0
Received 0 Likes
on
0 Posts
To me, the way they angled it out was a way to get o2 sensor space and/or other clearance. I dont agree it was well thought out since youd have to like s curve your exhaust to run it properly.
06-09-2013, 01:28 AM
#10

i bought a cheap set of stainless ebay headers just for that!! did the tubes on the drivers side clear frame/ control arm/ etc etc enough? i knew about the header kicking out like that, did see where they were cutting them at the flange and rewelding them..
08-08-2013, 09:06 PM
#12
Anyone been successful heat cycling headers on the car with VHT paint. Let the car run for a while, then turn it off to cool and repeat process.
I see others doing it in the oven, but now way thats going to happen not to mention they literally wouldn't fit anyways.
I see others doing it in the oven, but now way thats going to happen not to mention they literally wouldn't fit anyways.