
LS6 valve covers functionality?? HELP!!!
 10-11-2013, 08:37 PM
#1
On The Tree
Thread Starter
iTrader: (4)

Join Date: Dec 2011
Location: San Francisco
Posts: 134
Likes: 0
Received 0 Likes
on
0 Posts
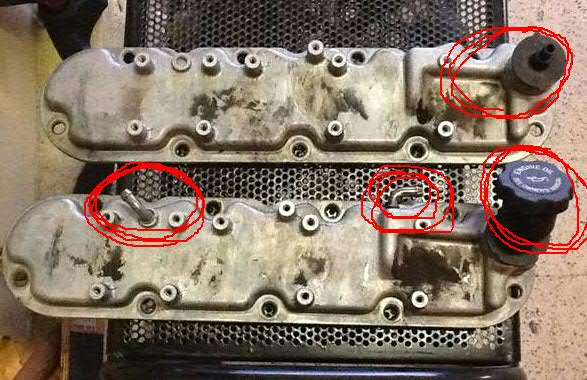
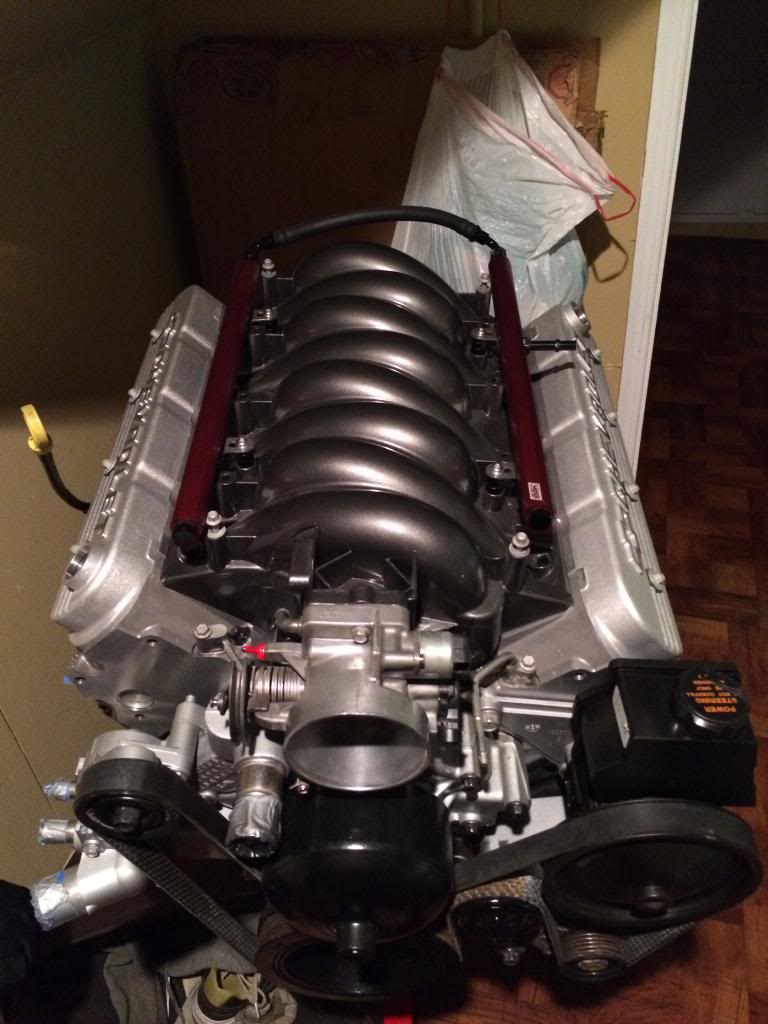
I am swapping some 243 LS6 heads onto my 98 LS1 block for my 69 chevelle and want to relocate my coils so i can put nice somewhat 'old school' style valve covers on. Below are some pics i have of the kind i am looking into.
any advice on where to look to buy them and if i can use them? it looks like some tubing will be deleted from the valve covers if i go aftermarket and im curious if they can still work or what adjustments etc ill need to make?
thanks
here are my old LS1 covers but since im now using ls6 heads the red circles are the parts i think may be deleted?:
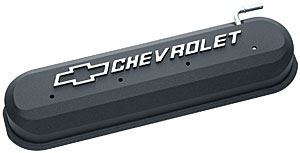
here are the kind i would like to use (black & grey) I would prefer black:
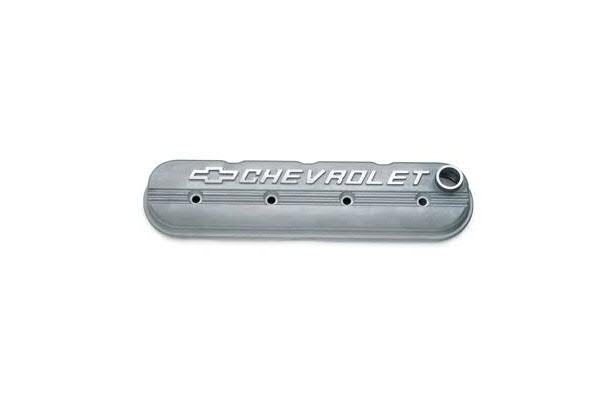
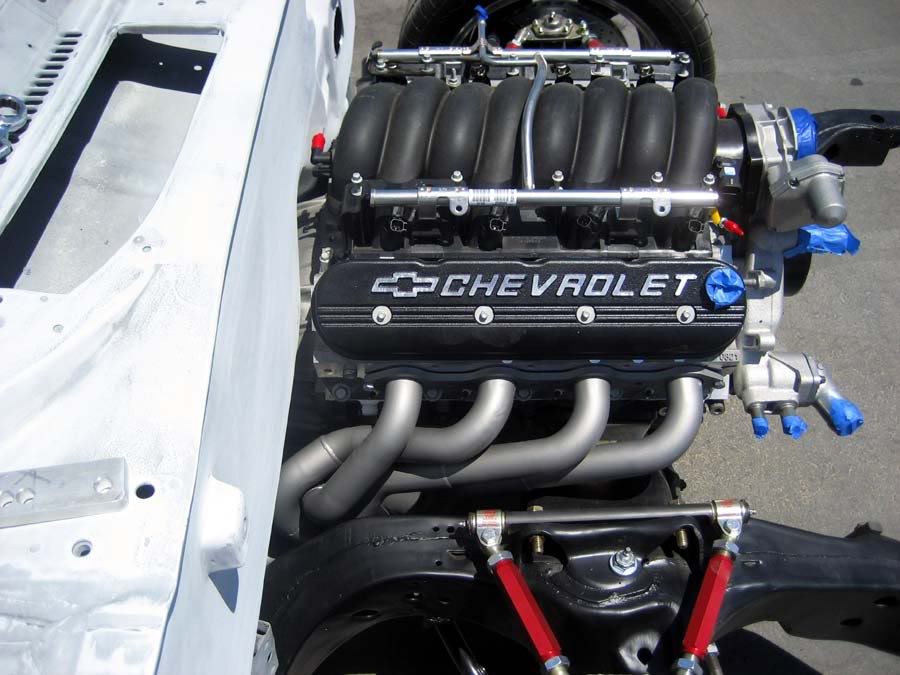
this is the look i am leaning towards:
another type of black cover:
any advice on where to look to buy them and if i can use them? it looks like some tubing will be deleted from the valve covers if i go aftermarket and im curious if they can still work or what adjustments etc ill need to make?
thanks
here are my old LS1 covers but since im now using ls6 heads the red circles are the parts i think may be deleted?:

here are the kind i would like to use (black & grey) I would prefer black:

this is the look i am leaning towards:

another type of black cover:


 10-12-2013, 12:02 AM
#3
TECH Resident
iTrader: (4)

Join Date: Feb 2009
Location: Ohio
Posts: 784
Likes: 0
Received 0 Likes
on
0 Posts
The tubes are all for the PCV system. There are plenty of threads here about modifying or deleting the PCV system. You can use any valve covers you want as long as the bolt pattern matches your heads.
10-13-2013, 01:14 PM
#4
On The Tree
Thread Starter
iTrader: (4)
Join Date: Dec 2011
Location: San Francisco
Posts: 134
Likes: 0
Received 0 Likes
on
0 Posts
very nice looking eng compartment. where are you located? what does the printing run if i wanted to do those same valve covers and the ls6 intake i have?? the car will be charcoal metallic grey with black ss stripes. i would probably do the same 2 colors...
03-13-2014, 12:28 PM
#6
On The Tree
Thread Starter
iTrader: (4)
Join Date: Dec 2011
Location: San Francisco
Posts: 134
Likes: 0
Received 0 Likes
on
0 Posts
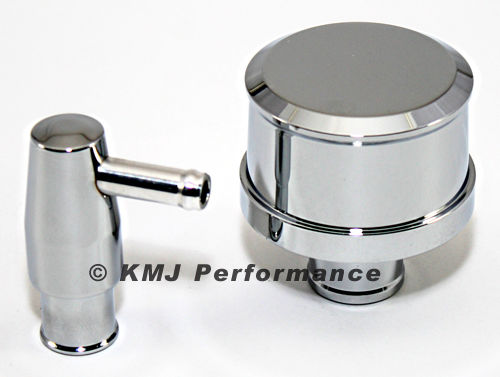
finally pulled the trigger and ordered these covers but by accident ordered 2 of the drivers side. the passenger side usually is close, no breather hole. QUESTION: should i keep both of these and just put a breather in one side. would that be beneficial? or should i exchange for the closed one? i attached a pic of what i would buy to fill both holes, the breather and pcv...would that work nicely?


 03-13-2014, 02:23 PM
#7
The LS6 doesn't use the older LS1 PCV system. It uses a Lifter Valley PCV System.
You can delete the older LS1 PCV system. But without any fresh air intake and PCV system to evaluate internal engine pressure and blowby. You might end up with blown engine seals.
You have two choices (there are others) ..
a) covert to the LS6 Valley PCV System with the Fresh air intake
or
b) run a Breather on both Valve Covers to relieve pressure (but can be an oily mess).
Many Race engine run a vacuum pump to evaluate the internal pressure.
But this has been the subject of many threads... along with many recommendation on solutions.
BC
Trending Topics
03-13-2014, 02:38 PM
#8
I have the same covers and I will be using an LS3 valley cover (you would use LS6 for your LS1) with built in PCV orifice for the dirty side of the PCV and use a Mr Gasket 5425 baffled grommet on the oil fill hole with a simple connector to fresh metered air air (no PCV valve) from my cold air intake. I am not going to run a catch can initially but may add one later.
If you do not use the baffled valve cover, you can use a PCV valve on one of your covers and run the other cover to fresh meter air from your intake. If you don't use metered air and instead use a breather, the engine will behave like it has a small vacuum leak.
Also here is how I made mine black:
If you do not use the baffled valve cover, you can use a PCV valve on one of your covers and run the other cover to fresh meter air from your intake. If you don't use metered air and instead use a breather, the engine will behave like it has a small vacuum leak.
Also here is how I made mine black:
After I was sure the valve covers would fit, I took them to the local powdercoater, Applied Powdercoat in Oxnard. This place does a lot of work for Haas Automation (CNC machines) and I've used them in the past to coat my own automation equipment (the type of engineering I did before I got into medical devices). They do great work. I selected Cardinal BK59 textured black for the finish. It is a little shinier and more black than what the Proform covers came with and it makes a great match for the plastic intake cover. I thought about doing VHT wrinkle black paint at home, which would have been much less expensive, but I was worried I wouldn't get a consistent finish. I'm glad I went this route.


I did a lot of research before deciding how to finish the lettering. This is a common task for the Honda tuner people, so if you search "painting raised letter valve covers" you can find some videos and info, but hardly anything that actually shows the process of finishing the letters. From what I've read there are three common techniques: mask, vasoline (or variant), and sand. The masking method is tedious and can actually leave a bad edge. With vasoline, you coat the faces of the letters prior to painting, then wipe the paint off afterwards. Both of those methods seemed iffy to me, so I went with the sanding method. I used painters tape to protect from accidentally sanding the wrong part and loaded 220 grit into a 5" random orbital sander. It took about 5 minutes per cover to remove the powdercoat and leave a swirly-brushed finish. I would definitely recommend this method; as long as you are careful with the sander and let it do the work, it does a very nice job. The edges of the letters look very crisp.
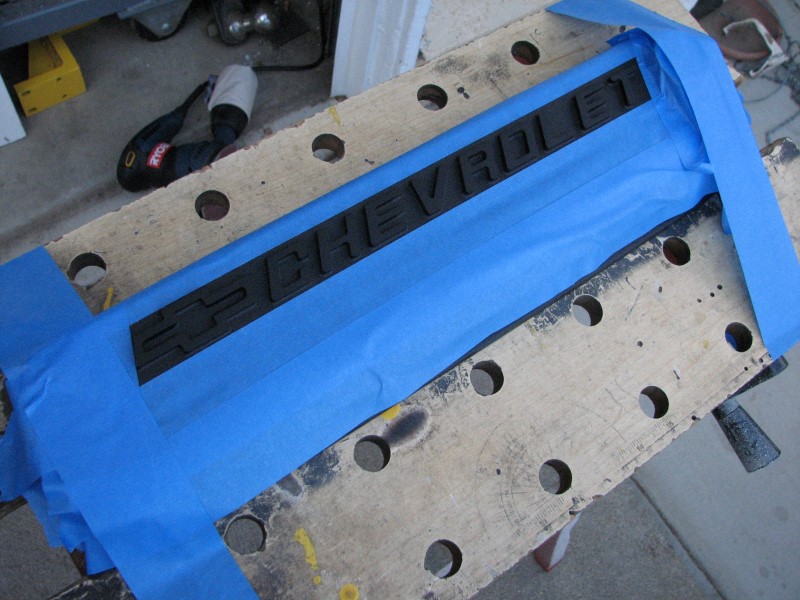


Before

After

I'm extremely happy with the results. Now I better get back to making the car go.
I did a lot of research before deciding how to finish the lettering. This is a common task for the Honda tuner people, so if you search "painting raised letter valve covers" you can find some videos and info, but hardly anything that actually shows the process of finishing the letters. From what I've read there are three common techniques: mask, vasoline (or variant), and sand. The masking method is tedious and can actually leave a bad edge. With vasoline, you coat the faces of the letters prior to painting, then wipe the paint off afterwards. Both of those methods seemed iffy to me, so I went with the sanding method. I used painters tape to protect from accidentally sanding the wrong part and loaded 220 grit into a 5" random orbital sander. It took about 5 minutes per cover to remove the powdercoat and leave a swirly-brushed finish. I would definitely recommend this method; as long as you are careful with the sander and let it do the work, it does a very nice job. The edges of the letters look very crisp.
Before
After
I'm extremely happy with the results. Now I better get back to making the car go.
03-13-2014, 02:57 PM
#9
On The Tree
Thread Starter
iTrader: (4)
Join Date: Dec 2011
Location: San Francisco
Posts: 134
Likes: 0
Received 0 Likes
on
0 Posts
I have the same covers and I will be using an LS3 valley cover (you would use LS6 for your LS1) with built in PCV orifice for the dirty side of the PCV and use a Mr Gasket 5425 baffled grommet on the oil fill hole with a simple connector to fresh metered air air (no PCV valve) from my cold air intake. I am not going to run a catch can initially but may add one later.
If you do not use the baffled valve cover, you can use a PCV valve on one of your covers and run the other cover to fresh meter air from your intake. If you don't use metered air and instead use a breather, the engine will behave like it has a small vacuum leak.
Also here is how I made mine black:
If you do not use the baffled valve cover, you can use a PCV valve on one of your covers and run the other cover to fresh meter air from your intake. If you don't use metered air and instead use a breather, the engine will behave like it has a small vacuum leak.
Also here is how I made mine black:
The Bandit, thanks for the feedback. i'll look into what you're saying about breather vs fresh meter air cus im not sure what that mean or entails. Also, i came across your valve cover thread once before and actually plan to follow it. It turned out GREAT!
03-13-2014, 05:00 PM
#10
Dan
with the LS6 Valley cover.. you don't need to use a) rear passenger and b) Rear Driver side ports. you can plug them. You only need to use the LS6 Valley port. You can run that to the Catch Can and then to the (if stock) TB lower port on the Passenger side.
You will need to have a fresh air port (front passenger) that would go to the (if stock) TB upper Passenger side port.
I am signed up for the Good Guys. Well see you there...I will be driving the Nova.. not sure if I will be running the Auto-X yet. As I still have some work to finish on some thing. Going to the Dyno Tuner this sat... but still working on the Brakes (might be a low vacuum signal. Will see if the tune helps, right now, at idle, it is like 9.5" of vacuum).
BC
03-13-2014, 07:13 PM
#11
On The Tree
Thread Starter
iTrader: (4)
Join Date: Dec 2011
Location: San Francisco
Posts: 134
Likes: 0
Received 0 Likes
on
0 Posts
Dan
with the LS6 Valley cover.. you don't need to use a) rear passenger and b) Rear Driver side ports. you can plug them. You only need to use the LS6 Valley port. You can run that to the Catch Can and then to the (if stock) TB lower port on the Passenger side.
You will need to have a fresh air port (front passenger) that would go to the (if stock) TB upper Passenger side port.
I am signed up for the Good Guys. Well see you there...I will be driving the Nova.. not sure if I will be running the Auto-X yet. As I still have some work to finish on some thing. Going to the Dyno Tuner this sat... but still working on the Brakes (might be a low vacuum signal. Will see if the tune helps, right now, at idle, it is like 9.5" of vacuum).
BC
with the LS6 Valley cover.. you don't need to use a) rear passenger and b) Rear Driver side ports. you can plug them. You only need to use the LS6 Valley port. You can run that to the Catch Can and then to the (if stock) TB lower port on the Passenger side.
You will need to have a fresh air port (front passenger) that would go to the (if stock) TB upper Passenger side port.
I am signed up for the Good Guys. Well see you there...I will be driving the Nova.. not sure if I will be running the Auto-X yet. As I still have some work to finish on some thing. Going to the Dyno Tuner this sat... but still working on the Brakes (might be a low vacuum signal. Will see if the tune helps, right now, at idle, it is like 9.5" of vacuum).
BC

