
1952 Chevy Coupe w/ 5.3 LS


 12-12-2013, 04:57 PM
#23
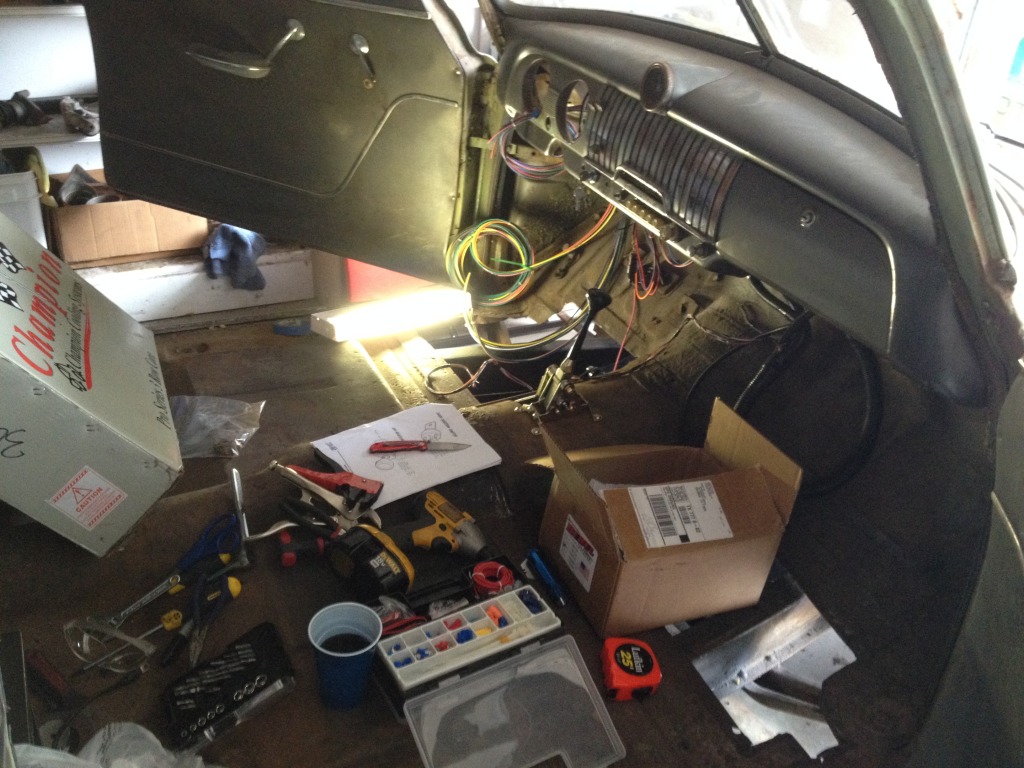
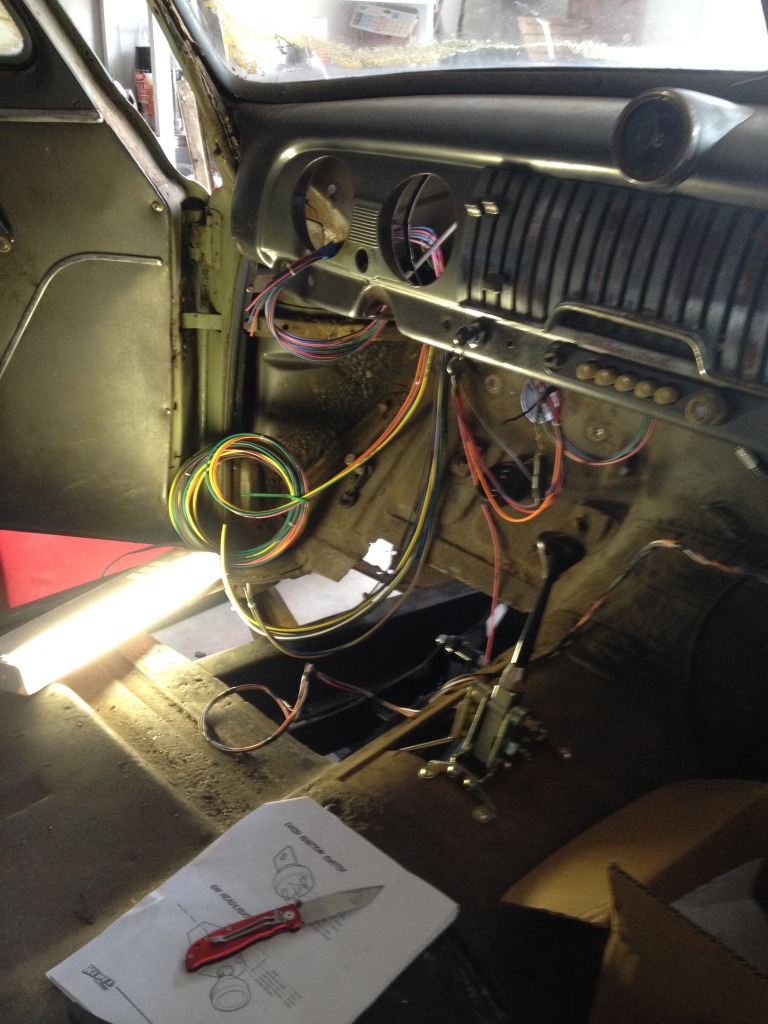
I got all of the wiring done that is needed to start the car, but I am having trouble getting a good ground. I have my battery mounted in the trunk and tried grounding to the trunk floor (no good), then extended the ground to the frame (no good). So, tonight I am going to try to run a 2ga. cable from the negative on the battery to a distribution block near the firewall and ground the body, block and frame there. Hopefully that will work and I can try to turn the motor over for the first time!
I am still waiting on funds for my gauges so the fuel gauge sender hole is open. I might fab up a block off plate so I can get some gas in there and try to fire the motor... we'll see how much time the wiring takes up.
Anyways here are some pics of my mess, i mean car...
Lokar Shifter installed
Set her down on the suspension to see ride height in rear
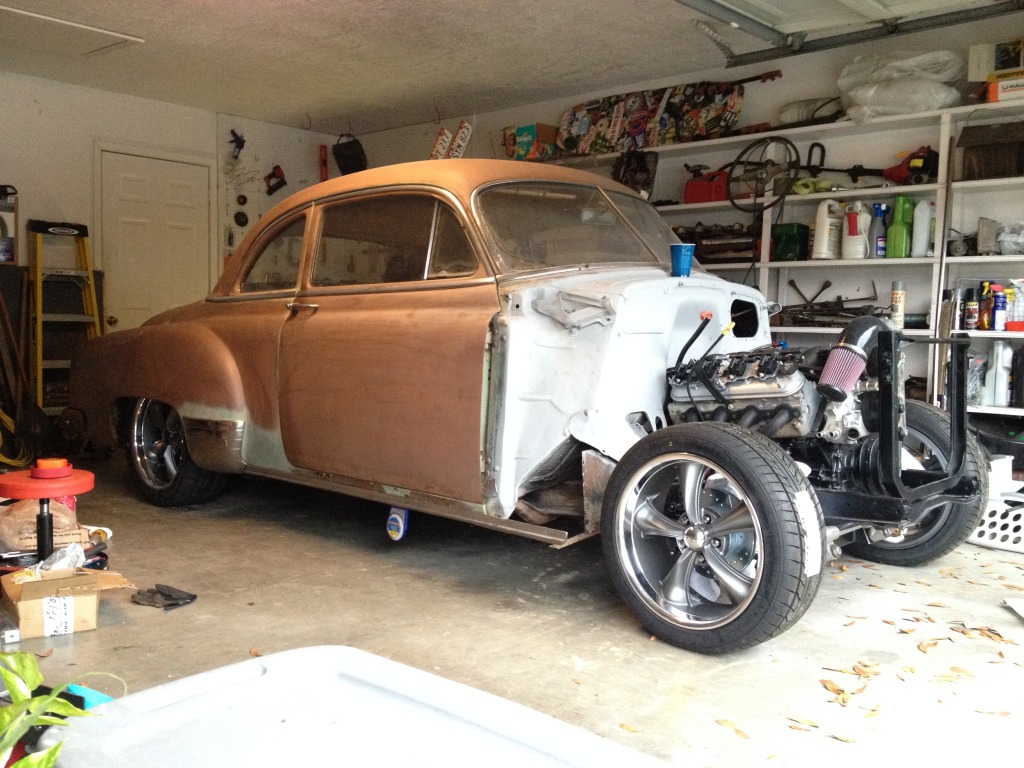
I want to try and get a front fender on it to see how the front looks. Might be able to do that tonight as well.
I am still waiting on funds for my gauges so the fuel gauge sender hole is open. I might fab up a block off plate so I can get some gas in there and try to fire the motor... we'll see how much time the wiring takes up.
Anyways here are some pics of my mess, i mean car...

Lokar Shifter installed

Set her down on the suspension to see ride height in rear

I want to try and get a front fender on it to see how the front looks. Might be able to do that tonight as well.


 12-16-2013, 01:45 PM
#28
On The Tree
iTrader: (1)
Join Date: Sep 2013
Location: Covington Ga
Posts: 130
Likes: 0
Received 0 Likes
on
0 Posts
Dang man I don't know how I missed your thread. The car is coming along killer. Do you have any pictures of your headers installed on the driver side? Everything on mine seems like its going to be super tight trying to fit exhaust and steering.
12-17-2013, 04:57 PM
#30
Thanks guys!
Do Work - I'm going to work on the steering tonight, so hopefully I will have something to share afterwards...
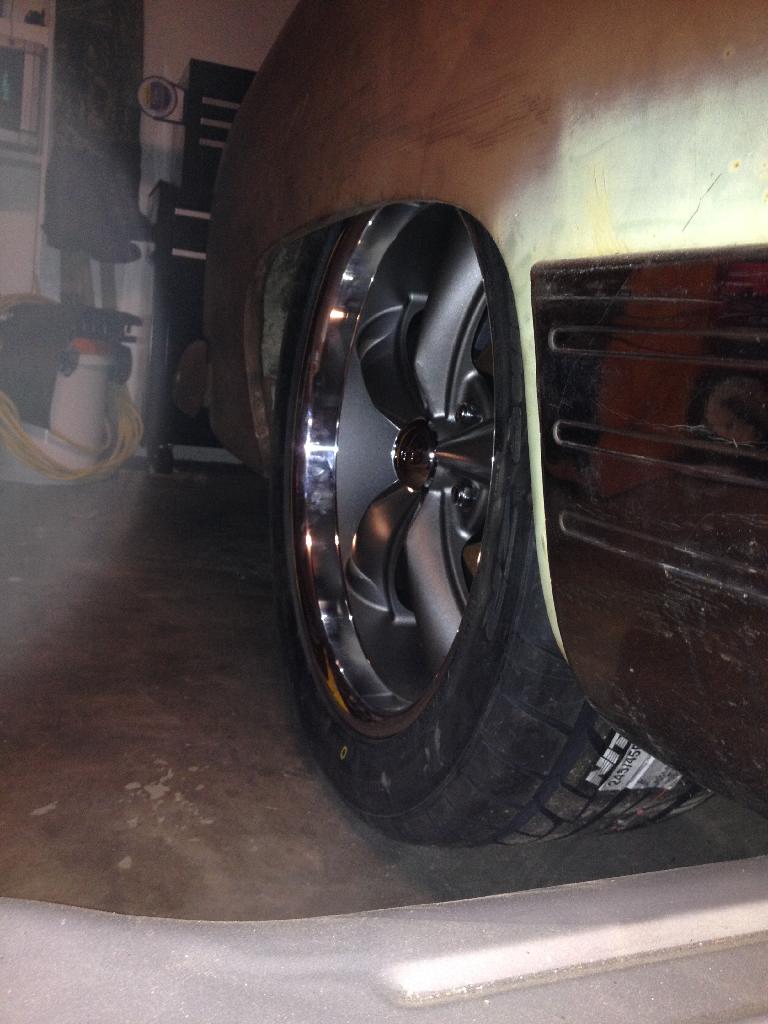
Deed - The wheels are 18x8 on all four corners with 4.5" back space (0 offset). The tires I'm running are 225/45 up front and 245/45 out back. I wanted to go wider with the wheel and tire in the back, but you know how narrow it is in the rear. I will have to trim the inner fender pretty good with the 245's.
Do Work - I'm going to work on the steering tonight, so hopefully I will have something to share afterwards...
Deed - The wheels are 18x8 on all four corners with 4.5" back space (0 offset). The tires I'm running are 225/45 up front and 245/45 out back. I wanted to go wider with the wheel and tire in the back, but you know how narrow it is in the rear. I will have to trim the inner fender pretty good with the 245's.
 01-11-2014, 07:24 PM
#35
The Holidays put a big halt on progress on the car, but I've been slowly getting stuff done the last two weeks. This is what I have accomplished this year:
- Made both upper and lower radiator hose. I had to splice together both...
- Modified truck tensioner pulley to fit LS1 water pump
- Install serpentine belt
- Install brake MC
- Made almost all of the brake hard lines. Only have one small section in rear to complete, but have to wait until axle is permanently mounted.
- Made transmission cooler lines
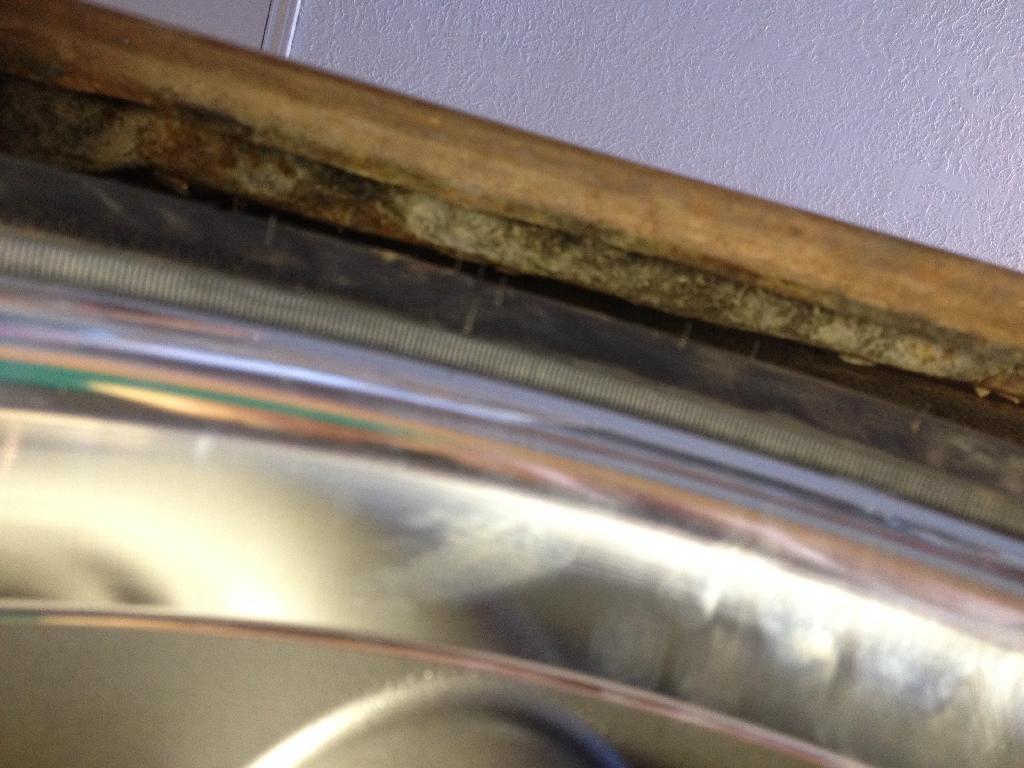
- Trimmed rear inner fenders to clear wheels/tires ***see below
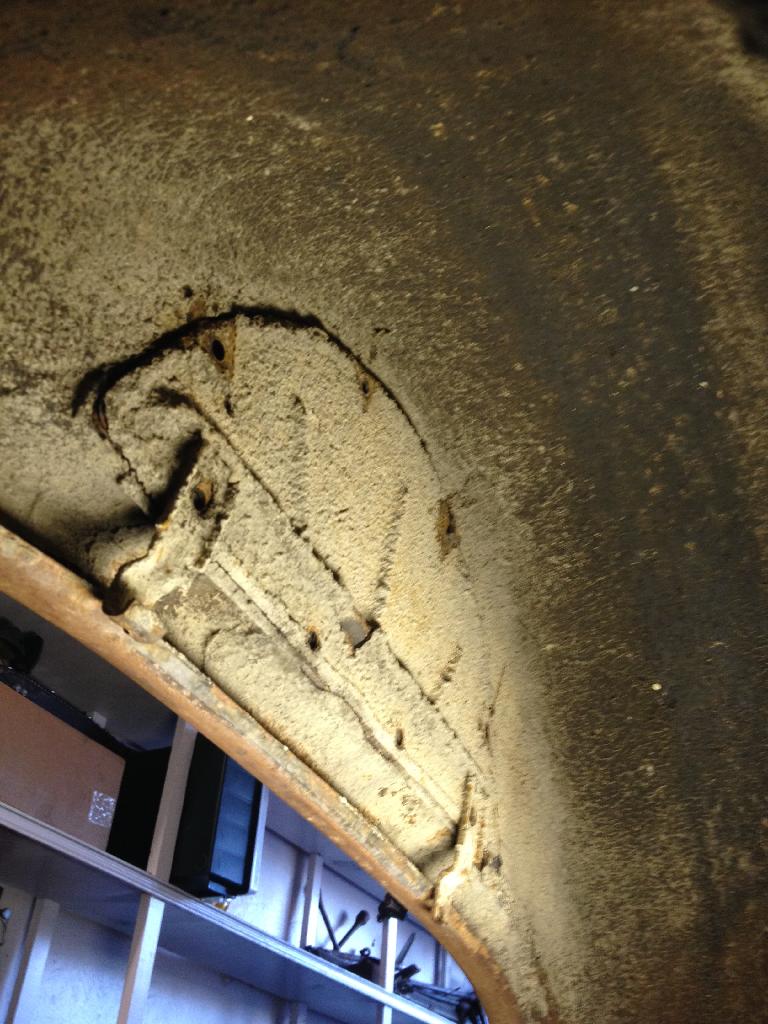
For those of you that are curious about what rear end you can run in a 49-54 Chevy Car, well I have successfully installed a posi-trac unit pulled from a 3rd gen Camaro! It is 62" from each outside wheel mounting surface which is about 2" wider than stock. I am running an 18" x 8" wheel with 0 offset (4.5" backspace) 245/45/18 tires. I really wanted this to work because the rear end has the limited slip diff, 3.42 gears and disc brakes.
I did have to trim the outside inner fender wells just a bit, but there are some very handy removable panels that made this quite simple. This will also make it easy to put a fill panel back in - just fabricate and bolt it back in place! Here are some pictures to show what I had to do and the results.
Tire making contact with inner fender
Inner fender with panel in place
Panel removed
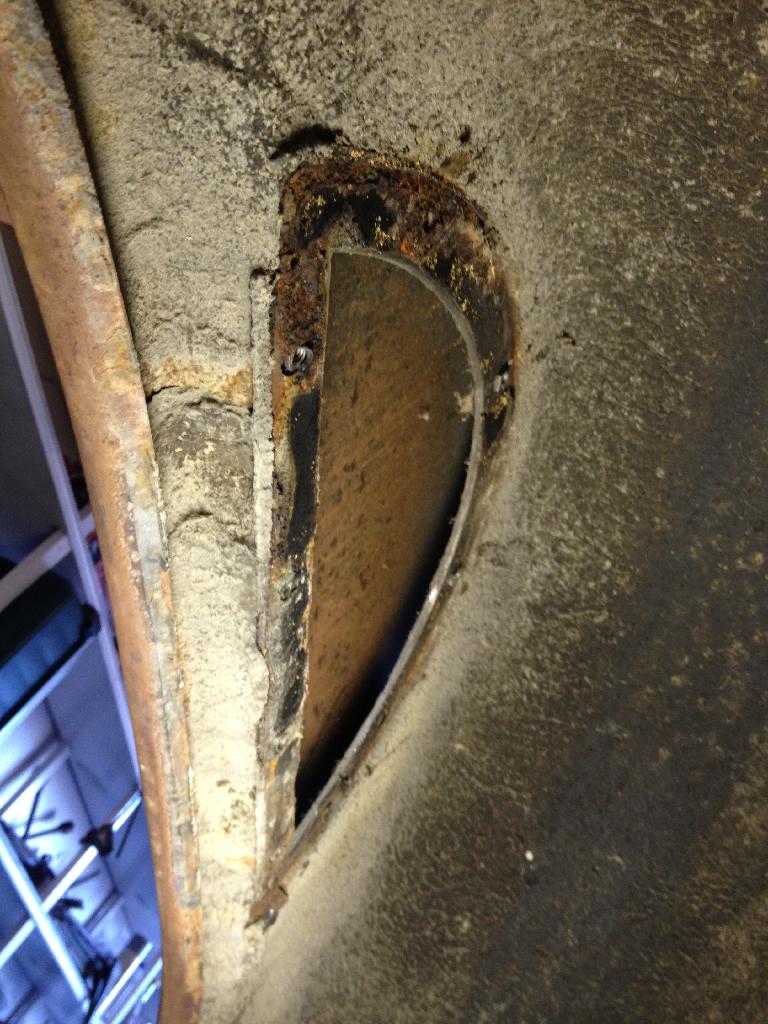
Material trimmed from bottom lip of where the panel was

Plenty of room! I will probably roll the fender as well to provide a little more space in there.
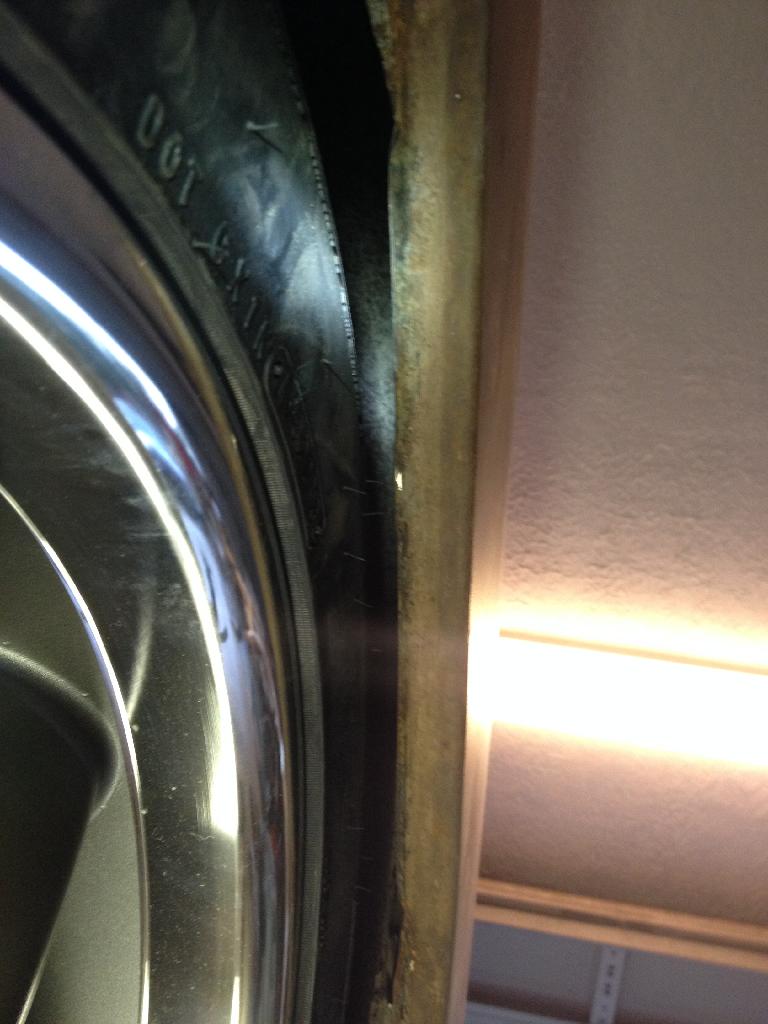
Very nice flush fit
- Made both upper and lower radiator hose. I had to splice together both...
- Modified truck tensioner pulley to fit LS1 water pump
- Install serpentine belt
- Install brake MC
- Made almost all of the brake hard lines. Only have one small section in rear to complete, but have to wait until axle is permanently mounted.
- Made transmission cooler lines
- Trimmed rear inner fenders to clear wheels/tires ***see below
For those of you that are curious about what rear end you can run in a 49-54 Chevy Car, well I have successfully installed a posi-trac unit pulled from a 3rd gen Camaro! It is 62" from each outside wheel mounting surface which is about 2" wider than stock. I am running an 18" x 8" wheel with 0 offset (4.5" backspace) 245/45/18 tires. I really wanted this to work because the rear end has the limited slip diff, 3.42 gears and disc brakes.
I did have to trim the outside inner fender wells just a bit, but there are some very handy removable panels that made this quite simple. This will also make it easy to put a fill panel back in - just fabricate and bolt it back in place! Here are some pictures to show what I had to do and the results.
Tire making contact with inner fender

Inner fender with panel in place

Panel removed

Material trimmed from bottom lip of where the panel was

Plenty of room! I will probably roll the fender as well to provide a little more space in there.

Very nice flush fit
 01-11-2014, 11:43 PM
#37
I started to, but it's going to require some creativity. The block hugger headers are good for fitment but the collector is right where the steering shaft needs to go. I'm either going to have to use 3 u-joints and a carrier bearing or notch the frame... I'll probably keep putting it off until it's the last thing to do.
Last edited by Leadfoot85; 01-12-2014 at 11:31 AM.
01-25-2014, 08:47 PM
#38
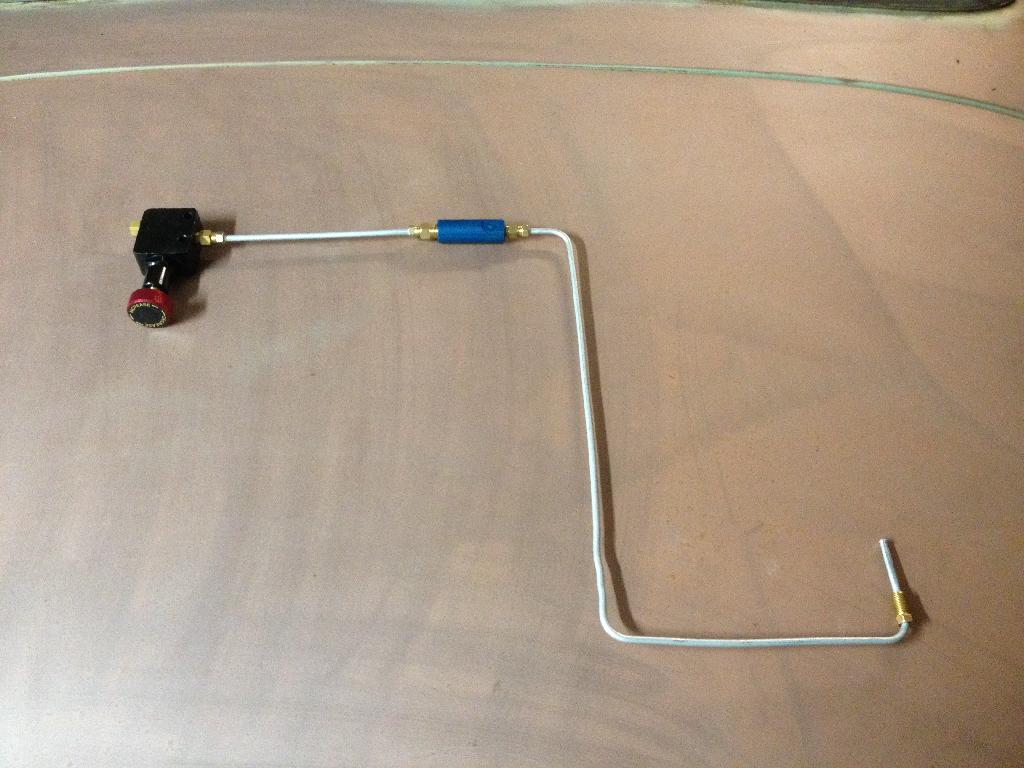
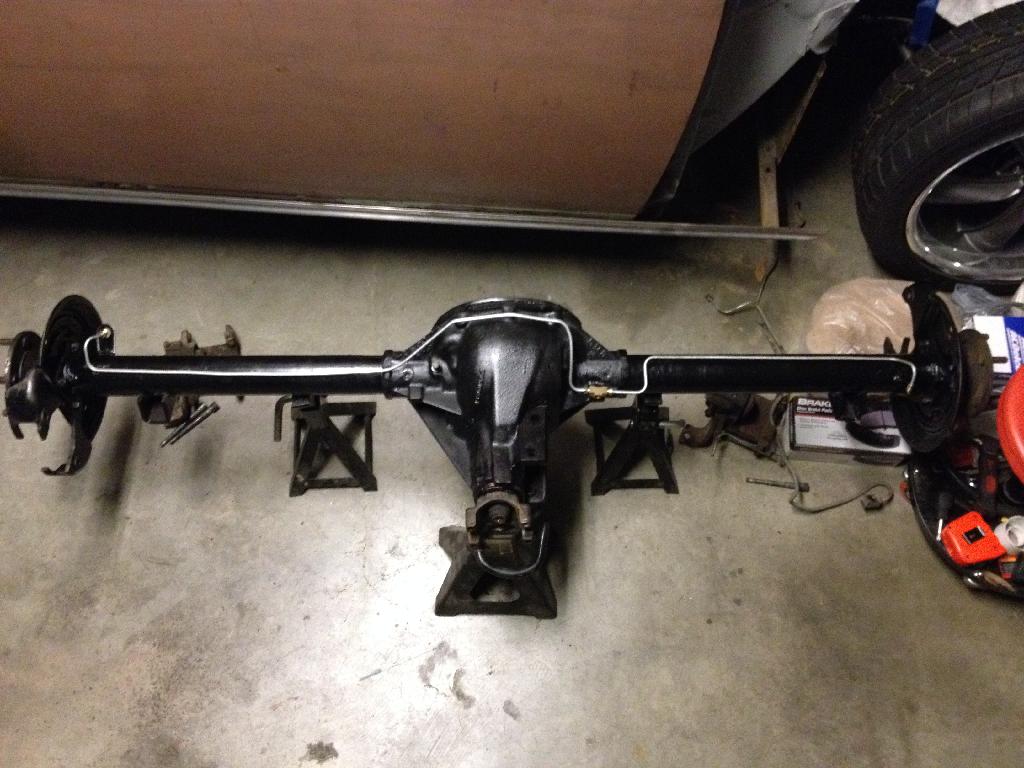
Time for an update. Since my last post I have installed my third gen camaro gas pedal and ran the throttle cable, ran a heater bypass hose, finished the last of the brake lines (had to re-make the lines on the rear axle as the old ones were all rusted) and I had to get new rear calipers as the old ones were both seized up (broke a C-clamp trying to compress one of the pistons...).
As soon as the calipers arrive I can bolt them up, install the rear end back in the car and hook up all of the brake lines. Then I'll bleed the brakes and move on to the drive shaft and steering (saving for last, lol).
I also got my gauges in and am working on installing them too. They are 5" Omega Quads with all electric gauges and came with their own senders. I already installed the fuel gauge sender and was able to put the gas tank back under the car. As far as mounting the gauges in the dash - I took the trim rings off the stock gauges and plan on attaching them to the new gauges. The diameter of the new gauges are about 1/8" smaller than the stock ones, so there is not enough material on the rings to crimp them on. I'm going to have to epoxy the rings on as well as the brackets that the stock gauges are mounted with. Should be fun!
Here are some pics:
Brake line w/ 2lb risidual valve (forgot to take pics installed :/)
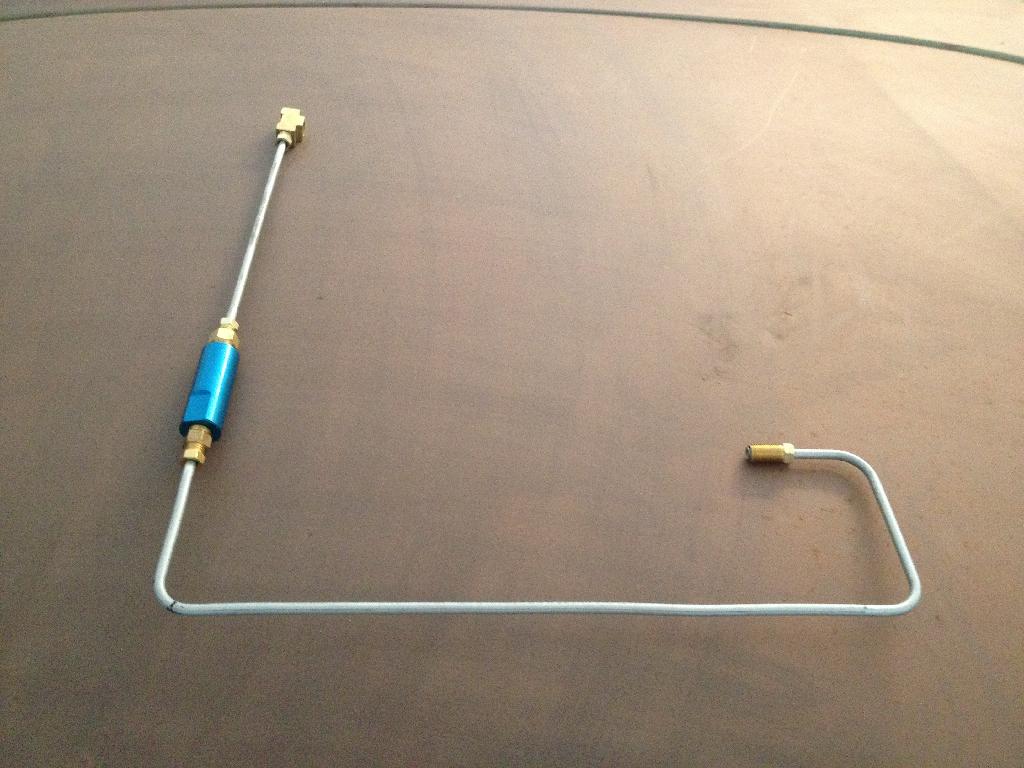
Prop valve and 2lb residual
Rear axle with new lines (waiting for calipers...)
C-clamp carnage

Gauges

Picked out the body color - "Candy Blood Red"

As soon as the calipers arrive I can bolt them up, install the rear end back in the car and hook up all of the brake lines. Then I'll bleed the brakes and move on to the drive shaft and steering (saving for last, lol).
I also got my gauges in and am working on installing them too. They are 5" Omega Quads with all electric gauges and came with their own senders. I already installed the fuel gauge sender and was able to put the gas tank back under the car. As far as mounting the gauges in the dash - I took the trim rings off the stock gauges and plan on attaching them to the new gauges. The diameter of the new gauges are about 1/8" smaller than the stock ones, so there is not enough material on the rings to crimp them on. I'm going to have to epoxy the rings on as well as the brackets that the stock gauges are mounted with. Should be fun!
Here are some pics:
Brake line w/ 2lb risidual valve (forgot to take pics installed :/)

Prop valve and 2lb residual

Rear axle with new lines (waiting for calipers...)

C-clamp carnage

Gauges

Picked out the body color - "Candy Blood Red"
