Hacksters 68 F100 LQ4/S475/4l80E

 11-11-2013, 11:02 PM
#22
Launching!
Thread Starter

Join Date: Mar 2012
Posts: 214
Likes: 0
Received 0 Likes
on
0 Posts
Managed to stop in at oil filter sales and service this morning and picked up a bunch of fittings.
First up on the to do list was to make some modifications to the fuel rail. Cut off the excess brackets for what I believe was the coil covers. Then I drilled out a -6 steel fitting until it sat right on the inner ridge of the fuel rail return fitting and brazed it on.
Did the same thing on the supply line only with a -8 line on this one.
Rails are early corvette with supply and return lines.
Then what started out as some prep for paint turned into a couple hours with red scotch brite pad, some 320 grit sandpaper and some matte clear and finally think that I am happy with the results. Normally the stock rails are a little less than pretty. Think this is an ok outcome of trying to save a few bucks.


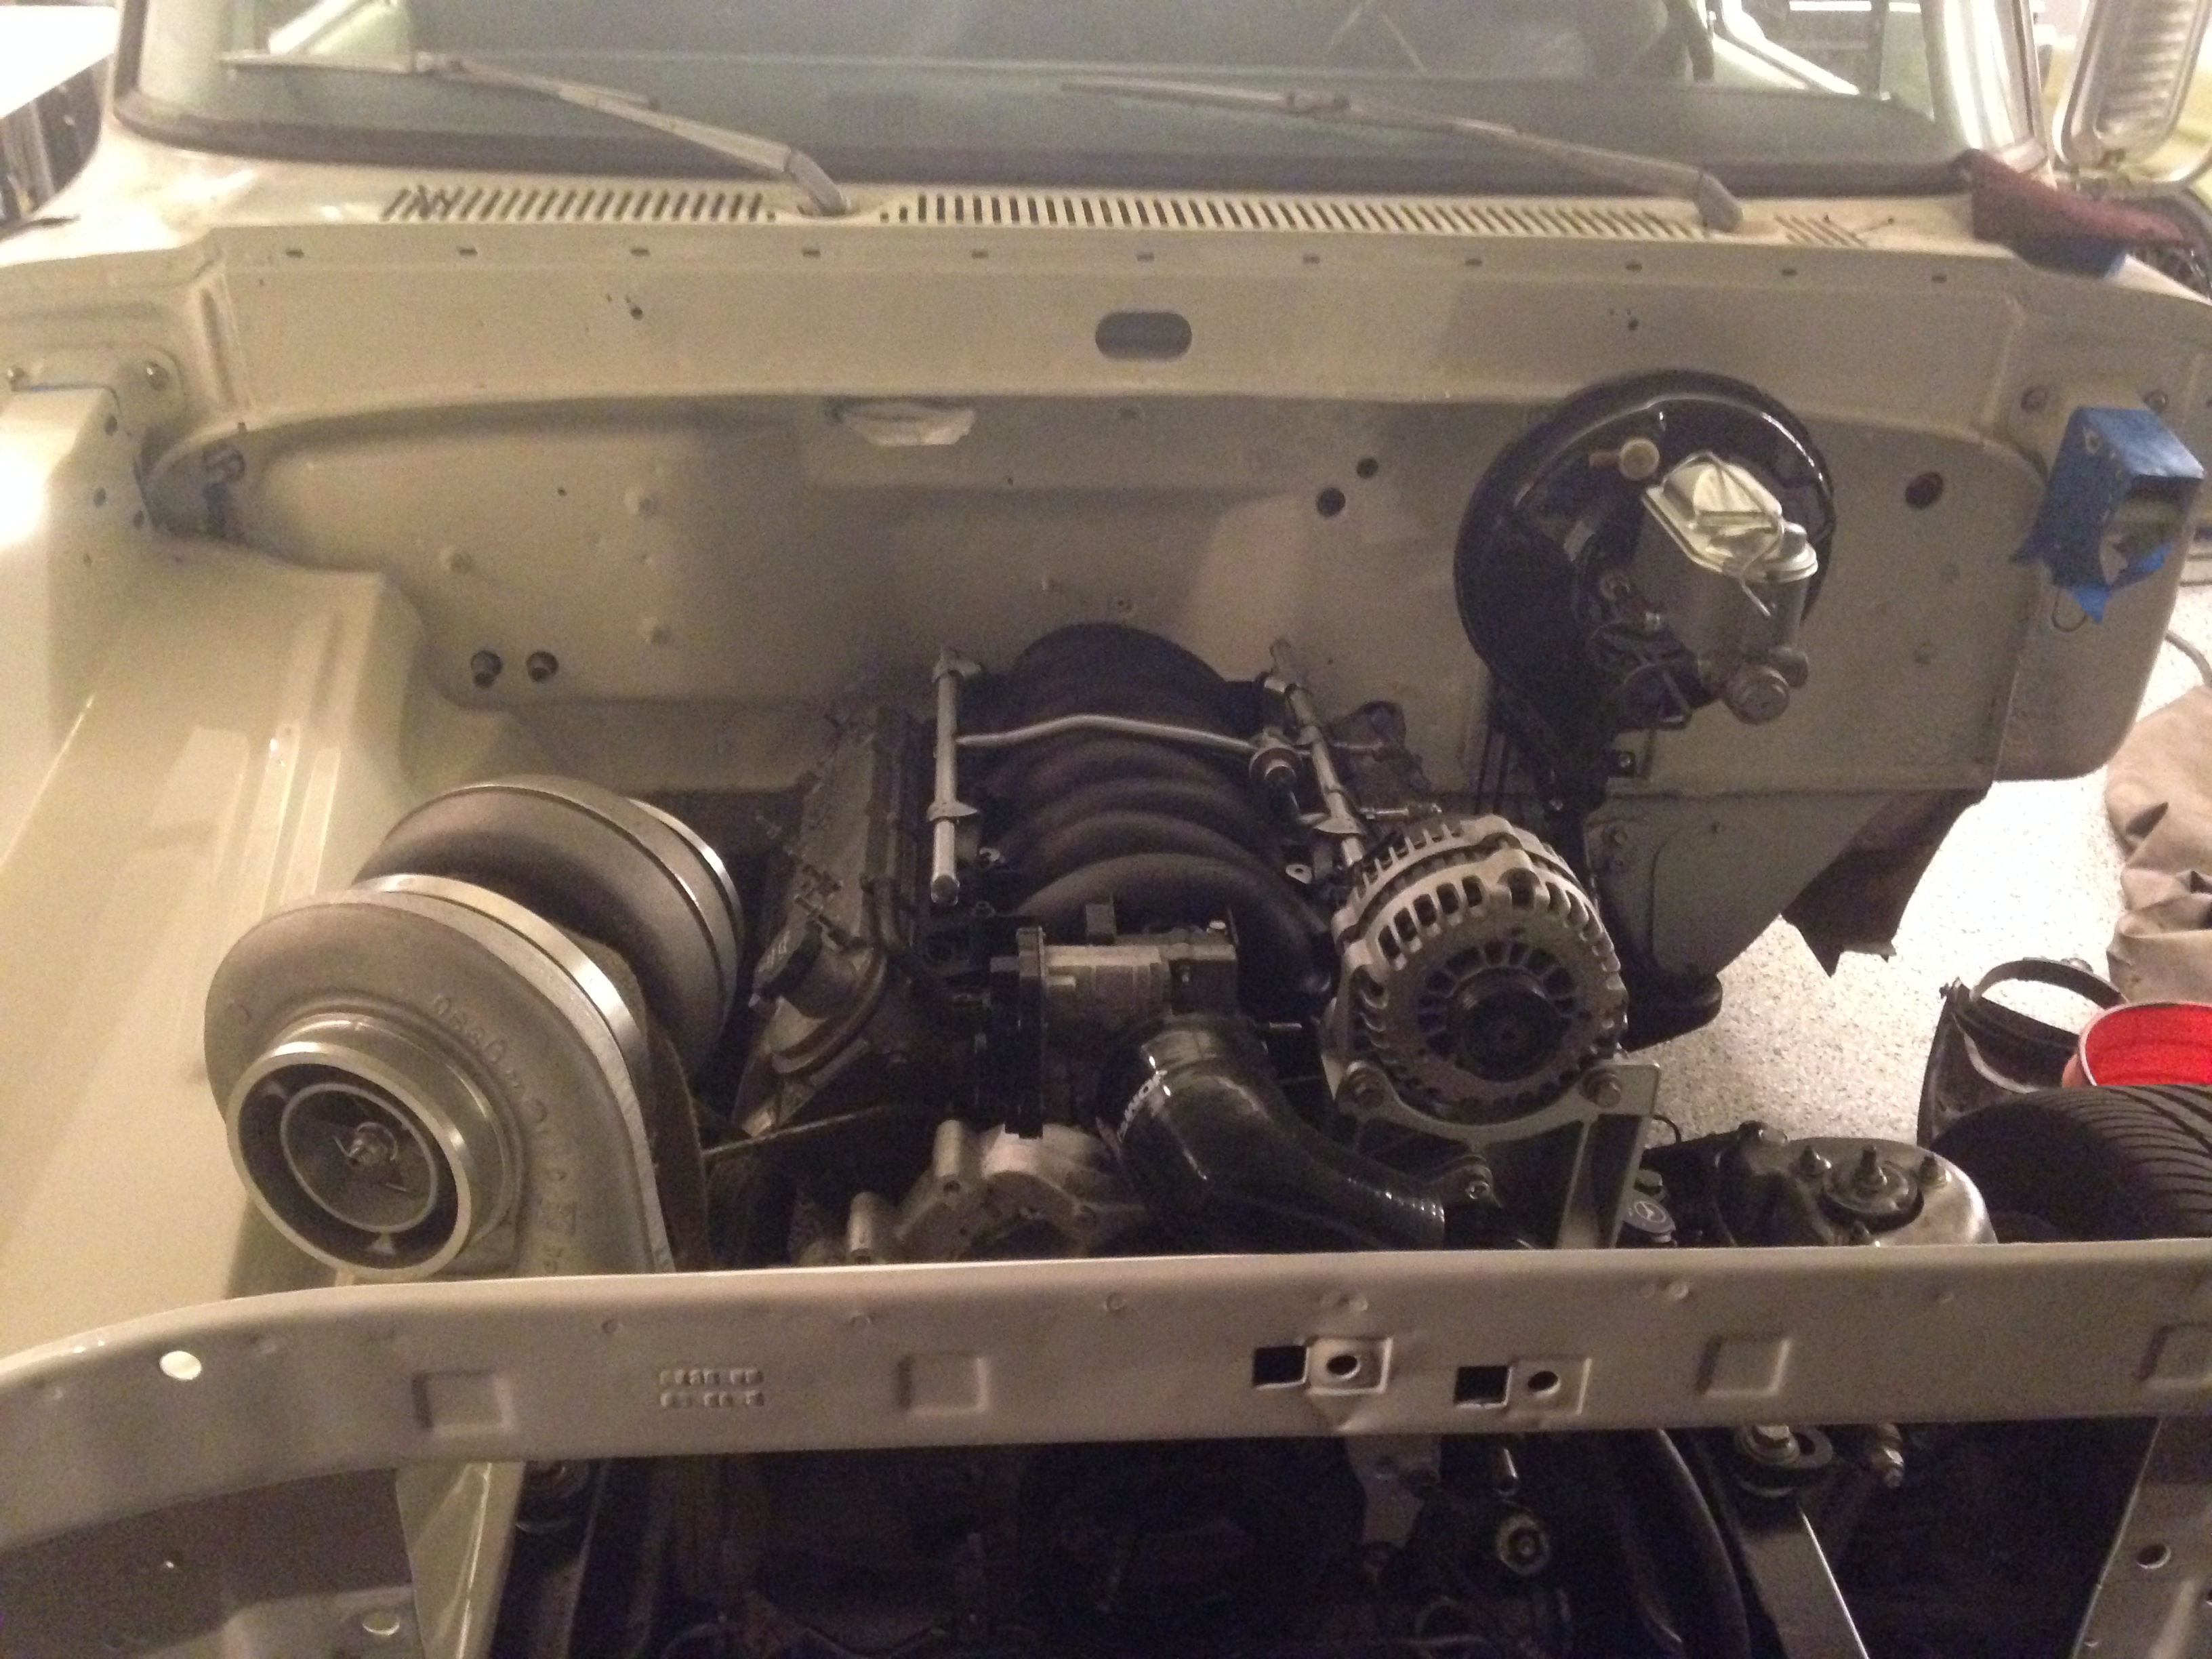
Also picked up some 6x1x110 bolts for the intake, got it all cleaned up, cleaned the heads off and stuck that pig down for good.
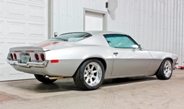
Also had to see what the engine bay is going to look like with the inner fenders on.


Turbo might show up tomorrow.....little bit excited about that one.
Sean
11-12-2013, 12:58 PM
#25
Launching!
Thread Starter
Join Date: Mar 2012
Posts: 214
Likes: 0
Received 0 Likes
on
0 Posts
Thanks guys,
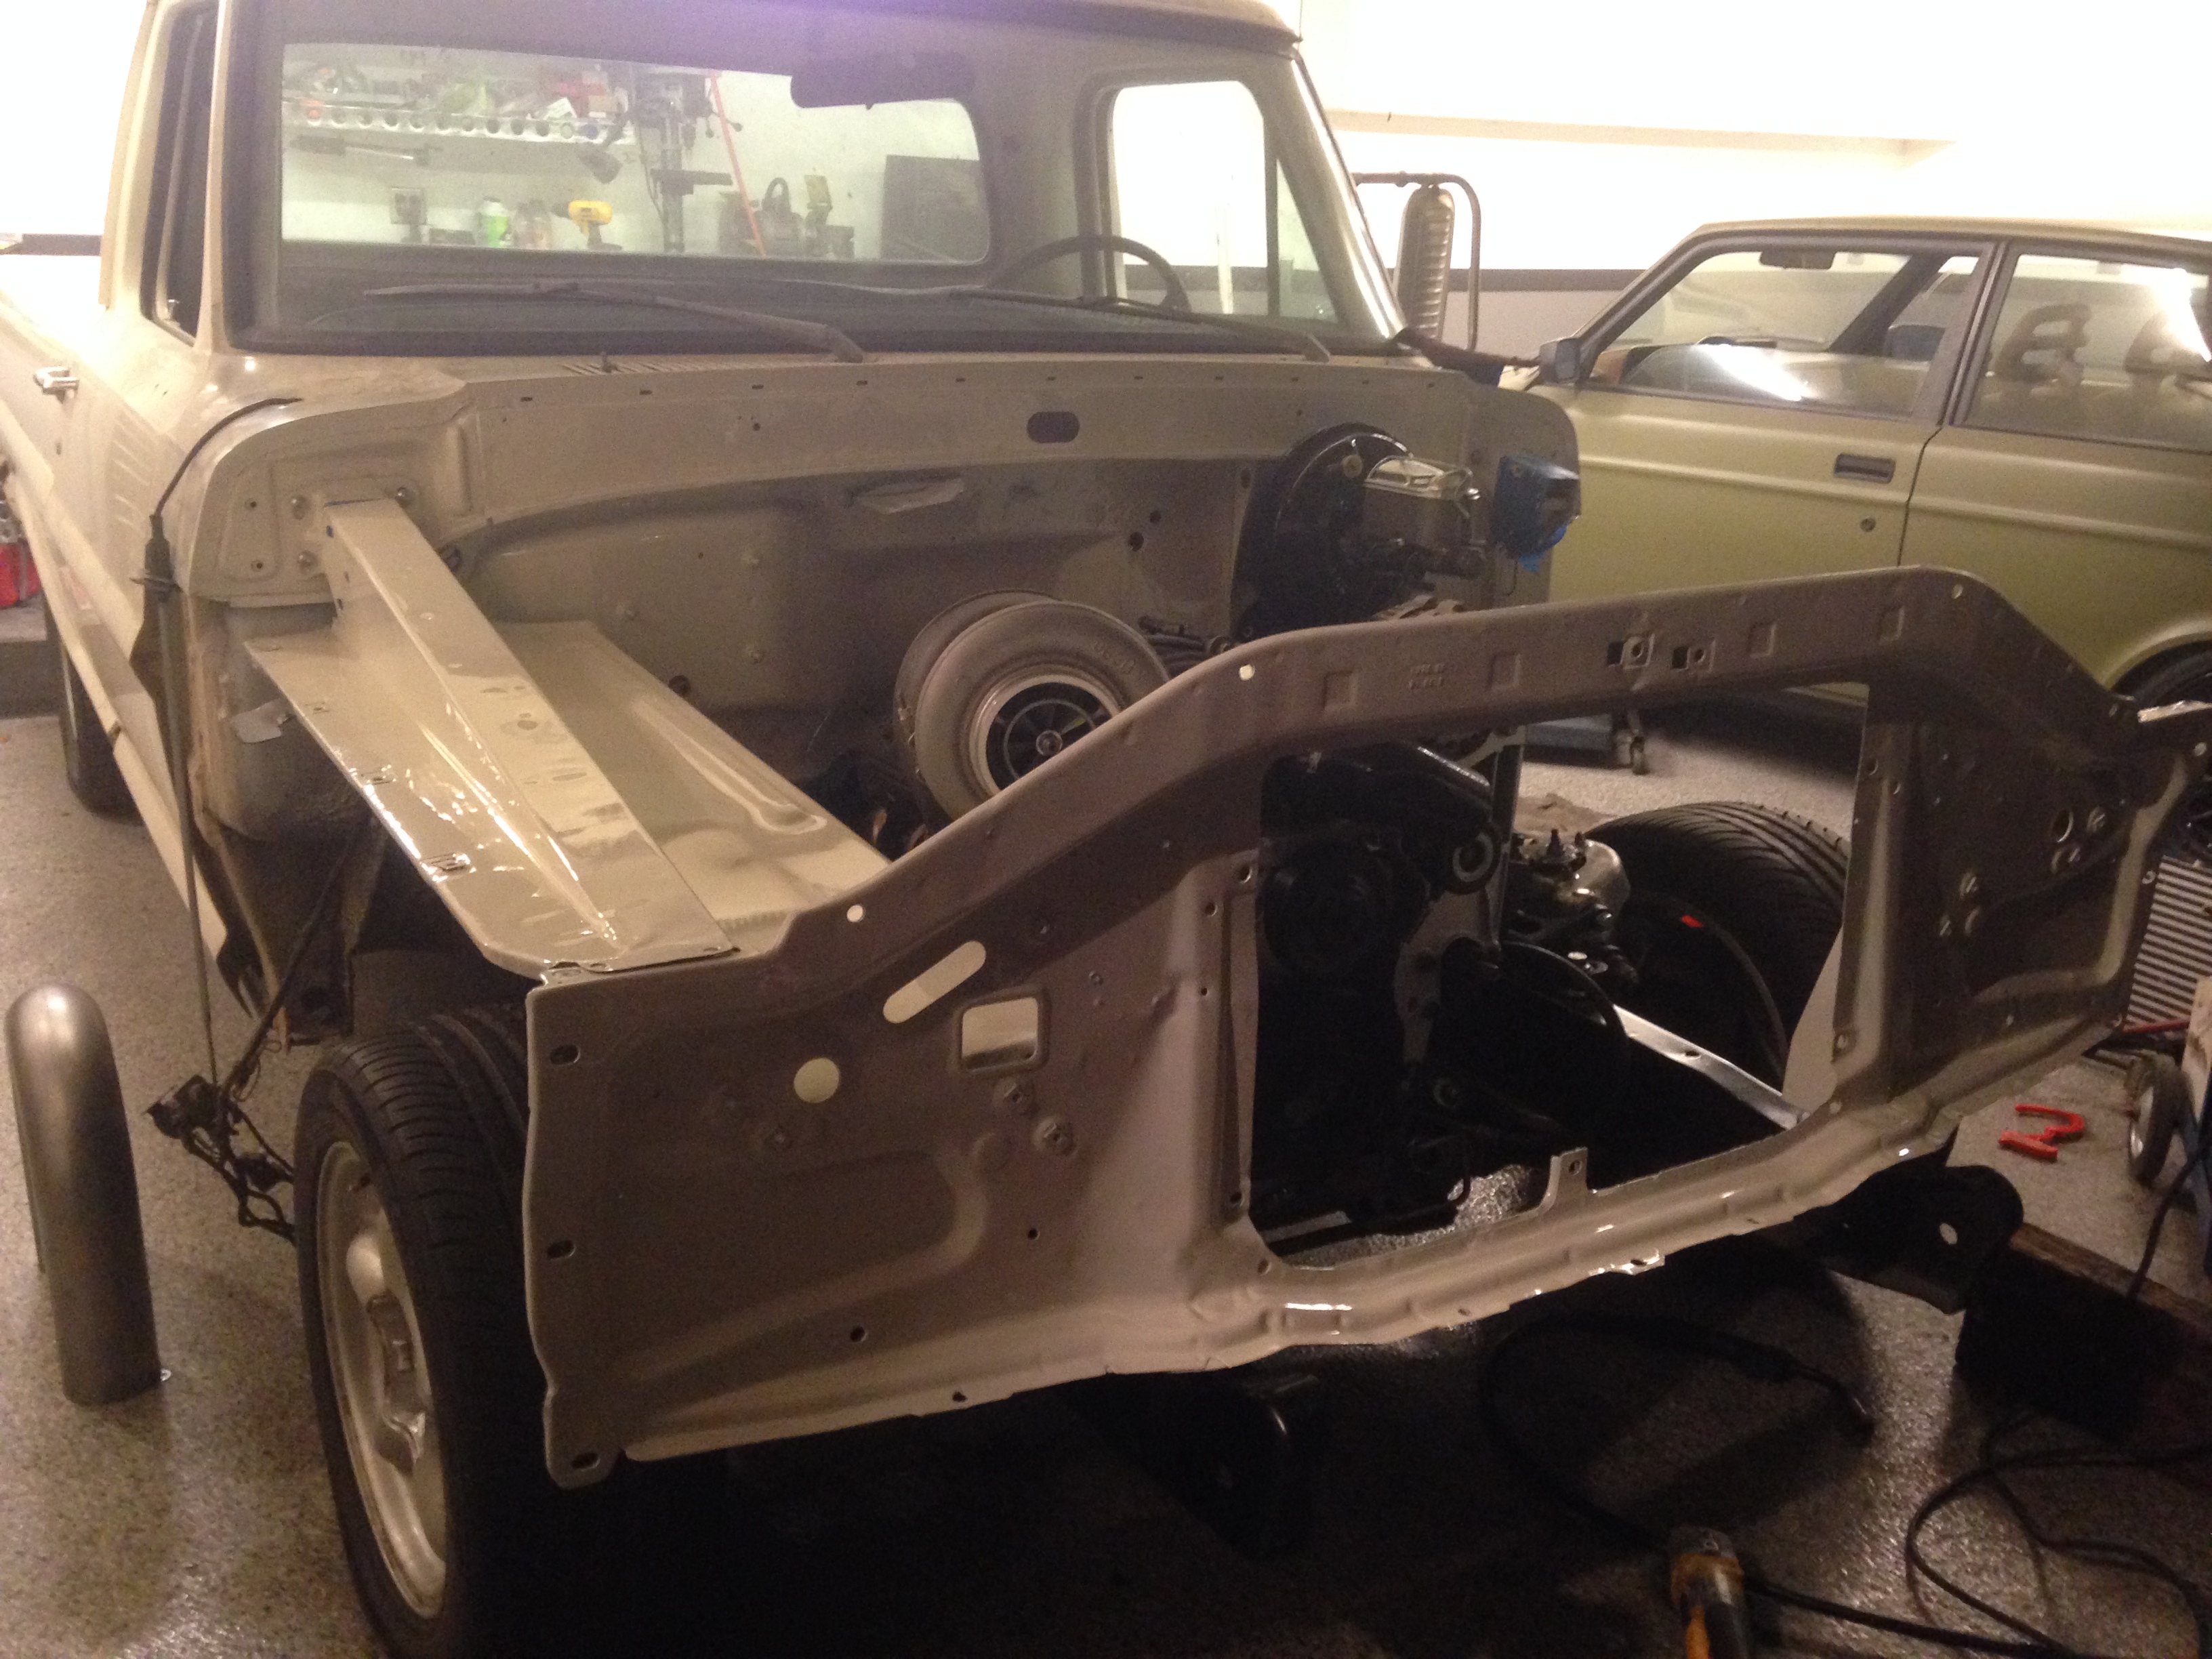
Just to give you an idea of what the inner fenders started out looking like....
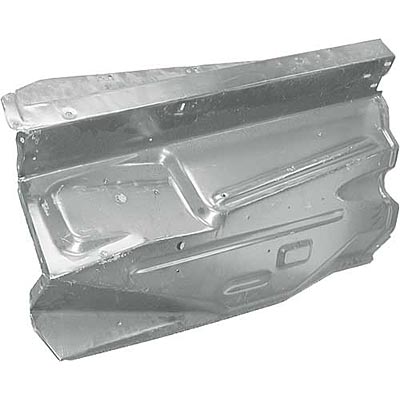
I had some rust below the battery tray on the passenger side, and while looking at it, I thought I could clean it up a bit. That long crisp body line that now runs the entire length of the inner fender was what I was really looking for when I started.
The best thing, is that you cant tell any of that work was done on it, just looks factory.

Sean
UPS man should be paying me a little visit today from Forced Inductions
Just to give you an idea of what the inner fenders started out looking like....

I had some rust below the battery tray on the passenger side, and while looking at it, I thought I could clean it up a bit. That long crisp body line that now runs the entire length of the inner fender was what I was really looking for when I started.
The best thing, is that you cant tell any of that work was done on it, just looks factory.
Sean
UPS man should be paying me a little visit today from Forced Inductions
11-14-2013, 09:39 AM
#26
Launching!
Thread Starter
Join Date: Mar 2012
Posts: 214
Likes: 0
Received 0 Likes
on
0 Posts
Good couple of days...
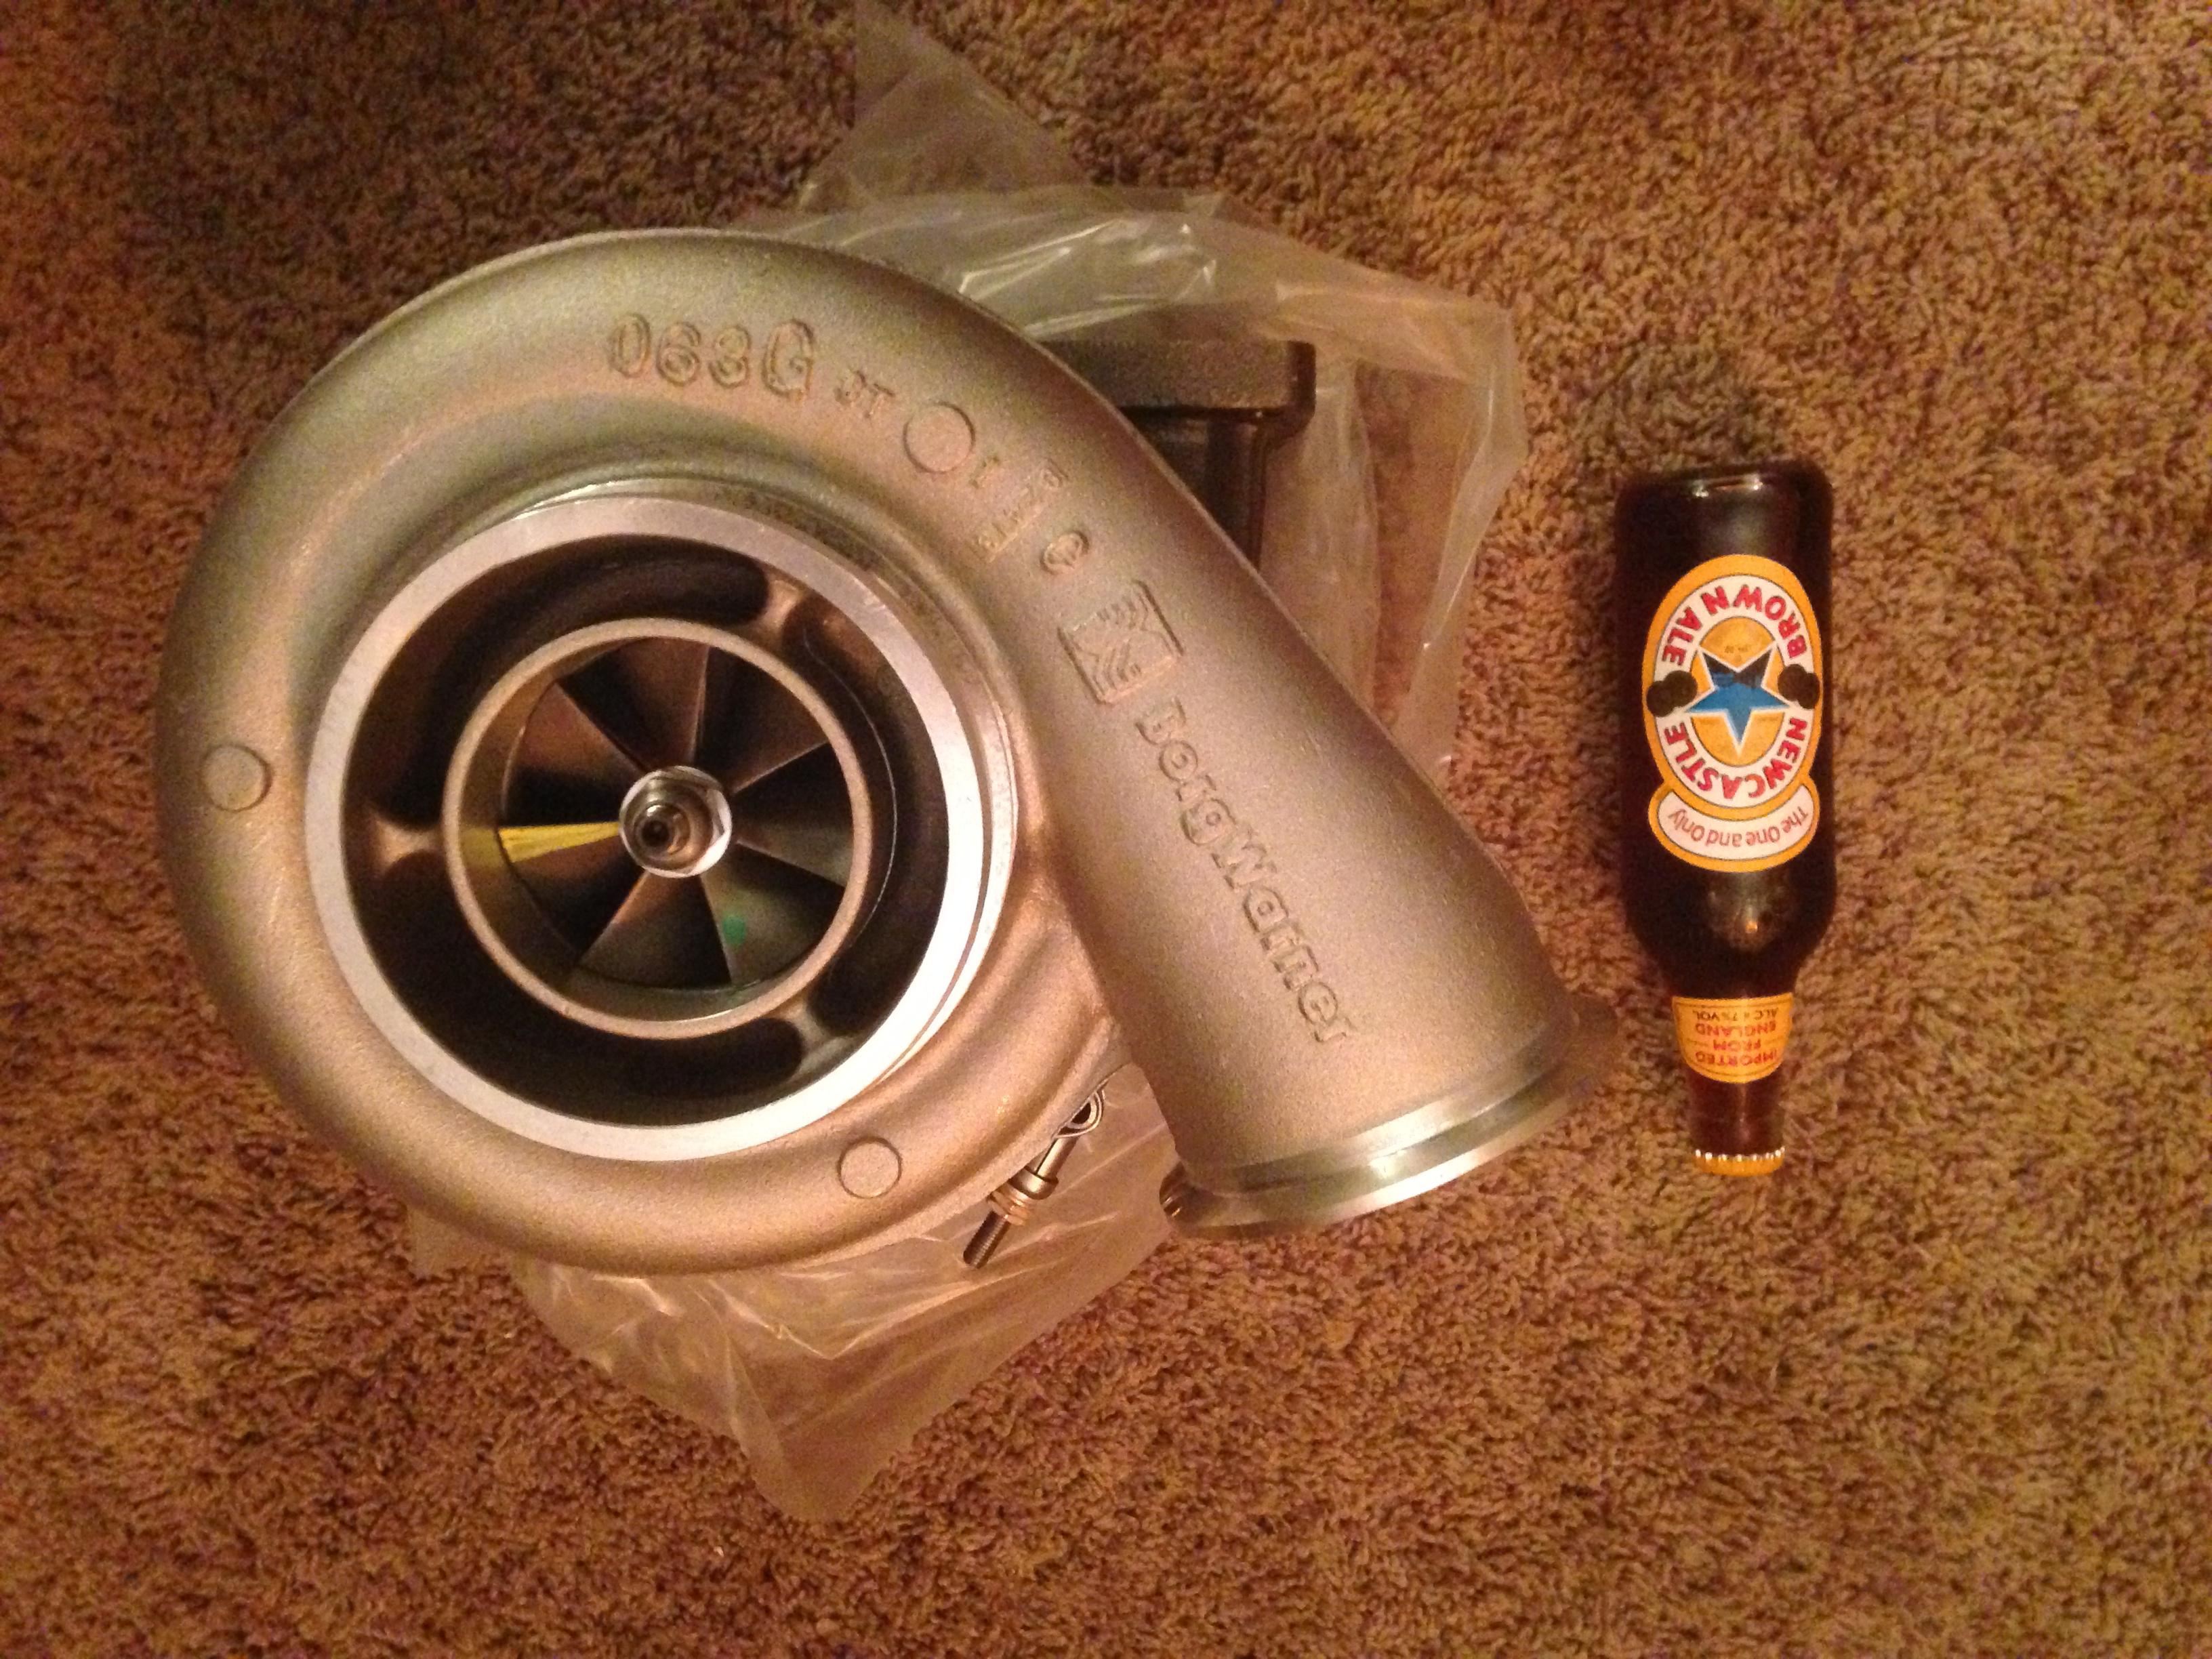
This showed up on Tuesday afternoon.
I laid out a bunch of exhaust parts on the parts table and got to work.
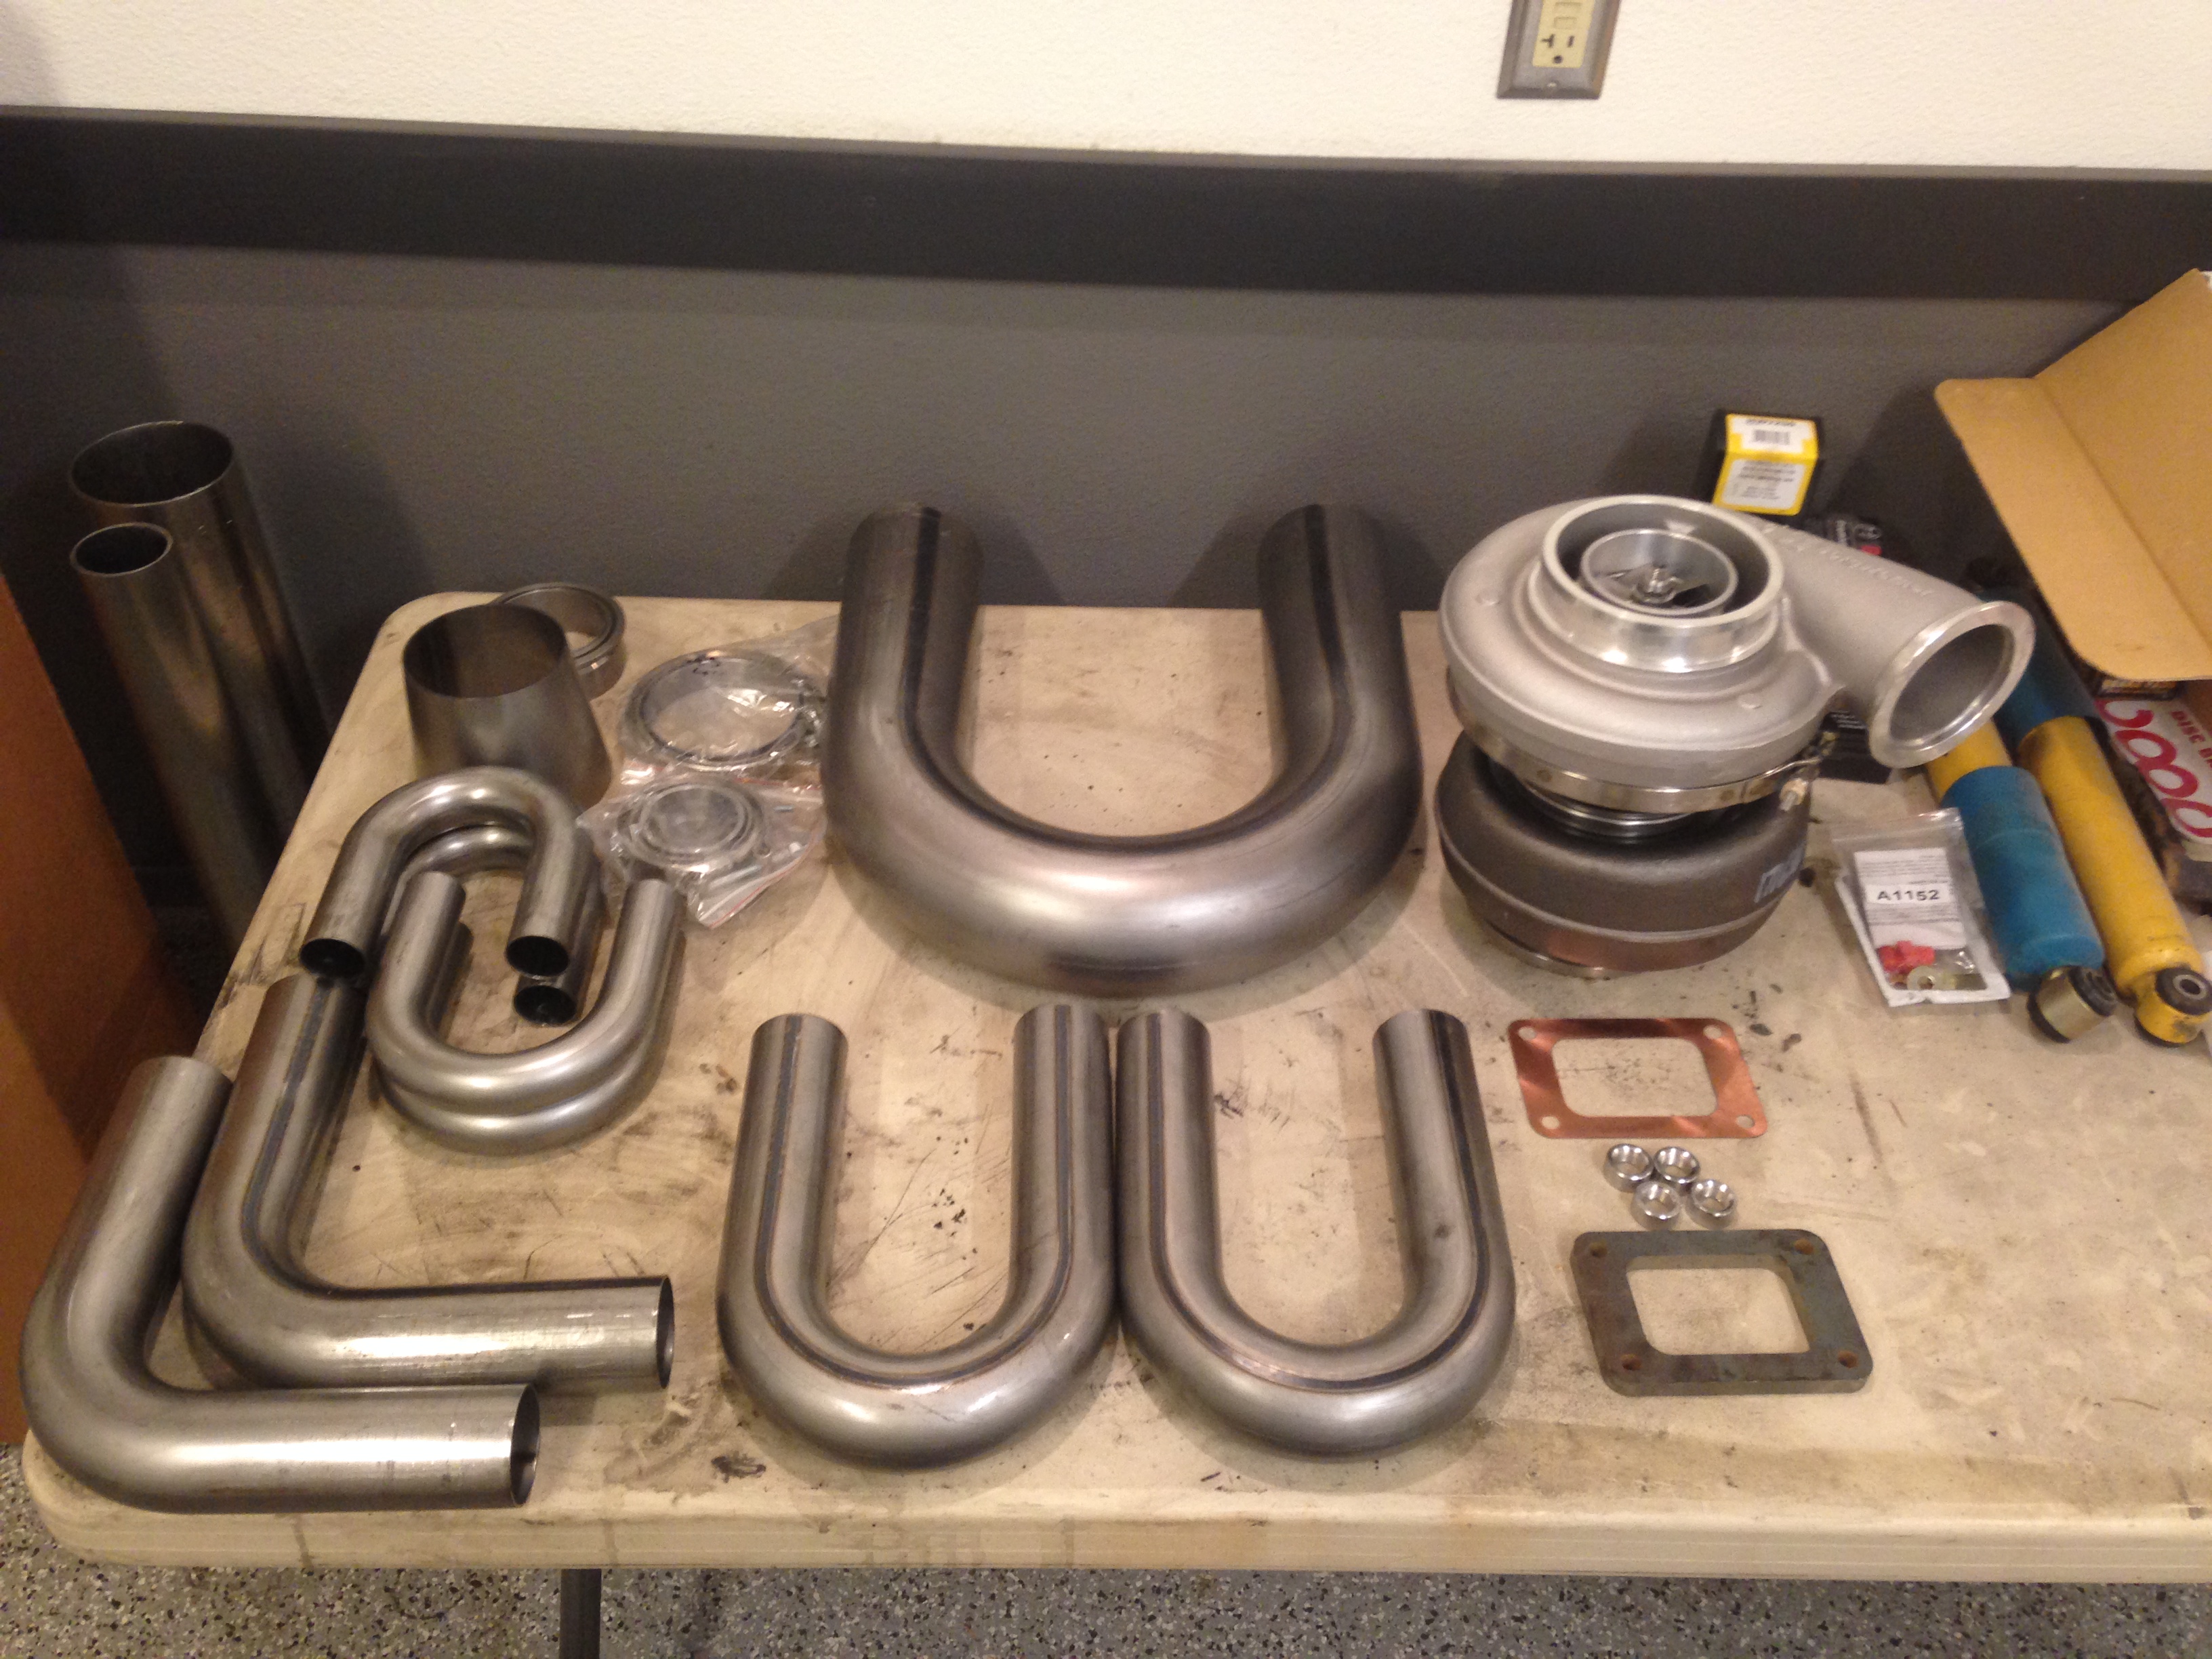
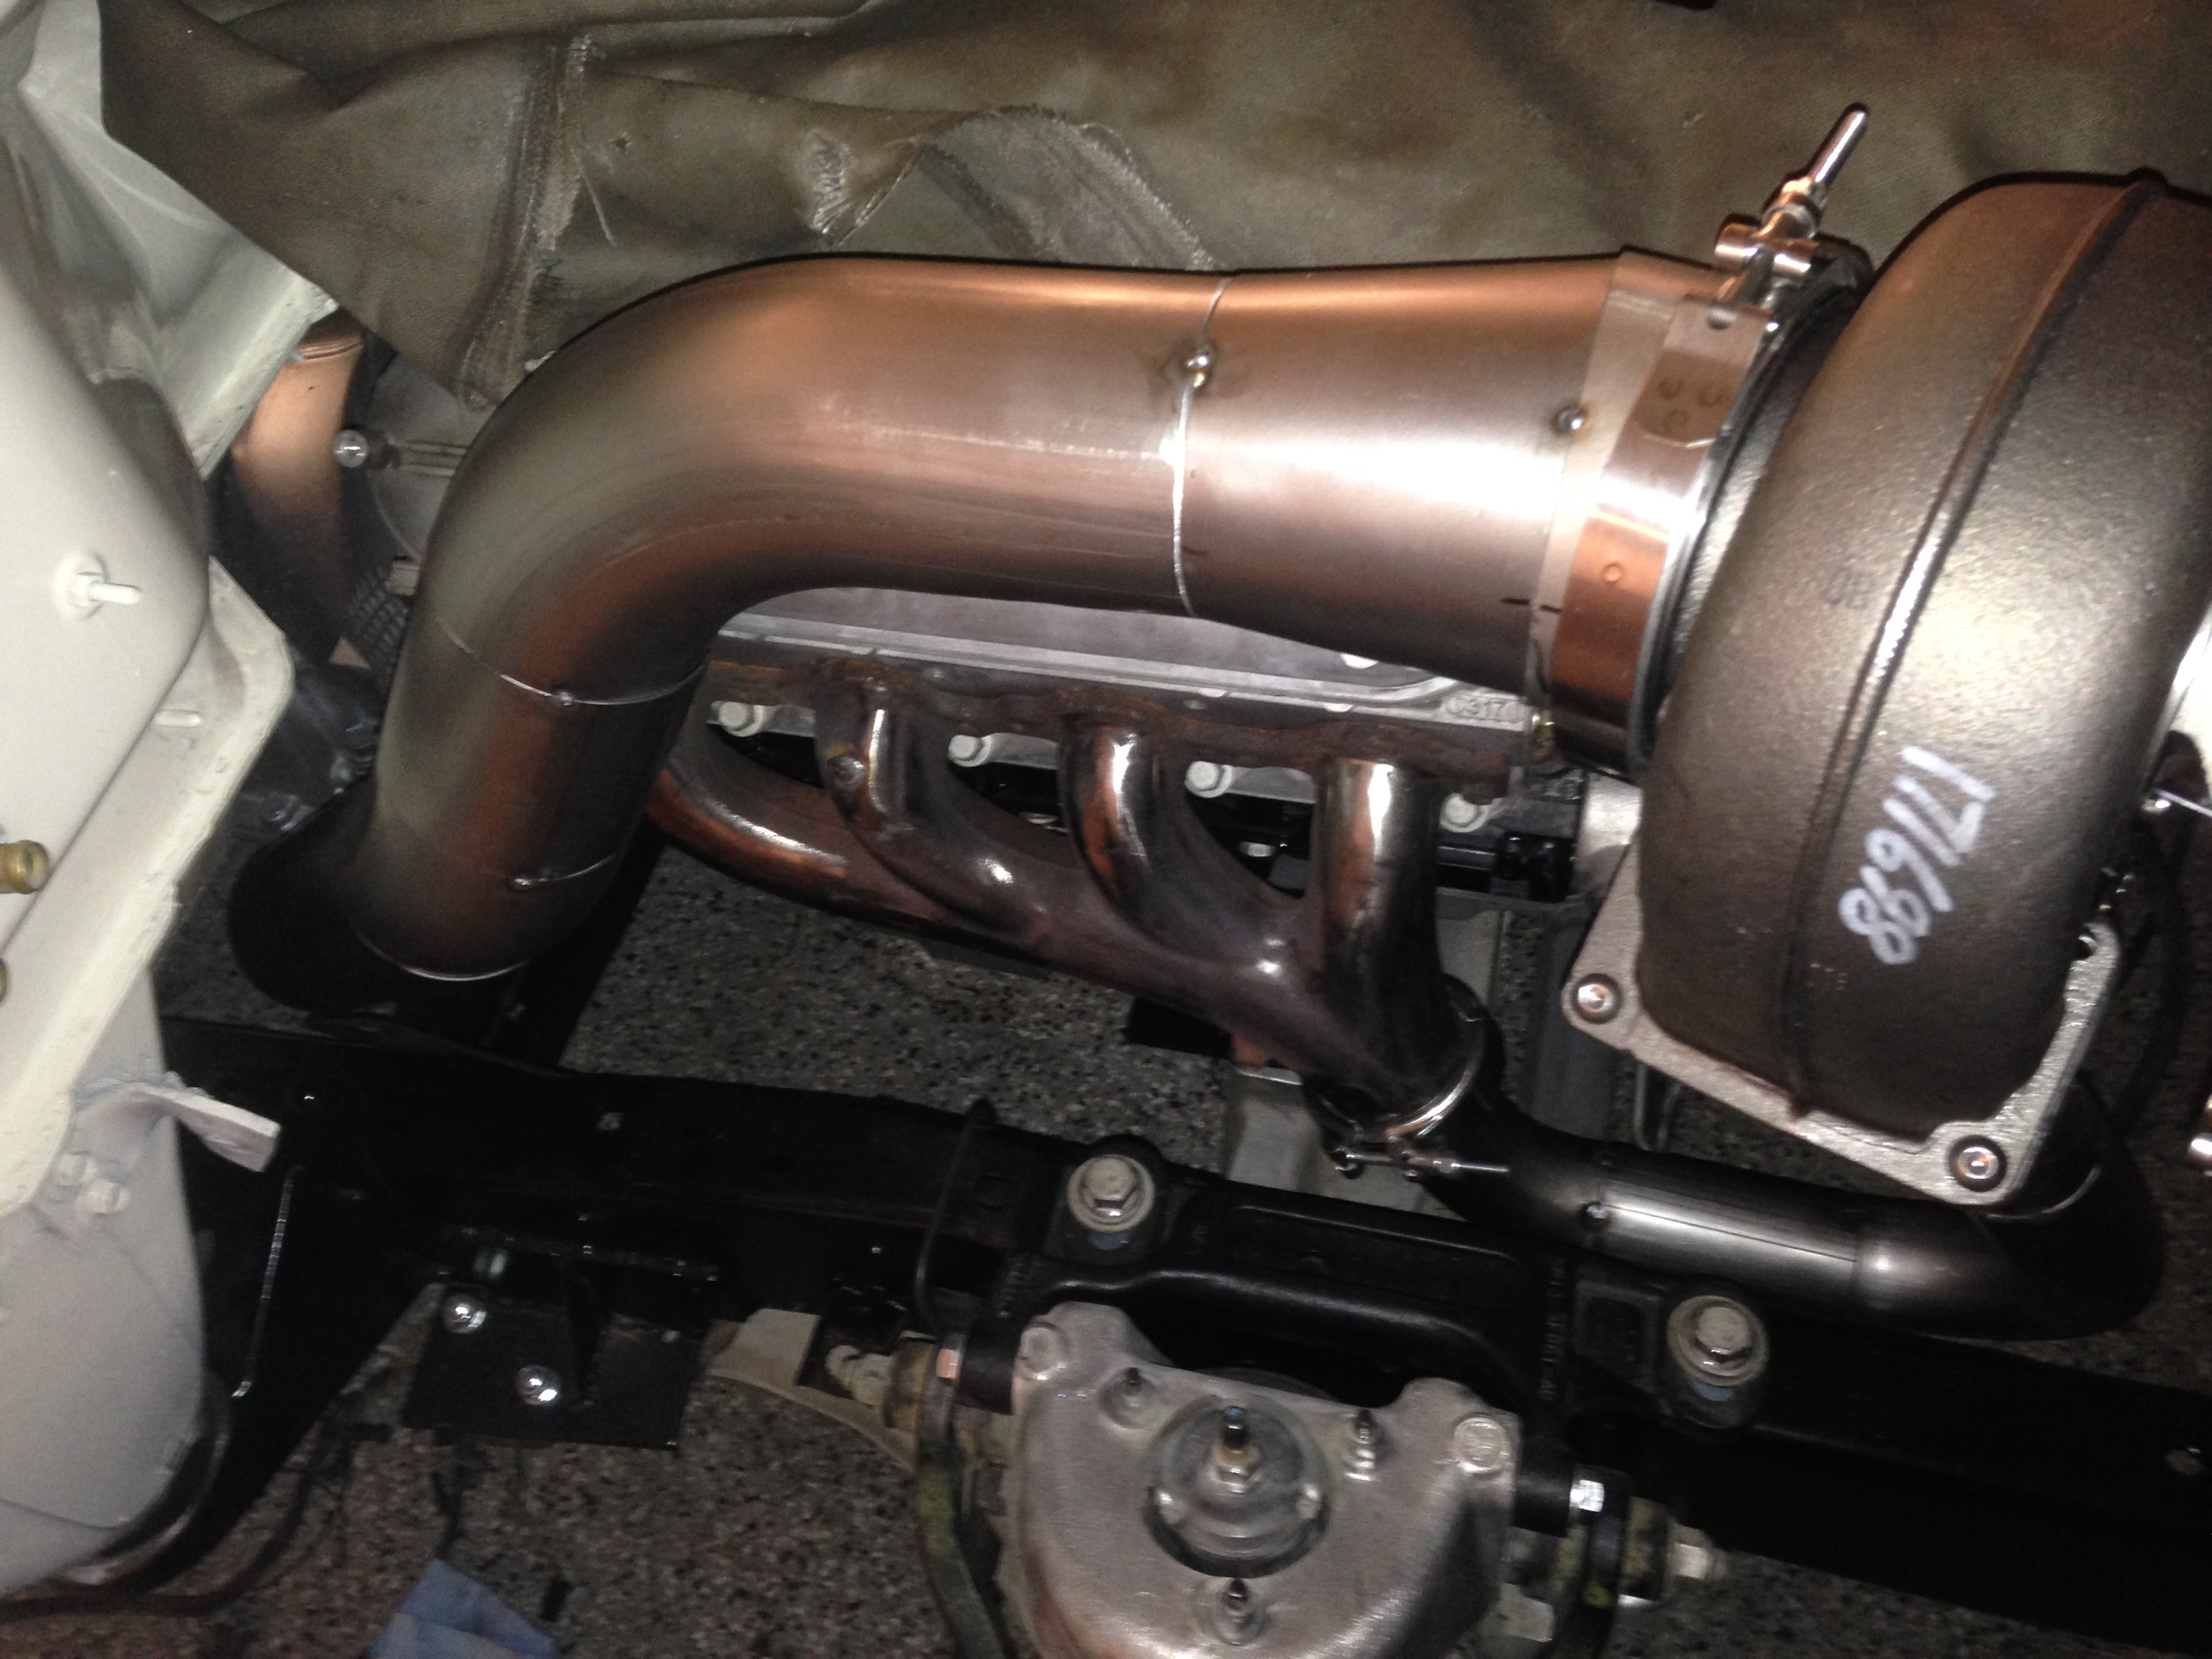
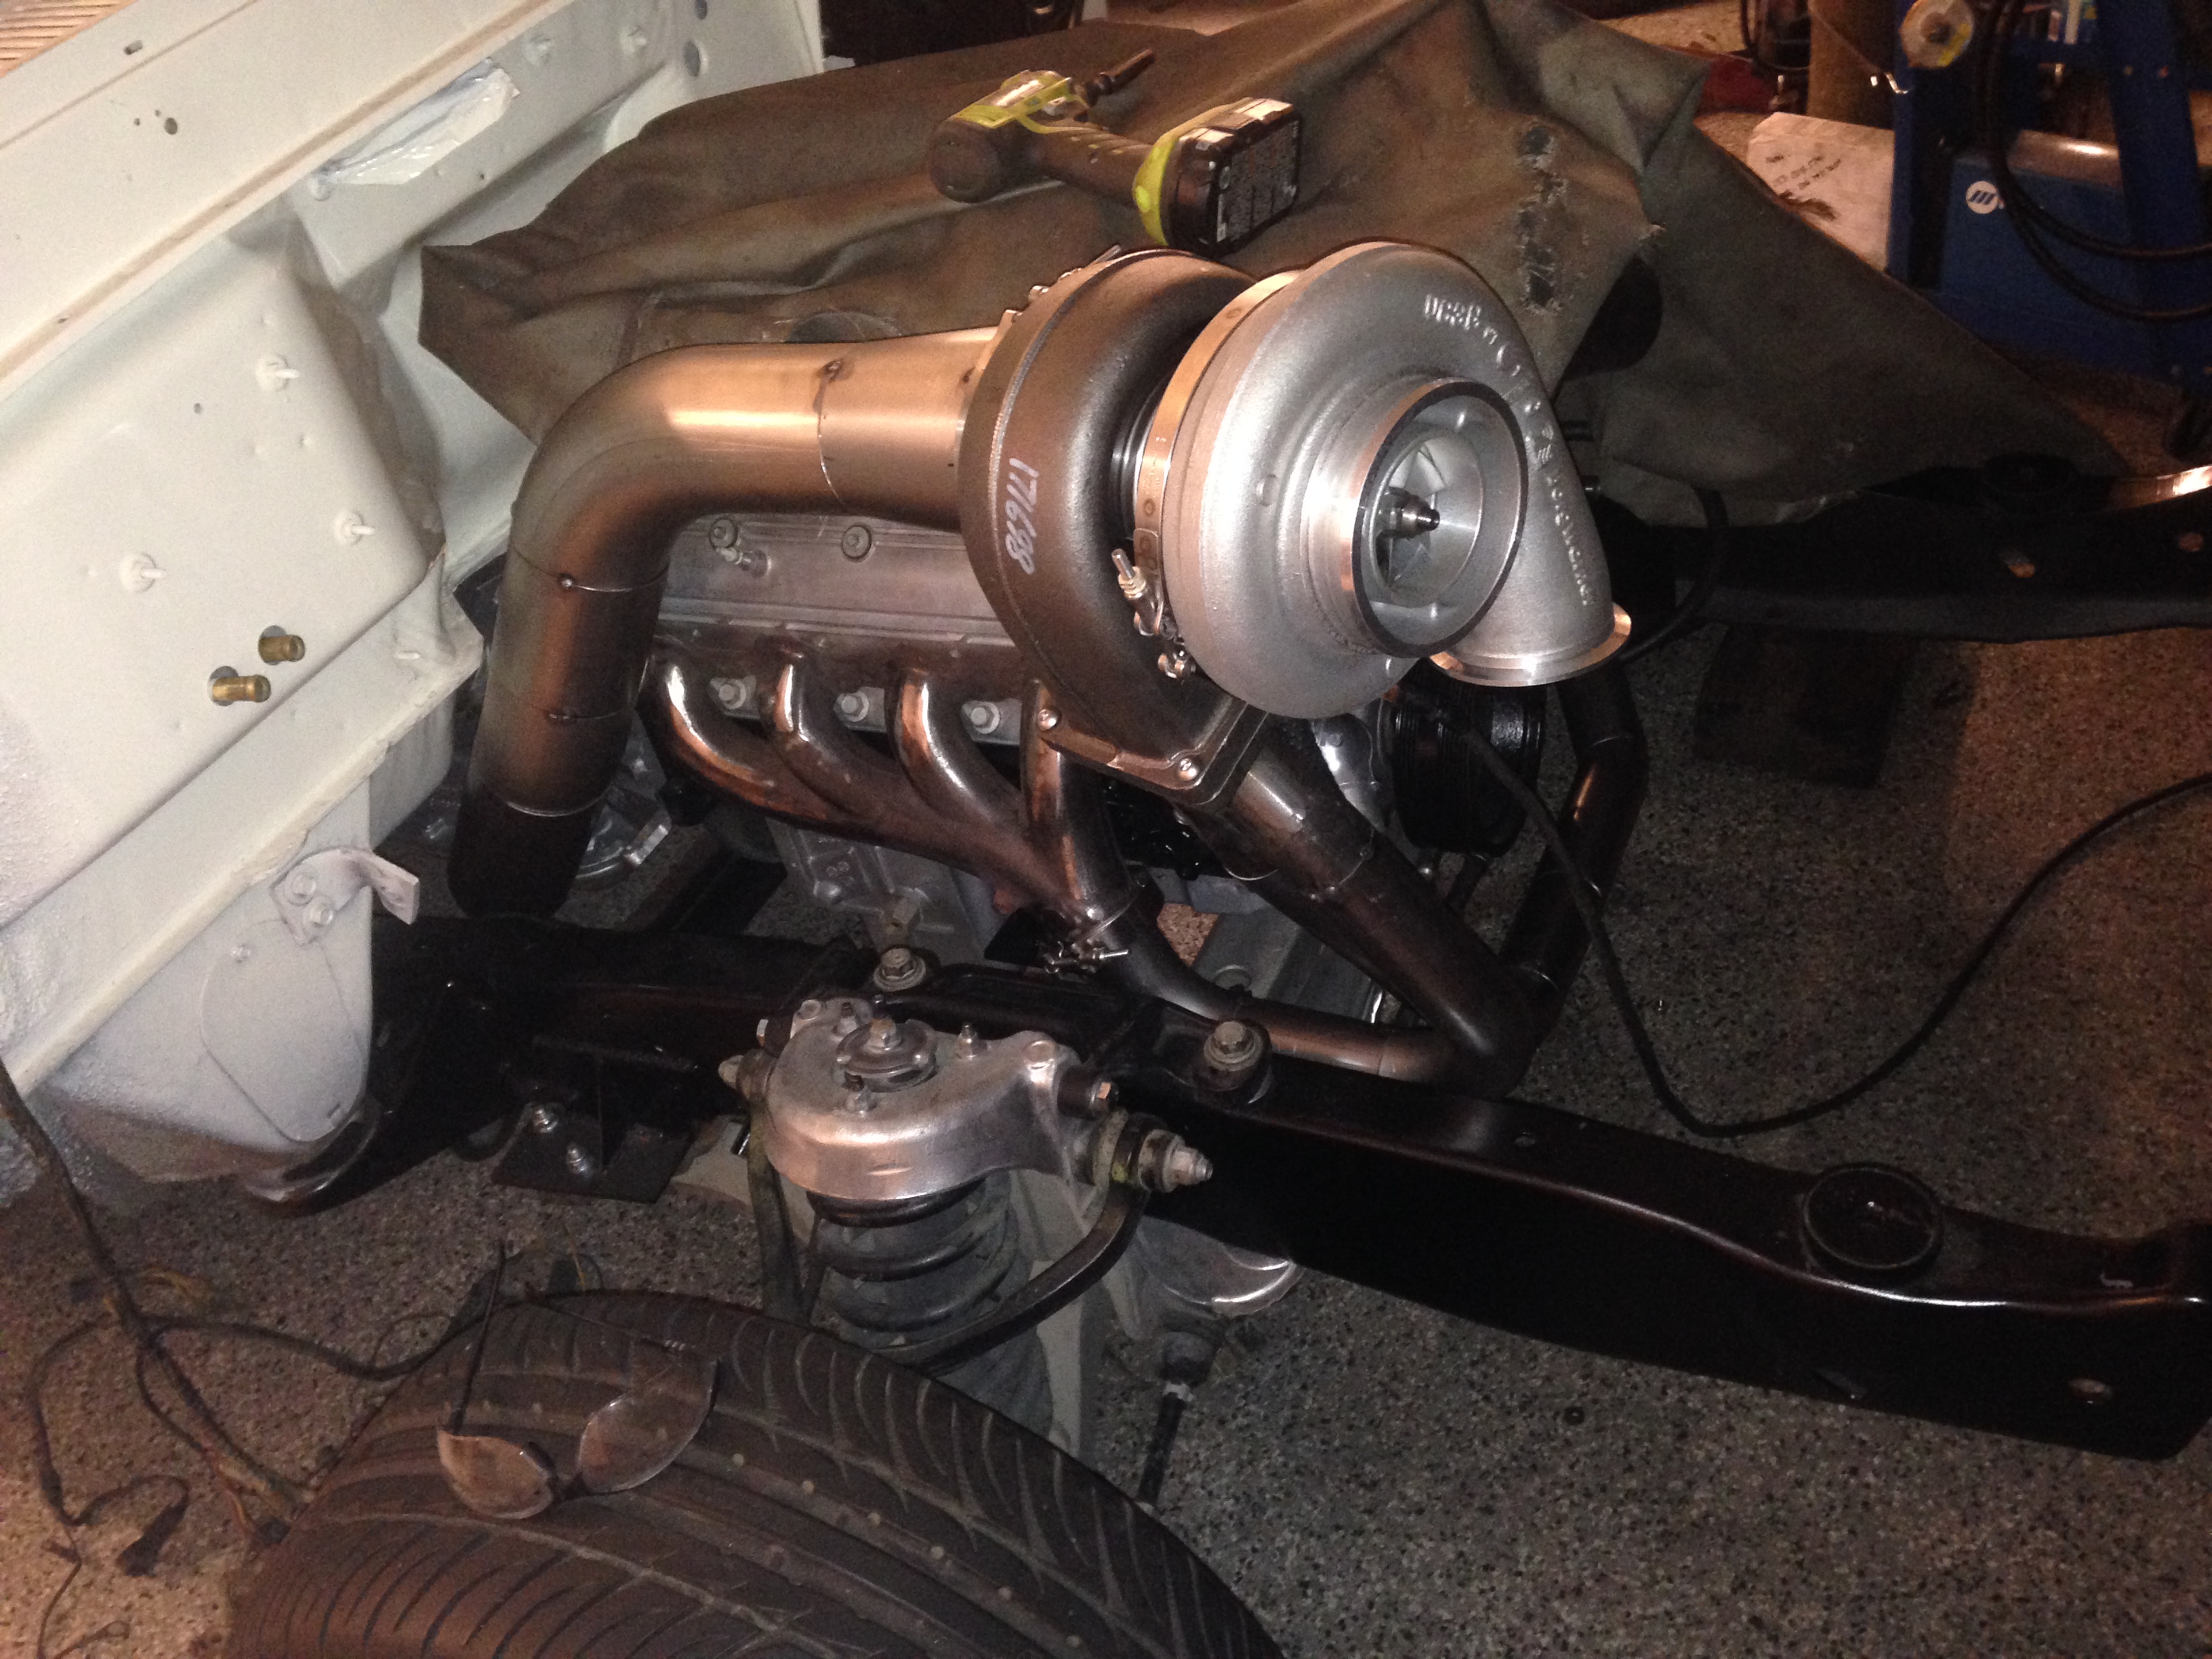
SO I started to get everything mocked up. Its big. Bigger than I thought it would be.
I really wanted it straight in the engine bay aesthetically, but there was just no way to make it fit there. So, it got clocked into this position and I built a mount to hold this big girl in place.
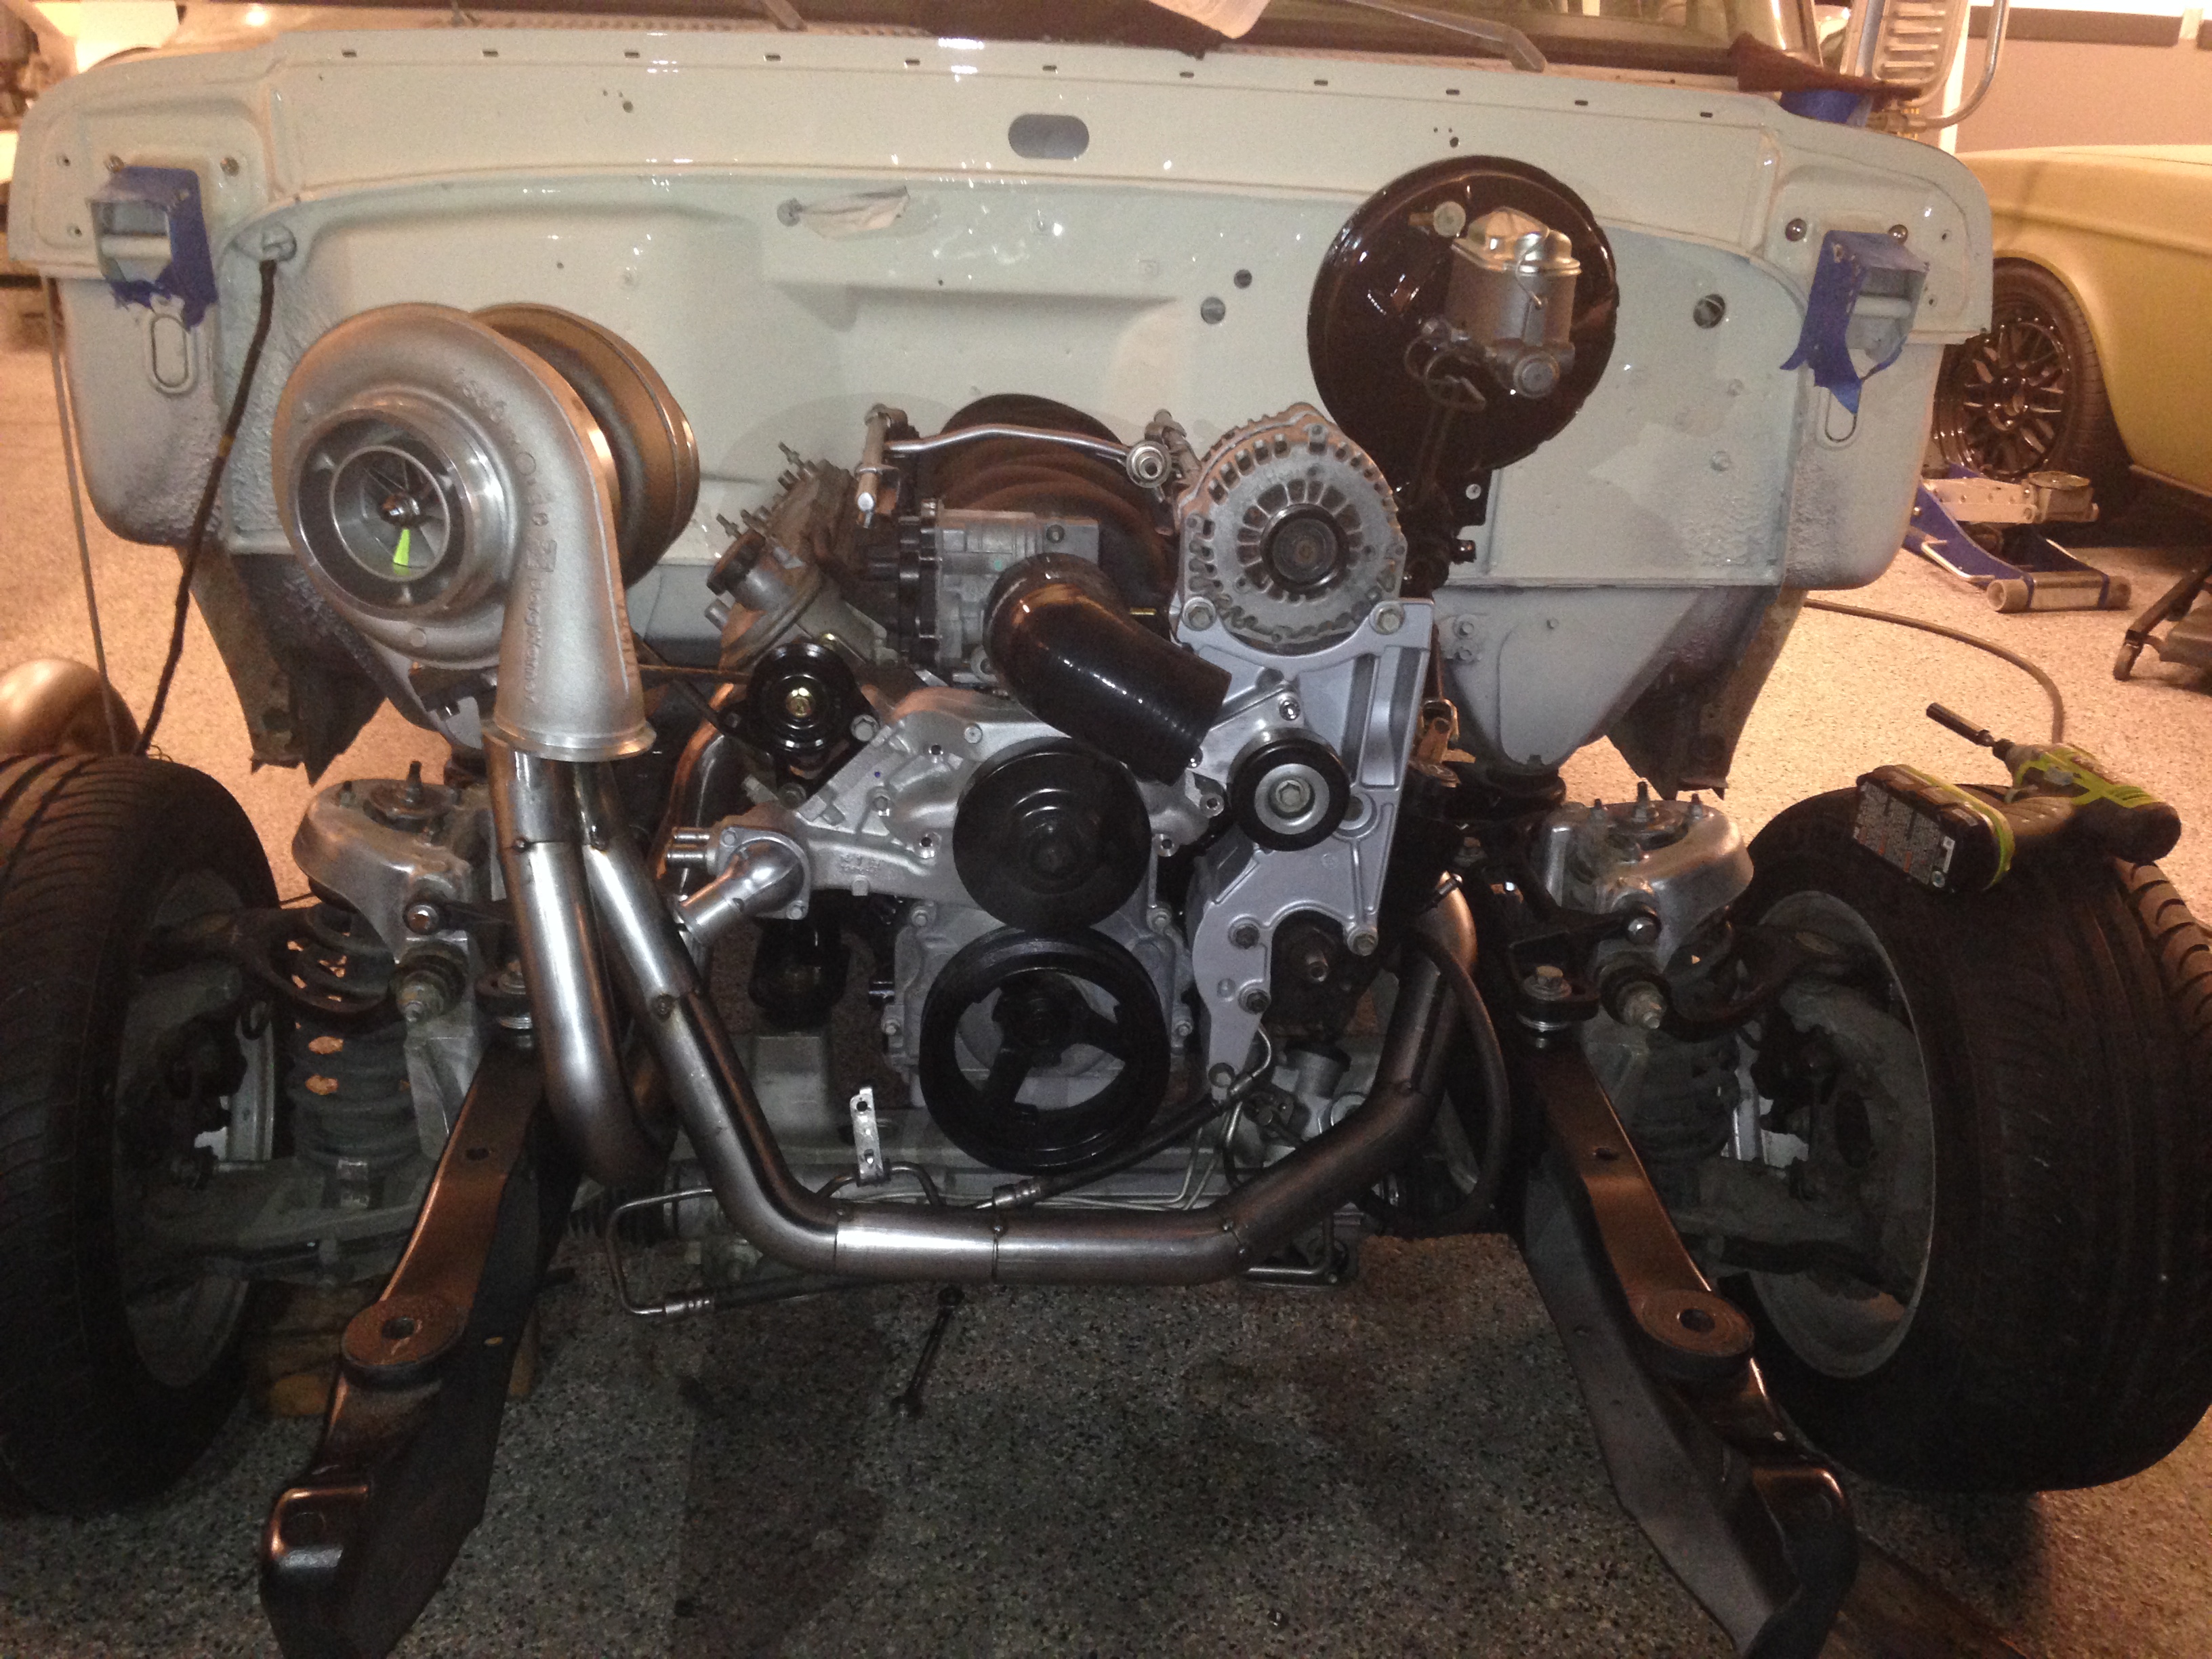
Checking for clearance to the front inner fender. It is close but not really many options at this time. Pretty sure a compressor blanket is going to be in my near future.
Wastegate showed up yesterday.
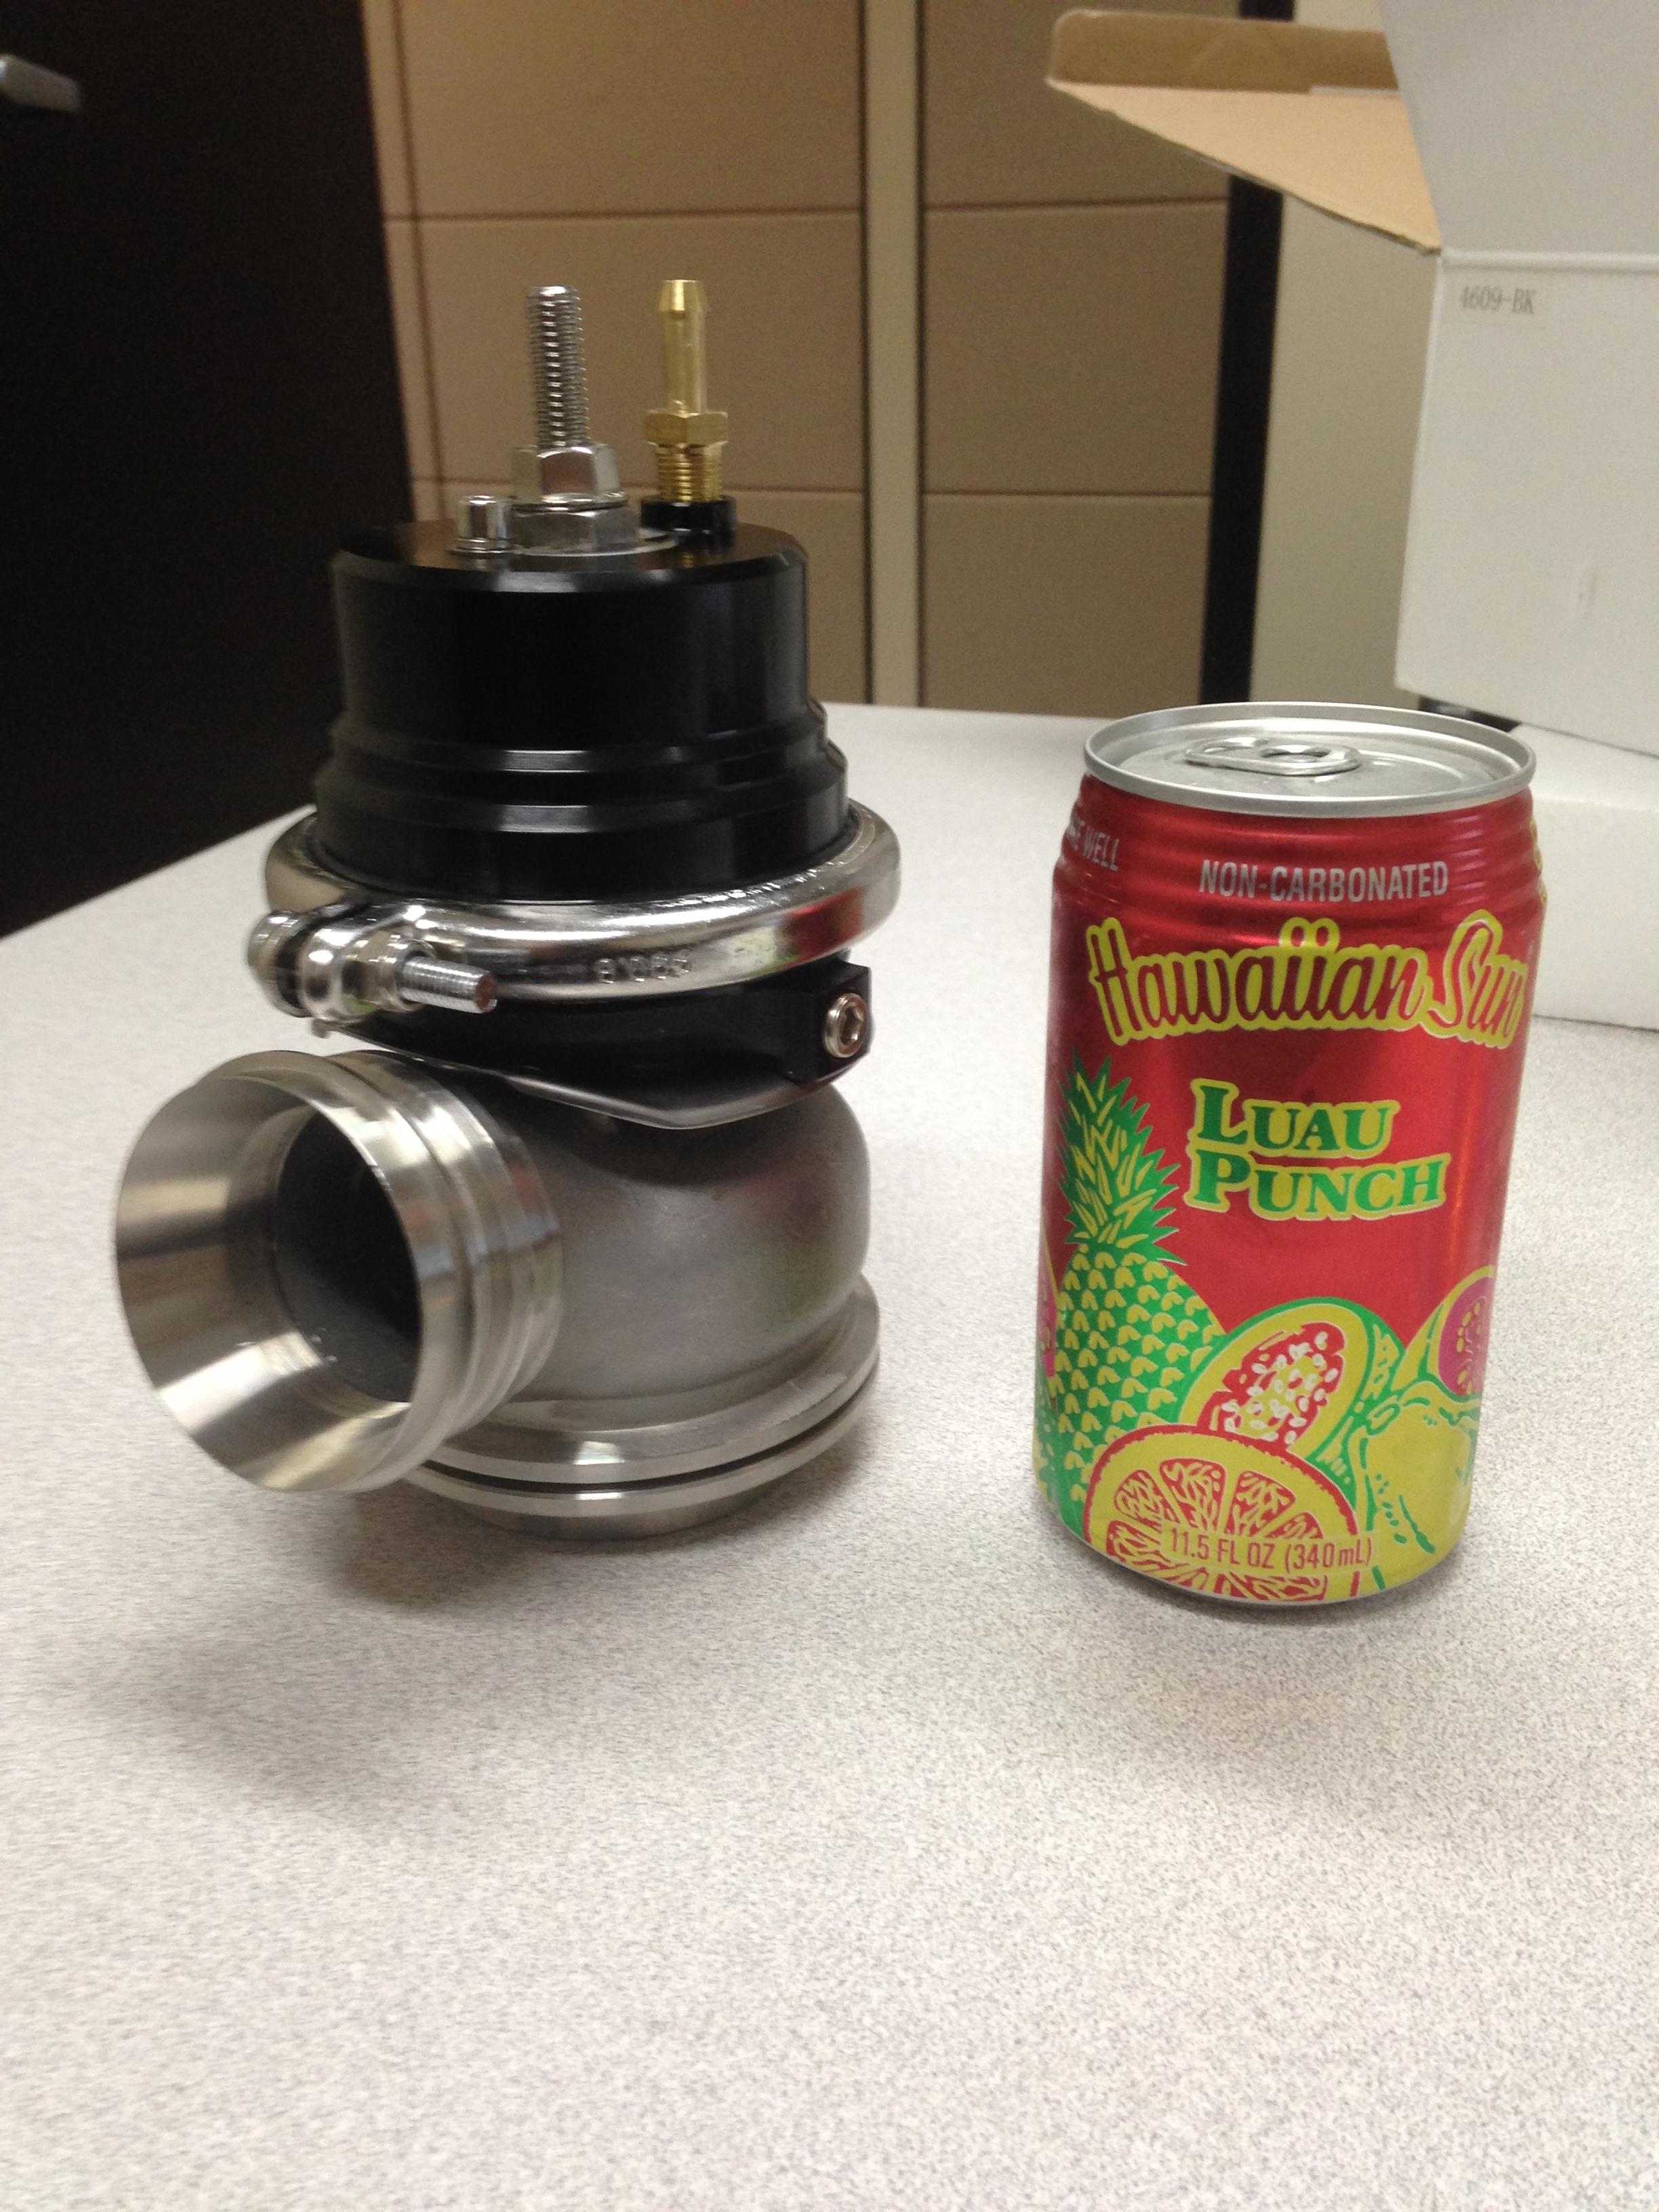
It, like the turbo is bigger than anticipated, where am I going to fit all this stuff?
Managed to get home at a descent hour last night and started on the fab work, this is what I enjoy doing so it was fun. Both manifolds chopped off, v bands tacked into place and all of the hot side tacked up. Still need some flex pipes, another v band and the wastegate but pretty happy how this all came together.
Exhaust is going to be almost too close to the oil fill on the valve cover, do they make valve covers with oil fill on both sides? Other than that and the wastegate and dump tube, I am pretty good for clearance on everything.
Thinking about just running a dump tube with a muffler on it instead of trying to snake it back through to the exhaust.
Sean
This showed up on Tuesday afternoon.

I laid out a bunch of exhaust parts on the parts table and got to work.

SO I started to get everything mocked up. Its big. Bigger than I thought it would be.
I really wanted it straight in the engine bay aesthetically, but there was just no way to make it fit there. So, it got clocked into this position and I built a mount to hold this big girl in place.
Checking for clearance to the front inner fender. It is close but not really many options at this time. Pretty sure a compressor blanket is going to be in my near future.


Wastegate showed up yesterday.

It, like the turbo is bigger than anticipated, where am I going to fit all this stuff?
Managed to get home at a descent hour last night and started on the fab work, this is what I enjoy doing so it was fun. Both manifolds chopped off, v bands tacked into place and all of the hot side tacked up. Still need some flex pipes, another v band and the wastegate but pretty happy how this all came together.


Exhaust is going to be almost too close to the oil fill on the valve cover, do they make valve covers with oil fill on both sides? Other than that and the wastegate and dump tube, I am pretty good for clearance on everything.
Thinking about just running a dump tube with a muffler on it instead of trying to snake it back through to the exhaust.
Sean
11-14-2013, 11:37 AM
#27
TECH Addict
iTrader: (19)
Join Date: Aug 2007
Location: Where the Navy tells me to go
Posts: 2,398
Received 106 Likes
on
88 Posts

Looks like this thing is going to be pretty badass when you're done! Is swapping in the Crown Vic front end a common thing to do on these older trucks, or what gave you that idea? I imagine that does wonders for ride quality and handling.
Those inner fenders came out great. Like you said, you can't even tell that the battery tray was there - nice job on making that body line continue the full length.
Oh, and just because I'm **** retentive, if something is pretty good it's decent, not descent.
Those inner fenders came out great. Like you said, you can't even tell that the battery tray was there - nice job on making that body line continue the full length.
Oh, and just because I'm **** retentive, if something is pretty good it's decent, not descent.
11-14-2013, 01:07 PM
#28
Launching!
Thread Starter
Join Date: Mar 2012
Posts: 214
Likes: 0
Received 0 Likes
on
0 Posts
Looks like this thing is going to be pretty badass when you're done! Is swapping in the Crown Vic front end a common thing to do on these older trucks, or what gave you that idea? I imagine that does wonders for ride quality and handling.
Those inner fenders came out great. Like you said, you can't even tell that the battery tray was there - nice job on making that body line continue the full length.
Oh, and just because I'm **** retentive, if something is pretty good it's decent, not descent.
Those inner fenders came out great. Like you said, you can't even tell that the battery tray was there - nice job on making that body line continue the full length.
Oh, and just because I'm **** retentive, if something is pretty good it's decent, not descent.
Haha!! Yep. That would be correct.
Crown Vic swap is pretty common on these old fords. It's an awesome swap since it damn near bolts in to the frame. Gets rid if all the bs twin I beams, gives you rack and pinion and great brakes.
11-14-2013, 11:15 PM
#30
Launching!
Thread Starter
Join Date: Mar 2012
Posts: 214
Likes: 0
Received 0 Likes
on
0 Posts
Worked on the downpipe tonight.
Looking for ideas for the wastegate placement now. Ordered a single 60 mm, but now, thinking I should have just done two 44's instead.
Any ideas out there or suggestions?
Got the last v band, and flex connector today. Have a few hours off tomorrow, hope to make a little progress on it then.
Sean


Looking for ideas for the wastegate placement now. Ordered a single 60 mm, but now, thinking I should have just done two 44's instead.
Any ideas out there or suggestions?
Got the last v band, and flex connector today. Have a few hours off tomorrow, hope to make a little progress on it then.
Sean
11-19-2013, 09:15 AM
#32
Launching!
Thread Starter
Join Date: Mar 2012
Posts: 214
Likes: 0
Received 0 Likes
on
0 Posts
Been busy trying to get stuff done the last few days, running a little low on motivation as my other two cars need work. Steering rack and all new joints on the ls Volvo and rear disc brake conversion on the 79 cummins were done this weekend as well.
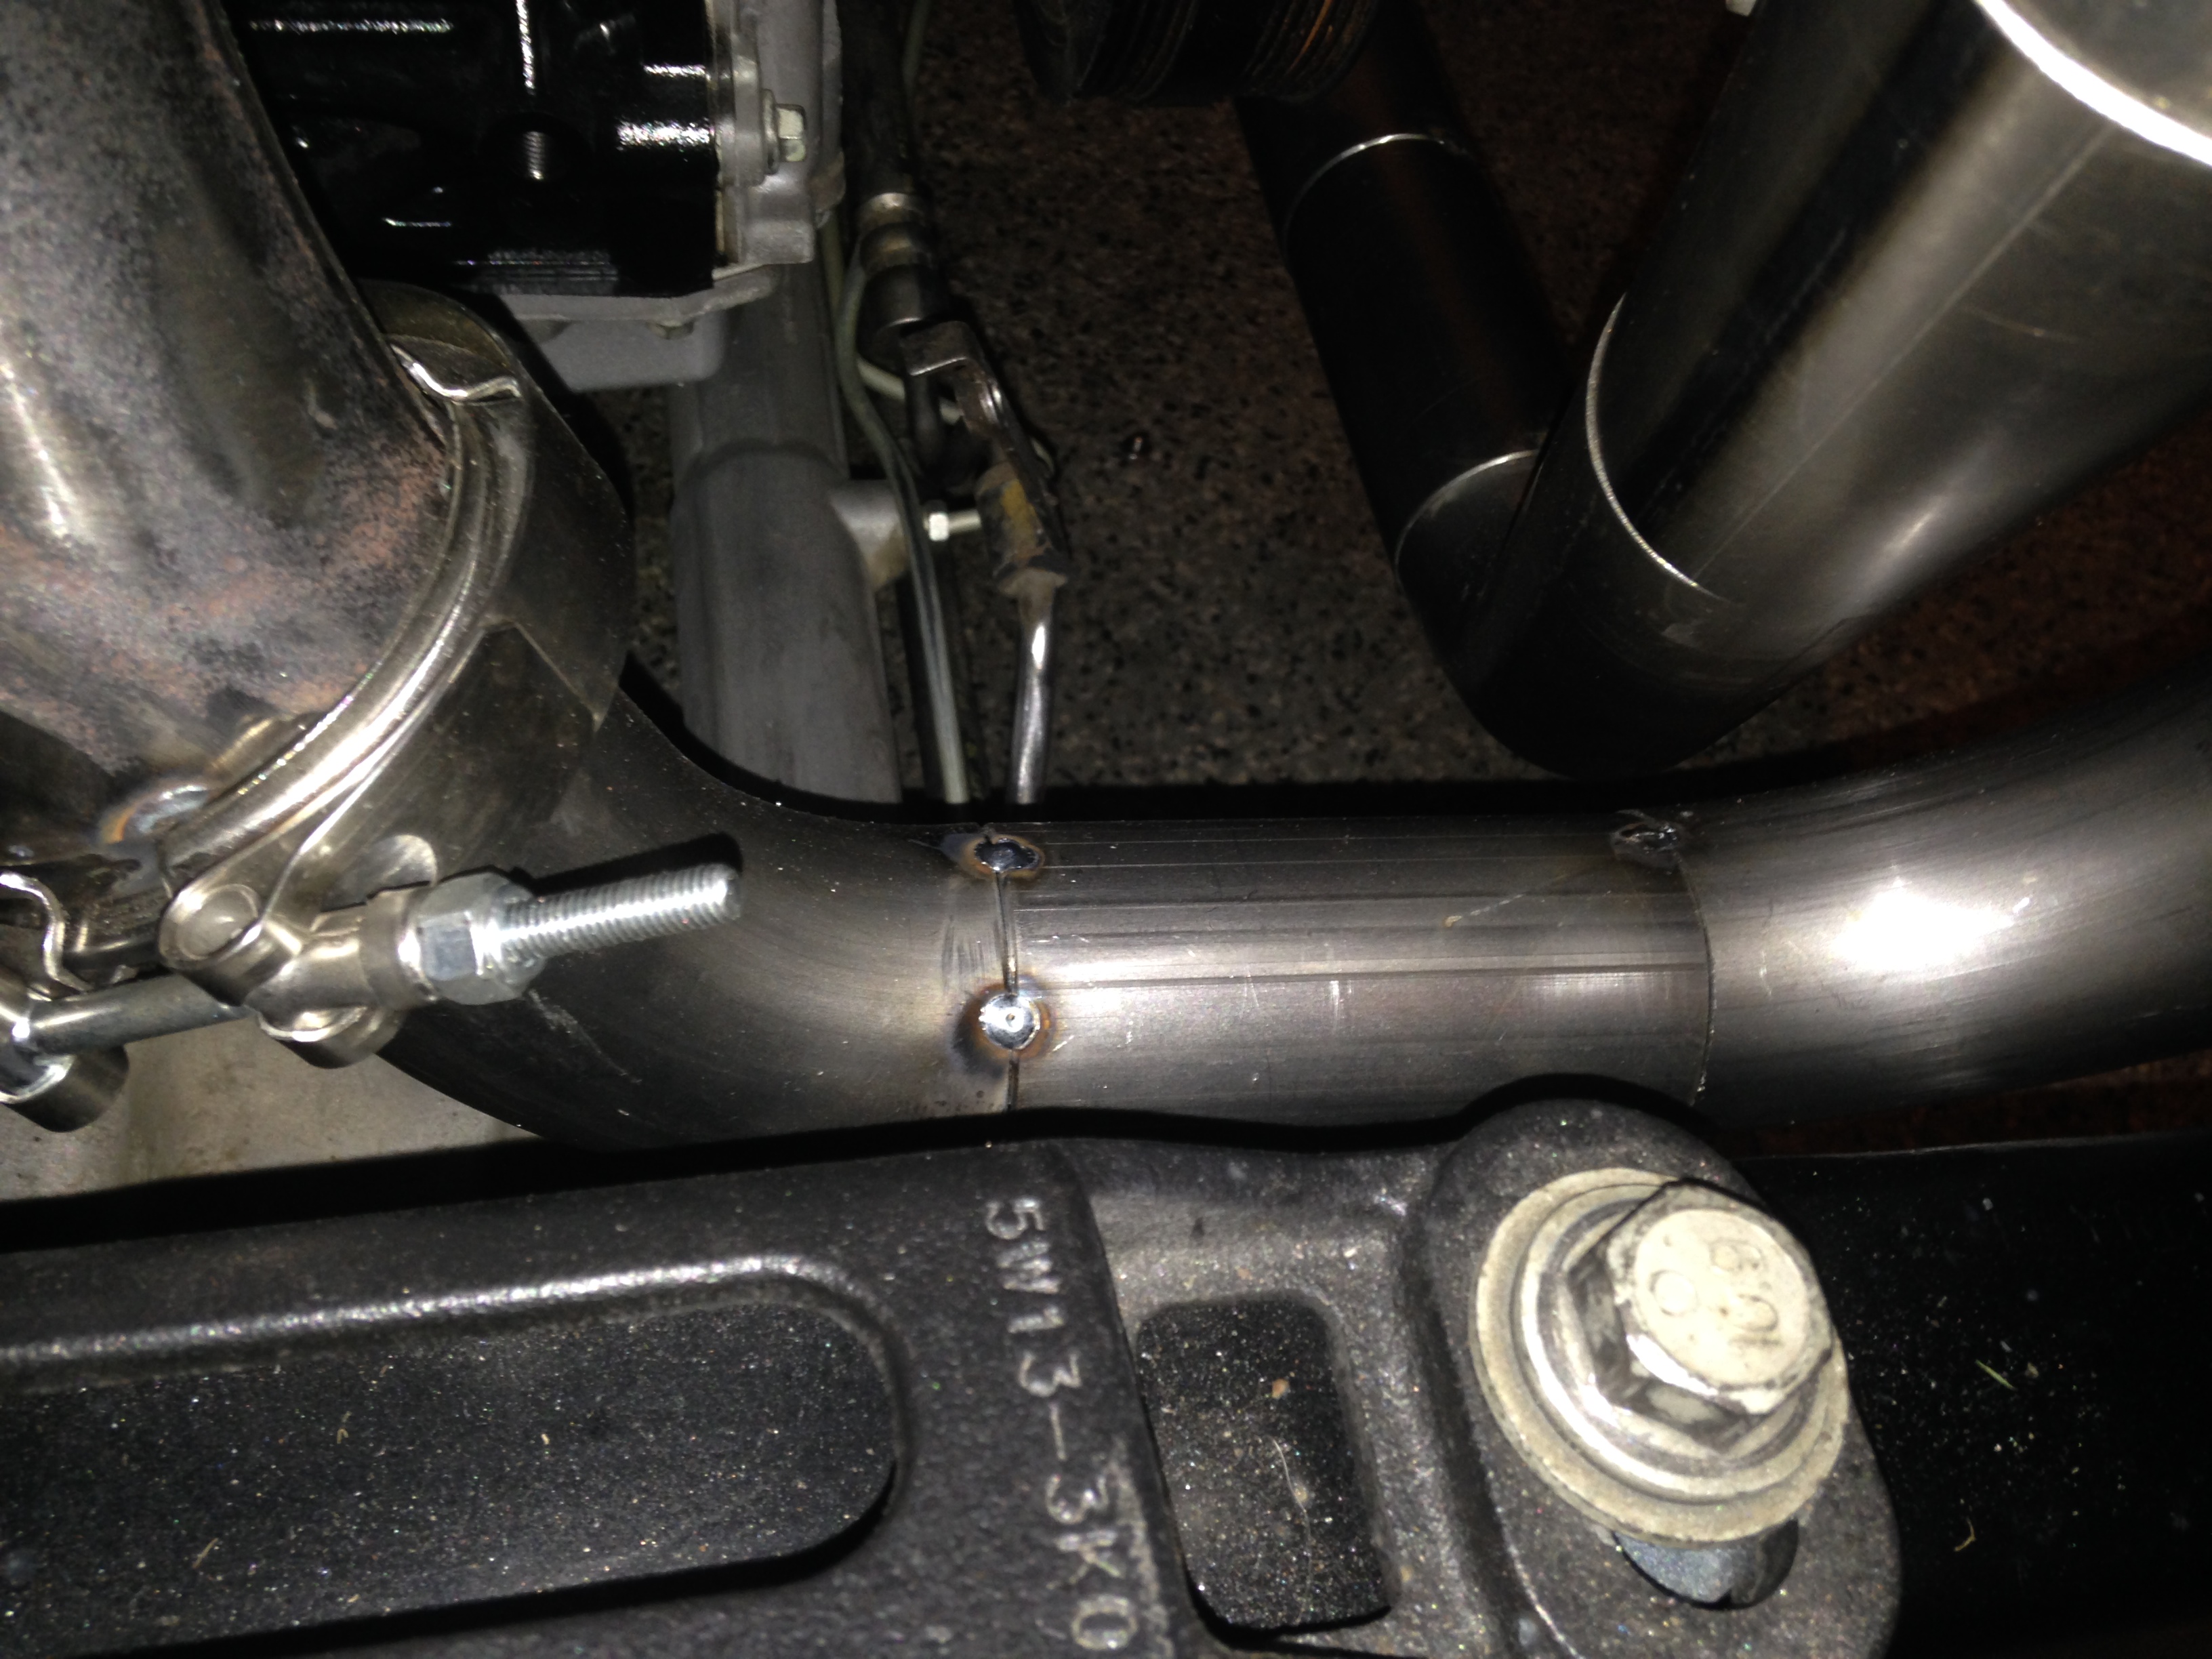
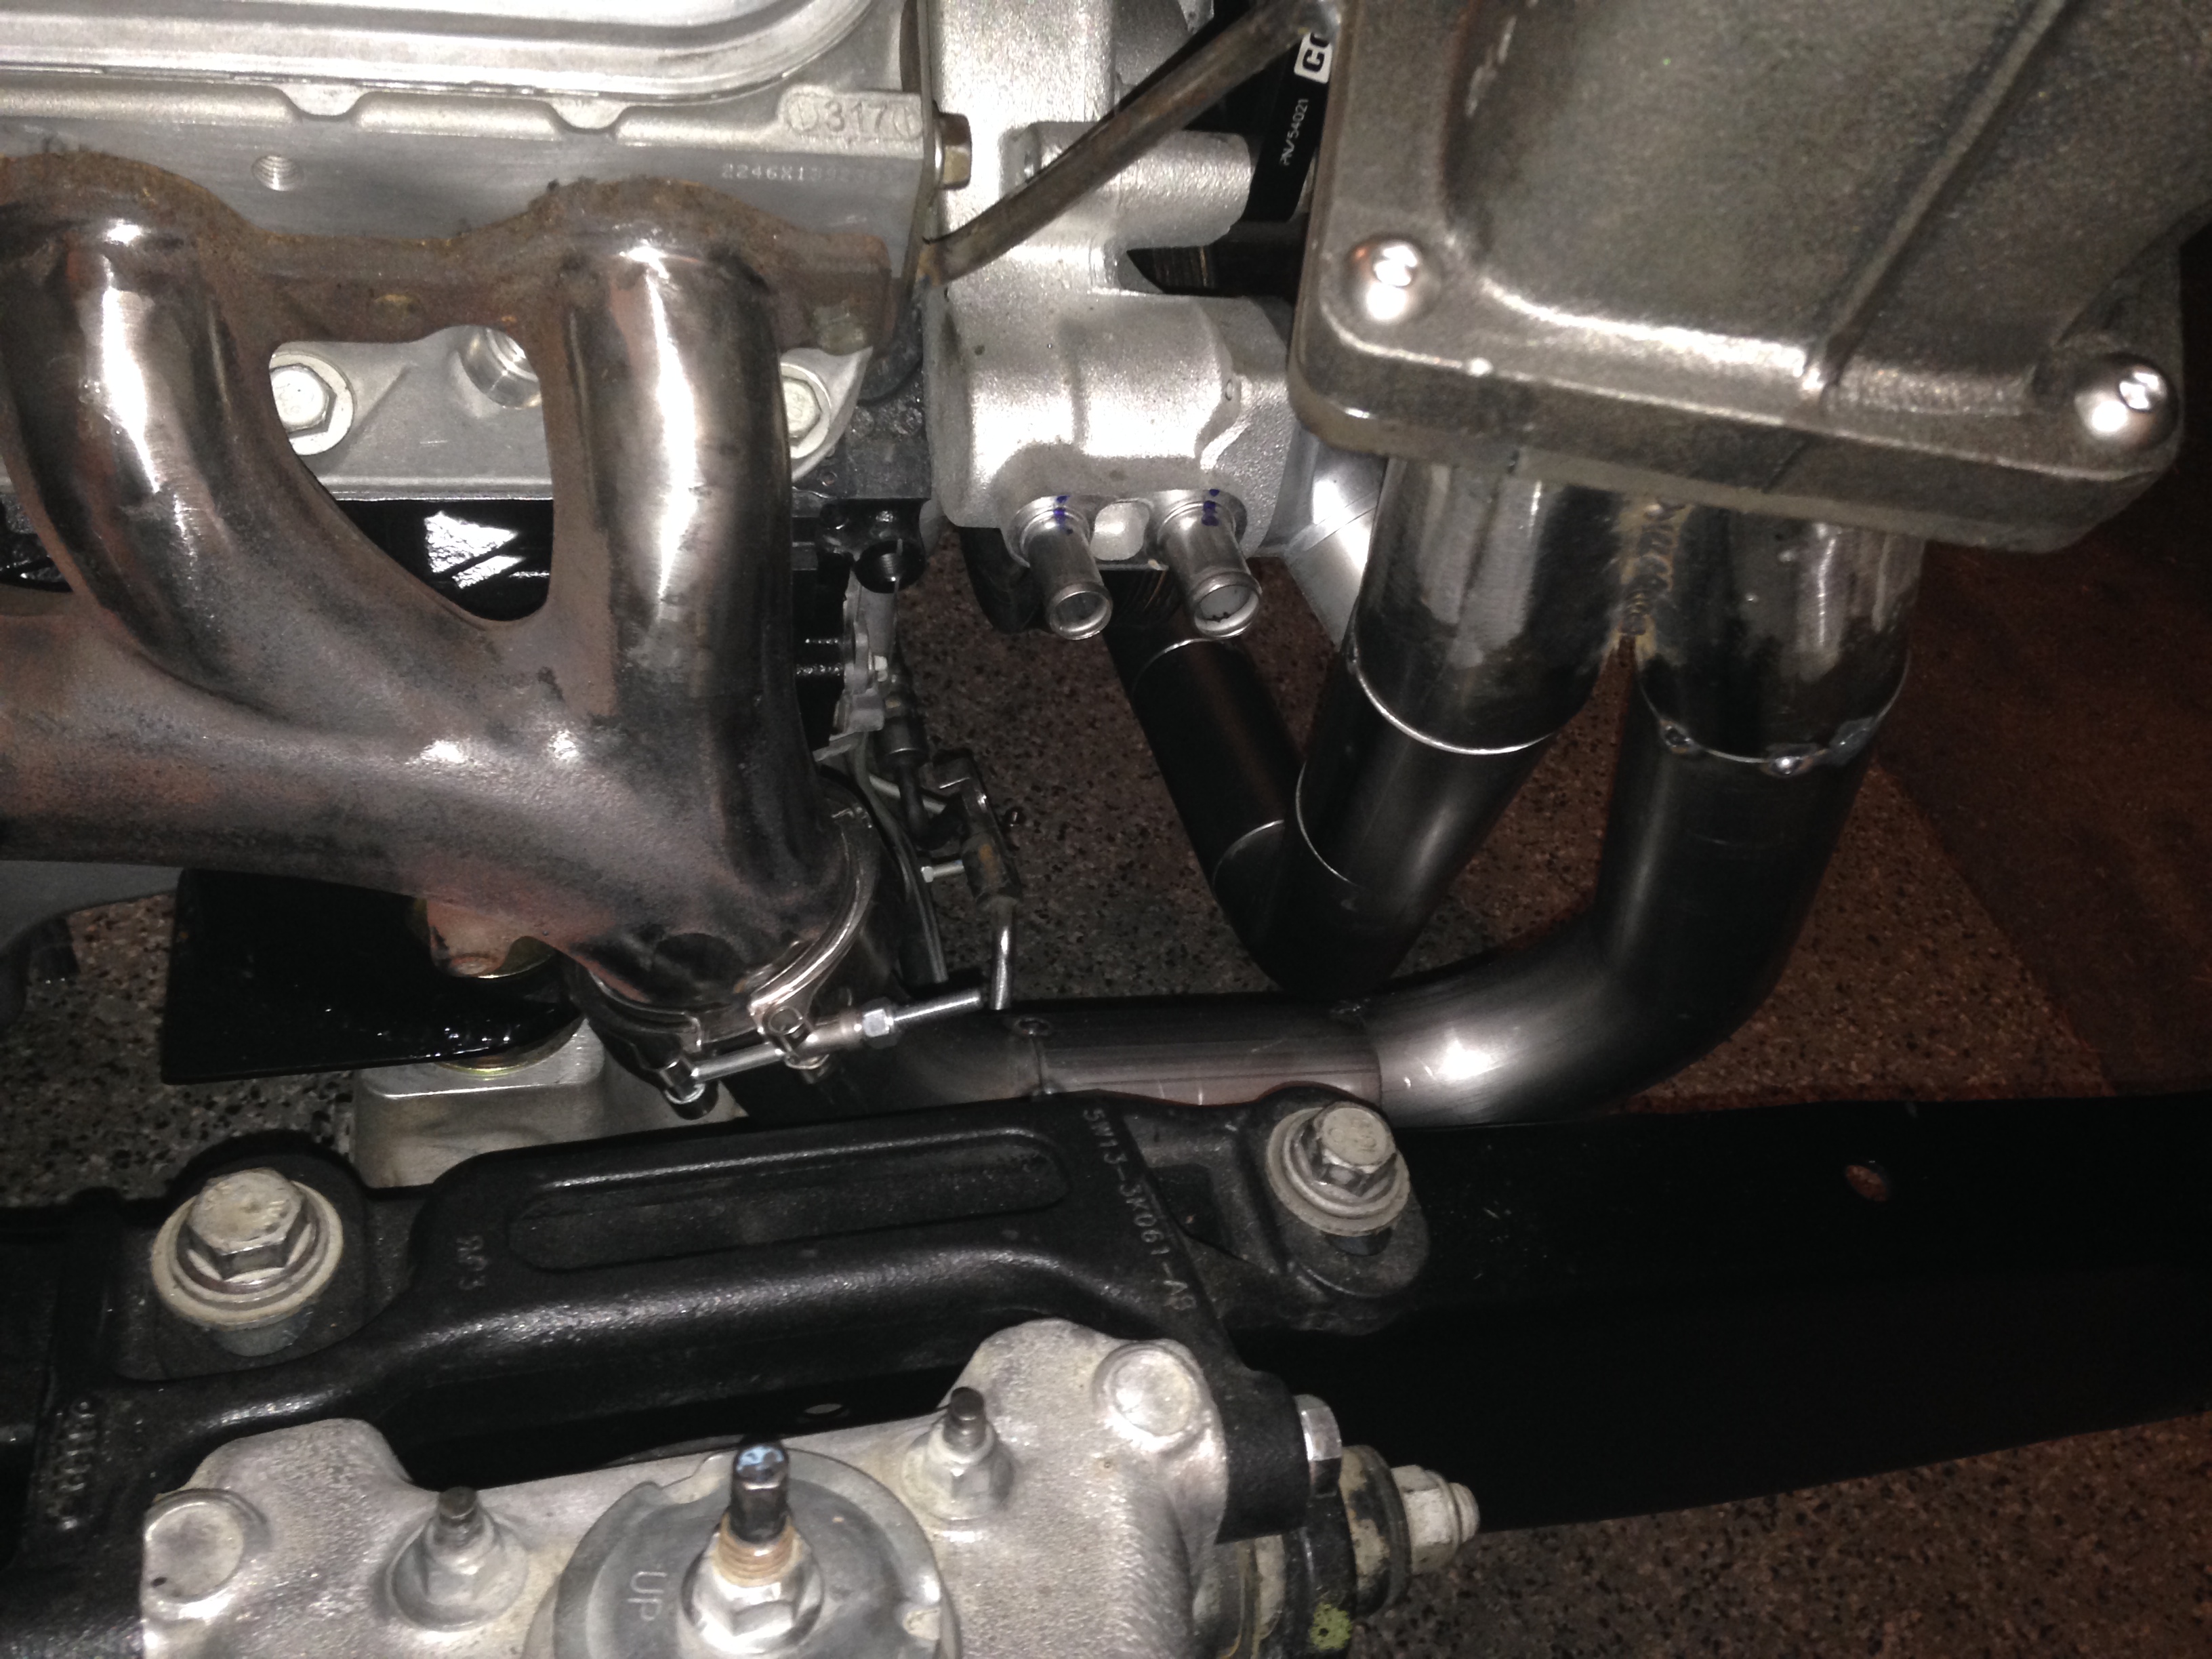
Figured out a routing for the wastegate, probably not ideal, but this way was the cleanest I could figure it out without a ton more exhaust under the hood.


Fits god with the inner fender still.

Once that was done I got to business wit the welder and die grinder.

You can see in this picture a pretty direct path from both banks to the wastegate. Piping to and from the wastegate is 2 1/4"

Went over to my neighbor Geno's house who is always a huge help on these projects and he let me loose with his tig machine. To those of you who are killed with a tig torch, you have my respect, its hard to make it look perfect. These are far from perfect, but should hold just fine.
Did the downpipe with the TIG as well as the v bands onto the manifolds. The rest of the hot side piping got treated to a date with the old wire feed, turned out alright.
Last night I finished up with a little dimple died bracket for the turbo brace and added in two o2 bungs and a wideband bung.


Here it is all pulled off and ready to head over to the ceramic coater.

Now I get to get back to other stuff, fuel door in the bed floor, plumbing the fuel system and probably getting started on some wiring, radiator and intercooler.
Sean
 11-19-2013, 03:29 PM
#34
Launching!
Thread Starter
Join Date: Mar 2012
Posts: 214
Likes: 0
Received 0 Likes
on
0 Posts
Yep, cleaned them all up before hand. Should turn out decent when its all coated. Doing everything in all black for that clean stealthy look.
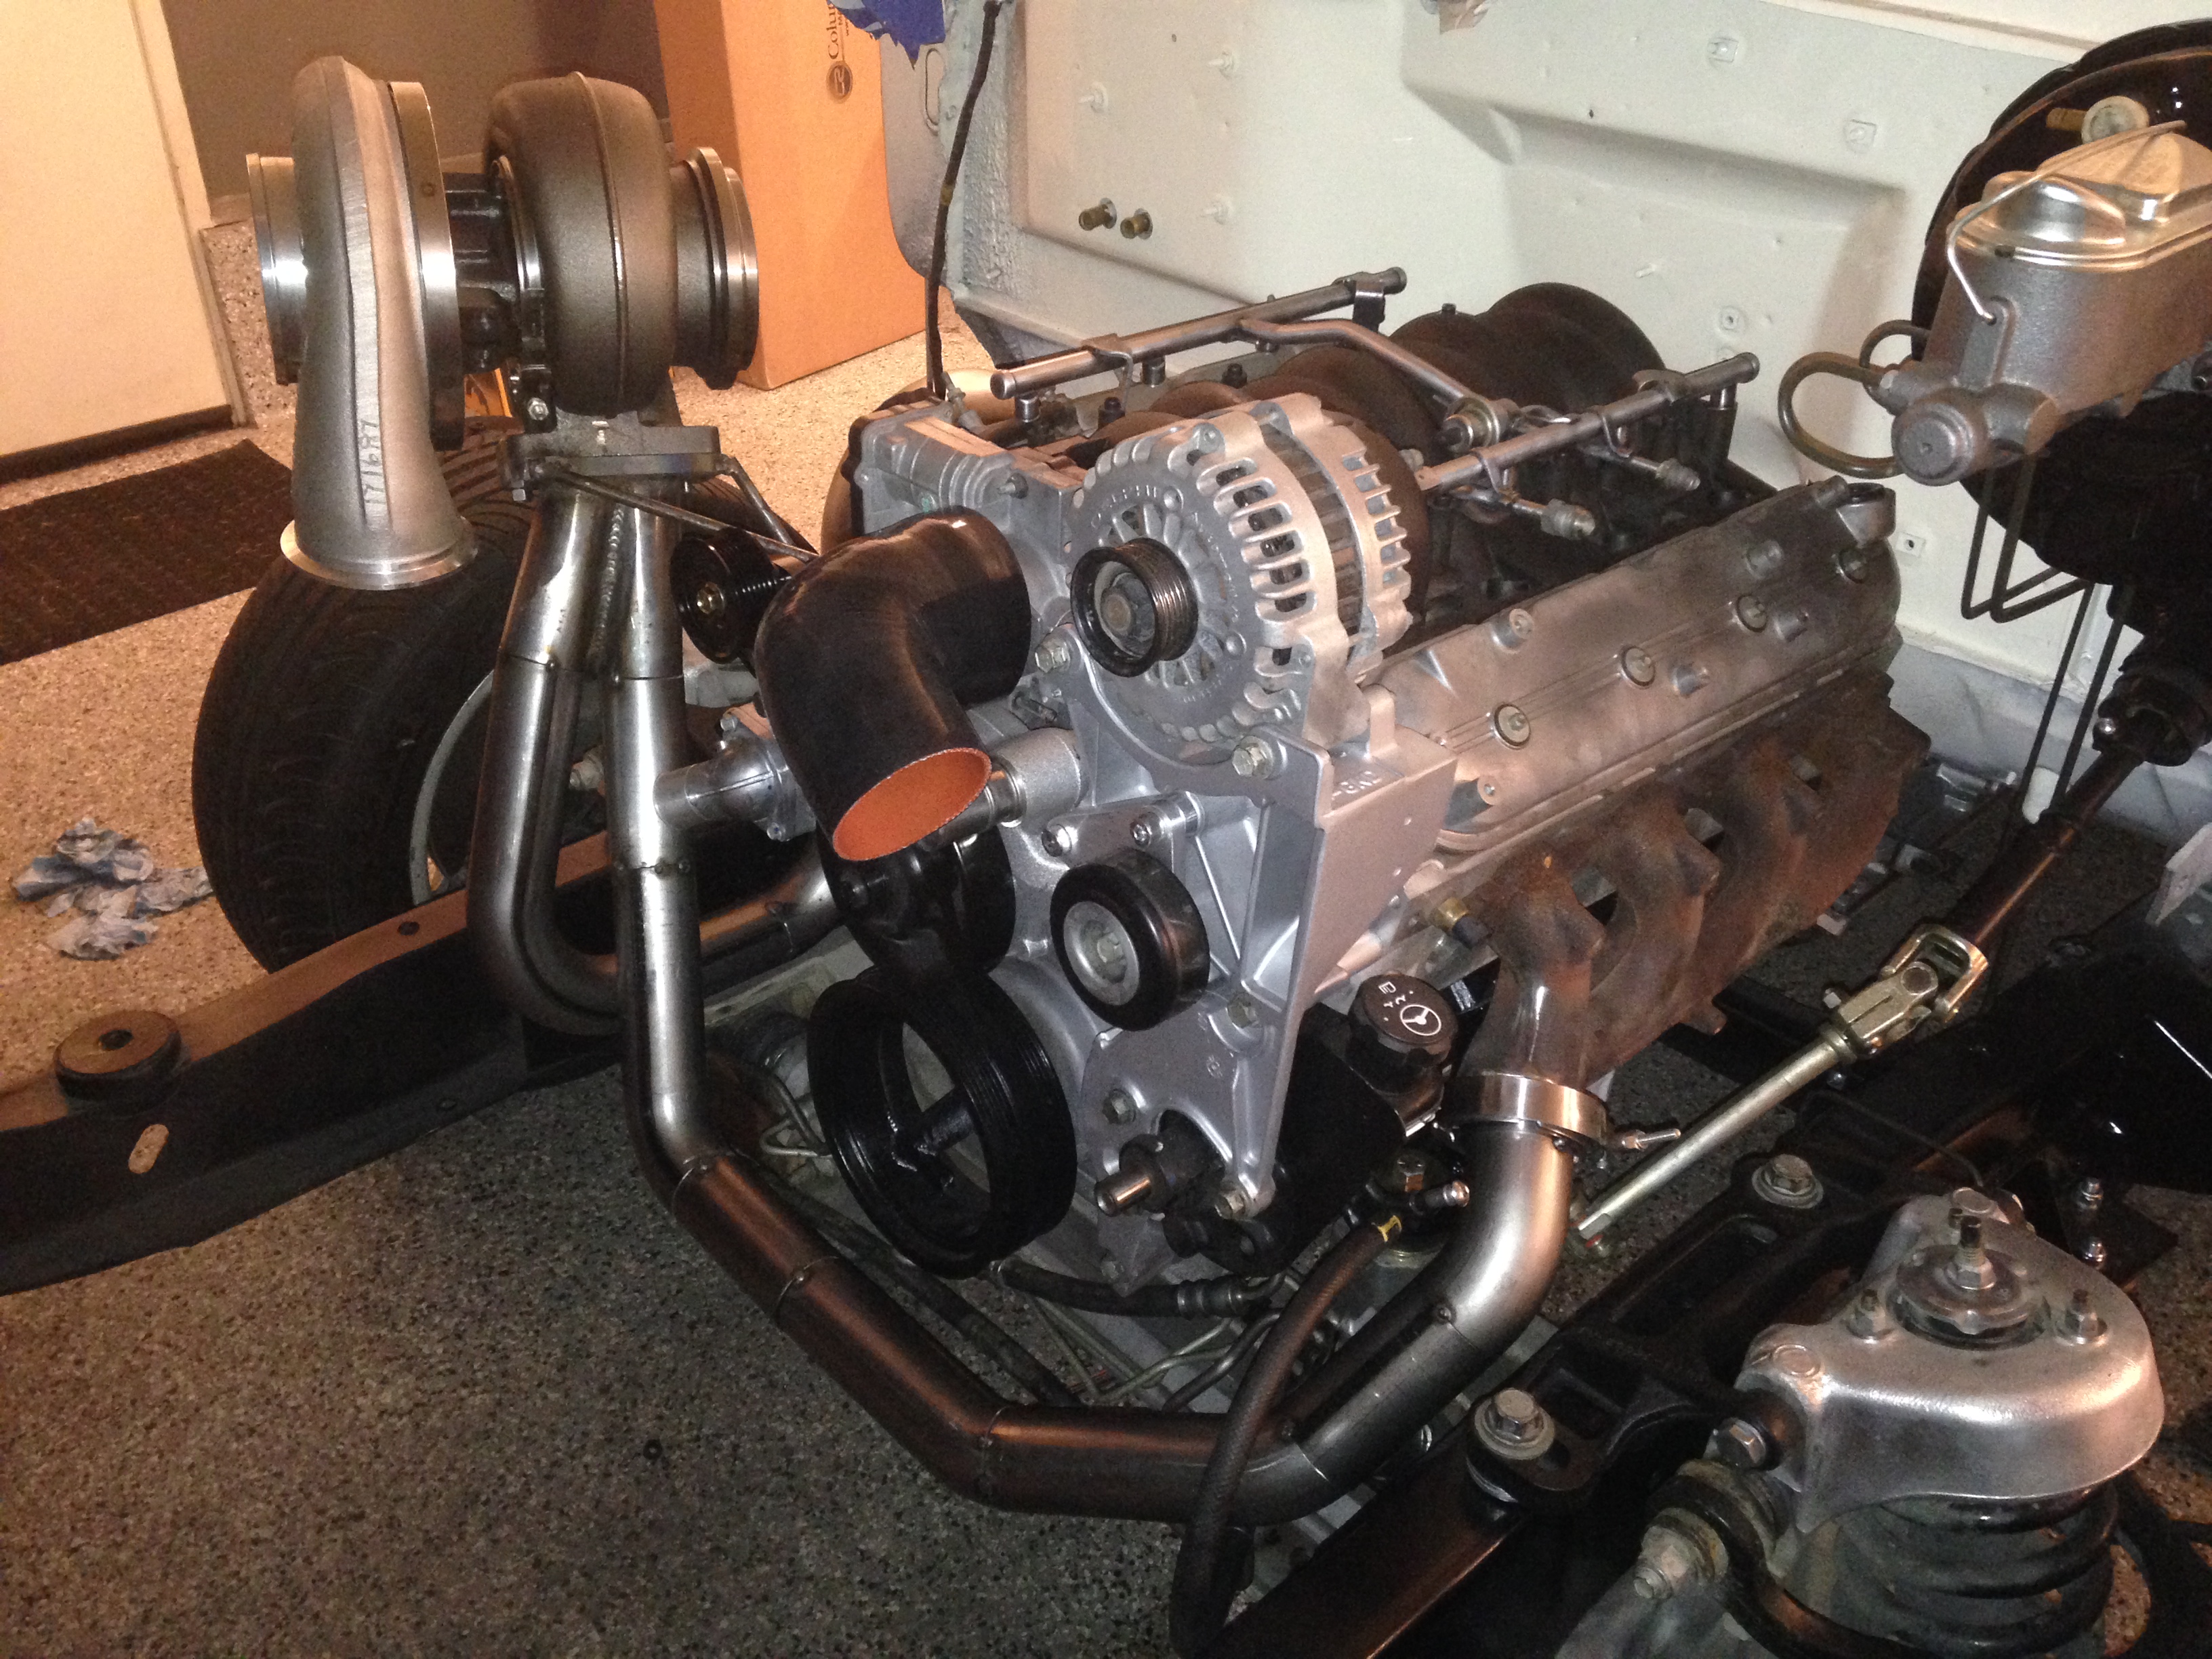
The turbo does make the ls engine look dinky in there
Sean
The turbo does make the ls engine look dinky in there
Sean
11-21-2013, 09:32 AM
#35
Launching!
Thread Starter
Join Date: Mar 2012
Posts: 214
Likes: 0
Received 0 Likes
on
0 Posts
Well, not a lot of progress on this the last few days, as lots of stuff is out of my hands.
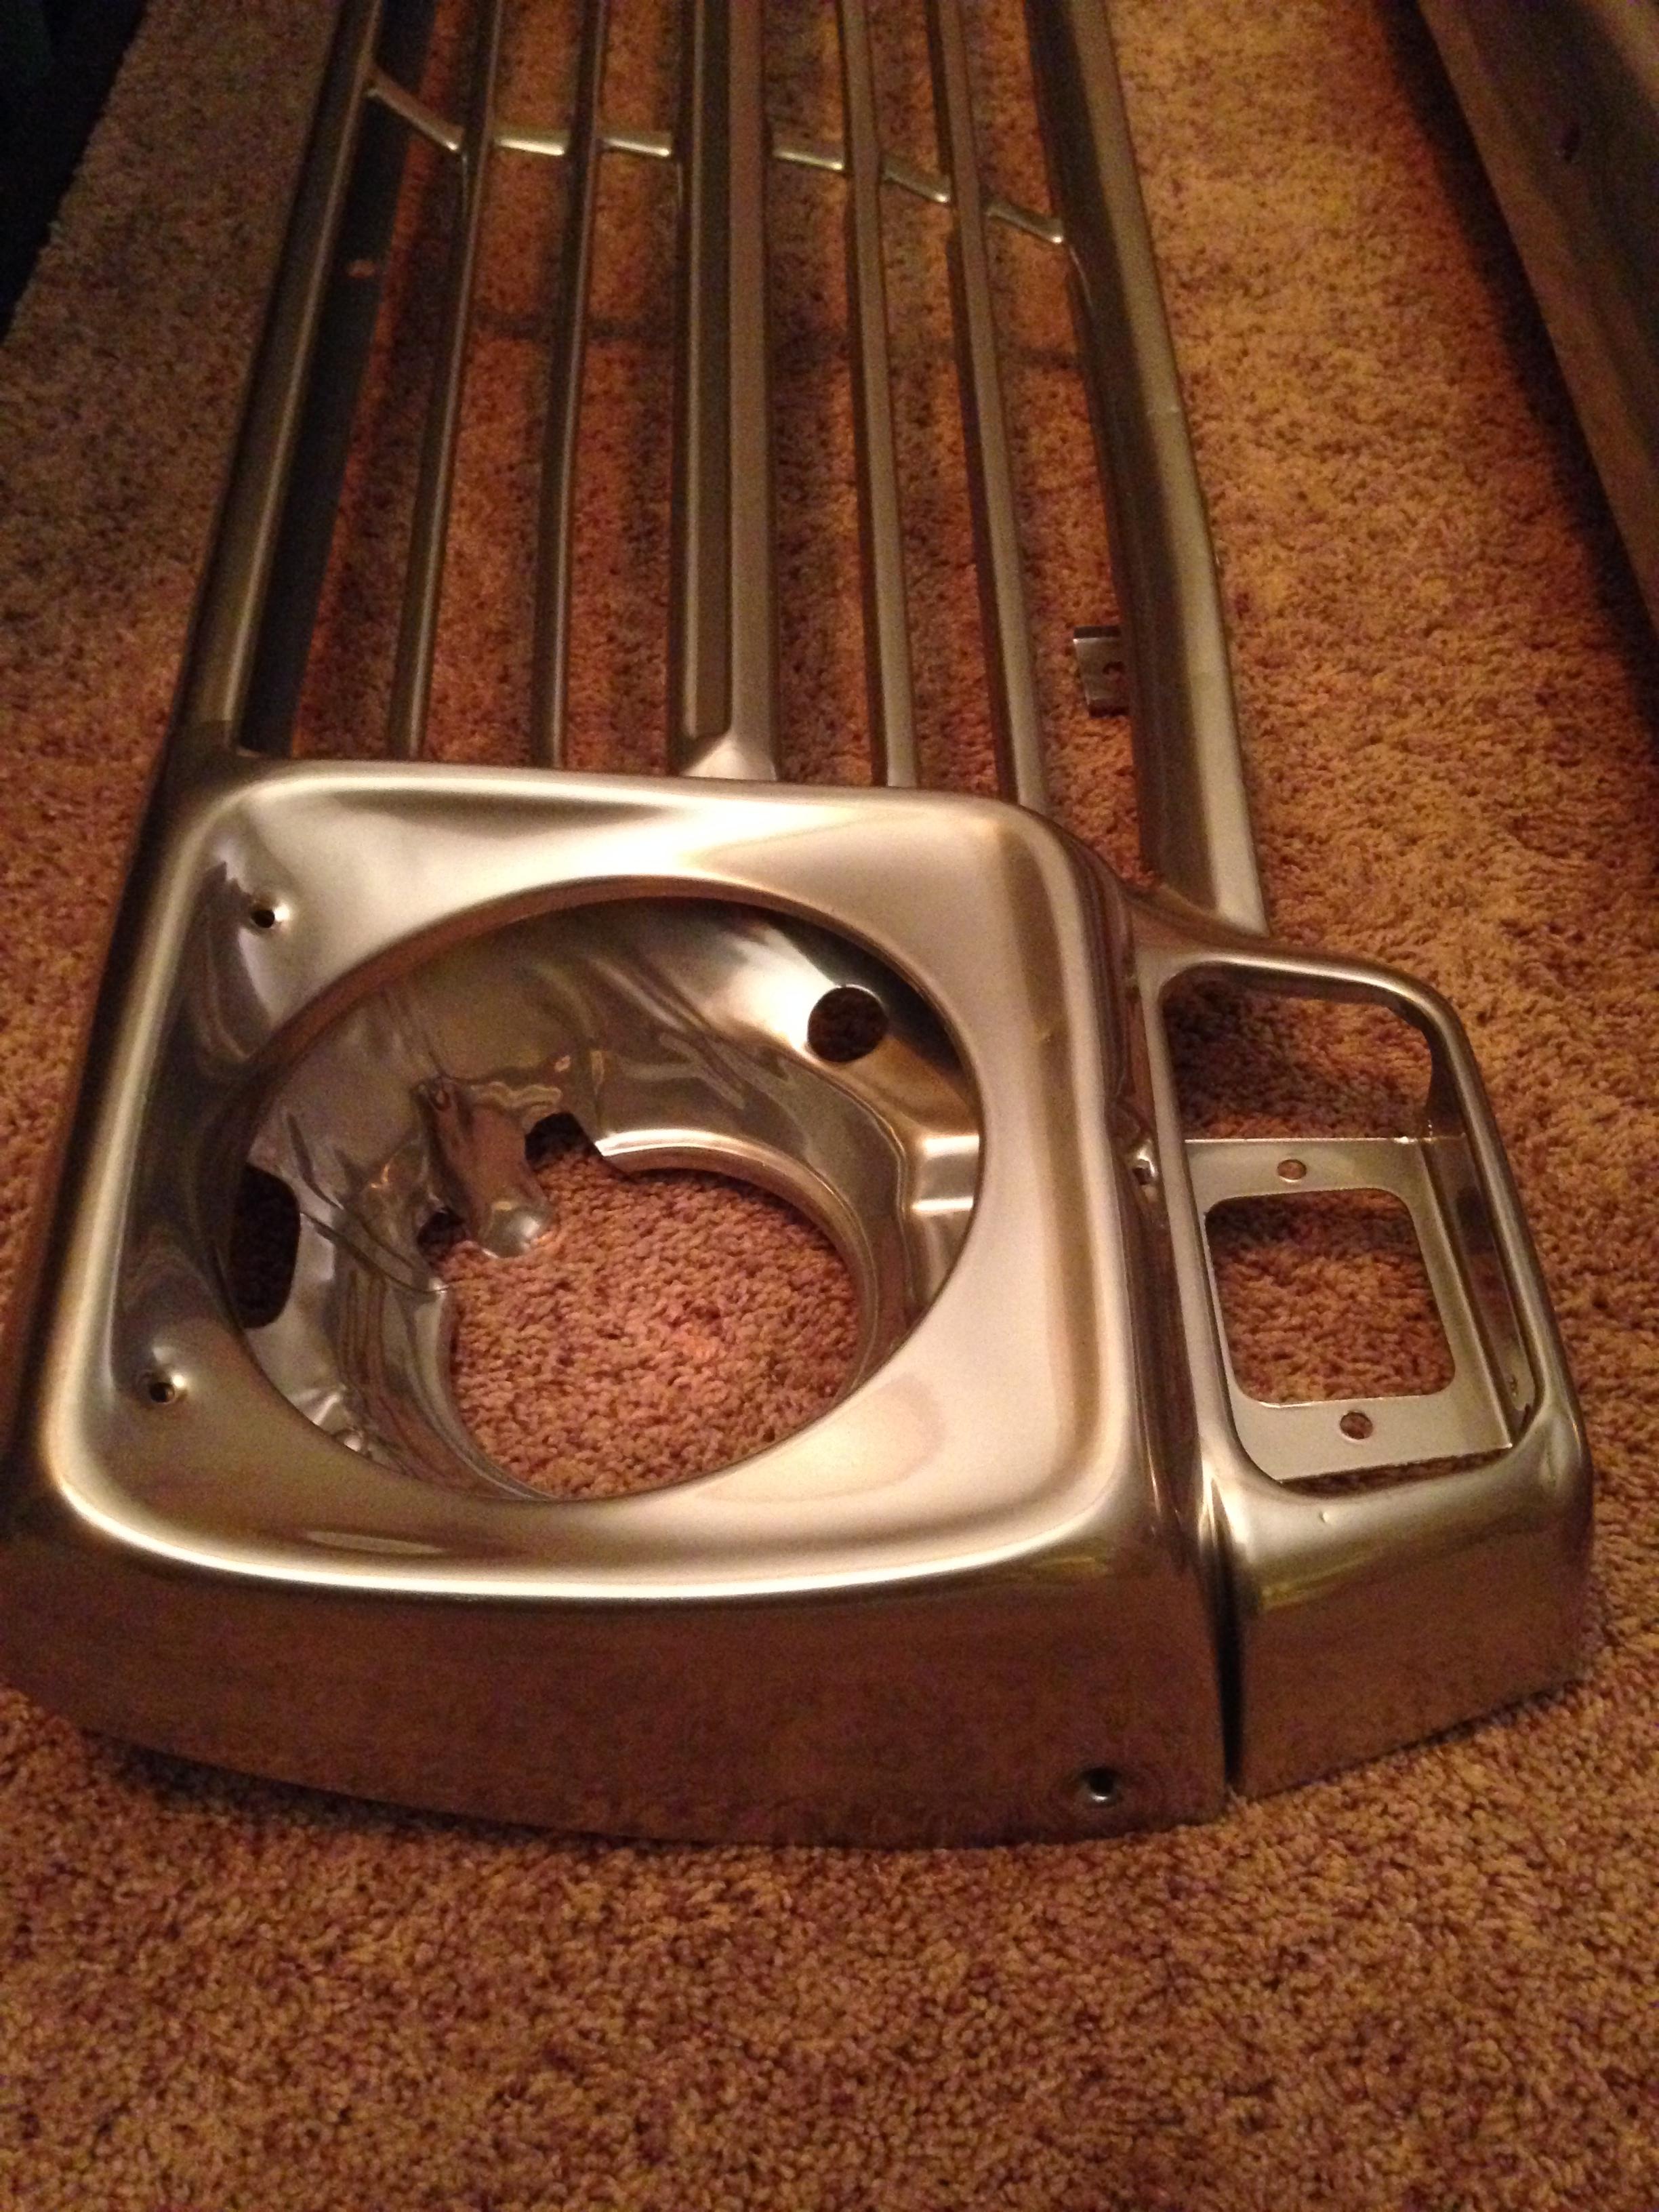
Got the grille, bumper, headlight bezels and buckets back from the powder coater last night.
I am very happy with the results on the grill, the bumper needs to get redone. Finish is spot on though, I wanted a dull aluminum finish and this is what we came up with.
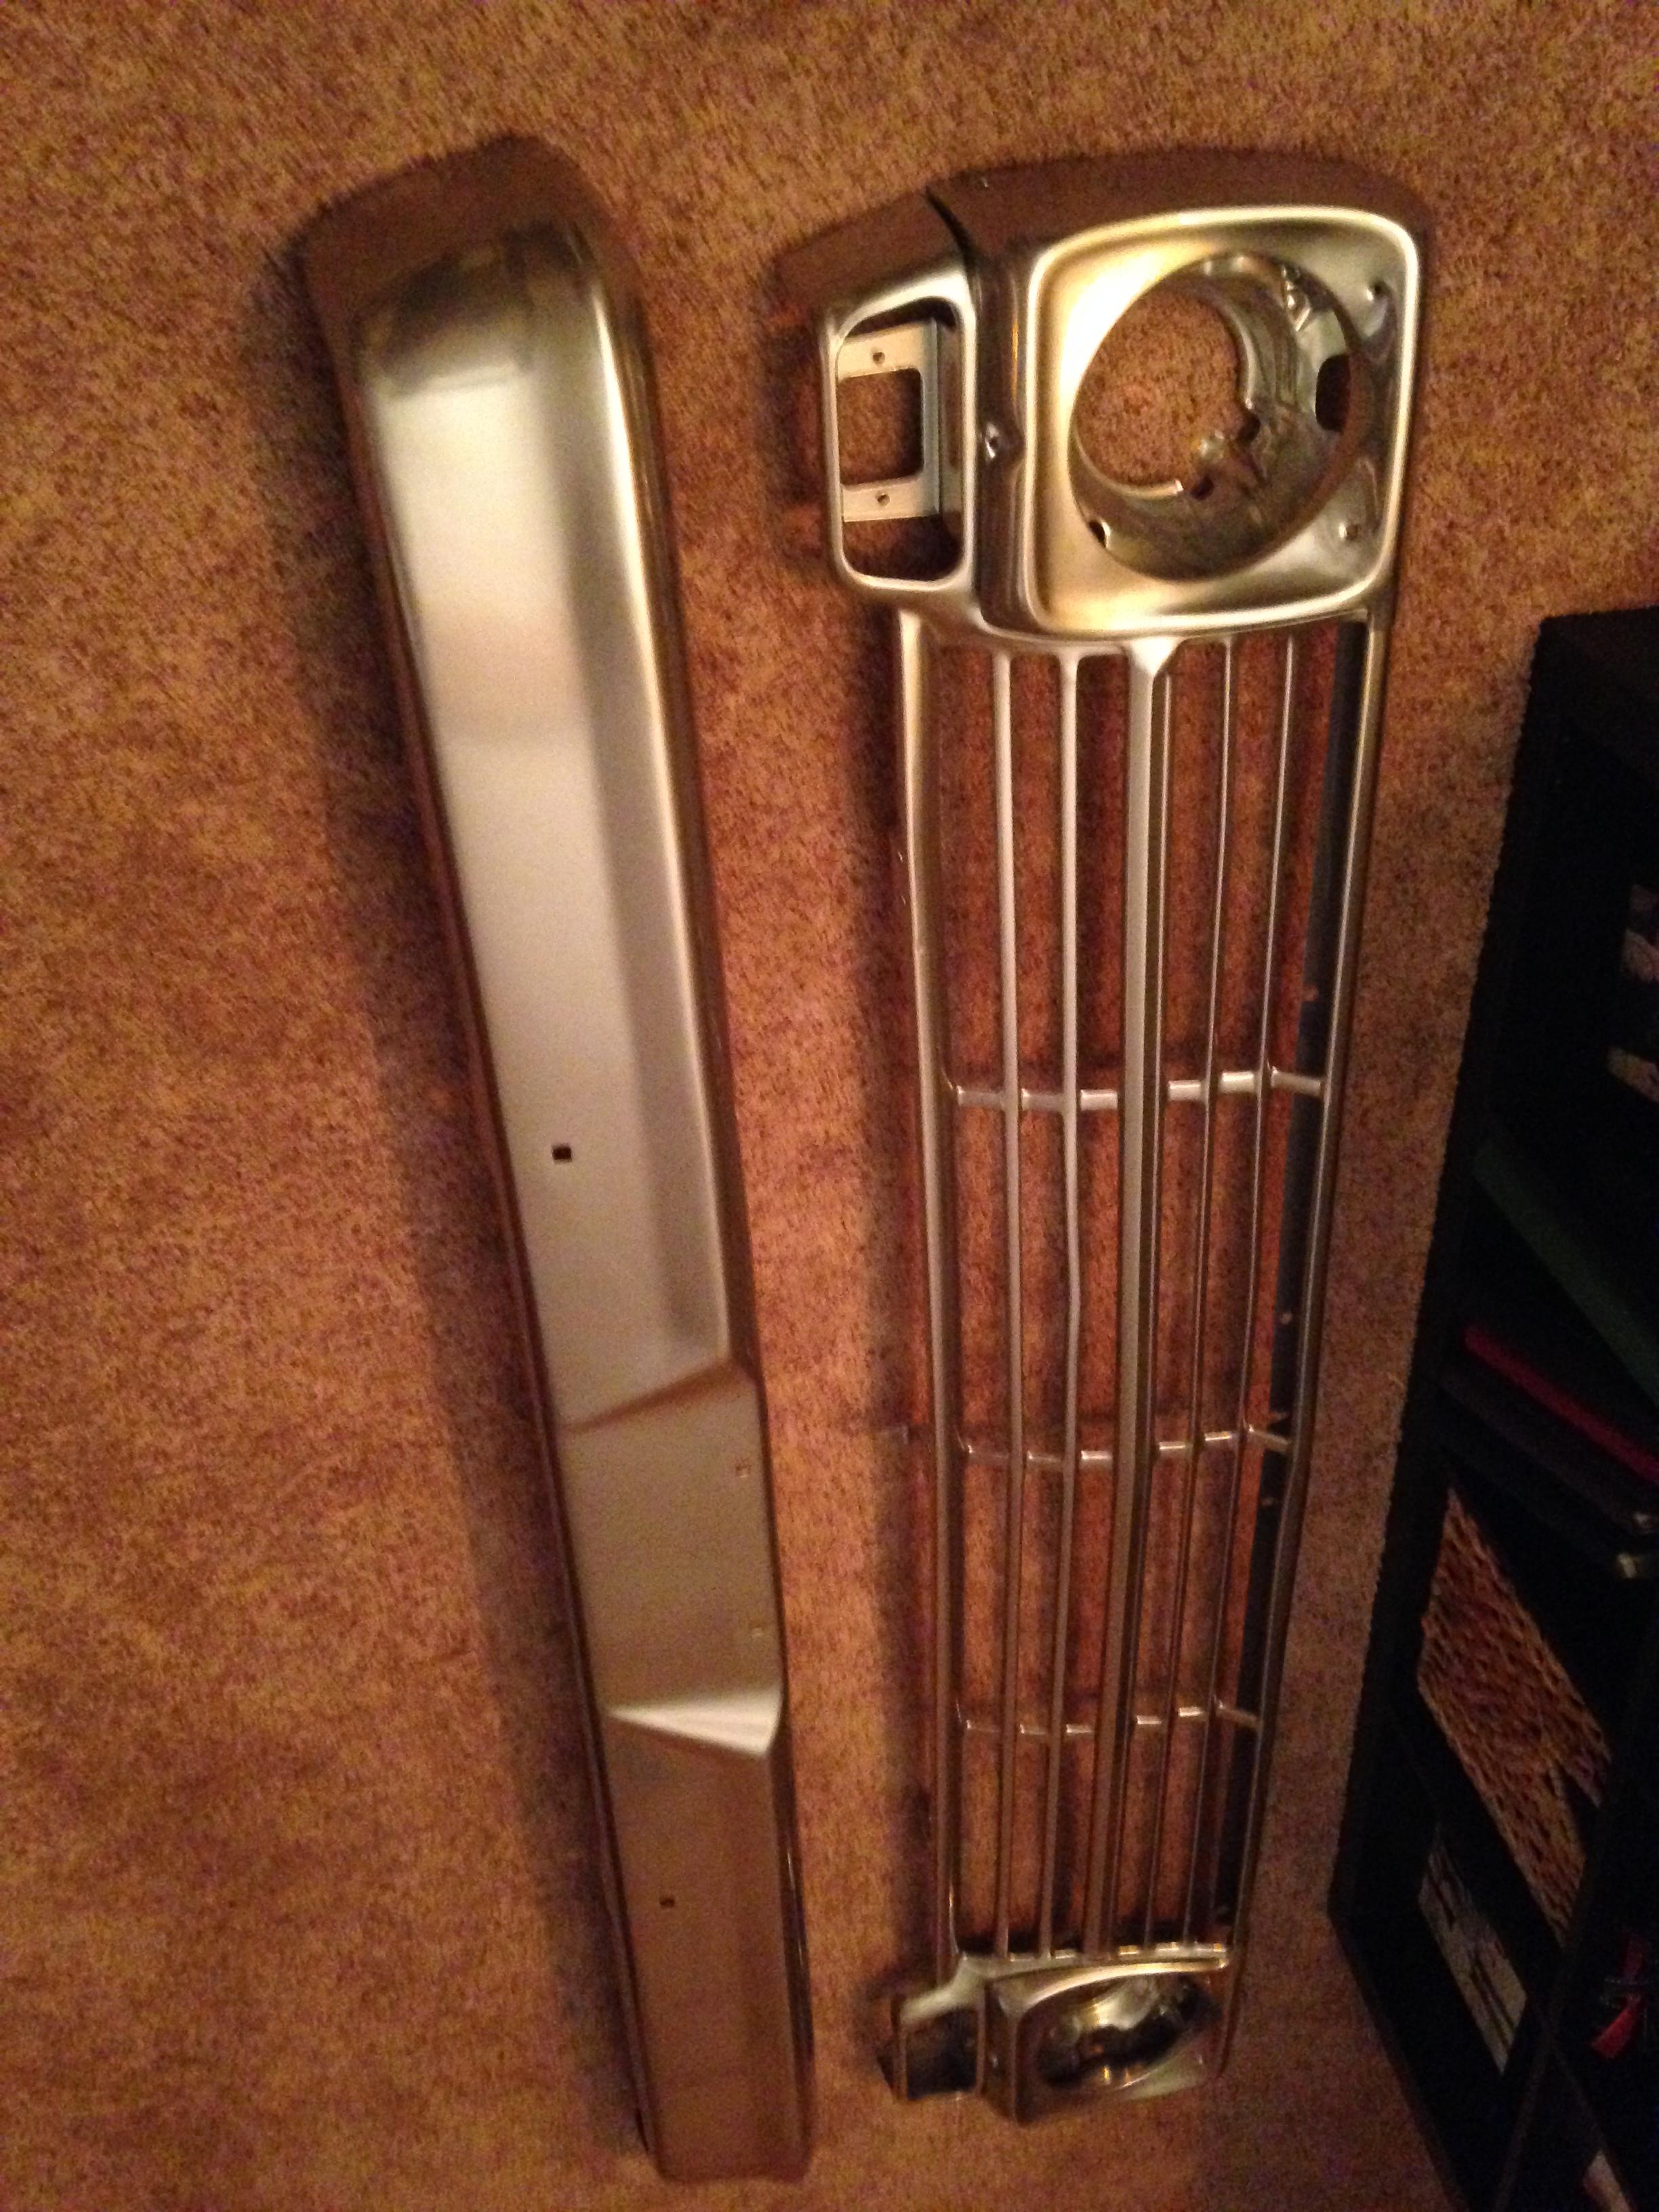

I can get the grille, inner fender and core support bolted in now and see where the intercooler can and cannot fit.
Sean
 11-21-2013, 03:48 PM
#37
Launching!
Thread Starter
Join Date: Mar 2012
Posts: 214
Likes: 0
Received 0 Likes
on
0 Posts
Yep, its powder coated steel!! on both the bumper, grille and bezels.
I could not be happier with the look, it is exactly what I wanted.
Called Dull Chrome, with a clear coat over the top.
Sean
I could not be happier with the look, it is exactly what I wanted.
Called Dull Chrome, with a clear coat over the top.
Sean