
Hacksters 68 F100 LQ4/S475/4l80E

 02-24-2014, 10:58 PM
#82
Launching!
Thread Starter

Join Date: Mar 2012
Posts: 214
Likes: 0
Received 0 Likes
on
0 Posts
Got my loom today and dropped off the charge piping and radiator tubes to the powder coater today...I could not stand them in white. Going gloss black on them all. I think it will look better.
Managed to get the loom on the harness and get it all tucked in where it should go. I like the loom, it turned out well.


Also, built a little panel to go in the glovebox to hold the relays and the fuse panel, computer fits next to it.


 02-25-2014, 11:14 AM
#85
Launching!
Thread Starter
Join Date: Mar 2012
Posts: 214
Likes: 0
Received 0 Likes
on
0 Posts
I used Painless Powerbraid on the harness. Ideally I would have stripped all the connectors off the harness and installed slide over sleeving, but the plan was to be able to see very little of the harness so I went with this.
It looks pretty good, better than corrugated split loom by a long shot and not quite as neat as slide over braided loom and heat shrink tubing.
Been reading a lot on shifters for the 4l80E, what are you guys running. Have heard lots about issues with using a 4l60e shifter not working well with the 80. It's not a race car, and I am trying to keep the interior pretty mellow looking. I hate the pull up latch style ratchet shifters, would like something that is more OEM, but willing to look at others.
Sean
02-25-2014, 01:12 PM
#86
Teching In

Join Date: Aug 2005
Location: Lake Oswego, OR
Posts: 24
Likes: 0
Received 0 Likes
on
0 Posts
What's your concept for the interior? Aftermarket steering column with shifter, or floor shift a la Lokar? (I share your disdain for ratchet shifters on non-track cars.)
 02-26-2014, 10:53 PM
#89
Launching!
Thread Starter
Join Date: Mar 2012
Posts: 214
Likes: 0
Received 0 Likes
on
0 Posts
Still no shifter. Cannot find anything that I like that is offered in the 4l80e pattern. I really dont want a notchy funky pull up, weird shifter. Almost want a stock floor shifter from something like my trailblazer has in it. Ill keep looking though.
All the little stuff just keeps holding me up. I need the adapters for both coolant and oil pressure to go in the back of the block for oil and the passenger head for the coolant. Really want to use the stock guages since its one of the rare things that this truck actually came with.
There is lots of other little things, and all of them seem to need to come from outside the Portland Metro area....
Managed to get some 12x1.5 to -8 fittings to get me out of the bosch 044 fuel pumps and up to the rail, they showed up today along with my MSD wires.
The wires were great, they have multi angle on one end and 90's on the other end. I used the multi angle on 7 of the plugs and the 90 on the one behind the down pipe.
Kind of a pain but by the 8th one I had it down to a science. Mark, cut to length, strip, install connector, crimp, install boot and install little clip x 8
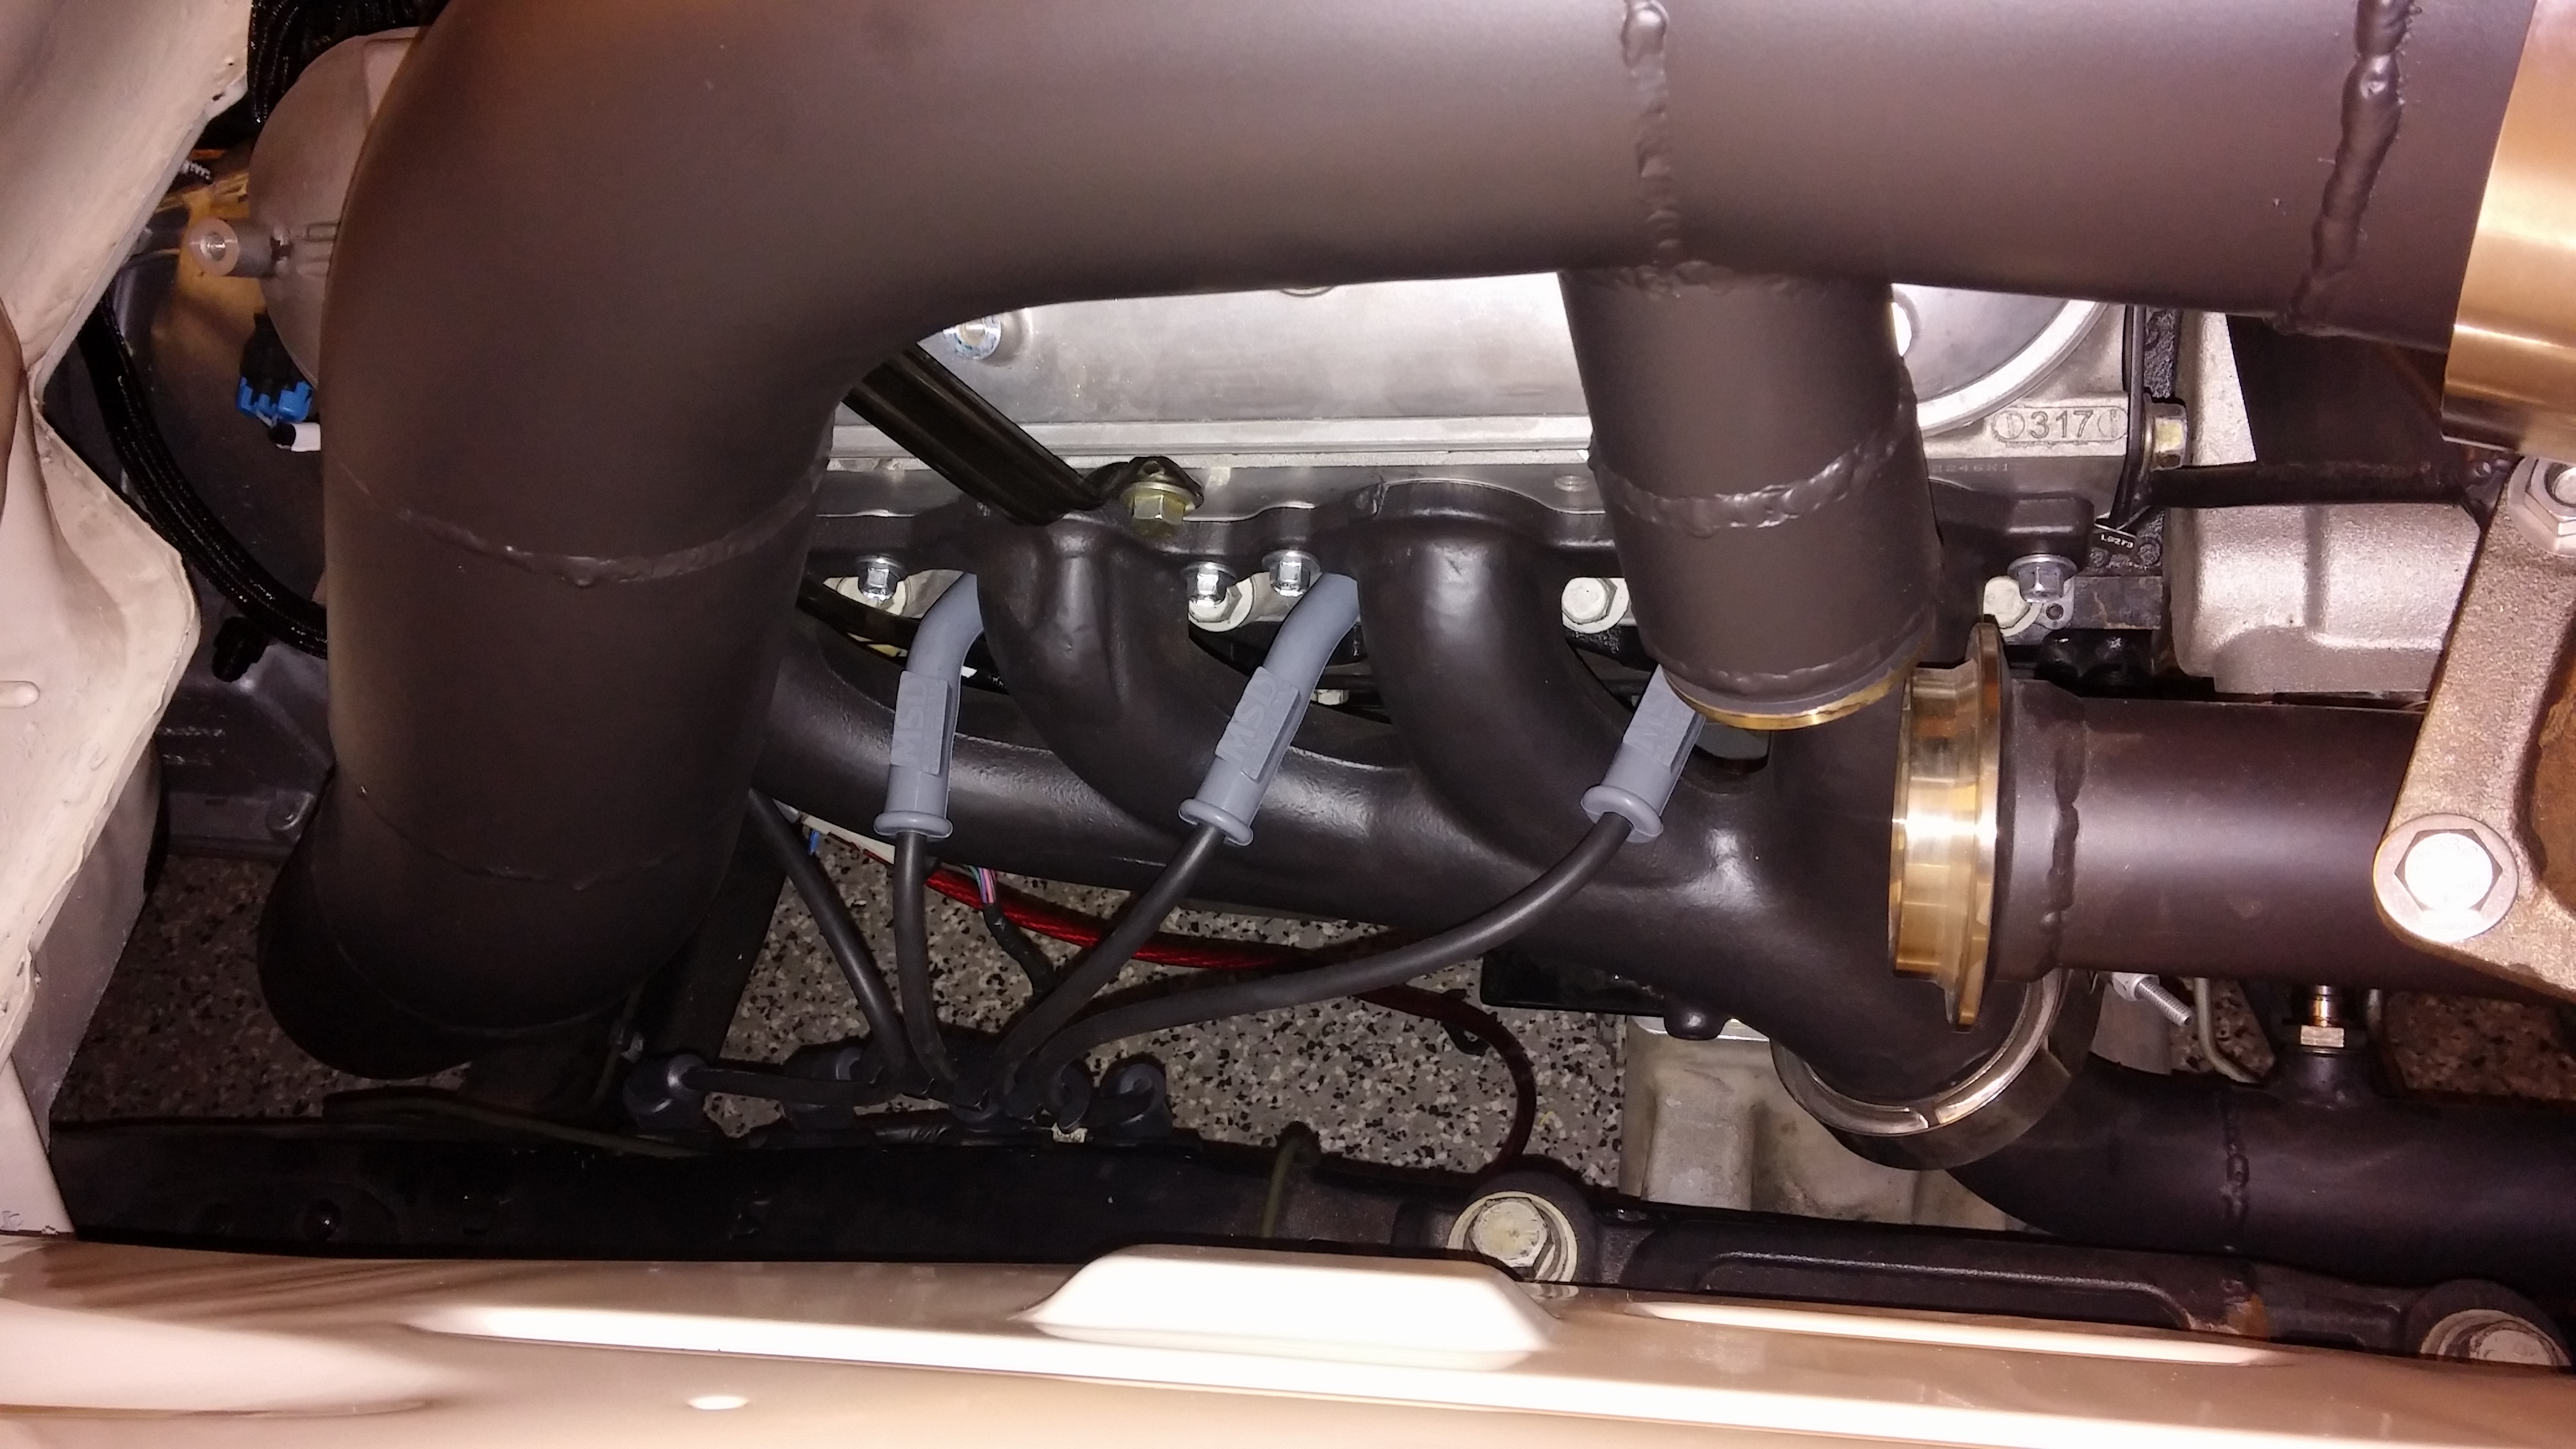
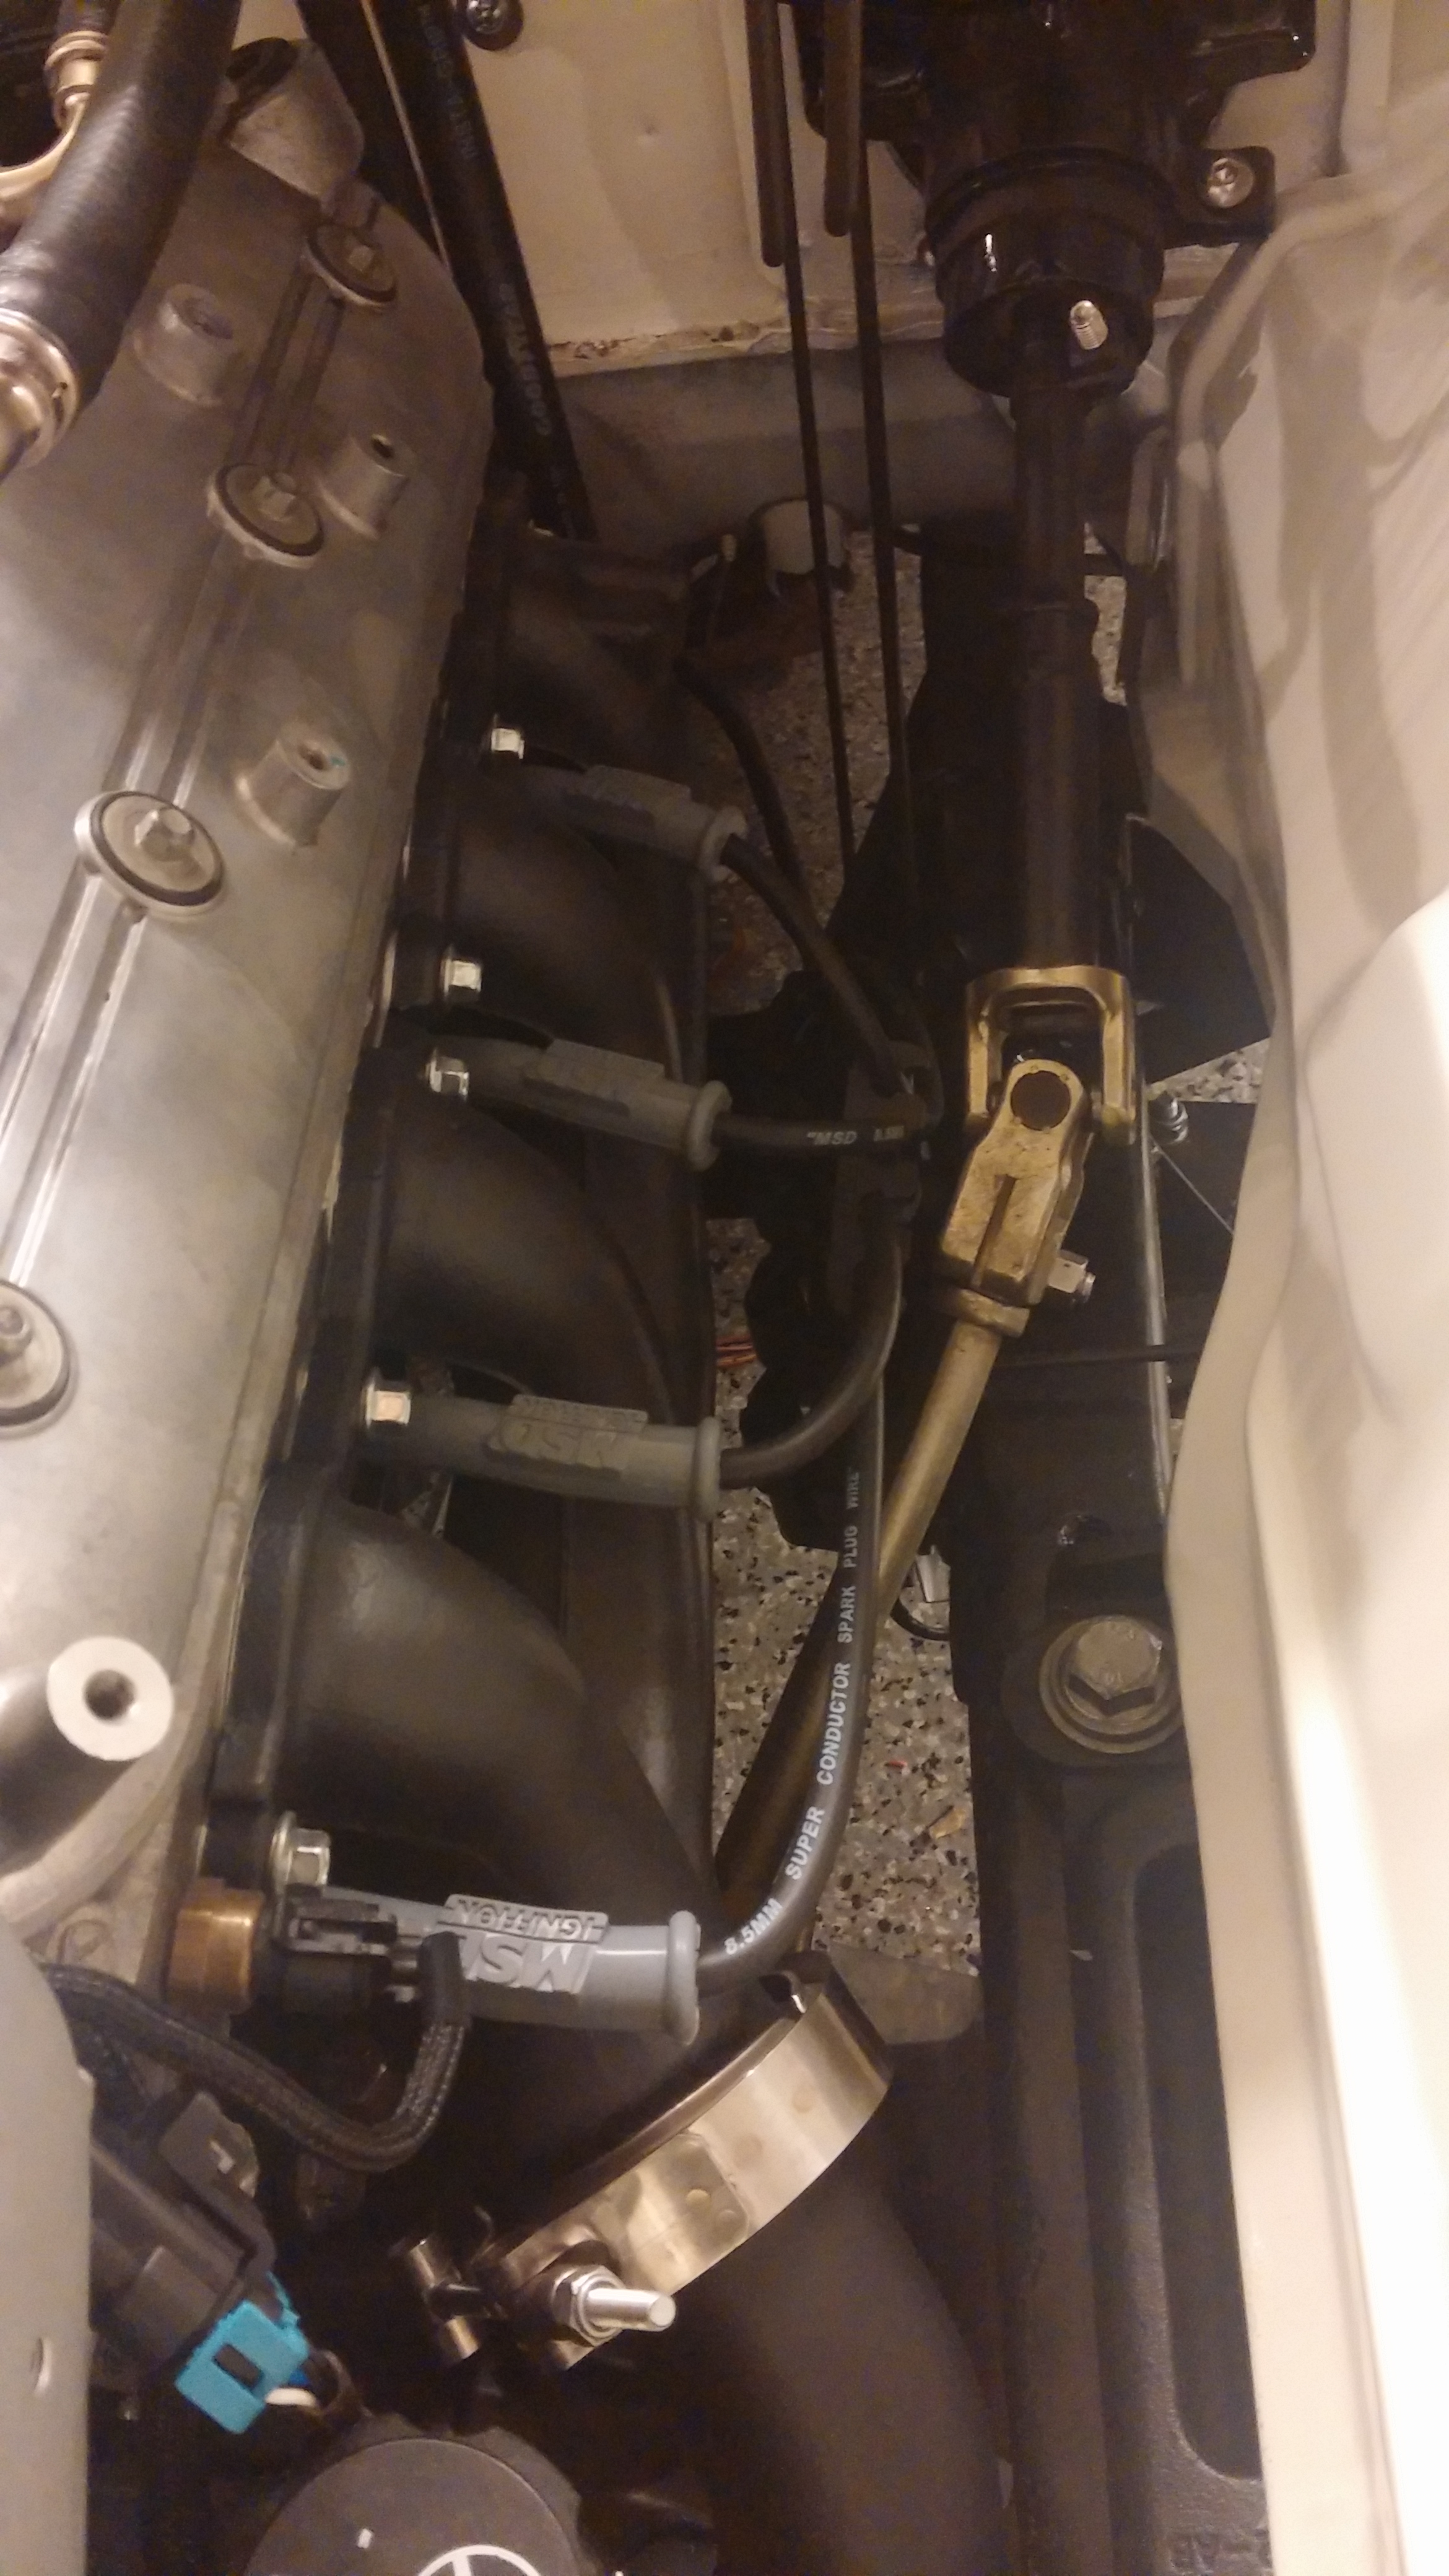
Got the alternator wire roughed in across the head, and up to the alternator, but not too sure how comfortable I am running it along the head and the back of the motor, but not too sure about running it behind the water pump and near the crossover and passenger v band flange.
What do you guys think.
Here is where I am at right now, seems like little tiny bits of progress, but this is damn near every wire to make this thing run.
I think if I get all the parts here and have one good solid day of work on the truck and maybe a little help, it will be ready to start up.
Sean
All the little stuff just keeps holding me up. I need the adapters for both coolant and oil pressure to go in the back of the block for oil and the passenger head for the coolant. Really want to use the stock guages since its one of the rare things that this truck actually came with.
There is lots of other little things, and all of them seem to need to come from outside the Portland Metro area....
Managed to get some 12x1.5 to -8 fittings to get me out of the bosch 044 fuel pumps and up to the rail, they showed up today along with my MSD wires.
The wires were great, they have multi angle on one end and 90's on the other end. I used the multi angle on 7 of the plugs and the 90 on the one behind the down pipe.
Kind of a pain but by the 8th one I had it down to a science. Mark, cut to length, strip, install connector, crimp, install boot and install little clip x 8


Got the alternator wire roughed in across the head, and up to the alternator, but not too sure how comfortable I am running it along the head and the back of the motor, but not too sure about running it behind the water pump and near the crossover and passenger v band flange.
What do you guys think.
Here is where I am at right now, seems like little tiny bits of progress, but this is damn near every wire to make this thing run.

I think if I get all the parts here and have one good solid day of work on the truck and maybe a little help, it will be ready to start up.
Sean
02-27-2014, 05:00 AM
#90
TECH Regular
iTrader: (3)

Join Date: Jan 2011
Location: Springfield, MO
Posts: 429
Likes: 0
Received 0 Likes
on
0 Posts
In my swap I didn't want a ratchet shifter either. I got an auto column and bought a conversion kit that was basically a piece of all thread connecting the trans and the column shift. It works great. If you're interested I can get the part number. I'm really happy with it.
02-27-2014, 05:44 AM
#91
TECH Addict
iTrader: (19)
Join Date: Aug 2007
Location: Where the Navy tells me to go
Posts: 2,397
Received 106 Likes
on
88 Posts

I used Painless Powerbraid on the harness. Ideally I would have stripped all the connectors off the harness and installed slide over sleeving, but the plan was to be able to see very little of the harness so I went with this.
It looks pretty good, better than corrugated split loom by a long shot and not quite as neat as slide over braided loom and heat shrink tubing.
It looks pretty good, better than corrugated split loom by a long shot and not quite as neat as slide over braided loom and heat shrink tubing.
 02-27-2014, 09:45 AM
#93

Love your build , should be a reel sleeper , got a couple questions for you . 1 what year crown vic did the front end come from . 2 did you change springs . 3 how much offset did you put in the motor , the engine stands look to be equal
02-27-2014, 12:25 PM
#94
Launching!
Thread Starter
Join Date: Mar 2012
Posts: 214
Likes: 0
Received 0 Likes
on
0 Posts
Stock springs in the front for now, they are waaay to stiff though, even with motor and tranny, turbo radiator and intercooler in there the front suspension is topped out. Pretty sure I am going to end up going with a coilover setup on the frontend to be able to adjust ride height and get some better read lower rate springs on the front.
As far as offset on the motor, I am not sure what you are talking about? It is centered in the engine bay and level from side to side.
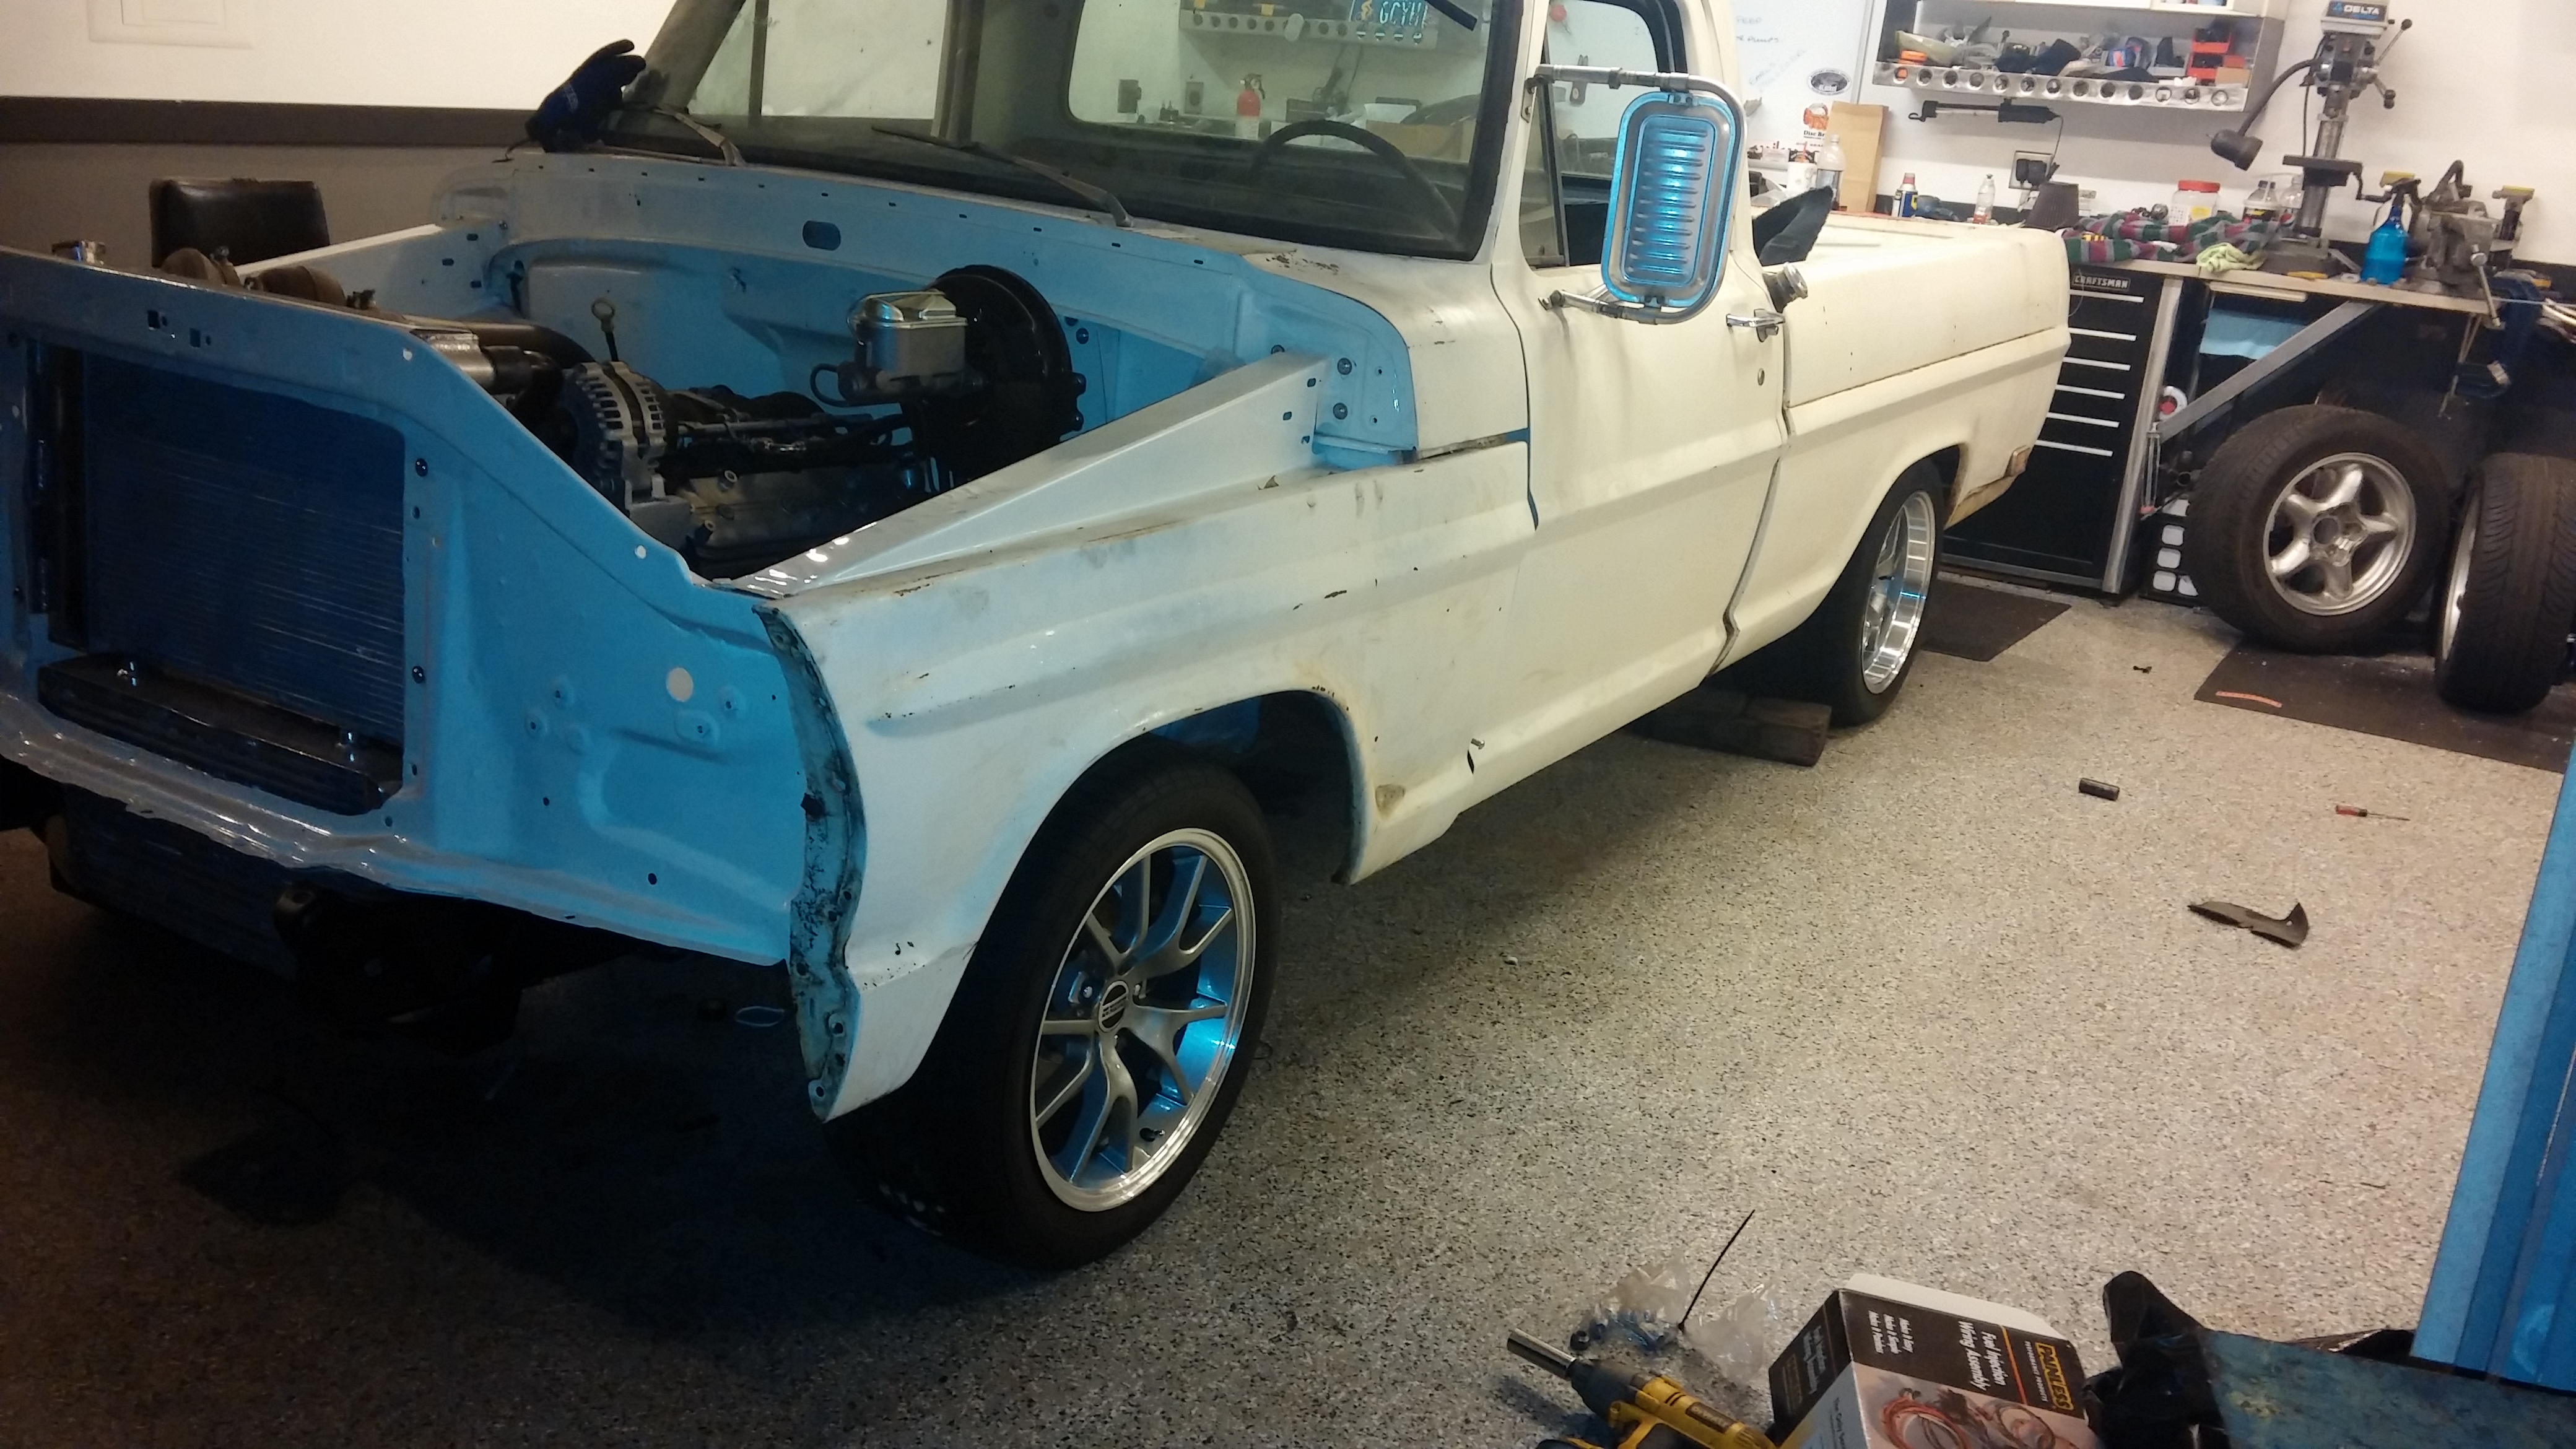
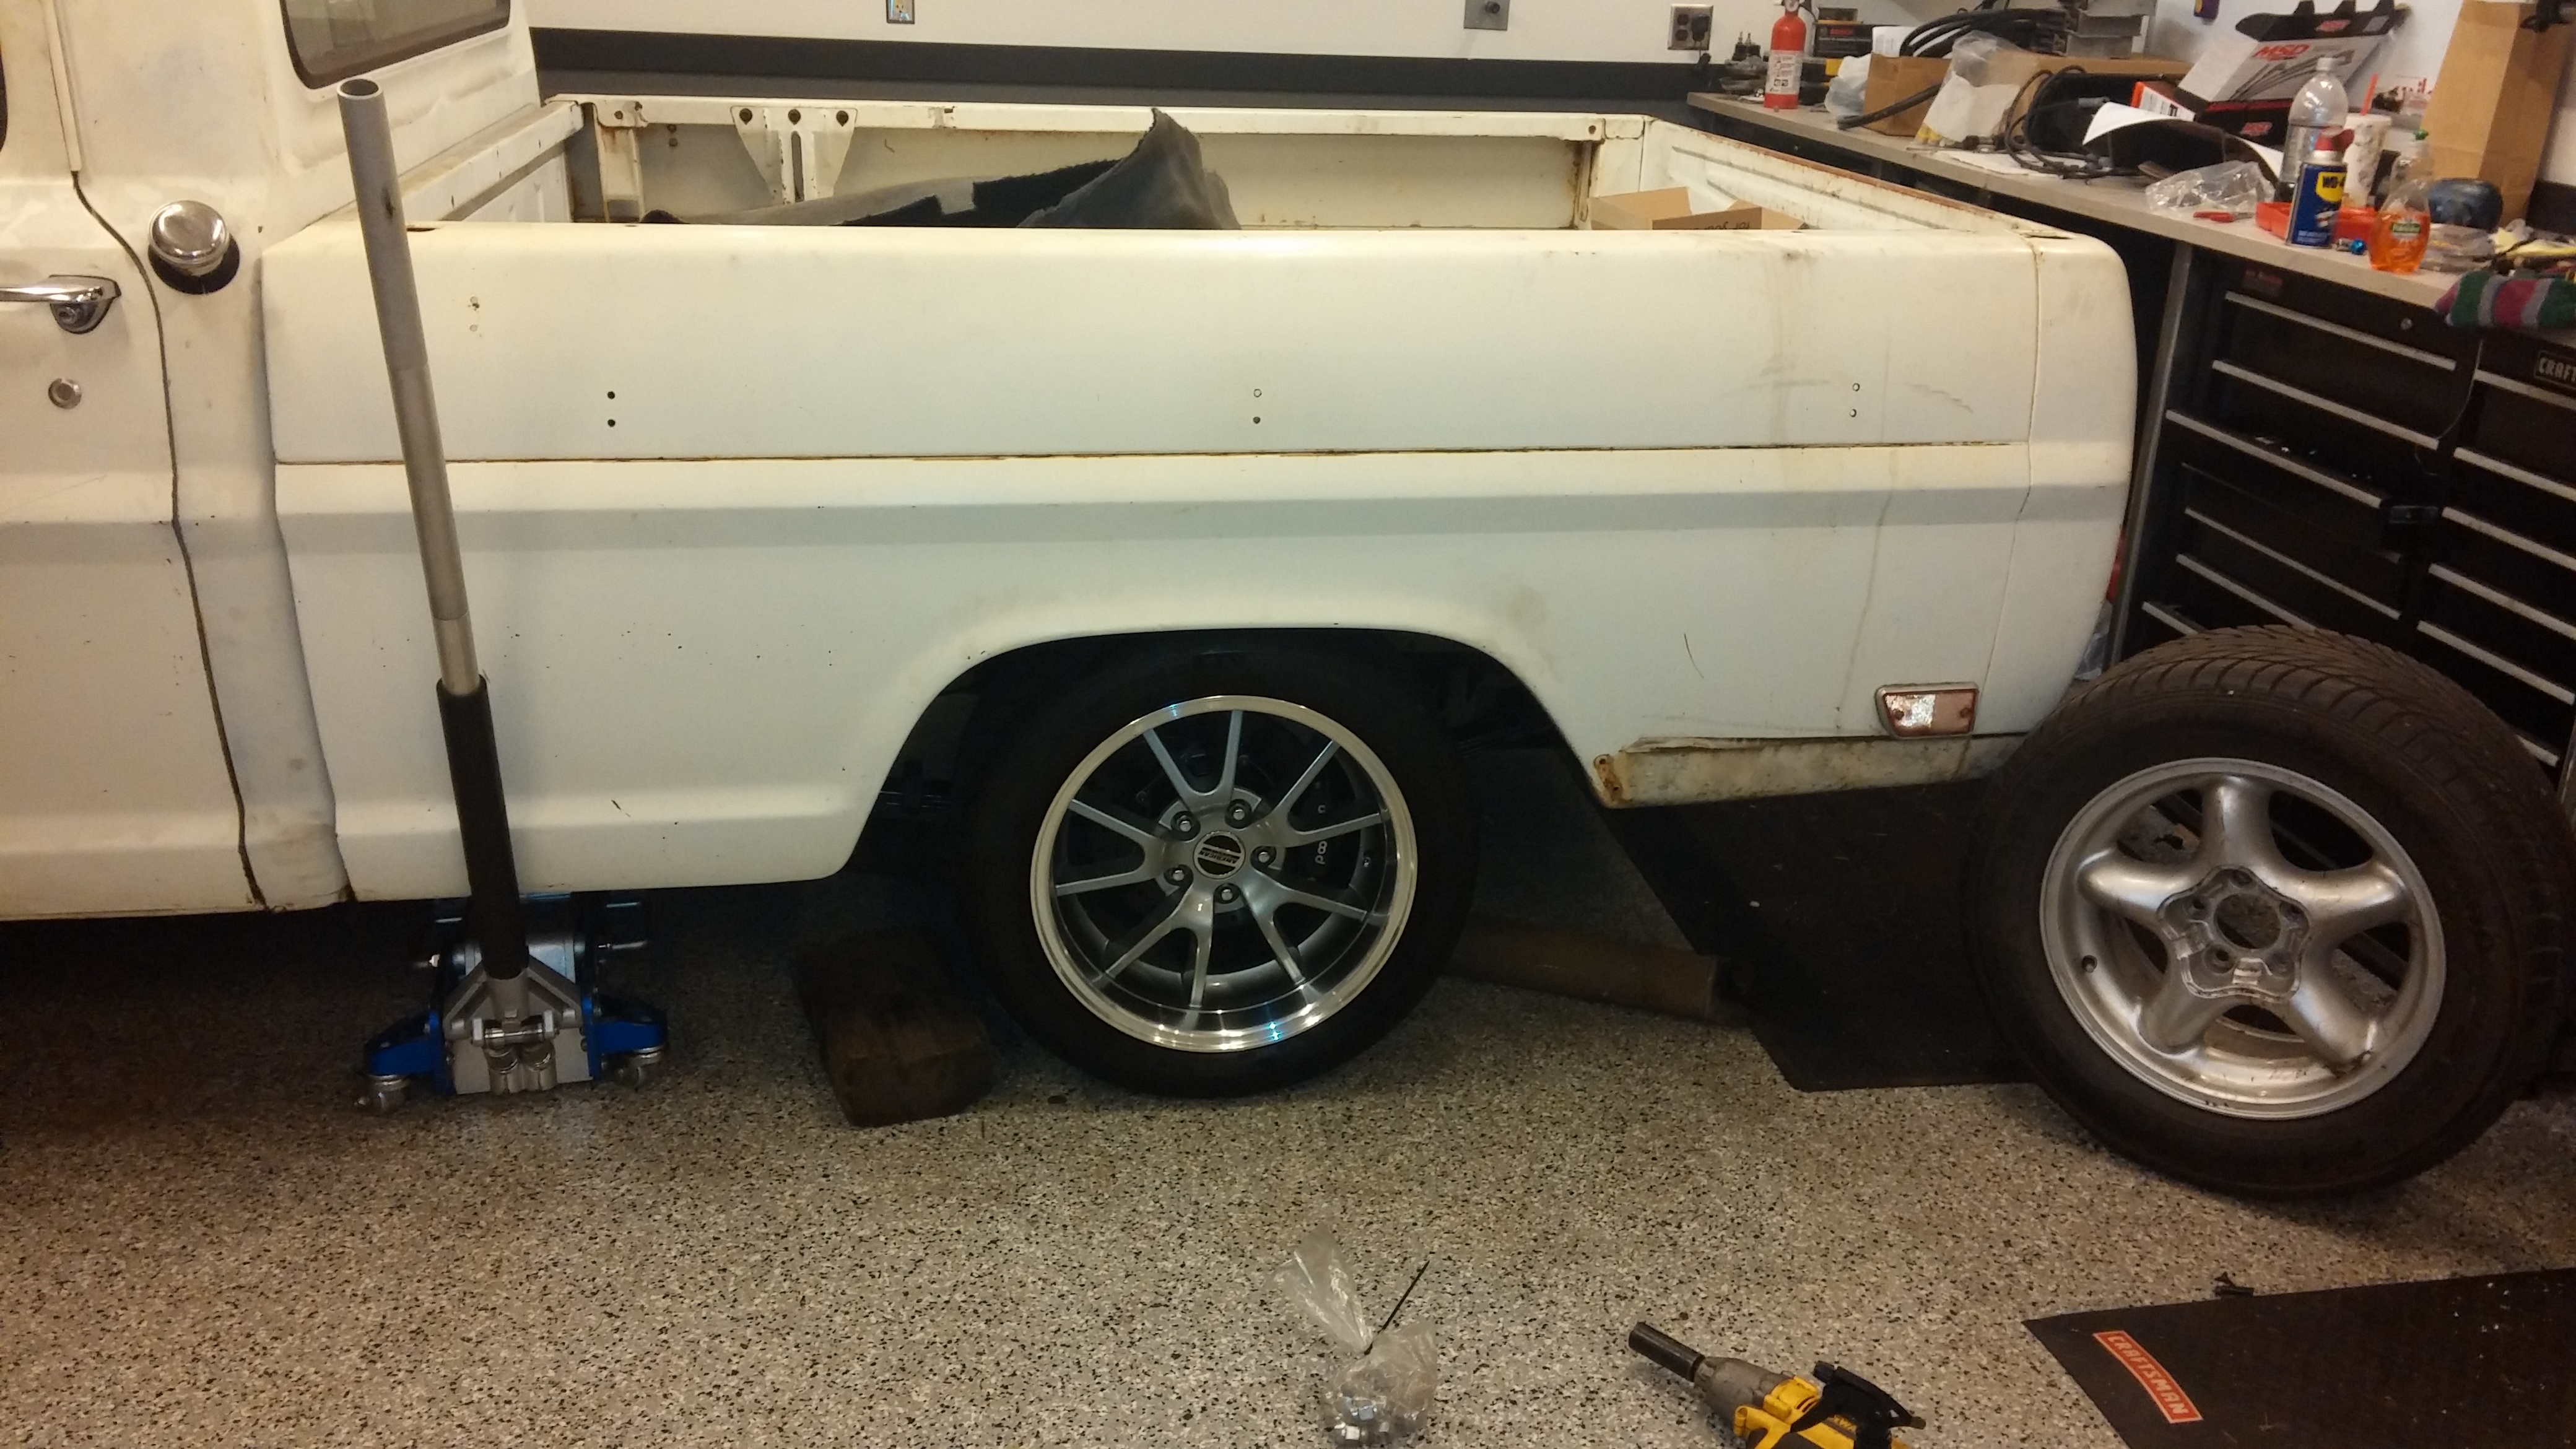
I think I found a set of fr500 wheels locally that will get me on the road for the meantime. Not 100% sure that they will fit, but they should be pretty damn close. 275/40/17 fronts and 315/40/17 rears. 9/10 combo for pretty cheap.
Sean
03-02-2014, 12:29 AM
#95
Launching!
Thread Starter
Join Date: Mar 2012
Posts: 214
Likes: 0
Received 0 Likes
on
0 Posts
Managed to score a deal on some wheels on the Craigslist for a pretty good deal. They are like new fr500 wheels anthracite centers with descent size tires on them.
275's on the front and 315's on the rear. Fronts are 9's ET27's Rears are 10.5's ET24. Pretty sure that I can at least fit an 11" Wheel and a 325 or a 345 on the back. Damn good fit on the truck so far, just wish that they were 18's or 20's though.
These will at least get me on the road until I can get some wheels....talking with Jason at Rushforth the last few days.
Managed to get just a couple hours in the garage today. Got a new starter and got it installed, got the tranny cooler mounted under the passenger floor board, outside the framerails and got it all plumbed.
Got a little more of the fuel system dialed in but need to pull the bed to notch the frame a little at the rear of the bed and need one more -8 45 degree push on fitting, then fuel system will be plumbed.
Figured out where the battery will mount, got the battery box drilled and marked the frame out and drilled mounts for the box. Tomorrow morning should get some paint on the battery mount and get it on the frame. Battery is under the bed, passenger side.
Still need some parts and a lot of electrical crap before I can start it.
Sean
275's on the front and 315's on the rear. Fronts are 9's ET27's Rears are 10.5's ET24. Pretty sure that I can at least fit an 11" Wheel and a 325 or a 345 on the back. Damn good fit on the truck so far, just wish that they were 18's or 20's though.
These will at least get me on the road until I can get some wheels....talking with Jason at Rushforth the last few days.


Managed to get just a couple hours in the garage today. Got a new starter and got it installed, got the tranny cooler mounted under the passenger floor board, outside the framerails and got it all plumbed.
Got a little more of the fuel system dialed in but need to pull the bed to notch the frame a little at the rear of the bed and need one more -8 45 degree push on fitting, then fuel system will be plumbed.
Figured out where the battery will mount, got the battery box drilled and marked the frame out and drilled mounts for the box. Tomorrow morning should get some paint on the battery mount and get it on the frame. Battery is under the bed, passenger side.
Still need some parts and a lot of electrical crap before I can start it.
Sean
03-02-2014, 10:16 PM
#96
Launching!
Thread Starter
Join Date: Mar 2012
Posts: 214
Likes: 0
Received 0 Likes
on
0 Posts
I guess its probably pretty obvious by now that I am not a big billet/ polished aluminum fan.
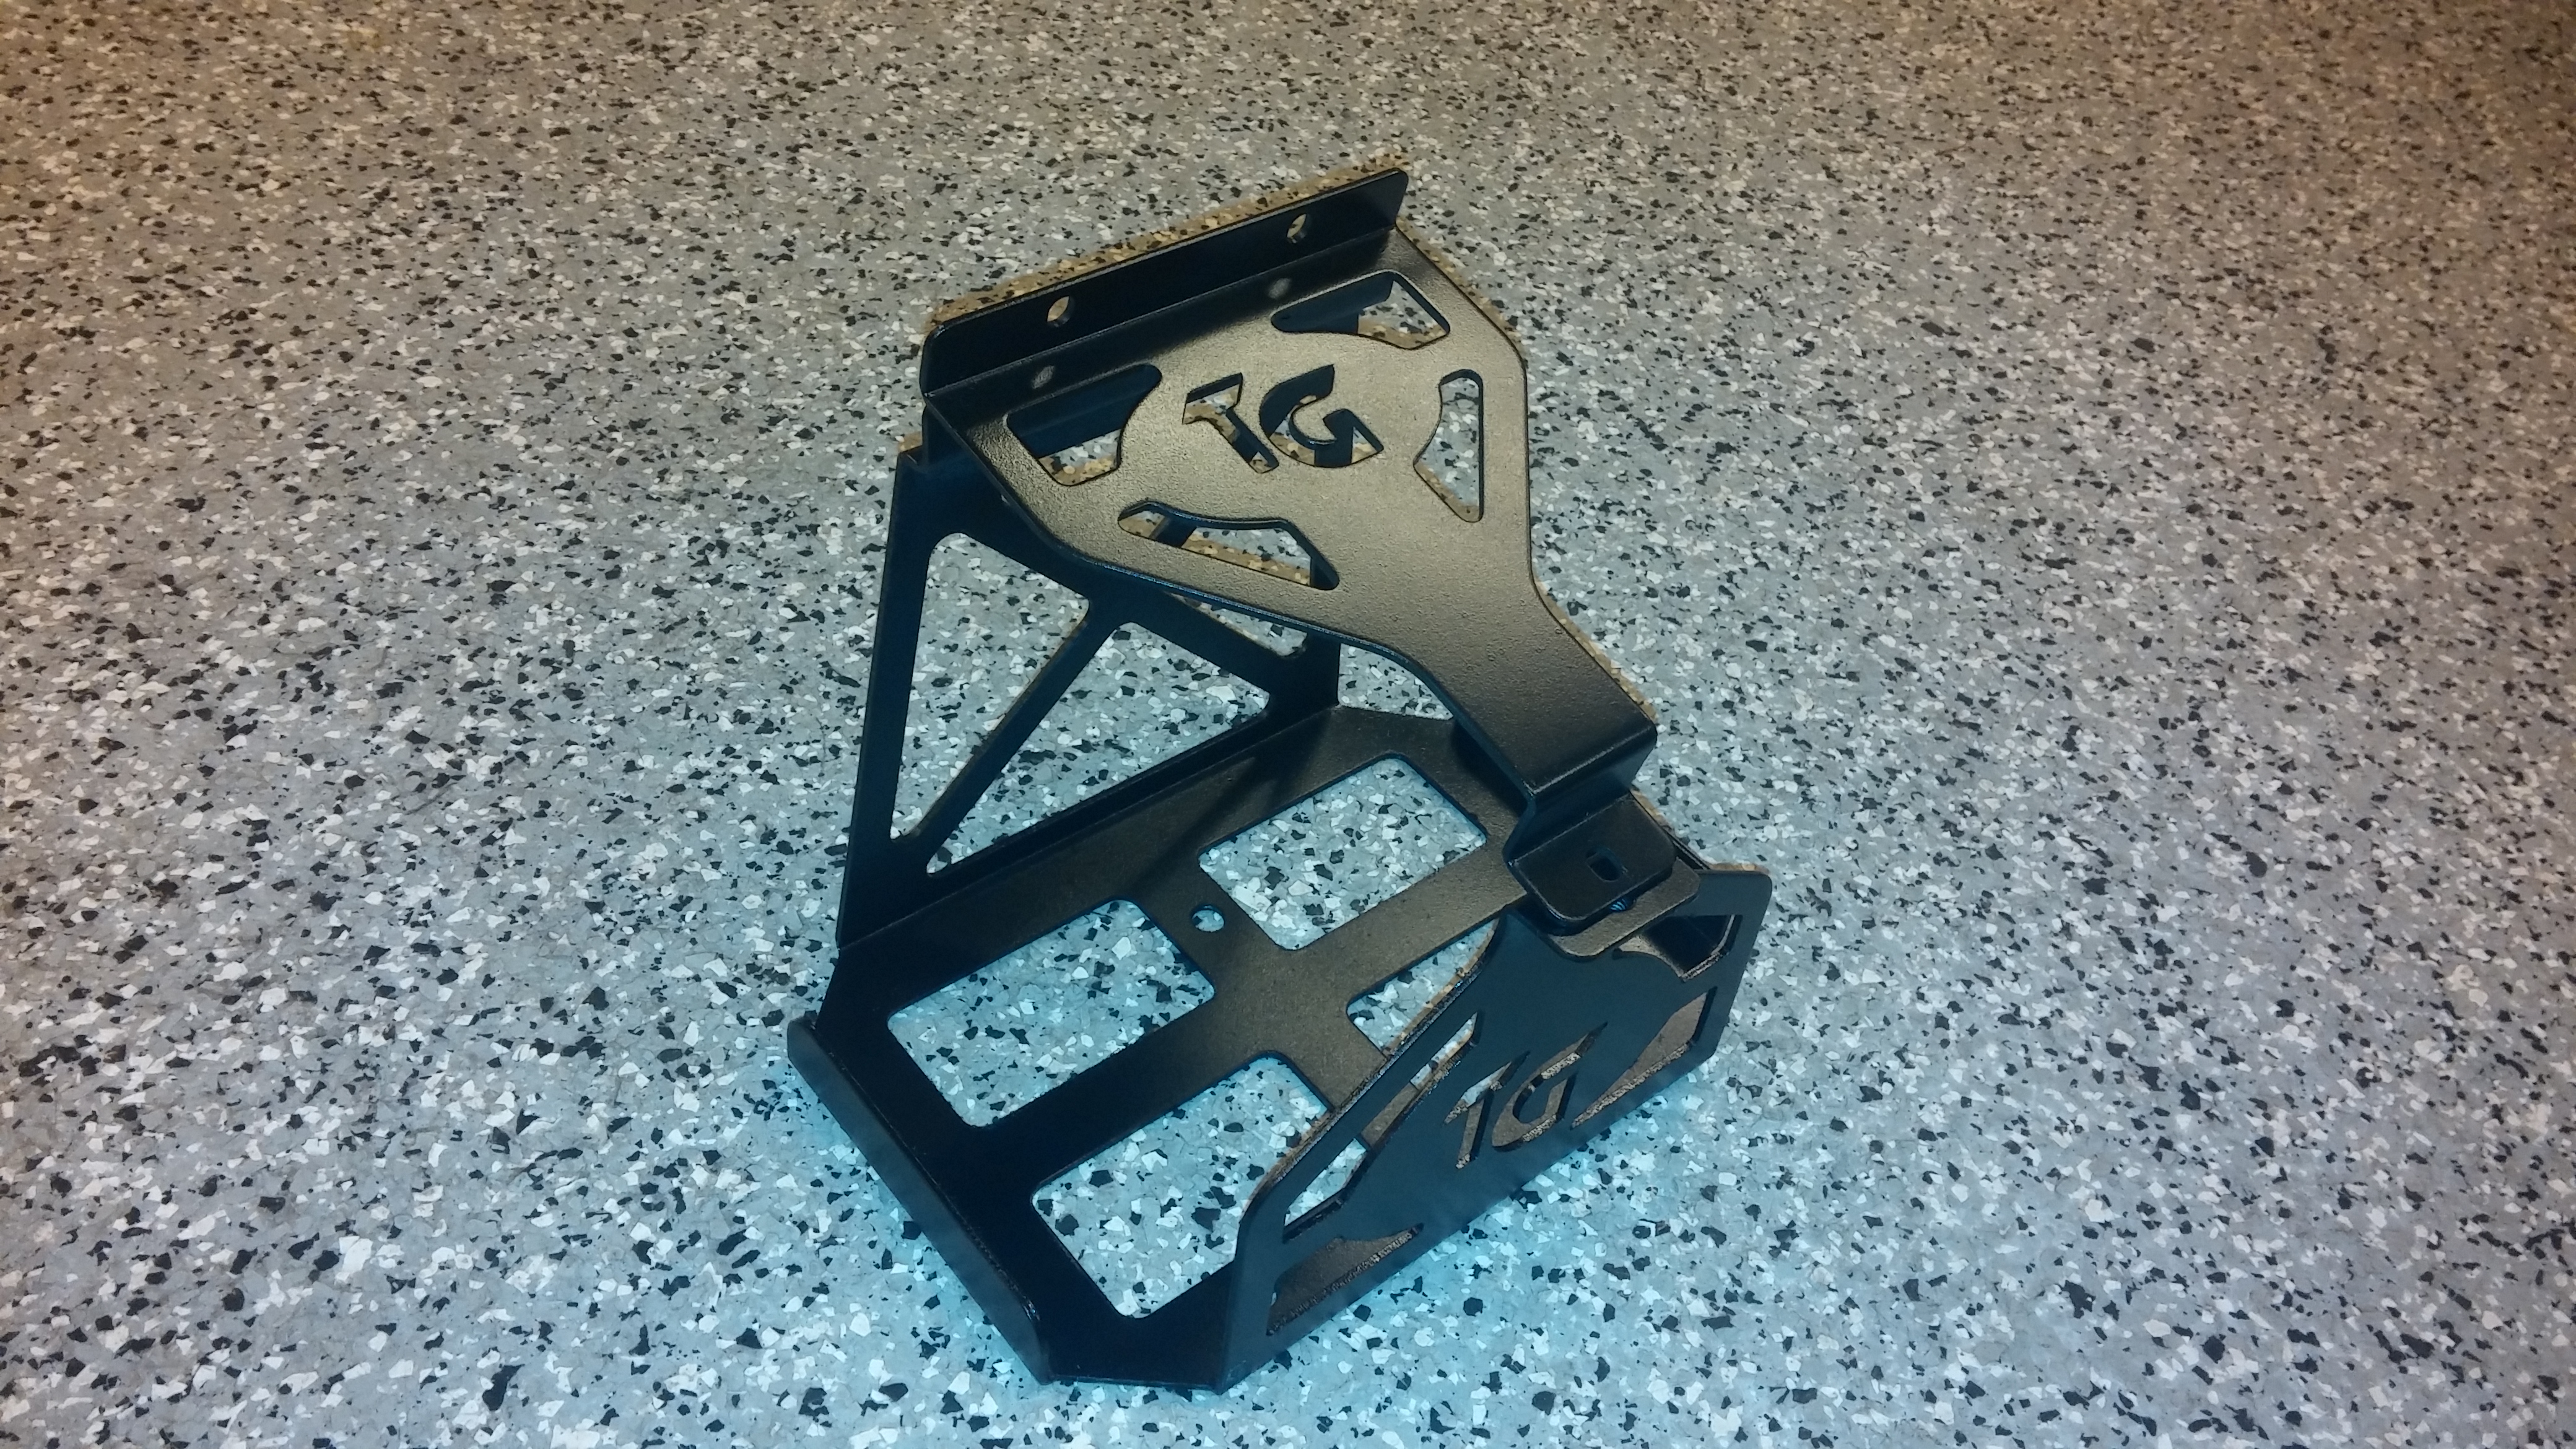
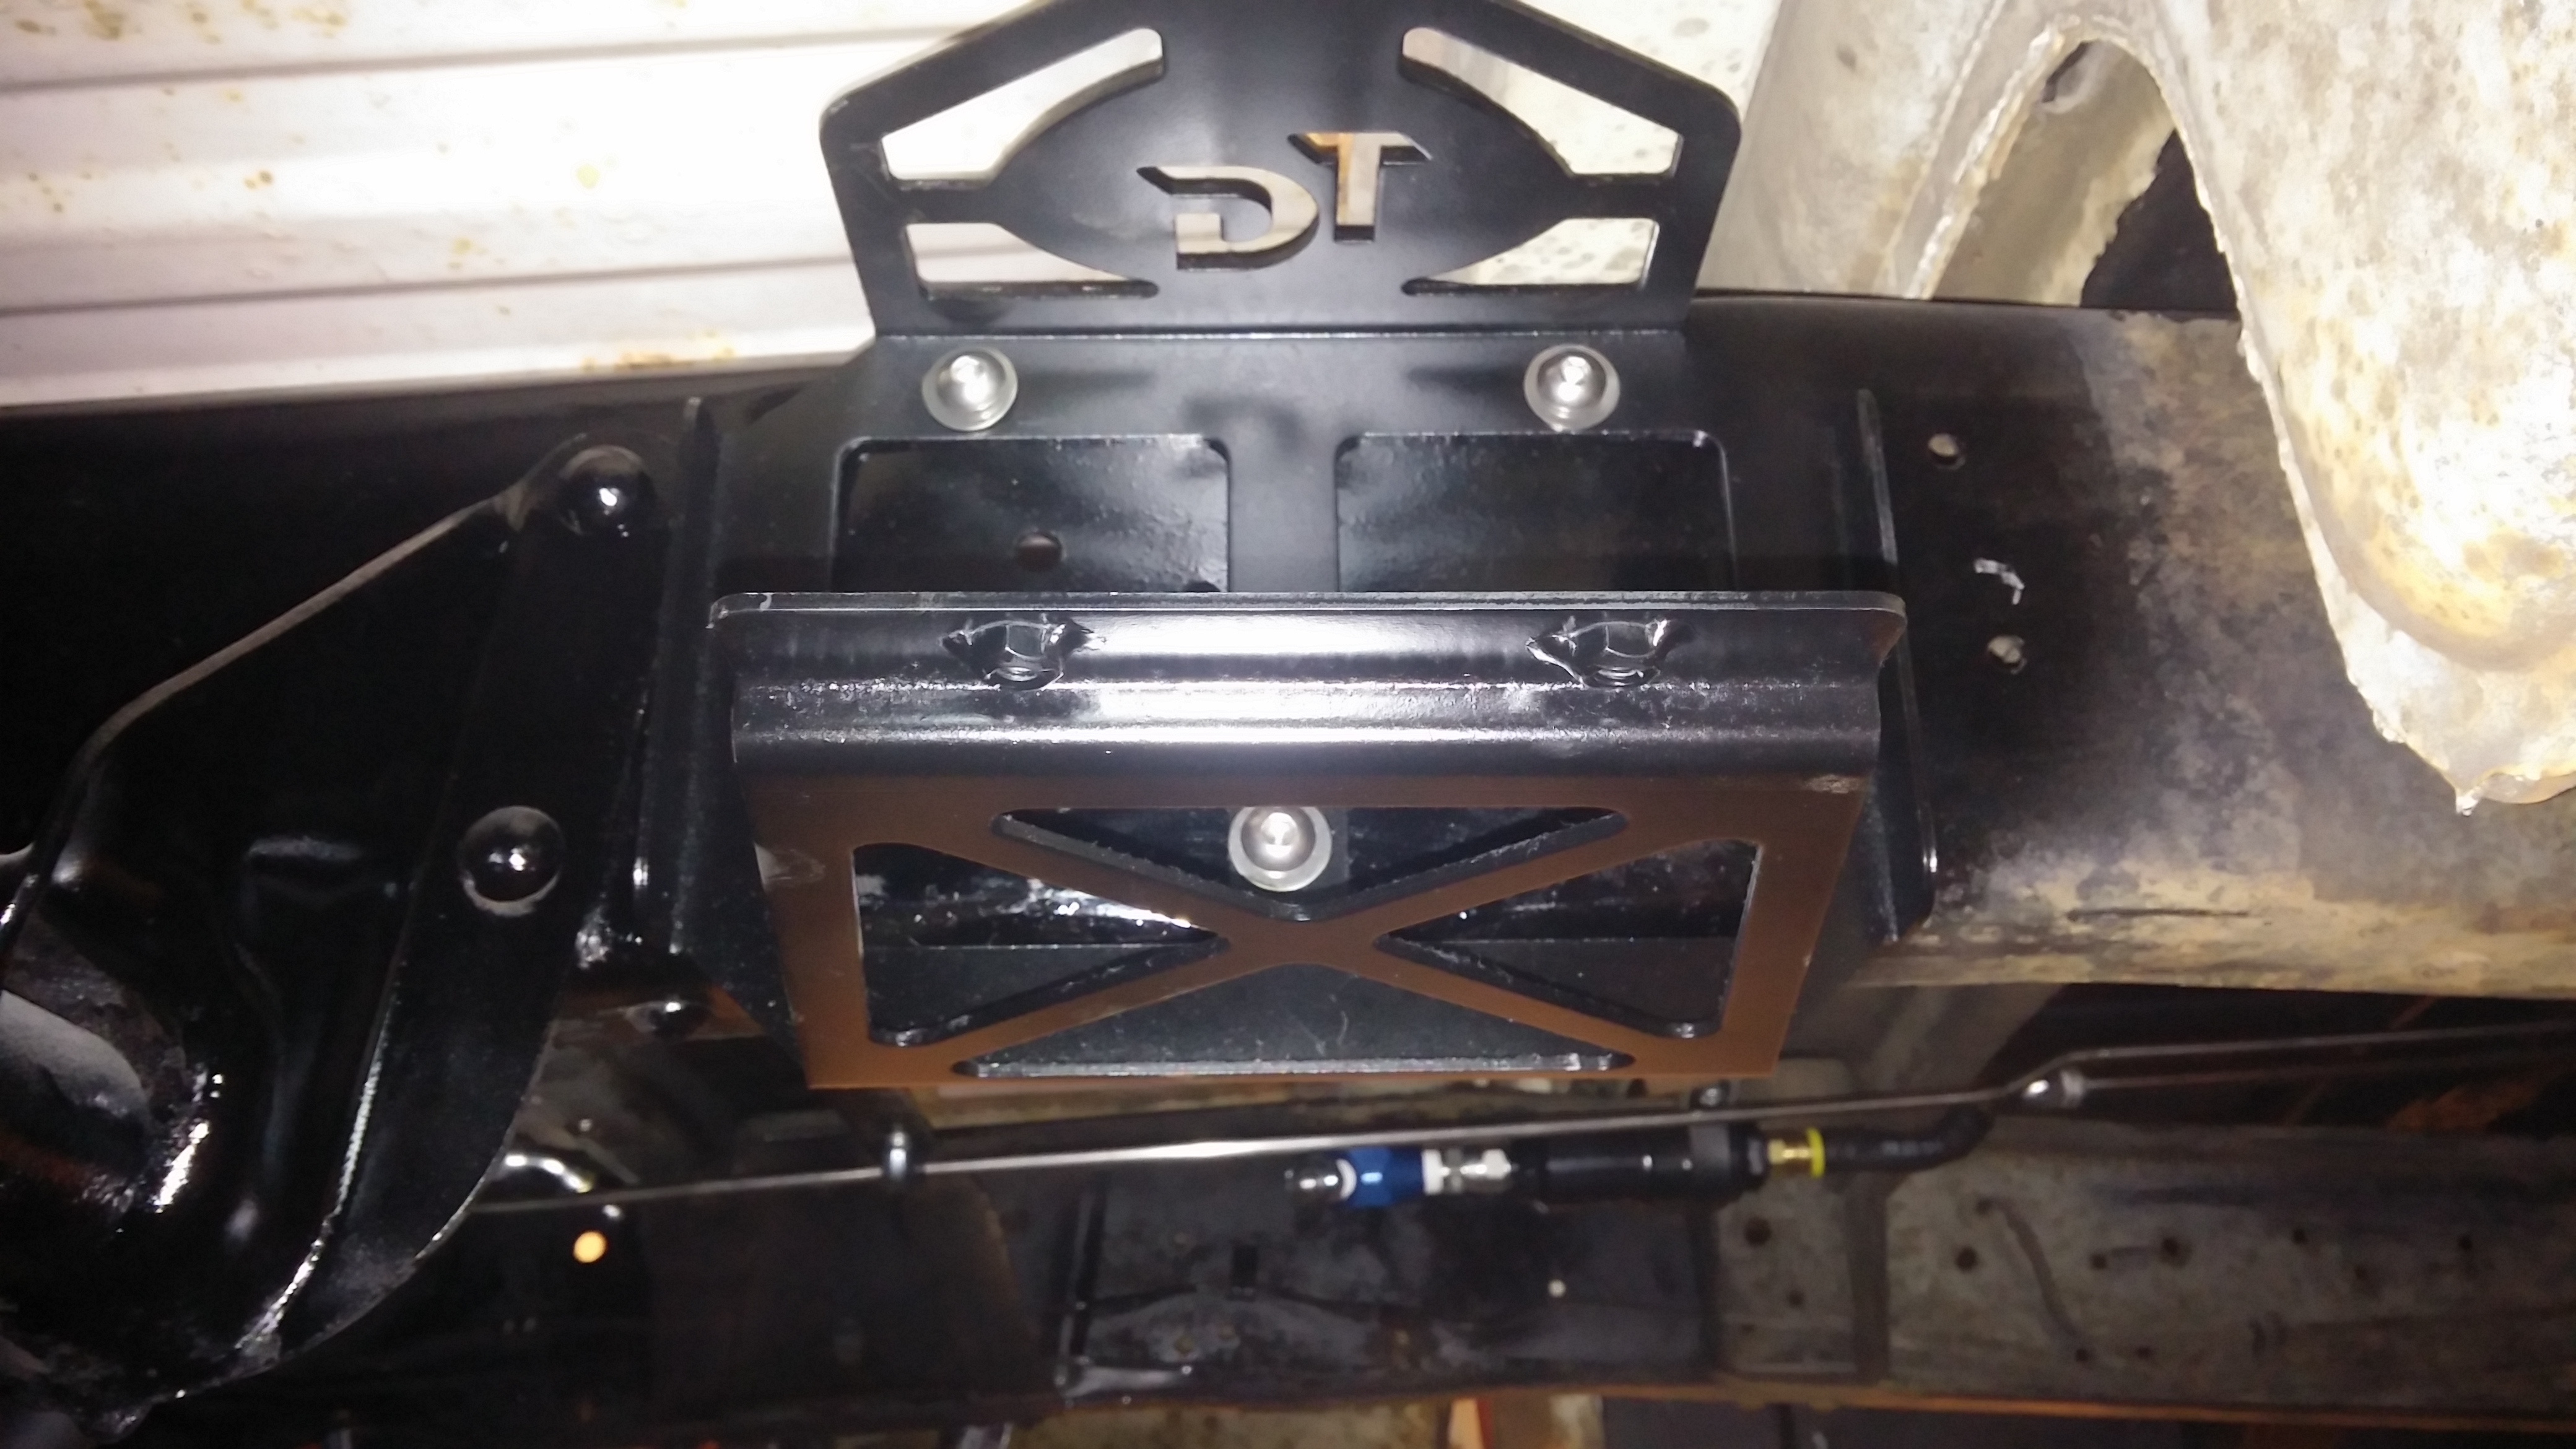
So I turned to my wheeler side and ordered up this battery box from Trail Gear. Very happy with it, except that is says TG on it Its ok, I think its fitting for this project.
Finished drilling and got some paint on it.
And here is the old girl parked in her new home. Passenger side frame rail just under the bed floor in front of rear wheel.

And this is where I spent my entire day. There was about four feet of framerail that never got painted so I wire wheeled that and painted it finally. Looks good and needed to get done before I could get the wire ran and the bolts in for the hold down clamps.
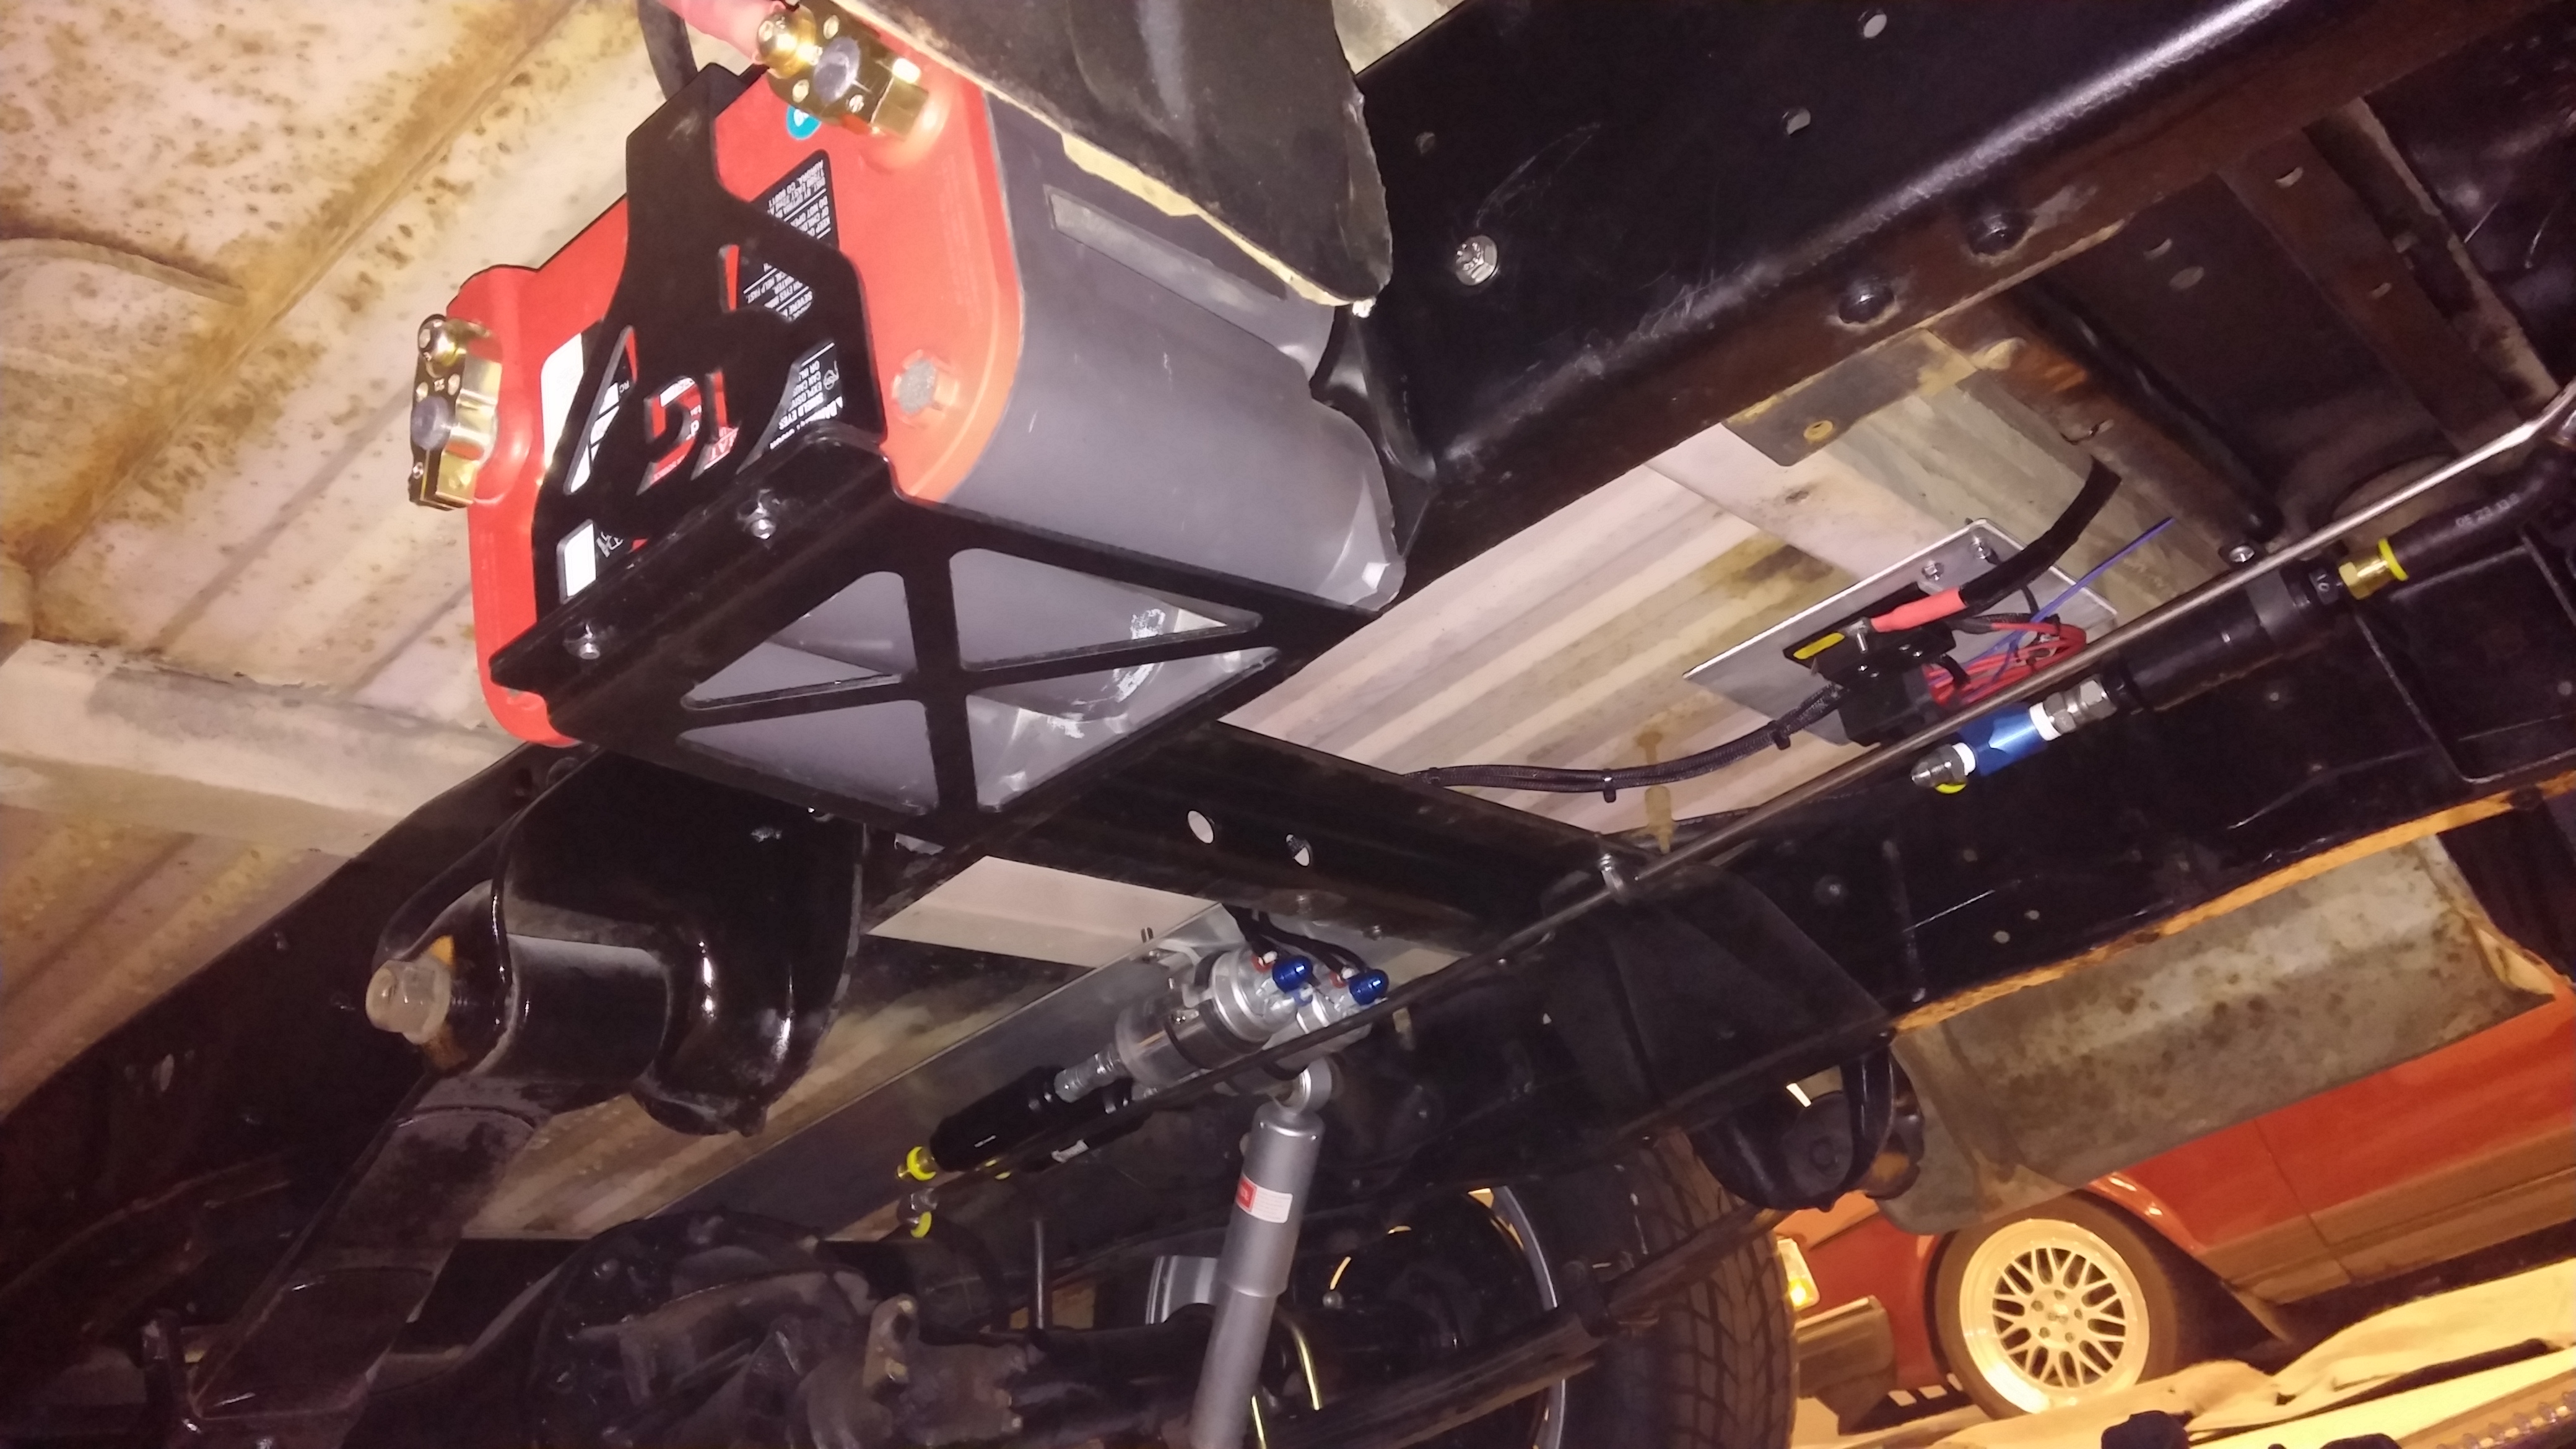
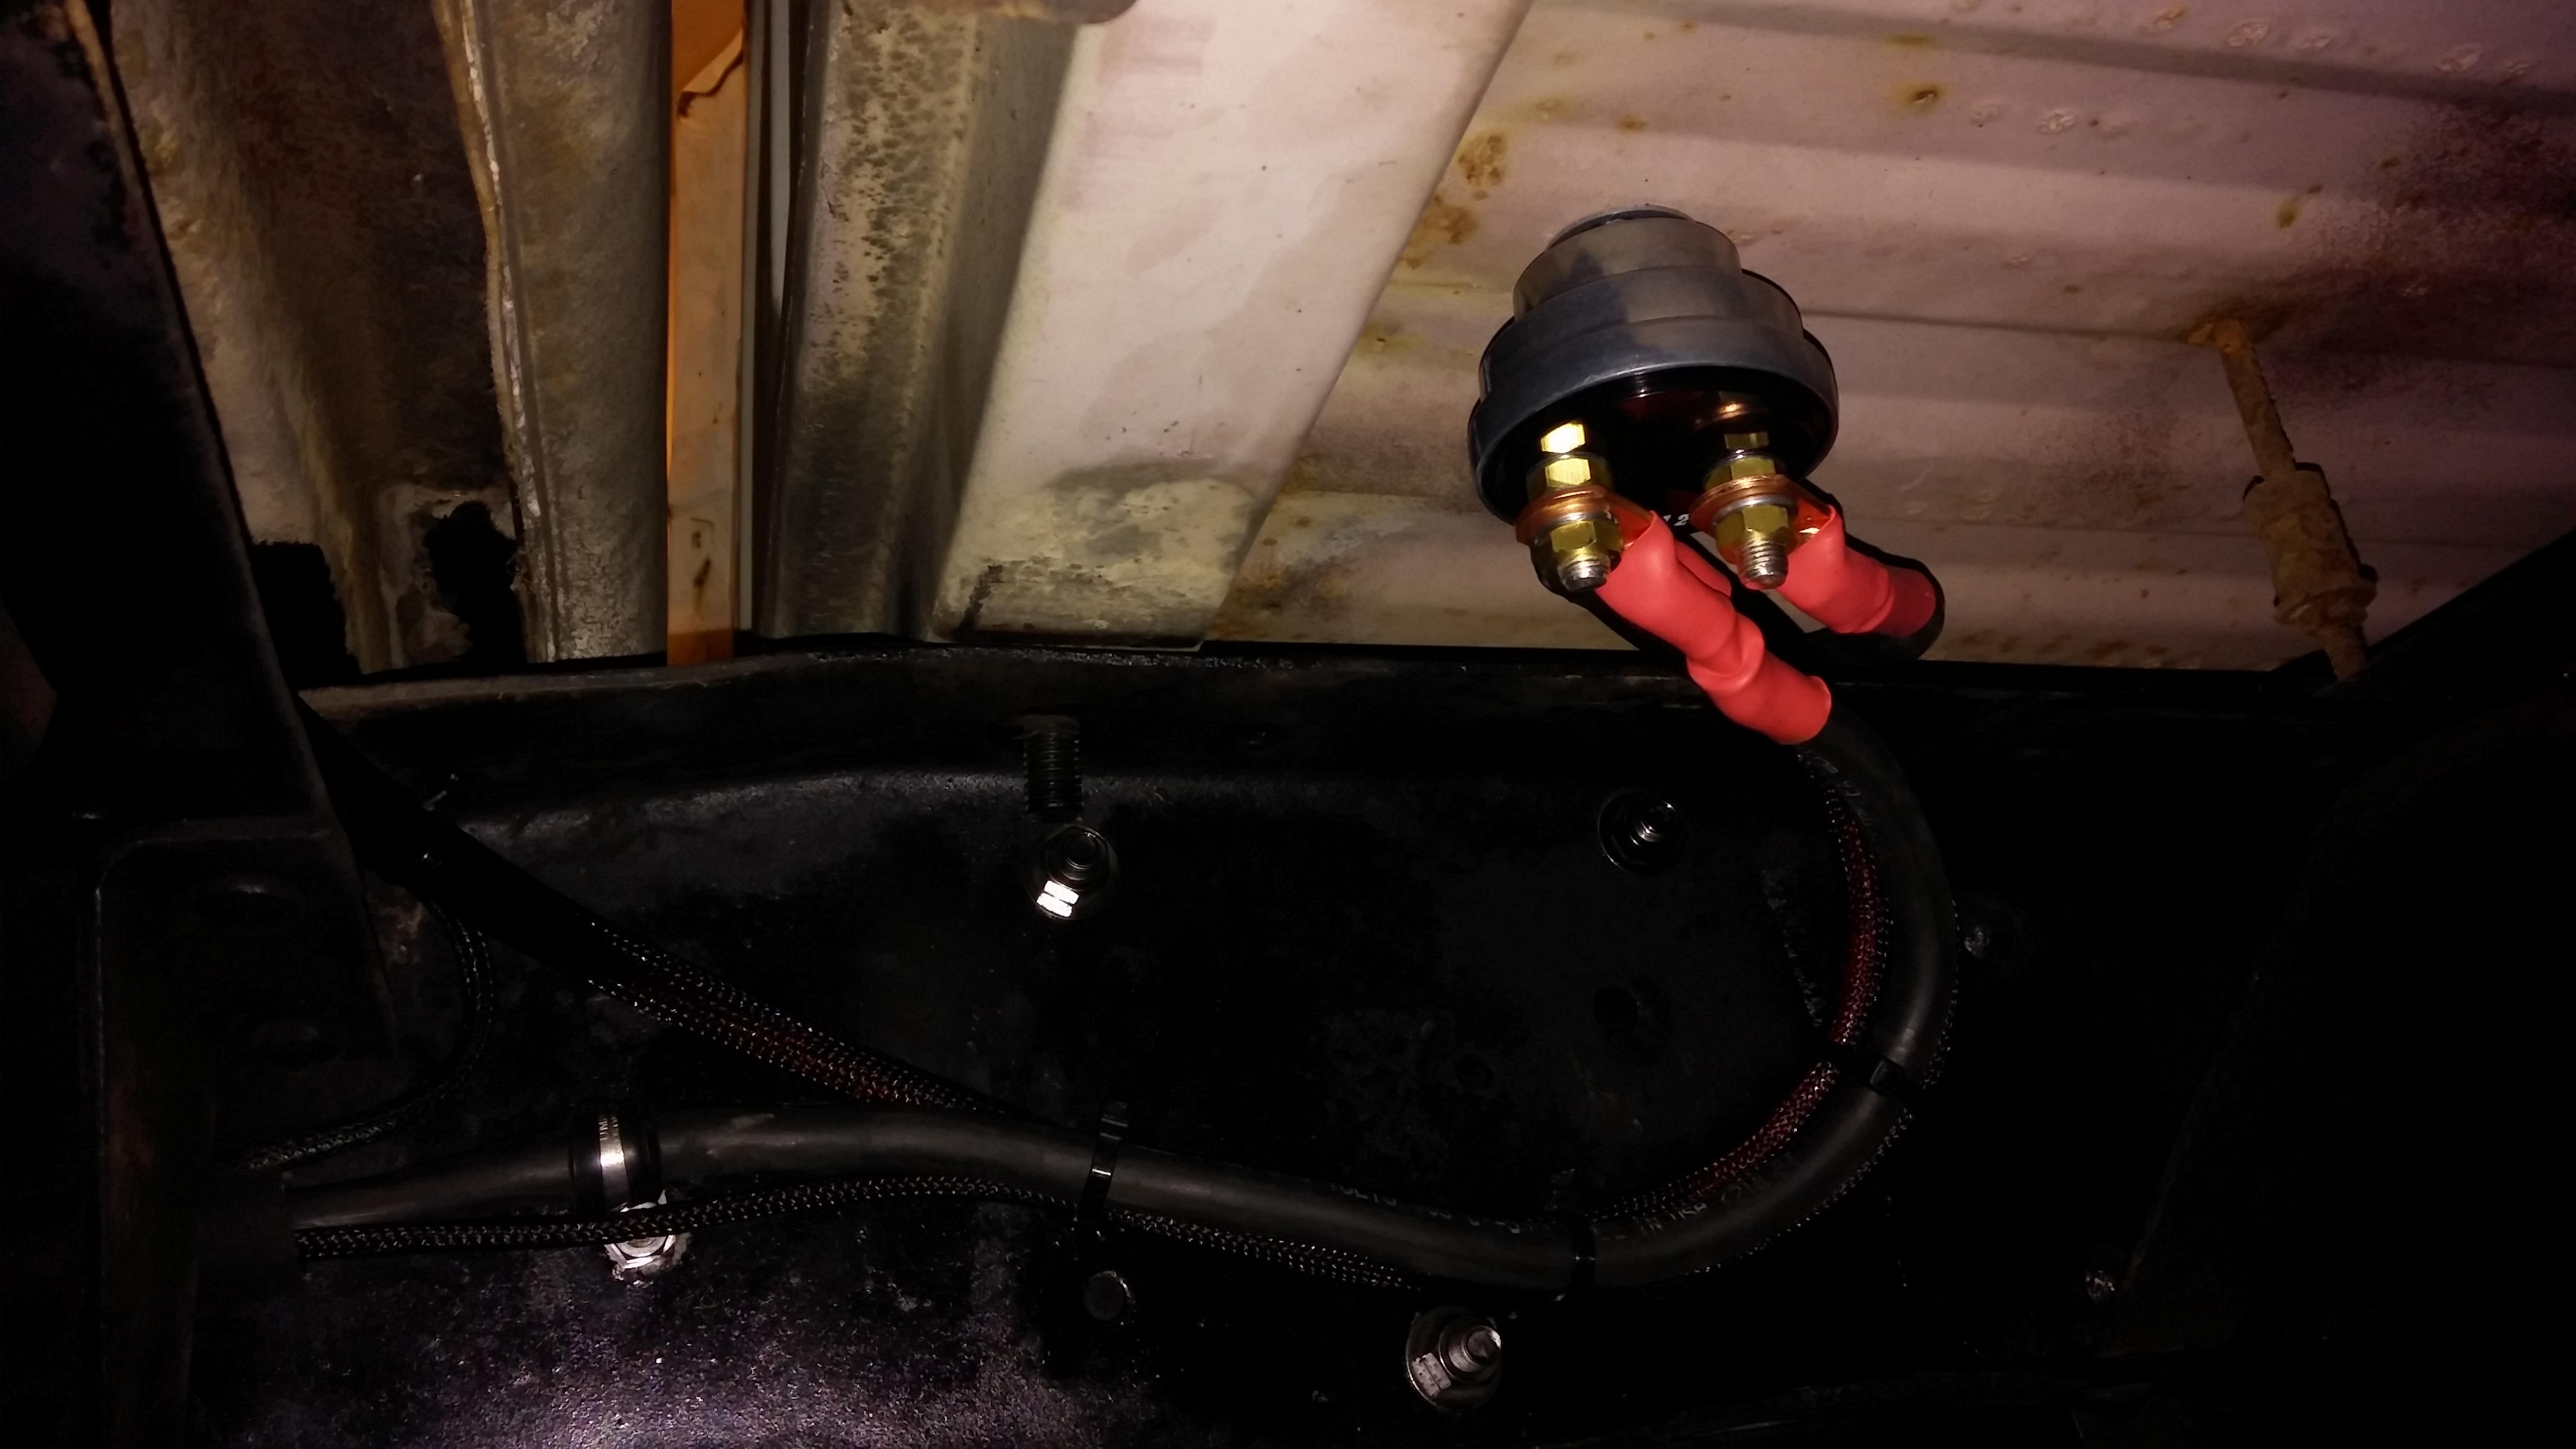
Mounted up a battery disconnect switch in the bed floor with the future knowing that I would need a push pull from the back of the bed, so this should work for that. Its just a taylor single pole disconnect.
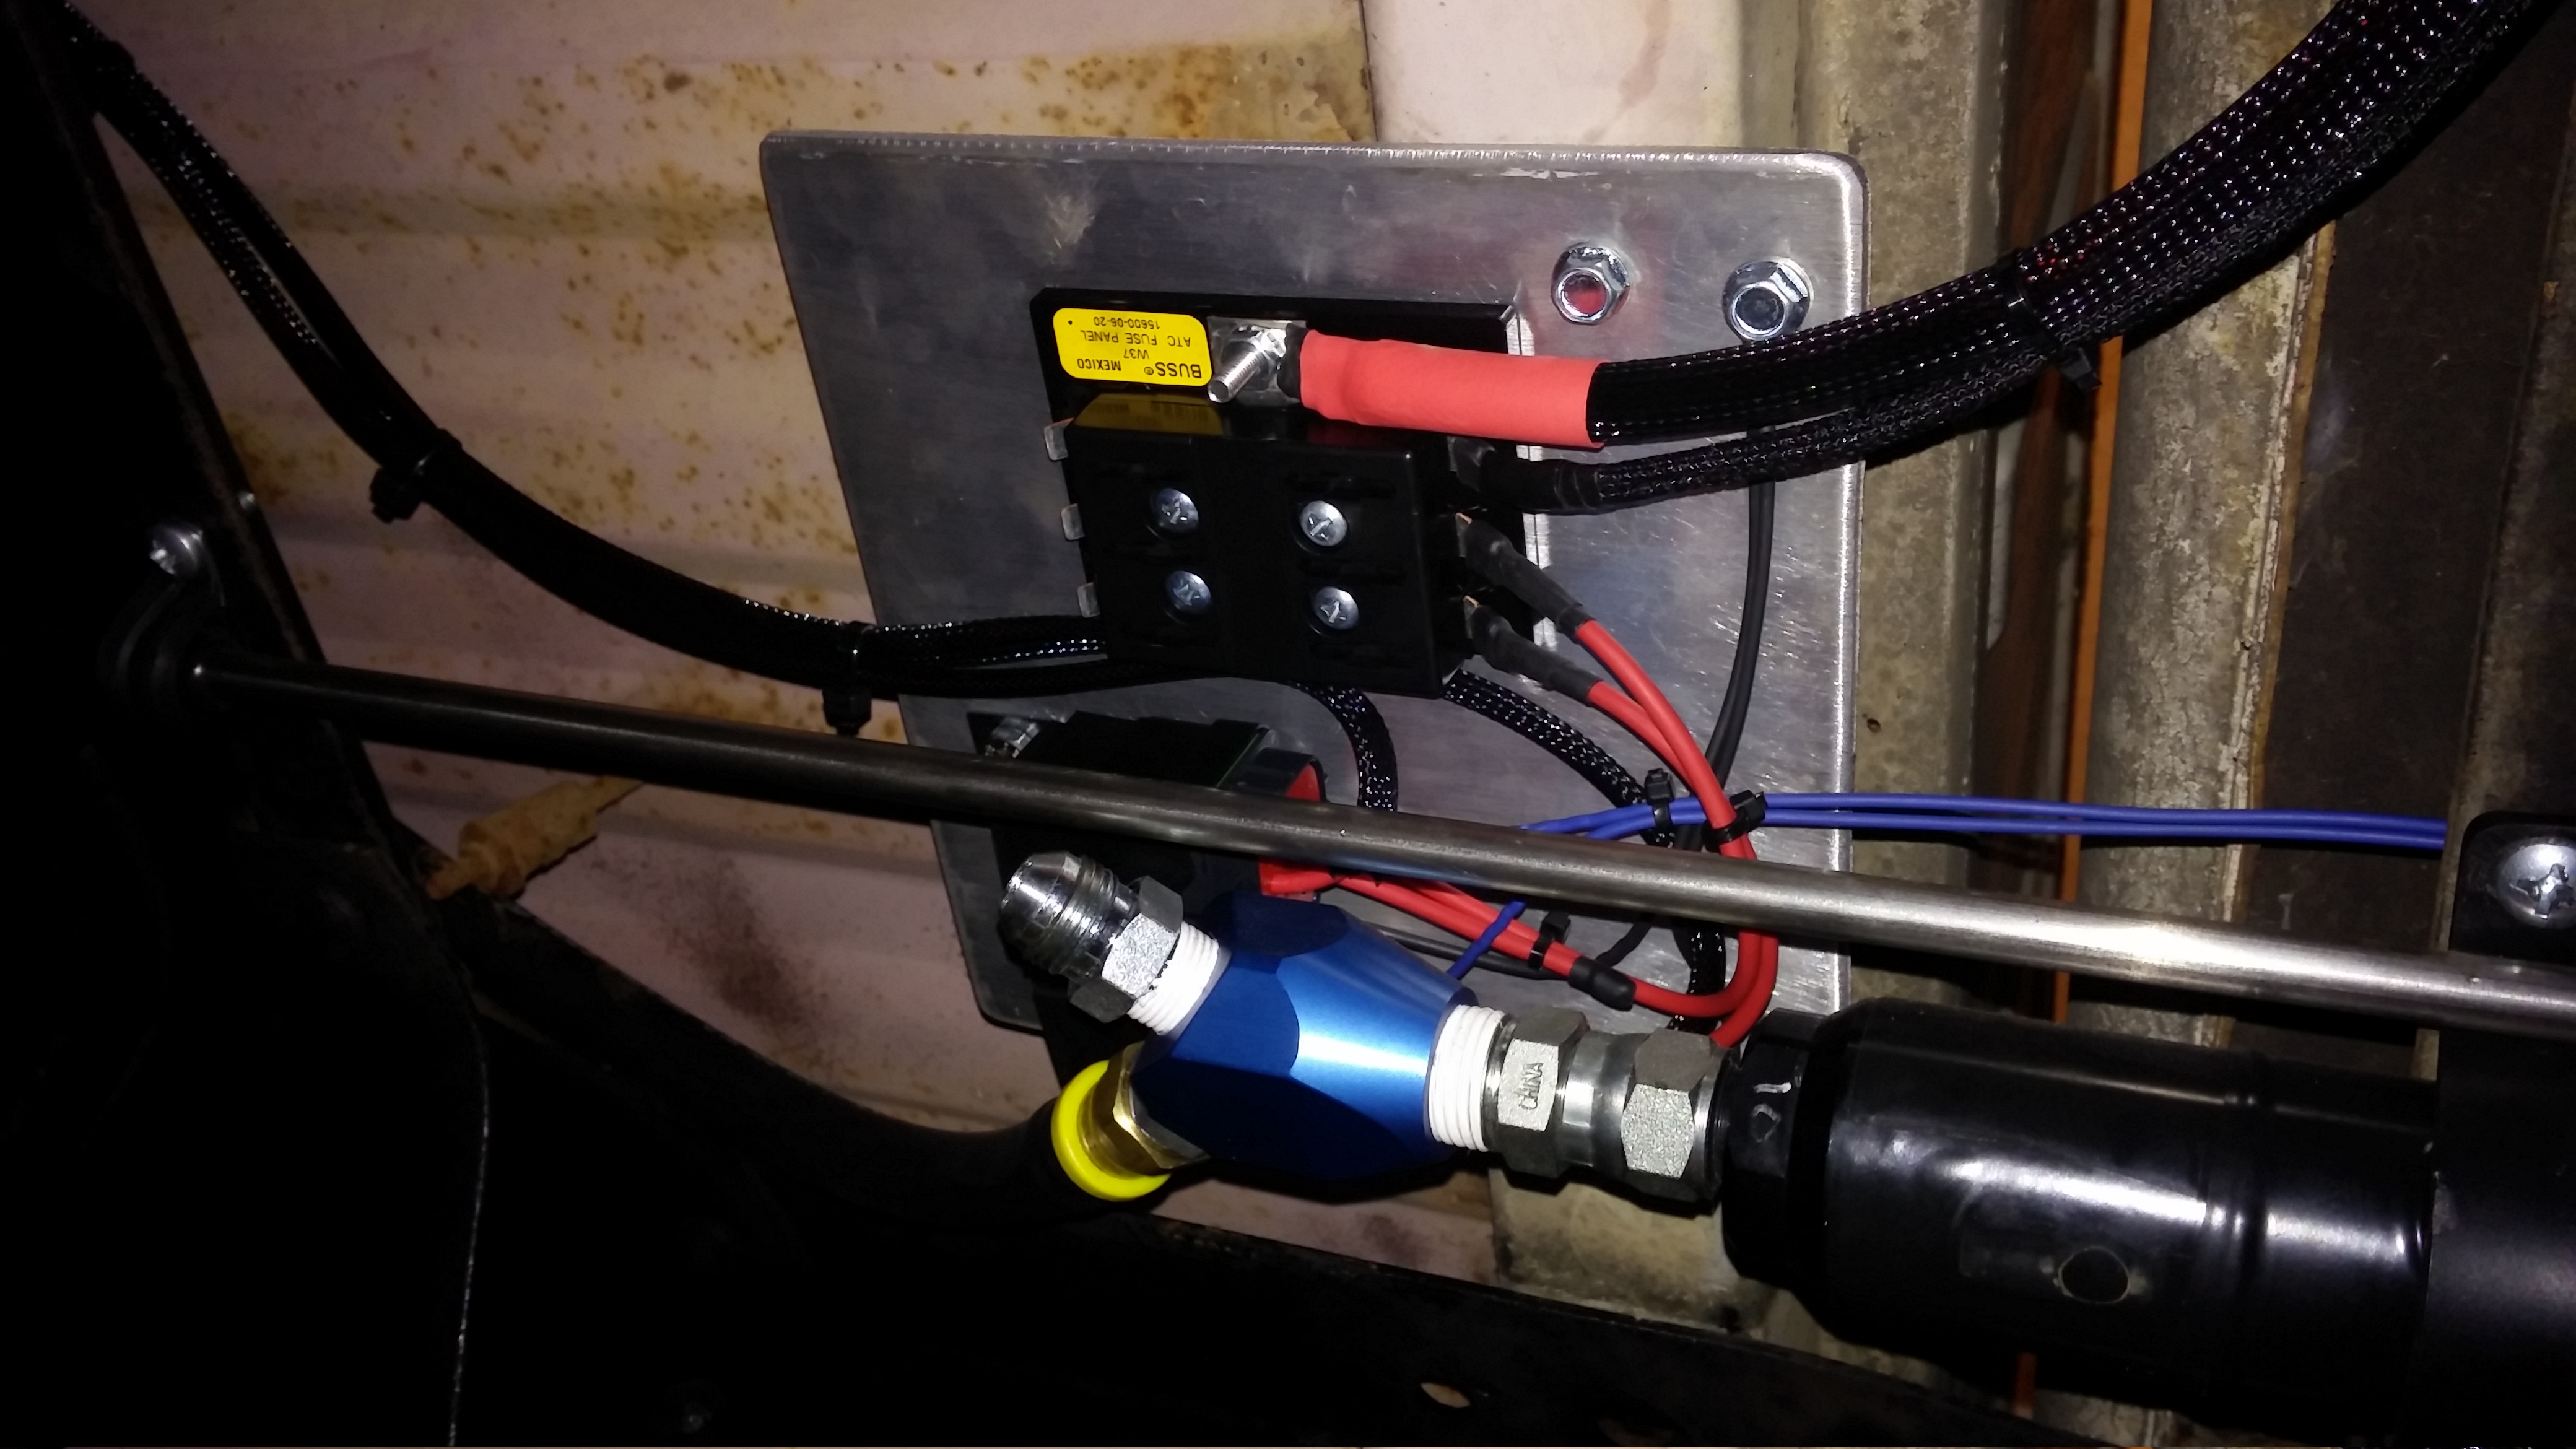
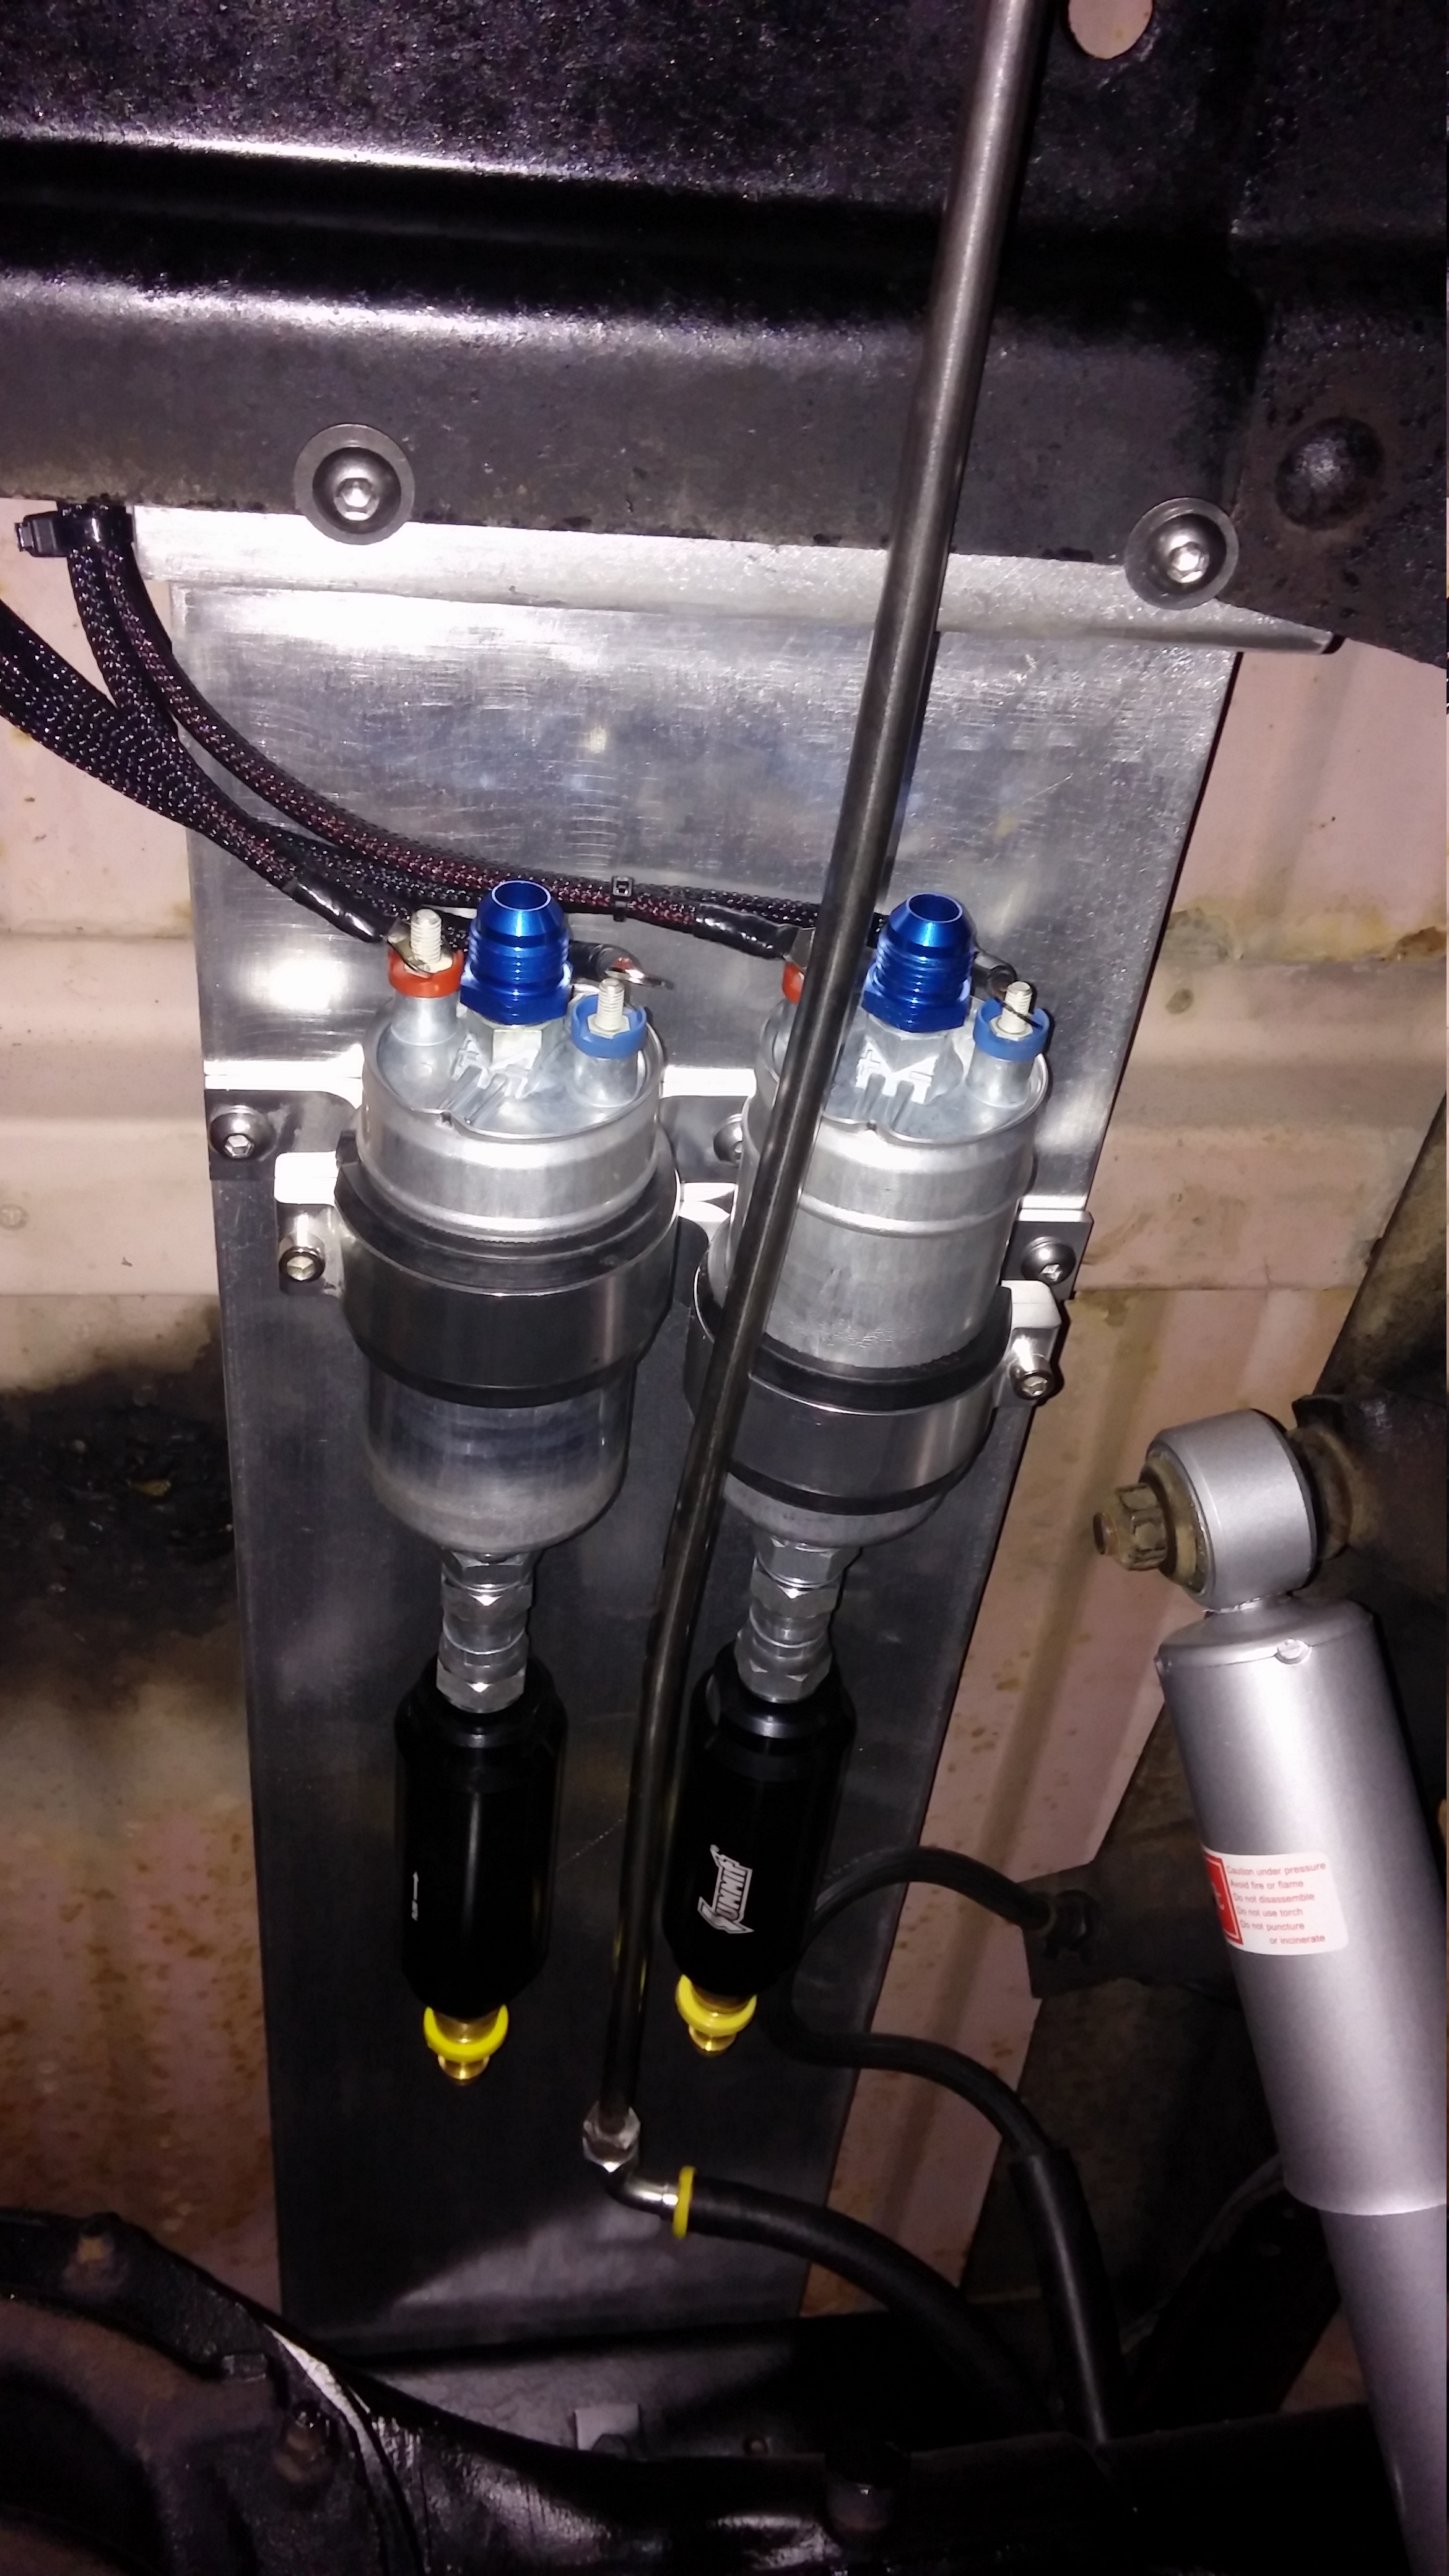
Moved onto the relays and power for the fuel system. I know that power makes these pumps run much better, so I gave it lots of power. Small fuse holder, and each pump gets its own dedicated 40 amp relay triggered from the GM ECU.

Installed and wired up.
Wired up the pumps, just waiting on hardware for these terminals but its wired.
Tranny Cooler installed, plumbed and wired up. Fused off the same little fuse block the fuel pumps are fused off of.

Negative battery cable is built and ran, main 12v is run from the battery terminal to the starter and clamped in place.
It doesn't look like a lot of progress by the pics and the end result, but soldering, shrink swpping and sleeving every single wire on the truck, often under the truck seems to take a lot of time.
I think I am almost done crawling around under this.
Need a couple fitting to finish the fuel lines.
Might invite a few people over next weekend and see if we can fire this turd up for the first time.
Sean
So I turned to my wheeler side and ordered up this battery box from Trail Gear. Very happy with it, except that is says TG on it
Its ok, I think its fitting for this project.Finished drilling and got some paint on it.

And here is the old girl parked in her new home. Passenger side frame rail just under the bed floor in front of rear wheel.


And this is where I spent my entire day. There was about four feet of framerail that never got painted so I wire wheeled that and painted it finally. Looks good and needed to get done before I could get the wire ran and the bolts in for the hold down clamps.

Mounted up a battery disconnect switch in the bed floor with the future knowing that I would need a push pull from the back of the bed, so this should work for that. Its just a taylor single pole disconnect.

Moved onto the relays and power for the fuel system. I know that power makes these pumps run much better, so I gave it lots of power. Small fuse holder, and each pump gets its own dedicated 40 amp relay triggered from the GM ECU.

Installed and wired up.

Wired up the pumps, just waiting on hardware for these terminals but its wired.

Tranny Cooler installed, plumbed and wired up. Fused off the same little fuse block the fuel pumps are fused off of.

Negative battery cable is built and ran, main 12v is run from the battery terminal to the starter and clamped in place.
It doesn't look like a lot of progress by the pics and the end result, but soldering, shrink swpping and sleeving every single wire on the truck, often under the truck seems to take a lot of time.
I think I am almost done crawling around under this.
Need a couple fitting to finish the fuel lines.
Might invite a few people over next weekend and see if we can fire this turd up for the first time.
Sean
03-04-2014, 10:41 AM
#97
Launching!
Thread Starter
Join Date: Mar 2012
Posts: 214
Likes: 0
Received 0 Likes
on
0 Posts
Ordered a shifter and a fan yesterday.
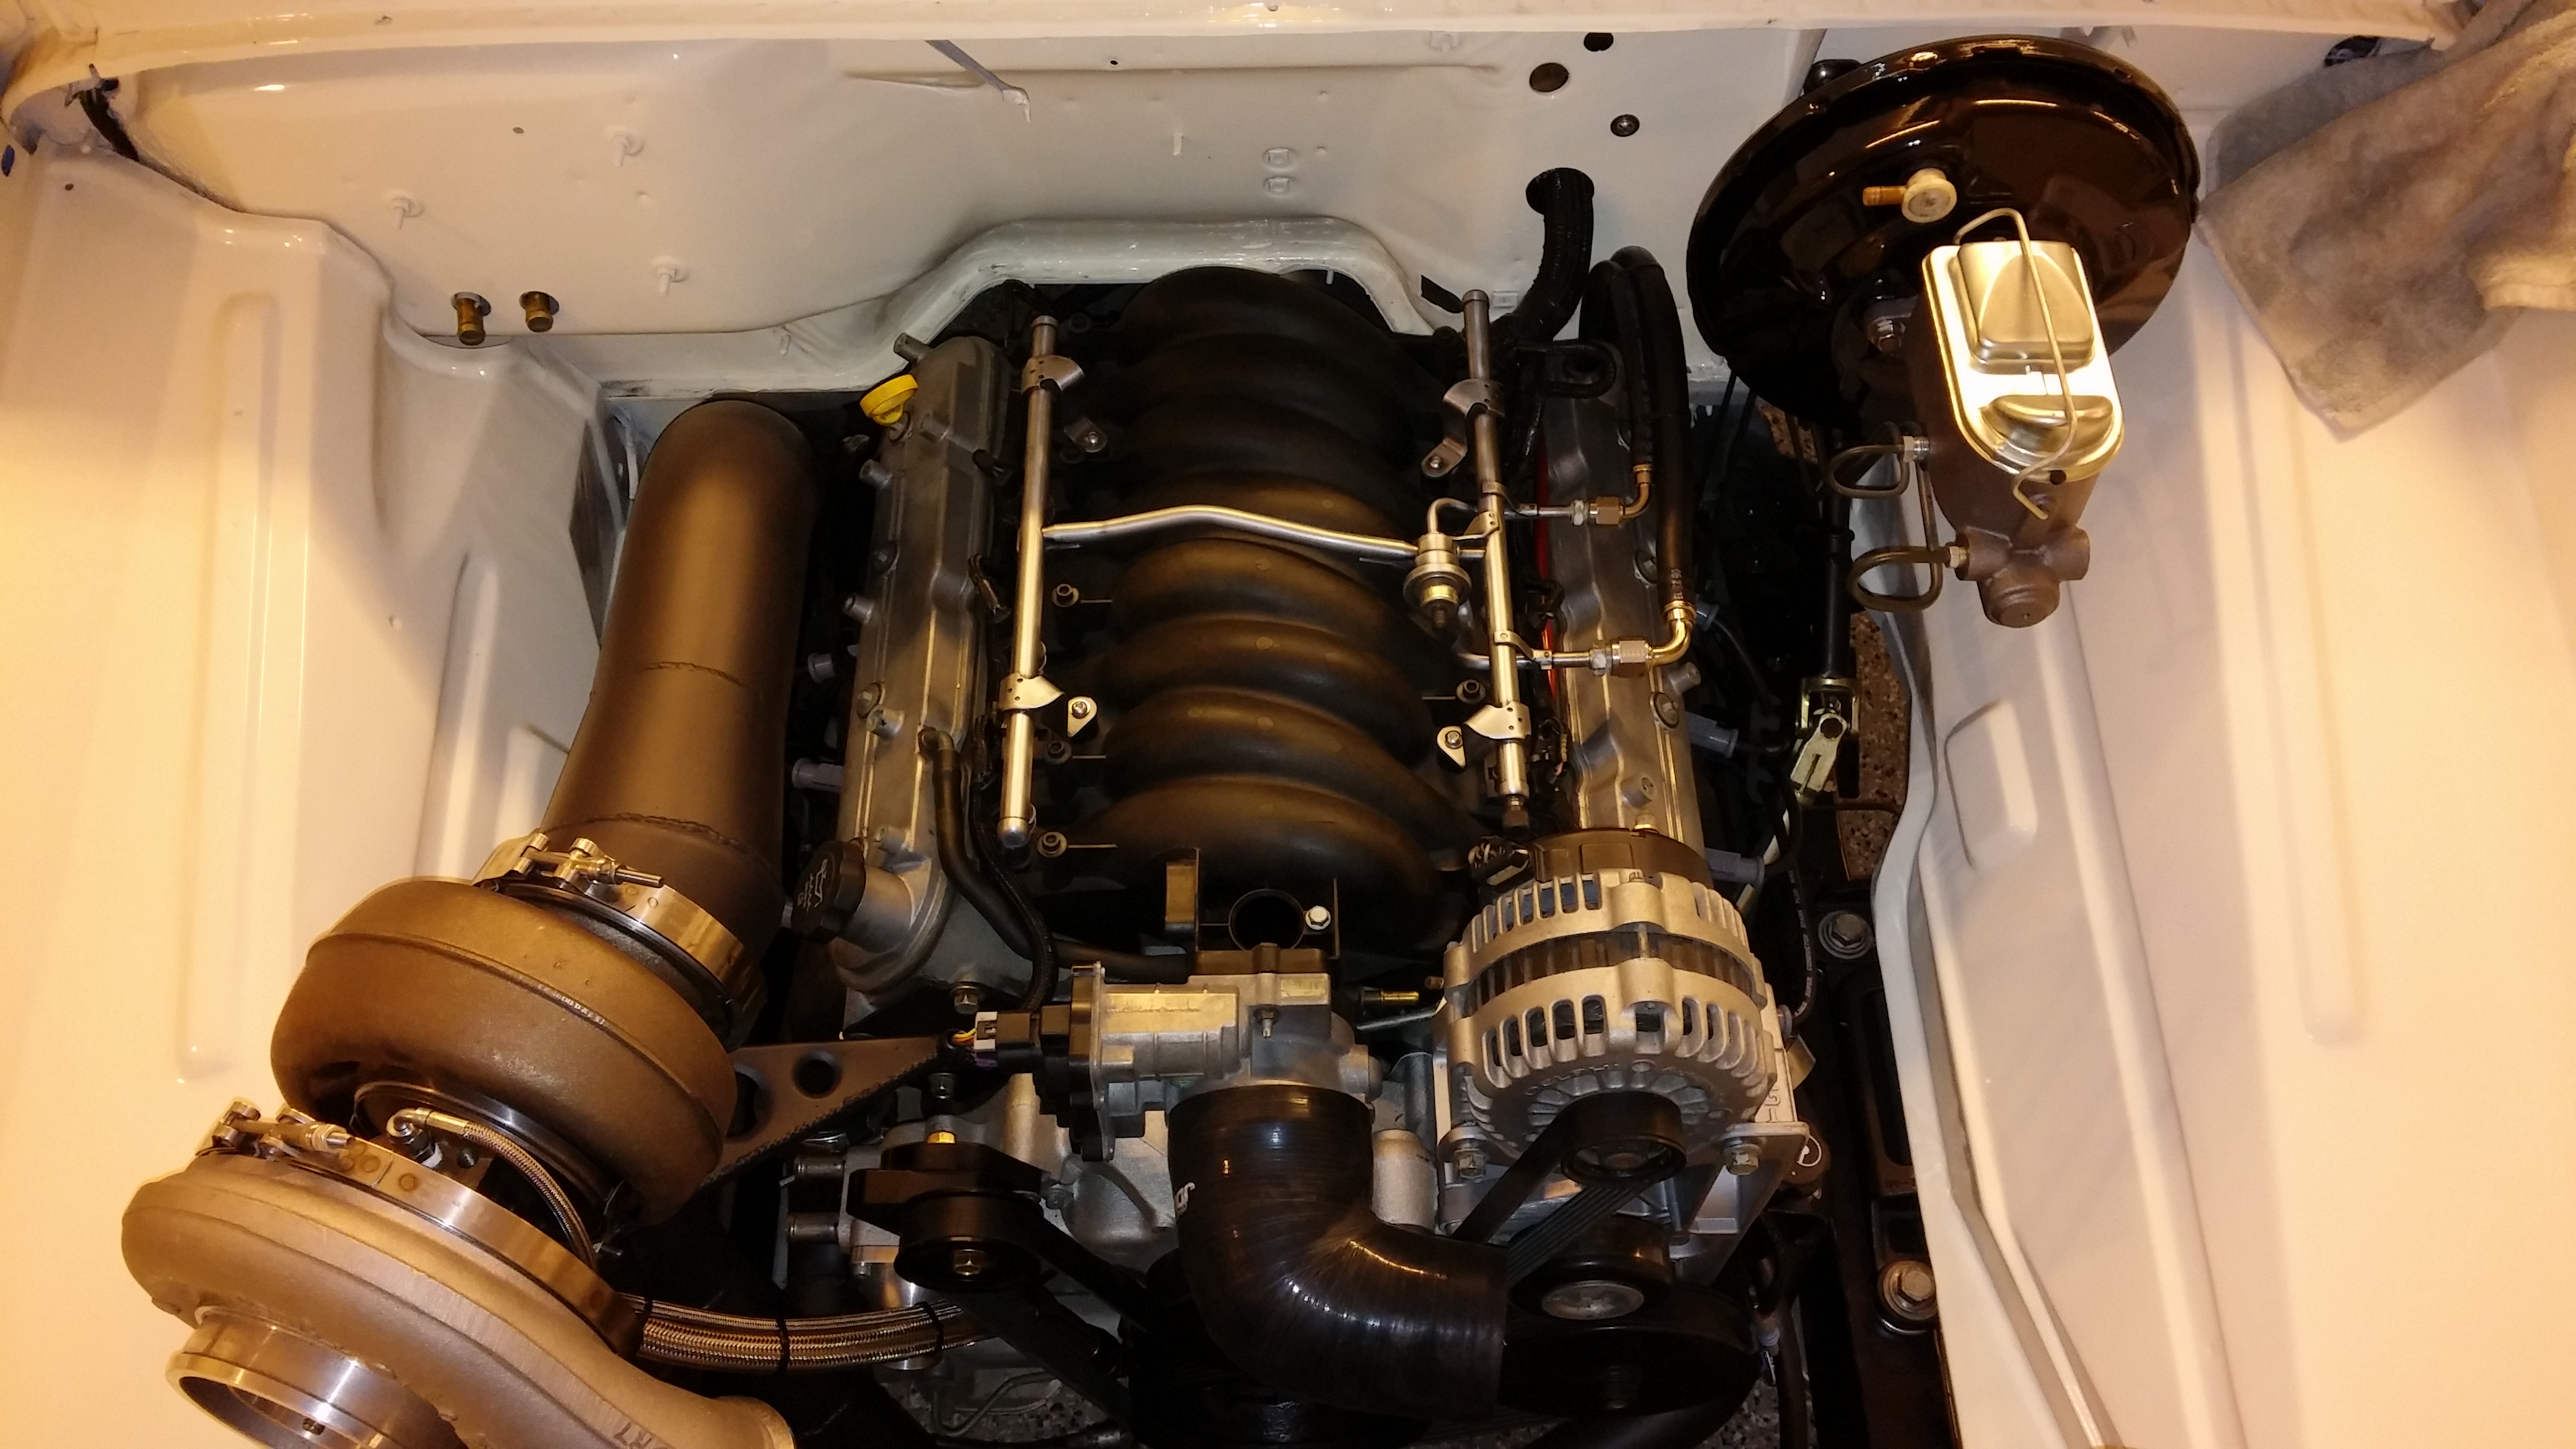
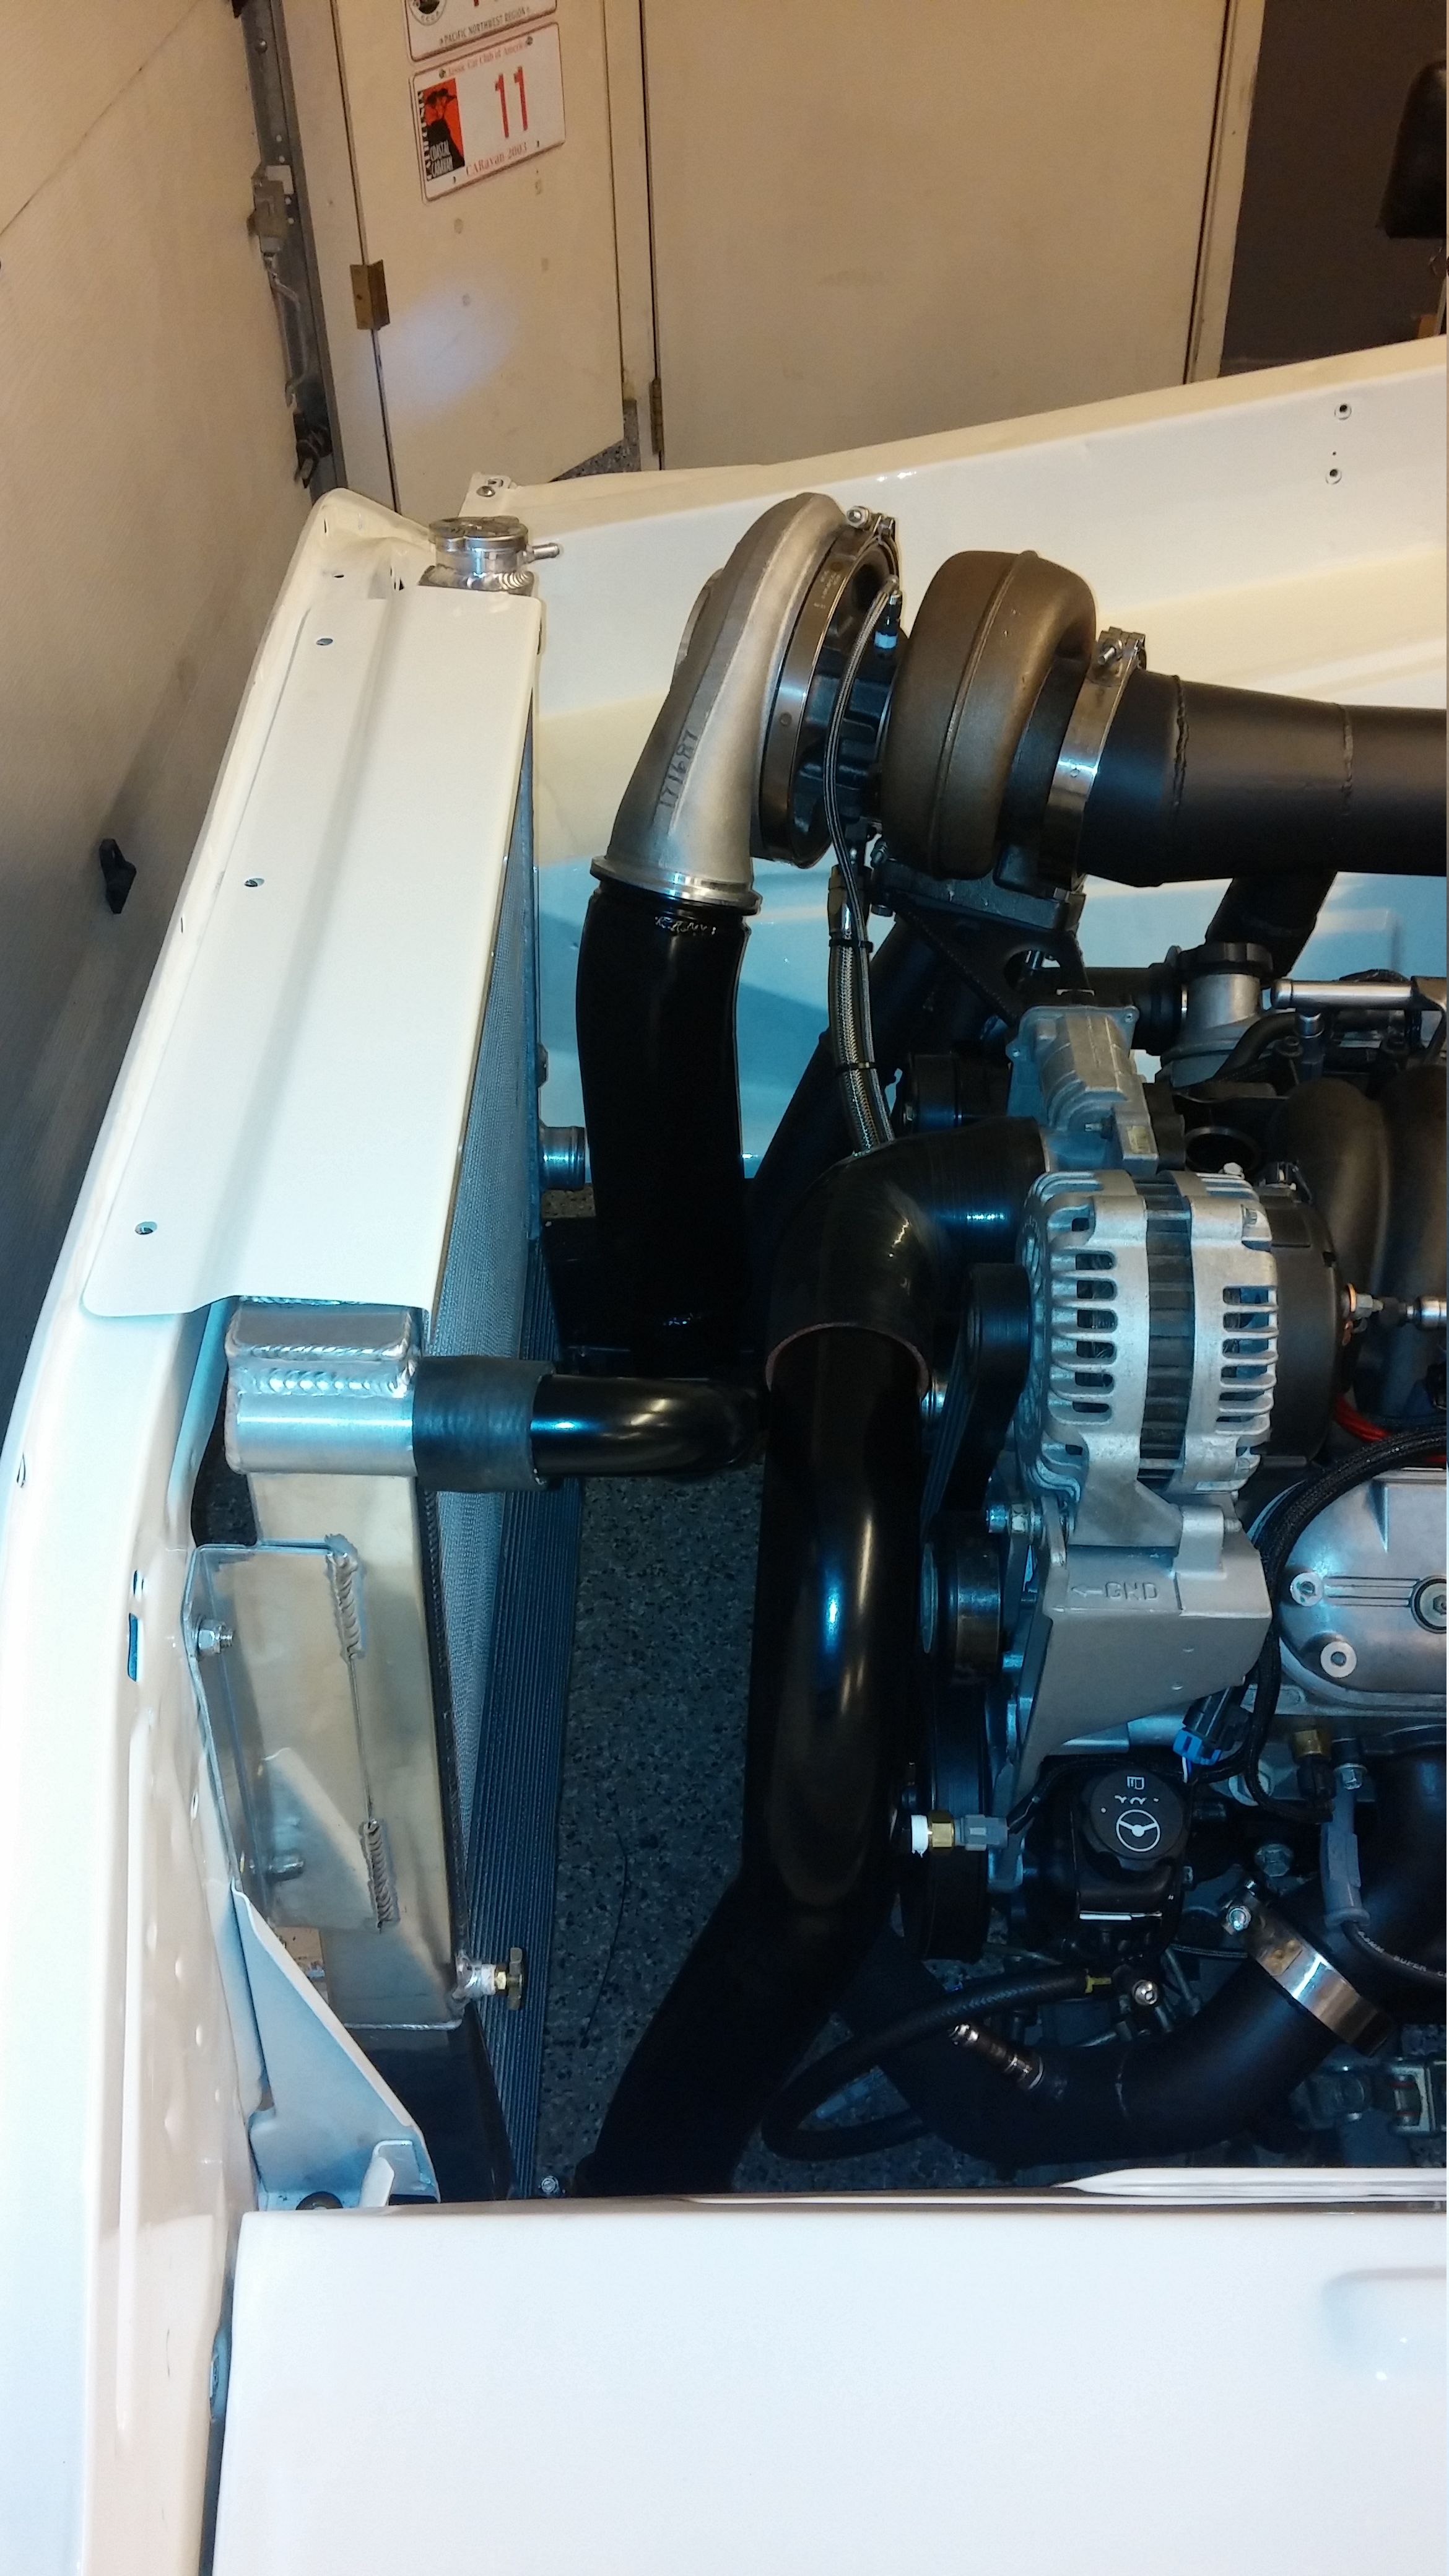
Got the powder coated radiator tubes back from the powdercoater and installed, picked up v band for outlet of turbo. I think they look better black than they did white, by a long shot.
Got the rest of the fuel system fittings after work and picked up hardware for the fuel pumps. Finished running all the fuel lines last night and buttoned up the last few connections under the truck I think. Even went through and did some final tightening on some fittings at the rear of the fuel system, still need to snug up everything up top on the fuel side.
Hope to get some wiring inside the cab done tonight and hope my fittings show up for coolant and oil pressure so I can get them installed and wired up.
Only things left to wire are:
Starter 12v from ignition key. I do not think I need a relay or anything in here with the GM Starter solenoid built into the starter
12v power tie in from main shut off switch up to the ecu, its already in the cab just need to run it up the console and hook it up.
switched 12v to the computer
brake switch to computer
12v signal for volt guage
ground for engine block
headlights, turn signals and taillights need to be run under the fenders and probably extended to reach now.
Extend fuel level sender wires back to the new tank in the rear.
Its a pretty small list compared to the last 8 or so days of wiring in my opinion.
Getting closer to the first start...
Sean
Got the powder coated radiator tubes back from the powdercoater and installed, picked up v band for outlet of turbo. I think they look better black than they did white, by a long shot.

Got the rest of the fuel system fittings after work and picked up hardware for the fuel pumps. Finished running all the fuel lines last night and buttoned up the last few connections under the truck I think. Even went through and did some final tightening on some fittings at the rear of the fuel system, still need to snug up everything up top on the fuel side.
Hope to get some wiring inside the cab done tonight and hope my fittings show up for coolant and oil pressure so I can get them installed and wired up.
Only things left to wire are:
Starter 12v from ignition key. I do not think I need a relay or anything in here with the GM Starter solenoid built into the starter
12v power tie in from main shut off switch up to the ecu, its already in the cab just need to run it up the console and hook it up.
switched 12v to the computer
brake switch to computer
12v signal for volt guage
ground for engine block
headlights, turn signals and taillights need to be run under the fenders and probably extended to reach now.
Extend fuel level sender wires back to the new tank in the rear.
Its a pretty small list compared to the last 8 or so days of wiring in my opinion.
Getting closer to the first start...
Sean
 03-04-2014, 12:32 PM
#100
Launching!
Thread Starter
Join Date: Mar 2012
Posts: 214
Likes: 0
Received 0 Likes
on
0 Posts