
Old School LSx 1967 Camaro
 01-15-2014, 07:08 AM
#81


Thank you for your great documentation! I am finding it very useful.
Questions:
1. How did you verify your bottom end (pistons, bearings, etc) was in usable condition? Did you check compression or perform a leakdown test? From the looks of things, you simply cleaned it up and bolted it in.
2. Do you have any documentation on how you measured, cut, and filled the shifter hole in the tunnel?
Thanks, and great looking build!
 01-15-2014, 10:06 AM
#82
Thank you for your great documentation! I am finding it very useful.
Questions:
1. How did you verify your bottom end (pistons, bearings, etc) was in usable condition? Did you check compression or perform a leakdown test? From the looks of things, you simply cleaned it up and bolted it in.
2. Do you have any documentation on how you measured, cut, and filled the shifter hole in the tunnel?
Thanks, and great looking build!
Questions:
1. How did you verify your bottom end (pistons, bearings, etc) was in usable condition? Did you check compression or perform a leakdown test? From the looks of things, you simply cleaned it up and bolted it in.
2. Do you have any documentation on how you measured, cut, and filled the shifter hole in the tunnel?
Thanks, and great looking build!
1) I didn't do any testing. I bought the engine from a local yard that specializes in LS dropouts and they guaranteed the engine. It had 89,000 miles on it and I saw pics of the Escalade it came out of. If it was bad, I knew I could return it.
I really didn't take many pics at that time, it happened pretty quickly and I was pushing to get the car done. I just measured from the back edge of the old shifter hole to the back edge of the shifter mount on the T56 and marked the tunnel. I traced a hole big enough to install the shifter from above, in case I needed to remove it in the future without dropping the trans, and cut the hole out using an angle grinder with a cut off blade, as well as a Dremel.
I used the scrap that I removed for the new opening, placed it under the old shifter opening (from below) and traced the old shifter opening onto the scrap. I cut that down and JB Welded it into place. I even re-used the piece of carpet from the new hole to fit the old hole, but now have a console over it, so it doesn't matter.
Here are two pics. The first is the location of the old opening vs the new opening:

And the second is the new opening:
 01-15-2014, 02:32 PM
#84
Once the engine and trans are in place, you will be able to slip a tape measure through your old shifter hole and measure how far back it is to the trailing edge of the T56 shifter hole. Transfer that onto the top of the tunnel, and then use your shifter base as a template.
01-17-2014, 10:05 AM
#85
Looking back on your build, are there any lessons learned you would like to offer? Is there anything you would recommend someone following your build to do differently?
I was reading your previous threads, and you mentioned a lack of TQ & HP under 3500 RPM. Looking back what would you have done differently to re mediate this issue? You mentioned swapping rear end gears to help. Would a smaller cam do the trick?
Also, judging by your custom brackets and fabrication, you seem to have a decent amount of mechanical skill. Would you mind rating your skill level? I have performed smaller tasks such as header and water pump swaps, but nothing to this extent yet. "There's only one way to learn..."
Last edited by Corey R.; 01-17-2014 at 01:45 PM.
01-17-2014, 03:04 PM
#86
Looking back on your build, are there any lessons learned you would like to offer? Is there anything you would recommend someone following your build to do differently?
I was reading your previous threads, and you mentioned a lack of TQ & HP under 3500 RPM. Looking back what would you have done differently to re mediate this issue? You mentioned swapping rear end gears to help. Would a smaller cam do the trick?
Also, judging by your custom brackets and fabrication, you seem to have a decent amount of mechanical skill. Would you mind rating your skill level? I have performed smaller tasks such as header and water pump swaps, but nothing to this extent yet. "There's only one way to learn..."
I was reading your previous threads, and you mentioned a lack of TQ & HP under 3500 RPM. Looking back what would you have done differently to re mediate this issue? You mentioned swapping rear end gears to help. Would a smaller cam do the trick?
Also, judging by your custom brackets and fabrication, you seem to have a decent amount of mechanical skill. Would you mind rating your skill level? I have performed smaller tasks such as header and water pump swaps, but nothing to this extent yet. "There's only one way to learn..."
1) I should have just bought a short block. I took everyone's advice and bought a complete long block with the heads, intake, correct accelerator pedal, ecm/pcu, wiring harness, sensors, etc. Then I tore it all the way down, and replaced everything. I ended up selling a bunch of stuff off, but I replaced the heads, intake, cam, timing chain, lifters, spark plugs, all the sensors, wiring harness, oil pan, etc. If you're going to just drop the engine in, then a complete engine is the way to go. If you're going to change a bunch of stuff, you're better off pricing it out first. I probably could have bought a very low mile short block for not much money, or even a completely rebuilt one for less than my complete engine. I didn't make that much money in parts that I sold off it.
2) It's not really a lack of TQ & HP like I said before. If you look at my dyno sheet I'm making 200rwhp at 3000rpm, but 350TQ at 3000 rpm and it's a nice flat curve up to around 410.
It's just that the Edelbrock Vic Jr. is a single plane intake, which is designed for higher RPM's, like the 1/4 mile. I chose it simply for looks, and accepted the consequences. I don't know if it's possible, but If you could find someone to machine some fuel injector ports into a dual plane Edelbrock Performer RPM LS intake, it would be a lot better for the street.
2a) I also kept my original 3.31 rear end gears, which were not ideal for the new trans. I just ordered an S60 rear with 4.10's so it will make my 6th gear more usable, but it will also let me climb through the RPM's a lot quicker, getting into that sweet spot. I really think this will make a huge difference in performance. Not that it was a slouch before.
3) I don't think the cam is the problem. I had it spec'd out by TEA who did my heads. But at the same time I was talking with a few other well known well respected people. I ended up with 4 people recommending almost the exact same specs. 3 people said 231/235, all 4 said .61x/.62x, and 3 people said 108 LSA and the other said 109 LSA.
4) I'm pretty handy, but my car knowledge was minimal. Everything is bolt on once you have the information. I did an H/C/I swap on my old sbc 350 with the help of a friend, so I had an idea of what to expect. I have wired a ton of car audio, so I am familiar with soldering/heat shrinking. I have a bunch of tools, and a work bench, so I can cut, bend and drill stuff if I need a bracket, but I can't weld. (just learning now on a flux core welder and I am great at making spatter). So on a handy scale, I would give myself a 9 out of 10. On car knowledge, I would give myself a 4 or 5 out of 10. Most of what I did I learned from the internet and a couple of LS swap books. I have a few build threads going, just so other people can learn from my mistakes and/or successes. I cut and pasted those threads here so all the LS swap info was in one place for future reference.
If you take the time to do the research, and are fairly handy you can do this swap. I did it in a one bay garage that is literally 4' wider and 4' longer than my car. That means that when I'm parked dead center in my garage, I have 2' on any given side. A lot of it was done in the driveway when I needed extra clearance, and it was done on jack stands, and with a Harbor Freight engine hoist and engine stand. Oh, and a shovel to clear the snow snow off my driveway so I could push the engine hoist and not lie in knee deep snow drivts.

 02-11-2014, 02:05 PM
#90
I made them. I just used a piece of black 1/0 welding cable, some battery terminals, and solder plugs. I stripped the end of the cable, held the terminal in a vice, dropped a solder plug in, heated it with a propane torch till it melted, and then inserted the stripped cable. Then I used a large piece of heat shrink to finish the cable.
06-12-2014, 05:08 AM
#92
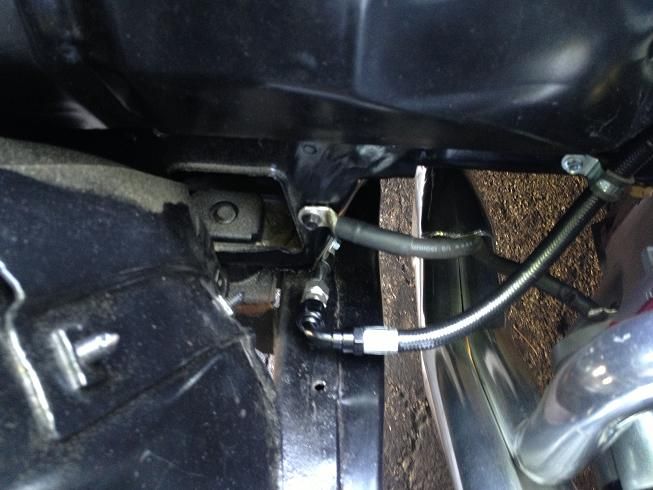
I posted this somewhere else, but figured I should keep all the details together for future reference.
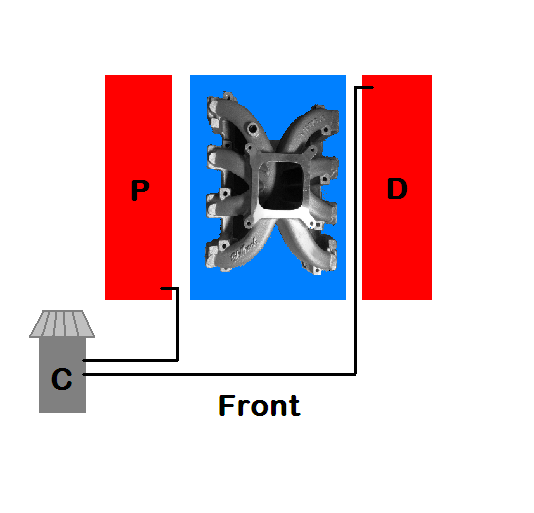
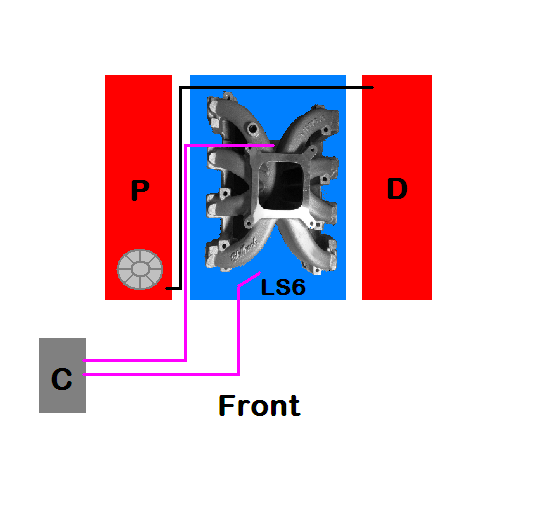
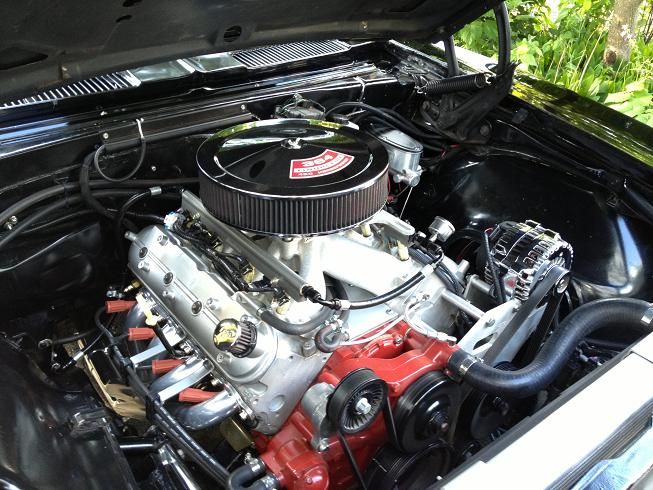
I just swapped out the LQ9 valley cover for an LS6 valley cover. The LS6 valley cover has an internal PCV valve with a vent tube coming out the front. I didn't have a PCV system before, just a hose running from one valve cover, to a vented catch can, to the other valve cover. And I have been getting a little oil pushing out from under the valve covers and from under the valley cover as well.
Here's what I had been running for a setup:
And the old LQ9 valley cover (that black hose in the middle attached to the vent tube on the front of the passenger side valve cover):

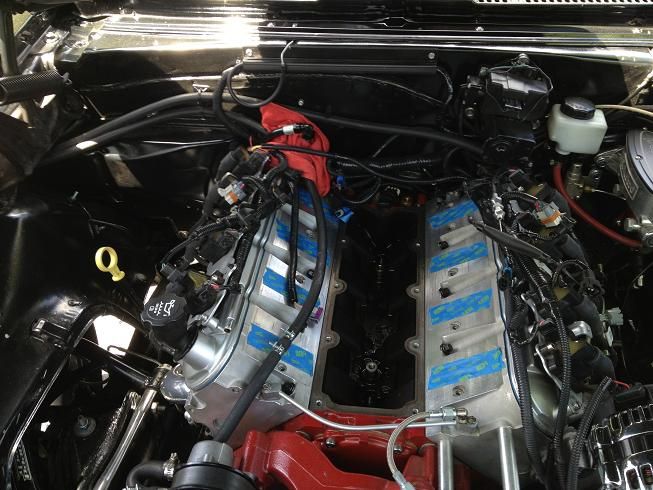
And this is the new setup:
And the new LS6 valley cover (I hadn't installed the knock sensors yet, and you can see the vent tube in front with a red cap on it):

Here it is all plumbed up and back together. It took about 2-2.5hrs start to finish, and now I have a working PCV. I have an oil cap breather installed on the drivers side valve cover, and the catch can is now a sealed system, but I didn't capture it in the pic.:

I have about 100 miles on it since the swap, and the oil problem seems to have been resolved. The engine sounds a little quieter now, and I don't have oil dripping down the back of it. I'll update again after a few hundred more miles.

I just swapped out the LQ9 valley cover for an LS6 valley cover. The LS6 valley cover has an internal PCV valve with a vent tube coming out the front. I didn't have a PCV system before, just a hose running from one valve cover, to a vented catch can, to the other valve cover. And I have been getting a little oil pushing out from under the valve covers and from under the valley cover as well.
Here's what I had been running for a setup:

And the old LQ9 valley cover (that black hose in the middle attached to the vent tube on the front of the passenger side valve cover):

And this is the new setup:

And the new LS6 valley cover (I hadn't installed the knock sensors yet, and you can see the vent tube in front with a red cap on it):

Here it is all plumbed up and back together. It took about 2-2.5hrs start to finish, and now I have a working PCV. I have an oil cap breather installed on the drivers side valve cover, and the catch can is now a sealed system, but I didn't capture it in the pic.:

I have about 100 miles on it since the swap, and the oil problem seems to have been resolved. The engine sounds a little quieter now, and I don't have oil dripping down the back of it. I'll update again after a few hundred more miles.
07-17-2014, 08:50 PM
#93
I finally tackled the coil pack relocation project. Like everything else, this seemed to take way longer than it should have. I had to figure out where I wanted to run my spark plug wires and how to keep them away from hot/moving parts.
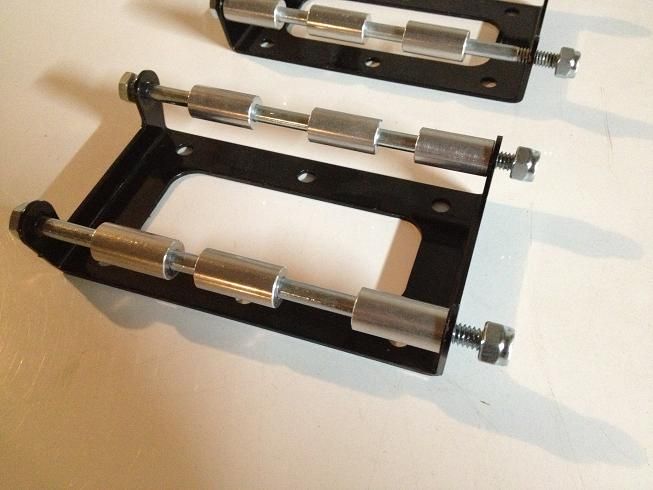
Here's the brackets I'll be using, they were $60 on eBay:
Here are one set of coils mocked up:
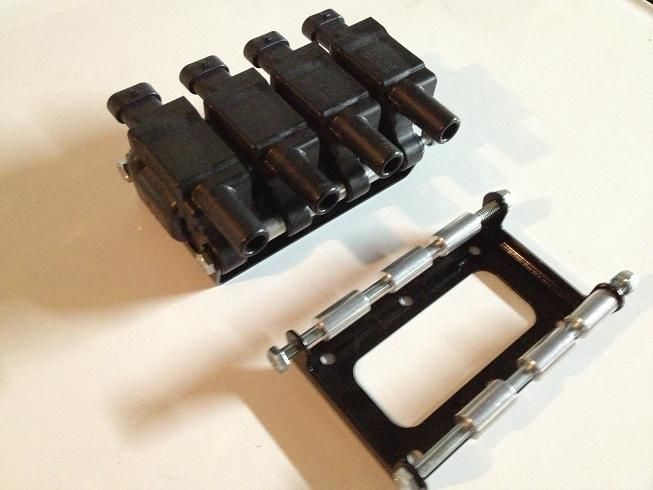
Here are the LS3 Coils on their stock bracket and then on the relocation bracket. A little more compact:
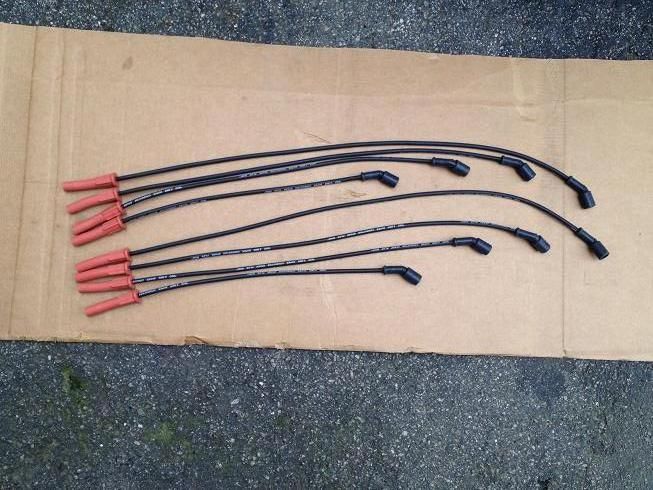
Here are the custom length plug wires I had made up. I'm not a fan of the red plugs, but I'm going to add some heat shield socks, so they will be covered up. These took forever to get from someone on here on LS1tech, and I didn't feel like sending them back to have the boots changed out.
I found a couple of locations up front that would work. This was my original thought:
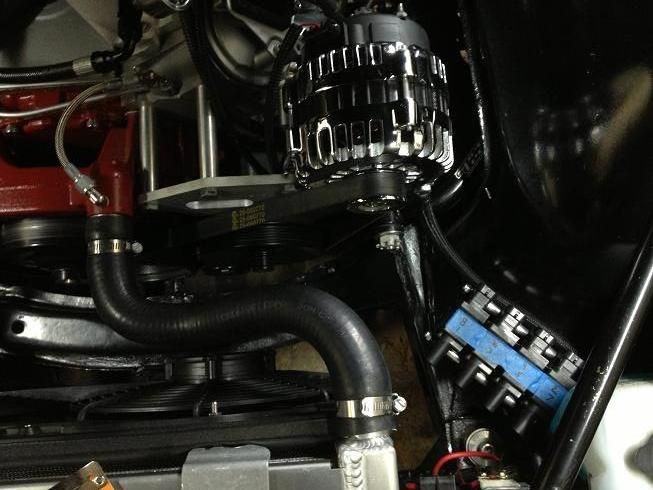
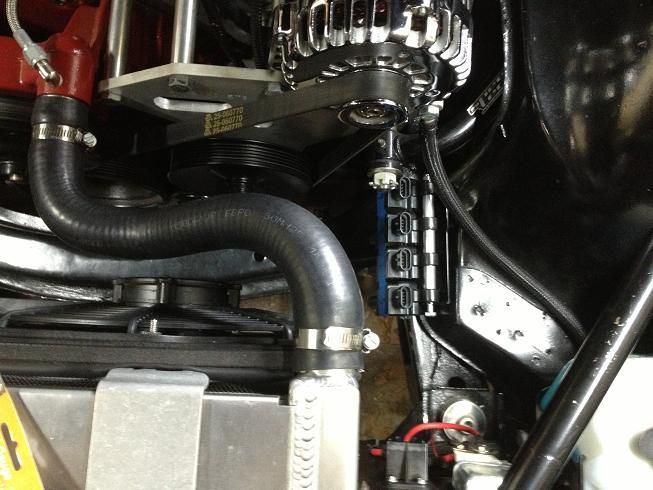
But I finally decided on this. I wanted them off the valve covers, but still accessible in case I ever had a problem with them:
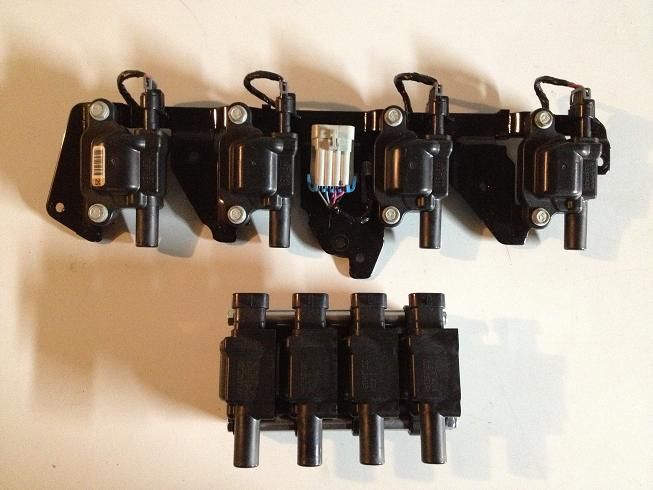
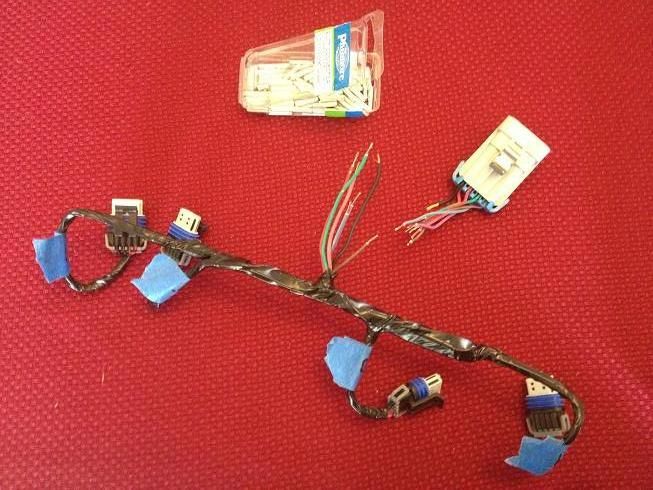
This is the original LS3 coil pack wiring harness. I staggered the cuts so I wouldn't end up with all the crimps in the same spot:
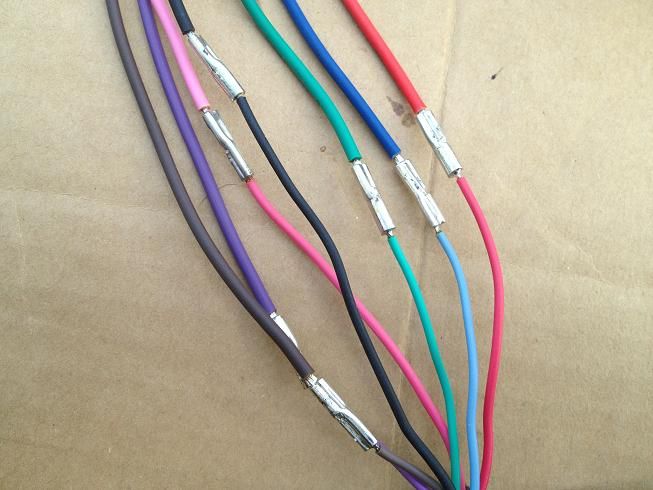
I ordered a bunch of automotive wiring on eBay and got to choose the colors. I tried to keep everything the same as the stock wiring, even if the shades are a little off:

All connections were crimped, soldered and then heat shrinked:
Here's the harness without the loom on it:
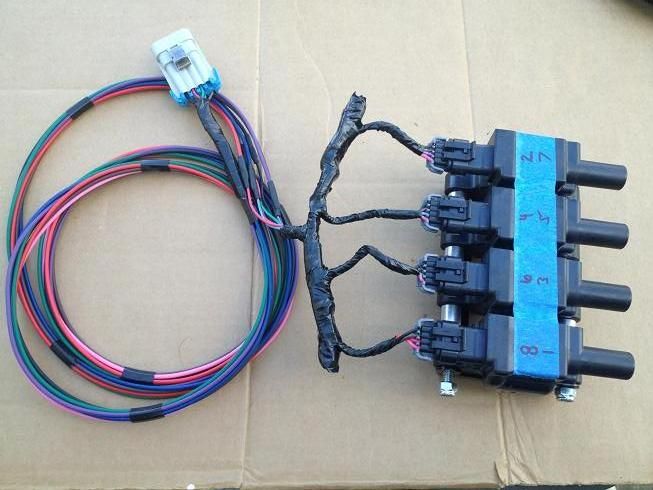
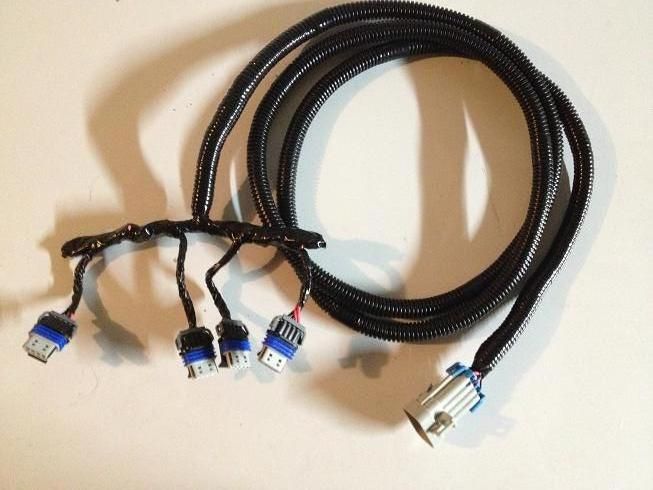
Here's the final extension harness. When I have some free time, I'm going to clean up the ends where it plugs into the packs. I didn't want to go cutting wires until I knew that everything worked first:
Here's the brackets I'll be using, they were $60 on eBay:

Here are one set of coils mocked up:

Here are the LS3 Coils on their stock bracket and then on the relocation bracket. A little more compact:

Here are the custom length plug wires I had made up. I'm not a fan of the red plugs, but I'm going to add some heat shield socks, so they will be covered up. These took forever to get from someone on here on LS1tech, and I didn't feel like sending them back to have the boots changed out.

I found a couple of locations up front that would work. This was my original thought:

But I finally decided on this. I wanted them off the valve covers, but still accessible in case I ever had a problem with them:

This is the original LS3 coil pack wiring harness. I staggered the cuts so I wouldn't end up with all the crimps in the same spot:

I ordered a bunch of automotive wiring on eBay and got to choose the colors. I tried to keep everything the same as the stock wiring, even if the shades are a little off:

All connections were crimped, soldered and then heat shrinked:

Here's the harness without the loom on it:

Here's the final extension harness. When I have some free time, I'm going to clean up the ends where it plugs into the packs. I didn't want to go cutting wires until I knew that everything worked first:
 07-17-2014, 08:50 PM
#94
Here's a before pic, with the big LQ9 coil packs still on the valve covers:
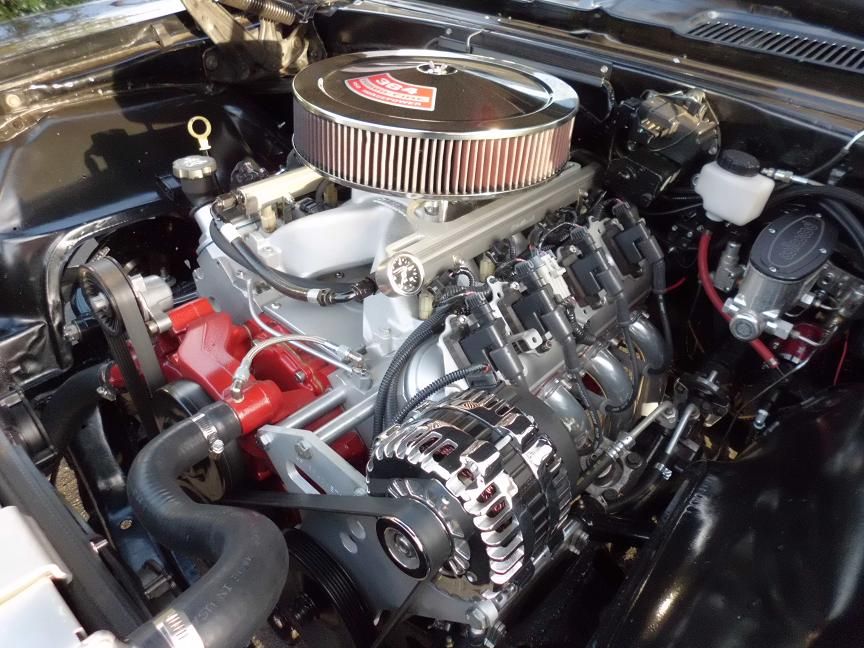
And a couple afters. I'll swap out the valve covers for some nicer one's once I find the right pair. But I'm happy with the result, it's definitely another step on the 'old school look' directions:
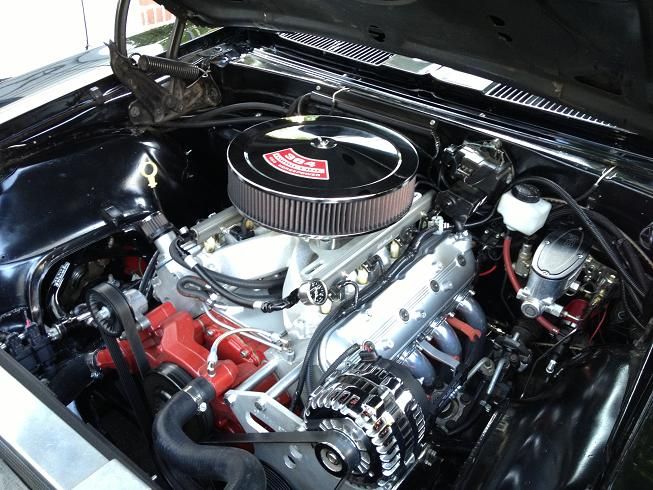

And a couple afters. I'll swap out the valve covers for some nicer one's once I find the right pair. But I'm happy with the result, it's definitely another step on the 'old school look' directions:

 07-18-2014, 07:10 PM
#96
Great job. Thks for posting all of the info and pics. I am in the process of an ls 2 with a t56 in a 68 Camaro. Also from a GTO so you just saved me days of research and frustration.
Thks
BobH
Thks
BobH
 07-19-2014, 07:22 AM
#99
Thanks! I haven't decided on the covers yet. I like some of the GM performance stuff. I'm going to photoshop some different options on and see what I like best. But right now I'm a few hundred miles from my computer, so it will have to wait till after the weekend.
07-19-2014, 08:17 AM
#100
I like the BMR crewmember however it is not clearanced for exhaust. What size exhaust are you running and how much clearance do you have ?
Also if possible can you post pictures from the side and underneath ?
Thks
BobH
Also if possible can you post pictures from the side and underneath ?
Thks
BobH