
Modified Truck Pan Question
 02-10-2014, 11:34 AM
#1
Teching In
Thread Starter
Join Date: Feb 2014
Location: Florida
Posts: 4
Likes: 0
Received 0 Likes
on
0 Posts
Hey guys,
I have an 89 RX7 and i'm swapping in a 5.3. I'm going to modify the oil pan instead of buying an F-body just because i'm cheap and like cutting/welding stuff. i have a bit of a strange question though.
In this thread the guy cuts 2.5in from the pan which makes the overall depth 5.75in and had to modify the truck pickup to fit the new pan depth. Which i understand fine and it looks like this will work well.
https://ls1tech.com/forums/conversio...-capacity.html
Now my question is can i just cut the pan 2.75in and make it the Camaro 5.5in depth and use the Camaro pickup? I feel like this would work but i honestly dont know. And before anyone freaks out i will have a filter relocation kit and a large Setrab oil cooler hooked up to this for added cooling and capacity. Any response would be appreciated!
 02-10-2014, 05:06 PM
#2

Frank
Glad you found my oil pan karate chop thread useful! FYI, 2500 miles later and no issues with the chopped pan set up. No starvation, no sloshing, no foaming, no loss of pressure, no leaking. Only issue I did have was the plug I had in the old oil level indicator location came a little loose and weeped an oil mess. I did end up using a 3/8� ball valve for a drain and it works well except it for drains SLOWLY. Like 20 minutes�Oh well, time to finish my beer before refilling.
If you attempt to chop and weld a pan in a similar fashion, I would warn you that it is very difficult to get a good weld from the dirty oil impregnated aluminum. We washed and brake cleaned and scrubbed and wire brushed and re brake cleaned and still had a tough time getting a good weld. You could smell the oil cook out, and see it rise to the surface of the weld puddle. Maybe a cycle in a hot tank, or a cook off session in the oven at 500 or an ultrasonic cleaner would help IDK. But just be prepared for a frustrating weld process!
Now as far as using an F-body pickup, I would recommend a test fit session first to confirm that the pick up is in the right location, and that the windage tray does not interfere. Truthfully chopping the pickup and shortening the dip stick was fun and excellent welding and fit up practice!
Now before you reply to this post, if you are going to be sticking around and diving into the awesome world of everything LS, go and post a thread in the introduction section and tell us about yourself, your car(s), interests, hobbies etc etc. Oh, and if you have a good looking significant other, some pics of her next to your car are always welcome. For vehicle size reference only of course! Welcome to LS1tech!
02-10-2014, 06:58 PM
#3
Teching In
Thread Starter
Join Date: Feb 2014
Location: Florida
Posts: 4
Likes: 0
Received 0 Likes
on
0 Posts
Frank
Glad you found my oil pan karate chop thread useful! FYI, 2500 miles later and no issues with the chopped pan set up. No starvation, no sloshing, no foaming, no loss of pressure, no leaking. Only issue I did have was the plug I had in the old oil level indicator location came a little loose and weeped an oil mess. I did end up using a 3/8� ball valve for a drain and it works well except it for drains SLOWLY. Like 20 minutes�Oh well, time to finish my beer before refilling.
If you attempt to chop and weld a pan in a similar fashion, I would warn you that it is very difficult to get a good weld from the dirty oil impregnated aluminum. We washed and brake cleaned and scrubbed and wire brushed and re brake cleaned and still had a tough time getting a good weld. You could smell the oil cook out, and see it rise to the surface of the weld puddle. Maybe a cycle in a hot tank, or a cook off session in the oven at 500 or an ultrasonic cleaner would help IDK. But just be prepared for a frustrating weld process!
Now as far as using an F-body pickup, I would recommend a test fit session first to confirm that the pick up is in the right location, and that the windage tray does not interfere. Truthfully chopping the pickup and shortening the dip stick was fun and excellent welding and fit up practice!
Now before you reply to this post, if you are going to be sticking around and diving into the awesome world of everything LS, go and post a thread in the introduction section and tell us about yourself, your car(s), interests, hobbies etc etc. Oh, and if you have a good looking significant other, some pics of her next to your car are always welcome. For vehicle size reference only of course! Welcome to LS1tech!
Glad you found my oil pan karate chop thread useful! FYI, 2500 miles later and no issues with the chopped pan set up. No starvation, no sloshing, no foaming, no loss of pressure, no leaking. Only issue I did have was the plug I had in the old oil level indicator location came a little loose and weeped an oil mess. I did end up using a 3/8� ball valve for a drain and it works well except it for drains SLOWLY. Like 20 minutes�Oh well, time to finish my beer before refilling.
If you attempt to chop and weld a pan in a similar fashion, I would warn you that it is very difficult to get a good weld from the dirty oil impregnated aluminum. We washed and brake cleaned and scrubbed and wire brushed and re brake cleaned and still had a tough time getting a good weld. You could smell the oil cook out, and see it rise to the surface of the weld puddle. Maybe a cycle in a hot tank, or a cook off session in the oven at 500 or an ultrasonic cleaner would help IDK. But just be prepared for a frustrating weld process!
Now as far as using an F-body pickup, I would recommend a test fit session first to confirm that the pick up is in the right location, and that the windage tray does not interfere. Truthfully chopping the pickup and shortening the dip stick was fun and excellent welding and fit up practice!
Now before you reply to this post, if you are going to be sticking around and diving into the awesome world of everything LS, go and post a thread in the introduction section and tell us about yourself, your car(s), interests, hobbies etc etc. Oh, and if you have a good looking significant other, some pics of her next to your car are always welcome. For vehicle size reference only of course! Welcome to LS1tech!
I posted in there already but i honestly thought no one would actually look at them haha. I made it short and to the point!
02-10-2014, 11:45 PM
#4
When we shortened a pan for my brothers swap I cleaned it out with carb cleaner and then soaked it in hot water with dawn dish soap a couple of times (left it soaking for a day each time) and the guy who welded it up didn`t mention having any issues with impregnated oil. Welds came out nice looking.
The only way to make an f-body pickup fit would be to extend the truck sump further forward.
The only way to make an f-body pickup fit would be to extend the truck sump further forward.
02-11-2014, 08:22 AM
#5
I pressure washed my pan and it took off the heavy stuff but it still wasn't clean. I then put my pan in the dishwasher (by itself) with regular dishwasher detergent. This was years ago - did it after mom went to bed.  It came out amazingly clean and welded without a problem. The only thing I didn't like is that there was a tiny tiny bit of flash rust on the steel oil filter threads but it wiped off instantly with an oily rag.
Forget all those harsh chemicals. The combination of soap, hot water, and steam do a really good job on aluminum parts. I'll be putting my front and rear covers for my new build in the dishwasher sometime in the next few weeks... this time after my wife goes to bed.
It came out amazingly clean and welded without a problem. The only thing I didn't like is that there was a tiny tiny bit of flash rust on the steel oil filter threads but it wiped off instantly with an oily rag.Forget all those harsh chemicals. The combination of soap, hot water, and steam do a really good job on aluminum parts. I'll be putting my front and rear covers for my new build in the dishwasher sometime in the next few weeks... this time after my wife goes to bed.
02-11-2014, 10:01 AM
#6
You are most welcome. I don't mind answering some questions, as long as you are not just being a lazy a$$ and not using the search tool! BTW, here is a handy search tip. You can direct a google search to only one site by putting "site:ls1tech.com" at the end of your search. For instance:
oil pan chop site:ls1tech.com
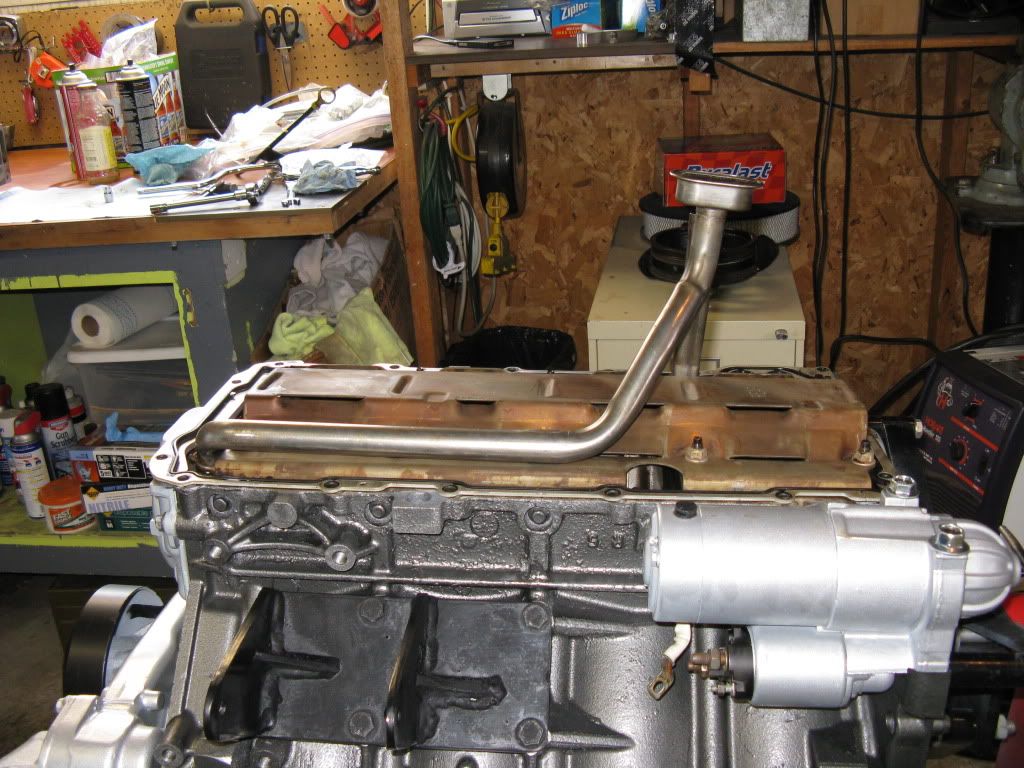
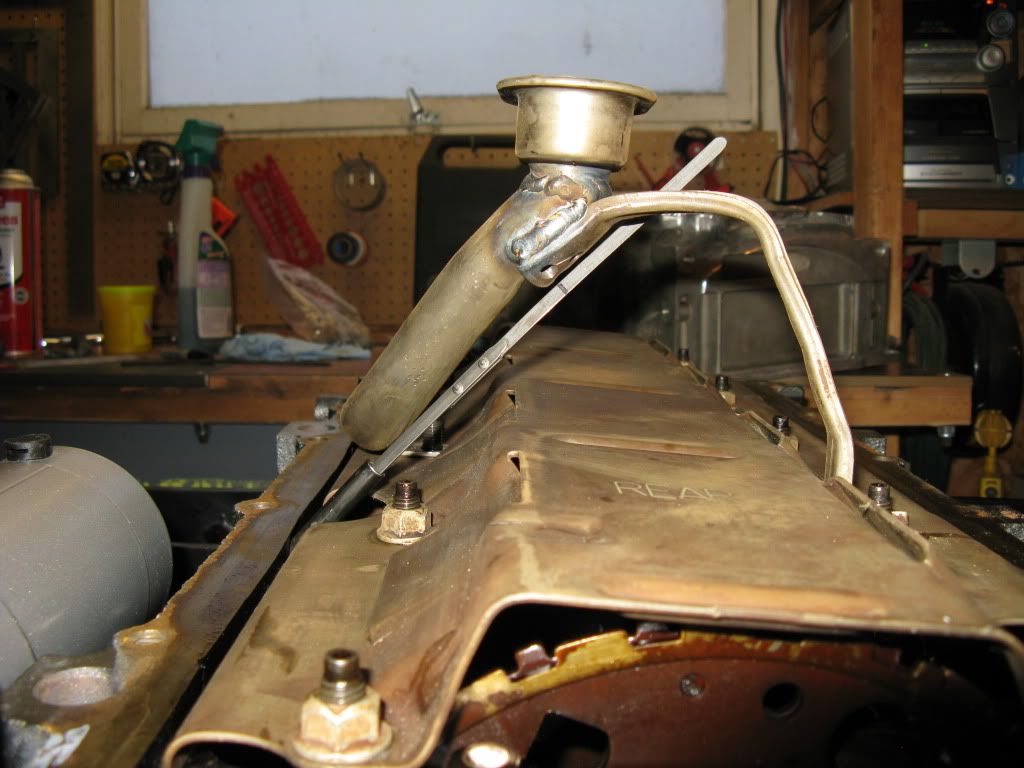
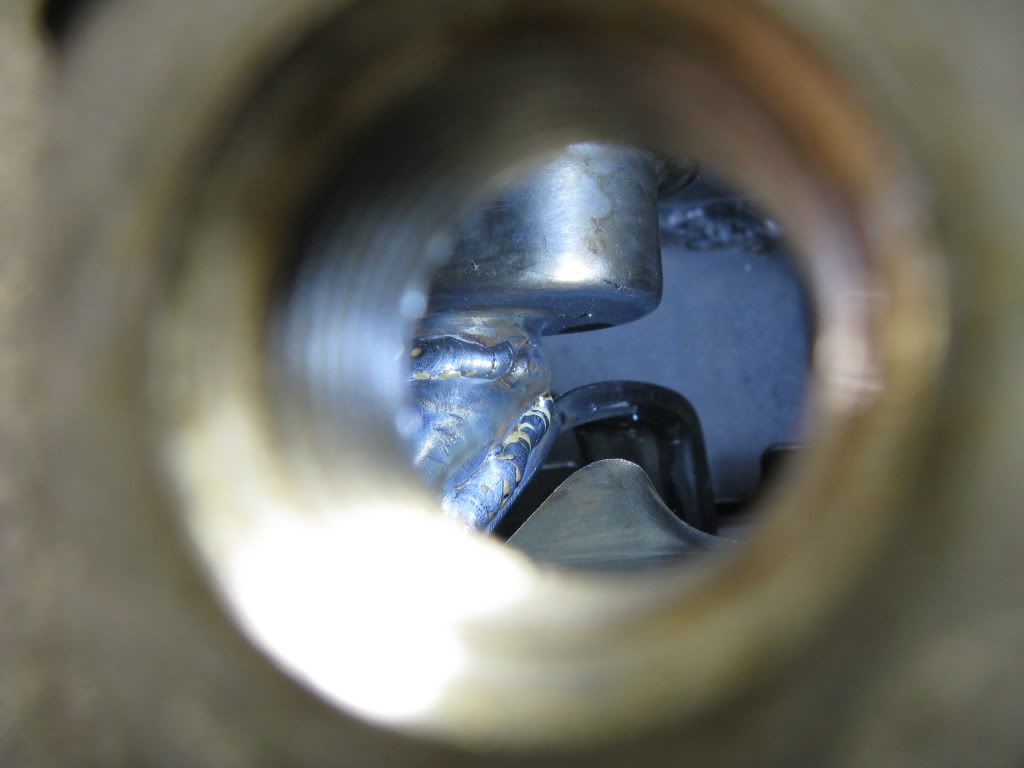
My build thread has quite a bit of detail in it pertaining to the oil pan chop and pickup fittment. And I think my photobucket account has even MORE pictures. Both are linked in my sig. One trick I used that I didn't describe in the build thread was that when I cut the pickup "head" (the oval piece with the screen) off the tube I left about 1/2" of tube on the head. Then I started taking SMALL cuts off the rest of the pickup tube. leaving the 1/2" of tube on the head allowed me to secure the head section to the tube with a worm clamp. Then I could test fit the oil pan and use modelling clay to check the pan to pickup clearance. I was aiming for 3/8", but ended up with just a little under 1/2". You don't want any less then 3/8" because of concerns that under high RPM the oil pump vacuum could pull the pickup down to the floor of the pan and starve the motor. Wife's tale? maybe, but I wasn't going to find out the hard way! I also found it handy to tape a flashlight INSIDE the oil pan during test fits was also helpful. I threw a couple of pics on because well...everyone loves pictures! If you have any more question just let me know. FYI, if you are in the market I have a spare truck pan, slosh tray and pickup I am looking to sell.
Stock pickup:
Chopped:
Inside pan:
Edit: Spelling corrections
oil pan chop site:ls1tech.com
My build thread has quite a bit of detail in it pertaining to the oil pan chop and pickup fittment. And I think my photobucket account has even MORE pictures. Both are linked in my sig. One trick I used that I didn't describe in the build thread was that when I cut the pickup "head" (the oval piece with the screen) off the tube I left about 1/2" of tube on the head. Then I started taking SMALL cuts off the rest of the pickup tube. leaving the 1/2" of tube on the head allowed me to secure the head section to the tube with a worm clamp. Then I could test fit the oil pan and use modelling clay to check the pan to pickup clearance. I was aiming for 3/8", but ended up with just a little under 1/2". You don't want any less then 3/8" because of concerns that under high RPM the oil pump vacuum could pull the pickup down to the floor of the pan and starve the motor. Wife's tale? maybe, but I wasn't going to find out the hard way! I also found it handy to tape a flashlight INSIDE the oil pan during test fits was also helpful. I threw a couple of pics on because well...everyone loves pictures! If you have any more question just let me know. FYI, if you are in the market I have a spare truck pan, slosh tray and pickup I am looking to sell.
Stock pickup:

Chopped:

Inside pan:

Edit: Spelling corrections
Last edited by cruisin'73; 02-11-2014 at 11:35 AM.
02-12-2014, 11:21 AM
#7
Teching In
Thread Starter
Join Date: Feb 2014
Location: Florida
Posts: 4
Likes: 0
Received 0 Likes
on
0 Posts
You are most welcome. I don't mind answering some questions, as long as you are not just being a lazy a$$ and not using the search tool! BTW, here is a handy search tip. You can direct a google search to only one site by putting "site:ls1tech.com" at the end of your search. For instance:
oil pan chop site:ls1tech.com
My build thread has quite a bit of detail in it pertaining to the oil pan chop and pickup fittment. And I think my photobucket account has even MORE pictures. Both are linked in my sig. One trick I used that I didn't describe in the build thread was that when I cut the pickup "head" (the oval piece with the screen) off the tube I left about 1/2" of tube on the head. Then I started taking SMALL cuts off the rest of the pickup tube. leaving the 1/2" of tube on the head allowed me to secure the head section to the tube with a worm clamp. Then I could test fit the oil pan and use modelling clay to check the pan to pickup clearance. I was aiming for 3/8", but ended up with just a little under 1/2". You don't want any less then 3/8" because of concerns that under high RPM the oil pump vacuum could pull the pickup down to the floor of the pan and starve the motor. Wife's tale? maybe, but I wasn't going to find out the hard way! I also found it handy to tape a flashlight INSIDE the oil pan during test fits was also helpful. I threw a couple of pics on because well...everyone loves pictures! If you have any more question just let me know. FYI, if you are in the market I have a spare truck pan, slosh tray and pickup I am looking to sell.
Stock pickup:
Chopped:
Inside pan:
Edit: Spelling corrections
 looks like someone tried to epoxy it back on. going to have to throw a few beads on there and see if i can fix it. Ill keep you guys updated.
 Trending Topics
02-12-2014, 03:31 PM
#8
This forum has been awesome so far! Thanks to everyone for the responses. The details and pictures are super helpful and i think the clay was a good idea. I was staring at the pan lastnight while i was coating some other parts and i think what im going to do is cut the 2.5 off the bottom of the pan and leave it open. this way using a straight edge i can cut and fit the pick-up tube perfect through the opening then close the pan up with a flat plate of aluminum. But i also found some cracks in the pan towards the flange looks like someone tried to epoxy it back on. going to have to throw a few beads on there and see if i can fix it. Ill keep you guys updated.
looks like someone tried to epoxy it back on. going to have to throw a few beads on there and see if i can fix it. Ill keep you guys updated.