
Project Sudden Delivery
 12-20-2014, 04:52 PM
#21


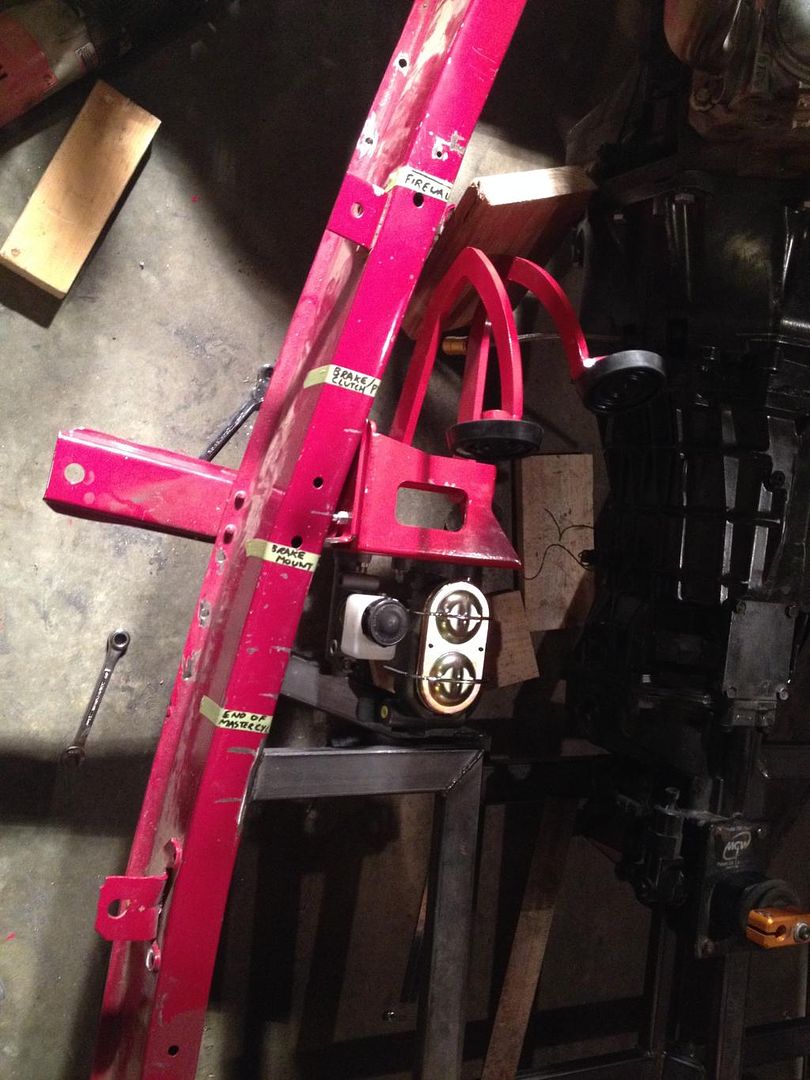
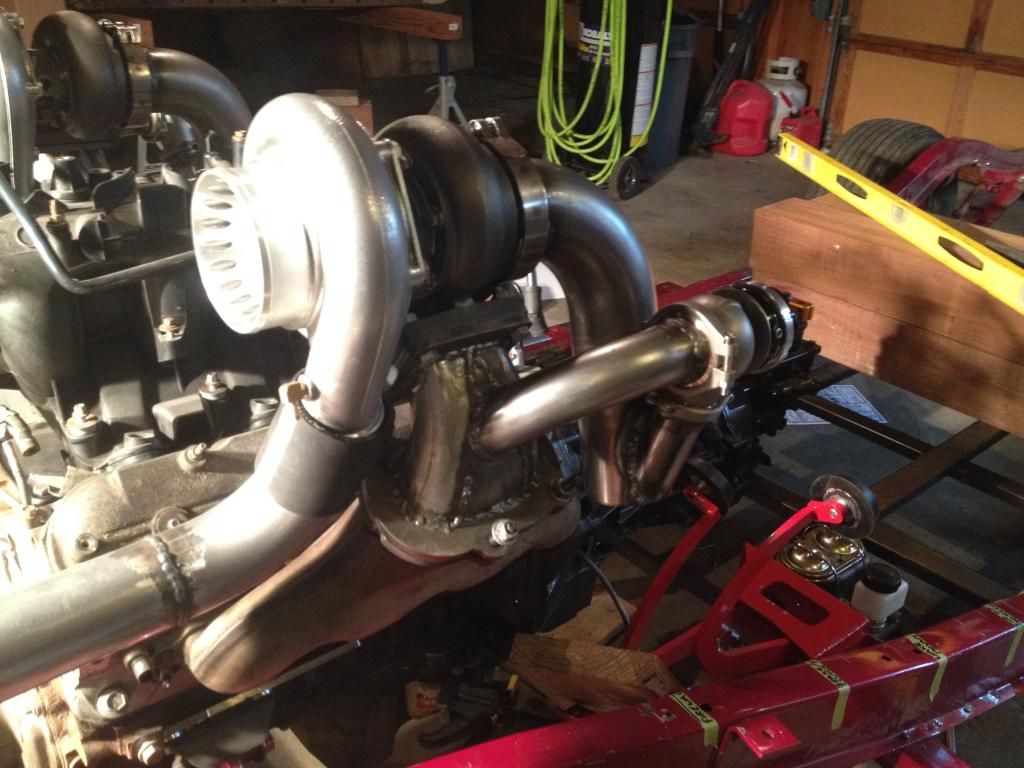
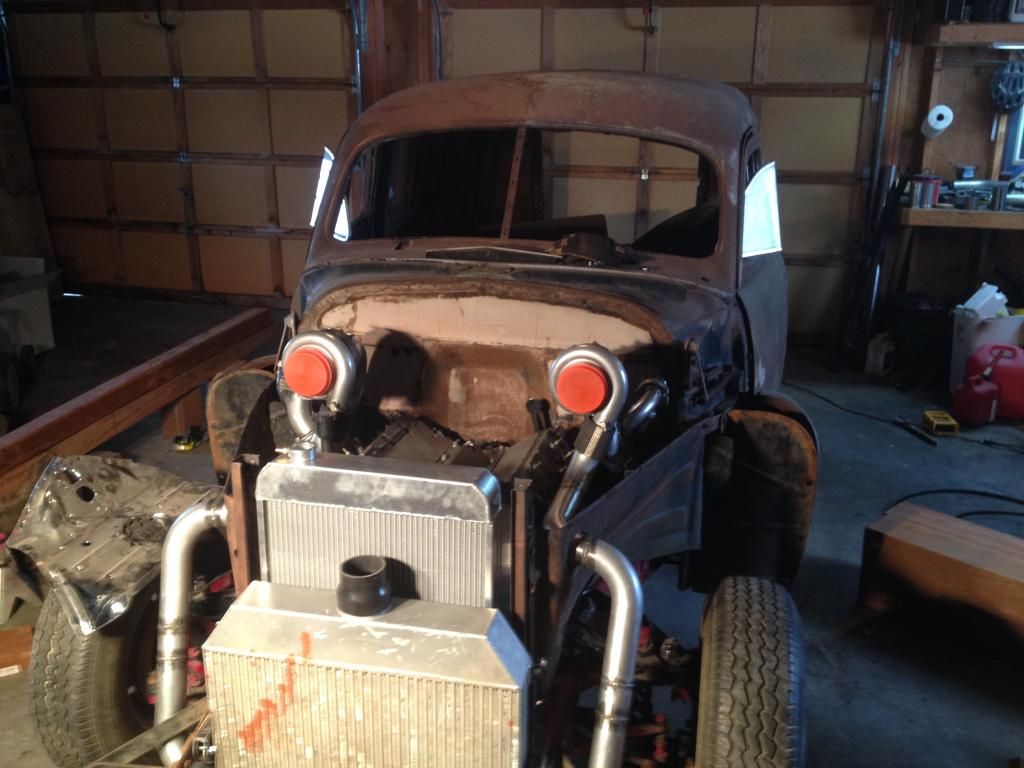
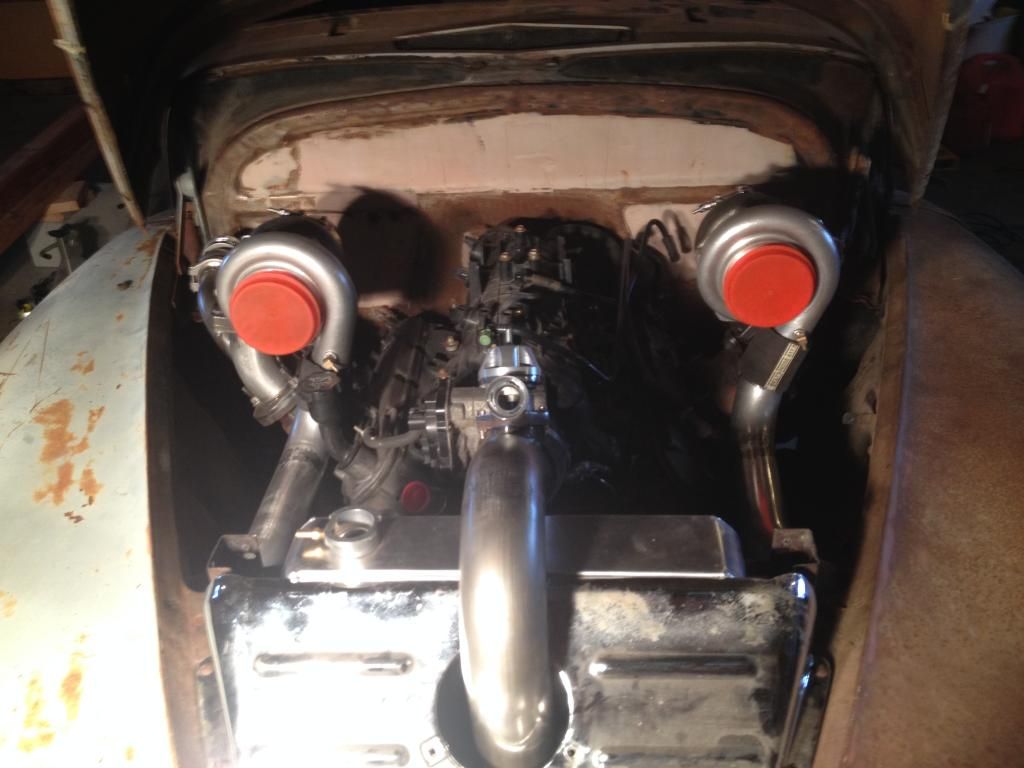
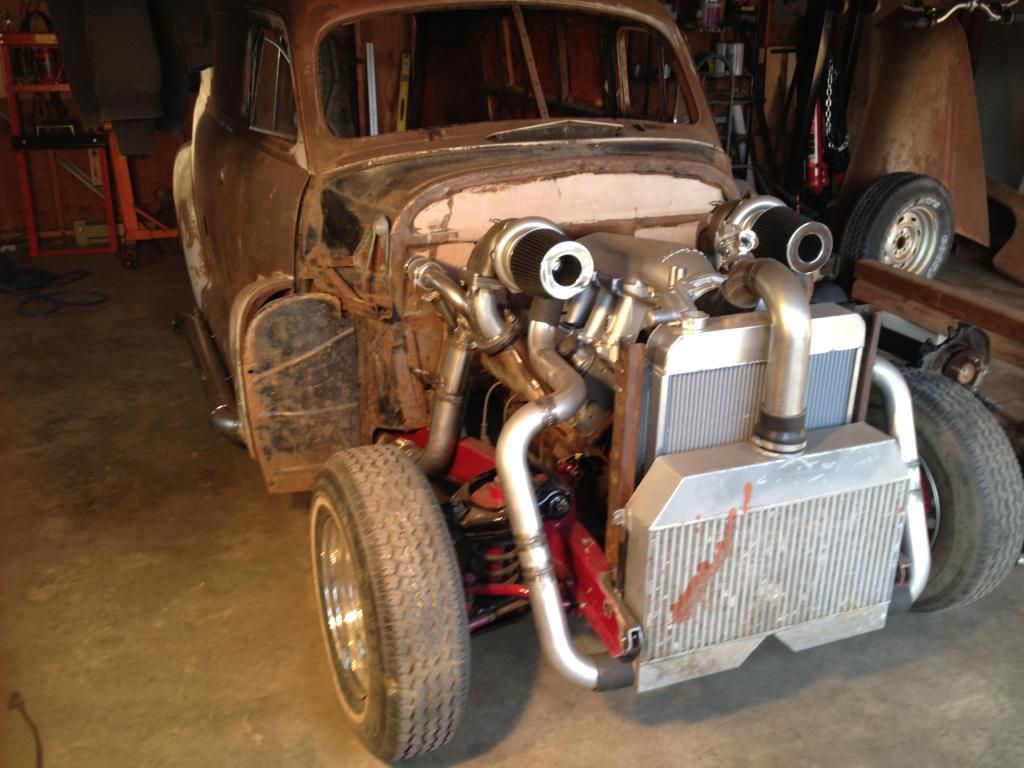
It has been a while since I've updated, I built the drivers side wastegate plumbing, installed my underfloor clutch/brake pedals, built a new radiator mount and fully welded all of my intake piping. Almost to the point of getting to work on the body! Here's some pics of recent progress. Let me know what you think!


 12-21-2014, 11:17 AM
#24
It's pretty tight. I don't have clamps on the couplers currently so they sag a bit but when they're tight I have a 1/2" of clearance on both sides when the wheel is turned all the way. I would've liked a little more clearance but the bumper brackets run trough the same space.
 12-28-2014, 05:18 PM
#26
Thanks Denmah, I must say all the info you've posted has been a great help in everything I'm attempting to do!
Small update for the long weekend...
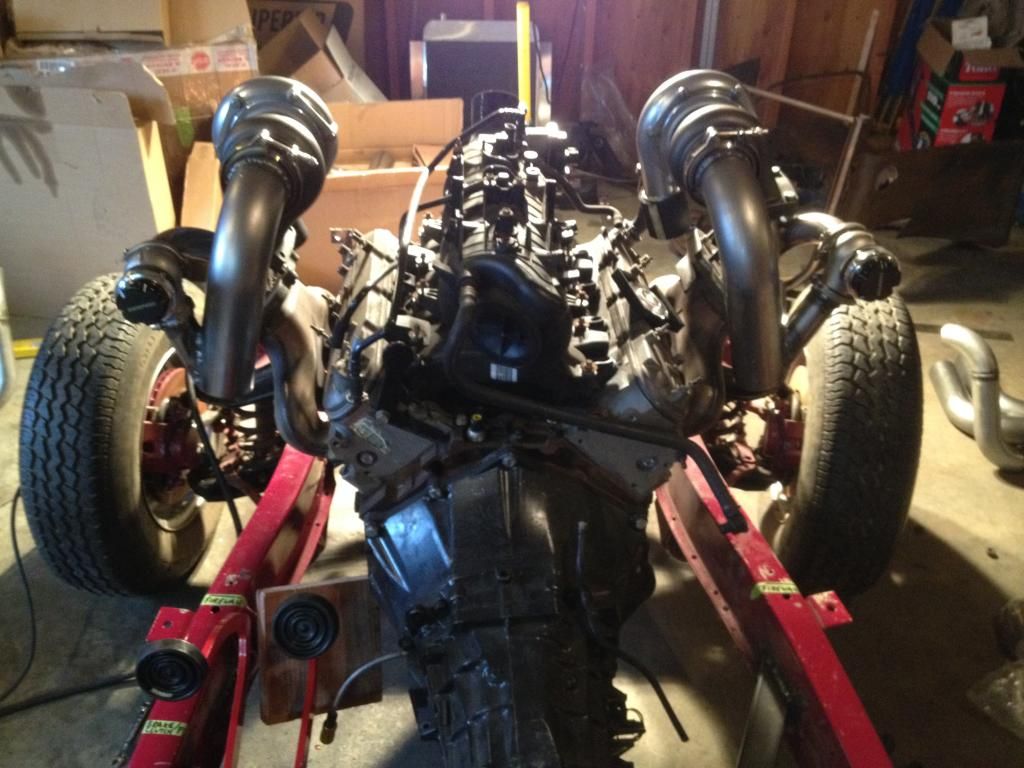
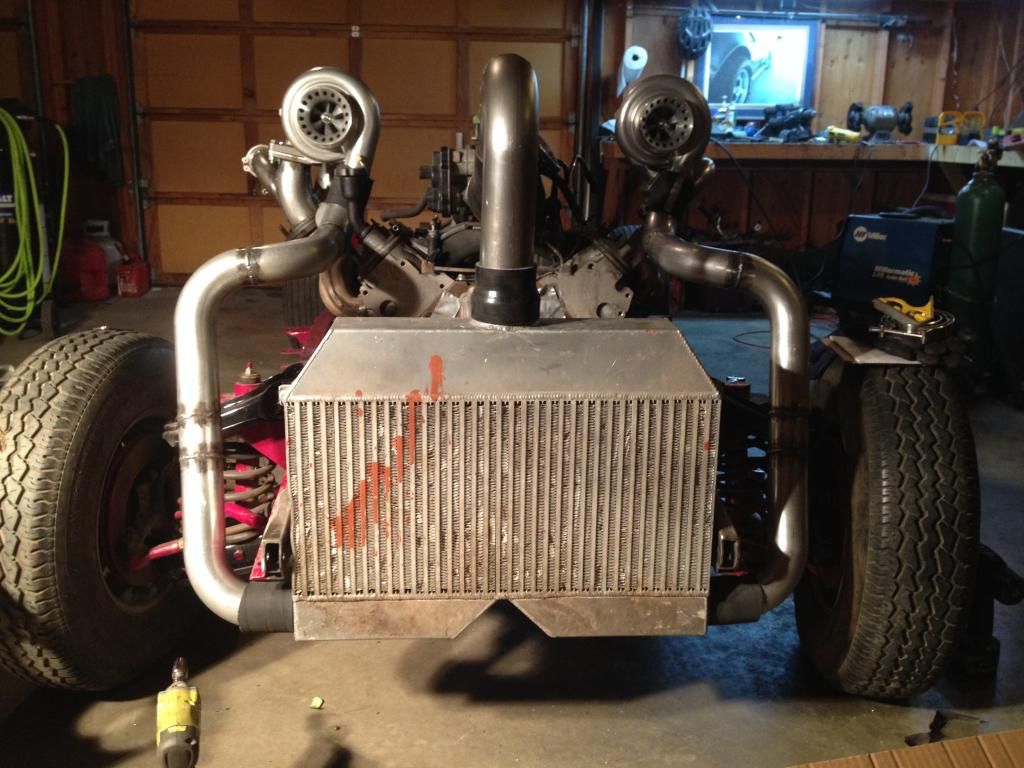
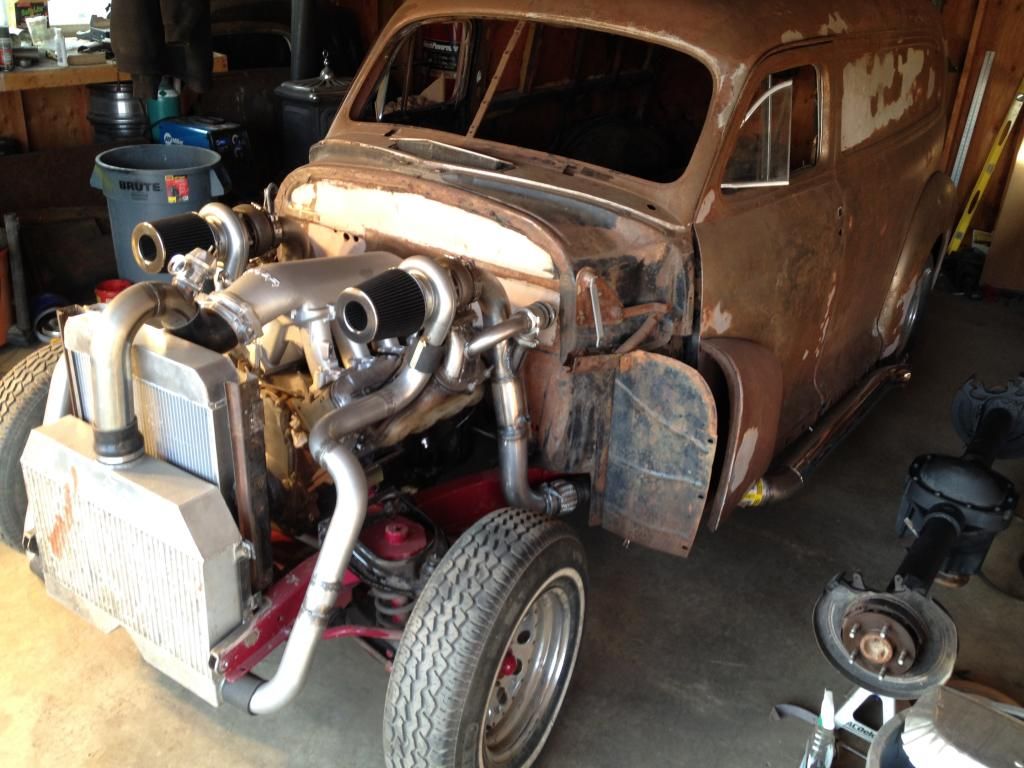
Did a little more work on the exhaust plumbing, but decided I needed the body on it in order to fit everything right. So I moved on to cleaning the inside of all my piping and smoothing the welds on the intake side (I'll leave the welds on the exhaust side as an added insurance against cracking). Then I lowered my radiator brace and mounted my radiator so my intake plumbing has plenty of clearance from the hood.
After doing all that and having some friends stop up and say it doesn't look like I've done anything, I decided to throw the body on it so there's noticeable changes, haha.
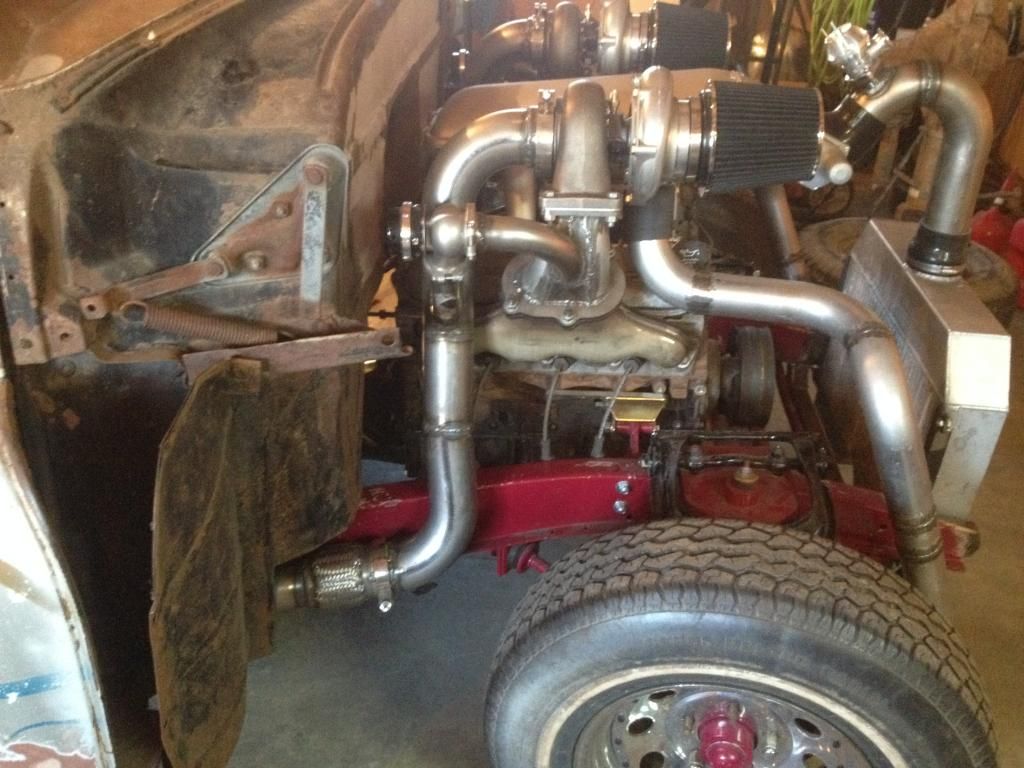
Here's a a few pics. Everything fits great. The turbos and plumbing clear the hood by ~2" and everything clears te firewall and I barely had to trim anything to slide the transmission in. To celebrate I'm spending the rest of the day brewing 2 5 gallon batches of beer while finishing off one of my last kegs!
On to the pictures!
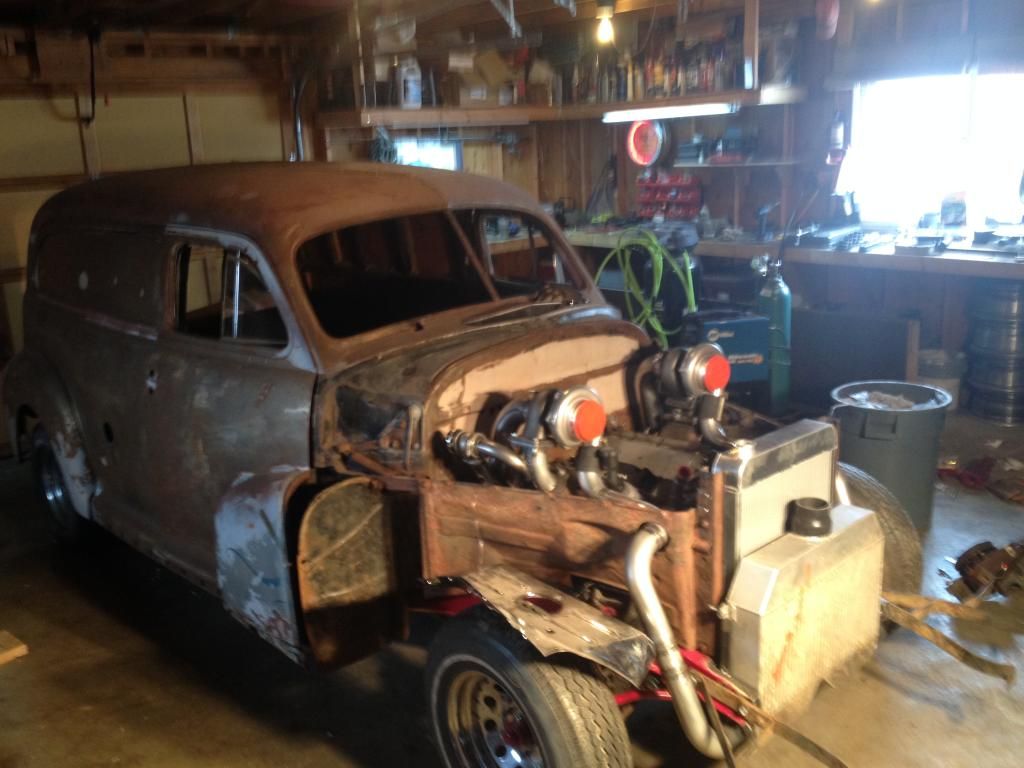
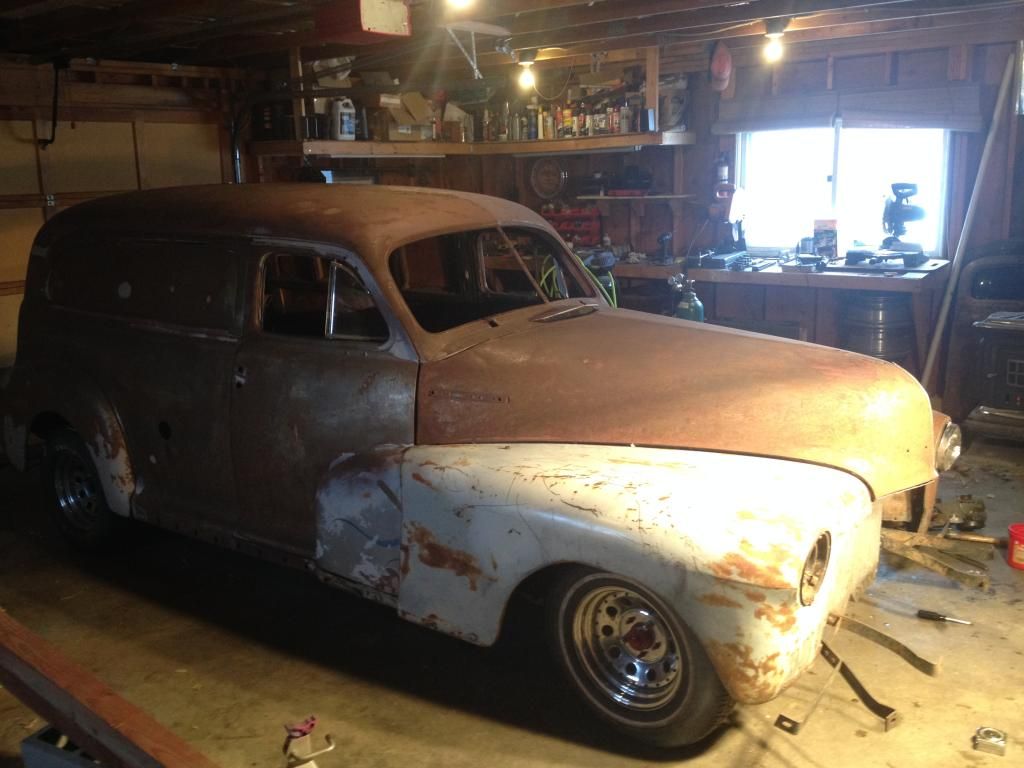
Let me know what you all think! I'm contemplating a 1-2" drop using drop spindles in the front and spacers in the rear to give it a good stance. Though I really like how everything looks very stock appearing from the outside.
Small update for the long weekend...
Did a little more work on the exhaust plumbing, but decided I needed the body on it in order to fit everything right. So I moved on to cleaning the inside of all my piping and smoothing the welds on the intake side (I'll leave the welds on the exhaust side as an added insurance against cracking). Then I lowered my radiator brace and mounted my radiator so my intake plumbing has plenty of clearance from the hood.
After doing all that and having some friends stop up and say it doesn't look like I've done anything, I decided to throw the body on it so there's noticeable changes, haha.
Here's a a few pics. Everything fits great. The turbos and plumbing clear the hood by ~2" and everything clears te firewall and I barely had to trim anything to slide the transmission in. To celebrate I'm spending the rest of the day brewing 2 5 gallon batches of beer while finishing off one of my last kegs!
On to the pictures!


Let me know what you all think! I'm contemplating a 1-2" drop using drop spindles in the front and spacers in the rear to give it a good stance. Though I really like how everything looks very stock appearing from the outside.
 12-28-2014, 05:39 PM
#28

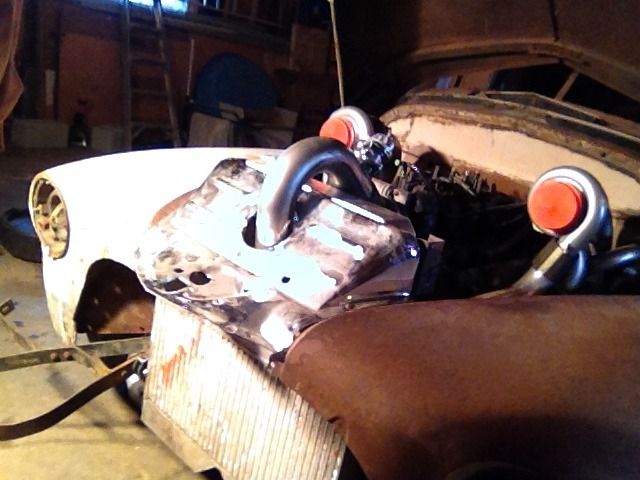
I really like the way that looks in the engine bay. Are you going to leave it rusty or paint it? That would be quite a surprise to open the hood on that in the stock body.
12-28-2014, 06:25 PM
#29
I agree with you 33willys. Living in Wyoming it's probably best I keep it high enough to be functional. I just want it to have a decently aggressive look where the wheels fill the openings. I still have the truck oil pan on and it gives me ~6 inches of clearance as it sits. If I swap pans the next lowest item is closer to 8-9, so I would still have a lot of room.
Casias, I plan on painting the body. I respect rat rods for what they are, but I want to have a painted finished hot rod when it's done. With that said I may try to keep it fairly stock looking so it's still a surprise when the hood is popped.
With the Unbrella Corporation urban camo truck a lot of people are telling me I should throw up some expanded metal and ammo cans and make a sinister rat rod instead but I'm just not feeling it.
 12-28-2014, 06:59 PM
#31
Haha, yeah it is Ironblocked. I've read through a lot of build that we're pretty much done by the time I started reading them so it feels slower than those, but to everyone around me (and my checkbook/credit) it is going pretty damn fast. I really like doing fiberglass/carbon fabrication and have a bunch on hand, so I keep telling myself to hurry to that point and then I can take my time and recoup costs and whatnot while working on interior and not spending much. My gf of 2 years seems a bit miffed that I've spent $$$$ on this and she has yet to see a ring 
12-29-2014, 02:48 AM
#32
On The Tree

Join Date: Nov 2012
Posts: 152
Likes: 0
Received 0 Likes
on
0 Posts
Haha, yeah it is Ironblocked. I've read through a lot of build that we're pretty much done by the time I started reading them so it feels slower than those, but to everyone around me (and my checkbook/credit) it is going pretty damn fast. I really like doing fiberglass/carbon fabrication and have a bunch on hand, so I keep telling myself to hurry to that point and then I can take my time and recoup costs and whatnot while working on interior and not spending much. My gf of 2 years seems a bit miffed that I've spent $$$$ on this and she has yet to see a ring
01-25-2015, 07:56 PM
#33
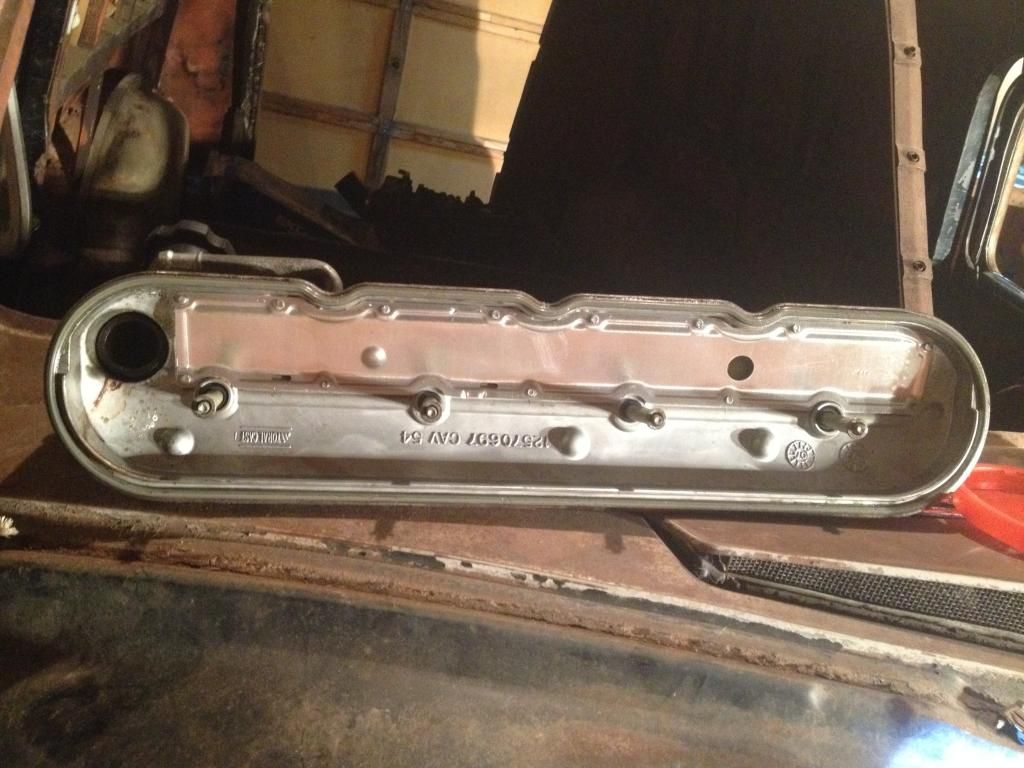
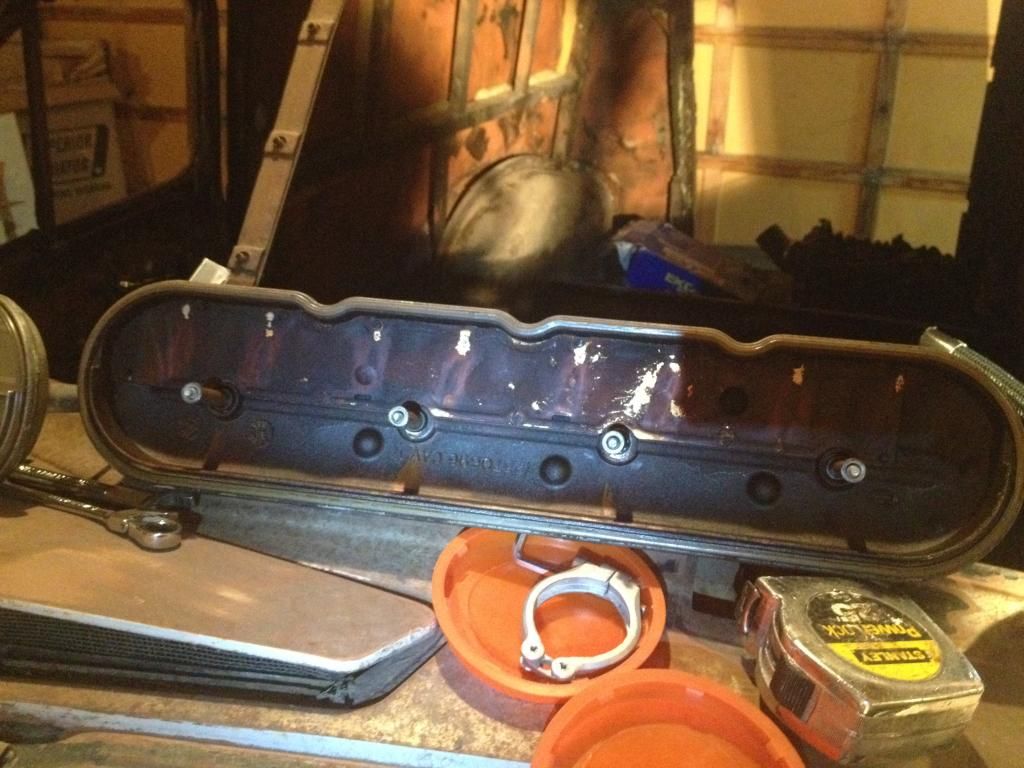
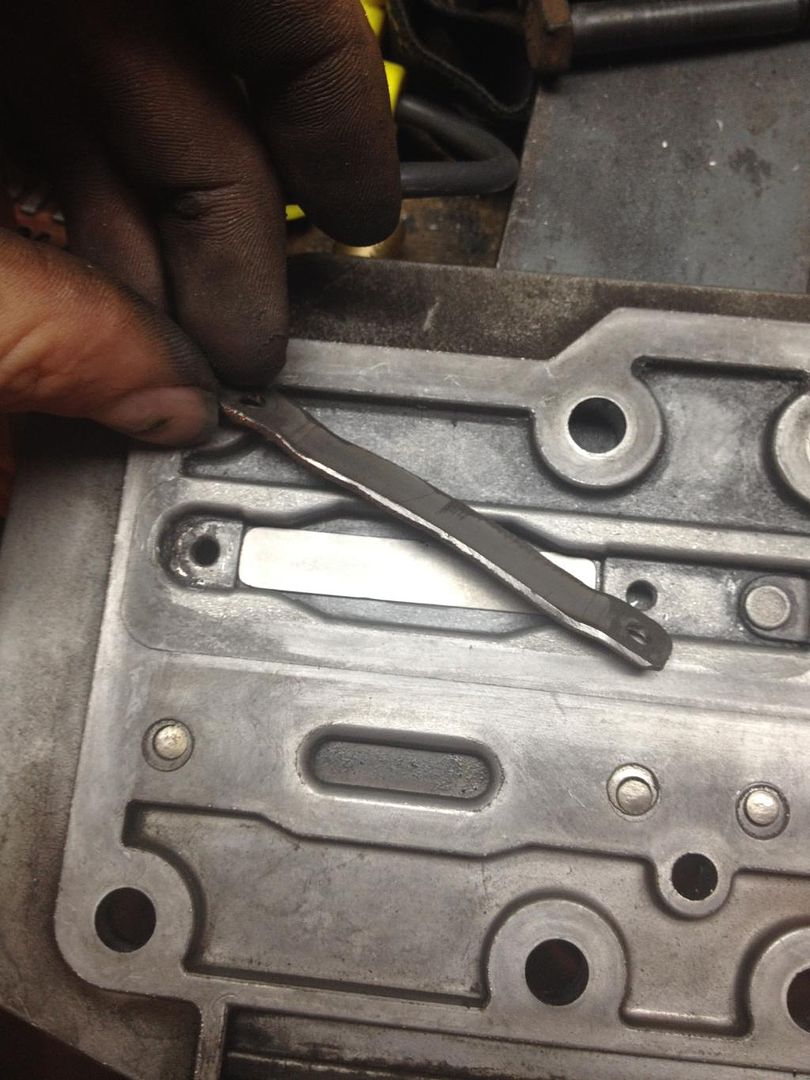
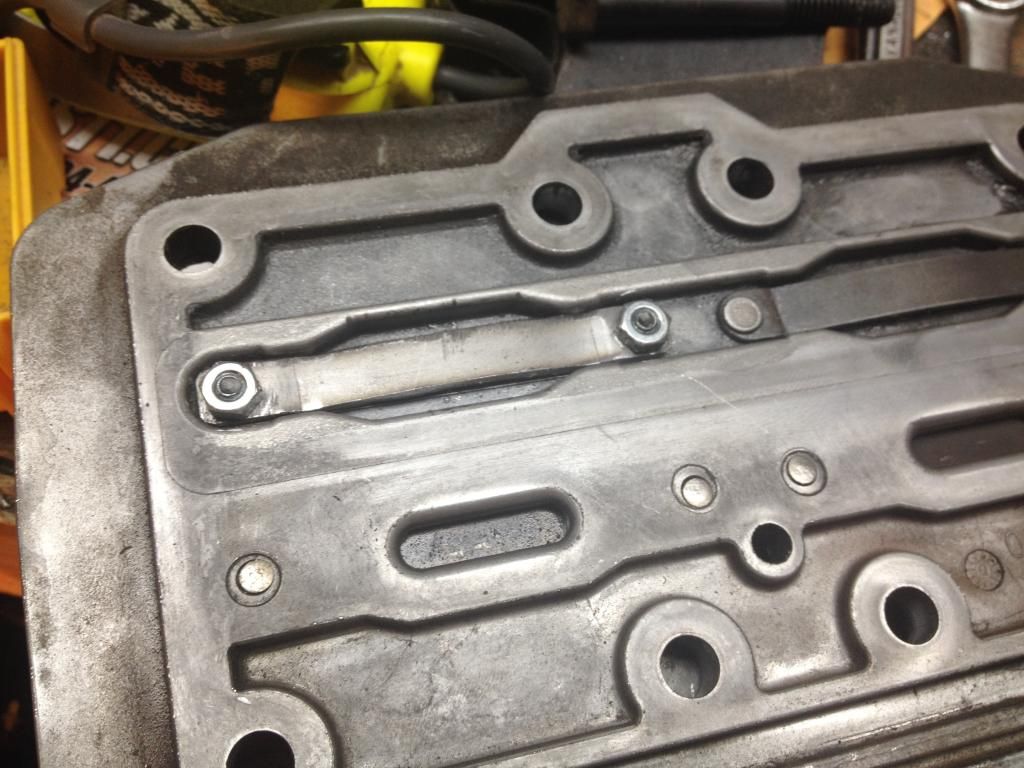
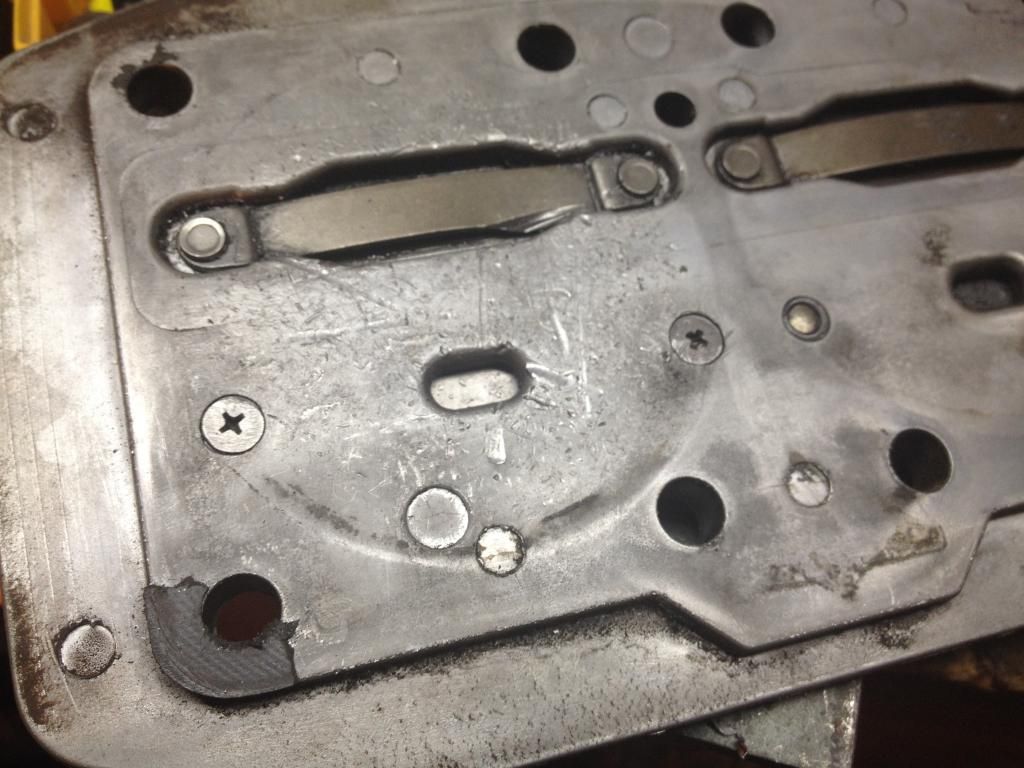
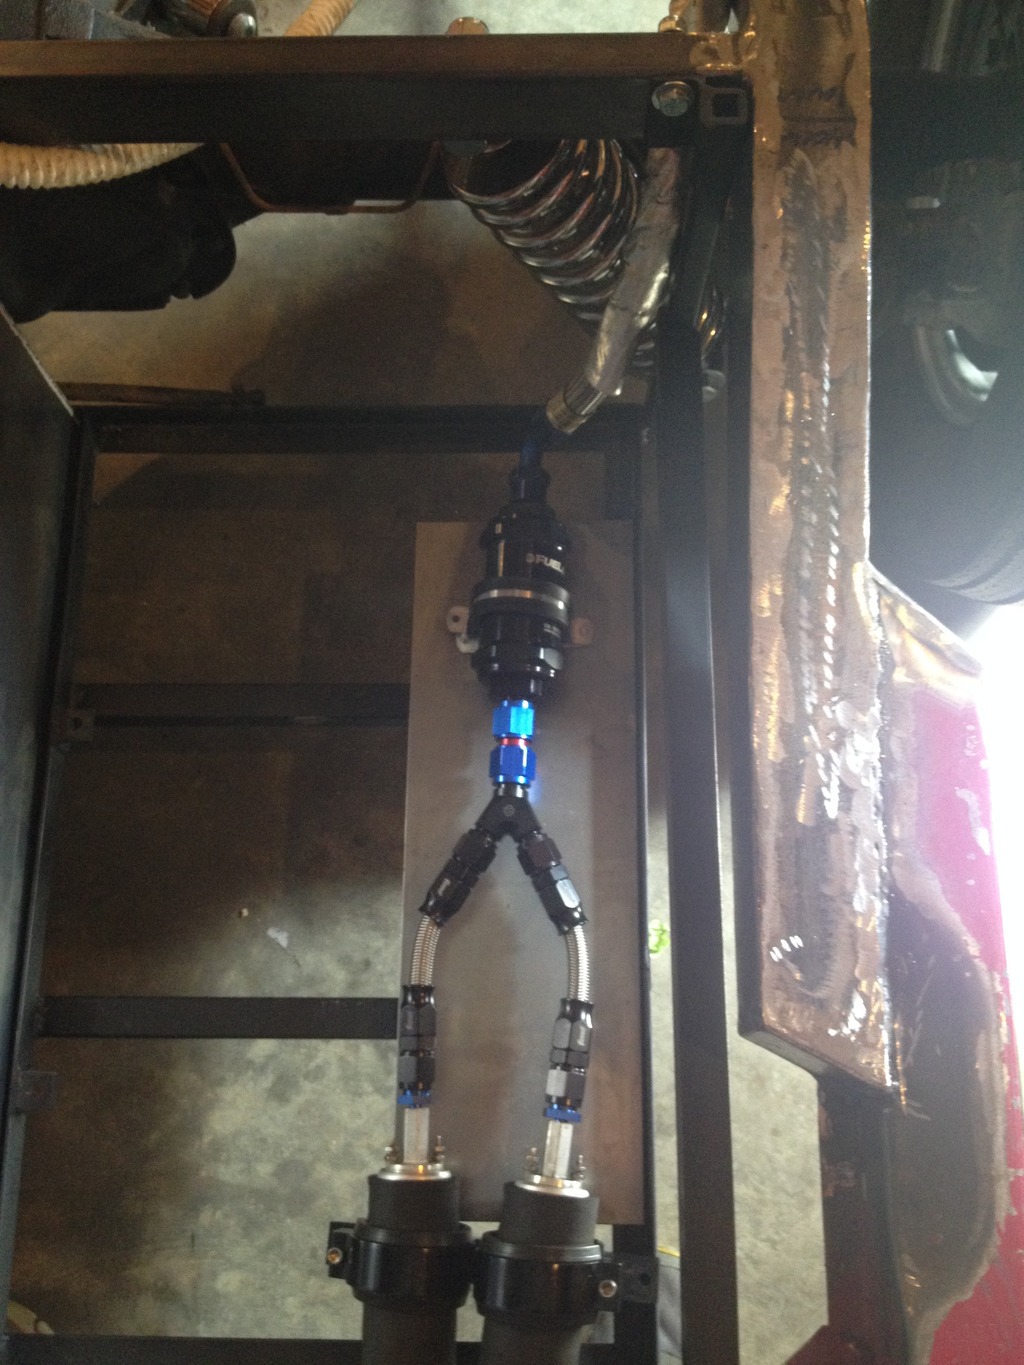
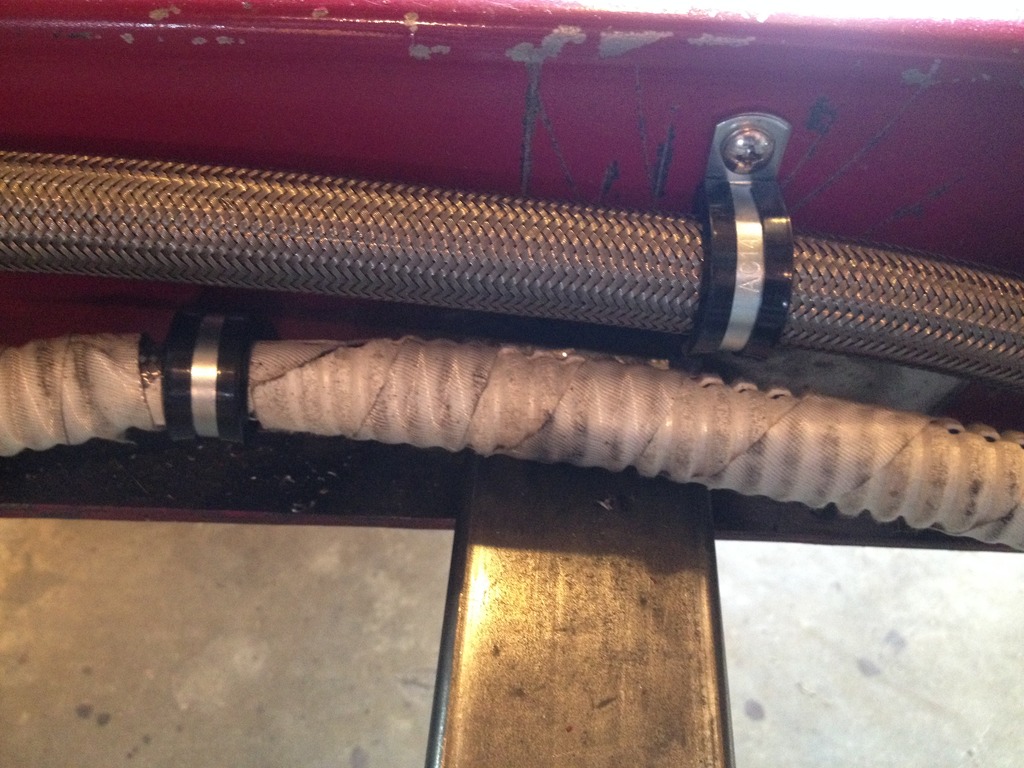
It's been a long time (4 weeks!) since I've updated this. I've been working on a lot of smaller, not so picture worthy, stuff. I put in new poly mounts for the engine and transmission. I picked up almost all of the fittings/AN lines for the oil and coolant cooling for the turbos. I also pulled the valve covers prepping for a cam and valve spring swap. Any idea why one cover is coated in 'cooked' oil and the other is virtually spotless? Anything to worry about?
Passenger Side:
Driver Side:
I then decided it was time to figure out what was wrong with my air compressor since I will be using it a lot in the near future.
Pulled the pump and popped the head off. Oops...
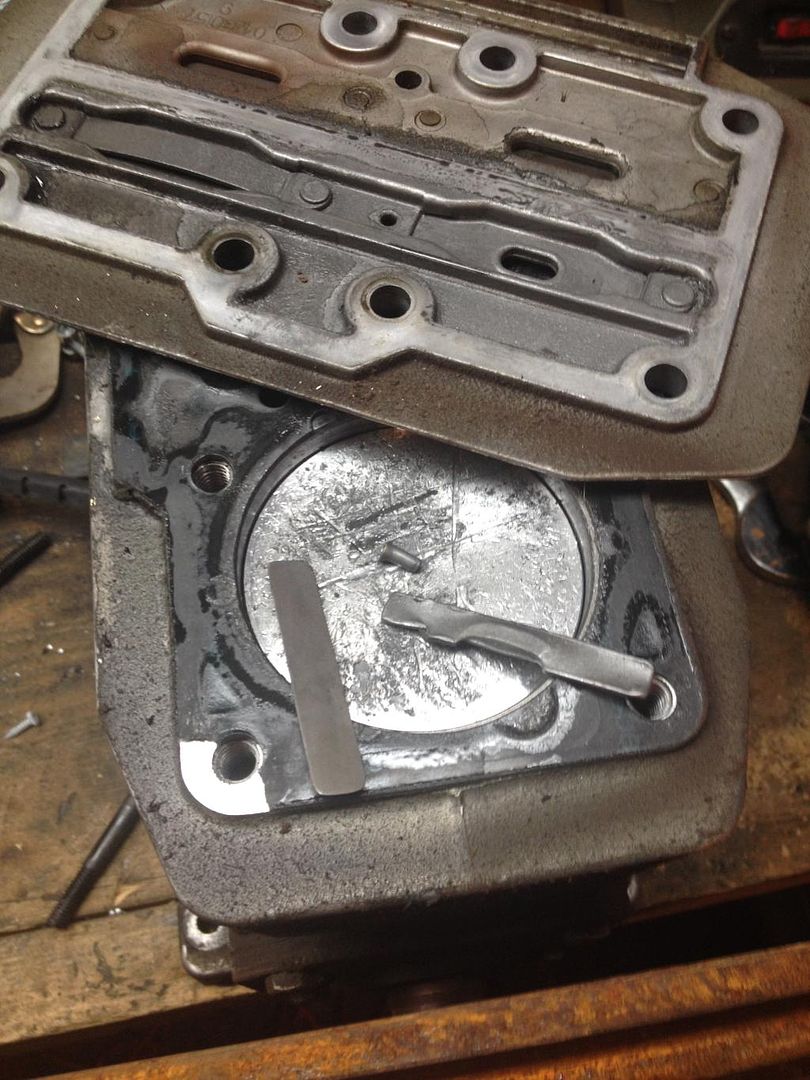
It seems one of the rivets failed that holds the spring which keeps the thin metal 'valve' in place.
Built a new one:
Used bolts to hold it in place:
Tested out great, but I couldn't find my Loctite so I'll be pulling it again and throwing some on the bolts.
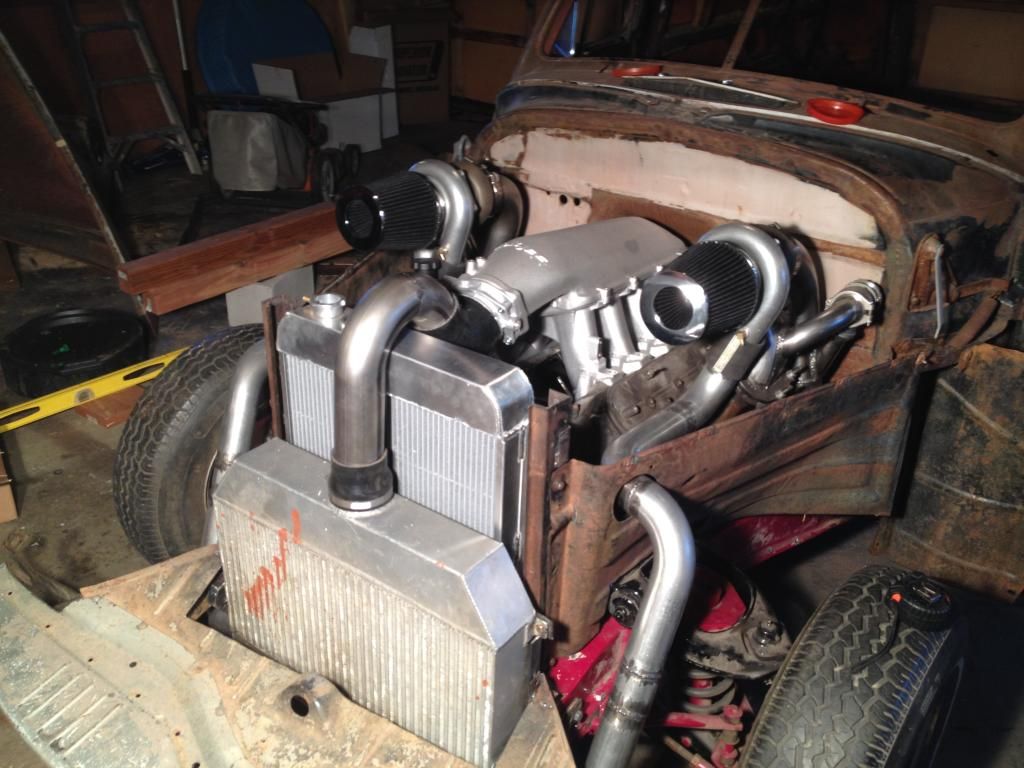
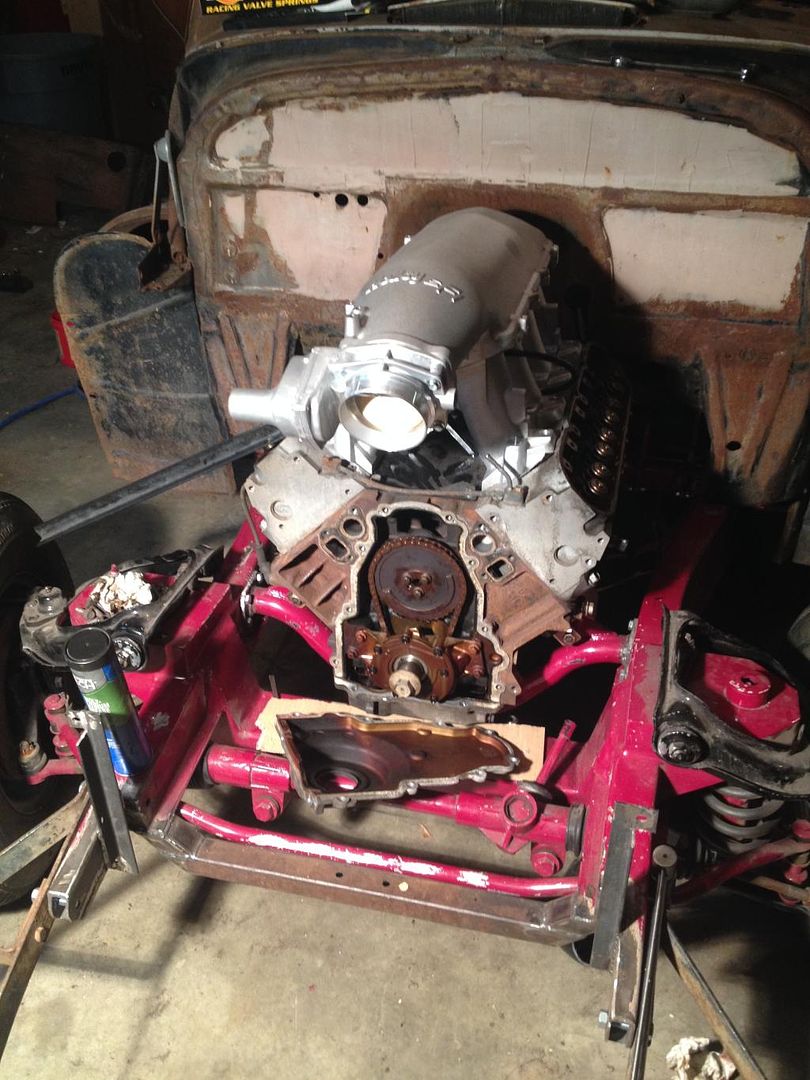
I also got my new TB in and decided to redo the plumbing to fit my new intake. Its a tight fit with the downward angle and the radiator, but it works!
I've also been doing some minor sheet metal work, and placed my pedals in the car, but I'm not particularly happy with how they sit, so I'll be changing them soon.
Passenger Side:

Driver Side:

I then decided it was time to figure out what was wrong with my air compressor since I will be using it a lot in the near future.
Pulled the pump and popped the head off. Oops...

It seems one of the rivets failed that holds the spring which keeps the thin metal 'valve' in place.
Built a new one:

Used bolts to hold it in place:


Tested out great, but I couldn't find my Loctite so I'll be pulling it again and throwing some on the bolts.
I also got my new TB in and decided to redo the plumbing to fit my new intake. Its a tight fit with the downward angle and the radiator, but it works!

I've also been doing some minor sheet metal work, and placed my pedals in the car, but I'm not particularly happy with how they sit, so I'll be changing them soon.
02-01-2015, 05:08 PM
#34
Update! Lingenfelter GT2-3 cam installed along with PAC 1218 springs. I feel it's a lot easier to do with the engine in the car on mine than it would've on an F-body!
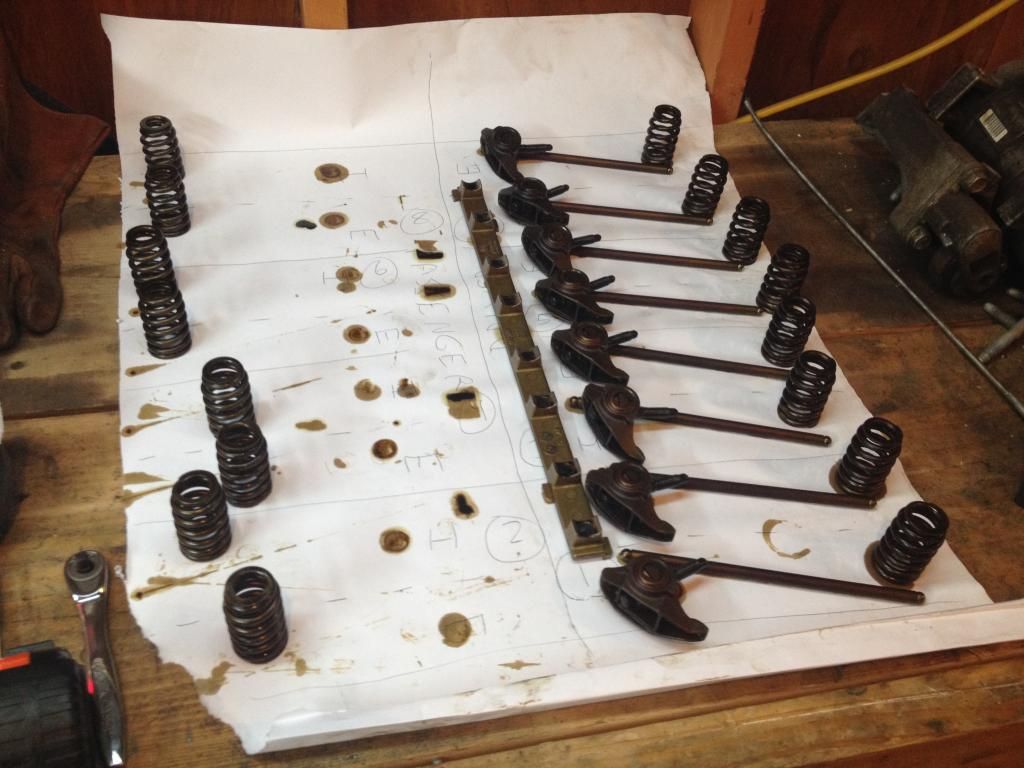
Tried to keep it cheap.
Here's a pic of my makeshift spring compressor:
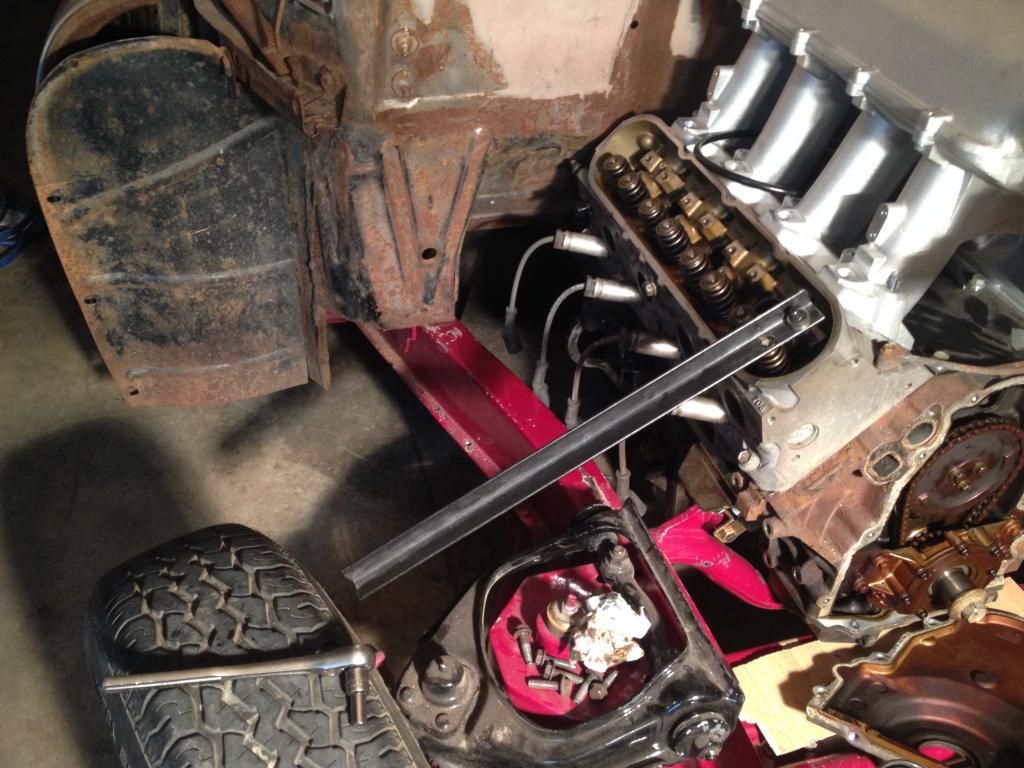
I also ran the exhaust down the outside of the frame:

Waiting on the rest of my fittings and exhaust parts. Then I'll pull the body off an run brake lines and get my fuel system in place. I've been putting my gf to work cleaning up the interior, scrubbing rust and cleaning out old seam sealer crap. Can't wait for warmer weather to really get to work on this thing!


Tried to keep it cheap.
Here's a pic of my makeshift spring compressor:

I also ran the exhaust down the outside of the frame:


Waiting on the rest of my fittings and exhaust parts. Then I'll pull the body off an run brake lines and get my fuel system in place. I've been putting my gf to work cleaning up the interior, scrubbing rust and cleaning out old seam sealer crap. Can't wait for warmer weather to really get to work on this thing!
03-09-2015, 10:29 AM
#35
Got the exhaust finished, pulled the body off (again) and tackled the rearend work that I wanted to do. I installed a triangulated 4-link and rear coilovers along with my Ford 8.8 inch rearend with disc brakes. I also narrowed the frame rails 3.25" on each side. I can now fit 15" wide tires with the right wheel offset!
Most of te pics are with my phone again, but my dad came over and took a few with his DSLR also, so there's some nice ones too.


Let me know what you guys think!
Most of te pics are with my phone again, but my dad came over and took a few with his DSLR also, so there's some nice ones too.


Let me know what you guys think!
 03-09-2015, 02:36 PM
#37

Freaking awesome. I love the way the pipe comes through the "core support"/hood latch area. Nice work
Definitely toss a set of drop spindles on it imo. everything looks better lower lol
Definitely toss a set of drop spindles on it imo. everything looks better lower lol
04-27-2015, 10:54 PM
#39
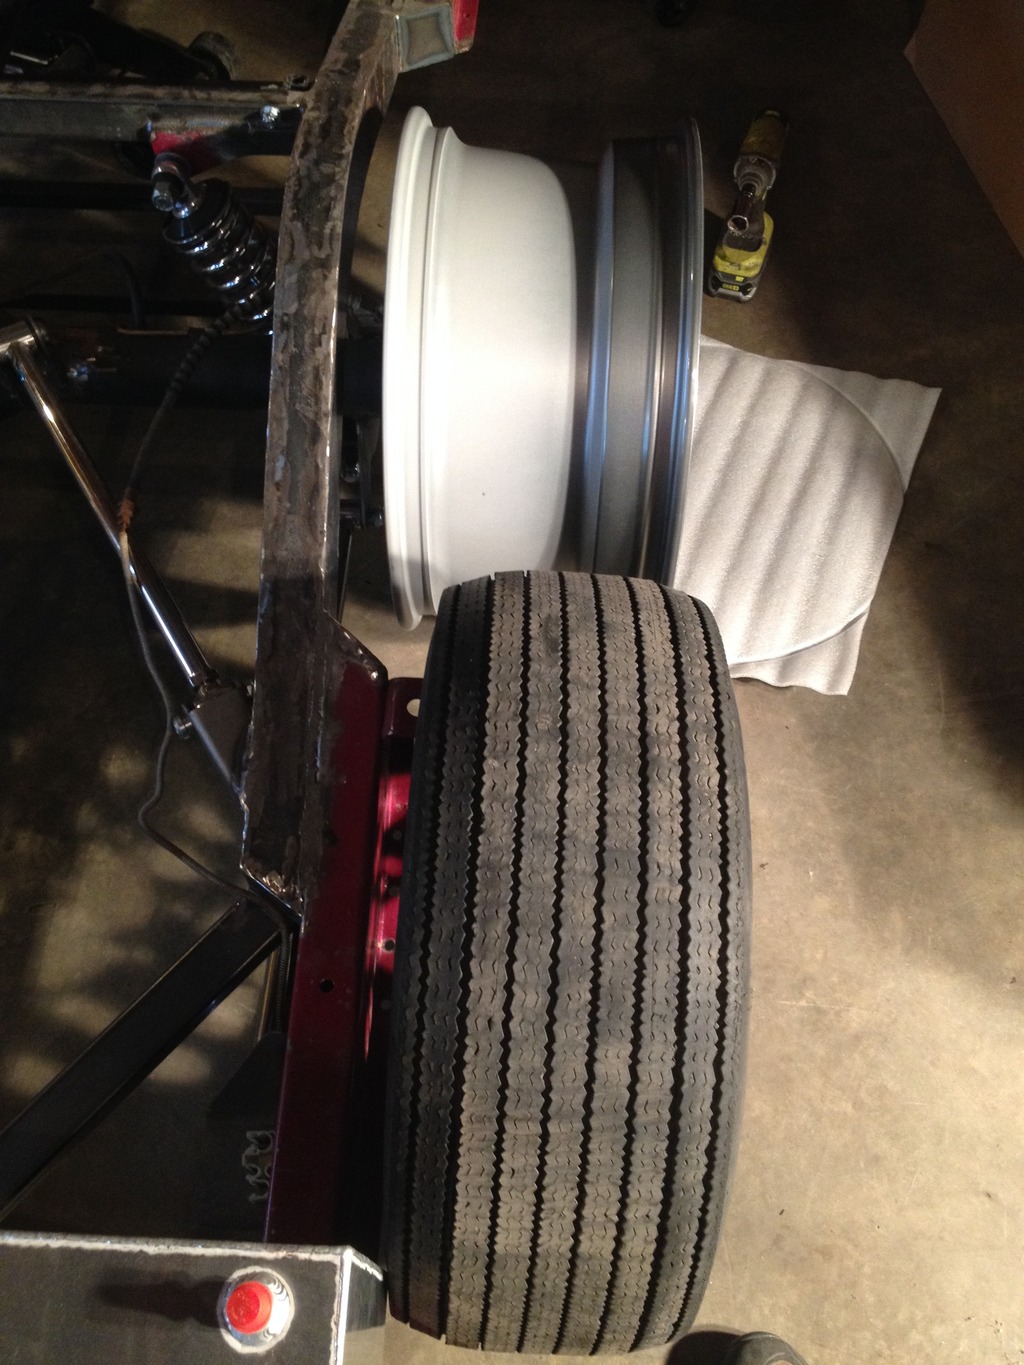
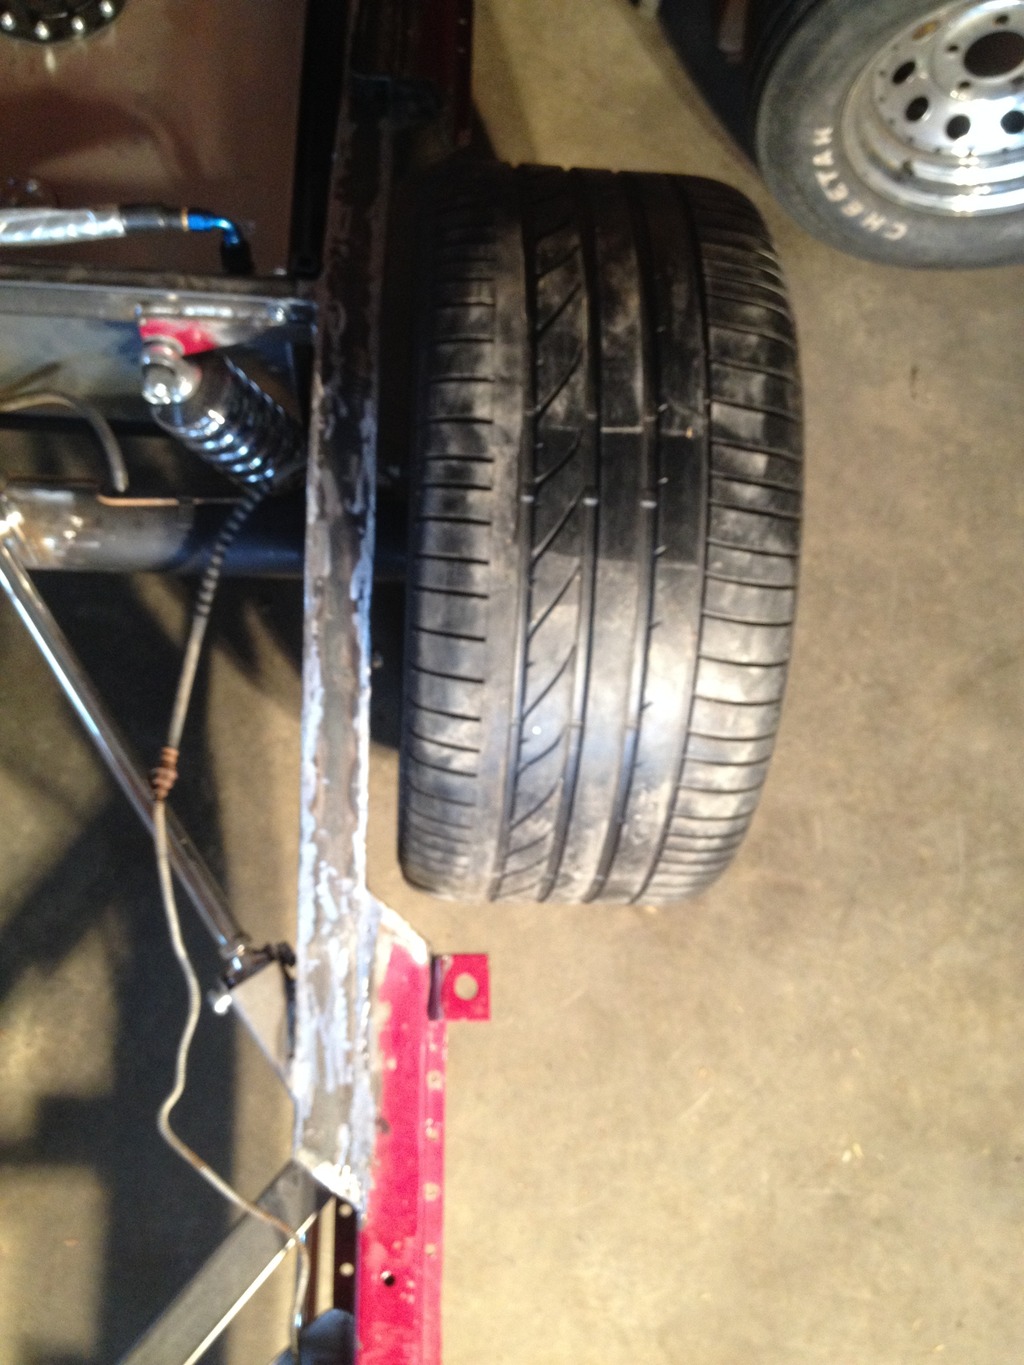
Well, it's been a LOOONG time since I've updated this. I've been very busy. Picked up an 'adjunct professor' job teaching Elementary Surveying at the local community college, plus I had to do a lot of studying for my Professional Engineering exam that I sat for on April 17th. Despite these 'distractions' I've still managed to get some work done on the car. I finished my dual cell cage and I finished all of my fuel lines, mounted them all with insulated clamps using riv-nut threaded inserts in the frame.
I picked out a set of wheels, and a set of 'temporary' tires while I work the bugs out of the car. The wheels are American Racing Torque Thrust Ms in 20x10. And the tires are 315/35/20s. A bit narrower than my final goal, but they'll do the job for now.


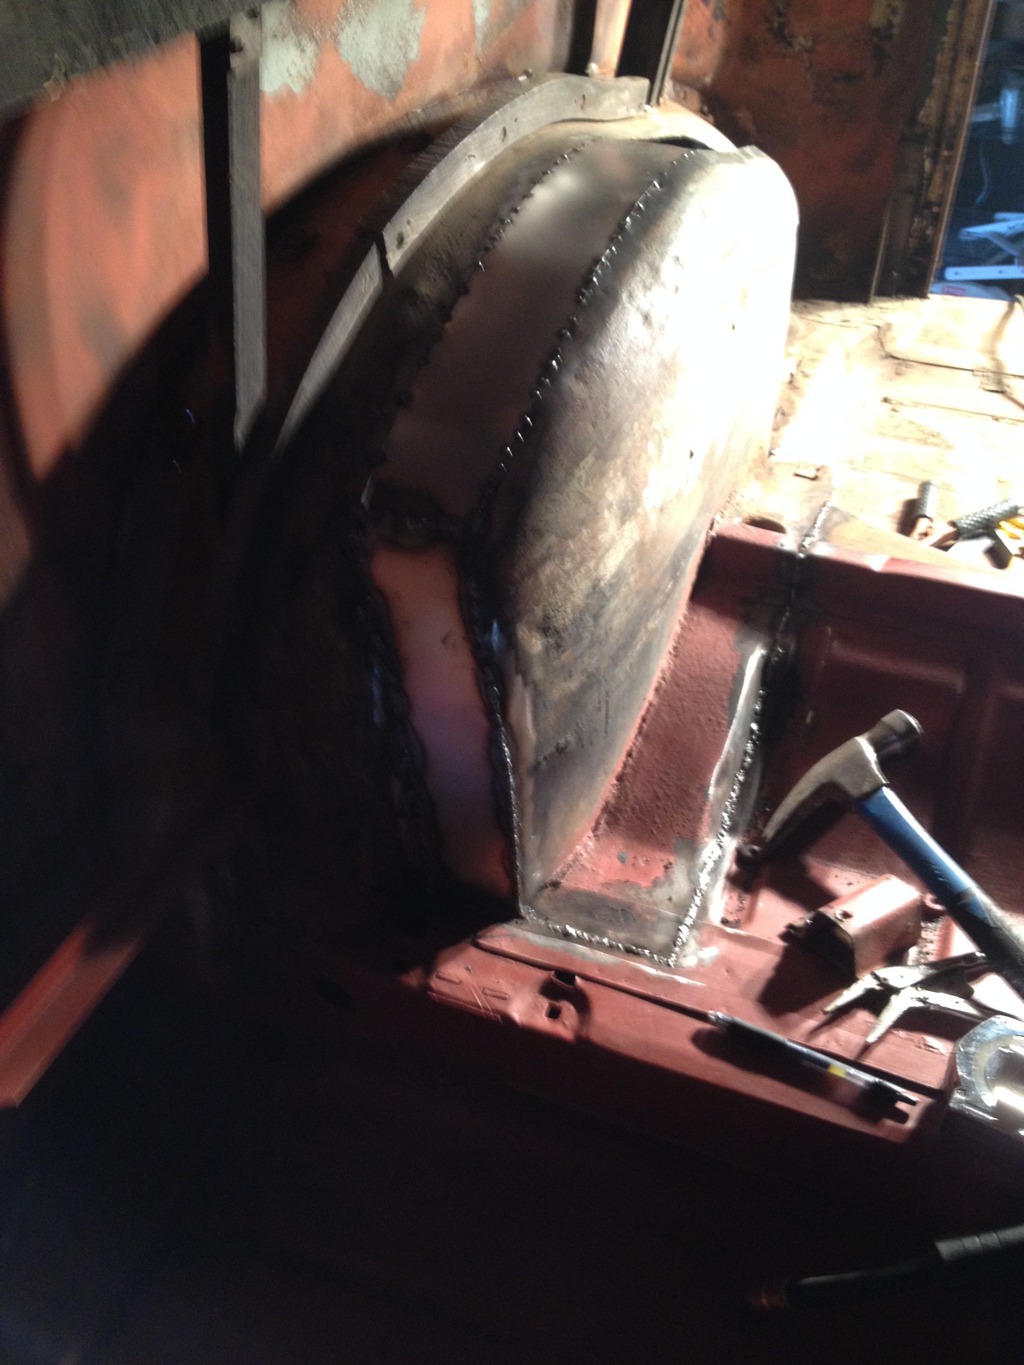
Next I started tubbing the inner fenders to match the frame and clear the new tires. It would've been much cleaner to move the whole inner fender in but I need as much width at the very front for my rear seat and it'll all be hidden when I finish the interior.

You can see where I came straight out at the front to give me a bit of room.
Passenger side finished.
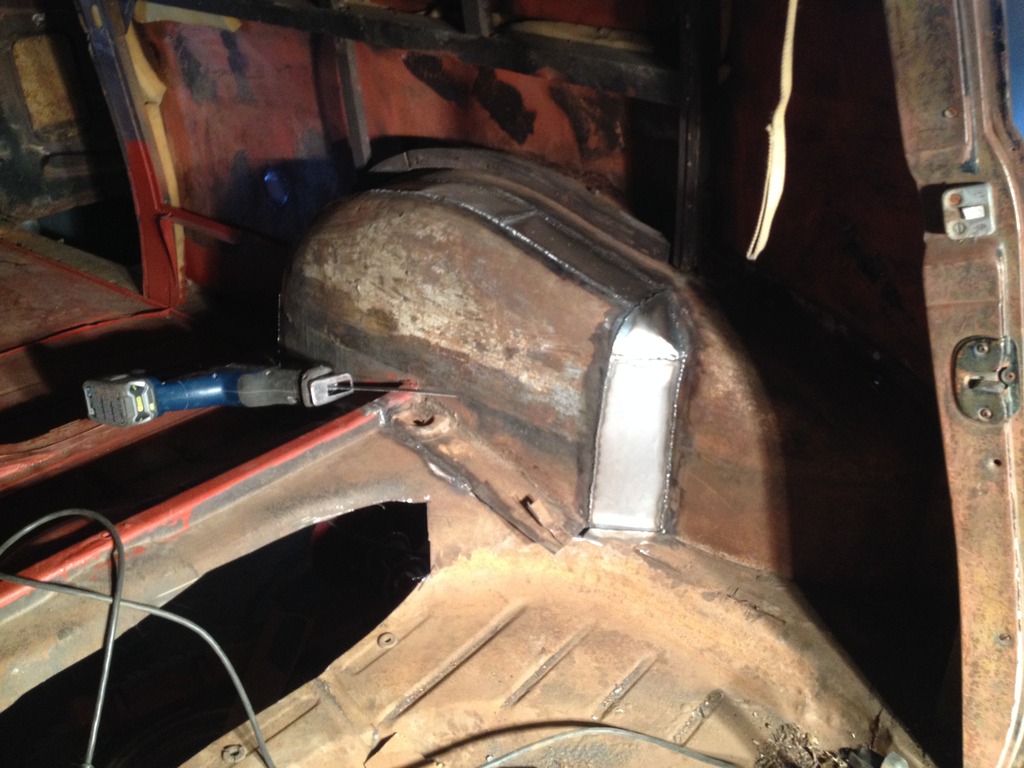
I've still got to finish the driver's side and then I'll start on replacing the rear floor to clear the fuel cell and incorporate a removable panel to access the batteries/fuel system. I also know what I need to do for my seat frames so that should go quickly as well.
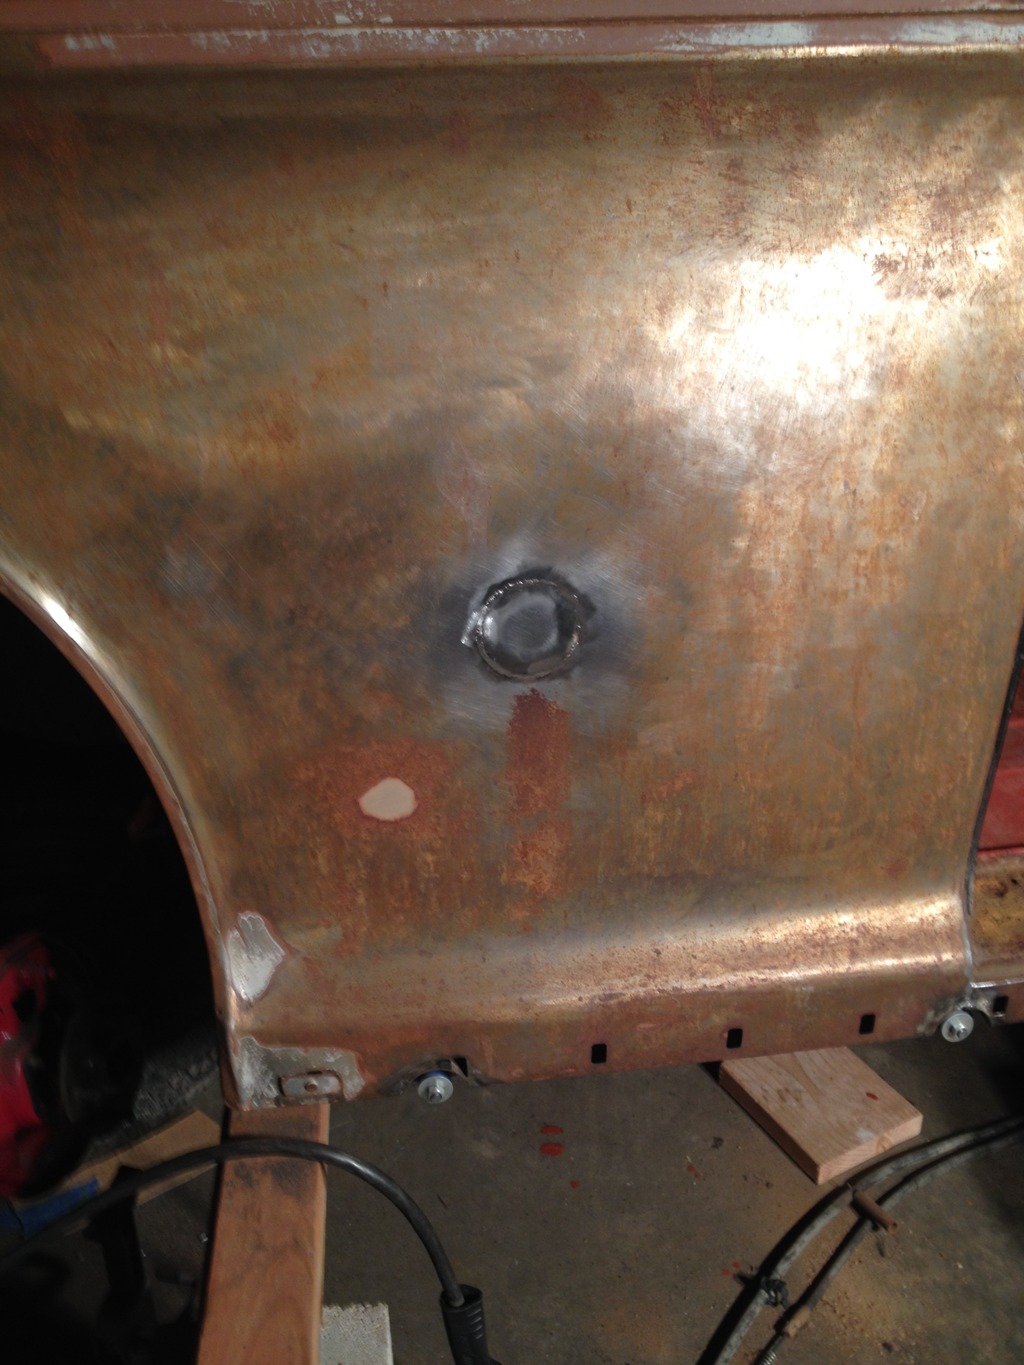
I also filled in my old fuel filler hole.
Can't wait until this teaching job is over so I can get my Saturdays back and really make some progress. The big projects still to come will be brake lines, seats, steering and column/linkage. I will be tearing the chassis down to just the frame, sandblasting and painting it, and then start working on the other body work.


I picked out a set of wheels, and a set of 'temporary' tires while I work the bugs out of the car. The wheels are American Racing Torque Thrust Ms in 20x10. And the tires are 315/35/20s. A bit narrower than my final goal, but they'll do the job for now.


Next I started tubbing the inner fenders to match the frame and clear the new tires. It would've been much cleaner to move the whole inner fender in but I need as much width at the very front for my rear seat and it'll all be hidden when I finish the interior.

You can see where I came straight out at the front to give me a bit of room.

Passenger side finished.

I've still got to finish the driver's side and then I'll start on replacing the rear floor to clear the fuel cell and incorporate a removable panel to access the batteries/fuel system. I also know what I need to do for my seat frames so that should go quickly as well.
I also filled in my old fuel filler hole.

Can't wait until this teaching job is over so I can get my Saturdays back and really make some progress. The big projects still to come will be brake lines, seats, steering and column/linkage. I will be tearing the chassis down to just the frame, sandblasting and painting it, and then start working on the other body work.