When you click on links to various merchants on this site and make a purchase, this can result in this site earning a commission. Affiliate programs and affiliations include, but are not limited to, the eBay Partner Network.
Small update today. Been driving the car here and there as I was hoping to before major sections of the build. A small issue came up a couple times with the airbag setup. I am relying on the pressure in each bag and the ECU from Ridetech to determine ride height and the height at start-up and predetermined settings (lowest parking height, ride-height and highest height). Unfortunately, the ride height at startup seems to vary...the amount of pressure in each bag is getting to the right psi, but the actual height of the car was different sometimes. Kinda weird, but I can kinda understand it. So I ordered a set of Ridetech's height sensors, which are mechanical sensors that provide a voltage reading to the ECU depending on what the sensor is reading. Those will go on next.
In the mean time, I've been working on the undercarriage a bit. Now keep in mind that this is and will not be a trailer queen, super show car. I am building a nice car that handles, stops, accelerates well that looks good, but I won't be afraid to run on something like the HotRod Power Tour. I don't want to have to worry about a rock bouncing up and scratching the undercarriage, etc. So with that, I'm just kind grinding down most of the surface rust on the bottom, cleaning it up, spraying rust-reformer and then rubberized undercoating.
Pics:
Before:
After rust-reformer, but before rubberized undercoating:
Still need another coat to get everything covered
Looks like I have some holes to weld up and then also fill the holes for the seats that the previous owner put in.
Getting there
More pictures after the rubberized undercoating on...
Finally got some pictures uploaded after undercoating.
Underside looking much better:
Added the ride height sensors. Still need to re-calibrate, but so far it's working well.
Finally, working with ABC Performance to build a new dash. I sent my specs and some details. He sent me a picture of one he had done before. I modified it and sent what I needed changed. You can see my changes by looking at the horrible photoshop'd stuff. I moved the starter button to the gauge panel under the water temp gauge. Putting (8) switches to the right of the steering column. Building out the section for the Vintage Air control panel. Using the same vents for air as in the picture. I am using the exact same gauges (coincidence). Adding one more LED between speedo and tach for check engine light when I put LS in. Then adding vents for air above the radio.
Super excited to get the dash back so I can have the interior painted and put the roll cage, gauges, carpet seats and new wiring in.
So tell me, how is the ride tech kit? I'm about to go for the level 2 on my 65 skylark.
Like you I've done a great deal of research and was surprised to hear about air rides capabilities while also not being interested in skraping up and down driveways.
Also, if you could. Please detail the ride height sensor install a bit more.
Thanks.
Martin
Martin,
I also have the level 2, but I added front and rear sway bars as well as the ride height sensors. The ride is very good as long as the bags don't have too much air in them. At max height, it rides like you are on hydraulics. But at appropriate height it rides very nice. I haven't done any 'spirited' driving yet, but I can tell you that the 'feel' of the car is much tighter and turn in is WAY better than stock. When I originally got the car, it rode and drove like a 50 year old muscle car...terrible mushy feel and turned like a barge. I did several things right off the bat, so all of them had a factor in making the car very different. Changing the body bushings was huge, and I strongly recommend that if you haven't done so already. Then I added power steering and a steering box from a Jeep Grand Cherokee. Now it only takes 2 3/4 turns lock to lock instead of what seemed like 20 with effort that a body builder would have difficulty with.
The suspension itself is great. Adding the airbags obviously allowed me to dial in ride height and put it on the ground when parked, which is exactly what I wanted. I drive at a slightly lowered height, which is nice as the RideTech suspension has plenty of travel and rides well. I adjusted the rebound so it is a little stiffer, but that is my personal preference and you can make it pretty darn soft if you like...just click the adjusters on the ShockWaves.
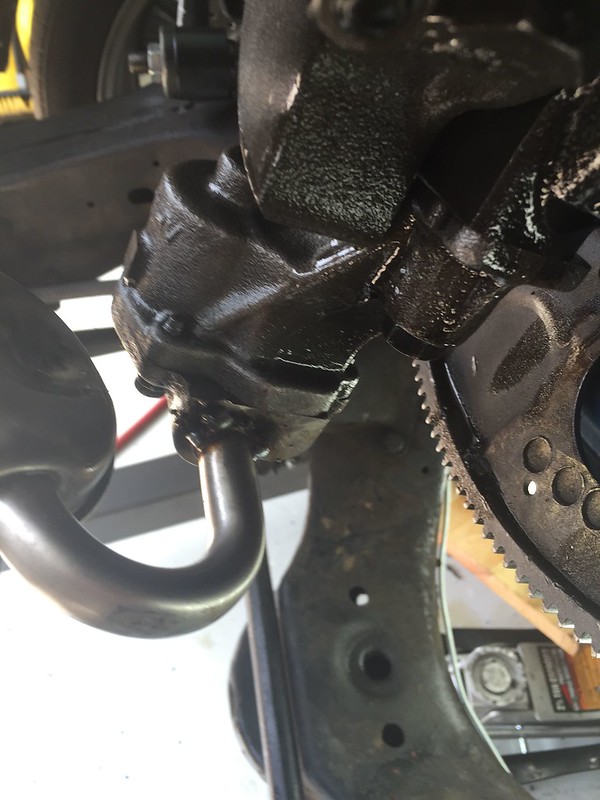
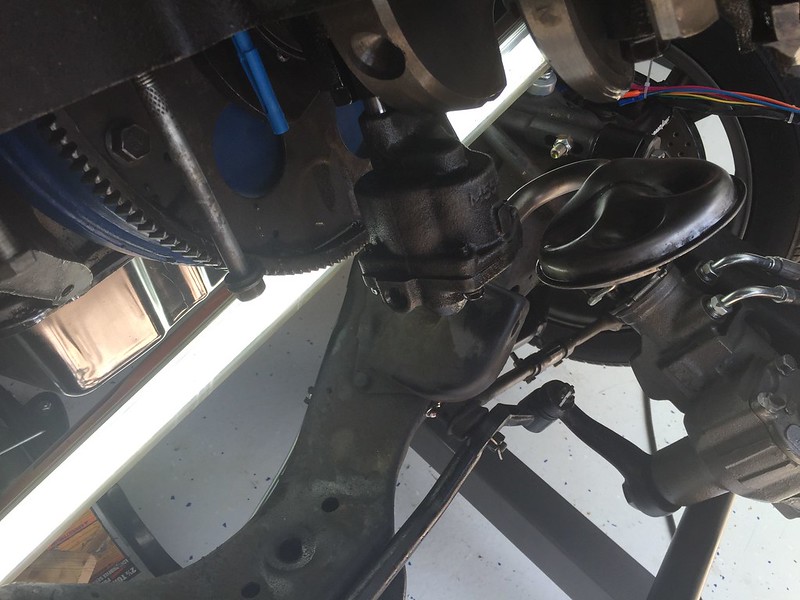
For the height sensors, I REALLY recommend them. Without, the RideTech ECU sets ride height purely on the amount of pressure in each bag. This is OK, but I found that after being completely deflated, when it returned to ride height at startup, it still wasn't perfect. It seems that if you air up different corners in a different order, the ride height was never the same. The ride height sensors send a voltage signal to the ECU and the ECU adjusts the ride height and amount of air in each corner based on voltage and air pressure, providing a much more precise and predictable height. Installation was pretty easy. Attach the body of the sensor to the frame and the arm to a suspension component, like a control arm. In the front I attached the sensor body to the frame just to the rear of the brake line attaches to the frame. I then made a small hole in the rear arm of the lower control arm, tapped it and bolted the sensor arm to that. The rear was a little more difficult. The body of the sensor was attached to the frame way up high on the frame loop for the rear end. I then made a bracket where the rear sway bar attaches to the rear lower control arm and attached the sensor to that. Originally I used the front bolt for the sway arm, but that didn't allow for enough travel of the sensor, so I moved it to the rear sway bar bolt on the control arm and that seems to work. Make sense? If not, I will try to get some pictures of the rear sensor setup.
I need to recalibrate it when I get it out on level ground. My water pump was making a weird noise, so I just swapped that and added a March serpentine set up with new H20 pump, alternator, A/C compressor and power steering pump. Unfortunately, the power steering pump (canister style) is hitting the steering box on the Chevelle, so I am awaiting a reservoir style pump. I will post more pics when I get that done. This should also clear up some concerns I have with the H20 pump and give me more piece of mind so I can drive the car a little further and provide more feedback.
Oh and the other thing I forgot to mention. I currently have long tube headers. When I put the car to the lowest height, it rests on the collectors for the headers, which I assume is putting undue pressure on the header bolts. Therefore, I can't set the car to the lowest it can go. I just got some mid-length headers, and need to have the exhaust routed to those so I can drop the car further at the lowest setting.
I ended up going with Ridetech's lvl 2 coil over system on my car, added the jeep box like you so I could put power steering back on my car, and it's the best driving Chevelle I've ever owned. I'm sure you will be very happy with your setup.
I ended up going with Ridetech's lvl 2 coil over system on my car, added the jeep box like you so I could put power steering back on my car, and it's the best driving Chevelle I've ever owned. I'm sure you will be very happy with your setup.
Thanks. I actually already have the Jeep box in and I can tell you that change, as well as body bushings is one of the best things I've ever done.
Good deal! Is everything more accurate for you, now?
I believe it is, but won't be sure until I re-calibrate. So far, it seems to go back to the same height, but I've only seen that in my garage and need to get it out into a larger area. I will know more once I get the serpentine belt system finished and can drive it.
I believe it is, but won't be sure until I re-calibrate. So far, it seems to go back to the same height, but I've only seen that in my garage and need to get it out into a larger area. I will know more once I get the serpentine belt system finished and can drive it.
-Jim
Good to hear! Let me know if you need anything, when you get a chance to re-run it through the setup.
Update time. Quite a bit has happened. If you read before, you will know that my plan is to do this car in stages. Do one area, drive...do another, drive...etc.
Well I was getting a noise in my H20 pump and I am not quite ready to move to LS until the winter, so I went out and got a serpentine kit for the 350. BEAUTIFUL. Put that on and drove around a bit waiting for the dash to come in so I could take it all to the painter to paint the inside. The interior is next on the list. Paint, seats, complete wiring, RideTech Tiger Cage, steering column, etc.
As I was driving around, I noticed low oil pressure once it got warm, but mostly when I was on the brakes. First thing that popped into my head...bad main bearings. Oh crap. Time to move up the time table on the LS. However, I figured I would pull the oil pan just to see if something happened I could fix. 'Cause when I put in the LS, then I'm doing the 6sp, then I gotta do the rear end, and the snowball effect happens. So my nephew was down this week and he's a gearhead, so we decided to pull the motor to get the oil pan out. The pick-up was sitting in the bottom of the pan. It fell out of the pump.
So we welded it to the pump and put everything back on with one of those fancy Fel-Pro one piece gaskets. Pretty nice item. While we were there, we swapped the headers for mid-length instead of long tube which hung down too low (when the Air Ride was all the way down, it actually sat on the headers). Also swapped the transmission mount. The old one was TRASHED. All that got done (2 hours to pull the motor, 1 hour to clean and put on new gasket (we took a few breaks), 2 hours to get motor back in).
So we go to fire the motor after re-adjusting the timing. It fired right up and sounded wicked with straight headers/no exhaust. However, we noticed oil pooling at the front. Another OH CRAP moment. And a "I am a dumbass" moment. Apparently, there are two types of the Fel-Pro gasket. One with a thicker front area and one with a thinner. We got the thinner one...and needed the thicker one. SO we spent the whole day pulling and putting the motor back in, only to be defeated by a gasket that was too thin RIGHT IN FRONT OF OUR FACES. Not sure what to do.
Eventually an LS will go in and I don't expect to drive the car more than 500 miles before I do that. So do I:
1. Pull the motor (AGAIN), get the right gasket, and re-install
2. Clean the crap out of the front seal, get "The Right Stuff" and cake the crap out of it to get seal
3. Say f'it and start with the LS
Pics:
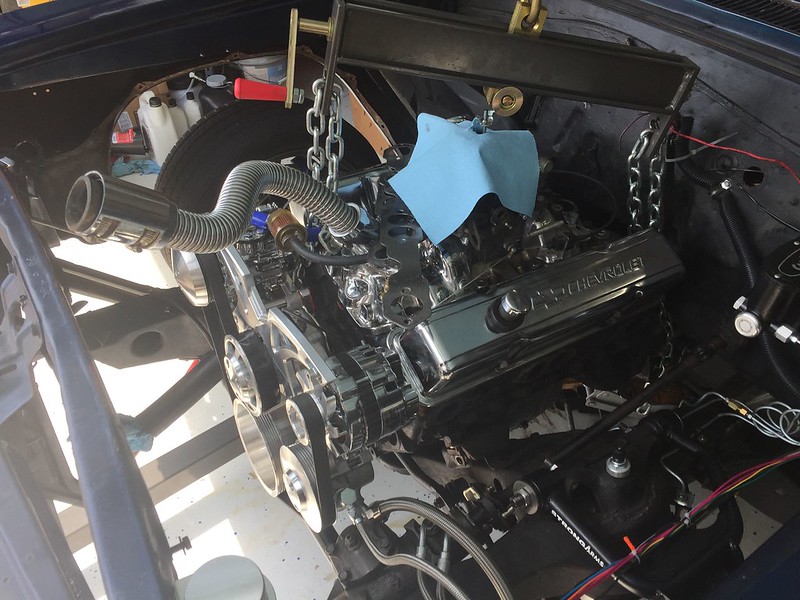
March serpentine kit and new Derale fans:
Power Steering reservoir:
New Dash from ABC Performance:
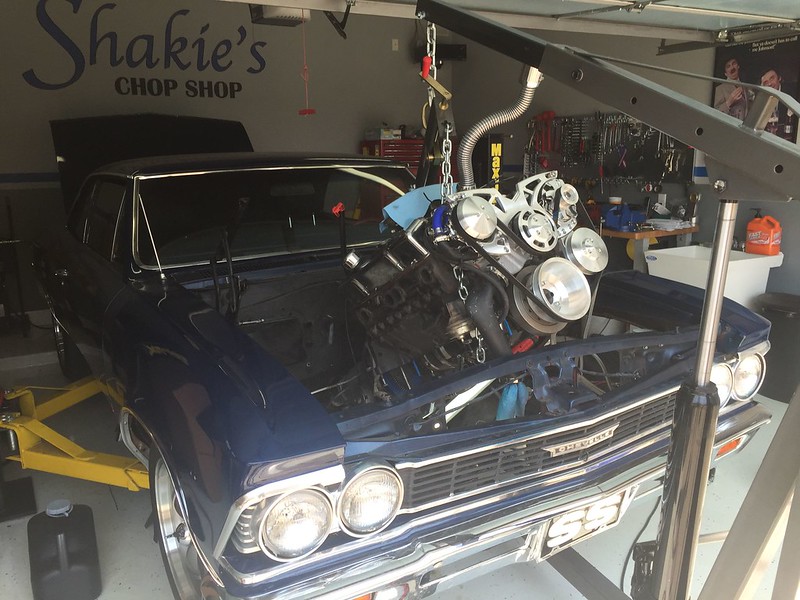
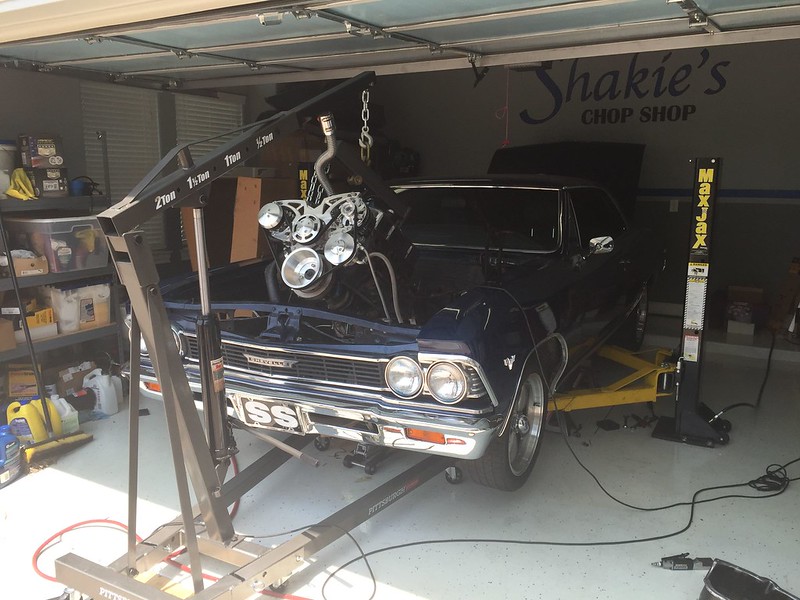
Motor hanging out:
Dang shame we got it this far out, back in...only to be defeated:
What to do...?
Last edited by Austin_Jim; 08-13-2015 at 08:45 PM.
Pulled the motor this weekend and put the right oil pan gasket in. Also found another bonehead move. When we welded the oil pickup to the pump, we welded it at an angle too low. I know, I know - stupid of us to not measure the distance between pickup and bottom of the oil pan. As it turns out, when the front gasket was too thin, the "Right Stuff" on the front would've temporarily fixed the issue. BUT, with the pickup too low, it was hitting the pan, not allowing the rear to seal. So I ground down the welds, pulled the pickup, cleaned it and re-welded it at a better angle (don't laugh at my welds).
Round two (getting faster at removal):
Re-welded (don't make fun of the welds ):
Back in:
Added fluids and nothing leaks so far. Traveling this week. Should be able to start it this weekend and report back as to whether or not I can drive it to the exhaust shop to marry the new shorty headers to the exhaust and then to the painters to paint the interior.

 05-20-2015, 04:59 PM


 ):
):