
G body Cutlass LS1/4l60e conversion


 03-08-2015, 08:57 PM
#22
TECH Enthusiast
Join Date: Sep 2014
Location: alburnett, iowa
Posts: 732
Likes: 0
Received 0 Likes
on
0 Posts
looks like you might need a steering hose for clearance of pulley. Does your joint in middle of steering shaft clear header? mine didnt I had to grind on it a bit.
03-09-2015, 08:36 PM
#24
TECH Enthusiast
Join Date: Sep 2014
Location: alburnett, iowa
Posts: 732
Likes: 0
Received 0 Likes
on
0 Posts
cool beans. my shortie headers came today for my truck 5.3 swap I want to get going on. Started getting parts/things done I can do for now. Truck harness done until can install. But before get on truck I need to make my buick drive to enjoy cruise in nights.
03-10-2015, 07:29 AM
#26
Staging Lane
Thread Starter

Join Date: Mar 2015
Posts: 55
Likes: 0
Received 0 Likes
on
0 Posts
I tell you what there's always a few things that you just keep putting off cuz they aren't fun at all. I'm learning to just keep chipping away at it though!
03-10-2015, 07:34 AM
#27
Staging Lane
Thread Starter
Join Date: Mar 2015
Posts: 55
Likes: 0
Received 0 Likes
on
0 Posts
The car has the rally guage setup, so the goal is to get all the original guages working, I'll wire the stock tach, I ordered a m16 to 1/8 npt for the oil pressure. I have to find a spot to tap for water temp. The only part I'm not messing with now is the speedo I'll use an app on my smartphone for mph (via GPS) and stay with the flow of traffic as long as a ricer doesn't try me!!! I plan on going back to a 3 speed auto once the car is making more power down the road!
03-10-2015, 08:20 AM
#28
Staging Lane
Thread Starter
Join Date: Mar 2015
Posts: 55
Likes: 0
Received 0 Likes
on
0 Posts
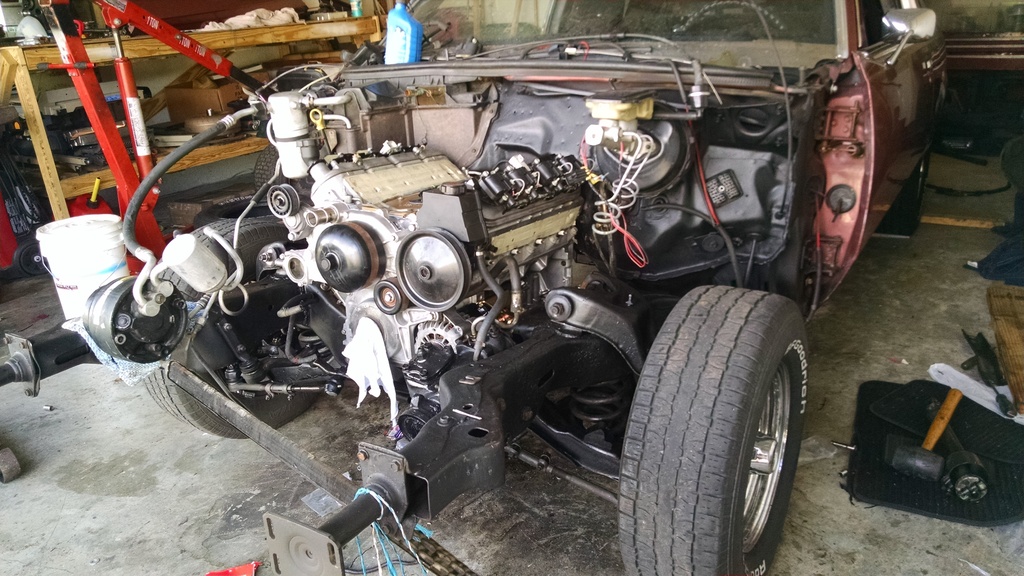
I put on my new brake lines, and laid out my harness to see if I can mount my computer where I want to, looks like it should work out.
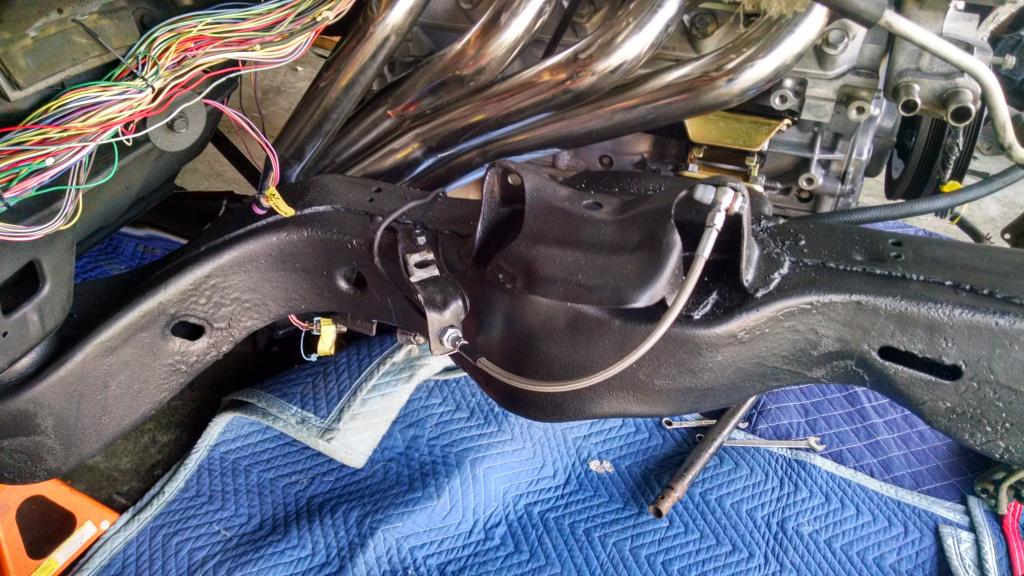
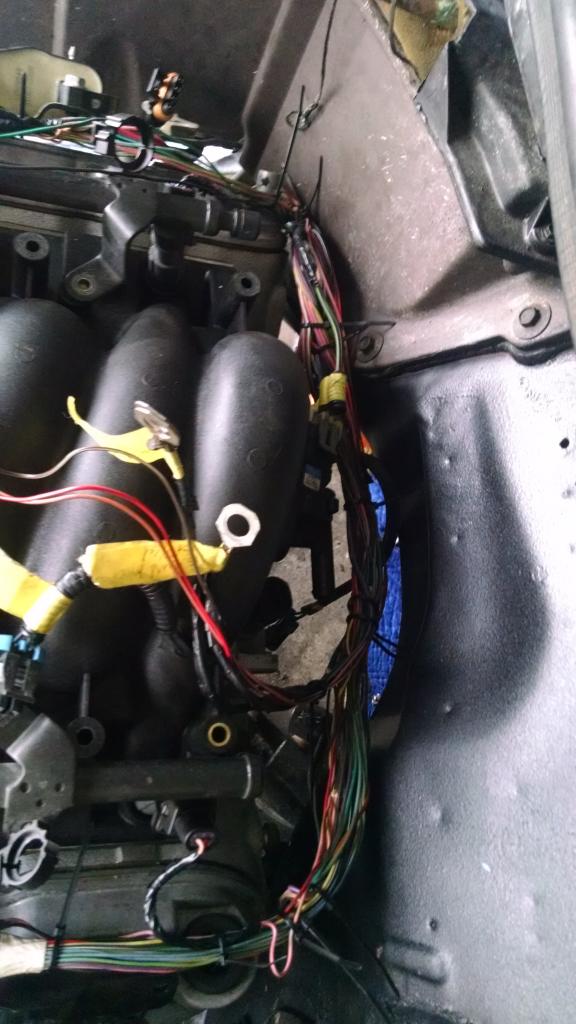
Driver side
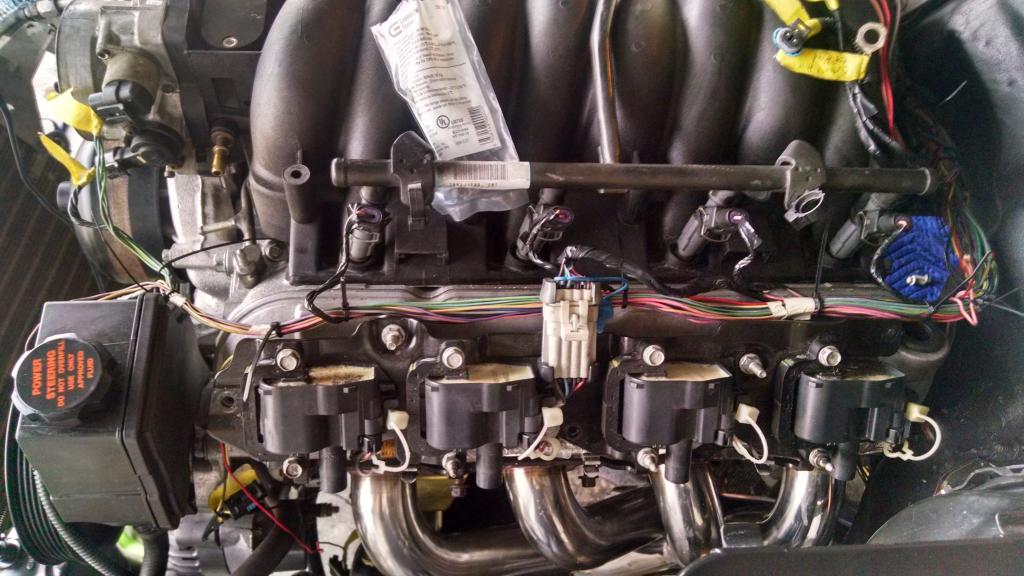
Back of motor
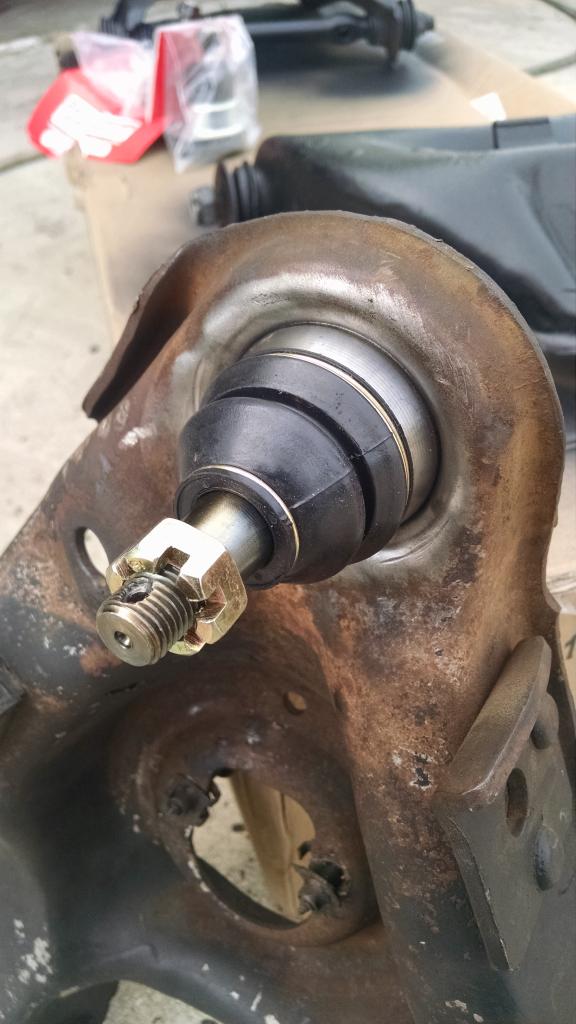
I am almost done cleaning and redoing my front suspension and steering.

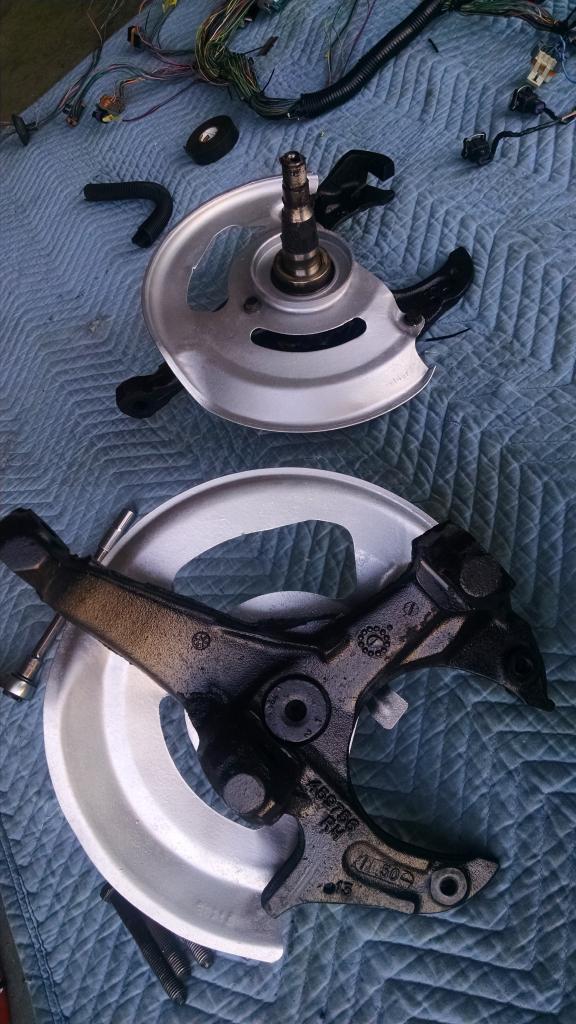
The next things on the list are relooming my engine harness, and breaking the crank pulley bolt loose which should be fun since I don't have the flexplate lockup tool but I do have a few shade tree tricks up my sleeve!
03-10-2015, 04:59 PM
#30
Staging Lane
Thread Starter
Join Date: Mar 2015
Posts: 55
Likes: 0
Received 0 Likes
on
0 Posts
It actually clears great, header does touch the frame itself where they start to bend but I knew that would happen. I'm going to pie cut the headers under the flange and bend them in a bit and get the rewelded.
03-10-2015, 10:41 PM
#31
Staging Lane

Join Date: Jan 2015
Location: El Paso Tx
Posts: 58
Likes: 0
Received 0 Likes
on
0 Posts
The car has the rally guage setup, so the goal is to get all the original guages working, I'll wire the stock tach, I ordered a m16 to 1/8 npt for the oil pressure. I have to find a spot to tap for water temp. The only part I'm not messing with now is the speedo I'll use an app on my smartphone for mph (via GPS) and stay with the flow of traffic as long as a ricer doesn't try me!!! I plan on going back to a 3 speed auto once the car is making more power down the road!
I bought a temp sending unit for a '98 Fbody. That sending unit is for a 3 wire connector. Next, I bought a harness adapter from TPI Parts, so it allows you to connect your 2 wire harness that goes to the PCM, connect to the temp sending unit. The extra wire is then spliced in to your stock Olds temp wire.
Let me see if I can get some pics posted to show....photobucket is being a turd right now.


 03-12-2015, 12:20 AM
#33

OK so you didn't use the spohn 971 and fbody mounts. It appears you used spohn solid motor mounts with 1" setback plates with spohn sbc motor mounts. The reason I say setback plates is because the fbody oilpan and headers. Or am I completely wrong I need to do this swap soon in my 84 hurst and I have a wrecked fbody with headers ready to go.
03-12-2015, 02:47 PM
#34
Staging Lane
Thread Starter
Join Date: Mar 2015
Posts: 55
Likes: 0
Received 0 Likes
on
0 Posts
OK so you didn't use the spohn 971 and fbody mounts. It appears you used spohn solid motor mounts with 1" setback plates with spohn sbc motor mounts. The reason I say setback plates is because the fbody oilpan and headers. Or am I completely wrong I need to do this swap soon in my 84 hurst and I have a wrecked fbody with headers ready to go.
03-12-2015, 08:51 PM
#35
TECH Enthusiast
Join Date: Sep 2014
Location: alburnett, iowa
Posts: 732
Likes: 0
Received 0 Likes
on
0 Posts
motor swaps are like going to hardware store/parts store throwing everything in a box shake it. what comes out make it fit. Ls combo can be had about any way imagineable, its the fabricator thats complicated.
03-12-2015, 08:54 PM
#36


Your swap experience using Hooker components would be quite different.
03-12-2015, 09:41 PM
#37
TECH Enthusiast
Join Date: Sep 2014
Location: alburnett, iowa
Posts: 732
Likes: 0
Received 0 Likes
on
0 Posts
03-15-2015, 10:14 AM
#38
Staging Lane
Thread Starter
Join Date: Mar 2015
Posts: 55
Likes: 0
Received 0 Likes
on
0 Posts
Got the crank pulley bolt loose, I put two screws in the crank where the flexplate bolts on and wrapped a strapped to the bolts then around frame heated the bolt up and it broke loose...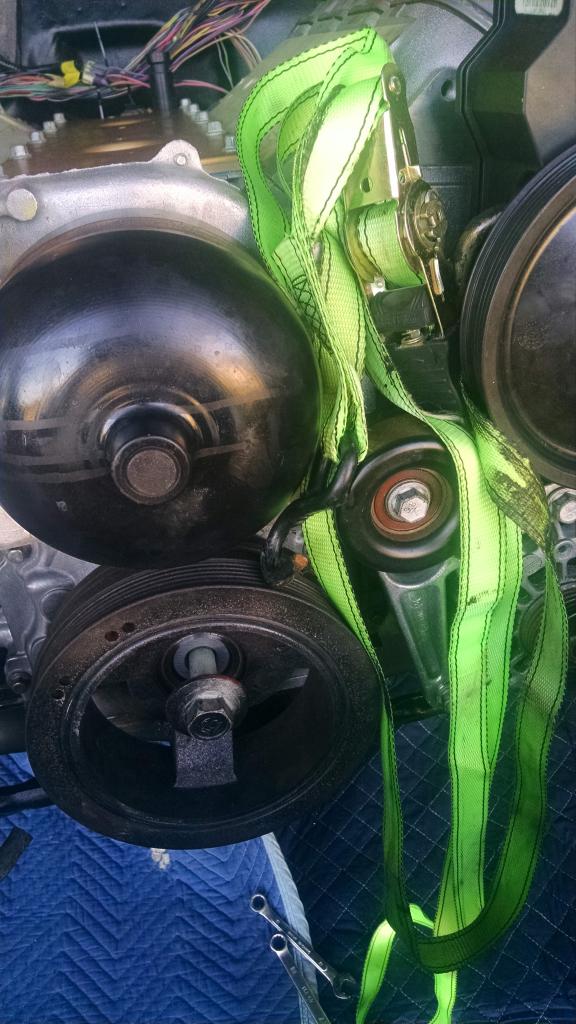
 03-15-2015, 10:28 AM
#39
Staging Lane
Thread Starter
Join Date: Mar 2015
Posts: 55
Likes: 0
Received 0 Likes
on
0 Posts
I got her Rollin again, pulled accessories, next up is to put tranny in to see how things line up. I'm going to have to set the cross member back 1" I think (I measured) and see how I can get my column shift to work the longtubes might get in the way. Measure for my driveshaft that should keep me busy for a little while.
200c vs. 4l60e
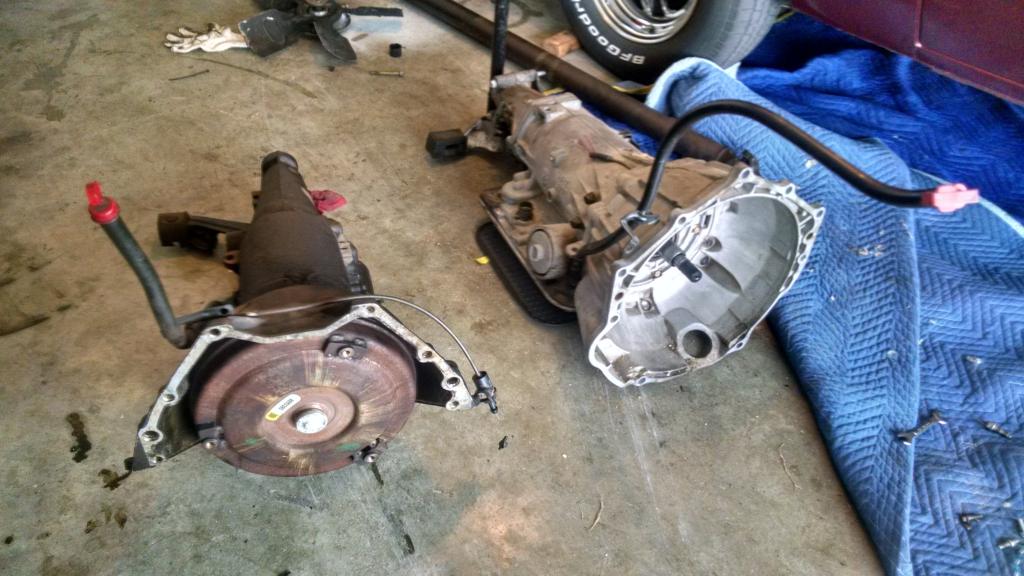

200c vs. 4l60e
