
SN95 Mustang SBE 5.3 to Forged 6.0 S480 Turbo Build! Update:Its Alive!
 08-22-2015, 02:31 PM
#1
Launching!
Thread Starter
iTrader: (1)
Join Date: Jun 2012
Location: Daytona Beach
Posts: 265
Likes: 0
Received 0 Likes
on
0 Posts

Hey guys im finally almost done with my new build so I figured I would start a new thread. This car previously had a SBE 5.3 225k LKQ motor that i did a VERY basic cam only/nitrous setup on which worked very well. After getting bored with the nitrous setup I took the plunge to go Forged Iron Block 370/6.0 with my own built S480 turbo setup.... Heres a run down of the simple 5.3 setup that netted me a 11.80s on motor and low 10s on nitrous.
OLD SETUP
03 5.3 225k mileage (don't care lol paid 500.00)
melling hv pump
ls2 timing set
GMPP ASA cam 226/236 .525/.525 110
Mls gaskets
comp 7.4 pushrods
Chinese head studs
862 heads milled .030
Comp 26-915 beehive springs
NGK Br7EF plugs
edelbrock vic jr intake
msd 6010
Barry Grant Mighty Demon 750 annular carb
Dynatech 1 7/8 longtubes, x pipe, ultra flo mufflers
Jw Th400 Reverse manual transbrake trans
Revmax Billet 3600 nitrous convertor
3100lb SN95 mustang
Full Upr chromoly tubular front everything
strange 10 way front/rear
Full Team Z rear suspension
1000hp 8.8 rear (spool,4.10,33spl mosers)
275/60/15 rear
The car was tuned on 93 pump gas for the motor and has a front cell for nitrous that runs 118 Outlaw N20 fuel.
In 97 degree heat the car made 308 WHP on motor through the TH400. The car made 475 wheel on a 15 year old nitrous works single plate on a 175. We did jet the car to 225 but, with the ASA cam being a 110 lob sep It didn't pick up enough hp to justify spraying it with that so I backed it down to the 175.
NEW SETUP
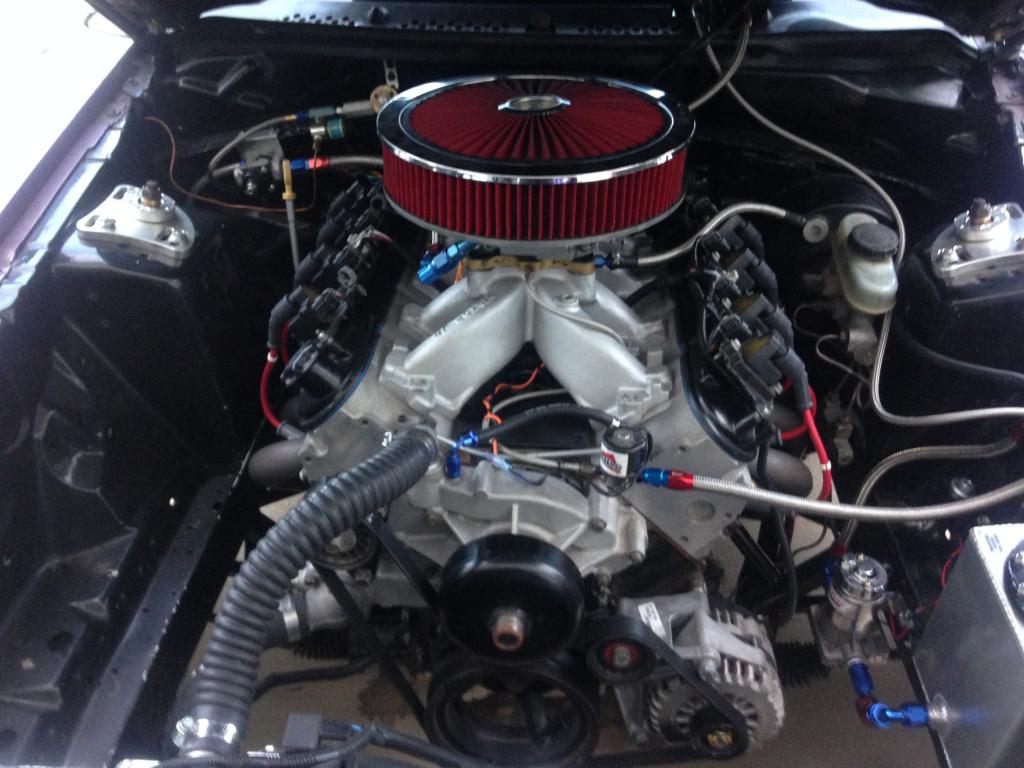
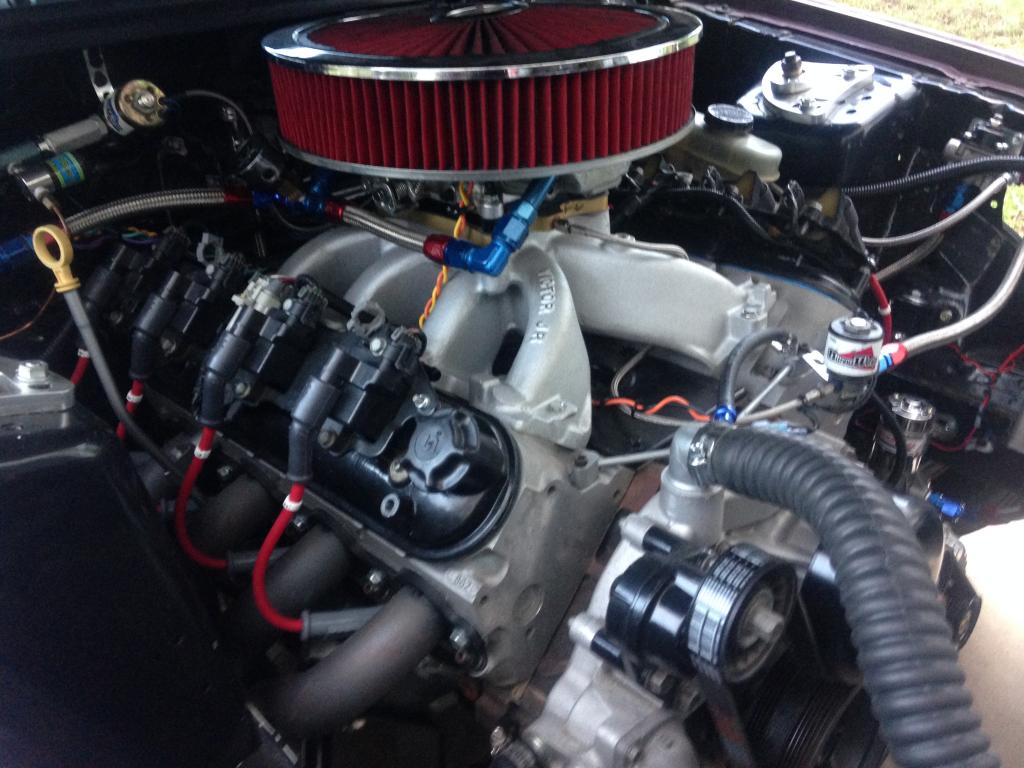
The camshaft is a Custom hydraulic roller from John Bewley @ Liljohnsmotorsports (similar stage 3'ish). The cam has a good amount of overlap in it due to this setup being a Blow Through style setup.. Very excited to hear the lope its going to have! The head gaskets are GMPP Ls9's installed dry with Alpermotorsports head studs. Stock rockers with Comp trunions installed. Topping the engine off is a edelbrock Super Victor manifold and Carb Shop Blow Through Holley 750 E85 billet annular booster carb. Pretty simple setup!
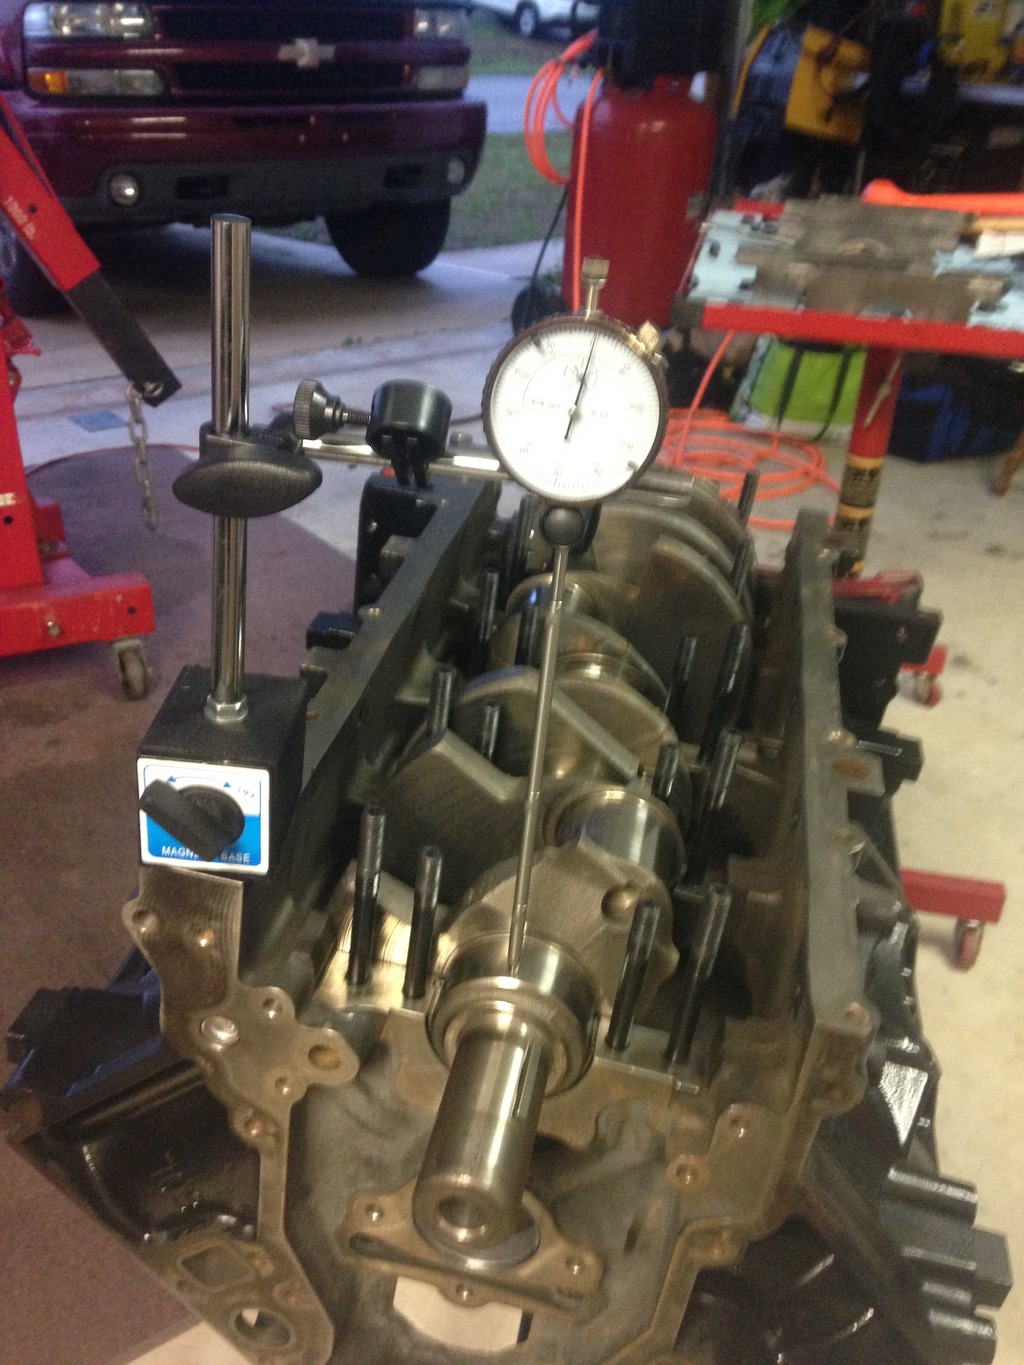
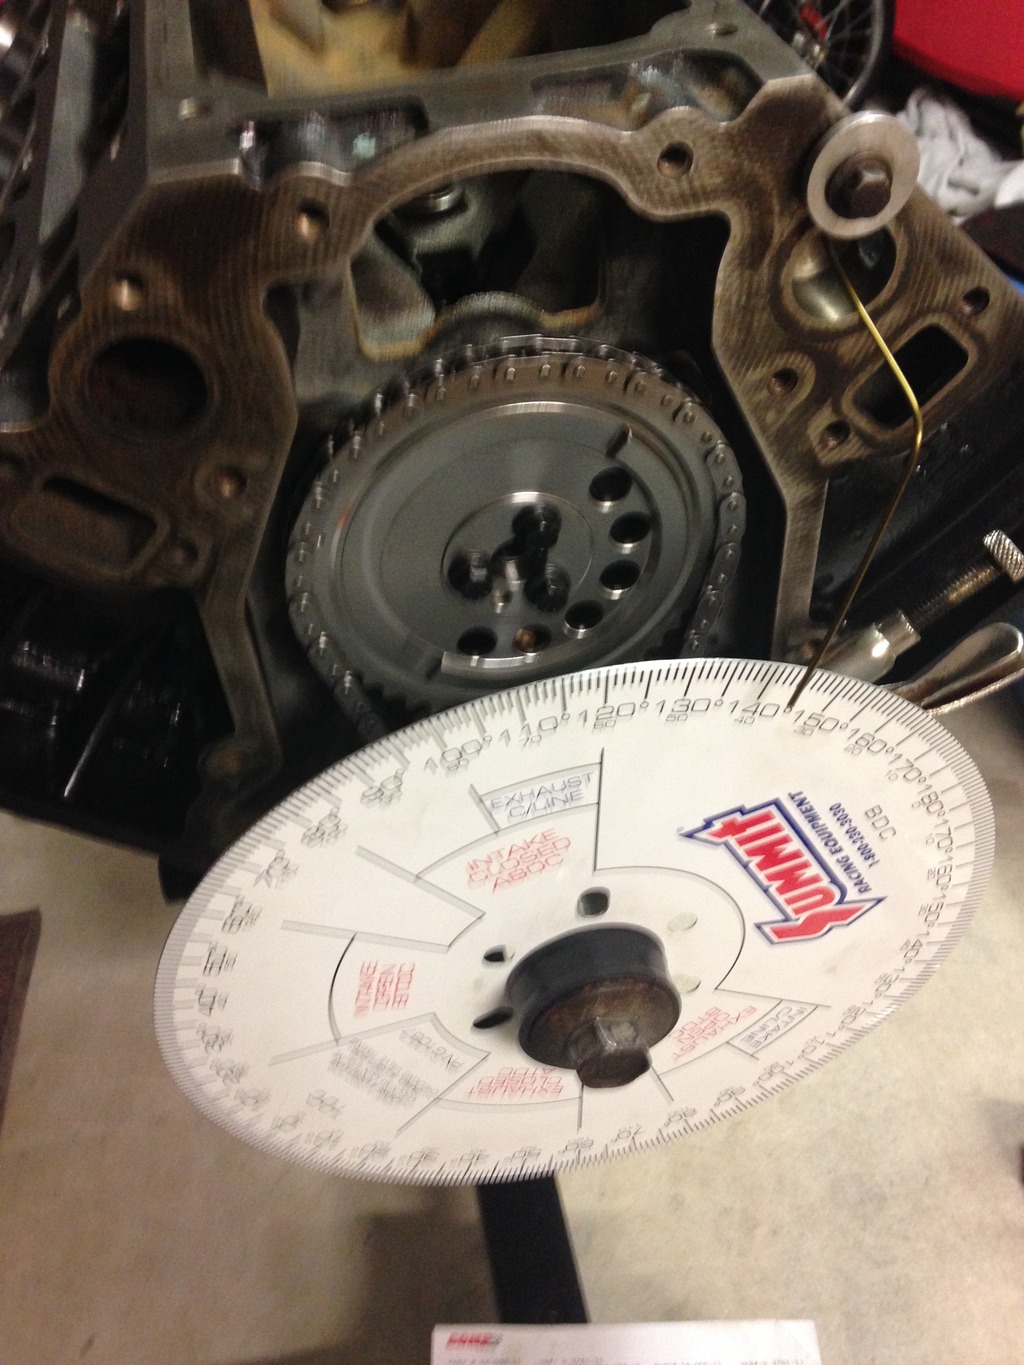
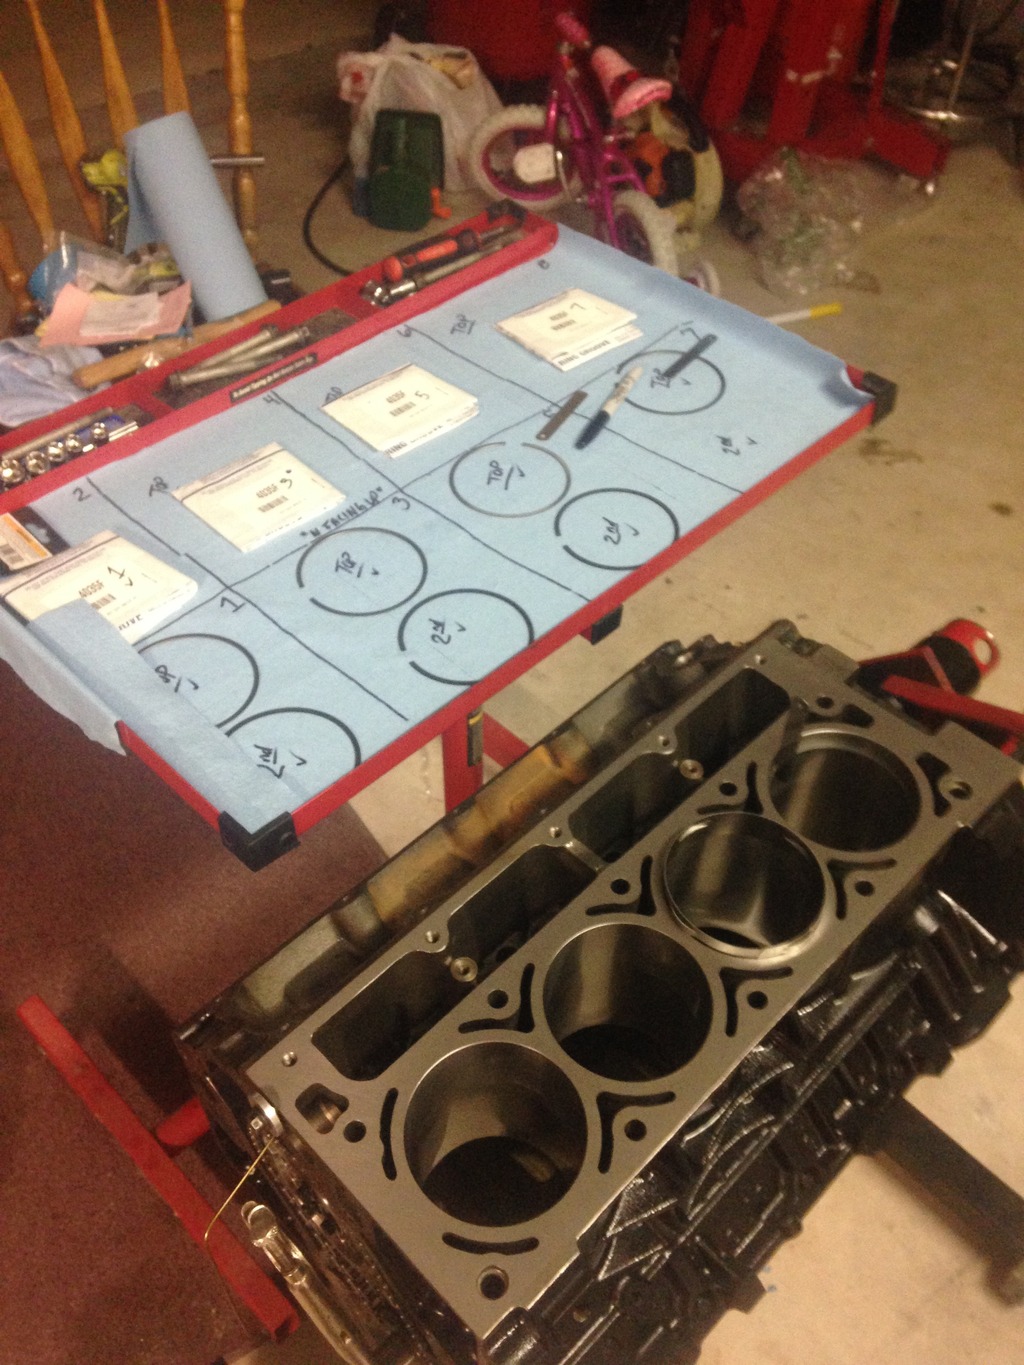
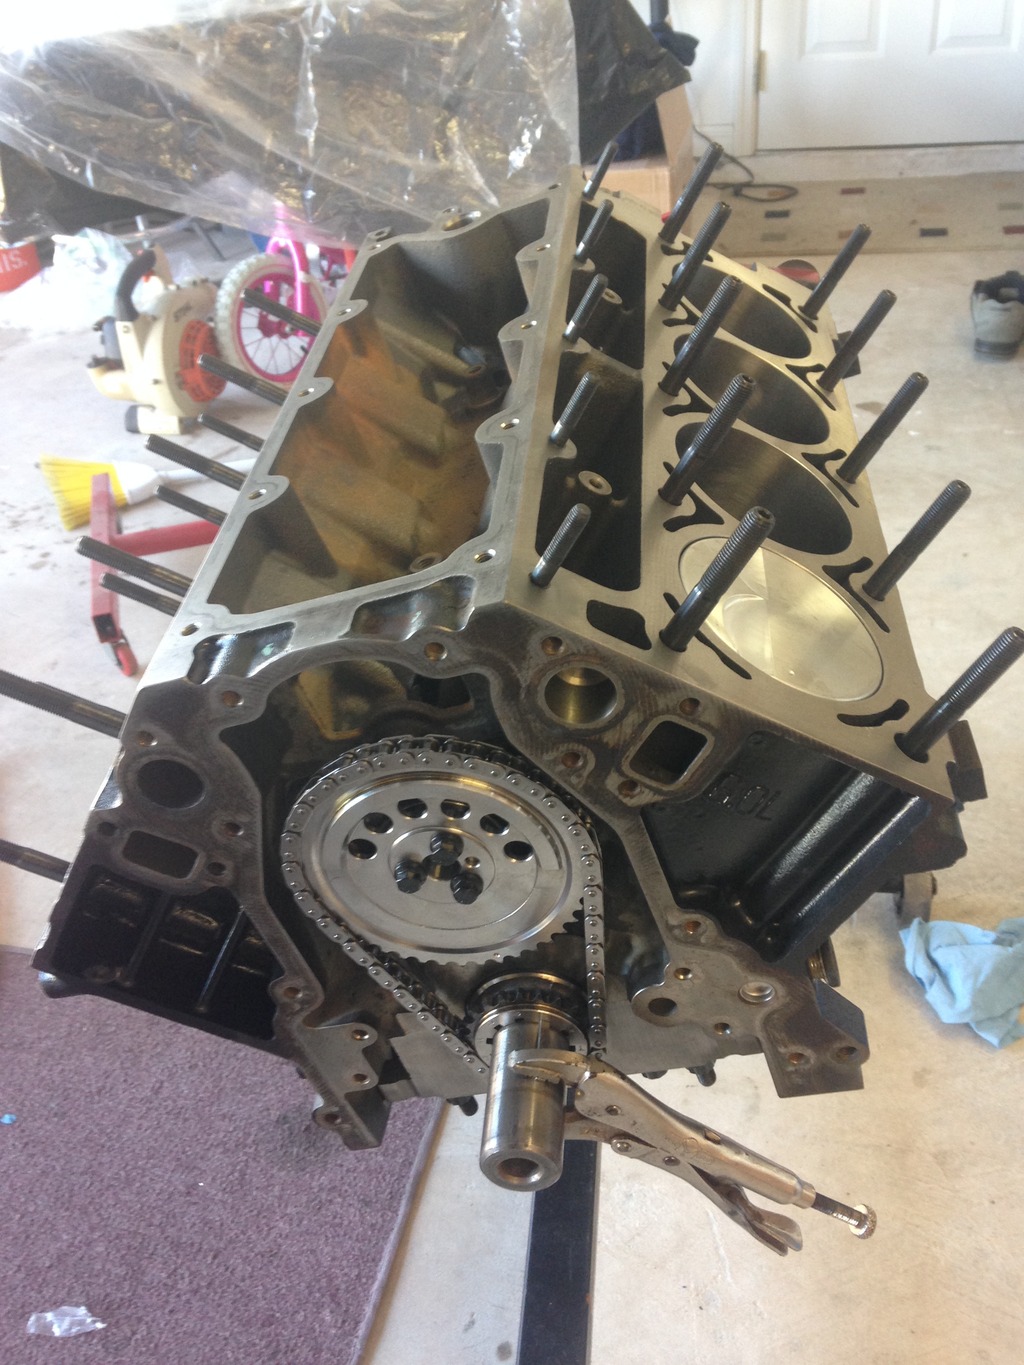
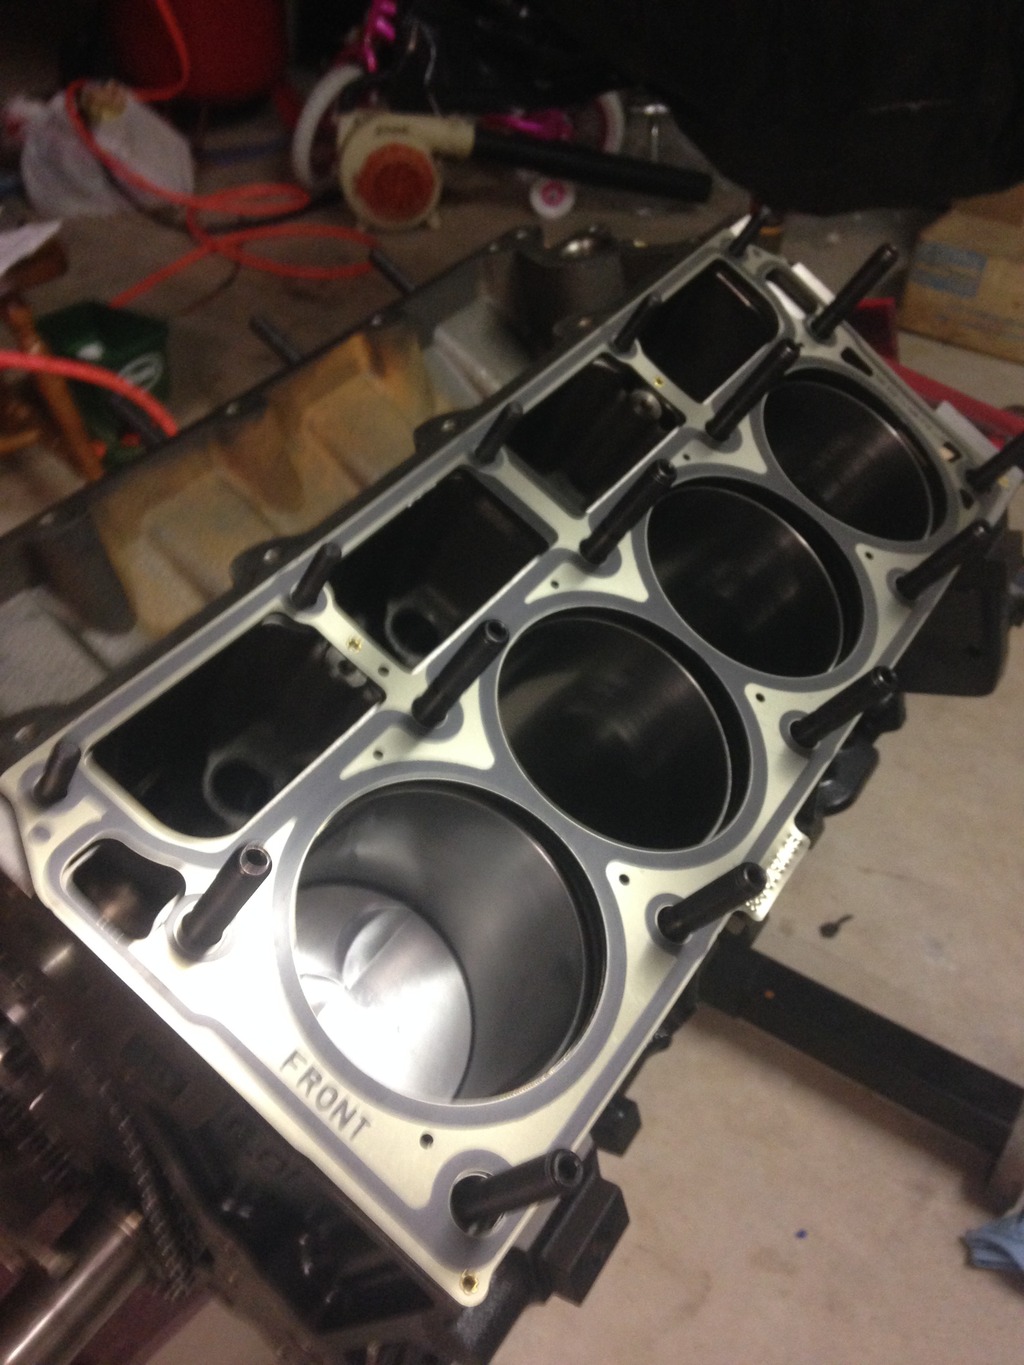
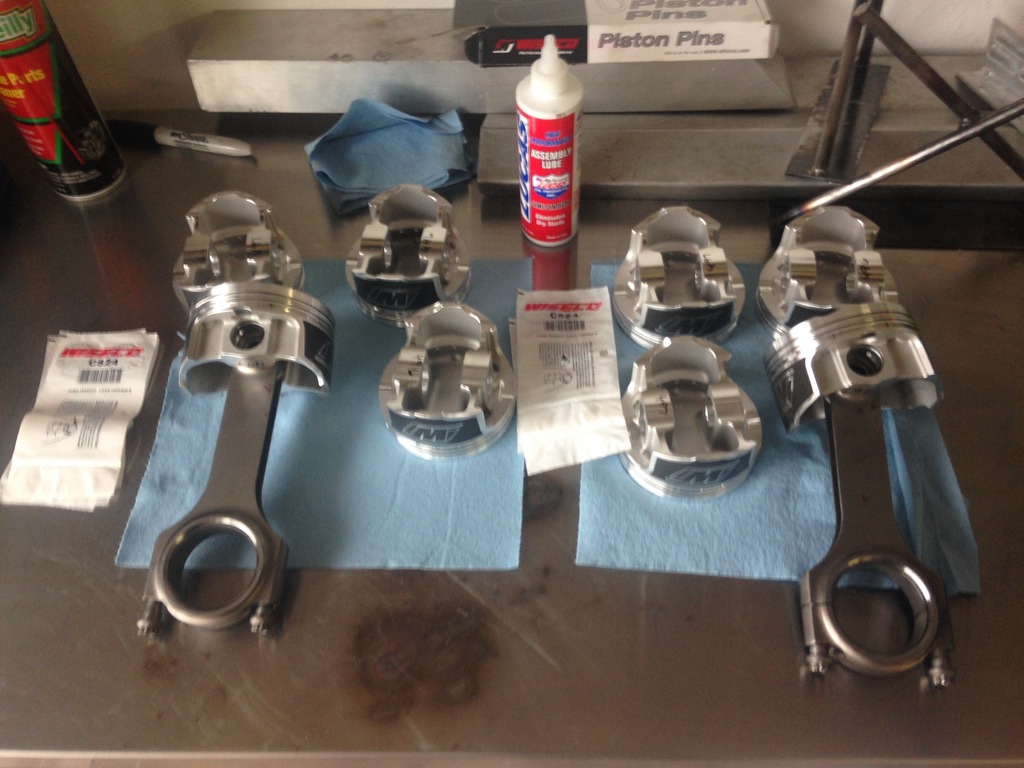
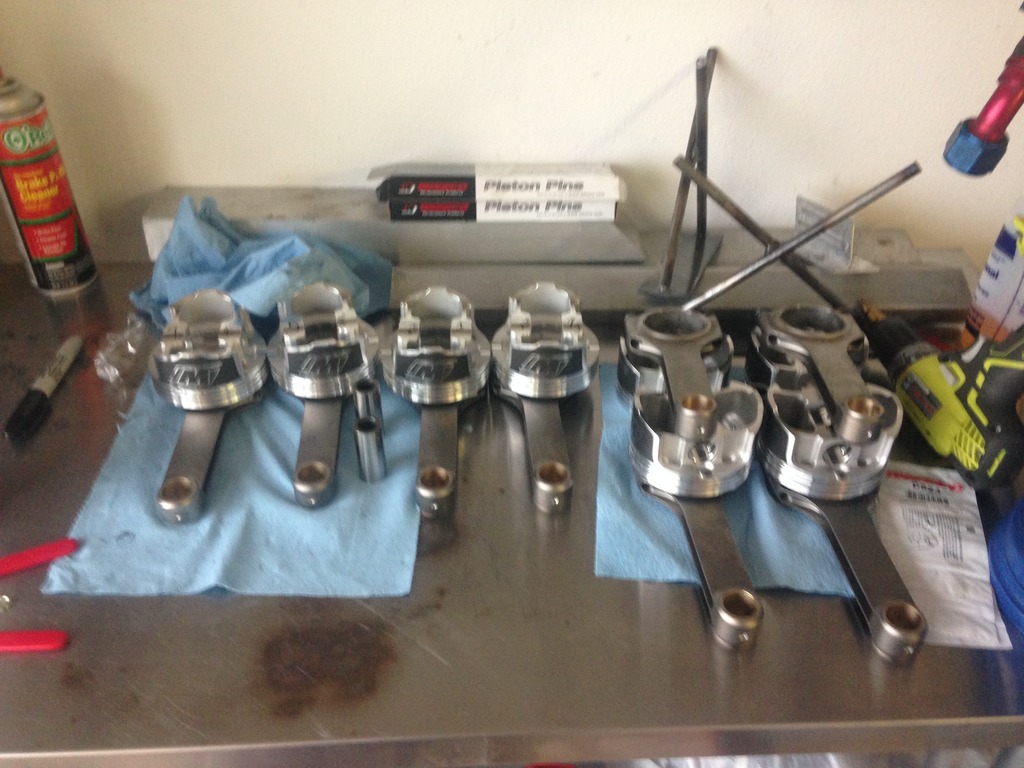
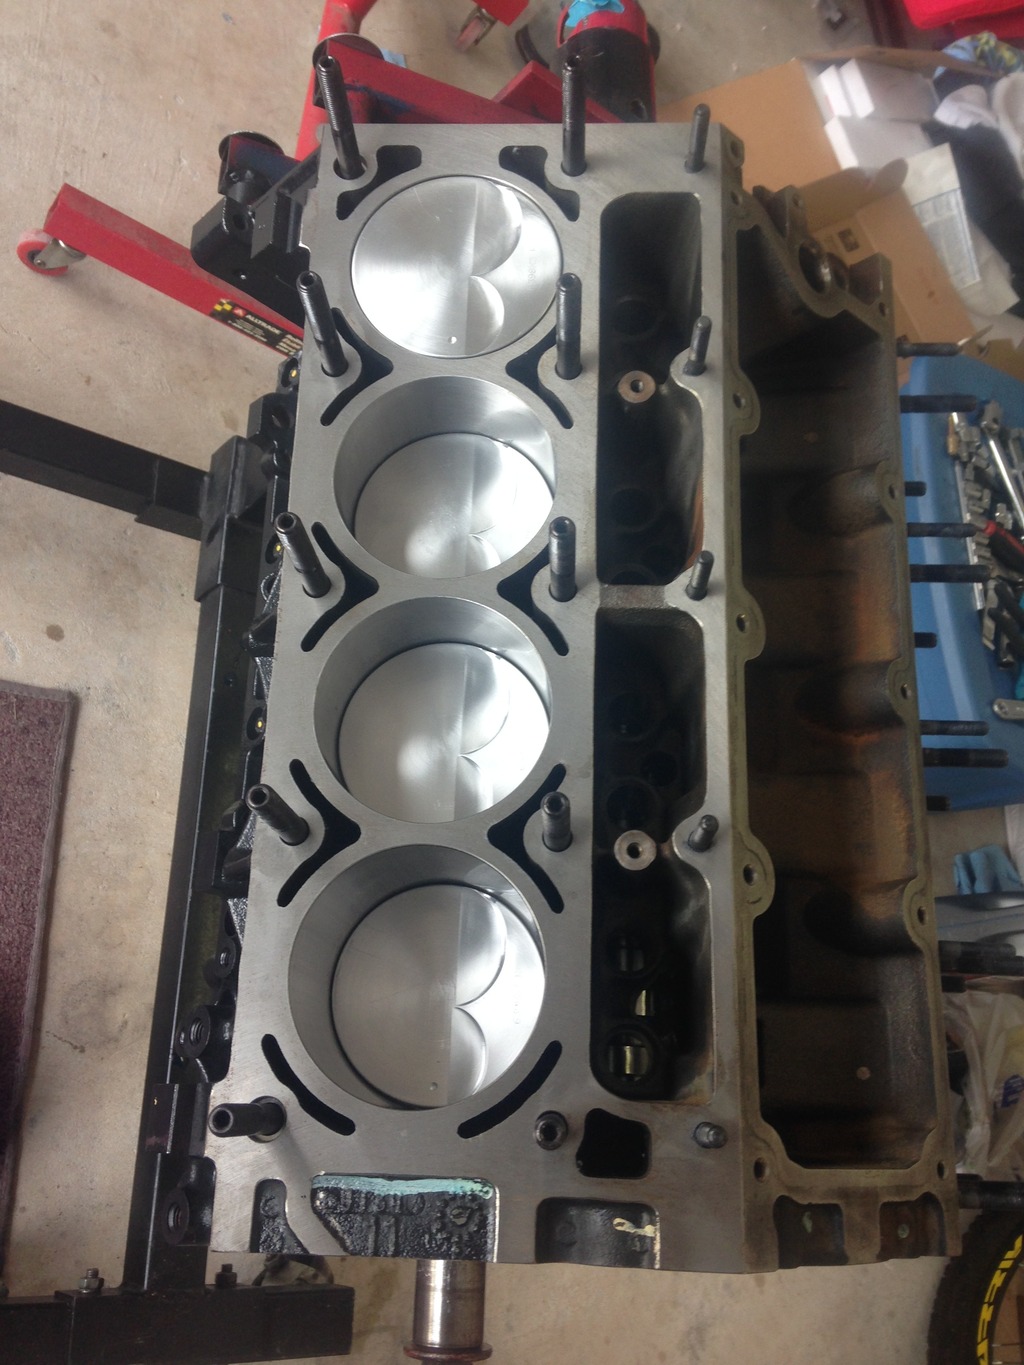
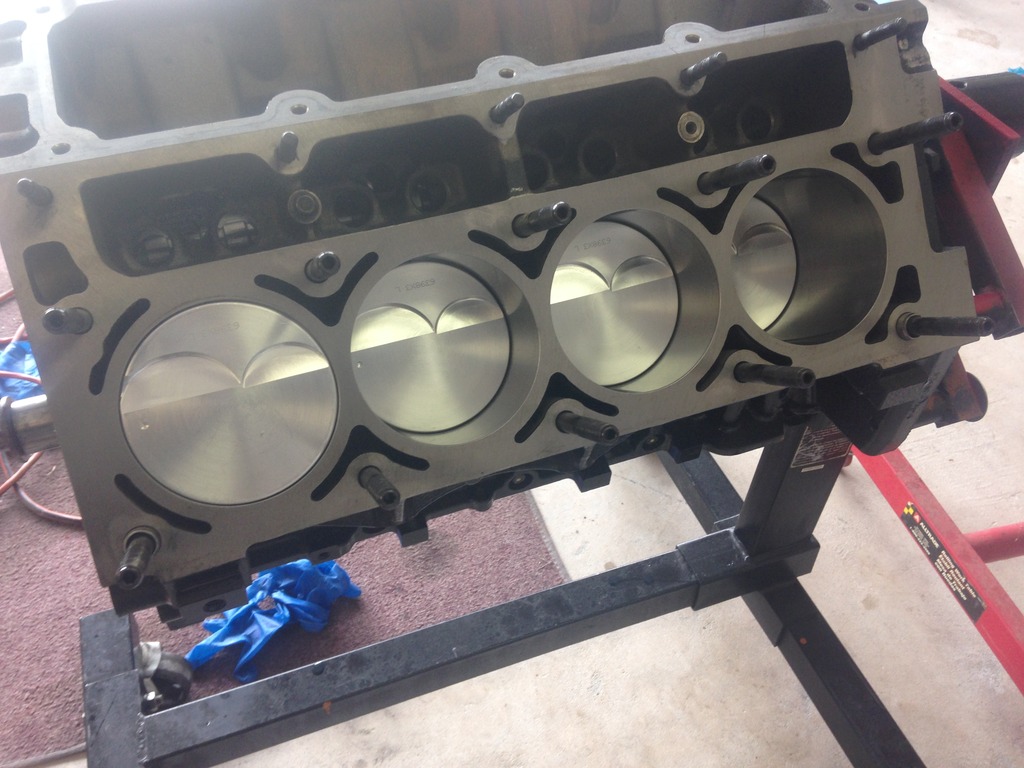
Heres some pics of the engine build from the beginning of diassembly to completion. I learned so much doing all myself! I used one of the LS assembly books that helped me greatly. Degree'ing the camshaft was a bitch in the beginning but i stuck with it and got it all figured out. CANT WAIT TO FIRE IT!!!!
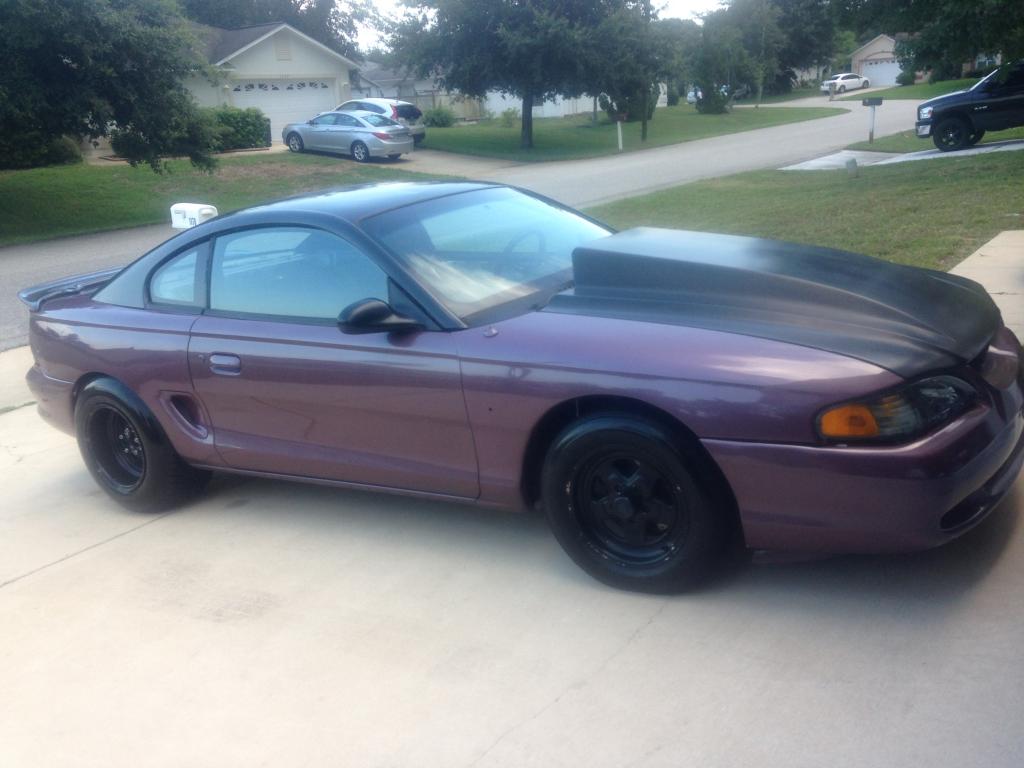
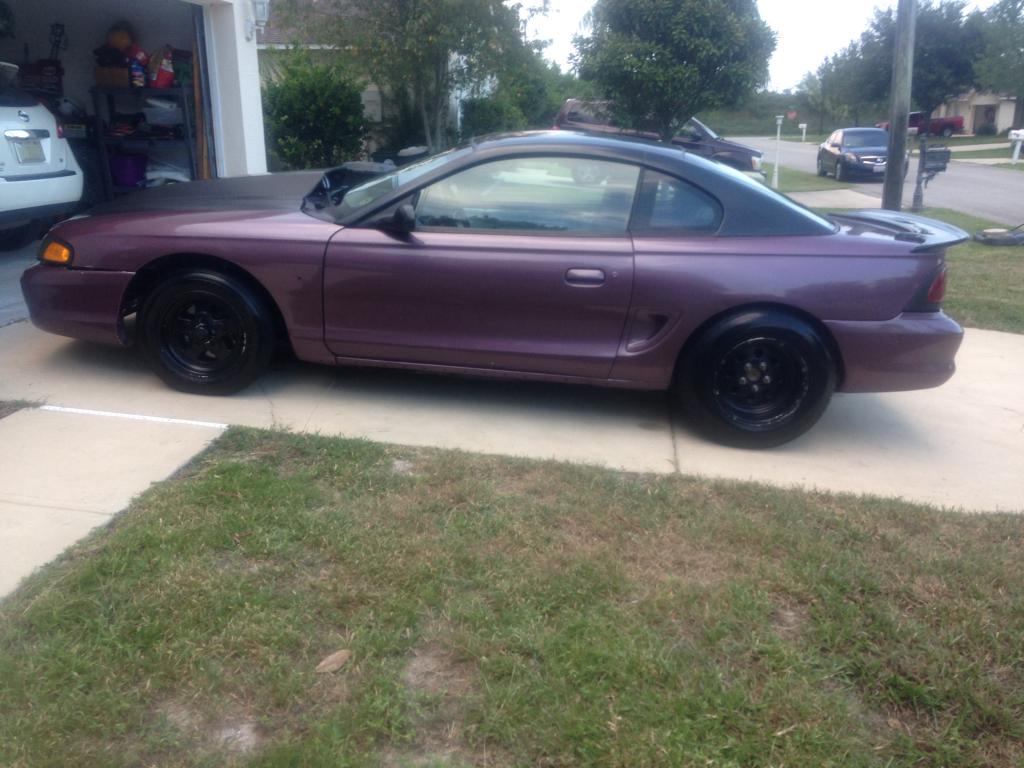
The Car
Video of 5.3
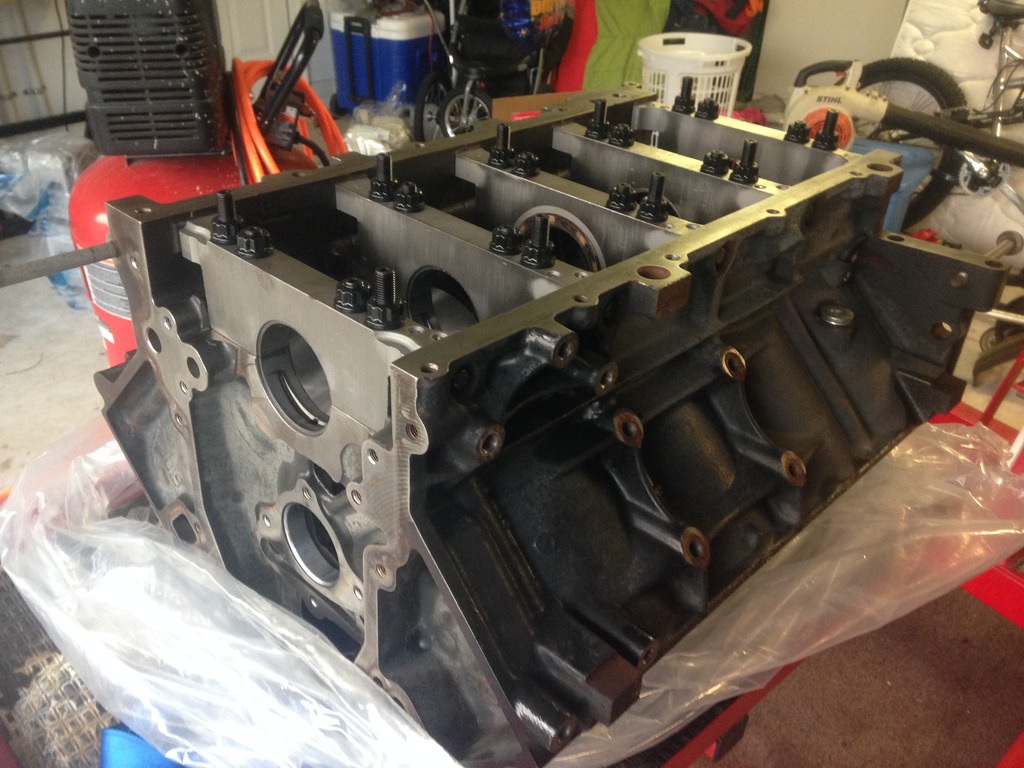
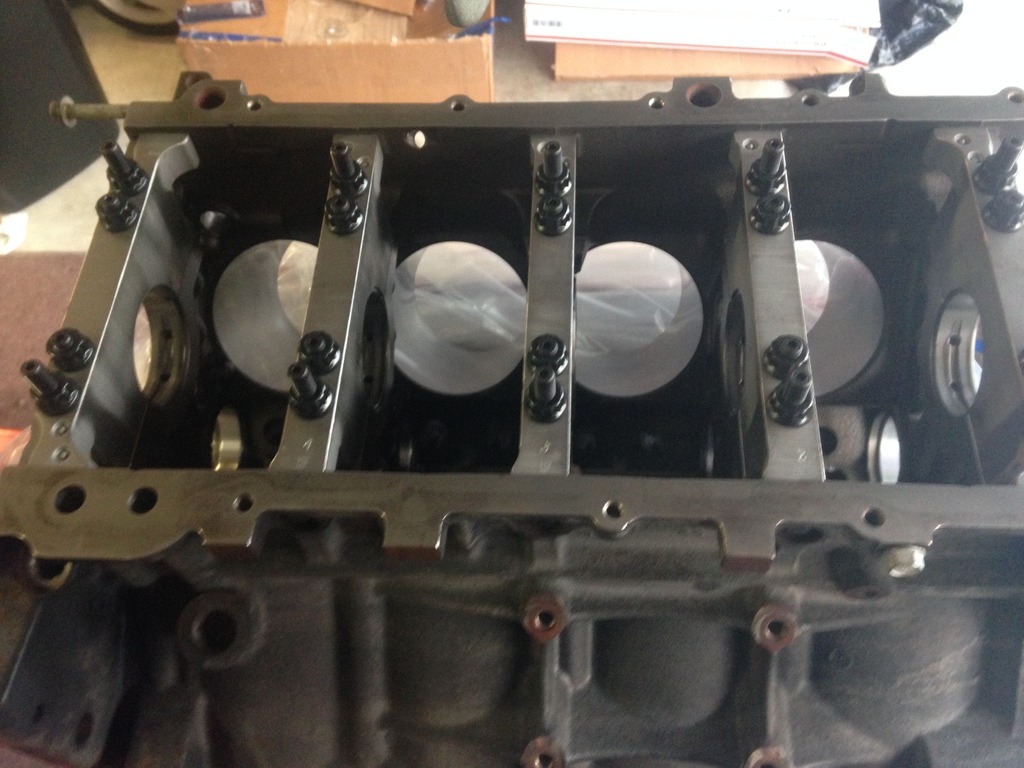
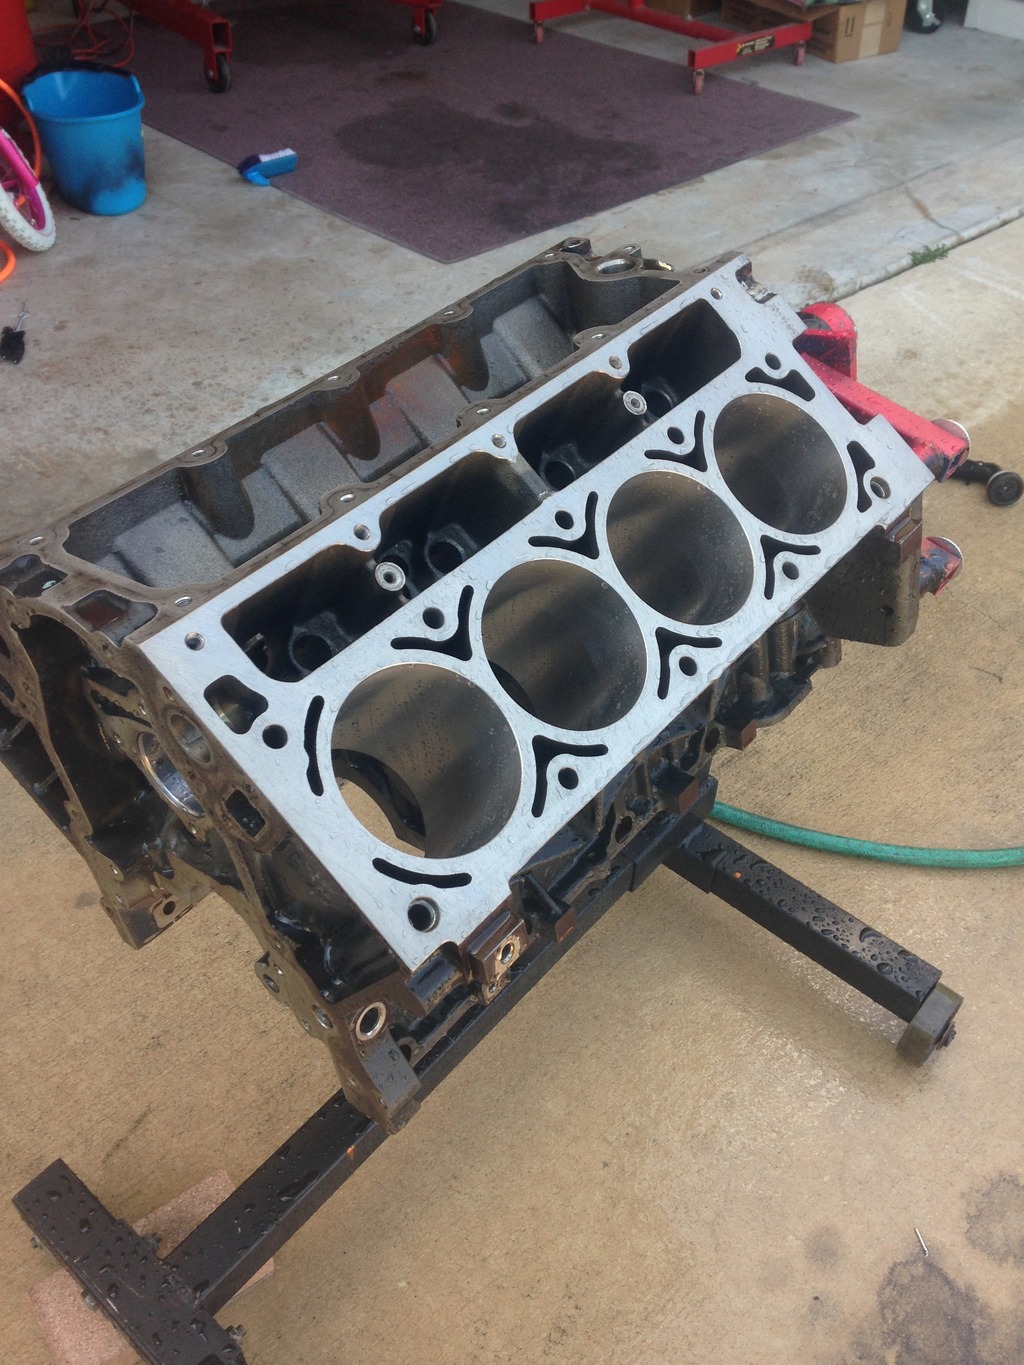
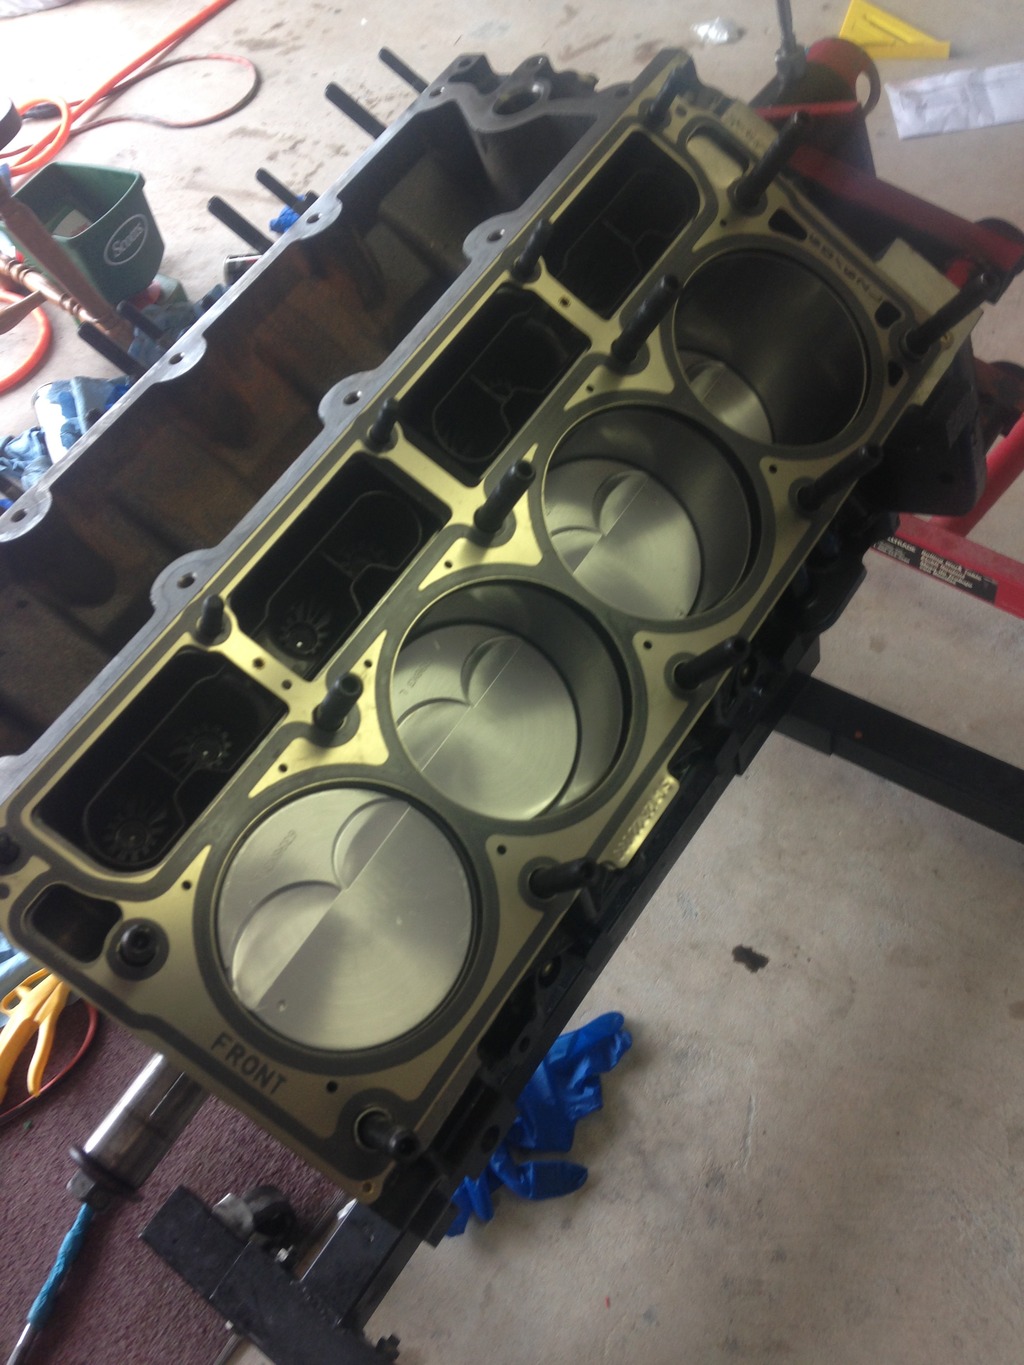
370 Build
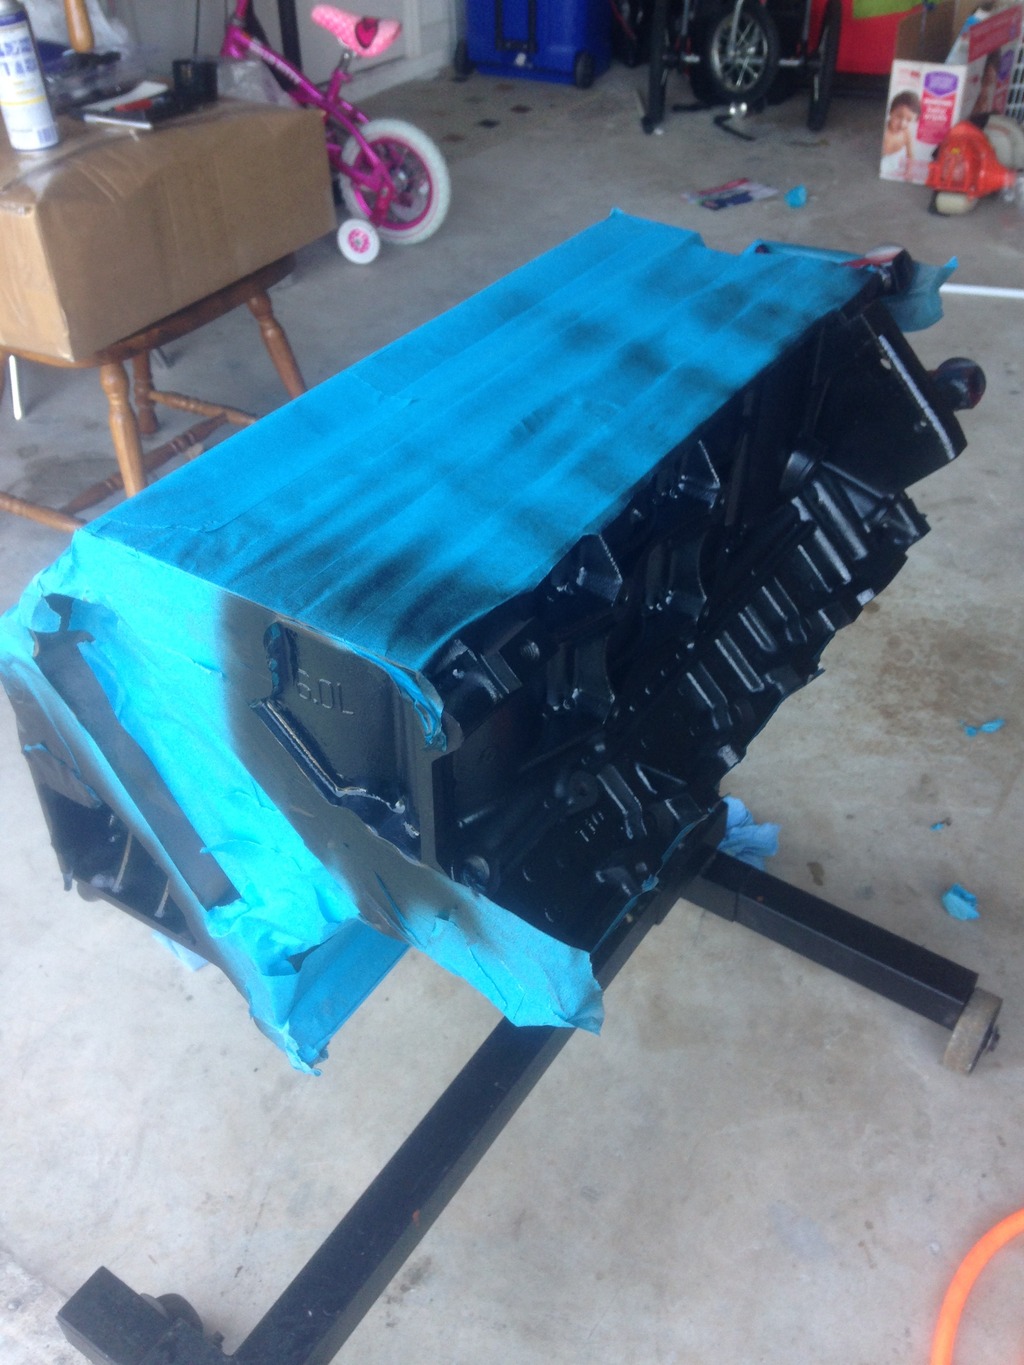
2005 block
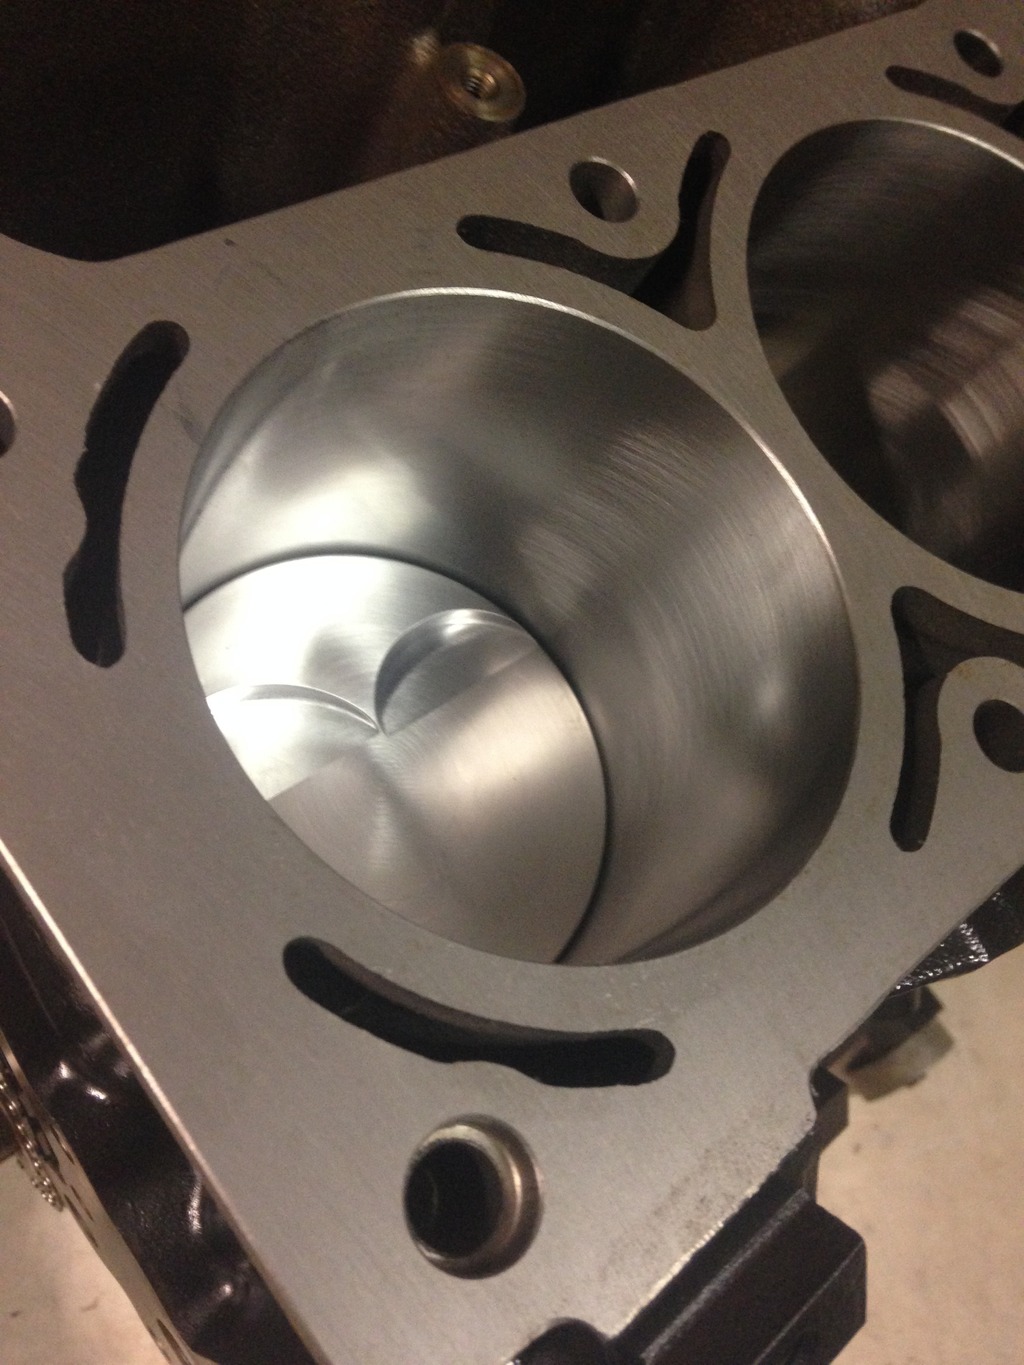
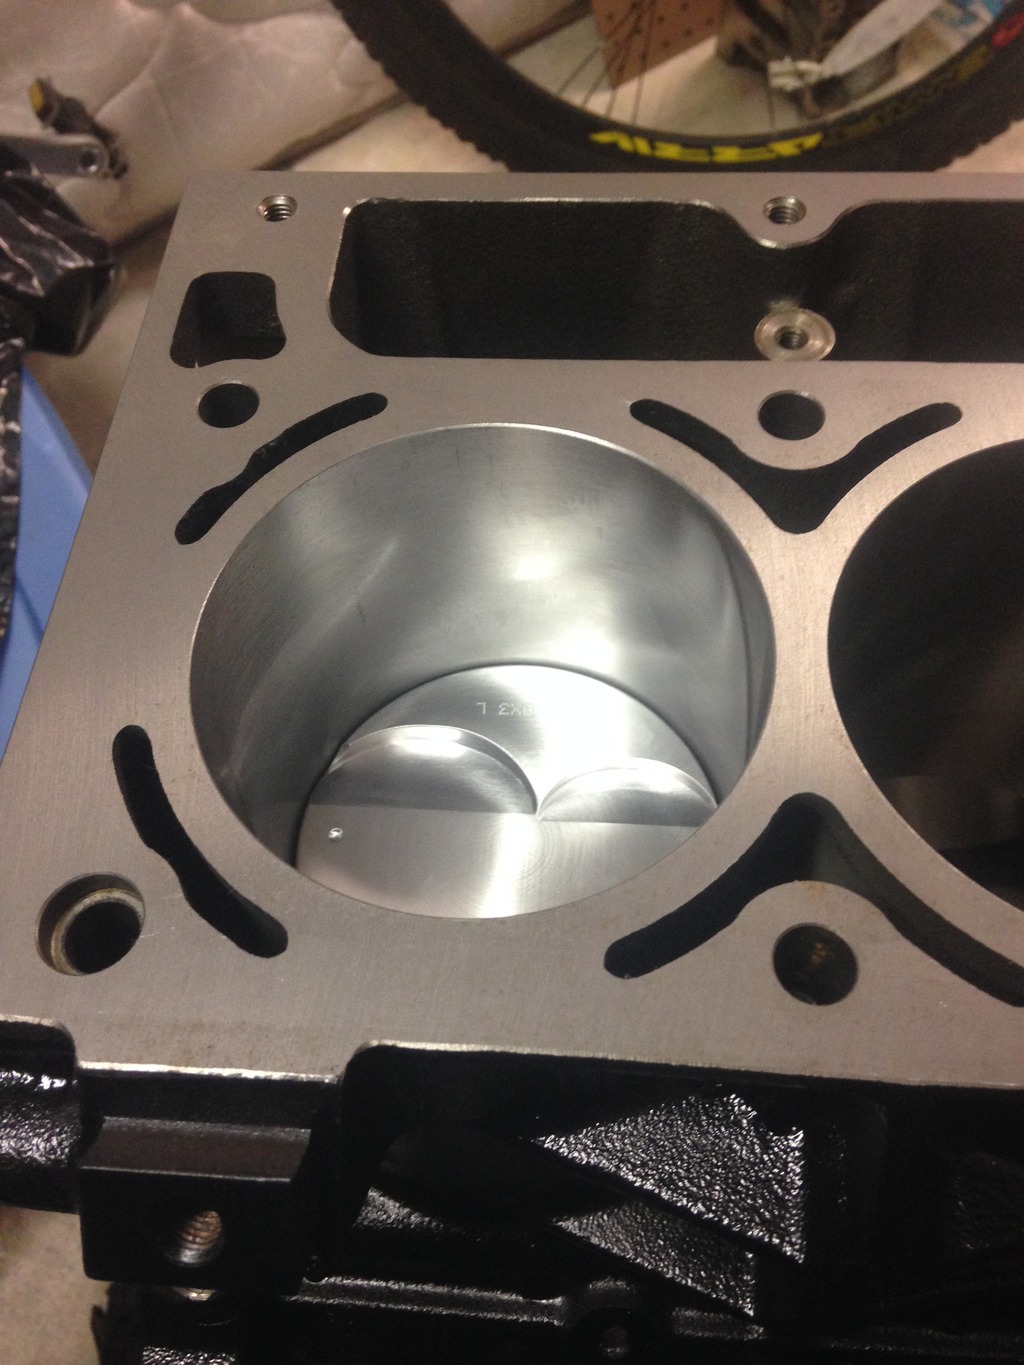
bored .035, torque plate honed, decked and squared
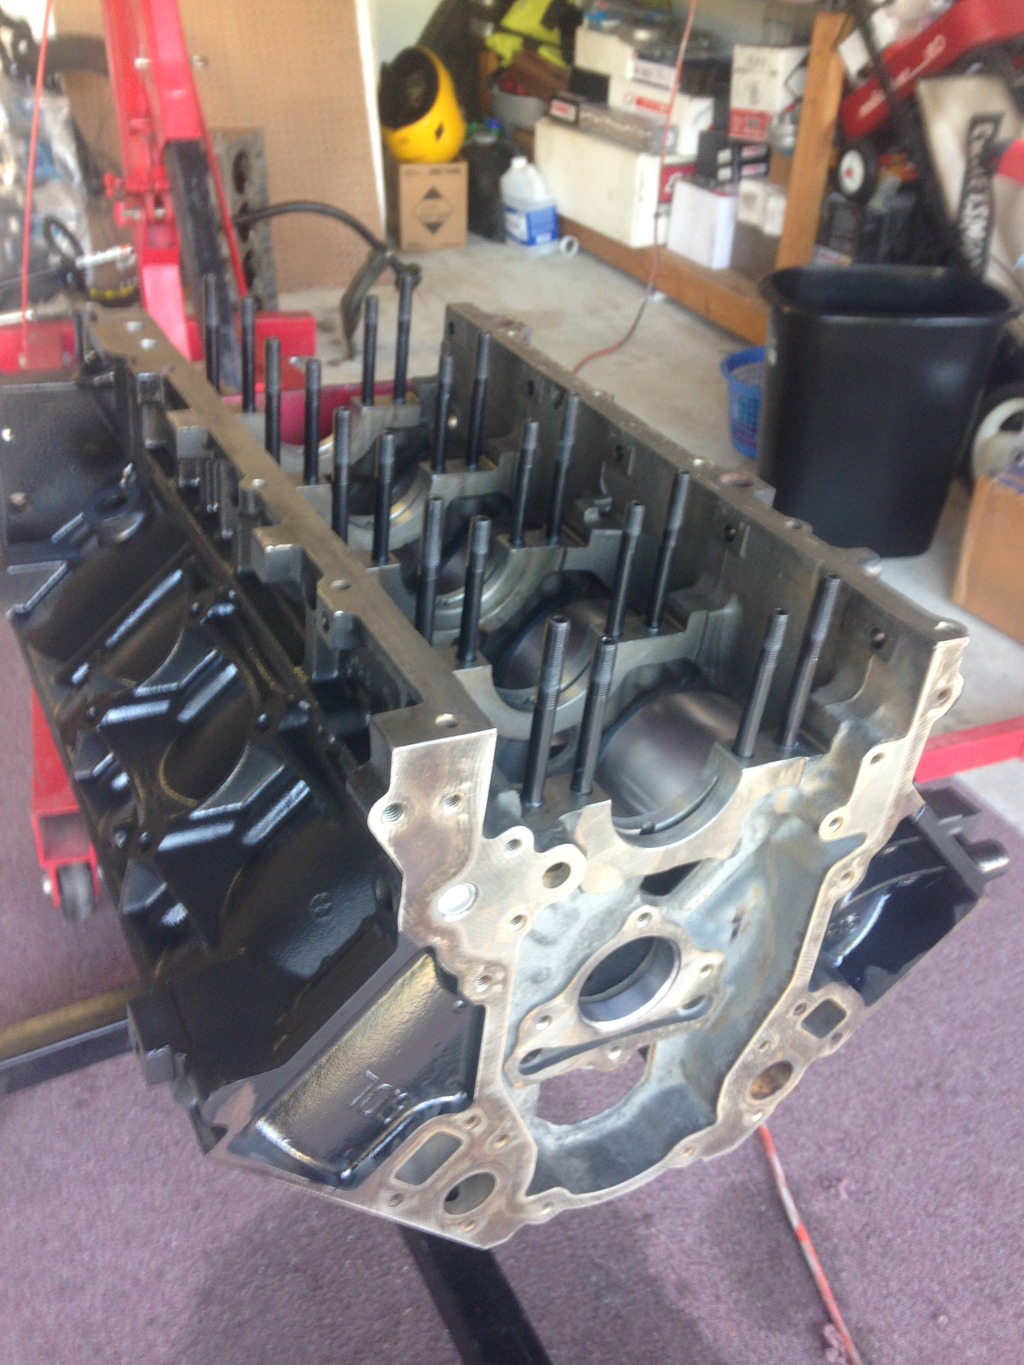
Clevite main/rods bearings to clearence
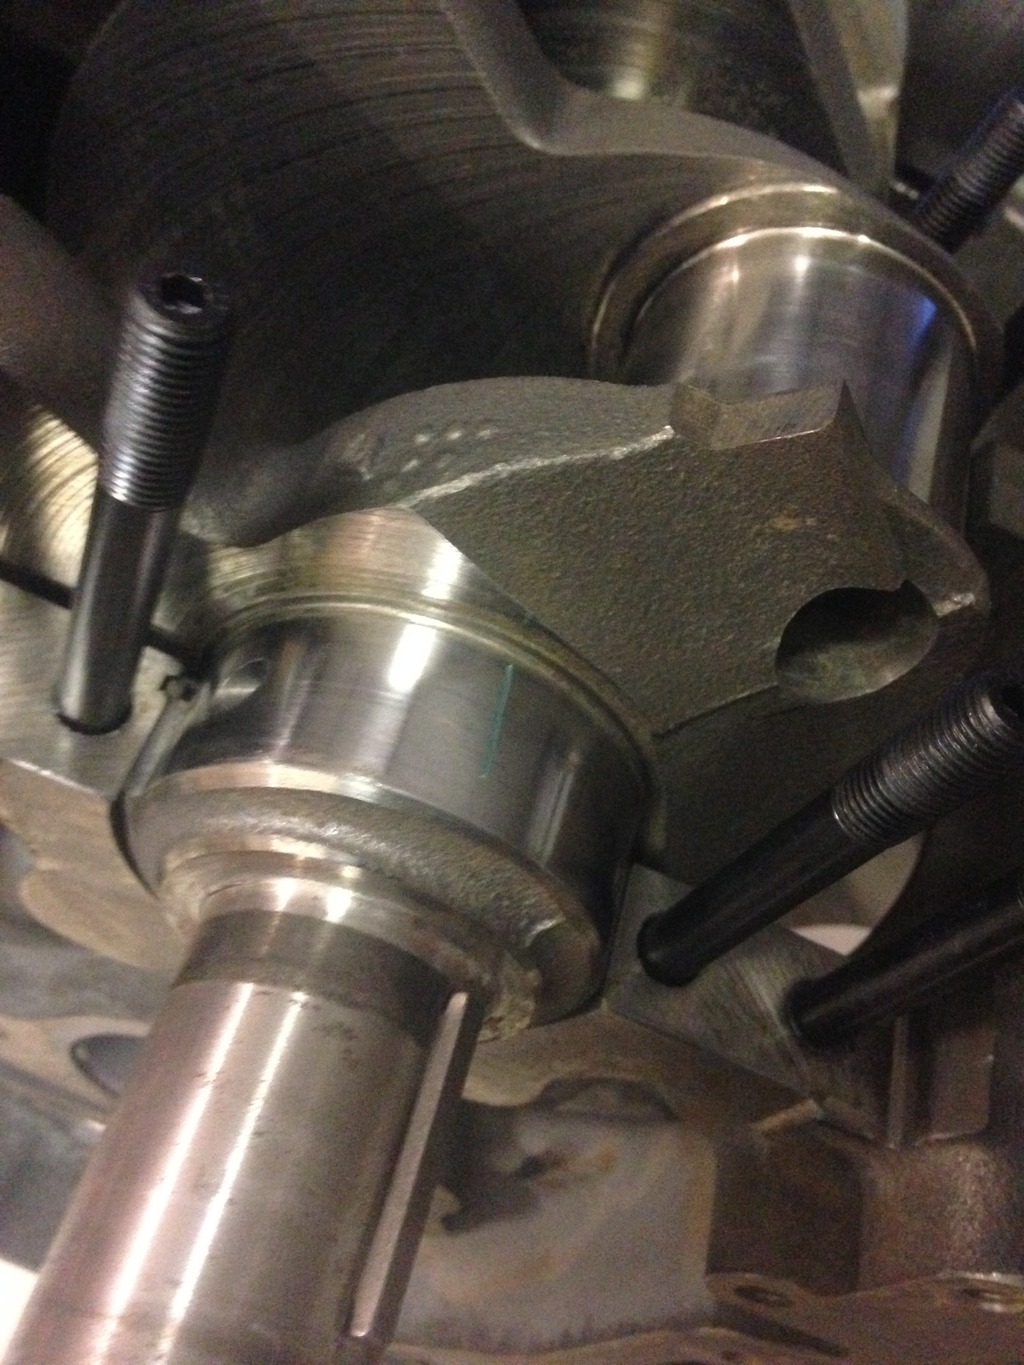
arp main studs
stock polished crankshaft
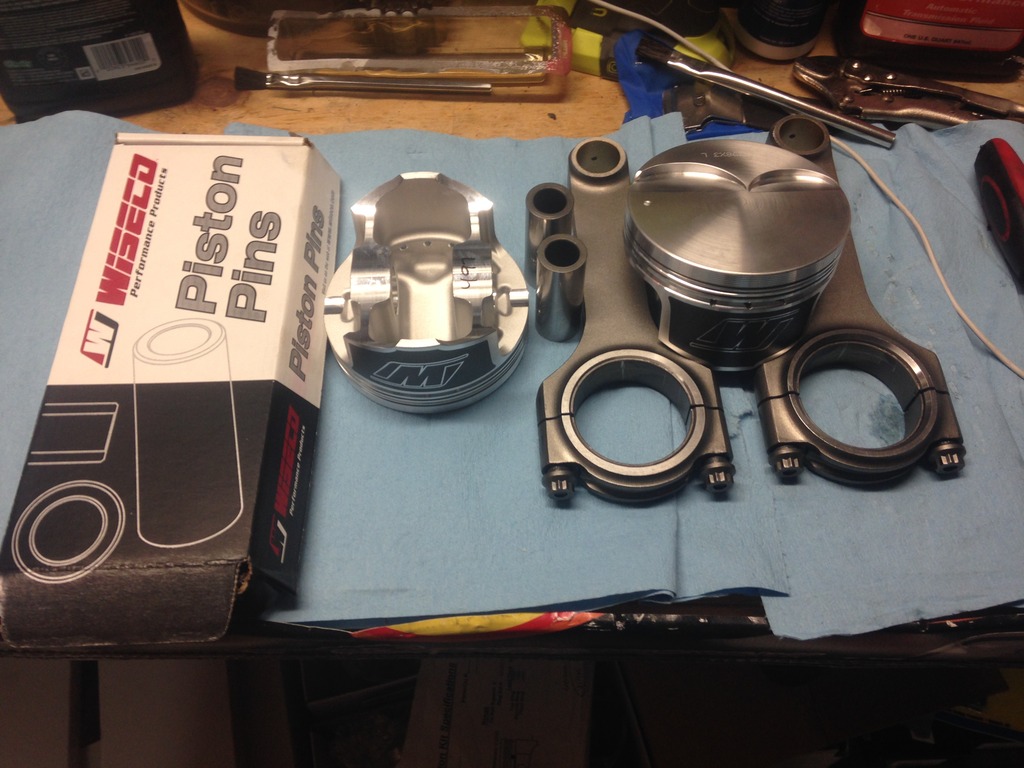
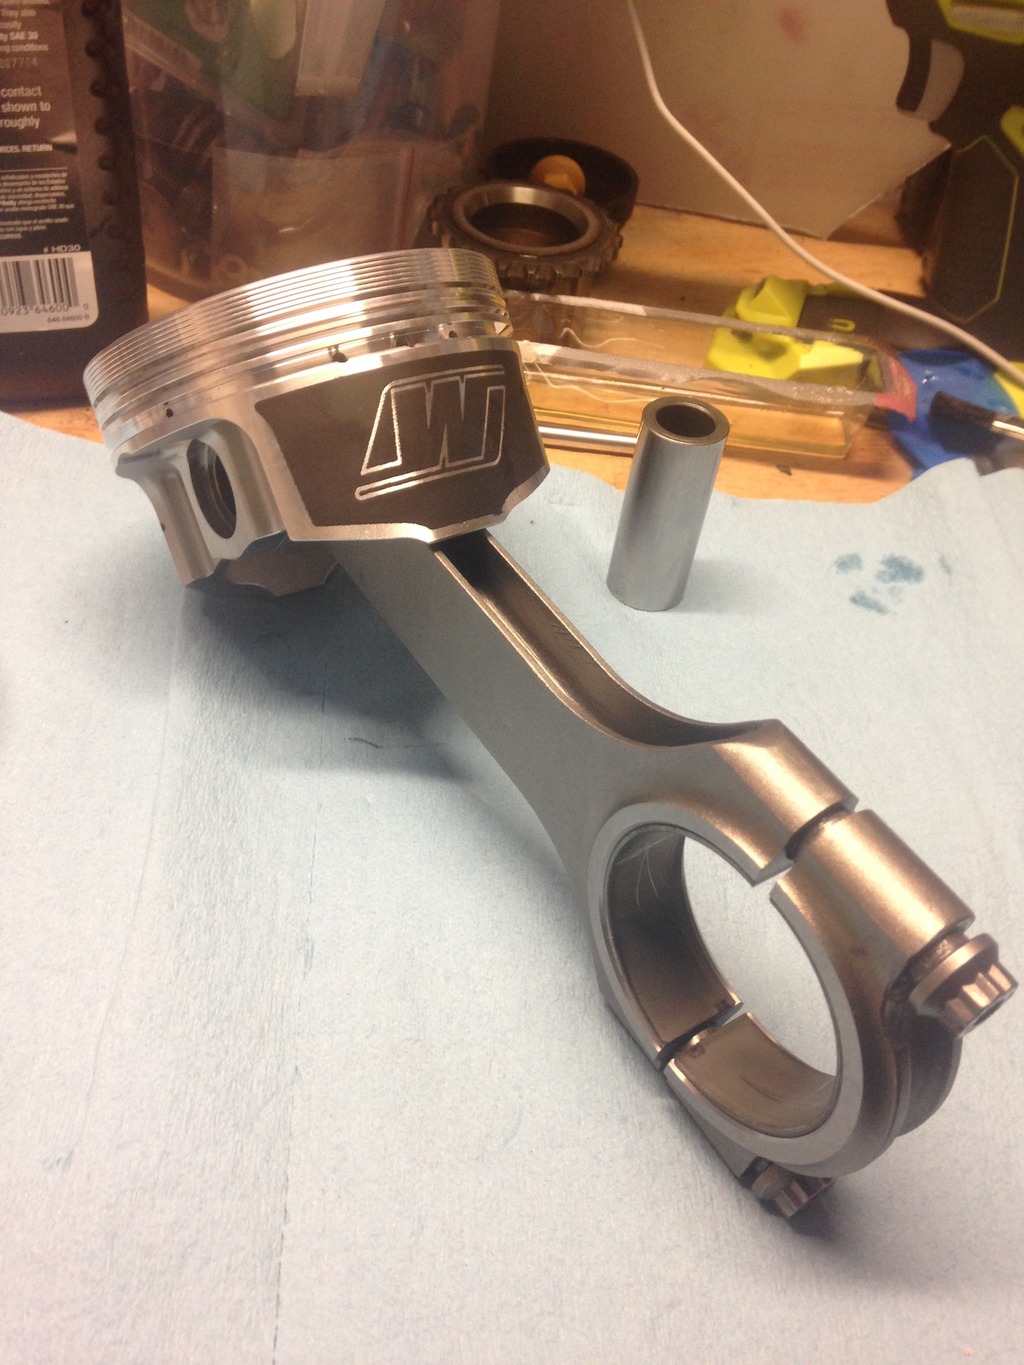
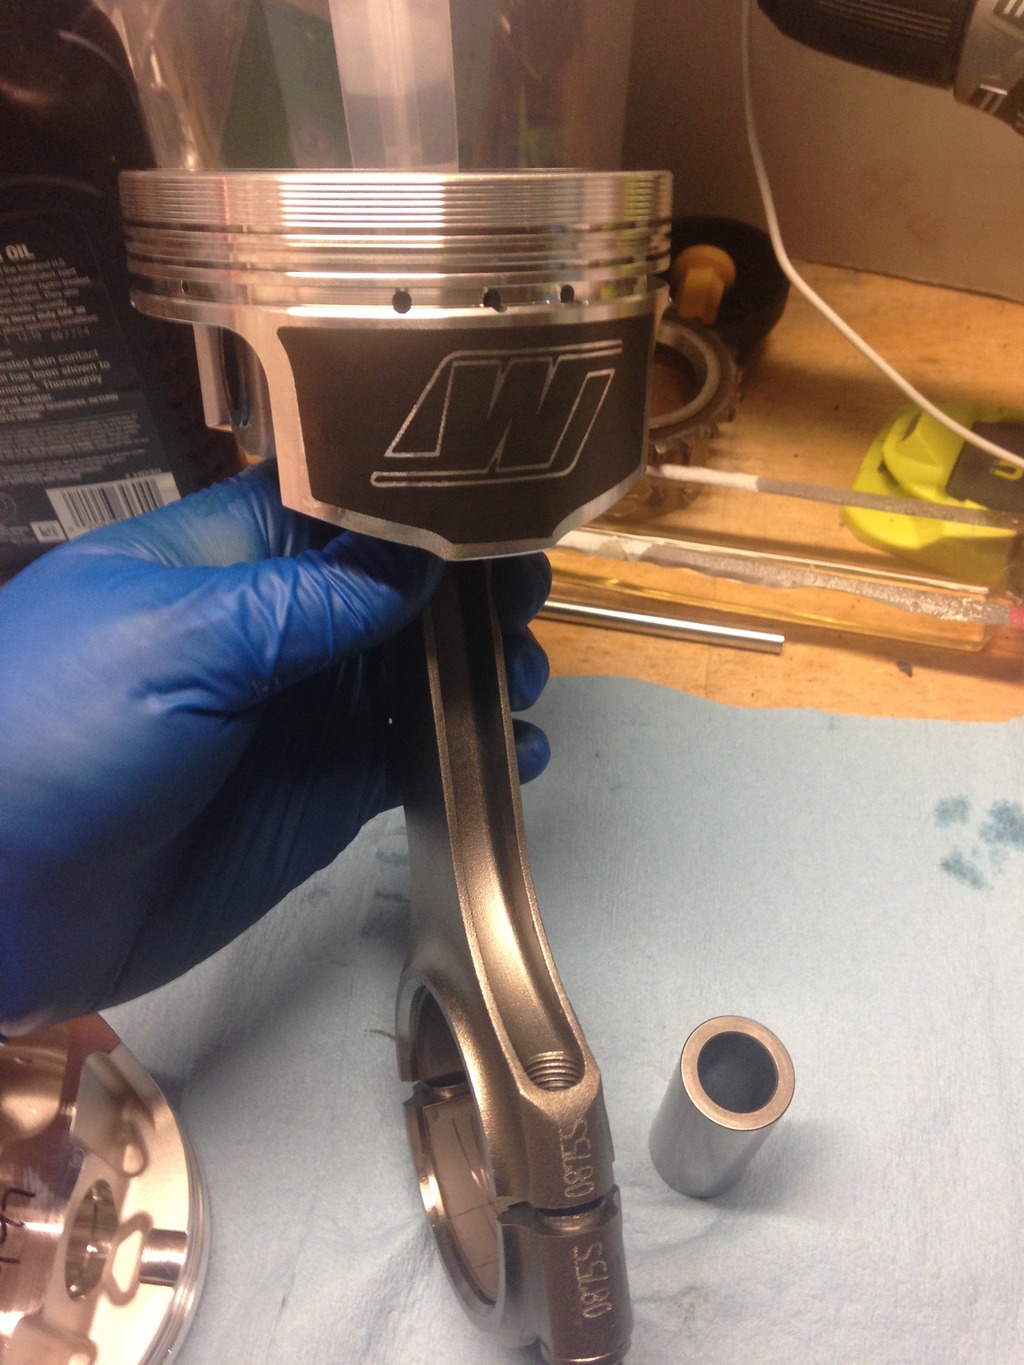
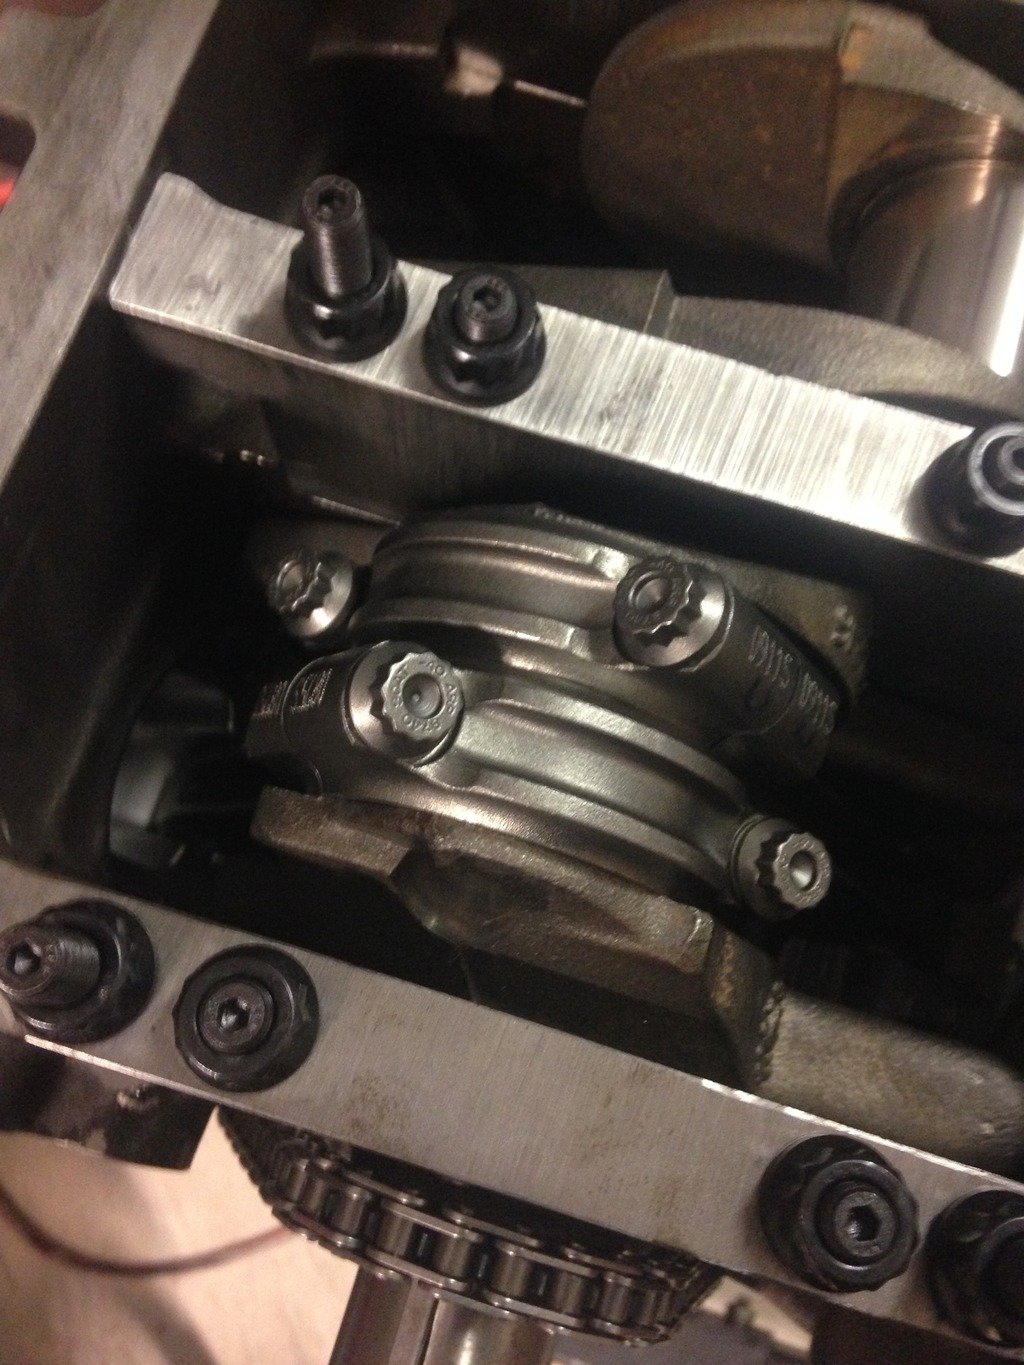
Scat H beam rods
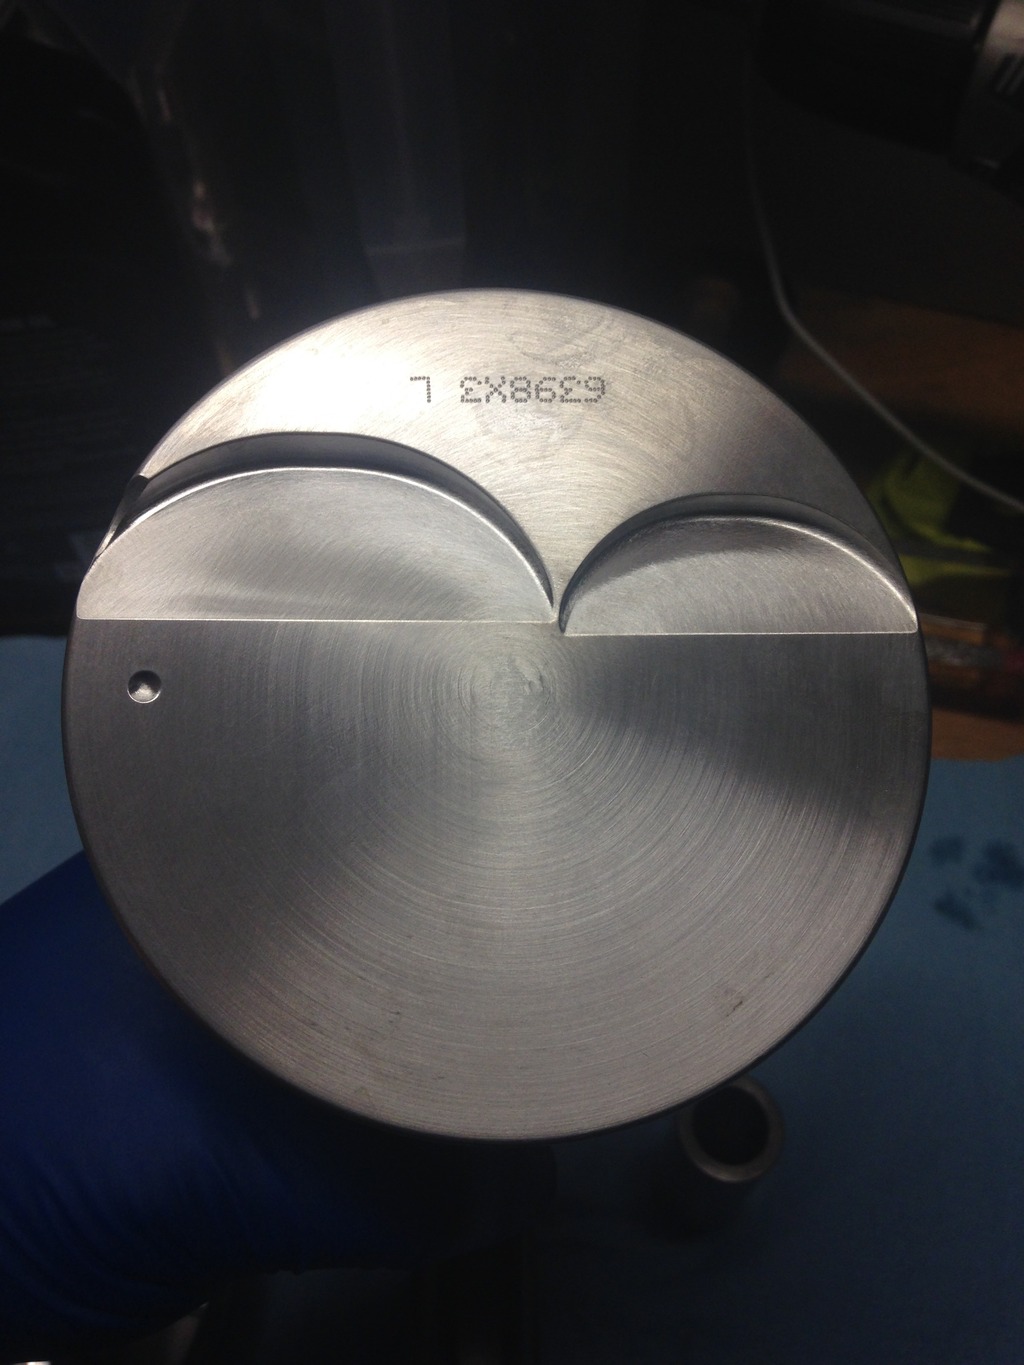
Wiseco K398x 2618 forged pistons with skirt coating
Wiseco Gfx rings gapped at .28
Ported LS6 oil pump
GMPP Muscle car pan
ATI Dampner
LilJons Custom Hydraulic Roller
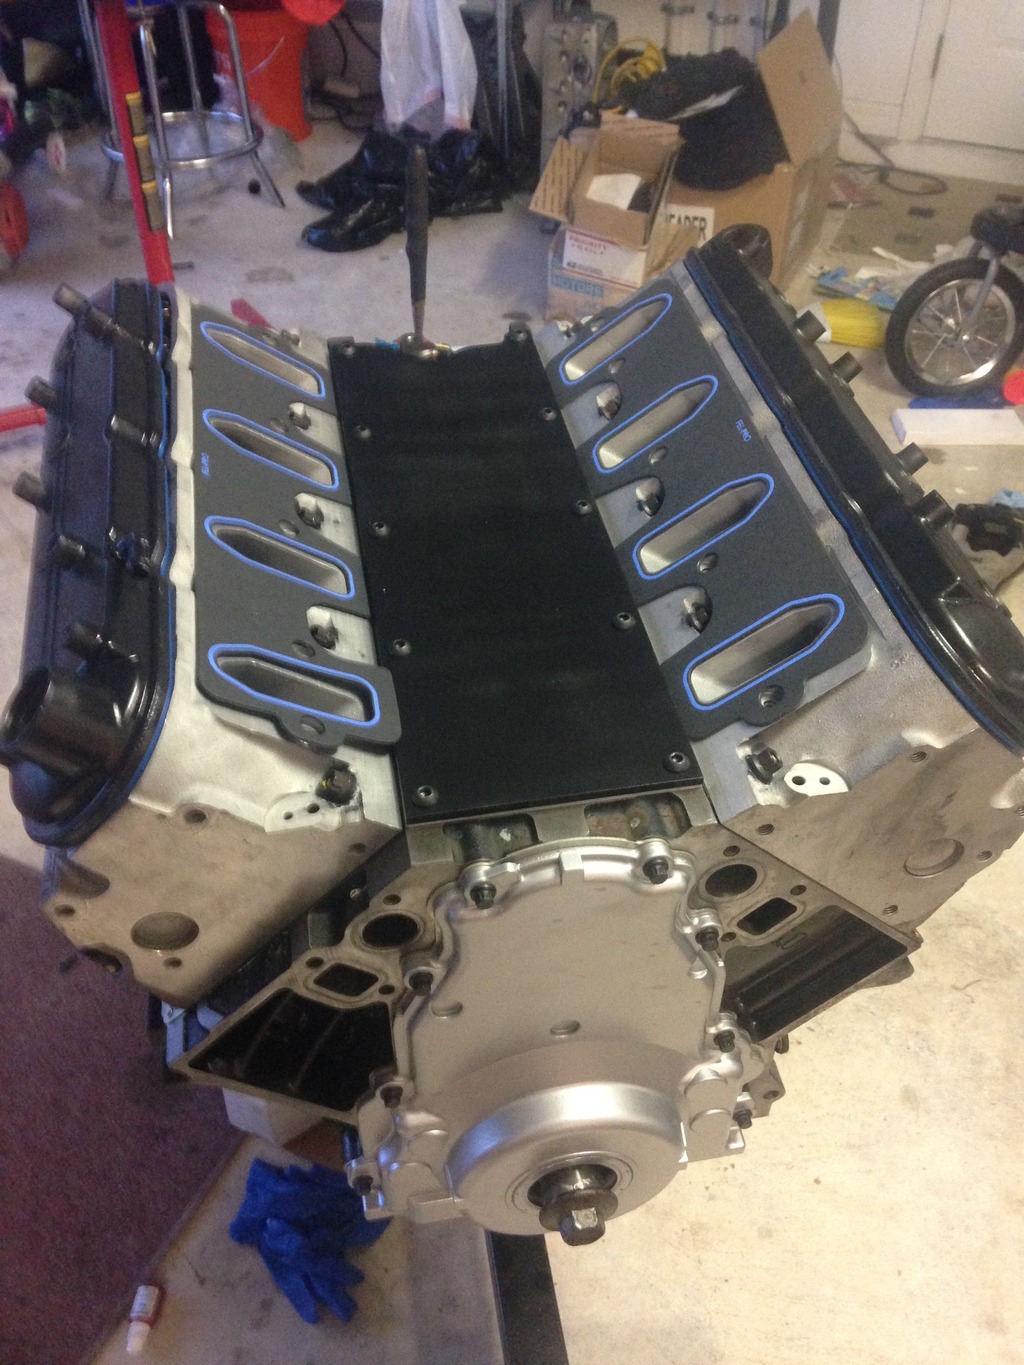
GMPP LS9 gaskets installed dry
Alpermotorsports Head studs 85ftlbs
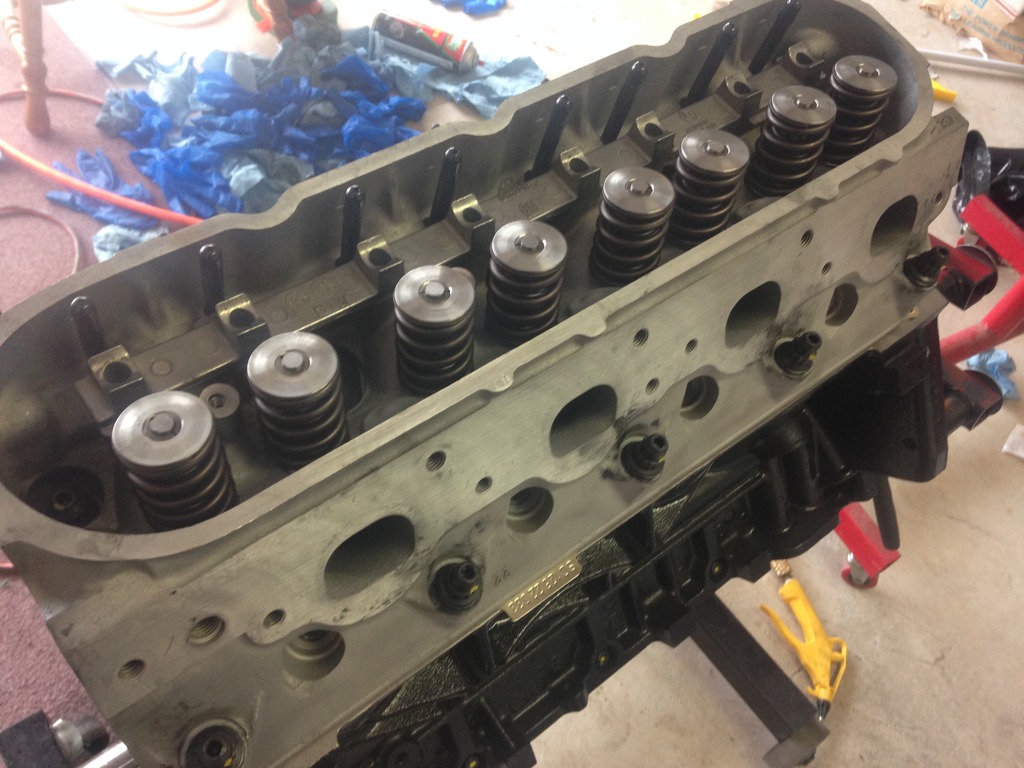
317 heads cleaned blasted, decked
PRC .650 springs, TI retainers, stock valves
Comp .80 wall one peice pushrods
Comp Trunion Upgrade
Fel Pro gaskets throughout
Edelbrock Super Victor Intake manifold
Carb Shop E85 Blow Through Billet Annular boosters holley 750 4150 Carb
Procharger Hat with extension ring underneath


OLD SETUP
03 5.3 225k mileage (don't care lol paid 500.00)
melling hv pump
ls2 timing set
GMPP ASA cam 226/236 .525/.525 110
Mls gaskets
comp 7.4 pushrods
Chinese head studs
862 heads milled .030
Comp 26-915 beehive springs
NGK Br7EF plugs
edelbrock vic jr intake
msd 6010
Barry Grant Mighty Demon 750 annular carb
Dynatech 1 7/8 longtubes, x pipe, ultra flo mufflers
Jw Th400 Reverse manual transbrake trans
Revmax Billet 3600 nitrous convertor
3100lb SN95 mustang
Full Upr chromoly tubular front everything
strange 10 way front/rear
Full Team Z rear suspension
1000hp 8.8 rear (spool,4.10,33spl mosers)
275/60/15 rear
The car was tuned on 93 pump gas for the motor and has a front cell for nitrous that runs 118 Outlaw N20 fuel.
In 97 degree heat the car made 308 WHP on motor through the TH400. The car made 475 wheel on a 15 year old nitrous works single plate on a 175. We did jet the car to 225 but, with the ASA cam being a 110 lob sep It didn't pick up enough hp to justify spraying it with that so I backed it down to the 175.
NEW SETUP
The camshaft is a Custom hydraulic roller from John Bewley @ Liljohnsmotorsports (similar stage 3'ish). The cam has a good amount of overlap in it due to this setup being a Blow Through style setup.. Very excited to hear the lope its going to have! The head gaskets are GMPP Ls9's installed dry with Alpermotorsports head studs. Stock rockers with Comp trunions installed. Topping the engine off is a edelbrock Super Victor manifold and Carb Shop Blow Through Holley 750 E85 billet annular booster carb. Pretty simple setup!
Heres some pics of the engine build from the beginning of diassembly to completion. I learned so much doing all myself! I used one of the LS assembly books that helped me greatly. Degree'ing the camshaft was a bitch in the beginning but i stuck with it and got it all figured out. CANT WAIT TO FIRE IT!!!!
The Car


370 Build
2005 block
bored .035, torque plate honed, decked and squared
Clevite main/rods bearings to clearence
arp main studs
stock polished crankshaft
Scat H beam rods
Wiseco K398x 2618 forged pistons with skirt coating
Wiseco Gfx rings gapped at .28
Ported LS6 oil pump
GMPP Muscle car pan
ATI Dampner
LilJons Custom Hydraulic Roller
GMPP LS9 gaskets installed dry
Alpermotorsports Head studs 85ftlbs
317 heads cleaned blasted, decked
PRC .650 springs, TI retainers, stock valves
Comp .80 wall one peice pushrods
Comp Trunion Upgrade
Fel Pro gaskets throughout
Edelbrock Super Victor Intake manifold
Carb Shop E85 Blow Through Billet Annular boosters holley 750 4150 Carb
Procharger Hat with extension ring underneath


Last edited by Serioussn95; 10-17-2015 at 01:38 PM. Reason: added vid


 08-30-2015, 01:08 PM
#5
Launching!
Thread Starter
iTrader: (1)
Join Date: Jun 2012
Location: Daytona Beach
Posts: 265
Likes: 0
Received 0 Likes
on
0 Posts
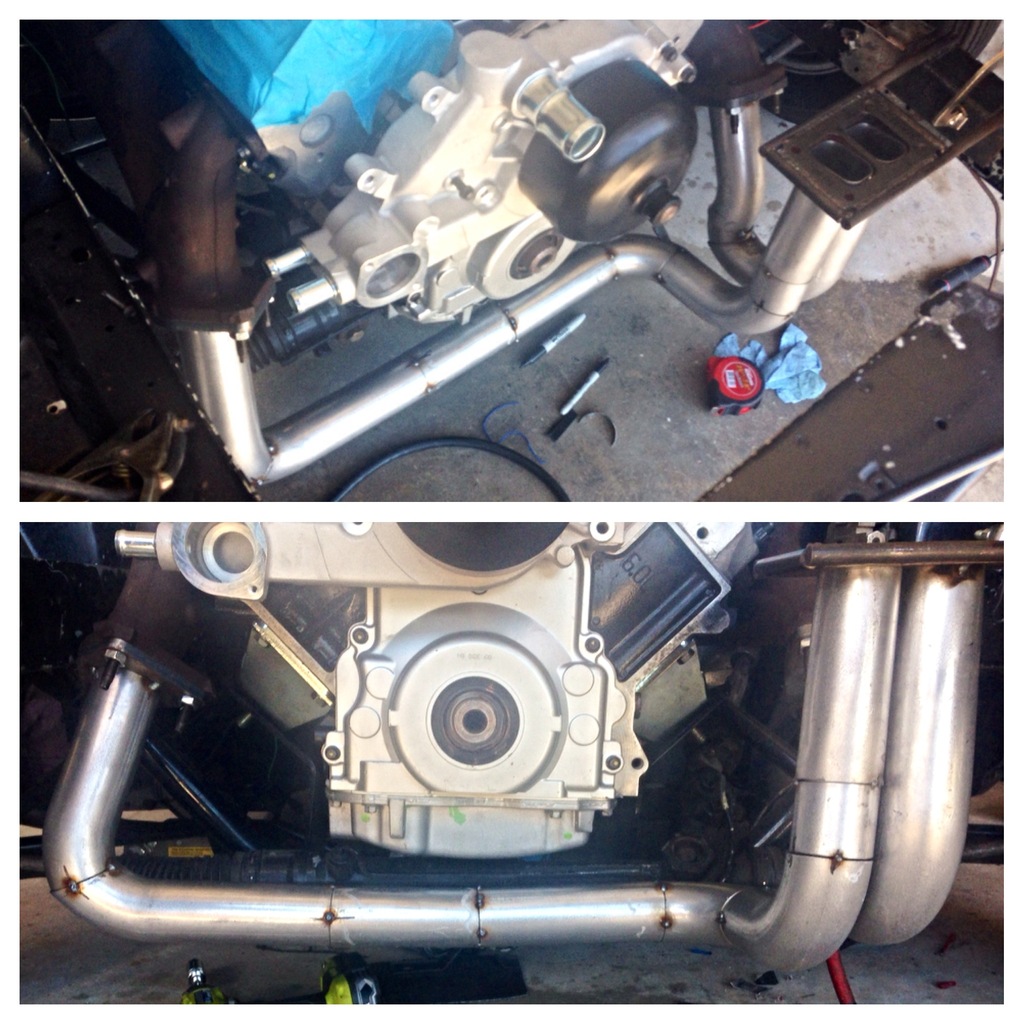
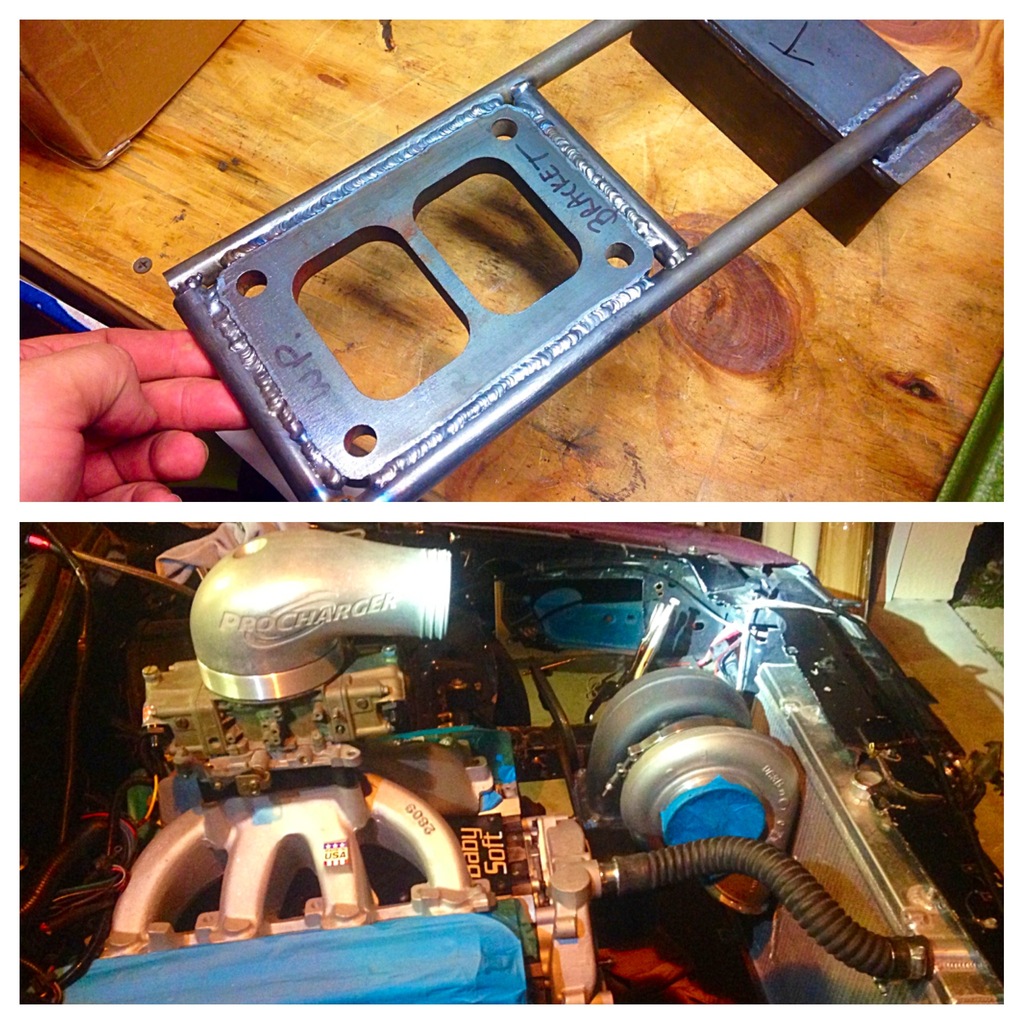
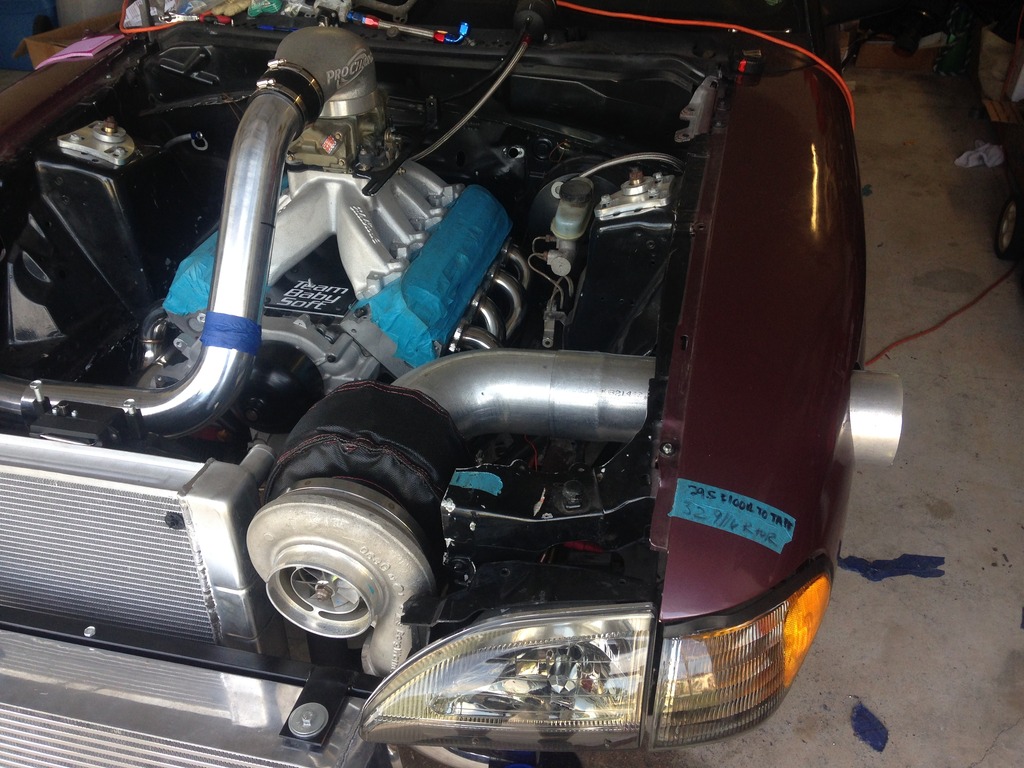
Heres pics of the turbo build. The turbo kit started out as the "Denmah" kit from Viren @ VS Racing. The orginal turbo was one of his 78/75 units but after falling into a super deal on a Borg Warner S480, I sold the 78/75 to a friend. The hotside piping was built from a Columbia Mandrel Super builder kit using 2.25 divided pipes into a raceparts solutions divided flange. The entire hotside is divided to help with spooling the T6 flanged turbo. I bought a cheap mig to do all of this but after getting more involved in the project I bought an AHP TIG 200x AC/DC unit. The unit works excellent and for the price I would say you cannot find a comparable unit!
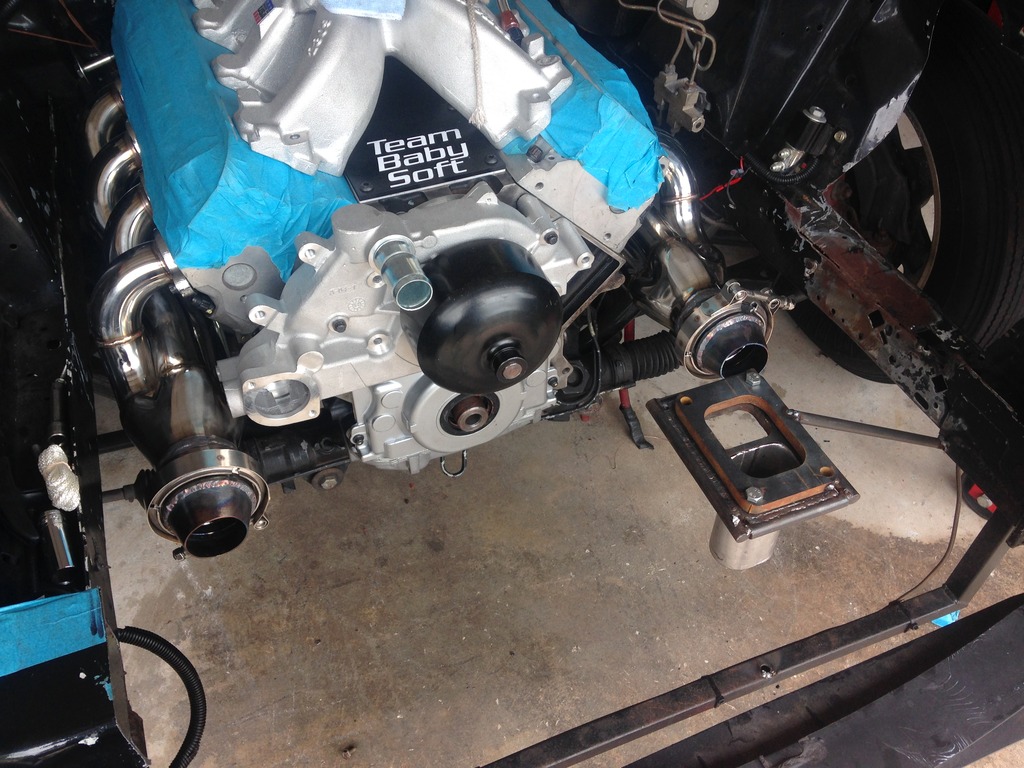
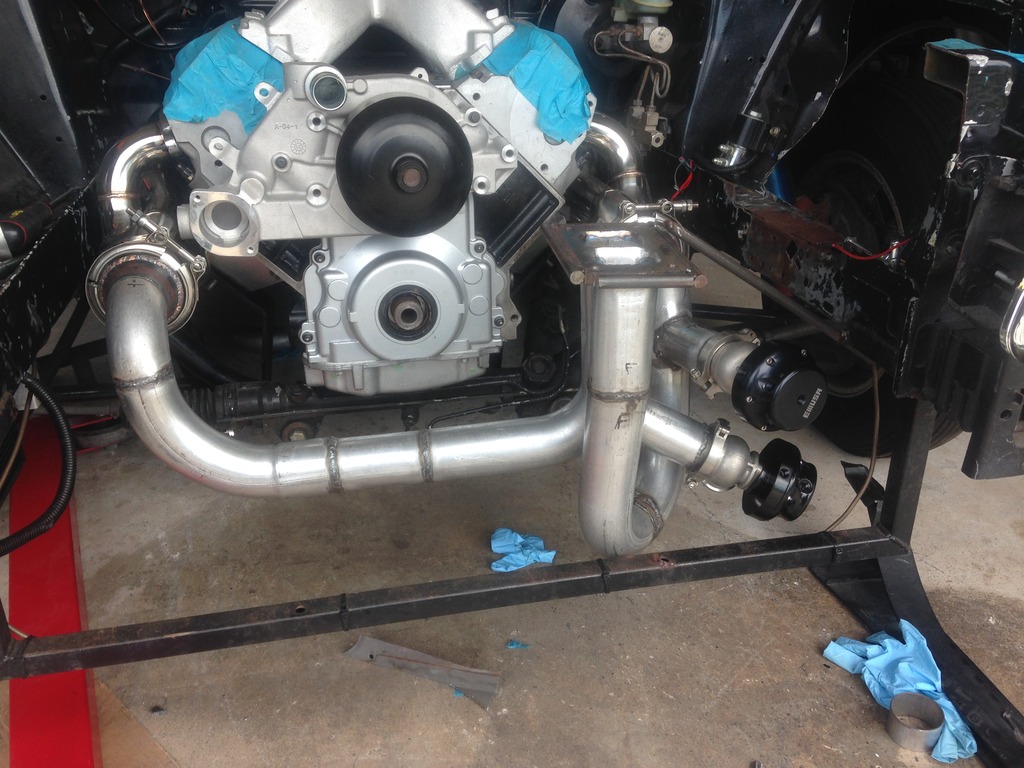
Originally I started out with non egr truck manifolds. After having a hell of a time with getting the turbo where I wanted it, I gave up on the manifolds and purchased the "ebay" stainless tubular headers from a guy on the classifieds. The quality is actually awesome, very this flanges and primary tubing. The only down fall was the collectors came off like 6-7" so I had to cut them, re weld them back down right off the collector. here was the original plan for turbo placement.

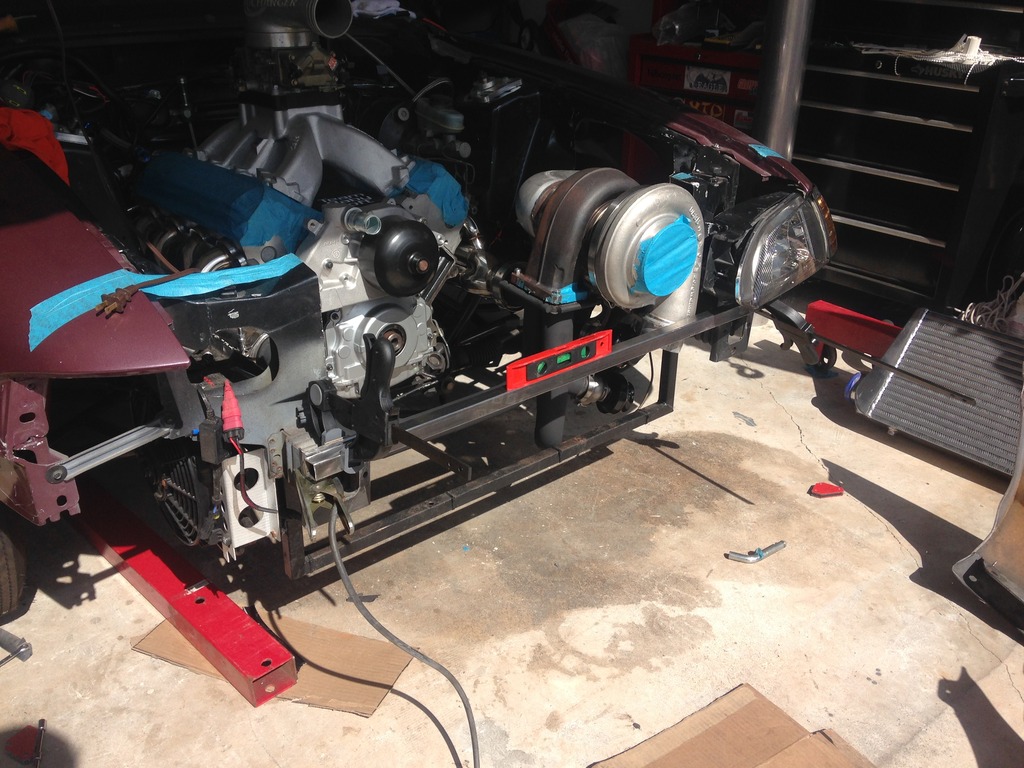
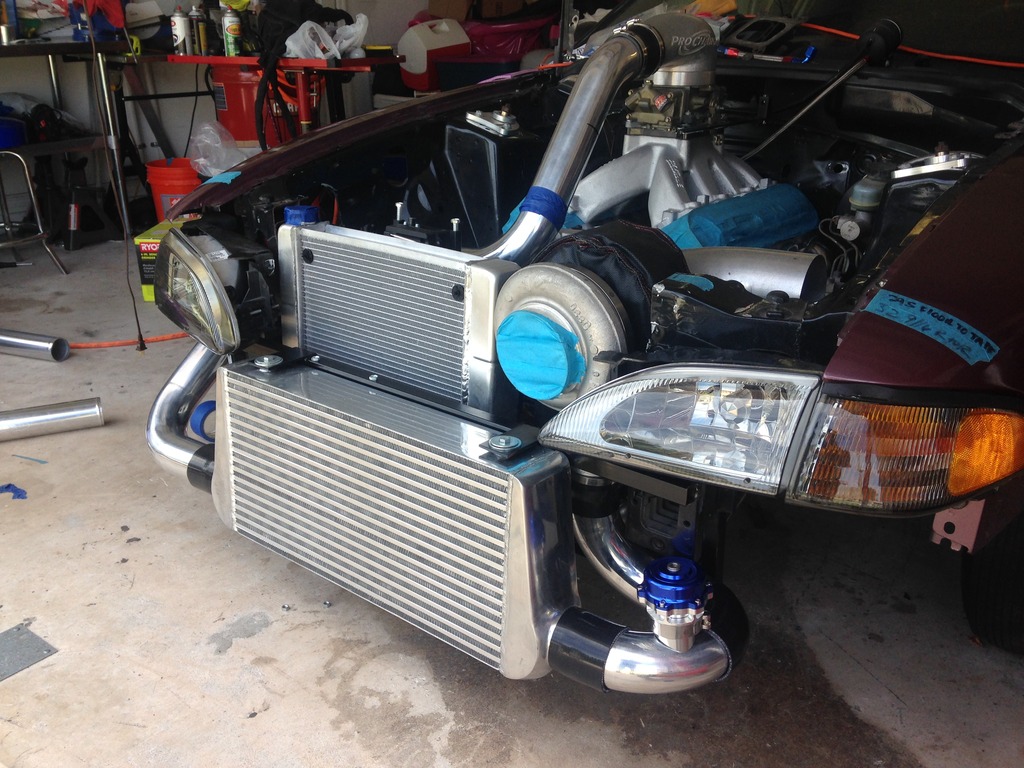
This was the first mockup. After having a buddy come over and convince me to say F*ck it, go forward facing that's what I ended up doing. I scrapped this plan and used some of the piping on the new setup.
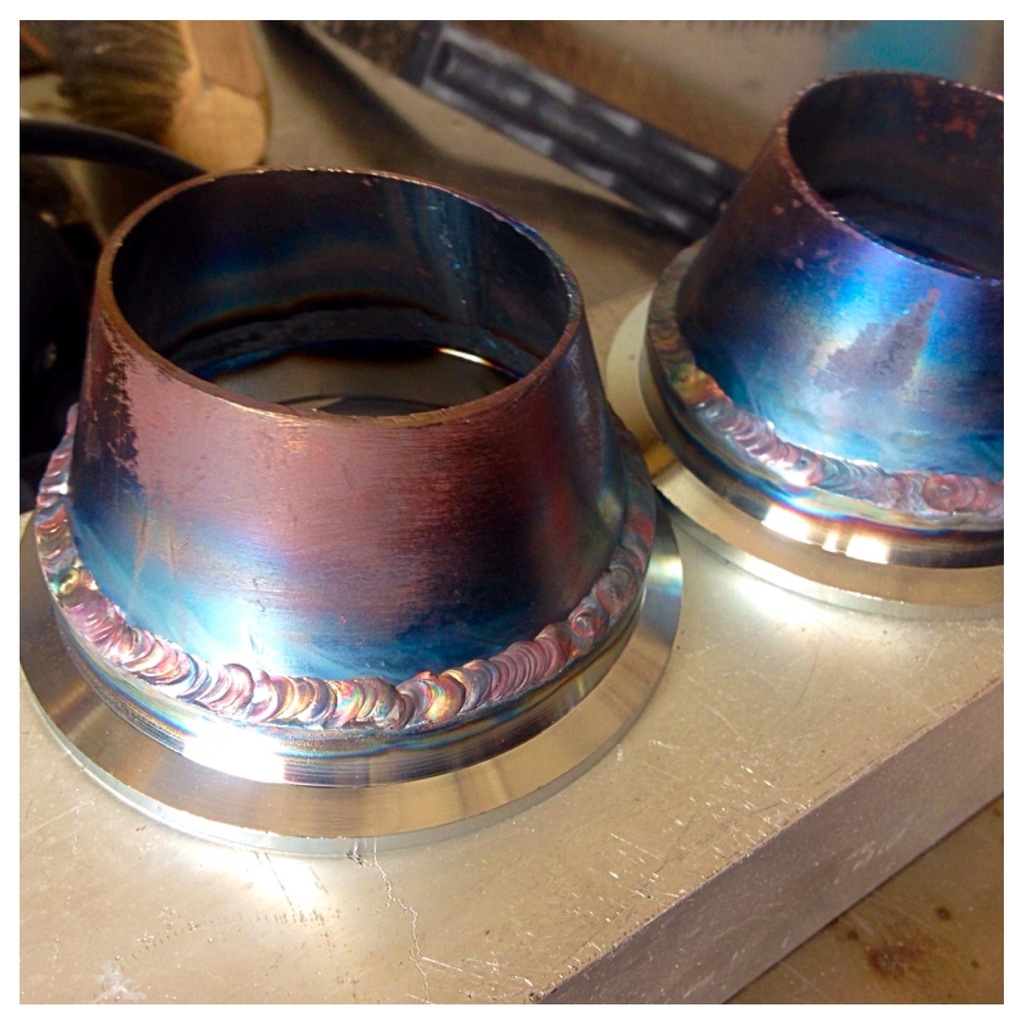
These are the reducer cones I cut down to fit the v bands on the tubular headers. This was a bit of a bitch bc the only thing I could use was a cutoff wheel instead of a saw. Also my first time tigging stainless steel. Still working at it lol

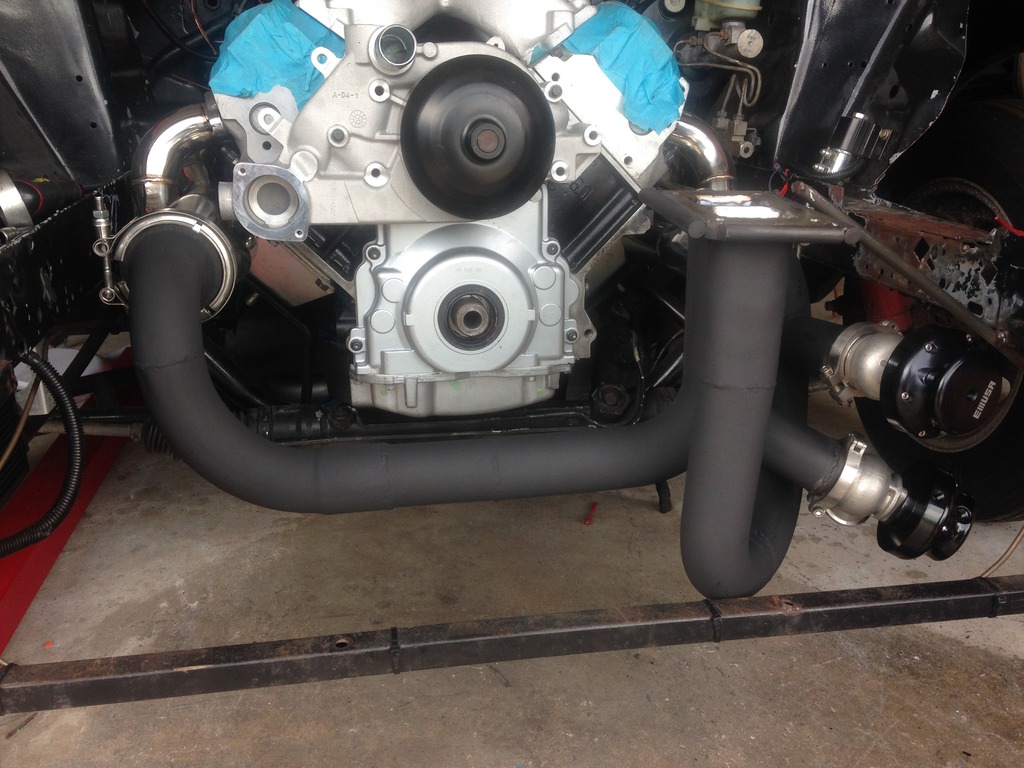
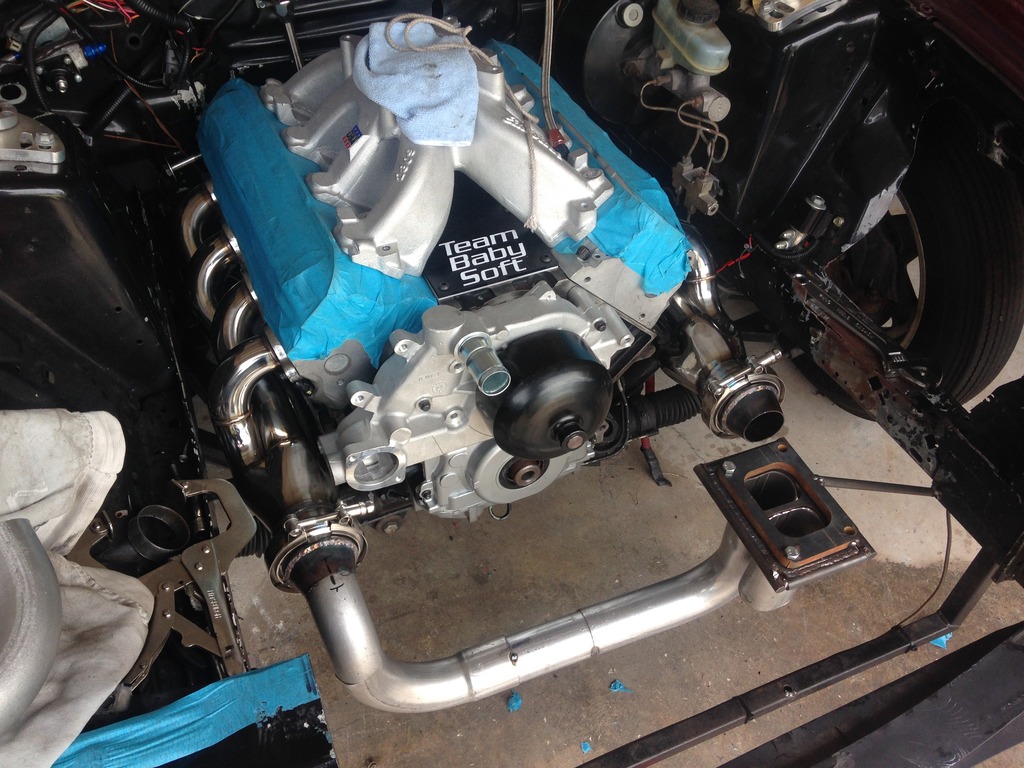
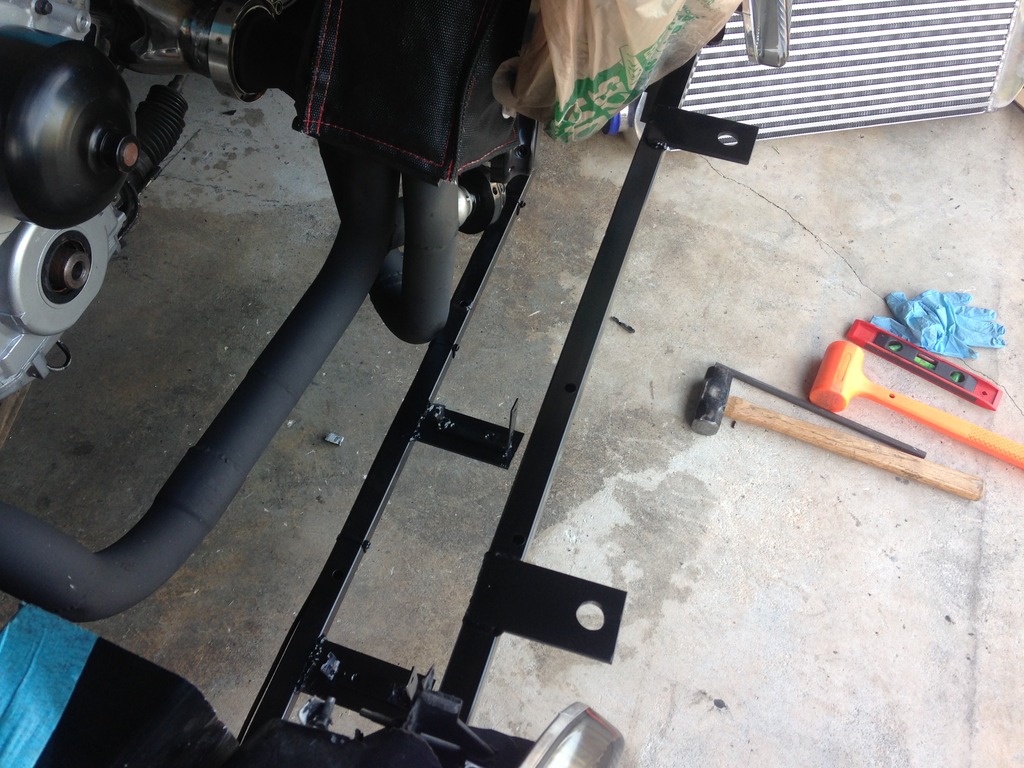
the start of the forward facing hotside mounting.


I got the wastegates plumbed up. This with a little bit of a process because this being my first turbo kit I didn't really now how to cut the angle of the piping without making it way too big. The remedy I used to was stepped bit that made the hole, then after tracing the outer diameter of the pipe, I then used an air grinder to gradually open the whole to size. I then welded on the wastegate pipes. Once welded, I used a 6' carbide burr to go inside and port everything out so there are no restrictions in air flow. I also took some time and fully ported the divided flange to a knife edge on the divider as well. I know its probably overkill but I was already in there cleaning stuff up anyways lol.

I used 2000* rustoleum BBQ paint to coat the hotside piping. I also will be wrapping the hotside with DEI Titanium wrap as well.
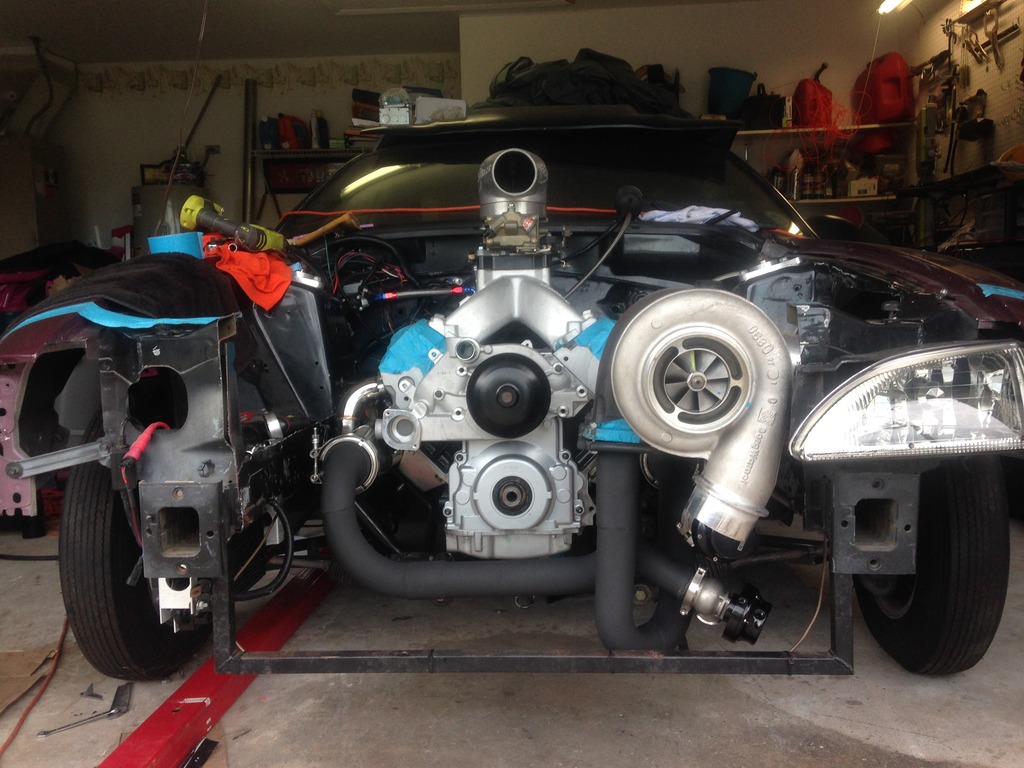
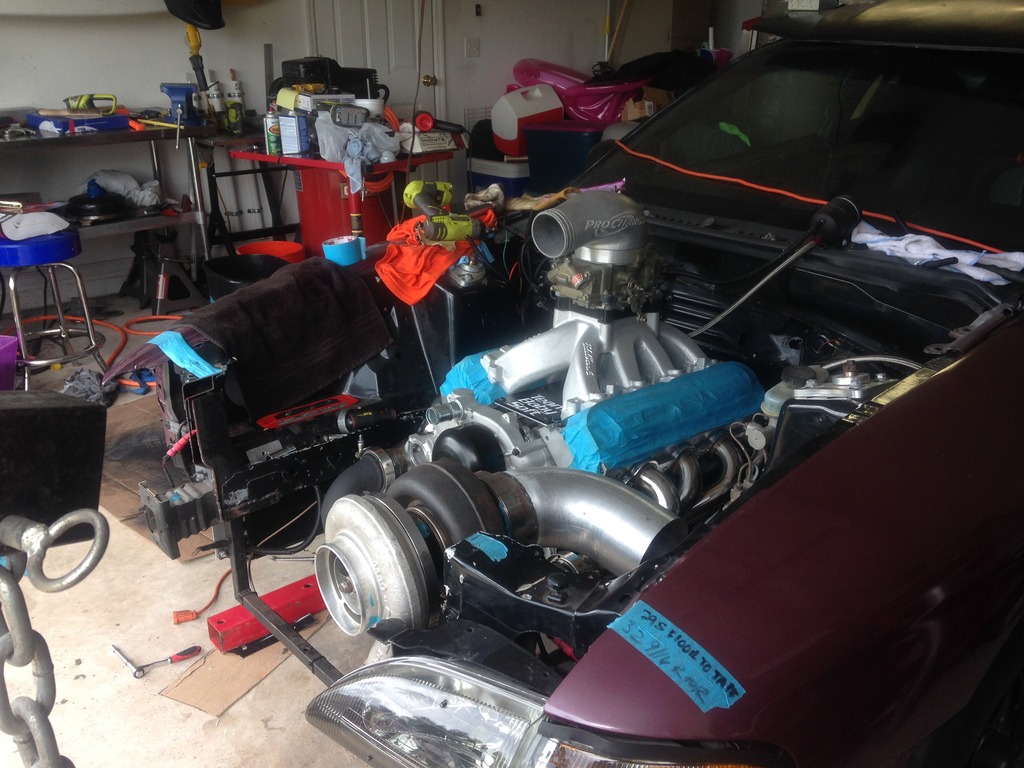
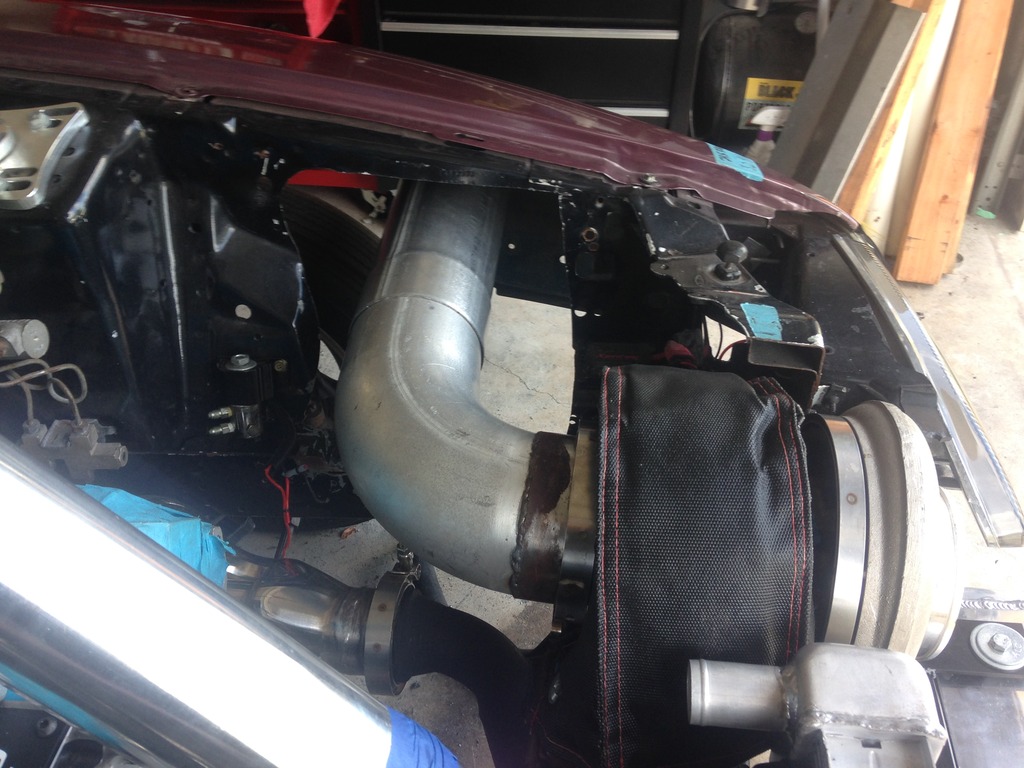
Turbo mounted.


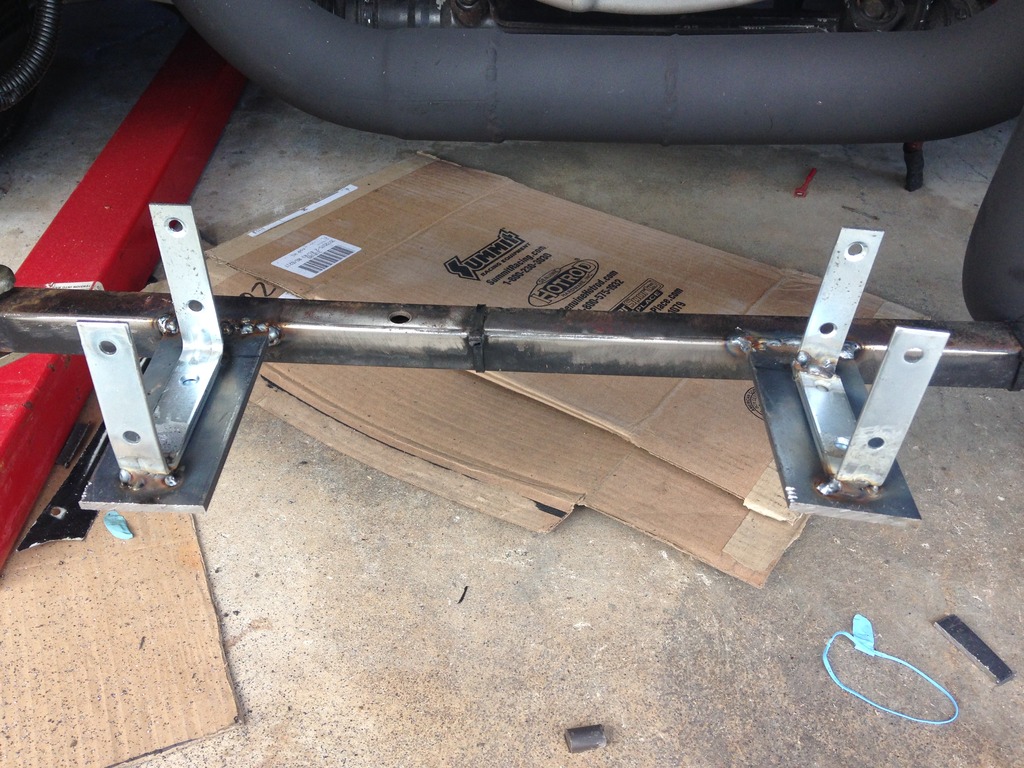
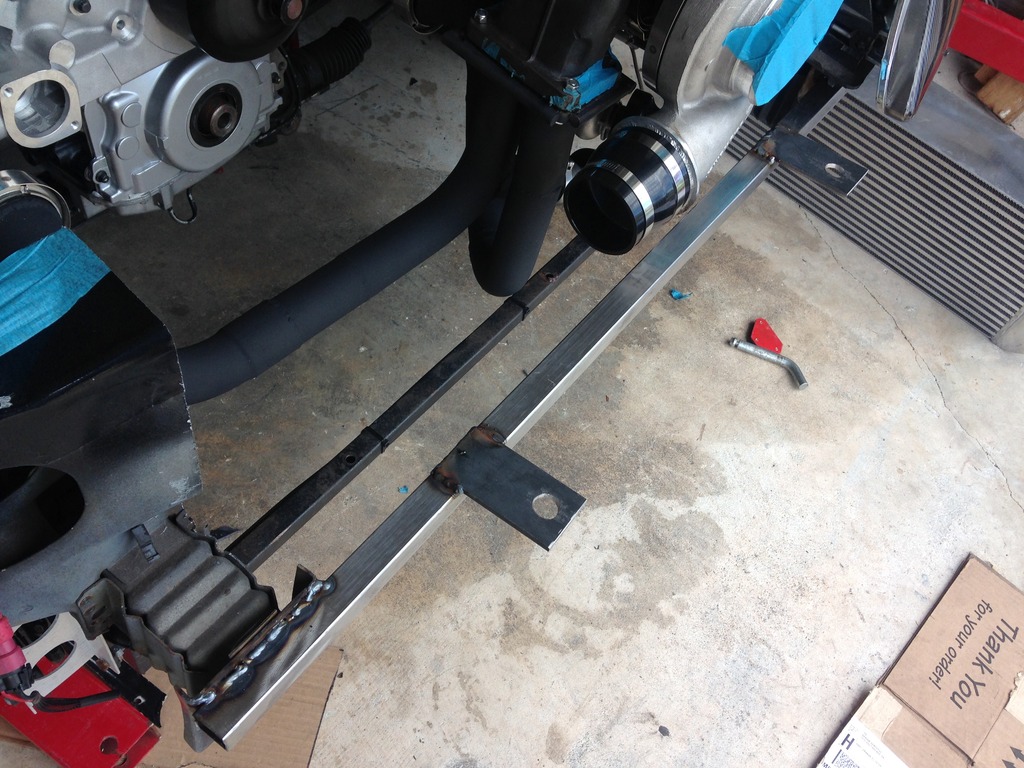
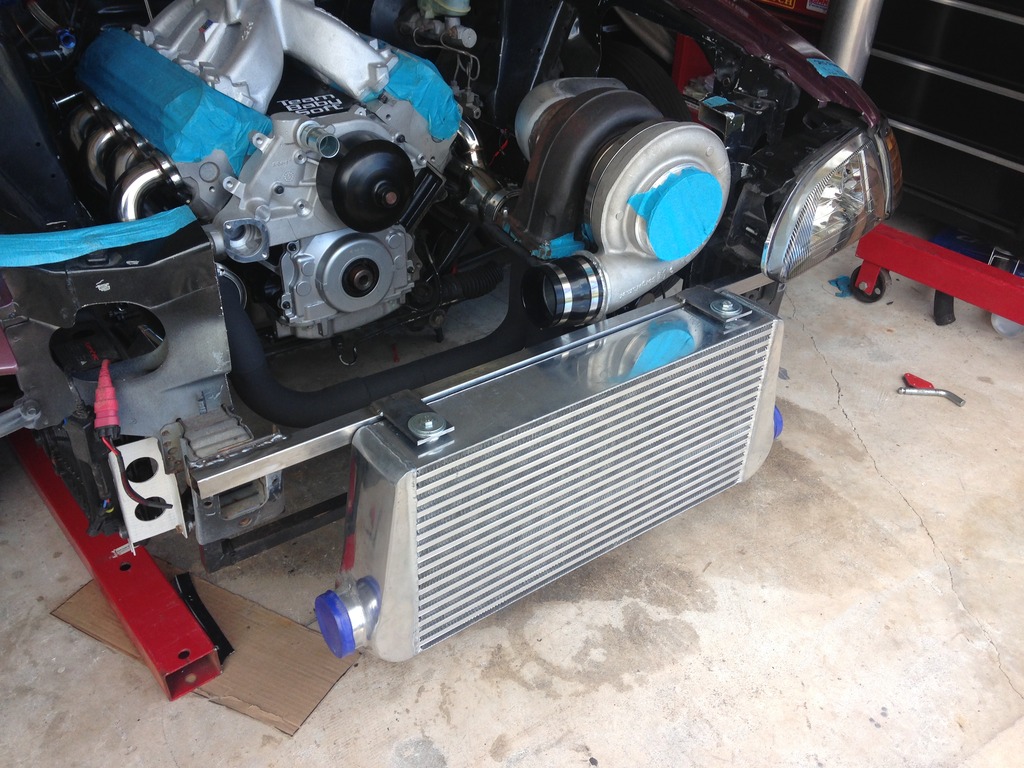
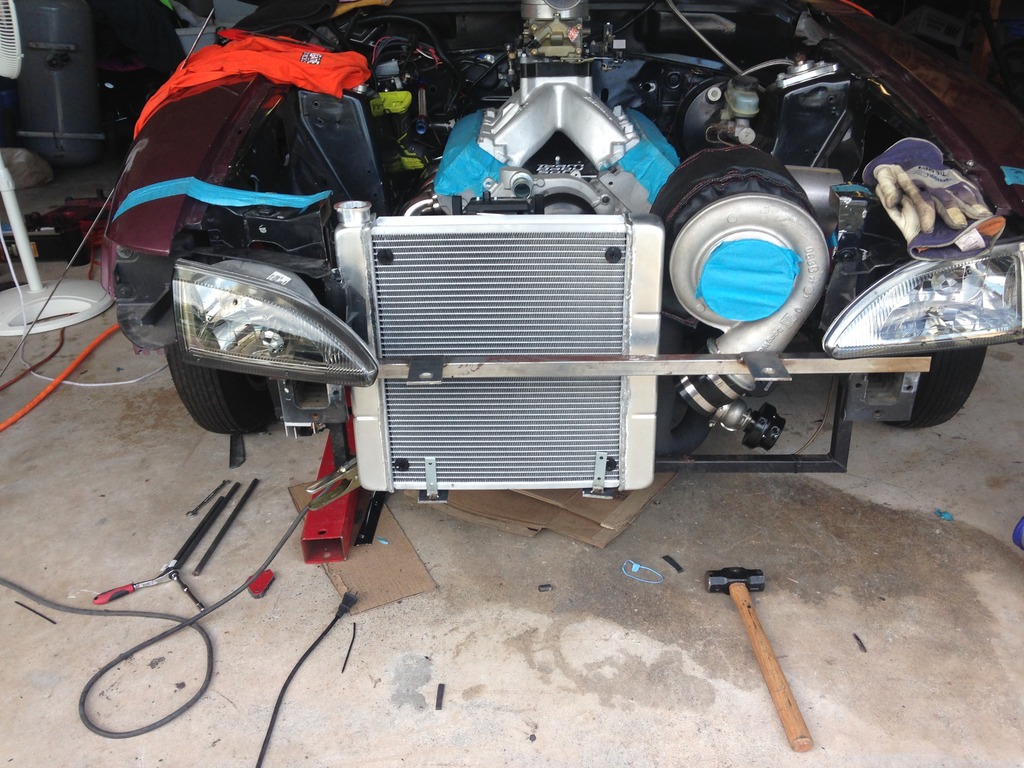
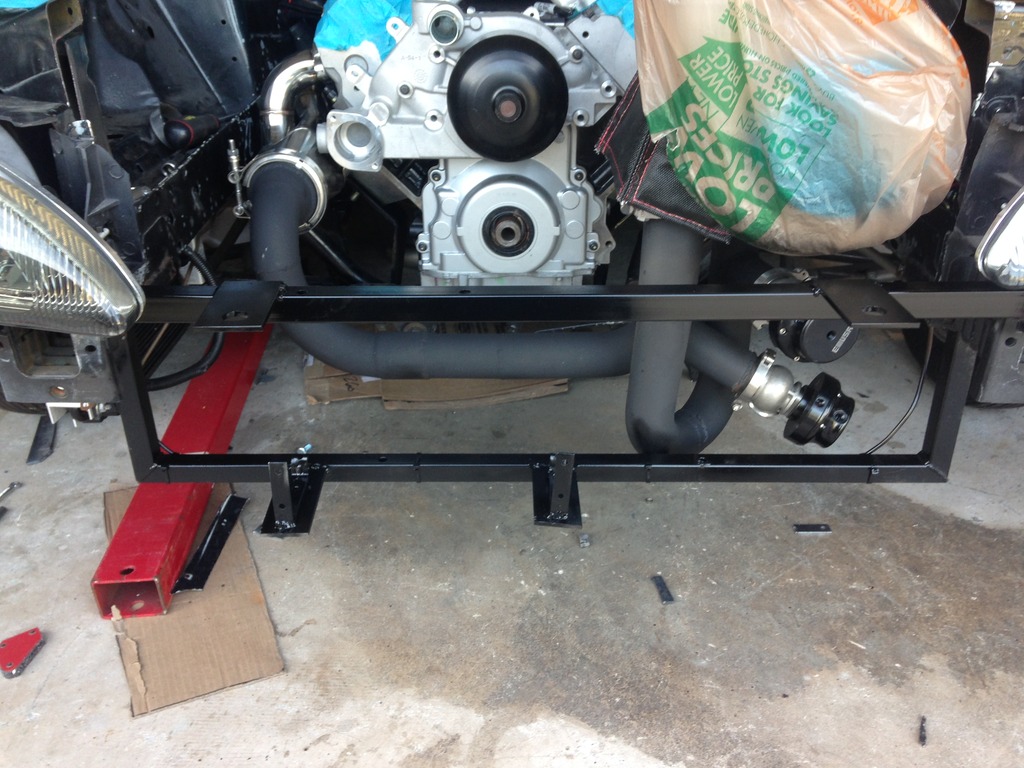
Now I decided to make an intercooler mount using some square bar I found at home depot.


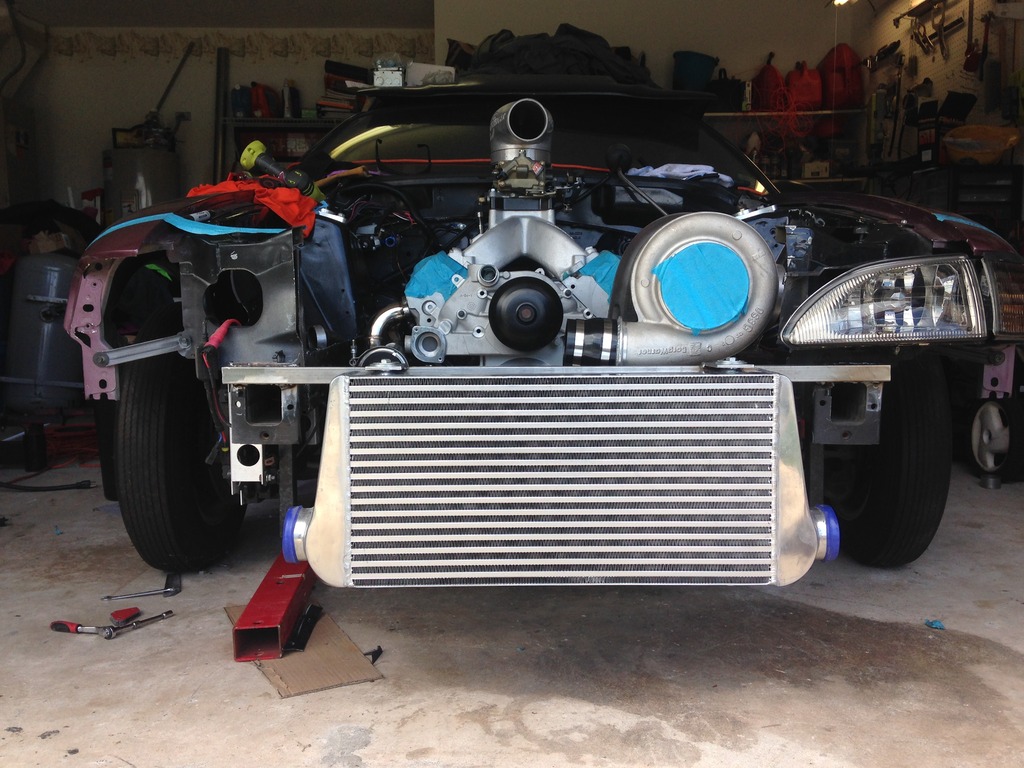
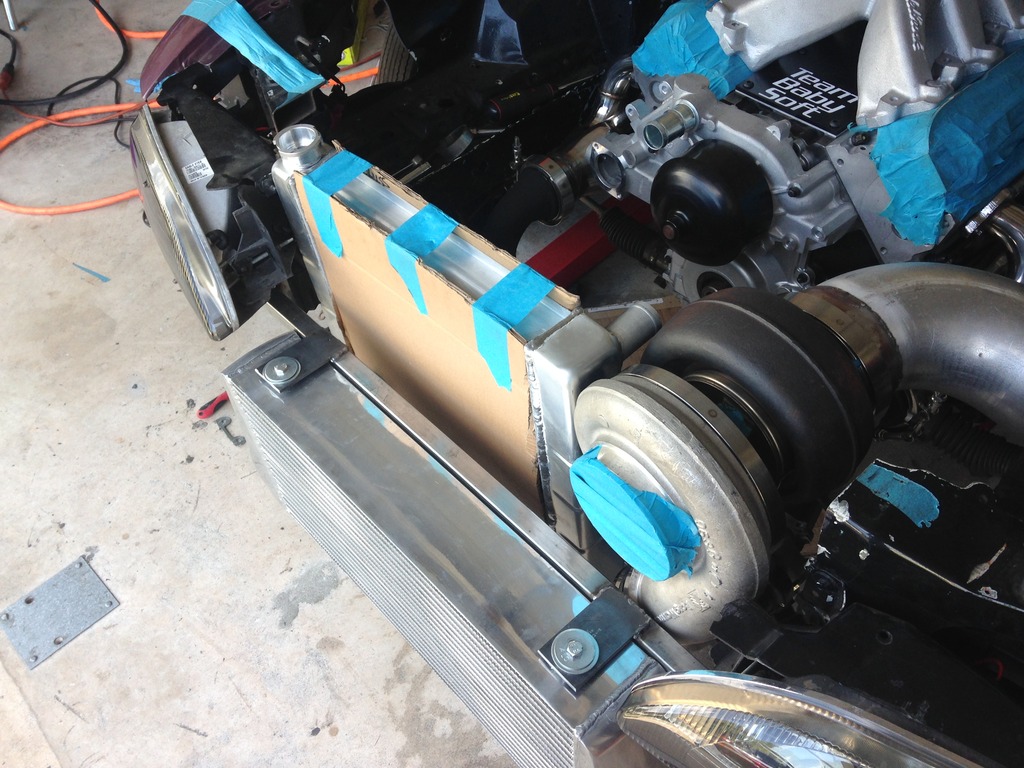
The radiator is a champion unit I found on ebay to fit the limited space I had to use. Its very nice quality, double pass, and 3.25 thick so it should do the trick. Im using an Fbody pump with a washer/restrictor style thermostat.
I made some cheap lower radiator mounts from some fence/gate ties I found at home depot. I welded them together and then welded them to the lower rad support base. I bought 1" thick door trim sealer to use as cushion for the bottom of the rad mounts which provides a snug fit when the rad is in.
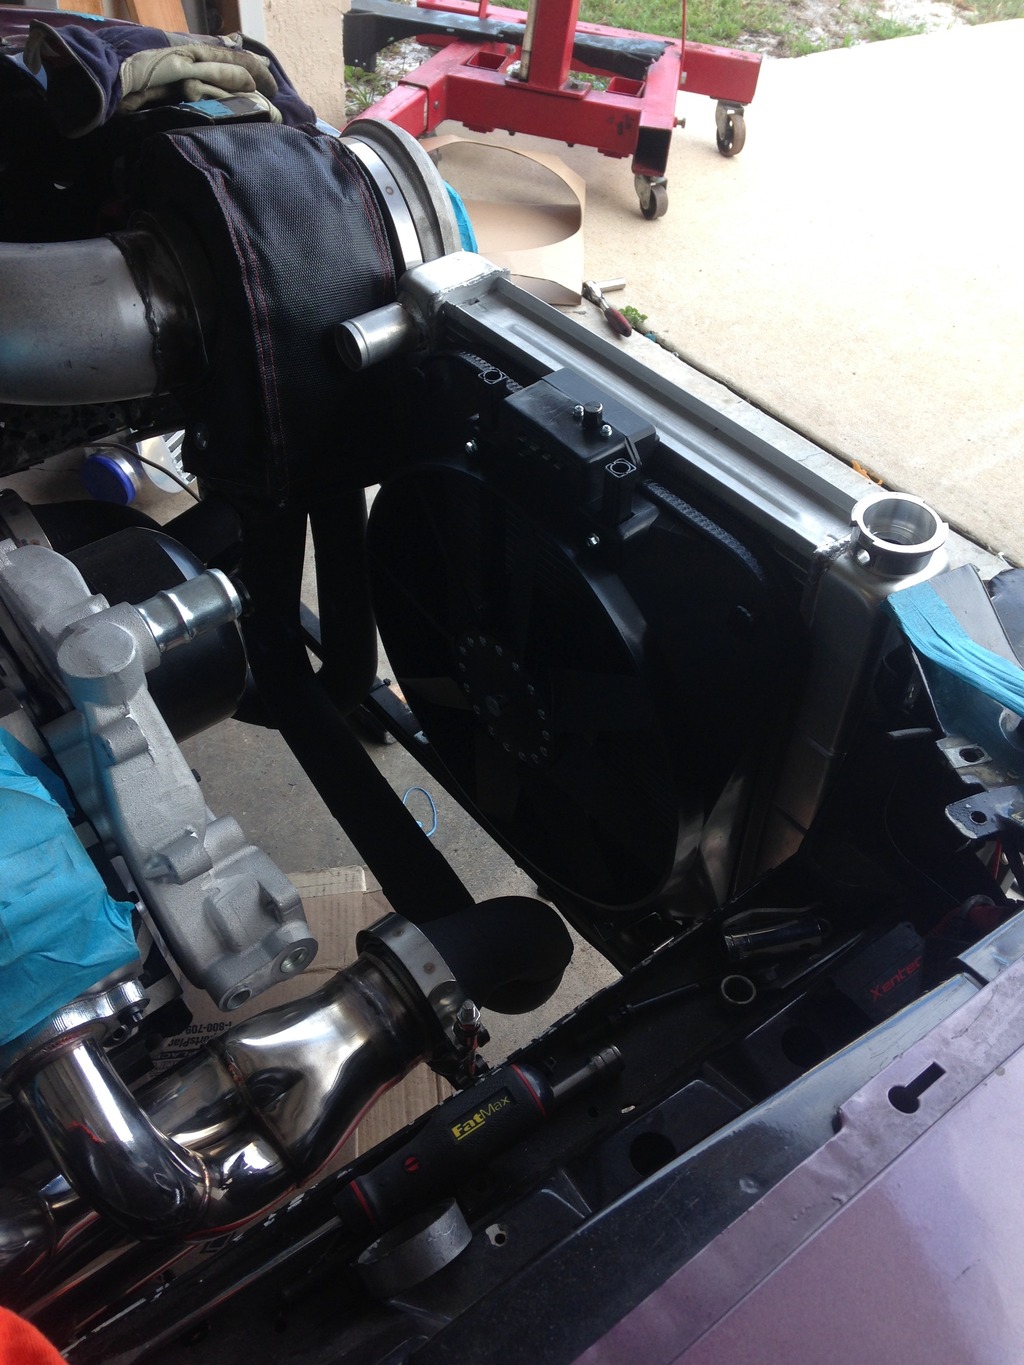

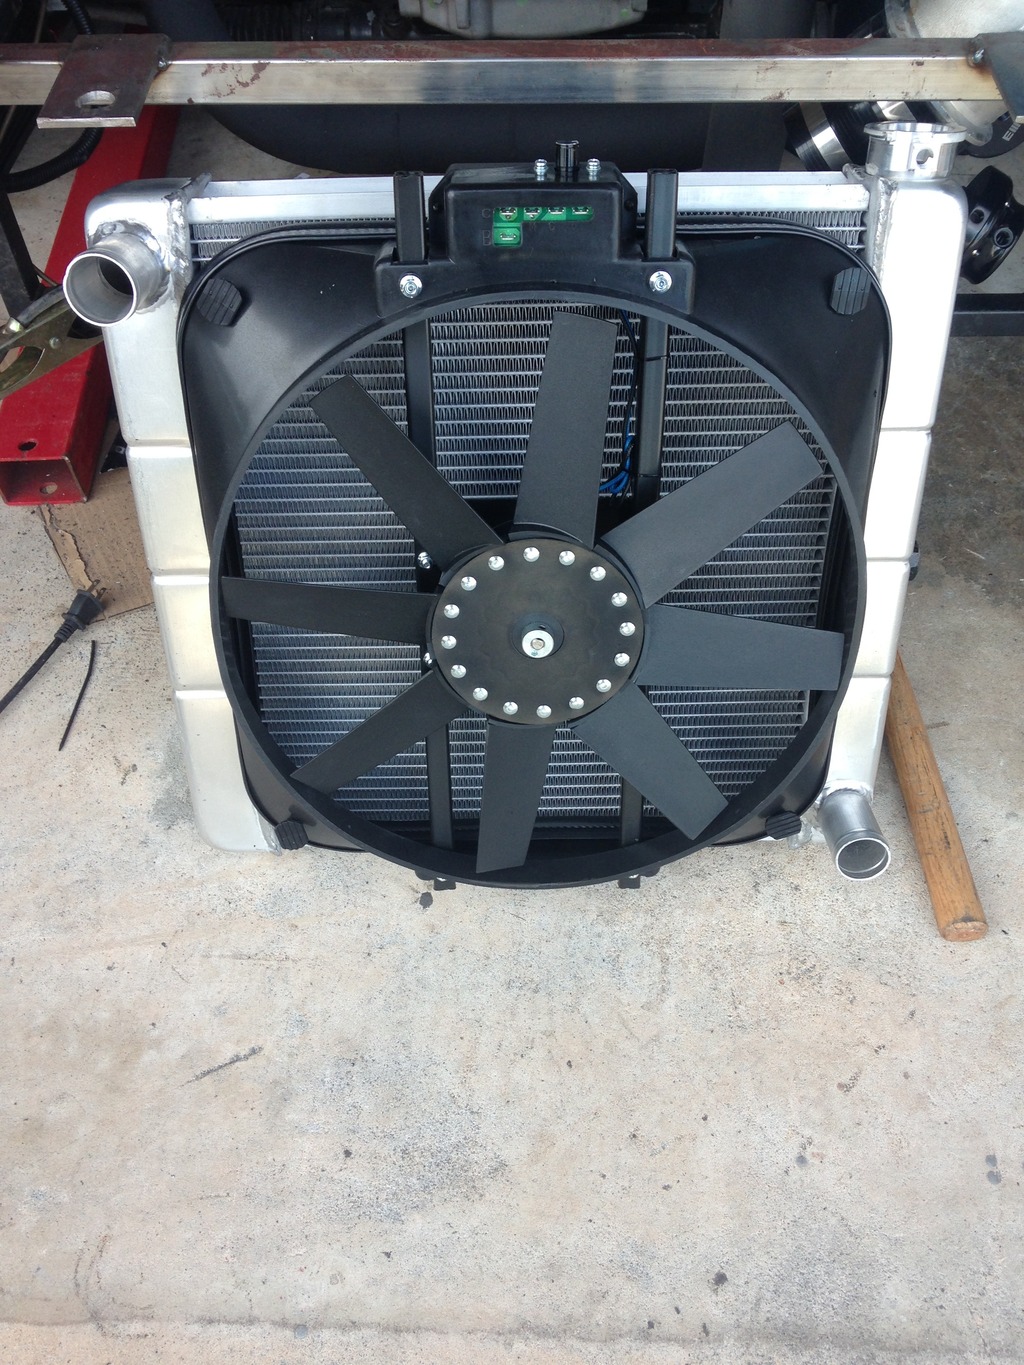
The fan is a preform unit that has an integrated fan,shroud, and thermostat unit. The fan supposedly flows 2800cfm per the specs provided, hopefully it will work well since im driving the car on the street a lot.

Originally I started out with non egr truck manifolds. After having a hell of a time with getting the turbo where I wanted it, I gave up on the manifolds and purchased the "ebay" stainless tubular headers from a guy on the classifieds. The quality is actually awesome, very this flanges and primary tubing. The only down fall was the collectors came off like 6-7" so I had to cut them, re weld them back down right off the collector. here was the original plan for turbo placement.

This was the first mockup. After having a buddy come over and convince me to say F*ck it, go forward facing that's what I ended up doing. I scrapped this plan and used some of the piping on the new setup.

These are the reducer cones I cut down to fit the v bands on the tubular headers. This was a bit of a bitch bc the only thing I could use was a cutoff wheel instead of a saw. Also my first time tigging stainless steel. Still working at it lol

the start of the forward facing hotside mounting.


I got the wastegates plumbed up. This with a little bit of a process because this being my first turbo kit I didn't really now how to cut the angle of the piping without making it way too big. The remedy I used to was stepped bit that made the hole, then after tracing the outer diameter of the pipe, I then used an air grinder to gradually open the whole to size. I then welded on the wastegate pipes. Once welded, I used a 6' carbide burr to go inside and port everything out so there are no restrictions in air flow. I also took some time and fully ported the divided flange to a knife edge on the divider as well. I know its probably overkill but I was already in there cleaning stuff up anyways lol.

I used 2000* rustoleum BBQ paint to coat the hotside piping. I also will be wrapping the hotside with DEI Titanium wrap as well.

Turbo mounted.


Now I decided to make an intercooler mount using some square bar I found at home depot.


The radiator is a champion unit I found on ebay to fit the limited space I had to use. Its very nice quality, double pass, and 3.25 thick so it should do the trick. Im using an Fbody pump with a washer/restrictor style thermostat.
I made some cheap lower radiator mounts from some fence/gate ties I found at home depot. I welded them together and then welded them to the lower rad support base. I bought 1" thick door trim sealer to use as cushion for the bottom of the rad mounts which provides a snug fit when the rad is in.


The fan is a preform unit that has an integrated fan,shroud, and thermostat unit. The fan supposedly flows 2800cfm per the specs provided, hopefully it will work well since im driving the car on the street a lot.
 08-30-2015, 01:08 PM
#6
Launching!
Thread Starter
iTrader: (1)
Join Date: Jun 2012
Location: Daytona Beach
Posts: 265
Likes: 0
Received 0 Likes
on
0 Posts
Heres pics of the turbo build. The turbo kit started out as the "Denmah" kit from Viren @ VS Racing. The orginal turbo was one of his 78/75 units but after falling into a super deal on a Borg Warner S480, I sold the 78/75 to a friend. The hotside piping was built from a Columbia Mandrel Super builder kit using 2.25 divided pipes into a raceparts solutions divided flange. The entire hotside is divided to help with spooling the T6 flanged turbo. I bought a cheap mig to do all of this but after getting more involved in the project I bought an AHP TIG 200x AC/DC unit. The unit works excellent and for the price I would say you cannot find a comparable unit!
Originally I started out with non egr truck manifolds. After having a hell of a time with getting the turbo where I wanted it, I gave up on the manifolds and purchased the "ebay" stainless tubular headers from a guy on the classifieds. The quality is actually awesome, very this flanges and primary tubing. The only down fall was the collectors came off like 6-7" so I had to cut them, re weld them back down right off the collector. here was the original plan for turbo placement.
This was the first mockup. After having a buddy come over and convince me to say F*ck it, go forward facing that's what I ended up doing. I scrapped this plan and used some of the piping on the new setup.

These are the reducer cones I cut down to fit the v bands on the tubular headers. This was a bit of a bitch bc the only thing I could use was a cutoff wheel instead of a saw. Also my first time tigging stainless steel. Still working at it lol
the start of the forward facing hotside mounting.

I got the wastegates plumbed up. This with a little bit of a process because this being my first turbo kit I didn't really now how to cut the angle of the piping without making it way too big. The remedy I used to was stepped bit that made the hole, then after tracing the outer diameter of the pipe, I then used an air grinder to gradually open the whole to size. I then welded on the wastegate pipes. Once welded, I used a 6' carbide burr to go inside and port everything out so there are no restrictions in air flow. I also took some time and fully ported the divided flange to a knife edge on the divider as well. I know its probably overkill but I was already in there cleaning stuff up anyways lol.
I used 2000* rustoleum BBQ paint to coat the hotside piping. I also will be wrapping the hotside with DEI Titanium wrap as well.

Turbo mounted.
Now I decided to make an intercooler mount using some square bar I found at home depot.


The radiator is a champion unit I found on ebay to fit the limited space I had to use. Its very nice quality, double pass, and 3.25 thick so it should do the trick. Im using an Fbody pump with a washer/restrictor style thermostat.
I made some cheap lower radiator mounts from some fence/gate ties I found at home depot. I welded them together and then welded them to the lower rad support base. I bought 1" thick door trim sealer to use as cushion for the bottom of the rad mounts which provides a snug fit when the rad is in.


The fan is a preform unit that has an integrated fan,shroud, and thermostat unit. The fan supposedly flows 2800cfm per the specs provided, hopefully it will work well since im driving the car on the street a lot.
Originally I started out with non egr truck manifolds. After having a hell of a time with getting the turbo where I wanted it, I gave up on the manifolds and purchased the "ebay" stainless tubular headers from a guy on the classifieds. The quality is actually awesome, very this flanges and primary tubing. The only down fall was the collectors came off like 6-7" so I had to cut them, re weld them back down right off the collector. here was the original plan for turbo placement.
This was the first mockup. After having a buddy come over and convince me to say F*ck it, go forward facing that's what I ended up doing. I scrapped this plan and used some of the piping on the new setup.
These are the reducer cones I cut down to fit the v bands on the tubular headers. This was a bit of a bitch bc the only thing I could use was a cutoff wheel instead of a saw. Also my first time tigging stainless steel. Still working at it lol
the start of the forward facing hotside mounting.
I got the wastegates plumbed up. This with a little bit of a process because this being my first turbo kit I didn't really now how to cut the angle of the piping without making it way too big. The remedy I used to was stepped bit that made the hole, then after tracing the outer diameter of the pipe, I then used an air grinder to gradually open the whole to size. I then welded on the wastegate pipes. Once welded, I used a 6' carbide burr to go inside and port everything out so there are no restrictions in air flow. I also took some time and fully ported the divided flange to a knife edge on the divider as well. I know its probably overkill but I was already in there cleaning stuff up anyways lol.
I used 2000* rustoleum BBQ paint to coat the hotside piping. I also will be wrapping the hotside with DEI Titanium wrap as well.
Turbo mounted.
Now I decided to make an intercooler mount using some square bar I found at home depot.
The radiator is a champion unit I found on ebay to fit the limited space I had to use. Its very nice quality, double pass, and 3.25 thick so it should do the trick. Im using an Fbody pump with a washer/restrictor style thermostat.
I made some cheap lower radiator mounts from some fence/gate ties I found at home depot. I welded them together and then welded them to the lower rad support base. I bought 1" thick door trim sealer to use as cushion for the bottom of the rad mounts which provides a snug fit when the rad is in.
The fan is a preform unit that has an integrated fan,shroud, and thermostat unit. The fan supposedly flows 2800cfm per the specs provided, hopefully it will work well since im driving the car on the street a lot.
08-30-2015, 01:33 PM
#7
Launching!
Thread Starter
iTrader: (1)
Join Date: Jun 2012
Location: Daytona Beach
Posts: 265
Likes: 0
Received 0 Likes
on
0 Posts
Made some removable upper radiator/fan supports
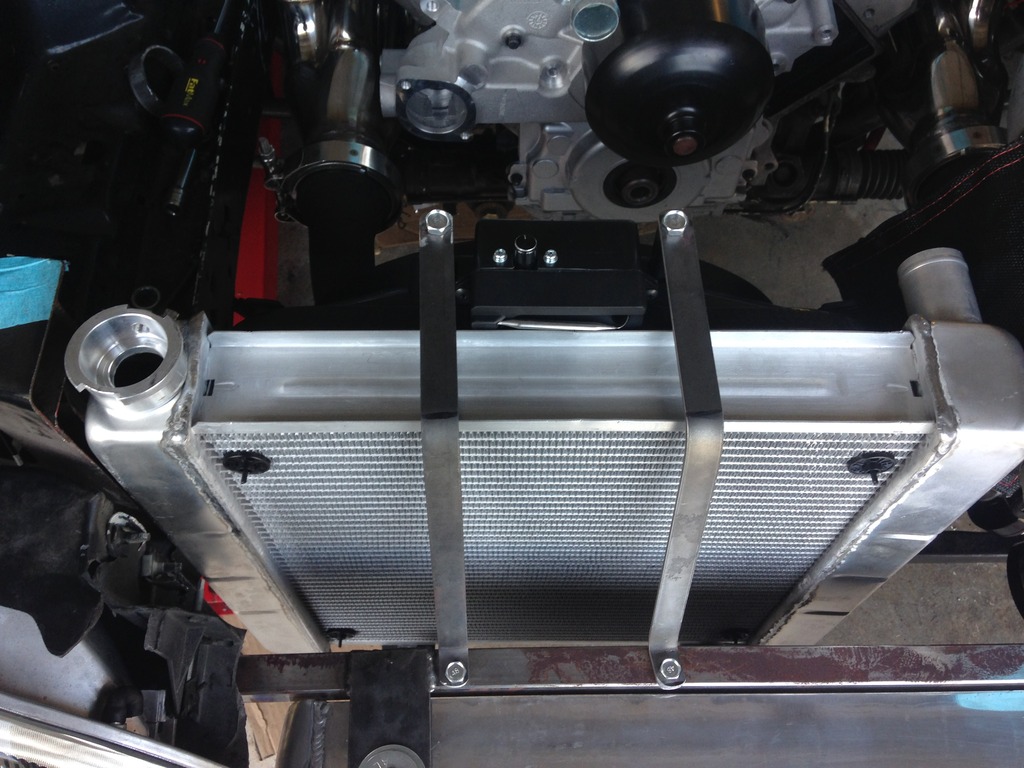

Painted everything up with the rustoleum gloss black. This stuff really lays nice!
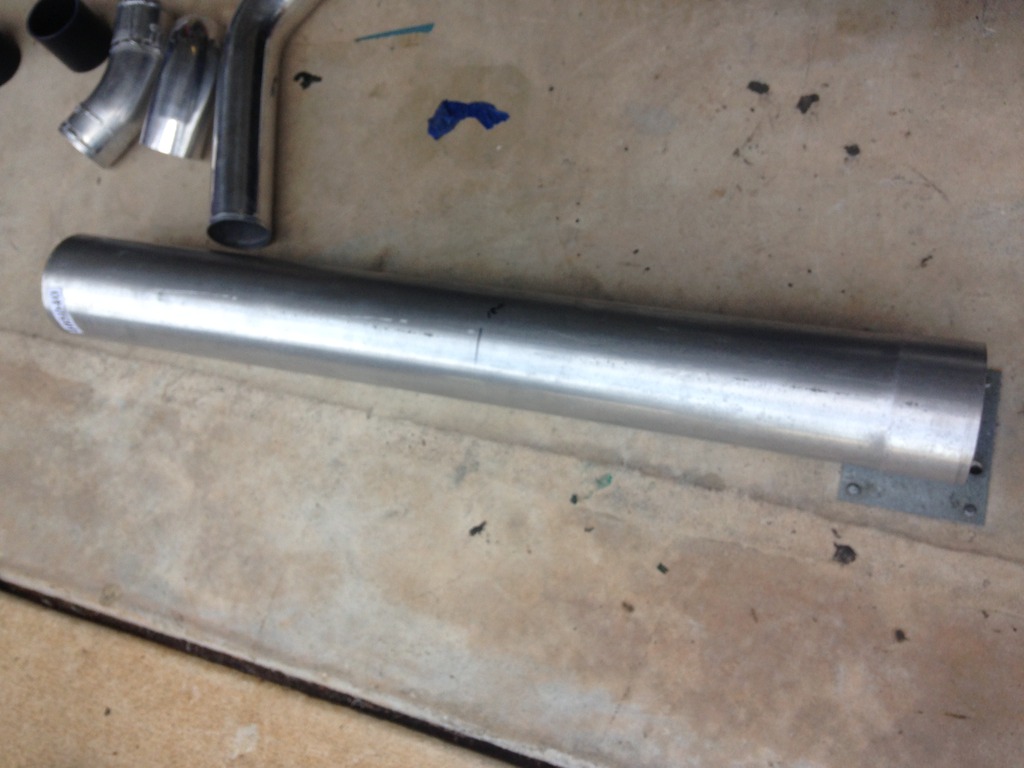
Finally able to start cutting and fitting up all the cold side piping.
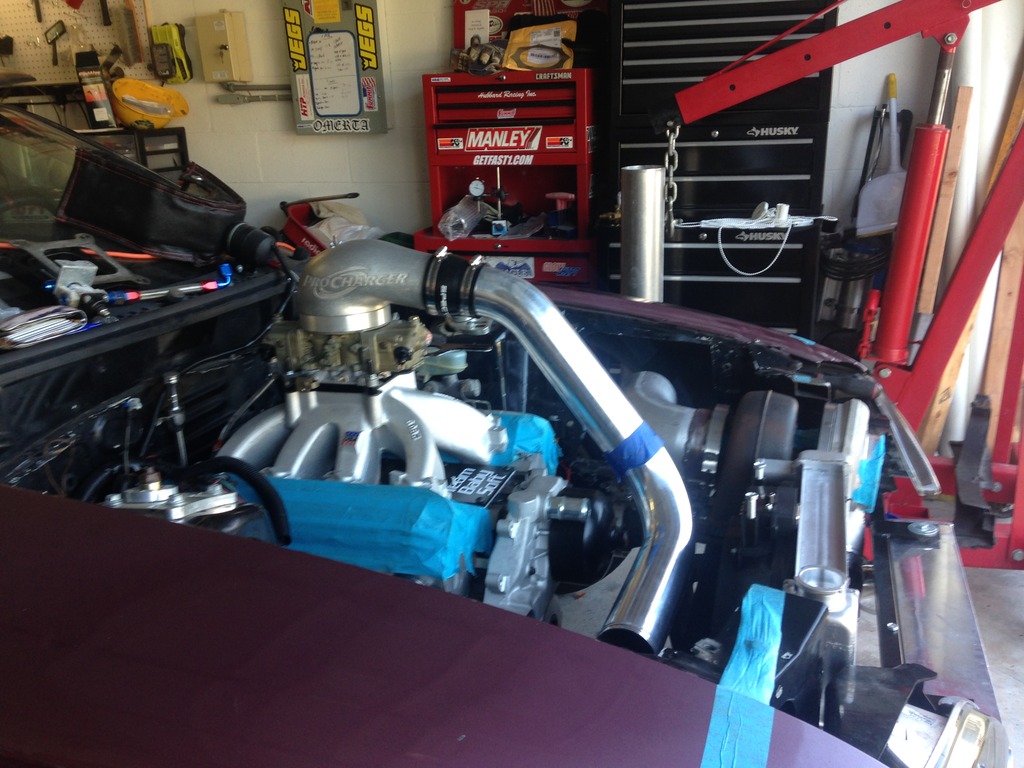

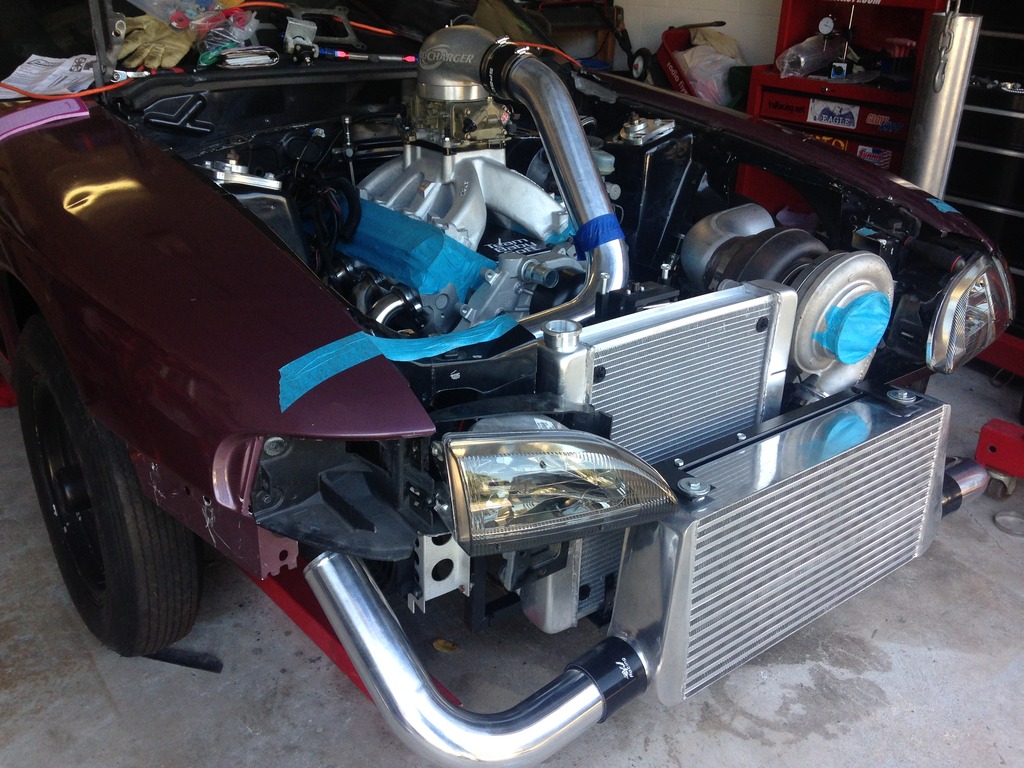

Just ordered another 50mm BOV from Viren at VSracing. Going to one preturbo and post turbo.
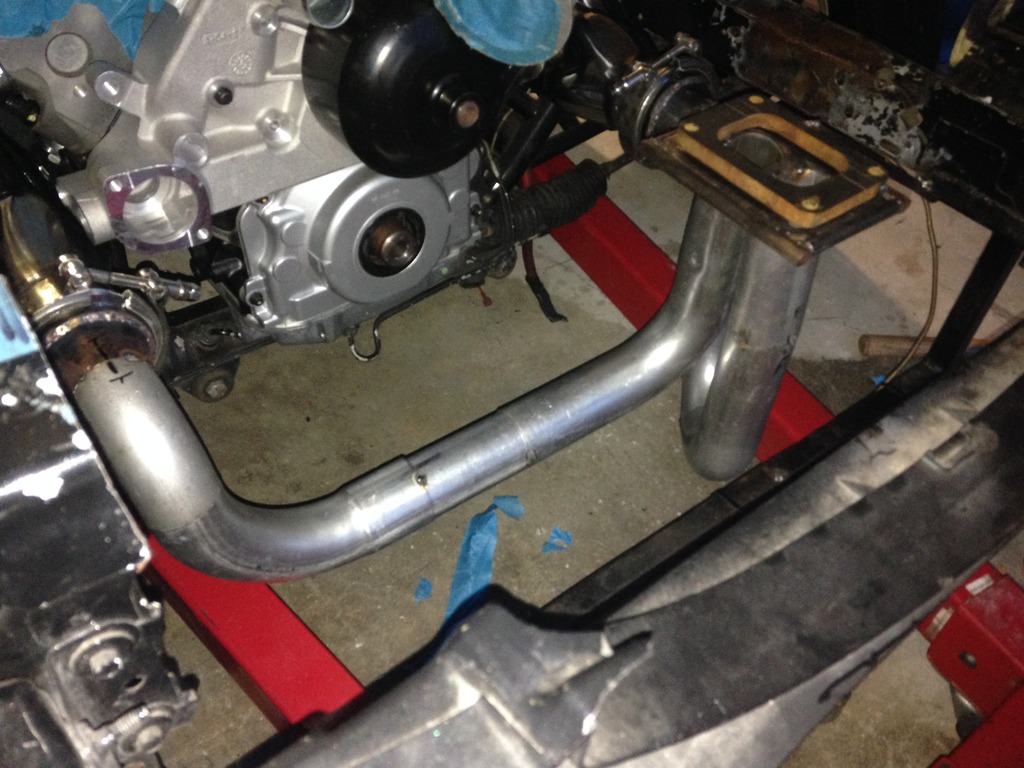
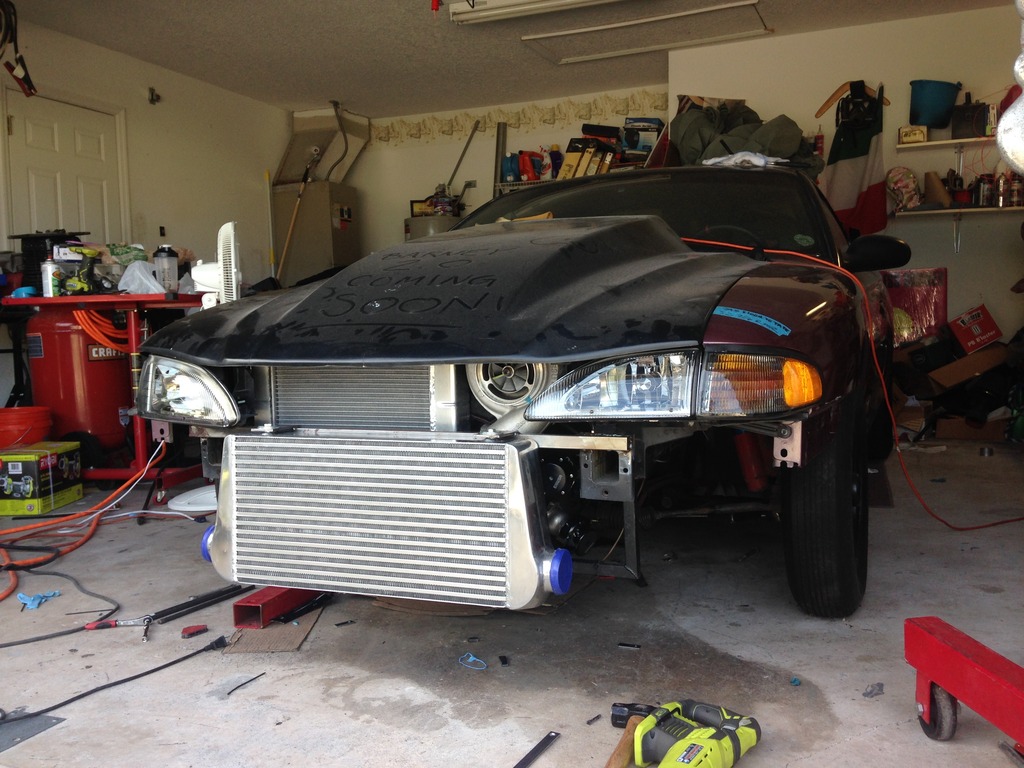
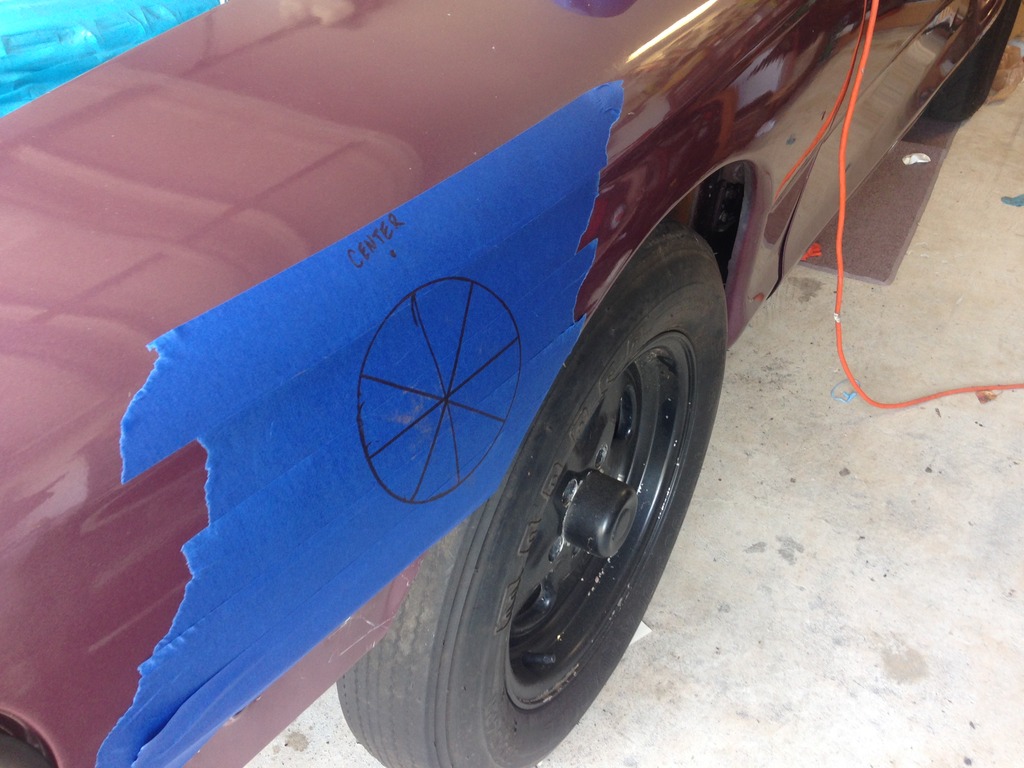
Mocking up the downpipe placement for the 5’ bumper exit. I have a %' MokeyFab ring im also putting on the car once everything is welded up in place.

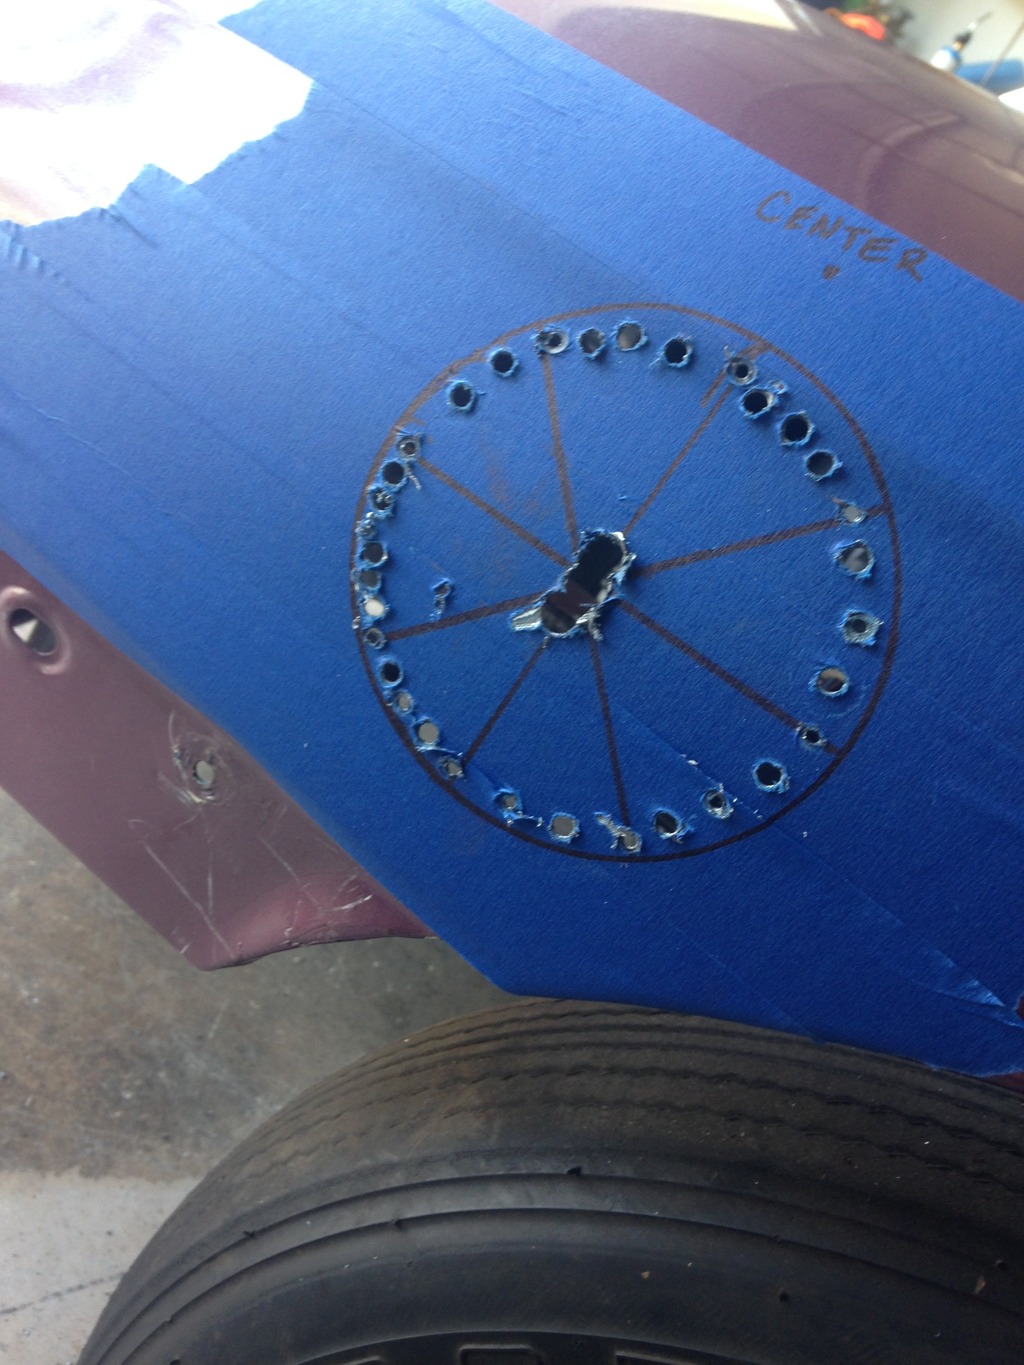
LOL I coudnt push myself to spend 50.00 on a 5”I holes saw so I did it the sloppy style.


Painted everything up with the rustoleum gloss black. This stuff really lays nice!


Finally able to start cutting and fitting up all the cold side piping.


Just ordered another 50mm BOV from Viren at VSracing. Going to one preturbo and post turbo.

Mocking up the downpipe placement for the 5’ bumper exit. I have a %' MokeyFab ring im also putting on the car once everything is welded up in place.


LOL I coudnt push myself to spend 50.00 on a 5”I holes saw so I did it the sloppy style.


Trending Topics
 08-31-2015, 10:23 PM
#10
Teching In

Join Date: Aug 2008
Location: Montezuma,Iowa
Posts: 11
Likes: 0
Received 0 Likes
on
0 Posts
Super nice work. I'm going to be doing the same thing. Just picked up the 6.0 and going turbo also but I'm not going carbed. Looks like it'll stick way outta the hood. Subscribe to this though.
 09-17-2015, 03:06 PM
#12
Launching!
Thread Starter
iTrader: (1)
Join Date: Jun 2012
Location: Daytona Beach
Posts: 265
Likes: 0
Received 0 Likes
on
0 Posts
Thanks guys. Ill be loading some more pics shortly, hasnt been too much progress due to waiting on parts to arrive. The entire car is being rewired and i will include all those pics as well... Stay tuned!!
10-17-2015, 01:37 PM
#13
Launching!
Thread Starter
iTrader: (1)
Join Date: Jun 2012
Location: Daytona Beach
Posts: 265
Likes: 0
Received 0 Likes
on
0 Posts
This was the first time we hit the starter with juice! Very stoked to finally hear it running. The cooling system and wiring should be done this week and then its off to the dyno for tuning! Stay tuned!
 11-07-2016, 07:52 PM
#20
Launching!
Thread Starter
iTrader: (1)
Join Date: Jun 2012
Location: Daytona Beach
Posts: 265
Likes: 0
Received 0 Likes
on
0 Posts
UPDATE!!!
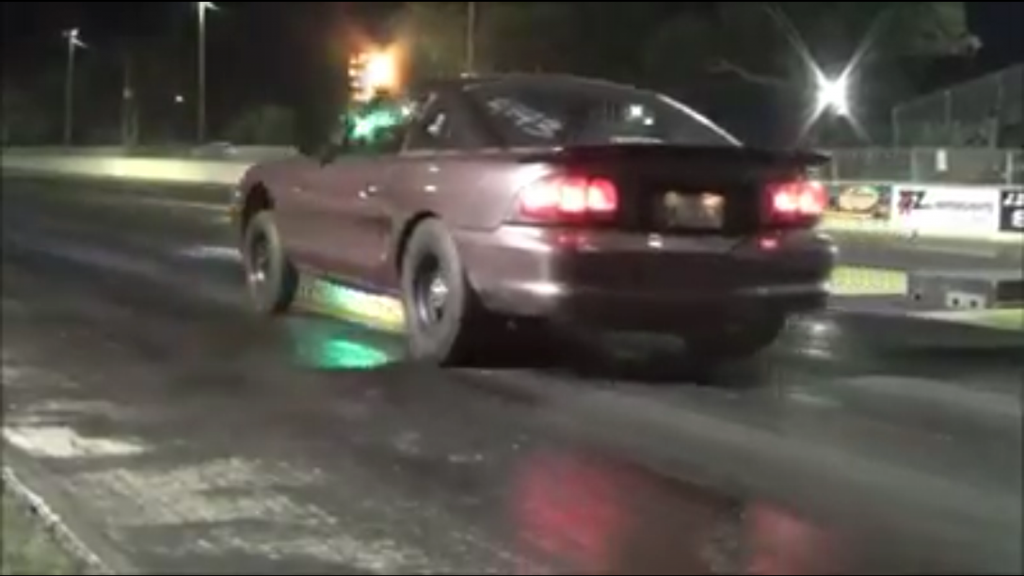
Hey guys well its been a while for this thread but I finally made it to the track! Straight off the trailer the car went 9.90 @141 with a soft 1.50 60'. This was on 12-14lbs, 15* of timing and 10.2 AFR at Wot! So much more left in the tuneup! I could have went down 2-4 jet sizes in the rear to get the AFRs where they needed to be. Also, this was only turning the motor 6400! The motor can turn 7-7200 all day with the valvetrain it has. I never even popped the hood that night lol. track saw I had no cage and said GTFO LOL! here's a video!
Hey guys well its been a while for this thread but I finally made it to the track! Straight off the trailer the car went 9.90 @141 with a soft 1.50 60'. This was on 12-14lbs, 15* of timing and 10.2 AFR at Wot! So much more left in the tuneup! I could have went down 2-4 jet sizes in the rear to get the AFRs where they needed to be. Also, this was only turning the motor 6400! The motor can turn 7-7200 all day with the valvetrain it has. I never even popped the hood that night lol. track saw I had no cage and said GTFO LOL! here's a video!