
Chevy Beretta Ls1/t56 Build
 08-15-2016, 08:51 PM
#81
TECH Addict
I should really just come over an see this thing in person at some point. Could probably even help wrench on it, too. What sort of beer do you drink?
Anyways, really glad to see progress being made. Makes me wish I had held on to my '94 Beretta. It had the "big 3.1L", as DailyGTO so eloquently put it.
Anyways, really glad to see progress being made. Makes me wish I had held on to my '94 Beretta. It had the "big 3.1L", as DailyGTO so eloquently put it.
 08-23-2016, 09:06 PM
#82
On The Tree
Thread Starter

its not too special to see yet, maybe ill take you up on it! Im hoping to be in a house in the next 6 months or so. A shop is almost my only requirement.. just gotta find one.. then serious progress will be made! A shop means 220v, which means I will be building my frame.
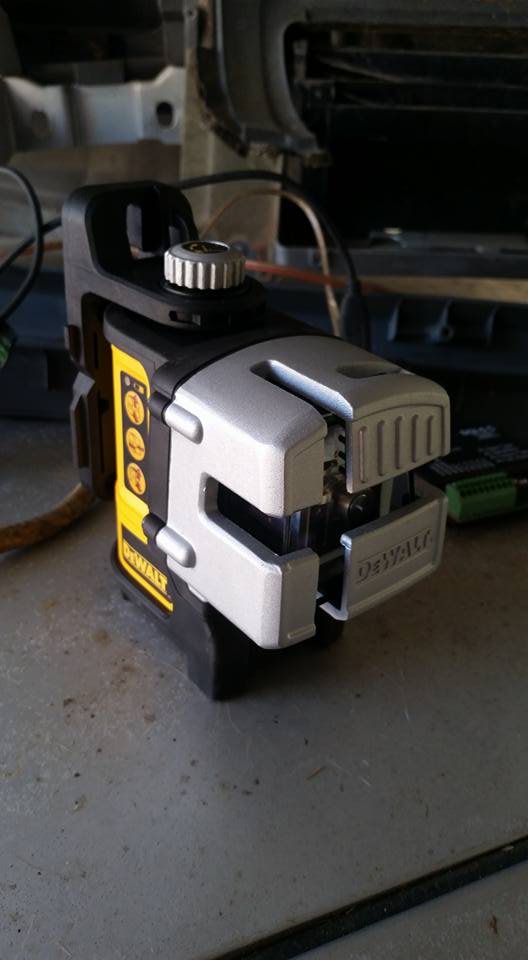
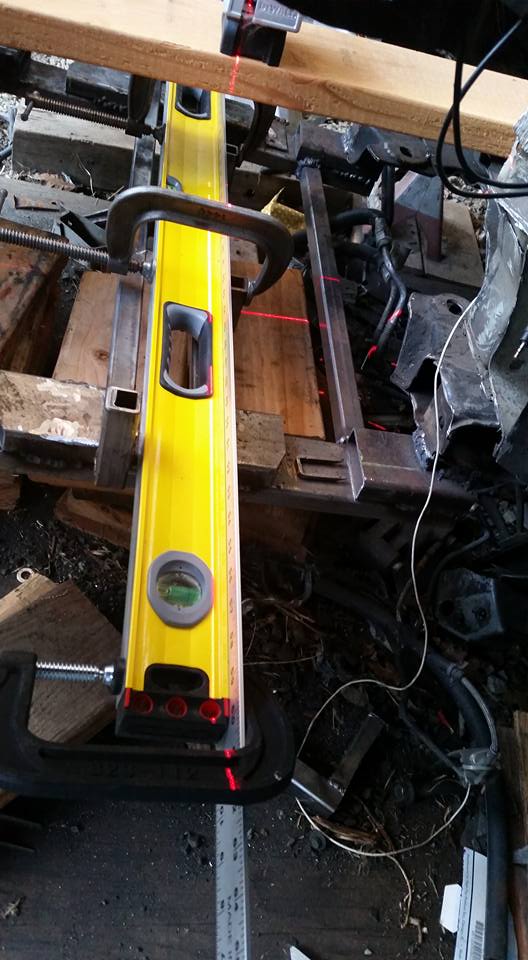
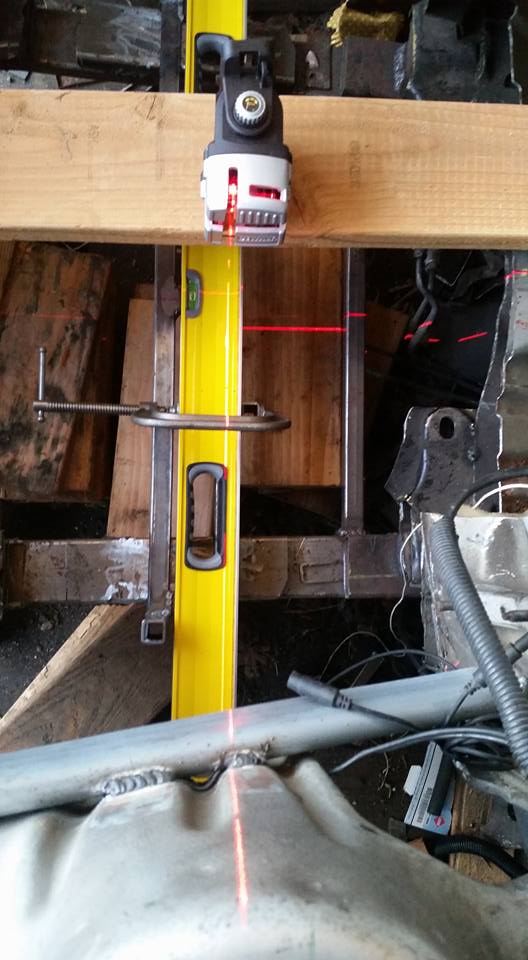
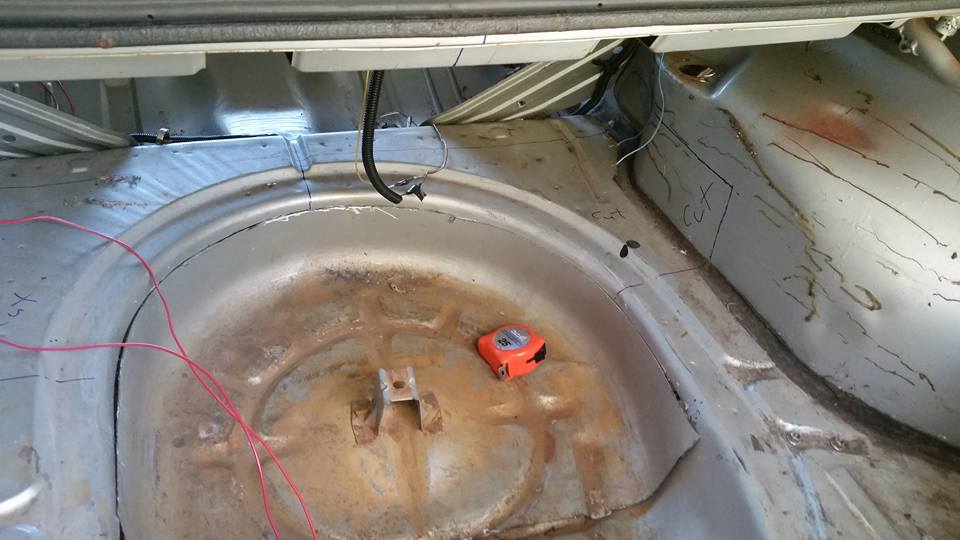
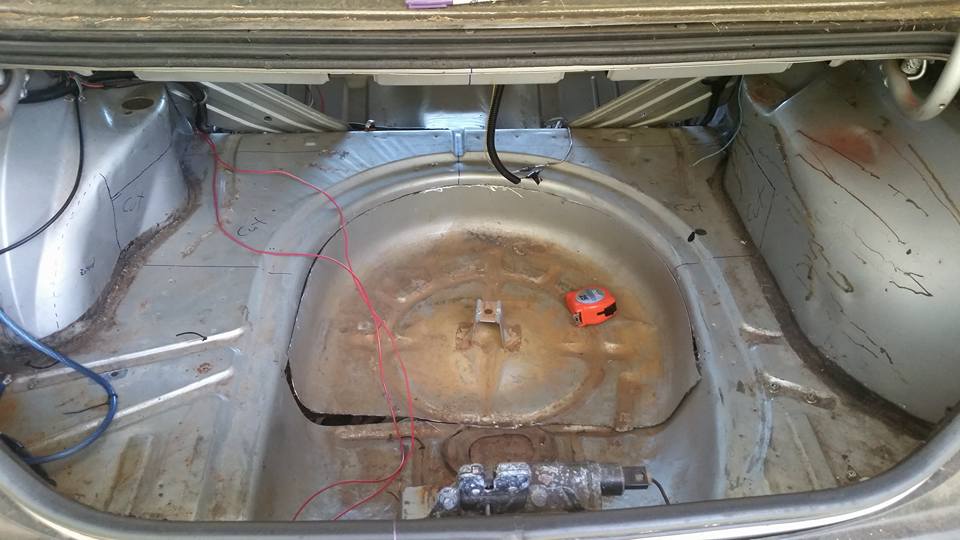
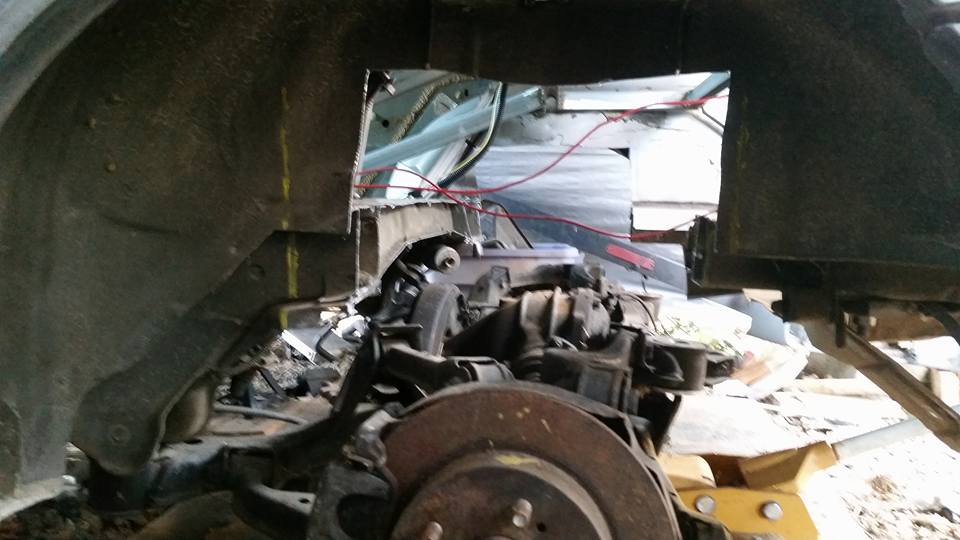
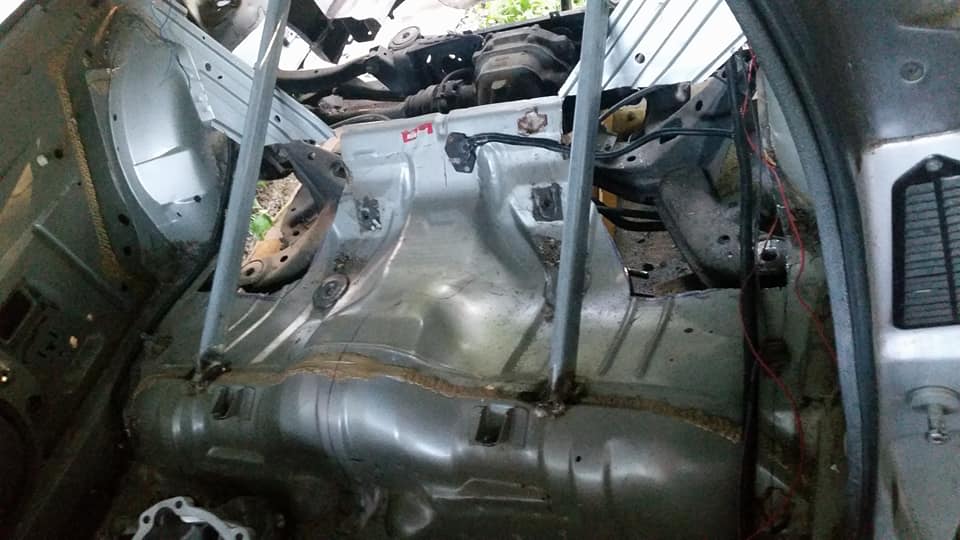
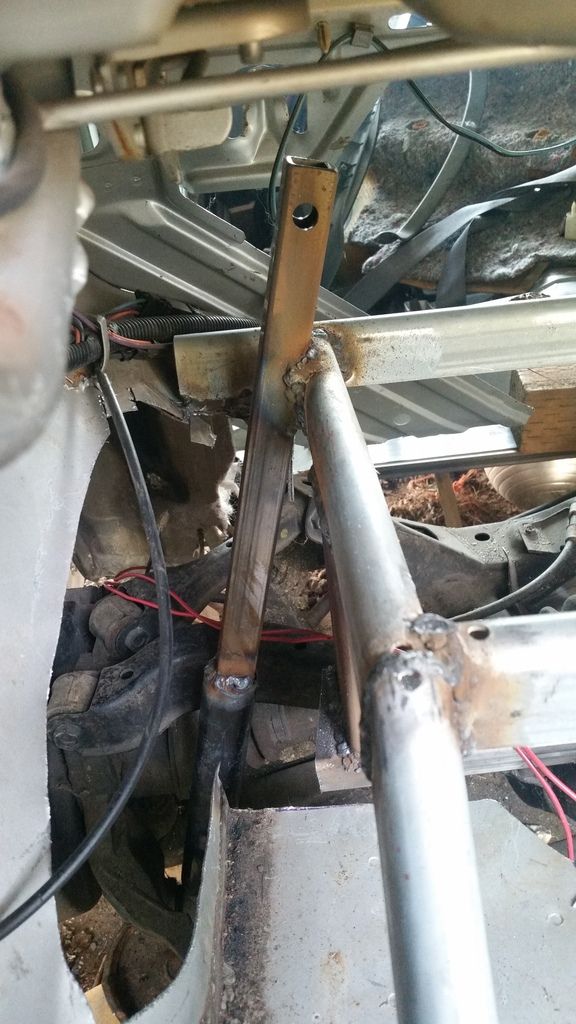
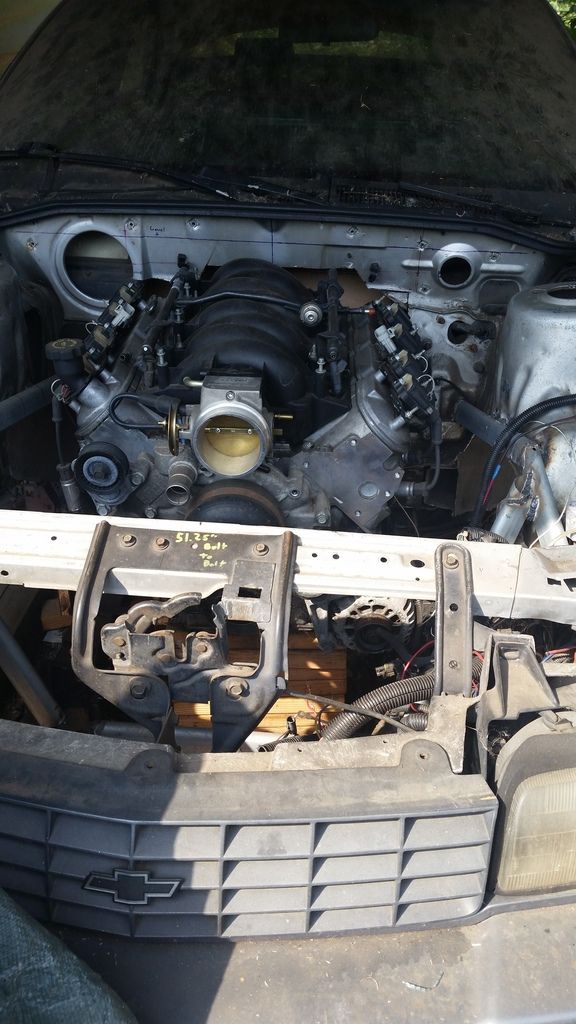
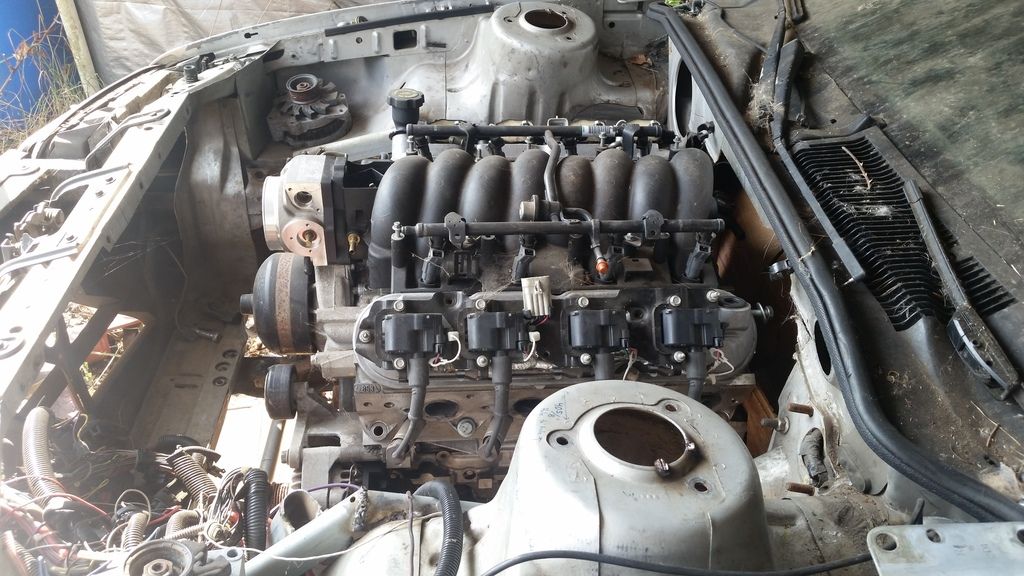
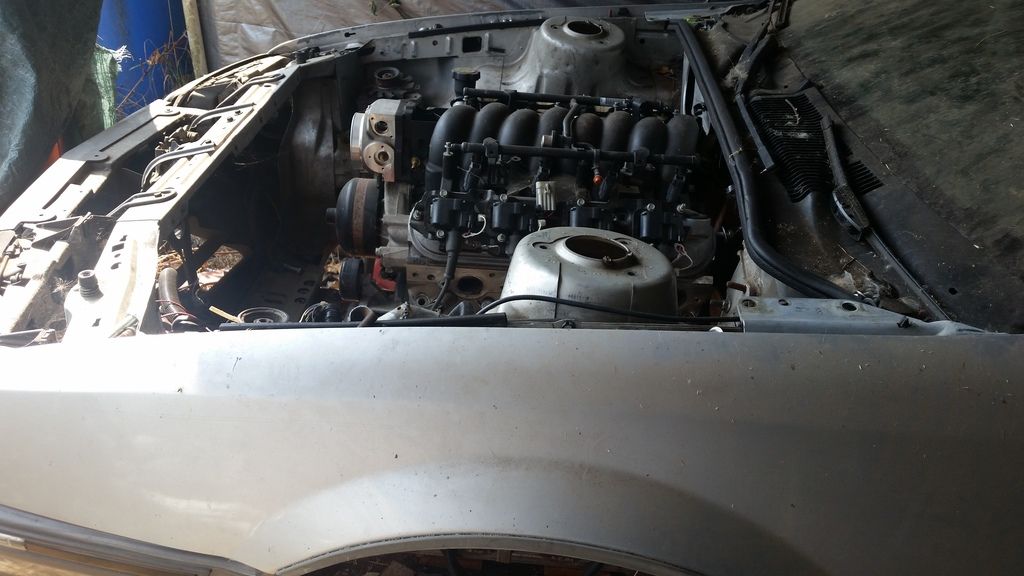
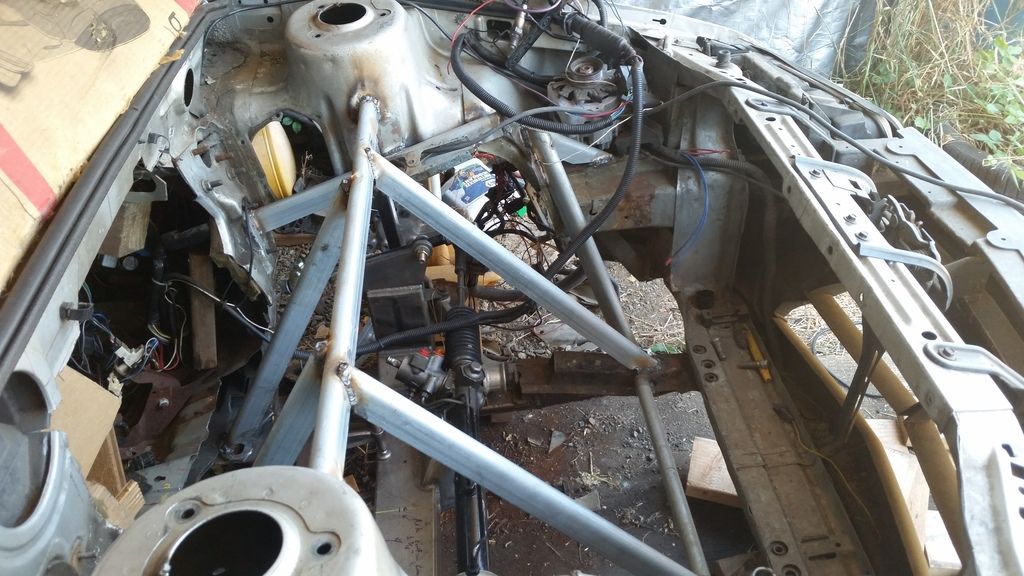
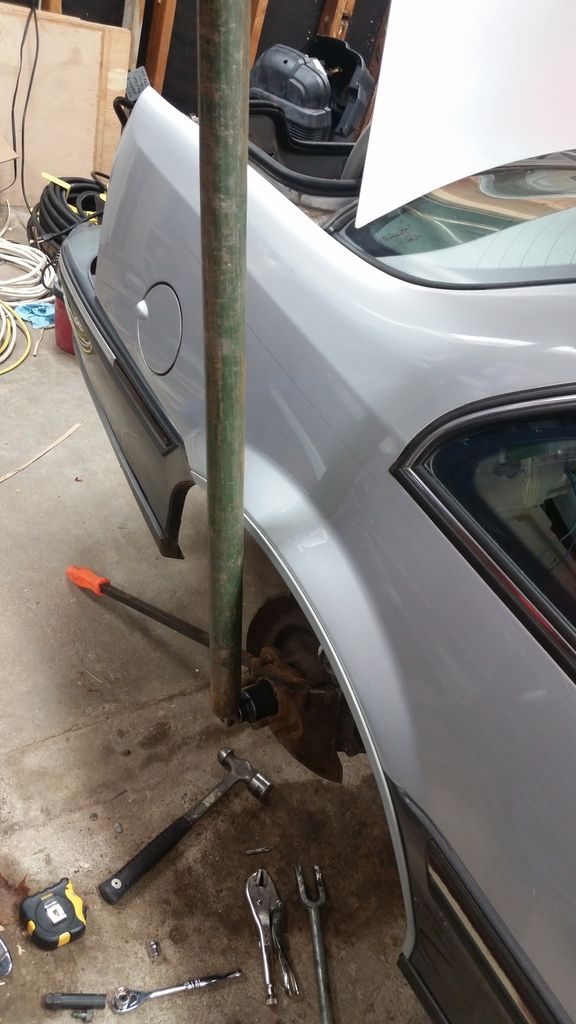
I did a little over the weekend. didnt have too much time but I tested out my new toy and made a center line down the whole car. Its amazing how poorly unibody cars are put together. Measuring the "frame rails" in the car, they are not even close to being the same on both sides. sure, in some spots. other spots are 1/2" off or more. Ill be taking more measurements on the bottom to make sure my rear center point is correct. kinda getting it setup in the rear, but still need to fix the front. Should have a day and a half to work on it this weekend.
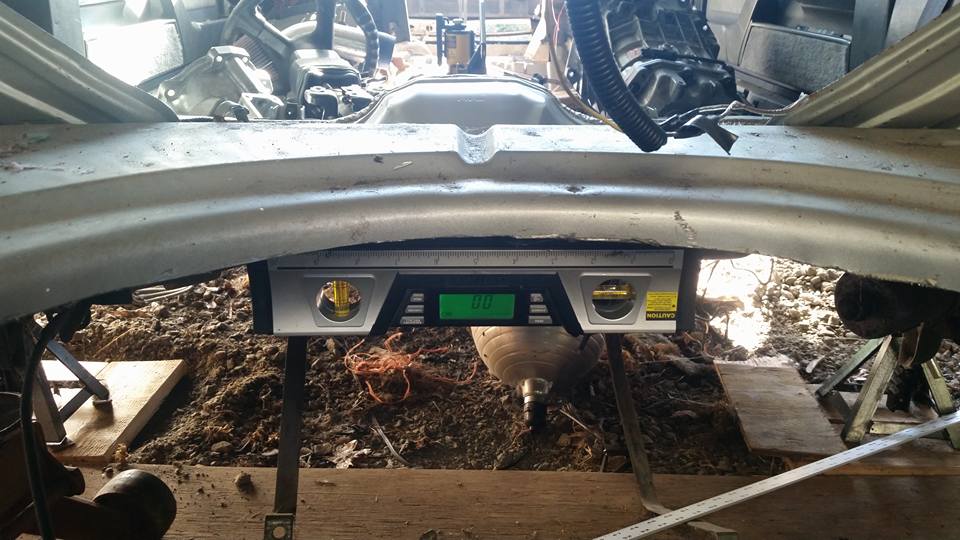
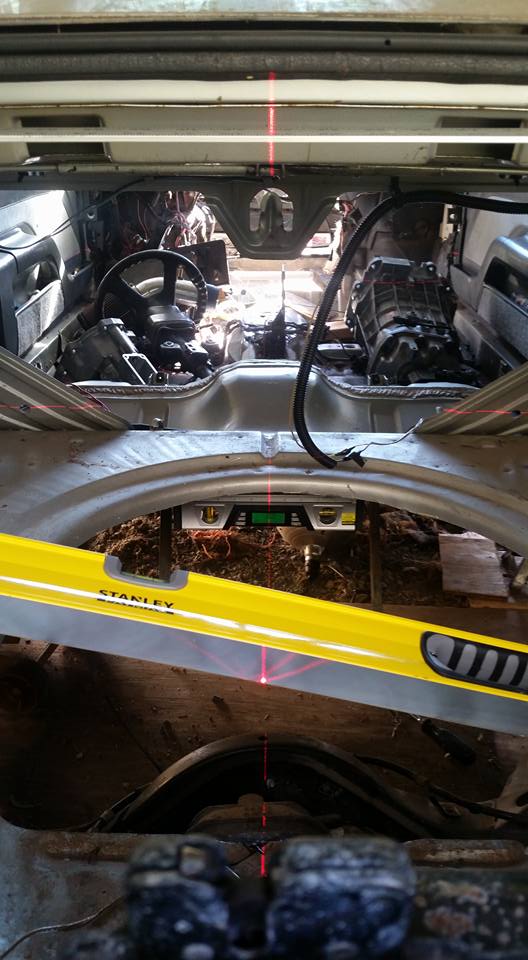
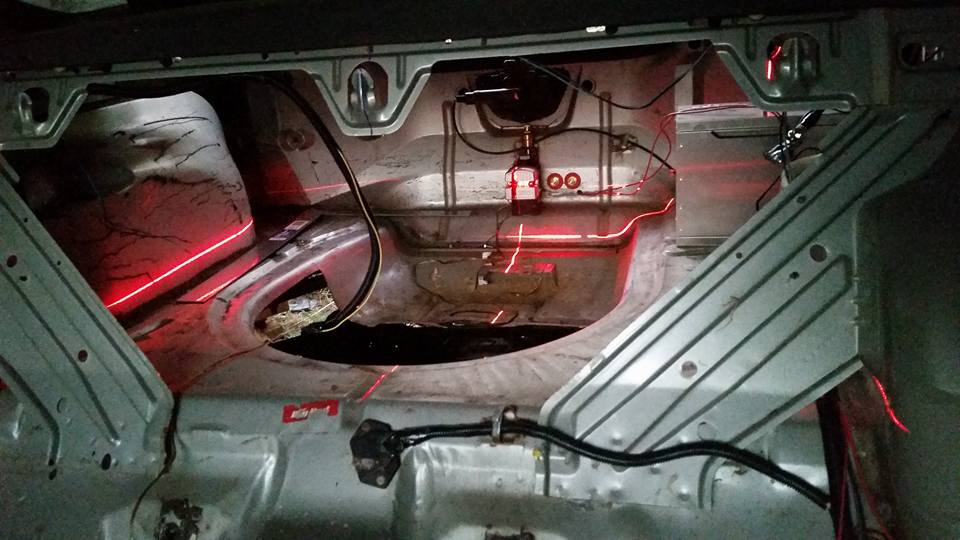
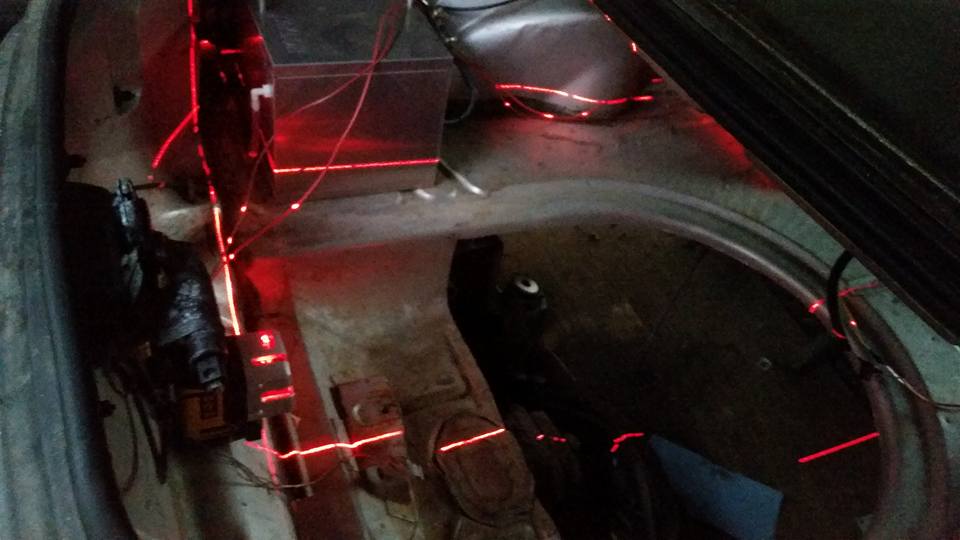
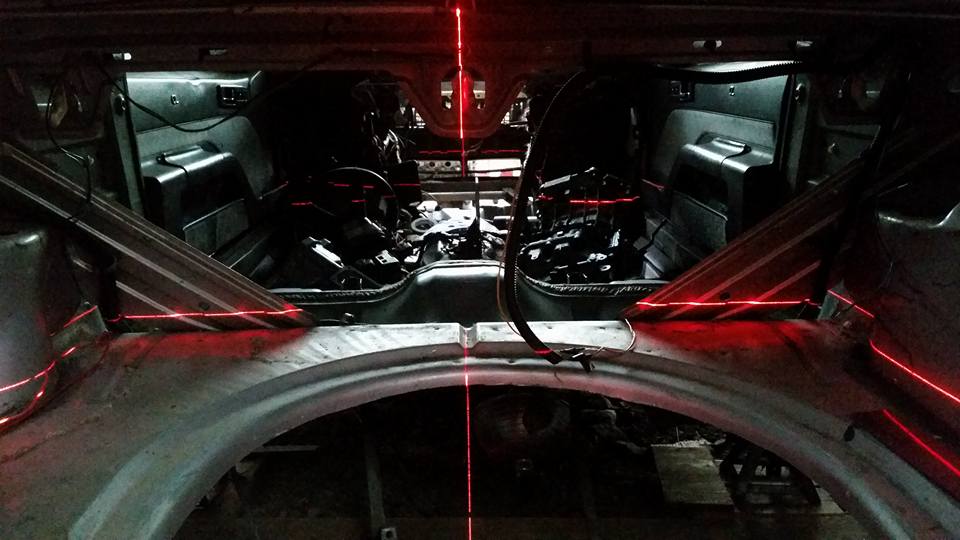
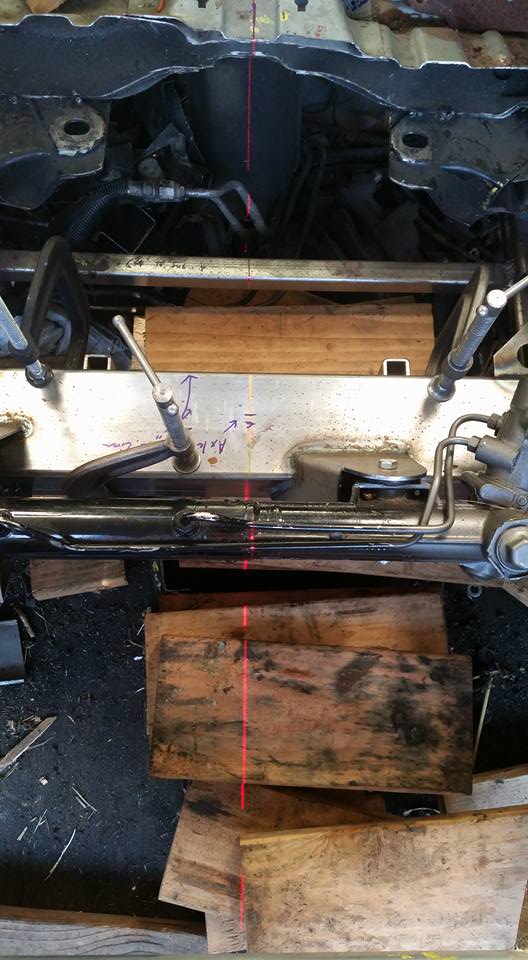
last pic makes me think center is 1/16" off in the back, But I guess ill find out. (yes I did change my rear center point front the 2nd pic, first one was a good guess for the pic)
I did a little over the weekend. didnt have too much time but I tested out my new toy and made a center line down the whole car. Its amazing how poorly unibody cars are put together. Measuring the "frame rails" in the car, they are not even close to being the same on both sides. sure, in some spots. other spots are 1/2" off or more. Ill be taking more measurements on the bottom to make sure my rear center point is correct. kinda getting it setup in the rear, but still need to fix the front. Should have a day and a half to work on it this weekend.


last pic makes me think center is 1/16" off in the back, But I guess ill find out. (yes I did change my rear center point front the 2nd pic, first one was a good guess for the pic)
08-28-2016, 10:20 PM
#83
On The Tree
Thread Starter
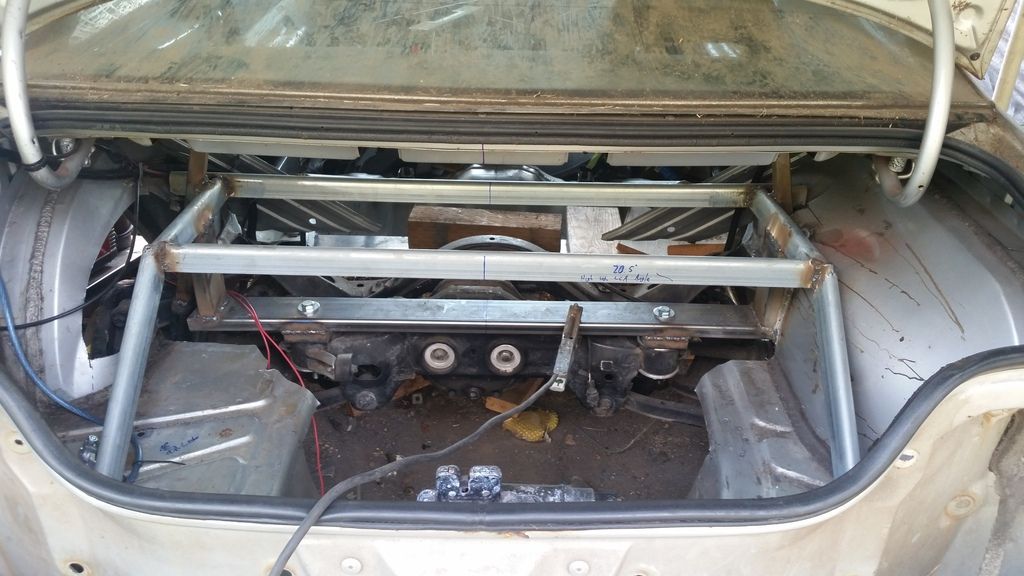
made some good progress over the weekend
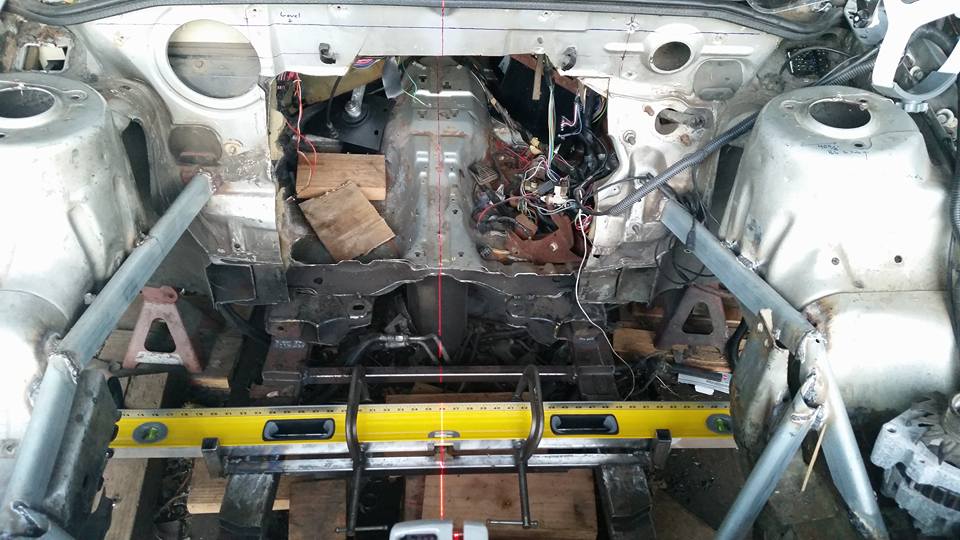
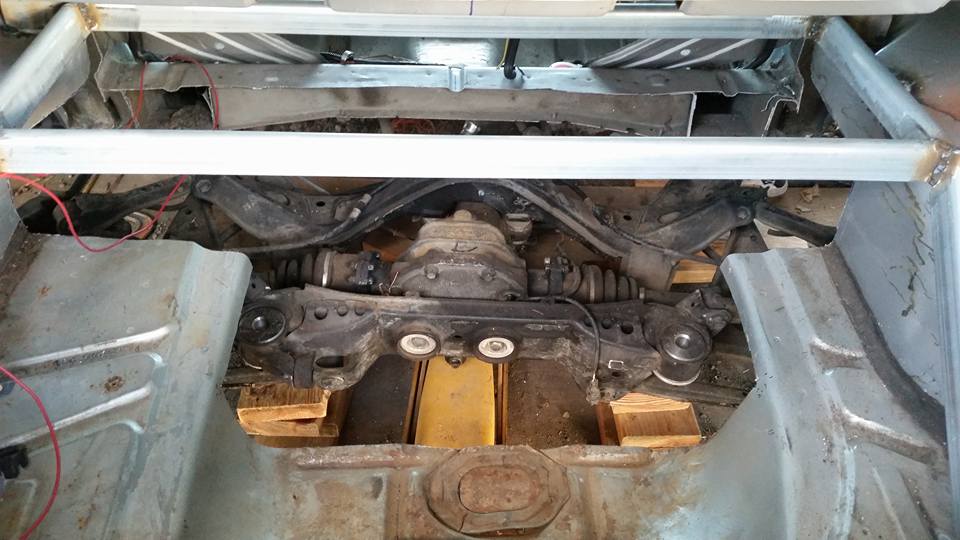
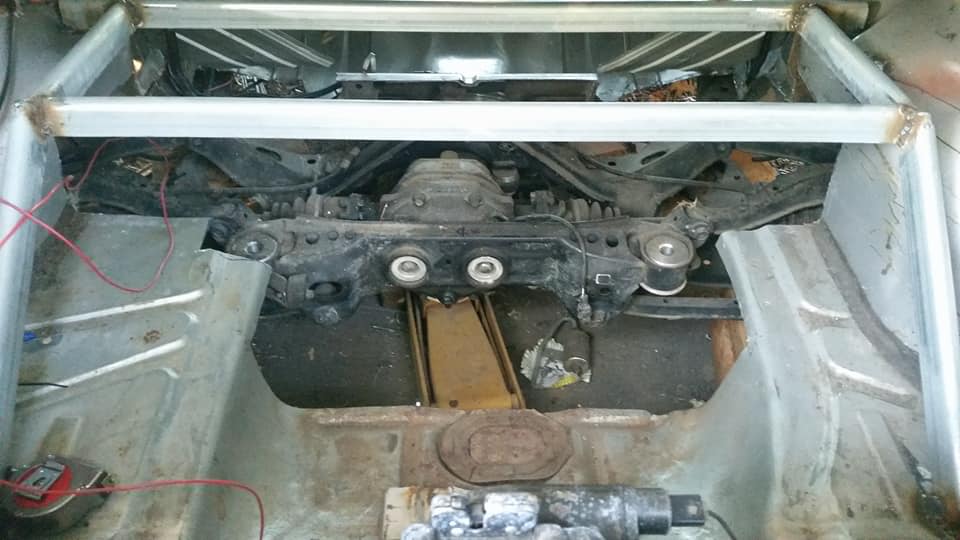
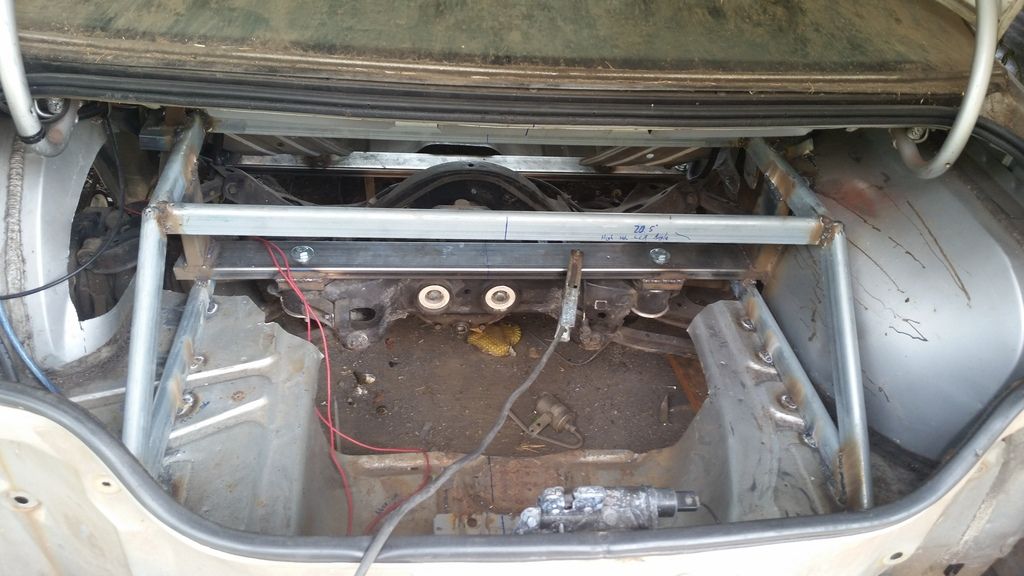
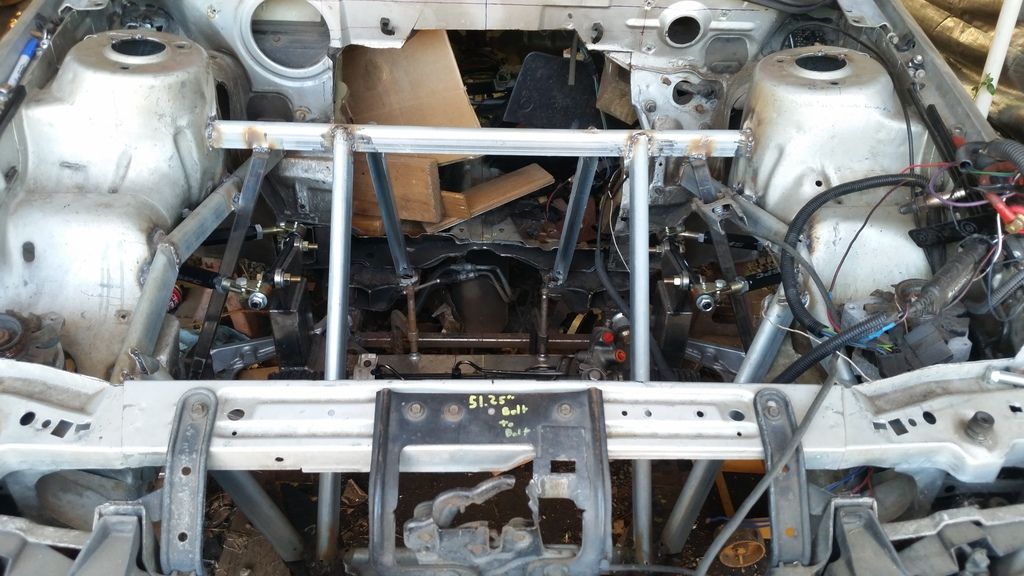
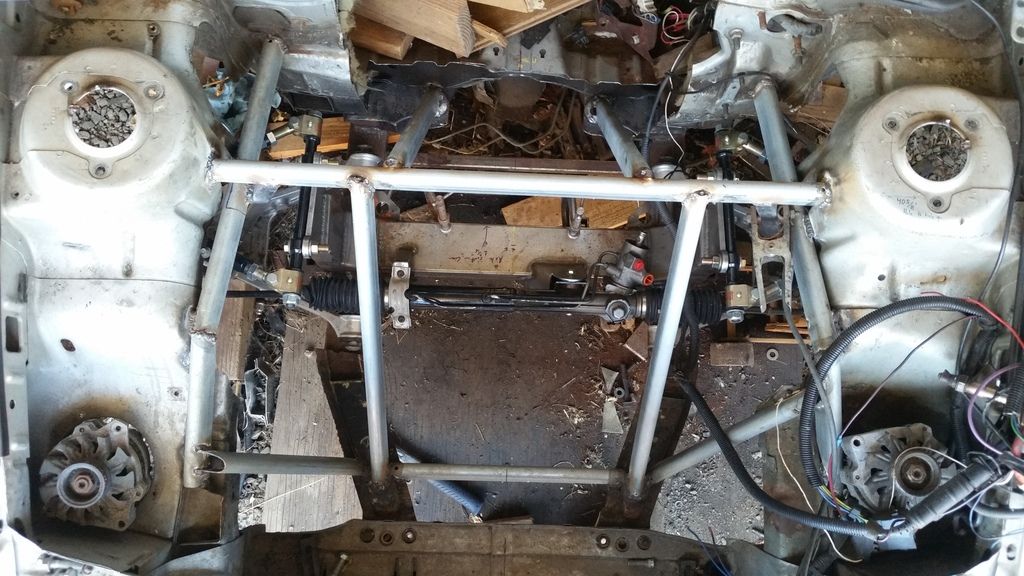
lowered the frame another 1/4", got it PERFECTLY center and square. literally took a day just to measure it out and make damn sure it was right.
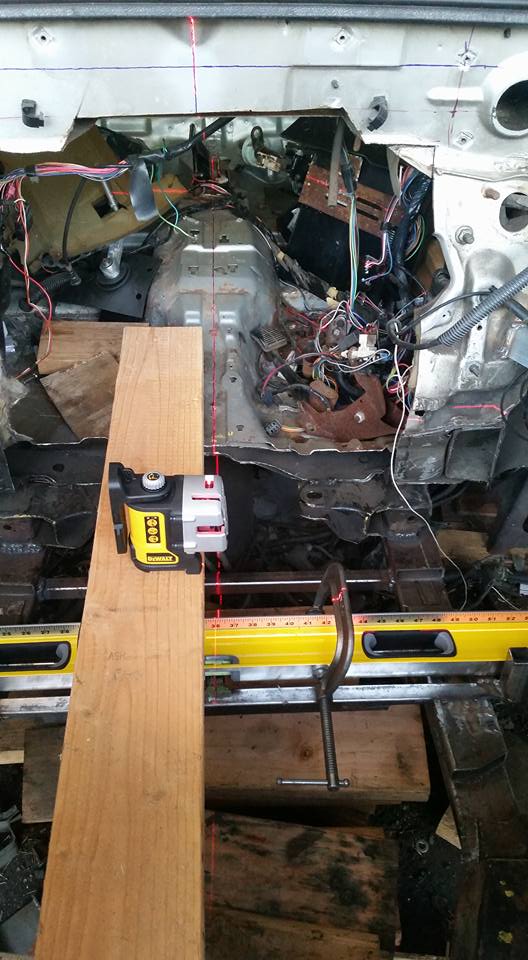
Also decided to find the axle center line, and use that. Instead of doing it how I was. Im really not sure why I didnt think of doing it like this before..

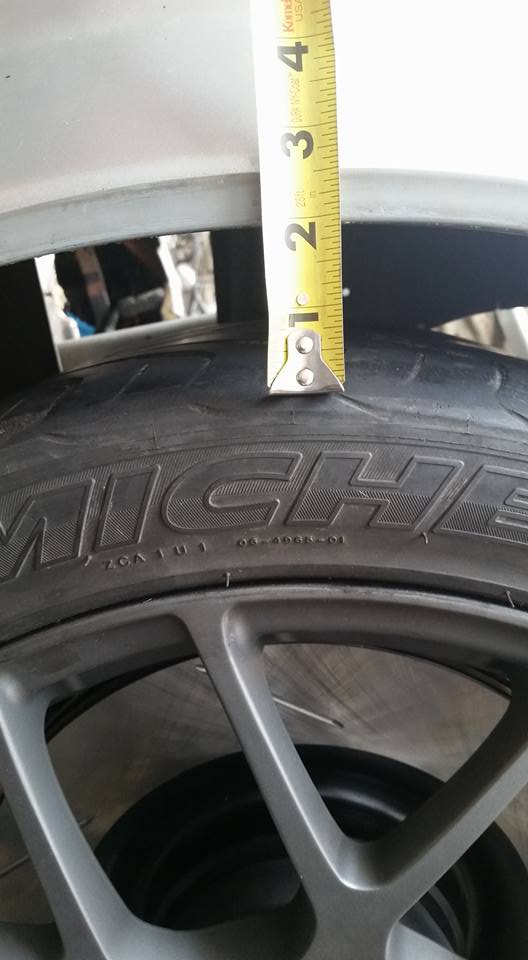
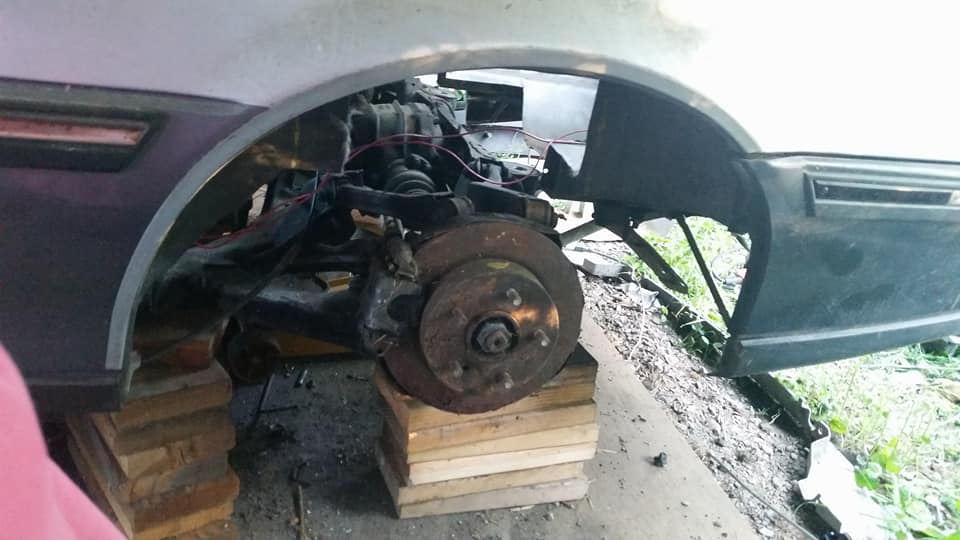
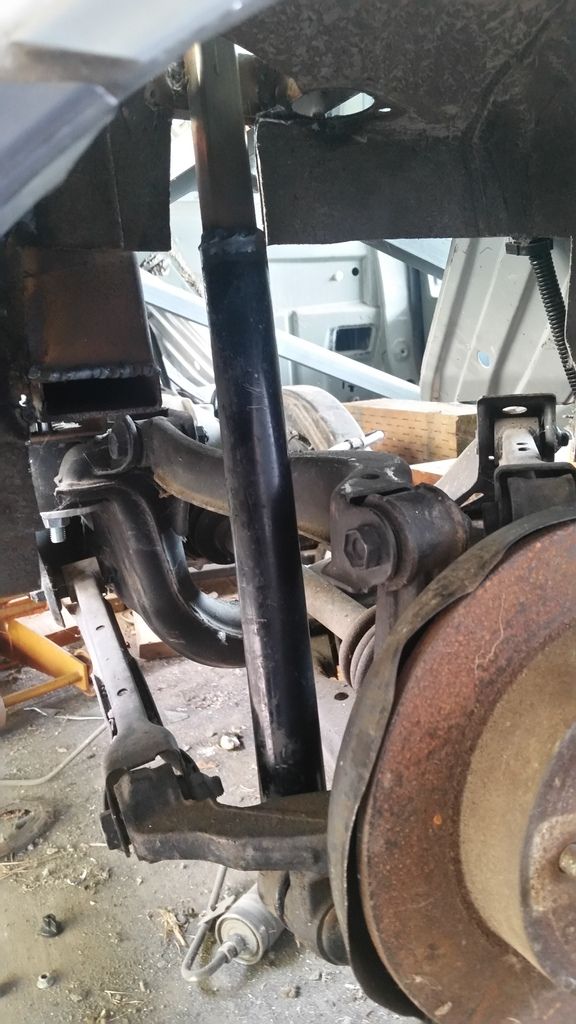
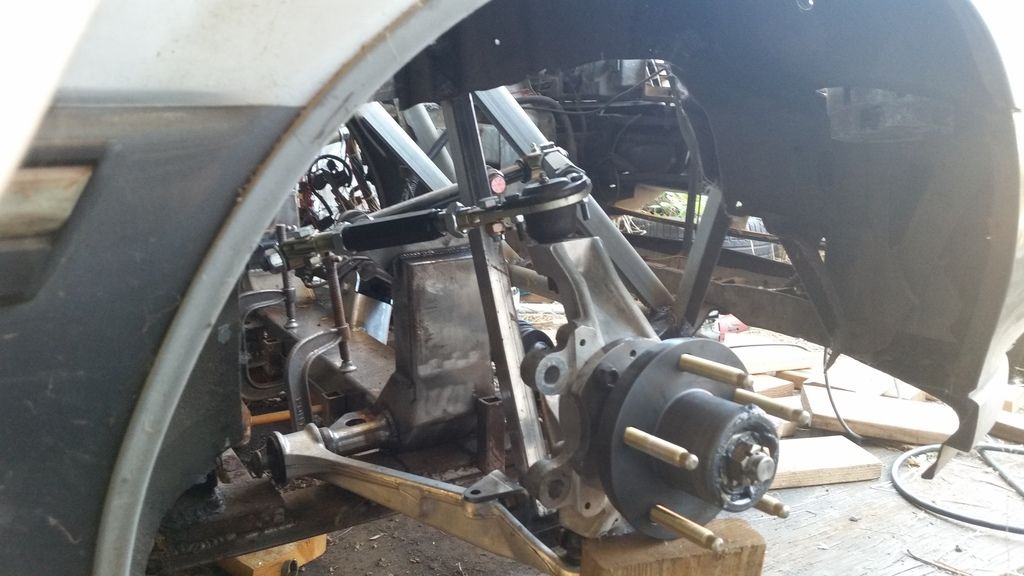
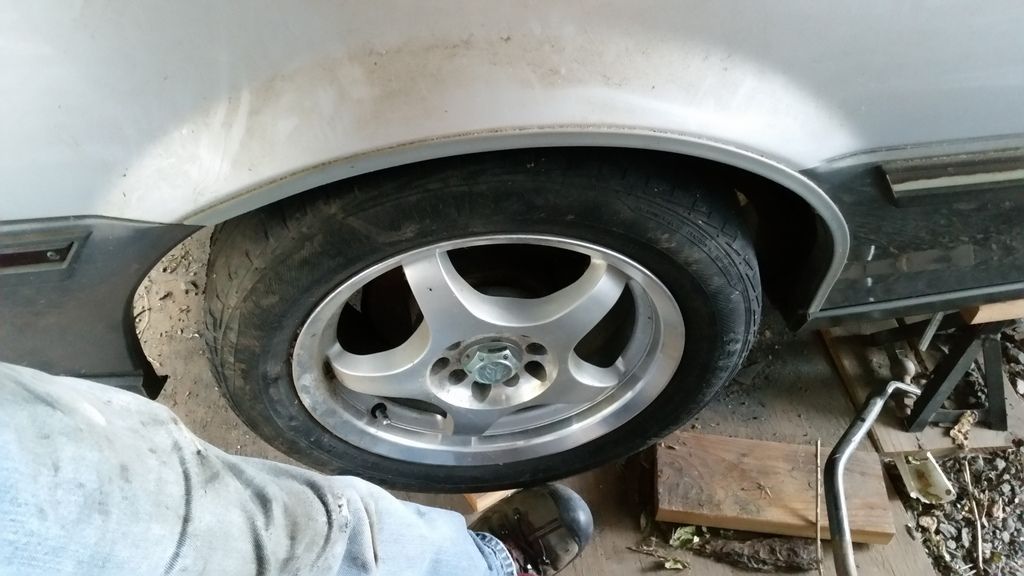
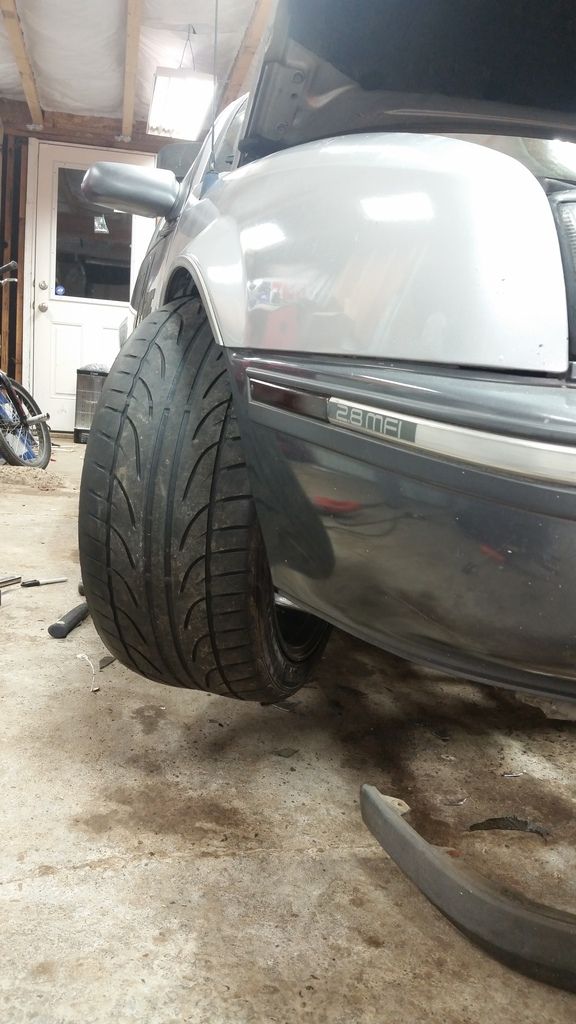
I think im going to raise it back up a 1/4"... but with shimms. The beauty of mockup using C clamps! those tires are REALLY bald, and the tires Im going to run are also more square. With all that I think it should sit a lot better. If not I guess it wont kill me to lower the car a tad, it wont mess with the geometry too bad doing that with coilovers, were talking a quarter to half inch at most. Building it to race, not sit on a trailer and look all stanced out.

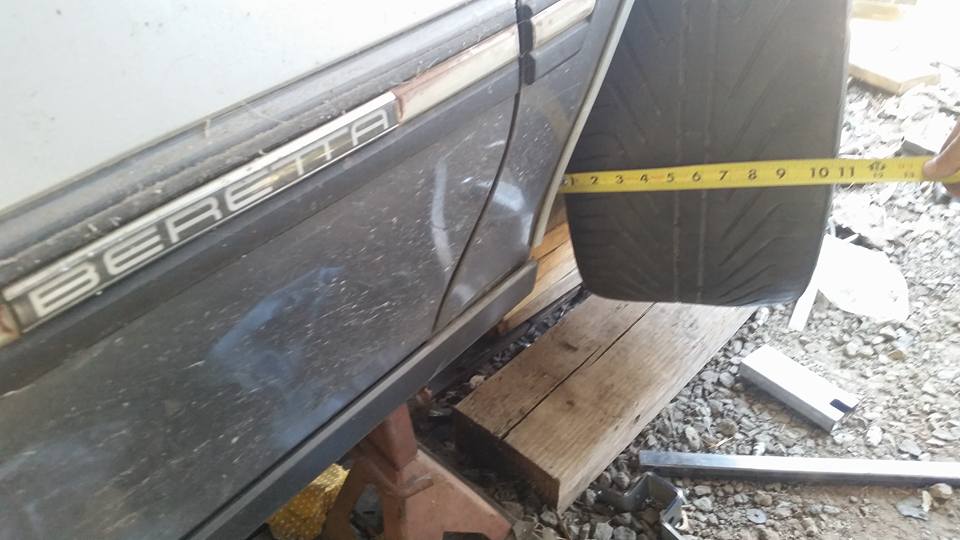
Turned to the lock! It clears. The other way almost clears.. rubs on a seam and also the inside of the fender. Very minor, Just didnt feel like cutting that yet.
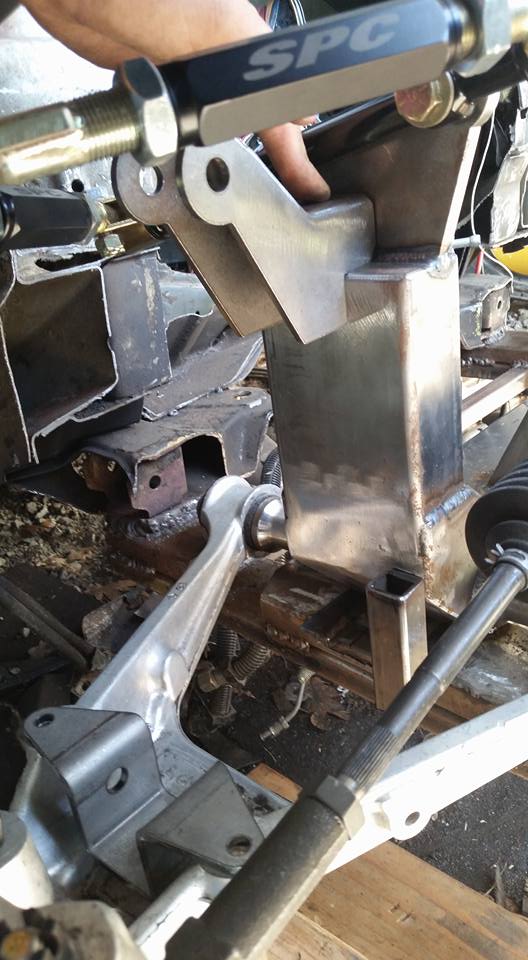
I started to build a dummy shock and a temp mount, but Then I had an idea.. Grabbed the mount that came with subframe and well.. Confirming with koni to make sure they have or can make a shock in the correct length, then I will have this tig welded on! done and done!

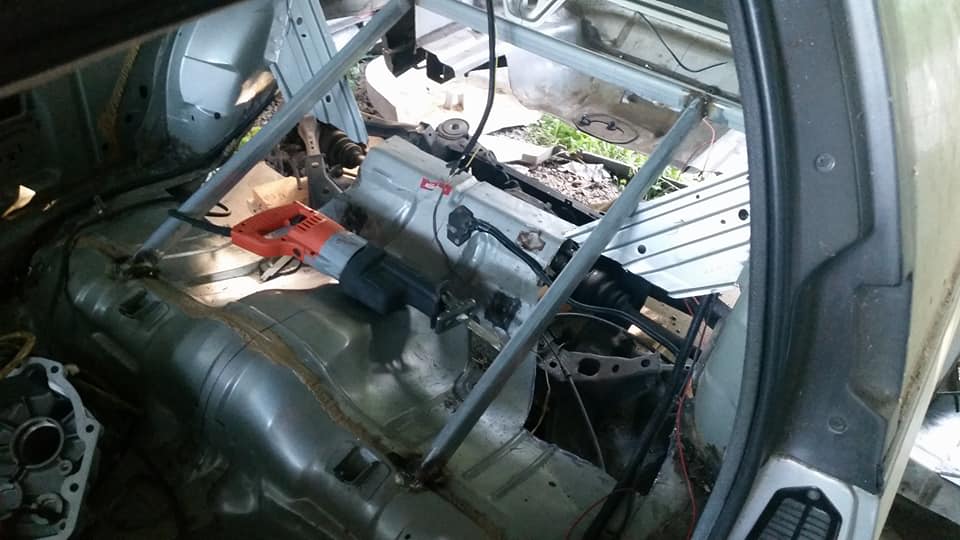
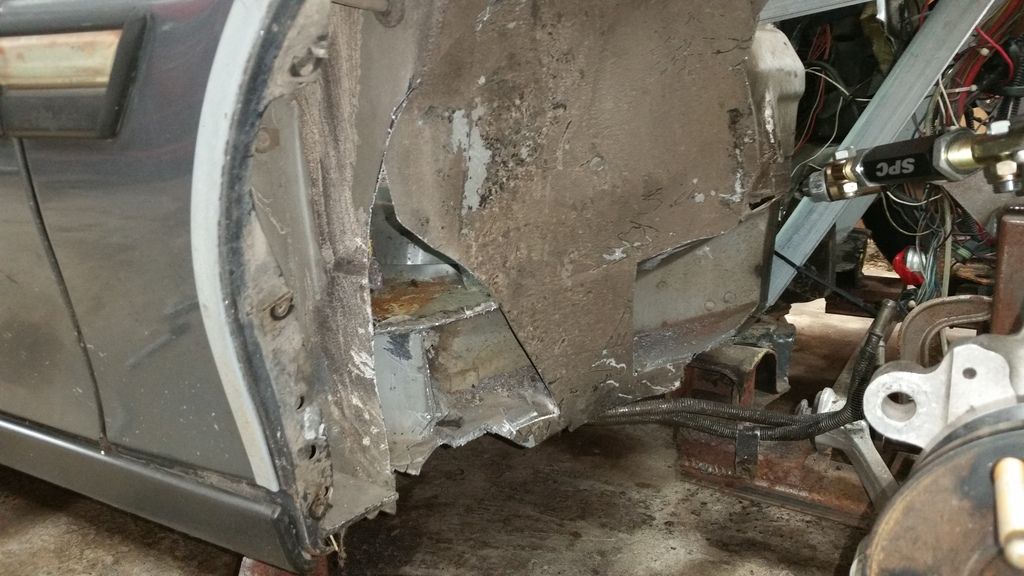
decided to figure the back end out a little more and think about how and where to put the temp supports. This should be easier to mount, Need to figure out my roll center on the rear still.. Might do that next weekend. I know your thinking "buy premade tubs and be done". Well, I thought that too. Side to side is very different.. and its also already attached to the side of the car! If I do it like this, leaves more of the car unhacked and I think it will be less work too. And I really dont want to weld on my qtr pannels and warp them! But anyways, Ill be cutting clear into the back seat maybe about an inch. I might just try and raise the factory floor the ~5" its going to need in that area. well see, this is a starting point, everything seems to always change!

lowered the frame another 1/4", got it PERFECTLY center and square. literally took a day just to measure it out and make damn sure it was right.


Also decided to find the axle center line, and use that. Instead of doing it how I was. Im really not sure why I didnt think of doing it like this before..


I think im going to raise it back up a 1/4"... but with shimms. The beauty of mockup using C clamps! those tires are REALLY bald, and the tires Im going to run are also more square. With all that I think it should sit a lot better. If not I guess it wont kill me to lower the car a tad, it wont mess with the geometry too bad doing that with coilovers, were talking a quarter to half inch at most. Building it to race, not sit on a trailer and look all stanced out.


Turned to the lock! It clears. The other way almost clears.. rubs on a seam and also the inside of the fender. Very minor, Just didnt feel like cutting that yet.

I started to build a dummy shock and a temp mount, but Then I had an idea.. Grabbed the mount that came with subframe and well.. Confirming with koni to make sure they have or can make a shock in the correct length, then I will have this tig welded on! done and done!


decided to figure the back end out a little more and think about how and where to put the temp supports. This should be easier to mount, Need to figure out my roll center on the rear still.. Might do that next weekend. I know your thinking "buy premade tubs and be done". Well, I thought that too. Side to side is very different.. and its also already attached to the side of the car! If I do it like this, leaves more of the car unhacked and I think it will be less work too. And I really dont want to weld on my qtr pannels and warp them! But anyways, Ill be cutting clear into the back seat maybe about an inch. I might just try and raise the factory floor the ~5" its going to need in that area. well see, this is a starting point, everything seems to always change!

 02-12-2017, 08:40 PM
#85
On The Tree
Thread Starter
Finally had a chance to work on the thing again. Finally ended up getting ahold of a house, So I would like to get the car rolling soon at least to get it in my garage. Then the real progress can be made!
but this is where im at now. not TOO much farther. but its progress.
figured out where I need to be for the rear roll center, 5 3/4" (front is 2 7/16"). I think that will do for a baseline anyways.


took me 3 tries to get it right..
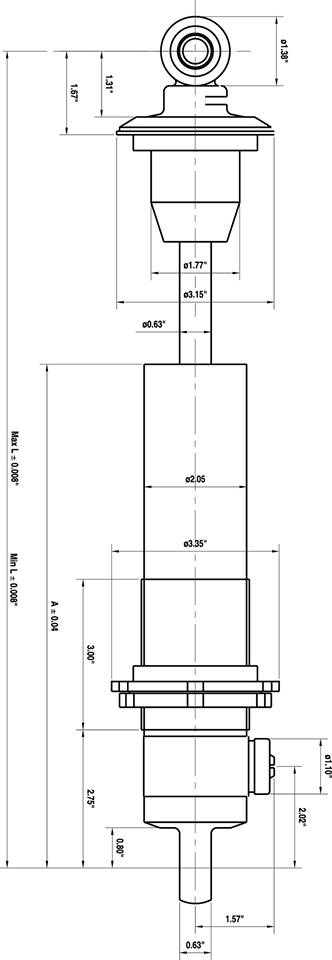
Diagram for the koni 8212 for the front. I think Im going to have to build a new front shock mount, as it sits I will have about 3" of total travel. Im not sure I like that.
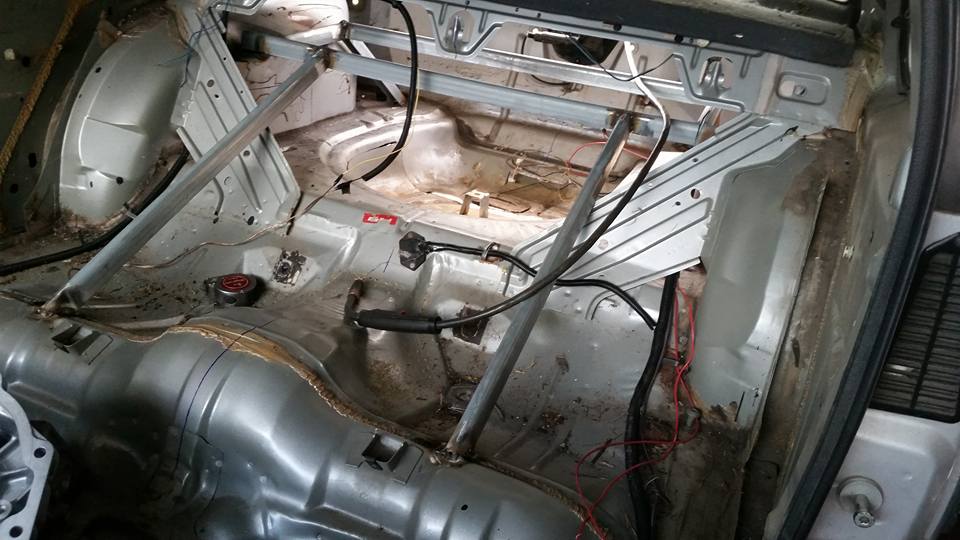
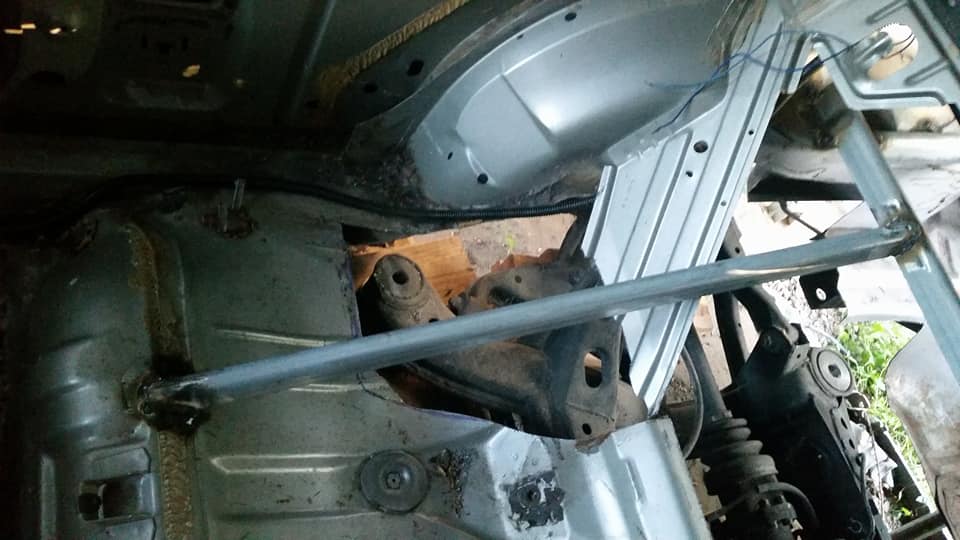
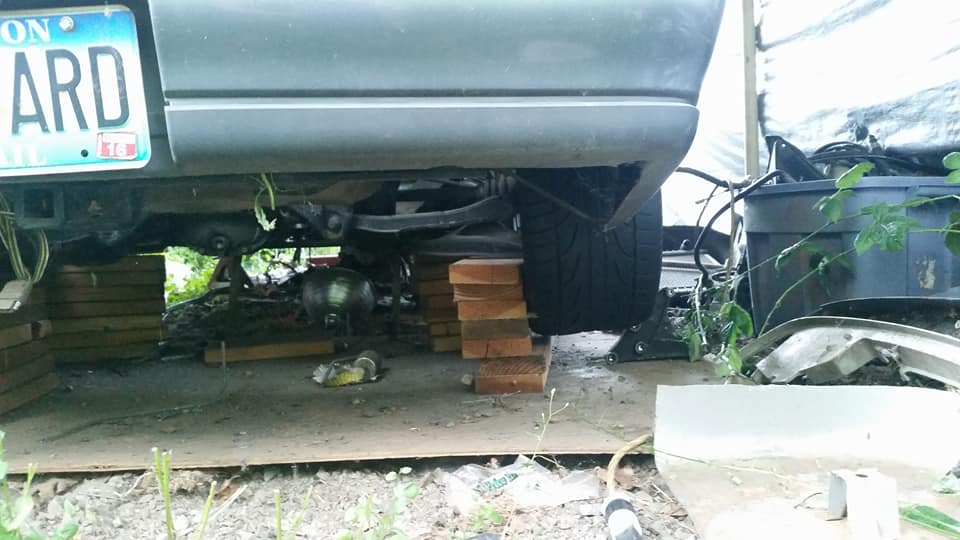
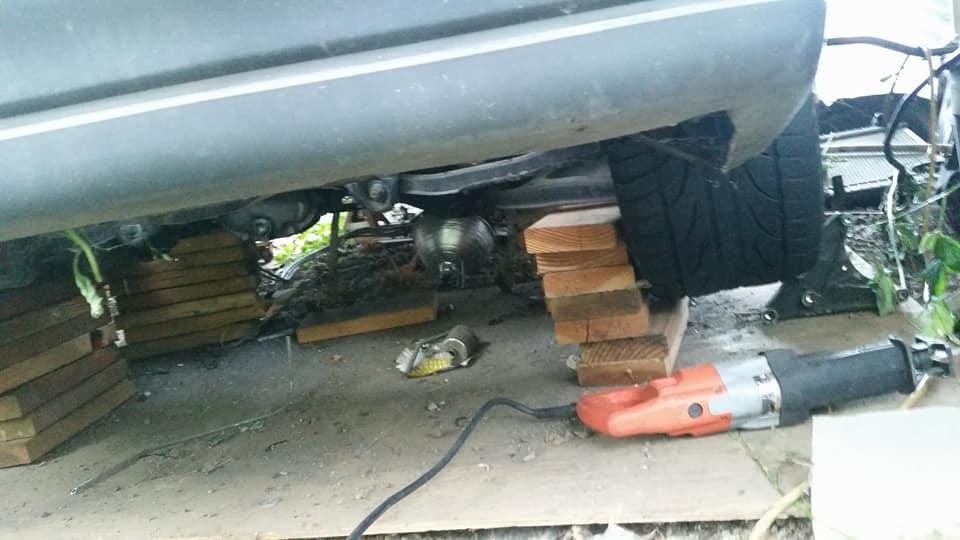
Got the back of the car supported a little better for the cutting thats about to take place. It will need more I think before it can even support the weight of the car. its only welded to sheet metal.
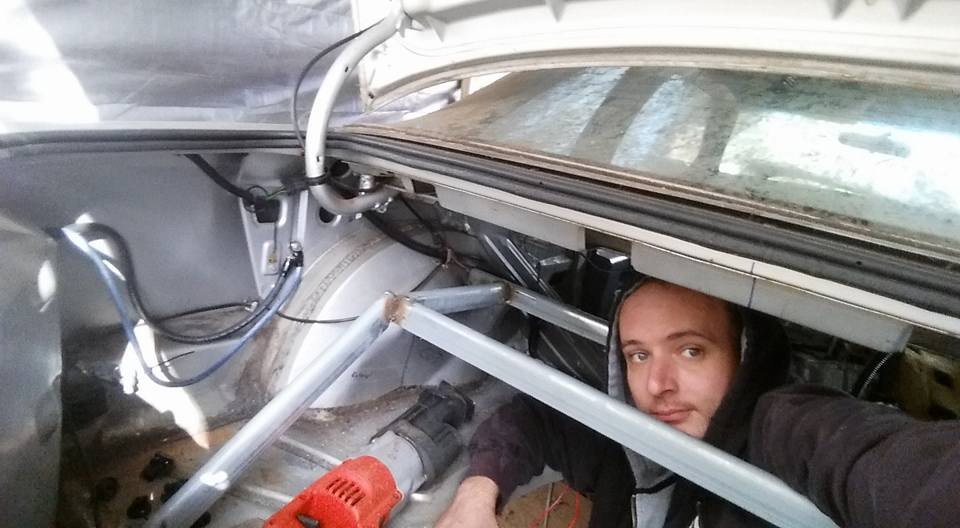
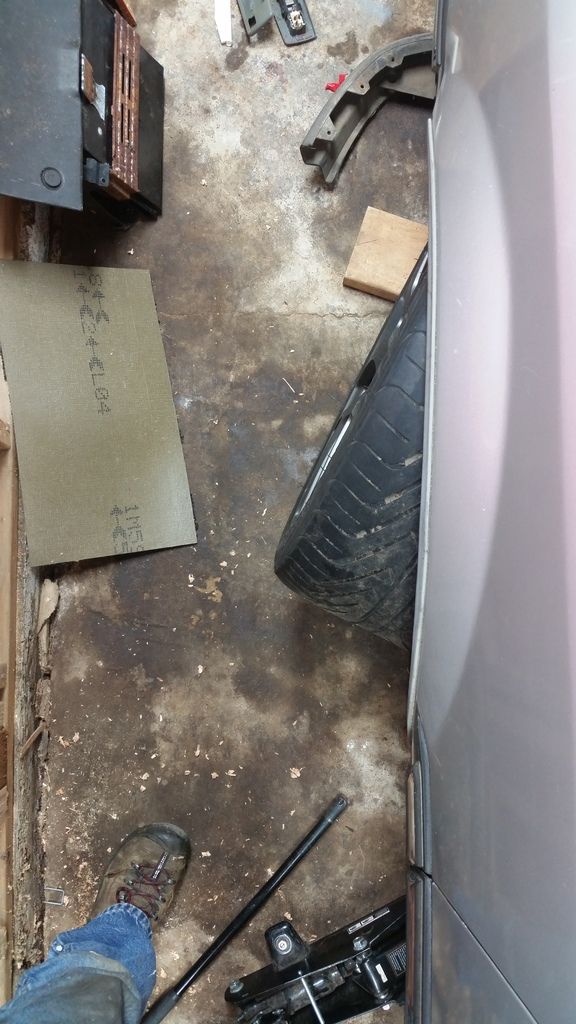
I need a raise! These working conditions are terrible!
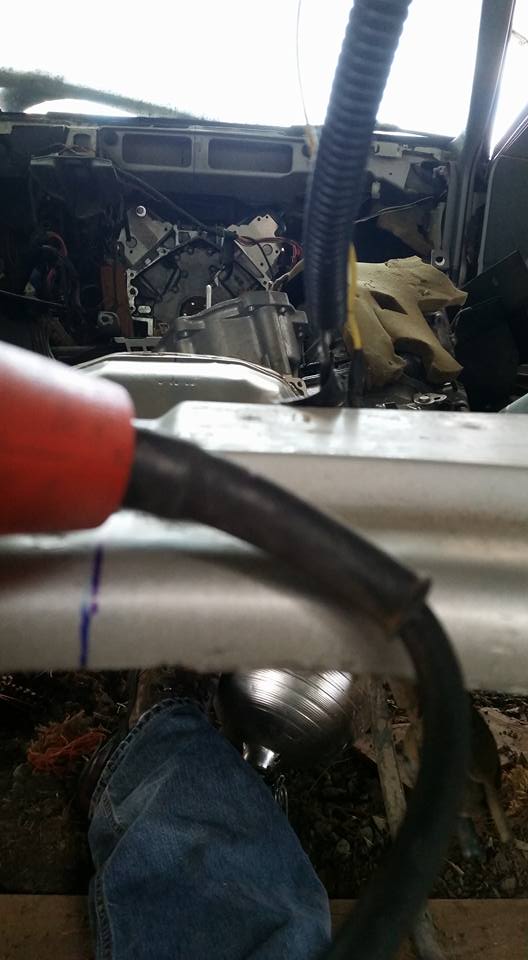
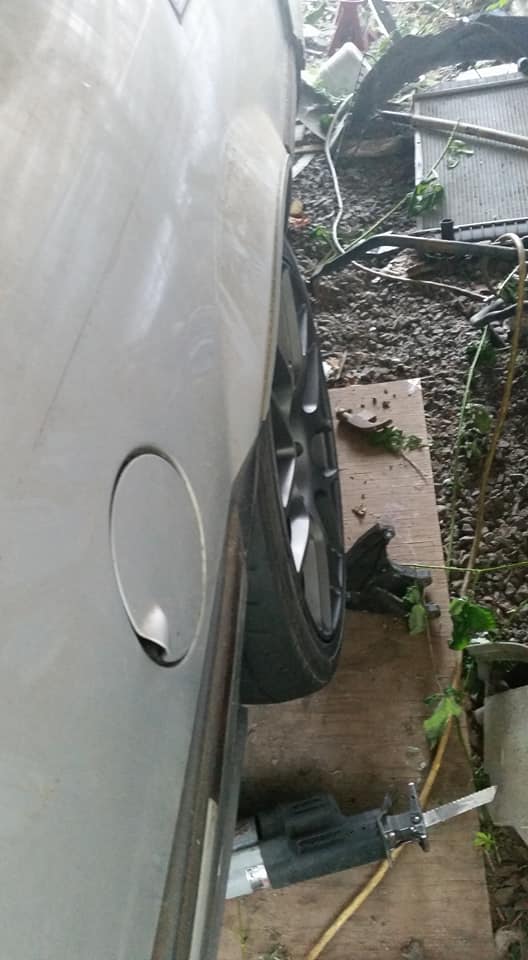
Thought it was an interesting view..
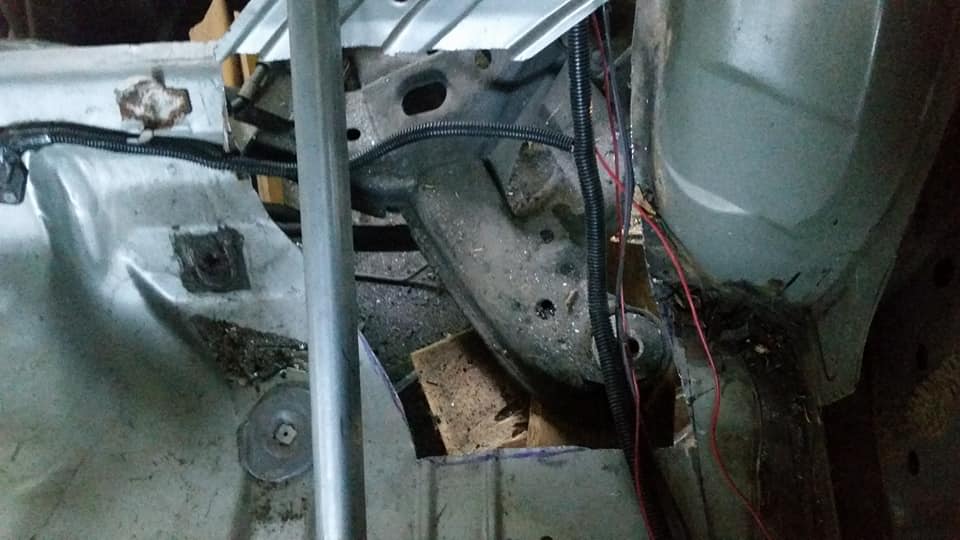
where it sits now. need to cut more out of the front side sadly. the front mounts are hitting the body. Ill be doing that next weekend if the weather is decent.
but this is where im at now. not TOO much farther. but its progress.
figured out where I need to be for the rear roll center, 5 3/4" (front is 2 7/16"). I think that will do for a baseline anyways.


took me 3 tries to get it right..

Diagram for the koni 8212 for the front. I think Im going to have to build a new front shock mount, as it sits I will have about 3" of total travel. Im not sure I like that.

Got the back of the car supported a little better for the cutting thats about to take place. It will need more I think before it can even support the weight of the car. its only welded to sheet metal.

I need a raise! These working conditions are terrible!

Thought it was an interesting view..


where it sits now. need to cut more out of the front side sadly. the front mounts are hitting the body. Ill be doing that next weekend if the weather is decent.
07-08-2017, 02:11 AM
#86
On The Tree
Thread Starter
Finally found some time to work on this thing last weekend. life has been hectic, but put a day and a half in it! hoping to get it rolling in the next month so I can move in to my garage and start making real progress!
shaving away at the back seat..
just trying to make it actually fit..
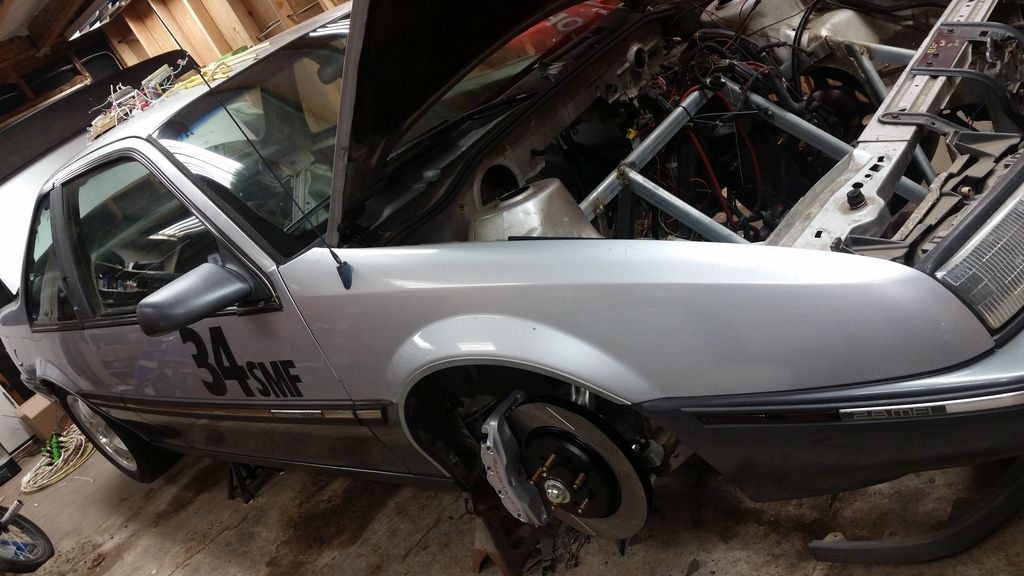
a ball park of where its going to sit, give or take a little.

I took this for a reason.. I have no idea what that was..
closer

shaving away at the back seat..

just trying to make it actually fit..

a ball park of where its going to sit, give or take a little.


I took this for a reason.. I have no idea what that was..

closer
07-08-2017, 02:12 AM
#87
On The Tree
Thread Starter

had to see what both wheels looked like.. again

about half an inch away


close to the final location


day 2. got the lazer out for the final adjustments

I guess I took a lot of pictures..


sadly I had to keep cutting.. Ill make my back seat fit somehow!!!! yes, the factory back seat will be crammed back in and probably have a cage going through it. but it will have it!


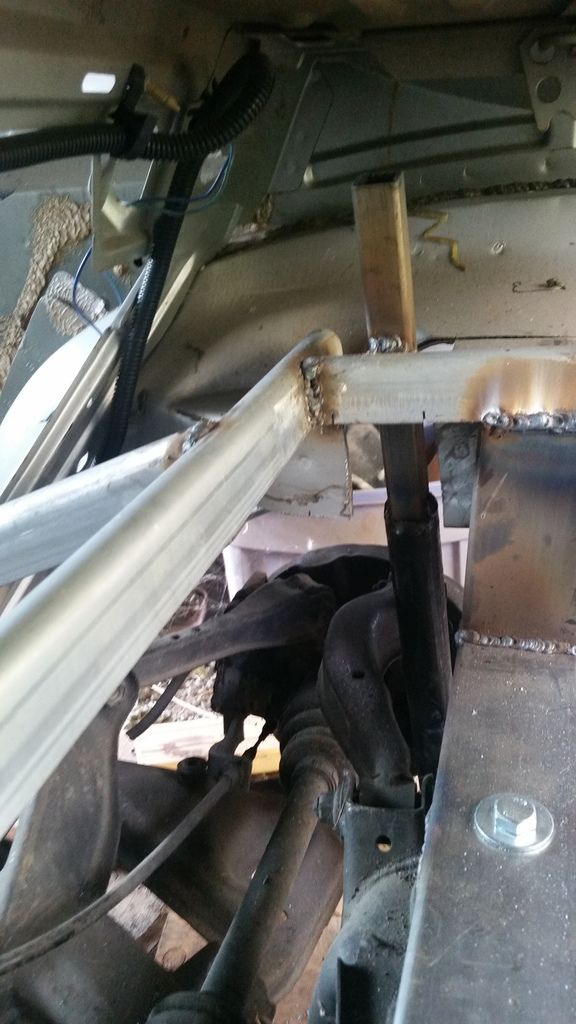
and there you have it! s14 rear end is bolted in. (in case you didnt read the thread, its getting a full frame, it will never be driven with this form of mounting)


Im unsure about the subframe height, I had it all calculated out and it just didnt look right so I put it up high, I can use spacers to drop it down when the frame goes in to hold it at the correct location once I calculate it again to see if I was right. not a huge deal. the stock s14 struts are very tall.. they want to mount in the rear deck lol. trying to think of an idea for that.. even if it is just to simple get it moved into my garage. Ill probably add more bracing just to be on the safe side for transport, but its solid, I can lift the back of the car up with the subframe.
08-26-2017, 06:14 PM
#88
On The Tree
Thread Starter
found a little time to work on it yesterday, after a few hours of trying to get the s14 rear struts to work, I gave up. Not gonna happen. ended up getting one corner "rolling". about 4 hours to go and the car will be rolling. I ended up just making a solid suspension setup lol. it will work, ill put some tall tires on it with low psi for the big move
08-28-2017, 01:04 AM
#89
On The Tree
Thread Starter
Rear end is rolling aside from putting wheels on. Front end needs my "dummy shocks" welded on and supported, one bearing greased, few bolts, wheels, and I think its ready to roll. Ill upload a few pics soon.
11-13-2017, 11:34 PM
#90
On The Tree
Thread Starter
Alright, back in the game. Been too busy to update the thread, Or sleep really! Ive made some progress.
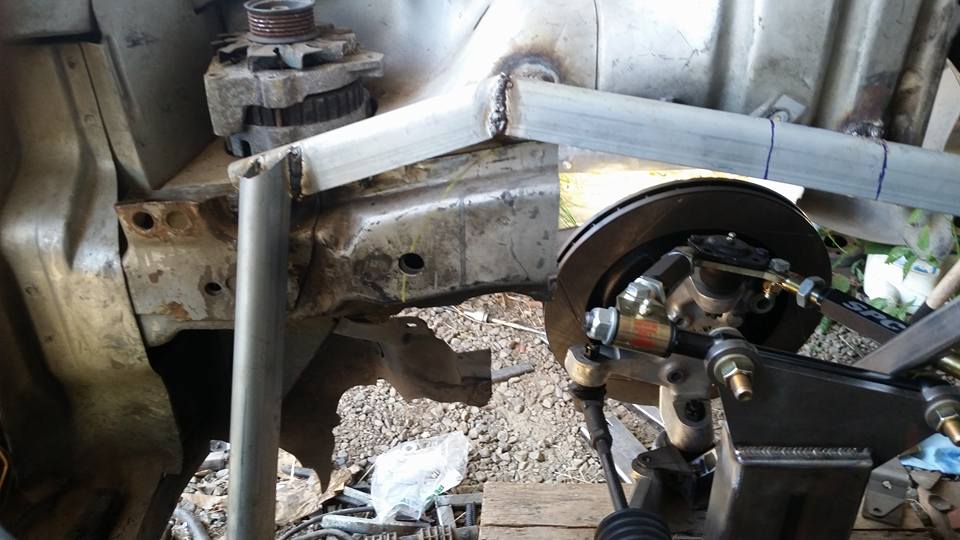
Ignore those terribly cold welds. Thats my solution for the temp shocks that got the car rolling, just thought I would share.
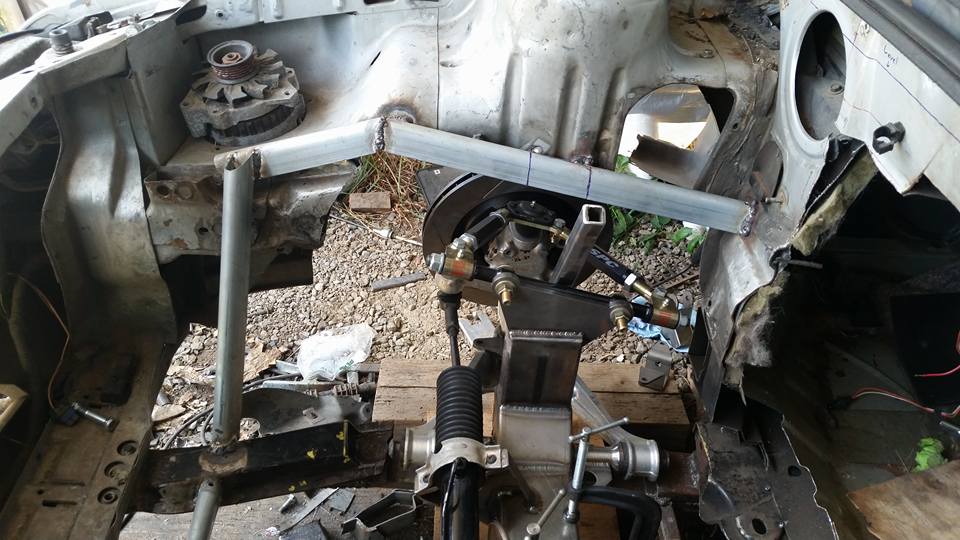
sorry, I had take a few more pictures before I pulled the LS out! I think its cool as hell lol.

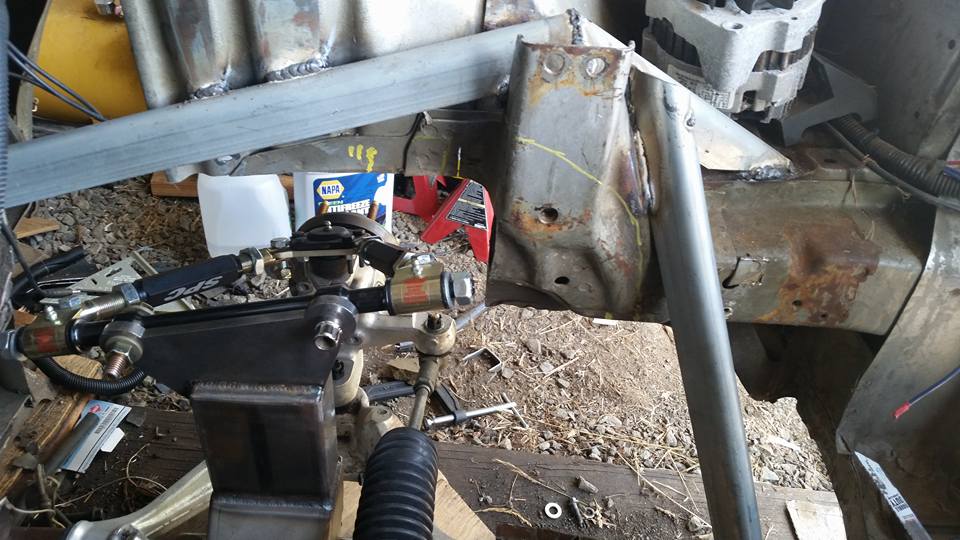
And thats the front end work to get it rolling and not fall apart. yes the subframe is held in with C clamps lol. But it works, didnt want to weld on that just yet.


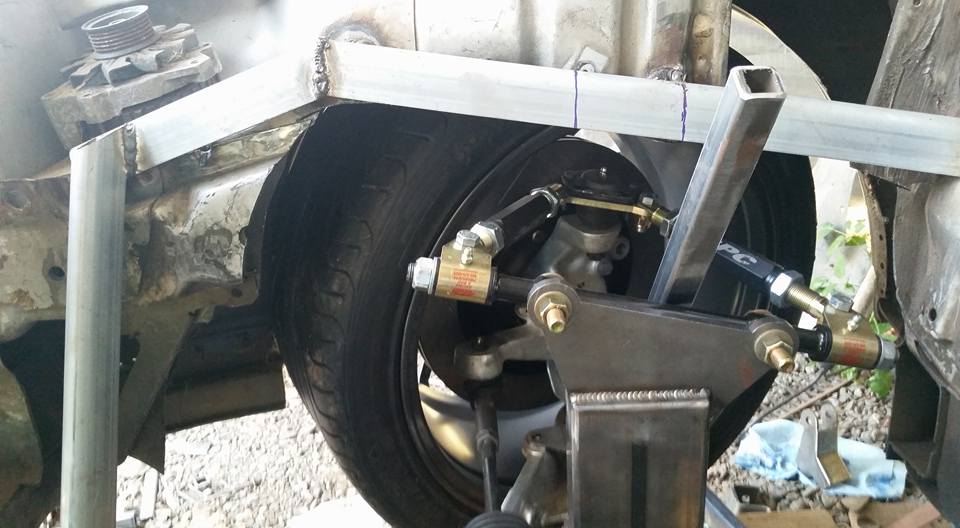
Had to drill out the holes so my custom spindle/spindle would fit.
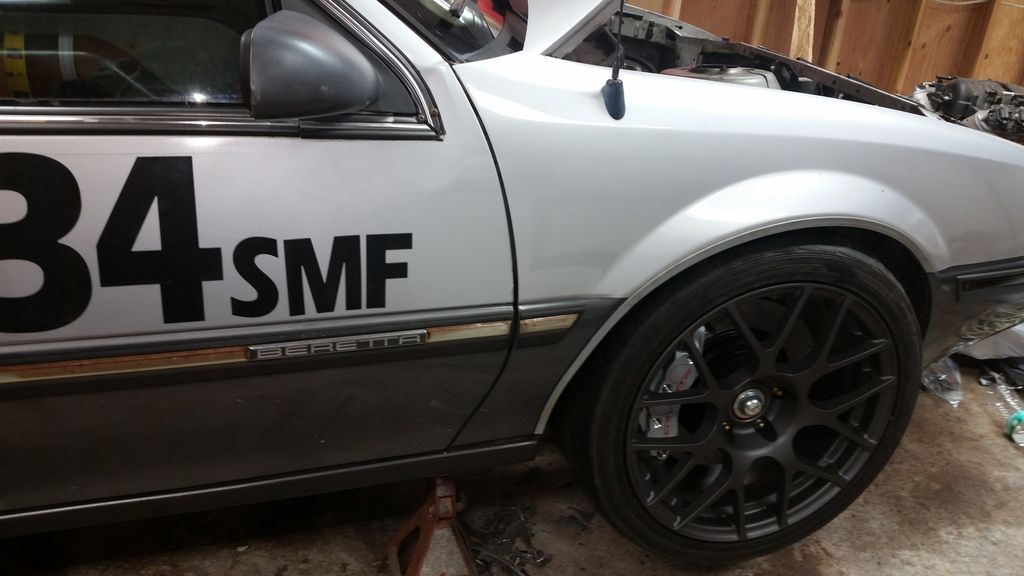
wheels I had laying around.


Ignore those terribly cold welds. Thats my solution for the temp shocks that got the car rolling, just thought I would share.


sorry, I had take a few more pictures before I pulled the LS out! I think its cool as hell lol.


And thats the front end work to get it rolling and not fall apart. yes the subframe is held in with C clamps lol. But it works, didnt want to weld on that just yet.


Had to drill out the holes so my custom spindle/spindle would fit.

wheels I had laying around.
11-13-2017, 11:36 PM
#91
On The Tree
Thread Starter

yes, its still together, didnt fall apart! and it rolls!!

tires rub.. more cutting to do! they will fit!!


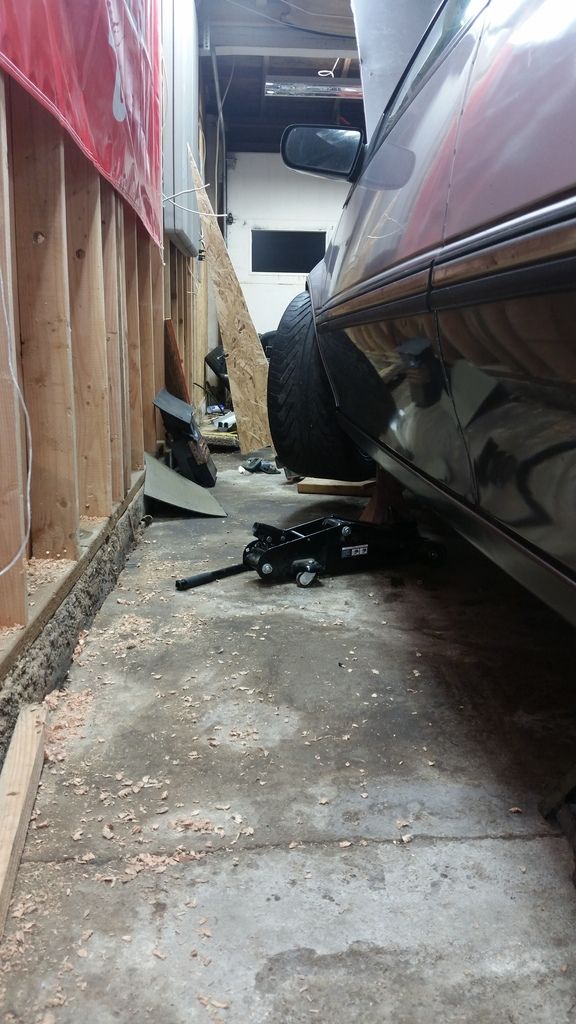
Best feeling ever. Its FINALLY just out side of my door! Finally!!!


hey, cars get cold too... just drying it off after its first bath in 3 or so years.


so due to VERY tight clearances around my wheels and whrere rear struts need to be, I was really thinking of doing a pushrod/cantilever setup. not a whole lot of information about proper setup and ratios tho.. thought I would share that for the fun of it. And I stole this image on the net
I ended up buying some 300zx rear uprights (spindles, or whatever you wish to call them). They will save my about 7lbs of unsprung weight on each side, along with giving me a better method of mounting struts. I was REALLY thinking about going koni yellows and tein upper pillowball mounts but I was just told it will be $530 EACH to convert to double adjustable.. I swear it used to be a lot cheaper than that.. Im also not sure if I like the angle that the 300zx struts are mounted.. but its an option I have. Another solution I came up with, PROBABLY going this route.. a company makes a press in aluminum "bushing" to change the mounting style

stole this from the company that makes it. I would have to build a new mount, but the bushing is what I need!

stole this one from them too..

this is what the koni mounts would look like for the 300zx setup.

this is the stock s14 mount. Its kinda a funky setup. I stole this picture from google too..

SOO if all goes as planned, Ill be able to use this koni 8212 in the back, just like the front! hoping to order the adapter kit in a week or so, and I found some cheap blown coilovers with the dimensions I need on ebay for mockup, probably getting those ordered soon also.
but, that is my update!! getting my garage wired up right now, no more 75' extension cord on my welder lol. It will be amazing! also getting everything setup still so I can work in it.
11-14-2017, 08:05 PM
#92

There's even a sleeper Saturn SL1 with a FWD LS drivetrain in it (looks totall stock outside)
It can be done...but RWD is the way to go. lol
What is the rear IRS out of?
Jay
11-14-2017, 11:26 PM
#93
On The Tree
Thread Starter
Yeah, i have no idea how those guys pull it off. The v6 was pretty crammed in as it was! The saturn is a smaller car.. And the F40.. I was really looking into that when I was still fwd. It has a lower hp rating than the stock getrag 282, and 1st gear is so short it seems pointless! I probably would have tried it if it wasnt for that 1st gear tho..
its the whole subframe from an s14 240sx
its the whole subframe from an s14 240sx

 11-17-2017, 07:03 PM
#95

I am pushing close to 45K miles with my warmed over LS4/F40 swap and it has been a blast!
11-19-2017, 12:13 AM
#97
On The Tree
Thread Starter
interesting, I swear the 282 was rated higher. Maybe Im thinking of another variation that was rated lower in the "282" world. I really dont miss that transmission... 3.09 would have been a great ratio tho!
and the garage is amazing, even tho its a bit small.. no updates other than my mockup coilovers arrived and the lower adapter should be in the mail! hoping to get all my metal moved over to my place so I can get started on making room for the shocks. They are going to fit very well I think by just eyeballing it.
and the garage is amazing, even tho its a bit small.. no updates other than my mockup coilovers arrived and the lower adapter should be in the mail! hoping to get all my metal moved over to my place so I can get started on making room for the shocks. They are going to fit very well I think by just eyeballing it.
11-19-2017, 12:13 PM
#98
Teching In

Join Date: Jun 2009
Posts: 6
Likes: 0
Received 0 Likes
on
0 Posts
Great to see this moving along and congrats on getting your own garage! I really like the attention you're giving the chassis. Roll center and ackerman are things many people wouldn't know about, or care.
11-19-2017, 09:50 PM
#99
On The Tree
Thread Starter
Thanks! Im definitely trying to make sure its setup to perform correctly. Just due to this build and digging deeper into suspension ive learned a ton, still lots to learn and some I dont 100% understand yet. But hey, I have time to learn. I would really like to outperform the track built 240s and vettes! In theory, No reason this car wont when its done. If I can drive..
11-26-2017, 04:09 AM
#100
On The Tree
Thread Starter
had a few hours to play around today. Got the car leveled.
clearance for the tires.. still need to cut more but it clears everything with bald tires. I dont think hoosiers will fit..
one downside to the c4 steering setup is the angle. It doesnt have much! hopefully this will do. I guess I could go crazy had have some knuckes CNCed later down the road if I needed more. But it was good enough for the vette, and many great cars dont have much angle, so we will see. I plan to leave it as is tho.
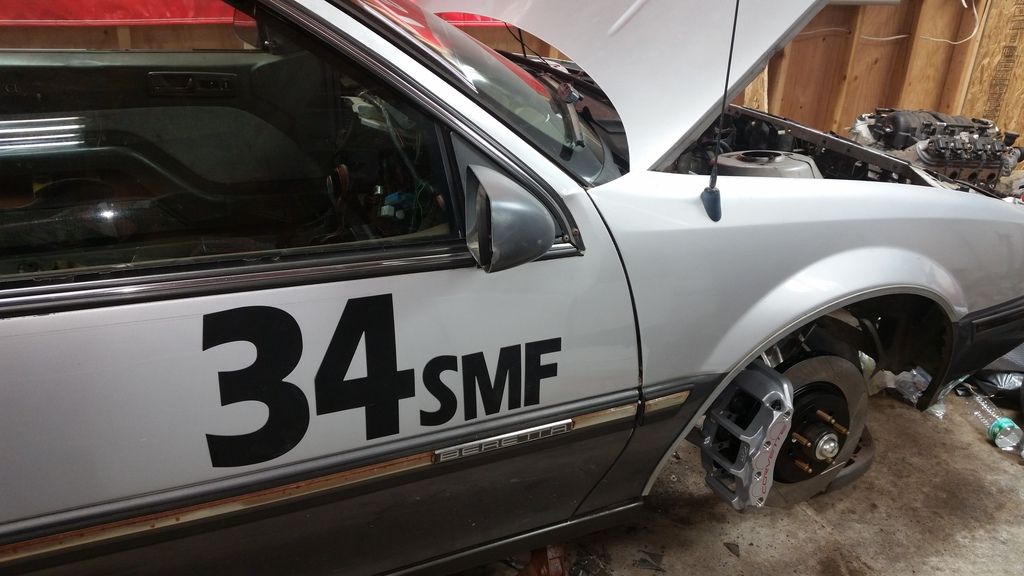
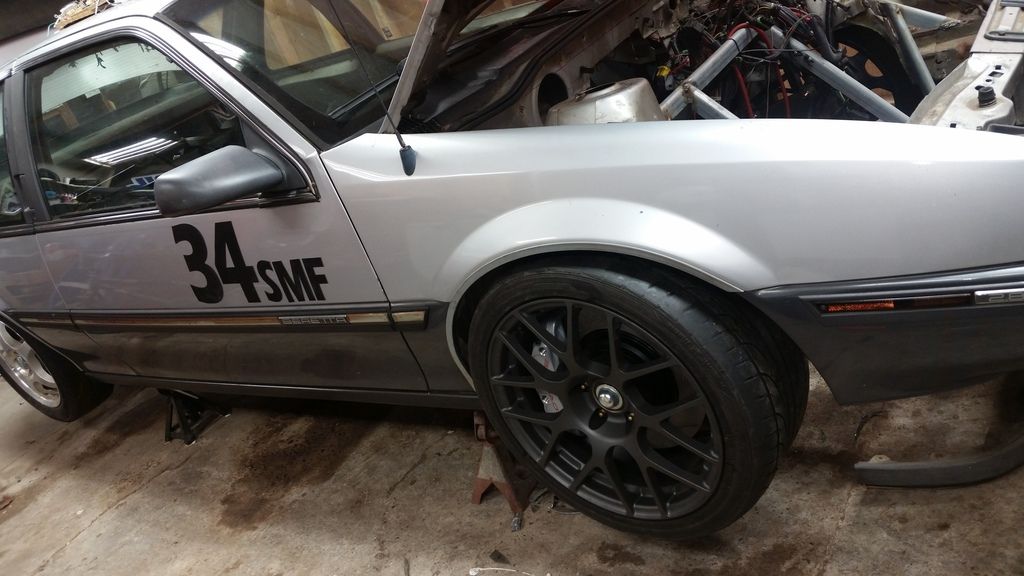
I know ive posted the brakes before, but come on.. how badass does that look..
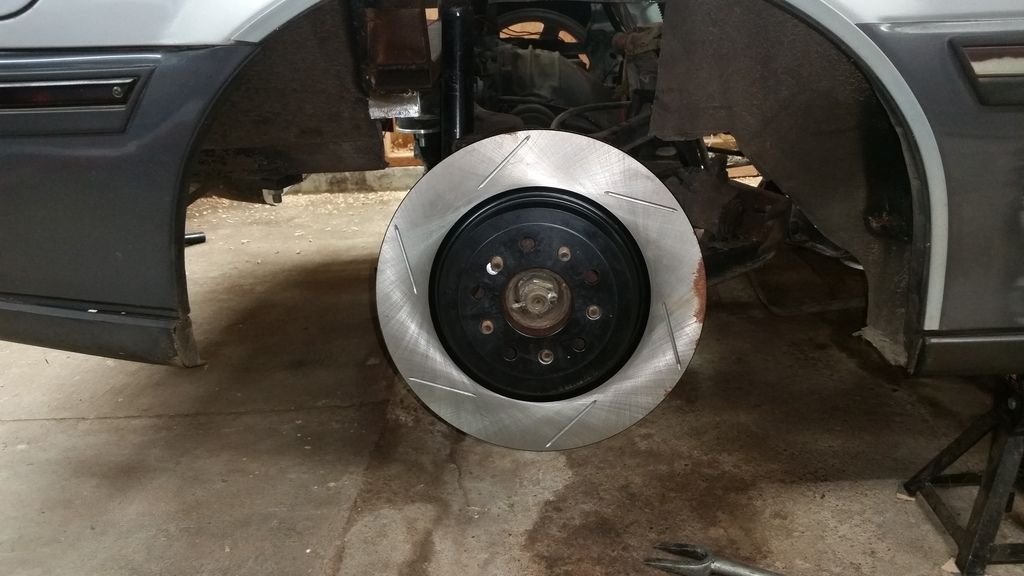
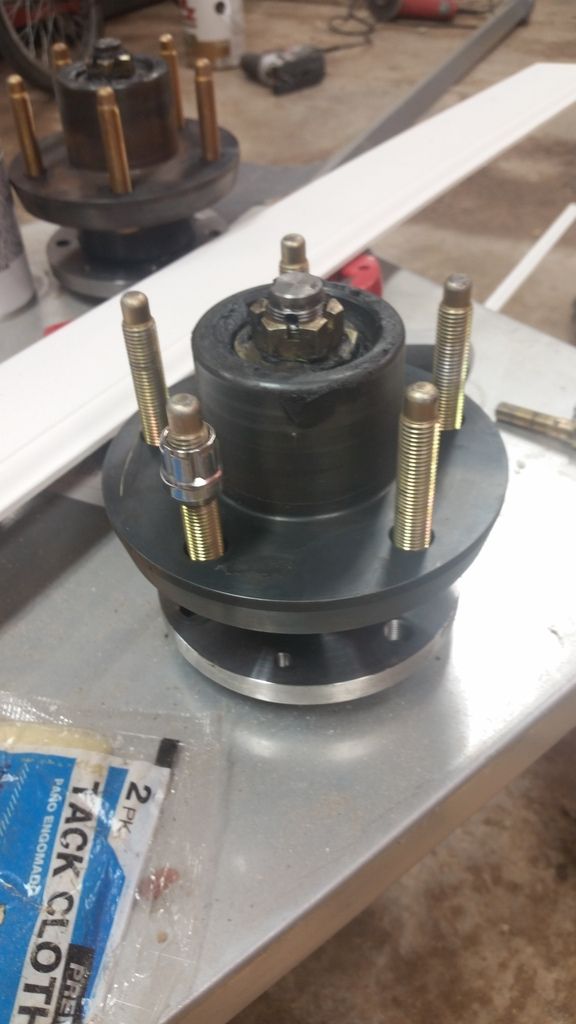
Rear rotors! first test fit actually. Been in a box for quite a long time..

thats a terrible picture.. but I had a problem! first test fit of my rear calipers also.. I can buy an adapter to run ctsv calipers on this (go figure right?) but the c6 brakes dont seem to work.. the factory bracket hits the caliper before it rests on the rotor in the right spot. The solution? yes, I have one!! The 240 guys like to run dual calipers, how? 1/4" steel plate lazered out and bolted on between the hub and the rear upright. Ill just have the same thing done (possibly cnc if the offset needs to change) for my c6 calipers. Then cut off the factory caliper mounts for clearance. Problem solved! Now set that on the back burner till I need them..
I was determined! waiting on a new fan for my air compressor.. but I got it! turns out I need a part from Nissan to make my ball joint fit on the 300zx uprights.. thats ordered.
Ive been planning out my chassis a bit more, still not 100% sure on frame rail size or thickness.. probably going to end up going with 2x4 .120 wall. I have some .120 wall scrap and my little welder seems to just fine on it now that hooked to real power, I have no reason to buy a bigger welder yet I guess like I was expecting. Nothing holding me back now!! well aside from my air compressor.. time.. and money.. but its a damn good start! hoping ill be ready to start on the frame in the next few months. It will give me time to go over the suspension geometry again and mockup the shocks.

clearance for the tires.. still need to cut more but it clears everything with bald tires. I dont think hoosiers will fit..


one downside to the c4 steering setup is the angle. It doesnt have much! hopefully this will do. I guess I could go crazy had have some knuckes CNCed later down the road if I needed more. But it was good enough for the vette, and many great cars dont have much angle, so we will see. I plan to leave it as is tho.

I know ive posted the brakes before, but come on.. how badass does that look..


Rear rotors! first test fit actually. Been in a box for quite a long time..

thats a terrible picture.. but I had a problem! first test fit of my rear calipers also.. I can buy an adapter to run ctsv calipers on this (go figure right?) but the c6 brakes dont seem to work.. the factory bracket hits the caliper before it rests on the rotor in the right spot. The solution? yes, I have one!! The 240 guys like to run dual calipers, how? 1/4" steel plate lazered out and bolted on between the hub and the rear upright. Ill just have the same thing done (possibly cnc if the offset needs to change) for my c6 calipers. Then cut off the factory caliper mounts for clearance. Problem solved! Now set that on the back burner till I need them..

I was determined! waiting on a new fan for my air compressor.. but I got it! turns out I need a part from Nissan to make my ball joint fit on the 300zx uprights.. thats ordered.
Ive been planning out my chassis a bit more, still not 100% sure on frame rail size or thickness.. probably going to end up going with 2x4 .120 wall. I have some .120 wall scrap and my little welder seems to just fine on it now that hooked to real power, I have no reason to buy a bigger welder yet I guess like I was expecting. Nothing holding me back now!! well aside from my air compressor.. time.. and money.. but its a damn good start! hoping ill be ready to start on the frame in the next few months. It will give me time to go over the suspension geometry again and mockup the shocks.