When you click on links to various merchants on this site and make a purchase, this can result in this site earning a commission. Affiliate programs and affiliations include, but are not limited to, the eBay Partner Network.
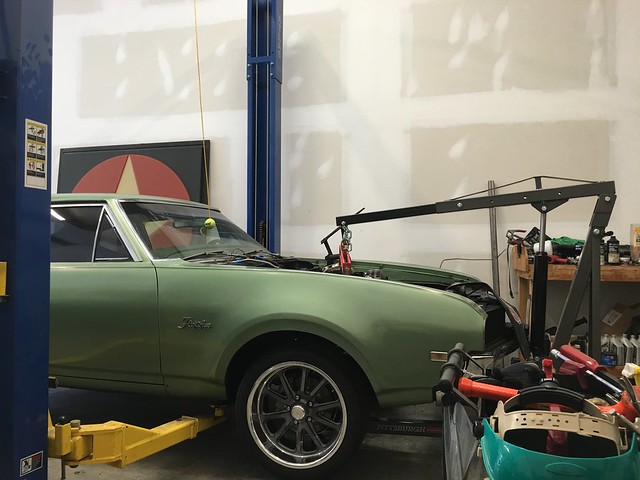
I took this car in on trade back in November. It was a 92k original mile 250 6cyl, 3 on the tree, bench seat car. Before the purists chime in, yes, I know that it is one of about 2800 built that way, but rarity does not equal desirability. When I picked it up, I was already looking for a candidate for an LS swap to take on this year's Hot Rod Power tour. I took my 72 C10 last year and just wanted to build something with a back seat so that more than one of my kids could go with me.
The original plan was just for an LS swap, but, not long after I got it, Hotchkis had a black friday sale on their suspension kits for 25% off.
Bought a full TVS system and added tubular A arms. then bought a front disk brake kit with booster and MC.
It handled great and the floaty boat feeling was gone, but it still sat a bit high for my taste. I decided to wait until the LS swap to adjust the springs.
Things done to date:
purchased a 2003 5.3 from a rear hit suburban with the 4l60e and complete harness, including TAC and pedal from the same vehicle.
After leaving the harness with a local LS swap guy for 3 months with no work done, got it back and sent it, along with the ECM to BP Automotive in KY.
Hotchkis TVS kit with mbm tubular A arms.
Disk brake conversion with MC and booster.
Automatic column (rebuilt after it arrived damaged).
LS engine installed with Transdapt #4575 plates
98-02 F body oil pan, windage tray, pickup, etc.
98-02 f body stock cast exhaust manifolds.
Radiator - Napa PN NR2700
Lower radiator hose Napa PN 7499
Upper radiator hose for a 2005 suburban
2009 Ford windstar fans from rock auto
Tanks inc Fuel Injection tank for 1969 Cutlass
Tanks inc sending unit for stock gas gauge
Tanks inc GPA4 fuel pump kit (walbro 255lph pump)
Tanks inc LS swap fuel line kit with fittings
Jeep GC steering box
dorman 300-130 PS pulley to clear the GC box
Engine was a 2003, but I really didn't want to run a return the length of the vehicle. I found a friend with a newer, returnless fuel rail and used that with the tanks inc kit, which includes the corvette FPR/filter
Built and installed the fuel lines yesterday and started laying out the harness. I'm sure I'll have questions, but I hope to have it fired up within the next week or two.
I took a week off from the project as the kids just got out of school.
Today was my first day back at the shop. I cut the tunnel to get it ready to modify and tightened the engine mounts.
I'll box this section and weld it up this week.
I do have a few questions as I get ready to tackle the wiring. The tcc lockup and neutral safety switch are my primary issues as I look at the wiring guide.
The car was a 3 speed on the column. I swapped the column for an auto one, but, for now, kept the clutch and brake pedal from the original setup.
I think that the nss ran off the clutch pedal originally. I have the pedal tucked behind the carpet which will engage the switch. If I tap into that switch, I'm thinking it may cause idle or off idle issues? Doesn't the ecm bump the idle in neutral?
Update:
I posted a couple of updates from my phone last month, but I guess they didn't go through.
End of July 2016 update:
The engine and transmission are in their final resting place, finally.
Even with the F body oil pan, I had pan to K member clearance issues. Everything would bolt in, but the pan was barely touching the K member on the passenger side. I thought that I could fix it by modifying the engine mount perches on the frame. I moved them back 1/4 inch, but still had the same issue. The Rubberized engine mounts soaked up the 1/4 inch and it still at at approximately the same spot.
I know that I've seen many A-body builds where the F-body pan clears the K Member just fine. This issue set me back about 3 weeks, just because I was stubborn and didn't want to pull the engine and trans back out completely to box the K-member. Mostly because my engine hoist had a short boom and I really would have had to pull the front clip to do it.
I finally gave up and bought a bigger engine hoist and, 15 minutes later, the engine was out. Untitled by efi-street, on Flickr
I basically cut and filet'd the K member and welded it so that it took the curve out of the corners where I had clearance issues.
Once that was taken care of, I moved onto the wiring and finishing up the fuel system.
The fuel tank, sending unit, pump, gauge sender, fuel lines, and corvette filter/FPR all came from Tanks inc...
I have to say that I was very impressed with all the stuff that I got from them and the tank was not much more than a plastic caprice tank from a junkyard that would have required me to modify the frame rails in the rear to fit it.
I also converted to returnless fuel rails to make this a bit easier.
I installed the Hotchkis TVS system, converted to disk brakes in the front, tubular A arms, etc...
The Hotchkis stuff sits a bit high for my taste. I didn't do anything with the springs when I installed everything because I wanted to see how it sat with the LS stuff installed.
I will probably get some springs with 1.5-2" more drop. I may cut the fronts and get some eibach's for the rear.
I will say, I drove it for a couple weeks with the suspension and the 6cyl before I started the engine swap and it was night and day. No more floating boat feel.
Next is finishing up the wiring and firing it up. I don't know if I posted it already, but I used BP automotive for the harness conversion.
Hopefully, I'll have her running sometime over the next week. still have to install fans, trans linkage, measure for the drive shaft, etc...
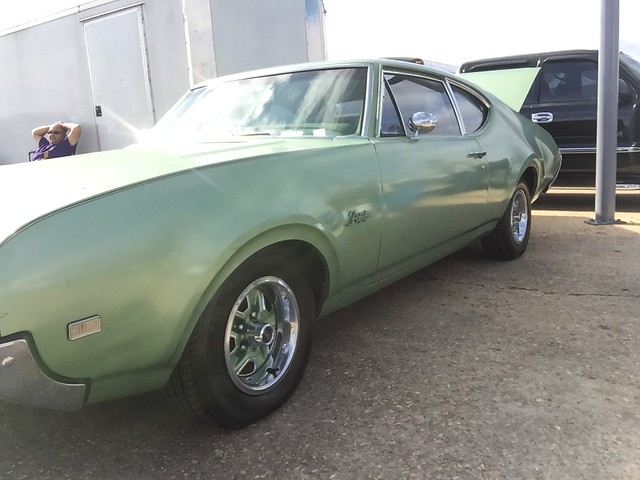
Once It's on the road, she will go out for paint (the original color was Meadow Green...much lighter than what is on it). Hope to have everything done for Cruisin the Coast in October. That seems like a lot of time, but, the original deadline was for the Hot Rod Power Tour.
Man, nice swap! I mean, can't believe you did THAT to such a rare car lol.
As far as your ride height, I am using (Hypercoil, 5.5 diameter, 11'' tall) springs in back and Hotchkis 1'' drops up front(for SBC), but I'm also running a 2'' drop front spindle. IMO, the combo gives a nice mild rake and the right amount of tire is exposed front and rear. But I am running a ~28.5'' tall Nitto in back.
Love the build and all the pics, keep up the great work!
Last edited by JetMech442; 04-25-2017 at 12:46 PM.
Reason: I had saif AFCO springs--they are hypercoil
Man, nice swap! I mean, can't believe you did THAT to such a rare car lol.
As far as your ride height, I am using AFCO springs in back and Hotchkis 1'' drops up front(for SBC), but I'm also running a 2'' drop front spindle. IMO, the combo gives a nice mild rake and the right amount of tire is exposed front and rear. But I am running a ~28.5'' tall Nitto in back.
Love the build and all the pics, keep up the great work!
Jetmech, you have any pics of how it sits?
And yes, there is a reason that I don't have this build posted on any Olds specific sites.
Honestly, when I picked the car up, I didn't realize how rare a post coupe f85 was.
I DID, however, know how rare it was to find an original A Body that still had the 6cyl in it.
Worked some over the weekend and all day today.
Yes, I know that I work slow. I am just a bit OCD.
The old "measure twice, cut once" addage should be modified to include "read 25 forum posts, cut once".
The majority of the wiring is done.
Things left to do (I'm sure there are more that I am forgetting):
- Have a 4ga cable with two eyelets built as a charging wire from alt to the starter.
- wire the pink 12v in run and start wire (thinking off ignition from the fuse box?)
- tap the heater hose inlet on the radiator for the steam vent. (alternatively, I may tap the water pump after it's running)
- Measure and have the drive shaft shortened. (have a new yoke for the 4l60)
- I have a TCC lockup/brake switch incoming from BP Automotive. will need to figure out how this gets wired in.
-have exhaust built/installed
- wire up the fans on the windstar fan setup. I ran by the local salvage yard today and clipped the two pigtails that I needed, so this should be easy.
- figure out how to mount the windstar fans to the radiator. I've read lots of chevelle builds using this fan and radiator combo, but... the cutlass core support cap is different and there will at least, need to be some trimming of the fan shroud.
Now for my question of the day.
The neutral safety switch.
I've read and researched and it looks like it can be bypassed to get the car running.
This car was a manual and I still have the clutch pedal in the car. I may be wrong, but can't I secure the clutch pedal behind the carpet and hook the original switch back up to make the car run as it will think it is in neutral all the time?
I plan to run the original wiring to the starter.
The NSS wire on the harness says it isn't required to run the engine.
I know that this can cause idle issues sometimes, mainly on cammed cars, which this one isn't.
Anyway, on with the pics:
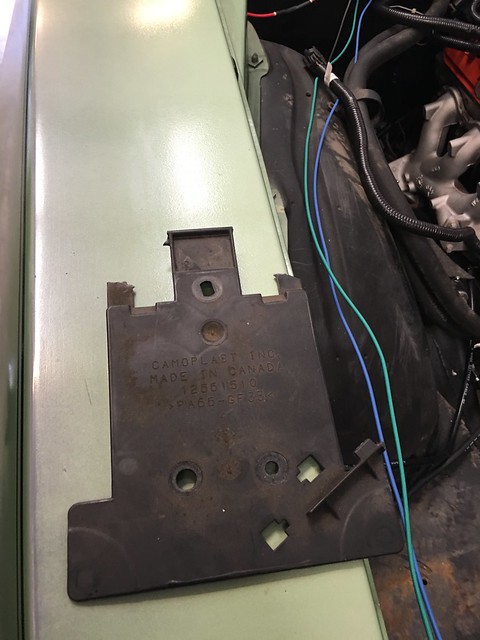
I need a good one of these. Mine had the rear ears broken off when I got the engine. Today's trip to the local salvage yard found nothing. (well, not for this. I did snag the pigtails for the Windstar fans and the Jeep GC return line for the PS converson.)
This is where the TAC will live. I had a few people ask me why I mounted the fuse box on the passenger side. This swap is DBW and I needed the space here for the TAC.
I modified the lokar shift linkage and got it installed over the weekend. It probably needs a bit more massaging as I can get it to D, but not 1 and 2. Untitled by efi-street, on Flickr
I bumped into a guy at the parts store yesterday that had swapped a 5.3 into an S10. His pulleys were very close to the fans. I don't think I'll have that issue. Untitled by efi-street, on Flickr
Don't remember where I found the thread about this, but this is my modified suburban (adjustable) pedal for dbw. It has shed a couple pounds I'm sure.
Lots of info saying it can't be done. Well, it can and has been done.
Untitled by efi-street, on Flickr
And a couple poser shots because I know folks like pics.
The neutral safety switch shouldn't have anything to do with the clutch. Generally there is a yellow (IIRC) starter wire coming from the ignition switch going to the clutch switch, and I believe it's purple coming out and going to the starter...(Or I could have it backwards, I don't remember...)
If you basically connect the two together, that should solve your problem. Every old GM car I've ever worked on was pretty much set up like that.
Dig the car. Looking forward to more progress.
When you said you took it on trade...are you a car dealer or something or did you just take it on trade on something else you sold?
Got the starter wired up today.
-4 gauge from battery to starter
-4 gauge from back of alternator to starter
- from the original starter harness:
- large eyelet to big post
- purple wire to the small post
Then it was time to tackle the mounting of the Windstar fans and radiator.
This radiator fit fine with no modifications, dropped right into the upper and lower original mounts.
I spent a few minutes trying to figure out how to mount the fan shroud/fans to the radiator/core support. The Cutlass core support cap is different from the Chevelle one from what I've seen.
What I did on the top was cut a notch in the fan shroud where the core support "cap" slides down into the notch and holds the fans. I like it and everything fits nice and snug. At the bottom, I used some holes in the core support that were already there with a couple of zip ties for now as I'm sure I'll have to pull this out again before I'm done.
You can also see blue tape with "fill" ect written on it. When I'm in the middle of a build, I always put blue painter's tape on parts, wires, etc...that need attention before fire up. I pull the tape off as I complete what needs to be done. Helps me to not make as many stupid mistakes by forgetting something.
I had planned to start her up Sunday, but we had no power to the fuel pump.
Lots of troubleshooting later, I found that I had no power to the ecm.
After 2 days of tracing wires with a test light, I found that, if I ground the black side of the ecm relay in the fuse box (from the BP Auto premium harness), it will start up.
Pretty sure that I have ample grounds, (heads to harness, head to firewall, block to frame to battery -).
I may be wrong, but seems like I have a bad ground connection in the harness?
It's been a long time, but I have been enjoying the car since November. The issue that I was having ended up being a loose ground on the front driver's side of the block. Tightened it up and it has fired up every time since.

 05-19-2016, 09:37 PM

 Oldsmobile F85 lsx swap by efi-street, on Flickr
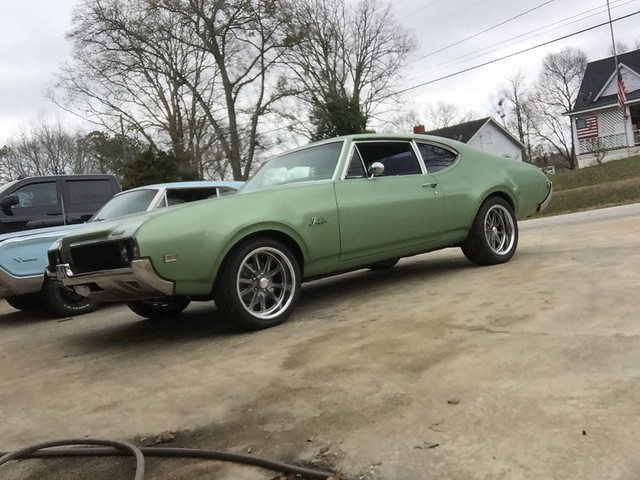 Oldsmobile F85 lsx swap by efi-street, on Flickr
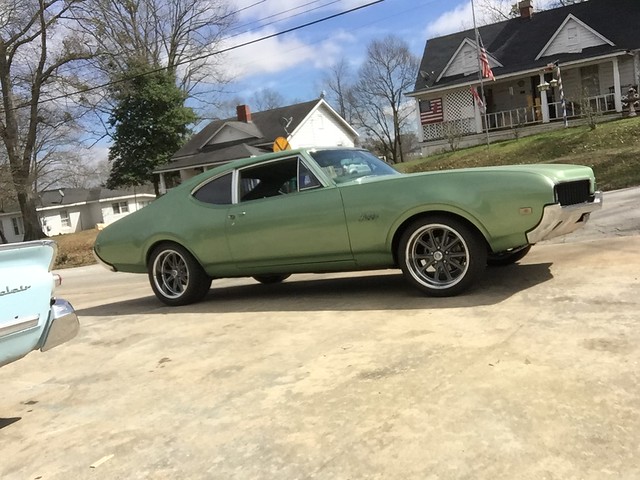 Oldsmobile F85 lsx swap by efi-street, on Flickr
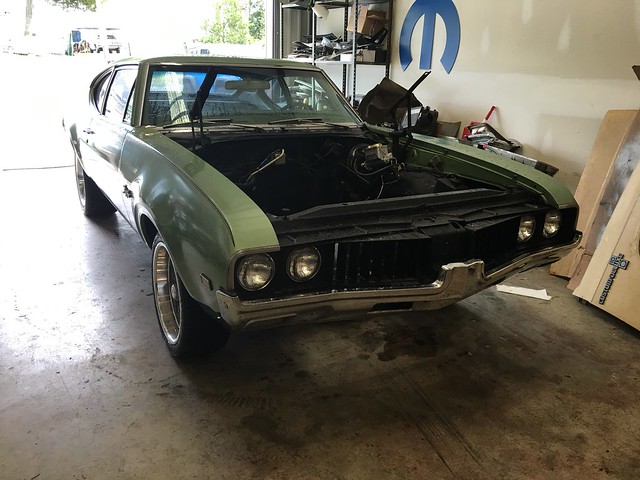 Oldsmobile F85 lsx swap by efi-street, on Flickr
 Oldsmobile F85 lsx swap by efi-street, on Flickr
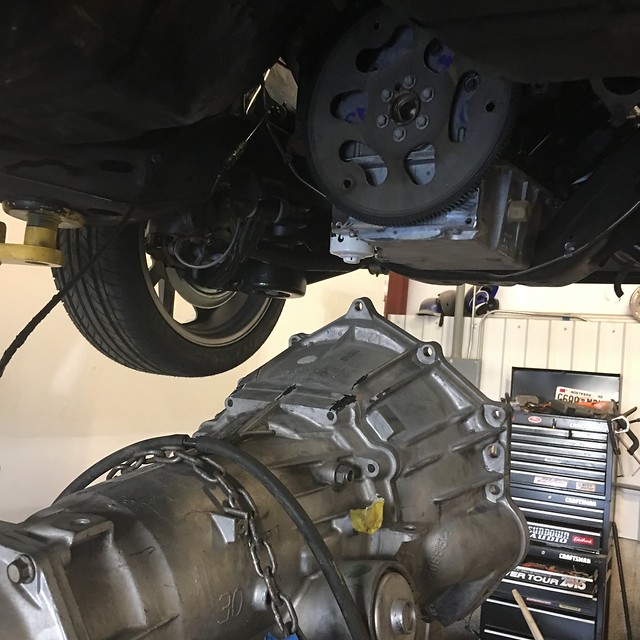 Oldsmobile F85 lsx swap by efi-street, on Flickr
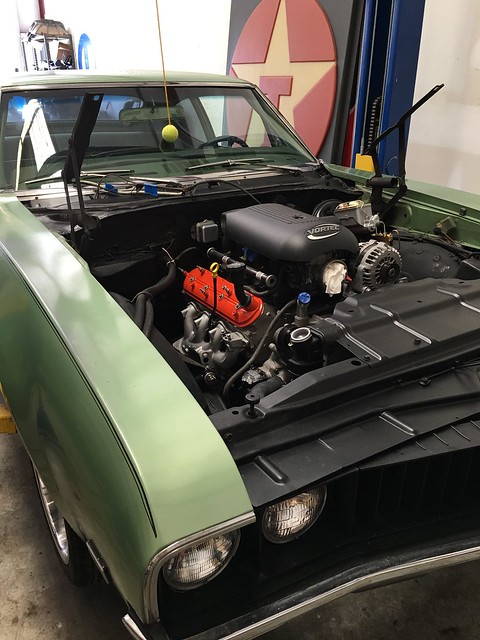 Oldsmobile F85 lsx swap by efi-street, on Flickr
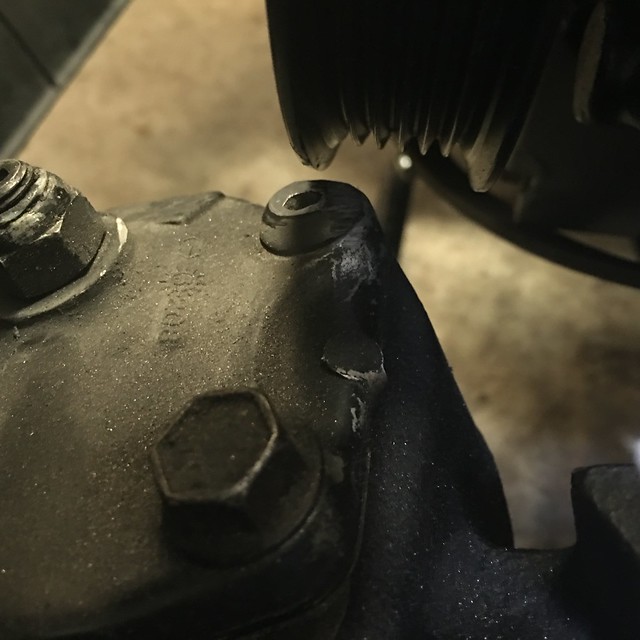 Oldsmobile F85 lsx swap by efi-street, on Flickr
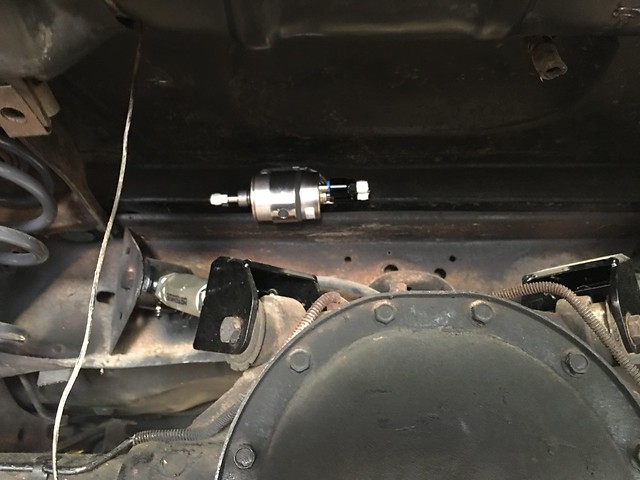 Untitled by efi-street, on Flickr


 Untitled by efi-street, on Flickr
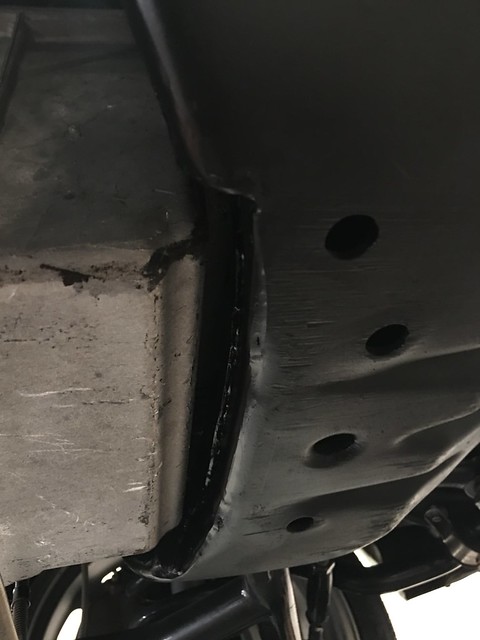 Untitled by efi-street, on Flickr
 Untitled by efi-street, on Flickr
 Untitled by efi-street, on Flickr
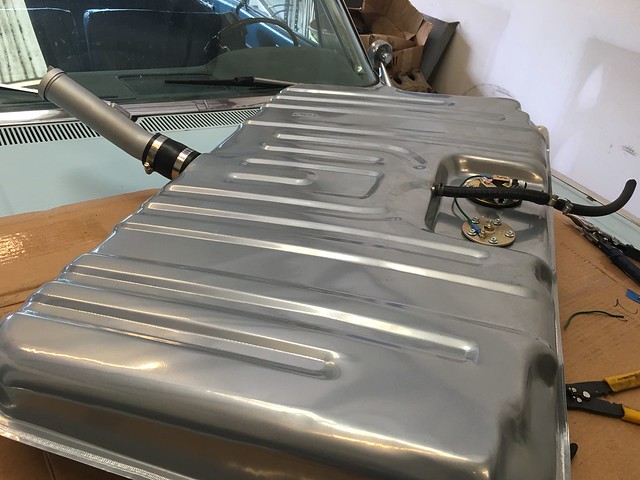 Untitled by efi-street, on Flickr
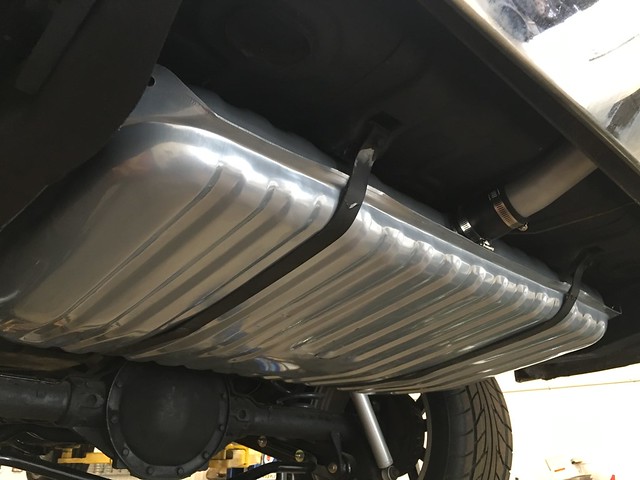 Untitled by efi-street, on Flickr
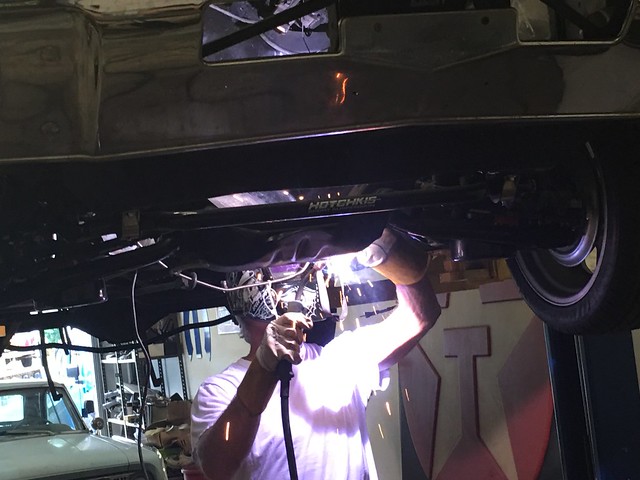 Untitled by efi-street, on Flickr
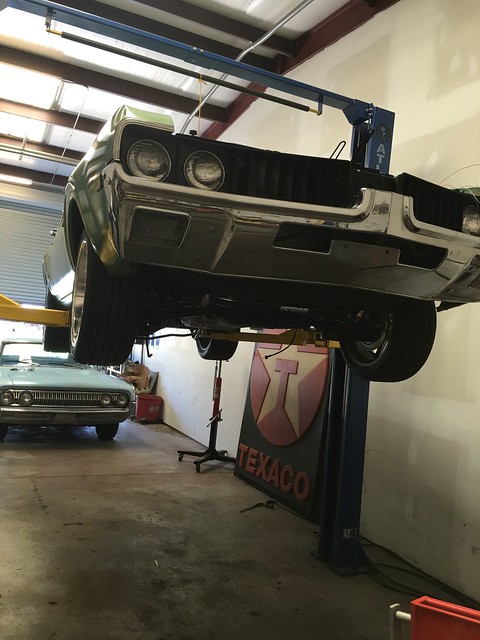 Untitled by efi-street, on Flickr
 Untitled by efi-street, on Flickr
 Untitled by efi-street, on Flickr
 Untitled by efi-street, on Flickr

 Untitled by efi-street, on Flickr
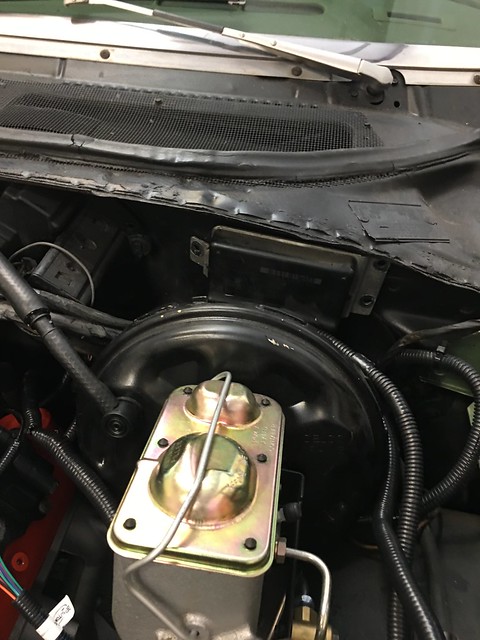 Untitled by efi-street, on Flickr
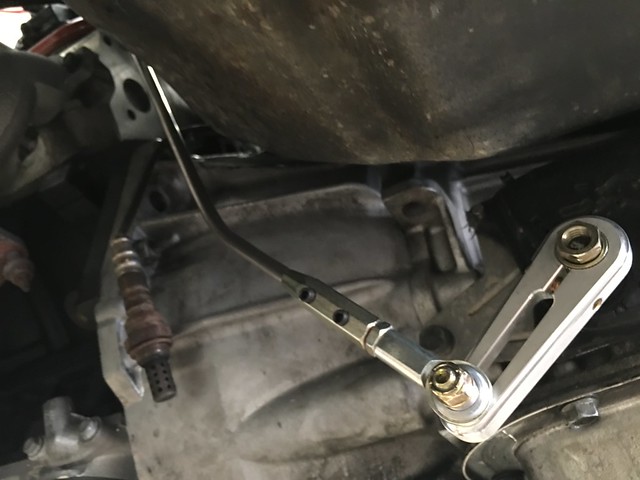 Untitled by efi-street, on Flickr
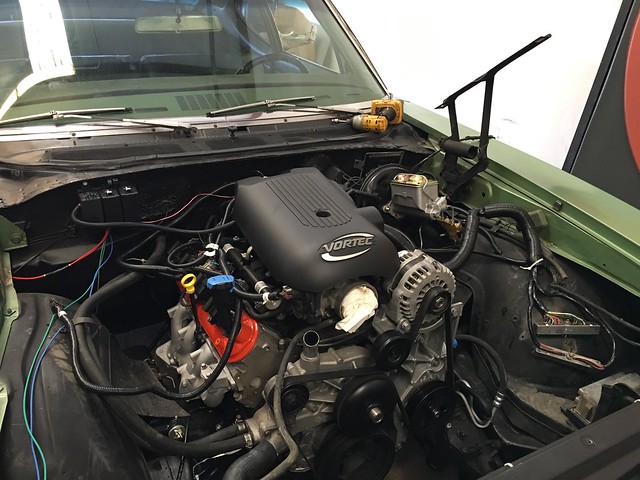 Untitled by efi-street, on Flickr
 Untitled by efi-street, on Flickr
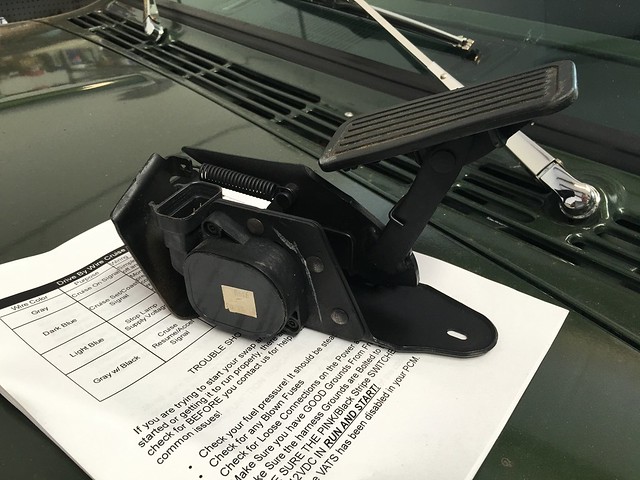 Untitled by efi-street, on Flickr
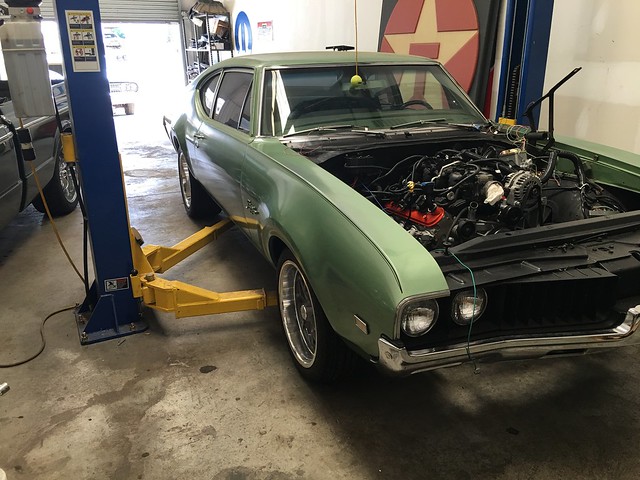 Untitled by efi-street, on Flickr
 Untitled by efi-street, on Flickr
 Untitled by efi-street, on Flickr
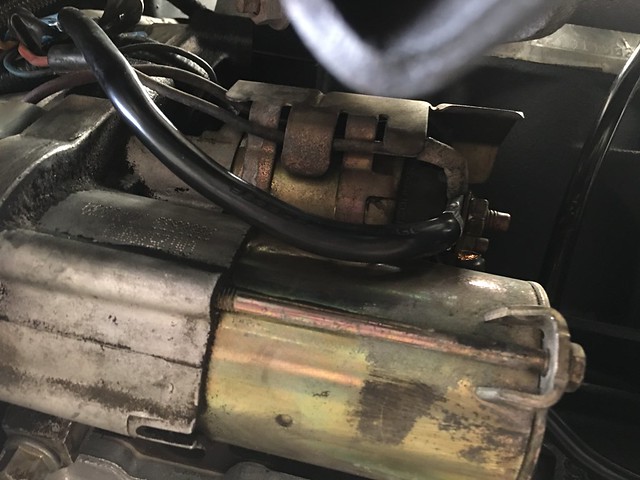 Untitled by efi-street, on Flickr
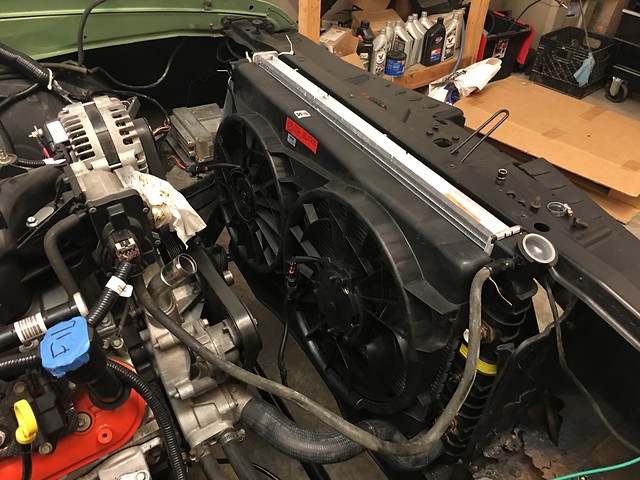 Untitled by efi-street, on Flickr
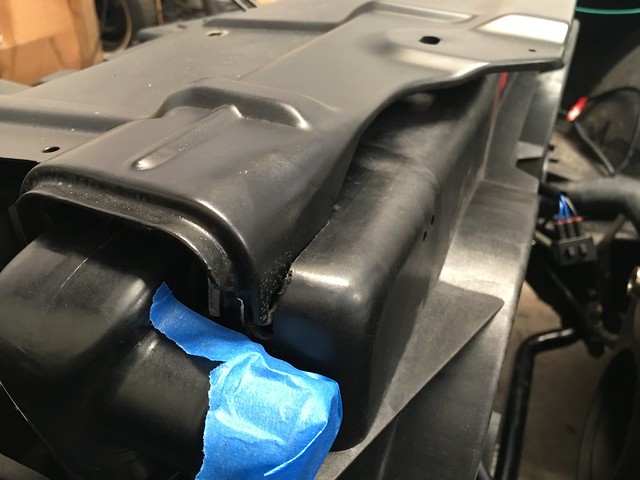 Untitled by efi-street, on Flickr
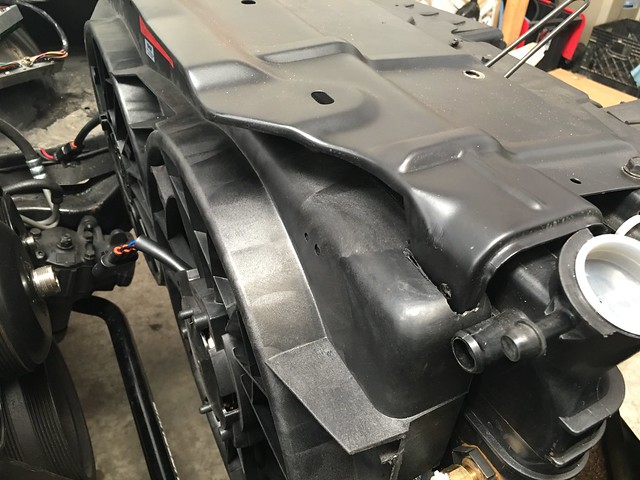 Untitled by efi-street, on Flickr
 Untitled by efi-street, on Flickr
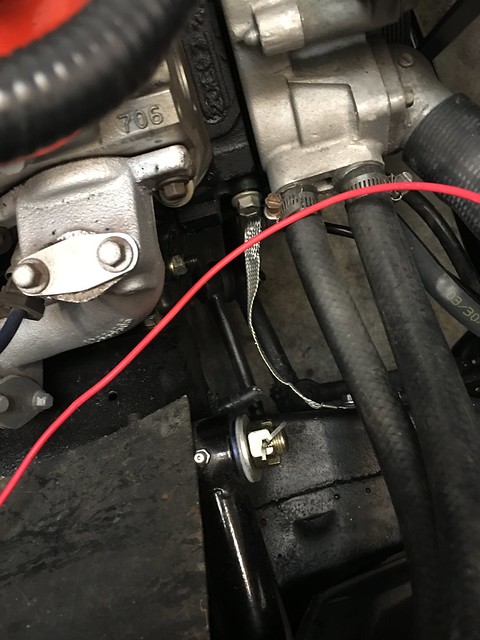 Untitled by efi-street, on Flickr