
5.3 TH350 into a '65 C10


 02-14-2017, 07:57 AM
#42
TECH Apprentice
Thread Starter
That F6 is great stuff. I bought mine from www.wirecare.com
02-14-2017, 07:58 AM
#43
TECH Apprentice
Thread Starter
02-14-2017, 08:01 AM
#44
TECH Apprentice
Thread Starter
No pictures of last nights work, it was small items, but progress is progress.
I got the battery tray bolted up to the core support, mocked up the radiator, looks like it will work out OK, but I will have to drill some holes and notch the crossmember directly below the core support. Not that big of a deal, but not exactly like I hoped.
Most likely no shop time tonight, got to take the wife out for Valentine's Day Dinner.
02-16-2017, 10:45 AM
#45
TECH Apprentice
Thread Starter
Last night I was rocking along getting some small items knocked out. Got the transmission crossmember finished up and ready to go back in. Got the battery tray bolted to the core support, marked the flanges of the radiator to drill the needed mounting holes and got two of the bed mounts repaired.
Moved on to soldering wires together for the injectors. Got Injectors 1, 3, 5, & 7 done and heat shrink applied. Tie wrapped that section together and moved the harness around to get to the other 4 sets of wires.
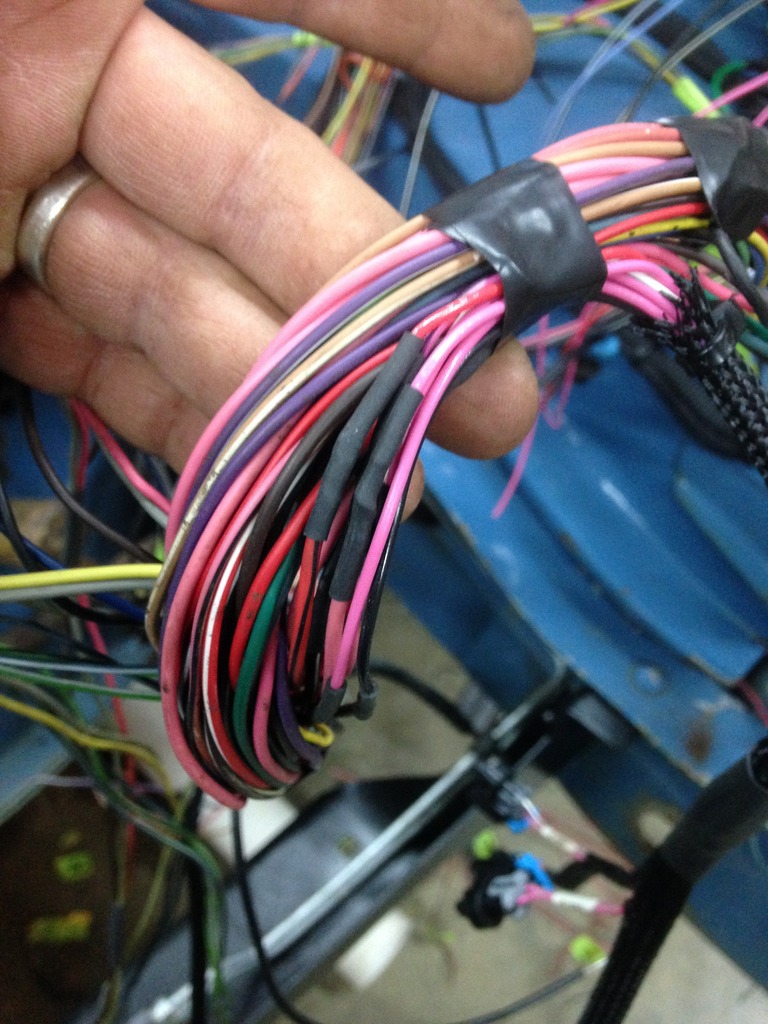
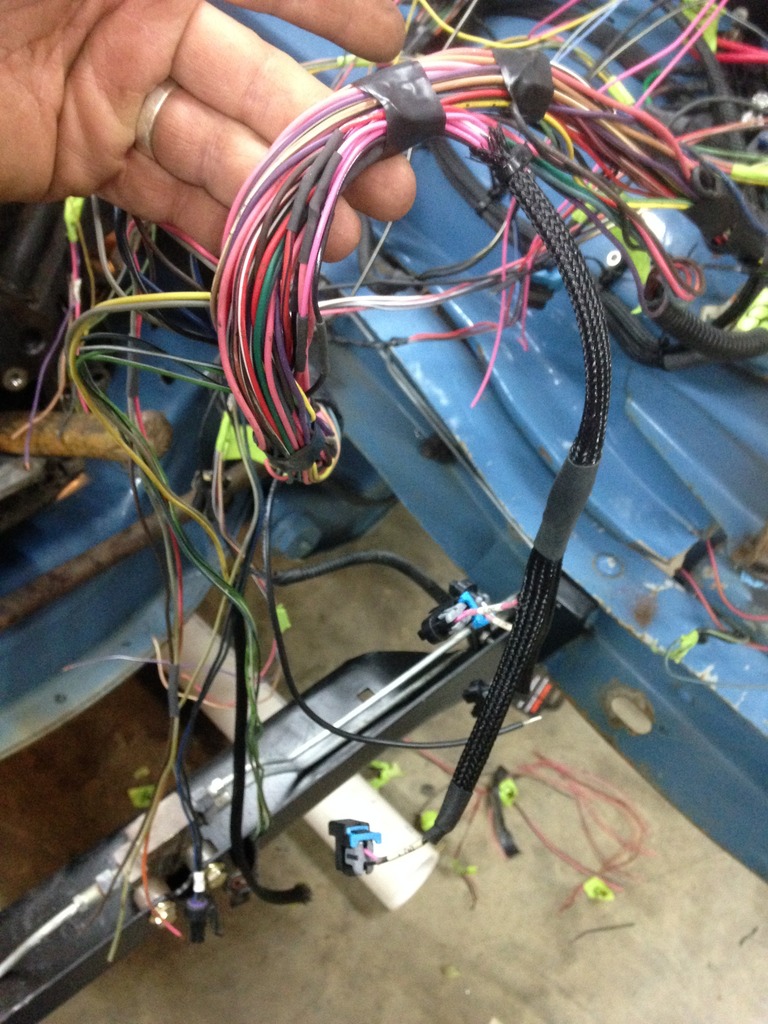
I had unplugged my soldering iron to plug in my heat gun for the heat shrink. So while I was moving the harness around, I had plugged in the iron to let it heat up. I got the first set of wire ready to solder with the control wire twisted together, grabbed the iron and it was still not hot. Looks like my soldering iron died on me...well crap. So much for finishing that part of my project.
Well, I moved on to fuel lines. I had bent up the two metal lines that go thru the bed floor and got those installed. Measured out the line length to cut the supply line to length. But my idea of pushing in the fittings did not work, so I called it a night. I found a thread on a homemade way of pressing the fittings into the line, so I will copy that and get some pics of what I'm doing with the fuel lines...It kinda took the wind out of my sail...maybe tonight will go better.
Moved on to soldering wires together for the injectors. Got Injectors 1, 3, 5, & 7 done and heat shrink applied. Tie wrapped that section together and moved the harness around to get to the other 4 sets of wires.


I had unplugged my soldering iron to plug in my heat gun for the heat shrink. So while I was moving the harness around, I had plugged in the iron to let it heat up. I got the first set of wire ready to solder with the control wire twisted together, grabbed the iron and it was still not hot. Looks like my soldering iron died on me...well crap. So much for finishing that part of my project.


Well, I moved on to fuel lines. I had bent up the two metal lines that go thru the bed floor and got those installed. Measured out the line length to cut the supply line to length. But my idea of pushing in the fittings did not work, so I called it a night. I found a thread on a homemade way of pressing the fittings into the line, so I will copy that and get some pics of what I'm doing with the fuel lines...It kinda took the wind out of my sail...maybe tonight will go better.
02-17-2017, 01:35 PM
#46
TECH Apprentice
Thread Starter
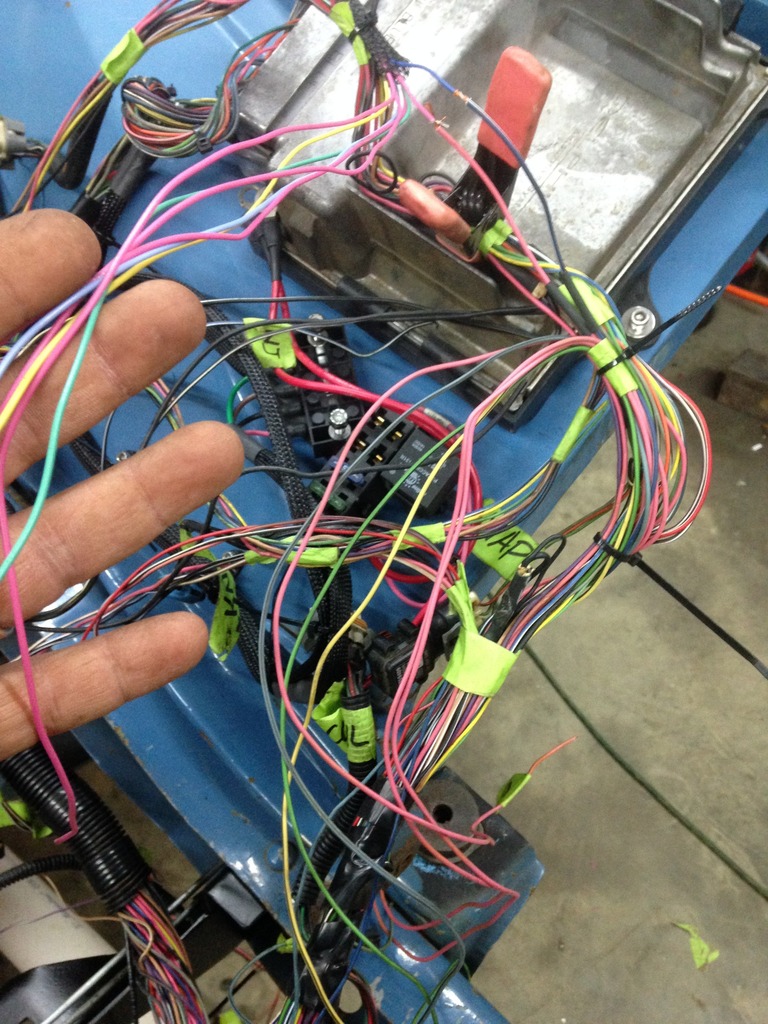
Got a replacement soldering iron yesterday, so I completed the wires that I could last night. I also worked on routing the harness a bit more.
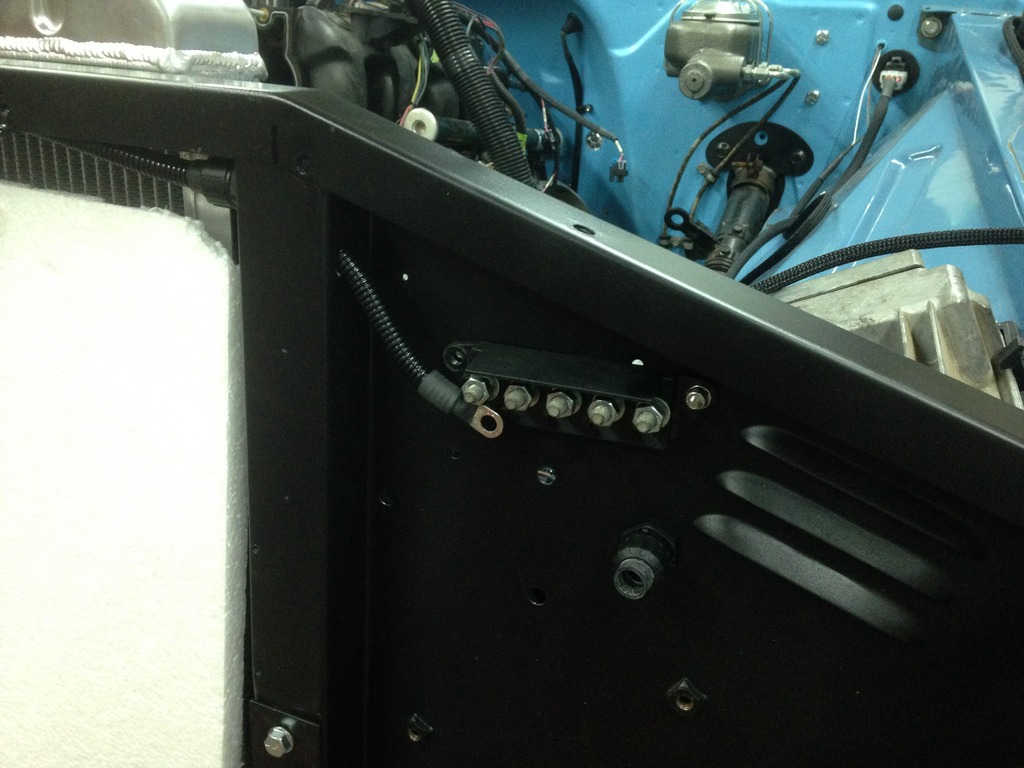
After the wiring, I mounted the radiator to the core support and mocked it back up to check a few things. I also mounted the power distribution block and the power wire from the battery into the core support. Since the CS has to come back out, I did not mount the terminal block or run the wires thru it yet. Getting closer...
After that, I laid under the truck to study the drive line. I believe that I can make a 3" dia. one piece driveshaft work and clear the trailing arm crossmember. I will get a couple more measurements and mock ups this weekend, but plan to get the DS local and have them build it Monday or Tuesday.
After I called in a night in the shop, Korbin came home with a load of engine parts. I have almost everything I need to get the engine together this weekend. Plans now are to get the mock up done and finalize my DS layout on Saturday so that I can pull out the engine mock up Saturday night. Korbin and I hope to get the short block together on Sunday. Maybe even the long block if everything falls into place.
7 days left...


After the wiring, I mounted the radiator to the core support and mocked it back up to check a few things. I also mounted the power distribution block and the power wire from the battery into the core support. Since the CS has to come back out, I did not mount the terminal block or run the wires thru it yet. Getting closer...


After that, I laid under the truck to study the drive line. I believe that I can make a 3" dia. one piece driveshaft work and clear the trailing arm crossmember. I will get a couple more measurements and mock ups this weekend, but plan to get the DS local and have them build it Monday or Tuesday.
After I called in a night in the shop, Korbin came home with a load of engine parts. I have almost everything I need to get the engine together this weekend. Plans now are to get the mock up done and finalize my DS layout on Saturday so that I can pull out the engine mock up Saturday night. Korbin and I hope to get the short block together on Sunday. Maybe even the long block if everything falls into place.
7 days left...
02-20-2017, 07:01 AM
#47
TECH Regular

Karl I was out of town this weekend so I couldn't offer any help. I'm hoping the motor assembly went OK and anxiously waiting on your weekend updates. Your days left can be counted on one hand 
02-20-2017, 09:51 AM
#49
TECH Apprentice
Thread Starter
I wish I could pull some all nighters, but I have a job and 3 kids so that's not going to happen...lol.
I still think I can make my goal. This weekend was productive...and expensive...
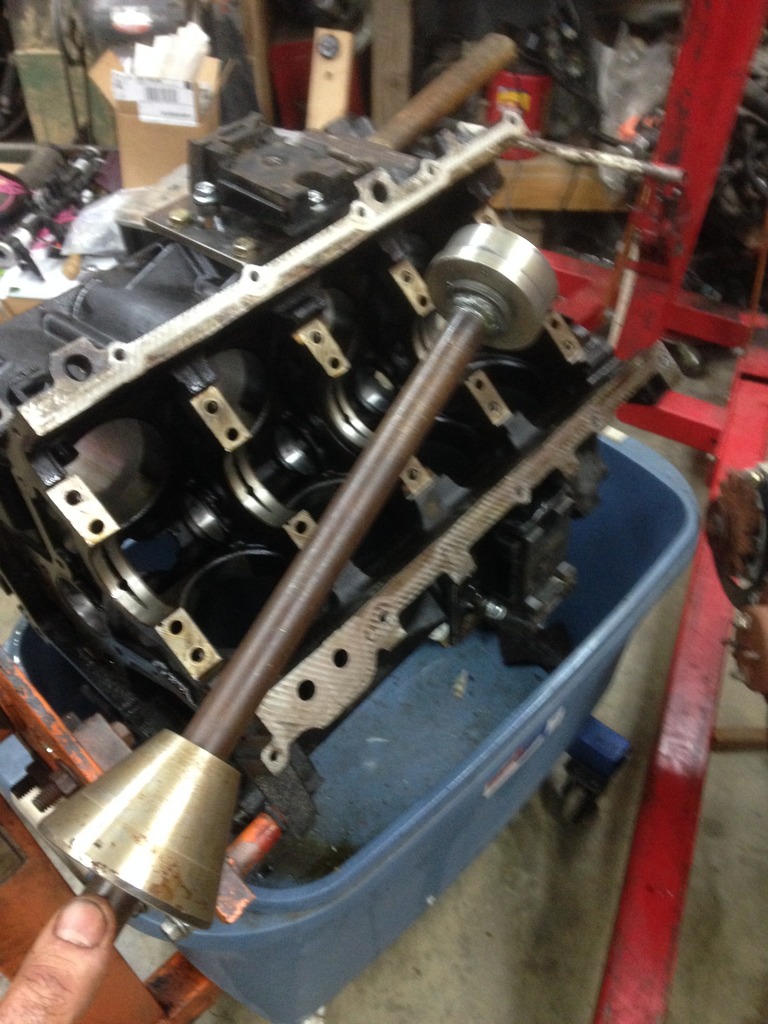
This weekend, I got the block all cleaned up and installed new cam bearings with my homemade bearing installer for LS engines. Worked pretty good.
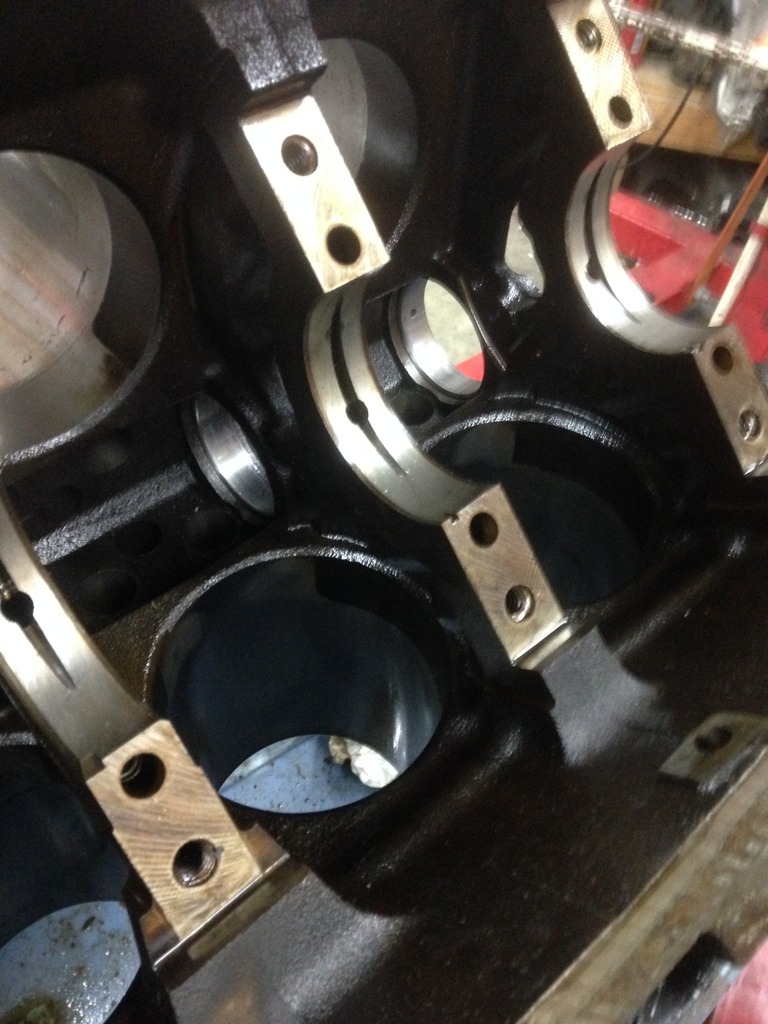
Got the short block all together, some of you might not agree with this, but I am trying Mat Hapel's way of Sloppy Mechanics. Reused all the 240k mile bearings on this assembly. I won't call it a rebuild since we just cleaned and reassembled with the old parts...I think the bearings look pretty good for that many miles, another reason that I am sold on LS engines.
Here are the main bearings:
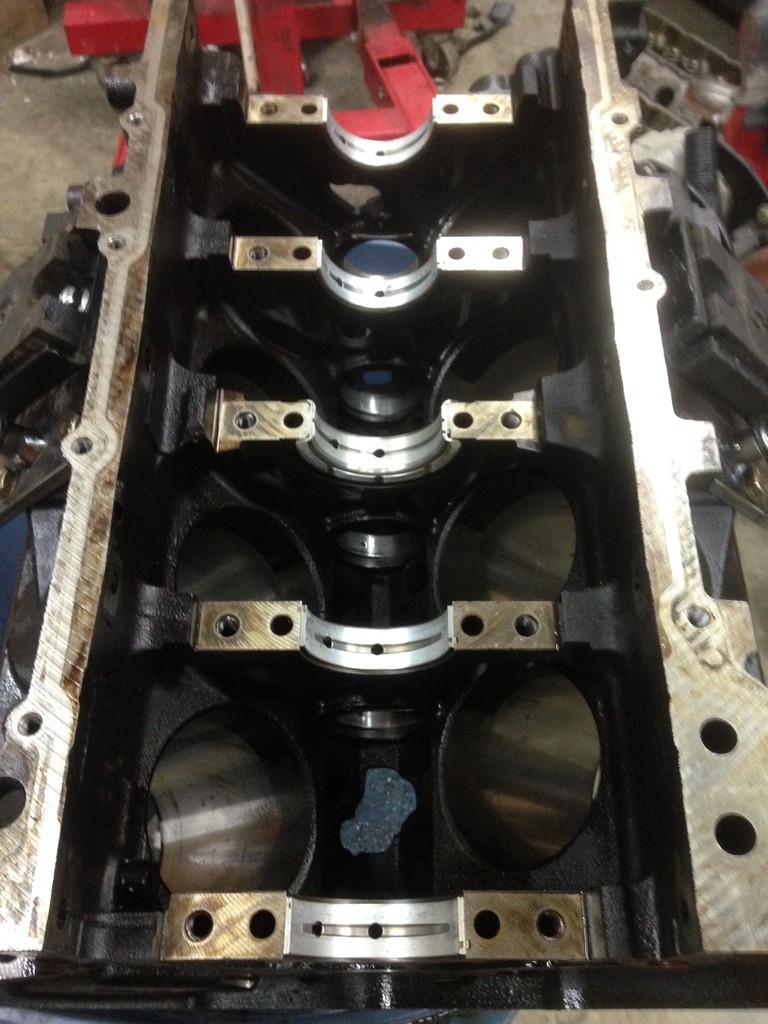
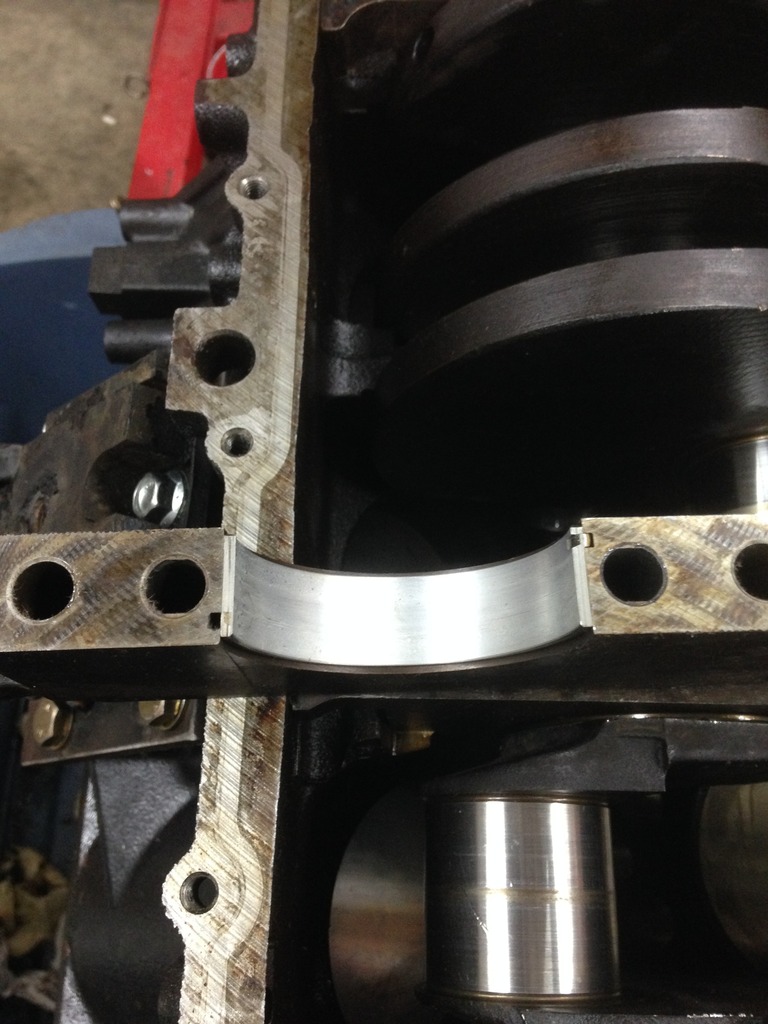
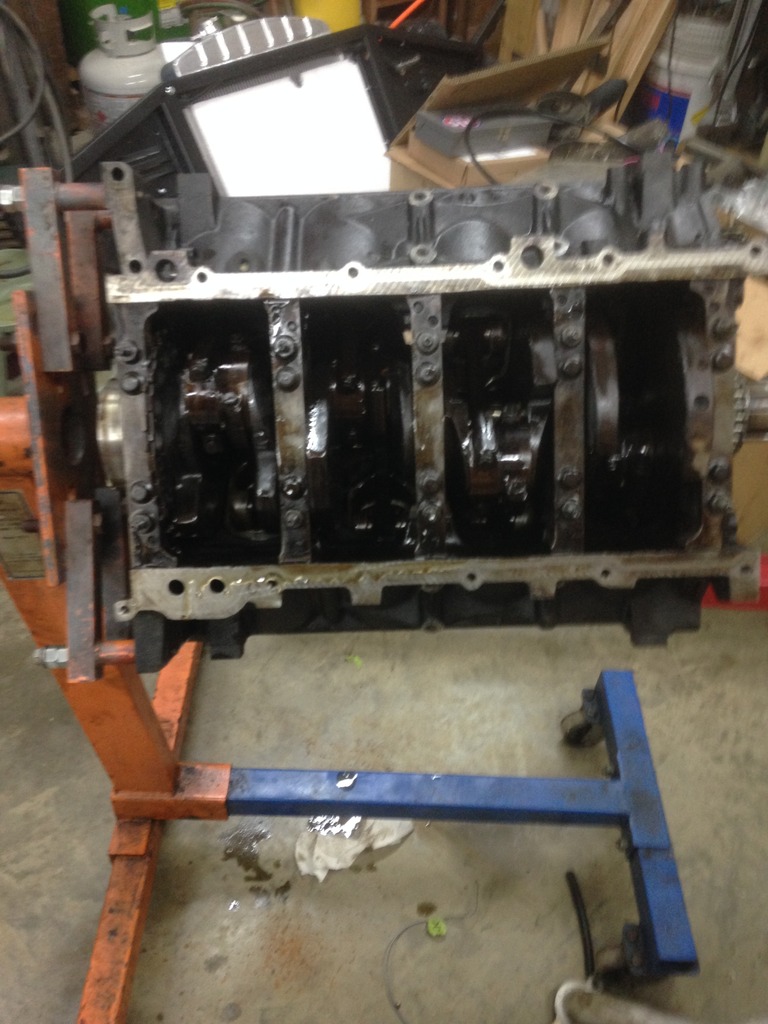
Could not put on the heads, because the dowel pins in the deck are MIA. So, maybe I can find some today and get the long block finished up tonight. After that, I just need my new gaskets to put all the cover's back on. They should be here tomorrow. Korbin and Owen both helped me out putting it all together and we had a bit of father/son time and had some fun doing it. Hard to believe that this is my FIRST V8 I have put together...In the past I was the detail, paint and body and general mechanic work guy and had others do my engine work if involved more than external gaskets and cleaning.
Short Block:
Since I am waiting on my seals for the rest of the engine, I will finish up the trans seals, flex plate modifications, and some other small items that need attention during tonight's shop time.
The expensive part of the weekend happened late yesterday. The morning started off good till my wife got up and noticed the refrigerator was not cooling. I was already a church, so after church, I came home and looked it over. The coils where covered in dust and crap. So I cleaned them up and it looked like it was going to solve the problem as the suction line was getting cooler to the touch. Well, it did not work. At 6:30 I came in from the shop to start gilling burgers for dinner, well it was now not as cool in the fridge as it was earlier in the day, so off to Lowe's I go and drop a cool grand for a new Whirlpool that my wife and daughter had looked at earlier in the day. So got it back home, ate and installed it last night with the help of my boys. Had to take the damn front door off the hinges to get this thing into the house...
As Keith said, you can count the days on one hand. I have 4 shop days left...
I still think I can make my goal. This weekend was productive...and expensive...
This weekend, I got the block all cleaned up and installed new cam bearings with my homemade bearing installer for LS engines. Worked pretty good.


Got the short block all together, some of you might not agree with this, but I am trying Mat Hapel's way of Sloppy Mechanics. Reused all the 240k mile bearings on this assembly. I won't call it a rebuild since we just cleaned and reassembled with the old parts...I think the bearings look pretty good for that many miles, another reason that I am sold on LS engines.
Here are the main bearings:


Could not put on the heads, because the dowel pins in the deck are MIA. So, maybe I can find some today and get the long block finished up tonight. After that, I just need my new gaskets to put all the cover's back on. They should be here tomorrow. Korbin and Owen both helped me out putting it all together and we had a bit of father/son time and had some fun doing it. Hard to believe that this is my FIRST V8 I have put together...In the past I was the detail, paint and body and general mechanic work guy and had others do my engine work if involved more than external gaskets and cleaning.
Short Block:


Since I am waiting on my seals for the rest of the engine, I will finish up the trans seals, flex plate modifications, and some other small items that need attention during tonight's shop time.
The expensive part of the weekend happened late yesterday. The morning started off good till my wife got up and noticed the refrigerator was not cooling. I was already a church, so after church, I came home and looked it over. The coils where covered in dust and crap. So I cleaned them up and it looked like it was going to solve the problem as the suction line was getting cooler to the touch. Well, it did not work. At 6:30 I came in from the shop to start gilling burgers for dinner, well it was now not as cool in the fridge as it was earlier in the day, so off to Lowe's I go and drop a cool grand
for a new Whirlpool that my wife and daughter had looked at earlier in the day. So got it back home, ate and installed it last night with the help of my boys. Had to take the damn front door off the hinges to get this thing into the house...As Keith said, you can count the days on one hand. I have 4 shop days left...
Last edited by aggie91; 02-20-2017 at 10:32 AM. Reason: added the expensive part of the weekend...
02-21-2017, 08:52 AM
#51
TECH Apprentice
Thread Starter
I have always heard that bad things happen in threes.
On my way home, my wife calls and tells me that the clothes washer keeps showing an error code and that she just left the vet with our dog, Daisy. Well Daisy has a torn ligament in her hind leg and being a young working breed, she is very active and would rather chase a ball you through then have you pet her most of the time. She has to have surgery to repair it and has to stay off her leg for 2 weeks after the surgery. We love our dogs and treat them like family. So, she will have surgery next week.
I get home and start checking on the washer. The error is for an unbalanced load. I go thru the normal steps for that code and start it again. The basket is not turning...
I pull the rear cover off and the motor is turning, but the basket does not. Get on the phone with a service tech and decide it is what they call the "spider assembly", I call it a coupling between the motor and the shaft that turns the basket. Get that on order, over $100 shipped to the house, it will be here Wednesday....Ok, while I am diagnosing the washer, Korbin come over with the dowel pins for the heads/block. So him and Owen head out to the shop and start getting head bolts and part rounded up. I head out there between calls and give them some other parts that I picked up yesterday. Owen takes and installs the front shocks while Korbin and I go over the heads/bolts/block that we plan to get done tonight. He needs to go help a buddy with his truck that is scheduled to go to LST also, so he leaves and I go back in the house to update my wife on the washer, we also discuss me skipping LST for financial reasons, but she urges me to keep my promise to the boys and get my truck together and go to the show, got to lover her for that! I grab a bite to eat and after that I head out to the shop. Damn, I am already worn out....
SO, out to the shop I go. I get the heads scrapped down to remove the old head gasket and clean them up the best I can. Put the dowels in the block, wipe down the deck, the MLS gaskets and get the heads on. Get all the bolts in the correct holes and torque them down. Next, I go gather up all the push rods, the rocker stands, bolts and the rockers. Put a drop of lube on the end of the push rods and drop them in place. Cleaned up the stands and placed them on the heads. Get the rockers out of the box and they are nasty, and I only have 12...
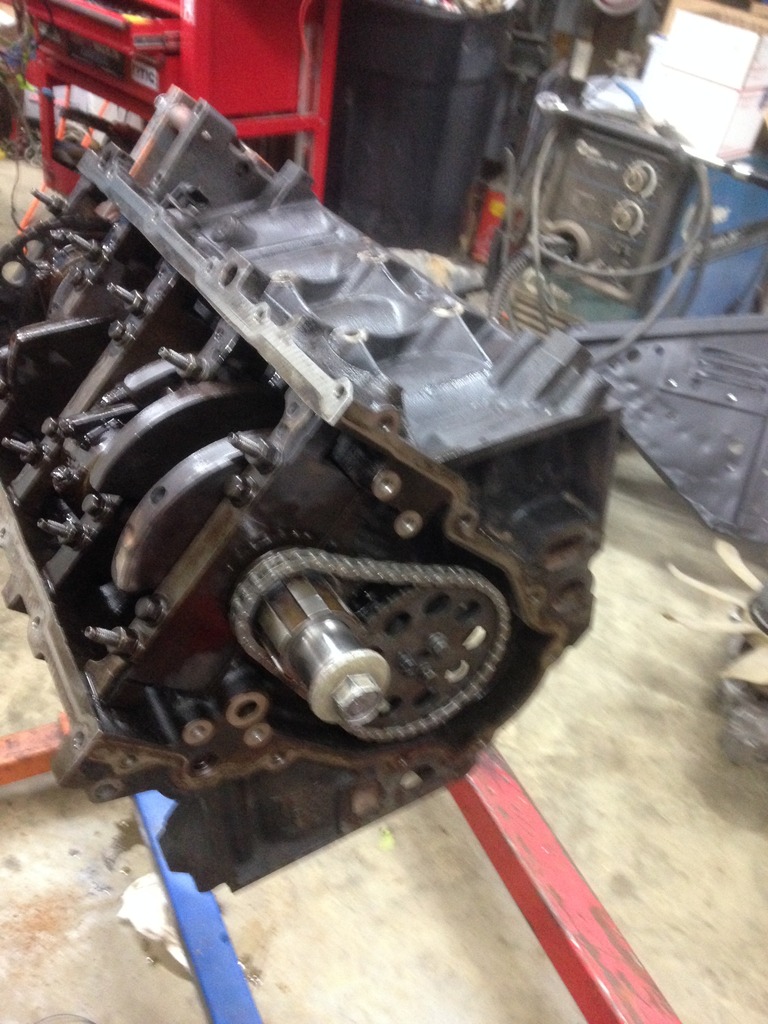
So, I drop them in some solvent to soak them over night, Korbin says he has 4 more. I primed and installed the oil pump before calling it a night. Little earlier than I planned, but that's life.Engine at my stopping point for the night:


Owen got the shocks on:

While I was looking for the rockers and parts, Owen pulled out the rear shock crossmember and got it cleaned up to put in. We will do that tonight.
My gasket set and the new knock sensors should arrive today, so the plan is to work a bit latter tonight and get the engine all put together and possibly mated to the trans and put back in the truck. Stay tuned!

Last edited by aggie91; 02-21-2017 at 09:24 AM.
02-21-2017, 03:12 PM
#53
TECH Apprentice
Thread Starter
Hedman Husler� LS Engine Swap Headers 45666 - 1 �” ceramic coated mid-length headers
These:
https://www.summitracing.com/parts/hed-45666
I bought these about 4 or 5 years ago. This is the 3rd truck they have been on.
These:
https://www.summitracing.com/parts/hed-45666
I bought these about 4 or 5 years ago. This is the 3rd truck they have been on.
02-22-2017, 02:34 AM
#54
Things do come in threes, i see it weekly lol. We get 1 truck with a bad fuel pump and tank liner delaminated there will be 2 more shortly. Ive started waiting 2 days before taking them to the radiator shop because i know another is coming. Either way im sorry about your luck bud. Sh*t always hits the fan at the worst time.
Youre truck is looking good though, keep plugging away and youll be there before you know it. 1 step at a time.
I think we all need more info on your cam bearing tool? That thing looks mint
Sorry if youve already covered it
Youre truck is looking good though, keep plugging away and youll be there before you know it. 1 step at a time.
I think we all need more info on your cam bearing tool? That thing looks mint
Sorry if youve already covered it
02-22-2017, 03:39 PM
#55
TECH Apprentice
Thread Starter
The cam bearing tool is something I drew up in CAD and had a machinist at work make the parts I needed. It is crude compared to the ones on the market for the task, but it worked and can be used to install or remove them. It needs some refinement, but it work for me.
02-22-2017, 03:55 PM
#56
TECH Apprentice
Thread Starter
I just need one more bad thing to get to 6 for the week...
Found out our oldest dog has an issue to and went to the vet today, no real answer as to what's wrong and I get a bill for $264...
The part for the washer is the wrong one that the tech over the phone said it was, got the correct one on order now and now have to go thru the hassle of returns and refunds of the wrong one. Hope it comes in tomorrow as scheduled, I need to wash underwear...
OK, shop time update:
I picked up the new drive shaft on the way home and painted it before getting Owen from baseball practice. Last night had some help from both of my boys and Korbin's buddy, Drew. Korbin and Drew worked on the rear shock cross member and shock mounting, Owen worked on mounting up the front wheels and helped me with the assembly of the long block. Time did not cooperate with us last night, but I should have the engine mated up with the trans and sitting in the truck. I would really like get to the point of firing it up, but that might be a stretch...either way I am still shooting to make it to LST!
Here is the competed short block:

 02-22-2017, 08:00 PM
#57
TECH Resident

Where is the Lone Star Shootout? GoodGuys coming up soon but not sure my back or knees will holdup to the walk, they stopped running the tram inside the entrance and that makes it a PITA for me. I just bought a 5.3 to put in my 71 3/4 ton, what all is involved in making the TH 350 work? Good job , following....
02-23-2017, 10:44 AM
#58
TECH Apprentice
Thread Starter
Where is the Lone Star Shootout? GoodGuys coming up soon but not sure my back or knees will holdup to the walk, they stopped running the tram inside the entrance and that makes it a PITA for me. I just bought a 5.3 to put in my 71 3/4 ton, what all is involved in making the TH 350 work? Good job , following....
http://www.lonestarthrowdown.com/
To make the TH350 work behind the 5.3 LS is not that hard. It takes a , http://www.ebay.com/itm/231532041096?_trksid=p2060353.m1438.l2649&ssPageName=STRK%3AMEBIDX%3AIT and a small bit of enlarging of the holes on the flex plate for the converter to bolt up.
Aftes I get part LST, I would be glad to talk you thru it over the phone, What part of Central Texas are you in?
02-23-2017, 11:02 AM
#60
TECH Apprentice
Thread Starter
Last night was a good night in the shop. We got a lot accomplished.
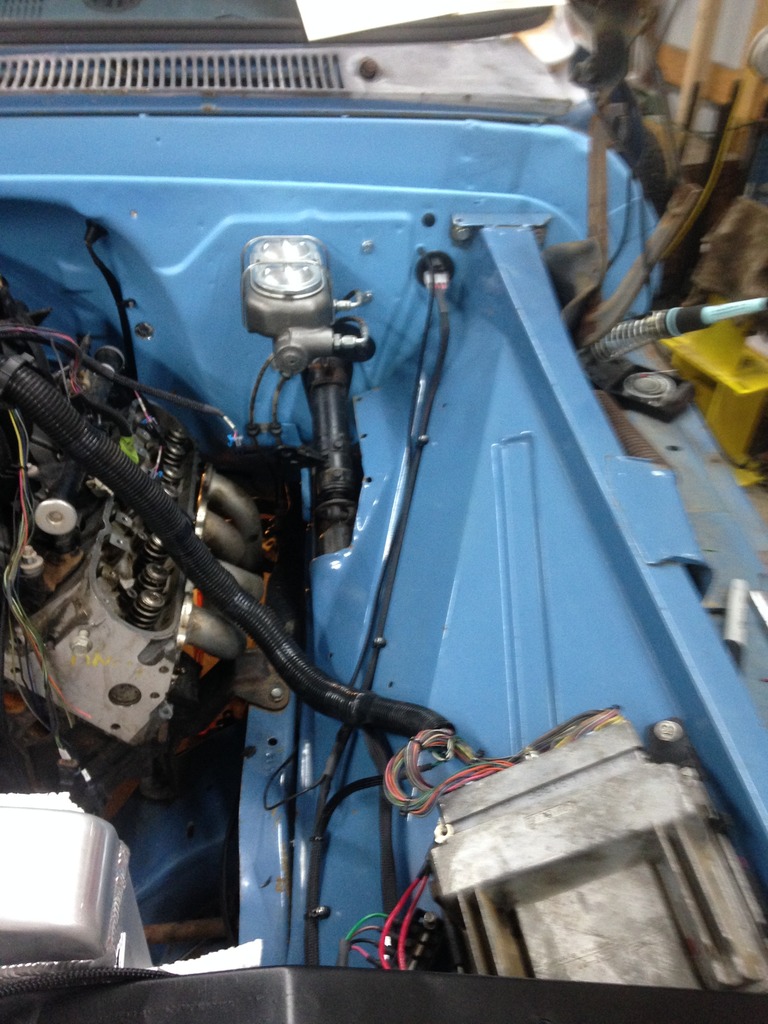
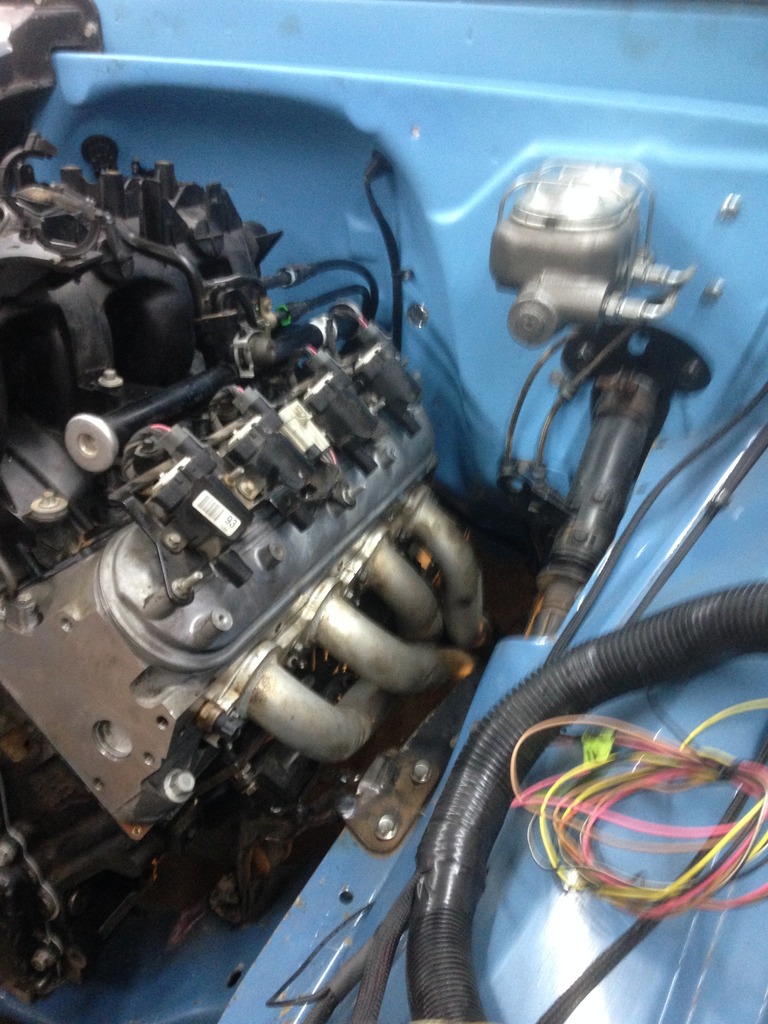
Engine, trans, and drive shaft are all in and bolted down. Shift linkage is hooked up, the engine wiring is hooked up less the MAF and the two Oxygen sensors. Need to install water pump and fan, the alternator and bracket, the belt, install the trans dip stick and a new pan gasket, and add all the fluids. I should be able to fire it up this afternoon. IF that goes well, then put on the front clip, drive around the block to check it out and then load it up for LST...
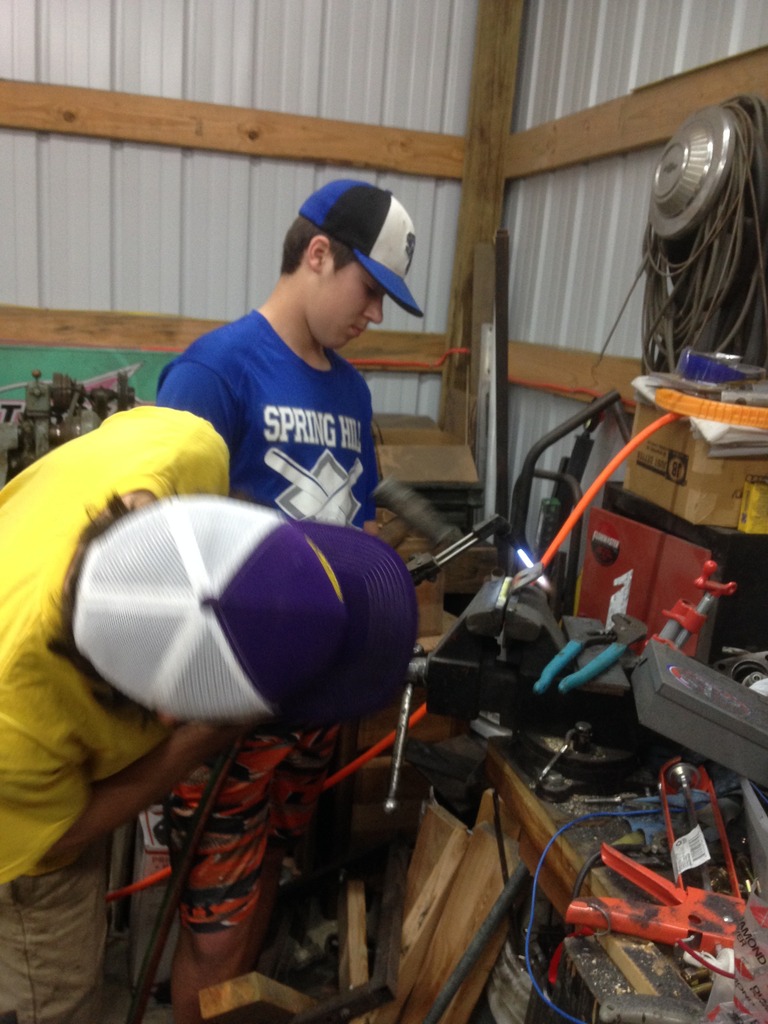
Again Korbin and Owen where out there helping the old man out, Owen has school and two baseball games today, so he headed to bed about 10:30 last night, Korbin stayed out with me till about midnight, and I called it quits at 1am. I had to come to work for 1/2 a day today.
Here are pics from last night. I meant to get some of the parts used to mate up the TH350, but I forgot...
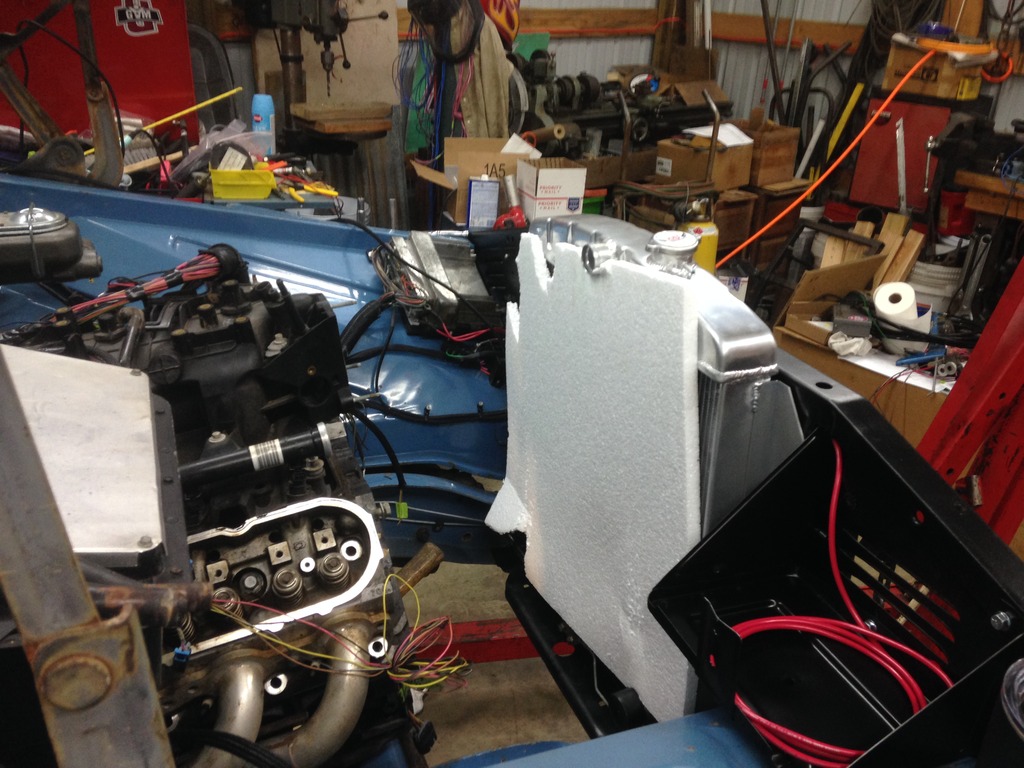
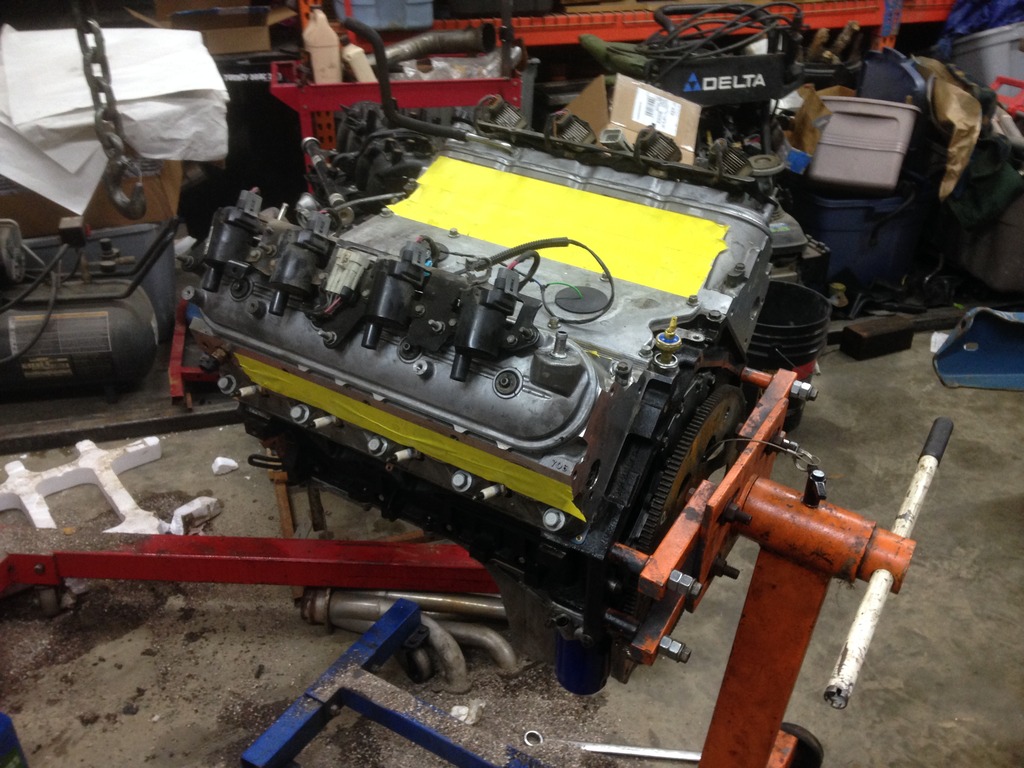
Sloppy Style engine stand modifications. Turns out it did not need this much clearance, but it worked out..
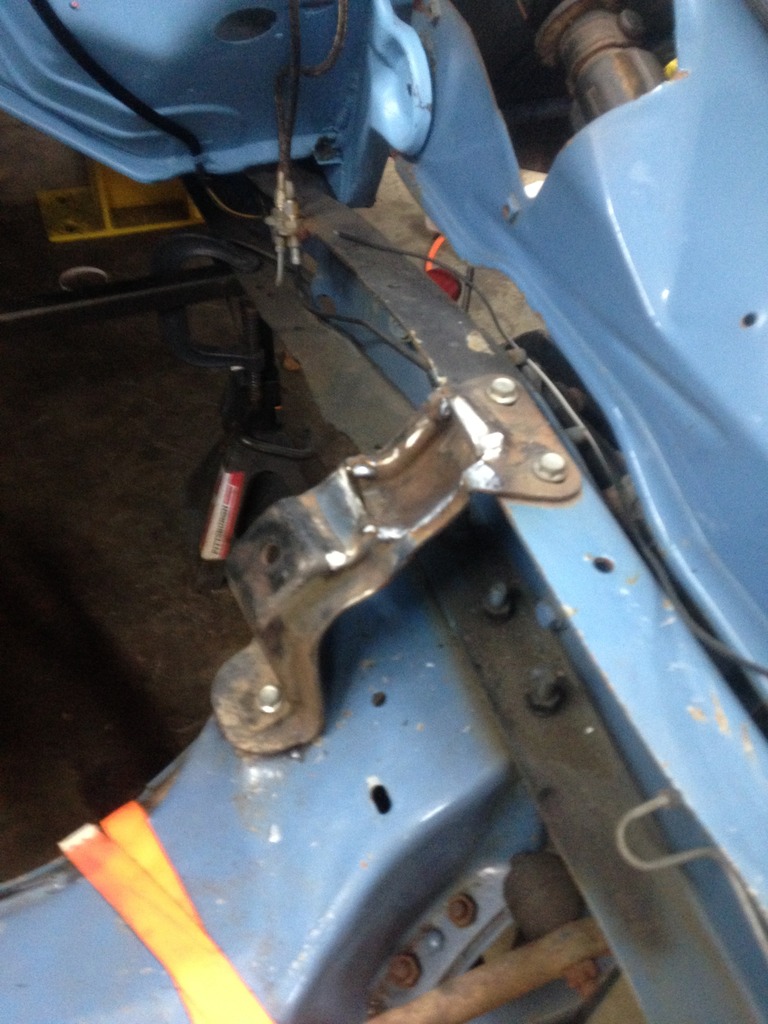
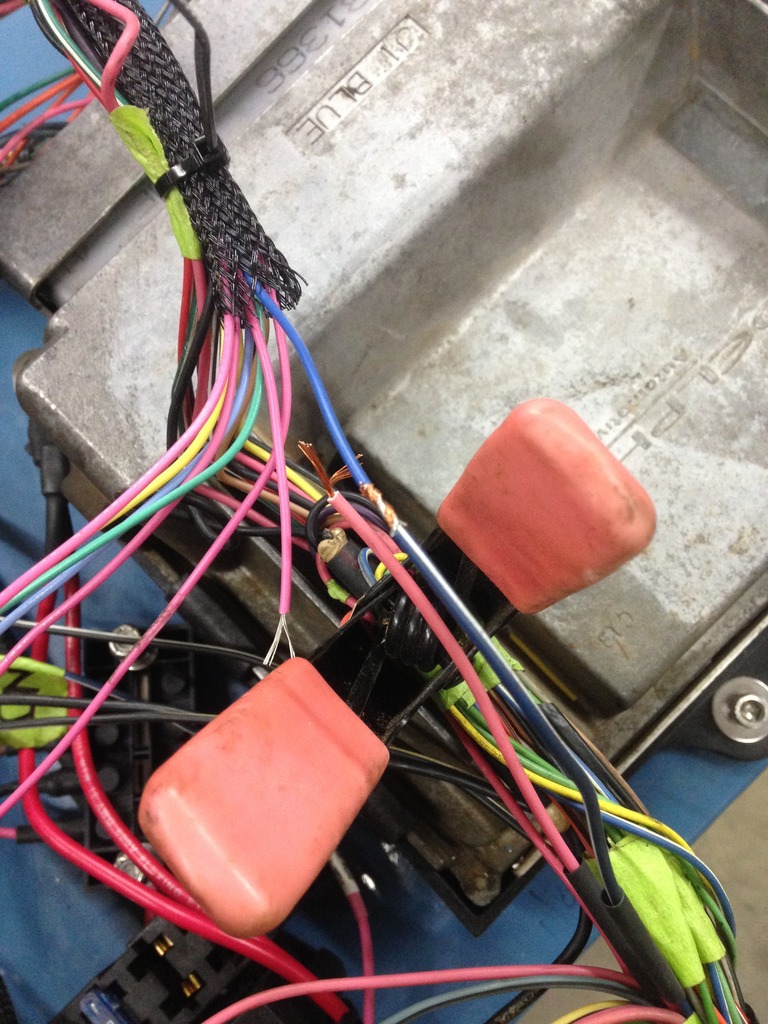
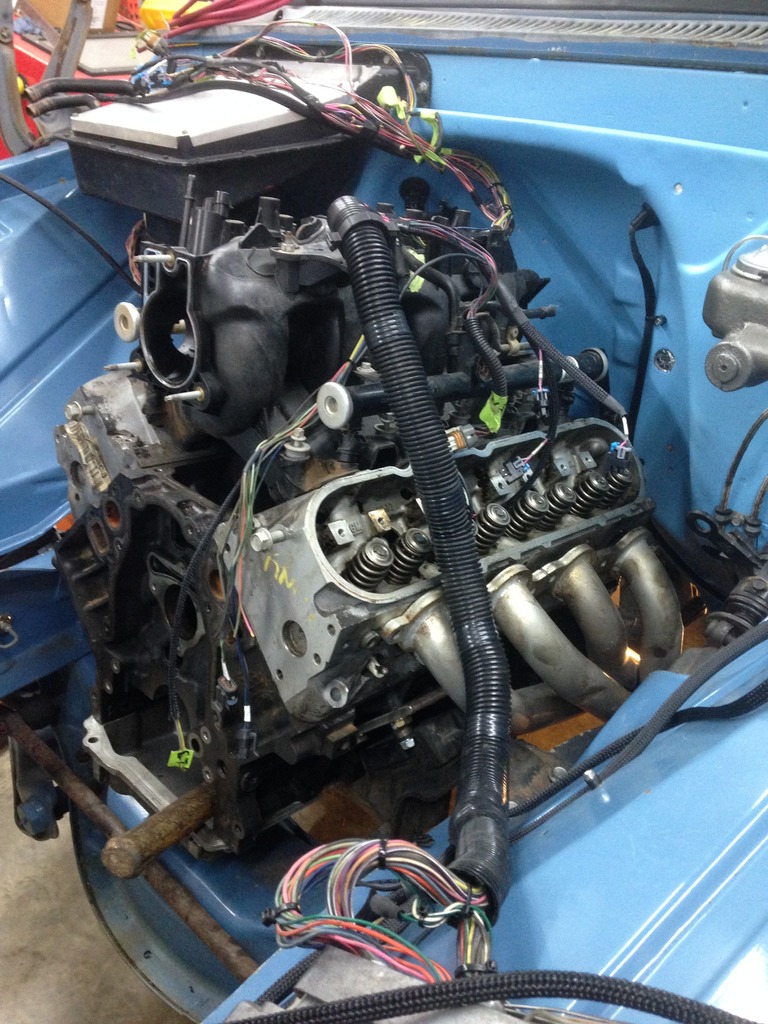
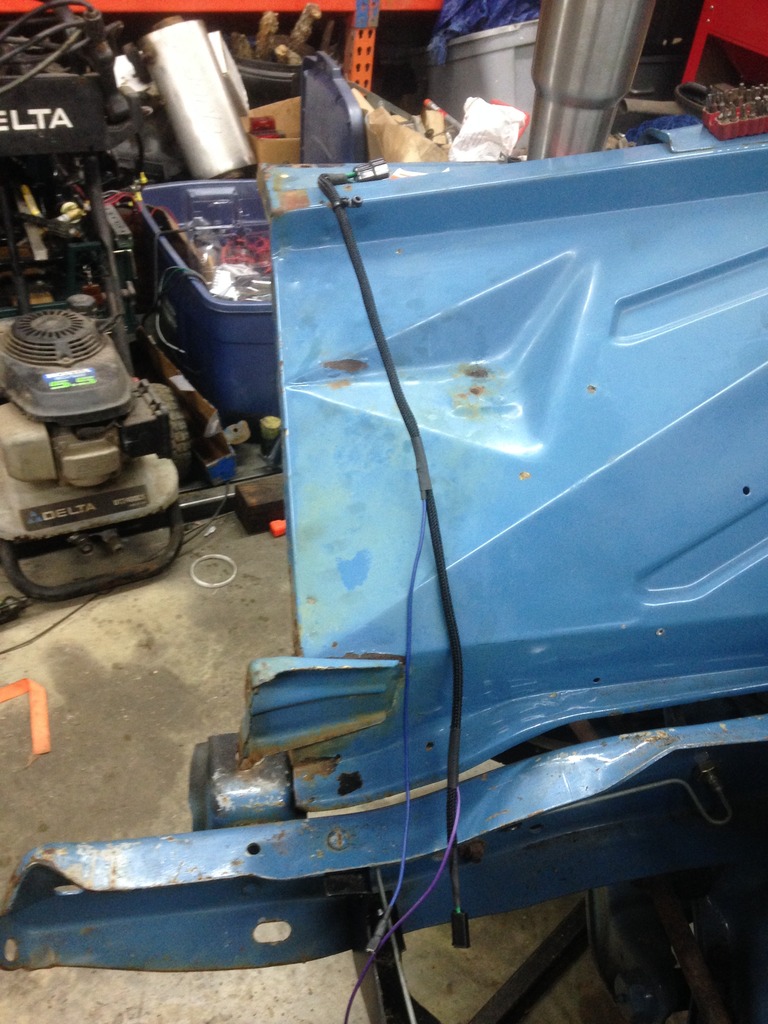
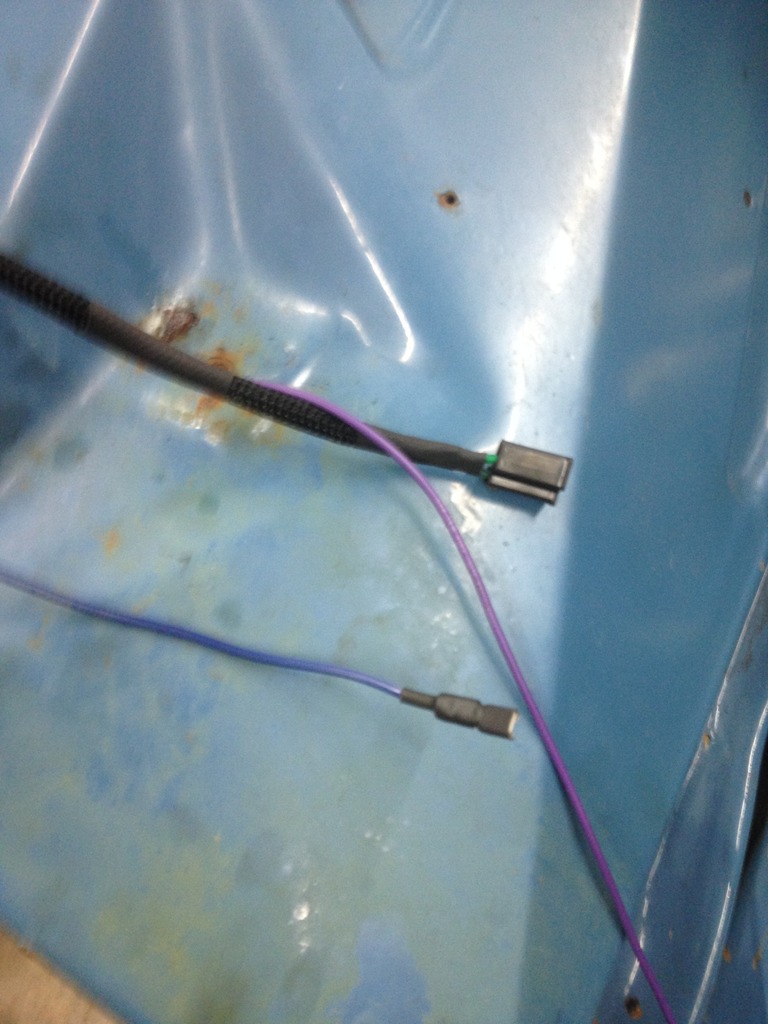
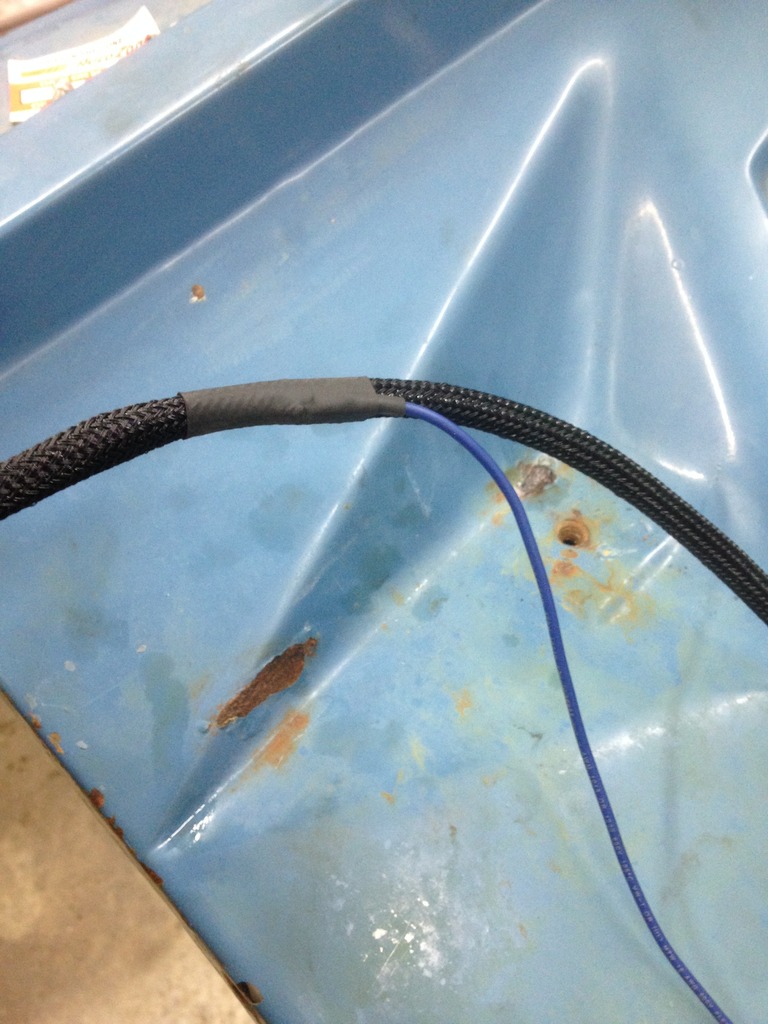
Finished up the harness that goes to the Temp Sender and Oil Sender for the dash lights and to the starter...Purple wire to the starter, block plug to the Temp Sensor, and the blue wire to the Oil Pressure Sender.
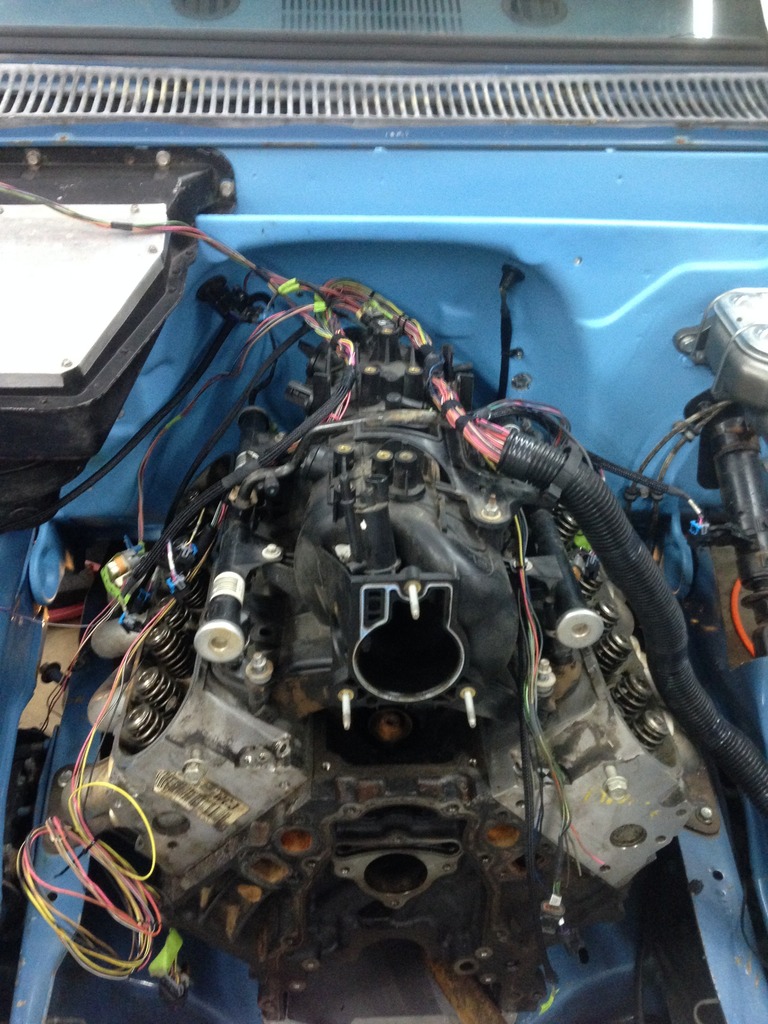
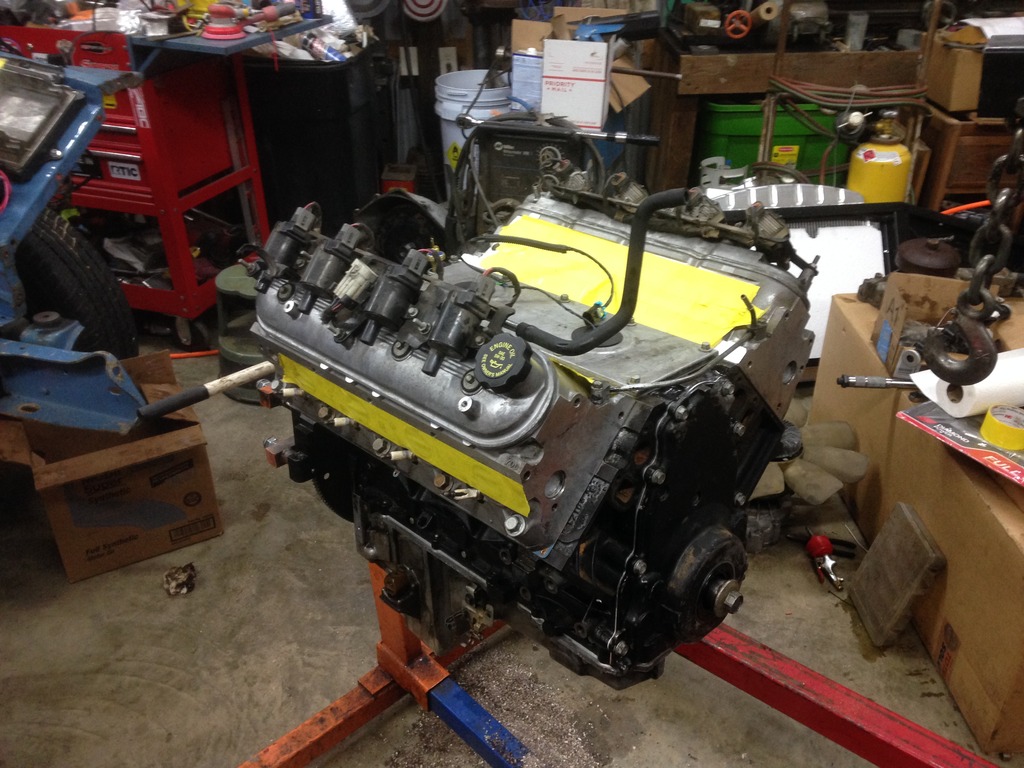
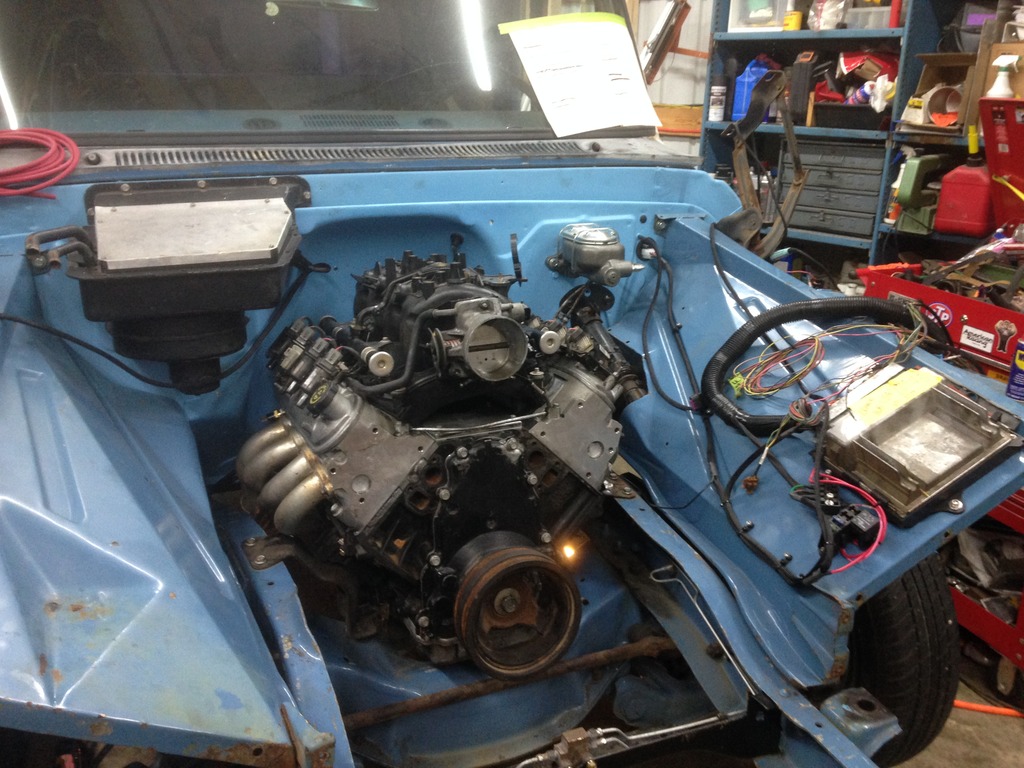
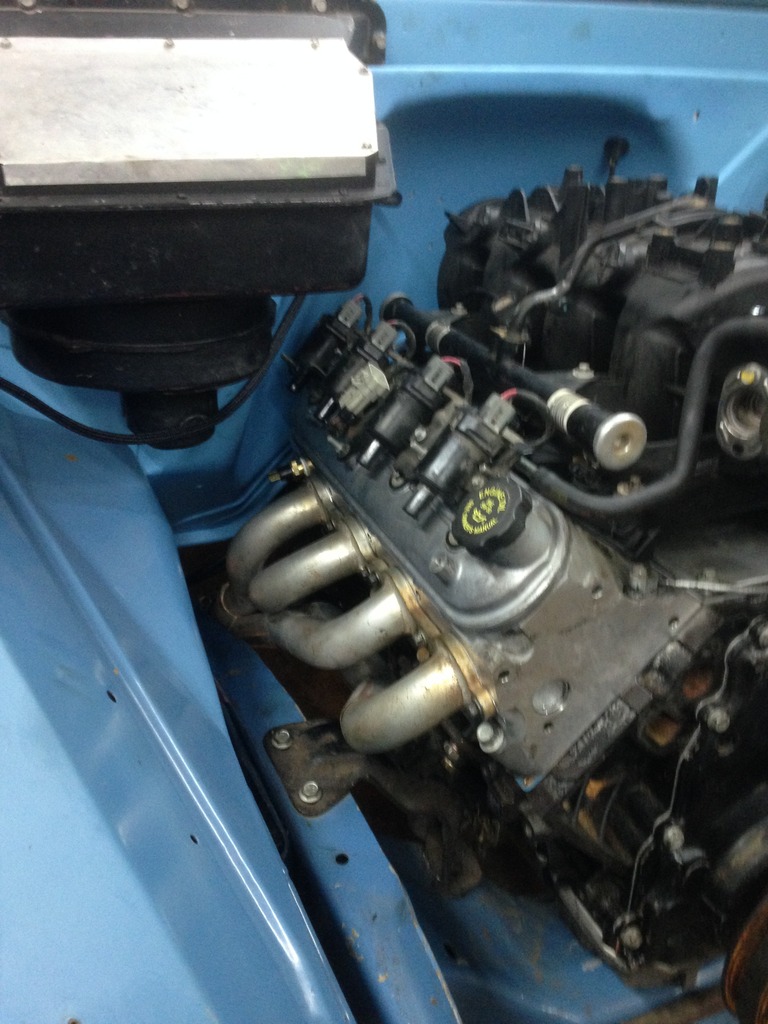
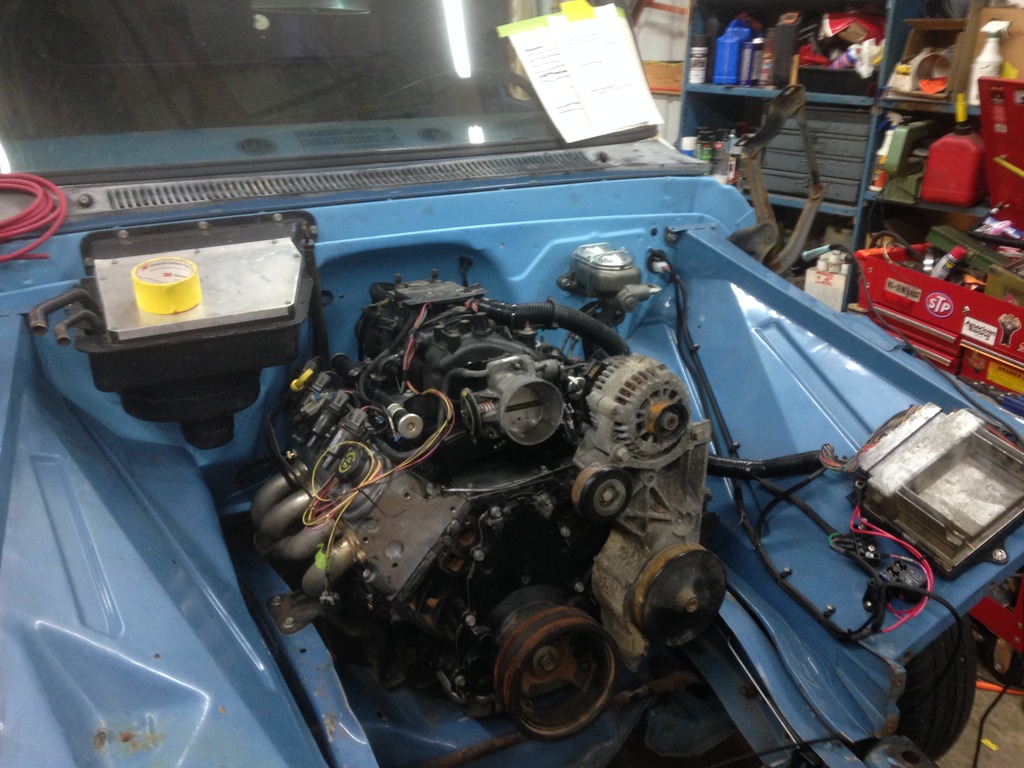
Shortly before I called it a night. I added the plug wires after this pic and the alternator and bracket are not bolted in yet, its just to mock up...
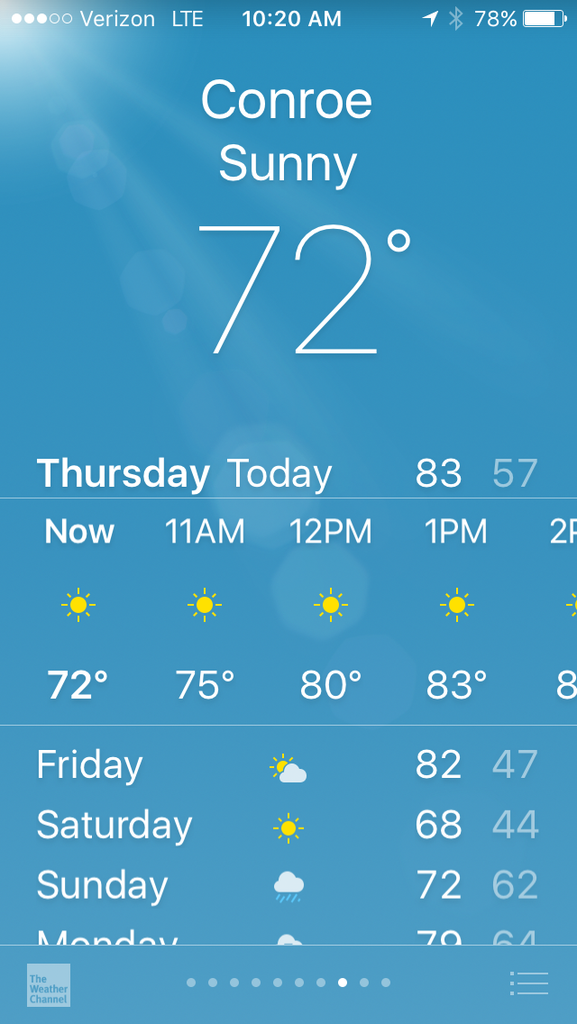
Look at this forecast for the LST weekend. I can't wait!
Engine, trans, and drive shaft are all in and bolted down. Shift linkage is hooked up, the engine wiring is hooked up less the MAF and the two Oxygen sensors. Need to install water pump and fan, the alternator and bracket, the belt, install the trans dip stick and a new pan gasket, and add all the fluids. I should be able to fire it up this afternoon. IF that goes well, then put on the front clip, drive around the block to check it out and then load it up for LST...
Again Korbin and Owen where out there helping the old man out, Owen has school and two baseball games today, so he headed to bed about 10:30 last night, Korbin stayed out with me till about midnight, and I called it quits at 1am. I had to come to work for 1/2 a day today.
Here are pics from last night. I meant to get some of the parts used to mate up the TH350, but I forgot...

Sloppy Style engine stand modifications. Turns out it did not need this much clearance, but it worked out..


Finished up the harness that goes to the Temp Sender and Oil Sender for the dash lights and to the starter...Purple wire to the starter, block plug to the Temp Sensor, and the blue wire to the Oil Pressure Sender.


Shortly before I called it a night. I added the plug wires after this pic and the alternator and bracket are not bolted in yet, its just to mock up...

Look at this forecast for the LST weekend. I can't wait!
