
LQ4 into a 3rd Gen/1972 Nova
 06-06-2009, 05:28 PM
#121
Staging Lane
iTrader: (2)

Join Date: Oct 2008
Location: El Mirage, Az
Posts: 88
Likes: 0
Received 0 Likes
on
0 Posts
Where did or where are you going to mount your external fuel pump?? I just got an Aeromotive pump and while my Rick's tank is front sumped I want to get it close to the tank as possible, crawling around under there I noticed not a ton of options to do so.
On one hand the fittings being low to help feed the motor is good on the other getting my pump near the same location has proven to be a little challenging..
Thanks as always
On one hand the fittings being low to help feed the motor is good on the other getting my pump near the same location has proven to be a little challenging..
Thanks as always
 06-07-2009, 03:33 PM
#122

There are two threaded holes in the upward-angled metal area just above/in front of the gas tank. This is where supports for the stock fuel line and charcoal line were bolted to. I aligned my Walbro external pump and Corvette FPR and then bolted them to a piece of 3/4"x1/8" flat stock about 18'"long, and then bolted that piece to the two threaded holes mentioned above. I may not have described it very well, but if you climb under there you should see them pretty quickly. The pump ended up being slightly above the top of the tank, but for the little while I drove the car I didn't experience any trouble having the tank "suck" the gas as opposed to having it gravity fed.
06-07-2009, 08:25 PM
#123
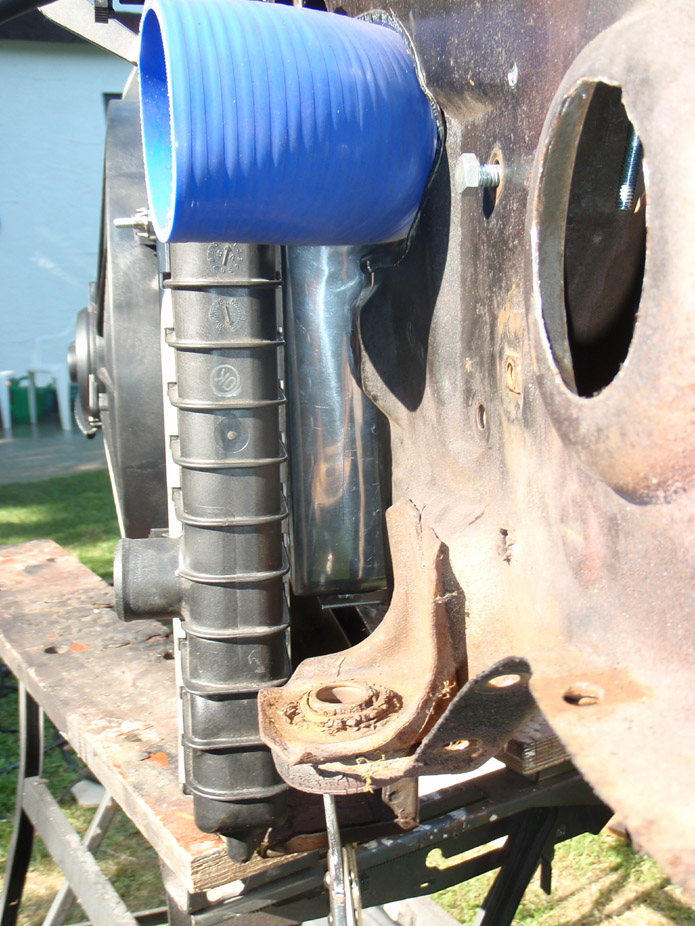
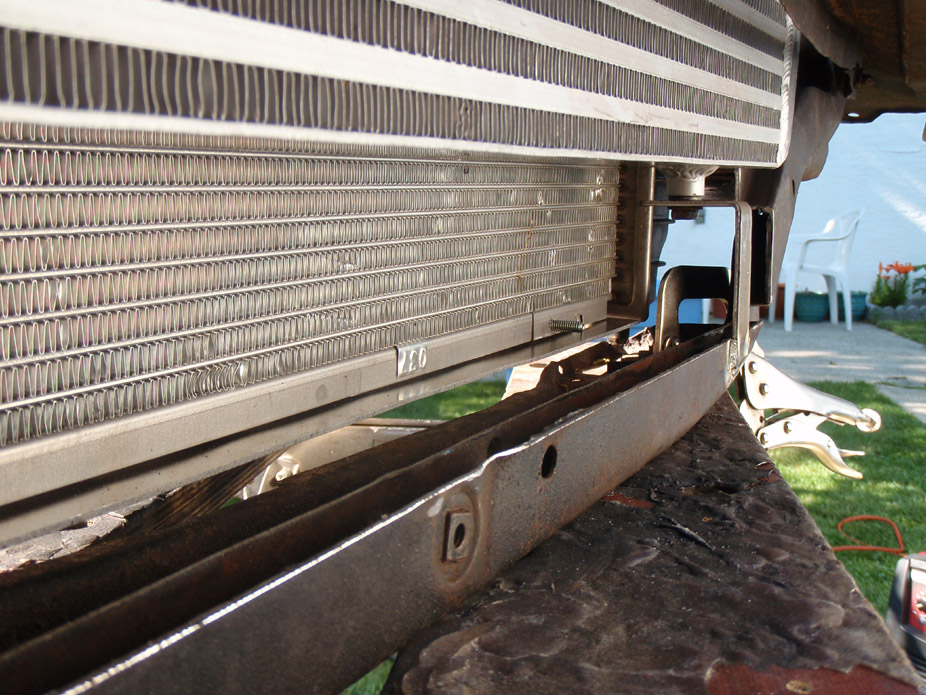
Today I finished cutting the outline of the intercooler...
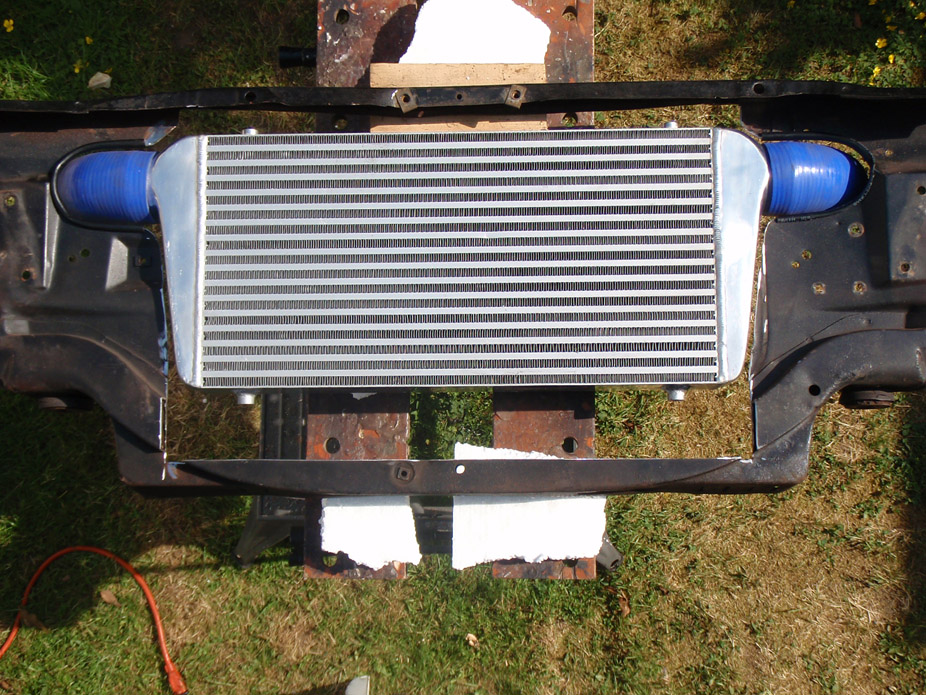
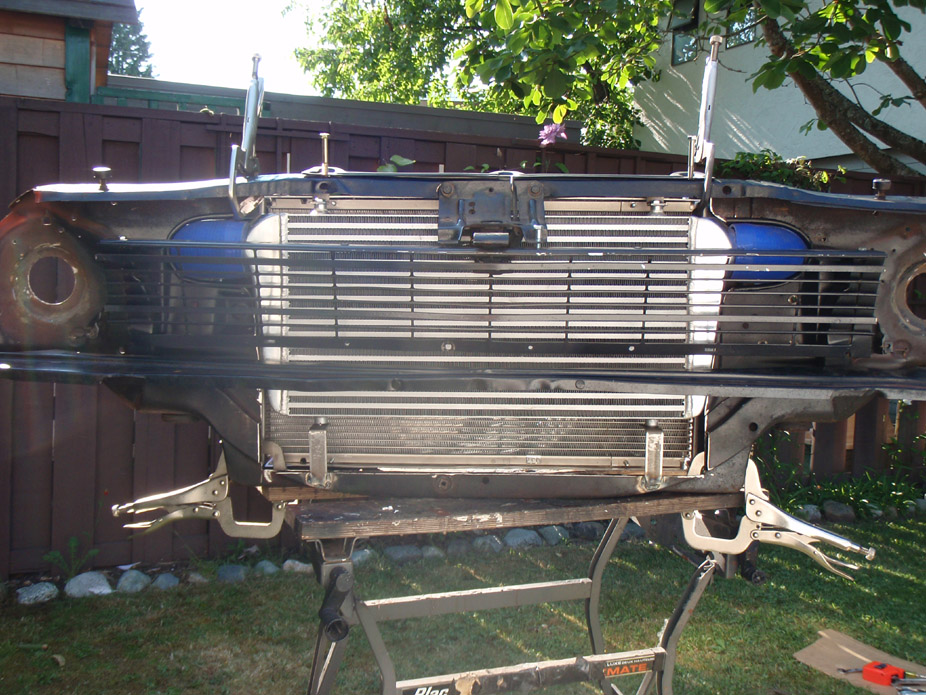
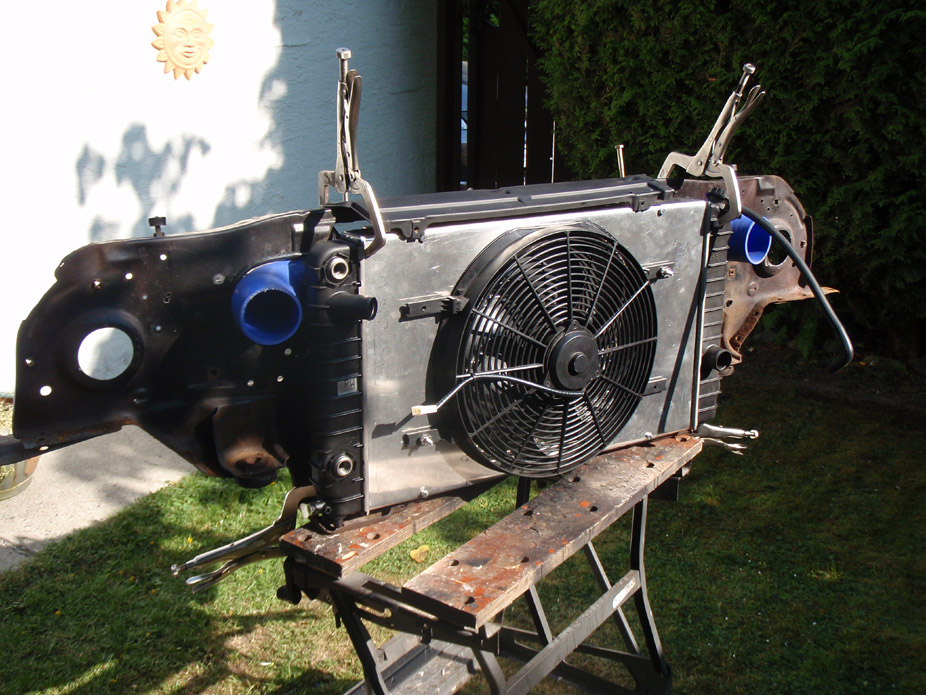
And finally, the radiator only moved back 1.25" overall, so clearance behind the fan should still be fine...
Will have to clearance grind a tiny bit of the stock hood latch, but I'm glad that it won't have to be a huge amount...
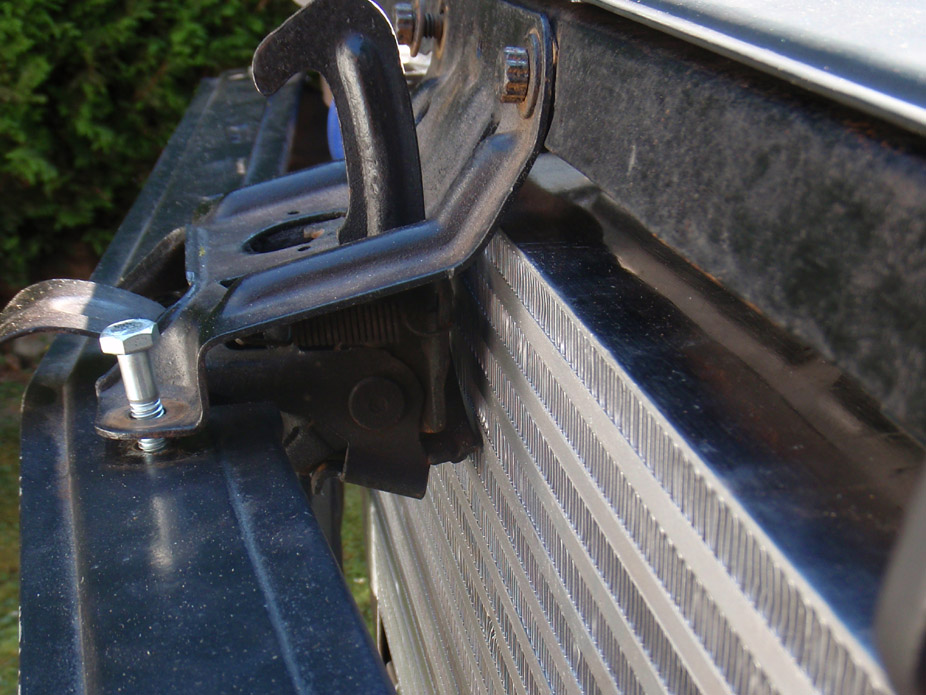
PLENTY of clearance for grill & grill-bumper trim piece ...
...
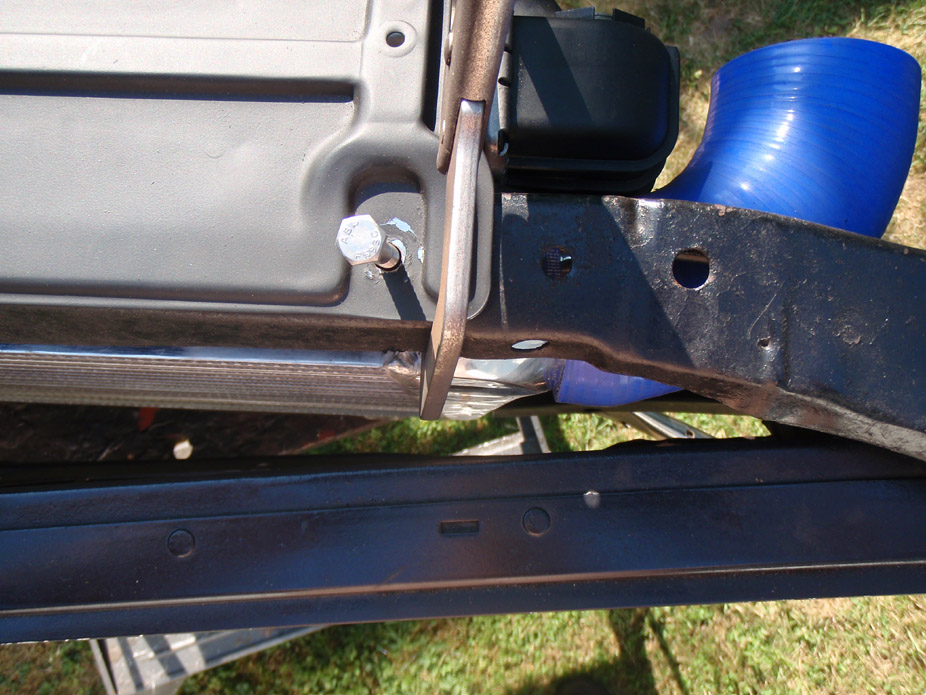
I'm going to "box" in the lower double-thickness parts of the rad support which were chopped up. This'll add rigidity as well as act like ducting for the part of the rad which doesn't have any IC in front of it...

And finally, the radiator only moved back 1.25" overall, so clearance behind the fan should still be fine...
Will have to clearance grind a tiny bit of the stock hood latch, but I'm glad that it won't have to be a huge amount...
PLENTY of clearance for grill & grill-bumper trim piece
...I'm going to "box" in the lower double-thickness parts of the rad support which were chopped up. This'll add rigidity as well as act like ducting for the part of the rad which doesn't have any IC in front of it...
06-07-2009, 11:55 PM
#124
Staging Lane
iTrader: (2)
Join Date: Oct 2008
Location: El Mirage, Az
Posts: 88
Likes: 0
Received 0 Likes
on
0 Posts
There are two threaded holes in the upward-angled metal area just above/in front of the gas tank. This is where supports for the stock fuel line and charcoal line were bolted to. I aligned my Walbro external pump and Corvette FPR and then bolted them to a piece of 3/4"x1/8" flat stock about 18'"long, and then bolted that piece to the two threaded holes mentioned above. I may not have described it very well, but if you climb under there you should see them pretty quickly. The pump ended up being slightly above the top of the tank, but for the little while I drove the car I didn't experience any trouble having the tank "suck" the gas as opposed to having it gravity fed.
 good work joe!
06-13-2009, 03:33 PM
good work joe!
06-13-2009, 03:33 PM
#126
I didn't go to bed last night, so I guess I'm not really gonna do any work on this glorious Saturday afternoon, but I did take a few snaps.
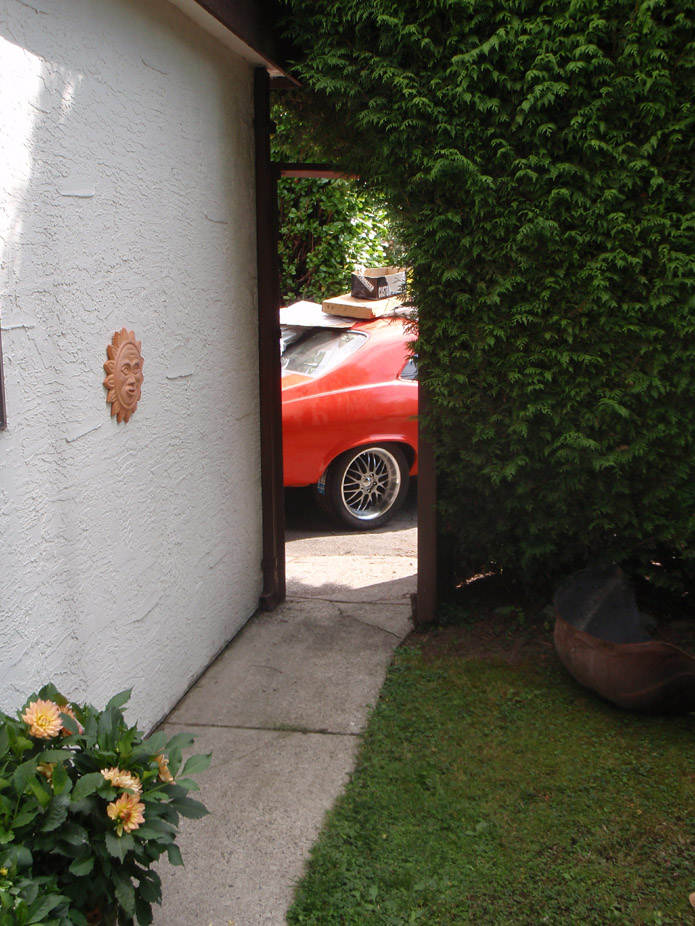
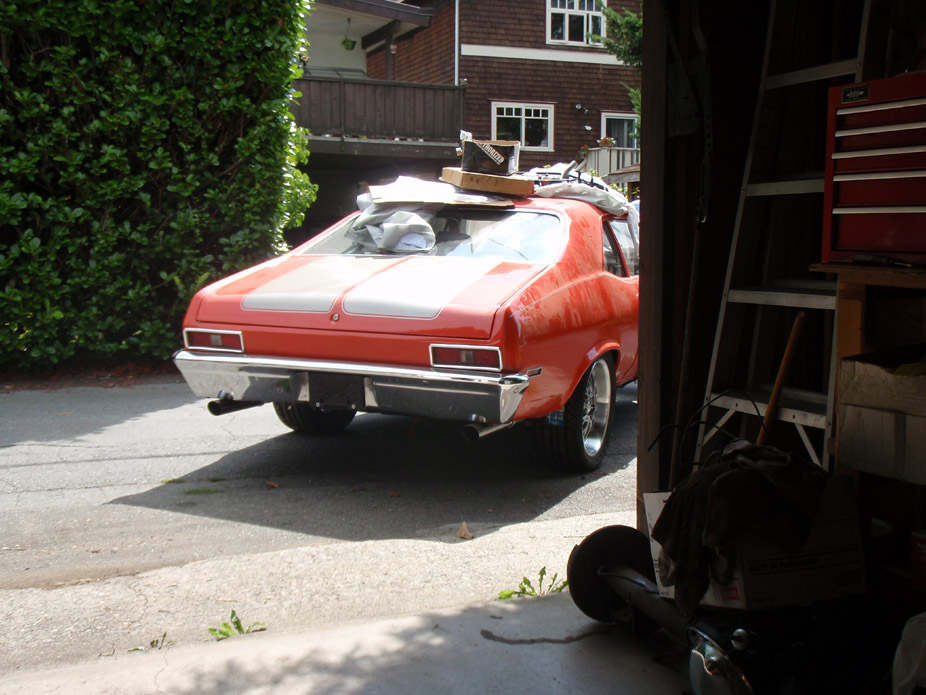
Rearranged garage to get more workable space on the front end.
My car misses the sun almost as much as I miss driving it!

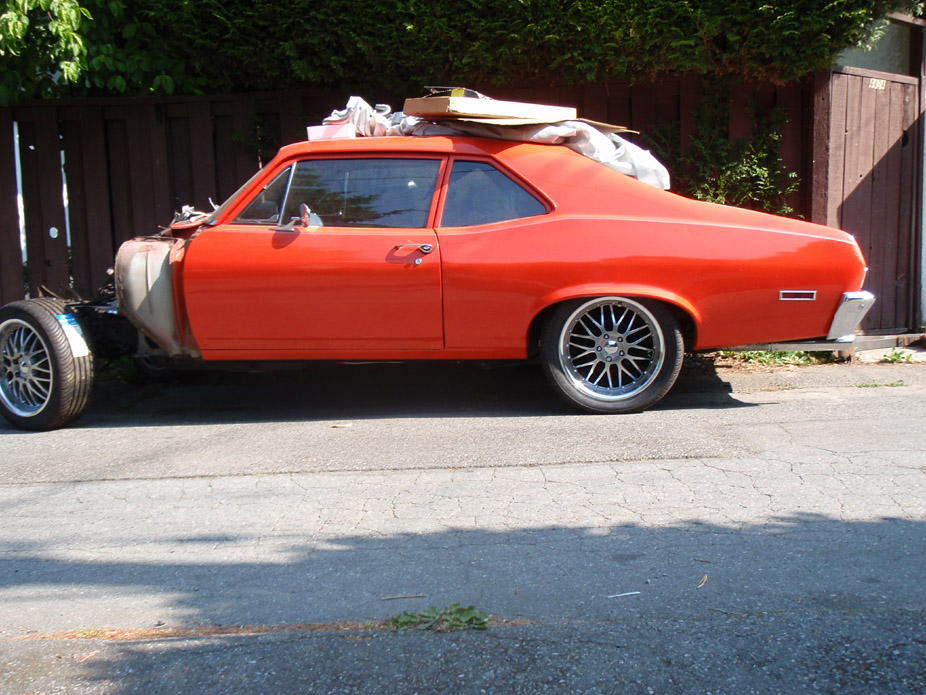
For anyone who wants to know what 18's look like on a 3rd gen... Mind you I think I'll have to lower the rear another inch and a bit, to get the lip just barely tucked...
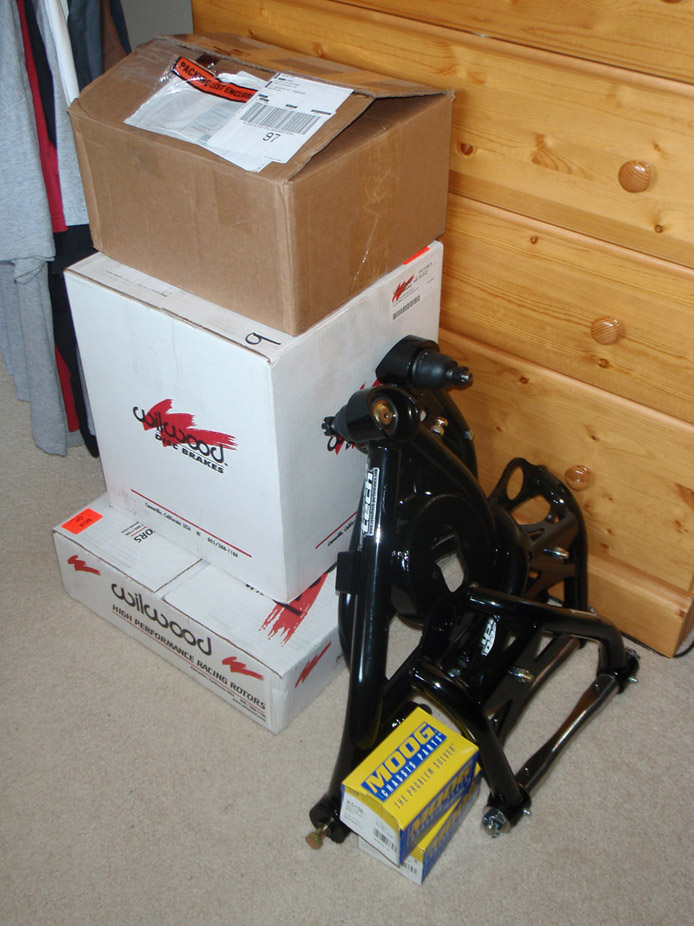
Goodies!!! I feel like a bit of an idiot just buying stuff to bolt on, it's so easy I don't know, is that breaking my build trend??

Funny money...
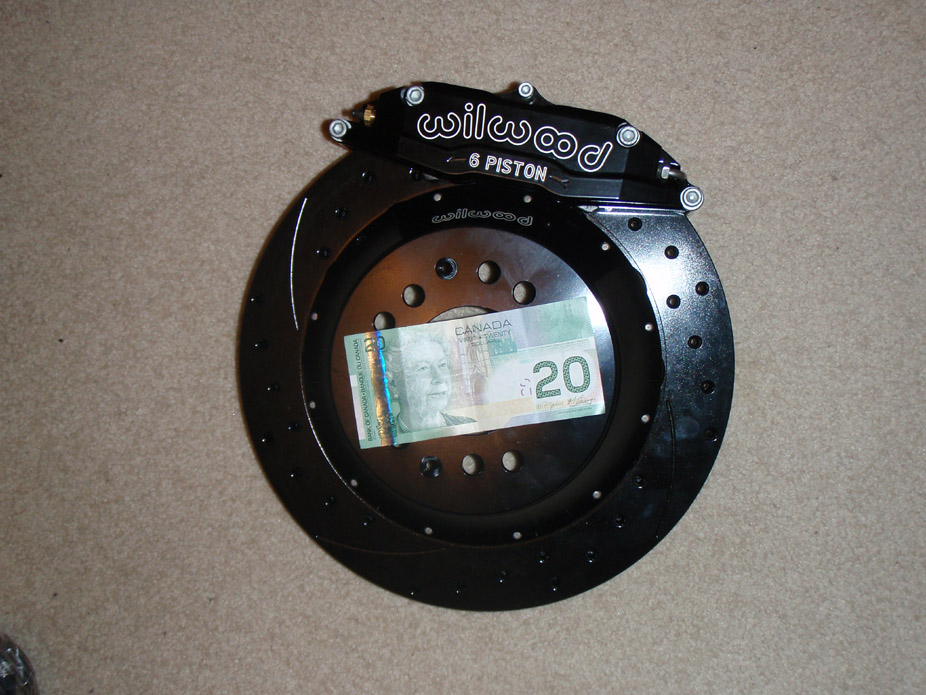
And... it's a big as my freaking head!!!!..
Rearranged garage to get more workable space on the front end.
My car misses the sun almost as much as I miss driving it!
For anyone who wants to know what 18's look like on a 3rd gen... Mind you I think I'll have to lower the rear another inch and a bit, to get the lip just barely tucked...
Goodies!!! I feel like a bit of an idiot just buying stuff to bolt on, it's so easy I don't know, is that breaking my build trend??
Funny money...
And... it's a big as my freaking head!!!!..
Last edited by frojoe; 08-15-2009 at 06:34 PM.
06-21-2009, 08:40 PM
#128
Ok so I should probably apologize to anyone following my thread, I have a tenancy to jump around a lot, maybe that's just my way of not becoming burned out just working on one thing till completion. I'll try to make things a little more streamlined in the future...
These are just some teaser shots because I liked them. PS... safety wiring sucks...

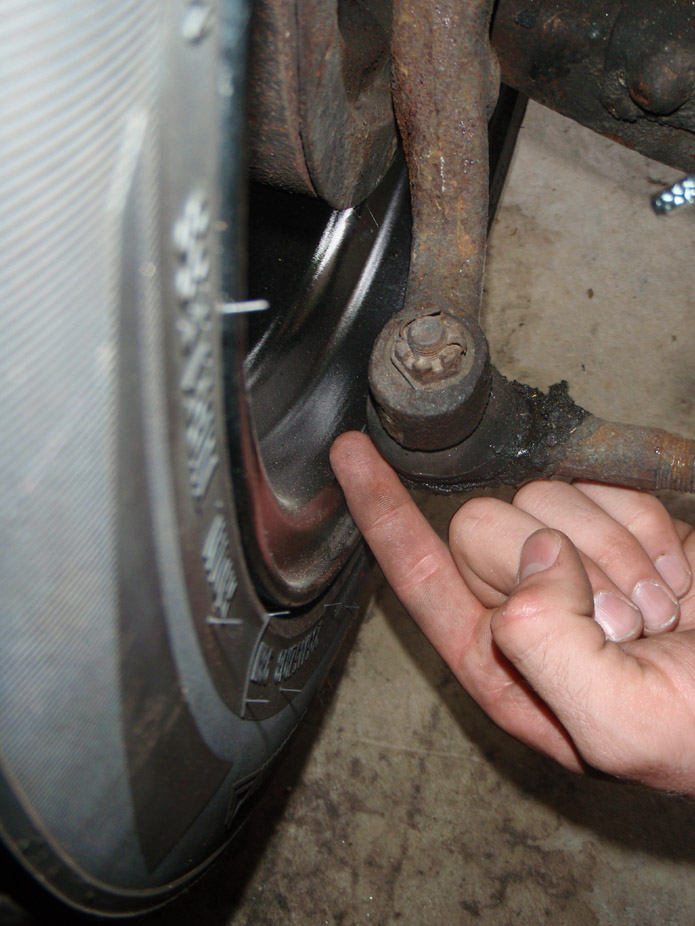
Everything fits real nicely...
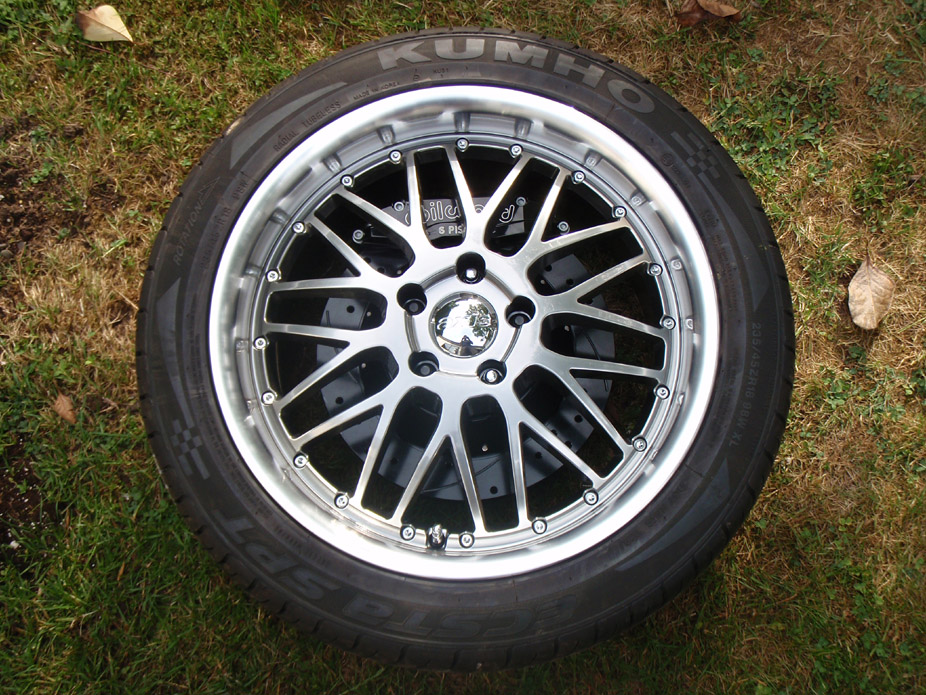
This is with stock drum spindles, 1.25" spacer adapters, and 40mm offset 8" wide wheels (equivalent to 4.325" backspacing when using the spacers)...
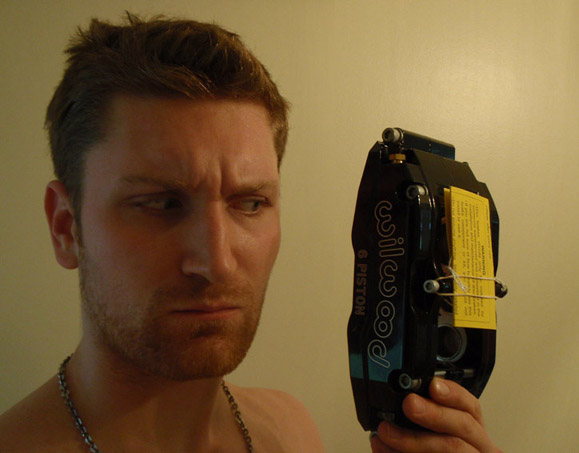
The Wilwood brakes will move the mounting face out 0.38" on either side from the stock drum face.
To keep the wheels in the same place they are now, with the Wilwoods I would need 0.87" spacers, which is too thick of a spacer for the 2" studs supplied in Wilwood kit, so I'm going to get 3" studs & use 0.5" spacers to bring the wheel in just a bit closer to the tie rod end than in the picture above.
These are just some teaser shots because I liked them. PS... safety wiring sucks...
Everything fits real nicely...
This is with stock drum spindles, 1.25" spacer adapters, and 40mm offset 8" wide wheels (equivalent to 4.325" backspacing when using the spacers)...
The Wilwood brakes will move the mounting face out 0.38" on either side from the stock drum face.
To keep the wheels in the same place they are now, with the Wilwoods I would need 0.87" spacers, which is too thick of a spacer for the 2" studs supplied in Wilwood kit, so I'm going to get 3" studs & use 0.5" spacers to bring the wheel in just a bit closer to the tie rod end than in the picture above.
Last edited by frojoe; 06-26-2009 at 12:15 PM.
06-21-2009, 08:59 PM
#129
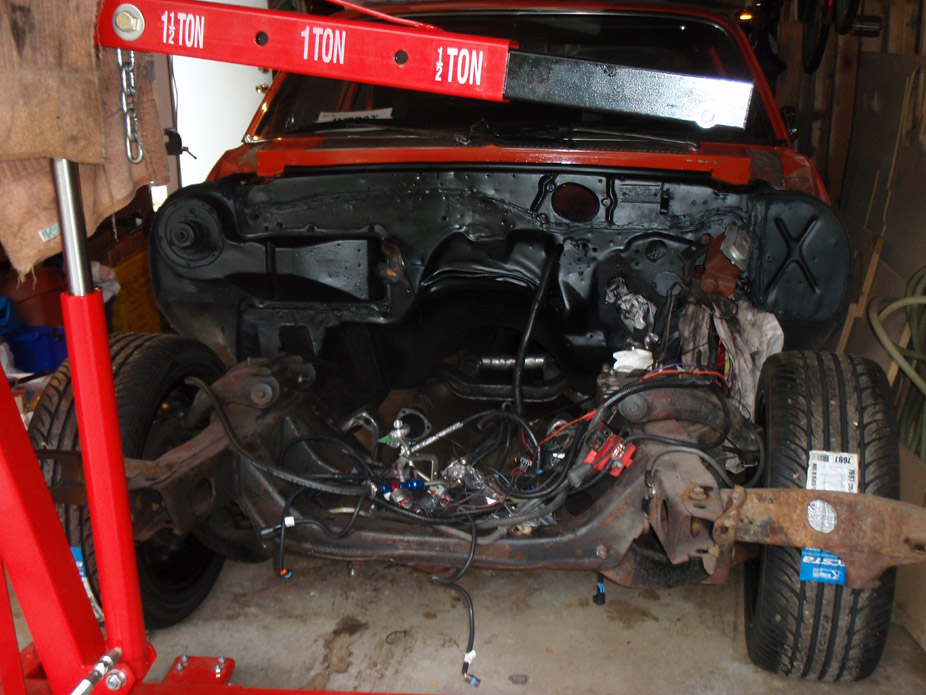
I decided to try as best I could to clean up the firewall. I'm not about to plug weld and bondo the thing, function over form. But I did give it a quick respray "while I'm at it"... and this'll likely be the only body-related paint I do to the car for a long time. It didn't make a huge difference, but enough to make the effort worth while.
Before...

After...
Randomly decided to start working on the interior. Apart from a couple ACC splices and stereo wires, this's all the previous owner(s) handiwork, geez more stuff to clean up...

A while ago I picked up a tilt column from an '80 Camaro for dirt cheap, and figured if GM were smart they'd keep a good thing going and have as many parts interchangeable as possible.
Looks like I was right, the '80 Camaro column (top) is damn near identical to my stock '72 Nova column (bottom)...
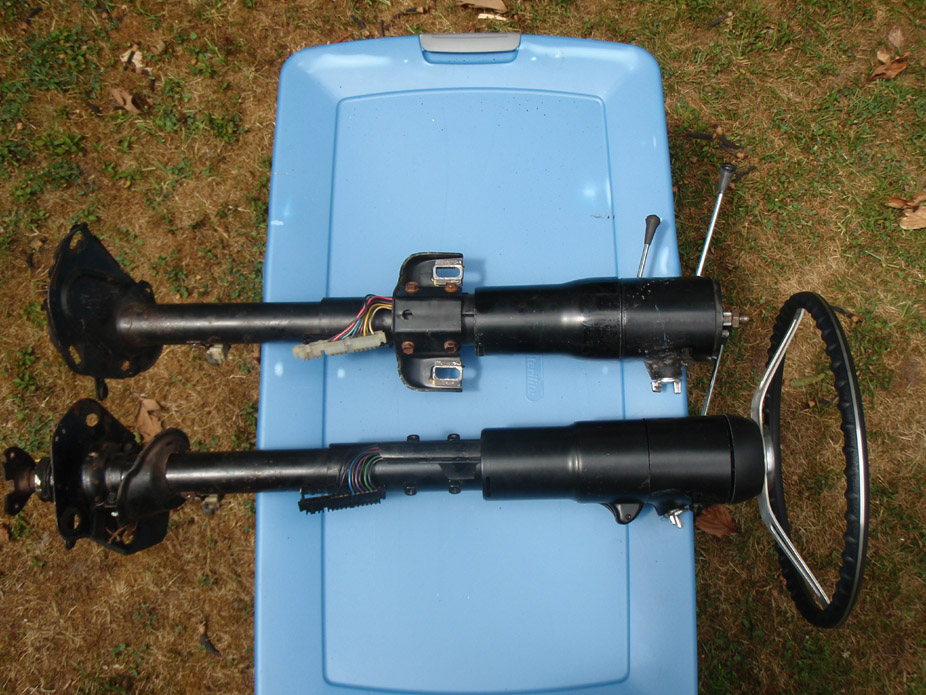
Except for the output shaft attachments...
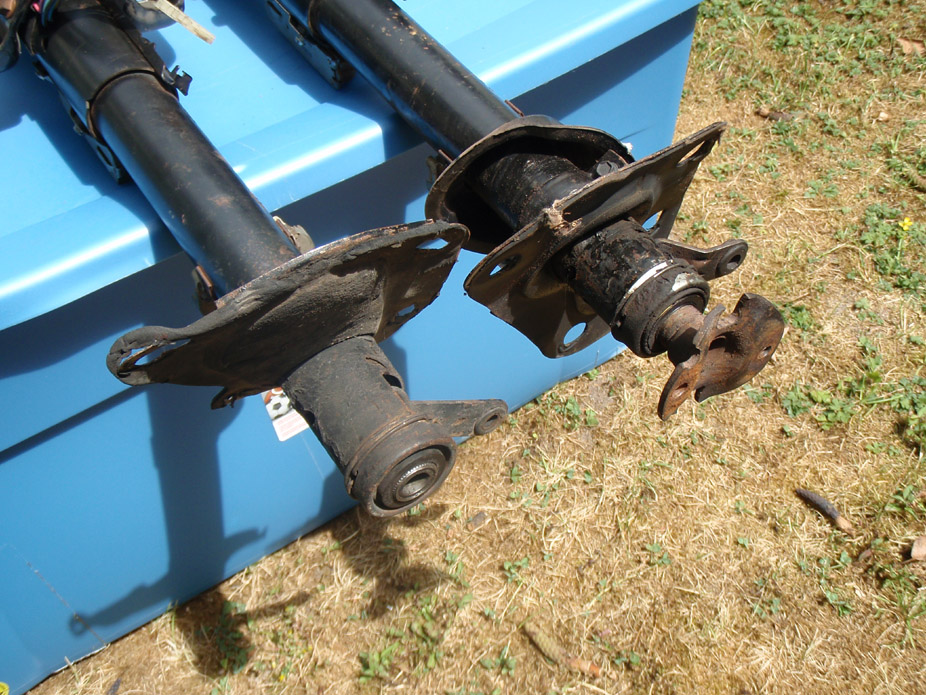
And firewall cover plates...

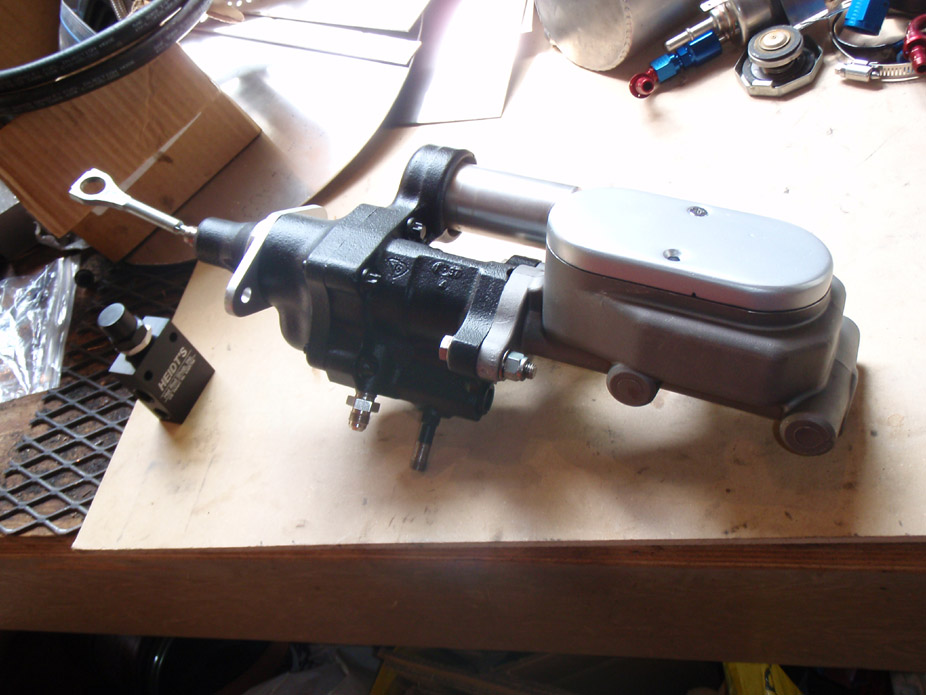
Thanks to Marktainium, picked up this 1 1/8" power brake aluminum master cylinder for cheap, looks nice on there...
Old manual brake rod is 5.25" long from firewall to pivot point...

New setup is 5.75" from firewall to pivot...
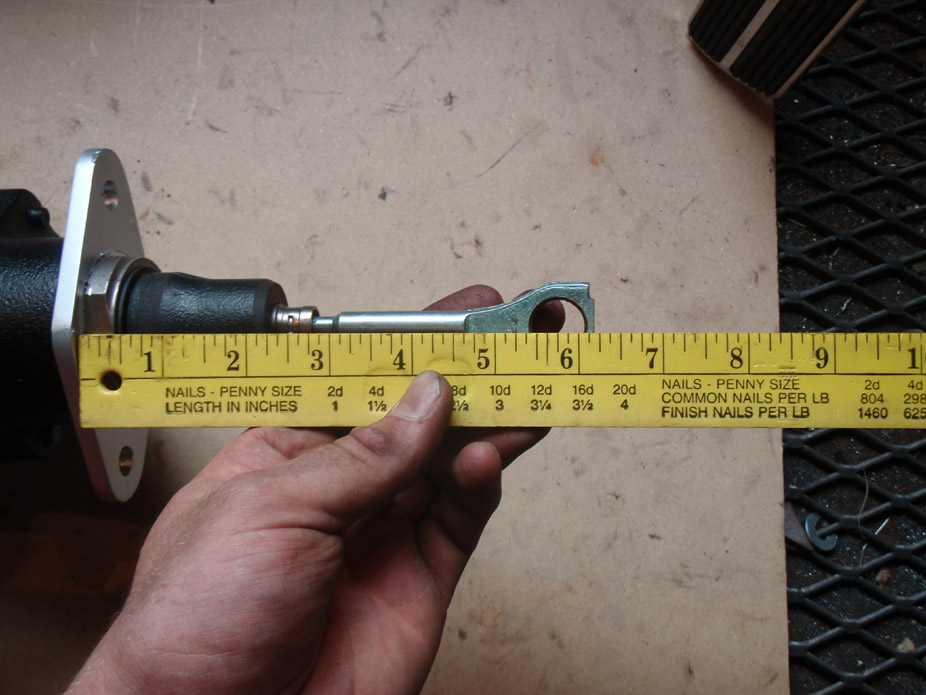
...I think I'm gonna make a custom brake/clutch pivot bracket moving them closer to the firewall for my long legs (I'm 6'2"), so I'll have to figure out whether to shorten the rod or not, more on that later.
Before...
After...
Randomly decided to start working on the interior. Apart from a couple ACC splices and stereo wires, this's all the previous owner(s) handiwork, geez more stuff to clean up...
A while ago I picked up a tilt column from an '80 Camaro for dirt cheap, and figured if GM were smart they'd keep a good thing going and have as many parts interchangeable as possible.
Looks like I was right, the '80 Camaro column (top) is damn near identical to my stock '72 Nova column (bottom)...
Except for the output shaft attachments...
And firewall cover plates...
Thanks to Marktainium, picked up this 1 1/8" power brake aluminum master cylinder for cheap, looks nice on there...
Old manual brake rod is 5.25" long from firewall to pivot point...
New setup is 5.75" from firewall to pivot...
...I think I'm gonna make a custom brake/clutch pivot bracket moving them closer to the firewall for my long legs (I'm 6'2"), so I'll have to figure out whether to shorten the rod or not, more on that later.
 06-21-2009, 11:47 PM
#131
Staging Lane
iTrader: (2)
Join Date: Oct 2008
Location: El Mirage, Az
Posts: 88
Likes: 0
Received 0 Likes
on
0 Posts
Does Wilwood recomend that 1 1/8" bore size? I thought big calipers like C5/C6 need more pressure not volume..however this may apply to manual brakes only...
06-22-2009, 12:39 AM
#132
LS1NOVA... you're engine is gorgeous.. any other pics of your finished car or build?? 
strtlegal... the smaller the bore size, the easier the pedal feel is. The standard(ish) sizes are 1" for manual and 1.125" for power. I've been reading that a lot of people are saying with the very high boosting action coming from the Hydroboost, that they can't find a MC with a large enough bore size to reduce the boosting amplification, aka bring some feel back into the pedal. Some have even tried using a 1 5/16" truck MC. I'm not sure exactly what brakes they've been using, but I would imagine this over-amplification might be a problem on stock single-piston brakes (52mm or whatever they are?).
What I figure is the Wilwoods have 6 pistons yes, but they're much smaller in diameter, producing less individual piston force for a given applied pressure. However, there are six of them, so regardless they'll have a larger cumulative area to apply force on the pad than any stock caliper, so this makes me really unsure of exactly how they'll feel.
I'm going though the trouble of relocating my pedal so I can have a more comfortable driving position, so I think I might also change the mounting point of the brake rod on the pedal, to reduce the leverage and possibly enhance "driver feel", but this will reduce pedal travel as well. I'm not sure if the effort will even net a noticeable change in pedal throw or feel for that matter, so this is all speculation right now, I haven't thought too deep into it yet.
Last edited by frojoe; 06-22-2009 at 11:42 PM.
06-22-2009, 05:04 PM
#135
sick ***... not enough time to read through the new posts, but it's coming out nicely joe. wish i had that kind of cash - oh wait, i would, but i've spent it all building my 6.0L/4L80e. Speaking of which... engine should be back from the machine shop this week - had a snafu w/ the pistons not fitting the rods (.927 wrist pin vs .943 stock). and i'm building my 4L80e as we speak (found a piece of metal in the case when i did my shift kit). and i'm done hijacking.
06-22-2009, 06:34 PM
#136
Haha thanks for the comments guys. Yea the only real big expenditure has been in the brakes, but with the upped performance levels of everything else, I decided the stock 4wheel manual drums needed a BIG improvement. Plus a little saying from my old mountain biking days... go big or go home! I promise I'll make it up in thriftiness elsewhere in teh build and fill you guys in on all the details!!
 06-22-2009, 10:52 PM
#138
TECH Apprentice
Join Date: Oct 2007
Posts: 307
Likes: 0
Received 0 Likes
on
0 Posts
What a build dude!!!!
Do you have a build thread for the car when you installed the truck engine? Im into a conversion like that. Stock ECM etc.
Where did you get the titanium master cylinder?
Very very nice!!!
Do you have a build thread for the car when you installed the truck engine? Im into a conversion like that. Stock ECM etc.
Where did you get the titanium master cylinder?
Very very nice!!!
06-22-2009, 11:38 PM
#139
LSfan70s... this thread was supposed to be my post-build thread!!! I tried detailing as much of the already-completed (or so I thought) conversion in text, because I didn't even own a digital camera at the time to take pics during all the work...
If you read through the text, it should give you the jist of what I did, although of course this has turned into a ridiculous project now, as stuff normally goes. Don't hesitate to ask me any questions you my have!!
The MC is a "MBM" GM-application power master cylinder. It is cast aluminum, not titanium (I wish!!!) but it is still much lighter than the boat-anchor iron MC that came stock... http://www.mbmbrakeboosters.com/Mast...-1/8-Bore.html
What happens when you're too lazy to move your car to get at the engine which you need to weight the front end when you don't have a spring compressor?? You have to use substitute weights! And by the way, separating ball joints sucks...
06-23-2009, 11:43 AM
#140
just read through the new posts - love the turbo build. while you're at it, you had may as well pull the front subframe, have it blasted, and repaint it. and do a swap to a PS box from a 3rd gen camaro with F41 suspension. it's the same physical size as ours, just vastly improved.