
1971 Buick Skylark: LS2 and 4l65e project
 09-13-2008, 07:58 AM
#1
On The Tree
Thread Starter
iTrader: (5)
Join Date: Jan 2007
Location: Atlanta
Posts: 109
Likes: 0
Received 0 Likes
on
0 Posts

OK, I've been gathering parts for about a month now so I figured that it was time to start the thread.
The project so far:
Parts:
2005 LS2 in truck configuration from a Chevrolet SSR
2005 4l65e from the same SSR
Spectre replacement fuel tank with pump for FI
Corvette filter regulator
SLP 25% underdrive Corvette balancer
GM Corvette accessory setup with air
New Corvette water pump
Intake, injectors, and fuel rail from my 2005 GTO
New LS2 Throttle body
Edelbrock Conversion headers
Entropy aluminum radiator with cooling fans and steam vent port
2008 Hummer oil pan, windage tray, pickup, dipstick and tube
BRP engine mounts and trans crossmember
Pending:
Wiring harness
AC lines
Driveshaft
Air filter setup
I've purchased almost all of my AN fittings and SS compression fittings for the fuel tank (since it doesn't come with AN fittings when you buy it). I'm trying to keep the braided line to a minimum, just from the tank to the filter/regulator. I have a hydraulic line flaring tool that will make the male side of a GM push connect fitting so I am trying to utilize that as much as possible.
It's a family owned car that has been with us since new in 1971. It's still running/driving on it's original Buick 350-4 right now and will be until closer to the end of October. Once everything is in and running correctly it will be torn back apart next summer for the body work and suspension upgrades.
Old idea:
My only dilemma right now is what to do for the motor mounts. I've watched everyone struggle with different setups since it either raised the engine too high or stopped them from installing AC. I don't mind notching the frame for the AC, but at the same time I refuse to cut my trans tunnel and raise it as the car is in really good shape, has buckets and a long floor mounted center console with shifter that I don't want to have to rework.
I want to keep the original trans crossmember as it has provisions to run the exhaust much closer the the car than any of the aftermarket conversion crossmembers that I've seen. I'm not sure that I've seen anyone do that with one of these before and I haven't seen anyone with a crossmember on here that resembles anything even similar to what I have. The crossmember is thick stamped steel with rubber cushions on either end with a metal housing that covers that insulator and holds it to the frame. My frame is drilled already for multiple trans setups and the crossmember itself has play in the mounting holes to make up for the differences in hole variations. I guess the unknown at this time is the height of the crossmember and will it work with this trans
Update:
Went with BRP engine/frame mounts and trans crossmember. I guess I will need to weld a tab for the emergency brake onto the BRP crossmember. Hopefully it will be able to take that force. Going to call and check in.
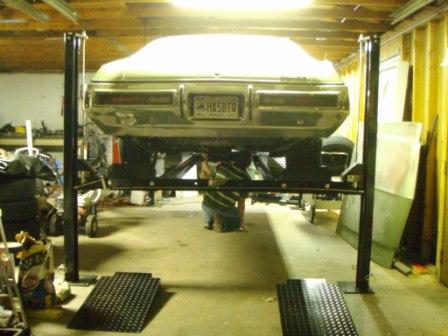
I'll take some pictures and post them up soon.
The project so far:
Parts:
2005 LS2 in truck configuration from a Chevrolet SSR
2005 4l65e from the same SSR
Spectre replacement fuel tank with pump for FI
Corvette filter regulator
SLP 25% underdrive Corvette balancer
GM Corvette accessory setup with air
New Corvette water pump
Intake, injectors, and fuel rail from my 2005 GTO
New LS2 Throttle body
Edelbrock Conversion headers
Entropy aluminum radiator with cooling fans and steam vent port
2008 Hummer oil pan, windage tray, pickup, dipstick and tube
BRP engine mounts and trans crossmember
Pending:
Wiring harness
AC lines
Driveshaft
Air filter setup
I've purchased almost all of my AN fittings and SS compression fittings for the fuel tank (since it doesn't come with AN fittings when you buy it). I'm trying to keep the braided line to a minimum, just from the tank to the filter/regulator. I have a hydraulic line flaring tool that will make the male side of a GM push connect fitting so I am trying to utilize that as much as possible.
It's a family owned car that has been with us since new in 1971. It's still running/driving on it's original Buick 350-4 right now and will be until closer to the end of October. Once everything is in and running correctly it will be torn back apart next summer for the body work and suspension upgrades.
Old idea:
My only dilemma right now is what to do for the motor mounts. I've watched everyone struggle with different setups since it either raised the engine too high or stopped them from installing AC. I don't mind notching the frame for the AC, but at the same time I refuse to cut my trans tunnel and raise it as the car is in really good shape, has buckets and a long floor mounted center console with shifter that I don't want to have to rework.
I want to keep the original trans crossmember as it has provisions to run the exhaust much closer the the car than any of the aftermarket conversion crossmembers that I've seen. I'm not sure that I've seen anyone do that with one of these before and I haven't seen anyone with a crossmember on here that resembles anything even similar to what I have. The crossmember is thick stamped steel with rubber cushions on either end with a metal housing that covers that insulator and holds it to the frame. My frame is drilled already for multiple trans setups and the crossmember itself has play in the mounting holes to make up for the differences in hole variations. I guess the unknown at this time is the height of the crossmember and will it work with this trans
Update:
Went with BRP engine/frame mounts and trans crossmember. I guess I will need to weld a tab for the emergency brake onto the BRP crossmember. Hopefully it will be able to take that force. Going to call and check in.
I'll take some pictures and post them up soon.
Last edited by 6spdgto; 10-29-2008 at 10:26 AM.
 09-13-2008, 08:10 AM
#2
TECH Enthusiast
iTrader: (5)

Join Date: Dec 2005
Location: Strawberry Point, IA
Posts: 553
Likes: 0
Received 0 Likes
on
0 Posts
Im using S&P mounts. I DID NOT have to notch the frame and I used the stock trans crossmember. I did however buy a custom front assy drive (including the AC) from S&P. I also had a Custom oil pan made for my car. Running turbos I wanted the extra oil capacity. Im running a Viper trans (6M) and shouldnt have to cut the tunnel. I did have to flip the trans mount on the crossmember to make the trans at the right hieght.
Ron
Ron
 09-13-2008, 03:44 PM
#5
On The Tree
Thread Starter
iTrader: (5)
Join Date: Jan 2007
Location: Atlanta
Posts: 109
Likes: 0
Received 0 Likes
on
0 Posts
Problem with the height is getting the oil pan to clear everything in the steering. Withte raised engine the trans will need to be raised to and then clearance in the tunnel could become an issue. I'll know as soon as I start mocking up the mounts.
09-13-2008, 03:47 PM
#6
On The Tree
Thread Starter
iTrader: (5)
Join Date: Jan 2007
Location: Atlanta
Posts: 109
Likes: 0
Received 0 Likes
on
0 Posts
Im using S&P mounts. I DID NOT have to notch the frame and I used the stock trans crossmember. I did however buy a custom front assy drive (including the AC) from S&P. I also had a Custom oil pan made for my car. Running turbos I wanted the extra oil capacity. Im running a Viper trans (6M) and shouldnt have to cut the tunnel. I did have to flip the trans mount on the crossmember to make the trans at the right hieght.
Ron
Ron
09-14-2008, 01:29 AM
#7

Take a look at my threads, this should be fairly similar to yours. I didn't mind notching the frame, it ended up being way cheaper for me. Also I don't think any aftermarket pulley drive system will ever be as reliable as a stock GM setup. They have R&D on their side. I really don't like the aftermarket, they do make some good products from time to time but many of the products are just hype that cost a bunch of $. Most of these products look really nice though.
Bottom line mock everything up and see where you are at. If you frame is a lot different than a chevelle 68-72 then you may have a new set of issues.
Bottom line mock everything up and see where you are at. If you frame is a lot different than a chevelle 68-72 then you may have a new set of issues.
Trending Topics
09-18-2008, 08:55 AM
#8
On The Tree
Thread Starter
iTrader: (5)
Join Date: Jan 2007
Location: Atlanta
Posts: 109
Likes: 0
Received 0 Likes
on
0 Posts
Take a look at my threads, this should be fairly similar to yours. I didn't mind notching the frame, it ended up being way cheaper for me. Also I don't think any aftermarket pulley drive system will ever be as reliable as a stock GM setup. They have R&D on their side. I really don't like the aftermarket, they do make some good products from time to time but many of the products are just hype that cost a bunch of $. Most of these products look really nice though.
Bottom line mock everything up and see where you are at. If you frame is a lot different than a chevelle 68-72 then you may have a new set of issues.
Bottom line mock everything up and see where you are at. If you frame is a lot different than a chevelle 68-72 then you may have a new set of issues.
I took some prelimnary measurements and it looks like it's going to be pretty easy and straighforward leaving the buick engine mounts where they are and building off of those. The crankshaft centerline looks like it may be raised as much as 1" from stock just to get the pan and everything to clear. The question now is will the tunnel allow for 1" of vertical movement. I guess I'll find out shortly.
09-18-2008, 01:50 PM
#9
Teching In

Join Date: Sep 2008
Location: Douglasville, Ga.
Posts: 1
Likes: 0
Received 0 Likes
on
0 Posts
as far as a upper mount for A/C, try this:
http://cgi.ebay.com/ebaymotors/ws/eB...m=330269492601
where in Atlanta are you?
http://cgi.ebay.com/ebaymotors/ws/eB...m=330269492601
where in Atlanta are you?
 09-18-2008, 04:13 PM
#11
Yep, my frame and yours looks to be pretty similar yet still a little different. I really like your project and I agree that GM setups work best as they have their $hit sorted out and working to a science.
I took some prelimnary measurements and it looks like it's going to be pretty easy and straighforward leaving the buick engine mounts where they are and building off of those. The crankshaft centerline looks like it may be raised as much as 1" from stock just to get the pan and everything to clear. The question now is will the tunnel allow for 1" of vertical movement. I guess I'll find out shortly.
I took some prelimnary measurements and it looks like it's going to be pretty easy and straighforward leaving the buick engine mounts where they are and building off of those. The crankshaft centerline looks like it may be raised as much as 1" from stock just to get the pan and everything to clear. The question now is will the tunnel allow for 1" of vertical movement. I guess I'll find out shortly.
09-18-2008, 11:07 PM
#12
On The Tree
Thread Starter
iTrader: (5)
Join Date: Jan 2007
Location: Atlanta
Posts: 109
Likes: 0
Received 0 Likes
on
0 Posts
as far as a upper mount for A/C, try this:
http://cgi.ebay.com/ebaymotors/ws/eB...m=330269492601
where in Atlanta are you?
http://cgi.ebay.com/ebaymotors/ws/eB...m=330269492601
where in Atlanta are you?
 10-29-2008, 10:50 AM
#17
8 Second Club
iTrader: (40)
Join Date: Aug 2005
Location: Raleigh,North Carolina
Posts: 1,861
Likes: 0
Received 0 Likes
on
0 Posts
Cool project. I had a 72 GS 455 Stage 1, that I sold it to buy my Trans Am, I wanted to have a modern car with, 4 wheel power disc brakes, air bags, cruise control, fuel injection, power steering etc...
Funny thing is my car now has manual brakes, manual steering, no abs, no cruise, but a little more h.p.
Maybe I should have kept the Buick.
My GS was undefeated in the street racing scene, many of Mustangs found out about "Fast with Class"
Funny thing is my car now has manual brakes, manual steering, no abs, no cruise, but a little more h.p.
Maybe I should have kept the Buick.
My GS was undefeated in the street racing scene, many of Mustangs found out about "Fast with Class"
11-07-2008, 04:53 PM
#19
On The Tree
Thread Starter
iTrader: (5)
Join Date: Jan 2007
Location: Atlanta
Posts: 109
Likes: 0
Received 0 Likes
on
0 Posts
All of the drivetrain is out.
Full new harness ordered today. Not bad at $725 fully customized for a LS2 + tranny, plus air, plus fans!
I have a SSR LS2 harness in case anyone would be intersted in purchasing it.
Looking at possibly doing a Currie complete 9+ rear setup with disc brakes.
Pictures this weekend I promise
Full new harness ordered today. Not bad at $725 fully customized for a LS2 + tranny, plus air, plus fans!
I have a SSR LS2 harness in case anyone would be intersted in purchasing it.
Looking at possibly doing a Currie complete 9+ rear setup with disc brakes.
Pictures this weekend I promise
01-14-2009, 10:46 AM
#20
On The Tree
Thread Starter
iTrader: (5)
Join Date: Jan 2007
Location: Atlanta
Posts: 109
Likes: 0
Received 0 Likes
on
0 Posts
Harness received and looks good.
Skipped on the 9" currie and opted to build the Buick 8.5 I have. 30 spline TrueTrac and new custom Moser axles.
12" disc brakes from a 2001 Camaro
13" Vette disc brake conversion for the front
Tubular upper and lower control arms for the front
Hydratech hydroboost brake kit
Just received the mechanical speedo tailshaft for the 4L65e
Too cold for me to be outside working right now

