2000 Black FRC Progress Thread


 01-24-2017, 11:14 AM
#142
TECH Veteran
iTrader: (14)
Love me some winter projects! I may have asked this before but how do you like the maxjax? thinking that might be a winter project for me. I have a basement garage and I cant clear a two post.
also your hose reel is ridiculously awesome
also your hose reel is ridiculously awesome
01-27-2017, 12:54 PM
#143
I actually did a refurb on the C6Z lower box when I bought it used, before even installing it in the car for the first time. It needed a thorough cleaning and lubrication, and that did help the general smoothness of the action, but didn't do anything for the sloppiness.
Here is my train of thought and plan of attack:
The plastic bushings that hold the "yoke" shaft have a 1/16" of slop in them which translates to play in the shift **** when in neutral, or any gear really. They will be replaced with either delrin or bronze bushings that will provide a much more solid "hold" on the shaft.
The C6 Upper box looked to be fine. I found that the black "cup" that rides in the lower "receiver" has no slop and moves very freely.
With the entire drivetrain removed from the car (minus engine), the shift linkage (with no shifter attached) still does not spring back from 5-6 to center. This rules out the shifter as causing my centering issue, although the shifter still contributes to the slop.
I bolted the shifter assembly back onto the torque tube to visualize what the shift linkage was doing, and chase down the slop. This video shows the bushing wear in the lower box. The left to right wiggling of the shift ****/lever at the end of the video has no effect on movement of components in the trans - it's all slop in the joint at the rear bellhousing! Any similar front/rear movement of the shift ****/lever has equal slop that is a result of the worn bushings inside the lower box.
There is also lots of play evident in the joint assembly right before the shift linkage enters the transmission. It looks to be held together with roll pins, I have not yet disassembled that area.
Of course I COULD purchase a (relatively) expensive aftermarket shifter such as MGW, Hinson, Kirban that has internal centering springs, but I feel that they are somewhat of a band aid to the pre-existing condition inside the transmission. They also tend to be very stiff and the throw is excessively short, which makes the effort go way up. I drive my car 99% on the street with a couple track days a year so an easy, low effort throw is important.
So the final list of suspects, working towards the back of the car:
C6 Lower box mount bushings (that mount the box to the torque tube) - non issue. These are solid on my C6Z shifter. No movement.
C6 Lower box shaft bushings - cause shifter sloppiness. Plan to install new bronze bushings custom sized to my yoke, press fit into box. Not too bad of a job, will require some machining.
T56 Shift linkage to trans - cause shifter sloppiness. Need to investigate, there looks to be a brass bushing inside a mini u-joint that is worn.
C5 T56 internal centering spring - causes shifter not to snap back to neutral from the 5-6 gate (in my case). Again, an aftermarket shifter might help, but I want to get to the root cause. I initially thought this might be caused by the fore-aft detent ball that rides on top of the shift gate (NOT the detent ball that is altered by the anti-venom mod)
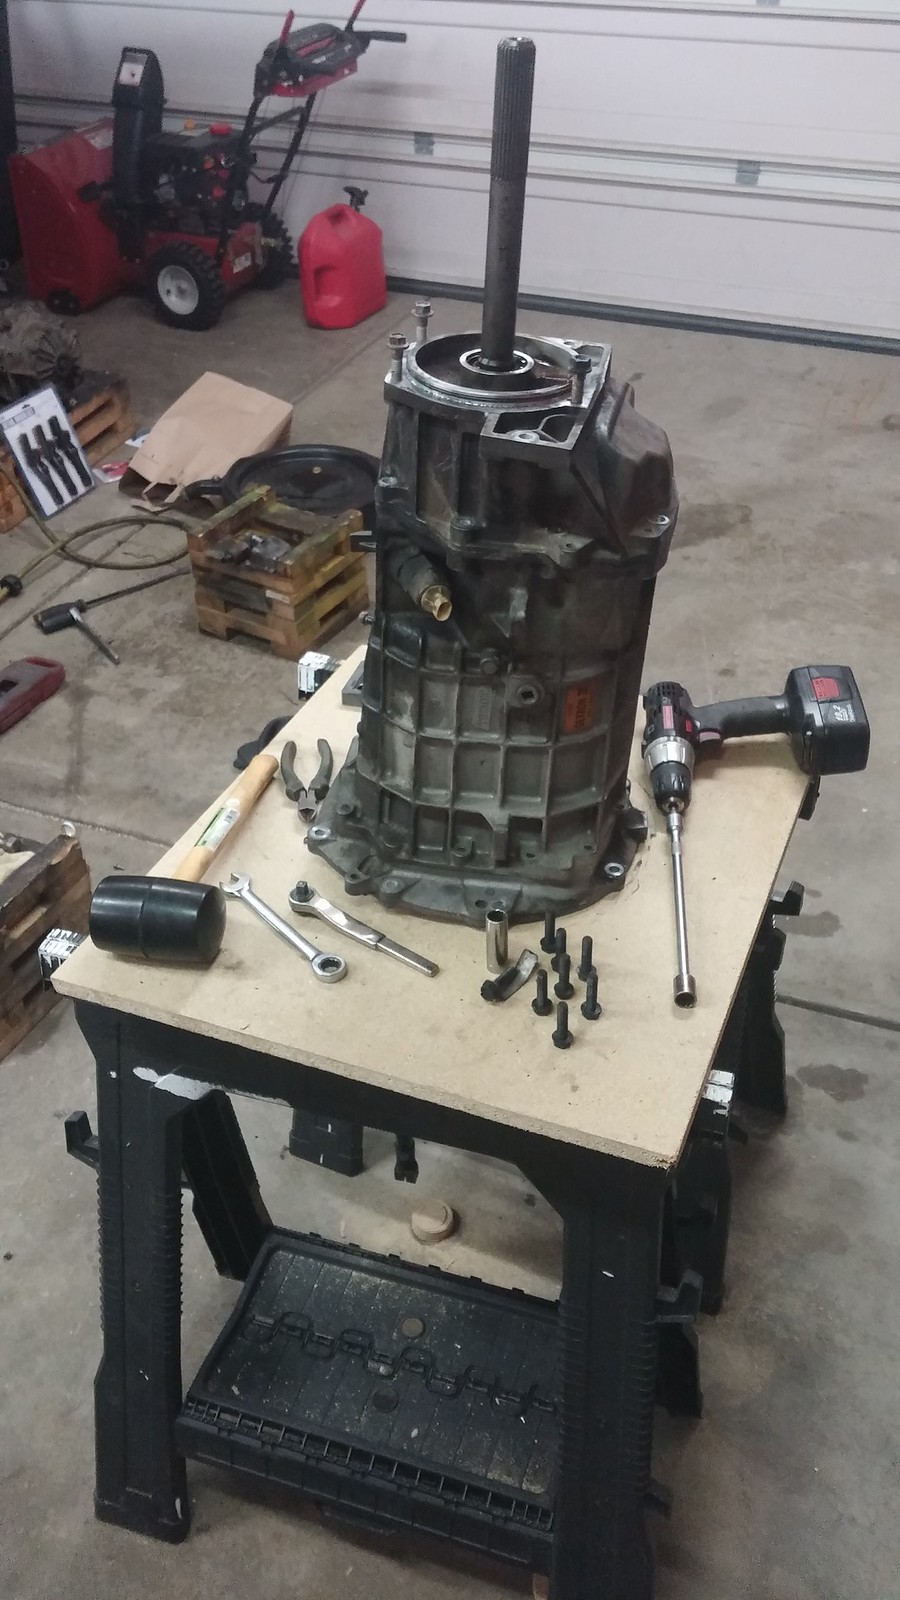
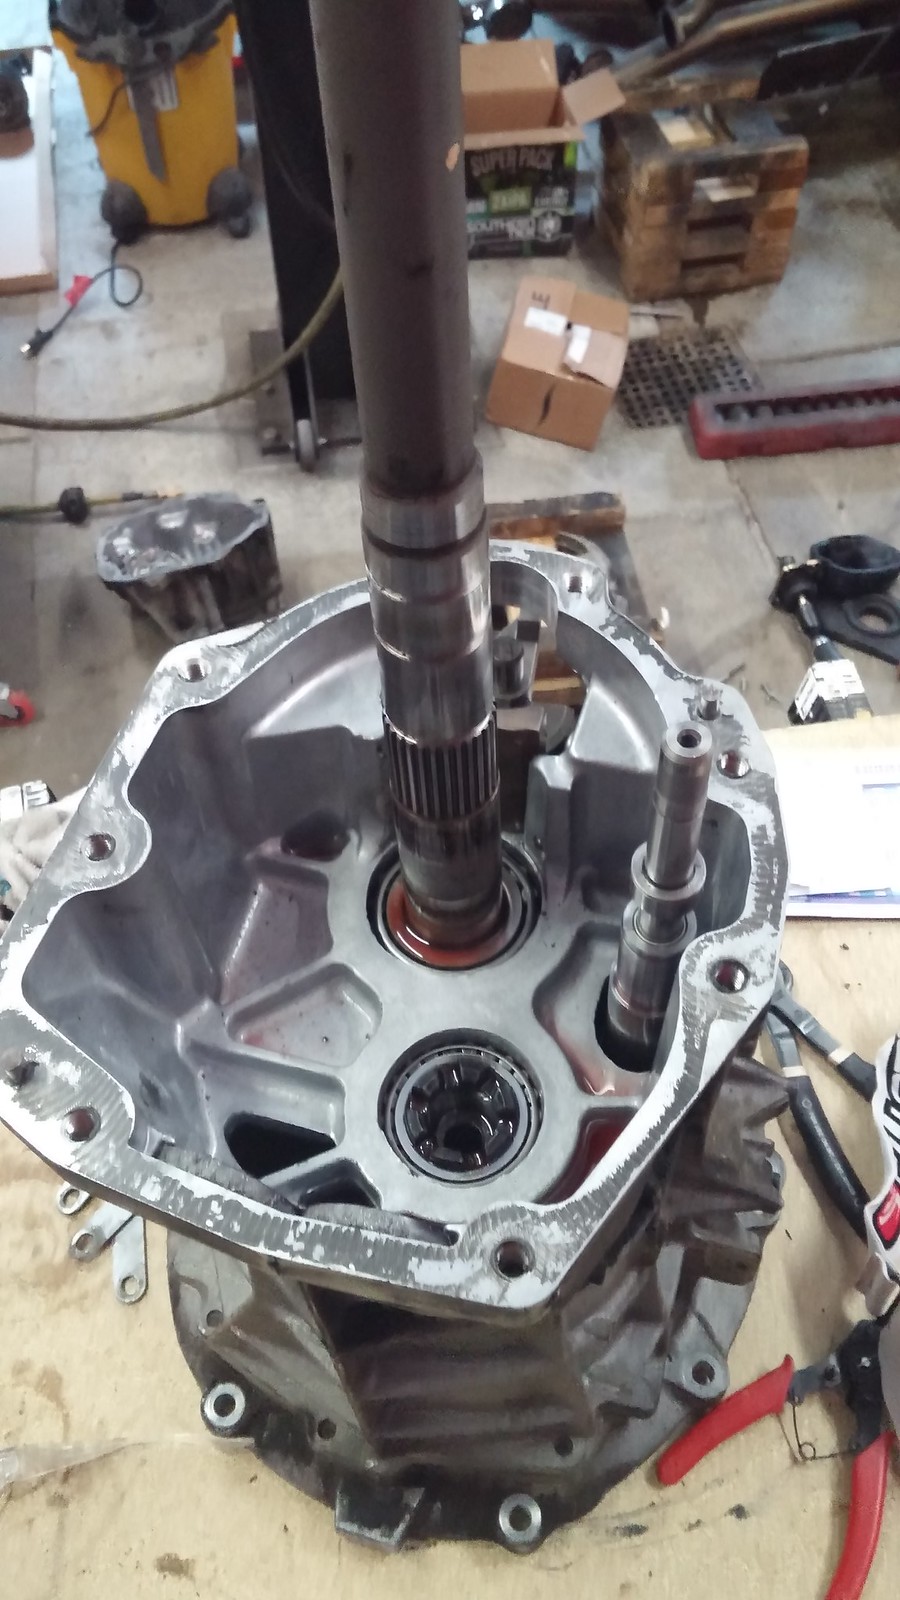
So I mounted up my T56 on the worktable.
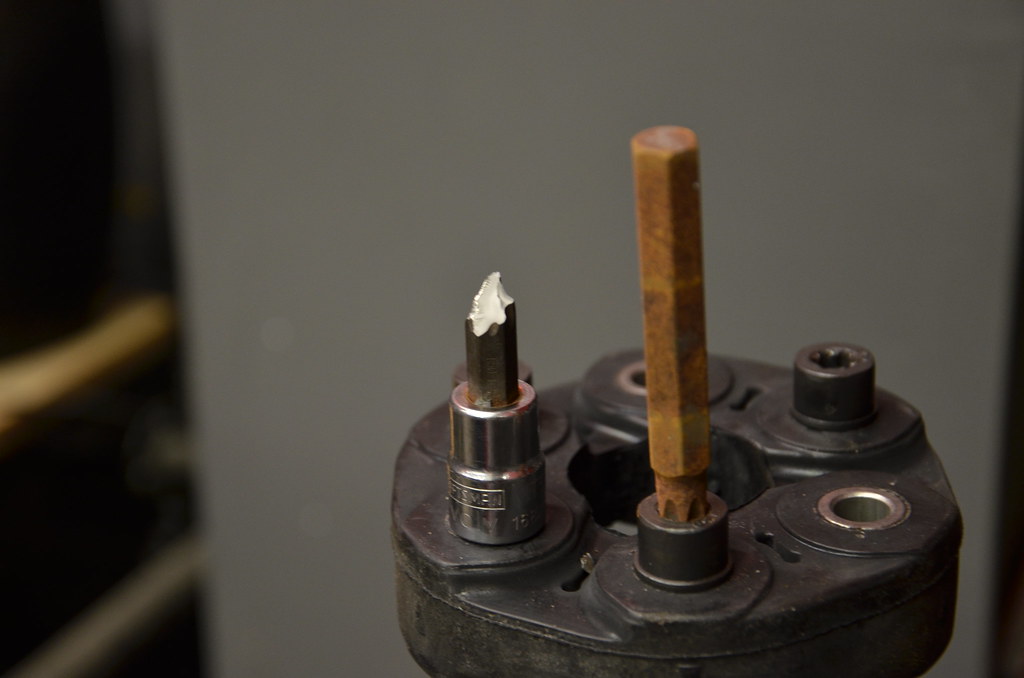
After pulling the rear tail housing case I visually verified that the shift detent ball wasn't binding up. This is not my picture, just an example of the guide plate that the lower detent ball rides in. I can't get the shift rail block off yet to verify if the ball is physically free, but that will come later.
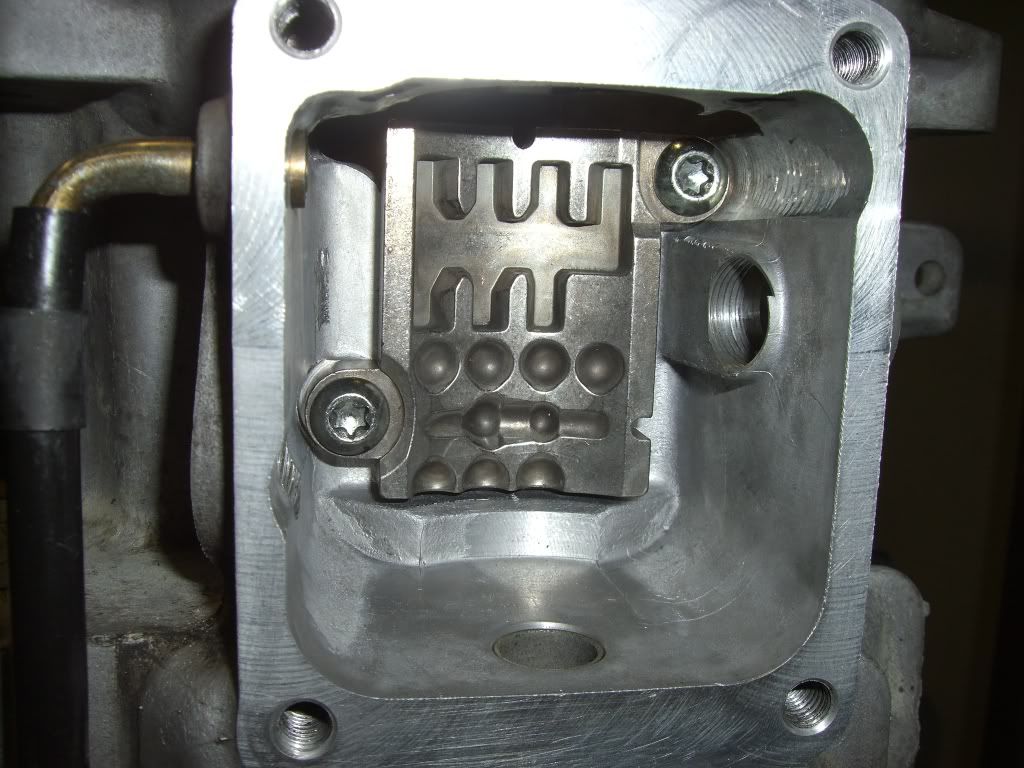
According to Bill Curlee: "There is a U shaped spring on the bottom plate that returns the shifter back to the center: " Through the process of elimination, this must be what is causing my shifter not to return back to center.
Tailhousing off.
I don't know if someone has gone through this trans in its life, but the buildup on the magnets didn't look TOO bad for 115k. I will be removing and cleaning these prior to reassembly. For what it's worth, I did replace the trans fluid with Dexron III ATF 1 year and 10K miles ago, and it looked brand new while draining.
That's where I left off for the night, my snap ring pliers were not big enough to handle the rings on the reverse shaft. More to come tonight.[/QUOTE]
01-27-2017, 02:18 PM
#144
TECH Veteran
iTrader: (14)
if you are trying to firm up the shifter feel, you may prefer bronze if you are trying to firm up the shifter. 90% of the time most cant tell the difference between the two but if its something you are specifically trying to resolve, the bronze is less compliant than delrin. In other words it would register less slop in the shifter.
Thanks for the info on the max jax. I keep going back and forth on it. I have an odd shaped garage its the whole basement of the house. I have a single door in that is its on garage roughly 26ft deep with door access to larger side of the garage that is the full length of the house with a double garage door. so its 2 cars wide about 40ft deep but then it opens up but has metal supports in the centers. I wanted to put it in the back section but it would be really close to an exterior wall if done this way. So the alternative is to put it in the center of my side of the garage, and just take it down when Im not using it though I'd prefer to just leave it up.
Thanks for the info on the max jax. I keep going back and forth on it. I have an odd shaped garage its the whole basement of the house. I have a single door in that is its on garage roughly 26ft deep with door access to larger side of the garage that is the full length of the house with a double garage door. so its 2 cars wide about 40ft deep but then it opens up but has metal supports in the centers. I wanted to put it in the back section but it would be really close to an exterior wall if done this way. So the alternative is to put it in the center of my side of the garage, and just take it down when Im not using it though I'd prefer to just leave it up.
Last edited by blackbyrd; 01-27-2017 at 02:26 PM.
01-31-2017, 02:01 PM
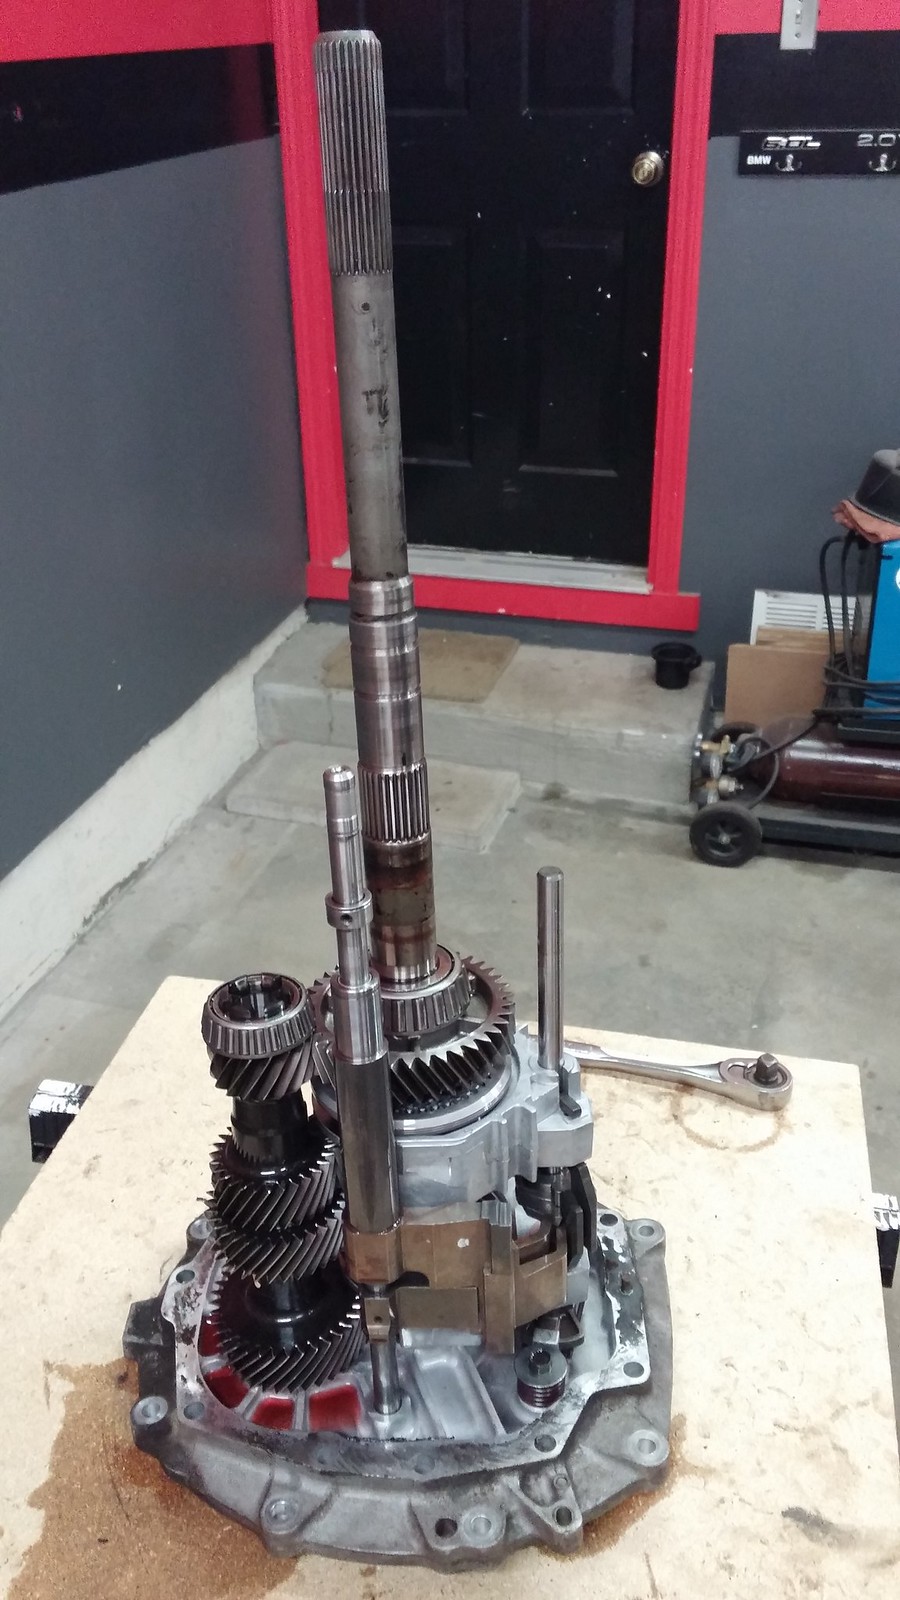
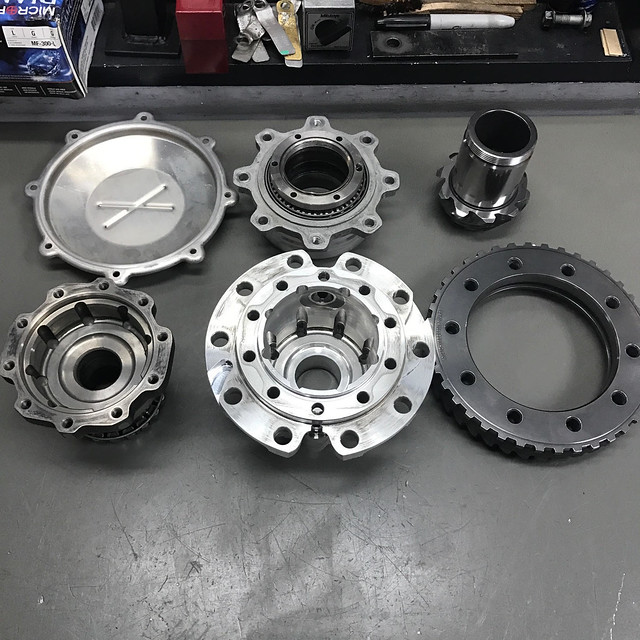
#145
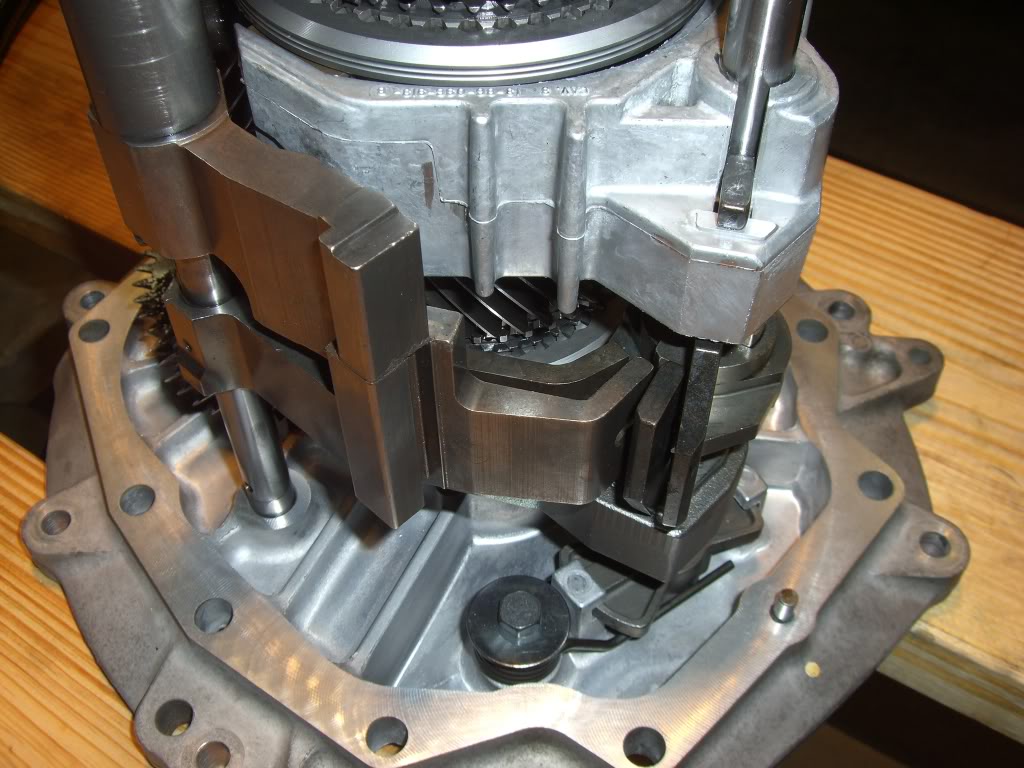
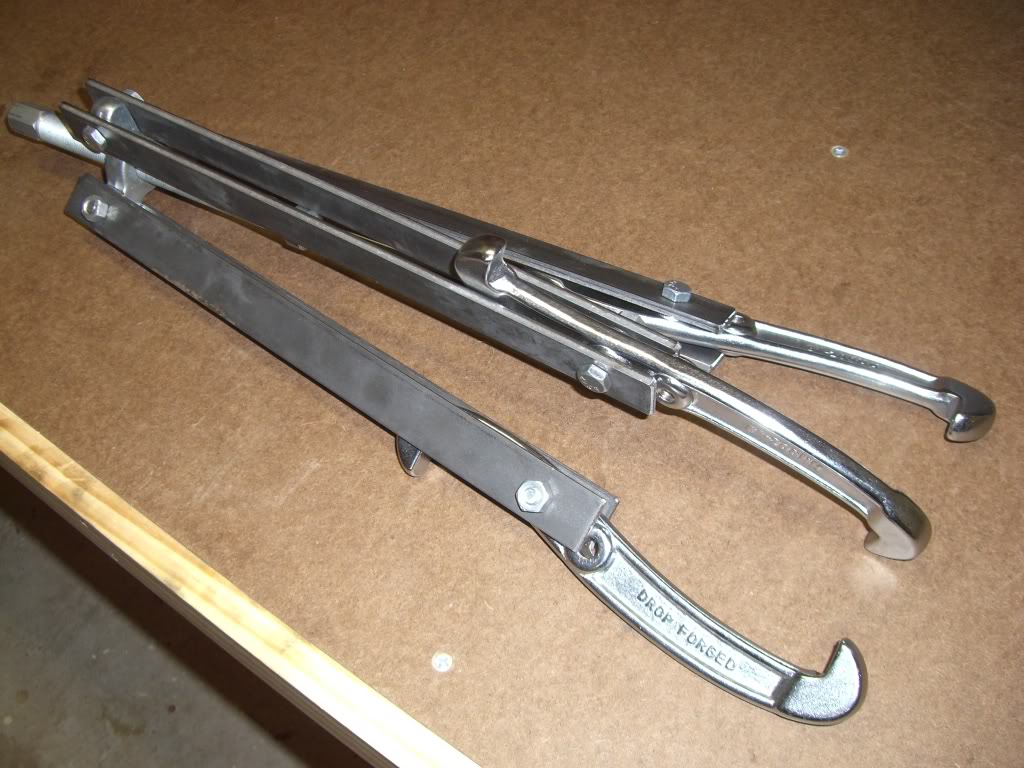
Good news - I was able to pull off the 5-6 driven gear without much difficulty after making up some 3 jaw puller extensions
Not my pic, just an example
Main case nearly empty of parts (all 5-6 and reverse stuff gone)
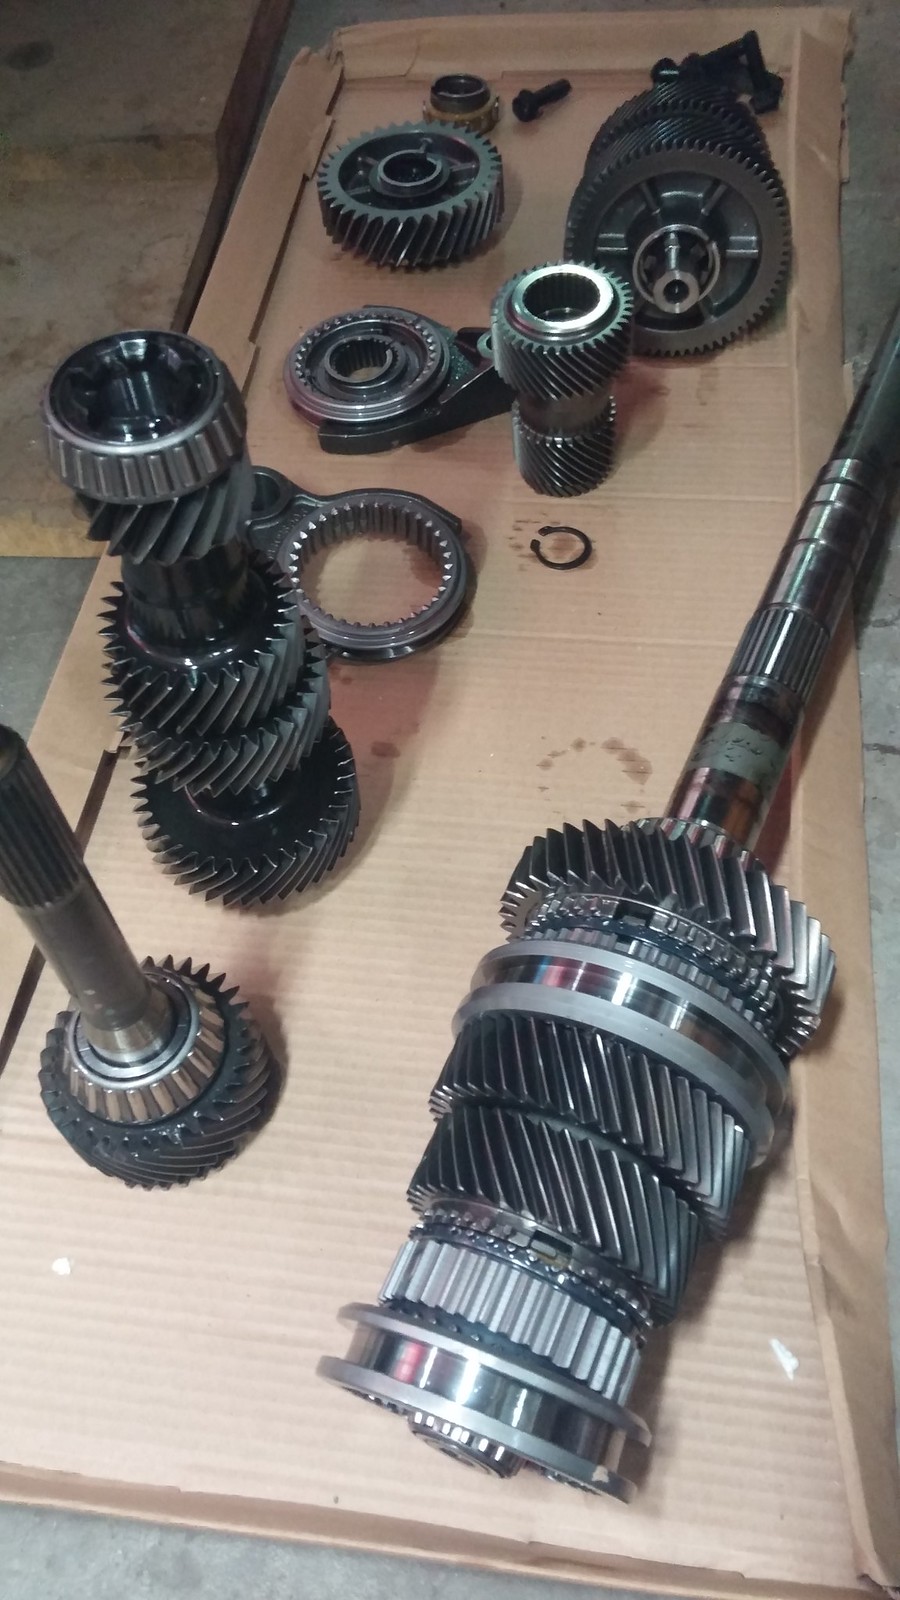
Everything laid out in order of disassembly
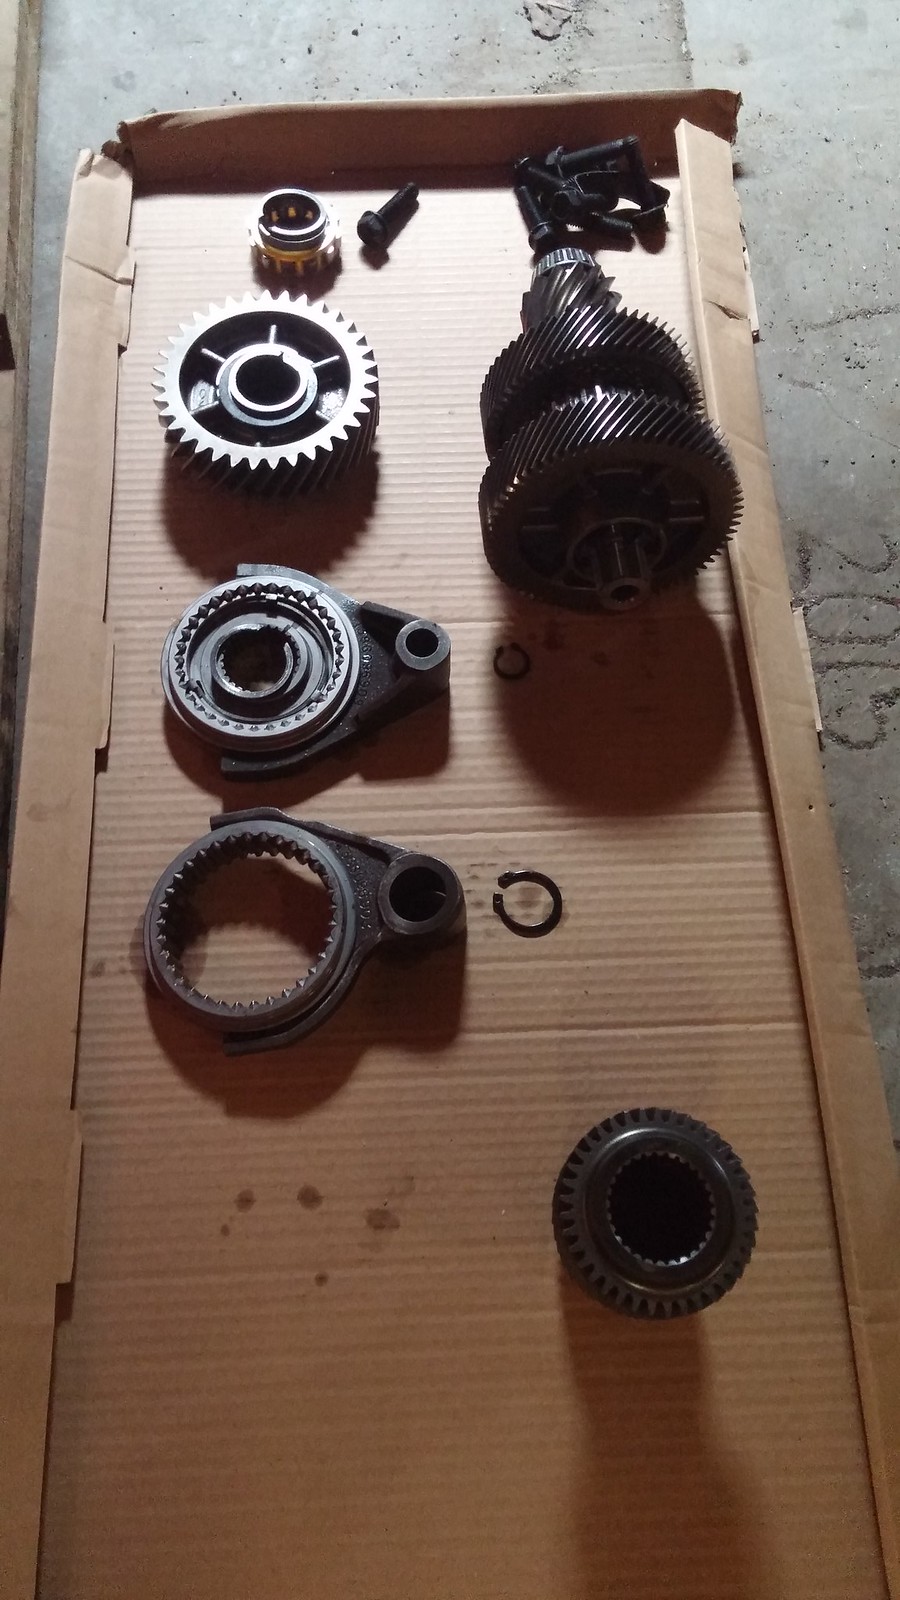
The bad news is that both the 5-6 and reverse shift fork pads showed issues of cracking. Probably to be expected after 115K miles. I will be replacing them for all gears/forks with billet bronze units.

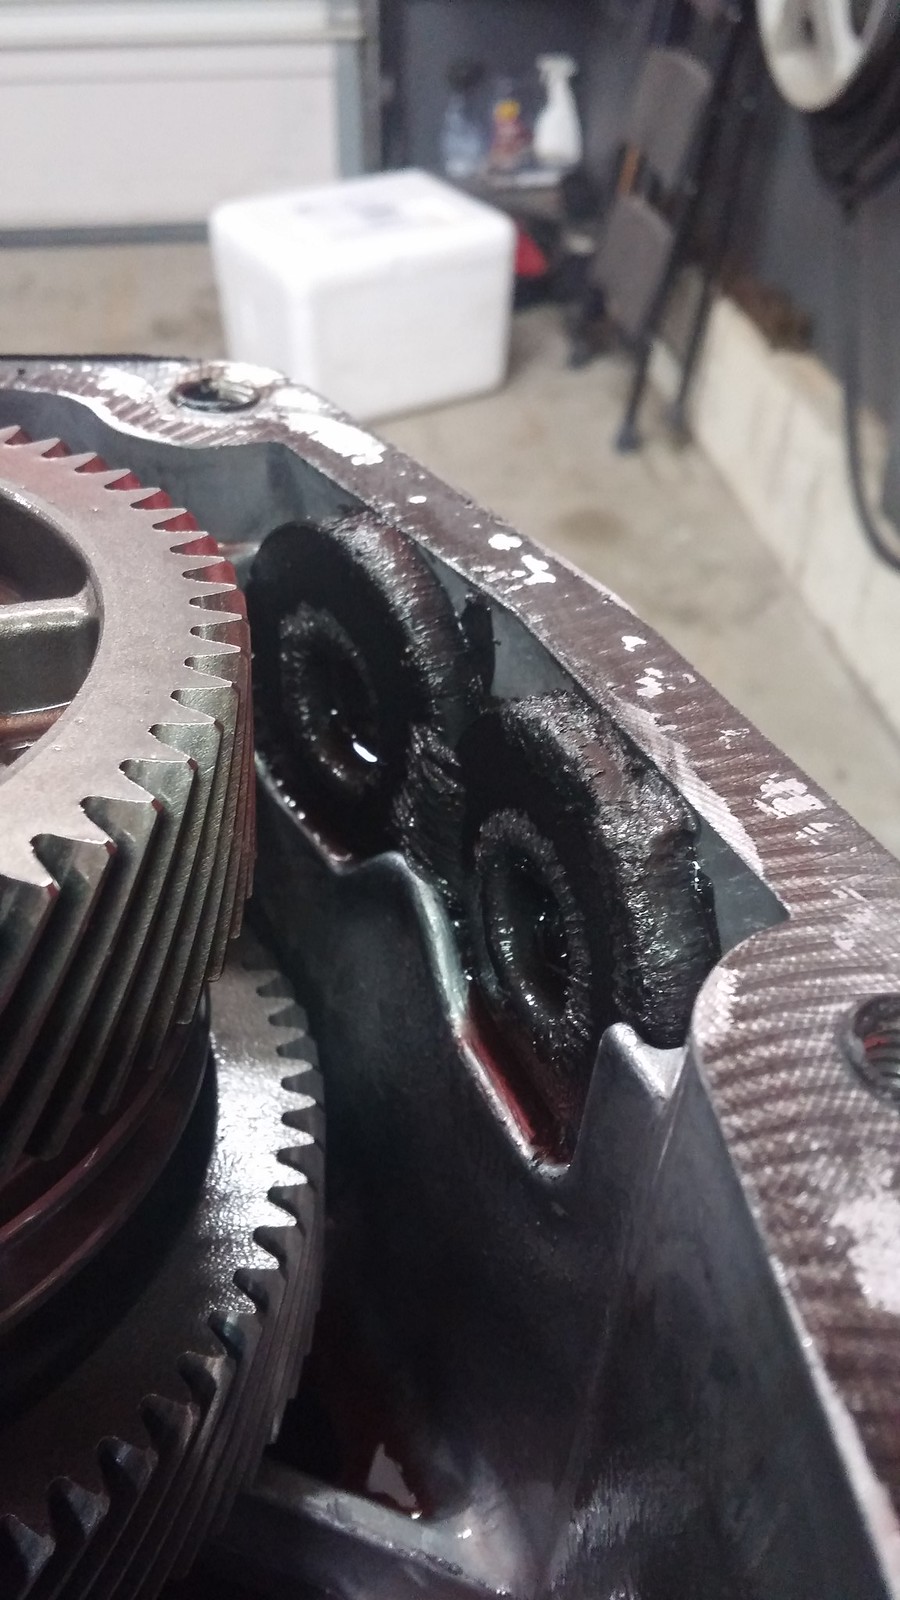
Magnets will need some cleanup but no chunks of anything on them, just that metallic paste
Hoping to have the main case off the front plate this week so I can finally get to the spring that made me take this whole thing apart in the first place.
Not my pic, just an example
Main case nearly empty of parts (all 5-6 and reverse stuff gone)
Everything laid out in order of disassembly
The bad news is that both the 5-6 and reverse shift fork pads showed issues of cracking. Probably to be expected after 115K miles. I will be replacing them for all gears/forks with billet bronze units.
Magnets will need some cleanup but no chunks of anything on them, just that metallic paste
Hoping to have the main case off the front plate this week so I can finally get to the spring that made me take this whole thing apart in the first place.
02-01-2017, 03:12 PM
#146
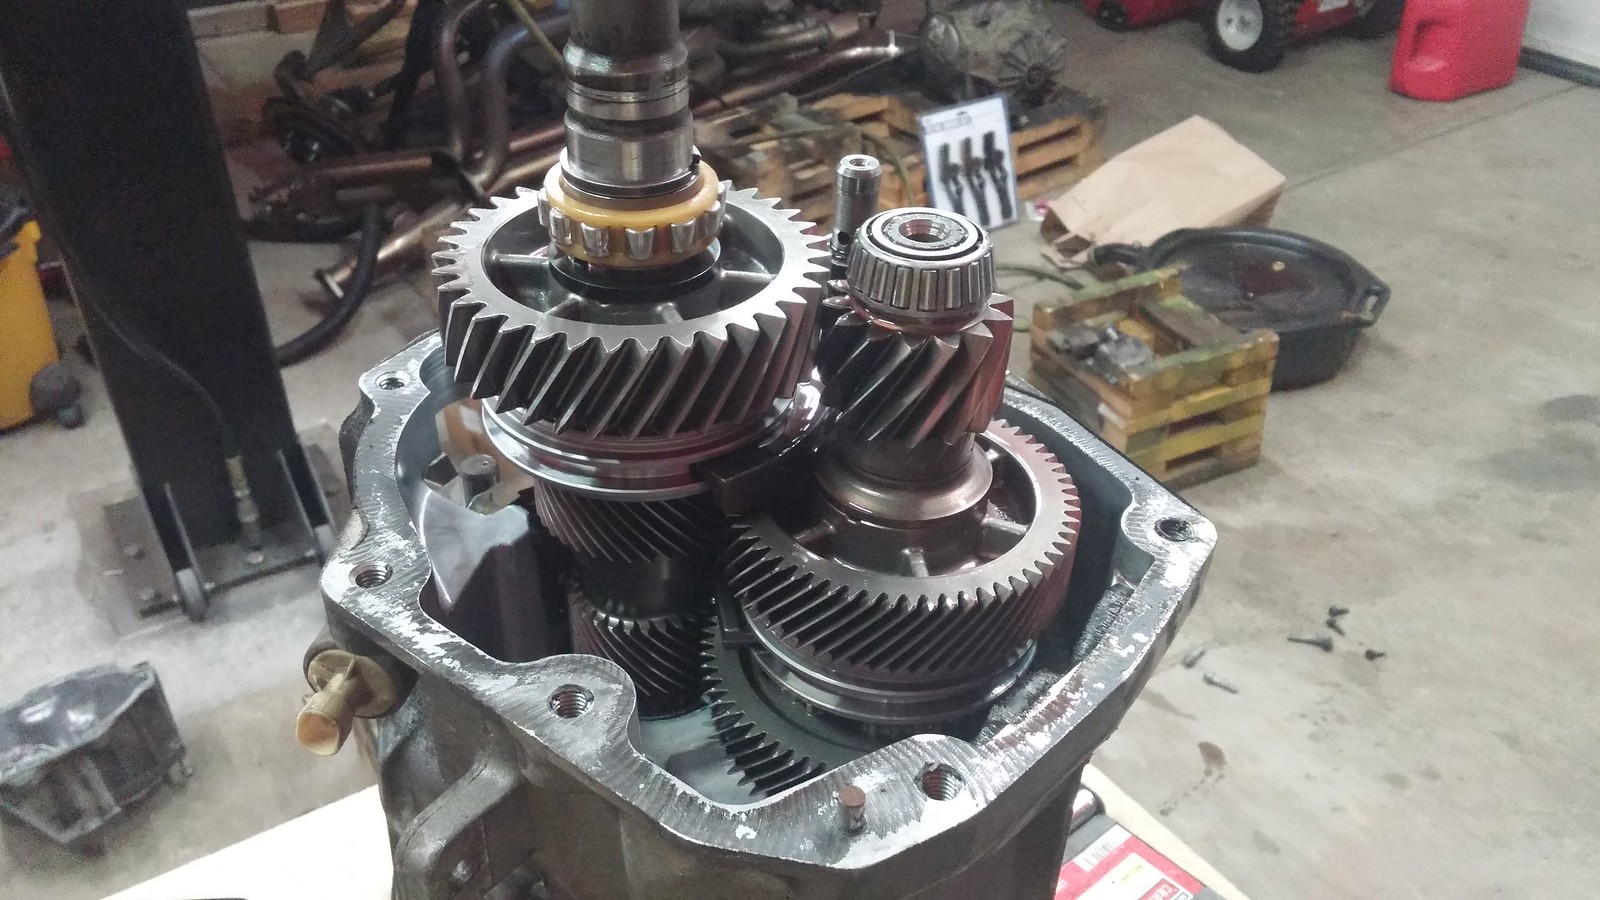
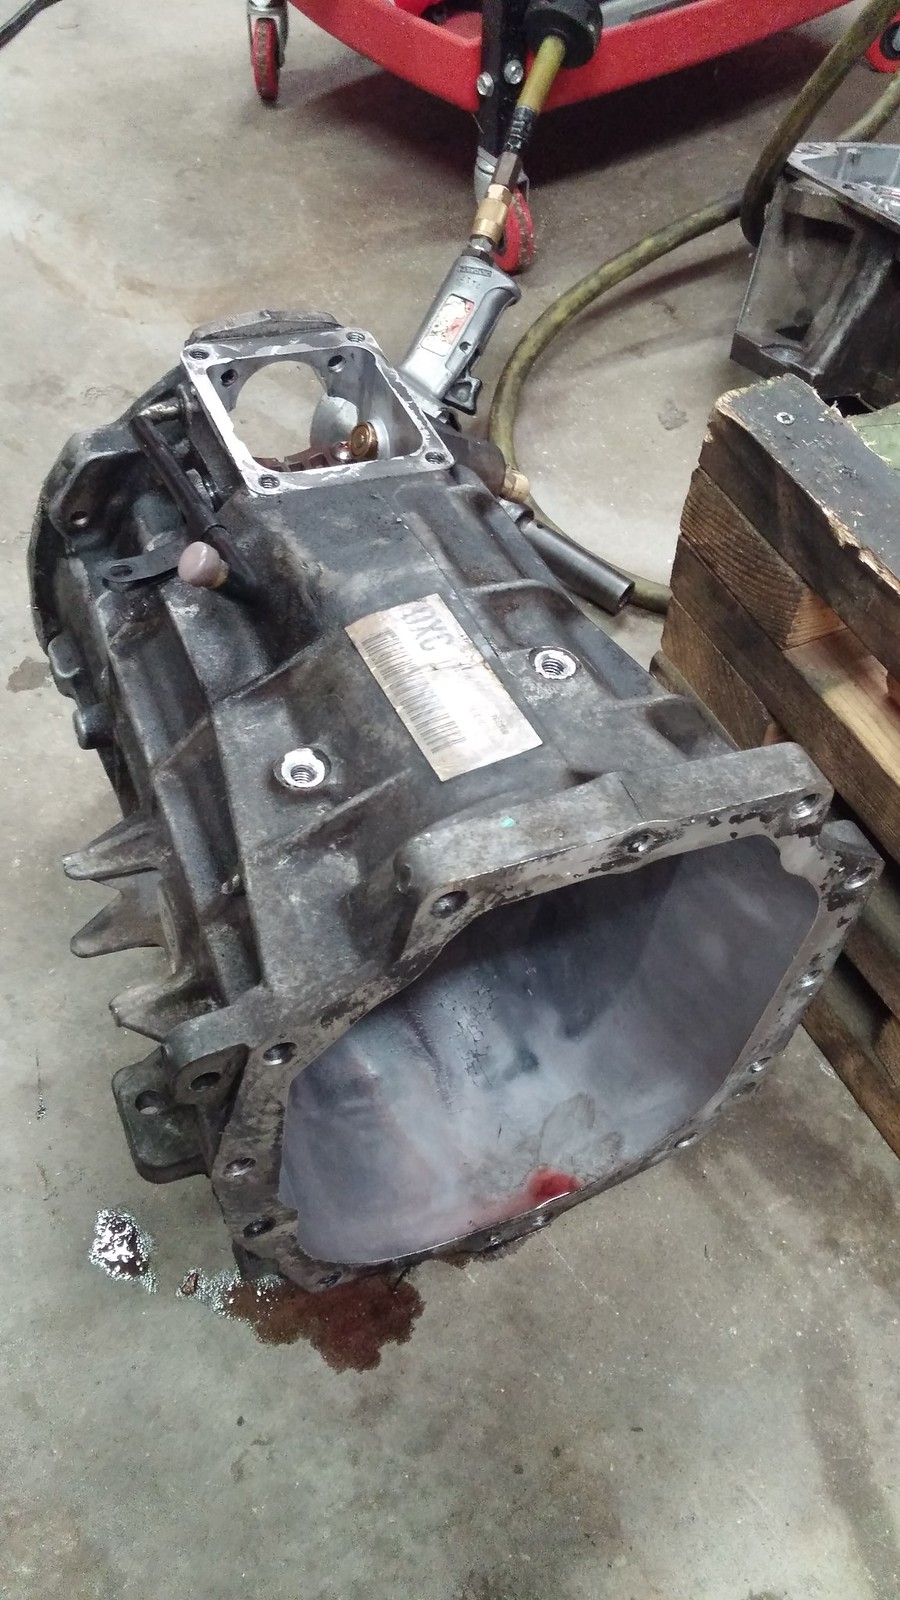
Got some work in last night.
Main case off
 0131171903 by Norbert Ogiba, on Flickr
And it's remarkably light
 0131171903b by Norbert Ogiba, on Flickr
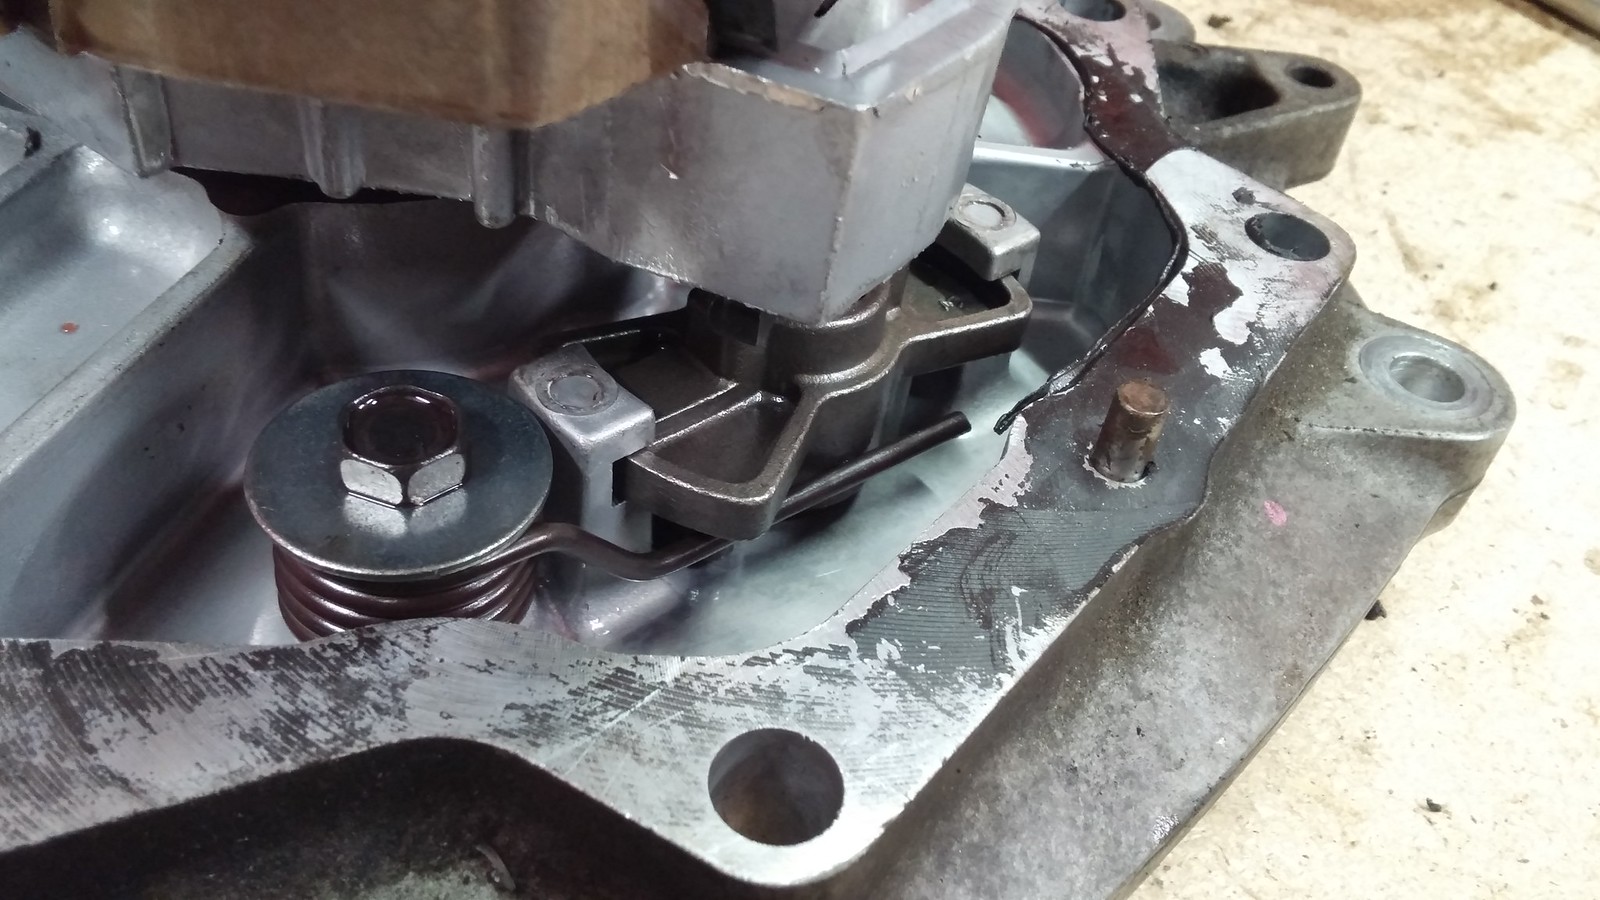
The torsion spring I've been trying to get at.
 0131171903a by Norbert Ogiba, on Flickr
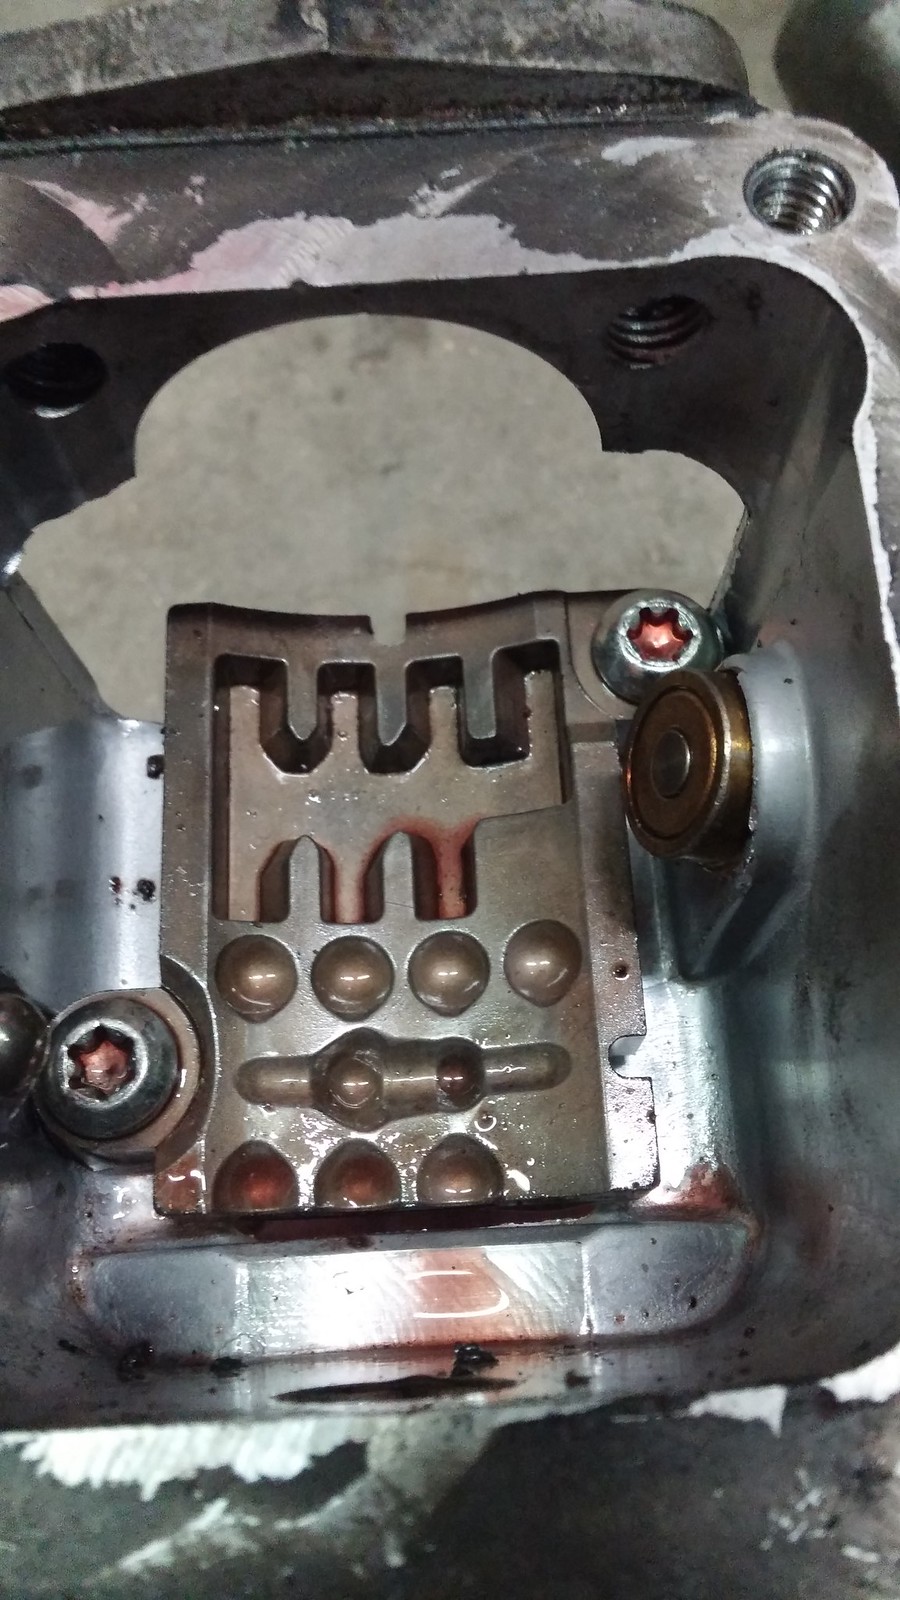
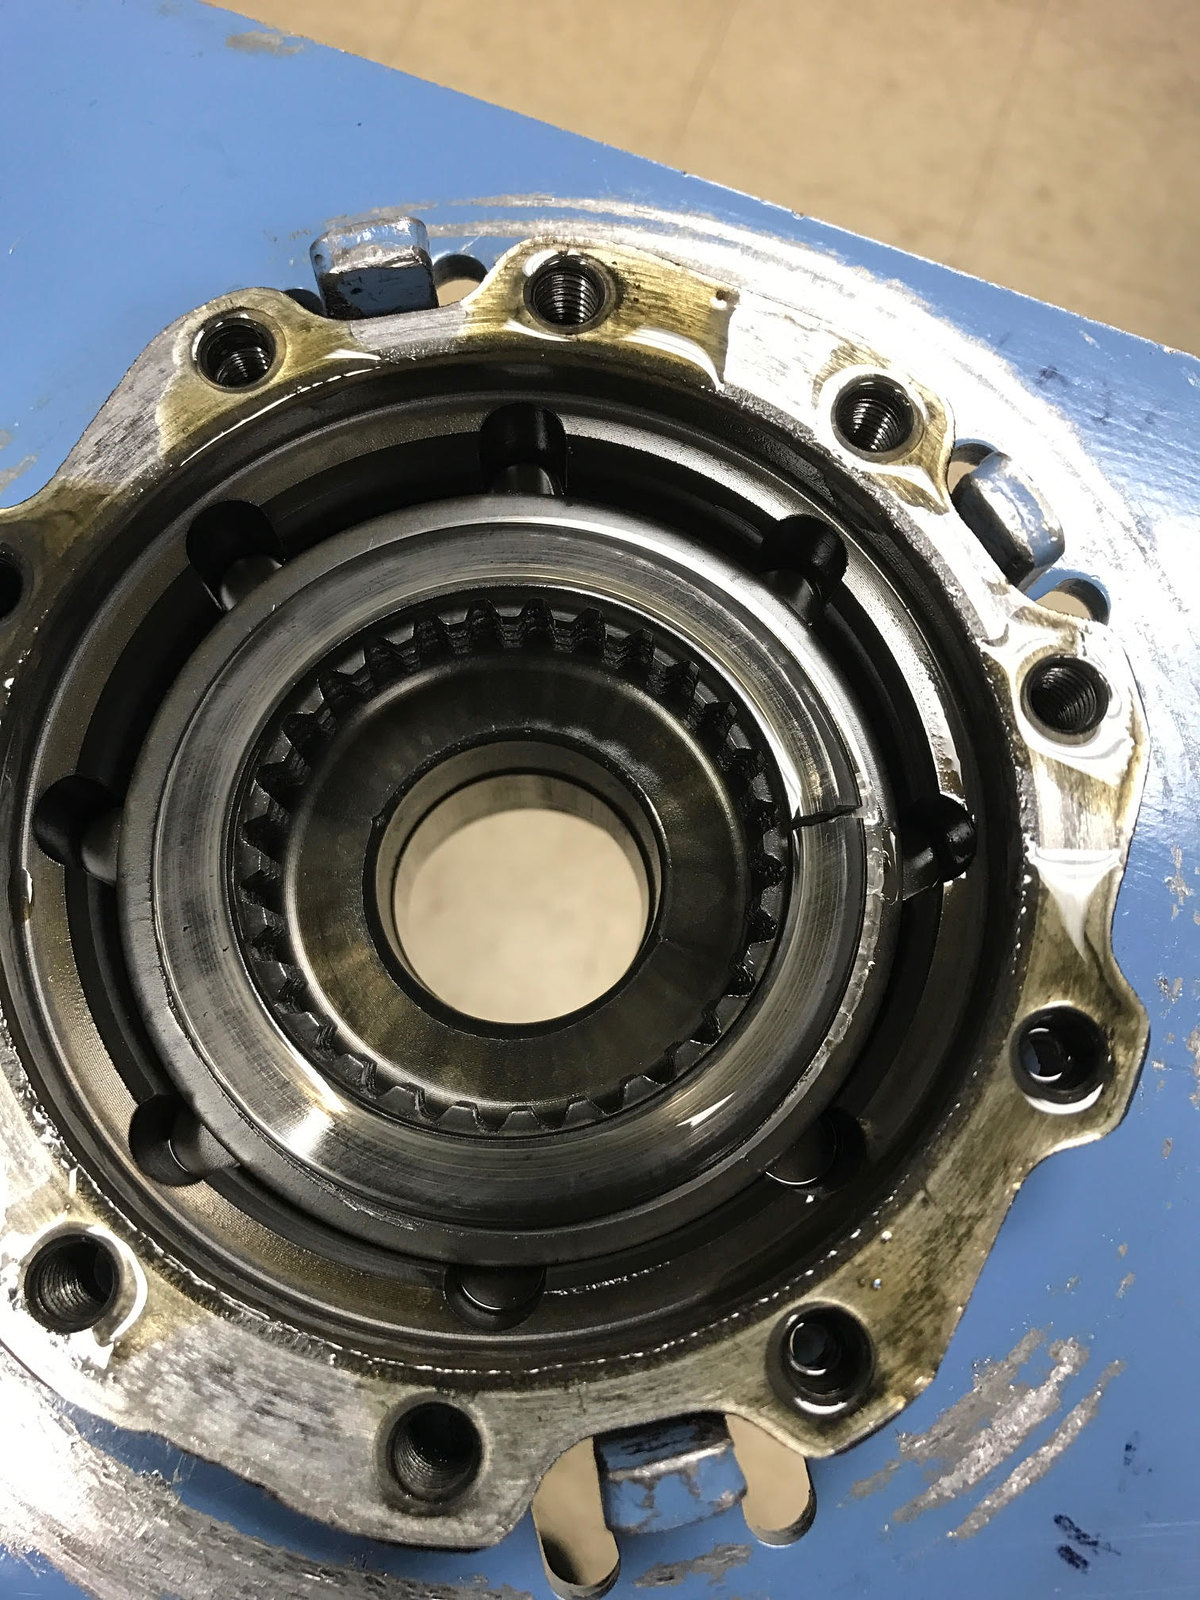
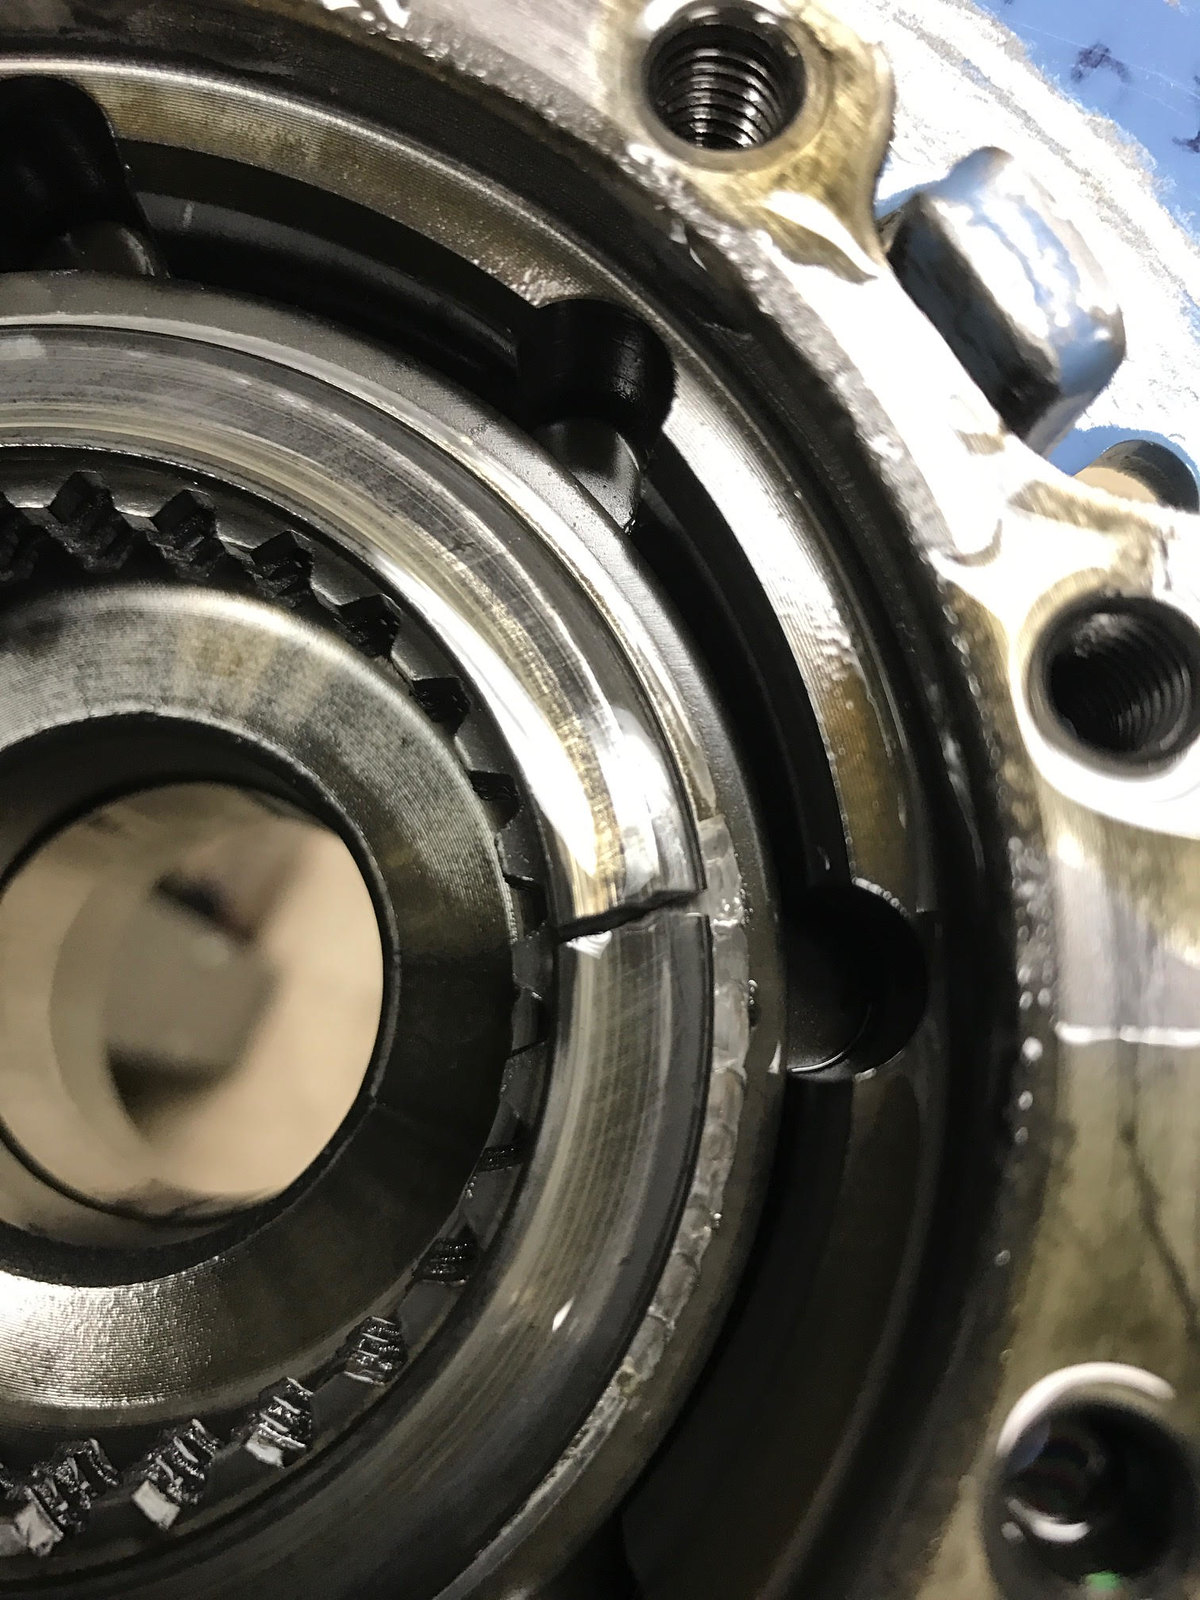
Shift guide plate was in nice shape, so was the detent ball that rides in it
 0131171905 by Norbert Ogiba, on Flickr
Mainshaft off, parts pile grows
 0131172025 by Norbert Ogiba, on Flickr
The stock 3.42 diff arrived today at RKT Performance for a rebuild and Motive 4.10 ring and pinion install. Rick sent over some pictures of the worn clutches and broken Belleville spring.
 unnamed1 by Norbert Ogiba, on Flickr
 unnamed2 by Norbert Ogiba, on Flickr
 unnamed3 by Norbert Ogiba, on Flickr
In addition to the Motive 4.10s it will be getting new C6Z06 clutches, springs, seals, and o-rings.
While I wait on T56 parts and the diff I think I'll start to work on the torque tube. That will consist of inspection of the rubber couplers (guibos), bushings, and bearings. Last of the "must do" items is an LS7 clutch and flywheel. I am starting to get the itch to drive this thing.
Main case off
0131171903 by Norbert Ogiba, on FlickrAnd it's remarkably light
0131171903b by Norbert Ogiba, on FlickrThe torsion spring I've been trying to get at.
0131171903a by Norbert Ogiba, on FlickrShift guide plate was in nice shape, so was the detent ball that rides in it
0131171905 by Norbert Ogiba, on FlickrMainshaft off, parts pile grows
0131172025 by Norbert Ogiba, on FlickrThe stock 3.42 diff arrived today at RKT Performance for a rebuild and Motive 4.10 ring and pinion install. Rick sent over some pictures of the worn clutches and broken Belleville spring.
unnamed1 by Norbert Ogiba, on Flickrunnamed2 by Norbert Ogiba, on Flickrunnamed3 by Norbert Ogiba, on FlickrIn addition to the Motive 4.10s it will be getting new C6Z06 clutches, springs, seals, and o-rings.
While I wait on T56 parts and the diff I think I'll start to work on the torque tube. That will consist of inspection of the rubber couplers (guibos), bushings, and bearings. Last of the "must do" items is an LS7 clutch and flywheel. I am starting to get the itch to drive this thing.
02-06-2017, 11:01 AM
#147
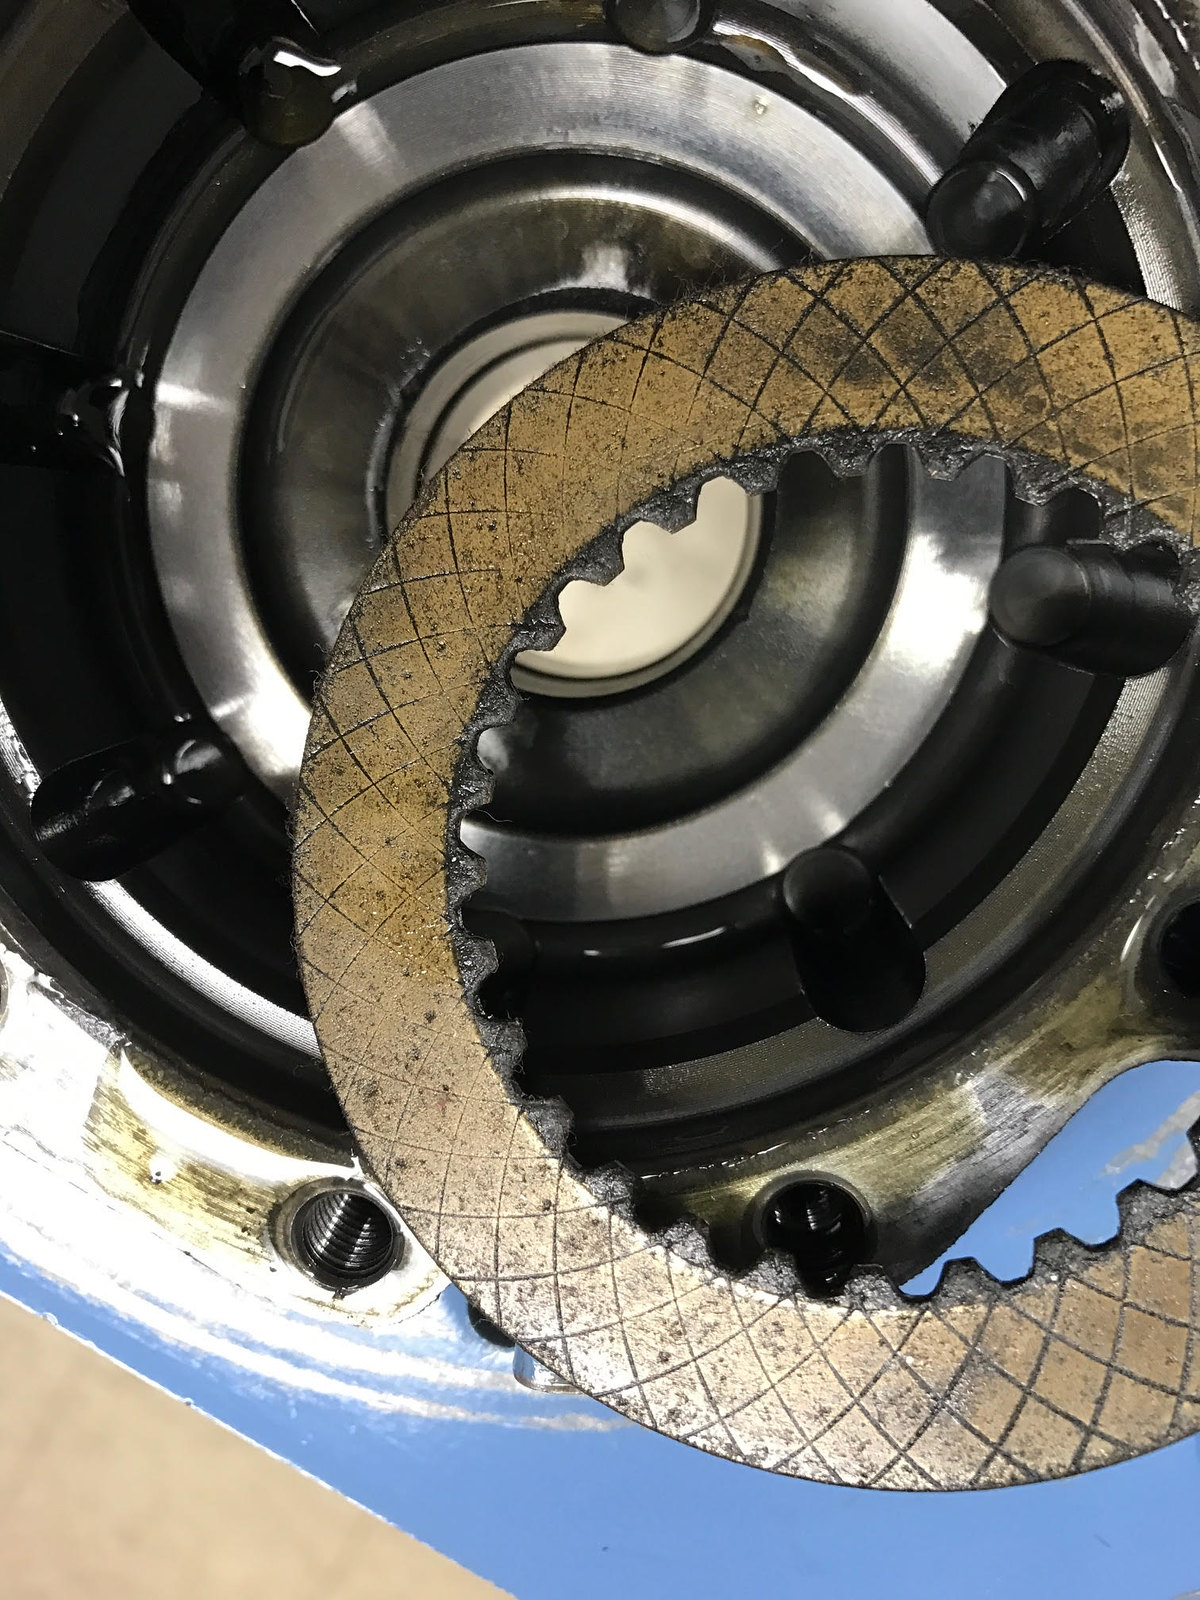
Diff is all torn apart at RKT Performance.
 unnamed7 by Norbert Ogiba, on Flickr
LS7 clutch, flywheel, pressure plate, pilot bearing on order.
Torque tube guibos on order (stock replacements). Old ones looked generally ok but had some stress cracks starting up.
Polyeurethane rear sway bar bushings on order.
unnamed7 by Norbert Ogiba, on FlickrLS7 clutch, flywheel, pressure plate, pilot bearing on order.
Torque tube guibos on order (stock replacements). Old ones looked generally ok but had some stress cracks starting up.
Polyeurethane rear sway bar bushings on order.
02-07-2017, 12:23 PM
#148
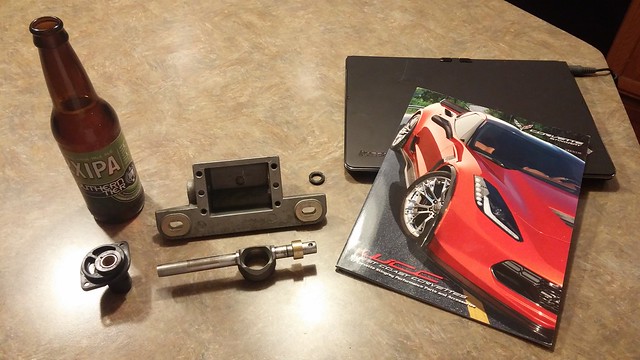
So while I wait for the diff to come back and other parts to come in, I had a friend make me some brass bushings for the C6 lower shift box.
After a long Monday at work followed by some snowmobiling, it was nice to come home to this and relax.
by https://www.flickr.com/photos/nogiba/, on Flickr
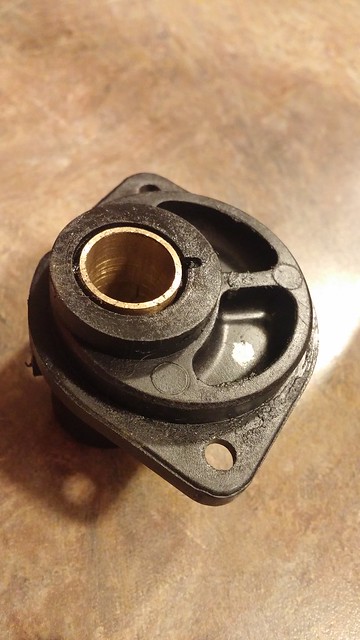
Pressed into retaining plastic
by https://www.flickr.com/photos/nogiba/, on Flickr
Great fitment on the larger (rear) bushing, only minor hand sanding needed.
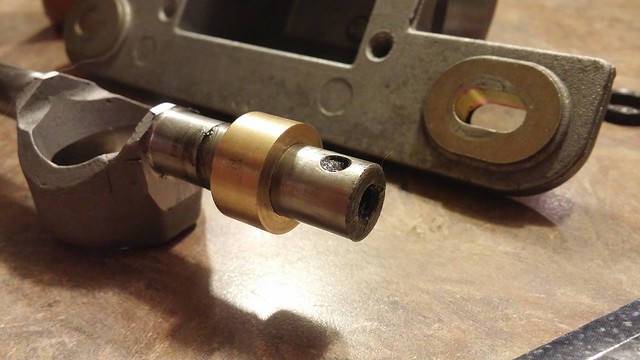
by https://www.flickr.com/photos/nogiba/, on Flickr
The rear bushing needed more work to to fit correctly as it was too tight. It was taking forever to hand sand this stuff so I chucked up the shift rod in the 5 axis CNC lathe and got to it.
https://www.youtube.com/watch?v=EqcF...ature=youtu.be
After a long Monday at work followed by some snowmobiling, it was nice to come home to this and relax.
Pressed into retaining plastic
Great fitment on the larger (rear) bushing, only minor hand sanding needed.
The rear bushing needed more work to to fit correctly as it was too tight. It was taking forever to hand sand this stuff so I chucked up the shift rod in the 5 axis CNC lathe and got to it.
https://www.youtube.com/watch?v=EqcF...ature=youtu.be
03-20-2017, 07:39 PM
#151
Time for some updates:
Bunch of small updates, I have been working on this thing a couple days a week getting little things done.
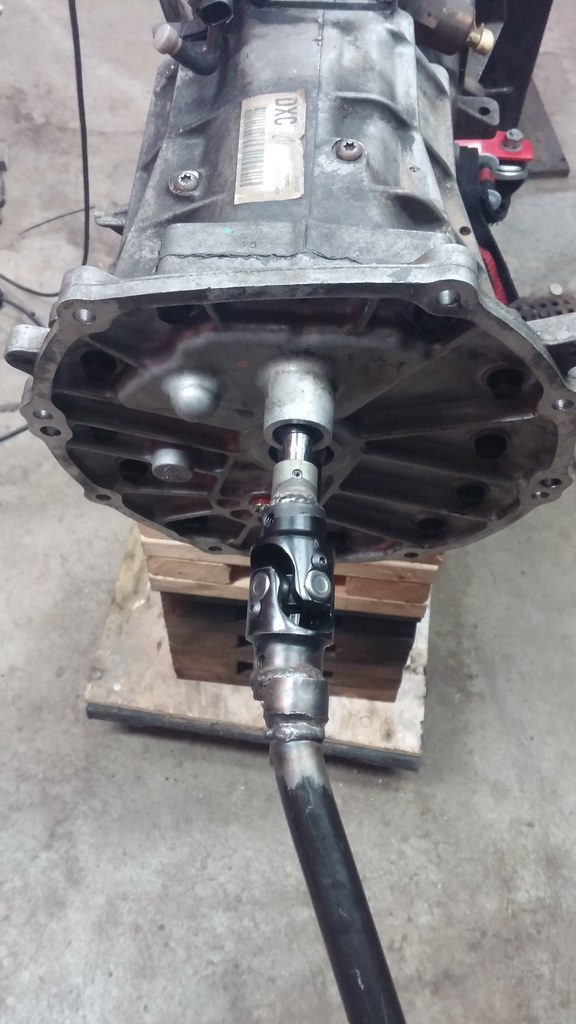
Torque tube out
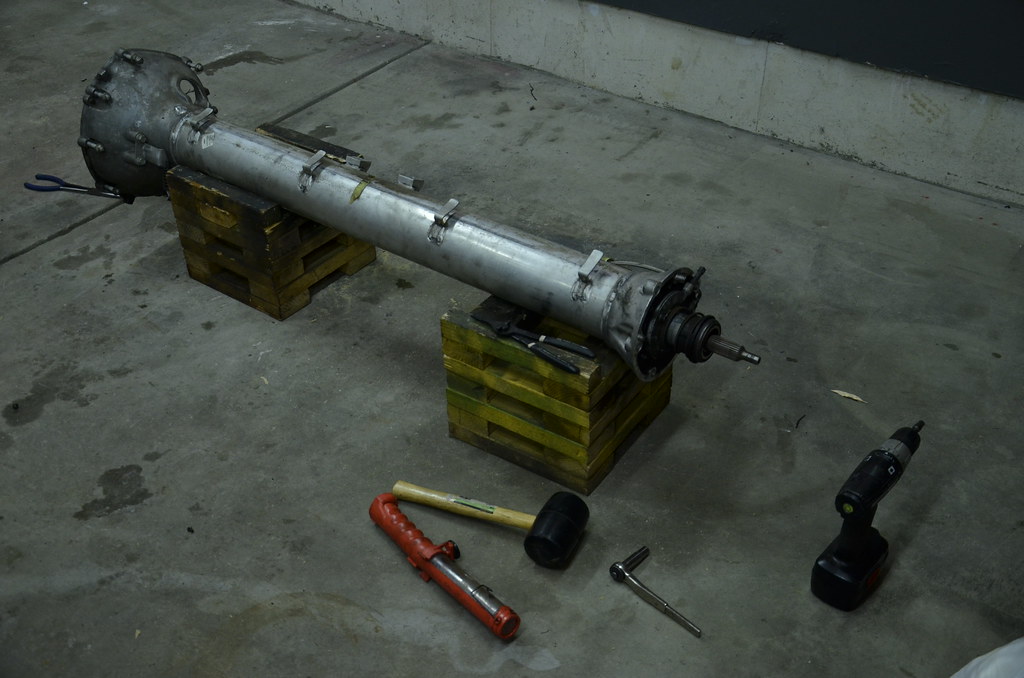 _DSC7628 by Norbert Ogiba, on Flickr
Removed the World's Largest Snap Ring using a pair of needlenose
 _DSC7631 by Norbert Ogiba, on Flickr
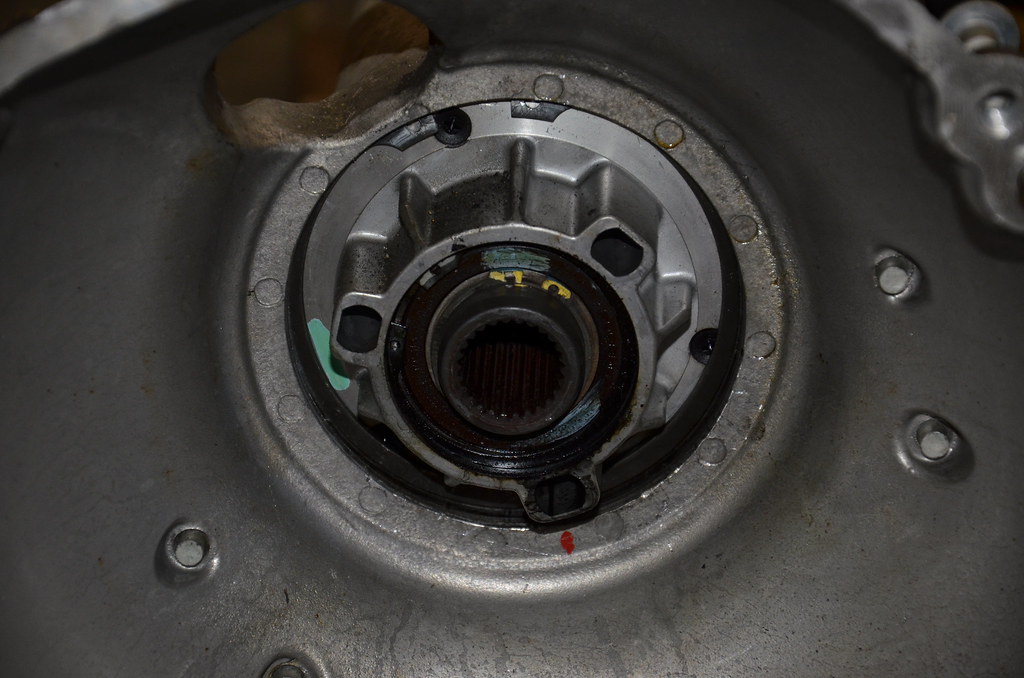
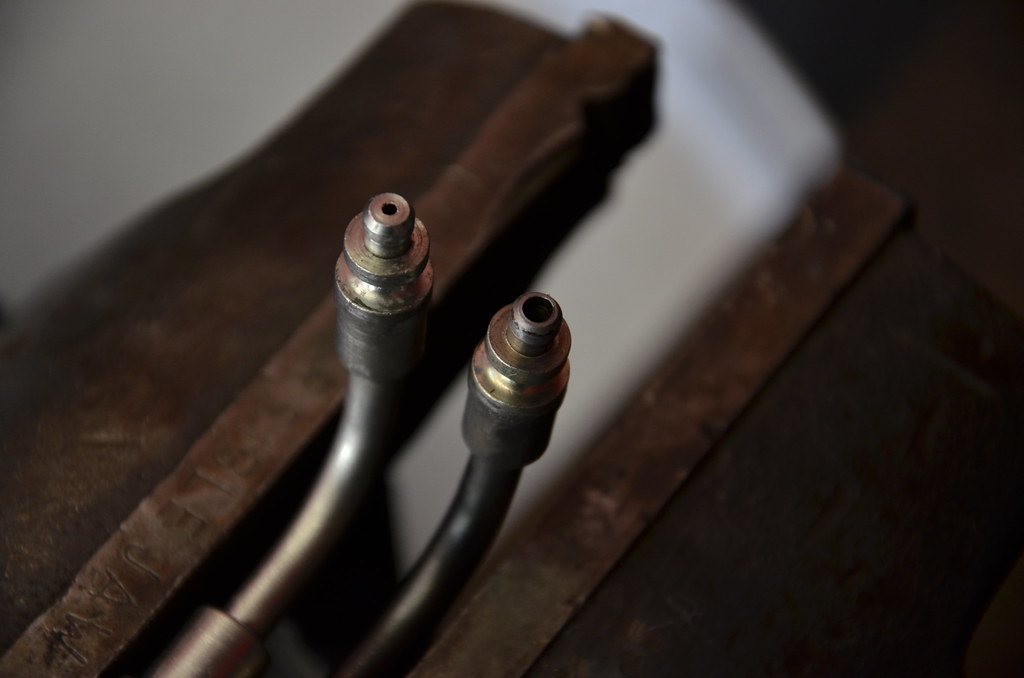
Driveshaft out, inspecting the 2 rubber couplers:
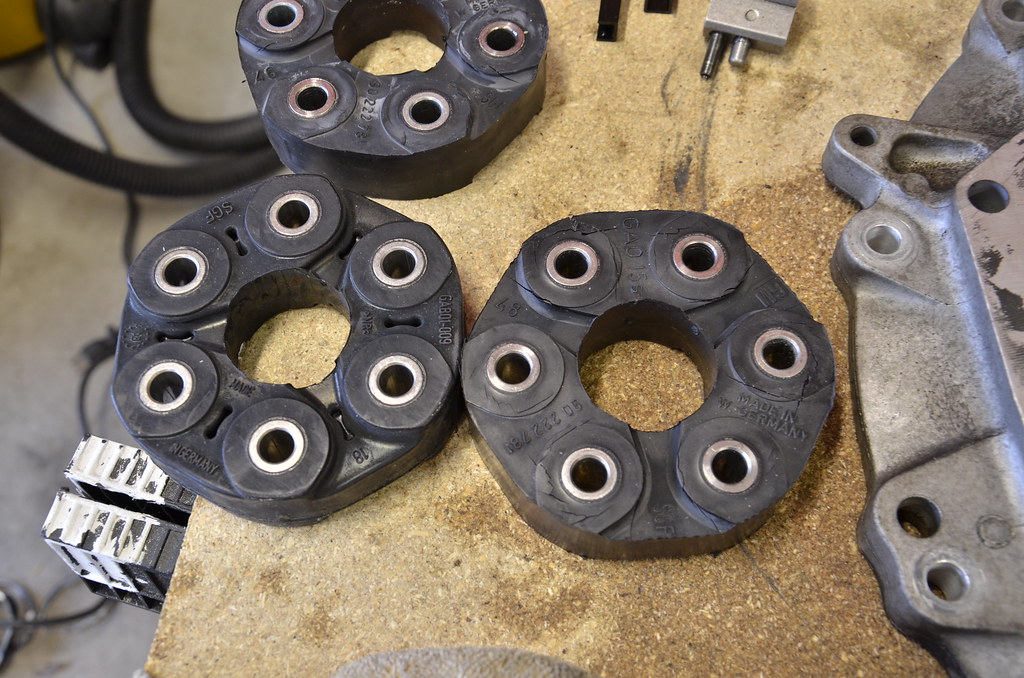 _DSC7687 by Norbert Ogiba, on Flickr
How cool is that! Made in West Germany! makes you wonder how old the tooling/mold is, and if it's still in use today...has to be from the 80s, at the latest...
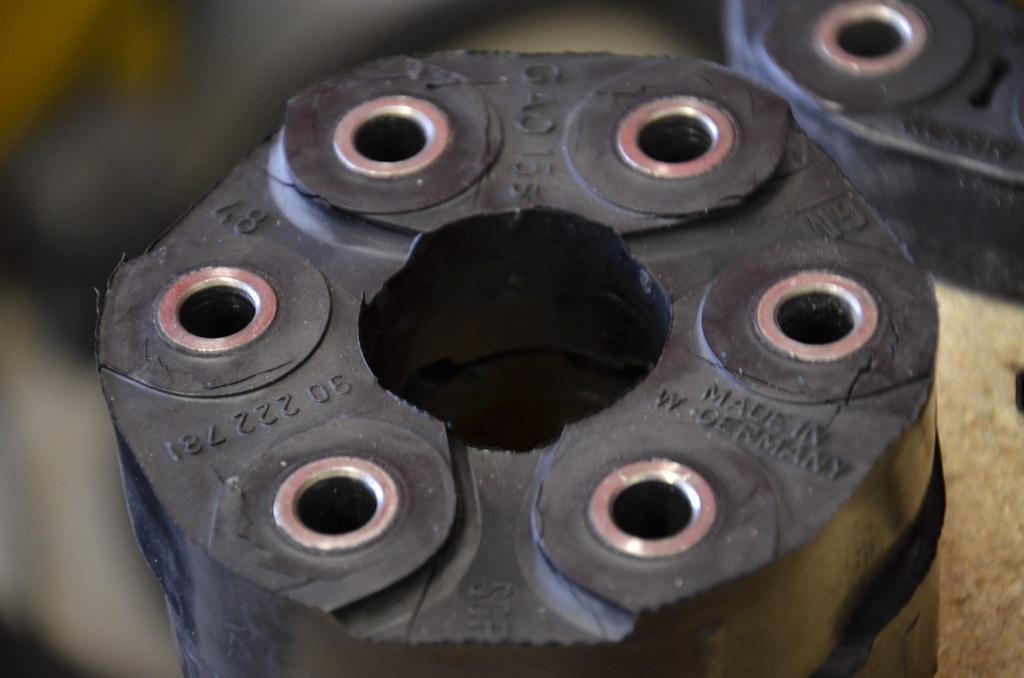 _DSC7686 by Norbert Ogiba, on Flickr
The originals had 115K on them and were in ok shape, but were starting to crack. The GM replacements were $180 EACH. Turns out there is a BMW application made by Febi/Bilstein that is a functionally identical but much less expensive.
Factory torque spec is fairly high on these, apparently I have shitty tools.
 _DSC7692 by Norbert Ogiba, on Flickr
Ah, the good old BMW days, proper giubo orientation and loctite on fasteners
 _DSC7693 by Norbert Ogiba, on Flickr
New pilot bearing
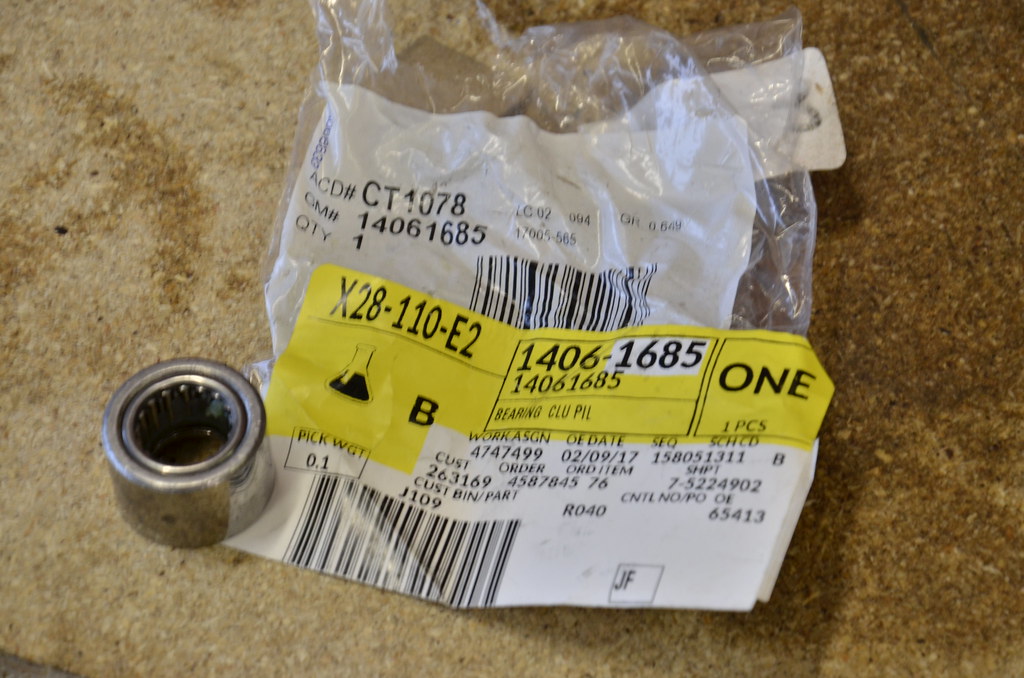 _DSC7689 by Norbert Ogiba, on Flickr
Drilled out the line on the new LS6 slave, before and after. The "after" is still a baby .125", LOL.
 _DSC7677 by Norbert Ogiba, on Flickr
Took a break from mechanical work to refinish the original period correct N73 Magnesium wheels. These were a $3000 option back in the day and were fairly rare. I picked up another pair of rears to have a square 18x9.5" setup all the way around. I'll probably end up using these as track wheels only.
 _DSC7680 by Norbert Ogiba, on Flickr
Torque tube out
_DSC7628 by Norbert Ogiba, on FlickrRemoved the World's Largest Snap Ring using a pair of needlenose
_DSC7631 by Norbert Ogiba, on FlickrDriveshaft out, inspecting the 2 rubber couplers:
_DSC7687 by Norbert Ogiba, on FlickrHow cool is that! Made in West Germany! makes you wonder how old the tooling/mold is, and if it's still in use today...has to be from the 80s, at the latest...
_DSC7686 by Norbert Ogiba, on FlickrThe originals had 115K on them and were in ok shape, but were starting to crack. The GM replacements were $180 EACH. Turns out there is a BMW application made by Febi/Bilstein that is a functionally identical but much less expensive.
Factory torque spec is fairly high on these, apparently I have shitty tools.
_DSC7692 by Norbert Ogiba, on FlickrAh, the good old BMW days, proper giubo orientation and loctite on fasteners
_DSC7693 by Norbert Ogiba, on FlickrNew pilot bearing
_DSC7689 by Norbert Ogiba, on FlickrDrilled out the line on the new LS6 slave, before and after. The "after" is still a baby .125", LOL.
_DSC7677 by Norbert Ogiba, on FlickrTook a break from mechanical work to refinish the original period correct N73 Magnesium wheels. These were a $3000 option back in the day and were fairly rare. I picked up another pair of rears to have a square 18x9.5" setup all the way around. I'll probably end up using these as track wheels only.
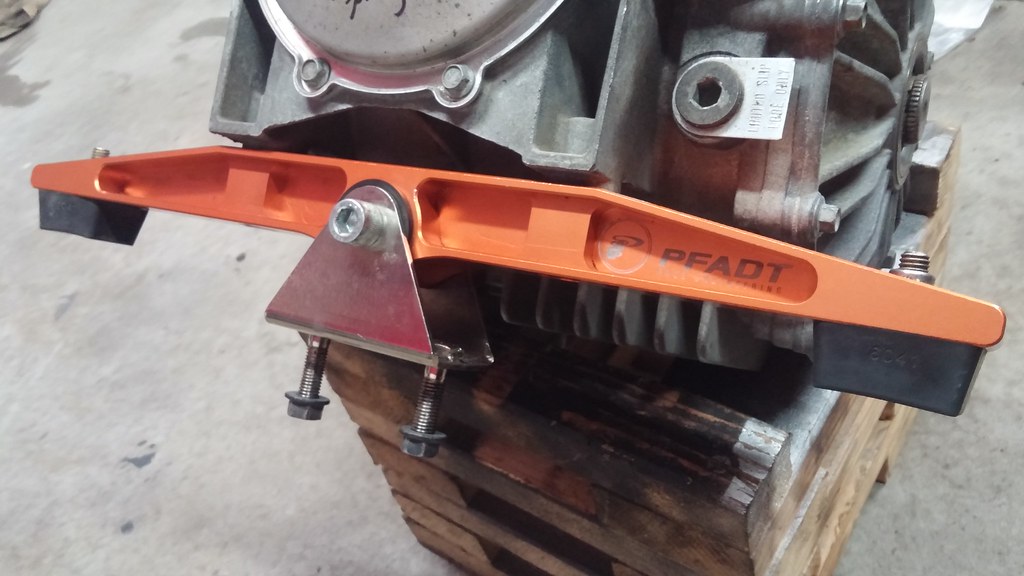
_DSC7680 by Norbert Ogiba, on FlickrStock photo of Pfadt Trans mount vs stocker to hopefully knock down some of the wheel hop
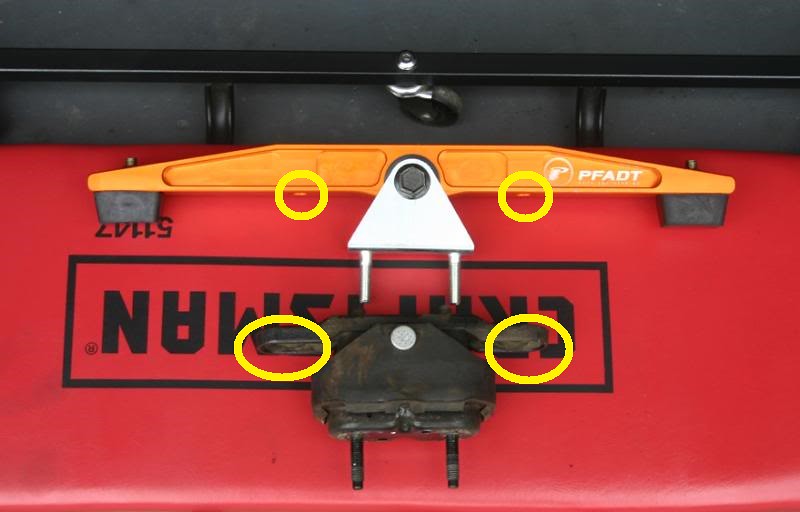 2 mount by Norbert Ogiba, on Flickr
LS7 Flywheel all degreased and ready to slam in
2 mount by Norbert Ogiba, on Flickr
While reassembling the T56 I had some trouble lining up the shift rails on the guide pins, as the rails want to walk down when the trans is sitting vertically. Made some Sharpie marks on the rail blocks to be able to peek through the guide pin holes and get an idea of where they were. Worked like a charm.
 _DSC7696 by Norbert Ogiba, on Flickr
 _DSC7697 by Norbert Ogiba, on Flickr
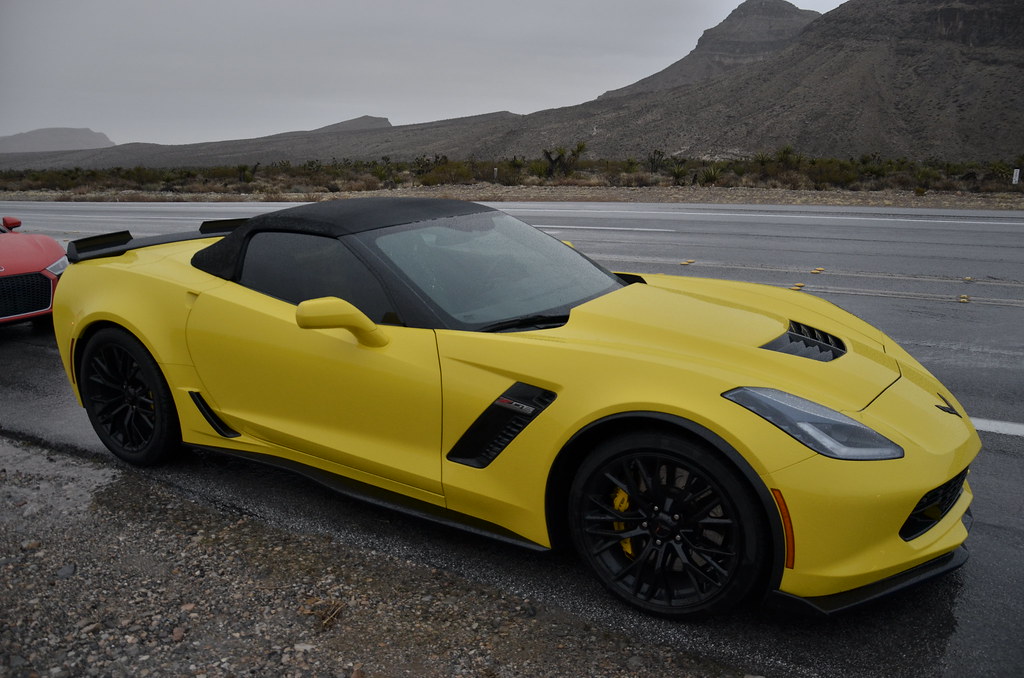
Took a break from the monotony to go to Vegas and kick the **** out of some cars. Somehow it rained that day...in Vegas...in the desert...
 _DSC7647 by Norbert Ogiba, on Flickr
 _DSC7654 by Norbert Ogiba, on Flickr
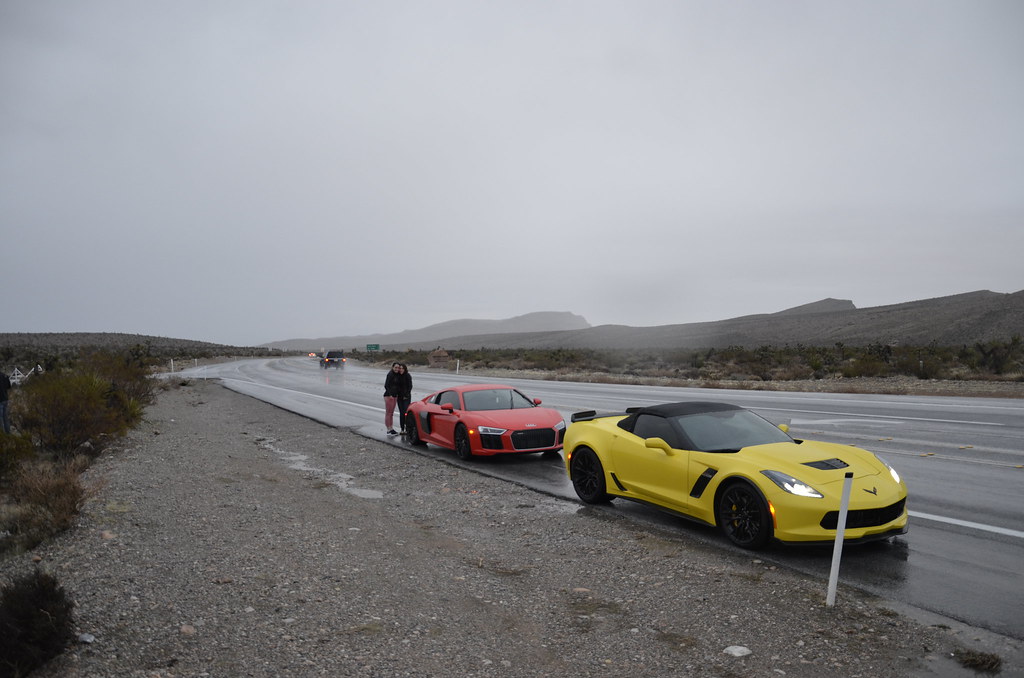 _DSC7644 by Norbert Ogiba, on Flickr
 _DSC7667 by Norbert Ogiba, on Flickr
 _DSC7661 by Norbert Ogiba, on Flickr
2 mount by Norbert Ogiba, on FlickrLS7 Flywheel all degreased and ready to slam in
2 mount by Norbert Ogiba, on FlickrWhile reassembling the T56 I had some trouble lining up the shift rails on the guide pins, as the rails want to walk down when the trans is sitting vertically. Made some Sharpie marks on the rail blocks to be able to peek through the guide pin holes and get an idea of where they were. Worked like a charm.
_DSC7696 by Norbert Ogiba, on Flickr_DSC7697 by Norbert Ogiba, on FlickrTook a break from the monotony to go to Vegas and kick the **** out of some cars. Somehow it rained that day...in Vegas...in the desert...
_DSC7647 by Norbert Ogiba, on Flickr_DSC7654 by Norbert Ogiba, on Flickr_DSC7644 by Norbert Ogiba, on Flickr_DSC7667 by Norbert Ogiba, on Flickr_DSC7661 by Norbert Ogiba, on Flickr
04-21-2017, 12:28 PM
#155
Thanks for asking. I didn't. I repainted 2 of them with regular black enamel, and they turned out like crap - need to strip them/sand them and try again. The other 2 (shown in pictures above) are just waiting on tires. I am on the hunt for some 275s in a square setup but don't want to plunk down on a new set.
05-15-2017, 07:52 AM
#156
Been a while since any updates, but I've been busy on this thing.
With the majority of the small stuff assembled, it was time to get the drivetrain back in the car. The Pfadt trans mount is easily the most "bling" piece on the car, shame it's hidden underneath the rear end. I installed it with the hopes that it would cure some of my wheel hop from a dig.
by https://www.flickr.com/photos/nogiba/, on Flickr
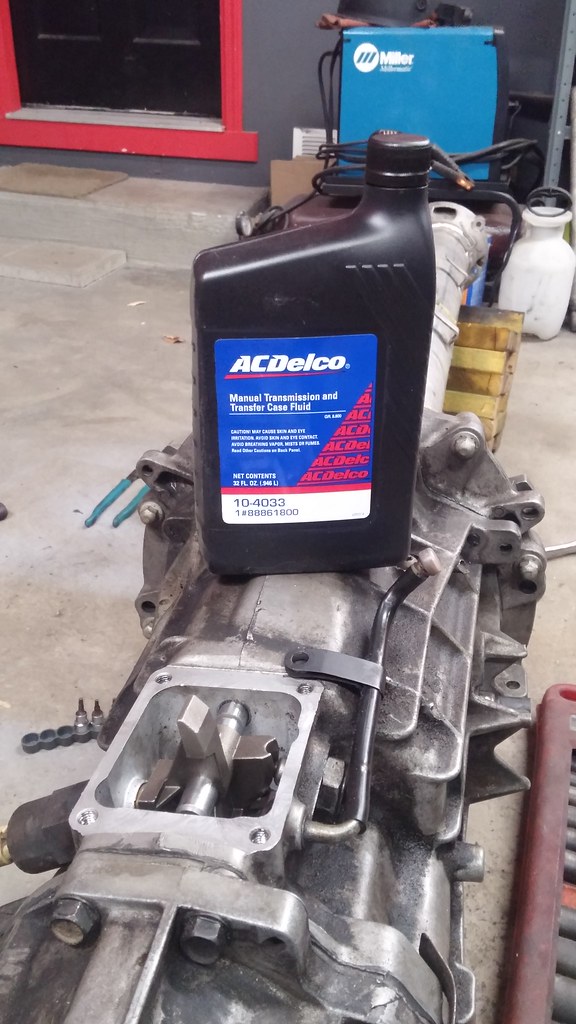
Filled the trans up - this stuff isn't cheap but gets good reviews.
by https://www.flickr.com/photos/nogiba/, on Flickr
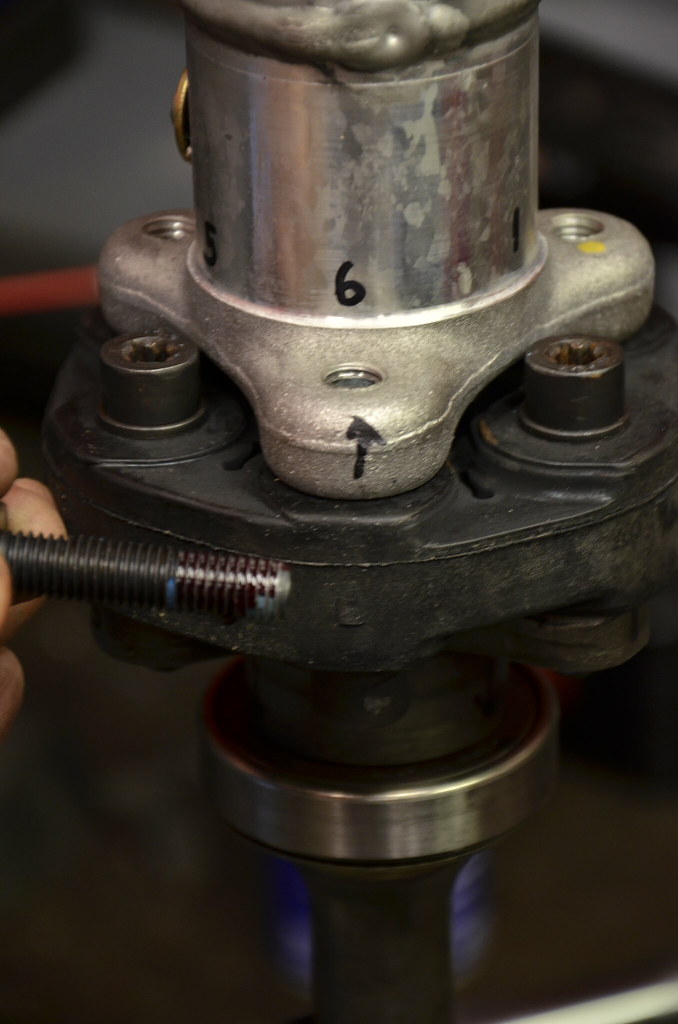
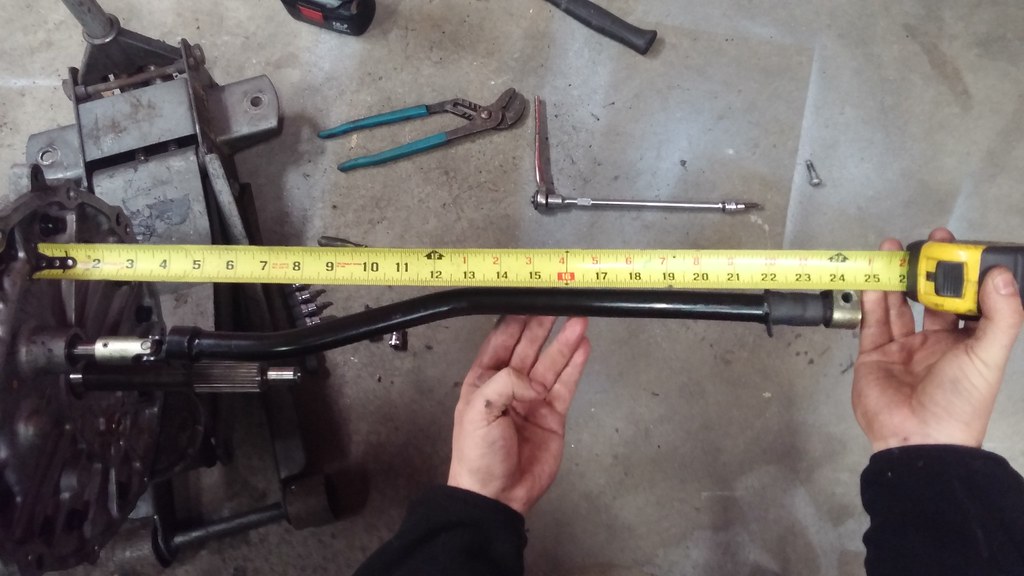
So the whole reason for all this drivetrain work was to improve shift feel and eliminate some of the "slop" in the gear lever, most of which was in the factory shift linkage that runs from the lever back to the trans. The small factory u-joint consists of a small pin held in a brass bushing, which had worn out.
Measuring for the new setup:
by https://www.flickr.com/photos/nogiba/, on Flickr
A factory replacement shift linkage u-joint doesn't exist, and I think the linkage arm is discontinued. The other option was a custom machined replacement brass bushing, but that would have worn the same way as the old unit. So I found a universal steering shaft u-joint on Amazon, chopped the ends off it, and welded it to the linkage. ZERO slop achieved!
by https://www.flickr.com/photos/nogiba/, on Flickr
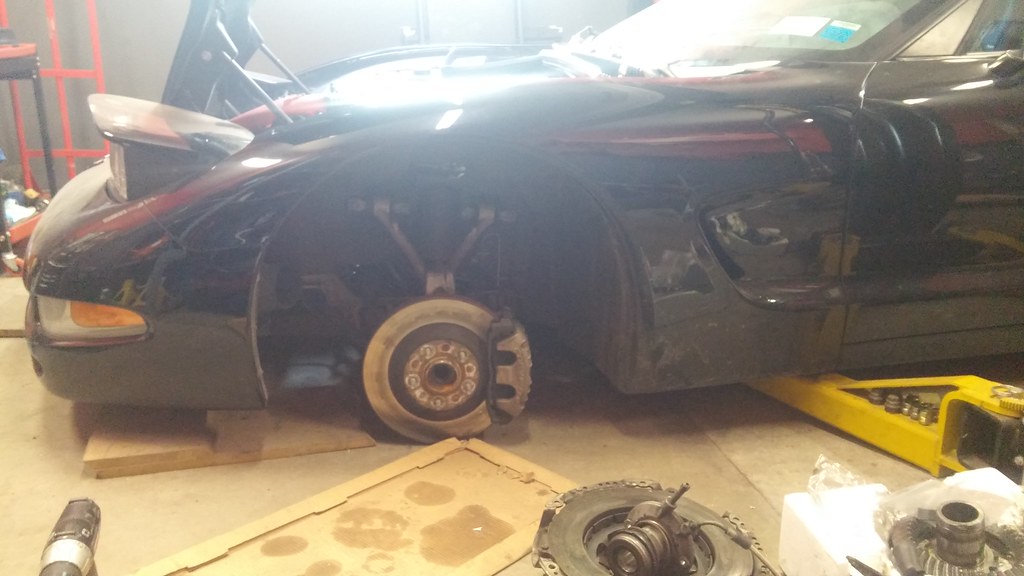
While the rear subframe was out I also tossed in new sway bar bushings. In retrospect, I should have installed all new poly bushings in the control arms while the cradle was out, but I was confident that the Pfadt trans brace would cure the wheel hop. (This did not end up being the case).
by https://www.flickr.com/photos/nogiba/, on Flickr
How to get the ultimate lows - remove wheels and put the lift all the way down.
by https://www.flickr.com/photos/nogiba/, on Flickr
The rest of the work was boring reassembly, I tend to get a little OCD with torquing everything to factory spec, but the first start/drive went flawlessly (despite being 20F outside).
by https://www.flickr.com/photos/nogiba/, on Flickr
by https://www.flickr.com/photos/nogiba/, on Flickr
by https://www.flickr.com/photos/nogiba/, on Flickr
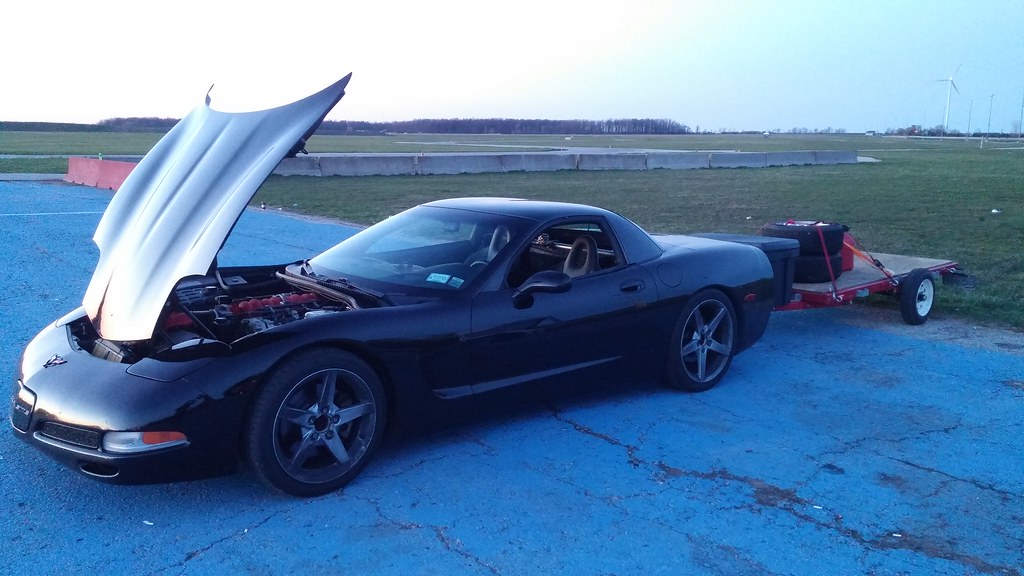
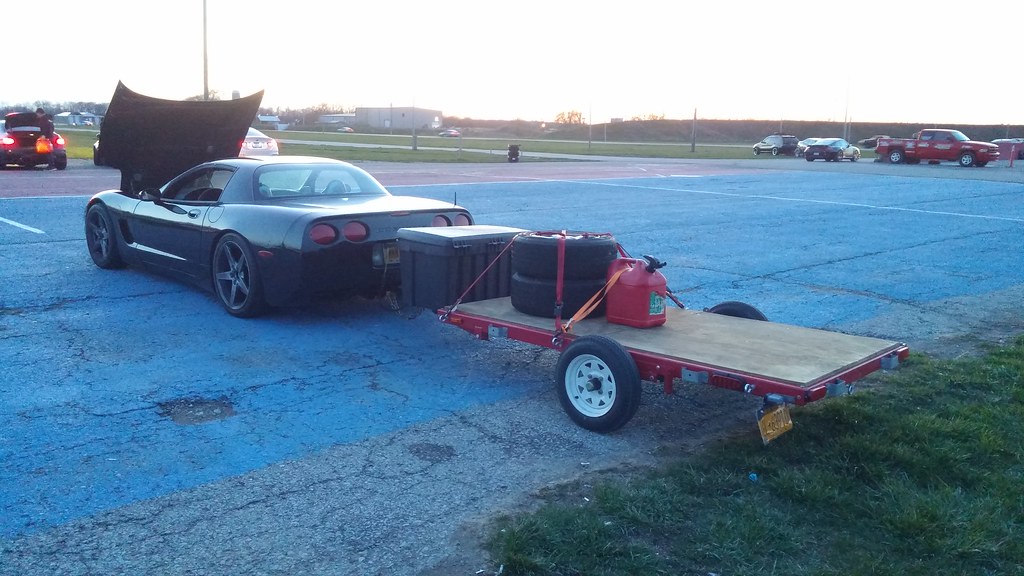
So after a long and agonizing 500 mile break in for the clutch, trans, and new rear gears (of which all was spend <50mph), it was time to put it to the test.
by https://www.flickr.com/photos/nogiba/, on Flickr
by https://www.flickr.com/photos/nogiba/, on Flickr
Hauls stuff like a beast.
I had a titanium Z06 exhaust on the car but sold it to a local with an automatic C5 ragtop - I installed it for him, and he was kind enough to leave me his old stockers (stainless steel). So now I had that stainless set, in addition to the stainless stockers on the car that I bought last year. More on that later...
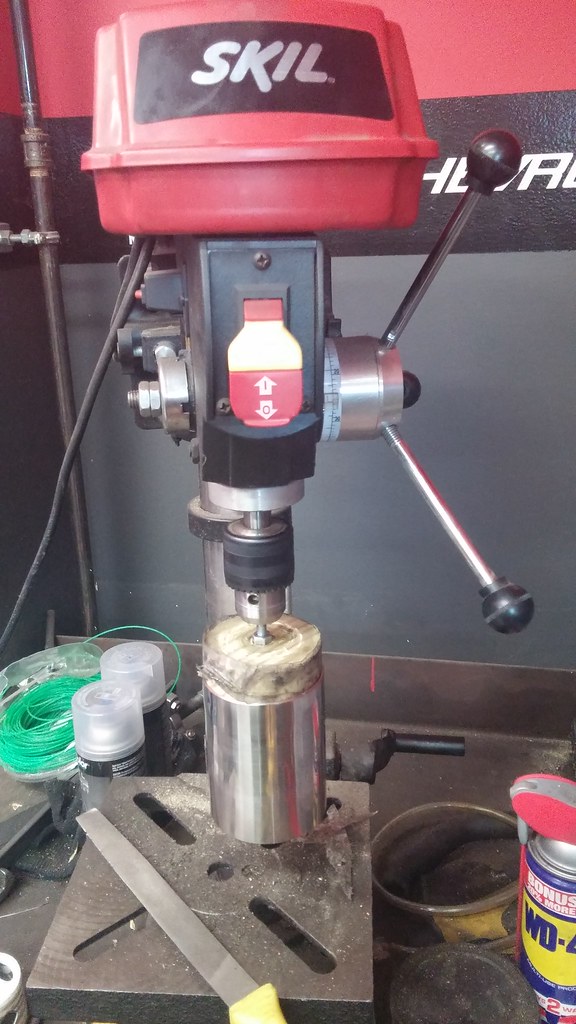
The factory tips are awfully ugly, so I chopped up some spare 3" polished stainless laying around and chucked it up in the drill press to spend time polishing it. The final effect is a brushed finish. I used a 3" hole saw to cut a slug out of a 2x4, then jammed the wood inside the pipe, put a nut and bolt through the wood, and got it all in the drill press.
by https://www.flickr.com/photos/nogiba/, on Flickr
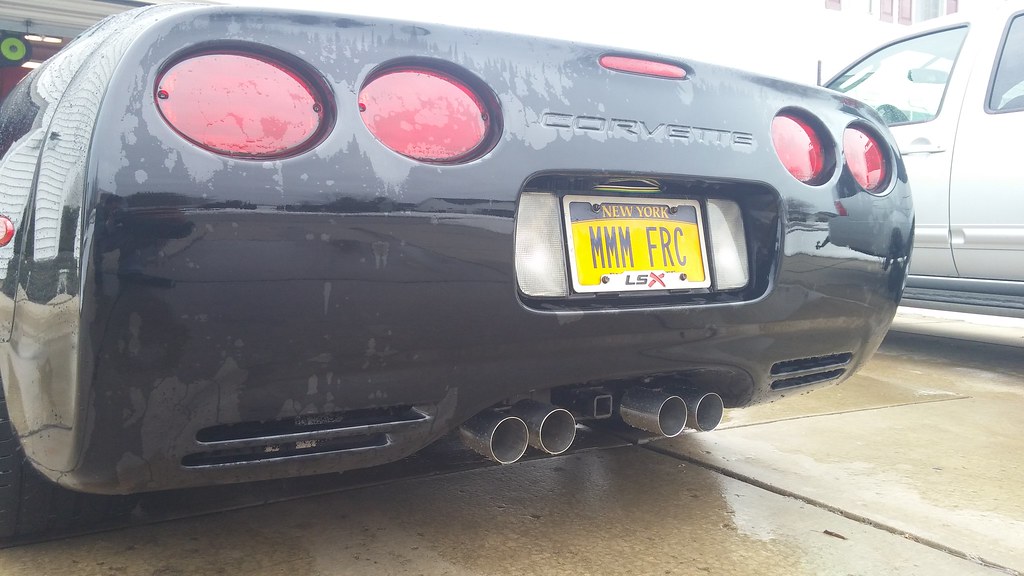
Welded over the existing oval (trimmed) tips:
by https://www.flickr.com/photos/nogiba/, on Flickr
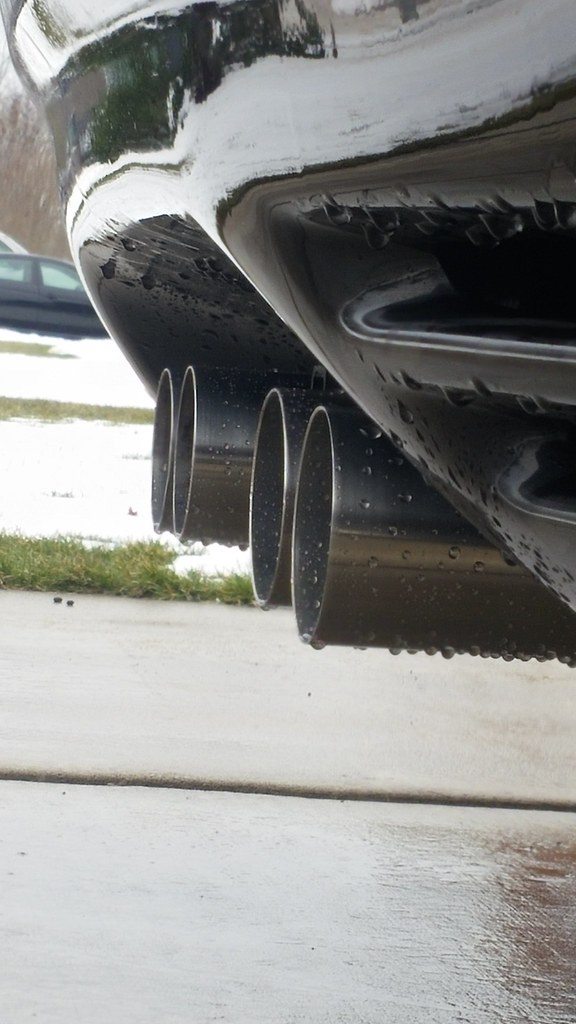
I used a small steel rod welded to each pair of tips to keep them perfectly square and level.
by https://www.flickr.com/photos/nogiba/, on Flickr
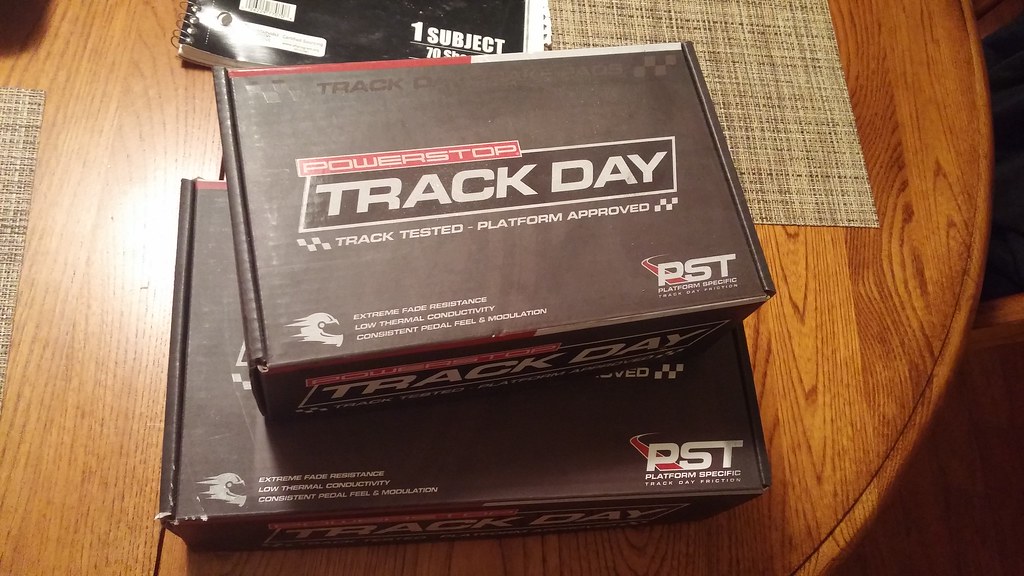
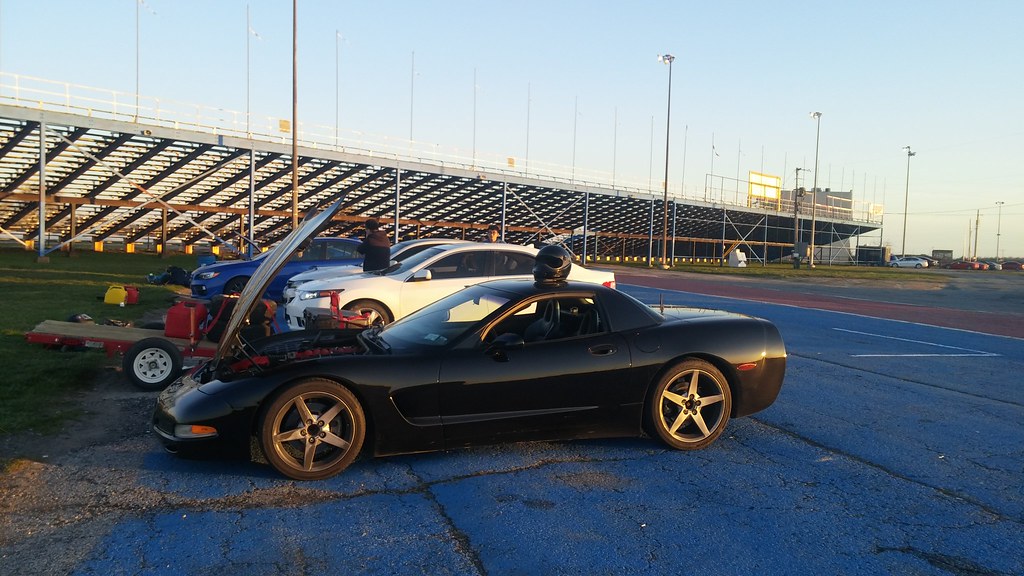
Finally installed my race pads in prep for an open lapping session at Toronto Motorsports Park. Great stopping power (finally activates the ABS) but dust extremely hard.
by https://www.flickr.com/photos/nogiba/, on Flickr
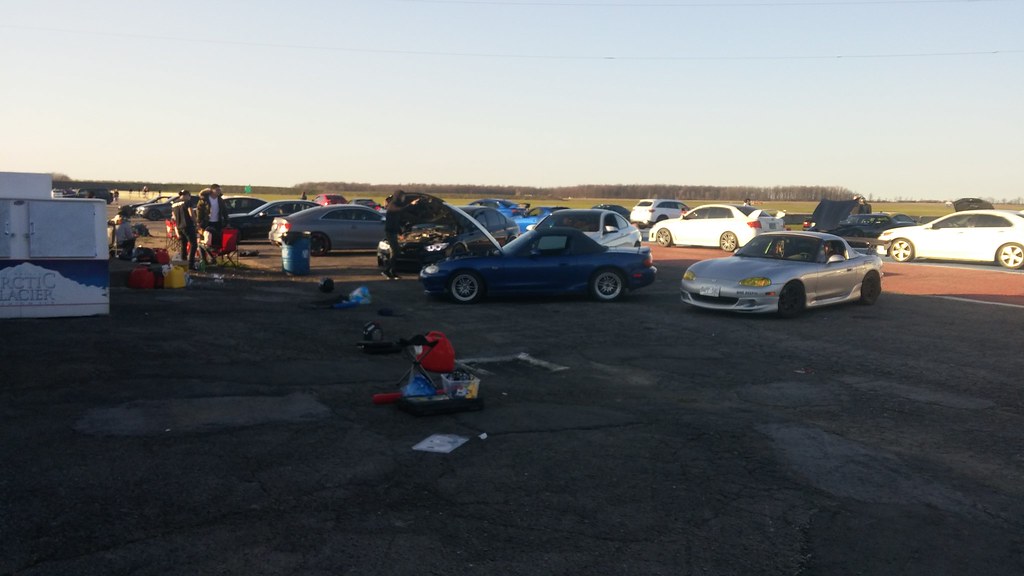
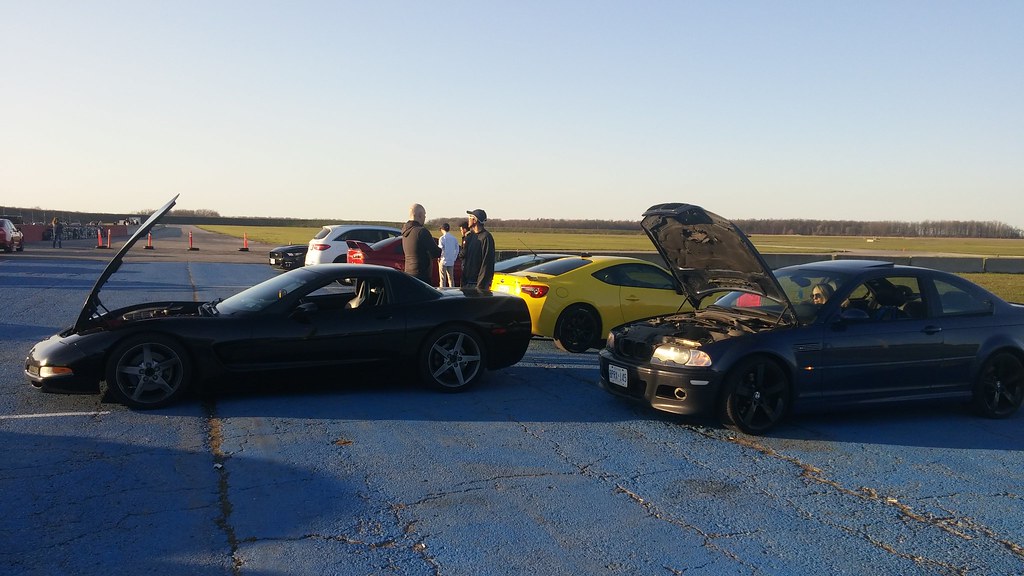
Track day bro
by https://www.flickr.com/photos/nogiba/, on Flickr
by https://www.flickr.com/photos/nogiba/, on Flickr
by https://www.flickr.com/photos/nogiba/, on Flickr
by https://www.flickr.com/photos/nogiba/, on Flickr
by https://www.flickr.com/photos/nogiba/, on Flickr
Great evening lapping - but it exposed a few flaws in the car. Still need to address the minor oil consumption issue that only occurs on track, so an LS6 valley cover/PCV is waiting in a box in the garage. I also found myself wishing for more grip in corners. More on that later in a future update...
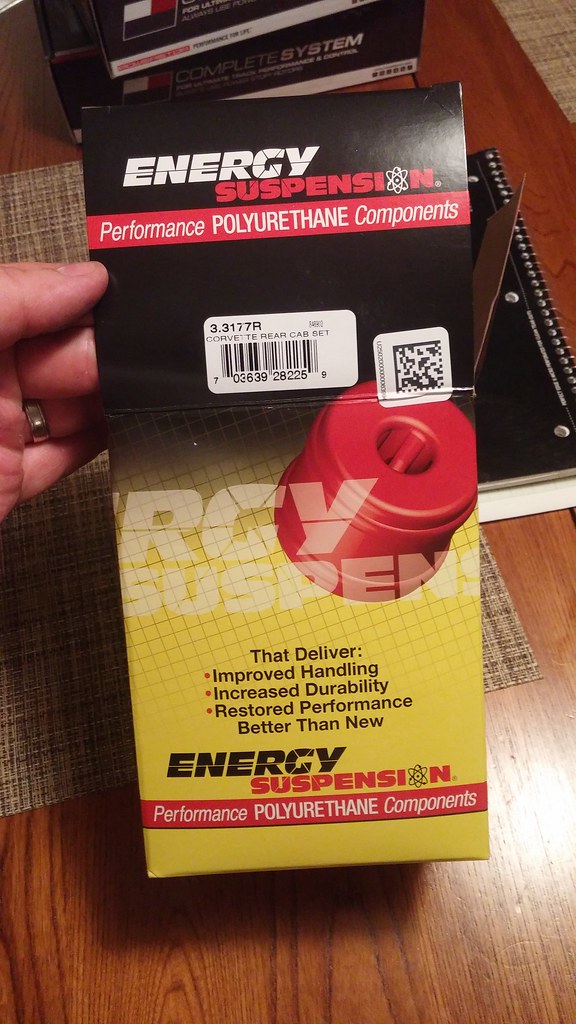
Finally, I got fed up with the wheel hop that occurs when aggressively leaving a light, so I ordered up a full set of Energy Suspension Control Arm bushings - in the process of installing that now. Like I said earlier, I should have done that while the cradle was out, but such is life.
by https://www.flickr.com/photos/nogiba/, on Flickr
I'm working on this thing quite often now, so hopefully I'll be posting more updates soon.
With the majority of the small stuff assembled, it was time to get the drivetrain back in the car. The Pfadt trans mount is easily the most "bling" piece on the car, shame it's hidden underneath the rear end. I installed it with the hopes that it would cure some of my wheel hop from a dig.
Filled the trans up - this stuff isn't cheap but gets good reviews.
So the whole reason for all this drivetrain work was to improve shift feel and eliminate some of the "slop" in the gear lever, most of which was in the factory shift linkage that runs from the lever back to the trans. The small factory u-joint consists of a small pin held in a brass bushing, which had worn out.
Measuring for the new setup:
A factory replacement shift linkage u-joint doesn't exist, and I think the linkage arm is discontinued. The other option was a custom machined replacement brass bushing, but that would have worn the same way as the old unit. So I found a universal steering shaft u-joint on Amazon, chopped the ends off it, and welded it to the linkage. ZERO slop achieved!
While the rear subframe was out I also tossed in new sway bar bushings. In retrospect, I should have installed all new poly bushings in the control arms while the cradle was out, but I was confident that the Pfadt trans brace would cure the wheel hop. (This did not end up being the case).

How to get the ultimate lows - remove wheels and put the lift all the way down.
The rest of the work was boring reassembly, I tend to get a little OCD with torquing everything to factory spec, but the first start/drive went flawlessly (despite being 20F outside).
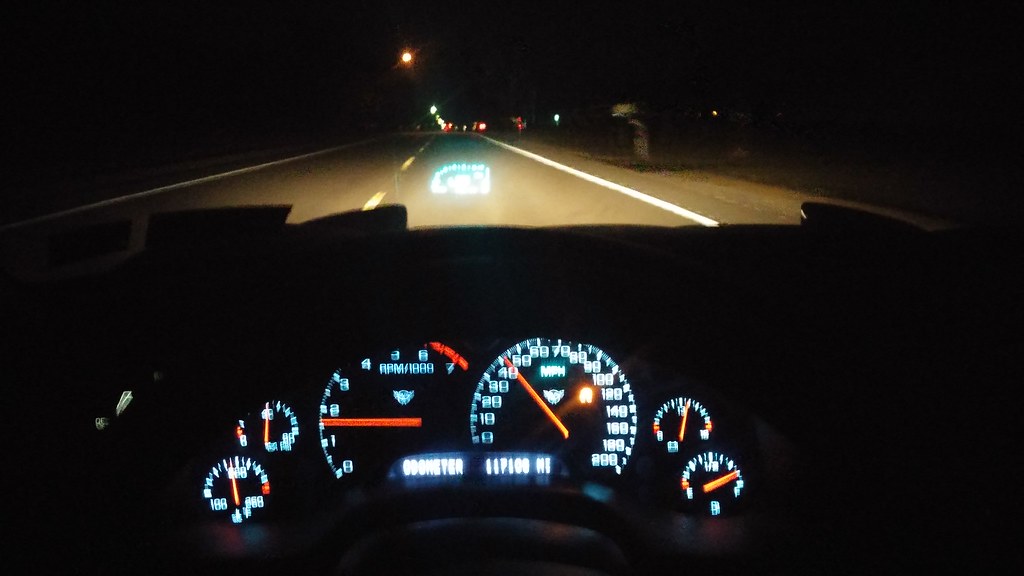
So after a long and agonizing 500 mile break in for the clutch, trans, and new rear gears (of which all was spend <50mph), it was time to put it to the test.
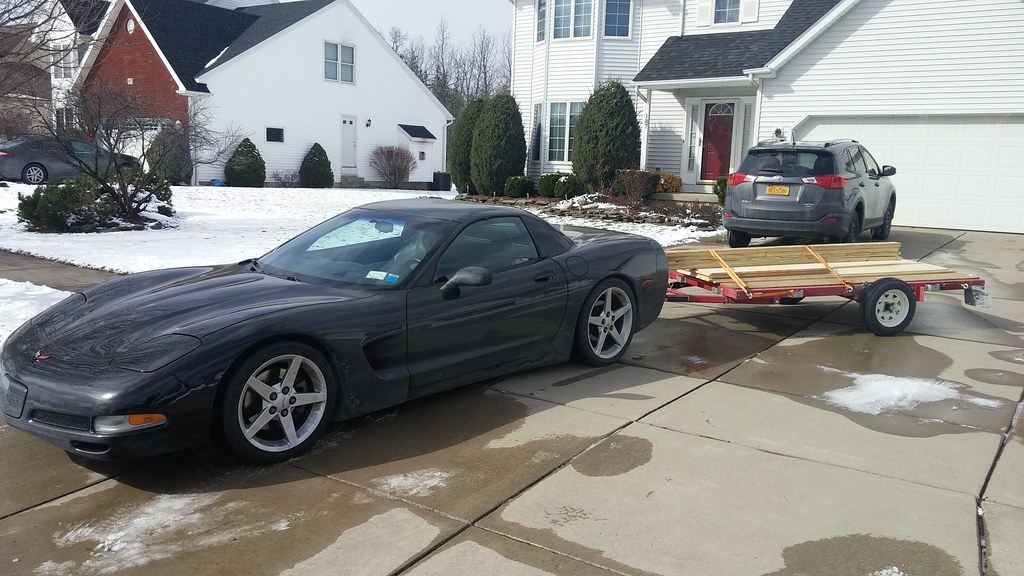
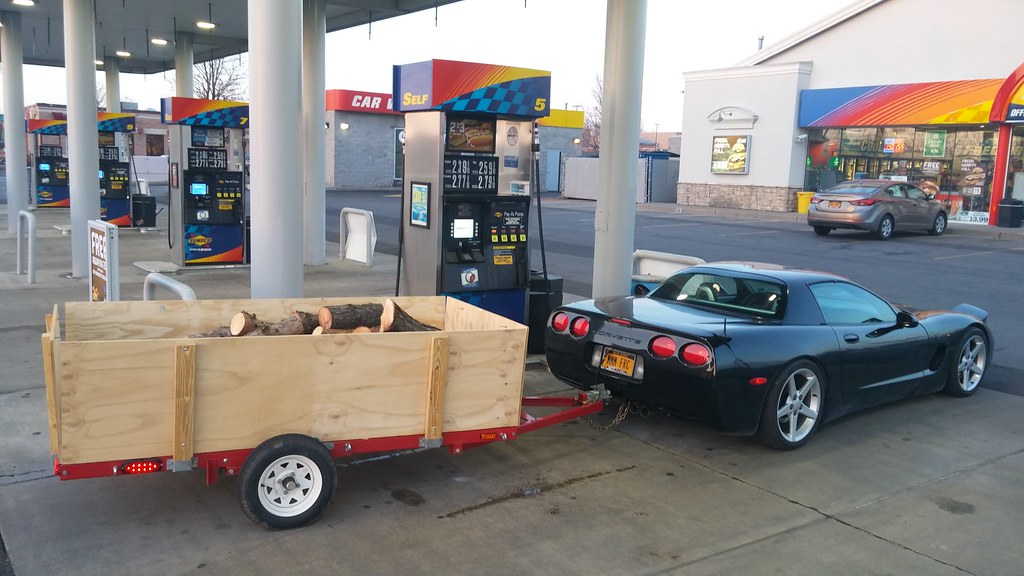
Hauls stuff like a beast.
I had a titanium Z06 exhaust on the car but sold it to a local with an automatic C5 ragtop - I installed it for him, and he was kind enough to leave me his old stockers (stainless steel). So now I had that stainless set, in addition to the stainless stockers on the car that I bought last year. More on that later...
The factory tips are awfully ugly, so I chopped up some spare 3" polished stainless laying around and chucked it up in the drill press to spend time polishing it. The final effect is a brushed finish. I used a 3" hole saw to cut a slug out of a 2x4, then jammed the wood inside the pipe, put a nut and bolt through the wood, and got it all in the drill press.
Welded over the existing oval (trimmed) tips:
I used a small steel rod welded to each pair of tips to keep them perfectly square and level.
Finally installed my race pads in prep for an open lapping session at Toronto Motorsports Park. Great stopping power (finally activates the ABS) but dust extremely hard.
Track day bro
Great evening lapping - but it exposed a few flaws in the car. Still need to address the minor oil consumption issue that only occurs on track, so an LS6 valley cover/PCV is waiting in a box in the garage. I also found myself wishing for more grip in corners. More on that later in a future update...
Finally, I got fed up with the wheel hop that occurs when aggressively leaving a light, so I ordered up a full set of Energy Suspension Control Arm bushings - in the process of installing that now. Like I said earlier, I should have done that while the cradle was out, but such is life.
I'm working on this thing quite often now, so hopefully I'll be posting more updates soon.
05-15-2017, 08:22 AM
#158
TECH Veteran
iTrader: (14)
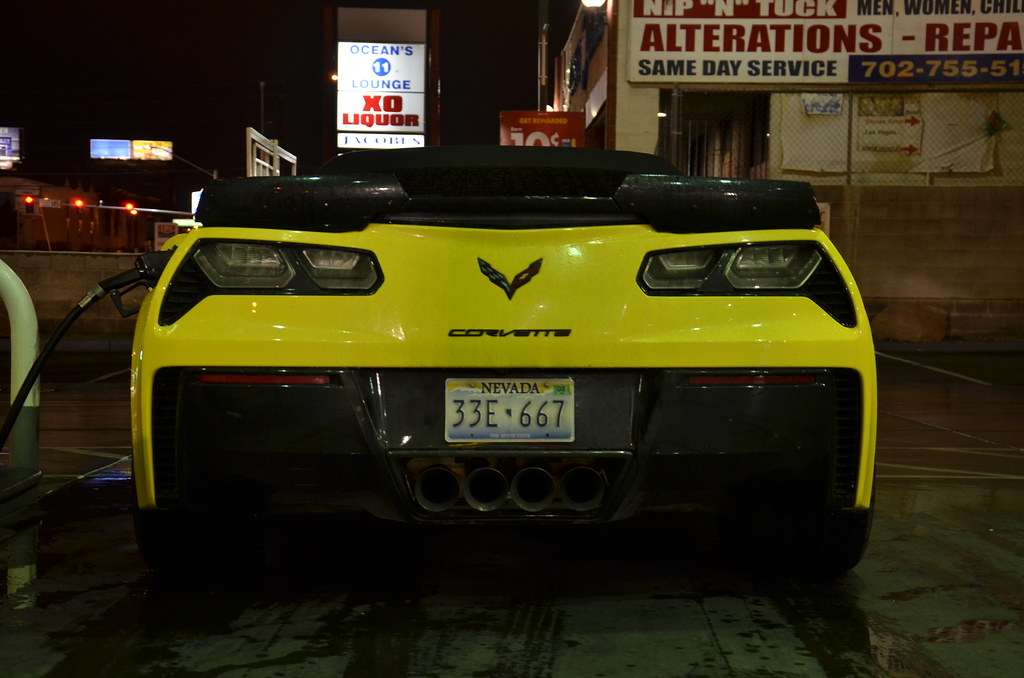
That picture at the gas station from the rear.....is your back glass out?
I have to say if I saw that in person.....id probably laugh quite a bit. Shame you didnt get rid of the wheel hop yet.
I have to say if I saw that in person.....id probably laugh quite a bit. Shame you didnt get rid of the wheel hop yet.